Modbus网关使用
CANopen转modbus智能通信网关使用说明书MCO-242

Modbus / CANopen网关MCO-242产品手册REV 1.1上海泗博自动化技术有限公司SiboTech Automation Co., Ltd技术支持热线:021-5102 8348E-mail:support@目 录1 产品概述 (3)1.1产品功能.....................................................................................................................................................3 1.2 产品特点....................................................................................................................................................3 1.3技术指标.....................................................................................................................................................3 1.4 电磁兼容性能............................................................................................................................................5 1.5相关产品.....................................................................................................................................................6 1.6 术语解释....................................................................................................................................................6 2 快速应用指南. (8)2.1 硬件连接....................................................................................................................................................8 2.2 安装软件....................................................................................................................................................8 2.3 通讯调试....................................................................................................................................................8 3 产品外观 (9)3.1外观说明.....................................................................................................................................................9 3.2 指示灯......................................................................................................................................................10 3.3 CAN 端口接线...........................................................................................................................................10 3.4串口接线...................................................................................................................................................11 3.5 数码管显示..............................................................................................................................................11 3.6按键...........................................................................................................................................................12 4软件配置.. (13)4.1 配置前注意事项......................................................................................................................................13 4.2 用户界面..................................................................................................................................................14 4.3 设备视图操作..........................................................................................................................................15 4.4 配置视图操作..........................................................................................................................................17 4.5 硬件通讯..................................................................................................................................................22 4.6 加载和保存配置......................................................................................................................................23 4.7 自动映射..................................................................................................................................................24 4.8 EXCEL 文档输出......................................................................................................................................24 5 工作原理.............................................................................................................................................................26 6 疑难解答.............................................................................................................................................................30 7 应用案例.............................................................................................................................................................31 8 安装 (32)8.1机械尺寸...................................................................................................................................................32 8.2安装方法...................................................................................................................................................32 9 运行维护及注意事项.........................................................................................................................................34 10 版权信息...........................................................................................................................................................35 附录 A: CANopen 协议简介. (36)1 产品概述1.1产品功能MCO-242是CANopen 主站协议与Modbus 从站协议转换的通信网关,可以实现多个CANopen 从站设备与Modbus 主站之间的数据通信。
钡铼技术 BL100 Modbus转MQTT网关说明书

版本:V1.0 日期:2021-08-06 版权:深圳市钡铼技术有限公司 网址: BL00 说明书 版本:V1.0日期:2021-08-18版权:深圳市钡铼技术有限公司 BL100 说明书 GSM/SMS/GPRS/3G/4G 转MQTT 网关 BL100前言感谢您使用深圳市钡铼技术有限公司的BL100 MODBUS转MQTT网关,阅读本产品说明书能让您快速掌握本产品的功能和使用方法。
版权声明本说明书之所有权由深圳市钡铼技术有限公司所有。
未经本公司之书面许可,任何单位和个人无权以任何形式复制、传播和转载本手册之任何部分,否则一切后果由违者自负。
免责声明由于运营商升级网络造成设备无法继续使用的,本公司不能提供免费的升级服务。
由于特殊原因造成运营商网络服务中断时,本机将无法正常工作,本公司不承担由此带来的后果。
本产品主要用于基于GSM/短信/GPRS/3G/4G的数据传输应用,请按照说明书提供的参数和技术规格使用,同时请注意无线电产品特别是GSM/3G/4G产品使用时应该关注的注意事项,本公司不承担由于不正常使用或不恰当使用本产品造成的财产或人身伤害。
1 产品简介 (5)1.1 概述 (5)1.2 应用示意图 (6)1.3 安全说明 (6)1.4 装箱清单 (7)1.5 功能特点 (9)1.6 技术参数 (10)1.7 设备选型 (11)2 硬件说明 (12)2.1 外形尺寸 (12)2.2 LED指示灯 (13)2.3 接口定义 (13)2.4 升级调试USB接口 (14)2.5 天线连接 (14)3 产品安装 (15)3.1 壁挂式 (15)3.2 导轨式安装 (15)4 配置软件使用 (16)4.1 配置前准备 (16)4.1.1 驱动安装 (16)4.1.2 查找端口号 (16)4.2 登录配置软件 (17)4.3 串口设置 (18)4.4 从机映射表 (19)4.5 云平台设置 (23)4.5.1 金鸽云3.0 (23)4.5.2 金鸽云2.0 (24)4.5.3 金鸽云MQTT (25)4.5.4 华为云配置 (26)4.5.5 阿里云配置 (27)4.5.6 其他平台(自定义协议) (28)4.6 设备自检 (29)4.7.1 参数配置 (30)4.7.2 号码设置 (32)4.7.3 定时器 (33)4.7.3.1时钟定时器 (33)4.7.3.2周期定时器 (34)4.7.4 设备升级 (34)4.7.5 映射寄存器数据 (35)4.8 导出配置文件 (36)4.9 载入配置文件 (36)4.10 恢复出厂设置 (37)5 设备应用示例和上云平台示例 (38)5.1 数据透传(DTU)的应用设置 (38)5.2 BL100做主站采集从机设备上云平台示例 (40)5.2.1 485串口模式设置 (40)5.2.2 金鸽云应用 (42)5.2.3 华为云的应用 (44)5.2.4 阿里云的应用 (50)5.2.5 MQTT的应用 (56)5.2.6 自定义云 (59)6 附录寄存器地址 (60)6.1 本机寄存器地址 (60)6.2 映射寄存器地址 (61)6.3 改写布尔型映射地址数据 (62)6.4 读取数据类型映射地址数据 (63)6.5 改写数据类型映射地址数据 (64)6.6 短信功能 (65)6.6.1 短信指令集 (65)7 售后服务 (67)7.1 固件升级 (67)7.2 保修条款 (67)7.3 技术支持 (67)1 产品简介概述◆BL100是一款基于4G全网通的MODBUS转MQTT网关设备,支持MODBUSRTU、MODBUS TCP、MQTT、阿里云、华为云、金鸽云和自定义平台以及透明传输功能。
中央空调集控有线接口协议(MODBUS) V1.2说明书

协议文档版本发布时间备注V1.02020.09.29前建立文件V1.12020.03.05增加风向、自动风速的控制和查询;增加主从机的查询;增加空调性能信息的查询V1.22020.03.30增加清爽、自动除湿、贴心睡眠三种模式MODBUS-RTU通讯协议应用说明表1网关通讯参数设置项目参数传输模式半双工波特率9600bps起始位1位数据位8位校验位偶校验(Even)停止位1位以上通讯规格参数也可以通过网关自带的WEB页面进行变更表2主要应用的功能码网关所用功能码作用0x03(读保存寄存器)用于读取空调的状态。
每次可读操作一个或多个寄存器(寄存器地址必须连续)。
每个寄存器保存一个空调的一个状态参数,根据寄存器读取的数量,可以一次读取一个空调的一个或多个参数(如开关、温度设定等),也可以将若干空调的全部参数一次读出。
0x06(写单个寄存器)用于写设定一个空调的一个参数每次只能写操作一个寄存器,每写操作一次,就会对一个空调的一个参数做出设定指令。
0x10(写多个寄存器)用于写设定多个空调的多个参数每次可写操作多个寄存器(寄存器地址必须连续)。
根据写寄存器的数量,可以一次写设定一个空调的一个参数或多个参数,也可以一次写多个空调的多个参数。
状态参数,包括:开关状态、温度设定值、模式设定状态、风速设定、房间温度和故障代码、是否为主机。
空调性能参数,包括:空调品牌、模式信息风速信息、设定温度信息、特殊性能信息表3状态保存寄存器地址与空调室内机地址的对应关系空调室内机地址状态参数保存寄存器地址0-00,1,2,3,4,50-16,7,8,9,10,110-212,13,14,15,16,17…………0-31186,187,188,189,190,1911-0192,193,194,195,196,1971-1198,199,200,201,202,2031-2204,205,206,207,208,209…………1-31378,379,380,381,382,383…………空调性能信息8000,8001,8002,8003,8004室内机状态参数保存寄存器起始地址为4000,每4个连续地址的寄存器保存1个室内机的控制指令,包括:开关指令、温度设定值指令、模式设定指令、风速设定指令、风向设定指令;表4控制指令寄存器地址与空调室内机地址的对应关系如下表空调室内机地址控制指令寄存器地址0-04000,4001,4002,40030-14004,4005,4006,40070-24008,4009,4010,4011…………0-314124,4125,4126,41271-04128,4129,4130,41311-14132,4133,4134,41351-24136,4137,4138,4139…………1-314252,4253,4254,4255…………表5查询空调状态所用的点位表(对应MODBUS功能码0x03)空调地址AA-BB 外部查询访问时的寄存器地址B15---B8B7B6B5B4B3B2B1B000-00D00000000000故障:1正常:0运行:1停止:0 D00010设定温度D00020设定模式0000制热送风除湿制冷D0003风向设定设定风速00000低速中速高速D0004B15-B9B8房间回风温度是否为主机D00050故障代码00-01D0006当前启停状态:0x01->开机;0x00->关机。
Modbus RS485转EtherNet IP网关 HT3S-EIS-MDN 用户手册 V1
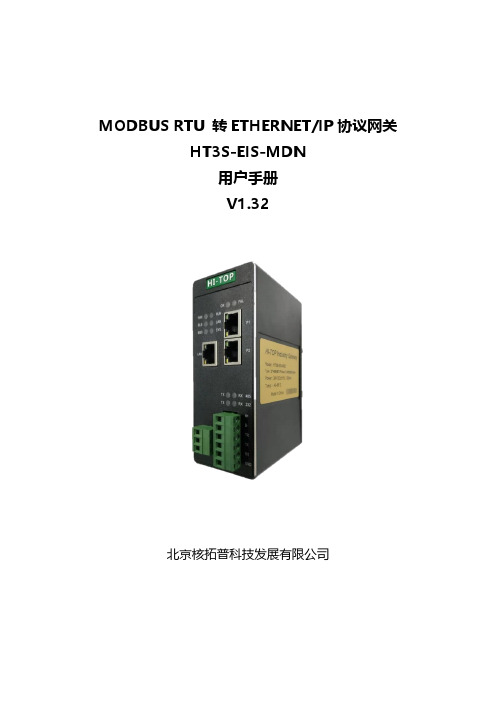
MODBUS RTU 转ETHERNET/IP协议网关HT3S-EIS-MDN用户手册V1.32北京核拓普科技发展有限公司目录1. 产品概述 (3)1.1 产品功能 (3)1.2 技术参数 (3)1.2.1 EtherNet/IP技术参数 (3)1.2.2 Modbus RTU技术参数 (4)2. 产品外观 (5)2.1 产品尺寸图 (5)2.2 端子说明 (5)2.3 指示灯 (6)2.4 拨码说明 (6)3. 硬件电气规范 (7)3.1 电气参数 (7)3.2 EtherNet/IP的电气连接 (7)3.3 MODBUS的电气连接 (8)3.3.1 RS485电气连接 (8)3.3.2 RS232电气连接 (8)4. 协议及数据转换 (9)4.1 协议转换原理 (9)4.2 EtherNet/IP协议介绍 (9)4.3 MODBUS协议介绍 (10)4.3.1 MODBUS存储区 (10)4.3.2 MODBUS功能码 (10)4.3.2.1读取输出状态(01H) (11)4.3.2.2 读取输入状态(02H) (11)4.3.2.3 读取保存寄存器(03H) (12)4.3.2.4 读取输入寄存器(04H) (13)4.3.2.5 强制单线圈(05H) (13)4.3.2.6 预置单保持寄存器(06H) (14)4.3.2.7 强制多线圈(0FH) (14)4.3.2.8 预置多寄存器(10H) (15)4.3.3 MODBUS异常码 (15)5. 网关配置及操作 (17)5.1 配置网关的MODBUS报文 (17)5.1.1 网关作为MODBUS主站 (17)5.1.2 网关作为MODBUS从站 (22)5.2 配置网关的EtherNet/IP地址 (26)5.3 配置网关的EtherNet/IP从站 (29)5.3.1 使用AB系统的配置方法 (29)5.3.2 使用欧姆龙系统的配置方法 (38)5.4 启动网关运行 (48)5.4.1 网关的控制字 (48)5.4.2 网关的状态字 (48)5.4.3 启动网关的MODBUS主站 (48)5.4.4 启动网关的MODBUS从站 (51)1. 产品概述1.1 产品功能HT3S-EIS-MDN是一款EtherNet/IP从站功能的通讯网关。
龙马 Modbus 网关(型号 LM Gateway202-M)技术数据表说明书

产品简介LM Gateway202-M数据采集网关,基于稳固的硬件平台设计,完善的软件内核。
提供4个RS-485串口,1个10/100 Mbps以太网口。
网关内嵌Modbus,BACnet,DLT645,PPI,Mbus等数据采集驱动,提供私有协议驱动集成,网关作为Modbus RTU,Modbus TCP服务器对外提供数据硬件规格LM Gateway202硬件参数:CPU ARM926EJ,主频为300MHz内存64MByte 高性能内存Nand Flash 128MByte SLC Flash串口4个全隔离RS485接口网口1个100M/10M以太网接口WIFI 可选配USB无线网卡电源DC9V~36V,支持防反接,抗雷,过流等保护整机重量210g外壳防护等级IP51安装尺寸144mm×100mm×35mm(L×W×H) 含挂耳机械安装DIN导轨卡槽固定LM Gateway202环境参数:功耗主板最大功耗≤3W工作温度工作相对湿度-40~80℃20~90%无凝露接口定义1.POWER电源座信号说明V+ 电源正V- 电源负E 安全地线2. DC座,5.5*2.1mm在电源质量不佳的环境下,建议使用开关电源供电,能有效提高网关抗干扰的能力。
3.网口10/100M高速自适应网卡;采用双级防雷防静电保护,能抵抗2KV雷击;唯一MAC地址。
LAN口默认IP 子网掩码Eth0 192.168.1.233 255.255.255.04.CON功能座PIN号信号说明1 COM1-A RS485-1 信号正端2 COM1-B RS485-1 信号负端3 COM1-GND 信号地4 COM1-TX RS232-1信号发送端5 COM1-RX RS232-1信号接收端6 COM2-A RS485-2 信号正端7 COM2-B RS485-2 信号负端8 COM2-GND 信号地9 COM2-TX RS232-2信号发送端10 COM2-RX RS232-2信号接收端11 COM3-A RS485-3 信号正端12 COM3-B RS485-3 信号负端13 COM3-GND 信号地14 COM3-TX RS232-3信号发送端15 COM3-RX RS232-3信号接收端16 COM4-A RS485-4信号正端17 COM4-B RS485-4 信号负端18 COM4-GND 信号地19 COM4-TX RS232-4信号发送端20 COM4-RX RS232-4信号接收端RS485:全隔离RS485接口,采用三级防护;支持GB/T 17626.5-2008标准中10/700uS测试的最高等级4KV防护;±15kV 人体放电模式;±15kV IEC1000-4-2 气隙放电;通讯参数可配置,默认通讯参数:9600,8-1-N。
Moxa MB3660系列1至16端口冗余Modbus网关产品说明书

MGate MB3660Series8and16-port redundant Modbus gatewaysFeatures and Benefits•Supports Auto Device Routing for easy configuration•Supports route by TCP port or IP address for flexible deployment•Innovative Command Learning for improving system performance•Supports agent mode for high performance through active and parallelpolling of serial devices•Supports Modbus serial master to Modbus serial slave communications•2Ethernet ports with the same IP or dual IP addresses for networkredundancy•SD card for configuration backup/duplication and event logs•Accessed by up to256Modbus TCP clients•Connects up to Modbus128TCP servers•RJ45serial interface(for“-J”models)•Serial port with2kV isolation protection(for“-I”models)•Dual VDC or VAC power inputs with wide power input range•Embedded traffic monitoring/diagnostic information for easy troubleshooting•Status monitoring and fault protection for easy maintenanceCertificationsIntroductionThe MGate MB3660(MB3660-8and MB3660-16)gateways are redundant Modbus gateways that convert between the Modbus TCP and Modbus RTU/ASCII protocols.They can be accessed by up to256TCP master/client devices,or connect to128TCP slave/server devices.Routing through the serial ports can be controlled by IP address,TCP port number,or ID mapping.Serial-port routing by designated TCP port and IP address allows access for up to4TCP clients/masters,while routing by ID mapping(slave ID table)allows access for up to256TCP clients/masters.The MGate MB3660isolation model provides2-kV isolation protection suitable for power substation applications.The MGate MB3660gateways are designed to easily integrate Modbus TCP and RTU/ASCII networks.The MGate MB3660gateways offer features that make network integration easy,customizable,and compatible with almost any Modbus network.For large-scale Modbus deployments,MGate MB3660gateways can effectively connect a large number of Modbus nodes to the same network. The MB3660Series can physically manage up to248serial slave nodes for8-port models or496serial slave nodes for16-port models(the Modbus standard only defines Modbus IDs from1to247).Each RS-232/422/485serial port can be configured individually for Modbus RTU or Modbus ASCII operation and for different baudrates,allowing both types of networks to be integrated with Modbus TCP through one Modbus gateway. High Performance with Innovative Command LearningThe MGate MB3660gateways support two communication modes:transparent mode and agent mode.For transparent mode,the gateway converts Modbus commands from Modbus TCP to Modbus RTU/ASCII,and vice versa,or from serial(master)to serial(slave).However,since only one Modbus protocol request-response action can be executed at any given time,each Modbus device has to wait its turn,resulting in poorer performance.In order to provide better performance,the MGate MB3660gateways are designed with an innovative Command Learning function,which can be activated with a single mouse click.Once activated,the gateway will learn and remember the Modbus commands it receives,and once a command has been learned,the gateway will act as though it were in agent mode,and actively send Modbus requests to the relevant Modbus devices.Since the data is saved in a different memory space that can be accessed by the SCADA system,the SCADA system can retrieve Modbus response data directly from the gateway’s memory,instead of waiting for the data to pass through the Modbus devices,dramatically increasing communication performance.Auto-Device Routing for Easy ConfigurationMoxa’s Auto-Device Routing function helps eliminate many of the problems and inconveniences encountered by engineers who need to configure large numbers of Modbus devices.A single mouse click is all that’s required to set up a slave ID routing table and configure Modbus gateways to automatically detect Modbus requests from a supervisory control and data acquisition(SCADA)system.By removing the need to manually create the slave ID routing table,the Auto-Device Routing function saves engineers significant time and reduces cost.Modbus Gateway with Power and Ethernet RedundancyFor a complicated Modbus system,redundancy is extremely important.The MGate MB3660Modbus gateways support redundancy for both the power input and Ethernet connection.The MGate MB3660gateways come with dual AC or DC power inputs built in for power redundancy,and have dual Ethernet ports(with different IPs)for network redundancy.To accommodate different types of applications,the dual Ethernet ports can be configured in one of two ways:•Use the same IP for both Ethernet ports.In this case,the MGate MB3660gateway will automatically switch to the backup LAN when the main LAN fails.•Use different IP addresses for each of the two Ethernet ports.In this case,Modbus clients/masters can use both Ethernet ports to communicate with Modbus RTU/ASCII slave devices at the same time.SpecificationsEthernet Interface10/100BaseT(X)Ports(RJ45connector)2IP addressesAuto MDI/MDI-X connectionEthernet Software FeaturesIndustrial Protocols Modbus TCP Client(Master)Modbus TCP Server(Slave)Configuration Options Web Console(HTTP/HTTPS)Device Search Utility(DSU)MCC ToolTelnet ConsoleManagement ARPDHCP ClientDNSHTTPHTTPSSMTPSNMP TrapSNMPv1/v2c/v3TCP/IPTelnetUDPNTP ClientRADIUSMIB RFC1213,RFC1317Time Management NTP ClientSecurity FunctionsAuthentication Local databaseRADIUSEncryption HTTPSAES-128AES-256SHA-256Security Protocols SNMPv3HTTPS(TLS1.2)Serial InterfaceNo.of Ports MGate MB3660-8Series:8MGate MB3660-16Series:16Connector MGate MB3660-8/16:DB9maleMGate MB3660-8/16-J:RJ45Serial Standards RS-232/422/485(software selectable)Baudrate50bps to921.6kbpsData Bits7,8Stop Bits1,2Parity NoneEvenOddSpaceMarkFlow Control RTS/CTSDTR/DSRRTS Toggle(RS-232only)Console Port RS-232(TxD,RxD,GND),8-pin RJ45(115200,n,8,1) Isolation2kV(I models)RS-485Data Direction Control ADDC(automatic data direction control)Pull High/Low Resistor for RS-4851kilo-ohm,150kilo-ohmsTerminator for RS-485120ohmsSerial SignalsRS-232TxD,RxD,RTS,CTS,DTR,DSR,DCD,GNDRS-422Tx+,Tx-,Rx+,Rx-,GNDRS-485-2w Data+,Data-,GNDRS-485-4w Tx+,Tx-,Rx+,Rx-,GNDSerial Software FeaturesIndustrial Protocols Modbus RTU/ASCII MasterModbus RTU/ASCII SlaveConfiguration Options Serial ConsoleModbus RTU/ASCIIMode Master,SlaveFunctions Supported1,2,3,4,5,6,15,16,23Max.No.of Commands256per serial portMemory Size65535bytesModbus TCPMode Client(Master),Server(Slave)Max.No.of Client Connections256Max.No.of Server Connections128Functions Supported1,2,3,4,5,6,15,16,23Max.No.of Commands256Memory Size65535bytesModbus(Transparent)Max.No.of Client Connections256Max.No.of Server Connections128Power ParametersInput Voltage All models:Redundant dual inputsAC models:100to240VAC(50/60Hz)DC models:20to60VDC(1.5kV isolation)No.of Power Inputs2Power Connector Terminal block(for DC models)Power Consumption MGate MB3660-8-2AC:109mA@110VACMGate MB3660I-8-2AC:310mA@110VACMGate MB3660-8-J-2AC:235mA@110VACMGate MB3660-8-2DC:312mA@24VDCMGate MB3660-16-2AC:141mA@110VACMGate MB3660I-16-2AC:310mA@110VACMGate MB3660-16-J-2AC:235mA@110VACMGate MB3660-16-2DC:494mA@24VDCRelaysContact Current Rating Resistive load:2A@30VDCPhysical CharacteristicsHousing MetalIP Rating IP30Dimensions(with ears)480x45x198mm(18.90x1.77x7.80in)Dimensions(without ears)440x45x198mm(17.32x1.77x7.80in)Weight MGate MB3660-8-2AC:2731g(6.02lb)MGate MB3660-8-2DC:2684g(5.92lb)MGate MB3660-8-J-2AC:2600g(5.73lb)MGate MB3660-16-2AC:2830g(6.24lb)MGate MB3660-16-2DC:2780g(6.13lb)MGate MB3660-16-J-2AC:2670g(5.89lb)MGate MB3660I-8-2AC:2753g(6.07lb)MGate MB3660I-16-2AC:2820g(6.22lb)Environmental LimitsOperating Temperature0to60°C(32to140°F)Storage Temperature(package included)-40to85°C(-40to185°F)Ambient Relative Humidity5to95%(non-condensing)Standards and CertificationsEMC EN55032/35EMI CISPR32,FCC Part15B Class AEMS IEC61000-4-2ESD:Contact:6kV;Air:8kVIEC61000-4-3RS:80MHz to1GHz:10V/mIEC61000-4-4EFT:Power:1kV;Signal:1kVIEC61000-4-5Surge:Power:2kV;Signal:1kVIEC61000-4-6CS:10VIEC61000-4-8PFMFSafety MGate MB3660-8-2AC/16-2AC/8-2DC/16-2DC:IEC62368-1,UL62368-1MGate MB3660I-8-2AC/16-2AC:IEC62368-1,UL62368-1MGate MB3660-8-J-2AC/16-J-2AC:UL60950-1Freefall IEC60068-2-31Shock IEC60068-2-27Vibration IEC60068-2-6IEC60068-2-64MTBFTime MGate MB3660-8-2AC:721,988hrsMGate MB3660-8-2DC:711,978hrsMGate MB3660-8-J-2AC:616,505hrsMGate MB3660-16-2AC:495,416hrsMGate MB3660-16-2DC:490,684hrsMGate MB3660-16-J-2AC:437,337hrsMGate MB3660I-8-2AC:429,807hrsMGate MB3660I-16-2AC:256,208hrs Standards Telcordia SR332WarrantyWarranty Period5yearsDetails See /warranty Package ContentsDevice1x MGate MB3660Series gateway Power Supply1x power cord,suitable for your region Cable1x RJ45-to-DB9console cable Installation Kit1x wall-mounting kitDocumentation1x quick installation guide1x warranty cardDimensionsOrdering InformationModel Name No.of Serial Ports Serial Connector Serial Isolation Input Voltage MGate MB3660-8-2DC8DB9male–20-60VDC(1.5kV isolation) MGate MB3660-16-2DC16DB9male–20-60VDC(1.5kV isolation) MGate MB3660-8-2AC8DB9male–100-240VAC(47-63Hz) MGate MB3660-16-2AC16DB9male–100-240VAC(47-63Hz) MGate MB3660I-8-2AC8DB9male2kV100-240VAC(47-63Hz)MGate MB3660I-16-2AC16DB9male2kV100-240VAC(47-63Hz) MGate MB3660-8-J-2AC8RJ45–100-240VAC(47-63Hz) MGate MB3660-16-J-2AC16RJ45–100-240VAC(47-63Hz) Accessories(sold separately)CablesCBL-F9M9-150DB9female to DB9male serial cable,1.5mCBL-F9M9-20DB9female to DB9male serial cable,20cmCBL-RJ45F9-1508-pin RJ45to DB9female serial cable,1.5mCBL-RJ45SF9-1508-pin RJ45to DB9female serial cable with shielding,1.5mConnectorsMini DB9F-to-TB DB9female to terminal block connectorPower CordsPWC-C13AU-3B-183Power cord with Australian(AU)plug,1.83mPWC-C13CN-3B-183Power cord with three-prong China(CN)plug,1.83mPWC-C13EU-3B-183Power cord with Continental Europe(EU)plug,1.83mPWC-C13JP-3B-183Power cord with Japan(JP)plug,7A/125V,1.83mPWC-C13UK-3B-183Power cord with United Kingdom(UK)plug,1.83mPWC-C13US-3B-183Power cord with United States(US)plug,1.83mCBL-PJTB-10Non-locking barrel plug to bare-wire cableMounting KitsWK-45-01Wall-mounting kit,2L-shaped plates,6screws,45x57x2.5mm©Moxa Inc.All rights reserved.Updated Aug07,2023.This document and any portion thereof may not be reproduced or used in any manner whatsoever without the express written permission of Moxa Inc.Product specifications subject to change without notice.Visit our website for the most up-to-date product information.。
格力中央网关说明书

2
中央空调 Modbus 网关套件用户说明书
3.1.4 DI/DO 数字量输入 / 输出
本网关目前支持 5 个 DI(数字输入),5 个 DO(数字输出),DO 6 预留。 DI1...DI5 数字输入 0/1 数字信号(二进制),适用无源输入。 DI 1:火警信号,短接 K1,则 DI 1 口输入火警信号“1”,Modbus 网关下发控制令所有空 调机组立即停止运行;断开 K1,则 DI 1 口输入信号“0”,恢复所有空调机组运行。 DI2...DI5:供用户自行定义 使用举例:将 K5 闭合,则读取 Modbus 协议中线圈 DI 5 位置,数值为“1”; 将 K5 断开,则读取 Modbus 协议中线圈 DI 5 位置,数值为“0”。
带匹配 电阻
不带匹配 电阻 功能
是拨钮的位置。
3.3.5 功能拨码器第 6 位——网关起始内机工程编号设置
参照“4.3 网络拓扑图”,CAN2 网络中,每台内机有其唯一能够区别于其它内机的身份标识,这个标识 称为内机工程编号。则同一 CAN2 网络中的内机的工程编号各不相同。 网关起始内机工程编号表示该网关可以处理的内机的范围。功能拨码器第 6 位拨码用于网关起始内机工 程编号设置。 内机的工程编号范围值为 1 ~ 255。 网关起始内机工程编号为 1:该网关可以处理工程编号为 1 ~ 128 的内机。 网关起始内机工程编号为 129:该网关可以处理工程编号为 129 ~ 255 的内机。 当内机的工程编号不在网关可处理范围,需改变内机的工程编号。 网关起始内机工程编号拨码设置示意图:
中央空调 Modbus 网关套件用户说明书
适用型号:MC30-24/E4(M)
珠 海 格 力 电 器 股 份 有 限 公 司
37.MODBUS TCP_IP 网关功能

EasyBuilder Pro V6.00.01目录第三十七章MODBUS TCP/IP 网关功能 (1)37.1 概要 (1)37.2 如何建立一个地址对应表 (1)37.3 地址对应设定须知 (4)第三十七章MODBUS TCP/IP 网关功能本章节说明如何使用MODBUS TCP/IP 网关功能并建立地址对应表。
37.1 概要以往若要使用SCADA (Supervisory Control and Data Acquisition)软件去存取与HMI 连接的PLC 数据时,需通过数据传输先将PLC 数据传送至HMI 的本地地址,再于PC 上使用MODBUS TCP/IP 通讯协议去读取HMI 的本地地址将PLC 数据取回。
现在用户可以通过EasyBuilder 提供的MODBUS TCP/IP 网关功能,将MODBUS 与PLC 的地址预先设定对应后,即可以直接利用MODBUS TCP/IP通讯协议存取PLC 上的数据。
37.2 如何建立一个地址对应表新增一个地址对应表,请依照下列步骤:1.于“系统参数设置” » “设备列表”新增欲监控的PLC 设备。
(以FATEK FB Series 为例)2.新增一个MODBUS Server (以太网),并启用“MODBUS TCP/IP 网关”,如下图所示:3.点击“地址对应表”按钮后,会显示默认的对应表,用户可以依需求修改并新增其他对应表。
4.假设,SCADA 需存取FATEK FB Series PLC 的D0 寄存器开始的连续50 个地址,设定如下:(1) 设定欲对应的寄存器类型,此范例为“字符”。
(2) 设定欲对应的寄存器之存取模式,此范例为“读/写”。
(3) 设定欲对应的MODBUS 起始地址,此范例为“4x1”。
(4) 设定欲对应的PLC 起始地址,此范例为“D0”。
(5) 设定欲对应地址的范围大小,此范例为“50”。
(6) 选择是否要高/低字节或高/低字符组转换。
Anybus Modbus-TCP RTU 网关用户手册说明书

Anybus®Modbus-TCP/RTU GatewayUSER MANUALHMSI-168-77 3.0ENGLISHImportant User InformationLiabilityEvery care has been taken in the preparation of this document.Please inform HMS Industrial Networks AB of any inaccuracies or omissions.The data and illustrations found in this document are not binding.We,HMS Industrial Networks AB,reserve the right to modify our products in line with our policy of continuous product development. The information in this document is subject to change without notice and should not be considered as a commit-ment by HMS Industrial Networks AB.HMS Industrial Networks AB assumes no responsibility for any errors that may appear in this document.There are many applications of this product.Those responsible for the use of this device must ensure that all the necessary steps have been taken to verify that the applications meet all performance and safety requirements in-cluding any applicable laws,regulations,codes,and standards.HMS Industrial Networks AB will under no circumstances assume liability or responsibility for any problems that may arise as a result from the use of undocumented features,timing,or functional side effects found outside the documented scope of this product.The effects caused by any direct or indirect use of such aspects of the product are undefined,and may include patibility issues and stability issues.The examples and illustrations in this document are included solely for illustrative purposes.Because of the many variables and requirements associated with any particular implementation,HMS Industrial Networks AB cannot as-sume responsibility for actual use based on these examples and illustrations.Intellectual Property RightsHMS Industrial Networks AB has intellectual property rights relating to technology embodied in the product de-scribed in this document.These intellectual property rights may include patents and pending patent applications in the USA and other countries.Trademark AcknowledgementsAnybus®is a registered trademark of HMS Industrial Networks AB.All other trademarks are the property of their re-spective holders.Copyright©2016HMS Industrial Networks AB.All rights reserved.Anybus®Modbus-TCP/RTU Gateway User ManualHMSI-168-773.0Table of Contents Page1Preface (3)1.1About This Document (3)1.2Document history (3)1.3Conventions (4)1.4Terminology (4)2Introduction (5)3Installation (6)3.1Mounting on DIN Rail (6)3.2MAC ID and Default IP Address (6)3.3Connections (7)3.4LED Indicators (8)4Configuration (9)4.1IP Configuration (9)4.2Web Configuration Interface (12)A Internal Registers (15)B Technical Data (17)C Regulatory Compliance (18)This page intentionally left blank1Preface1.1About This DocumentThis manual describes how to install and configure Anybus Modbus-TCP/RTU Gateway.For additional related documentation and file downloads,please visit the Anybus support web-site at /support.1.2Document historySummary of recent changesRevision list1.3ConventionsUnordered(bulleted)lists are used for:•Itemized information•Instructions that can be carried out in any orderOrdered(numbered or alphabetized)lists are used for instructions that must be carried out insequence:1.First do this,2.Then open this dialog,anda.set this option...b....and then this one.Bold typeface indicates interactive parts such as connectors and switches on the hardware,ormenus and buttons in a graphical user interface.Monospaced text is used to indicate program code and otherkinds of data input/output such as configuration scripts.This is a cross-reference within this document:Conventions,p.4This is an external link(URL):This is additional information which may facilitate installation and/or operation.1.4TerminologyIn this document the TIA-232/485serial communication standards are referred to asRS-232/485when describing hardware,and as EIA-232/485in the software interface.Introduction5(20) 2IntroductionFig.1OverviewThe Anybus Modbus-TCP/RTU Gateway allows Modbus RTU devices be connected to aModbus TCP network.The gateway functions as a Modbus TCP server and performs a trans-parent conversion between the two protocols.All Modbus accesses that are not addressed tothe virtual slave of the Anybus Modbus-TCP/RTU Gateway will be forwarded to the ModbusRTU network.The maximum frame length(number of registers)that can be used is limited only by the Modbusspecification and the functionality of the connected Modbus RTU devices.All Modbus functioncodes are supported.Configuration is carried out using the built-in web interface.The IP address of the gateway canbe set using the Anybus IPconfig utility.3Installation3.1Mounting on DIN RailMounting Fig.2Mounting on DIN rail1.Hook the unit onto the upper lip of the rail.2.Press the unit towards the rail until it snaps into place.Removing Fig.3Removing from DIN rail1.Insert a flat-head screwdriver into the slotted tab on the bottom of the unit and pull the tab gently downwards.2.Pull the bottom end of the unit free of the rail and lift the unit from the rail.3.2MAC ID and Default IP AddressThe default IP address of a Anybus Modbus-TCP/RTU Gateway is 10.200.1.n ,where n corre-sponds to the last number in the MAC ID,which is printed on the label on the side of the unit.The MAC ID is in hexadecimal format.If the MAC ID is 00:30:11:FA:00:1F ,the IP address will be 10.200.1.31,since the hexadecimal value 1F =31.MAC IDFig.4Label with MAC ID3.3ConnectionsIn this document the TIA-232/485serial communication standards are referred to as RS-232/485when describing hardware,and as EIA-232/485in the software interface.3.3.1Terminal BlockFig.5Terminal blockTerminal block connectionsDescriptionPower 9–24V DC/AC groundDigital Input 2+(10–24VDC)Digital Input 1+(10–24VDC)Digital Input Common -used usedRS-232Receive RS-232TransmitSerial common (signal ground)RS-485Line A RS-485Line B3.3.2D-sub ConnectorThe 9-pin male D-sub connector provides an RS-232interface.The Anybus Modbus-TCP/RTU Gateway is configured as a DTE device.Fig.6D-sub connectorD-sub connector pin layout3.3.3Ethernet ConnectorThe RJ-45socket provides a 10/100Mbps Ethernet networkconnection.Fig.7Ethernet connectorEthernet connector pin layout3.4LED IndicatorsFig.8LED Indicators4Configuration4.1IP Configuration4.1.1Installing the IPconfig UtilityIPconfig is a Windows-based tool used for TCP/IP network configuration of a HMS devices.Thetool will detect all connected devices and allow configuration of their IP address,netmask,de-fault gateway,DNS and hostname.1.Download IPconfig from /support.2.Extract the contents of the zip archive in a folder on your computer and double-click theexecutable file to run the installer.4.1.2Scanning for Connected DevicesMake sure that the devices to be configured are connected on the same Ethernet subnet as thecomputer running e standard Ethernet cables.When IPconfig utility started it will scan the available local networks.All detected devices will bepresented in a list in the main window.To refresh the list,click on Scan.4.1.3Ethernet ConfigurationTo change the TCP/IP settings for a device,either double-click on the entry or right-click on itand select Configuration.Fig.10Ethernet configurationNotes•Do not enable DHCP if there is no DHCP server available on the network.See also IPconfig Settings,p.11•You can add a name for the device in the Hostname field.Only characters a-z,A-Z, 0–9and_(underscore)are allowed.•The default password for authentication of the new settings is admin.To change the password,check the Change password box and enter the current password in thePassword field and the new password in the New password field.Click Set to save the new settings.The device will be automatically restarted.The new settingscan be tested by opening a web browser and entering the IP address assigned to the device.4.1.4IPconfig SettingsAdditional settings for IPconfig can be accessed by clicking on Settings.settingsCheck this option to select a specific network interface to usedevices on a computer with multiple interfaces.Server If a device has been set to use DHCP but there is no DHCPnetwork,the device may no longer be detected in a scan.Toan internal DHCP server in IPconfig can be activated.Click the checkbox to enable the option,then click OK to closeIPconfig will automatically refresh,and the missing device shoulddetected.Select the device and change its configuration to useaddressing instead of DHCP.Disable the internal DHCP server after the device has been4.2Web Configuration InterfaceRight-click on the entry for the gateway in IPconfig and select Open Web Interface to open itslocal web server in your default browser.You can also type the IP address directly into the webbrowser address field.The default login user name is admin and the default password is admin.Fig.12Logging in to the web interface4.2.1NetworkFig.13Network settingsThe Network settings page allows viewing and changing the TCP/IP settings.These are thesame settings as those entered in IPconfig.When DHCP is enabled the unit will automatically receive the settings for IP address,subnetmask,default gateway,and DNS.Contact your network administrator if in doubt.Click on Save Settings to save the new configuration.4.2.2ModbusFig.14Modbus settings4.2.3StatusFig.15Status page4.2.4AdminFig.16Admin pageThis page allows you to change the default password for the gateway.The user name cannotbe changed.A Internal RegistersAppendix B:Technical Data17(20)B Technical DataTechnical SpecificationsAppendix C:Regulatory Compliance18(20) C Regulatory ComplianceThis product is in compliance with the EMC directive2014/30/EC through conformance with thefollowing standards:EN61000-6-4(2007)Emission standard for industrial environment•EN55016-2-3,Class A(2010)•EN55022,Class A(2011)EN61000-6-2(2005)Immunity for industrial environment•EN61000-4-2(2009)•EN61000-4-3(2006)•EN61000-4-4(2012)•EN61000-4-5(2014)•EN61000-4-6(2014)E214107Field wiring terminals shall be connected with minimum wire size24AWG.This page intentionally left blankHMSI-168-77 3.0./UTC©2016HMS Industrial Networks AB。
Profibus_DP转Modbus使用说明
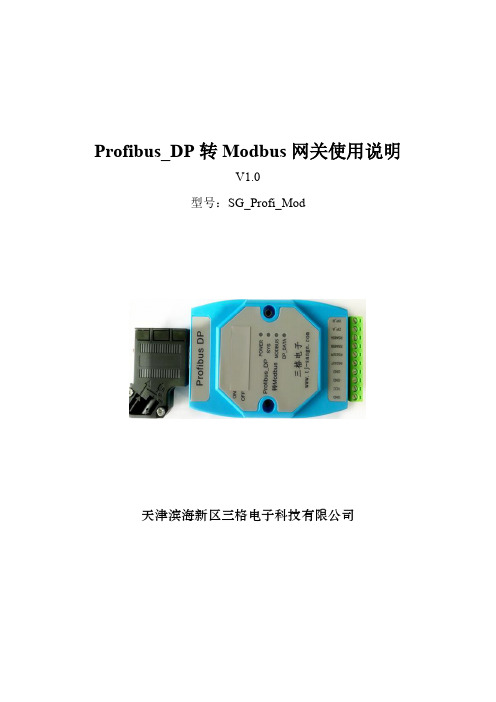
Profibus_DP转Modbus网关使用说明V1.0型号:SG_Profi_Mod天津滨海新区三格电子科技有限公司一、产品基本参数模块支持标准的profibus协议,可接入多种组态软件和PLC 中。
可以将支持标准modbus协议的设备(主机/从机)接入profibus 总线系统中。
产品工作电压范围DC7-DC30V。
内置隔离和浪涌保护电路,可长时间运行于工控现场。
Profibus接口波特率自适应,最高支持12Mbps。
主要参数如下表:二、硬件接口说明模块内置有8位拨码开关(低7位有效),用于设置本模块Profibus地址。
每一位拨到ON位置表示1,拨到OFF位置表示0。
地址用二进制数表示。
例如模块地址设置为9,则第一位和第四位拨到ON 其他位拨到OFF。
模块出厂默认地址设置为9.模块端子接口说明模块指示灯说明三、组态参数设置说明本模块Modbus接口可以工作在主机模式或从机模式,两种模式分别配套对应的GSD文件。
主机模式GSD文件名为:MDP.GSD。
从机模式GSD文件名为:SDP.GSD。
对于两种模式的组态以下分别介绍。
1、模块modbus接口工作在主机模式。
Modbus主机模式下可以支持的命令为01、02、03、04、05、06、15、16。
Modbus主机工作模式下,模块可以访问多台modbus 从机,模块通过命令轮询访问的方式与各个从机通信。
如模块发送3号请求数据命令,到从机应答完成,这样一个命令周期称为一个命令组,模块可以最大支持15个这样的命令组,每组命令的具体参数在下面会具体讲解。
在组态产品前需要先安装对应的MDP.GSD文件。
安装完后可以在总线中添加模块Modbus_M-Profibus DP。
如图1。
图1添加后可以按需要选择数据交换的长度,如不确定可选择128 byte in 128 byte out。
如图2。
图2选择完成后点击确定会弹出如下图(3)对话框,注意修改模块地址和拨码开关地址一致。
PROFIBUS转MODBUS-RTU网关使用手册说明书

PROFIBUS转MODBUS-RTU网关PBMD485-K20(主站)PBMD232-K20(主站)使用手册北京微硬创新科技有限公司2009-3目录使用须知 (3)产品系列概述 (3)您关心的技术参数 (3)典型应用网络图 (4)产品功能 (4)1. 硬件连接及STEP7参数配置说明 (5)1.1. 硬件接口及指示灯说明 (5)1.1.1硬件接口说明 (5)1.1.2指示灯说明 (7)1.2. PBMD232/485-K20 STEP7参数配置说明 (7)1.2.1. GSD文件说明 (7)1.2.2. Modbus报文的配置及网关启动操作 (8)1.3. PBMD232/485-K20的通讯状态字及控制字介绍 (9)1.3.1通信状态字 (10)1.3.2通信控制字 (10)2. STEP7硬件建立及配置 (11)2.1. 西门子PLC的PROFIBUS主站配置 (11)2.2. 网关PBMD232/485-K20作为PROFIBUS从站的配置过程 (16)2.2.1. PROFIBUS从站配置——网关做MODBUS主站 (16)3. Modbus-RTU 协议简介 (20)3.1.MODBUS存储区 (20)3.2.MODBUS功能码 (20)3.2.1.读取输出状态(01H) (20)3.2.2.读取输入状态(02H) (21)3.2.3.读取保存寄存器(03H) (21)3.2.4.读取输入寄存器(04H) (22)3.2.5.强制单线圈(05H) (22)3.2.6.预置单保持寄存器(06H) (23)3.2.7.强制多线圈(0FH) (23)3.2.8.预置多寄存器(10H) (23)3.3.MODBUS异常码 (24)附录A:从站状态监测功能说明 (25)附录B:如何使用串口调试助手截取MODBUS报文 (27)附录C:如何使用Modbus Slave连接PBMD232/485-K20(主站) (29)使用须知● 如果您已经熟悉Modbus-RTU协议以及熟练使用西门子配置软件Step7,仅仅关心本产品的使用问题,请参看1.2节《PBMD232/485-K20 STEP7参数配置说明》。
Modbus ECS8103CP 网关服务器用户手册

Modbus网关服务器用户手册ECS8103CP【功能介绍】ECS8103CP是一款多功能串口Modbus 网关设备,它内部集成了Modbus TCP、Modbus RTU 和Modbus ASCII 协议,并且该设备串口可通过软件灵活配置成RS-232、RS-485 或RS-422模式,用户利用它可以轻松实现Modbus以太网设备与Modbus串口设备的无缝整合。
Modbus协议是电子工业设备上应用最为广泛的一种通用协议,现已成为一种通用的工业标准。
通过此协议,各种Modbus设备(如 PLC、DCS、HMI、各种仪表等)之间经由网络或串行链路可以相互进行通信。
但是使用在串口和以太网上的Modbus 协议是不同的,因此需要一个网关来完成两个协议之间的通讯转换工作。
ECS8103CP是专门用来连通Modbus TCP 设备和Modbus RTU/ASCII 设备的产品。
【产品特点】1、32 位 ARM Cortex-m3 CPU2、支持1个10/100M 以太网接口3、支持 RS-232、RS-422、RS-485 三种串口方式4、串口波特率、数据位、停止位、校验位均可设定5、支持ARP、IP、ICMP、IGMP、UDP、TCP、DHCP、DNS、MODBUS TCP、MODBUS RTU、MODBUS ASCII协议6、支持RTU_ Master--TCP_ Slaver 、TCP_ Master--RTU_ Slaver 、ASCII_ Master--TCP_ Slaver 、TCP_ Master--ASCII_ Slaver四种工作模式7、最大支持 32 个Modbus TCP主站、4个Modbus TCP从站8、提供字符超时时间自动适应功能9、提供 ID 映射功能,实现主机 ID 号的管理10、本地端口、目标IP地址和目标端口号可设定11、可使用 Web Server、Telnet、 MG Configuration配置工具进行配置12、配置工具支持Windows98/me/NT/2000/XP/WIN7/WIN8/WIN10 等操作系统13、工业级设计,可长期稳定运行在恶劣环境【产品规格】以太网标准:10/100Mbps自适应以太网口通讯模式:全双工/半双工自适应传输距离:小于100米接口形式:RJ-45串口RS-232信号:TXD,RXD,RTS,CTS,GNDRS-422信号:T+,T-,R+,R-RS-485信号:D+,D-检验位:None\Even\Odd\space\mark数据位:6bit,7bit,8bit波特率:300bps ~ 230400bps方向控制:RS-485采用数据流向自动控制技术负载能力:RS-485/422端支持最大32结点轮询传输距离:RS-485/422端1000米,RS-232口10米接口保护:1500W浪涌保护,15KV静电保护接口形式:RS-232端DB-9公头,RS-485/422端子台电源电源输入:DC9~48V供电功耗:120mA @ 24V(最大)环境工作温度:-20℃~70℃储藏温度:-40℃~95℃储藏湿度: 5~95% RH外型尺寸长×宽×高:103x72x27(mm)【接口定义】RS-232:DB9公头(TXD,RXD,RTS,CTS,GND)RS-422:接线端子(T+, T-, R+, R-)RS-485:接线端子(D+,D-)网络接口:RJ45(Ethernet)电源接口:接线端子VS+,VS-【恢复出厂设置】硬件恢复:把端子上的Setup和GND短接重新供电,然后断开Setup和GND,可恢复出厂设置。
微硬网关MODBUS-DP使用方法

微硬网MODBUS-DP网关调试方法1、网关介绍MODBUS转PROFIBUS网关:凡具有RS232/485接口的MODBUS协议设备都可以使用本产品实现与现场总线PROFIBUS的互连。
如:具有MODBUS 协议接口的变频器、电机启动保护装置、智能高低压电器、电量测量装置、各种变送器、智能现场测量设备及仪表等等, 都可以使用该MODBUS转PROFIBUS网关。
详细介绍:型号:PBMD485-K20网关有2种型号PBMD485-K20:MODBUS485接口设备可以通过网关接入PROFIBUS总线网络;PBMD232-K20:MODBUS232接口设备可以通过网关接入PROFIBUS总线网络;以上两个型号的产品都可以通过拨码开关设定为两种功能:在MODBUS 侧做从站(即MS功能),或者在MODBUS侧做主站(即MM功能),实现MODBUS转PROFIBUS。
MODBUS转PROFIBUS网关技术指标:(1)网关在MODBUS侧有两种功能:MM功能的网关在PROFIBUS-DP 一侧是从站,在MODBUS一侧是MODBUS主站;MS功能的网关在PROFIBUS-DP一侧是从站,在MODBUS一侧是MODBUS从站;接口通过PROFIBUS通信数据区和MODBUS数据区的数据映射实现PROFIBUS和MODBUS的数据透明通信。
(2)无论做MODBUS主站还是从站,都支持MODBUS 01H、02H、03H、04H、05H、06H、0FH、10H号功能;(3)PROFIBUS-DP协议,符合;JB/T 10308.3-2001: 测量和控制数字数据通信工业控制系统用现场总线第3部分:PROFIBUS规范;(4)标准PROFIBUS-DP驱动接口, 波特率自适应,最大波特率6M;(5)PROFIBUS 侧的输入/输出数量在以下三种范围内可以由用户自由设定:①Input Bytes + Output Bytes ≤232 Bytes;②Max Input Bytes ≤224 Bytes;③Max Output Bytes ≤224 Bytes。
两路开关量输入两串口服务器Modbus网关NP902_2DI应用说明

两串口设备联网服务器用户手册两串口RS-485 —TCP/IPSerial Device Server User’s ManualVersion 6.11目录1产品简介 (1)1.1产品特色 (1)1.2技术规格 (2)1.3接口特性: (4)连接电源 (4)连接网络 (4)连接串口设备 (5)1.4软件安装 (5)系统要求 (5)软件安装 (5)操作说明 (5)2使用指南 (7)2.1串口服务器参数 (7)2.2配置参数 (8)21产品简介1.1产品特色NP902_2DI设备联网服务器(G&S NETPORT系列产品之一,以下简称NP902_2DI)是我司自主研发生产的工业级串口联网设备。
采用32位ARM处理器,嵌入式实时多任务操作系统,提供10M/100M的通讯,使设备运行更加稳定,可靠。
NETPORT系列串口服务器让您无需投入大量资金来更换或升级原有软件和硬件系统,就可以让您原有的RS-485串口设备轻松实现以太网互联,为串口数据信息提供高效、安全、稳定的数据通道。
目前该系列产品已广泛应用于:◢工厂自动化控制◢机房监控◢PLC控制◢智能电表◢生物识别装置、读卡器◢安保系统◢机电仪器联网控制等等领域1NP902_2DI特点:●采用32位工业级处理器,高可靠性及低功耗●10/100M自适应以太网接口,串口界面多种可选●所有信号内置15 KV ESD保护,RS485 每线600W TVS保护,网络1.5KV电磁隔离●保证最高波特率115.2Kbps下,长时间双向文件传输不丢1个bit●支持Windows实COM串口驱动程序,支持离线设置虚拟串口,上电即插即用。
●支持通用Socket操作模式,包括TCP Server/Clint和UDP。
●支持断电或者断网自动恢复,免去很多维护成本●支持状态监视。
提供了多个指示灯来分析服务器的工作状态●平台软件自动搜索服务器●支持7-24V DC宽电压输入,并提供Terminal和Power Jack两种电源接口方式,充分体贴现场安装环境●提供方便的固件升级,保证不断提升产品性能和可靠性,保障客户的投资。
Modbus网关设备说明书

Modbus网关设备操作手册目录一产品介绍 (4)1.1产品概述 (4)1.2功能特点 (4)1.3技术参数 (4)1.4物品清单 (5)二硬件安装 (6)2.1安装拓扑图 (6)三软件及配置 (8)3.1初次登录 (8)3.2主机配置 (10)3.3主机配置 (10)3.4数据推送配置 (12)3.5串口配置 (13)3.6数据展示 (19)3.7字符叠加配置 (19)3.8导图 (20)四服务与支持 (21)五联系方式 (23)一产品介绍1.1产品概述MODBUS网关设备是一种读取传感器MODBUS数据将其在视频监控画面上叠加显示并可上报至第三方平台的设备,主要用于实时获知、保存所监测多路传感器的数据信息,方便查看。
1.2功能特点1.具备多路传感器接口,包含两路RS232接口以及两路RS485接口,满足各个场合不同需求2.支持所有标准MODBUS协议设备接入,各项参数均可自由配置3.强悍的挂载能力,最大支持64路传感器同时接入4.支持有线网络以及高速4G无线网络将数据上报至第三方平台5.支持平台软件开发定制,可为客户提供量身定制化服务6.配置简便,所有配置均可通过WEB进行更改7.支持市面上主流网络高清摄像机进行字符叠加,其它非主流相机可定制,可同时支持4路相机叠加8.叠加后不影响原视频画面清晰度,摄像机视频的画质及分辨率与未安装MODBUS网关设备前一致9.独特双网口设计,集成交换机功能,方便连接摄像机,无须额外布线10.远程升级功能,设备无需返厂即可通过WEB升级系统固件1.3技术参数尺寸(mm)124×132×28设备供电DC12V产品功耗<3W设备工作温湿度温度(-40℃—80℃),湿度(<50%)数据采集协议MODBUS标准协议传感器接口两路RS232及两路RS485传感器接入数量最大64路网络接口双网口(10M-100M自适应)数据上报支持有线、无线4G上报到第三方平台配置方式支持WEB配置及跨网段设备搜索功能支持相机型号海康、大华等主流网络摄像机,其它可定制叠加字符显示位置全屏位置可调叠加字体颜色海康相机支持自带112种颜色可调1.4物品清单名称数量MODBUS网关设备一台合格证1张保修卡1张1.5设备选型NE-MS7600-MODNE-MS7600-TCP二硬件安装2.1安装拓扑图三软件及配置出厂参数:设备出厂时已经配置好了默认的网络参数,这些值可以根据客户的需求改变,请参考本设备初始IP地址:192.168.1.252子网掩码:255.255.255.0网关地址:192.168.1.1WEB端口:80WEB初始登录用户名:adminWEB初始登录密码:admin8883.1初次登录1:设备提供两个网口,分别为LAN和W(LAN),将网线一端连接LAN口;如果MODBUS网关设备接的路由器或者交换机的网段为192.168.1.xxx的话,将连接设备的网线的另外一端连接交换机就可以;如果192.168.1.252的IP被使用的话,或者MODBUS网关设备连接的路由器或者交换机所在的网段不是192.168.1.xxx的话,将电脑断开网络,然后使用一根网线将电脑的网口和MODBUS网关设备LAN口连接;然后将自己电脑的IP配置为192.168.1.110网关:192.168.1.1子网掩码:255.255.255.0;因针对不同的系统配置电脑IP的方式不一致,可以针对自己的系统通过百度配置电脑IP;例如:使用的操作系统为win7系统,可以上网搜索:win7修改IP设置。
MGate MB3660系列Modbus网关快速安装指南说明书

P/N: 1802036600013*1802036600013*MGate MB3660 Series Quick Installation GuideVersion 2.2, January 2021Technical Support Contact Information/support2021 Moxa Inc. All rights reserved.OverviewThe MGate MB3660 (MB3660-8 and MB3660-16) series gateways are 8 and 16-port redundant Modbus gateways that convert between the Modbus TCP and Modbus RTU/ASCII protocols. The gateways come with built-in dual AC or DC power inputs for power redundancy, and have dual Ethernet ports (with different IPs) for network redundancy.The MGate MB3660 series gateways provide not only serial-to-Ethernet communication, but also serial (Master)-to-serial (Slave) communication, and can be accessed by up to 256 TCP master/client devices, or connected to 128 TCP slave/server devices.Each serial port can be configured individually for Modbus RTU or Modbus ASCII operation and for different baudrates, allowing both types of networks to be integrated with Modbus TCP through one Modbus gateway.Package ChecklistBefore installing the MGate MB3660 series gateway, verify that the package contains the following items:• 1 MGate MB3660-8 or MB3660-16 gateway• 1 RJ45-to-DB9 female serial cable for console setting• 2 L-shaped brackets for wall mounting• 2 AC power cords (for AC models)•Quick installation guide•Warranty cardOptional Accessories•Mini DB9F-to-TB: DB9 female to terminal block connector•CBL-RJ45M9-150: RJ45 to DB9 male serial cable, 150 cm•CBL-RJ45F9-150: RJ45 to DB9 female serial cable, 150 cm •CBL-F9M9-20: RJ45 to DB9 female serial cable, 150 cm•CBL-RJ45SF9-150: RJ45 to DB9 female serial shielded cable, 150 cm•WK-45-01: Wall-mounting kit, 2 L-shaped plates, 6 screws, 45 x 57 x 2.5 mm•PWC-C13AU-3B-183: Power cord with Australian (AU) plug, 183 cm •PWC-C13CN-3B-183: Power cord with three-prong China (CN) plug, 183 cm•PWC-C13EU-3B-183: Power cord with Continental Europe (EU) plug, 183 cm•PWC-C13JP-3B-183: Power cord with Japan (JP) plug, 7 A/125 V, 183 cm•PWC-C13UK-3B-183: Power cord with United Kingdom (UK) plug, 183 cm•PWC-C13US-3B-183: Power cord with United States (US) plug, 183 cm•CBL-PJTB-10: Non-locking barrel plug to bare-wire cableNotify your sales representative if any of the above items are missing or damaged.Hardware IntroductionAs shown in the following figures, the MGate MB3660-8 has 8 DB9/RJ45 ports for transmitting serial data, and the MGate MB3660-16 has 16 DB9/RJ45 ports for transmitting serial data. The MGate MB3660I series gateways provide 2 kV serial port isolation protection.AC-DB9 ModelsDC-DB9 ModelsAC-DB9-I ModelsAC-RJ45 ModelsReset Button — Press the Reset button continuously for 5 sec to load factory defaultsThe reset button is used to load factory defaults. Hold the reset button down for five seconds using a pointed object such as a straightened paper clip. Release the reset button when the Ready LED stops blinking. LED IndicatorsName Color Function PWR 1, PWR 2 RedPower is being supplied to the power input OffPower cable is not connected Ready Red Steady on: Power is on and the unit is booting upBlinking: IP conflict, DHCP, or BOOTP server did notrespond properly, or a relay output occurredGreen Steady on: Power is on and unit is functioning normallyBlinking: Unit is responding to the locate functionOff Power is off, or power error condition existsTx Green Serial port is transmitting dataRx Amber Serial port is receiving dataLAN 1, LAN 2 Green Indicates 100 Mbps Ethernet connectionAmber Indicates 10 Mbps Ethernet connectionOff Ethernet cable is disconnectedHardware Installation ProcedureSTEP 1: After unpacking the unit, use an Ethernet cable to connect theunit to the network.STEP 2: Connect your device to the desired port on the unit.STEP 3: Place or mount the unit. The unit may be placed on a horizontalsurface such as a desktop, or mounted on the wall.STEP 4: Connect the power supply to the unit.Wall or Cabinet MountingTwo metal plates are provided for mounting the unit on a wall or inside a cabinet. Attach the plates to the unit’s rear panel with screws. With the plates attached, use screws to mount the unit on a wall.The heads of the screws should be 5.0 to 7.0 mm indiameter, the shafts should be 3 to 4 mm indiameter, and the length of the screws should bemore than 10.5 mm.Termination Resistor and Adjustable Pull High/Low ResistorsIn some critical environments, you may need to add termination resistors to prevent the reflection of serial signals. When using termination resistors, it is important to set the pull high/low resistors correctly so that the electrical signal is not corrupted. The MGate MB3660 uses DIP switches to set the pull high/low resistor values for each serial port. To expose the DIP switches located on the back of the PCB, first remove the screws holding the DIP switch cover in place, and then remove the cover. The sequence from right to left is port 1 to port 16.To add a 120 Ω termination resistor, set switch 3 on the port's assigned DIP switch to ON; set switch 3 to OFF (the default setting) to disable the termination resistor.To set the pull high/low resistors to 150 KΩ, set switches 1 and 2 on the port's assigned DIP switch to OFF. This is the default setting.To set the pull high/low resistors to 1 KΩ, set switches 1 and 2 on the port's assigned DIP switch to ON.Pull High/low Resistors for the RS-485 PortDefault SW1 23Pull High Pull Low Terminator ON 1 KΩ 1 KΩ120 ΩOFF 150 KΩ150 KΩ–Software Installation InformationTo configure your MGate MB3660, connect the gateway’s Ethernet port directly to your computer’s Ethernet port and then log in from a web browser. The default IP addresses of LAN1 and LAN2 are192.168.127.254 and 192.168.126.254, respectively.You can download the User's Manual and Device Search Utility (DSU) from Moxa's website: . Please refer to the User’s Manual for additional details on using the DSU.The MGate MB3660 also supports login via a web browser.Default IP address: 192.168.127.254/192.168.126.254Default account: adminDefault password: moxaPin Assignments RJ45 (LAN, Console)Pin LANConsole (RS-232)1 Tx+ DSR2 Tx- RTS3 Rx+ GND4 – TxD5 – RxD6 Rx- DCD7 – CTS8 – DTR DB9 Male (Serial Ports)Pin RS-232RS-422/RS-485-4WRS-485-2W1 DCD TxD-(A) –2 RxD TxD+(B) –3 TxD RxD+(B) Data+(B)4 DTR RxD-(A) Data-(A)5 GND GND GND6 DSR – –7 RTS – –8 CTS – –9 – ––RJ45 (Serial Ports)Pin RS-232RS-422/RS-485-4WRS-485-2W1 DSR – –2 RTS TxD+(B) –3 GND GND GND4 TxD TxD-(A) –5 RxD RxD+(B) Data+(B)6 DCD RxD-(A) Data-(A)7 CTS – –8 DTR – – Relay OutputN.O. Common N.C.SpecificationsPower Input Dual 20 to 60 VDC (for DC models);or dual 100 to 240 VAC,47 to 63 Hz (for AC models) Power ConsumptionMGate MB3660-8-2ACMGate MB3660-8-2DC MGate MB3660-16-2AC MGate MB3660-16-2DC MGate MB3660-8-J-2AC MGate MB3660-16-J-2AC MGate MB3660I-8-2AC MGate MB3660I-16-2AC 144 mA/110 V, 101 mA/220 V312 mA/24 V, 156 mA/48 V178 mA/110 V,120 mA/220 V390 mA/24 V, 195 mA/48 V111 mA/110 V, 81 mA/220 V133 mA/110 V, 92 mA/220 V100-240 VAC, 50/60 Hz, 310 mA (max.) 100-240 VAC, 50/60 Hz, 310 mA (max.)Operating Temperature 0 to 60°C (32 to 140°F)Storage Temperature -40 to 85°C (-40 to 185°F)Operating Humidity 5 to 95% RHDimensions (W x D x H) 440 x 197.5 x 45.5 mm(17.32 x 7.78 x 1.79 in)Fault Relay Circuit 3-pin circuit with current carrying capacityof 2 A @ 30 VDC。
ISS-3Lua可编程Modbus智能网关

ISS-3Lua可编程Modbus智能网关一、硬件接口 (2)1、指示灯说明 (2)2、电源输入接口 (3)3、串口分配 (3)4、RS485口接线 (3)5、RS232口接线 (4)6、10/100Mbps以太网接口 (5)二、安装软件 (6)1、首先以管理员权限运行Xframe安装文件,并安装软件 (6)2、选择默认的“我的设备”,然选择“扫描可识别网络设备” (6)3、修改IP (6)4、如果扫描不到设备 (6)三、进入产品的设置菜单 (8)1、进入Telnet管理菜单 (8)2、操作规则 (8)四、进入编程环境 (10)1、添加Lua程序编程环境 (10)2、上传Lua程序至转换器 (13)3、扫描添加目标设备 (15)4、手动添加目标设备 (17)5、定义多个目标设备 (17)6、上传至转换器 (18)7、查看调试信息 (19)8、更多Lua程序设计信息 (19)五、设置串口参数 (20)1、概述 (20)2、进入修改串口参数菜单 (20)3、配置串口基本参数 (21)4、配置串口使用方式 (21)5、设置为上位机时的参数 (22)六、切换端口类型 (23)七、设置串口波特率 (24)八、嵌入式Modbus虚拟机工作方式及参数设置 (26)1、概述 (26)2、Modbus虚拟机运行方式示例 (27)1)设置Modbus读命令对应的寄存器值 (27)2)应答Modbus写命令 (30)3、与Modbus RTU串口上位机通讯 (35)1)首先将ISS-3Lua的上位机串口连接至电脑 (35)2)设置Modbus Poll通过串口读取数据 (35)4、Modbus虚拟机与协议转换的联合使用 (37)九、ISS-3Lua产品描述表 (38)十、京金华产品保修规定 (39)一、硬件接口产品硬件接口如下图所示1、指示灯说明Power:电源指示灯,正常工作时应该为常亮状态,否则请检查设备供电。
Active:工作指示灯,正常工作时,一秒闪烁一次。
PROFINET转RS485 MODBUS RTU网关连接西门子PLC和工业称重控制仪表配置案例

PROFINET转RS485 MODBUS RTU网关PNMD485-K20连接西门子PLC和工业称重控制仪表配置案例前言:随着工业现场总线技术以及工业以太网技术的飞速发展,工业自动化现场通常有多种通讯协议同时存在,对于不同协议的设备之间如何通讯,是我们必须面临解决的问题,如工业称重自动化项目中为了方便工程师实时监控称重数据,会把称重仪表接入到PLC监控系统中,在这种需求越来越多的情况下,不同协议之间可以实现协议转换就尤为重要,此方案是以微硬创新协议转换网关为例,介绍如何实现PROFINET和MODBUS-RTU的数据交换,实现MODBUS转PROFINET,或者PROFINET转MODBUS数据通讯。
项目概述:本项目现场是在国内某自动化项目,该PLC系统使用的是西门子S7-1200 PLC,支持PROFINET 工业以太网协议;工业称重仪表为国内某公司生产的,提供RS485 串口,支持标准MODBUS-RTU网络通讯协议;协议转换网关为微硬创新PROFINET转MODBUS网关PNMD485-K20项目拓扑图:项目目的:通过MODBUS转PROFINET网关完成协议转换之后,实现PLC通过RS485串口和称重仪表连接,采集称重表的各种状态值,并设置称重表的工作模式,可以通知仪表去皮、清零,打印数字,远程校正、配置参数,实时监控仪表的运行状态:1.读取仪表显示重量.2.控制仪表去皮、清零、清皮、打印、数字去皮等等3.远程校正、配置参数、加载预置点目标值等等4.监控仪表的运行状态,包括监控预置点5.读取仪表扩展输入口和控制仪表扩展输出口项目方案:由于称重控制仪表有RS485通讯接口,支持MODBUS-RTU现场总线通讯协议,作为MODBUS从站,PLC 支持PROFINET 以太网通讯协议,作为PROFINET 主站,PLC和称重控制仪表的协议是不同的,仪表是MODBUS-RTU,PLC是PROFINET,所以PLC是不能直接采集称重控制仪表的数据的,需要通过MODBUS转PROFINET/ROFINET转MODBUS协议转换模块实现不同协议间的数据交换。
- 1、下载文档前请自行甄别文档内容的完整性,平台不提供额外的编辑、内容补充、找答案等附加服务。
- 2、"仅部分预览"的文档,不可在线预览部分如存在完整性等问题,可反馈申请退款(可完整预览的文档不适用该条件!)。
- 3、如文档侵犯您的权益,请联系客服反馈,我们会尽快为您处理(人工客服工作时间:9:00-18:30)。
ModbusRTU/TCP双向转换功能与组态王及ModbusPoll连接设置一、工作方式
支持Modbus TCP报文及Modbus RTU报文的双向转换,可以让现有的Modbus RTU设备通过以太网用Modbus TCP方式与各类软件进行通讯。
中间不再需要虚拟串口软件,提高了系统的紧凑性和运行效率。
我公司具备RS232/RS485转以太网功能的产品均支持此功能。
其中串口共享服务器支持多台主机同时访问一个Modbus RTU下位机,其他产品支持1台主机访问。
转换后的Modbus寄存器等参数均保持原样,不错任何修改。
二、设置为Modbus RTU/TCP双向转换模式
1.使用虚拟串口软件登录到设备的管理菜单中。
最简单的方法是,通过虚拟串口软件的设备探测器进入管理菜单。
在主界面中,选中扫描添加设备。
在设备探测器中,选中扫描到的设备,然后选择管理-使用Telnet管理此设备
输入口令后,出现管理菜单。
默认的口令为admin。
2.配置要使用的端口
输入端口前的数字即可进入对应的端口配置菜单,例如准备将端口A设置为Modbus RTU/TCP 模式,输入1即可。
检查串口的波特率及其他参数是否与设备相符,如果不符,输入参数前的数字即可修改。
打回车跳过不需要修改的参数
在出现 <选择串口接收模式>时,选择第3项,Modbus TCP至Modbus RTU双向转换模式。
之后选择Modbus转换模式参数,通常情况下,使用默认设置即可工作。
此处参数意义
Modbus TCP报文头格式:默认为全信息模式,包括字节长度等信息。
选择Modbus RTU的CRC格式:默认为标准格式。
接收数据帧间隔:当达到此间隔没有收到下位机的数据,将打包转发数据到上位机。
此参数越小,通讯速度越快,但如果过小,会出现数据拆包现象,导致工作不正常。
对应的TCP/IP端口:Modbus TCP的通讯端口,组态王、Modbus Poll等软件需要连接至此端口进行通讯。
端口A默认为6020,端口B默认为6021,以此类推。
注意,Modbus TCP默认端口为502,但是对于多口串口服务器无法为所有端口都启用502端口,所以使用6020及以后的端口。
用户也可以修改此端口为需要的端口。
上位机软件也需要修改Modbus TCP端口参数为6020或以后的端口。
必须与串口服务器此参数对应,否则无法建立连接。
三、组态王设置
1、在设备的COM1、COM2下,单击新建,然后选择驱动程序。
2、选择PLC-莫迪康-Modbus TCP-TCP驱动。
3、选择串口号,使用默认的即可,最终是使用TCP/IP通讯
4、设置地址
注意此处的格式:[192.168.192.100]:[6020] [1]
[192.168.192.100]:串口服务器的IP地址
[6020]:此处用串口服务器的6020端口,即第1个口来通讯,6021为第2个串口,以此类推。
[1]:子设备ID,为1台下位机地址码。
如果有多个下位机,需要定义多个设备,并且设置不同的地址码。
5、定义变量
与串口通讯时的寄存器地址完全相同。
四、Modbus Poll设置
Modbus Poll软件通常用于测试Modbus RTU和TCP产品,支持完整的Modbus协议。
1、建立连接
选择Connection->Connect菜单项
选择TCP/IP连接方式,在IP Address栏中填入串口服务器IP。
Port填入端口。
注意,此处的Port为6020端口,即使用串口服务器第1个端口。
2、定义查询参数
选择Setup->Poll Definition菜单项
Slave:下位机地址码
Function:功能码
Address:Modbus寄存器的开始地址
Length:要读取的寄存器长度
ScanRate:轮询间隔
3、运行状态
Tx为发送成功次数,Err为错误次数,ID为地址码。
