2015 春季 Nachos3.4-Lab5-文件系统
NachOS-3.4安装

Nachos-3.4的安装与环境配置一、Nachos-3.4的安装实验环境是Linux,Nachos可以运行在内核版本1.2.13以上的各种Linux版本。
编译器的版本是gcc2.7.2版本以上。
安装文件准备1. 下载获得文件code-linux.tar.gz2. 学生需要将此文件拷贝到自己的工作目录下,并将其解开:~$ tar -xzvf code-linux.tar.gz此时工作目录下生成nachos-3.4和gnu-decstation-nltrix两个文件夹。
二、编译安装当需要单独编译线程管理部分时先进入threads目录,采用如下命令:~/nachos-3.4/code/threads$执行make depend命令:~/nachos-3.4/code/threads$ make depend编译nachos:~/nachos-3.4/code/threads$ make nachos运行nachos:~/nachos-3.4/code/threads$ ./nachos出现0和1两个进程的切换证明安装成功。
需要注意的问题:在ubuntu中,可能没有gmake,所以需修改Makefile文件~/nachos-3.4/code$ vi Makefile修改Make的值从gmake改为make如果编译器关于文件mon报错,则需要修改该文件:~/nachos-3.4/code$ vi Makefile将CFlAGS的值去掉最后的-fwritable-strings再次编译即可成功:~/nachos-3.4/code/threads$ make nachos三、交叉编译器coff2noff的安装如果需要在NachOS中运行用户态的程序,就需要用MIPS交叉编译器进行编译,生成coff格式的文件,然后通过NachOS中提供的coff2noff工具将其转换成NachOS所支持的文件格式,交叉编译的过程是将*.c->*.coff->*.noff,最后生成的*.noff即为NachOS下的可执行文件。
nachos作法

Nachos作法介绍Nachos(Not Another Completely Heuristic Operating System)是一个教学用的操作系统内核,由加州大学伯克利分校开发。
它是一个简化的操作系统,旨在帮助学生理解操作系统的基本原理和设计。
Nachos提供了一个模拟的计算机环境,可以在上面运行操作系统。
它提供了一些基本的系统调用,如创建进程、文件读写等,并模拟了一些硬件设备,如磁盘、内存等。
通过使用Nachos,学生可以学习操作系统的各个方面,包括进程管理、内存管理、文件系统等。
Nachos的特点Nachos有以下几个特点:1.模拟环境:Nachos提供了一个模拟的计算机环境,可以在上面运行操作系统。
这使得学生可以在不依赖真实硬件的情况下学习操作系统的原理和设计。
2.简化的操作系统:Nachos是一个简化的操作系统,它只实现了一些基本的功能,如进程管理、内存管理、文件系统等。
这使得学生可以更容易地理解和修改Nachos的代码。
3.可扩展性:Nachos的设计非常模块化,各个组件之间的耦合度较低。
这使得学生可以方便地扩展和修改Nachos的功能,以满足不同的教学需求。
4.开放源代码:Nachos是开放源代码的,任何人都可以访问和修改Nachos的代码。
这使得学生可以更深入地理解操作系统的实现细节,并参与到Nachos的开发中。
Nachos的使用方法要使用Nachos,你需要按照以下步骤进行操作:1.下载Nachos:首先,你需要从Nachos的官方网站上下载Nachos的源代码。
Nachos的官方网站提供了不同版本的Nachos,你可以根据自己的需求选择合适的版本。
2.编译Nachos:下载完Nachos的源代码后,你需要将其编译成可执行文件。
Nachos的源代码附带了一个Makefile,你只需要在终端中运行make命令即可编译Nachos。
3.运行Nachos:编译完成后,你可以在终端中运行./nachos命令来启动Nachos。
Nachos实验报告10
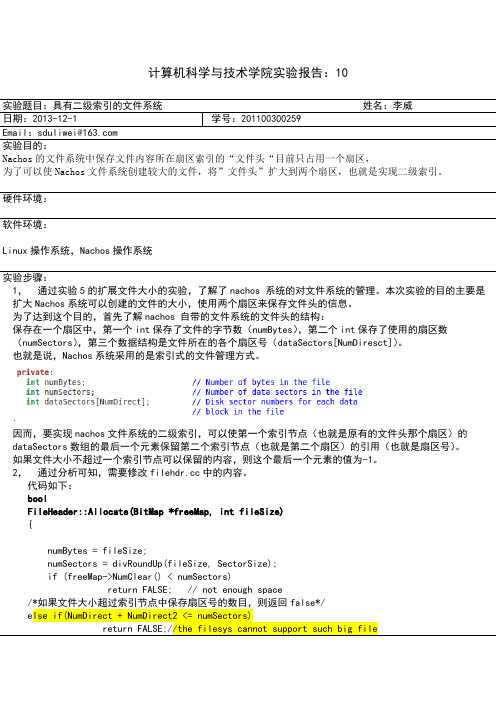
计算机科学与技术学院实验报告:10实验题目:具有二级索引的文件系统姓名:李威日期:2013-12-1 学号:201100300259Email:sduliwei@实验目的:Nachos的文件系统中保存文件内容所在扇区索引的“文件头“目前只占用一个扇区,为了可以使Nachos文件系统创建较大的文件,将”文件头”扩大到两个扇区,也就是实现二级索引。
硬件环境:软件环境:Linux操作系统,Nachos操作系统实验步骤:1,通过实验5的扩展文件大小的实验,了解了nachos 系统的对文件系统的管理。
本次实验的目的主要是扩大Nachos系统可以创建的文件的大小,使用两个扇区来保存文件头的信息。
为了达到这个目的,首先了解nachos 自带的文件系统的文件头的结构:保存在一个扇区中,第一个int保存了文件的字节数(numBytes),第二个int保存了使用的扇区数(numSectors),第三个数据结构是文件所在的各个扇区号(dataSectors[NumDiresct])。
也就是说,Nachos系统采用的是索引式的文件管理方式。
因而,要实现nachos文件系统的二级索引,可以使第一个索引节点(也就是原有的文件头那个扇区)的dataSectors数组的最后一个元素保留第二个索引节点(也就是第二个扇区)的引用(也就是扇区号)。
如果文件大小不超过一个索引节点可以保留的内容,则这个最后一个元素的值为-1。
2,通过分析可知,需要修改中的内容。
代码如下:boolFileHeader::Allocate(BitMap *freeMap, int fileSize){numBytes = fileSize;numSectors = divRoundUp(fileSize, SectorSize);if (freeMap->NumClear() < numSectors)return FALSE; // not enough space/*如果文件大小超过索引节点中保存扇区号的数目,则返回false*/else if(NumDirect + NumDirect2 <= numSectors)return FALSE;//the filesys cannot support such big file/*toNextNode 是保留第二个索引节点的扇区号*/int toNextNode=NumDirect-1; //toNextNode is the Sector number of the second node of the filehd//if the second node is not needed, then dataSector[toNextNode]=-1if(numSectors < toNextNode){for (int i = 0; i < numSectors; i++)dataSectors[i] = freeMap->Find();//为文件分配扇区dataSectors[toNextNode] = -1;}//If the numSectors excends the rage of dataSectors,else{for (int i = 0; i < toNextNode; i++)dataSectors[i] = freeMap->Find();dataSectors[toNextNode] = freeMap->Find();//找一个空闲的扇区,作为第二个扇区,索引节点//this is the content,i.e.filehdr of the allocated sectors, of the second nodeint dataSectors2[NumDirect2];for (int i = 0; i < numSectors - NumDirect; i++)dataSectors2[i] = freeMap->Find();//为文件分配扇区//the fefault synchDisk->WriteSector do not include the second node//so write back the new build nodesynchDisk->WriteSector(dataSectors[toNextNode], (char *)dataSectors2); }return TRUE;/*revised*/}voidFileHeader::Deallocate(BitMap *freeMap){/*toNextNode 是保留第二个索引节点的扇区号*/int toNextNode= NumDirect - 1;// test if has the second nodeif(dataSectors[toNextNode]==-1){for (int i = 0; i < numSectors; i++){ASSERT(freeMap->Test((int) dataSectors[i])); // ought to be marked!freeMap->Clear((int) dataSectors[i]);}}//has a second node, then find it, then clean the bitmap, thenelse{//clear the first n-1 bit,remain the toNextNodeint i=0;for ( ; i < toNextNode; i++){ASSERT(freeMap->Test((int) dataSectors[i])); // ought to be marked!freeMap->Clear((int) dataSectors[i]);}int dataSectors2[NumDirect2];synchDisk->ReadSector(dataSectors[toNextNode], (char *)dataSectors2);freeMap->Clear((int) dataSectors[toNextNode]);//clear the toNextNodefor( ; i < numSectors; i++)freeMap->Clear((int) dataSectors2[i-toNextNode]);//toNextNode==the number of filehdr item }}intFileHeader::ByteToSector(int offset){ASSERT(offset<=numBytes);/*toNextNode 是保留第二个索引节点的扇区号*/int toNextNode = NumDirect - 1; //test if offset excedes the first nodeif(offset / SectorSize < toNextNode)return(dataSectors[offset / SectorSize]);else{int dataSectors2[NumDirect2];synchDisk->ReadSector(dataSectors[toNextNode], (char *)dataSectors2);return (dataSectors2[offset / SectorSize - toNextNode]);}}voidFileHeader::Print(){/*revised*/int i, j, k;/*toNextNode 是保留第二个索引节点的扇区号*/int toNextNode = NumDirect - 1;char *data = new char[SectorSize];//test if there is a second nodeif(dataSectors[toNextNode] == -1){printf("FileHeader contents. File size: %d. File blocks:\n", numBytes); for (i = 0; i < numSectors; i++)printf("%d ", dataSectors[i]);printf("\nFile contents:\n");for (i = k = 0; i < numSectors; i++) {synchDisk->ReadSector(dataSectors[i], data);for (j = 0; (j < SectorSize) && (k < numBytes); j++, k++) {if ('\040' <= data[j] && data[j] <= '\176') // isprint(data[j])printf("%c", data[j]);elseprintf("\\%x", (unsigned char)data[j]);}printf("\n");}}// If there is a secondary index,// first read in the dataSectors2 from the Disk.// Then, deallocate the data blocks for this file.// At last, deallocate the block that dataSector2 locates.else{int dataSectors2[NumDirect2];synchDisk->ReadSector(dataSectors[toNextNode], (char *)dataSectors2);//1, print the filedre itemsprintf("FileHeader contents. File size: %d. File blocks:\n", numBytes);for (i = 0; i < toNextNode; i++)printf("%d ", dataSectors[i]);for(; i < numSectors; i++)printf("%d ", dataSectors2[i - toNextNode]);printf("\nFile contents:\n");//2,print the content of the first node pointedfor (i = k = 0; i < toNextNode; i++) {synchDisk->ReadSector(dataSectors[i], data);for (j = 0; (j < SectorSize) && (k < numBytes); j++, k++) {if ('\040' <= data[j] && data[j] <= '\176') // isprint(data[j])printf("%c", data[j]);elseprintf("\\%x", (unsigned char)data[j]);}printf("\n");}//3,print the content of the second node pointedfor( ; i < numSectors; i++) {synchDisk->ReadSector(dataSectors2[i - toNextNode], data);for (j = 0; (j < SectorSize) && (k < numBytes); j++, k++) {if ('\040' <= data[j] && data[j] <= '\176') // isprint(data[j])printf("%c", data[j]);elseprintf("\\%x", (unsigned char)data[j]);}printf("\n");}}delete [] data;/*revised*/}boolFileHeader::AppSectors(BitMap *freeMap, int appFileSize){/*revised*/if(appFileSize <= 0)return false;int restFileSize = SectorSize * numSectors - numBytes;if(restFileSize >= appFileSize){numBytes += appFileSize;return true;}else{int moreFileSize = appFileSize - restFileSize;if(freeMap->NumClear()< divRoundUp(moreFileSize, SectorSize))return FALSE;else if(NumDirect + NumDirect2 <= numSectors + divRoundUp(moreFileSize, SectorSize)) return FALSE;int i = numSectors;numBytes += appFileSize;numSectors += divRoundUp(moreFileSize, SectorSize);/*toNextNode 是保留第二个索引节点的扇区号*/int toNextNode = NumDirect-1; //test if has the second nodeif(dataSectors[toNextNode] == -1){//test if need the second nodeif(numSectors < toNextNode)for( ; i < numSectors; i++)dataSectors[i] = freeMap -> Find();//need the second nodeelse{for( ; i< toNextNode ; i++)dataSectors[i]= freeMap ->Find();dataSectors[toNextNode] = freeMap ->Find();int dataSectors2[NumDirect2];for ( ; i < numSectors ; i++)dataSectors2[i - toNextNode] = freeMap->Find();synchDisk->WriteSector(dataSectors[toNextNode], (char *)dataSectors2);}}/** If before appending, there is already a secondary index*///First read the dataSectors2 from the Disk.//Then, append the file size.//At last, write back the secondary index block into the sector,else{int dataSectors2[NumDirect2];synchDisk->ReadSector(dataSectors[toNextNode], (char *)dataSectors2);for( ; i < numSectors; i++)dataSectors2[i-toNextNode] = freeMap -> Find();//the var toNextNode==the number of int that synchDisk->WriteSector(dataSectors[toNextNode], (char *)dataSectors2);//the fefault synchDisk}}return TRUE;/*revised*/}运行结果:首先运行命令 ./nachos –f 格式化Nachos磁盘然后运行 ./nachos –ap test/big big 若干次,知道出现提示,文件太大不能再追究为止。
Nachos实验报告9

计算机科学与技术学院实验报告:9实验题目:设计并实现具有优先级的线程调度策略姓名:李威日期:2013-12-1 学号:201100300259 班级:11级软件3班Email:sduliwei@实验目的:Nachos系统采用基本的FCFS的线程调度策略,修改成为具有优先级的线程调度策略硬件环境:软件环境:linux操作系统,Nachos操作系统实验步骤:1.修改Thread类的构造函数,加入优先级priority属性,并且加入getPrioty方法。
以便在线程的等待队列中找到优先级最高的线程。
其中,线程优先级的范围从1到7,默认为7,即最低优先级。
修改代码如下:(,thread.h)class Thread {……………………………………public:Thread(char* debugName, int priority=7);// initialize a Thread …………………………………………………int getPriority(){return this->priority;}Thread::Thread(char* threadName, int p){if(p<1) priority = 1;else if(p>7) priority = 7;else priority = p;name = threadName;stackTop = NULL;stack = NULL;status = JUST_CREATED;#ifdef USER_PROGRAMspace = NULL;#endif}2,首先,了解Nachos系统原来的线程调度方式。
通过读,,文件中的内容了解线程调度的方式。
首先,修改 文件中的ThreadTest方法,创建有优先级的Thread,代码如下:然后,从Thread类中找到Fork方法,代码如下:这说明ThreadTest方法的目的是,实例化新的线程,调用Fork方法,也就是让新产生的线程去执行SimpleThread方法,并且把当前执行的线程加入到等待队列。
操作系统实验报告1
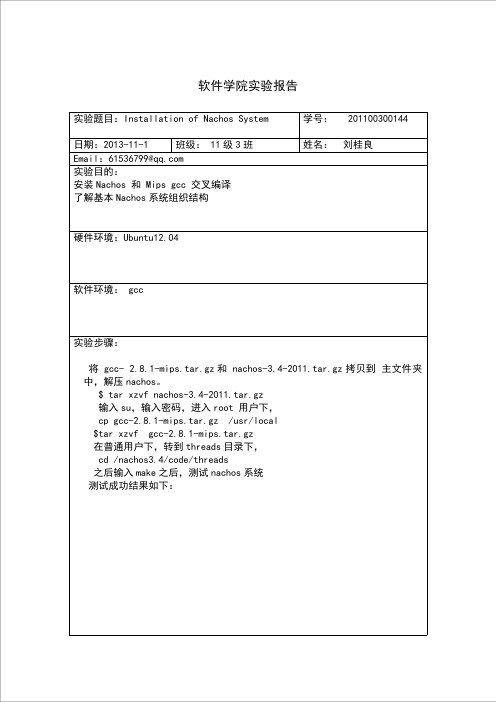
姓名: 刘桂良
硬件环境:Ubuntu12.8.1-mips.tar.gz 和 nachos-3.4-2011.tar.gz 拷贝到 主文件夹 中,解压 nachos。 $ tar xzvf nachos-3.4-2011.tar.gz 输入 su,输入密码,进入 root 用户下, cp gcc-2.8.1-mips.tar.gz /usr/local $tar xzvf gcc-2.8.1-mips.tar.gz 在普通用户下,转到 threads 目录下, cd /nachos3.4/code/threads 之后输入 make 之后,测试 nachos 系统 测试成功结果如下:
软件学院实验报告
实验题目:Installation of Nachos System 日期:2013-11-1 班级: 11 级 3 班 Email:61536799@ 实验目的: 安装 Nachos 和 Mips gcc 交叉编译 了解基本 Nachos 系统组织结构 学号: 201100300144
结论分析与体会: 通过这次实验,熟悉了 C++语言和系统开发调试,理解 Nachos 系统的 Makefile, 掌握重构 Nachos 系统的方法。
北大操作系统高级课程-陈向群作业-虚拟内存管理实习报告

虚拟内存管理实习报告目录内容一:总体概述 (3)内容二:任务完成情况 (3)任务完成列表(Y/N) (3)具体Exercise的完成情况 (3)内容三:遇到的困难以及解决方法 (11)内容四:收获及感想 (11)内容五:对课程的意见和建议 (11)内容六:参考文献 (11)内容一:总体概述本次lab主要是针对操作系统内存管理的学习,内存管理主要有固定分区、可变分区、页式和段式管理。
现代操作系统主要采用页式内存管理,它把用户程序地址空间划分成大小相等的部分,称为页。
内存空间按页的大小划分为大小相等的区域,称为内存块(物理页面,页框,页帧)。
以页为单位进行分配,逻辑上相邻的页,物理上不一定相邻。
虚拟内存的基本思想:每个程序拥有自己的地址空间,这个空间被分割成多个块,每一块称作一页或者页面,每一页有连续的地址范围。
这些页被映射到物理内存,但并不是所有页都必须在内存中才能运行。
当程序引用到一部分在物理内存中的地址空间时,由硬件立即执行必要的映射。
当程序引导到一部分不在物理内存中德的地址空间时,由操作系统负责将缺失的部分装入屋里内存并重新执行失效的指令。
内容二:任务完成情况任务完成列表(Y/N)Exercise1 Exercise2 Exercise3 Exercise4 Exercise5 Exercise6 Exercise7 Challange 完成情况Y Y Y Y Y Y N N具体Exercise的完成情况一、TLB异常处理目前,Nachos系统对于内存的管理是基于软件模拟的TLB机制。
其工作原理、异常处理、替换算法等方面,与分页式内存管理非常相像。
Exercise 1 源代码阅读Ø阅读code/userprog/,着重理解nachos执行用户程序的过程,以及该过程中与内存管理相关的要点。
Ø阅读code/machine目录下的machine.h(cc),translate.h(cc)文件和code/userprog目录下的exception.h(cc),理解当前Nachos系统所采用的TLB机制和地址转换机制。
海康雷达区间测速卡口方案

高清雷达测速卡口解决方案(IS-3013VR)目录第1 章概述 (1)1.1 应用背景 (1)1.2 设计原则 (1)1.3 设计依据 (4)第2 章系统总体设计 (7)2.1 设计思想 (7)2.1.1坚持两个原则 (7)2.1.2遵循三个模式 (7)2.1.3保持四个一致 (7)2.2 技术路线 (8)2.2.1卡口系统前端设备技术路线 (8)2.2.2卡口系统中心管理平台技术路线 (8)2.3 系统结构 (9)2.4 系统组成 (10)2.5 功能描述 (11)2.5.1车辆捕获功能 (11)2.5.2车辆速度检测功能 (11)2.5.3车辆图像记录功能 (11)2.5.4超速抓拍功能 (12)2.5.5智能补光功能 (12)2.5.6车辆牌照自动识别功能 (13)2.5.7车身颜色识别功能 (14)2.5.8车型判别功能 (15)2.5.9车标识别功能 (15)2.5.10车辆子品牌识别功能 (15)2.5.11未系安全带检测功能 (15)2.5.12接打电话检测功能 (15)2.5.13人脸特征抠图 (15)2.5.14打开遮阳板检测 (16)2.5.15前端备份存储功能 (16)2.5.16数据断点续传功能 (16)2.5.17图像防篡改功能 (16)2.5.18网络远程维护功能 (16)2.5.19全景高清录像功能(选配) (16)2.5.20平台功能 (17)2.6 系统性能指标 (17)第3 章前端子系统设计 (20)3.1 前端子系统组成 (20)3.1.1前端子系统组成 (20)3.1.2车辆测速单元 (21)3.1.3图像采集识别处理单元 (21)3.1.4前端数据处理及上传单元 (22)3.1.5网络传输单元 (22)3.1.6视频监控单元(选配) (22)3.2 系统现场布局 (22)3.2.1现场布局俯视图 (23)3.2.2现场布局侧视图 (23)3.3 硬件设备配置原则 (23)3.4 前端系统主要设备选型 (24)3.4.1 300万卡口抓拍单元 (24)3.4.2雷达 (26)3.4.3补光灯 (27)3.4.4终端服务器 (28)第4 章网络传输子系统设计 (30)第5 章中心存储子系统设计 (31)5.1 存储方案 (31)5.1.1存储需求 (31)5.1.2存储技术对比 (31)5.1.3存储方案选择 (33)5.2 数据存储设计 (33)5.3 图片存储设计 (34)5.4 视频存储设计(选配) (34)第6 章中心管理平台子系统设计 (36)6.1 平台概述 (36)6.1.1平台整体架构 (36)6.1.2平台功能模块 (38)6.1.3平台业务支撑 (39)6.2 运行环境要求 (40)6.2.1硬件环境 (40)6.2.2软件环境 (41)6.2.3网络环境 (42)6.3 配置推荐原则 (42)6.4 平台功能设计 (51)6.4.1平台基础应用 (51)6.4.2平台增值应用 (72)6.4.3平台新技术应用 (90)第7 章系统特点 (99)7.1 一套卡口抓拍单元覆盖2/3个车道 (99)7.2 摄像机高密度集成技术应用提升卡口前端系统稳定性 (99)7.3 车牌前端识别技术 (99)7.4 视频检测模式保障系统工作稳定性 (100)7.5 雷达测速模式保障速度的准确性 (100)7.6 系统运维成本低 (101)7.7 前端系统结构简单稳定 (101)第8 章系统拍摄效果 (102)8.1 300万雷达卡口抓拍效果 (102)8.1.1白天抓拍效果 (102)8.1.2夜间抓拍效果 (104)。
lab5-网络攻防基本步骤
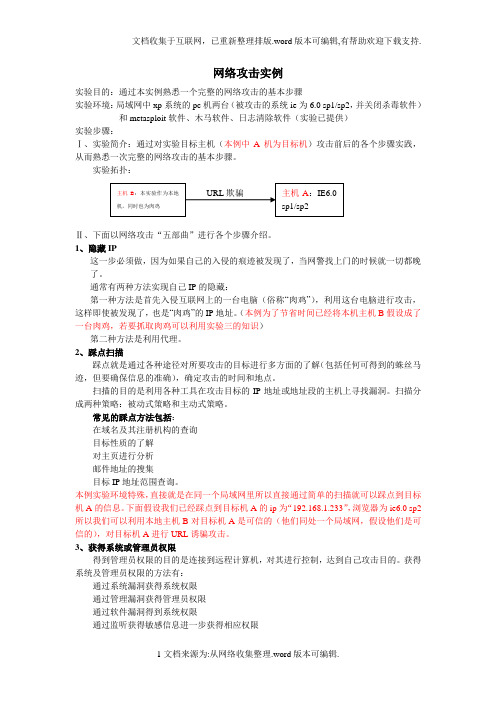
网络攻击实例实验目的:通过本实例熟悉一个完整的网络攻击的基本步骤实验环境:局域网中xp系统的pc机两台(被攻击的系统ie为6.0 sp1/sp2,并关闭杀毒软件)和metasploit软件、木马软件、日志清除软件(实验已提供)实验步骤:Ⅰ、实验简介:通过对实验目标主机(本例中A机为目标机)攻击前后的各个步骤实践,从而熟悉一次完整的网络攻击的基本步骤。
实验拓扑:Ⅱ、下面以网络攻击“五部曲”进行各个步骤介绍。
1、隐藏IP这一步必须做,因为如果自己的入侵的痕迹被发现了,当网警找上门的时候就一切都晚了。
通常有两种方法实现自己IP的隐藏:第一种方法是首先入侵互联网上的一台电脑(俗称“肉鸡”),利用这台电脑进行攻击,这样即使被发现了,也是“肉鸡”的IP地址。
(本例为了节省时间已经将本机主机B假设成了一台肉鸡,若要抓取肉鸡可以利用实验三的知识)第二种方法是利用代理。
2、踩点扫描踩点就是通过各种途径对所要攻击的目标进行多方面的了解(包括任何可得到的蛛丝马迹,但要确保信息的准确),确定攻击的时间和地点。
扫描的目的是利用各种工具在攻击目标的IP地址或地址段的主机上寻找漏洞。
扫描分成两种策略:被动式策略和主动式策略。
常见的踩点方法包括:在域名及其注册机构的查询目标性质的了解对主页进行分析邮件地址的搜集目标IP地址范围查询。
本例实验环境特殊,直接就是在同一个局域网里所以直接通过简单的扫描就可以踩点到目标机A的信息。
下面假设我们已经踩点到目标机A的ip为“192.168.1.233”,浏览器为ie6.0 sp2 所以我们可以利用本地主机B对目标机A是可信的(他们同处一个局域网,假设他们是可信的),对目标机A进行URL诱骗攻击。
3、获得系统或管理员权限得到管理员权限的目的是连接到远程计算机,对其进行控制,达到自己攻击目的。
获得系统及管理员权限的方法有:通过系统漏洞获得系统权限通过管理漏洞获得管理员权限通过软件漏洞得到系统权限通过监听获得敏感信息进一步获得相应权限通过弱口令获得远程管理员的用户密码通过穷举法获得远程管理员的用户密码通过攻破与目标机有信任关系另一台机器进而得到目标机的控制权通过欺骗获得权限以及其他有效的方法。
BUAAOSLab5文件系统

BUAAOSLab5⽂件系统Lab5实验的⽬的在于:了解⽂件系统的基本概念和作⽤了解普通磁盘的基本结构和读写⽅式了解实现设备驱动的⽅法掌握并实现⽂件系统服务的基本操作了解微内核的基本设计思想和结构为了避免同志们坐享其成,所有代码均取⾃[login学长的开源代码](),为⽅便理解,做少量注释,可以理解该篇为Lab 5任务导读(x⽬录什么是⽂件系统?⽂件系统的出现是为了更好地管理在不易失存储介质上存放的数据,⽽通常来说这种外部不易失的存储设备就是磁盘。
⽂件系统将磁盘上的数据抽象化,使得⽤户能够很⽅便地访问数据⽽⽆需关⼼具体和磁盘之间的交互。
注意,⽂件系统是⾼度抽象性的,它是管理数据的抽象的界⾯,⽽背后实际的数据存储形式是对⽤户来说不可见的。
因此,⽂件系统⼀⽅⾯需要⾯向复杂多样的数据存储媒介,⼀⽅⾯需要⾯向⽤户提供简洁统⼀的接⼝。
同时,⽂件系统也可以不仅是⽂件系统,诸如proc这样的虚拟⽂件系统还可以实现Windows中任务管理器的功能,这取决于你如何定义⼀个⽂件是什么。
有关本次实验的具体问题本次实验中提到的⽂件系统既是指磁盘⽂件系统,⼜是指操作系统上的⽂件系统。
注意,磁盘⽂件系统是在磁盘驱动器上⽽⾔的,⽽操作系统的⽂件系统是针对操作系统⽽⾔的,两者的结构即使⼀致,其在磁盘和内存上的表⽰也会有⼀定差异,需要注意区分。
本次我们需要分三步实现⽂件系统:实现磁盘的⽤户态驱动程序实现磁盘上和操作系统上的⽂件系统结构,并在调⽤驱动程序的基础上实现⽂件系统操作相关函数提供接⼝和机制使得⽤户态下也能够使⽤⽂件系统⼀些基本概念的补充为什么说操作系统和磁盘上⽂件系统不同也能进⾏正常使⽤:举例,Linux使⽤的是VFS⽂件系统,但是可以与Ext4等多种⽂件系统的磁盘驱动器正常通讯。
理论上,磁盘⽂件系统不同的磁盘上,数据的组织⽅式不同,按统⼀的⽅式去访问肯定不⾏。
但是Linux提出的VFS(Virtual Filesystem Switch)是⼀个虚拟的⽂件系统,其将其他不同⽂件系统分别进⾏解释,然后以统⼀的⽅式进⾏管理,由此实现了对于⽤户来说完全⼀致的效果。
Tcl_1_2015.00_LG_03 S公司2015年tcl教程Lab guide

Play with Strings3and ListsPlay with Strings and Lists Lab 3-1Lab 3Lab 3-2 Play with Strings and ListsThe Power of Tcl 1: Becoming a Proficient Tcl UserLab OverviewDuring this lab, you will build a broad and useful command repertoire formanipulating strings and lists.Answers & SolutionsThis lab guide contains answers and solutions to all questions. If you need help answering a question or would like to confirm your results, check the back portion of this document. Lab TasksCreate a useful command while applyingthe commands learned in lectureLAB 2Learn skills that will be essential everytime you write Tcl scriptsLAB 3Master the commands to count patterns instrings, and gain comfort with the basiccomponents of a Tcl scriptLAB 1Lab 3 File LocationsDirectory Structuredesign_data ORCA netlistscripts Constraint and run scriptslibs Technology librariestcl_procs Tcl procedures and solutions.synopsys_pt.setup PrimeTime setup file.synopsys_dc.setup Design Compiler setup fileRelevant Filesscripts/rpt_TNV.tcl Incomplete TNV commandrun.tcl Reads the ORCA designtcl_procs/rpt_TNV.tcl Full TNV solution for homeworklist_sub.tcl Solution for Q25 in Task 5pin_match.tcl Solution for Q26 in Task 5Play with Strings and Lists Lab 3-3 The Power of Tcl 1: Becoming a Proficient Tcl UserLab 3Lab InstructionsTask 1.Playing With Tcl StringsBefore applying strings to real world examples, you will go through some basicexamples to gain an understanding of what strings are all about.The skills learned will be useful in the future whenever you explore new Tclcommands or forget how to use commands you learned in the past.1.Invoke either Design Compiler or PrimeTime.There is no need to read a design for the following exercises.All subsequent instructions are generic for either tool - DesignCompiler or PrimeTime.1.Create two strings by executing the following commands.e the command regexp –all to count patterns in a string.Question 1. How many letter l’s are in the string captured by variable a(you should get 3)?....................................................................................................Question 2. How many newlines in the string captured by variable b (youshould get 2)?.................................................................................................... Lab 3-4 Play with Strings and ListsThe Power of Tcl 1: Becoming a Proficient Tcl UserLab 33.Count the total number of characters in a string using the command stringlength. Execute the following example.Question 3. Did the above exercise confirm that spaces and newlinescount as individual characters in strings?....................................................................................................4.Determine if a string matches a pattern using globbing and the commandstring match.For string matching to succeed (i.e. the return value is 1), the pattern and thestring must be identical except that the pattern may include wildcardcharacters such as *.Question 4. Did the above commands work as expected?....................................................................................................5.Extract characters from a string using the command string index.Question 5. Does the index range start at 1 or 0 (i.e. to get the firstcharacter in a string, do you use an index of 1 or 0)?....................................................................................................Question 6. Do you need to know the total number of characters in astring to extract the LAST character of the string?.................................................................................................... Play with Strings and Lists Lab 3-5 The Power of Tcl 1: Becoming a Proficient Tcl UserLab 3Question 7. From your own experimentation, what will string indexreturn if you provide an index outside the range of theprovided string argument?....................................................................................................e the string command to find the index of the last \nt (a newline followedby the letter t) in the string captured by the variable b.Use the relevant portion of the man page for the string command shownbelow.string last string1 string2Search string2 for a sequence of characters that exactly match thecharacters in string1. If found, return the index of the firstcharacter in the last such match within string2. If there is nomatch, then return -1.Question 8. What is the index of the first character of the last \nt in thestring captured by variable b?....................................................................................................7.Append strings using the append command.Question 9. After executing the above command, was the value ofvariable a modified?....................................................................................................Question 10. Does the append command add spaces when it concatenatesstrings?....................................................................................................8.Visually identify the string commands used so far on job aid #1.Lab 3-6 Play with Strings and ListsThe Power of Tcl 1: Becoming a Proficient Tcl UserLab 3 Task 2.Playing With Tcl ListsPerform the same type of exercises with Tcl lists.1.Create two Tcl lists by executing the following lines.2.Count the total number of elements in each list using the Tcl commandllength.Question 11. Explain why the last example above returned a value of 1?....................................................................................................Question 12. Do spaces count as individual list elements?....................................................................................................3.Play with list indices. Extract list elements using the command lindex.Question 13. Write the command to extract the last element from a list.Use your experience with string indices, or use the man pagefor lindex..................................................................................................... Play with Strings and Lists Lab 3-7 The Power of Tcl 1: Becoming a Proficient Tcl UserLab 3Lab 3-8 Play with Strings and ListsThe Power of Tcl 1: Becoming a Proficient Tcl User4.Determine if any list element matches a pattern using lsearch –glob .Question 14. What does lsearch –glob return if the match is successful and what does it return if the match is NOT successful? .................................................................................................... 5.Insert items into a list using the command linsert . Question 15. Did the above command modify the variable b ? .................................................................................................... Question 16. Rewrite the above command such that the value of variable b is modified to be "zero one two three". .................................................................................................... 6.Append lists together using the command lappend .Question 17. After executing the first command above, was the value of variable b modified? .................................................................................................... Question 18. Does lappend add spaces when appending elements to a list? .................................................................................................... Question 19. Can individual list elements themselves be lists? ....................................................................................................Lab 37.Iterate over every element of a list using the command foreach.Question 20. How many times does the foreach command iterate?....................................................................................................Question 21. What is the user defined variable list_element set to duringeach iteration?....................................................................................................8.Visually identify the list commands used so far on job aid #1.Task 3.Convert Strings Into Lists and Back AgainFor the last exercise, perform the same type of “hello world” exercises converti ngstrings to lists and back to strings.1.Create two strings by executing the following command.2.Convert a string to a list using the split command.Question 22. Do the splitChars remain in the resulting list?....................................................................................................Question 23. Do spaces from the original string remain in the resulting list?.................................................................................................... Play with Strings and Lists Lab 3-9 The Power of Tcl 1: Becoming a Proficient Tcl UserLab 33.Convert a list back to a string using the join command.Question 24. Describe the result of the last command executed above.....................................................................................................4.Quit the Synopsys tool and return to lecture. This completes the workshoplabs.Task 4.Optional Homework: Complete rpt_TNV.tclPlease look at the foils in the appendix of Unit 4 for a description of the problemyou will be solving in this task.1.Invoke either Design Compiler or PrimeTime using the script ./scripts/run.tcl2.Play with your starting point by sourcing the procedure contained in./scripts/rpt_TNV.tcl and executing the command rpt_TNV.3.Edit the procedure in ./scripts/rpt_TNV.tcl such that the total number ofviolations is reported for each individual group (each clock group as well aseach group of design rule violations).One example solution is contained in ./tcl_procs/rpt_TNV.tcl Task 5. Writing Custom ScriptsQuestion 25. Write a Tcl script to subtract list_2 elements from list_1 elements(i.e. list1 – list 2) (Create list1 to be “dc pt mw icc1” and list2 to be “pt icc2 mw”)……………………………………………………………………Question 26. Write a Tcl script to check if a pin exists in the input list, and if soreport the net to which it is connected. (The input list is given as“I_ORCA_TOP/pad_in[10] I_ORCA_TOP/pad_in[5]I_ORCA_TOP/sd_DQ_in[11]”)……………………………………………………………………..Lab 3-10 Play with Strings and ListsThe Power of Tcl 1: Becoming a Proficient Tcl UserAnswers / SolutionsTask 1.Playing with Tcl StringsQuestion 1. How many letter l’s are in the string captured by thevariable a?Question 2. How many newlines are in the string captured by thevariable b?Question 3. Did the above exercise confirm that spaces and newlinescount as individual characters in strings?Yes. The command string length will count everycharacter in a string, which includes newlines and spacesrepresenting a single character. The double quotes that wereused to create the string in the first place are not part of theactual string and are not counted in the string length.Question 4. Did the above commands work as expected?The first command succeeds because the pattern completelymatches the string.The second command fails. The pattern and the string mustbe identical. The pattern two* does not completely matchthe string! The following example will return a successfulmatch (notice the wildcard * matches newlines as well).Question 5. Does the index range start at 1 or 0 (i.e. to get the firstcharacter in a string, do you use an index or 1 or 0)?0. You will notice later that this is consistent with listindexing as well.Lab 3-12 Play with Strings and ListsQuestion 6. Do you need to know the total number of characters in astring to extract the LAST character of the string?No. You can use the string index end to extract the lastcharacter.Question 7. From your own experimentation, what will string indexreturn if you provide an index outside the range of theprovided string argument?The command returns the empty string.Question 8.What is the index of the first character of the last \nt in thestring captured by variable b ?Question 9. After executing the above command, was the value ofvariable a modified?Yes. Certain commands ask for the variable name and willmodify the variable value. Other commands will modify thestring itself (not the variable). To confirm, use printvar asshown below. Also shown is the relevant portion of theman page where it clearly asks for the variable itself.printvar a→ a = "hello worldonetwothree"man appendNAMEappend - Append to variable SYNOPSISappend varName ?value value value ...?DESCRIPTIONAppend all of the value arguments to the current value of variable varName.Question 10. Does the append command add spaces when it concatenatesstrings?No, it does not.Task 2.Playing with Tcl ListsQuestion 11. Explain why the last example above returned a value of 1.The last command returns the length of the list “b” whichhas one list element (named b). Notice this is different fromthe second to last command which is using the value of thevariable named b (which is set to "one two three" and hasthree list elements).Question 12. Do spaces count as individual list elements?Spaces are used to separate list elements and are not countedas list elements themselves. If you wanted to include aspace as a list element, you will have to do something likethe following example.Question 13. Write the command to extract the last element from a list.Use your experience with string indices, or use the manpage for lindex.String and list indices are consistent. Following is thecorrect command and the relevant portion of the man page. lindex $a endman lindex. . . If index has the value end, it refers to the last element in the list, and end-integer refers to the last element in the list minus the specified integer offset.Question 14. What does lsearch –glob return if the match is successfuland what does it return if the match is NOT successful?This command returns the list index of the 1st matching listelement if successful (recall the first list index starts at 0!).It returns –1 if not successful. This matches the relevantportion of the man page shown below.DESCRIPTIONThis command searches the elements of list to see if one of themmatches pattern. If so, the command returns the index of the first matching element. If not, the command returns -1.Question 15. Did the above command modify the variable b?No, the variable b is still “one two three”.Question 16. Rewrite the above command such that the value of variableb is modified to be "zero one two three".Question 17. After executing the first command above, was the value ofvariable b modified?Yes, in this example the variable b WAS modified. Useprintvar to validate this.Question 18. Does lappend add spaces when appending elements to alist?Spaces are used to separate elements in a list. Therefore,lappend MUST add spaces when appending list elements. Lab 3-14 Play with Strings and ListsQuestion 19. Can individual list elements themselves be lists?Yes. This is shown in the last example as shown below.The list captured by the variable b is appended to a as asingle list element.Question 20. How many times does the foreach command iterate?In this example, 3 times – once for every list element in a. Question 21. What is the user defined variable list_element set to during each iteration?It is set to each subsequent item in the original list a. Theresult of the foreach iteration is shown below.Task 3.Convert Strings Into Lists and Back Again Question 22. Do the splitChars remain in the resulting list?No, they do not. The splitChars are removed as well asidentify where the original string should be split into theresulting list.Question 23. Do spaces from the original string remain in the resultinglist?Yes they do. If an individual list element contains spaces, itwill be shown with { } to identify it as a single list elementas shown in the example below.# The o is removed from the resulting list# The space in the original list is part of the second list element# The resulting list contains 3 list elementssplit $a o→ hell { w} rld# A different example.# Notice the space is kept as part of the second list elementsplit $a e→ h {llo world}# Notice now that space is used as a splitting element# The space is removed and the resulting list is split accordinglysplit $a "e "→ h llo worldQuestion 24. Describe the result of the last command executed above.The final result is a string where all letter o’s in the origina lstring are replaced by the number 5.Task 5. Writing Custom ScriptsQuestion 25. Write a Tcl script to subtract list_2 elements from list_1 elements(i.e. list1 – list 2)proc list_sub { lis1 lis2 } {set result ""foreach el $lis1 {if {[lsearch -exact $lis2 $el] == -1} {lappend result $el}}return $result}Lab 3-16 Play with Strings and ListsQuestion 26. Write a Tcl script to check if a pin exists in the input list, and if so report the net to which it is connected. (The input list is given as “I_ORCA_TOP/pad_in[10]I_ORCA_TOP/pad_in[5] I_ORCA_TOP/sd_DQ_in[11]”)set my_pins [list I_ORCA_TOP/pad_in[10] I_ORCA_TOP/pad_in[5]I_ORCA_TOP/sd_DQ_in[11]]proc match_pins { pin_name } {global my_pinsif {[lsearch -exact $my_pins $pin_name ] != -1} {set net [get_object_name [get_attribute [get_pins $pin_name -quiet] net]]puts "The pin $pin_name is connected to the net $net"} else {puts "No pin found"}}Note: In the above script try replacing the “-exact” switch with “-glob” or “-regexp” and check what the script outputs.。
Nachos系统调用实习报告

Nachos系统调用实习报告在本次实习中,我参与了Nachos系统的开发与优化工作。
Nachos是一款开源的嵌入式操作系统,旨在提供安全、高效和可靠的计算环境。
通过实习,我希望能够更深入地理解操作系统的内部机制,提升我的系统编程技能,并且在实际项目中运用所学知识。
在进行系统调用设计时,遇到了参数传递的问题。
经过研究,我们决定采用寄存器传递参数,并优化了寄存器的使用方式,提高了调用效率。
在实现文件系统时,遇到了读写性能的问题。
我们通过对文件系统进行优化,包括缓存机制、文件分割等手段,有效地提高了读写性能。
在多任务调度中,遇到了任务优先级冲突的问题。
我们通过引入任务调度器,实现了任务的动态优先级调整,解决了冲突问题。
团队合作:在实习期间,我与团队成员积极沟通,共同解决了许多问题。
我们经常进行技术讨论,分享解决方案,共同优化系统性能。
这种团队合作的方式让我收获颇丰。
在实习过程中,我运用了所学的操作系统知识,如进程管理、文件系统、设备驱动等,对Nachos系统进行优化。
同时,我还学习了汇编语言、C语言以及嵌入式开发的相关知识,并将其应用到实际项目中。
这些知识的应用让我对操作系统有了更深入的理解。
通过实习,我更加深入地理解了操作系统的内部机制和实现方法。
我学会了如何在实际项目中运用所学知识,提高了我的系统编程技能。
我认识到团队合作的重要性,学会了如何与他人协作解决问题。
我认识到自我学习和持续进步的重要性,需要在工作中不断学习和提升。
对某些专业知识掌握不够深入,需要进一步学习。
在解决问题时,有时过于急躁,需要更加耐心地思考和分析问题。
通过本次实习,我更加深入地理解了操作系统的内部机制和实现方法,提高了我的系统编程技能和解决问题的能力。
我也认识到团队合作的重要性,学会了如何与他人协作解决问题。
这些经验和收获将对我未来的学习和工作产生积极的影响。
在过去的六个月中,我有幸在XYZ科技公司的Nachos团队实习,专注于文件系统的开发与优化。
LabWindows CVI 2015 Release Notes说明书
RELEASE NOTESLabWindows /CVI Version 2015These release notes introduce LabWindows ™/CVI ™ 2015. Refer to this document for system requirements, installation and activation instructions, and information about new features in LabWindows/CVI.ContentsLabWindows/CVI System Requirements (1)Installing LabWindows/CVI (2)Before Installation (2)Running the Installation (2)Activating LabWindows/CVI (4)What’s New in LabWindows/CVI? (4)Upgraded Version of Clang (4)Improved Source Code Browsing (4)Include Runtime Installers in Distributions (5)Include Driver and Component Files in Patch Distributions (5)Updated Windows SDK (5)Improved Installer Messages and Errors (6)Bug Fixes (6)LabWindows/CVI Resources...................................................................................................6LabWindows/CVI System Requirements To run LabWindows/CVI, you must have the following:•Personal computer using a Pentium 4/M or equivalent processor •Microsoft operating systems:–Windows 8.1 (32-bit and 64-bit)–Windows 8.0 (32-bit and 64-bit)–Windows 7 (32-bit and 64-bit), including Starter Edition –Windows Server 2012 R2 (64-bit)–Windows Server 2008 R2 Service Pack 2 (64-bit)Note LabWindows/CVI supports only R2 editions of Windows Server.•1024 × 768 resolution (or higher) video adapter •Minimum of 512 MB of RAM, 2 GB recommended™™•7 GB free hard disk space for full installation, which includes the Windows SDK 8.1 and the Microsoft .NET Framework 4.5.2; additional space needed for National Instruments Device Drivers•Microsoft-compatible mouseInstalling LabWindows/CVIThe LabWindows/CVI Platform DVD includes LabWindows/CVI and the following modules and toolkits:Modules•Real-Time Module•Vision Development ModuleToolkits•Real-Time Execution Trace Toolkit•SQL Toolkit•Signal Processing Toolkit•PID Toolkit•Execution Profiler Toolkit•ECU Measurement and Calibration Toolkit•Automotive Diagnostic Command SetIf you purchased any of these modules or toolkits, you can install them using the LabWindows/CVI Platform DVD. If you want to evaluate any of these modules or toolkits before purchasing them, you can install these add-ons from the LabWindows/CVIPlatform DVD.Before InstallationKeep the following points in mind before you install LabWindows/CVI:•If you already have a different version of LabWindows/CVI installed on your computer, be sure to install version 2015 in a different directory. If you want to install to an existing directory, uninstall the other version before installing LabWindows/CVI 2015.•You must have administrator privileges to install LabWindows/CVI.•If your software is part of a V olume License Agreement (VLA), contact your VLA administrator for installation instructions.Running the InstallationComplete the following steps to install LabWindows/CVI:LabWindows/CVI Runtime with the LabWindows/CVI 2015 Runtime. To restore theprevious runtime, uninstall LabWindows/CVI 2015, the LabWindows/CVI 20152||LabWindows/CVI Release NotesLabWindows/CVI Release Notes |© National Instruments |3Runtime, and any previous versions of LabWindows/CVI and LabWindows/CVIRuntimes on the computer. Then reinstall the LabWindows/CVI version you want to use, along with any additional National Instruments software you might haveinstalled.1.Insert the LabWindows/CVI media into the disk drive. If the media does not runautomatically, open Windows Explorer, right-click the disk drive icon, and selectAutoPlay .2.On installation startup, the National Instruments LabWindows/CVI 2015 screen appears. Click Install LabWindows/CVI, Modules, and Toolkits .3.Continue to follow the instructions on the screen.Note If you have a serial number for the product you want to install, enter thenumber during installation when you are prompted. You also can activate the product after installation. For more information about finding serial numbers, refer to/info and enter SerialNumbers_en as the Info Code.Each product on the LabWindows/CVI Platform DVD has a different serial number, with the possible exception of the LabWindows/CVI Execution Profiler Toolkit.The Execution Profiler Toolkit does not require a separate license if youhave a LabWindows/CVI Full Development System license. If you have theLabWindows/CVI Base Package, you can install the Execution Profiler Toolkit for evaluation.4.If you select Device Drivers in the Features panel, the LabWindows/CVI installer promptsyou to insert the National Instruments Device Drivers media, which is available on . The NI Device Drivers media is required only if you want to upgrade existing driver software to the latest version. Otherwise, you can ignore this prompt.5.If you have an active Internet connection, the installer prompts you to select Windows SDK components to install. The components you select are downloaded and installed from the Microsoft website. For more information about the components, refer to /info and enter the Info Code CVI2015_WindowsSDK .If you do not have an active Internet connection, LabWindows/CVI installs all Windows SDK components, which might not be the latest components available on the Microsoft website.Note If you cancel the Windows SDK installation, LabWindows/CVI will notfunction properly. You can download the Windows SDK from one of the following places:•The Microsoft website•—Visit /info and enter the Info CodeDownloadMSDTWindowsSDK4| |LabWindows/CVI Release Notes6.Install hardware. Refer to your device documentation, such as printed manuals or PDFs, for information about installing your NI hardware.7.To activate a National Instruments product, refer to the What’s New in LabWindows/CVI? section of this document.Activating LabWindows/CVIIf you did not enter a serial number during installation, click Activate Products in the License Status dialog box to launch the NI Activation Wizard.Once you choose your activation method and launch the NI Activation Wizard, follow the instructions on the screen to activate LabWindows/CVI. For more information about activation, refer to the Activating Your Software topic in the LabWindows/CVI Help .Note If you are unable to activate LabWindows/CVI, refer to the web page at/activate .What’s New in LabWindows/CVI?This section includes information about changes and enhancements in LabWindows/CVI 2015.Upgraded Version of ClangLabWindows/CVI has updated the Clang 2.9 compiler to Clang 3.3. This upgrade provides the following features:•New warning flags and warnings messages •Improved detection of unintialized local variables •Improved stability when building large files •Up to 21% faster execution speed for 64-bit binariesNote The compiler backend is particularly suited for optimizing resources used in mathematical calculations, so you will see the highest performance gains if youperform complex computation, mathematics, or analysis.Improved Source Code BrowsingIn addition to the updated compiler, source code browsing also has been improved. These improvements include the following features:•Improved array support for the function prototype tooltip, Select Variable dialog box, and documentation generation from source code •Improved preprocessor support with macros •Improved stability due to various fixesLabWindows/CVI Release Notes |© National Instruments |5Include Runtime Installers in DistributionsSelect the Only display runtime installers option in the Drivers & Components tab of the Edit Installer dialog box to show which runtime installers are available for deployment. This option makes it easy to distinguish between full installers and runtime installers. Runtime installers are typically smaller in size, allowing you more control over the size of your distribution.Include Driver and Component Files in Patch DistributionsYou now can include NI components and driver files in your patch distributions. You also can choose to include in your patch all products with upgrades or patches by selecting the Include driver updates option in the Drivers & Components tab of the Edit Installer dialog box.Updated Windows SDKThis version of LabWindows/CVI installs the Windows SDK 8.1. Refer to MSDN for a complete list of enhancements. Some of the features provided by the Windows SDK include the following items:•Handle processes and threads—You can use functions such asSetProcessInformation to lower the priority of processes that perform background operations, GetProcessInformation to get the memory priority of a process, SetThreadInformation to lower the priority of a thread that does not need to run immediately, and GetThreadInformation to get the priority of a thread.•Get the firmware type—Call GetFirmwareType to find the firmware type of your users’ computers.•Speed up operations that access the same file data repeatedly—Call OperationStart and OperationEnd .•Take advantage of better virtual memory handling—Call functions such asPrefetchVirtualMemory , OfferVirtualMemory , ReclaimVirtualMemory , and DiscardVirtualMemory .•Take advantage of better physical memory handling—Call functions such as GetMemoryErrorHandlingCapabilities ,RegisterBadMemoryNotification , andUnregisterBadMemoryNotification .•Call helpers for National Language Support functions—For example, you can call IsValidNLSVersion to determine whether a version is valid for a National Language Support function.To use the Windows SDK 8.1, include the following in the Compiler Defines dialog box: _WIN32_WINNT=_WIN32_WINNT_WIN8 or WINVER=_WIN32_WINNT_WIN8.NoteThe Windows SDK 8.1 requires Windows 7 (minimum).Improved Installer Messages and ErrorsErrors and warning messages you receive when you create installers provide more useful information.Bug FixesFor a list of bugs fixed in LabWindows/CVI 2015, refer to the NI web page at /info and enter the Info Code exmvwx.LabWindows/CVI ResourcesHow do I get started?Read the Getting Started with LabWindows/CVI manual, which provides a tutorial for learning basic LabWindows/CVI program development techniques.Are there known issues or late-breaking information?Refer to the LabWindows/CVI Readme, which you can access from Start»All Programs»National Instruments»LabWindows CVI 2015»LabWindows CVI 2015 Documentation. The readme file contains information about known issues.Where can I find reference information?The LabWindows/CVI Help contains complete reference information. Use the Search tab in the LabWindows/CVI Help to quickly locate specific information.Where can I find examples?Find examples with the NI Example Finder, which you can access by selecting Help»Find Examples.LabWindows/CVI example programs are located in the following location:C:\Users\Public\Documents\National Instruments\CVI2015\samples.Is there a list of LabWindows/CVI documentation?The Guide to LabWindows/CVI Documentation topic describes documentation available for new users and upgrade users. In addition, this topic provides links to LabWindows/CVI documentation, including manuals and web resources. You can access the Guide to LabWindows/CVI Documentation topic through the LabWindows/CVI Help.Where else can I go for LabWindows/CVI information?Visit the LabWindows/CVI w ebsite at for the most up-to-date information about LabWindows/CVI.6||LabWindows/CVI Release NotesRefer to the NI Trademarks and Logo Guidelines at /trademarks for more information on National Instruments trademarks. Other product and company names mentioned herein are trademarks or trade names of their respective companies. For patents covering National Instruments products/technology, refer to the appropriate location: Help»Patents in your software, the patents.txt file on your media, or the National Instruments Patents Notice at /patents. You can find information about end-user license agreements (EULAs) and third-party legal notices in the readme file for your NI product. Refer to the Export Compliance Information at /legal/export-compliance for the National Instruments global trade compliance policy and how to obtain relevant HTS codes, ECCNs, and other import/export data. NI MAKES NO EXPRESS OR IMPLIED WARRANTIES AS TO THE ACCURACY OF THE INFORMATION CONTAINED HEREIN AND SHALL NOT BE LIABLE FOR ANY ERRORS. U.S. Government Customers: The data contained in this manual was developed at private expense and is subject to the applicable limited rights and restricted data rights as set forth in FAR 52.227-14, DFAR 252.227-7014, and DFAR 252.227-7015.© 2003–2015 National Instruments. All rights reserved.373607N-01Aug15。
Nachos操作系统部分实验说明

………
新的设计的实验内容和步骤:
重新执行../lab2中的make 重新执行./nachos –rs 10
可以看到新内核的输出按规定的静态优先数次序在并发执行:
Name:Main Num:0 looped:0 Name:T1 Num:1 looped:0 Name:T2 Num:2 looped:0 Name:T1 Num:1 looped:1 Name:T2 Num:2 looped:1 Name:T1 Num:1 looped:2 ……
以上设计实验输出结果的分析:
主线程首先执行后放弃CPU,T1优先级最高排在队首先被选中。主线程由于优 先级最低被排在队列尾。
T1 线程放弃 CPU,当前 T2 在队首先被选中。T1 优先级最高又被排在队首。 T2线程放弃CPU,当前T1在队首先被选中。T2被排在队首。 如此重复5次,T1和T2线程执行结束,队列中仅有主线程了。主线程连续执行 4次后结束工作。
………… private:
………….. int Priority;//线程的优先数 } 4、在构造线程类时为线程设置一个静态优先数: 在 中的 Thread::Thread(char * debugName,int priority)
{ ……. Priority = priority;
一、内核线程调度策略设计
设计目标:
在 Nachos 系统中实现按优先数调度线程, 研究各种调度策略算法的实现, 分析各种调度算法的性能。 …..
设计背景:
从 Nachos 系统的基本内核./threads/ 文件中可以看出 Nachos 系统的基本内核实现了先进先出的调度策略。
调度类 Scheduler 管理着一个就绪队列 list。它的成员函数 ReadyToRun(currentThread)将当前线程挂入该队列的队尾: Scheduler::ReadyToRun (Thread *thread) {
2016秋季Nachos3.4-Lab4-虚拟内存

2016-2017第一学期操作系统实习Lab4 虚拟内存实习说明本实习希望通过修改Nachos系统平台的底层源代码,达到“实现虚拟存储系统”的目标。
【背景描述】目前,Nachos系统所实现的内存管理模块中,虽然存在地址转换机制,但是却没有实现真正的虚拟内存。
Nachos系统的内存分配必须在用户程序载入内存时一次性完成,故此,系统能够运行的用户程序的大小被严格限制(32 * 128 B = 4KB,在Nachos系统中物理内存的页面大小PageSize为128 B,而每个用户程序最多只能获得32个物理页面,一旦超出则将导致系统出错)。
但是现代操作系统对内存管理的要求是支持多道程序,并且使得对任一程序而言,可用的内存空间应当是无限的,即需实现虚拟内存。
同时还要提供存储保护机制。
【时间规划】建议第一周完成TLB异常处理、第二周完成分页式内存管理、第三周完成Lazy Loading.【实习内容】一、TLB异常处理目前,Nachos系统对于内存的管理是基于软件模拟的TLB机制。
其工作原理、异常处理、替换算法等方面,与分页式内存管理非常相像。
Exercise 1 源代码阅读阅读code/userprog/,着重理解nachos执行用户程序的过程,以及该过程中与内存管理相关的要点。
阅读code/machine目录下的machine.h(cc),translate.h(cc)文件和code/userprog目录下的exception.h(cc),理解当前Nachos系统所采用的TLB机制和地址转换机制。
Exercise 2 TLB MISS异常处理修改code/userprog目录下中的ExceptionHandler函数,使得Nachos系统可以对TLB异常进行处理(TLB异常时,Nachos系统会抛出PageFaultException,详见code/machine/)。
Exercise 3 置换算法为TLB机制实现至少两种置换算法,通过比较不同算法的置换次数可比较算法的优劣。
强化学习

文件系统的实现(续)
客户端打开文件的操作
客户进程访问文件系统
int fd_alloc(struct Fd **fd_store)
在进程的文件描述符表中,从0到MAXFD-1(MAXFD 为32,即一个进程可以打开的最大文件个数)寻找一个 可用的文件描述符。
查找文件描述符索引节点是否已经有相关页映射。 首先用fd_alloc()找到一个未用的文件描述符,然后向服 务器发送一个IPC请求打开文件,并将文件系统中文件 页表映射到客户端的地址空间中。
Spawn函数
int spawn(const char *prog, const char **argv)
Spawn函数与Unix的exec功能类似,从磁盘文件系统装入 并运行一个可执行文件,其中prog为文件系统中可执行 文件的路径,argv为可执行文件的参数。 该函数首先打开文件并读取ELF文件头到内存,创建一 个新的进程并使用函数init_stack在地址USTACKTOP PGSIZE为其分配一个堆栈,将读取的ELF文件中程序 的代码段、数据段和bss段加载到进程的地址空间,初 始化子进程的寄存器状态,然后由系统进行调度。
Spawn函数(续)
父进程内存格式
本章结束
背景知识(续)
组成文件系统的基础部分在磁盘上的布局
文件系统的实现
“File”数据结构
文件系统的实现(续)
其他重要数据结构
超级块(struct Super) 设备(struct Dev) 文件句柄(struct Fd)
文件系统的实现(续)
磁盘的访问
块缓存 块位图 文件操作
NachOS实验报告(4个全)

四川大学操作系统课程设计报告学院:软件学院专业:软件工程专业年级:08级组编号:组成员:提交时间:2010年6月24日指导教师评阅意见:.. . . .指导教师评阅成绩:::实验项目一项目名称:开发Shell程序试验背景知识Shell此处的shell是指命令行式的shell。
文字操作系统与外部最主要的接口就叫做shell。
shell是操作系统最外面的一层。
shell管理你与操作系统之间的交互:等待你输入,向操作系统解释你的输入,并且处理各种各样的操作系统的输出结果。
shell提供了你与操作系统之间通讯的方式。
这种通讯可以以交互方式(从键盘输入,并且可以立即得到响应),或者以shell script(非交互)方式执行。
shell script是放在文件中的一串shell和操作系统命令,它们可以被重复使用。
本质上,shell script是命令行命令简单的组合到一个文件里面。
Shell基本上是一个命令解释器,类似于DOS下的。
它接收用户命令(如ls等),然后调用相应的应用程序。
较为通用的shell有标准的Bourne shell (sh)和C shell (csh)。
交互式shell和非交互式shell交互式模式就是shell等待你的输入,并且执行你提交的命令。
这种模式被称作交互式是因为shell与用户进行交互。
这种模式也是大多数用户非常熟悉的:登录、执行一些命令、签退。
当你签退后,shell也终止了。
shell也可以运行在另外一种模式:非交互式模式。
在这种模式下,shell不与你进行交互,而是读取存放在文件中的命令,并且执行它们。
当它读到文件的结尾,shell也就终止了。
实验目的:Shell是一个命令处理器(command processor)——是一个读入并解释你输入的命令的程序,它是介于使用者和操作系统之核心程序(kernel)间的一个接口。
它是一个交互性命令解释器。
shell 独立于操作系统,这种设计让用户可以灵活选择适合自己的shell。
Nachos File System

软件学院实验报告实验题目:Nachos File System学号:201100300135日期:2013-10-30班级:11级3班姓名:祝新革Email:zhuxinge123@实验目的:what is the functionality of the Nachos file system,andhow to examine the contents of the simulated hard disk in Nachos.硬件环境:Ubuntu12.04软件环境:Nachos,Mips,GDB实验步骤:1.按照操作命令按步执行,nachos[-d f]-f.This is used to format the simulated hard disk named DISK before any other file system commands can start.nachos[-d f]-cp unix filename nachos filename.This command copies a UNIX file named unix filename in your UNIX system to a Nachos file named nachos filename in the Nachos file system.This is currently the only way to create a file in the Nachos file system.nachos[-d f]-p nachos filename.This command displays the contents of the nachos file named nachos filename(similar to UNIX command cat).nachos[-d f]-r nachos filename.This command removes the nachos file named nachos filename(similar to UNIX command rm).nachos[-d f]-l.This command lists the names of all the nachos files on the screen (similar to UNIX command ls).nachos[-d f]-D.This command prints all the contents of the entire file system including the bitmap,the file headers,the directory and the files.nachos[d f]-t.This command tests the performance of the file system.It is not work ing yet.结果如下:执行./nachos./nachos-f./nachos-D./nachos-cp test/small smallod DISK:查看DISK中的内容./nachos-l small./nachos-p small结论分析与体会:通过这次实验了解到nachos文件系统的基本构成和架构。
- 1、下载文档前请自行甄别文档内容的完整性,平台不提供额外的编辑、内容补充、找答案等附加服务。
- 2、"仅部分预览"的文档,不可在线预览部分如存在完整性等问题,可反馈申请退款(可完整预览的文档不适用该条件!)。
- 3、如文档侵犯您的权益,请联系客服反馈,我们会尽快为您处理(人工客服工作时间:9:00-18:30)。
2014-2015第二学期操作系统实习
Lab5文件系统实习说明
本实习希望通过修改Nachos系统的底层源代码,达到“完善文件系统”的目标。
【背景描述】
Nachos文件系统建立在模拟磁盘上,提供了基本的文件操作,如创建、删除、读取、
写入等等。
文件的逻辑结构与物理位置之间的映射关系由文件系统统一维护,用户只需通
过文件名即可对文件进行操作。
然而,相比于实际文件系统,Nachos文件系统还存在很多不足之处:
文件长度的限制
Nachos文件系统采用直接索引方式,故文件长度不能超过4KB(更准确的说,是
((128 – 2 * 4) / 4) * 128 = 3840 B)。
同时,文件的长度必须在创建时予以指定,且
不得更改。
文件数目的限制
Nachos文件系统只有一级目录,系统中所有的文件都存于根目录下,且数目不能
多于10个。
粗粒度的同步互斥机制
Nachos文件系统每次只允许一个线程进行访问,不支持多个线程同时访问文件系
统。
性能优化与容错
Nachos文件系统没有Cache机制,也没有容错机制,即当文件系统正在使用时,
如果系统突然中断,文件内容的正确性无法保证。
【实习内容】
一、文件系统的基本操作
Exercise 1 源代码阅读
阅读Nachos源代码中与文件系统相关的代码,理解Nachos文件系统的工作原理。
code/filesys/filesys.h和code/filesys/
code/filesys/filehdr.h和code/filesys/
code/filesys/directory.h和code/filesys/
code /filesys/openfile.h和code /filesys/
code/userprog/bitmap.h和code/userprog/
Exercise 2 扩展文件属性
增加文件描述信息,如“类型”、“创建时间”、“上次访问时间”、“上次修改时间”、
“路径”等等。
尝试突破文件名长度的限制。
Exercise 3 扩展文件长度
改直接索引为间接索引,以突破文件长度不能超过4KB的限制。
Exercise 4 实现多级目录
Exercise 5 动态调整文件长度
对文件的创建操作和写入操作进行适当修改,以使其符合实习要求。
二、文件访问的同步与互斥
Exercise 6 源代码阅读
a)阅读Nachos源代码中与异步磁盘相关的代码,理解Nachos系统中异步访问模
拟磁盘的工作原理。
filesys/synchdisk.h和filesys/
b)利用异步访问模拟磁盘的工作原理,在Class Console的基础上,实现Class
SynchConsole。
Exercise 7 实现文件系统的同步互斥访问机制,达到如下效果:
a)一个文件可以同时被多个线程访问。
且每个线程独自打开文件,独自拥有一
个当前文件访问位置,彼此间不会互相干扰。
b)所有对文件系统的操作必须是原子操作和序列化的。
例如,当一个线程正在
修改一个文件,而另一个线程正在读取该文件的内容时,读线程要么读出修
改过的文件,要么读出原来的文件,不存在不可预计的中间状态。
c)当某一线程欲删除一个文件,而另外一些线程正在访问该文件时,需保证所
有线程关闭了这个文件,该文件才被删除。
也就是说,只要还有一个线程打
开了这个文件,该文件就不能真正地被删除。
三、Challenges题目(至少选做1个)
Challenge 1 高级系统调用
实现如下系统调用:Exec,Join,Exit。
提示:userprog/中的StartProcess函数有助于测试Exec。
Challenge 2 性能优化
a)例如,为了优化寻道时间和旋转延迟时间,可以将同一文件的数据块放置在
磁盘同一磁道上
b)使用cache机制减少磁盘访问次数,例如延迟写和`预读取。
Challenge 3 实现pipe机制
重定向openfile的输入输出方式,使得前一进程从控制台读入数据并输出至管道,后一进程从管道读入数据并输出至控制台。
Challenge 4 实现系统调用:Fork和Yield
【实习建议】
1.数据结构的修改和维护
文件管理的升级基于对原有Nachos数据结构的修改。
增加文件的描述信息需对文
件头结构进行简单修改。
多级目录中可创建目录也可创建文件,应根据实际的文
件类型初始化文件头信息。
2.实现多级目录应当注意
●目录文件的含义。
每个目录对应一个文件,通过此文件可了解其子目录及父
目录的信息。
●Nachos的目录文件大小是预先定义的,但实际上,目录文件的大小应根据内
容确定,且能改变。
●实现多级目录后,添加、删除目录项要根据具体的路径,对树的遍历要有深
刻的理解。
3.为了实现文件长度无限,可以采取混合索引的分配方式。
