wifi驱动移植例子
RK平台Realtek WiFi驱动移植说明

密级状态:绝密()秘密()内部(√)公开()RK平台Realtek WiFi驱动移植说明(系统产品一部)文件状态:[]正在修改[√]正式发布当前版本:V1.0作者:胡卫国完成日期:2015-03-13审核:完成日期:福州瑞芯微电子有限公司Fuzhou Rockchips Semiconductor Co.,Ltd(版本所有,翻版必究)版本历史版本号作者修改日期修改说明备注V1.0胡卫国2015-03-13初始版本目录1REALTEK驱动基本情况说明 (2)2WIFI驱动移植 (3)2.1WIFI驱动入口函数 (3)2.2电源控制及SDIO识别操作 (4)2.3M AKEFILE配置修改 (5)2.4使用自定义W I F I MAC地址 (6)3BT固件更新 (7)1Realtek驱动基本情况说明Realtek系列WiFi BT芯片,如RTL8188EU,RTL8189ES,RTL8723系列,驱动移植包都是类似的目录结构,驱动代码目录结构也类似。
以RTL8188EUS_RTL8189ES_linux_v4.1.8_9499.20131104.zip为例解压之后里面包含文档、驱动源码包、android reference代码等内容,具体如下:Android部分RK一般都已经移植好集成到SDK中,由于Realtek驱动更新比较频繁,所以客户最常遇到的事情就是更新WiFi驱动。
2WiFi驱动移植可对比SDK Kernel中已经移植好的驱动与Realtek的驱动进行合并。
驱动在以下目录drivers/net/wireless/rockchip_wlan/针对kernel3.10版本drivers/net/wireless/针对kernel3.0版本2.1wifi驱动入口函数Realtek提供的驱动入口函数为:module_init(rtw_drv_entry);module_exit(rtw_drv_halt);在以下文件中:os_dep\linux\sdio_intf.c针对sdio接口wifios_dep\linux\usb_intf.c针对usb接口wifiRK平台做了稍微修改,主要是为了增加RK版本信息打印及wifi gpio电源控制,启动sdio 识别。
linux之wifi相关应用的移植和使用

linux之wifi相关应用的移植和使用一、 libnl移植下载源码:/~tgr/libnl/ libnl-3.2.21.tar.gz解压缩后,在libnl-3.2.21当前目录下,新建build.sh,编辑内容如下:---------------------------------------分割线----------------------------------------------------[html]view plaincopy1.<span style="font-size:18px;">#!/bin/sh2.CFLAGS=”-I/home/eastmoon/rootfs/kernel/usr/include” \=”arm-linux-gcc” \4../configure –host=arm-linux \5.--prefix=/home/eastmoon/rootfs/usr</span>---------------------------------------分割线----------------------------------------------------设置下build.sh的权限后,./build.sh 配置好以后,make下,再make install 就ok了。
上面的的脚本简单说明下:第2行为libnl需要包含的内核的头文件。
第3行为交叉编译的工具指定。
第4行是把需要的库install到相应的rootfs中去。
然后可以看到在rootfs/usr中就会有include/libnl3 和/lib下的一些相关的.so等库了。
二、 openssl移植下载源码:/source/ openssl-1.0.1e.tar.gz解压缩后,在openssl-1.0.1e当前目录下,新建build.sh,编辑内容如下:---------------------------------------分割线----------------------------------------------------[html]view plaincopy1.<span style="font-size:18px;">#!/bin/sh2../Configure \3.Linux-arm \4.-DL_ENDIAN –fPIC \5.Linux:”arm-linux-gcc” \6.--prefix = “home/eastmoon/rootfs/usr”</span>---------------------------------------分割线----------------------------------------------------设置下build.sh的权限后,./build.sh配置好以后,make再make install然后可以看到在rootfs/usr中就会有include/openssl 和/lib下的一些相关.so等库了。
WIFI移植全过程

WIFI移植全过程基于S3C S3C242424440的SDIO 卡WIFI 移植移植1112/1112/yangjun yangjun yangjun环境:Ubuntu10.10LINUX2.26.38交叉编译工具链:arm-linux-gcc一、SDIO 设备驱动移植1、修改SD 卡驱动使内核支持SD 卡修改文件:arch/arm/mach-s3c2440/mach-smdk2440.c添加所需头文件:#include#include#include//增加平台设备对sd 卡的支持static struct platform_device *smdk2440_devices[] __initdata = {&s3c_device_ohci,&s3c_device_lcd,&s3c_device_wdt,&s3c_device_i2c0,&s3c_device_iis,&s3c_device_sdi,};//添加平台数据dev->platform_datastatic struct s3c24xx_mci_pdata smdk2440_mmc_cfg __initdata={.gpio_detect = S3C2410_GPG(8),//此处保留为使用中断号8,看芯片手册.set_power = NULL,.ocr_avail = MMC_VDD_32_33,};2、在smdk2440_machine_init 中添加s3c24xx_mci_set_platdata(&smdk2440_mmc_cfg);二、配置内核以支持Marvel 无线WIFI选择38内核中的wlan marwell sdio 模块device drivers ---->[*] Network device support --->[*] Wireless LAN --->Marwell 8xxx Libertas WLAN driver supportMarwell Libertas 8385/8686/8688 SDIO 802.11b/g cards Networking support --->-*- Wireless ---><*> cfg80211 - wireless configureation API{*} common routines for IEEE 802.11 drivers三、编译内核,生成驱动模块1、先执行make 然后make modules 最后执行make uImage //内核生成模块的方式2、将生成的wlan相关ko文件拷贝到目标板中,在这我放在/sdio目录下/drivers/net/wireless/libertas/$cp libertas.ko libertas_sdio.ko /opt/filesystemx/sdio/3、把固件helper_sd.bin sd8686.bin拷贝到相应的位置/rootfs/filesystem/lib/firmware/mrvl/(后面两个目录是自己创建的,固件的话我当时也是问老师拿的,没办法!)4、在目标板子插入SDIO WIFI 并加载驱动首先插入SDIO WIFI 然后加载驱动/sdio#insmod libertas.ko/sdio#insmod libertas_sdio.kohelper_name=/lib/firmware/mrvl/helper_sd.binfw_name=/lib/firmware/mrvl/sd8686.bin (注意要在一行)驱动加载完成会提示:(注意:如果没有,则再次热插拔你的sdio wifi卡便可以看到)if_sdio_intteruptlibertas: 00:01:36:19:b3:6b, fw 9.70.3p23, cap 0x00000303if_sdio_intteruptlibertas: wlan0: Marvell WLAN 802.11 adaptersdio_havefister_driversdio_init_module have done(此处提示信息有可能会不一样)四、制作无线测试工具及测试1、无码(没有密码)测试无线网卡用无线工具iwconfig iwlist等命令是通过开源软件wireless_tools_29.rar编译得到。
ralink 无线网卡驱动arm平台移植问题总结

下面是今天遇到的问题,之前配置已经通过了,但是这次却不行。重新配置了几次还是不 行,后来看论坛有人说这是没有用 make clean 的问题。因为之前编译通过的文件不会再编译了, 所以可能里面当时是错误的,虽然后面改过编译选项了,但是这些文件仍然保留,所以还是会报 错。
所以你在改过编译选项后,记住最好是 make clean 一下。
出现这个错误你只需要在内核目录下 make scripts 一下在编译驱动就行了。
今天终于编译的差不多了,现在就是加载是固件有问题。先总结一下前面遇到的问题吧, 前面遇到的很多编译错误,比如缺少文件,没有定义的变量,没有相关的头文件等等,基本都是 内核配置不对产生的问题。
配置无线 usb 网卡时,你先要配置网络参数,之后需要配置设备驱动中的无线设备,即使 他里面没有包含你需要的驱动你至少也要加载一个上去,不然他不会编译需要的文件,你在编译 驱动是当然也报错。最后你还需要配置你用的接口,现在用的是 usb 的,如果你用的 pci 的,你 还需要配置 pci 的编译选项。
操作过程如下(开发包 readme 详细看):
1> $tar -xvzf DPB_RT2870_Linux_STA_x.x.x.x.tgz go to "./DPB_RT2870_Linux_STA_x.x.x.x" directory.
2> In Makefile 设置 "MODE = STA" "TARGET = LINUX" 并设置 linux 源码路径和交叉编译链的路径 ifeq ($(PLATFORM),AM3517) # Linux 2.6 LINUX_SRC = /opt/3517project/DIM3517_kernel_2.6.32 CROSS_COMPILE = /opt/tools/arm-2009q1/bin/arm-none-linux-gnueabiendif
Hisi3520+USBWIFI(RT3070)做路由器移植过程

Hisi3520+USBWIFI(RT3070)做路由器移植过程硬件平台:Hisi3520开发板Linux内核:linux-3.0.y说明:这是一个Hisi3520+RT3070WIFI作为路由器的移植过程!在做下面的过程中,我认为你是有个有点嵌入式开发经验的人,内核源码已经可以编译通过运行等!特别要强调,usb总线驱动一定要是好的。
下面的步骤也描述了如何利用sdk安装交叉编译器。
如需帮助,请联系孙怀亚。
第一步、下载Hi3520A_SDK_V1.0.2.0.tgz,这是海思的开发SDK,可以将第二步、解压缩海思SDK#tar -zxvf Hi3520A_SDK_V1.0.2.0.tgz修改sdk.Unpack文件#vim sdk.unpack将第一行的#!bin/sh改为#!bin/bash,如下图#./sdk.unpack解压完成后目录多出如下目录osdrv,mpp目录:进入osdrv目录#cd osdrv在osdrv目录下,有文件系统工具busybox,内核kernel,交叉编译工具toolchain,uboot 等,目录结构详细说明请看目录的readme_en.txt。
第三步、安装交叉编译器:进入toolchain目录进入arm-hisiv100-linux运行#./cross.install 安装脚本将自动帮你将交叉编译器安装到/opt目录下,同时在/etc/profile文件的最后一行加入环境变量,你可以看一下这两个地方的变动:可以看到/opt目录下多出了hisi-linux目录可以看到/etc/profile文件最后多出了如下几行:运行一下环境变量配置:#Source /etc/profile 这个将重新配置环境变量在中端中输入#arm-hisiv100-linux-gcc –v如果看到如上图信息说明你的交叉编译已经安装完毕,可以使用了!如果没有,你需查找原因,一般会解决的,如果实在不行,请联系孙怀亚。
Hisi3520+USBwifi做客户端的移植过程
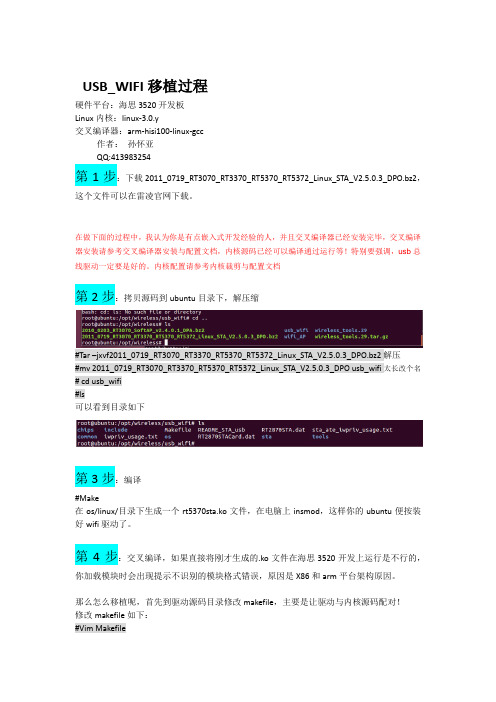
USB_WIFI移植过程硬件平台:海思3520开发板Linux内核:linux-3.0.y交叉编译器:arm-hisi100-linux-gcc作者:孙怀亚QQ:413983254第1步:下载2011_0719_RT3070_RT3370_RT5370_RT5372_Linux_STA_V2.5.0.3_DPO.bz2,这个文件可以在雷凌官网下载。
在做下面的过程中,我认为你是有点嵌入式开发经验的人,并且交叉编译器已经安装完毕,交叉编译器安装请参考交叉编译器安装与配置文档,内核源码已经可以编译通过运行等!特别要强调,usb总线驱动一定要是好的。
内核配置请参考内核裁剪与配置文档第2步:拷贝源码到ubuntu目录下,解压缩#Tar –jxvf2011_0719_RT3070_RT3370_RT5370_RT5372_Linux_STA_V2.5.0.3_DPO.bz2解压#mv 2011_0719_RT3070_RT3370_RT5370_RT5372_Linux_STA_V2.5.0.3_DPO usb_wifi太长改个名# cd usb_wifi#ls可以看到目录如下第3步:编译#Make在os/linux/目录下生成一个rt5370sta.ko文件,在电脑上insmod,这样你的ubuntu便按装好wifi驱动了。
第4步:交叉编译,如果直接将刚才生成的.ko文件在海思3520开发上运行是不行的,你加载模块时会出现提示不识别的模块格式错误,原因是X86和arm平台架构原因。
那么怎么移植呢,首先到驱动源码目录修改makefile,主要是让驱动与内核源码配对!修改makefile如下:#Vim Makefile修改os/linux/config.mk#vim os/linux/config.mk修改如下支持wpa:找到,这里让去的支持WPA修改编译器:这里指的编译器的路径回到顶层执行make#make ARCH=arm CROSS_COMPILE=arm-hisiv100-linux-编译完毕在os/linux目录下生成:rt5370sta.ko在common中生产rt2870.bin第5步.移植到海思3520开发板上:拷贝刚才生成的.ko文件到开发板的目录下(随便哪个目录,只要你自己能找到):在开发板的etc目录下建立Wireless目录,在Wireless下建立RT2870STA目录,拷贝驱动源码目录下RT2870STA.dat到刚建立的文件夹下。
移植wifi无线网卡到mini2440上全过程
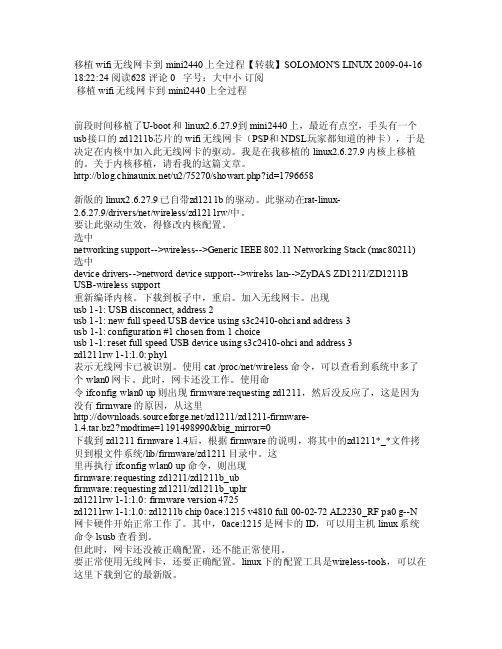
移植wifi无线网卡到mini2440上全过程【转载】SOLO MON'S LINU X 2009-04-16 18:22:24 阅读628 评论0 字号:大中小订阅移植wi fi无线网卡到min i2440上全过程前段时间移植了U-boot和linu x2.6.27.9到mini2440上,最近有点空,手头有一个usb接口的zd1211b芯片的wif i无线网卡(PSP和NDSL玩家都知道的神卡),于是决定在内核中加入此无线网卡的驱动。
我是在我移植的linux2.6.27.9内核上移植的。
关于内核移植,请看我的这篇文章。
http://bl og.ch inaun ix.ne t/u2/75270/show art.p hp?id=1796658新版的li nux2.6.27.9已自带z d1211b的驱动。
此驱动在r at-li nux-2.6.27.9/dr ivers/net/wirel ess/z d1211rw/中。
要让此驱动生效,得修改内核配置。
选中netw orkin g sup port-->wir eless-->Ge neric IEEE 802.11 Ne twork ing S tack(mac80211)选中d evice driv ers-->netw ord d evice supp ort-->wire lss l an-->ZyDAS ZD1211/ZD1211B USB-wirel ess s uppor t重新编译内核。
下载到板子中,重启。
加入无线网卡。
出现u sb 1-1: US B dis conne ct, a ddres s 2u sb 1-1: ne w ful l spe ed US B dev ice u sings3c2410-oh ci an d add ress3usb 1-1: conf igura tion#1 ch osenfrom1 cho iceu sb 1-1: re set f ull s peedUSB d evice usin g s3c2410-ohciand a ddres s 3z d1211rw 1-1:1.0: phy1表示无线网卡已被识别。
RT3070驱动移植

RT3070驱动移植无线网卡为RT3070,驱动分为STA驱动和SoftAP驱动两种,STA驱动支持无线网卡工作在STA模式下,而SoftAP的驱动支持无线网卡工作在软AP的模式下,可以作为一个软的接入点。
STA驱动为2010_0831_RT3070_Linux_STA_v2.3.0.0_DPO.bz2。
SoftAP的驱动是:2010_0203_RT3070_SoftAP_v2.4.0.1_DPA.bz2。
需要移植STA驱动和SoftAP驱动,两款驱动的移植步骤差不多。
下边首先对STA驱动进行移植。
STA驱动的移植#tar jxvf 2010_0831_RT3070_Linux_STA_v2.3.0.0_DPO.bz2cd 2010_0831_RT3070_Linux_STA_v2.3.0.0_DPO修改原有的Makefile文件如下(只给出需要修改的部分,“-”表示删除的行,“+”表示添加的行):+#Makefile for RT3070 on MBC-SAM9G45+#2010_11_13 by liyiRT28xx_MODE = STATARGET = LINUXCHIPSET = 3070-PLATFORM = PC+PLATFORM = IXPifeq ($(PLATFORM),IXP)-LINUX_SRC = /project-CROSS_COMPILE = arm-linux-+LINUX_SRC = /home/Embest_SAM9G45/linux-2.6.30+CROSS_COMPILE = /usr/local/arm2007q1/bin/arm-none-linux-gnueabi-endif修改os/linux文件夹中的config.mk文件,需要修改的地方如下(只给出需要修改的部分):# Support Wpa_Supplicant- HAS_WPA_SUPPLICANT=n+HAS_WPA_SUPPLICANT=y# Support Native WpaSupplicant for Network Maganger-HAS_NATIVE_WPA_SUPPLICANT_SUPPORT=n+HAS_NATIVE_WPA_SUPPLICANT_SUPPORT=yifeq ($(PLATFORM),IXP)- WFLAGS += -DRT_BIG_ENDIAN+#WFLAGS += -DRT_BIG_ENDIANendififeq ($(PLATFORM),IXP)EXTRA_CFLAGS := -v $(WFLAGS) -I$(RT28xx_DIR)/includeendififeq ($(PLATFORM),IXP)- CFLAGS := -v -D__KERNEL__ -DMODULE -I$(LINUX_SRC)/include-I$(RT28xx_DIR)/include -Wall -Wstrict-prototypes -Wno-trigraphs -O2 -fno-strict-aliasing -fno-common -Uarm -fno-common -pipe -mapcs-32-D__LINUX_ARM_ARCH__=5 -mcpu=xscale -mtune=xscale -malignment-traps -msoft-float $(WFLAGS)- EXTRA_CFLAGS := -v $(WFLAGS) -I$(RT28xx_DIR)/include- export CFLAGS-+endif修改完成以后,通过以下命令编译:make ARCH=arm KBUILD_NOPEDANTIC=1如果不加KBUILD_NOPEDANTIC=1将出现CFLAGS was changed in …. Fix it to use EXTRA_CFLAGS的错误,编译不能通过。
Android-WIFI移植分析—曹颖
11
配置路径和权限
A)配置init.rc文件修改out/target/product/fs100/root/init.rc, 让wifi用户拥有相关 的权限, 在 #give system access to wpa_supplicant.conf for backup and restore后面增加:
3
SDIO WIFI部分
项目负责人:曹颖 项目目标:实现WIFI上网功能、并对WIFI休眠进行改善。 项目开发流程:
硬件分析:对Marvell8686 SDIO WIFI模块硬件工作特性了解和分析 工作原理分析:对Marvel8686 SDIO WIFI工作原理进行分析 Android WIFI框架分析:对Android WIFI系统框架分析 进行源码分析、编写、修改及编译 调试、并完善 2011-9-29至2011-10-7:硬件分析、了解驱动框架 2011-10-8至2011-10-16:Android SDIO WIFI移植及工作原理分析 2011-10-17至2011-10-23:Android WIFI框架分析 2011-10-24至2011-10-30:进行源码分析 2011-10-31至2011-11-5:准备答辩就业
7
配置内核支持SDIO WIF
make
menuconfig
[*] Networking support ---> [*] Wireless ---> --- Wireless <*> Improved wireless configuration API [*] cfg80211 regulatory debugging [*] nl80211 new netlink interface support -*- Common routines for IEEE802.11 drivers Device Drivers ---> [*] Network device support ---> Wireless LAN ---> <*> Marvell 8xxx Libertas WLAN driver support <M> Marvell Libertas 8385 and 8686 SDIO 802.11b/g cards
WiFi驱动移植到Linux

linux下移植之WIFI驱动2010-05-14 22:271.前言硬件平台: imx27+sd8686软件平台: linux内核: 2.6.272.移植思想1, WIFI 模块本身和 cpu 之间的接口;我们的模块和 cpu 之间的接口是 sdio 的,也就是说必须要先保证SDIO 本身是工作的,与SD卡,MMC属于同类型。
主要用到这几个GPIO引脚SD0...SD3,SD2_CMD,SD2_CLK,以及复位引脚PB24.2, WIFI 模块本身的上电时序;模块都有它自己的规律,所以必须要根据 spec 了解它本身的上电过程,严格遵守;3,以太网接口的创建;我们的 WIFI 模块本身是建立在 SDIO 口之上的,而对上都是提供以太网接口的,所以必须要保证这个接口以及创建;4,特殊处理;不同的模块都有它特别的地方,比如我们用的是 8686 和 compo 也就是说它和蓝牙共用天线,所以需要在初始化的时候做特殊的处理,发送特殊的命令,才能工作;3.移植过程1,sdio本身是通过gpio口模拟的,所以需要对gpio口进行配置;static mfp_cfg_t littleton_mmc3_pins[] = {GPIO7_2_MMC3_DAT0,GPIO8_2_MMC3_DAT1,GPIO9_2_MMC3_DAT2,GPIO10_2_MMC3_DAT3,GPIO103_MMC3_CLK,GPIO105_MMC3_CMD,};2,wifi模块本身的初始化;#define MFP_WIFI_V18_ENABLE (GPIO26_GPIO)#define MFP_WLAN_RESETN (GPIO99_GPIO)#define WIFI_WAKEUP_HOST (GPIO104_GPIO) /*error must be changed*/#define WLAN_ENABLE_PIN 26#define WLAN_RESET_PIN 99#define M200_B#ifdef M200_B#define BT_RESET_PIN EXT1_GPIO(1)#define BT_RESET_GPIO (GPIO1_2_GPIO)#else#define BT_RESET_GPIO (GPIO6_2_GPIO)#define BT_RESET_PIN EXT1_GPIO(6)#endifstatic mfp_cfg_t lin2008_wifibt_pins[] = {MFP_WIFI_V18_ENABLE,MFP_WLAN_RESETN,WIFI_WAKEUP_HOST,/*wakeup host*/};static mfp_cfg_t lin2008_wifibt_pins2[] = {MFP_WIFI_V18_ENABLE,};static int wifibt_power_status;int lin2008_poweron_wifibt_board(void){if (!wifibt_power_status) {mxc_mfp_config(ARRAY_AND_SIZE(lin2008_wifibt_pins)) ;gpio_direction_output(WLAN_ENABLE_PIN, 1);gpio_direction_output(WLAN_RESET_PIN, 1);gpio_direction_output(BT_RESET_PIN,1);mdelay(10);gpio_direction_output(BT_RESET_PIN, 0);gpio_direction_output(WLAN_RESET_PIN, 0);// bt need > 5 ms to resetmdelay(5);gpio_direction_output(BT_RESET_PIN, 1);gpio_direction_output(WLAN_RESET_PIN, 1);wifibt_power_status++;return 0;}wifibt_power_status++;return 1;}int lin2008_poweroff_wifibt_board(void){wifibt_power_status--;if (!wifibt_power_status) {mxc_mfp_config(ARRAY_AND_SIZE(lin2008_wifibt_pins2) );gpio_direction_output(WLAN_ENABLE_PIN, 0);return 0;}return 1;}3,以太网接口的创建这里在 android 平台上要做特殊的处理,也就是 firmware 的位置要放好,否则加载 firmware 始终不成功,那么以太网接口就不会被创建了;需要把 helper_sd.bin 放在 /lib/firmware/mrvl 下面(若没有,则创建一个);把 sd8686.bin 放在 /lib/firmware/mrvl 下面(同上);4,特殊的处理对于 8686 模块需要做特殊的处理,在注册完以太网接口以后,需要添加下面这段话 :{#define BCA_CFG_NUM_OF_MODES 4#define BCA_CFG_SINGLE_ANT_WITH_COEX 0#define BCA_CFG_DUAL_ANT_WITH_COEX 1#define BCA_CFG_SINGLE_ANT_FOR_BT_ONLY 2#define BCA_CFG_MRVL_DEFAULT 3#define BCA_CONFIG BCA_CFG_SINGLE_ANT_WITH_COEXstatic u32 BCACfgTbl[BCA_CFG_NUM_OF_MODES][3] = {//0xA5F0, 0xA58C, 0xA5A0{ 0xa027181c, 0x40214, 0xd24d}, //Mode 0: Single ANT with COEX enable{ 0xa027181c, 0x40211, 0xd24d}, //Mode 1: Dual ANT with COEX enable{ 0xa027181c, 0x40222, 0xd21c}, //Mode 2: single ANT for BT only{ 0xa027801d, 0x18000, 0xd21c}, //Mode 3: Marvell default};wlan_offset_value RegBuffer;RegBuffer.offset = (0xA5F0);RegBuffer.value = BCACfgTbl[BCA_CONFIG][0];wlan_prepare_cmd(priv,HostCmd_CMD_MAC_REG_ACCESS,HostCmd_ACT_GEN_SET,HostCmd_OPTION_WAITFORRSP,0,&RegBuffer);RegBuffer.offset =(0xA58C);RegBuffer.value = BCACfgTbl[BCA_CONFIG][1];wlan_prepare_cmd(priv,HostCmd_CMD_MAC_REG_ACCESS,HostCmd_ACT_GEN_SET,HostCmd_OPTION_WAITFORRSP,0,&RegBuffer);RegBuffer.offset = (0xA5A0);RegBuffer.value = BCACfgTbl[BCA_CONFIG][2];wlan_prepare_cmd(priv,HostCmd_CMD_MAC_REG_ACCESS,HostCmd_ACT_GEN_SET,HostCmd_OPTION_WAITFORRSP,0,&RegBuffer);}基本上这样就可以工作了;4.其它问题Sdio 口默认是用的 3.2V 这里需要修改相关的地方强制设成是1.8V ,否则 SDIO 接口将无法工作;Linux平台上需要移植一些上层软件才能验证,比如iwconfig , iwlist 等。
RT3070 STA移植

RT3070 wifi arm+linux移植软硬件平台:宿主机:ubuntu12.10虚拟机目标版:TQ2440,linux2.6.30.4交叉编译工具:arm-linux-4.3.3网卡:Ralink3070模块步骤:1、编译驱动的预操作:编译arm版本的内核源码。
从TQ2440的光碟中获取内核源码,此内核源码已经经过天嵌的移植,可以直接编译移植入TQ2440中,镜像中已经支持USB。
2、编译rt3070模块的驱动在雷凌的官网下载linux版本的rt3070驱动2011_0719_RT3070_RT3370_RT5370_RT5372_Linux_STA_V2.5.0.3_DPO.bz2,解压后的目录名称太长,所以可以对其做修改方便使用,然后进入到目录中tar –jxf2011_0719_RT3070_RT3370_RT5370_RT5372_Linux_STA_V2.5.0.3_DPO.bz2mv 2011_0719_RT3070_RT3370_RT5370_RT5372_Linux_STA_V2.5.0.3_DPO rt3070cd rt3070目录中的README_STA_usb文件介绍了编译和加载驱动的一些信息。
需要对os/linux/目录下的conf.mk文件进行修改,这里只贴出要修改的部分:vim os/linux/config.mk# Support Wpa_SupplicantHAS_WPA_SUPPLICANT=y# Support Native WpaSupplicant for NetworkMagangerHAS_NATIVE_WPA_SUPPLICANT_SUPPORT=yMakefile也要进行修改,芯片类型改为3070,默认的PLATFORM为PC,将其注释掉,而将PLATFORM = SMDK前面的#去掉,那么将后面的ifeq($(PLATFORM),SMDK)下的内核源码路径指定为上述的交叉编译过的内核源码目录,交叉编译工具指定为arm-linux-,当然之前应该把交叉工具链安装好,这里不再详述。
无线wlan在mips平台上的移植与应用
无线wlan在mips平台上的移植与应用第一:确定使用USB wlan使用的芯片。
第二:根据得到的芯片型号,可以从官方网站上下载对已型号的芯片驱动,官网上能够下载到windows和linux等系统的驱动。
第三:移植成功后,我们需要测试芯片是否能够使用,需要使用开源的无线网卡的util来测试,用户可以选择wireless tool或wpa supplicant工具还测试。
第四:如果我们想在自己的平台中使用无线网卡,最好的方式是基于wireless tool或wpa supplicant工具上进行封装。
USB wlan芯片型号:RT5370移植的系统:linux处理器的架构:mips一.移植RT5370到mips架构的处理器上RT5370交叉编译从官网中下载linux源码包(1) $tar -xvjf2011_0719_RT3070_RT3370_RT5370_RT5372_Linux_STA_V2.5.0.3_DPO.bz2mv 2011_0719_RT3070_RT3370_RT5370_RT5372_Linux_STA_V2.5.0.3_DPO 5370 cd 5370(2) vi Makefile添加我们的平台BCM7581,并屏蔽掉PCPLATFORM = BCM7581#PLATFORM = PC另外需要添加我们平台的kernel路径和交叉编译链ifeq ($(PLATFORM),BCM7581)LINUX_SRC = 内核的源码目录CROSS_COMPILE = mipsel-linux-endif(3) vi os/linux/config.mk添加ifeq ($(PLATFORM),BCM7581)EXTRA_CFLAGS := $(WFLAGS) -I(RT28xx_DIR)/includeendif(4)$make将在os/linux目录下生成的rt5370sta.ko复制到盒子目录中(5) 拷贝无线网卡初始化的配置文件在机顶盒目录中建立/etc/Wireless/RT2870STA目录$cp RT2870STA.dat /etc/Wireless/RT2870STA/RT2870STA.dat(6) 加载驱动进去盒子存放驱动的目录,加载驱动Insmod rt5370sta.ko失败:请检查内核是否配置802.11相关协议,和对USB的支持(因为我们这边使用的是USB 无线网卡,因此支持USB协议是最基本的)成功:一般ifconfig后就会弹出相应的无线网卡的名字,名字可能是ra0,wlan0,wlan1. 二.移植RT5370成功后,需要测试是否可用目前有两个工具可以使用。
rtl8188eu驱动移植
rtl8188eu驱动移植测试平台宿主机平台:Ubuntu 16.04.6⽬标机:iMX6ULL⽬标机内核:Linux 4.1.15rtl8188eu 驱动移植在⽹上下载Linux版的驱动源码;wifi驱动的实现有两种:1)将驱动源码交叉编译为内核模块ko⽂件,拷贝到⽬标机,通过 insmod 指令安装,在开机脚本中添加模块安装机wifi配置即可实现开机⾃动联⽹,本⽅法较为简单在此不做赘述;2)将驱动移植到内核中,后⾯通过配置内核实现wifi⽀持,下⾯对内核驱动的移植进⾏详细描述;移植步骤:1.将驱动源码解压,并修改为 rtl8188eu ,对于移植的驱动我⼀般都放在 drivers/staging/ 这个暂存⽬录下;2.修改 drivers/staging/Makefile 加⼊⽀持 rtl8188eu 的驱动编译obj-$(CONFIG_R8188EU) += rtl8188eu/3.添加 Kconfig ⽀持,修改 drivers/staging/Kconfigsource "drivers/staging/rtl8188eu/Kconfig"⾄此内核驱动移植完毕。
内核配置及驱动使⽤在内核⽬录make ARCH=arm CROSS_COMPILE=arm-linux-gnueabihf- menuconfig因为使⽤板载wifi情况较多,所以直接编译进内核;然后make ARCH=arm CROSS_COMPILE=arm-linux-gnueabihf- zImage更新内核查看⽆线⽹络,对于wlan0 已经⽀持wpa_supplicant是⼀个连接、配置WIFI的⼯具,下⾯使⽤该⼯具对wifi⽹络进⾏配置和连接使⽤ wpa_passphrase wifi配置⽂件 wifi.conf⽹络名和密码wpa_passphrase "HTGW-Guest" >> wifi.conf67106002查看配置⽂件启动wlan0wpa_supplicant -D wext -B -i wlan0 -c wifi.conf-D 驱动程序名称(可以是多个驱动程序:nl80211,wext)-i 接⼝名称-c 配置⽂件 -B 在后台运⾏守护进程⾃动获取IP地址udhcpc -b -i wlan0 -R。
移植wifi无线网卡到mini2...
移植wifi无线网卡到mini2440上全过程(Transplant WiFiwireless network card to mini2440 whole process)Transplant WiFi wireless network card to the whole process of mini2440 [reprint] SOLOMON'S LINUX 2009-04-16 18:22:24 read 628 comment 0: large and medium subscriptionTransplant WiFi wireless network card to mini2440 whole processSome time ago the transplantation of U-boot and linux2.6.27.9 to mini2440, recently a bit empty, WiFi wireless network card zd1211b chip and a USB interface on hand (PSP and NDSL game player knows God), so I decided to drive to join the wireless network card in the kernel. I was transplanted on my transplanted linux2.6.27.9 kernel. For the kernel transplant, please see my article./u2/75270/showart.php? Id=1796658The new version of linux2.6.27.9 has its own zd1211b driver. This driver is inrat-linux-2.6.27.9/drivers/net/wireless/zd1211rw/.To make this driver effective, you have to modify the kernel configuration.SelectedNetworking support-->wireless-->Generic IEEE 802.11 Networking Stack (mac80211)SelectedDevice drivers-->netword device support-->wirelss lan-->ZyDAS ZD1211/ZD1211B USB-wireless supportRecompile kernel. Download to the board, restart. Add wireless network card. AppearUSB 1-1: USB disconnect, address 2USB 1-1: new full speed USB device using s3c2410-ohci and address 3USB 1-1: configuration #1 chosen from 1 choiceUSB 1-1: reset full speed USB device using s3c2410-ohci and address 3Zd1211rw 1-1:1.0: phy1Indicates that the wireless network card has been identified. Using the cat /proc/net/wireless command, you can see more than one wlan0 network card in the system. At this point, the network card is not working. Use lifeIfconfig wlan0 up appears firmware:requesting zd1211, and then it doesn't respond, because there's no reason for firmware, from here/zd1211/zd1211-firmware-1.4 .tar.bz2? Modtime=1191498990&big_mirror=0After downloading to zd1211 firmware 1.4, the zd1211*_* file is copied to the root file system /lib/firmware/zd1211 directory according to the instructions of firmware. thisThen execute the ifconfig wlan0 up command, then appearFirmware: requesting zd1211/zd1211b_ubFirmware: requesting zd1211/zd1211b_uphrZd1211rw 1-1:1.0: firmware version 4725Zd1211rw 1-1:1.0: zd1211b chip 0ace:1215 v4810 full 00-02-72 AL2230_RF PA0 g--NNIC hardware started to work properly. Among them, 0ace:1215 is the network card ID, can use the host Linux system command lsusb to see.But at this point, the network card has not been properly configured, can not be used properly.The normal use of wireless network card, but also the correct configuration. The configuration tool under Linux is wireless-tools, which can be downloaded to the latest version of it./personal/Jean_Tourrilhes/Linux/Tools. htmlAfter downloading, the source code is decompressed. And thenmodify the makefile file, which will beCC = GCCAR = arRANLIB = ranlibInsteadCC = arm-linux-gccAR = arm-linux-arRANLIB = arm-linux-ranlibAfter the make is executed, the generated iwconfig iwlist file is copied to the /bin directory in the root file system of rat-linux for mini2440Copy libiw.so.29 to /lib directory.Start the mini2440 development board, enter the Linux command line, execute the ifconfig wlan0 up, start the wireless network card. Execute iwlist scanning again, and this command can be searchedAvailable wireless network access point. My wireless access point is a wireless router, ESSID is "rat-linux", the implementation of the command will be the following outputWlan0 Scan completed:Cell 01 - Address: 00:19:C6:53:B9:CEESSID: "rat-linux""Mode:MasterChannel:2Frequency:2.417 GHz (Channel 2)Quality=11/100 Signal level:66/100Encryption key:onBit Rates:1 Mb/s; 2 Mb/s; 5.5 Mb/s; 11 Mb/s; 6 Mb/s9 Mb/s; 12 Mb/s; 18 Mb/s; 24 Mb/s; 36 Mb/s48 Mb/s; 54 Mb/sExtra:tsf=000000056306469fExtra: Last beacon: 1065ms agoYou can see that my wireless access point is password. Suppose the password is 123456. Use the following command to set the password.Iwconfig wlan0 key 123456To connect to the wireless network, use the following command to set up the ESSIDIwconfig wlan0 ESSID "rat-linux""Other parameters can be used without the default. You can use the following command to join the wireless network.Iwconfig wlan0 AP AutoAnd then iwconfig wlan0, you can see the following information.Wlan0 IEEE 802.11BG ESSID: "rat-linux""Mode:Managed Frequency:2.417 GHz Access Point:00:19:C6:53:B9:CEBit Rate=1 Mb/s Tx-Power=27 dBmRetry min limit:7 RTS thr:off Fragment thr=2352 BEncryption key:1234-56 Security mode:openPower Management:offLink Quality=100/100 Signal level:66/100Rx invalid nwid:0 Rx invalid crypt:0 Rx invalid frag:0Tx excessive retries:0 Invalid misc:0 Missed beacon:0This means that it has access to wireless networks.Finally, specify the IP address for the wireless network card. The following commandsIfconfig wlan0 192.168.1.30 netmask 255.255.255.0My development host and wireless network card are in the same network segment, so they can communicate with each other through PING. Therefore, you can use the IP address of the PING wireless network card on the host to ensure the networkDoes the card work properly?. The Ping 192.168.1.30 is executed on the host, and the normal PING pass.So far, the wireless network card installation is complete.Finally, in order to facilitate the configuration, the above configuration commands can be written into the Linux script file. After that, the configuration of the above steps can be completed as long as the script is executed. Script fileAs follows.# /bin/sh!Ifconfig wlan0 upIwconfig wlan0 key 123456Iwconfig wlan0 ESSID "rat-linux""Iwconfig wlan0 AP AutoIfconfig wlan0 192.168.1.30 netmask 255.255.255.0Note: the test using the HUAWEI hg522 wireless SAGEM XG-760N ZD1211B cat Sagem wireless card (Zydas)Telecomadmin password: nE7jA%5mSecurity settings WEPWEP certification: share 64bit / / if 128bit, the password is too long iwconfig password will return errorKey 12312Iwconfig wlan0 ESSID "ChinaNet-WS4P""Iwconfig wlan0 key s:12312iwconfig wlan0 ap carifconfig wlan0 192.168.1.30 netmask 255.255.255.0另有加密方式 wpa-psk 加密模式: tkip / aes / tkip aes +- 加密模式同上 wpa2 psk如果wep加密长度设为128bit, 则密码太长 iwconfig配置密码时会返回错误:error for wireless television "set encode" (8b2a):set options on device wlan0; invalid argument.无线模式如何设置无线网络的wpa - psk安全认证11 / 03 / 2010 | 08: 17分类: 未分类 |在笔记本电脑上安装slackware 10.1之后, 无线连接一直用wep认证.wep尽管比什么都不用要安全一点, 但是还是很容易被人破解, 而wpa认证在安全性上更有保障.wpa - psk更适合家庭用户使用, 相比企业级应用的wpa认证, 尽管安全性上稍逊, 但设置上简单得多, 不需要专门的认证服务器.下面是在slackware 10.1上设置wpa - psk的过程和配置文件, 主要软硬件环境是: slackware 10.1, 内核版本2.6.10, intel 2200b / g 无线网卡.首先是升级无线网卡的驱动程序.按下列顺序安装有关程序:1.从 http: / / 下载ieee80211-1.2.16.tgz 源码, 并编译安装 (make & make install).在其后运行的时候, 出现了 michael _ mic: tfm _ michael = = null 的错误提示, 说明模块安装时出现问题, 下载相关的补丁程序: http: / / / patches /ieee80211-1.2.16-crypt-fix2.patch 再度编译安装后, 错误消失.2.从 http: / / 下载ipw2200-1.2.1.tgz, 用 make & make install 编译安装.如果原来已经安装了ipw2200的驱动程序, 升级前用源码目录中的 remove old 脚本进行卸载.3.从 http: / / 下载 3.0版的firmware, 解压缩到 / lib / firmware / 目录.如果之前已经安装了旧版本的firmware, 直接删除有关文件即可.然后, 安装wpa _ supplicant从 http: / / hostap.epitest.fi / wpa wpa supplicant supplicant / 下载 _ _ - 0.4.9 的源码, 在源码目录建立.config 文件, 内容是:config _ driver _ ipw = y用 make & make install 编译安装.安装后, 运行 wpa passphrase your - your - _ ssid pre shared key 产生16进制表示的密码串, 其中 your - ssid 是无线网络的ssid, your - pre - shared - key就是wpa - psk认证所需的密码.产生的结果要放到 / etc / wpa _ supplicant.conf 文件中去, 内容是:network = {ssid = "your - ssid" # 这里是无线网络的ssidproto = wpakey _ mgmt = wpa-pskpairwise = tkippsk = xxxxxxxxxxxxxxxx # 这个就是用wpa _ passphrase命令生成的16进制串}最后, slackware 10.1及之前版本的用户, 到 http: / / / ~ alien / rc _ scripts / 下载 rc.inet1 和rc.wireless 脚本, 用来替换 / etc / rc.d 目录中的相应文件, 注意要赋予它们可执行属性 (chmod - x).然后建立 / etc / rc.d / rc.wireless.conf 内容如下:ipw2200″ info = ')# essid (extended 无线网络的ssid network name):essid = "your ssid.nwid = ""operation method: # ad-hoc managed master repeater, secondary, autostyle = "auto"# frequency or channel 1, 2, 3, 2.422g (channel), 2.46g (frequency)freq = ""channel = "6″ # 与无线ap / 路由器的设置一致# (cell size and the phase speed): 1, 2, 3; 70 (dbm) direction = ""# bit rate: car 11 feet.rate = ""# encryption key: development - 89ab - cd: passwordkey = "# 使用wpa - psk时, 这里保持空白# rts threshold: off, 500rts = ""a # fragmentation threshold: off"points"the iwconfig # parameters: power off, ap 01: 23 45 67, 89, ab iwconfig = ""# iwspy parameters: 01: 23 45 67, 89, abiwspy = ""# iwpriv parameters: set _ port 2, and _ conducted 50 60iwpriv = ""# wpa support, set key = "")"_ supplicant wpa wpa._ supplicant # wpa.wpadriver = "ipw" # 使用ipw2200驱动重新启动系统, 无线网络的wpa - psk认证就可以工作了.无线加密――wpa-psk加密的设置方法及特点 (五)一、wpa简介we 是改进wep所使用密钥的安全性的协议和算法.它改变了密钥生成方式, fi保护接入 (wpa) (wired equivalent privacy) 更频繁地变换密钥来获得安全.它还增加了消息完整性检查功能来防止数据包伪造. wpa的功能是替代现行的wep 协议.过去的无线lan之所以不太安全, 是因为在标准加密技术 "wep" 中存在一些缺点.wpa是继承了wep基本原理而又解决了wep缺点的一种新技术.由于加强了生成加密密钥的算法, 因此即便收集到分组信息并对其进行解析, 也几乎无法计算出通用密钥.wpa还追加了防止数据中途被篡改的功能和认证功能.由于具备这些功能, wep中此前倍受指责的缺点得以全部解决.二、wpa在家庭无线网络中的应用.完整的wpa实现是比较复杂的, 由于操作过程比较困难 (微软针对这些设置过程还专门开设了一门认证课程), 一般用户实现是不太现实.所以在家庭网络中采用的是wpa的简化版――wpa-psk (预共享密钥).这篇文档进行加密举例使用是我司无线宽带路由器tl - wr941n和无线网卡tl - wn821nwep加密方式可以分别和open system、shared key链路认证方式使用.1.采用open system authentication方式: 此时wep密钥只做加密, 即使密钥配的不一致, 用户也是可以上线, 但上线后传输的数据会因为密钥不一致被接收端丢弃.2.采用shared key authentication方式: 此时如果双方密钥不一致, 客户端就不能通过shared key认证, 无法上线.也就是说, 当wep和shared key认证方式配合使用时, wep也可以作为一种认证方法.无线网卡的master, managed, ad hoc monitor等模式无线网卡的工作模式Wireless network cards can work in a variety of modes. Common patterns are Master, Managed, ad-hoc, monitor, and so on.For Master mode, it is mainly used in wireless access point AP, providing wireless access service and routing function. We can imagine using a wireless router is in Master mode, but for ordinary PC, if there is a suitable hardware it can also turninto a wireless AP. In LINUX, the use of software HOSTAP can make a Linux PC has AP function, but the current HOSTAP support of wireless network card is limited, my INTEL Centrino PRO 4965 wireless card is not supported by hostap.For general wireless network cards, the most common patterns are managed, ad-hoc and monitor. Managed mode for wireless AP access connection, in this mode, we can wireless access, Internet access to the internet. The ad-hoc mode can be used when the two hosts need to be connected directly, so that the hosts are connected in a peer-to-peer way. The Monitor model is mainly used for monitoring the internal wireless network traffic, network is used to check and troubleshooting.The difference between Promiscuous and Monitor (RFMON)In the traditional finite network, we know that the network card can work in two modes, that is, ordinary and promiscuous modes. Under the Promiscuous mode, we can monitor the traffic inside the Ethernet directly. When this card does not distinguish between the data packets through the target address is not the machine, altogether will check for the upper layer of the protocol stack under section. This is also the basic basis for the existence of traditional sniffer software.There are differences and similarities between wireless networks and traditional wired ethernet. Wireless LAN signal transmission is completely broadcast by radio means, which means that each person can have a certain device to receive and crack the wireless signal. So wireless LAN is more insecure than wired network. According to the theory, when a network card isconnected to a known wireless network, it should be able to be configured as promiscuous mode to accept all packets as the traditional Ethernet network. Because in wireless environment, all wireless signals can be received by the network card, wireless AP can not play a switch to achieve point to point restriction forwarding. But the reality is that the current driver seems to have not yet developed enough to support such promiscuous patterns, at least for my IPW4965.But this does not mean that there is no way to monitor wireless traffic. The wireless network card has a special mode, that is, mode mode (monitor monitor, or RFMON, Radio Frequence). I have said all packets are transmitted by radio signals, so in this mode under network card can receive all it can receive the radio signal and trying to parse, but not limited to the wireless lan. This model has a fundamental role in the discovery mechanism of wireless LAN, but also provides an invisible tool to crack wireless lan. Some tools such as KISMET, NetStumbler and so on can use monitor mode to discover the SSID of WLAN and crack its password.It sounds like the monitor model is far more than the promiscuous model, but for the wireless LAN software development, there is no promicuous mode is a very troublesome thing. At least I'm still working on that. Although a little hope, such as in the monitor mode of packet injection, but the specific implementation remains to be explored.。
qca5018 wifi驱动移植流程
qca5018 wifi驱动移植流程
1. 从官网或者其他途径下载到对应的WIFI芯片的驱动包
2. 将驱动包解压放到内核“/driver/net/wireless目录下”,即"drivers/net/wireless/xxxx"
3. 打开/driver/net/wireless/Kconfig,在其最后增加"source "drivers/net/wireless/xxxx/Kconfig"
4. 打开drivers\net\wireless\Makefile,在其最后增加
"obj-y += xxxx/"
5. 内核增加USB驱动支持,如果非USB接口WIFI则不需要,路径:Device Drivers-->[*]USB support--->
6. 内核增加WIFI驱动支持,路径:Device Drivers-->[*] Network device support-->[*] Wireless LAN-->
7. 内核增加IEEE 802.11协议支持,路径:[*] Networking support-->-*- Wireless-->
8. 将下载的驱动编译进内核,路径:Device Drivers-->[*] Network device support-->[*] Wireless LAN-->[*]xxxx wifi-->
9. 执行make,重新编译内核
10. 使用新的zImage启动,加载wifi驱动,编译后的ko路径:/drivers/net/wireless/xxx。
ARM板TL_WN725N usb wifi Linux Driver 移植
ARM板TL_WN725N USB Wifi Driver 移植内容描述:2014-12-15,TL_WN725N USB Wifi Linux Driver 移植。
操作1:确定型号插入TP-link USB wifi,提示UT@utcooker:/data # 插入前后lsusbBus 001 Device 007: ID 0bda:8179得知idVendor=0bda, idProduct=8179,确认芯片型号为8188eu,TL-WN725N V2版本。
UT@utcooker:/data # netcfgsit0 DOWN 0.0.0.0/0 0x00000080 00:00:00:00:00:00lo UP 127.0.0.1/8 0x00000049 00:00:00:00:00:00ip6tnl0 DOWN 0.0.0.0/0 0x00000080 00:00:00:00:00:00操作2:测试驱动1)Realtek官方暂无8188eu linux 驱动。
下载相近型号芯片驱动源码。
进入os_dep\linux\usb_intf.c 查看RTL8192C_USB_IDS无{USB_DEVICE(USB_VENDER_ID_REALTEK, 0x8187)}2)github 下载驱动rtl8188eu-master.tar (经测试,热插拔有问题)rtl8188EUS_linux_v4.1.4_6773.20130222.tar.gz(可用)RTL8188EUS_RTL8189ES_linux_v4.1.7_9024.20130916.zip(可用)操作3:修改内核以RTL8188EUS_RTL8189ES_linux_v4.1.7_9024.20130916.zip为例,移植过程如下:1)确认linux内核有以下配置:[*] Networking support --->-*-Wireless ---><*> cfg80211 - wireless configuration API[*] cfg80211 wireless extensions compatibility2)打开makefileCONFIG_PLATFORM_I386_PC = y 改为CONFIG_PLATFORM_I386_PC = nCONFIG_PLATFORM_ARM_S3C2K4 =n 改CONFIG_PLATFORM_ARM_S3C2K4 = y 配置编译链及内核源码地址ifeq ($(CONFIG_PLATFORM_ARM_S3C2K4), y)EXTRA_CFLAGS += -DCONFIG_LITTLE_ENDIANARCH := armCROSS_COMPILE := /opt/FriendlyARM/gcc-toolschain/4.5.1/bin/arm-linux-KSRC := /svn/pengdonghui/Android_maize/linux-3.5-newEndif3)make –j32后得到8188eu.ko放入开发板:adb push 8188eu.ko /data加载驱动模块:UT@utcooker:/data # insmod 8188eu.ko[18668.230000] bFWReady == _FALSE call reset 8051...[18668.260000] usbcore: registered new interface driver rtl8188eu 查看网络设备:UT@utcooker:/data # ifconfig -a…wlan0 Link encap:Ethernet HWaddr 08:57:00:98:6B:31BROADCAST MULTICAST MTU:1500 Metric:1RX packets:0 errors:0 dropped:0 overruns:0 frame:0TX packets:0 errors:0 dropped:0 overruns:0 carrier:0collisions:0 txqueuelen:1000RX bytes:0 (0.0 B) TX bytes:0 (0.0 B)此时,此时能看到网络接口,Android界面setting 无法打开wifi。
wifi驱动移植范例
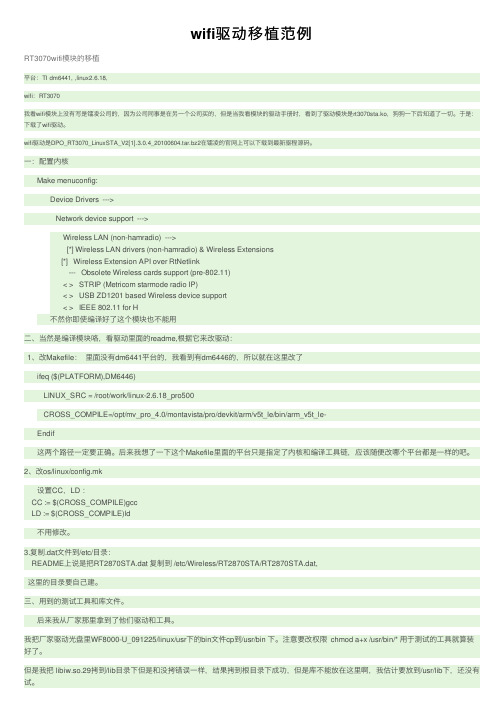
wifi驱动移植范例RT3070wifi模块的移植平台:TI dm6441, ,linux2.6.18,wifi:RT3070我看wifi模块上没有写是镭凌公司的,因为公司同事是在另⼀个公司买的,但是当我看模块的驱动⼿册时,看到了驱动模块是rt3070sta.ko,狗狗⼀下后知道了⼀切。
于是:下载了wifi驱动。
wifi驱动是DPO_RT3070_LinuxSTA_V2[1].3.0.4_20100604.tar.bz2在镭凌的官⽹上可以下载到最新驱程源码。
⼀:配置内核Make menuconfig:Device Drivers --->Network device support --->Wireless LAN (non-hamradio) --->[*] Wireless LAN drivers (non-hamradio) & Wireless Extensions[*] Wireless Extension API over RtNetlink--- Obsolete Wireless cards support (pre-802.11)< > STRIP (Metricom starmode radio IP)< > USB ZD1201 based Wireless device support< > IEEE 802.11 for H不然你即使编译好了这个模块也不能⽤⼆、当然是编译模块咯,看驱动⾥⾯的readme,根据它来改驱动:1、改Makefile:⾥⾯没有dm6441平台的,我看到有dm6446的,所以就在这⾥改了ifeq ($(PLATFORM),DM6446)LINUX_SRC = /root/work/linux-2.6.18_pro500CROSS_COMPILE=/opt/mv_pro_4.0/montavista/pro/devkit/arm/v5t_le/bin/arm_v5t_le-Endif这两个路径⼀定要正确。
RTL8723BU-WiFi-BT模块移植(WiFi部分)
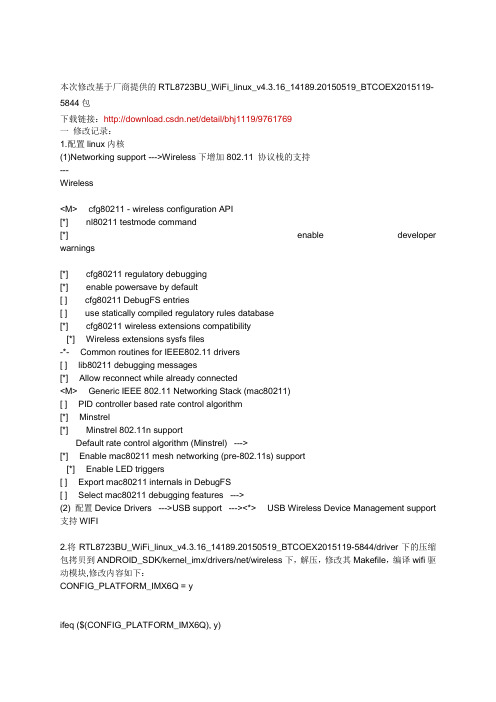
本次修改基于厂商提供的RTL8723BU_WiFi_linux_v4.3.16_14189.20150519_BTCOEX2015119-5844包下载链接:/detail/bhj1119/9761769一修改记录:1.配置linux内核(1)Networking support --->Wireless下增加802.11 协议栈的支持---Wireless<M> cfg80211 - wireless configuration API[*] nl80211 testmode command[*] enable developer warnings[*] cfg80211 regulatory debugging[*] enable powersave by default[ ] cfg80211 DebugFS entries[ ] use statically compiled regulatory rules database[*] cfg80211 wireless extensions compatibility[*] Wireless extensions sysfs files-*- Common routines for IEEE802.11 drivers[ ] lib80211 debugging messages[*] Allow reconnect while already connected<M> Generic IEEE 802.11 Networking Stack (mac80211)[ ] PID controller based rate control algorithm[*] Minstrel[*] Minstrel 802.11n supportDefault rate control algorithm (Minstrel) --->[*] Enable mac80211 mesh networking (pre-802.11s) support[*] Enable LED triggers[ ] Export mac80211 internals in DebugFS[ ] Select mac80211 debugging features --->(2) 配置Device Drivers --->USB support ---><*> USB Wireless Device Management support 支持WIFI2.将RTL8723BU_WiFi_linux_v4.3.16_14189.20150519_BTCOEX2015119-5844/driver下的压缩包拷贝到ANDROID_SDK/kernel_imx/drivers/net/wireless下,解压,修改其Makefile,编译wifi驱动模块,修改内容如下:CONFIG_PLATFORM_IMX6Q = yifeq ($(CONFIG_PLATFORM_IMX6Q), y)EXTRA_CFLAGS += -DCONFIG_LITTLE_ENDIANEXTRA_CFLAGS += -DCONFIG_IOCTL_CFG80211 -DRTW_USE_CFG80211_STA_EVENT -DCONFIG_PLATFORM_ANDROID -DCONFIG_ANDROID -DCONFIG_CONCURRENT_MODE ARCH := armCROSS_COMPILE := XXX/prebuilts/gcc/linux-x86/arm/arm-eabi-4.6/bin/arm-eabi-KSRC := XXX/kernel_imx//MODULE_NAME := 8723buendif如果(1)中选项没有选上,会导致加载wifi模块时报如下错误:rtl8723bu: no symbol version for cfg80211_ready_on_channelrtl8723bu: Unknown symbol cfg80211_ready_on_channel (err -22)rtl8723bu: Unknown symbol odm_SwAntDetectInit (err 0)rtl8723bu: no symbol version for __ieee80211_get_channelrtl8723bu: Unknown symbol __ieee80211_get_channel (err -22)rtl8723bu: no symbol version for cfg80211_roamedrtl8723bu: Unknown symbol cfg80211_roamed (err -22)rtl8723bu: no symbol version for wiphy_registerrtl8723bu: Unknown symbol wiphy_register (err -22)原因就是:编译WiFi模块时会去KSRC所指的路径下找相应的库,若果相关的编译选项没有选上会导致某些库缺失,从而导致编出来的WiFi模块不完整。
RT73 wifi无线网卡移植过程
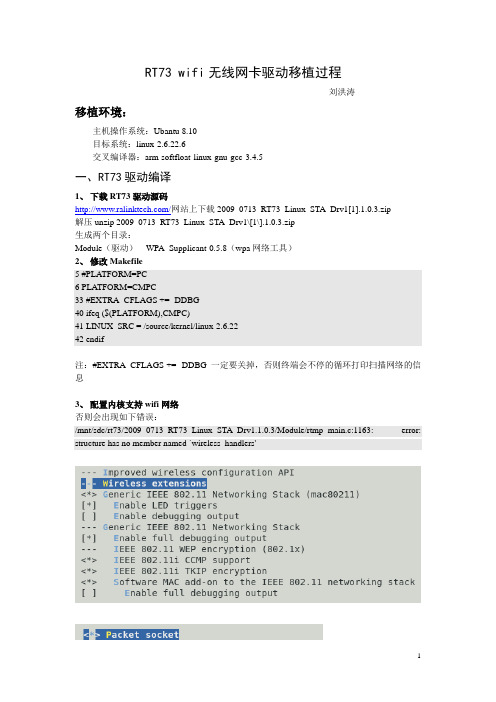
RT73 wifi无线网卡驱动移植过程刘洪涛移植环境:主机操作系统:Ubantu 8.10目标系统:linux-2.6.22.6交叉编译器:arm-softfloat-linux-gnu-gcc-3.4.5一、RT73驱动编译1、下载RT73驱动源码/网站上下载2009_0713_RT73_Linux_STA_Drv1[1].1.0.3.zip解压unzip 2009_0713_RT73_Linux_STA_Drv1\[1\].1.0.3.zip生成两个目录:Module(驱动)WPA_Supplicant-0.5.8(wpa网络工具)2、修改Makefile5 #PLATFORM=PC6 PLATFORM=CMPC33 #EXTRA_CFLAGS += -DDBG40 ifeq ($(PLATFORM),CMPC)41 LINUX_SRC = /source/kernel/linux-2.6.2242 endif注:#EXTRA_CFLAGS += -DDBG 一定要关掉,否则终端会不停的循环打印扫描网络的信息3、配置内核支持wifi网络否则会出现如下错误:/mnt/sdc/rt73/2009_0713_RT73_Linux_STA_Drv1.1.0.3/Module/rtmp_main.c:1163: error: structure has no member named `wireless_handlers'配置完毕后,需要编译下内核,目的是使配置在include/linux/autoconfig.h中生效4、编译源码,生成rt73.ko/rt73/2009_0713_RT73_Linux_STA_Drv1.1.0.3/Module# make拷贝驱动到目标系统#cp rt73.ko /source/rootfs/rt73/5、拷贝固件到目标系统#cp rt73.bin /source/rootfs/etc/Wireless/RT73STA/#cp rt73.rt73.dat /source/rootfs/etc/Wireless/RT73STA/二、移植wpa_supplicant因为现在的无线wifi网络大多是wpa加密。
AndroidKitKat4.4Wifi移植之AP模式与网络共享功能调试记录-电脑资料
AndroidKitKat4.4Wifi移植之AP模式与网络共享功能调试记录-电脑资料Tethering技术在移动平台上已经运用的越来越广泛了,它可以把移动设备当做一个接入点,其它的设备可以通过Wi-Fi,USB或是Bluetooth等方式连接到此移动设备,。
在Android中可以将Wifi设为AP模式作为WLAN接入点,从而与其他设备共享Android的互联网连接。
Android成为接入点后,就无法通过WLAN连接使用Android的应用程序访问互联网,但可以通过其他方式如以太网或移动网络访问互联网。
此时以太网或移动网络在网络共享(Tethering)中是作为upstream的角色。
最近在Atmel的SAMA5D3-EK开发板上调试Wifi模块,需要在Android下实现Tethering,通过Wi-Fi的AP模式,将网络连接共享给其它设备。
开发板上一个有线网卡(eth0),一个无线网卡(wlan0),eth0连接到外网,wlan0作为AP共享给其他设备比如Android手机,使得Android手机可以通过开发板连接到外网。
硬件平台:Atmel SAMA5软件平台:Linux 3.10 +Android 4.4Wifi模组:RTL8723AU(USB接口)因为使用的内核是厂商基于主线内核开发的,虽然主线内核中加入了Android的基本支持,但并不完全。
在做Android移植时,如果发现Android上层的某些功能缺乏内核的支持,可以根据Google维护的AndroidLinux内核将相应的更改应用到厂商Linux内核中,在前文《Android KitKat 4.4平台开发-添加USBADB和MTP功能支持》中就是使用的这种方法。
整个Wifi移植过程,Wifi模组厂商Realtek给出了详细的过程,但内容只涉及Wifi驱动及Android部分,使用哪个Linux内核以及内核如何配置需要我们自己决定。
- 1、下载文档前请自行甄别文档内容的完整性,平台不提供额外的编辑、内容补充、找答案等附加服务。
- 2、"仅部分预览"的文档,不可在线预览部分如存在完整性等问题,可反馈申请退款(可完整预览的文档不适用该条件!)。
- 3、如文档侵犯您的权益,请联系客服反馈,我们会尽快为您处理(人工客服工作时间:9:00-18:30)。
Linux下的wifi驱动移植例子详解
2012-06-13 10:34:00| 分类:IT人生路| 标签:|字号大中小订阅
Linux下的wifi驱动移植例子详解
平台:TI dm6441, ,linux2.6.18,
wifi:RT3070
我看wifi模块上没有写是镭凌公司的,因为公司同事是在另一个公司买的,但是当我看模块的驱动手册时,看到了驱动模块是rt3070sta.ko,狗狗一下后知道了一切。
于是:下载了wifi驱动。
wifi驱动是DPO_RT3070_LinuxSTA_V2[1].3.0.4_20100604.tar.bz2在镭凌的官网上可以下载到最新驱程
源码。
一:配置内核
Make menuconfig:
Device Drivers --->
Network device support --->
Wireless LAN (non-hamradio) --->
[*] Wireless LAN drivers (non-hamradio) & Wireless Extensions
[*] Wireless Extension API over RtNetlink
--- Obsolete Wireless cards support (pre-802.11)
< > STRIP (Metricom starmode radio IP)
< > USB ZD1201 based Wireless device support
< > IEEE 802.11 for H
不然你即使编译好了这个模块也不能用
二、当然是编译模块咯,看驱动里面的readme,根据它来改驱动:
1、改Makefile:里面没有dm6441平台的,我看到有dm6446的,所以就在这里改了
ifeq ($(PLATFORM),DM6446)
LINUX_SRC = /root/work/linux-2.6.18_pro500
CROSS_COMPILE=/opt/mv_pro_4.0/montavista/pro/devkit/arm/v5t_le/bin/arm_v5t_le-
Endif
这两个路径一定要正确。
后来我想了一下这个Makefile里面的平台只是指定了内核和编译工具链,应该随
便改哪个平台都是一样的吧。
2、改os/linux/config.mk
设置CC,LD :
CC := $(CROSS_COMPILE)gcc
LD := $(CROSS_COMPILE)ld
不用修改。
3.复制.dat文件到/etc/目录:
README上说是把RT2870STA.dat 复制到 /etc/Wireless/RT2870STA/RT2870STA.dat,
这里的目录要自己建。
三、用到的测试工具和库文件。
后来我从厂家那里拿到了他们驱动和工具。
我把厂家驱动光盘里WF8000-U_091225/linux/usr下的bin文件cp到/usr/bin 下。
注意要改权限chmod
a+x /usr/bin/* 用于测试的工具就算装好了。
但是我把 libiw.so.29拷到/lib目录下但是和没拷错误一样,结果拷到根目录下成功,但是库不能放在这里
啊,我估计要放到/usr/lib下,还没有试。
四、测试:
查看模块驱动里面的iwpriv_usage.txt可知道各个命令的参数,我由于当初没有看这里面的东西在进入有
密码的路由器时吃了大亏,原来这里写的很清楚。
insmod rt3070sta.ko
ifconfig ra0 up 启用无线网卡,至于为什么是ra0,因为我的使用手册上是这样做的
此时cat /proc/wireless 可以看到多了一个ra0
iwlist scanning 可以搜索到可用的网络 iwlist ra0 scanning (只搜索ra0的无线网络)
iwpriv ra0 set SSID="name"无线网络配置 name是搜到的一个网络的名字。
假如不要密码这样就行了。
iwpriv ra0 set WPAPSK="A3DDD" 输入登陆密码
iwconfig ra0 key open 打开密码输入密码后一定要加这条命令哦,不然连接不上ifconfig ra0 192.168.1.109 netmask 255.255.255.0为无线网卡指定IP地址
设置网关 route add default gw 192.168.1.1
之后我在ubantu上ping 192.168.1.109 成功。
这些命令就是所谓的工具。
在超级终端ping 外网成功。
各种密码的命令参数,这在iwpriv_usage.txt里面可以查到。
无密码:
iwpriv ra0 set SSID="Vodafone D100"
注意:在切换到无密码的用户时,若之前是有密码用户,则要iwconfig ra0 key off。
WPA型密码:
网上说若路由器的加密方式是wpa的话要移植wpa_supplicant工具,我没有这样做,还是可以。
iwpriv ra0 set NetworkType=Infra 网络类型有Infra,Adhoc两种,前者是基于AP的,后者是p2p
iwpriv ra0 set
AuthMode=WPAPSK OPEN,SHARED,WEPAUTO,WPAPSK,WPA2PSK,WPANONE iwpriv ra0 set EncrypType=TKIP NONE,WEP,TKIP,AES
iwpriv ra0 set SSID="Vodafone D100"
iwpriv ra0 set WPAPSK="1234567890"
WEP型密码:
iwpriv ra0 set NetworkType=Infra
iwpriv ra0 set AuthMode=OPEN
iwpriv ra0 set EncrypType=WEP
iwpriv ra0 set DefaultKeyID=1
iwpriv ra0 set Key1="1234567890"
iwpriv ra0 set SSID="Vodafone D100"
切换用户登陆:
直接重新输入登陆名字和输入密码的命令,值得注意的是在切换有密码和没有密码的用户时要相应的
iwconfig ra0 key open和iwconfig ra0 key off。
网上说若路由器的加密方式是wpa的话要移植wpa_supplicant工具,我没有作过,看别人的/jimmy_1986/archive/2010/09/09/5872536.aspx
错误信息
PING 192.168.1.1 (192.168.1.1): 56 data bytes
ping: sendto: Network is unreachable
此原因是没有设置ip ifconfig ra0 192.168.1.109 up 解决。
ping 219.134.65.113 外网
ping: sendto: Network is unreachable
此原因是没有设置网关 route add default gw 192.168.1.1 解决。
