COVIDIENTM手持气囊压力表操作指南
气囊式容积测定仪使用说明
试试 坑样 编编 号号
数显尺读数(mm) 初始 终止 读数差
容积常数 Ag=
cm3/mm
试坑体积 (cm3)
试样 质量 (g)
试样湿密度 (g/cm3)
含水率 (%)
试样干密度 (g/cm3)
平均干 密度 (g/cm3)
(3)=(2) (1) (2)
-(1)
复核
年月日
试验
年月日
四、 容积仪易损件更换及保养
(3)打开气塞,向下推动活塞至气缸最低点,关闭气塞;
(4)拆下气
计算公式: Vp=Ag • (L2-L1)
式中: Vp—试坑体积(cm3) Ag—容积仪常数(cm3/mm) L1—数显深度尺初始读数(mm) L2—数显深度尺终止读数(mm)
表二 气囊法密度试验记录表
安装步骤: 一、装配小气囊
1. 拆下操作手柄顶上的四个内六方螺丝。 2. 提起操作手柄,直到拉出气压标下部的细玻璃管,在细玻璃管的顶端套上小气囊。 3. 把细玻璃管放回原处,重新装上四个螺丝。注意:此时要拧紧数显卡尺顶端的螺丝。 二、装配大气囊 1. 把护坑环上的四个旋钮拧松,使其下方的垫片可自由旋转即可。 2. 把气缸从护坑环上取出来。 3. 把气缸低边八个内六方的螺钉取下。 4. 把气缸底部金属固定环从气缸上取下来。 5. 将大气囊套在带孔德隔离板上。将大气囊和隔离板放进气缸的金属固定环的圆形槽
0~90 ° 夹 (3)按前述要求推动活塞下移,直至气压标内水位上升到与前相同的位置时,停止施压,
角做 2 次)
读取游标读数,记录 L2(取两次平均值);
(4)向上抽动活塞至最高点,整体移出仪器,该点测试结束移至下一点循环进行。
收工
(1)反复打开(关闭)气塞,抽紧气囊贴于隔栅底部;
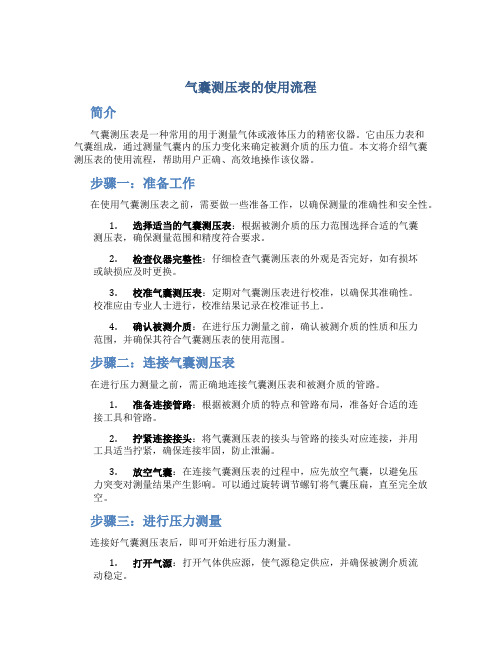
气囊压力表的使用流程
气囊压力表的使用流程1. 简介气囊压力表是一种用于测量气囊的压力的工具。
它通常由一个压力计和一个连接气囊的软管组成。
气囊压力表广泛应用于物流、运输和建筑等领域,用于确保气囊的压力达到安全标准。
2. 准备工作在使用气囊压力表之前,需要进行以下准备工作:1.确认压力表的检定日期,确保其处于有效期内。
2.检查压力表的外观是否完好,无损坏或松动的部位。
3.检查软管是否完好,无明显划痕或磨损。
4.检查软管连接部位是否紧固,无松动现象。
5.清洁压力表和软管,确保其表面干净无尘。
3. 使用步骤使用气囊压力表的步骤如下:1.确保气囊内没有压力,避免意外伤害。
2.将气囊压力表连接到气囊上。
3.打开气囊压力表上的阀门,使压力表与气囊相通。
4.等待数秒钟,直到压力表指针稳定在一个数值上。
5.读取压力值。
注意,不要用手指触摸指针,以免影响准确度。
6.记录测得的压力值,并根据需要采取相应的措施。
4. 注意事项在使用气囊压力表时,需注意以下事项:•准确性:确保所使用的气囊压力表具有合适的精度和准确性。
可以定期进行检验和校准,以确保其准确度。
•安全性:在使用气囊压力表时,应遵循相关安全规范,如佩戴防护手套和眼镜等。
•温度:在测量之前,应确保气囊和压力表处于相同的温度下,以免温度差异影响测量结果。
•储存:在不使用气囊压力表时,应妥善储存,避免受潮或受热。
•维护:定期清洁和维护压力表和软管,以确保其正常工作状态。
5. 常见问题解答5.1 气囊压力表的读数不稳定怎么办?可能是气囊内部压力波动引起的。
可以尝试重新调整气囊的压力,并再次测量。
5.2 如何判断气囊的压力是否达到安全标准?可以参考气囊厂商提供的技术规格和标准,将测得的压力值与标准进行比较。
5.3 如何处理测得的压力值超出正常范围?如果测得的压力值超出了正常范围,应立即采取措施,如减少或增加气囊的压力,以确保其处于安全范围内。
6. 总结使用气囊压力表时,准备工作的细致和正确的操作步骤是确保测量结果准确的关键。
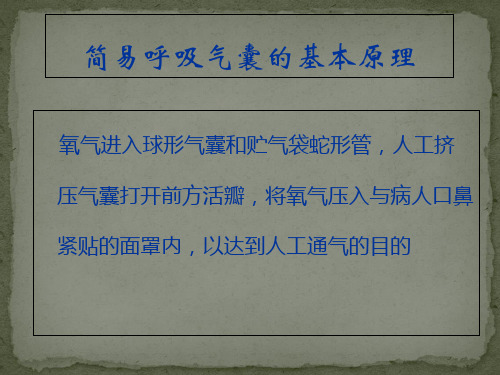
简易呼吸气囊使用技术及操作规程(标准版)

简易呼吸气囊使用技术及操作规程【操作评估】1. 迅速、准确判断患者有无呼吸,判断患者呼吸通过看、听、感觉(看胸部有无起伏;听有无呼吸音;感觉有无气流逸出。
)三步骤来完成,判断时间不能少于5秒,不能超过10秒,无反应表示呼吸停止,应立即给予人工呼吸。
2. 用物准备呼吸气囊(图4-1)、合适的面罩、供氧设备、抢救用物及抢救药物。
3. 操作者自身准备着装整齐,洗手、戴口罩;能准确判断患者的病情;熟悉简易呼吸气囊的使用方法;操作手法熟练。
【实施步骤】1. 摆好体位患者去枕仰卧、头后仰,清除口腔异物,如有活动性义齿应取下。
2. 开放呼吸道采用仰头抬颏法。
3. 将简易呼吸气囊连接氧气,氧流量8~10L/min。
4. 一手以“EC”(图4-2)的手法固定面罩;另一手挤压简易气囊,将简易呼吸器连接氧气,氧流量8~10L/min,每次送400~600mL,频率10~20次/min。
5. 观察、记录病情并做好解释工作。
6. 整理床单位、用物,患者取舒适体位。
【注意事项】1. 面罩的选择决定最佳使用效果。
2. 应用氧气储气袋调节氧流量致使其鼓起。
3. 随时观察应用效果。
4. 并发症的观察与处理。
5. 适当的的呼吸频率。
6. 鸭嘴阀是否正常工作。
7. 接氧气时,注意氧气管是否连接稳固。
8. 如果操作中单身阀受到呕吐物、血液等污染时,用力挤压球体数次,将积物清除,将单向阀卸下用水清洗。
9. 简易呼吸气囊的清洁与消毒①将简易呼吸器各配件依顺序拆开。
②置入2%戊二醛碱性溶液中浸泡10小时。
③取出后用清水冲洗所有配件。
④储氧气袋禁用消毒剂浸泡,因易损坏。
⑤特殊感染患者,可用环氧乙烷熏蒸。
⑥消毒后的部件应完全干燥后检查是否有损坏,将部件依顺序组装。
⑦做好测试工作,完好备用。
【健康指导】1. 安抚患者,促进情绪稳定以配合治疗。
2. 交代患者应用简易气囊辅助呼吸后必须继续氧疗。
应用氧气筒吸氧时,应注意防火、防油、防热、防震。
3. 鼓励家属给予患者心理支持,缓解紧张情绪。
护理技术操作规范技术之气管导管气囊压力监测
护理技术操作规范技术之
气管导管气囊压力监测
(一)评估和观察要点
1.评估患者的病情、意识及合作程度。
2.评估气管导管或气切套管的型号、插管深度及气囊充盈情况。
3.观察患者的生命体征、血氧饱和度及呼吸机参数。
(二)操作要点
1.将气囊压力监测表连接于气管导管或气切套管气囊充气口处,调整气囊压力在适当范围内。
2.应用最小闭合容量技术,将听诊器放于气管处,向气囊内少量缓慢充气,直到吸气时听不到漏气声为止。
(三)指导要点
1.向清醒患者说明气囊压力测定的目的及意义。
2.在监测过程中嘱患者平静呼吸,勿咳嗽。
(四)注意事项
1.定时监测气囊压力,禁忌在患者咳嗽时测量。
2.避免过多、过快地抽出和充入气囊气体。
3.患者出现烦躁不安、心率加快、血氧饱和度下降、呼吸机气道低压报警或低潮气量报警时,应重新检查气囊压力。
4.呼吸机持续低压报警,在气管插管处可听到漏气声或者用注射器从气囊内无限抽出气体时,可能为气囊破裂,立即通知值班医师进行处理。
5.放气前,先吸净气道内及气囊上滞留物。
气管导管气囊压力监测考核评分标准(100分)。
COVIDIENTM手持气囊压力表操作指南
COVIDIEN TM手持气囊压力表操作指南
1、适应症:
充气球囊可为带有高容量低压套囊的气管导管进行充气、放气和压力控制。
2、使用之前,必须按照如下步骤检查充气球囊:
a)用手指堵住Luer接口;
b)使用充气球囊充气至120cmH
2
O;该数值必须稳定2-3秒钟。
如果压力下降,则需要由制造商进行修理。
3、将带有连接管的充气球囊与导管的充气管连接。
向套囊充气,使其压力达到
60-90cmH
2
O。
这将确保套囊紧贴气管壁。
立即按下红色排气阀释放压力,直到指针指向绿色区域为止。
4、与气管导管之间持续连接能够对套囊压力进行监控。
如果压力增大,则可利用红色排气阀将压力调节到所需压力值。
5、为防止有误吸或者肺炎的风险,同时也要避免造成气管黏膜缺血,因此套囊
内压力需设定在22 cmH
2O和32 cmH
2
O之间,测量精确性为整个测量范围的±4
cmH
2
O。
气囊测压表的使用流程
气囊测压表的使用流程简介气囊测压表是一种常用的用于测量气体或液体压力的精密仪器。
它由压力表和气囊组成,通过测量气囊内的压力变化来确定被测介质的压力值。
本文将介绍气囊测压表的使用流程,帮助用户正确、高效地操作该仪器。
步骤一:准备工作在使用气囊测压表之前,需要做一些准备工作,以确保测量的准确性和安全性。
1.选择适当的气囊测压表:根据被测介质的压力范围选择合适的气囊测压表,确保测量范围和精度符合要求。
2.检查仪器完整性:仔细检查气囊测压表的外观是否完好,如有损坏或缺损应及时更换。
3.校准气囊测压表:定期对气囊测压表进行校准,以确保其准确性。
校准应由专业人士进行,校准结果记录在校准证书上。
4.确认被测介质:在进行压力测量之前,确认被测介质的性质和压力范围,并确保其符合气囊测压表的使用范围。
步骤二:连接气囊测压表在进行压力测量之前,需正确地连接气囊测压表和被测介质的管路。
1.准备连接管路:根据被测介质的特点和管路布局,准备好合适的连接工具和管路。
2.拧紧连接接头:将气囊测压表的接头与管路的接头对应连接,并用工具适当拧紧,确保连接牢固,防止泄漏。
3.放空气囊:在连接气囊测压表的过程中,应先放空气囊,以避免压力突变对测量结果产生影响。
可以通过旋转调节螺钉将气囊压扁,直至完全放空。
步骤三:进行压力测量连接好气囊测压表后,即可开始进行压力测量。
1.打开气源:打开气体供应源,使气源稳定供应,并确保被测介质流动稳定。
2.稳定测量:等待几分钟,让压力稳定在一个固定值,以便进行准确的测量。
3.记录测量数据:使用气囊测压表上的刻度,读取被测介质的压力值,并记录下来。
注意读取的刻度时应与视线垂直,以减少读数误差。
4.将压力恢复为零:在测量完毕后,需要将压力恢复为零。
可通过旋转调节螺钉,逐渐加压直至气囊复原。
步骤四:存储和处理数据测量完毕后,需妥善存储并处理测量数据,以便后续的分析和应用。
1.记录测量数据:将测得的压力值记录在测量记录表或计算机软件中,以备后续分析和比对。
气囊压力表操作流程及规范
气囊压力表操作流程及规范下载温馨提示:该文档是我店铺精心编制而成,希望大家下载以后,能够帮助大家解决实际的问题。
文档下载后可定制随意修改,请根据实际需要进行相应的调整和使用,谢谢!并且,本店铺为大家提供各种各样类型的实用资料,如教育随笔、日记赏析、句子摘抄、古诗大全、经典美文、话题作文、工作总结、词语解析、文案摘录、其他资料等等,如想了解不同资料格式和写法,敬请关注!Download tips: This document is carefully compiled by theeditor.I hope that after you download them,they can help yousolve practical problems. The document can be customized andmodified after downloading,please adjust and use it according toactual needs, thank you!In addition, our shop provides you with various types ofpractical materials,such as educational essays, diaryappreciation,sentence excerpts,ancient poems,classic articles,topic composition,work summary,word parsing,copy excerpts,other materials and so on,want to know different data formats andwriting methods,please pay attention!气囊压力表操作流程及规范详解气囊压力表,作为一种重要的医疗设备,用于监测和控制气囊压力,以确保患者呼吸系统的安全。
气囊测压表.ppt
台湾 架设第一条电报线,成为中国自
出行 (1)新式交通促进了经济发展,改变了人们的通讯手段和 , 方式 转变了人们的思想观念。
(2)交通近代化使中国同世界的联系大大增强,使异地传输更为便 捷。 (3)促进了中国的经济与社会发展,也使人们的生活
多姿多彩 。
[合作探究· 提认知]
电视剧《闯关东》讲述了济南章丘朱家峪人朱开山一家, 从清末到九一八事变爆发闯关东的前尘往事。下图是朱开山 一家从山东辗转逃亡到东北途中可能用到的四种交通工具。
历史ⅱ岳麓版第13课交通与通讯 的变化资料
精品课件欢迎使用
[自读教材· 填要点] 一、铁路,更多的铁路 1.地位
铁路是
交通运输 建设的重点,便于国计民生,成为国民经济
发展的动脉。 2.出现 1881年,中国自建的第一条铁路——唐山 路建成通车。 1888年,宫廷专用铁路落成。 至胥各庄铁 开平
一、近代交通业发展的原因、特点及影响 1.原因 (1)先进的中国人为救国救民,积极兴办近代交通业,促
进中国社会发展。
(2)列强侵华的需要。为扩大在华利益,加强控制、镇压
中国人民的反抗,控制和操纵中国交通建设。
(3)工业革命的成果传入中国,为近代交通业的发展提供 了物质条件。
2.特点 (1)近代中国交通业逐渐开始近代化的进程,铁路、水运和
管黏膜出血的风险)。
注意事项
(1)气囊压力以维持在25~35cmH2O为宜,能有效避免误吸的发生和气管黏膜
的损伤。 (2)以最小的气体容积去避免过度的气囊充气。 (3)定时监测气囊压力,每4小时应检查气囊压力1次,禁忌在患者咳嗽时测量。
(4)8岁以下患儿一般均用没有气囊的ETT,无需测量。
(5)避免过多过快的抽出和充入气囊气体。 (6)患者出现烦躁不安、心率加快、血氧饱和度下降、呼吸机气道低压报警 或低潮气量报警时,应重新检查气囊压力。 (7)呼吸机持续低压报警,在气管插管处听到漏气声或用注射器从气囊内无 限抽出气体时,可能为气囊破裂,立即通知医生处理。 (8)放气前,应先吸净气道内和气囊上的滞留物。
气囊测压仪的使用流程

气囊测压仪的使用流程1. 准备工作在使用气囊测压仪之前,需要进行一些准备工作,以确保正常操作和准确测量结果。
•检查气囊测压仪的外观,确保没有明显损坏或松动部件。
•插入合适的电池或连接电源,确保设备能够正常工作。
•检查测压仪的测量范围和精度,根据需要选择合适的测量范围。
•确保测压仪的触头清洁,避免影响测量结果。
2. 连接和设置连接气囊测压仪的过程分为两个步骤:连接气囊和连接测压仪。
2.1 连接气囊按照以下步骤连接气囊以进行测压:1.打开气囊的充气阀,确保气囊内没有气体。
2.将气囊连接到需要测压的系统或设备上。
3.关闭气囊的充气阀,确保气囊内不再注入或排出气体。
2.2 连接测压仪将气囊测压仪连接到气囊进行测量:1.将测压仪的触头与气囊连接口对齐。
2.轻轻旋转测压仪,直到触头与气囊连接牢固。
3.检查测压仪的显示屏,确保设备已经成功连接。
3. 进行测量使用气囊测压仪进行测量时,需要注意以下事项:•根据需要选择测压的时间和地点,确保测量环境安全且稳定。
•保持测压仪和触头与气囊保持密切接触,避免松动或抖动。
•注意测量过程中的相关指示和警报,及时处理异常情况。
•根据实际需要选择测量模式和单位,确保测量结果符合要求。
•完成测量后,将气囊和测压仪分离并关闭设备,避免能量浪费和触电等危险。
4. 数据处理和分析在完成测量后,需要对测量数据进行处理和分析,以获取有价值的信息。
以下是常见的数据处理和分析方法:•将测量数据导入电脑或移动设备,使用专业的数据处理软件进行分析。
•绘制趋势图或曲线图,分析测量数据的变化趋势。
•计算平均值、标准差和相关性等统计指标,评估测量数据的准确性和可靠性。
•将测量数据与标准值或设定值进行比较,判断系统或设备的性能是否符合要求。
5. 故障排除在使用气囊测压仪过程中,可能会遇到一些故障或异常情况。
以下是常见的故障排除方法:•检查电池或电源是否正常连接并具有足够的能量。
•检查测压仪和气囊的连接是否松动或损坏。
气囊压力监测操作流程考试

气囊压力监测操作流程考试To begin with, the process of conducting a test on the airbag pressure monitoring system requires careful attention to detail and strict adherence to safety protocols. 首先,进行气囊压力监测系统的测试过程需要仔细的注意细节和严格遵守安全规程。
First and foremost, the technician responsible for conducting the test must thoroughly inspect the airbag system to ensure that it is functioning properly and free from any visible damage or defects. 首先,负责进行测试的技术人员必须彻底检查气囊系统,以确保其正常运行并没有任何可见的损坏或缺陷。
Additionally, the technician should carefully review the manufacturer's guidelines and specifications for the airbag system to ensure that the test is conducted in accordance with the recommended procedures. 此外,技术人员应仔细查阅制造商的指南和规范,以确保测试按照建议的程序进行。
Furthermore, the technician must use specialized equipment to measure the pressure within the airbag system accurately. 此外,技术人员必须使用专门的设备准确测量气囊系统内的压力。
气囊压力监测操作规范
气囊压力监测操作规范气囊压力监测操作规范一、操作目的监测气囊压力,使呼吸机使用更加安全,减少气道粘膜压力性损伤,避免误吸,减少食管气管瘘,减少呼吸机相关性肺炎等并发症的发生。
二、评估要点1、患者意识水平,理解合作程度和对气管插管的认知程度。
2、患者对呼吸的支持及呼吸肺的顺应情况。
3、观察患者喉咙部发出声音有无异常,如鼾声、水泡声。
4、机械通气患者气道峰值、潮气量等情况。
三、物品准备用物准备:压力表一个、5ml 空针一个、治疗巾一张、乙醇棉签两根、检查手表一个、吸痰管数根、弯盘、听诊器等。
四、操作要点1、核对医嘱,备齐用物,携用物至患者床边,核对患者,向患者解释操作的目的和注意事项。
2、病情允许取低半卧位。
3、听诊器听患者双肺呼吸音是否对称,是否需要吸痰。
4、铺治疗巾于颈下胸前,弯盘置于患者右侧,调整气管插管或气管切开管位于中立位。
5、先将气囊外露于患者体外延长管开口端乙醇棉签消毒,压力表充气口乙醇棉签消毒,待干。
6、用5ml 空针将气囊原有气体抽尽,立即将气囊开口端与气囊表充气口连接。
7、关闭气囊表充气阀,开始捏充气囊,充气。
8、观察气囊表盘刻度,一般患者充气压力为20-25mmHg(婴幼儿及老年人视情况而定或遵医嘱)。
9、充气压力达到所需刻度后取下气囊表。
10、听诊器听诊双肺呼吸音是否对称,是否需要吸痰。
11、消毒液润湿纱布消毒听诊器。
12、处理手术用物,整理床单位。
13、处理用物,洗手记录。
五、注意事项1、气囊压力要在患者安静时测定。
2、密切观察机械通气患者的气道峰值,潮气量情况,发现漏气,随时监测充气。
3、气囊压力要因人而异,准确遵医嘱选择合适患者情况的压力,不可千篇一律。
477数字手持压力计说明书

SPECIFICATIONSService: Air and compatible gases.Wetted Materials: Consult factory.Accuracy: ±0.5% F.S., 60 to 78°F (15.6 to 25.6°C);±1.5% F.S. from 32 to 60°F and 78 to 104°F (0 to15.6°C and 25.6 to 40°C).Pressure Hysteresis: ±0.1% of full scale.Pressure Limits: See chart.Temperature Limits: 0 to 140°F (-17.8 to 60°C). Compensated Temperature Limits:32 to 104°F (-0 to 40°C).Storage Temperature Limits: -4 to 176°F (-20 to 80°C). Display:0.42˝ (10.6 mm) 4-1/2˝ digit liquid crystal. Resolution:See chart.Power Requirements: 9 volt alkaline battery. Battery included but not connected.Weight: 10.2 oz (289 g).Connections: Two barbed connections for use with 1/8˝(3.18 mm) or 3/16˝ (4.76 mm) I.D. tubing. Two compres-sion fittings for use with 1/8˝ (3.18 mm) I.D. x 1/4˝ (6.35 mm) O.D. tubing for 477-6-FM & 477-7-FM only. Agency Approvals: FM, CE.INSTRUCTIONSBattery InstallationThe unit is shipped with a separate 9 volt alkaline battery which must be installed before operation. Remove the two screws holding the bottom endcap in the place and remove it. Connect the battery to the enclosed battery clip observ-ing correct polarity. Be careful not to trap wires between the battery, case or foam pads which retain the battery. This could make it difficult to install the battery or remove it later for replacement. Be sure the rubber gasket is properly seat-ed in the gasket channel and replace endcap. Note that the endcap will only fit one way because the holes are slight-ly off-center. Place the “Z” shaped wrist strap clip in one of the screw recesses and replace the screws. Do not over-tighten. Attach wrist strap to clip.When battery replacement becomes necessary, use only a 9 volt alkaline type such as a Duracell® MN1604, Eveready®522 or equivalent. Zinc-carbon types, often labeled Heavy-duty are not recommended because of the increased poten-tial for leakage. Alkaline batteries are also a better value because they last up to three times longer in this device. On-Off OperationThe on-off control is a toggle function. Press the ON/OFF key once to turn unit on; again to turn it off. If the manome-ter is left on with no activity for approximately 20 minutes, unit will turn itself off to conserve the battery.Display BacklightThe Model 477 includes a display backlight to allow use in the dark or in poor lighting conditions. Units must be switched off before this feature can be activated. Next, press and hold the ON/OFF key down. After about 1 second the backlight will come on and remain lighted for approximately 2 minutes after which it will turn itself off to conserve battery life.Zeroing Pressure ReadingPotential inaccuracy due to temperature effects can be minimized by re-zeroing immediately before use. To zero the display, vent both ports to atmosphere so no pressure is applied to either port. Press the ZERO/STORE key and - - -- will be momentarily displayed as zeroing occurs. Zeroing is not possible when the memory mode is in use. It must be done before selecting that function.If the unit is accidently zeroed with pressure applied to one of the ports, internal circuitry might detect an error and dis-play ALARM 1 or ALARM 2 at the top of the readout area. Additionally, if the ports are then vented, the audible over-pressure alarm may sound continuously. This will not normally cause harm it the maximum pressure has not been exceeded. To correct the fault, vent the pressure ports to atmosphere and press the ZERO/STORE key to zero the unit. The fault will then be corrected.Pressure ConnectionsDual size barbed connections are provided to fit both 1/8″ and 3/16″ I.D. rubber or vinyl tubing. For a single positive pres-sure, connect tubing to port marked + and vent opposite port to atmosphere. For a single negative pressure (vacuum), connect tubing to port marked - and vent opposite port to atmosphere. To measure differential pressure, connect high-er pressure to port marked + and lower pressure to port marked -. Manometer will indicate the difference between the two.Selecting Pressure UnitsUp to nine pressure units are available. The display will indicate the current selection. To change to different units, use the UNITS/LOC key. Each touch will cause an advance to the next choice. The selected units will remain in memory even when power is shut off. This way, your preference will always be displayed after the initial selection.Display HoldThere may be situations where you want to temporarily retain a reading. The Model 477 includes a Display Hold fea-ture which freezes the current reading and holds it in the display until cleared. To activate this operation, momentarily press the HOLD/MEMORY key when the pressure you want to save is displayed. A HOLD indicator will appear in the display to indicate that the reading shown is frozen. To return to normal operation, press the HOLD/MEMORY key again.The HOLD indicator will disappear and the current pressure will again be shown.Memory FunctionA memory function is included in the Model 477 that allows you to store up to 40 pressure readings for later review or recording. This feature is especially valuable for making a traverse of duct velocity pressures with a Pitot tube or for multipoint pressure measurements. The readings are stored in non-volatile memory so they will be retained even if the unit is shut off or the battery is removed.2Entering Memory ModeTo enter the memory mode, press and hold the HOLD/MEMORY key until the MEM indicator appears in the display. The key can then be released. The active memory location will be shown in the small lower left numeric display. Initially it will read 01.Storing Pressure ReadingsTo store a reading, press the ZERO/STORE key. The reading will be stored under the indicated memory location and a beep will sound indicating that the reading has been saved. As each reading is saved the memory location display will advance to the next number. Note that in the memory mode, the display zero function is not available. To zero the display, you must first exit the memory mode and then press the ZERO/STORE key.Viewing Stored Readings - Selecting a LocationTo view the contents of memory the unit must first be in the memory mode. The current pressure is not displayed. To distinguish the memory display from a current reading, the HOLD indicator will be shown. Each time the UNITS/LOC key is pressed, the memory location will advance to the next stored reading. If the key is held down, the unit will auto-matically scroll through the stored readings until the key is released. This procedure can also be used to select a spe-cific location to store a new reading. To resume pressure measurement, press the HOLD/MEMORY key. The HOLD display will disappear and the display will again show the current pressure. The last viewed memory location will remain displayed. The next time a reading is stored it will be saved in the indicated position.Clearing MemoryTo clear the contents of memory the unit must first be in the memory mode. All previously stored readings can then be cleared by holding the ZERO/STORE key and simultaneously pressing the ON/OFF key. During this operation - - - -will be displayed. Once memory is cleared, the current pressure will be displayed and the memory location will be reset to 01.Exiting Memory ModeTo exit the memory mode press the HOLD/MEMORY key. The memory indicator will disappear. All readings stored in memory will be saved for later review.Overpressure AlarmA visual indicator and audible alarm are provided to alert the operator that pressure has exceeded the operating range of the unit. Exceeding the range will not damage it or affect calibration as long as the maximum rated pressure is not exceeded. Do not exceed the maximum rated pressure of the manometer. Doing so will cause permanent damage to the sensor, may rupture the housing and/or cause injury.The maximum pressure is shown on the rear label and on page 1 of these instructions.Low Battery IndicatorA weak battery can cause improper operation or inaccurate measurements. A low battery indicator is provided on the display to show when the battery needs replacement. Although the unit might appear to function and indicate proper-ly, the accuracy of readings cannot be guaranteed when the LOW BAT indicator is illuminated. Replace the battery with a fresh one. Do not leave an exhausted battery in the unit due to potential leakage.MAINTENANCEThe Series 477 Handheld Digital Manometer is not field serviceable and should be returned if repair is needed (field repair should not be attempted and may void warranty). Be sure to include a brief description of the problem plus any relevant application notes. Contact customer service to receive a return goods authorization number before shipping. Duracell®is a registered trademark of The Gillette Company.Eveready®is a registered trademark of Eveready Battery Company, Inc.©Copyright 2012 Dwyer Instruments, Inc.Printed in U.S.A. 7/12 FR# 02-440861-00 Rev. 5。
VARILITE PSV 气囊氧气浮沉氧气调节器操作指南说明书
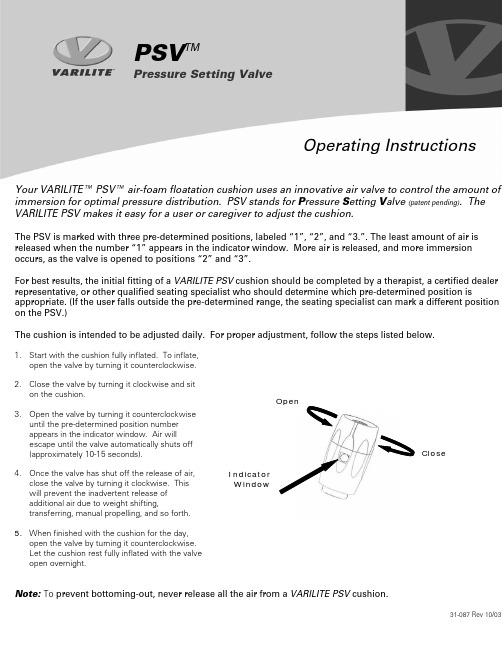
PSV TMPressure Setting ValveOperating InstructionsYour VARILITE™ PSV™ air-foam floatation cushion uses an innovative air valve to control the amount of immersion for optimal pressure distribution. PSV stands for P ressure S etting V alve (patent pending). The VARILITE PSV makes it easy for a user or caregiver to adjust the cushion.The PSV is marked with three pre-determined positions, labeled “1”, “2”, and “3.”. The least amount of air is released when the number “1” appears in the indicator window. More air is released, and more immersion occurs, as the valve is opened to positions “2” and “3”.For best results, the initial fitting of a VARILITE PSV cushion should be completed by a therapist, a certified dealer representative, or other qualified seating specialist who should determine which pre-determined position is appropriate. (If the user falls outside the pre-determined range, the seating specialist can mark a different position on the PSV.)The cushion is intended to be adjusted daily. For proper adjustment, follow the steps listed below.1.Start with the cushion fully inflated. To inflate,open the valve by turning it counterclockwise.2.Close the valve by turning it clockwise and siton the cushion.until the pre-determined position numberappears in the indicator window. Air willescape until the valve automatically shuts off(approximately 10-15 seconds).4.Once the valve has shut off the release of air,close the valve by turning it clockwise. Thiswill prevent the inadvertent release ofadditional air due to weight shifting,transferring, manual propelling, and so forth.5.When finished with the cushion for the day,open the valve by turning it counterclockwise.Let the cushion rest fully inflated with the valveopen overnight.Note: To prevent bottoming-out, never release all the air from a VARILITE PSV cushion.31-087 Rev 10/03PSV TMPressure Setting ValveThe PSV is located on the right side of VARILITE cushions. For operation from the left side, remove the cushion from the cover and rotate the PSV 180°. To prevent damage to the valve body, use a 1/2 in. open-endwrench, open the valve all the way, and place the wrench on the flatshoulders at the base of the valve body.A low-slip material is used on the underside of all VARILITE PSV cushion covers to prevent the cushion from sliding in the wheelchair. For extra security, PSV cushion covers have loop sewn to the low-sip material that can be attached to a drop base or solid seat with adhesive hook (provided).To ensure long life and optimal performance of your VARILITE PSV cushion : •Never leave your VARILITE PSV cushion exposed to extreme weather conditions such as heat, cold or UV rays. • Check your cushion’s inflation level when you change altitudes. If punctured or if the valve is left open, the cushion will deflate under pressure. In the unlikely event of a puncture, immediately contact an authorized VARILITE dealer or VARILITE Customer Service.•Never put your VARILITE PSV cushion in a washing machine. Your cushion may be wiped with warm water and mild detergent, and the covers should be washed, with the zipper closed, according to the instructions on the care and use label. Be sure all components are completely dry before reassembling. Do not autoclave. • Your VARILITE PSV cushion always should be used with its cover. The cover protects the cushion from punctures, burns and being soiled, and it enhances pressure distribution and promotes air circulation for healthy tissue.Turn here with wrench。
气囊压力管理
间断测压法存在的问题
3
存在漏气
2
由于不能做到实时监测,也容易引起 相关并发症,对患者造成潜在危险
1 压力表为机械式,需每6-8小时监测一 次,增加了护理临床工作量
四
气囊漏气监测与预防
气囊漏气的原因
气囊压力管理
人工气道气囊
气囊充气线 指示球 单向阀
外径15mm的接头
气囊
带刻度的导管
X线显示线
内容
气囊压力监测的必要性
理想的气囊压力 气囊充气测压方法 气囊漏气监测与预防
一
气囊压力监测的必要性
气囊的种类
• 根据气囊内压力的大小分为三类
低容高压气囊 高容低压气囊 低容低压气囊
气囊的种类
高容低压气囊 低容低压气囊
误剪气囊连接管补救方法
• 迅速用血管钳夹闭断 端,避免气囊漏气; • 准备用物:一次性采 血针头一个、剪刀一 把、3M胶布一小截
误剪气囊连接管补救方法
• 取下采血针头后面一小段橡皮管,剪去前 后两端; • 分别将误检的气囊连接管的两个断端插入 橡皮管两端 • 用3M胶布固定
• 取 下 橡 皮 管 插 入 橡 皮 两 端
• 在900个套囊压力测量结果中,只有113个 (12.6%)在最佳范围20-30cmH2O内,这 些结果均来自充气量6cc,7cc组; • 不管是哪种型号的导管,充气量5cc均导致 充气不足,充气量8、9、10cc均导致过度 充气; 结论:将推荐的充气量范围从5-10cc缩窄至 6-7cc可能是合理的,无关导管的型号。
谢谢
气囊漏气后处理
1.立即使用测压表给气囊充气至合适范围。 2.如果出现要频繁给气囊加气才能维持气道封闭的情况,可 能是: (1)气囊或气囊管有破损:常规做好紧急更换人工气道 的必要准备,备好同样型号或偏小的气管插管及气切套管、 一旦气囊漏气,及时更换导管。 (2)气囊管末端阀门失灵:在气囊管末端连接一个三通 管代替阀门。 (3)导管位置不正确,气囊位于声门以上:调整插管及 管路的位置。
简易呼吸皮囊的检测与操作
病人取仰卧位,去枕转向一侧,取出假牙或异物,清 除呼吸道分泌物
开放气道,保护呼吸道通畅 呼叫、通知医生(护士不离开病人) 连接面罩、皮囊及氧气,氧流量调到>10L/min,储
氧袋充盈 拉开床头离墙40-60cm,操作者站患者头顶位置,
开放气道。
正确使用简易呼吸皮囊
将面罩罩住病人口鼻, CE”手法按紧不漏气 “CE”手法:中、无名指将患者下颌角往上提,拇
心肺复苏 各种中毒所致的呼吸抑制 神经肌肉疾病引起的呼吸肌麻痹 各种电解质紊乱所致的呼吸抑制 呼吸系统所致的呼吸抑制
呼吸皮囊的禁忌征
中等以上的活动性咯血 心肌梗死 大量胸腔积液
评估
评估病人的病情及生命体征 评估病人的呼吸道通畅状态 评估呼吸气囊是否完好
正确使用简呼吸皮囊
关闭皮囊颈部的开口端,试着挤压皮囊,如果用适当的 力量不能压扁皮囊或挤压的力量迫使空气从皮囊颈部的 开口端的手缝间逸出,说明吸入阀能有效地防止气体倒 流。
氧气接口
挤压皮囊后,用一手关闭吸入阀上的储气阀 接口,皮囊会慢慢膨胀,说明氧气接口通 畅
储气阀检测
先将储气袋充满气,关闭储气阀的出口并挤压储气 袋,可以看见一侧瓣膜翘起,说明储气阀能有效地 把多余的气体排入大气。
气囊压力带的使用流程

气囊压力带的使用流程1. 简介气囊压力带是一种专为运动员和健身爱好者设计的训练辅助工具。
它通过提供稳定的支撑和压力,可以帮助改进姿势、增加肌肉力量和形成骨骼稳定性。
本文将介绍使用气囊压力带的流程和注意事项。
2. 使用准备在开始使用气囊压力带之前,需要进行以下准备工作:1.清洁与消毒:确保压力带干净卫生,可以使用温和的清洁剂和湿布进行清洁,并确保充分晾干。
需要注意的是,避免使用含有酸性或碱性成分的清洁剂。
2.调整大小:根据个人需求,调整压力带的大小。
通过松紧带、调节扣等调整装置,确保压力带紧贴身体且舒适。
3.学习正确使用姿势:在进行训练前,学习正确的使用姿势非常重要。
可以参考压力带的官方说明书、视频教程或向专业教练寻求帮助。
3. 使用流程使用气囊压力带的流程如下:3.1 穿戴压力带1.躺在地板上或舒适的表面上,将压力带放在身体需要支撑的部位,例如腰部、胸部或大腿。
2.根据个人需要,调整压力带的大小,确保它紧贴身体。
3.将压力带的松紧带或调节扣进行调整,以加强或减弱对身体的压力。
3.2 姿势调整1.维持正确的姿势是有效使用气囊压力带的关键。
在使用之前,确保学习正确的姿势。
2.调整自己的身体姿势,使得压力带可以正常地支撑身体,并且没有不适感。
3.3 训练和运动1.针对特定的身体部位或运动目标,进行适当的训练。
可以进行力量训练、平衡训练、柔韧性训练等。
2.根据个人需求和身体状况,控制训练的强度、时间和频率。
3.在训练过程中,逐渐增加训练的难度和强度,但一定要注意身体的反应,并避免过度训练。
3.4 储存和维护1.训练结束后,将压力带进行清洁和消毒,并确保完全干燥。
2.折叠或卷起压力带,并放置在干燥、通风的地方储存。
3.定期检查压力带是否有磨损或损坏,如有需要及时修理或更换。
4. 注意事项在使用气囊压力带时,需要注意以下事项:1.使用前进行适当的热身运动,以减少受伤的风险。
2.遵循正确的姿势和技巧,以充分发挥气囊压力带的作用。
橡胶气囊详细说明
使用方法注意事项:
1、在使用橡胶气囊充气芯模前,首先检查钢筋笼钢丝接头及轧丝头不得朝内径方向弯曲,以免扎伤芯模,形成漏气现象。
先浇注钢筋笼底部砼垫层,再用绳将芯模牵引到钢筋笼内,并使纵向接缝朝上。
2、注意:气囊内模使用时必须刷隔离剂,少抽模阻力,气囊不允许用机油代替隔离剂,一方面机油对橡胶侵蚀,另一个机油会污染钢筋。
用肥皂水稀释,作为脱模剂效果比较理想。
皂粉和水的比例大约是1:20 。
3、打开阀门充气到规定压力,即可关闭阀门、切忌不得超压。
4、异型芯模应交替充气直达规定压力。
5、将进入钢筋笼内的芯模上下左右加以固定。
克服上浮力及左右移动。
6、浇筑混凝土后,使用振动棒从两侧同时振捣,防止芯模左右移动。
且振动棒段头不可接触芯模,以免穿破漏气。
7、待混凝土初凝后,打开橡胶充气芯模的阀门放气,抽出芯模即可。
(脱模时间根据施工情况自定)一般情况为:当手纸肚摁下有清晰指纹时,方可脱模。
- 1、下载文档前请自行甄别文档内容的完整性,平台不提供额外的编辑、内容补充、找答案等附加服务。
- 2、"仅部分预览"的文档,不可在线预览部分如存在完整性等问题,可反馈申请退款(可完整预览的文档不适用该条件!)。
- 3、如文档侵犯您的权益,请联系客服反馈,我们会尽快为您处理(人工客服工作时间:9:00-18:30)。
COVIDIEN TM手持气囊压力表操作指南
1、适应症:
充气球囊可为带有高容量低压套囊的气管导管进行充气、放气和压力控制。
2、使用之前,必须按照如下步骤检查充气球囊:
a)用手指堵住Luer接口;
b)使用充气球囊充气至120cmH
2
O;该数值必须稳定2-3秒钟。
如果压力下降,则需要由制造商进行修理。
3、将带有连接管的充气球囊与导管的充气管连接。
向套囊充气,使其压力达到
60-90cmH
2
O。
这将确保套囊紧贴气管壁。
立即按下红色排气阀释放压力,直到指针指向绿色区域为止。
4、与气管导管之间持续连接能够对套囊压力进行监控。
如果压力增大,则可利用红色排气阀将压力调节到所需压力值。
5、为防止有误吸或者肺炎的风险,同时也要避免造成气管黏膜缺血,因此套囊
内压力需设定在22 cmH
2O和32 cmH
2
O之间,测量精确性为整个测量范围的±4
cmH
2
O。