e_tascam_pcm_recorder_om_va
TASCAM+DM-24数字调音台的安装与使用
1 调音台的特性调音台是音响系统中不可缺少的关键设备,可以分为模拟调音台和数字调音台,日常工作中根据所完成的任务和经济状况不同而配备不同的调音台。
数字调音台的各项功能单元与模拟调音台基本一样,并按照传统模拟调音台的使用习惯设置面板。
不同的是,数字调音台内的音频信号只是数字信号,在数字调音台内音频信号加工处理全部采用数字方式进行,即用0或1表示电平的低或高,因此数字信号的反复多次处理不会使音质降低,有比模拟调音台更高的电声指标。
数字调音台由硬件和软件两方面构成,内置了均衡器、效果器、混响器以及压缩、扩展、压限器等周边设备的数字处理器,而模拟调音台则全部由硬件组成;数字调音台不像模拟调音台那样一个通路对应一个输入/输出模块,它采用状态设置的方法来设定通路参数,有多种操作菜单可供调用,在工作界面上最大限度地减少了模块数和推子数,只要将某个通路调出就可以进行设置和调整,操作根据实时要求可存储、可复位、可以自动诊断故障,实现了调整动作的全自动化。
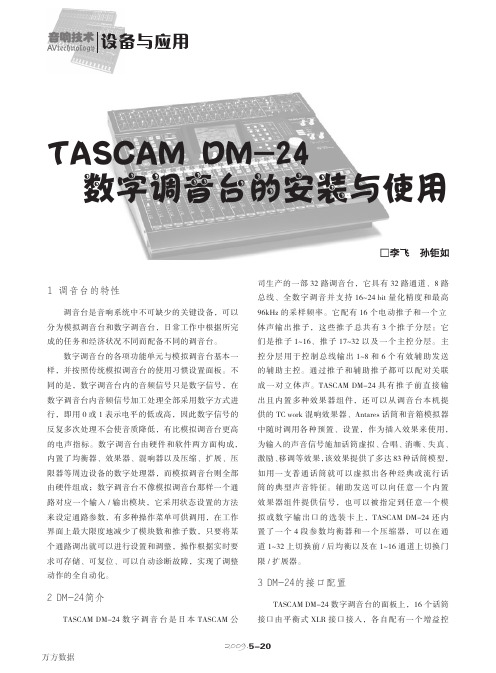
2 DM-24简介TASCAM DM-24数字调音台是日本TASCAM公司生产的一部32路调音台,它具有32路通道、8路总线、全数字调音并支持16~24 bit量化精度和最高96kHz的采样频率。
它配有16个电动推子和一个立体声输出推子,这些推子总共有3个推子分层:它们是推子1~16、推子17~32以及一个主控分层。
主控分层用于控制总线输出1~8和6个有效辅助发送的辅助主控。
通过推子和辅助推子都可以配对关联成一对立体声。
TASCAM DM-24具有推子前直接输出且内置多种效果器组件,还可以从调音台本机提供的TC work混响效果器、Antares话筒和音箱模拟器中随时调用各种预置、设置,作为插入效果来使用,为输入的声音信号施加话筒虚拟、合唱、消嘶、失真、激励、移调等效果,该效果提供了多达83种话筒模型,如用一支普通话筒就可以虚拟出各种经典或流行话筒的典型声音特征。
TASCAM DR-40使用教程

按鍵說明上半部
內建麥克風
LCD顯示
按鍵說明下半部
播放鍵
電源鍵/HOME鍵
錄音鍵
功能選單Βιβλιοθήκη 按鍵說明左側部耳機孔
錄音音量鍵
按鍵說明右側部
記憶卡插槽
開機
將電源鍵按住不放 直到螢幕亮即可放開
格式化
按下[MENU]找OTHER選項裡的SYSTEM 有QUICK FORMAT 或FULL FORMAT(時間較久)
1.使用內建麥克風 2.使用XLR外接麥克風
立體聲(Stereo)與單聲道(Mono)
Stereo:立體收音,左右聲音混和錄製 Mono:獨立收音,左右聲音分軌錄製
Stereo Mono
監聽
左側部的耳機孔可插入耳機 正面下半部的+-可以調整耳機音量
使用內建麥克風
1.按下[REC MODE]鍵 將REC MODE 設為 STEREO 2. 將SOURSE 設為 INT MIC ST
※注意※ 若為不能充電或裝電池的麥克風則需開啟幻象電源來送電給麥克風
錄音
1.輕按 『錄音鈕』一次 紅色燈閃爍代表預備中
2.利用左側的『錄音音量調整鈕』 調整錄音音量
3.再按一次『錄音鈕』 正式錄音
4.按 停止鍵(方塊狀) 結束錄音
幻象電源
左側部的EXT IN開到MIC+ PHAMTOM 即開啟幻象電源
3.按下[MENU]尋找 REC SETTING即可更改檔案格式 一般選擇WAV 48khz 24bit較佳
錄音
1.輕按 『錄音鈕』一次 紅色燈閃爍代表預備中
2.利用左側的『錄音音量調整鈕』 調整錄音音量
3.再按一次『錄音鈕』 正式錄音
TASCAM TEAC MX-2424 24-Bit 24-Track Hard Disk Reco
TASCAM TEAC Professional Division MX-242424-Bit 24-Track Hard Disk RecorderWelcomeCongratulations on your purchase of the MX-2424 24-track 24-bit Hard Disk Recording system. While we share your excitement, we ask that you please review the following before using the MX-2424.Contents of the box•MX-2424 Owners Manual•MX-2424 Owners Manual Updates•SCSI Instructions•Option Installation Instructions•MX-2424 CD-ROM•Smart Media Card•Power cable for front bay drive•Demo song track sheet•MX-2424 Welcome Letter•This Read Me documentWhat is this? Contents of the box explained•Manuals & Instructions: Stuff you should read!•MX-2424 CD-ROM: Contains all the manuals in electronic PDF format, the current version of MX-OS MX-2424 Operating System and ViewNet MX for both Macintosh and Windows.•Smart Media Card: This is used for updating the version of MX-OS in your MX-2424. It is delicate so keep it in its box in a safe place. Refer to the Owner’s Manual section on MX-OS Operations.•Drive Power cable: Use this cable to connect the power from the MX-2424 motherboard to a drive installed in the front bay. Refer to the Option Installation Instructions for details.•Demo song track sheet: There is a pre-loaded demo song in the MX-2424 to listen to and check the connections to your mixer. To load it press PROJ twice, select it with the Arrow keys and press YES.•MX-2424 Welcome Letter: More stuff to read!•This Read Me document: It’s the thing you’re reading…Where to go for support and software updatesSCSI Drive SupportBefore installing any additional SCSI devices, please review the SCSI Instructions.Hard DrivesBackup DrivesThe MX-2424 has the ability to backup data to a SCSI DVD-RAM or Travan tape drive. The following model numbers are supported:Brand Model Type of Device CapacityHitachi GF-2050DVD-RAM9.4GBHitachi GF-1050DVD-RAM 5.2GBPanasonic LF-D103U DVD-RAM 5.2GBCreative Technology RAM1220S DVD-RAM 5.2GBSeagate Hornet NS-20Travan10GBBackup MediaDVD-RAMMedia which adheres to the following requirements may be used for DVD-RAM backup on the MX-2424:• 5.2GB Double Sided•9.4GB Double Sided (Hitachi GF-2050 only)•Rewritable•Type 1Travan•10GB (Uncompressed) Travan Tape MediaTypes of BackupThree types of backup are supported on the MX-2424 using DVD-RAM drives:•FAT-32 Initialized•MacHFS initialized (Only using DVD-RAM Tune-Up on the Mac)•Mac HFS+ initialized (Only using DVD-RAM Tune-Up on the Mac)•Un-initializedWhen a FAT-32 formatted DVD-RAM disk is created on the MX-2424 it will identify is as a FAT-32 volume. Such a disk can be mounted on a PC.An un-initialized DVD-RAM disk will mount on the MX-2424 as a backup (BU) volume. The MX-2424 will back up data to such a disk using an advanced backup program capable of spanning single projects across multiple disks. These disks will not mount or be readable on a computer.It is possible to audition a pair of tracks from a FAT-32, HFS or HFS+ formatted DVD-RAM disk by loading the project directly from the DVD-RAM disk.Mounting a SCSI Hard Drive on a computerWith support for removable drives it is possible to take audio drives back and forth between the MX-2424 and a computer for backup or sharing of audio files between the MX-2424 and a computer-based DAW. MacintoshRequired software:•FWB Hard Disk Toolkit 3.0 or higherThe MX-2424 has the ability to initialize SCSI drives using Menu 710. However, this initialization process does not install a Mac driver onto the disk. The following steps must be taken in order to mount on a Maca disk that has been initialized on the MX-2424:1.Connect the drive to the Macintosh SCSI port. Verify that proper termination and SCSI cabling rulesare followed and boot up the computer system.unch FWB Hard Disk Toolkit. In Device View, under the Device pull down menu, choose the“Update Driver” function.3.Click “Yes” to update the driver.4.Reboot the computer system. This is an FWB requirement – failure to do so will corrupt the disk.5.Once rebooted, the drive will mount and may be used as a standard Mac volume. Note that once thismounting process is performed and the volume has been updated with FWB drivers, there is no need to repeat the above steps in order to mount the drive on a Mac until the drive has been initialized again on the MX-2424.Note: A hard disk formatted to Mac OS Standard on a Macintosh may be taken to the MX-2424 for reliable use. Such a disk does not need to be initialized on the MX-2424 and may be taken back and forth between the two systems without any further driver installation or initialization.NOTE:The MX-2424 does not support hard disks partitioned on the Macintosh.Disk initialization on the MX-2424 will remove Mac driver software.General Tips and Reminders•It is recommended that projects be started at the 01:00:00:00 mark. This is to prevent crossing the 00:00:00:00 point during operation.•Always un-mount disks before turning the unit off by pressing SHIFT+MOUNT.•Un-mount backup media (BU format) from DVD-RAM/Travan drives when recording.•The Render feature is intended to enhance drive performance for sessions with heavy edit density. The Render function can also be used in the rare occurrence that an “Out of Audio Memory” error isencountered.Future EnhancementsWhile the MX-2424 contains an impressive feature set as it is, here are some of the enhancements to be released in the near future:•Waveform editing。
TASCAM FW-1884快速入门指南说明书
This guide is designed to quickly get you started using the FW-1884. If you have anyproblems or questions during setup, the Owner’s Manual covers this in much more detail.1. Plug the included FireWire cable into the FW-1884’s FireWire port and your computer’s FireWire port. Don’t turn on the power yet.2. Insert the FW-1884 Software and Documentation CD-ROM into your computer’s CD-ROM drive. The installer will automatically launch. Click OK on the screen. If the installer asks you where it should look for drivers, select the installation CD-ROM. Follow the on screen instructions.3. Restart your computer. When it has restarted, turn on the FW-1884 using the power switch on the back right side of the unit.4. The New Hardware Wizard will launch when it sees your new hardware. Click “Next” on the fi rst screen. If you see any messages telling you that the product hasn’t passed Windows Logo Testing, click “Continue Anyway.” After the fi rst driver is installed, the New Hardware Wizard will fi nd new hardware and walk you through the installation process two more times.5. Open the “DAW Plugins” folder. Find the ASIO plug-in for your DAW recording software. If none exists, check the TASCAM website for a new driver.1. Insert the FW-1884 Software and Documentation CD-ROM into your computer’s CD-ROM drive. Follow the instructions below for your computer platform and then move on to step2. a. Mac OS X Users: Double-click the Mac OS X in-staller fi le on the installer CD, ending with the suffi x “.dmg”. Disk Copy should automatically mount the disk image. Select this new “disk” and double click the FW-1884 Installer. Enter your administrator’s password and then follow the instructions. b. Mac OS 9 Users: If OMS is not installed on your Mac, run the OMS 2.3.8 Installer fi rst. Next, selectthe “Driver Installers” folder on the CD and openthe “Mac OS 9” folder inside of that. Double click the FW-1884 Installer and then follow the instructions. When you’re fi nished, launch OMS Setup and follow the instructions.2. Plug the FireWire cable into the FW-1884 ’s FireWire port and your computer’s FireWire port.3. Open the “DAW Plugins” folder. Find the plug-in for your DAW recording software. If none exists, check the TASCAM website for a new driver.1. First, install the FW-1884 software as explained in the previous section.2. After the software has been installed and yourcomputer restarts, you should see that the “FireWire” light on the top right corner of the FW-1884 is on. (If it isn’t, you may need to restart again or check your connections.) 3. Press the “Control Panel” button on the left side of the unit to launch the FW-1884 Manager application.4. When the FW-1884 Control Panel opens, it will de-fault to the Settings tab (see below). Set the Control Protocol to either FW-1884 Native, HUI Emulation or Mackie Control Emulation, depending on the needs of your software. 5. The Clock Source and Sample Rate can be set from this control panel or from the front panel of the FW-1884. 6. The Audio Latency should be raised if you hear clicks in the audio playback, especially on machines with relatively slow processors. 7. The Audio Monitoring control selects if the Monitor knob on the FW-1884 front panel changes the output level of analog outputs 1 and 2 or 1 through 8. Use the 1:2 setting if you’re monitoring in Stereo, use the 1:8 setting if you’re monitoring in surround. In most DAW software, you should leave the “Master Fader Affects ANLG 1:2” box unchecked, so that you don’t attenuate the master level twice.8. Select the Routing tab to change the functionality of the digital inputs and outputs. 9. Mac OS X: Click on the “Core Audio” tab to select how many inputs and outputs you’ll have available to your audio applications. On slower systems, such as a Mac with a G3 processor, you may need to select less channels for the audio to record and playback without glitches.Mac OS 9: Select which pair of inputs & outputs Sound Manager will use for stereo I/O in the Settings tab.Windows: Select which pair of inputs and outputs Windows will use for stereo I/O in the Sound and Audio Devices control panel. 10. To use the FW-1884 with your DAW software, you’ll need to open your DAW and choose the “Audio Setup...” or similar menu item. Set the audio device to FW-1884. There should also be menus for adding a MIDI interface and Control Suface. Since every DAW program and sequencer handles this differ-ently, check the Software Application Notes found on your Installation CD.Refer to the FW-1884 Setup Guide and User’s Manual for more information on setting up the FW-1884 in your studio.The FW-1884 Settings tab in Windows XPThe FW-1884 Core Audio tab in Mac OS X。
LW2287数字无线摄像头系统快速启动指南说明书

A. Installation des caméras
1 Monter la caméra au mur ou au plafond à l’aide des vis (incluses).
Encoche pour câble
Pour une utilisation extérieure, il est conseillé de l’installer dans un endroit protégé.
Avant de procéder à l’installation permanente de la caméra :
Planifier l’endroit ainsi que la position de la caméra. Déterminer l’endroit où les câbles qui connectent la caméra à l’adaptateur d’alimentation électrique seront acheminés. Vérifier les performances de la caméra en regardant l’image sur le moniteur lorsque la caméra est située à l’endroit où elle sera installée de façon permanente. Éviter d’installer la caméra dans des endroits où le signal sans fil doit traverser des structures en ciment, en béton ou en métal. Cela réduira la portée d’émission.
e4a调用摄像头录像代码
e4a调用摄像头录像代码
在e4a中调用摄像头录像可以通过以下代码实现:
首先,你需要在e4a中使用Camera对象来调用摄像头。
你可以使用Camera对象的open()方法来打开摄像头,并使用setPreviewDisplay()方法将摄像头预览显示在一个SurfaceView或者SurfaceHolder上。
然后,你可以调用startPreview()方法来开始摄像头预览。
接着,你需要使用MediaRecorder对象来实现录像功能。
你可以通过以下步骤来录像:
1. 创建一个MediaRecorder对象。
2. 设置MediaRecorder的音视频源为摄像头。
3. 设置输出文件的格式、编码器、输出文件路径等参数。
4. 调用MediaRecorder的prepare()方法来准备录像。
5. 调用MediaRecorder的start()方法来开始录像。
最后,当你想要停止录像时,你可以调用MediaRecorder的stop()方法来停止录像,并释放相关资源。
需要注意的是,在使用摄像头和录像功能时,你需要在AndroidManifest.xml文件中添加相应的权限,如相机权限和录像权限。
总的来说,调用摄像头录像的代码主要涉及到Camera对象和MediaRecorder对象的使用,需要注意权限的设置和相关资源的释放。
希望这些信息能够帮助到你。
科达界面麦克风300a说明

科达界面麦克风300a说明科达界面麦克风300a说明概述•介绍科达界面麦克风300a的基本信息和用途•简要描述产品的特点和优势规格参数•列出科达界面麦克风300a的具体规格参数•包括麦克风类型、频率响应、灵敏度等信息使用方法•描述如何正确使用科达界面麦克风300a•包括接口连接、操作指南等内容注意事项•提醒用户在使用科达界面麦克风300a时需要注意的事项•包括保养、存放、防水等方面的建议常见问题解答•列举一些用户常见的问题,并给出解答•包括故障排除、常见错误操作等内容售后服务•提供售后服务联系方式和方法•提醒用户如何寻求产品售后支持免责声明•强调在使用科达界面麦克风300a时可能存在一定风险•提醒用户使用产品需谨慎,自行承担使用风险以上是针对“科达界面麦克风300a说明”的文章大纲,按照这个结构进行编写可以帮助用户更好地了解和使用产品。
对于“科达界面麦克风300a说明” 的详细文章,可以按照以下的具体内容展开:科达界面麦克风300a说明概述科达界面麦克风300a是一款专为音频录制和采集而设计的产品。
它具有高品质的录音效果和广泛的适用性,可用于广播、音乐录制、语音识别和多种音频应用场景。
规格参数•麦克风类型:电容麦克风•频率响应:20Hz - 20kHz•灵敏度:-35dB ±2dB (0dB=1V/Pa @ 1kHz)•最大声压级:130dB (THD<% @ 1kHz)•信噪比:>75dB•电源供应:USB供电使用方法1.首先,将科达界面麦克风300a连接到电脑或其他录音设备的USB接口上。
2.打开录音软件,并设置科达界面麦克风300a为默认录音设备。
3.调整录音软件中的音量和增益参数,以达到最佳的录音效果。
4.在录音时,保持离麦克风适当的距离,尽量避免外界噪音的干扰。
5.完成录音后,保存文件,并进行后期处理和编辑。
注意事项•使用前请仔细阅读使用说明书。
•避免将科达界面麦克风300a暴露在过高或过低的温度环境中。
TASCAM MD350中文使用说明书

·当重放完成,录音座将在下个曲目开始 时中止。 3、 按[PLAY]或[READY]开始播放下一个
曲目。 · 放 弃 自 动 准 备 重 放 , 要 重 复 按 [AUTO SPACE]直到“A·READY”消失。 ·A·SPACE 和 A·READ 不能一起使用。 ■ 自动提示状态(只在 SP 状态下录制
出的仍是双声道。 ·插入一张 MD 或按[STOP]键取消控制状
态。
调整录音电平 ·录制相同信号 1、 插入一张可录制的 MD,按[REC ORD]
键进入录音准备状态(“REC”灯亮) 2、 放 节 目 的 最 高 电 平 片 断 并 转 向
[INPUT]控制键,以不致于使顶峰的 “OVER”部分发亮。 3、 重新放节目。 ·按[PLAY]键或[READY]键就开始录音。 ■ 录制数字信号 1、 在录音录音状态下,按[EDIT/NO]键 直到“D-LEV 0.0DB”出现。 2、 转动[TRACK]拨号盘调整录音电平, 录 音 电 平 在 变 动 范 围 是 -6.0DB 和 +6.0DB 之间时可选择设定在 0.5DB 上。 3、 调整好之后按[YES]键。
剩余可记录时间
唱片名称
在播放状态:
曲目号,当前曲目播放 过的时间
曲目号,当前曲目剩 下播放时间
曲目名称
·总曲目数出现在“TRACK NO.DISPLAY” ·唱片名称和曲目名称只有在它们都被记 录在 MD 上时才显示。 ·当曲目被设置在停止状态(“TRACK”是
亮的)按[DISPLAY]显示名称。 ·当曲目名称由 100 多个汉字组成时,第
什么时记录类似的磁带 ■ 在每个曲目后插入空间来播放曲目 自动留空重放功能可以在每个曲目间插 入 3 秒的空白,这能使在记录 MD 的类似 磁带时,曲目扫描操作成为可能。 1、 在遥控板上按[AUTO SPACE]直到显示
AVer Document Camera Setup Guide

Setup your AVer Document Camera from home!Please first identify which AVer document camera you are using to know what software to install.A+ Suite (Sphere2 on Win10/Mac) or Sphere Lite (Chromebooks): AVer U70+, AVer U50, AVer M70HD, AVer 300AFHD, AVer F70W, AVer F50-8M, AVer F17-8M, M17-13MAVerTouch (Win10/Mac): AVer M15W, AVer M15-13M, AVer M70WA+ Interactive Software (Old Version on Win/Mac): V300AF ASIC, SPC300 ASIC, SPC300 +, CP130, CP150, CP300, SPB350, SPB370, CP135, CP155, CP355, V355AF, V310AF, SPB350+, V300AF+, F30, F50, U10, U15, AP20,M50, W30Sphere (Old Version on Win/Mac): PL50, SPB350, SPB370, SPB350+, M50, M70, V300AF+, F50, F30, F15 U15, W30A+ Suite (Sphere2):1.Download the A+ Suite software on your computer, go to:https:///education/support/aplus-suiteSelect the OS you are using to download the software (we will use Win10 in this tutorial)2.Open the downloaded .exe file to start the installationFollow the setup wizard to install the A+ Suite software3.After installation is completed, open the Sphere2 software4.Plug in the power adapter to your document camera and turn it on by pressing the power button (does notapply to U-series doc cams, your document camera may look different than the one pictured)5.Locate a USB port on your computer and connect your camera to it via USB cable that is included6.Select the visualizer icon on the top right of the Sphere2 software and select your camera7.You are now connected to your AVer document camera and can begin teaching!If you own an AVer F70W and wish to connect to your computer wirelessly, please follow this guide: https:///education/downloads/F70WV2-Quick-Guide-EN-v5-2020-02-24.pdfSphere Lite (Chromebook):1.Download the Sphere Lite software on your Chromebook, go to:https:///webstore/detail/sphere-lite/bhmibpbadaengbikmoglphhlhioajdjn?hl=enunch Sphere Lite app after installing3.Plug in the power adapter to your document camera and turn it on by pressing the power button (does notapply to U-series doc cams, your document camera may look different than the one pictured)4.Locate a USB port on your Chromebook and connect your camera to it via USB cable that is included5.Select your camera on the bottom left. You are now connected to your AVer document camera and can beginteaching!AVerTouch:1.Download the AVerTouch software on your computer, go to:https:///education/support/avertouchSelect the OS you are using to download the software (we will use Win10 in this tutorial)2.Unzip the downloaded .zip file3.Open the extracted folder and run the .exe to start the installation4.Follow the setup wizard to install the AVerTouch software5.After installation is completed, open the AVerTouch software6.Plug in the power adapter to your document camera and turn it on by pressing the power button (yourdocument camera may look different than the one pictured)7.Locate a USB port on your computer and connect your camera to it via USB cable that is includedNote: For M15W/M70W users, please make sure WiFi is turned off when trying to do a USB connection 8.The connected visualizer will appear within the AVerTouch software. Click the play icon to connect to thecameraIf you own an AVer M15W/M70W and wish to connect to your computer wirelessly, please follow this guide: M15W: https:///education/downloads/M15W-instruction-manual-EN-2019-12-20.pdfM70W: https:///education/downloads/M70W-instruction-manual-EN-v1-2019-12-20.pdfA+ Interactive Software:1.Download the A+ Interactive Software on your computer, go to:https:///education/support/averplusSelect the OS you are using to download the software2.Unzip the downloaded .zip file3.Open the extracted folder and run the .exe to start the installation4.Follow the setup wizard to install the A+ Interactive Software5.After installation is completed, open the A+ Interactive Software6.Power on and connect your doc cam to your computer via USB cable7.Select your visualizer within the software and you are now connected!Sphere:1.Download the Sphere on your computer, go to:https:///education/support/sphereSelect the OS you are using to download the software2.Run the downloaded .exe to start the installation3.Follow the setup wizard to install the Sphere software4.After installation is completed, open the Sphere Software5.Power on and connect your doc cam to your computer via USB cable6.Select your visualizer within the software and you are now connected!Using your AVer Document Camera with other platforms (Zoom, Skype, Google Hangout).Open up your software of choice and connect your AVer document camera to your computer via USB cable.Select your AVer document camera as your visualizer and you are successfully connected!(Please refer to Zoom, Skype, or Hangout user guides to navigate through their software)Zoom:https:///hc/en-us/articles/201362033-Getting-Started-on-Windows-and-MacSkype:https:///en/skype/windows-desktop/start/Hangout:https:///hangouts/?hl=en#topic=6386410Note: The following AVer doc cams are not UVC compliant and are not compatible with other platforms: F50, M70, PL50, W30, W30HD, Tabcam, 355AF, M50More HelpFor FAQs, technical support, software and instruction manual download, please visit:https:///education/support/Contact InformationAVer Information Inc.668 Mission Ct. Fremont, CA 94539, USAToll-free: 1(877)528-7824Local: 1(408)263-3828********************。
TASCAM TAS-2023.6 安装系统设计指南说明书
Amusement Facilities and Theaters Hotels and Banquet Halls Retail / Commercial Facilities Broadcasting Stations and StudiosLive StreamingEducational Facilities Conference Rooms /Corporate Systems 2023.6System Design Guide for InstallationsIntroductionDue to the evolution of technology, AV installations with new levels of sophistication and flexibility have emerged.The evolution of video, lighting and network technologies has created new systems and services with maximum versatility, a productive user experience, and premium audio quality. Because of this, proper technical knowledge and a solution-based approach is becoming more essential for both system engineers and sales consultants to provide customers a creative and successful solution with the best quality. TASCAM produced this design guide to meet such needs, and to visually present project proposals more clearly by illustrating system examples based on application or project type.TEAC CORPORATIONTM-95GNMX-8ASS-CDR250N BD-MP1RC-W100-R120Gooseneck micProgrammable controllerRecording mixerModel 24CD-400UGooseneck micTM-82ML-4D/OUT4 line out Dante converterTM-95GNTM-95GN TM-95GN Gooseneck micMM-4D/INMM-4D/INMM-4D/IN4 Mic in / 4 Line in Dante converterSS-CDR250N / IF-DA2DA-6400 / IF-DA64MX-8ACD-400U202MK VIIBD-MP1TM-95GNDouble cassette deckGooseneck micSS-CDR250NModel 24TM-95GNCD-400UGooseneck micTM-82Recording mixerCase study(Japan) Case study(Global)TASCAM Sonicview 24Digital ixerSB-16DDante stage box DA-6400 / IF-DA64Digital mixerDante stage boxTASCAM Sonicview 16SB-16DML-32DBO-16X/INDante stage boxDante stage boxTASCAM Sonicview 24Digital mixerSB-16D x 2SB-16D x 2XLR analog output x16XLR MIC/LINE input x 24Digital mixer(Equipped on back panel)iPadTASCAM Sonicview 24SS-CDR250NDA-6400/DA-6400dpIF-DA64Dante interface card IF-DA2Digital mixerTASCAM Sonicview 24Digital mixerTASCAM Sonicview 24SS-CDR250NTalkback micTM-82DA-6400/DA-6400dpIF-DA64IF-DA64(Equipped on back panel)64ch Dante cardIF-DA64(Equipped on back panel)Solid-state 64-track playerDA-6400/DA-6400dp64ch Dante cardIF-DA64TASCAM Sonicview 24Digital mixerIF-DA64DA-6400/DA-6400dp SB-16DDante stage boxDA-6400/DA-6400dp32ch analog Dante converter 32ch analog balance outML-32D(Equipped on back panel)Case study(Japan)Case study(Global)Monterey Pop FestivalKooster McAllisterThird Eye BlindDel CastilloTommy BolanOnline MagazineGrand PerformancesCLAIR GLOBAL TOURSMatt MolchanyDynamic micModel 16Recording mixerTM-95GNMM-4D/INTASCAM DCP ConnectSolid state / CD player SS-CDR250N Solid state / CD player SS-CDR250NTM-95GNMM-4D/IN TASCAM DCP ConnectSolid State / CD player SS-CDR250NMX-8AMicMicAnalog outRecording mixerDouble cassette deckSS-R250NCD-400U202MK VIITASCAMTM-82Model 16MZ-123BTCD-200BTCD-400UMIC/LINE INCD player / bluetooth receiverGooseneck mic3 zone audio mixer with Bluetooth receiverTM-95GNMZ-223BT CD-400UDante converterML-4D/OUTDante ConverterMM-4D/INDigital mixerTASCAM Sonicview 16TASCAMDCP CONNECTTM-95GNDante converterML-4D/OUTSS-R250N IF-DA2CD-400UDante converterML-4D/OUTMX-8ACD-400U202MK VIISS-CDR250NMX-8A control softwareRemote control unitRemote control unitMX-8A control softwareRS-485Double cassette deckTM-95GNGooseneck micCD-400U202MK VIISS-CDR250NTM-95GNMX-8AGooseneck micDouble Cassete DeckTASCAM MX CONNECTMX-8A control softwareTM-95GNMM-2DSS-R250N IF-DA2TASCAMDCP CONNECTMZ-123BTMH-8TM-90BMMic inLine in3 zone mixerMaster talkback micBack-talk micHeadphone amplifierAnalog output➀ ➁ ➂GPIO OUT(FADER START)GPIO IN(MUTE GRP)Mic 1・・・8・・・DJ micCG-2000Talkback unitMH-8CD-6010SS-CDR250NSS-R250NRC-SS150TASCAM Sonicview 24Digital mixer(Installed into Sonicview 24’s back panel)Talkback mic Remote Control UnitMicCG-2000CD-6010SS-CDR250NSS-R250NPeripheral equipment SB-16DMH-8TASCAM Sonicview 24Digital mixerTalkback unitTM-70USBCase study(Japan)Case study(Global)Jim SternKenny ‘Tick’ SalcidoDavid Crowder (写真なし)Johnny "Juice" RosadoVS-R264/265Dynamic Mic / Gooseneck mic / Boundary mic balance outputMatrix mixerVS-R264/265VS-R264/265MX-8ATM-95GN TM-82TM-90BMTM-90BMModel 12USB audio interfsce / recording mixerModel 12USB audio interfsce / recording mixerCan be used for audio mixing, recording and as an streaming interface all at onceDirect monitoring OFF Loopback OFFMic for speaker on the stageGooseneck micMain outTM-95GNTM-80Audio interfaceMiNiSTUDIO CREATOR US-42BRecording mixerModel 16VS-R264/265VS-R264/265EncoderDante converterGooseneck micTM-95GNTM-70USBTASCAM Sonicview ControlDante stage boxSB-16D Ambience micDigital mixerTASCAM Sonicview 16Case study(Japan) Case study(Global)Case study(Global)Michael SandovalImpact in EducationNicki SunDark Side of the CooksAAK-RS1 ................................................................... 6, 21, 22, 26 BBD-MP1 ................................................................. 4, 5, 7, 8, 20, BD-MP4K .. (35)BO-16DX/IN (11)CCA-XLR2d (43)CD-200BT ..........................................................................20, 24 CD-400U ...................................... 5, 7, 8, 23, 24, 25, 26, 27, 28 CD-6010 ........................................................................... 32, 33 CG-2000 ........................................................................... 32, 33 DDA-6400 ............................................... 6, 10, 13, 14, 15, 16, 17 DA-6400dp .......................................................... 14, 15, 16, 17 IIF-AE16 ............................................................................. 32, 33 IF-DA2 .............................................................. 6, 13, 21, 26, 29 IF-DA64 ................................................ 6, 10, 13, 14, 15, 16, 17 IF-MTR32 . (46)MMH-8 .......................................................................... 31, 32, 33 Mixcast 4 .......................................................................... 34, 45 ML-16D .. (11)ML-32D ..............................................................................11, 17 ML-4D/OUT-X .............................................................. 6, 22, 26 MM-2D .............................................................................. 29, 44 MM-4D/IN-X ................................................................. 6, 21, 26 Model 12 ...........................................................................39, 40 Model 16 .....................................................................20, 23, 41 Model 24 .............................................................................. 5, 8 MX-8A ........................................................... 4, 7, 23, 27, 28, 38 MZ-123BT ........................................................................ 24, 31 MZ-223 .. (25)PPS-P1220E ............................................................. 6, 21, 22, 26 RRC-SS150 ......................................................................... 32, 33 RC-W100-120 .......................................................... 4, 7, 23, 27 SSB-16D ......................................... 10, 11, 12, 13, 14, 16, 33, 46 SS-CDR250N ............................. 4, 6, 13, 14, 21, 27, 28, 32, 33 SS-R250N ..................................................... 23, 26, 29, 32, 33 Streaming Dashboard (43)TTASCAM DCP CONNECT ................................ 6, 21, 22, 26, 29 TASCAM DISCOVERY ...................................................... 38, 43 TASCAM EZ CONNECT ................................. 4, 6, 7, 23, 26, 27 TASCAM MX CONNECT ............................... 4, 7, 23, 27, 28, 38 TASCAM Podcast Editor .................................................34, 45 TASCAM Sonicview Control .......................................... 13, 46 TASCAM Sonicview 16 ............................................. 11, 26, 46 TASCAM Sonicview 24 ..................... 10, 12, 13, 14, 16, 32, 33 TM-200SG (43)TM-70 .................................................................. 32, 33, 34, 45 TM-80 (41)TM-82 ......................................... 5, 8, 14, 20, 23, 25, 27, 28, 38 TM-90BM ......................................................... 4, 31, 38, 39, 44TM-95GN ..... 4, 5, 6, 7, 8, 20, 21, 23, 24, 26, 27, 28, 29, 31, 3238, 39, 41, 44 TSQD-32A (40)UUS-42B (41)VVS-R264 .............................................................. 38, 42, 43, 44 VS-R265 ............................................................ 38, 42, 43, 44 0-9202MK VII ...................................................... 7, 8, 20, 23, 27, 28Index。
TASCAM DV-RA1000HD高分辨率音频 DSD主机录音机说明书

239PRICEVOCOP RO CDR1000-P RO CD-R/RW RECORDER A standalone CD burnerdesigned for quick burning of music and vocals on the road or on stage without acomputer. It has the ability to burn music to CD-R, CD-RW live in real-time, erasedata from CD-RW discs and create separate tracks while recording live. It featuresa digital coaxial audio input (compatible with 44.1 kHz), RCA and balanced XLR audioline in/out connections, headphone jack, and recording level control. It is 1RU andcomes rackmount ready.ITEM DE S CRIPTION PRICE CDR1000-PRO ...........CD-R/RW recorder, 1RU ...............................................................399.00 UBLISHING EZ Dupe’s Publishing Plant is a full-on produc-tion facility for all of your DVD or CD media needs. The Publishing Plant is only 23 inches wide and 21 inches deep. Its engineering design segues into an Epson Artisan 50 printer, creating a fully automatic system. It writes DVDs at 20x speed, and CDs at 48x. It features a 100 disc capacity, and is compatible with most DVD and CD formats. Includes an LICATION All models come standard with a 160GB HDD and USB2.0 interconnect. Stand-alone tower models only. Professional duplication with up to 20x speed for DVD+/-R, 8x for DVD+/-RW, 8x for DVD+/-DL, 52x for CD-R, and up to 32x for CD-RW. Available in 2- to 11-target configurations. Models shown below are most popular configurations, call for others. PRICEEPSON PP-100 DISCPRODUCER SERIESDISC PRINTERS Offering the lowest cost per print,and Epson’s renowned print quality, Discproducer has amaximum output of 100 disc per session, with an hourlyrate of 30 CDs or 15 DVDs. In print-only mode, thePP-100 can print up to 45 discs per hour. The networkedversion can receive up to five jobs at the same time andhas been optimized for working in groups. The security version is designed for applica-tions requiring top-level security and archived data protection. The Autoprinter can printonto 100 CDs and/or DVDs in one session, with an hourly rate of 95 discs. All modelsfeature bi-directional printing and print at resolutions of up to 1440x1440 dpi.ITEM DE S CRIPTION PRICEPP-100......................Epson Discproducer ...................................................................2695.00PP-100N worked version of PP-100 ..........................................................CALLPP-100NS worked version of PP-100 w/security .........................................CALLPP-100AP .................Epson Autoprinter ......................................................................1950.00AccessoriesPJIC-SET ...................Set of 6 ink cartridges, 1 in each color .......................................230.00PJIC1-C .....................Cyan ink cartridge .........................................................................40.00PJIC2-LC ...................Light cyan ink cartridge ................................................................40.00PJIC3-LM ...................Light magenta ink cartridge .........................................................40.00PJIC4-M ....................Magenta ink cartridge ...................................................................40.00PJIC5-Y .....................Yellow ink cartridge .......................................................................40.00PJIC6-K .....................Black ink cartridge ........................................................................40.00C13S020476 .............N E W !240EZ DU E MEDIA MIRROR MULTI-FORMAT DUPLICATOR The Media/Mirror backs up audio andvideo DVDs and CDs, many types of media cards (CFI/II, SD, MS-Pro Duo are most common types), andUSB media devices. Features multi-session technology,which permits several memory cards or USB devices tobe placed on a single DVD or CD. It will also place mediafrom media cards larger than CD or DVD capacity ontomultiple discs. Professional duplication with up to 20x for DVD±R, 8x for DL DVD±R, DVD+RW, 6x for DVD-RW, 56x for CD-R, and 32x for CD-RW. All units carry a 3-year manufacturer’s warranty.ITEM DE S CRIPTION PRICE MM01PIB ..................Single-target multi-format duplicator .........................................389.00MM02PIB ..................Dual-target multi-format duplicator ...........................................459.00MM03PIB ..................Triple-target multi-format duplicator ..........................................529.00EZ DUPE MEDIA MAVEN SERIES DVD /CD /MEDIACARD DUPLICATION SYSTEM This series of profes-sional duplicators is lightning fast in reproducing mirror-image copies of virtually every type of media card with theoptional media expander. It features a SATA drives for themost accurate transfer of data. Create DVD & CD cop-ies from USB directly to disc with the touch of a button.Professional duplication with up to 8x speed for DVD, 52xon CD. Optional media expander writes to Micro SD, MS/MS Duo, Mini SD, SD/SDHC and MMC cards.ITEM DE S CRIPTION PRICE MMM30 .....................1 source, 3 target DVD/CD duplicator .........................................479.00MMM50 .....................1 source, 5 target DVD/CD duplicator .........................................629.00MMM70 .....................1 source, 7 target DVD/CD duplicator .........................................769.00MMM90 ..................... 1 source, 9 target DVD/CD duplicator .......................................1019.00MMMEX .....................11 target media expander for multi-media maven .......................22.95MICROBOARDS COPYWRITER® ive bring digital-quality audio to your church, school, studio, or boardroom. Record from practically any audio source, including live feed from a microphone, a cassette deck, a mixer, and many MICROBOARDS COPY WRITER & COPY WRITER PRO CD/These towers feature industrial Optiarc recorders that copy both DVD and CD formats. In addition these support bit to bit data verification, ensuring a perfect burn every time. These support nearly every format like DVD Video, DVD ROM, DVD+R/-R, DVD-RW, DVD+RW, and dual layer DVD. Supported CD formats are CD-DA (Red Book), CD-ROM modes 1&2, XA forms 1&2, ISO 9660, Photo CD, CD-Extra, HFS, and Hybrid. The Pro versions feature onboard 320GB hard disc drives. EZ DUP E P ORTABLE USBDUPLICATORS These por-table, stand-alone USB dupli-cation systems feature userfriendly 4-key control with L CD, 2GB per minute USB duplication andbit-by-bit Compare function to confirm successful copies. No warm-up or cool-down is required. Other features include test and check functions for USB drives, real-time display of detailed information, and ergonomic, portable design.ITEM DE S CRIPTION PRICE 2CUSB .......................2 target, portable USB duplicator/tester .....................................149.956CUSB .......................6 target, portable USB duplicator/tester .....................................989.002CUSB 6CUSB MICROBOARDS G3 SERIES DISC PUBLISHERS The G3P-1000 DVD/CD disc publisher has a single recorder, with 50 disc input capacity. It burns 24x for DVDs, and 48x for CDs. Utilizes HP inkjet technology to produce images at up to 4800dpi via a single tri-color cartridge (GX-300HC). The G3PBD-1000 shares the same features but adds 8x Blu-Ray disc publish-ing capability. The G3A-1000 is an autoprinter version only. Compatible with Pentium 4 3.0GHz or greater machines running: Windows and Intel-based Macs OSX 10.5+ compatible. Comes MICROBOARDS CX-1 DVD/CD/BLU-RAY low cost-per-unit. Comes with PRINTWRITE-2 disc EZ DUPE STUDIO STANDARD RACKMOUNT SERIESDurable, stylish, and rugged designs with heavy-duty housing which are ideal for an industrial environment. These commonly feature a 250W, 350W, and 400W industrial power supply with safety approved selectable voltage, 8cm ball bearing fan to maxi-mize ventilation, and 80GB hard drive standard. Professional duplication with up to 20x speed for DVD+/-R, 8x for DVD+/-RW, 10x for DVD+/-DL, 40x for CD-R, and up to 32x for CD-RW. Units carry a 4-year manufacturer’s warranty.ITEM DE S CRIPTION PRICE RK3TDVDSOB ..3-target CD/DVD rackmt duplicator, Sony, 80 GB HDD, black ................589.00RK5TDVDSOB ..5-target CD/DVD rackmt duplicator, Sony, 80 GB HDD, black ................759.00RK7TDVDSOB ..7-target CD/DVD rackmt duplicator, Sony, 80 GB HDD, black ................899.00RK9TDVDSOB ..9-target CD/DVD rackmt duplicator, Sony, 80 GB HDD, black ..............1099.00Shop anytime. Buy online. Honesty and Valuesince 1971242MICROBOARDS QD/QDH SERIES DVD/CD DUP LICATORSAffordable duplication solutions for copying audio, video,or data. They feature small desktop footprints, anduse an easy-to-use 4 button touch panel interface.Supported formats include DVD-R, DVD+R, DVDVideo, DVD-ROM, DVD-DL, All CD formatsincluding CD+G. Also features copyverification & track extractionfeatures, USB 2.0 intercon-nect, and Zulu2 disc masteringsoftware. 1 year manufacturer’sRECORDEX RX-100 SERIES CD DUP LICATORSThese small, high-capacitysional gravity disc feeding system (as opposed to roboticpicking arms) that can load and unload a disc in just 3seconds. You can leave it unattended for hours with the100-disc input and output bin. Duplicators feature singletiple simultaneous operations. Enclosed design systemkeeps the unit dust-free and nearly silent. The RX-100PCincludes a premium software suite that allows it to ripCDs to MP3s, back up data, create and restore ISO files,erase RW discs, duplicate data discs, and burn copies ofaudio files. In addition to MP3, the unit supports WMA, WAV, and OGG formats. The RO™ COMMERCIAL RINTERS These are auto printers that create photo-quality results in under a minute. They have a smart dual cartridge system which prints true black while saving the color cartridge specifically for color applications tridges. Compatible with most major brands of optical media. Both printers use standard off-the-shelf HP ink cartridges (HP56 black, HP57 color). Minimum system requirements – Pentium Designed for industrial environments, the MX-1 and MX-2 come with 1 or 2 high-speed DVD/CD recorders, and a low cost-per-disc inkjet printer (4800dpi) for a complete publishing solution. The PF-Pro (PFP-1000) is a printer only, with no recorders. All units feature 100-disc input/output and enhanced automation for reliable loading & unloading of discs. Ships with software for Mac/PC and connects via USB2.0. Please call to verify sions are also available. Comes with PRINTWRITE-2 disc publishing software.This small autoloader has 3 recording drives, a 250GB hard drive and can make 60 discs a run. Records at speedsup to 24x for DVD±Rs & DVD±RWs, and 48x for CD-R &CD-RWs. Writes at speeds up to 40x for CD-Rs, 24x forCD-RWs, DVD-Rs, and DVD+Rs, 8x for DVD+RWs, and 6x forN E W !Tenemos ventas y servicio en Español.Expertos que hablan Español disponibles en x1178 y x1164.Honesty and Valuesince 1971。
Tascam dr2d 中文说明书

用
键或滑轮选择 REMOTE 项,按 ENTER/MARK 确认
(12)峰值分贝显示(dB) (13)录音模式/采样频率;此显示录音文件格式和采样频率 注:待录状态时,屏幕只会显示四项: INPUT SETTING:输入设置;AUTO REC:自动录音 MONITOR:监听;EFFECTOR:效果器 MENU 菜单栏介绍: 按 MENU 键可进行以下各个设置 INFORMATION:关于文件、SD 卡和系统的信息
在推着 1 的同时拉 2 (2) 将纽扣电池(CR2025)放入到拔出的圆弧中
(3) 重新插入到电池口中 3 使用遥控器
北京乐霖音频科技发展有限责任公司
Tascam DR2d 中文说明书
当你向使用遥控器时,首先确认 SETUP 设置窗口的 REMOTE 项 目是打开的,方法是按 MENU 进入菜单窗口选择 SETUP,并按 ENTER/MARK 确认
(2) 循环和重复提示
:单首回放 :单首循环
:所有循环 :循环点回放 (3) 音高控制开关(黑底为正在启用) (4) 部分取消状态(黑底为正在启用) (5) 输入监听状态(黑底为正在启用) (6) 电源余量指示;当电池开始使用时,页面的右上角就
北京乐霖音频科技发展有限责任公司
Tascam DR2d 中文说明书
长按此键代表开机和关机
5.
播放和暂停键;当主页面显示或回放停止
时,按此键开始回放;在回放过程中,按此键停止当前位置的回
放;当节拍器界面打开时,使用此键打开并停止节拍器
6. DUAL 双键;长按此键打开 DUAL SEC 设置页面;如果当前选
择的文件正在使用双录音模式,每次按下此键时,其他文件都会
北京乐霖音频科技发展有限责任公司
Linux_ALSA声卡驱动原理分析

11/12/2011
目录
一、导读 二、ALSA架构简介 三、准备工作 四、设备打开过程和数据流程 i. 整体分析 ii. 设备驱动程序insmod流程图 iii. 应用程序主流程图 iv. 声卡打开流程图 v. 数据写入流程图 五、ALSA其它形式的数据写入方法流程图
11/12/2011
二、ALSA架构简介
11/12/2011
目录
一、导读 二、ALSA架构简介 三、准备工作 四、设备打开过程和数据流程 i. 整体分析 ii. 设备驱动程序insmod流程图 iii. 应用程序主流程图 iv. 声卡打开流程图 v. 数据写入流程图 五、ALSA其它形式的数据写入方法流程图
11/12/2011
一、导 读
ALSA-lib
control
timer
… pcm
dmix
内核API ALSA-driver 设备驱动
hardware
ens1371
11/12/2011
目录
一、导读 二、ALSA架构简介 三、准备工作 四、设备打开过程和数据流程 i. 整体分析 ii. 设备驱动程序insmod流程图 iii. 应用程序主流程图 iv. 声卡打开流程图 v. 数据写入流程图 五、ALSA其它形式的数据写入方法流程图
本文主要针对ALSA声卡硬件驱动,从应用程序的角度展示了从用户层到内核层再 到硬件驱动程序控制声卡硬件的过程。主要包括insmod、声卡打开、数据写入 三个流程。rmmod和声卡关闭的流程与insmod、声卡打开类似,本文没有描 述。ALSA的其他部分如控制、录音等,不在本文叙述范围内。其中的insmod是 系统初始化时或手动加载,不需要具体的应用程序参与。具体到硬件,使用的是 ENS1371芯片,关于最小化的ENS1371芯片驱动程序,可以参考《 Linux ALSA声卡驱动开发最佳实践.pptx》。
TASCAM DM-3200 DM-4800数字混音台说明书

222M COMPATIBLE TASCAMDM -3200/DM -4800 DIGITAL M IXERS The DM-3200 is a 32-chan-nel digital mixing console, even at its full 96kHz/24bit audio resolution. It features48 inputs at mixdown consisting of 16 analog mic/line inputs with analog inserts,24 channels of TDIF and 8 channels of ADAT built-in, with EQ and compression oneach channel. It has 16 mixing busses, 8 aux sends, 4-band fully-parametric EQ anddynamics on every channel, and 4 effects processors. It mixes in surround, panningup to 6.1 output channels, and the optional IF-SM/DM expansion card adds surroundmonitoring and downmixing. An additional expansion card, the IF-FW/DM FireWirecard, turns the console into a 24-channel computer audio interface, making it acomplete studio solution for professional DAW recording. It has 2 expansion cardslots to support optional FireWire, surround monitor, ADAT, AES/EBU, Analog, TDIFcards, Aviom A-Net, and CobraNet. DAW and transport machine control is standard.The DM-4800 has a 64-channel mix platform with a “fat channel” strip in the center ofthe board, providing instant access to 4-band parametric EQ, dynamics and aux con-trols available for the first 48 channels. It features 24 mic preamps and a completelyconfigurable 24-buss routing system.ITEM DESCRIPTIO N PRICEDM3200.....................32-channel digital mixer .................................................................CALLDM4800.....................64-channel digital mixer .................................................................CALLOptional AccessoriesMU1000.....................Optional meterbridge for DM3200 or DM4800 .................................CALLIFFW/DM-MKII ..........FireWire interface card ....................................................................CALLIFAN/DM ....................8-channel balanced analog card ....................................................CALLIFTD/DM ....................8-channel TDIF digital card ............................................................CALLIFAE/DM ....................8-channel AES/EBU digital card .....................................................CALLIFSM/DM ...................Surround monitor card ....................................................................CALLIF-AV/DM ...................Aviom A-Net® Interface Card .........................................................CALLIF-CB/DM ..................CobraNet® Interface Card ..............................................................CALLPW1000CS ................Cascade cable for DM3200 .............................................................CALL (DM4800 / METER BRIDGE OPTIONAL)SYMETRIX ZONE MIX 760 Paging and music management for venues like restau-rants, bars, clubs, retail and more. Features 12 inputs (4 mic, 8 line), 6 outputs, com-pression, AGC, matrix mixing, paging, feedback elimination, filters and equalization. Set-up uses a straightforward Windows interface connected via Ethernet. Remote control isachievable with the Symetrix ARC-2I adaptive remote control wall plate. The ARC-2I is amenu-driven remote control with 24 menus, each with up to 16 enumerations that canbe used to control basic functions or initiate complex logic-based control events suchas gain, preset triggering, source selection, room combining and more.ITEM DESCRIPTIO N PRICE760............................Zone mixer, 12 inputs ...............................................................1239.00ARC-2I ......................Adaptive remote control wall plate ..............................................199.00WHIRLWIND M IX-5S All-purpose mixer for sound con t ract i ng. Offers 4 inputchannels, each with XLR and 1/4" TRS balanced con n ec t ors, suitable for mic or line-level use. An LED readout provides a visual in d i c a t ion of levels, and phantom poweris provided for operating condenser mi c ro p hones. XLR and 1/4" TRS outputs areprovided, with the XLR output mic or line level swit c h a ble. The outputs have theirown drive-circuit for isolation. An aux channel is pro v id e d with RCA input jacks forconnecting a tuner, CD player, tape player, etc.ITEM DESCRIPTIO N PRICEMIX-5S ......................Stereo mixer ................................................................................379.07MIX-5 ........................Mono version of MIX-5S ...............................................................336.898 SERIES LIVE The Yamaha log 8-group consoles with lots of features, great performance and quality sound. Each mono input223compact console package thatincludes Yamaha’s unsurpassedIXING STUDIO MW10C5D DIGITAL LIVE in two versions, the microphone preamps on the standard PM5D224AHA LS9 DIGITALExpandable digitalpact and lightweight frame with16 mono-input/4 stereo-inputconfiguration (LS9-16) or in thelarger frame, high-input capacity (LS9-32). With 32 input head amps for mic or line levelinputs plus 4 stereo inputs, the LS9-32 can comfortablyhandle the complex and varied source requirementsfor live sound applications. Both models can doublethe mono input capacity, expanding to 32 (LS9-16) orYGDAI interface cards. They have motorized 100mmlong-throw faders and a versatile bus architecture withLS9-16LS9-32M7CL-32M7CL-48AVY16-ES100MY8AD24MY8AE96S MY8AEB MY8DA96MY8AE MY8AD96MY8AE96MY16AE MY16AT MY16-CII MY16ES64MY16MD64YAMAHA CARDS FOR DIGITAL MIXERS ITEM DESCRIPTIO N PRICE AVY16-ES100 .......16-channel Ethersound network I/O card, RJ45 ....................................CALL MY4AD ..................24 bit 4-channel input card – XLR .......................................................CALL MY4DA ..................20 bit 4-channel output card – XLR .....................................................CALL MY8AD24..............8-24bit analog inputs on balanced 1/4" connectors ............................CALL MY8AD96..............24 bit/96kHz 8-channel line level analog input card (25-pin D-sub) ......CALL MY8ADDA96 .........8-channel analog I /O ............................................................................CALL MY8AE ..................8 AES/EBU digital format I /O (25-pin D-Sub) .......................................CALL MY8AE96..............24 bit/96kHz 8-channel AES/EBU digital I /O card (25-pin D-sub) ........CALL MY8AE96 ..............24 bit/96kHz 8-channel AES/EBU digital I/O card w/sample rate converter (25-pin D-sub) ...............................................CALL MY8AEB ................8-channel AES/EBU I/O card w/video input on BNC ..............................CALLMY8AT ..................8 ADAT digital format I /O (optical connectors) .....................................CALL MY8DA96..............24 bit/96kHz 8-channel line level analog output card (25-pin D-sub) .......CALL MY8-SDI-D ...........1-channel/8-multiplex 24bit HD/SDI card, w/2X BNC ...........................CALL MY8TD ..................8 TDI F digital format I /O (25-pin D-Sub) ..............................................CALL MY16AE ................16-channel AES/EBU I /O card ...............................................................CALL MY16AT ................16-channel ADAT I /O card .....................................................................CALL MY16-CII ..............16-channel Cobranet network I/O card .................................................CALL MY16ES64 ............16-channel EtherSound network I/O card, 2 Ethercon,9-pin HA remote, and 2 RJ45 cascade. Use with up to3-MY16EX cards to increase I/O to 64. .................................................CALLMY16EX ................16-channel I/O expansion card for use with MY16MD64 or MY16ES64,has 2 RJ45 cascade, uses standard CAT5 cables for interconnect ..........CALLMY16MD64...........16-channel MADI I/O card, 2-BNC, 2 optical MADI, & 2 RJ45 cascade.Use w/up to 3 MY16EX cards to increase I/O to 64. ..............................CALLMY16TD ................16-channel TDI F I /O card ......................................................................CALLLightViper fiber optic system interface cards for YGDAI-compatible Yamaha consolesVIMMY32M-T4 ......Interface card with TAC4 fiber connector ........................................1609.00 VIMMY32M-OC .....Interface card with Neutrik OpticalCon fiber connector ..................1015.00VIMMY32M-LC ......Interface card with LC fiber connector ..............................................899.00VIMMY32-S ..........Slave card, no fiber connections .......................................................740.00VIMMY32M-ST ......Interface card with ST optics ............................................................934.00Please visit the LightViper Digital Optical Snakes Systems section for more information and compatible gear.WAVES WSG-Y16 SOUNDGRID I/O CARD FOR YAMAHA MIXING CONSOLES Waves SoundGrid is a new audio networking and processing platform that delivers high precision with low latency. The WSG-Y16 brings cutting-edge SoundGrid technology to Yamaha mixing consoles. Together with a server, a Mac or PC, and iLok authorized Waves plug-ins, the WSG-Y16 lets you process 16 channels of audio using Waves award-winning plug-ins (in conjunction with Waves Multi-Rack software) directly from a Yamaha console. Features include redundancy and recovery safety net, MIDI control from the console, plus scalablilty and expand-ability, make this card indespensible to any compatible Yamaha console. Supports 44.1/48/88.2/96kHz sample rates (44.1 & 48kHz for 16 channel processing) and tranmits via Ethernet.ITEM DESCRIPTIO N PRICE WSG-Y16 ...................Mini-YGDAI SoundGrid I/O card ...................................................640.00Tenemos ventas y servicio en Español.Expertos que hablan Español disponibles en x1178 y x1164.Honesty and Valuesince 1971。
ALC888在Linux下4声道音频采集
ALC888在Linux下4声道音频采集摘要:alc888是瑞昱公司生产的7.1+2声道高清晰音频编解码器。
被广泛用于x86系列工控主板。
包含97db的dac和90db的adc。
利用现有硬件修改开源驱动实现最小成本的多路音频采集方案。
关键词:dac;adc;alc888;alsa;linux;x86;工控中图分类号:tp274.2文献标识码:a文章编号:1007-9599 (2013) 05-0000-021引言关于多通道音频采集播放有许多方案,比如用dsp+pci等等 .在对音质要求不高的前提下,有没有更低成本,更短开发周期的解决办法?笔者注意到现在比较流行的alc一系列芯片都有2个独立的adc,因此理论上只要适当修改驱动及pcb就可以实现4路音频采集.2alc888简介alc888是瑞昱公司生产的7.1+2声道高清晰音频编解码器。
提供同时支持7.1音频回放的10个dacs通道,外加通过前面板立体声输出的2个独立立体声通道输出。
alc888内置2个可以支持立体声麦克风的adcs。
还包括回声消除(aec),波束成形(bf),噪音抑制(ns)技术。
所有的dacs支持独立16/20/24-bit,44.1k/48k/96k/192khz采样频率。
所有的adcs支持独立的16/20/24-bit,44.1k/48k/96k/192khz的采样频率。
3硬件原理图4声道采集主要功能管脚是sensea,senseb的接模拟地和mic1,mic2的模拟信号输入。
alc888与南桥芯片ich9m的hda接口管脚相连。
注意个脚的匹配电容电阻,其直接影响各声道的音质。
4软件实现linux下音频驱动有两种,oss和alsa。
他们都是linux下最常见的2种音频驱动。
笔者采用修改部分alsa内核驱动来实现4声道音频采集。
笔者是在fedora14系统环境下实现,内核版本为2.6.35.6-45.fc14.i686,其alsa版本为1.0.23.系统安装后还需要要安装alsa-utils,alsa-lib,xmlto软件包.alsa-utils提供了alsamixer等软件服务,安装它之前需要先安装xmlto软件包。
Tascamdr07mkII中文使用说明书
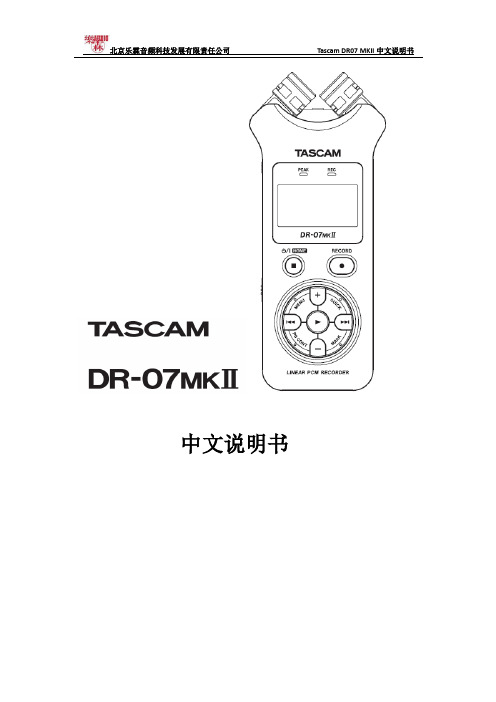
中文说明书感谢您购买TASCAM DR07MKII便携式录音机,请仔细阅读此说明以便最大限度地使用到DR07MKII的所有功能,我们希望您能尽情使用此设备。
此设备具备以下功能:A.手持便携式录音机B.可调节内置电容话筒的录音制式XY或ABC.可达到最高96KHZ/24BIT的WAVE PCM线性录音D.MP3录音指标可达到32-320 kbpsE.内置混响效果F.配音录制模式G.自动录音和自动标记功能H.峰值减少功能,优化的音乐录音,自动设定录音时的增益I.限制和低切滤波器,以帮助防止失真J.自动或手动电平设置K.自定义录音开始5或10秒。
在按下录音键等待,直到你准备好L.自动和手动追踪增益M.变速播放(50%-150%),而不改变音高N.循环和重复播放O.电平对齐功能可以防止在播放过程中不均衡的音量P.播放EQ设置Q.编辑功能(分离和删除)R.每个文件最多99个标记点S.音调调谐器T.1 / 8“立体声麦克风/线路输入B 2.0传输至PC和外部电源端口V.高达2秒预录音缓冲W.跳回到先前的点(1-10,20,30秒)X.1 / 8“耳机/线路输出Y.内置扬声器此设备原厂配有2节AA(5号)电池,也可使用AC变压器(可选:TASCAM PS- P515U)或USB总线供电,并装有2GB Micro SD(64MB-2GB)卡,同时可支持Micro SDHC (4GB-32GB)卡,默认录音为44.1KHZ,16BIT的WAV录音制式;并可通过USB与电脑连接,进行文件传输。
一、面板介绍前面板:1.内置的心形麦克;可调整为(打开)AB或(关闭)XY的录音制式;如果你要用外部麦克,可连接至后面板的MIC/EXT in接口,这时,内置的心形麦克失效。
2.峰值指示灯;亮起说明输入信号过大3.显示窗口;显示当前状态和信息4.开关机和停止/回到主页面;当在回放过程中按下时,则表示节目在当前播放位置下暂定;若在暂定时间段按下此键,则表示播放回到初始起点上;若在录音过程或待录状态下,按此键则会停止录音;当其他窗口打开时,按此键则会回到主菜单;在需要确认信息时,此键还代表“NO”(否定)的意思;长按此键代表开机和关机5.+ 加号键; 当显示主页面或调音界面时,按此键代表提高内置扬声器和外接耳机的音量;当回放控制窗口显示时,按此键代表提升回放速度;当设定界面显示时,按此键代表改变选定的项目6.MENU菜单键;当主页面显示时,按此键代表打开菜单界面;按此键可从任何设置界面返回到菜单窗口;当菜单界面显示时,再按此键代表返回到主页面;当轨道的进出时间点被选定和回放控制页面显示时,按此键会关闭循环回放状态7.向前倒带键;按此键代表将在节目中途播放或停止的状态返回到起始位置;当节目轨道的进出时间点被选定后,按此键代表取出这些点;如果节目停在开头,按下此键会跳到上一个节目,长按此键会从后向前寻找;同时按下此键和MARK标记键时,系统会跳到上一个标记点;在设置窗口中,使用此键可移动光标至左;在浏览BROWSE页面中,按此键则会提升一个级别;在录音或待录状态下按此键,则会衰减来自内置或外接话筒的输入电平,在调整过程中,屏幕也会随之反应8.PB CONT回放控制键;此键代表进入了回放控制界面,此界面显示时,再按此键会回复到主页面;在待录状态下按此键会关闭自计时器的功能或改变某点时间9.-减号键;当主页面或调音界面显示时,按此键代表衰减内置扬声器以及外接耳机的音量;在调整过程中,屏幕也会是指反应;当回放控制页面打开时,按此键会衰减回放速度,当设置页面开启时,使用此键来改变所设定的项目10.录音灯;在待录状态下此灯会闪烁,在录音时此灯亮起11.录音键;当节目停止时,按此键代表进入到待录状态,录音灯会闪;当在监听混合窗口下,输入时打开时,会弹出一个对话框问你是否打开配音状态;在待录状态下,按此键开始录音,录音灯为亮起状态;当录音时,按此键会暂停录音12.快速QUICK按键;在主页面,不管是回放,停止还是暂定或是待录,或者显示回放控制页面时,按此键会进出快速菜单页面,当按下此键时,会依照你的机器处于的哪种状态来定义功能:在停止时:按此键为当前歌曲的删除,分离或电平对齐回放或回放控制页面时:电平对齐待录:电平控制按此键会分离正在录音状态并建立新文件;当浏览窗口或播放列表状态显示时,按此键会显示或取消弹出文件或文件夹操作的窗口13.向后倒带键;在回放或停止时按此键会跳至下一首节目开头,当进出点设定为在当前位置到节目结束时,按此键会跳到那些点;长按此键会从前向后寻找;同时按下此键和MARK标记键时,系统会跳到下一个标记点;在设置窗口中,使用此键可移动光标至右;在浏览BROWSE页面中,按此键则会下降一个级别;在录音或待录状态下按此键,则会提升来自内置或外接话筒的输入电平,在调整过程中,屏幕也会随之反应14.播放键;当主页面回放停止时,按此键会开始回放;在回放过程中,按此键则会跳回到播放;当设置页面打开时,用此键来确认设定;当文件或文件夹在浏览窗口选定时,按此键会回到主页面,并且播放文件或从其文件夹的第一个文件开头开始播放15.MARK标记键:当录音时,用此键手动增加标记点;同时按下此键与和可分别移动上一个或下一个标记点的位置;当回放控制窗口打开时,使用此键可设定开始in 和结束out的区间以便在此位置循环回放,当开始结束点设定后,按此键可取消循环回放并且提出开始结束点底面板:16. 套环扣;可用套背环使用顶面板:17. MIC/EXT IN外部输入接口用此接口可连接至Mini立体声接口的话筒或外部输入设备,此接口可提供插入供电,并需要在输入设置窗口进行相关设定,若插入此接口,内置话筒将不起作用左侧面板:18. 耳机和线路输出接口;此接口可连接至耳机或带有任何模拟输入设备19. HOLD锁定键;向箭头方向移动可锁定所有的机器上的所有功能键,并使其所有功能键失效右侧面板:20.USB口可使用附送的USB线连接至电脑进行文件传输。
TascamDR菜单说明

1、按下录音键(11),进入录音状态2、按下一首键(13)进行麦克风的灵敏度调节,调到70试试3、再次按下录音键(11),开始正式录音4、录完音后,按下HOME键(4)进行保存录音5、按下播放键(14)进行录音回放1、内置立体声麦克风2、PEAK:峰值指示器,如果亮红灯,说明峰值过高,需要调低麦克风的灵敏度。
3、显示屏4、Home:在回放时,按下此开关是停上当前文件的播放。
在录音时按下此按键,是停止录音。
5、+:音量增加。
在菜单设置中,使用此键是进行菜单选项的更改。
6、Menu:菜单键,在停止状态,按下此键是进入系统菜单。
7、:在播放状态,按下此键,是返回到当前播放文件的开始处。
在停止状态,按下此键是选择上一文件。
在录音状态,按下此键是降价麦克风的灵敏度。
8、:按下此键是激活回放控制。
9、:音量减小。
在回放控制界面,按下此键是降低播放速度。
在菜单设置界面,按下此键是更改设置选项。
10、:录音工作指示灯。
11、:录音按键,按下此按键开始录音。
,在录音时,再次按定此键是暂停录音。
12、:显示一些状态信息。
13、:下一首。
在录音过程中,按下此键是增大麦克风的灵敏度。
14、:播放键。
二、菜单设置1:REC SETTING:录音设置菜单2:PLAY SETTING:播放设置菜单3:BROWSE:查看TF卡或文件夹4:SPEAKER:打开或关闭机身喇叭5:OTHERS:其它了菜单显示三、设置日期与时间按下MENU键,打开菜单显示界面。
使用+或-键,选中OTHERS菜单,然后再按播放键,之后会显示如下新菜单再次按+或-键选中date/time菜单,按下播放键,进入日期/时间设置按下键,移动光标(高亮显示区),使用+或-键进行更改。
按下播放键确认更改。
四、录音设置菜单1、按下机身MENU键,进入菜单设置,使用+或-选中REC SETTING项,然后按下播放键,进入录音菜单使用+或-键,选择FORMAT,按下播放键确认选择,要更改数值,按+或-键进行更改WA V:16bit(默认),W AV 24bit(注:数值越大,录音效果越好,对应的文件体积也就越大)MP3:32KBPS,64KBPS,96KBPS,128KBPS,192KBPS,256KBPS,320KBPS.TYPE: STEREO 立体声录音MONO:单声道录音SAMPLE:44.1K(default)\48K,96K(注:数值越大,录音效果越好,对应的文件体积也就越大)。
TASCAM CD-RW750 说明书
TASCAM CD-RW750 说明书基本操作准备:打开电视,选择VIDEO界面,打开立体声系统电源;1.插入AC电源插孔,将滑动杆滑倒DVD的位置;2.按OPEN/CLOSE打开DVD盒盖;3.放入盘片;4.关闭盒盖,按下CLOSE键后开始播放DVD;5.当电视上出现选择菜单后,根据指引或数字选择,后按ENTER 确认;6.按NEXT SKIP进行下一个界面,按PRVE SKIP回到上一个界面;7.按TITLE键,或MENU可停止播放回到菜单,按TITLE,MENU或RETURE可回到DVD,按RETURN回到VEDEO CD。
停止播放—按STOP;快进-NEXT SKIP;快退-PREV SKIP;加速播放,按F.FWD上,可选择2X,4X,8X,20X播放速度,再按PLAY回到正常播放速度;暂停-PAUSE,再按PLAY回到正常播放;慢速播放,按遥控器上的SLOW,按一次是1/2速度。
每次按下后速度递减为1/2,1/3,1/4,1/5,1/6,1/7.按PLAY回到正常播放。
MP3播放:1.插入MP3或WMA格式盘片,数秒钟后电视屏幕会显示所有文件夹;2.选择要播放的文件,按ENTER确认;3.最多可显示14个字节,非英文的文件名无法正确显示;4.按NEXT进入下一页,按PREV回到上一页;5.按REPEAT1/ALL更改播放模式。
USB连接播放:B内存放所需的文件,MP3,UMA,JPEG图片,文章等格式;2.将USB插入对应插槽,电视显示所有文件夹;3.按UP/DOWN进行选择,按ENTER开始播放;4.FOLDER-all全部播放;5.SINGLE-play仅播放一个文件夹;6.REPEAT ONE重复播放;7.REPEAT FOLDER重复播放同一个文件夹内。
屏幕播放信息:当播放进行时,持续按遥控器上的OSD键,屏幕会连续显示信息,再次按OSD屏幕信息清零。
编制播放:可按你要求的顺序进行播放。
- 1、下载文档前请自行甄别文档内容的完整性,平台不提供额外的编辑、内容补充、找答案等附加服务。
- 2、"仅部分预览"的文档,不可在线预览部分如存在完整性等问题,可反馈申请退款(可完整预览的文档不适用该条件!)。
- 3、如文档侵犯您的权益,请联系客服反馈,我们会尽快为您处理(人工客服工作时间:9:00-18:30)。
TASCAM PCM RecorderiPhone/iPad/iPod touch Application D0*******AUSER'S GUIDEContentsIntroduction (3)Trademarks (3)What's in the Main Window (4)What's in the Settings Window (6)The Sharing Window (7)What’s in the Files Window (8)Operations (10)To Record a Track (10)To Play a Track (10)To Transfer Your Recording to a Computer (10)To Delete a Recording (10)System Requirements (10)FAQs (11)2 TASCAM PCM RecorderIntroduction TrademarksTASCAM is a trademark of TEAC Corporation, registered in the U.S. and other•countries.iPad, iPhone, iPod, iPod touch and iTunes are trademarks of Apple Inc., registered in•the U.S. and other countries.Other company names, product names and logos in this document are the trademarks•or registered trademarks of their respective owners.TASCAM PCM Recorder 34 TASCAM PCM RecorderWhat's in the Main WindowWhen you launch TASCAM PCM Recorder you will see the main screen:(iPhone 4 screens shown in this document, iPad version differs slightly)1 Input LevelAdjust up or down to change the recording level. A line shows unity gain (no cutting or boosting of the level) for use with USB interfaces like the TASCAM iM2. 2 TimeThis displays the running time of your file during recording or playback. 3 Remaining TimeDuring playback, this shows how much time is remaining until the end of the file. During recording, it shows how much time is remaining until you reach the maximum file size. You can record for 12 hours in mono or 6 hours in stereo.NOTEThe remaining time shown varies depending on the free space left on the iPhone/iPad/iPod touch.4 File FormatThis displays whether the recorder is in Stereo or Mono recording mode. It also shows the recording resolution of your WAV file. The recording format is always 44.1kHz, 16-bit. You can load files into app through iTunes on the computerconnected via the dock. (See “7 Mono/Stereo” in the section “What's in the Settings Window”.)5 Level MeterThe level of the input or playback sound is displayed graphically in this bar graph meter. There is also a numeric display of your level above the meter.6 File NameThis shows the name of your file. The automatic file naming scheme is YYMMDD_NNNN.wav (year, month, day, number.) You can change the name of your recording later in the Files screen. 7 StopStops playback or recording.8 LockThis locks all the controls of this application except Output Volume. You may want to press the Record button and then the lock button to keep from accidentally pressing the Stop button if the device is in your pocket.9 RewindThis rewinds to the beginning of the file. To return to the previous file in the file list, press the Rewind button within 3 seconds after the file starts playing from the beginning. You can also incrementally search backwards through the file by pressing and holding the button.What's in the Main Window 0PlayPressing this button plays back the currently-loaded file.If you press the button during playback, the file is rewound 3 seconds and thenstarts playing from that point.q Output VolumeThis attenuates the output. It is separate from the headphone volume of youriPhone/iPad/iPod touch. A line shows unity gain.w SettingsPress this button to open the settings window. (See the next section.)e SharingPress this button to open the SoundCloud Sharing window. (See the section “TheSharing Window”.)r FilesPress this button to open the Files window. (See the section "What's in the FilesWindow.")t EQ StateThis button shows if EQ is being written to the file (“EQ-In”) or if it is only on playback(“EQ-Out”). You can change the EQ settings in the Settings window.y Progress BarDuring playback or stop, this bar shows how far through the file you have played. Ifyou press on this bar and drag your finger, you can “scrub” through the file.u RecordPress the button once to put the unit in record pause (record light flashes). Thenpress either Play or Record button again to start recording.i Fast ForwardPress this button once to skip to the next file in the file list. You can alsoincrementally search forwards through your recording by pressing and holding thebutton.TASCAM PCM Recorder 56 TASCAM PCM RecorderWhat's in the Settings WindowPress the Settings button (the “gear” in the bottom left corner of the window) to openthe Settings window. The following controls are available in this window:1 High EQThis control adds or subtracts high frequencies to the audio (shelving at 4500Hz). This can be added to the sound input while the “EQ to Input” button is enabled (red) or added to the sound output while the “EQ to Input” button is disabled (gray). (See “4 EQ to Input” below.)2 Low EQThis control adds or subtracts low frequencies to the audio (shelving at 250Hz).3 SpeakerEnables or disables the iPhone/iPad/iPod touch speaker. This is only available when using the built-in audio on your Apple device. When a USB interface or Dock connector accessory is plugged in, this button does nothing. The speaker is automatically switched off when you press the Record button to avoid feedback, but you can switch it back on in record-pause mode if desired. 4 EQ to InputWhen this button is enabled (red), the EQ settings are being written to the file that you record.NOTETASCAM PCM Recorder stores the High EQ and Low EQ settings for either sound input or output, depending on the “EQ to Input” setting (enabled/disabled). The EQ settings can be applied to either sound input or output at a time.5 Lo-CutWhen enabled, cuts all low frequencies.6 L/R SwapWhen using a stereo digital input source like the TASCAM iM2 via the dock, this button exchanges the left and right inputs during recording.7 Mono/StereoThis changes the recording format to stereo or mono. When using the built-in microphone on your iPhone/iPad/iPod touch, or a device that connects to theheadphone jack on your iPhone/iPad/iPod touch like the TASCAM iXZ, this is always Mono. Stereo recording is available when attaching a USB audio interface or device.8 Reset EQSets both the High and Low EQ controls to 0dB (centered/disabled)9 LimiterThis button enables a peak limiter. It helps decrease distortion and keep levels from varying too much.NOTEAdjust settings of your input device to avoid distortion.TASCAM PCM Recorder 7The Sharing WindowTASCAM PCM Recorder allows you to share or publish your recordings directly toSoundCloud, a free service that allows you to share your music online. Your recordings that have been just uploaded are all kept private. To publish them, log into yourSoundCloud account by using a web browser, and then change sharing settings. Pressthe Sharing button at the bottom of the screen to open the Sharing window:1 Log InUse this to log into your SoundCloud account. If you don’t have one yet, you’ll need to create an account at first. 2 File ListThis lists all of the recordings you’ve made in PCM Recorder. You can rename these in the Files menu before uploading if you wish. Select a file in the list by pressing the name to highlight it.3 UploadOnce you’ve selected a file in the list above, press the Upload button to publish it to SoundCloud.4 Log OutUse this to sign out of your SoundCloud account if you wish.5 Progress BarThis area shows the progress of sending your file to the SoundCloud server.8 TASCAM PCM RecorderWhat’s in the Files WindowUse the Files window to load, delete and rename files. Press the Files button at thebottom of the screen to open the Files window:1 Version Number2 File ListSelect a file here first by pressing it, and then use one of the buttons below. (The file selected is highlighted.)3 LoadPress this button to load the selected file for playback.4 DeletePress this button to delete the selected file. The program will ask you to confirm first.TASCAM PCM Recorder 95 Cont PlayThis button controls what happens when the app gets to the end of a file while playing. When this button is lit (red), TASCAM PCM Recorder will play all files in sequence in the file list. When it is unlit (grey), TASCAM PCM Recorder plays thecurrently loaded file and then stops.6 RenameSelect a file in the list and press the Rename button to change the name of the file.You may want to do this before uploading a file to SoundCloud in the Sharing menu.What’s in the Files Window10 TASCAM PCM RecorderOperationsTo Record a Track1 Press the Record button once so it starts flashing.2 Set the input level using the control at the top of the screen.3 Press the Record button again to begin recording.When you are finished recording, press the Stop button.To Play a Track1 Press the Play button to play the currently-selected file.2 Press the Fast Forward button to skip to the next file.3 Press the Rewind button to skip to the beginning of the file.4Press and hold the Rewind or Fast Forward button to incrementally search forwards or backwards through the file.To Transfer Your Recording to a Computer1 Connect your iPhone/iPad/iPod touch to your computer and launch iTunes.2 Select your iPhone/iPad/iPod touch in the left column of iTunes, and then clickon the Apps tab.3Scroll down to File Sharing and select PCM Recorder in the list.4 Select your recording in the PCM Recorder Documents window and click "Save To..."5 Find a location on your computer and click Choose.You can now open your mix in an audio editor or drag it into your iTunes library to convert to an MP3 file and share online.To Delete a Recording1 Press the Files button to open the Files window.2 Select the recording you want to delete.3 Press the Delete button.4Press the Continue button.System RequirementsiPad 2, iPad, iPhone 4S, iPhone 4, iPod touch • (4th generation)iOS 4.3 or later•FAQs Q: What is the red bar I sometimes see on the top of the screen while TASCAM PCMRecorder is running in the background?A: This is a security setting in iOS. It means that some application is running that hasaccess to the built-in microphone. You can ignore this.TASCAM PCM Recorder 11TASCAM PCM Recorder。
