Hitachi 日立保湿清洁美容仪CM-N810中文说明书

合集下载

美容仪器操作说明书

美容仪器操作说明书

美容仪器操作说明书操作前注意事项:1. 在使用美容仪器之前,请仔细阅读本操作说明书,并按照说明书的要求正确操作。

2. 在操作美容仪器之前,请确保身体干燥,避免触摸手柄或控制面板时导电。

3. 若您有任何肤质问题或者疾病,请在使用之前咨询专业人士,并按照他们的建议操作。

4. 请确认美容仪器和附件是否完好无损,若发现任何损坏,请勿使用,联系售后服务。

5. 请确保使用美容仪器时周围环境安全,确保无水或其他液体溅入仪器。

一、美容仪器的基本使用方法和步骤:1. 准备工作:a. 洗净双手,确保手部清洁干燥。

b. 将美容仪器所需的电源线插入电源插座,并确保电源开关处于关闭状态。

c. 将美容仪器的配件按照说明书插入正确的接口,确保连接牢固。

2. 美容仪器的开启和关闭:a. 打开电源开关,美容仪器开始启动,显示屏或指示灯将显示启动状态。

b. 使用完成后,关闭电源开关,美容仪器停止工作。

3. 操作步骤:a. 根据您的肤质和需求选择合适的功能按钮或旋钮。

b. 轻按或旋转相关按钮,调节美容仪器的强度、模式或其他参数。

c. 将美容仪器轻轻按摩在所需部位,根据使用说明书所建议的频率和时间进行操作。

d. 操作结束后,将美容仪器从体肤表面移开。

二、常用的美容功能和操作说明:1. 清洁功能:a. 在清洁功能下,美容仪器将通过特定技术清除毛孔中的污垢和油脂。

b. 先使用温水洗净脸部,以去除表面污垢。

c. 将美容仪器的清洁模式选择到适当的档位。

d. 按摩美容仪器在脸部,避免过度按摩时间和压力。

2. 护肤功能:a. 在护肤功能下,美容仪器将通过特定技术帮助吸收护肤品。

b. 将美容仪器的护肤模式选择到适当的档位。

c. 使用指腹将所需护肤品涂抹在脸部。

d. 按摩美容仪器在脸部,帮助吸收护肤品。

3. 深层营养功能:a. 在深层营养功能下,美容仪器将通过特定技术将营养成分输送至肌肤底层。

b. 先使用温水洗净脸部,以去除表面污垢。

c. 将美容仪器的深层营养模式选择到适当的档位。

Hitachi 分体式壁挂式变频热泵消费者指南说明书
Hitachi 分体式壁挂式变频热泵消费者指南说明书

Split System: Wall Mounted Inverter Heat PumpsConsumer Guide<($5:$55$17<,1&5($6,1* <285&20)2576Imagine choosing your perfect day theninstantly creating it in the comfort of your own home. With Hitachi heat pumps you create your favourite season anytime, at the touch of a button.The choice is yours. Welcome to Another Hitachi Day.Comfort All Year RoundThere’s nothing worse than having a cold house all winter long–waking up in the morning to freezing temperatures, cold surroundings and damp air.In summer, it can be hard to cool a stuffy house that‘s been shut up all day, or to be comfortable on humid evenings, when open windows can pose a security risk and invite insect problems.Now, with an Hitachi wall mounted heat pump, you can control your everyday environment day and night, all year round.Our heat pumps provide effective cooling at temperatures as high as 43°C outside, and out-perform other heating systems at temperatures as low as –10°C.Energy StarThis logo is awarded to appliances that are among the most energy effi cient on the market in their class at the time of testing. Only Energy Star models can qualify for a heat pump subsidy under EECA’s ‘Warm Up NZ’ campaign.(Refer back page Specifi cations table).Save power, save moneyHitachi advanced technology leads in power effi ciency. A measure of this effi ciency is called the Coeffi cient Of Performance, or COP . Hitachi heat pumps have excellent COP . For every 1 kW of electricity used by our heat pumps, more than 3.5 kW of heating or 3 kW of cooling is delivered to your room. The Energy Effi ciency graph below shows how effective our heat pumps are compared to other heating methods.Heat Pump air conditioningElectric fan heater Natural Gas heaterLPG heater Oil heaterCoal slow combustionCoal open fire0 50 100 150 200 250 300 350 400Efficiency %Installing an Hitachi heat pump means no more heat going up the chimney, andno more cluttering up your home with a host of power hungry appliances.What is more, our heat pumps disperse warm or cool air throughout your room, unlike traditional radiators.Another Hitachi DayEnhance the value ofyour homeHitachi modern air conditioning systems are compact, elegant, and unobtrusive. Each system comprises an indoor unit (wall mounted) and an outdoor unit (located near the house), sized to suit the area to be air conditioned. Select from a range of models all designed to blend in with your environment.Indoor:R AS-50YHA3 RAS-60YHA3Outdoor: R AC-50YHA3 RAC-60YHA3Total Hitachi ComfortTotally Safe…Even when you are not at home.Outdoor DurabilityWith its special anti-corrosion “green” coating, the Green Fin Condenser lasts up to three times as long as standard types. This coating on theoutdoor heat exchanger assures better performance and improves durability even in tough conditions such as those incoastal areas. * Models RAS-25YHA3 and RAS-35YHA4 have a transparent anti-corrosiontreatment applied.Low Starting Current and Auto RestartHitachi DC Inverter technology uses a low starting current, to minimise power usage at start up. For convenience, Hitachi heat pumps are able to memorise the precise operation mode, air fl ow, temperature and timing settings. If there is a power cut, settings will automatically reset to the original operating mode once power is restored.LCD Remote System ControllersThe handy infrared remote control allows you toaccurately select the desired room temperature from the comfort of your armchair. All commands are shown clearly on the liquid crystal display. A smart system of one touch buttons can create the perfect environment with ease.The new SPX-WKT1 Weekly Timer is available as an optional extra. Offering 5 different programs for each calendar day with start and end times and temperature control. Customise settings for “Weekly Program” or use the “Temporary Operation Mode”. Choice of 5 fan settings: Auto/High/Medium/Low/Sleep.Green anti-corrosioncoating*SaltcontentAir Water Corrosion resistant layer ■ Base material ■SPX-WKT1 Weekly Timer –featuring remote functionsRAS-50YHA3 RAS-60YHA3RAS-70YHA3 RAS-80YHA3RAS-25YHA3 RAS-35YHA4Pre-FilterAir Purifying FilterA Breath of Fresh AirAfter 24 hoursBefore deactivationNano Titanium Air Purifying FilterShuts out germs, bacteria and allergens.Nano Titanium particles are minute particles that catch and neutralize bacteria, mould and odour molecules which are approximately 1,000 times larger.The Air Purifying Filter uses both these incredibly small nano titanium particles and anti-bacterial Silver Agents to trap and eliminate microbes as well as neutralise allergens and remove harmful substances such as formaldehyde.Nano Titanium Pre-Filter*The pre-fi lter which covers the entire air inlet to stop dust and other particles from entering is also coated with nano titanium.The two-stage action of nano titanium in both the pre-fi lter and the purifying fi lter ensures that bacteria and odours are removed from the air.*Optional Nano Titanium on RAS-25/35.Deactivation EffectSample: Escherichia coli.Bacteria (sample Escherichia coli) is deactivated by 99% in 24 hours. (Tested by SIRIM QAS International Sdn, Bhd. Report No: 2004KLO100).Silver ActionSilver Agents.Silver agents are also included in the air purifying fi lter to effi ciently catch and deactivate ing the action of the nano titanium catalyst which is 1/200 the size of regular antibacterial and silver agents, microbes are captured and effectively neutralised to provide a powerful deodorising effect.distributors ofModel: Indoor Unit RAS-25YHA3RAS-35YHA4RAS-50YHA3RAS-60YHA3RAS-70YHA3RAS-80YHA3Capacity *Cooling Capacity (kW) 2.5 3.5 5.0 6.07.08.0Range ( kW )0.9 ~ 3.11.1 ~ 4.20.9 ~ 5.80.9 ~ 6.81.5 ~ 8.31.5 ~ 8.5Heating Capacity (kW) 3.4 4.5 6.17.08.39.0Range (kW)0.9 ~ 4.41.1 ~ 5.60.9 ~ 6.80.9 ~ 7.51.5 ~ 9.71.5 ~ 9.7Dehumidifying Capacity (l/h)1.4 1.62.8 2.8 4.8 4.8Effi ciencyPower Input kW (Cooling)0.670.94 1.48 1.80 2.05 2.45Power Input kW (Heating)0.85 1.10 1.66 1.99 2.36 2.75EER / AEER (Cooling) 3.73 / 3.74 3.72 / 3.74 3.38 / 3.34 3.33 / 3.22 3.41 / 3.28 3.27 / 3.35COP / ACOP (Heating) 4.00 / 3.87 4.09 / 3.85 3.67 / 3.80 3.52 / 3.62 3.52 / 3.66 3.27 / 3.26Star Rating Cool / Heat ////// ENERGY STAR®YesYesYesYesYesYesDimensions & weightsDimensions IU (H x W x D mm) 280 / 780 / 220280 / 780 / 220295 / 1030 / 207295 / 1030 / 207333 / 1150 / 245333 / 1150 / 245Weight IU (kg)9.59.511111616Dimensions OU (H x W x D mm) 548 / 750 / 288548 / 750 / 288650 / 850 / 298750 / 850 / 298800 / 850 / 298800 / 850 / 298Weight OU (kg)333645505252Noise levelsSound Pressure Level IU dB(A) ✝ (Hi / Med / Low / Sleep) 38 / 32 / 26 / 2243 / 35 / 29 / 2647 / 39 / 28 / 2449 / 41 / 32 / 2947 / 42 / 33 / 3049 / 45 / 40 / 36Sound Pressure Level OU (dB) Cool / Heat46 / 4946 / 4950 / 5250 / 5151 / 5355 / 55InstallationPipe Connection Sizes: Gas (mm) (in)9.5 (3/8)9.5 (3/8)12.7 (1/2)12.7 (1/2)15.9 (5/8)15.9 (5/8)Pipe Connection Sizes: Liquid (mm) (in) 6.35 (1/4) 6.35 (1/4) 6.35 (1/4) 6.35 (1/4) 6.35 (1/4) 6.35 (1/4)Max. Pipe Length (m) (min./max.) 3 / 20 3 / 20 3 / 30 3 / 30 3 / 30 3 / 30Max. Height Difference (m)101010202020Pipe Connection MethodFlare Flare Flare Flare Flare Flare FeaturesNano Titanium Air Purifying Filter Yes Yes Yes Yes Yes Yes Nano Titanium Pre-Filter Optional Optional Yes Yes Yes Yes Anti Corrosion Fin (O/U Coil)TransparentTransparentGreen Green Green Green Indoor Fan – Anti-Bacterial Coating Yes Yes Yes Yes Yes Yes Multi-Directional Air Flow ––––Yes Yes Weekly Timer SPX-WKT1OptionalOptionalOptionalOptionalOptionalOptionalRange of operation: Cooling -10˚C to 43˚C, Heating -15˚C to 21˚C. * AS/NZ3823.2 ✝ Japanese Industry Standard. Refrigerant: R410A.Note: Materials and specifi cations subject to change without prior notice due to the manufacturer’s ongoing research and development programme.Wall Mounted Single Split System Specifi cationsYour local Hitachi dealer:3760a 09/12Peace of MindTemperzone Ltd distributes Hitachi heat pumps throughout New Zealand.Hitachi heat pumps from temperzone have a 6 year warranty on parts and labour.It’s a comfort to know that this warranty is backed by Temperzone Ltd, the largest air conditioning manufacturer and exporter in Australasia: founded, owned and operated by New Zealanders since 1956.Easy InstallationYour temperature problems can be solved in a matter of hours.Call us today for your no obligation on site inspection and quote.Six year warranty Energy Effi cient Quiet and DiscreetConvenient comfort control‘Hitachi ticks all the boxes’<($5:$55$17<,1&5($6,1* <285&20)2576。

日立美容仪原理
日立美容仪原理

日立美容仪原理
日立美容仪系列产品涉及多个领域,包括面部护理、按摩、皮肤清洁等。

每款产品的工作原理可能有所不同。

以下是可能涉及的一些常见技术原理:
1.超声波技术:
•一些日立美容仪采用超声波技术,通过高频振动帮助深层清洁皮肤,促进血液循环,增强皮肤的吸收能力,使护肤
品更容易渗透。

2.电流/微电流技术:
•某些美容仪器可能利用微电流或电流刺激肌肤,以促进肌肤的新陈代谢、增强弹性,有助于改善细纹、松弛等肌肤
问题。

3.光疗技术:
•光疗是一种利用特定波长的光刺激皮肤的技术。

日立美容仪中可能包括LED光疗,根据不同波长的光对肌肤有不
同的影响,如促进胶原蛋白生产、改善色素沉着等。

4.声波按摩技术:
•一些日立美容仪采用声波按摩技术,通过特定频率的声波按摩促进肌肤血液循环,提升面部轮廓,缓解肌肉疲劳。

5.热敷/冷敷技术:
•美容仪器中可能集成了热敷或冷敷功能,通过温度的变化来刺激皮肤,促进血液循环、舒缓肌肤。

6.电动刷头技术:
•部分美容仪器可能带有电动刷头,用于深层清洁,去除死皮细胞,使皮肤更加光滑。

请注意,具体的日立美容仪器的工作原理可能因产品型号和用途而异。

使用这类设备前,请仔细阅读相关产品说明书,按照指导使用,以确保安全有效地享受美容护理。

安装及保养说明书-海信日立
安装及保养说明书-海信日立

安装及保养说明书-海信⽇⽴安装及保养说明书室内机本说明书为室内机专⽤说明书,请阅读本说明书的同时,阅读与之匹配的室外机说明书。

提⽰感谢您购买热泵空调。

在使⽤前,请仔细阅读并理解本说明书。

阅读完毕后,请妥善保存以便⽇后使⽤。

多联式热泵空调MULTI-SPLIT AIR-CONDITIONERP01104Q尊敬的⽤户:您好!感谢您选择和使⽤本公司产品。

为了您更好的了解和使⽤本产品,在使⽤之前,务必阅读并遵守以下相关事项。

本说明书应被视为空调设备的⼀部分,请妥善保管。

本说明书对热泵式空调机进⾏了统⼀的说明及介绍,因此,既可⽤于您的空调机也适⽤于其它空调。

本公司致⼒于不断地对产品进⾏改进,如有变更恕不另⾏通知。

本公司对于空调机因在特定环境中运转⽽发⽣的偶然性损坏事故,不负任何责任。

本空调只能作为普通空调使⽤,不能⽤于⼲燥服装、冷冻⾷品、冷却或加热等其他⽬的。

请勿将空调安装在以下场合。

否则可能导致⽕灾、机器变形或者故障。

*有油飞溅的地⽅(包括机油)。

有易燃⽓体存在的场所。

*带有硫化⽓体或硅元素存在的场所(如温泉等)。

*海岸地带多盐性或强酸、强碱的场所,会腐蚀机体。

●●●●●●●在标明各种危害严重程度时会使⽤标志性词语(危险、警告和注意)。

关于各种危害等级的定义以及它们对应的标志性词语如下所⽰:●●本热泵式空调机的设计温度范围如下表所⽰。

请在此范围内使⽤。

温度(℃)不要让机器的出风⼝直接⾯对动植物,这样对动植物有不利的影响。

安装和服务⼯程必须符合当地的标准、法律法规。

空调内机作为“公众不易接近的器具”,要求空调内机的安装⾼度不应低于2.5⽶。

本空调安装只能由经销商或专业⼈员进⾏,如⽤户⾃⾏安装,可能引起漏⽔、触电或⽕灾。

若您有不明之处,请与经销商或本公司指定的服务中⼼联系。

为了保护环境,请勿将产品随意丢弃,本公司按照国家相关规定可提供回收服务,并按国标要求可提供可更换的部件。

●*23WB 15WB -5DB*15DB 43DB* 27DB 15WB*室内室外室内室外制冷运⾏制热运⾏最⾼最低*这个温度值可能随不同的室外机⽽改变。

美容仪器使用说明书
美容仪器使用说明书

美容仪器使用说明书一、前言感谢您购买我们的美容仪器。

本使用说明书将为您提供详细的操作指导,保证您在使用过程中能够正确、安全地操作该仪器,达到最佳的美容效果。

二、产品概述美容仪器是一种专业的美容设备,旨在帮助改善皮肤质量,减少皱纹,提升面部轮廓,增强皮肤弹性,并促进血液循环。

本仪器采用先进的技术和创新设计,能够提供多种美容功能,并适用于各种皮肤类型。

三、安全须知1. 在使用本仪器之前,务必仔细阅读本使用说明书,并按照指导进行操作。

2. 使用前请确保皮肤干净,并按照需要涂抹适当的护肤品。

3. 请保持仪器干燥,避免接触水或其他液体。

4. 在使用过程中,如有不适应或异常状况,请立即停止使用,并咨询专业人员。

5. 请将本仪器放置在儿童无法触及的地方。

6. 在清洁和维护仪器时,请确保断开电源并遵守相关安全规定。

四、操作步骤1. 打开电源开关,确保仪器已连接电源。

2. 选择合适的功能模式,并调整适当的功率档位。

3. 轻轻将仪器置于皮肤上,通过轻按或按摩的方式进行操作。

4. 按照使用时间限制,一般建议每次使用不超过20分钟。

5. 使用完毕后,关闭电源开关,将仪器放置在干燥通风的地方。

五、功能模式说明1. 清洁模式:该模式适合深层清洁皮肤,去除皮肤表面污垢和毛孔内的杂质。

建议每周使用1-2次。

2. 护理模式:该模式可以深入滋养皮肤,促进胶原蛋白生成,改善皮肤弹性。

建议每天使用1次,每次不超过10分钟。

3. 按摩模式:该模式适用于面部按摩和舒缓肌肤。

建议每天使用1次,每次不超过15分钟。

4. 电离导入模式:该模式可以帮助皮肤吸收护肤品中的有效成分。

建议在涂抹护肤品后使用,每次不超过5分钟。

5. 冷热敷模式:该模式能够调节肌肤温度,舒缓肌肤疲劳和浮肿。

建议每天使用1次,每次不超过10分钟。

六、注意事项1. 请遵守本使用说明书中的操作指导,不要超时使用或过度使用美容仪器。

2. 如果您使用过程中出现皮肤过敏、疼痛或不适,请停止使用并咨询医生建议。

美容行业仪器器材使用方法说明书
美容行业仪器器材使用方法说明书

美容行业仪器器材使用方法说明书使用方法说明书1. 简介美容行业仪器器材使用方法说明书主要为美容院、美容工作室、美容师等提供使用指南和操作流程,保证仪器器材的正确使用,提高美容工作效率和质量。

本文将详细介绍美容行业仪器器材的使用方法,以便用户能够顺利进行美容操作。

2. 仪器器材概述在本节中,将对美容行业常见的仪器器材进行简要介绍,包括但不限于:- 磨砂仪器:用于去除皮肤角质,改善肤色和肤质。

- 美容仪器:如电波拉皮仪、射频仪器等,用于紧致肌肤、提升面部轮廓。

- 水氧仪:通过高压注射水氧,增加皮肤湿度,改善肌肤肤质。

- 冷冻仪器:通过低温处理,收缩毛孔、减轻炎症。

- 美容针具:如微针、渗透针等,用于微创美容。

- 其他仪器器材:如脱毛仪、激光仪器等。

3. 使用方法在使用仪器器材之前,请务必仔细阅读本说明书,并按照以下步骤操作:步骤1:准备工作1. 检查仪器器材是否正常工作,确保各部件完好。

2. 准备好所需的耗材和消毒液。

步骤2:使用前准备1. 对使用仪器器材的区域进行清洁,并彻底除去化妆品和其他污物。

2. 清洁并消毒使用仪器器材的部件。

步骤3:具体操作方法在本节中,将对各种仪器器材的具体操作方法进行说明,以供参考。

a) 磨砂仪器使用方法:1. 清洁并消毒磨砂仪器。

2. 将磨砂仪器调至适合的档位。

3. 将磨砂仪器轻轻按压于需要处理的皮肤上,按照指定方向进行操作。

4. 操作完成后,清洁并消毒磨砂仪器。

b) 美容仪器使用方法:1. 清洁并消毒美容仪器。

2. 按照仪器指示选择适当的功能和参数。

3. 将美容仪器配合适当的护肤品或导入剂进行操作。

4. 操作完成后,清洁并消毒美容仪器。

c) 水氧仪使用方法:1. 清洁并消毒水氧仪。

2. 调整水氧仪气流和水流的比例。

3. 将水氧仪按压于需要处理的皮肤上,按照指定方向进行操作。

4. 操作完成后,清洁并消毒水氧仪。

d) 冷冻仪器使用方法:1. 清洁并消毒冷冻仪器。

2. 调整冷冻仪器的温度和时间。

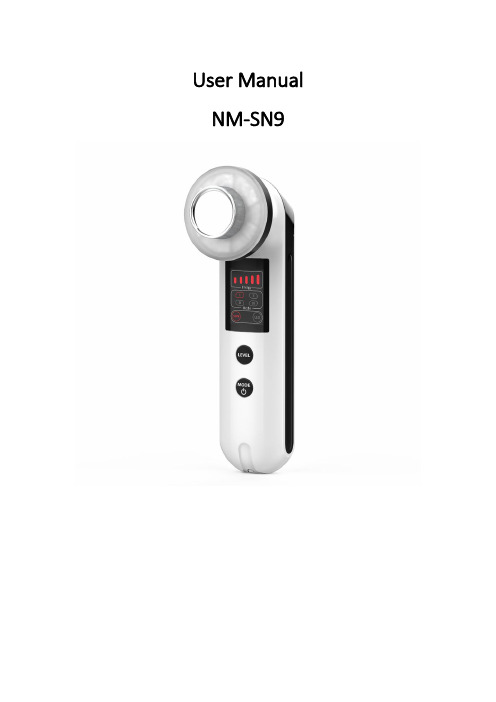
超声面部清洁器说明书
超声面部清洁器说明书

User Manual NM-SN9PrefaceDear users:We’re pleased to present to you the Ultrasonic Facial Cleanser Sonic Vibrating Ultrasound Face Cleansing Device featured with deep cleaning and importing nutrition.The use of ultrasonic high-frequency vibration technology,not only remove grease in the pore,but also change the volume of cells to improve blood circulation,refine the nutrient molecules,so that they can reach deep into the skin,making it full of luster and elasticity. Ultrasonic beauty machines are skin care machines for professional use,which needs to be handled by professionals with proper training.Any improper use will result in adverse outcomes.Therefore we advise any personnel read this guide thoroughly and follow the instructions strictly before operation.We believe our quality product will bring in good returns on your end.Also,you can count on our worry-free after-sales service.Thank you!Table of ContentsPrefacePart IBrief IntroductionAdvantagesWorking PrinciplesMain EffectsApplicable RangeInapplicable RangeNotes after OperationPart II1.Detailed Operations2.Technical Parameters3.Safety Precautions4.Dos and Don’ts5.Troubleshooting&Solutions6.FAQs7.Packing List8.Operational DiagramsPart IBrief IntroductionUltrasonic beauty machines are currently the most popular beauty machines that work on skin rejuvenation,nutrition lead-in and cleaning.It mainly works on greasy pore,dry skin,malnutritioned,dull skin and so on.Moreover,they are convenient and easy to operate.This equipment is safe,efficient and has no side-effects.Ultrasonic energy and strong permeability can drive facial cells to vibrate,not only remove grease in the pore,but also change the volume of cells to improve blood circulation, refine the nutrient molecules,so that they achieve the ability to stimulate cell regeneration and can reach deep into the skin,making it full of luster and elasticity. Advantages1.Portable,travel size,easy to operate and fast.2.New motor,longer lifespan.3.Safe,effective,non-invasive,harmless,and has no side effects.4.One machine is equipped with multi-purpose to meet a variety of needs.5.Unevenness,bleed,swelling and stasis will not appear after treatment.6.When ultrasonic wave introduces nutrition,it also removes gunk in the pore,so that pore water circulation can achieve the double effect of both export and import.7.It has7photon color lights.Different color light can be selected according to different skin states.PrinciplesUltrasonic facial beauty instrument is based on the theory of high frequency vibration. It reaches deep into the subcutaneous tissues,4-6mm to be exact.Ultrasonic energy and strong permeability can drive facial cells to vibrate,not only remove grease in the pore,but also change the volume of cells to improve blood circulation,refine the nutrient molecules,so that they achieve the ability to stimulate cell regeneration and can reach deep into the skin,making it full of luster and elasticity.Also,its high frequency vibration generates the thermal effect that help lead in nutrition to skin quickly,so the skin can better absorb the nutrients.At the same time the release of photon light can help whiten skin,calm,repair,fade spot and anti-wrinkle.Red LED:Red LED of specific wavelength heats up skin bottom,activates collagen regeneration,accelerates skin’s micro circulation,increase skin elasticity,leaving skin rosy,smooth,young and has less wrinkles.Promote the regeneration of skin cells and activate active ingredients.Blue LED:Blue LED of specific wavelength shrinks pores,calm skin,fight acne,balance sebum production,quickly lock in moisture and essence,leaving sin more elastic. Diminish skin inflammation,fight bacteria,fight acne.Yellow LED:It can add energy to skin cells,promote the role of glands,assist digestion, treat skin diseases,enhance immune function,accelerate blood circulation,effectively repair red marks,red spots,relieve swelling,pigmented spots,and is suitable for removing spots and brightening.Green LED:Green LED of specific wavelength helps to calm,repair skin,relieve pain, and promote blood circulation.It is suitable for those with thin corneum,and who are prone to allergy and redness.Purple LED:Dual frequency of red and blue LED.It combines the efficacy of two kinds of phototherapy and has a particularly good and repair effect especially for the treatment of acne and acne marks.Turquoise LED:Dual frequency of green and blue LED.It gradually enhance cell energy, and works great on metabolism.Orange LED:Dual frequency of red and yellow LED.It gradually enhance cell energy and boosts metabolism.Main Effects1.Clean pores and deeply introduce nutrients.2.Improve dry skin,water shortage and enlarged pores.3.Stimulate cell regeneration and promote product absorption.4.Improve uneven,dark and dull skin tone.5.Fade melanin and spots.6.Activate collagen to resist wrinkles.7.Replenish the moisture needed by the skin to make the skin tender and smooth. Applicable Range1.Those with dry skin,lack of water and nutrition.2.Those with uneven,dark and dull skin.3.Those with hyperpigmentation at bottom skin.4.Those whose skin begins to have fine lines,dry lines,false wrinkles.5.Those with large pores with excessive oil secretion.6.Those with acne of all sorts etc.7.Those with poor skin absorption.Inapplicable Range1.Those with severe sensitive skin or who’s during the allergic phase.2.Those who are pregnant,or those with serious heart disease,severe“3H”(hypertension,hyperglycemia,hyperlipidemia),or other serious illness.3.Those who just have undergone plastic surgery or recovering from it.4.Those with large area of facial wounds.5.Those with skin diseases and infectious diseases.Notes after Operation1.Stay hydrated and use sun protection.2.Avoid exfoliator,AHA or other stimulative skin care products.3.Avoid switching skin care products constantly.4.Apply more facial masks to stay hydrated.5.Always remove your makeup before bed.Part II1.Detailed OperationMode Effect FrequencyUltrasoundI Lead in nutrition;Refine skin;Deepcleaning Consecutive mode:the handle is at work constantlyII Lead in nutrition;SkincleaningSlow intermittent mode:longer intervalIII Lead in nutrition;Gentle cleaningFast intermittent mode:shorter intervalIV Leadinnutrition;Deep cleaning Faster intermittent mode:the shortestintervalMaximum energy level is 5.Higher energy,stronger vibration,and better effectsPhoton LEDI Skin rejuvenation,repair,whitening,acnetreatmentConsecutive mode:single LEDIISoothe,calm and repairskin Mono-color intermittent mode:one color LEDflashes intermittentlyIII Brighten skin,regain water and oil balance Multi-color slow intermittent mode:7colorsLED flash slowlyIV Brighten skin,better skin barrier Multi-color fast intermittent mode:7colorsLED flash quickly5min auto-off when not workingPress for 3seconds to switch between ultrasound and LEDPress for 5seconds to turn off the deviceLED and ultrasound can be at work at the same timeMachine Interface:On/Off (Click to turn on the device.Press for 3seconds to switchbetween functions.Press for 5seconds to turn off the device.)Energy Level (5is the maximum level of energy)Energy Level InterfaceMode InterfaceUltrasoundLEDLED and ultrasound are at work at the same time.2.Technical ParametersMaterial:ABS+Stainless steelOutput:15V1APower:15WTreatment Frequency:15minutes/timeColor:White&BlackSize:7cm(L)*5cm(W)*17cm(H)3.Safety Precautions1.Those who are during pregnancy,menstruation,lactation or surgery recovery.2.Those with hypertension,heart disease,diabetes,hyperthyroidism and malignant tumor.3.Those with skin diseases,infectious diseases and skin allergy.4.Those who are during convalescence or those with wounds.5.Those with skin diseases and infectious diseases.6.Those who are over-aging.7.Don’t operate around metal,plastic,or silicone infills.4.Dos and Dont’s1.During operation,please keep the treatment area moist to avoid skin discomfort.e sunscreen after treatment and avoid direct sunlight.3.Do not use around the ears,eyes,throat and other vulnerable areas.4.It is prohibited for patients with heart disease,hypertension and infectious skin diseases.5.If there is any other plastic surgery or filling before the treatment,use the device after recovery or3months or go through with the plastic surgery one month after the treatment.6.The operation should be close to the skin with even strength to avoid skin discomfort.7.During operation,energy shall be adjusted from low to high to avoid discomfort.8.Turn off the device after the operation,so as not to affect the service life.9.After the operation of the device,wipe the main body and handle clean with a tissue dipped in normal saline to effectively extend the service life(please do not use alcohol).10.Keep the device in a cool,dry and ventilated place,away from direct sunlight,high temperature and water.11.Be sure to turn off the main engine power supply after use,and then pull out the power plug.12.The operation time shall be at least10minutes.Do not place the operation on the eyeball.13.This device can be operated frequently without dependence.14.Select the LED suitable for your skin during operation,or choose to cycle all the LED colors.5.Troubleshooting&Solutions1.The instrument cannot be started,but the key light on the back of the instrument does not work?A.Make sure the power cord is connected to a valid power socket.B.If the above methods cannot be addressed,please contact the instrument dealer for assistance.2.No response after clicking the button?A.Turn off the device and restart.B.If the above methods cannot be addressed,please contact the instrument dealer for assistance.6.FAQs1.Q:Can ultrasonic lead-in effect help remove acne scars?A:Ultrasonic lead-in uses ultrasonic high frequency vibration to channel whitening nutrients into the skin,accelerate nutrient absorption,inhibit melanin formation and fade spots,effectively improve dull skin,make the skin appear to be radiant and nourished.It works especially great with dark spot left by acne scar.It is green, ecological simple,safe,reliable and has no side effect.General outdoor activities can be conducted after the treatment.2.Q:Is LED light harmful to eyes?A:LED lights are of high purity spectrum gene.Bioluminescence is very beneficial to the recovery of eyeball cell activity.Clinical medicine uses red LED to treat eyeball congestive conjunctivitis,glaucoma and children's vision correction,amblyopia and presbyopia and the treatment of visual impairment and so on.Therefore it will not cause any harm to eye vision.To reduce discomfort,avoid looking directly at the eyes.7.Packing List1x Main Machine2x Microcurrent Pads1x Microcurrent Line1x Power Cord8.Operational DiagramsProduct Techniques Diagrams ParameterAdjustmentSkin Care:30min,3-5times/weekEnergy Level:3-5UltrasoundMode:ConsecutiveLED Mode:Red LED Makeup remover+Cleanser+Essence+Facial mask+NM-SN9 1.Remove makeup,3min.2.Cleanse face with cleanser,2min.3.Apply (whitening,hydrating,repairing,anti-aging)essence evenly on the face,1min.4.Turn on the device,adjust energy level and mode.5.Device operation:Movethe probe in circles from chinto earlobe,mouth corner toear gate,nose wing to temple,3times.(You might feel aslight warmth and vibration)6.Lift from lower eyelid tothe temple,3times.7.Lift from canthus to theend of the eyebrow,3times.8.Brace the skin horizontallyin circles on forehead,3times.9.Move in small circles onthe nose,3times.10.Do the same on the otherside.11.Turn off the device.12.Apply facial mask.13.Turn on the device andadjust LED color and mode.14.Device operation:Usestamp technique,covering thewhole face,3times.15.Turn off the device,remove the mask and clean,2min.16.Apply toner,essence,cream and sunscreen.Technique5Technique6Technique8Recommended treatment:10treatments account for one full course.After one session,skin is hydrated and nourished.After a full course,skin appears to be clean,ruddy and more elastic.After two courses,skin is smooth,hydrated,plump,elastic.Three courses help skin stay at the current perfect condition.。

美容仪说明书了解美容仪的功能和正确的使用方法
美容仪说明书了解美容仪的功能和正确的使用方法

美容仪说明书了解美容仪的功能和正确的使用方法美容仪说明书尊敬的用户:感谢您选择本品牌的美容仪。

为了确保您正确使用美容仪并获得最佳的护肤效果,特别编写了本说明书,以帮助您了解美容仪的功能和正确的使用方法。

请您仔细阅读本说明书,并按照指导进行操作。

一、产品介绍美容仪是一款多功能护肤仪器,具有深层清洁、导入营养、提升紧致等功能。

采用了先进的技术,结合了专业级护理手法,为您带来舒适的护肤体验。

二、功能特点1. 深层清洁:美容仪通过超声波振动技术,能够彻底清洁毛孔内的污垢和油脂,有效净化皮肤。

2. 导入营养:美容仪的离子导入功能,促进护肤品中的营养成分渗透到皮肤深层,加速吸收,提高护肤效果。

3. 提升紧致:美容仪的射频功能,能够刺激胶原蛋白的生成,紧致肌肤,改善皱纹和下垂现象。

三、使用步骤1. 准备工作:1.1 保持皮肤干燥和清洁。

1.2 将美容仪充电至电量充足,确保可以连续使用。

1.3 准备好适合自己皮肤类型的护肤品。

2. 深层清洁:2.1 长按开关按钮,打开美容仪的超声波振动功能。

2.2 涂抹适量的清洁凝胶或洁面乳于脸部,并将美容仪轻轻按摩于脸部皮肤上,以循环方式进行清洁,避开眼部和口部。

2.3 清洗脸部后,关闭超声波振动功能,将美容仪置于干燥通风处。

3. 导入营养:3.1 打开美容仪的离子导入功能。

3.2 取适量的护肤品,涂抹于脸部皮肤上。

3.3 将美容仪轻轻移动于脸部皮肤上,以帮助护肤品中的营养渗透到皮肤深层,直至护肤品完全吸收。

3.4 关闭离子导入功能,将美容仪置于干燥通风处。

4. 提升紧致:4.1 打开美容仪的射频功能。

4.2 将美容仪轻轻移动于需要提升紧致的部位,以帮助刺激胶原蛋白的生成和肌肤的紧致。

4.3 关闭射频功能,将美容仪置于干燥通风处。

四、注意事项1. 使用前,请确保美容仪的工作状态良好,无损坏和电池不足等问题。

2. 在使用美容仪之前,请先将化妆品和脏物清洁干净,避免影响护肤效果。

美容仪器的维护与清洁指南

美容仪器的维护与清洁指南

美容仪器的维护与清洁指南作为一名写作水平超高的爆文作家,我将为大家揭秘美容仪器的维护与清洁指南。

无论你是美容爱好者还是专业人士,这篇文章都将为你提供宝贵的建议与方法,确保你的美容仪器始终保持高效、安全和持久。

第一步:了解你的美容仪器在开始维护和清洁之前,首先需要了解你所使用的美容仪器的类型和组成部分。

不同的美容仪器有不同的结构和材质,因此每种仪器的维护方法也会有所不同。

在你购买或使用美容仪器之前,务必阅读说明书,并与制造商咨询,了解该仪器的特殊需求和注意事项。

第二步:日常清洁良好的日常清洁是维护美容仪器的关键。

首先,确保在每次使用后都将仪器的表面彻底擦拭干净,以去除任何残留物或化妆品。

使用柔软的抹布或纸巾,蘸取适量的温和清洁剂,轻轻擦拭仪器表面,注意不要让水溅入内部。

第三步:定期深层清洁除了日常清洁外,定期进行深层清洁也是必不可少的。

重点清洁的部位包括仪器的头部、控制面板和电池仓。

根据具体仪器的要求,在清洁前确定是否需要将电池取出。

使用温和的清洁剂和湿抹布轻轻擦拭这些部位,再用干抹布擦干。

注意不要将水或清洁剂溅入电池仓或电路内部,以免损坏仪器。

第四步:储存与保养正确的储存和保养可以有效延长美容仪器的使用寿命。

首先,确保在使用和清洁后彻底晾干所有零部件。

然后,将仪器放置在干燥、整洁的地方,远离直接阳光和高温。

如果仪器配有保护套或盒子,建议在不使用时将其放入,以避免灰尘和损坏。

第五步:定期维护即使你遵循了上述步骤,依然需要定期进行维护,以确保美容仪器的最佳性能。

根据制造商的建议,检查仪器的电池寿命并更换旧电池。

如果发现仪器存在损坏或故障,应立即联系专业人士进行维修,切勿自行修理。

综上所述,美容仪器的维护与清洁对于保持其高效、安全和持久至关重要。

通过正确的清洁方法、储存和保养,以及定期维护,你可以确保自己的美容仪器始终处于最佳状态,为你的美容日常提供卓越的效果和体验。

无论你是在家使用还是在专业场合使用美容仪器,都请严格按照本文所述的维护与清洁指南进行操作。

hitachi-gennect-one-user-说明书

hitachi-gennect-one-user-说明书

第14版GENNECT One 用户手册 (1)目录 (2)致初次使用人员 (6)关于画面 (6)安装 (11)与测量仪器的连接 (14)从文件读入数据 (19)读入通过GENNECT Cross for iOS/Android获取的文件 (19)读入电池测试仪、功率分析仪的CSV文件 (22)读入图像文件 (22)读入PDF文件 (24)读入LR5000系列的测量文件 (26)读入记录单元、存储记录仪的测量文件 (27)读入功率分析仪(PW8001)的BIN格式文件 (28)读入功率记录单元、电能质量分析仪的测量文件夹 (28)从测量仪器读入测量数据 (30)从电池测试仪BT3554/BT3554-01/BT3554-50读入测量数据 (30)从电能质量分析仪PQ3100读入测量数据 (32)从读入其他测量仪器读入测量数据 (34)查看数据 (35)查看标准测量的测量数据 (35)查看日志记录的测量数据 (39)查看电池的测量数据 (43)查看电能质量分析仪PQ3100, PQ3198的测量数据 (48)查看钳形功率计PW3360, PW3365的测量数据 (50)查看功率分析仪PW3390,PW6001,PW8001的测量数据(PW Assistant) (52)查看数据采集仪LR8400, LR8401, LR8402, LR8410, LR8450的波形数据 (56)查看存储记录仪MR6000,MR8847A的波形数据 (57)查看图像数据 (59)查看PDF数据 (60)利用时间数列查看器查看测量数据 (61)支持数据格式 (61)限制 (61)操作流程 (61)选择测量数据 (61)选择测量项目,利用时间数列查看器打开 (63)时间数列/日志记录查看器的操作方法 (65)显示功率分析模式(仅限于PW8001) (88)整理数据 (100)添加组 (100)更改组的名称 (101)将数据移动到组中 (102)删除组 (103)操作数据列表 (104)勾选/取消勾选数据 (104)折叠/展开数据列表 (105)指定过滤条件以筛选数据 (106)以文本格式检索数据 (107)利用标签检索数据 (108)编辑标题/注释 (109)设置检索标签 (109)编辑检索标签 (110)输出HIOKI GENNECT Format(.hok)的文件 (112)输出ZIP格式 (.zip) 的文件 (112)输出CSV/图像文件 (114)输出PDF文件 (116)删除数据 (119)进行测量仪器的设置(测量仪器的设置功能) (120)支持的测量仪器 (120)限制 (120)操作流程 (120)进行测量仪器的设置内容变更 (120)进行电池测试仪BT3554/BT3554-01/BT3554-50的设置 (123)进行实时测量(日志记录(LAN)) (140)对应测量仪器 (140)限制 (141)操作流程 (142)开始日志记录 (142)停止记录 (151)显示日志记录任务 (151)关于画面构成 (153)使用记录时间表功能 (154)操作流程 (154)记录表 (154)记录时间表 (158)显示安排任务 (164)监控测量值(仪表板功能(LAN)) (167)概要 (167)支持的测量仪器 (168)限制 (168)操作流程 (169)启动仪表板 (170)启动MAP编辑器(测量仪器的选择) (171)创建测量仪器的界面(基本篇) (179)创建测量仪器的界面(应用篇) (180)开始/停止测量值的监控 (198)管理测量仪器列表 (202)其它功能 (208)警报功能 (213)进行通道间计算的详细设置 (216)设置计算公式 (216)进行自动输出(日报・周报・月报)的详细设置 (221)进行自动输出(CSV)的详细设置 (232)手动从测量仪器导入文件(文件导入(手动)功能) (234)支持的测量仪器 (234)限制 (234)操作流程 (235)开始文件导入(手动) (235)支持文件导入(手动)的存储器清单 (237)对象文件清单 (237)自动接收测量仪器的文件(文件传送(自动)功能) (239)对应测量仪器 (239)限制 (239)操作流程 (240)测量仪器的保存设置 (247)操作测量仪器(远程操作(LAN)) (252)对应测量仪器 (252)限制 (252)操作流程 (253)校准测量仪器的时钟(LAN) (254)支持的测量仪器 (254)操作方法(通过控制台画面进行时间校准) (254)操作方法(进行自动对时设置) (255)测量仪器对时详细说明 (258)进行应用程序的设置 (260)进行通用设置 (260)进行电池功能的设置 (263)与GENNECT Cloud协同 (266)互联网连接 (266)准备GENNECT Cloud (267)登录到GENNECT Cloud (268)保存/删除登录信息 (270)重新发行密码 (271)与GENNECT Cloud协同共享/管理数据 (272)限制 (272)画面构成(全体) (273)画面构成与功能(①文件夹选择区) (274)画面构成与功能(②数据列表) (275)画面构成与功能(③列表操作区) (276)画面构成与功能(④信息显示区) (277)画面构成与功能(⑤功能按钮区) (278)开始协同GENNECT One与GENNECT Cloud的测量数据 (279)管理数据列表(云)的测量数据 (281)设置有关GENNECT Cloud的应用程序 (288)[远程测量模式] 标签 (288)[数据列表(云)] 标签 (288)[数据列表(本地)] 标签 (289)[记录数据] 标签 (289)利用远程测量模式 (291)概要 (291)操作流程 (292)开始远程测量模式 (292)退出远程测量模式 (298)关于画面构成 (299)操作测量仪器(远程操作 (Cloud)) (300)支持的测量仪器 (300)开始远程操作 (301)进行测量仪器的重新启动 (301)通过浏览器打开 (301)确认、编辑用户信息与账户信息 (302)删除Trial用户 (303)从Trial计划切换为Free计划 (303)在云端分享和管理电池测试仪的阈值和档案信息(GENNECT Cloud Standard/Pro 计划) (304)在云中分享电池测试仪的阈值(GENNECT Cloud Standard/Pro 计划) (304)在云中管理电池测试仪的阈值(GENNECT Cloud Standard/Pro 计划) (306)在云中分享电池测试仪的档案信息(仅BT35543-50, GENNECT Cloud Standard/Pro 计划) (308)在云中管理电池测试仪的档案信息(仅BT3554-50, GENNECT Cloud Standard/Pro 计划) (310)进行注销 (313)最新版本的确认 (314)显示帮助 (315)显示建议和期待 (316)显示隐私政策 (317)变更显示语言 (317)卸载 (318)通过[所有程序]进行卸载 (318)通过[控制面板]进行卸载 (318)附录 (320)确认、变更计算机的网络设置 (320)用于[日志记录]和[仪表板]功能的区分名称和测量项目名称 (321)感谢您选择使用GENNECT One。

日立N2000中文说明书

日立N2000中文说明书

皮肤测试为了防止皮肤过敏,使用前先进行皮肤测试1,对初次使用的保养品进行皮肤测试将手臂内侧洗干净,然后用毛巾擦干。

在洗净的地方涂上需要测试的保养品,放置48小时。

涂抹硬币大小的面积即可,测试期间内没有出现异常的话,不要清洗或者擦拭测试的肌肤,如果出现异常立即清洗。

48小时之后肌肤没有异常的话可以开始使用。

测试的结果有异常的话说明该化妆品不适合用于这款美容仪。

用前须知肌肤有发炎或者伤口的情况请勿使用;请勿佩戴贵金属或者隐形眼镜使用1、各个模式一个该模式所需要的保养品温热清洁模式---清洁毛孔脏污。

需要化妆棉,将日常使用的爽肤水倒在化妆棉上面。

温热保湿模式---将保湿成分渗入肌肤,达到保湿护理。

将日常使用的爽肤水倒在化妆棉上面使用。

或者不用化妆棉,直接将凝胶、凝胶状的保养品或者比较粘稠的化妆水涂抹在肌肤上进行护理。

温热面膜模式---可以使用日常用的乳液或者片装面膜,不需要用化妆棉。

冷却模式---冷却头直接接触肌肤,不需要使用化妆棉或者爽肤水。

2、使用之前要先卸妆、清洁面部。

3、在机身上安装化妆棉将温热头上面贴的保护膜撕掉,不撕掉保护膜的话机身将无法运转。

用专用的橡皮圈固定化妆棉,一般市面上销售的化妆棉就可以,太硬或者太小的化妆棉可能无法安装到机身上。

橡皮圈比较小的一边朝上,不要强行逆向安装化妆棉,以免损坏机器。

4、取下橡皮圈的方法将橡皮圈的朝下的一边握住,然后慢慢的往上移动直至取下来5、为了肌肤的安全,使用时请注意①本机器的基本模式是一天一次大概8分钟。

注意1~3模式一天不要使用超过3分钟,第4模式一天不要使用超过一回。

模式1大概3分钟,3分钟之后自动停止模式2大概3分钟,3分钟之后自动停止模式4冷却时间10秒,使用时间大约1分50秒,时间到了自动停止模式3大概3分钟,3分钟之后自动停止包括温热面膜模式在内,一天不要使用超过11分钟温热面膜模式中如果使用乳液的话可以一天使用一次,如果使用面膜的话建议一周使用1~2次就可以。

美容仪器产品说明书美容仪器的功能和使用方法介绍

美容仪器产品说明书美容仪器的功能和使用方法介绍

美容仪器产品说明书美容仪器的功能和使用方法介绍美容仪器产品说明书一、产品概述美容仪器是一种先进的美容护肤设备,采用高科技技术,旨在提供智能化、便捷化的美容体验。

其独特的功能和使用方法,将帮助用户达到肌肤美容和护理的目的。

本产品说明书将详细介绍美容仪器的功能和使用方法,帮助用户正确、安全地运用该设备。

二、功能介绍1. 深层清洁功能美容仪器配备了一种先进的清洁模式,能够有效去除面部肌肤深层的污垢和杂质。

通过高频震动和微电流的结合,能够快速清洁毛孔,深层清除黑头、白头,净化肌肤,让肌肤呼吸畅通。

2. 提拉紧致功能美容仪器具备提拉紧致的功能,通过微电流和光热等技术,刺激肌肤胶原蛋白生成,增加皮肤弹性,让肌肤更加紧致。

此外,还能有助于淡化细纹和皱纹,改善皮肤松弛等问题,使脸部轮廓更加明显、紧致。

3. 深层滋养功能美容仪器拥有渗透深层的滋养功能,通过电离导入技术,将营养成分有效输送至肌肤底层。

这种功能不仅有助于肌肤的吸收和亮白,还能提供所需的滋润、镇静和修复,有效改善肌肤干燥、敏感等问题。

4. 促进血液循环功能美容仪器具备促进血液循环的功能,通过微震和光疗等方法,可以有效地增加面部及颈部的血液循环,加速新陈代谢,帮助肌肤排毒,消除浮肿,并使肌肤恢复紧致、光彩。

三、使用方法介绍1. 准备工作使用美容仪器之前,请确保面部肌肤干净,去除化妆品和油脂。

使用前也要注意将仪器进行适当的清洁和消毒,以确保卫生。

2. 功能选择根据个人需求,选择适合的功能模式。

常见的模式包括深层清洁、提拉紧致、滋养补水等,用户可以根据自身肌肤问题进行选择。

3. 操作步骤将美容仪器轻轻滑动在面部,按摩肌肤。

对于深层清洁功能,可以先涂抹适当的清洁霜或洁面乳,然后用仪器在脸部打圈按摩;对于提拉紧致功能,可选择适当的温度和震动强度,轻轻按摩脸部和颈部肌肤;而对于深层滋养功能,则可选择相应的导入功能,轻轻按摩使肌肤充分吸收。

4. 使用时间和频率为了保证使用效果,一般建议每次使用美容仪器的时间控制在15-20分钟左右。

多功能美容仪器的使用说明

多功能美容仪器的使用说明

多功能美容仪器产品功能说明美容护肤多功能美容仪纤姿宝丽姿九、十四、十五、是六、十八合一多功能美容仪九合一综合美容仪QZ-9000B 十四合一美容仪QZ-9000D十五合一超声波美容仪器QZ-9000E 十六合一多功能美容仪器QZ-9000F18多功能美容仪器QZ-9000H高周波电疗仪一、工作原理高周波电疗是一种重要的美容护理仪器,其是通过特制玻璃棒消炎管产生的高频率电流作用于面部不同位置,从而达到治疗效果。

二、作用1、电疗仪对皮肤起到消炎杀菌及镇静安抚的作用。

2、高周波电疗所产生的臭氧有杀菌作用,能促进暗疮伤口愈合及收剑毛孔的作用。

3、电疗仪对调解皮脂的分泌,改善皮肤的PH值,使皮肤偏中性。

4、可促进血液循环,加快皮肤的新陈代谢。

5、有延缓衰老、抗皱、收紧的作用。

三、操作方法1、将消炎管(玻璃棒)插入电疗棒内(输出插座)2、可根据所需面积的大小来选择相应的适宜的消炎管。

3、将消炎管消毒。

4、在皮肤上擦上足够的介质(精华素)。

5、打开开关调整电疗的强度,要先用手接触后才放在客人的脸上进行点状式接触皮肤,可产生火花,具有杀菌、消炎、催熟暗疮、促进细胞再生及伤口愈合的作用。

6、用消炎管冲击眼部,能舒缓因眼袋而下垂及黑眼眶的现象。

7、操作完毕,切断电源,将玻璃消炎管除下,消毒放好。

四、注意事项1、操作时,消炎管不能在一个部位进行电疗时间过长,避免灼伤皮肤。

2、操作时,面部皮肤一定要有足够的介质。

3、装拆消炎管时,要先关掉强弱调节开关,以延长仪器的寿命。

4、各种消炎管要优质清洁,干净,使用前后必须消毒。

5、在电疗的部位避免有金属物存在。

6、敏感性皮肤,皮肤血管外露,酒糟鼻或其它严重皮肤病者,禁止使用。

7、孕妇禁用。

8、切勿将消炎管接触眼球部位。

贾法尼导入导出贾法尼导入导出的功能是针对不同的皮肤问题性质的解决,简单易于操作,是专业美容的常用仪器的一项功能。

功能:1、祛除黑头,收缩毛孔2、改善凹凸,修复疤痕3、祛除死皮,磨皮清洁磨皮部分一、工作原理采用物理换肤原理,利用磨皮枪高速运转的刷头去除表皮老废角质及毛孔内粉刺,促进皮肤更新,治疗过程安全,效果快,治疗后可重新得到一明亮、光泽、细致、柔嫩的新皮肤,因为非化学性换肤,完全不会刺激伤害皮肤,是目前欧、美、日最受欢迎的换肤方式。

美容仪器说明书

美容仪器说明书

美容仪器说明书引言:感谢您选择购买我们的美容仪器。

本说明书将为您提供详尽而准确的操作指南,以确保您正确使用美容仪器并获得满意的美容效果。

在开始使用之前,请仔细阅读本说明书,并按照指引进行操作。

一、产品概述本美容仪器为一款先进的美容设备,通过采用非侵入性技术,为用户提供高效、安全、舒适的美容护理体验。

其主要功能包括:清洁肌肤、补水保湿、提升紧致、淡化细纹等。

同时,本美容仪器还具备多种功能模式可供选择,以满足不同肌肤需求。

二、使用前须知在开始使用本美容仪器之前,请注意以下事项:1. 请确保您的面部皮肤清洁干净,并无任何化妆品残留。

2. 若您有特殊皮肤问题或疾病,请咨询专业医生的建议后再进行使用。

3. 在使用过程中,如发现皮肤出现不适或过敏症状,请立即停止使用并就医。

4. 请勿在水中或潮湿的环境中使用本美容仪器,以免发生电器故障或危险。

三、操作方法1. 打开电源开关,将美容仪器轻轻贴近肌肤。

确保美容仪器与肌肤完全接触,以确保其正常工作。

2. 选择合适的功能模式。

根据您的需求,调节美容仪器的功能模式,并按下启动按钮。

3. 在使用过程中,将美容仪器按照画圈或画直线的方式在肌肤上移动。

保持每次使用的时间和频率在适当范围内。

4. 操作完成后,关闭电源开关,并用清洁纸巾或湿布擦拭美容仪器的表面,并将其放置在干燥通风的地方。

四、功能模式介绍1. 清洁模式:本模式可深层清洁毛孔,去除面部污垢和角质,恢复肌肤的光滑和细腻。

2. 补水模式:本模式通过电磁波技术,将水分快速渗入皮肤底层,提供长效的补水效果,令肌肤水润饱满。

3. 提升紧致模式:本模式采用射频技术,通过热能刺激胶原蛋白的生成,有效提升肌肤的紧致度和弹性。

4. 淡化细纹模式:本模式利用微电流技术,刺激肌肤细胞的再生和新陈代谢,缓解细纹和皱纹问题。

五、注意事项1. 请勿将美容仪器用于眼睛周围的区域,以免对眼部造成伤害。

2. 使用过程中,若感到不适,请适当降低功率或停止使用。

美容仪器使用说明书

美容仪器使用说明书

美容仪器使用说明书欢迎选择我们的美容仪器。

本使用说明书将为您提供详细的操作指南,确保您正确、安全地使用美容仪器,以达到最佳的美容效果。

在开始使用之前,请仔细阅读以下内容。

一、产品概述1.1 产品名称:美容仪器1.2 产品型号:XXX1.3 产品功能:改善肌肤质量、增加肌肤弹性、减少皱纹等1.4 注意事项:请遵守本说明书中的操作步骤,不得随意拆卸或修改美容仪器的零部件。

二、产品特点2.1 高效美容:美容仪器配备了先进的技术,可有效改善肌肤状况。

2.2 个性化定制:美容仪器提供多种美容模式和强度设置,以满足不同用户的需求。

2.3 安全可靠:美容仪器通过了严格的质量检测,确保用户的安全使用。

三、操作步骤在使用美容仪器之前,请确保已经彻底洁净双手和面部,以避免污染仪器或面部皮肤。

3.1 步骤一:连接电源- 将美容仪器连接到电源适配器,并将适配器插头插入电源插座。

- 确保电源适配器连接牢固,电源灯亮起。

3.2 步骤二:选择模式和强度- 按下美容仪器上的电源开关,开机。

- 根据个人需求,选择合适的美容模式和强度。

请参考产品说明书中的具体介绍。

3.3 步骤三:操作美容仪器- 将美容仪器轻轻放置于面部皮肤上,并以缓慢、均匀的方式移动。

注意不要用力按压皮肤。

- 避免美容仪器长时间停留在同一区域,以免引起皮肤过度刺激。

3.4 步骤四:清洁和保养- 在使用完美容仪器后,断开电源适配器,并将仪器保存在干燥清洁的环境中。

- 使用干净柔软的布清洁美容仪器的触摸面。

四、使用注意事项4.1 切勿在睡眠中使用美容仪器。

4.2 若您正在使用其他外用药物,请咨询医生是否可以同时使用美容仪器。

4.3 不适用于以下人群:孕妇、心脏病患者、电子植入物使用者等。

如有其他疾病或不适,请咨询医生建议。

4.4 美容仪器仅限于面部使用,请勿用于其他部位。

4.5 如出现皮肤不适、过敏等问题,请立即停止使用并咨询专业医生。

五、常见问题解答5.1 美容仪器使用时间应该多久?使用时间取决于所选择的美容模式和强度,请参考产品说明书中的建议时间。

日立N2000中文说明书

日立N2000中文说明书

Example for useStep 2 "HOT MOISTURIZE "When you do not have much time in the morning or when you need to go out suddenly, you can just use “HOT MOISTURIZE .” It only takes approximate three minutes to moisturize your skin thoroughly. Press the mode switch button to set to“HOT MOISTURIZE .”Quick treatment (Required time: approximate 3 minutes)Press the mode switch button and set the mode of your preferred treatment.Quick tighten-up treatment (Required time: approximate 2 minutes) Step 4 “COOL”When you want to tighten your pores or cool down your skin before applying make up, you can just use “COOL .” After 10-second preparation for cooling, it only takes approximate one minute and 50 seconds to tighten the pores of your skin. Press the mode switch button to set to “COOL .”Tighten-up treatment (Required time: approximate 5 minutes) Step 1 “HOT CLEANSING”Step 4 “COOL”When you want to remove fine residue remaining in pores and tighten the pores of your skin, use “COOL ” after using “HOT CLEANSING .” This treatment cleanses and tightens the pores of your skin. After the “HOT CLEANSING ” mode is finished, press the mode switch button to set to “COOL .”Step 1 "HOT CLEANSING "Step 2 "HOT MOISTURIZE "Step 4 “COOL”Standard daily moisturize treatmentAfter using “HOT CLEANSING ,” moisturize the clean skin in “HOT MOISTURIZE and tighten the pores of your skin by cooling effect in “COOL.” After the “HOT MOISTURIZE ” mode is finished, press the mode switch button to set to “COOL.”Daily treatment (Basic mode) (Required time: approximate 8 minutes) Recommended full treatment (Required time: approximate 11 minutes) Step 1 “HOT CLEANSING”Step 2 "HOT MOISTURIZE "Step 3 “HOT MASK”Step 4 “COOL”Care for your skin once or twice a week by using all modes.Fine vibrations in “HOT MASK ” mode and gentle switching of the electrode will enhance the moisturizing effect of lotion or mask. The cooling effect of “COOL” mode will tighten the pores of your skin.Step 1 "HOT CLEANSING "Step 2 "HOT MOISTURIZE "Before you go out or when you have more time, use “HOT MOISTURIZE ” after using “HOT CLEANSING .” This treatment moisturizes the clean skin thoroughly.Moisturize treatment (Required time: approximate 6 minutes)How to useMake sure to use only 100-240V AC for power supply and use the included power adaptor (this device is not rechargeable).After the power switch is switched to “On,” the heating head warms slowly.CordDo not wind the cord aroundthe main body.Device plug.Make sure to pull out the device plugfrom the main body after using.(Make sure to holding the plug to pullout from main body.)Do not keep the device plug and cord in a state of bending.NOTICEAbout Skin Testing FunctionAbout Operating TimeThe continuous operating time of each mode is default.The time is not included under below circumstances:W hen the head or the head attached with cotton puffand back plate are not contacted with skin continuously. T he cotton puff does not contain enough toner. The actual operating time normally would be longer.Attention for UseMake sure to hold the main body of the product with your handtouching back plate and apply the head of the product to your skin. Otherwise, the product will not be operated.Back plateThis product which is operated through the human body.The electric circuit operates on skin in contact with the back plate and the head of the product.About Auto-off FunctionIf the product is not in operation around 3 minutes,the power will turn off automatically.There is an ending sound given and the product will turn off automatically when each mode is completed.The product may keep on operating even after the head is moved away from skin, but this is not a failure. In such a case, it can be stopped by turning off the power switch or releasing the back plate.FAQsNo.Questions AnswersQ1Tingling sensation is felt on the skin. Check the intensity level. If it is set on "High" level, press the level switch button to switch to "Low" level. If toner in the cotton pad wears off, replenish it again. If you still feel uncomfortable on the skin, stop using the product immediately and consult a dermatologist.Q2Can "HOT CLEANSING"mode remove makeup? This product cannot remove makeup.Please use a makeup remover cleanser.Q3Will dirt be more easily removed by applyingmore force? Electric power is used for removing dirt and moisturizing. Thus, by applying more force, it will not make any difference.Gently apply to skin and massage slowly.Q4Cotton pad cannot be attached properly. Use a normal rectangular or round cosmetic cotton pad.(If the cotton pad is too thick or thin, it willnot be able to attach.)Q5Can the product be used in the bathroom? This product is not waterproof.Never use or place this product in wet and damp areas, e.g. bathroom.Q6Does the "COOL" modework with toner?Yes but it will not enhance the cooling effects.Q7The cooling head does not feel cool during the "COOL"mode. The "COOL" mode automaticallystops after being used around 2 minutes.Approximately 10 seconds is required at the start of the mode before the cooling effect takes place.It will last for another 1 minute 50 seconds before it stops automatically.The "COOL" mode may be used continuously and continuous use will reduce the cooling effect.Q8Can I use milky lotion or gel?Q9Does this product have whitening or blemishremoval function? This product is not for whitening or removing blemish. It will pull out fine dirt that remains deep in the pores and penetrate moisture into the skin.Q10Which regions are notsuitable to use this product? Please refer to the instruction manual for the list of regions.Milk-based lotion or gel can be used when using “HOT MOISTURIZE” mode without cotton pad and “HOT MASK” mode.Please refer to the "About mode switching" in the "Preparation before use" section in the instruction manual for details.。

日立CM810的使用方法

日立CM810的使用方法

日立CM-N810中文使用说明詳解日立負離子美容機第一步溫馨提示:我之前在【跟老公的皮膚比一比】裡面說明機子拿回來要先充電,有的朋友在第一次使用前沒有充電,可能是沒有看到我那一篇文章,我今天再這裡再強調一下。

機子拿回來請先充電,要充6個小時再使用。

(11/Mar/2013)最近有很多朋友买了日本版的日立负离子家用美容机,如果是日本版就是说,说明书也是全日语的。

之前我有介绍我自己的用后感想,今天干脆详解一下它的用法和翻译日文说明书。

注:黑色字是翻译说明书,小字体是我自己的研究结果功能分為4步:第一步清洁模式第二部轻拍模式第三部保湿模式第四部醒肤模式简单使用:每天只用第一步和第三步所需时间10分钟加强护理:使用第一步,第二步,第三步所需时间15分钟集中护理:使用一,二,三,四步每星期一次所需时间20分钟第一步清洁这一步很重要,是因为大家都知道,我们的皮肤容易生暗疮,最主要的原因是因为毛细孔里面的脏东西,这个步骤可以帮我们清洁皮肤底层的污垢,使肌肤渐渐的变成不易生暗疮的状态。

有效清除用洗面奶清洁不掉的存在毛孔里面的污垢,使接下来使用的第二步更加有效渗透。

洗完脸以后,将化妆棉安装到美容机上,使用平时用开的一般化妆水或者有去角质效果的清洁化妆水浸湿棉花。

(请不要使用乳液或者胶状的化妆品)化妆棉的浸湿程度是浸透整块棉花。

我的经验:经过我这几个月的实践,我是先使用纯净水,浸透棉花,然后再将化妆水倒在棉花上,这样比较不浪费化妆水,否则有大部分的化妆水只是存在于棉花里面,而导入你的皮肤的化妆水相对来水就变少了。

注意不可使用矿泉水,因为经过机器导入,会将矿物质导入到肌肤底层,没有资料显示矿物质存在于肌肤底层会对皮肤产生怎样的影响,但是最好避免。

另外,化妆水最好使用质感比较稠的,这样棉花会变得滑滑的,接触到皮肤,不会给皮肤带来负担,不会擦伤皮肤。

日本皮肤科医生建议的护肤方法很重要的一点就是尽量用自己的手擦化妆品,以免皮肤拉伤。

日本Hitachi品牌空调产品说明书

日本Hitachi品牌空调产品说明书

MODULAR ELECTRIC FURNACE2, 3, 4, and 5 TONSFEATURESS Modular Blower Cabinet, Air Conditioning or Heat Pump readyS Upflow, horizontal right or left applicationsS Downflow requires sub−base accessoryS Electronic fan control boardS Three speed PSC motor on all modelsS Matches with AC and HP cased coils (Hot water coil may be used, but doesn’t match case size)S Accepts accessory two stage outdoor thermostatsS208/230−1−60 supply voltageS Requires a “NO HEAT KIT” if installed without electric heat.S Field installed electric heater packages from5kW−25kW, single or three phase available separately SERVICES Direct drive slide−out blower assemblyQUALITYS Internally lined with ½inch(12.7mm) insulationS Thermosetting powder coated steel cabinet WARRANTYS5 year parts limited warrantyUSCModel NominalTons NominalCFM Motor HPDimensions H x W x Din (mm)Unit Weightlbs/kgShip Weightlbs/kgMF08B1500B28001/324 x 15−1/2 x 20−1/2(610 x 394 x 521)56/2559/27MF12F1900B312001/224 x 19−1/8 x 20−1/2(610 x 495 x 521)62/2867/30MF16J2200B416001/224 x 22−3/4 x 20−1/2(610 x 578 x 521)67/3073/33MF20L2400B520003/424 x 24−1/2 x 20−1/2(610 x 622 x 521)70/3278/35MF Product SpecificationsSpecifications subject to change without notice.UNIT SPECIFICATIONS − ELECTRIC FURNACEModel Number MF08B1500B MF12F1900B MF16J2200B MF20L2400B Application Upflow / Horizontal / Downflow *Electrical Volts−Phase−Hz.208/230-1-60Data**Minimum Circuit Ampacity 3.1 3.6 3.67.5 Time Delay Fuse (Amps)15Max Fuse or Breaker Size(Amps)15Blower Size DD10 − 7DD10 − 8DD10 − 9DD10 − 9 Data Horsepower−Speed1/3 − 31/2 − 31/2 − 33/4 − 3 Full Load Rated (Amps) 2.5 2.9 2.9 6.0 Transformer40 VAWeight Unit / Shipping Lbs (Kg)56/59 (25/27)62/67 (28/30)70/78 (32/35)70/78 (32/35) * Accessory subbase kit required for downflow application**Disregard if electric heat is added. Refer to Electric Heat table.MODEL NUMBER IDENTIFICATION GUIDEPRODUCT FAMILYM = MODULAR M F12F1900B2SERIESSALES CODES B = MODULAR BLOWER (115V)F = MODULAR ELECTRIC FURNACE (208/230V)V = MODULAR VARIABLE SPEED BLOWER (208/230V)FIELD INSTALLED HEATER NOMINAL CFM RANGE COIL WIDTH MATCH 08 = 800B15 = 15-1/2 Cabinet 12 = 1200F19 = 19-1/8 Cabinet 16 = 1600J22 = 22-3/4Cabinet 20 = 2000L24 = 24-1/2CabinetAirflow based on no coil, no filter, no electric heat (pre−accessory external static pressure). When heaters, filters, hori-zontal drain pan and/or downflow subbase are installed in an application, airflow must be re−calculated by adding the heater static, filter static, and coil static pressures (provided in the following tables) to the pre−accessory external static amount. See Coil Specification Sheet. Add.10 for Horizontal Drain Pan Kit. Add .20 for Downflow Subbase Kit.AIRFLOW IS BLOWER ONLY, NO COIL ATTACHEDMF08ESP in wcSPEED VOLTS0.20.30.40.50.60.70.8Low 230v102910201007985960915862 208v872860845825797765721Med 230v1286127012541220118011251058 208v111311051091107010421000947High 230v1500147014321380131512501168 208v1317130512861255122011701008MF12ESP in wcSPEED VOLTS0.20.30.40.50.60.70.8Low 230v973975979979973955931 208v811815816810797780749Med 230v1284129513011305130212801246 208v1084108410841090108910651030High 230v1663167016711655163115851519 208v1383138513901390138313651328MF16ESP in wcSPEED VOLTS0.20.30.40.50.60.70.8Low 230v1020101510091002991975950 208v858845830815801780749Med 230v1379138513861379136413431309 208v1156115411491144113411201098High 230v1776178217831765173816981643 208v1496149614961495149514701433MF20ESP in wcSPEED VOLTS0.20.30.40.50.60.70.8Low 230v1492149514921475145113951308 208v1246124512381225120311751125Med 230v1969195519351890181817001570 208v1641164016331615158415101406High 230v2696260024922350219220201844 208v2417235522872200209219401774FILTER STATIC PRESSURE DROPWASHABLEFILTER SIZENOMINALDISPOSABLEFILTER SIZECFMMODEL600800100012001400160018002000 MF0814 1/4 x 201/414 x 200.050.090.130.19−−−−−−−−−−−−MF1217 3/4 x 20 1/418 x 20−−−−−−−−0.090.120.170.22−−−−−−MF1621 1/4 x 20 1/420 x 20−−−−−−−−−−−−−−0.120.150.19−−−MF2024 3/4 x 20 1/424 x 20−−−−−−−−−−−−−−0.090.110.140.18HEATER STATIC TABLE HEATER KW / STATIC DROPSingle−PhaseCFM EHIA05EHIA07EHIA10EHIA15EHIA20EHIA25 6000.010.010.01-- ---- ---- --7000.010.010.01-- ---- ---- --8000.010.010.010.01-- ---- --9000.010.010.010.01-- ---- --10000.010.010.010.010.02-- --11000.010.010.010.020.02-- --12000.010.010.010.020.02-- --13000.010.020.020.020.02-- --14000.010.020.020.020.030.03 15000.010.020.020.020.030.04 16000.010.020.020.030.030.04 17000.010.020.020.030.030.04 18000.010.020.020.030.040.04 19000.010.020.020.030.040.05 20000.010.020.020.030.040.05 Three−PhaseCFM-- ---- --EHIA10EHIA15EHIA20EHIA25 600-- ---- --0.01-- ---- ---- --700-- ---- --0.01-- ---- ---- --800-- ---- --0.010.01-- ---- --900-- ---- --0.010.01-- ---- --1000-- ---- --0.010.010.02-- --1100-- ---- --0.010.020.02-- --1200-- ---- --0.010.020.02-- --1300-- ---- --0.020.020.02-- --1400-- ---- --0.020.020.030.03 1500-- ---- --0.020.020.030.04 1600-- ---- --0.020.030.030.04 1700-- ---- --0.020.030.030.04 1800-- ---- --0.020.030.040.04 1900-- ---- --0.020.030.040.05 2000-- ---- --0.020.030.040.05 -- --DO NOT OPERATE IN THIS AREA CFM / KW LIMIT EXCEEDEDUNIT SPECIFICATIONS − No Heat KitNo Heat Kit Model Table 1Supply CircuitSupplyCircuitNo.HPMax.MotorAmpsMCABranchCircuitAMPMax Over-currentProtectionDevise(Amps)Recommended Volts Phase HertzSupply Wire75°C copperGround Wire# ofWiresWireSizeMax. Ft.Length# ofWiresMinWireSizeEHIA00KN10MF08*208160Single1/3 2.5 3.115214105114 230MF12*208160Single1/2 2.9 3.615214105114 230MF16*208160Single1/2 2.9 3.615214105114 230MF20*208160Single3/4 6.07.51521490114 230* Modular blower without electric heat Conversion: 1 foot = .305 metersTECHNICAL DATA Single Phase with Circuit BreakerMaximum RecommendedMCA Overcur­Supply Wire Ground Nom.Supply Heater Max FLA Min Protective75 0 C. Copper WireHeater Supply Heat­i Heat kW Per Circuit kW Per Heater Motor Total Circuit Device# of Wire Max.# of MinModel Volt­BTUH KW Element No.Circuit AMPS.AMPS.AMPS.Ampacity(AMPS.)Wires Size Length (Ft)Wires SizeEHIA05KB1024016378 4.8 4.8Single 4.820.0626.032.53528113110 20812283 3.6 3.6Single 3.617.3623.329.130210118110EHIA07KB10240245677.2 3.6Single7.230.0636.045.0452881110 20818425 5.4 2.7Single 5.426.0632.040.0402892110EHIA10KB10240327569.6 4.8Single9.640.0646.057.56026101110 208245677.2 3.6Single7.234.6640.650.86026115110EHIA15KB102404913414.4 4.8Single14.460.0666.082.5902411318Mult. 19.640.0646.057.56026101110Mult. 2 4.820.0020.025.025******** 2083685110.8 3.6Single10.851.9657.972.4802412818Mult. 17.234.6640.650.86026115110Mult. 2 3.617.3017.321.625210109110EHIA20KB102406551319.2 4.8Single19.280.0686.0107.51102213716Mult. 19.640.0646.057.56026101110Mult. 29.640.0040.050.0502873110 2084913414.4 3.6Single14.469.2675.294.010*********Mult. 17.234.6640.650.86026115110Mult. 27.234.6034.643.3452885110EHIA25KB102408189124 4.8Single24100.06106.0132.515021/017716Mult. 19.640.0646.057.56026101110Mult. 214.460.0060.075.0802412418 2086141818 3.6Single1886.5692.5115.71252116116Mult. 17.234.6640.650.86026115110Mult. 210.851.9051.964.9702690110TECHNICAL DATA Single−Phase with Terminal BlockMaximum RecommendedMCA Overcur­Supply Wire Ground Nom.Supply Heater Max FLA Min Protective75 0 C. Copper WireHeater Supply Heat­i Heat kW Per Circuit kW Per Heater Motor Total Circuit Device# of Wire Max.# of MinModel Volt­BTUH KW Element No.Circuit AMPS.AMPS.AMPS.Ampacity(AMPS.)Wires Size Length (Ft)Wires SizeEHIA05KN1024016378 4.8 4.8Single 4.820.0626.032.53528113110 20812283 3.6 3.6Single 3.617.3623.329.130210118110EHIA07KN10240245677.2 3.6Single7.230.0636.045.0452881110 20818425 5.4 2.7Single 5.426.0632.040.0402892110EHIA10KN10240327569.6 4.8Single9.640.0646.057.56026101110 208245677.2 3.6Single7.234.6640.650.86026115110TECHNICAL DATA Three Phase with Circuit BreakerMaximum RecommendedMCA Overcur­Supply Wire Ground Nom.Supply Heater Max FLA Min Protective75 0 C. Copper WireHeater Supply Heat­i Heat kW Per Circuit kW Per Heater Motor Total Circuit Device# of Wire Max.# of MinModel Volt­BTUH KW Element No.Circuit AMPS.AMPS.AMPS.Ampacity(AMPS.)Wires Size Length (Ft)Wires SizeEHIA10HB10240327569.6 3.2Single9.623.1629.136.44038117110 208245677.2 2.4Single7.220.0626.032.53538131110EHIA15HB102404913414.4 4.8Single14.434.7640.750.9603613218 2083685110.8 3.6Single10.830.0636.045.0453894110EHIA20HB102406551319.2 3.2Single19.246.2652.265.3703416518Mult. 1 6.415.4621.426.830310102110Mult. 212.830.8030.838.54038110110 2084913414.4 2.4Single14.440.0646.057.5603611718Mult. 1 4.813.3619.324.230310113110Mult. 29.626.7026.733.33538127110EHIA25HB1024081891244Single2457.8663.879.8803413518Mult. 1819.3625.331.63538134110Mult. 21638.5038.548.2503888110 20861418183Single1850.0656.070.0703415318Mult. 1616.7622.728.33031096110Mult. 21233.3033.341.74538102110Conversion: 1 foot = .305 metersHEATER STAGING Single−PhaseELECTRIC HEATER VOLTAGETOTAL HEAT KW1st STAGE KW (W1)2nd STAGE KW (W2) 208V240V208V240V208V240VEHIA05KB10208−240/1/60 3.6 4.8 3.6 4.8−−EHIA07KB10208−240/1/60 5.47.2 5.47.2−−EHIA10KB10208−240/1/607.29.67.29.6−−EHIA15KB10208−240/1/6010.814.47.29.6 3.6 4.8 EHIA20KB10208−240/1/6014.419.27.29.67.29.6EHIA25KB10208−240/1/6018247.29.610.814.4EHIA05KN10208−240/1/60 3.6 4.8 3.6 4.8−−EHIA07KN10208−240/1/60 5.47.2 5.47.2−−EHIA10KN10208−240/1/607.29.67.29.6−−Three−PhaseELECTRIC HEATER VOLTAGE TOTAL HEAT KW1st STAGE KW (W1)2nd STAGE KW (W2)208v240v208v240v208v240v EHIA10HB10208−240/3/607.29.67.29.6−−EHIA15HB10208−240/3/6010.814.410.814.4−−EHIA20HB10208−240/3/6014.419.2 4.8 6.49.612.8 EHIA25HB10208−240/3/601824681216Conversion: 1 foot = .305 metersHEAT STRIP STAGINGSingle−Stage OperationTwo−Stage Capable Three−Stage Capable (with ODTS only)(no staging − all electric heat together)Single−Phase EHIA05KB / KNEHIA15KBEHIA20KBEHIA25KBEHIA25KB EHIA07KB / KNEHIA10KB / KNEHIA15KBEHIA20KBEHIA25KBThree−Phase EHIA10HB EHIA10HBEHIA20HBEHIA25HB EHIA15HB EHIA15HBEHIA20HB EHIA20HBEHIA25HB EHIA25HBACCESSORIESModel Description Used with MF ModelEHIA00KN10No Heat Kit08, 12, 16, 20 EHIA05KB10 5 kW 1-Phase w/C.B.08, 12, 16, 20 EHIA05KN10 5 kW 1-Phase w/T.B.08, 12, 16, 20 EHIA07KB107.5 kW 1-Phase w/C.B.08, 12, 16, 20 EHIA07KN107.5 kW 1-Phase w/T.B.08, 12, 16, 20 EHIA10KB1010 kW 1-Phase w/C.B.08, 12, 16, 20 EHIA10KN1010 kW 1-Phase w/T.B.08, 12, 16, 20 EHIA15KB1015 kW 1-Phase w/C.B.08, 12, 16, 20 EHIA20KB1020 kW 1-Phase w/C.B.12, 16, 20 EHIA25KB1025 kW 1-Phase w/C.B.16, 20 EHIA10HB1010 kW 3-Phase w/C.B.12, 16, 20 EHIA15HB1015 kW 3-Phase w/C.B.12, 16, 20 EHIA20HB1020 kW 3-Phase w/C.B.16, 20 EHIA25HB1025 kW 3-Phase w/C.B.16, 20KN = 1-phase T.B. = terminal blockKB = 1-phase C.B. = circuit breakerHB = 3-phase SINGLE POINT WIRING KITModel DescriptionUsed withHeater size AMFK20SPA Single Point Wiring Kit (4-pole)15-20 kW AMFK30SPA Single Point Wiring Kit (6-pole)25 kW OUTDOOR THERMOSTATModel DescriptionUsed withHeater size AMF002OTA2-Stage ODTS15 kW andabove DOWNFLOW KITModel DescriptionUsed withMF Model AMF008DFB1Downflow kit08 AMF012DFB1Downflow kit12 AMF016DFB1Downflow kit16 AMF020DFB1Downflow kit20International Comfort Products, LLC Lewisburg, Tennessee 37091 U.S.A.。

洁净洗车设备操作手册说明书

洁净洗车设备操作手册说明书

X &VX SERIES Pressure WashersEngine exhaust from this product contains chemicals Thank you Thank you for selecting our products. Our personnel have proudly made every effort to ensure that your new pressure washer is of the quality you expect. But things do occasionally go wrong. This is why every pressure washer is covered by a limited warranty. Among other things, this warranty provides for the replacement of parts found to be defective during the operation of your new pressure washer. Please note that the owner/operator has certain obligations under the terms of the warranty. Be sure to read this manual for directions on proper installation, start-up, use, and stor-age of your pressure washer.Your new pressure washer was tested after production for proper pressure and flow.Please note that this process will sometimes leave a water residue in the pump. The dealer you have purchased your new machine from should review with you the prop-er installation, start-up, use, and storage. Most ‘big’problems occur when shortcuts are taken in one of these processes. If a problem occurs that you need some assis-tance with, please feel free to contact us at the listing below:Warranty Service Center520 Brooks RoadIowa Falls, IA 501261.800.648.6007Be familiar with the model plate located on your machine.Have the model and code number with you when you call for service. (Located on motor).Please make note of Model Identification Model #Code #Serial #Always have this information when callingWarranty Service Center.WarningStatement of WarrantyThe manufacturer of this product agrees to repair or replace designated parts that prove defective within the warranty peri-od listed in the chart below. Specific limitations and exclusions apply. This warranty covers defects in material and workmanship and not failure due to normal wear, depreciation, abuse, accidental damage, negligence, improper use, maintenance or storage. To make claim under the terms of the warranty, all parts said to be defective must be returned to a designated Warranty Service Center for warranty inspection. The judgments and decisions of the factory-authorized personnel concerning the validity of war-ranty claims are final.Many components are covered by warranties given by their respective manufacturers. These warranties pass through to the end user. As a factory authorized and trained warranty service center the factory will honor the terms of all component warranties and satisfy claims of the appropriate warranty provisions.Normal wear items include but are not limited to: hoses, nozzles, filter, valves, seals and are not covered by this warranty.This warranty is in lieu of all other warranties, express or implied, including without limitation any warranties of mer-chantability or fitness for a particular purpose and all such warranties are hereby disclaimed and excluded by the Manufacturer. The Manufacturer's warranty obligation is limited to repair and replacement of defective products as provided herein and the Manufacturer shall not be liable for any further loss, damages or expenses, including damages from shipping, accident, abuse, acts of God, misuse or neglect. Neither is damage from repairs using parts not purchased from the Manufacturer or alterations performed by non-factory authorized personnel. Failure to install and operate equipment according to the guidelines put forth inAccessories:Includes tips, guns, wands, hoses, injectors, unloaders, sandblasters, flat surface cleaners, hose reels, turbo nozzles, drain nozzles, brushes, foamers, GFCI units, thermal relief, filters, tanks, etc.90 daysWARNINGThe following warnings must be followed, Failure to follow these warnings could result in serious personal injury or death!Electrical equipment can cause shock and sparks.Do not bypass or remove the grounding prong in any electrical plug.Keep electrical plugs, connections and cords out of water and moisture.Refer to instructions prior to equipment operation.Disconnect from power source before servicing.Inspect and repair damaged or exposed electrical components prior to use.Never splice electrical cords on pressure washers.Never allow children or untrained personnel to operate machinery.High Temperature Water.Wear protective clothing and face shield.Do not direct water stream toward self or others.Do not spray electrical apparatus.High pressure water can cause death or serious injury.High pressure fluid can create a high pressure stream or ruptured vessel.Wear safety face shield.Relieve pressure before servicing.Do not modify/repair/rework vessel or change safety relief or pressure setting.Do not direct stream toward self or others.Pressurized fluid streams and rupturedpressure vessels can cause death or serious injury.Important Safety InstructionsWARNING - when using this product basic precautions should always be followed, including the following:1.Read all the instructions before using the product.2. To reduce the risk of injury, close supervision is necessary when a product is used near children.3.Know how to stop the product and bleed pressure quickly. Be thoroughly familiar with the controls.4.Stay alert - watch what you are doing.5.Do not operate the product when fatigued or under the influence of alcohol or drugs.6.Keep operating area clear of all persons.7.Do not overreach or stand on unstable support. Keep good footing and balance at all times.8.Follow the maintenance instructions specified in the manual.9.“WARNING - Risk of Injection or Injury - Do Not Direct Discharge Stream At Persons.”SAVE THESE INSTRUCTIONSGROUNDING INSTRUCTIONSThis product must be grounded. If it should malfunction or breakdown, grounding provides a path of least resis-tance for electric current to reduce the risk of electric shock. This product is equipped with a cord having an equipment-grounding conductor and a grounding plug. The plug must be plugged into appropriate outlet that is properly installed and grounded in accordance with all local codes and ordinances.DANGER - Improper connection of the equipment-grounding conductor can result in a risk of electrocution. Check with a qualified electrician or service personnel if you are in doubts to whether the outlet is properly grounded. Do not modify the plug provided with the product - if it will not fit the outlet, have a proper outlet installed by a qualified electrician. Do not use any type of adaptor with this product.When you receive your pressure washer be sure you check for concealed freight damage. Any damage should be noted with the delivering carrier. If you have any questions related to freight call the 800 number listed in the front of the manual.Check all oil levels in the pump or engine if applicable. Failure to check all levels will result in equipment damage. Most pump are shipped with oil from factory and the crankcase are sealed,you may have to remove a shipping plug and install a dipstick in the pump. Oil type is stated on the pump breadown and in the engine book.Your water supply must provide water to the equipment that exceeds the Gallon Per Minute {GPM}rate of your machine. You can check your GPM by using a 5 Gallon bucket and a timer. If your machine is 5 GPM or less and the bucket fills in less than a minute you have adequate supply.Some systems are effected by things like washing machines, livestock watering systems and flush-ing of toilets. Be sure the supply is still adequate when these operations are taking place. The water temperature cannot exceed 145 Degrees Fahrenheit on the standard models and 180degrees Fahrenheit on the high temperature models and the pressure should not exceed 60 PSI.Failure to secure adequate water supply will result in pump damage. DO NOT RUN PUMP DRY.Your water should not contain particles larger than 80 microns. Although there are small filters installed on pressure washers that filter the water, they could only filter poor quality water for a short period of time before they clog. This would result in damage to the machine. Therefore you should insure no sand or scale particles are present in the water supply.Hook a garden hose from the hydrant to the machine, when doing this be sure to check the inlet water filter or screen. This hose should be at least 5/8” diameter and a length at least 15 feet. This 15’length helps isolate the water supply from pulsations from the pump. Many states require a Vacuum Break or backflow preventor be installed at the hydrant, before the garden hose, to insure the water source cannot be contaminated. Be sure to check local and state regula-tions upon installation. Turn on the water supply and open the trigger gun, this will purge all the air from the system.Look for water leaks and stop any leak found. Leaks can cause erratic pump behavior.A circuit dedicated only to the pressure washer is recommended. This circuit should be installed by a licensed electrician and checked to supply adequate voltage Under Load.Sometimes the distance from the panel is to long, the wire size is to small or the voltage is initially to low, this will cause the GFCI or Thermal to trip. If the GFCI trips or the thermal overload on the motor trips con-sult factory. Plug your cord into the receptacle. DO NOT USE EXTENSION CORD!Prior to turning on the power switches or your engine check the oil level in the pump.Turn on the power switch. Pull trigger gun and check for adequate pressure.Inspectionfor freightdamage.Inspection of oil levels WaterSupplyWaterQualitySupplyhosePurge AirElectricalSupplyPumpTurn onPower Initial setup and operation of your new pressure washerThe pressure was set at the factory during the testing procedure, no adjustments to the machine should be required for operation. During operation do not leave the machine running for more than 2minutes without the trigger gun being pulled. Although your machine has a by-pass valve on it and may have a thermal relief system, this can cause extensive pump damage. If machine will not be discharging water for more than 2 minutes, shut the machine off.Your machine is supplied with interchangeable spray tips. The black tip lowers your pressure anddrawschemical. The other tips are for high pressure rinse at different spray angles. Red is 0 degree, yellow is 15 degree, green is 25 degree and white is 40 degree. The yellow tip is used for most standard applications. Be sure the quick coupler is fully engaged before pulling the trigger gun. Failure to do may result in the tip becoming a projectile and may be lost or damage to property or persons may occur.Your pressure washer is supplied with a downstream chemical injector with dual chemical selector. The 1/4” clear vinyl tube is to be inserted into the desired chemical to apply. Be sure to use the black, lowpressure nozzle to inject chemical. The chemical injector will only open up and allow chemical into the line when this tip is used. This tip enables the pressure to drop to approximately 250 PSI to draw chemical. The injector can be turned on and off or the rate of injection can also be set by turning the knob that the clear vinyl tube attaches to. See calibration below.Be sure to flush injection system with clear water after use.The chart below is an average ratio observed using water as the test fluid to draw through the injectorand serves only as a guide, your actual ratio will vary.Setting on valveInjection Ratio 96:188:1710:1613:1520:1428:1335:1250:1For better accuracy, calibrate using the following formula:(GPM x 128) ¸ (ounces drawn in 1 minute) = x:1.IE: If a 2.0 GPM machine draws 8 ounces of chemical in 1 minute: (2 x 128)8 = 32:1Factory supplied hoses are sized in length and diameter for best operational performance and sizedwithin the pressure capabilities. Additional hose added to the machine may change the performance of the machine. Consult factory if you have any questions. When replacing or disconnecting the quick couplers be sure the machine is shut off and relieve the pressure from all hoses.DuringOperation Nozzles Chemicalinjector use Hoses and couplersCalibrationLow NozzlePressure SoapInjectorNotWorkingProperly Surging Operation NoticeLow nozzle pressure is a common complaint. In a majority of instances, low nozzle pressure is gener-ally caused by one of the following:1. Plugged nozzle tip.2. Inlet screen plugged.3. Insufficient flow in gallons per minute (not pressure) to the pump.4. Unloader valve stuck open due to debris lodged under the check valve ball.5. Customer use of shut-off-type quick connectors.6. Plugged hose.7. Incorrect nozzle or soap tip installed.Another complaint is that pressure surges.That is, when the trigger is pulled, pressure is satisfactory for a moment then falls off. When the trigger is released, pressure builds up to normal levels. This isgenerally a sign that the water supply cannot provide the flow rate (gallons per minute) required by the pump. Following are some possible solutions:1. Make sure the supply is not restricted; that there are no under-sized fittings and the inlet screen is unobstructed.2. Make sure the flow rate of the water supply is sufficient for the pump. First, find the capacity of your pump in gallons per minute (gpm) as shown in the Water Supply section on Page 5. Then determine the flow rate of your supply by measuring the gallons that can be delivered in one minute. If your supply does not deliver the gpm your pump requires, do not use the pump. It will suck air, causing cavitation that can quickly damage pump components.3. Check for leaks in the supply fittings. Any leak will cause the pump to draw air and perform poorly. When a soap injector is not working properly, the problem is generally fairly easy to isolate. Check the following:1. Make sure the Black, soap tip is installed. Soap injectors will not work when high pressure nozzles are installed.2. Be sure that the soap injector valve is turned on, and turn selector valve to desired setting.3. A piece of debris may be caught in the injector valve, injector ball valve, or orifice. Disassemble and clean the injector.User maintenance procedures include replacing valves and seal. Unloader components are not user serviceable. Repairs involving unloaders and crankcase components should be referred to the factory or a factory authorized repair center.Pop off (515500)Unloader7534)(208/3050X)(MTM18.0155)(2555)(UD UBI22)(3050XS)(GEN YU2140)(4040X)Themo(509306)(AR XWA8629)(208)(UD GD5530S)(2555)(UD MKD5035S)(3050X)(UD MD5030U)(3050XS)(UD MKD4040S)(4040X)(521316) -3 PHASEPressure gauge(520902)Switch(526328)。

  1. 1、下载文档前请自行甄别文档内容的完整性,平台不提供额外的编辑、内容补充、找答案等附加服务。
  2. 2、"仅部分预览"的文档,不可在线预览部分如存在完整性等问题,可反馈申请退款(可完整预览的文档不适用该条件!)。
  3. 3、如文档侵犯您的权益,请联系客服反馈,我们会尽快为您处理(人工客服工作时间:9:00-18:30)。
Use only 100-240V AC for power supply. (Cause of a fire or electric shock)
Never use if the power cord or the power plug is damaged or its insertion to the outlet is loose. (If the power cord breaks, a fire or electric shock may occur.)
(Cause of an accident or trouble)
- Regions where orthopedic treatment was given - Eyeballs and upper eyelids
- Wound sites
- Facial melanoderma - Mucosal regions, such as inside the mouth

Փ⫼䁾ᯢ᳌ INSTRUCTIONS
Ion cleansing with moisturizing support device
CM-N8100BF
ҰൠՈఉ༻
9:; ,8
&%$#"
‫ܙ‬䳏Ѹ⌕ᓣܽ⫼ AC/RECHARGEABLE 100V-240V AC FREE VOLTAGE
- Regions where there is itching, sensation of warmth, or liver spots due to physical stimulus etc.
- Regions where skin irritation is caused by cosmetics
- Persons with a fever
- Persons with a blood pressure disorder
- Persons with an infectious disease - Persons with a tubercular disease
- Persons with a malignant tumor
The following persons should avoid use of this product.
(Cause of an accident or trouble)
- Persons with heart disease
- Persons with an acute (pain) illness
- Persons with particularly sensitive skin - Persons with hemophilia
- Persons under dental care
- Persons whose blood vessels have expanded due to long time use of steroid
Persons who use this product for the first time should use it while observing the condition of their skin. (Cause of skin trouble or poor physical condition)
This appliance is not intended for use by persons (including children) with reduced physical, sensory or mental capabilities, or lack of experience and knowledge, unless they hanstruction concerning use of the appliance by a person responsible for their safety.
Use with wet hands prohibited
Use prohibited in wet areas
Never insert or remove the power plug in/from the outlet with wet hands. (Cause of a failure or short circuit)
- Persons with facial neuralgia
- Persons who are pregnant
- Persons who are menstruating
- Persons with atopic dermatitis
- Persons with an allergic predisposition
If any unusual sound or abnormality occurs in the main body, immediately stop using this product and contact the distributor for repair together with the charger. (Cause of an accident or trouble)
Never wash this product with water. And, never soak in water or splash water on this product. (Cause of a failure or short circuit) Never use, charge or leave this product in places splashed with water or in damp places, such as in a bathroom. (Cause of a failure or short circuit)
The symbol indicates "Compulsory" (Make sure to do this).
"General action"
"Unplug"
Prohibited
Persons who use the following medical electronic devices should not use this
Never damage the power cord, unnecessarily bend, pull, twist, bind, place a heavy object on it, pinch, process, or wind around the charger, etc. (If the power cord breaks, a fire or electric shock may occur.)
˔ Precautions are classified as follows. Make sure to observe the precautions because they are all important in relation to safety.
Indicates an imminently dangerous situation in which improper handling may result in death or serious injury to a user.
೔ຊ‫૷ݪ‬
Made in Japan
㪚㪤㪄㪥㪏㪈㪇㪇㪙㪝
English Ё᭛
Page 1~12
13~24


˝ ˝


English
Safety precautions
˔ Precautions described here are intended for safe and correct use of this product and are to prevent injury and damage to you and others before they occur.
hormones or liver function disorder
- Persons who are under the influence of alcohol or medication, or who are very tired

Prohibited Make sure
Do not use this product on the following regions.
Indicates a dangerous situation in which improper handling could result in death or serious injury to a user.
Indicates a dangerous situation in which improper handling could result in slight injury to a user or damage to property (house, household effects, etc.).
Unplug Prohibited Make sure
If any abnormality occurs during charge or use, immediately pull out the power plug of the charger from the outlet. (Cause of an accident or fire)
Children should be supervised to ensure that they do not play with the appliance.
When feeling pain or disorder during use of this product, or sensing anything wrong with your skin after use, stop using this product and consult a dermatologist. (Cause of skin trouble etc.)
相关文档
最新文档