Enhance PM by HWWT2-final
马赛克修复软件Video Enhancer使用教程

级别: 认证会员显示用户信息0 发表于: 2009-08-18倒序阅读┊只看楼主┊小中大来源于分享分类视频瑕疵修复软件Video Enhancer下载及使用教程Video Enhancer 是一款提升视频质量的软件。
采用大量的VirtualDub 滤镜和附加的编解码器重新压缩的视频处理,将马赛克进行还原。
您可通过使用Video Enhancer 强加您视频的分辨率以极大的提升其品质,它可以调用绝大多数VirtualDub 滤镜及任意编解码器进行重压缩处理。
本站特别推出Video Enhancer 的详细使用教程,希望对大家有一定的帮助,如果您的电脑中没有安装Video Enhancer,请下载其中文汉化增强版。
Video Enhancer(提升视频质量、视频马赛克还原)V1.60 汉化绿色版迅雷下载:thunder://QUFodHRwOi8vaC04My4xNS41MnouY29tLy81MnovRGVlTW9uVmlkZW9Fbmh hbmNlci12MS42LnJhclpaVideo Enhancer(提升视频质量、视频马赛克还原)V1.90 汉化绿色版迅雷下载/download/2008/07191/haDeeMonVideoEnhancer.rar1、启动Video Enhancer,进入Video Enhancer的主界面,如图:t12、在输入视频文件的右下方有一个浏览按钮,点击浏览,选择要处理的视频,如图:t23、在浏览的下面有一个“多文件”,意思是Video Enhancer可以同时处理多个视频文件,单击多文件,添加其它要处理的文件,如图:t34、单击添加,选择其它的要处理的文件,然后单击确定,回到主界面:t45、接下来有一个超分辨率模式,如果你的电脑配置还行的话,选择上面的质量优先模式,否则选择下面的速度优先。
这是视频处理过程的不同插值计算方法。
6、在输出文件的右下面的浏览,是让你选择处理好的文件存放路径,最好选择一个空间比较大的地方,因为输出的AVI占用磁盘空间比较大,具体要看不同的编码。
海康威视 DS-2CD3126G2-IS 2 MP IR 固定弧形网络摄像头说明书

DS-2CD3126G2-IS (D)AcuSense 2 MP IR Fixed Dome Network CameraEmpowered by deep learning algorithms, Hikvision AcuSense technology brings human and vehicle targets classification alarms to front- and back-end devices. The system focuses on human and vehicle targets, vastly improving alarm efficiency and effectiveness.⏹High quality imaging with 2 MP resolution⏹Excellent low-light performance with powered-by-DarkFighter technology⏹Efficient H.265+ compression technology⏹Clear imaging against strong back light due to 120 dB true WDR technology⏹Focus on human and vehicle targets classification based on deep learning⏹Advanced streaming technology that enables smooth live view and data self-correcting in poor network⏹Water and dust resistant (IP67) and vandal-resistant (IK10)SpecificationCameraImage Sensor 1/2.8" Progressive Scan CMOSMin. Illumination Color: 0.002 Lux @ (F1.4, AGC ON), B/W: 0 Lux with IR Shutter Speed 1/3 s to 1/100,000 sSlow Shutter YesP/N P/NWide Dynamic Range 120 dBDay & Night IR cut filterAngle Adjustment Pan: 0° to 355°, tilt: 0° to 75°, rotate: 0° to 355° LensLens Type Fixed focal lens, 2.8, 4, and 6 mm optionalIris Type FixedLens Mount M12Focal Length & FOV 2.8 mm, horizontal FOV 107°, vertical FOV 54°, diagonal FOV 129° 4 mm, horizontal FOV 86°, vertical FOV 47°, diagonal FOV 102° 6 mm, horizontal FOV 55°, vertical FOV 29°, diagonal FOV 65°Aperture F1.4 DORIDORI 2.8 mm: D: 44 m, O: 17 m, R: 8 m, I: 4 m 4 mm: D: 53 m, O: 21 m, R: 10 m, I: 5 m 6 mm: D: 86 m, O: 34 m, R: 17 m, I: 8 mIlluminatorSupplement Light Type IRIR Range Up to 40 m IR Wavelength 850 nm Smart Supplement Light Yes VideoMax. Resolution 1920 × 1080Main Stream 50 Hz: up to 50 fps (1920 × 1080, 1280 × 720)60 Hz: up to 60 fps (1920 × 1080, 1280 × 720)*High frame rate is supported under certain settings.Sub-Stream 50 Hz: 25 fps (640 × 480, 640 × 360) 60 Hz: 30 fps (640 × 480, 640 × 360)Third Stream 50 Hz: 10 fps (1920 × 1080, 1280 × 720, 640 × 480, 640 × 360) 60 Hz: 10 fps (1920 × 1080, 1280 × 720, 640 × 480, 640 × 360) *Third stream is supported under certain settings.Fourth Stream 50 Hz: 10 fps (1280 × 720, 640 × 480, 640 × 360) 60 Hz: 10 fps (1280 × 720, 640 × 480, 640 × 360) *Fourth stream is supported under certain settings.Video Compression Main stream: H.265/H.264/H.264+/H.265+Sub-stream: H.265/H.264/MJPEGThird stream: H.265/H.264Fourth stream: H.265/H.264/MJPEG*Third stream and fourth stream are supported under certain settings.Video Bit Rate 32 Kbps to 8 MbpsH.264 Type Baseline Profile/Main Profile/High ProfileH.265 Type Main ProfileH.264+ Main stream supportsH.265+ Main stream supportsBit Rate Control CBR/VBRScalable Video Coding (SVC) H.264 and H.265 encodingRegion of Interest (ROI) 5 fixed regions for main stream and sub-streamAudioEnvironment Noise Filtering YesTwo-Way Audio YesAudio Sampling Rate 8 kHz/16 kHz/32 kHz/44.1 kHz/48 kHzAudio Compression G.711ulaw/G.711alaw/G.722.1/G.726/MP2L2/PCM/MP3/AACAudio Bit Rate 64 Kbps (G.711ulaw/G.711alaw)/16 Kbps (G.722.1)/16 Kbps (G.726)/32 to 192 Kbps (MP2L2)/8 to 320 Kbps (MP3)/16 to 64 Kbps (AAC)NetworkSimultaneous Live View Up to 6 channelsAPI Open Network Video Interface (PROFILE S, PROFILE G, PROFILE T), ISAPI, SDK, ISUPProtocols TCP/IP, ICMP, HTTP, HTTPS, FTP, DHCP, DNS, DDNS, RTP, RTSP, NTP, UPnP, SMTP, IGMP, 802.1X, QoS, IPv4, IPv6, UDP, Bonjour, SSL/TLS, PPPoE, ARP, SNMPUser/Host Up to 32 users. 3 user levels: administrator, operator and userSecurity Password protection, complicated password, HTTPS encryption, IP address filter, Security Audit Log, basic and digest authentication for HTTP/HTTPS, TLS 1.1/1.2, WSSE and digest authentication for Open Network Video InterfaceNetwork Storage MicroSD/SDHC/SDXC card (256 GB) local storage, and NAS (NFS, SMB/CIFS), auto network replenishment (ANR)Together with high-end Hikvision memory card, memory card encryption and health detection are supported.Client iVMS-4200, Hik-Connect, Hik-CentralWeb Browser Plug-in required live view: IE 10+Plug-in free live view : Chrome 57.0+, Firefox 52.0+ Local service: Chrome 57.0+, Firefox 52.0+ImageSNR ≥ 52 dBDay/Night Switch Day, Night, Auto, Schedule Target Cropping YesImage Enhancement BLC, HLC, 3D DNR, EIS Image Parameters Switch YesImage Settings Rotate mode, saturation, brightness, contrast, sharpness, gain, white balance adjustable by client software or web browserInterfaceAlarm 1 input, 1 output (max. 12 VDC, 30 mA)Audio 1 input (line in), max. input amplitude: 3.3 vpp, input impedance:4.7 KΩ, interface type: non-equilibrium;1 output (line out), max.output amplitude: 2.5 vpp, output impedance: 100 Ω, interface type: non-equilibrium, mono soundOn-Board Storage Built-in memory card slot, support microSD/SDHC/SDXC card, up to 256 GB Hardware Reset YesEthernet Interface 1 RJ45 10 M/100 M self-adaptive Ethernet portPower Output 12 VDC, max. 100 mA (supported by all power supply types)EventBasic Event Motion detection (human and vehicle targets classification), video tampering alarm, exceptionSmart Event Unattended baggage detection, object removal detection, scene change detection, audio exception detectionPeople counting Support counting people in and out and area limit Deep Learning FunctionFace Capture YesPerimeter Protection Line crossing detection, intrusion detection, region entrance detection, region exiting detectionGeneralLinkage Method Upload to NAS/memory card/FTP, notify surveillance center, trigger recording, trigger capture, send email, audible warningFirmware Version V5.5.112 Build 20220504Web Client Language 33 languagesEnglish, Russian, Estonian, Bulgarian, Hungarian, Greek, German, Italian, Czech, Slovak, French, Polish, Dutch, Portuguese, Spanish, Romanian, Danish, Swedish, Norwegian, Finnish, Croatian, Slovenian, Serbian, Turkish, Korean, Traditional Chinese, Thai, Vietnamese, Japanese, Latvian, Lithuanian, Portuguese (Brazil), UkrainianGeneral Function Anti-flicker, heartbeat, mirror, privacy mask (up to 4 areas), flash log, password reset via email, pixel counterSoftware Reset YesStorage Conditions -30 °C to 60 °C (-22 °F to 140 °F). Humidity 95% or less (non-condensing) Startup and OperatingConditions-30 °C to 60 °C (-22 °F to 140 °F). Humidity 95% or less (non-condensing)Power Supply 12 VDC ± 25%PoE: 802.3af, Type 1, Class 3Power Consumption and Current 12 VDC: 0.6 A, max. 7 WPoE (802.3af, 36 V to 57 V), 0.25 A to 0.15 A, max. 8.5 WPower Interface Ø5.5 mm coaxial power plugCamera Material Aluminum alloy bodyCamera Dimension Ø121.4 mm × 92.2 mm (Ø4.8" × 3.6") Package Dimension 150 mm × 150 mm × 141 mm (5.9" × 5.9" × 5.6") Camera Weight Approx. 580 g (1.2 lb.)With Package Weight Approx. 820 g (1.6 lb.)ApprovalEMCFCC SDoC (47 CFR Part 15, Subpart B);CE-EMC (EN 55032: 2015, EN 61000-3-2: 2019, EN 61000-3-3: 2013, EN 50130-4: 2011+A1: 2014);RCM (AS/NZS CISPR 32: 2015); IC VoC (ICES-003: Issue 6, 2019); KC (KN 32: 2015, KN 35: 2015) SafetyUL (UL 60950-1);CB (IEC 60950-1:2005 + Am 1:2009 + Am 2:2013, IEC 62368-1:2014);CE-LVD (EN 60950-1:2006+A2:2013, IEC 62368-1:2014+A11:2017); BIS (IS 13252(Part 1):2010+A1:2013+A2:2015); LOA (SANS IEC60950-1)Environment CE-RoHS (2011/65/EU); WEEE (2012/19/EU); Reach (Regulation (EC) No 1907/2006) ProtectionIP67 (IEC 60529-2013), IK10 (IEC 62262:2002)⏹Typical ApplicationHikvision products are classified into three levels according to their anti-corrosion performance. Refer to the following description to choose for your using environment.This model has NO SPECIFIC PROTECTION.LevelDescriptionTop-level protectionHikvision products at this level are equipped for use in areas where professional anti-corrosion protection is a must. Typical application scenarios include coastlines, docks, chemical plants, and more.Moderate protectionHikvision products at this level are equipped for use in areas with moderate anti-corrosion demands. Typical application scenarios include coastal areas about 2 kilometers (1.24 miles) away from coastlines, as well as areas affected by acid rain.No specific protectionHikvision products at this level are equipped for use in areas where no specific anti-corrosion protection is needed.⏹Available ModelDS-2CD3126G2-IS (D) (2.8/4/6 mm)⏹Dimension ⏹Accessory⏹OptionalDS-1253ZJ-MWater-proof DS-1276ZJ-SUSCorner MountDS-1280ZJ-DM46Junction BoxDS-1272ZJ-120BWall MountDS-1272ZJ-120Wall MountDS-1275ZJ-SUS Vertical Pole Mount DS-1271ZJ-120 Pendant Mount。
Final Cut Pro中的音频去噪和声音增强方法
Final Cut Pro中的音频去噪和声音增强方法Final Cut Pro是一款功能强大的视频剪辑软件,它提供了多种音频处理工具,其中包括音频去噪和声音增强。
在进行视频制作时,音频质量是至关重要的。
下面将介绍一些使用Final Cut Pro进行音频去噪和声音增强的方法。
1. 音频去噪:在Final Cut Pro中,有两种去噪方法:噪音消除器和音频过滤器。
噪音消除器可以通过分析音频中的噪音频谱来去除噪音。
您只需选中音频剪辑,然后在“音频增强”选项卡中选择“噪音消除器”工具。
调整“噪音门限”和“噪音抑制”设置,可以实时预览去噪效果。
音频过滤器是另一种去噪方法,它可以通过滤波技术去除特定频率范围内的噪音。
在“音频增强”选项卡中选择“音频过滤器”工具,然后调整滤波器的参数以达到最佳效果。
2. 声音增强:Final Cut Pro中有几个工具可以增强音频。
一个常用的方法是使用均衡器来调整音频频谱。
您可以选择音频剪辑,然后在“音频增强”选项卡中选择“均衡器”工具。
通过调整频率范围的增益和平衡,来改善音频的听感。
另一个方法是使用音频压缩器,它可以平衡音频的动态范围,提高整体音量。
选择音频剪辑后,在“音频增强”选项卡中选择“音频压缩器”工具,并调整压缩器的参数。
3. 音频混响:音频混响是一种常用的声音增强技术,可以给音频添加环境感和深度。
Final Cut Pro中的“音频增强”选项卡提供了多种音频混响效果。
选择音频剪辑后,选择“音频增强”选项卡,然后选择“混响”工具。
您可以尝试不同的混响效果和参数,来达到所需的效果。
4. 音频剪辑和调整:除了上述方法,Final Cut Pro还提供了更多的音频编辑和调整功能,可以帮助您进一步优化音频。
您可以使用渐变工具在音频剪辑中添加渐变效果,平滑音频的起始和结束部分。
调整音频的音量、平衡和声相,以使其达到完美的观听效果。
此外,您还可以使用关键帧工具在音频剪辑中添加音量和效果的变化。
视频后期修复利器 Final Cut Pro插件推荐

视频后期修复利器:Final Cut Pro插件推荐在视频制作中,后期修复是至关重要的一部分。
它可以帮助我们修复录制过程中产生的错误和瑕疵,使得最终的作品更加完美。
而Final Cut Pro则作为一款强大的视频后期处理软件,凭借其丰富的功能和方便易用的界面,成为了许多专业视频编辑人员和爱好者的首选。
为了更好地进行视频后期修复工作,下面我将介绍一些Final Cut Pro中常用的插件,希望能够为您的视频制作带来更大的便利和提升。
1. Neat VideoNeat Video是一款强大的去噪插件,可以有效地减少视频中的噪点和颗粒。
它具有自动噪声分析功能,可以根据视频本身的噪声特性智能地调整去噪参数,从而达到最佳的去噪效果。
使用Neat Video,您可以轻松地消除摄像机传感器噪声、低光照条件下的噪点和其他常见的噪声问题,让您的视频画面更加清晰和细腻。
2. Color FinaleColor Finale是一款专业的调色插件,可以帮助您轻松地进行颜色校正和调整。
它提供了丰富的工具和选项,包括色彩平衡、色阶、曲线编辑等,可以帮助您实现准确的色彩还原和效果调整。
与Final Cut Pro 自带的调色工具相比,Color Finale具有更高的精确度和自定义性,让您能够更好地掌控视频的色彩效果。
3. CoreMelt SliceXCoreMelt SliceX是一款强大的掩膜插件,可以帮助您实现精确的图像跟踪和编辑。
它提供了多种图像分割和掩膜工具,包括形状跟踪、运动跟踪等,可以帮助您快速而准确地选择和处理特定的图像区域。
借助CoreMelt SliceX,您可以在视频中添加特效、修复错误,甚至实现创意性的图像处理,提升视频的专业程度和观赏性。
4. CrumplePop BetterStabilizerCrumplePop BetterStabilizer是一款出色的视频稳定插件,可以帮助您消除因相机抖动或镜头晃动而引起的模糊和不稳定。
Glider Flying Handbook说明书

Glider Flying Handbook2013U.S. Department of TransportationFEDERAL AVIATION ADMINISTRATIONFlight Standards Servicei iPrefaceThe Glider Flying Handbook is designed as a technical manual for applicants who are preparing for glider category rating and for currently certificated glider pilots who wish to improve their knowledge. Certificated flight instructors will find this handbook a valuable training aid, since detailed coverage of aeronautical decision-making, components and systems, aerodynamics, flight instruments, performance limitations, ground operations, flight maneuvers, traffic patterns, emergencies, soaring weather, soaring techniques, and cross-country flight is included. Topics such as radio navigation and communication, use of flight information publications, and regulations are available in other Federal Aviation Administration (FAA) publications.The discussion and explanations reflect the most commonly used practices and principles. Occasionally, the word “must” or similar language is used where the desired action is deemed critical. The use of such language is not intended to add to, interpret, or relieve a duty imposed by Title 14 of the Code of Federal Regulations (14 CFR). Persons working towards a glider rating are advised to review the references from the applicable practical test standards (FAA-G-8082-4, Sport Pilot and Flight Instructor with a Sport Pilot Rating Knowledge Test Guide, FAA-G-8082-5, Commercial Pilot Knowledge Test Guide, and FAA-G-8082-17, Recreational Pilot and Private Pilot Knowledge Test Guide). Resources for study include FAA-H-8083-25, Pilot’s Handbook of Aeronautical Knowledge, FAA-H-8083-2, Risk Management Handbook, and Advisory Circular (AC) 00-6, Aviation Weather For Pilots and Flight Operations Personnel, AC 00-45, Aviation Weather Services, as these documents contain basic material not duplicated herein. All beginning applicants should refer to FAA-H-8083-25, Pilot’s Handbook of Aeronautical Knowledge, for study and basic library reference.It is essential for persons using this handbook to become familiar with and apply the pertinent parts of 14 CFR and the Aeronautical Information Manual (AIM). The AIM is available online at . The current Flight Standards Service airman training and testing material and learning statements for all airman certificates and ratings can be obtained from .This handbook supersedes FAA-H-8083-13, Glider Flying Handbook, dated 2003. Always select the latest edition of any publication and check the website for errata pages and listing of changes to FAA educational publications developed by the FAA’s Airman Testing Standards Branch, AFS-630.This handbook is available for download, in PDF format, from .This handbook is published by the United States Department of Transportation, Federal Aviation Administration, Airman Testing Standards Branch, AFS-630, P.O. Box 25082, Oklahoma City, OK 73125.Comments regarding this publication should be sent, in email form, to the following address:********************************************John M. AllenDirector, Flight Standards Serviceiiii vAcknowledgmentsThe Glider Flying Handbook was produced by the Federal Aviation Administration (FAA) with the assistance of Safety Research Corporation of America (SRCA). The FAA wishes to acknowledge the following contributors: Sue Telford of Telford Fishing & Hunting Services for images used in Chapter 1JerryZieba () for images used in Chapter 2Tim Mara () for images used in Chapters 2 and 12Uli Kremer of Alexander Schleicher GmbH & Co for images used in Chapter 2Richard Lancaster () for images and content used in Chapter 3Dave Nadler of Nadler & Associates for images used in Chapter 6Dave McConeghey for images used in Chapter 6John Brandon (www.raa.asn.au) for images and content used in Chapter 7Patrick Panzera () for images used in Chapter 8Jeff Haby (www.theweatherprediction) for images used in Chapter 8National Soaring Museum () for content used in Chapter 9Bill Elliot () for images used in Chapter 12.Tiffany Fidler for images used in Chapter 12.Additional appreciation is extended to the Soaring Society of America, Inc. (), the Soaring Safety Foundation, and Mr. Brad Temeyer and Mr. Bill Martin from the National Oceanic and Atmospheric Administration (NOAA) for their technical support and input.vv iPreface (iii)Acknowledgments (v)Table of Contents (vii)Chapter 1Gliders and Sailplanes ........................................1-1 Introduction....................................................................1-1 Gliders—The Early Years ..............................................1-2 Glider or Sailplane? .......................................................1-3 Glider Pilot Schools ......................................................1-4 14 CFR Part 141 Pilot Schools ...................................1-5 14 CFR Part 61 Instruction ........................................1-5 Glider Certificate Eligibility Requirements ...................1-5 Common Glider Concepts ..............................................1-6 Terminology...............................................................1-6 Converting Metric Distance to Feet ...........................1-6 Chapter 2Components and Systems .................................2-1 Introduction....................................................................2-1 Glider Design .................................................................2-2 The Fuselage ..................................................................2-4 Wings and Components .............................................2-4 Lift/Drag Devices ...........................................................2-5 Empennage .....................................................................2-6 Towhook Devices .......................................................2-7 Powerplant .....................................................................2-7 Self-Launching Gliders .............................................2-7 Sustainer Engines .......................................................2-8 Landing Gear .................................................................2-8 Wheel Brakes .............................................................2-8 Chapter 3Aerodynamics of Flight .......................................3-1 Introduction....................................................................3-1 Forces of Flight..............................................................3-2 Newton’s Third Law of Motion .................................3-2 Lift ..............................................................................3-2The Effects of Drag on a Glider .....................................3-3 Parasite Drag ..............................................................3-3 Form Drag ...............................................................3-3 Skin Friction Drag ..................................................3-3 Interference Drag ....................................................3-5 Total Drag...................................................................3-6 Wing Planform ...........................................................3-6 Elliptical Wing ........................................................3-6 Rectangular Wing ...................................................3-7 Tapered Wing .........................................................3-7 Swept-Forward Wing ..............................................3-7 Washout ..................................................................3-7 Glide Ratio .................................................................3-8 Aspect Ratio ............................................................3-9 Weight ........................................................................3-9 Thrust .........................................................................3-9 Three Axes of Rotation ..................................................3-9 Stability ........................................................................3-10 Flutter .......................................................................3-11 Lateral Stability ........................................................3-12 Turning Flight ..............................................................3-13 Load Factors .................................................................3-13 Radius of Turn ..........................................................3-14 Turn Coordination ....................................................3-15 Slips ..........................................................................3-15 Forward Slip .........................................................3-16 Sideslip .................................................................3-17 Spins .........................................................................3-17 Ground Effect ...............................................................3-19 Chapter 4Flight Instruments ...............................................4-1 Introduction....................................................................4-1 Pitot-Static Instruments ..................................................4-2 Impact and Static Pressure Lines................................4-2 Airspeed Indicator ......................................................4-2 The Effects of Altitude on the AirspeedIndicator..................................................................4-3 Types of Airspeed ...................................................4-3Table of ContentsviiAirspeed Indicator Markings ......................................4-5 Other Airspeed Limitations ........................................4-6 Altimeter .....................................................................4-6 Principles of Operation ...........................................4-6 Effect of Nonstandard Pressure andTemperature............................................................4-7 Setting the Altimeter (Kollsman Window) .............4-9 Types of Altitude ......................................................4-10 Variometer................................................................4-11 Total Energy System .............................................4-14 Netto .....................................................................4-14 Electronic Flight Computers ....................................4-15 Magnetic Compass .......................................................4-16 Yaw String ................................................................4-16 Inclinometer..............................................................4-16 Gyroscopic Instruments ...............................................4-17 G-Meter ........................................................................4-17 FLARM Collision Avoidance System .........................4-18 Chapter 5Glider Performance .............................................5-1 Introduction....................................................................5-1 Factors Affecting Performance ......................................5-2 High and Low Density Altitude Conditions ...........5-2 Atmospheric Pressure .............................................5-2 Altitude ...................................................................5-3 Temperature............................................................5-3 Wind ...........................................................................5-3 Weight ........................................................................5-5 Rate of Climb .................................................................5-7 Flight Manuals and Placards ..........................................5-8 Placards ......................................................................5-8 Performance Information ...........................................5-8 Glider Polars ...............................................................5-8 Weight and Balance Information .............................5-10 Limitations ...............................................................5-10 Weight and Balance .....................................................5-12 Center of Gravity ......................................................5-12 Problems Associated With CG Forward ofForward Limit .......................................................5-12 Problems Associated With CG Aft of Aft Limit ..5-13 Sample Weight and Balance Problems ....................5-13 Ballast ..........................................................................5-14 Chapter 6Preflight and Ground Operations .......................6-1 Introduction....................................................................6-1 Assembly and Storage Techniques ................................6-2 Trailering....................................................................6-3 Tiedown and Securing ................................................6-4Water Ballast ..............................................................6-4 Ground Handling........................................................6-4 Launch Equipment Inspection ....................................6-5 Glider Preflight Inspection .........................................6-6 Prelaunch Checklist ....................................................6-7 Glider Care .....................................................................6-7 Preventive Maintenance .............................................6-8 Chapter 7Launch and Recovery Procedures and Flight Maneuvers ............................................................7-1 Introduction....................................................................7-1 Aerotow Takeoff Procedures .........................................7-2 Signals ........................................................................7-2 Prelaunch Signals ....................................................7-2 Inflight Signals ........................................................7-3 Takeoff Procedures and Techniques ..........................7-3 Normal Assisted Takeoff............................................7-4 Unassisted Takeoff.....................................................7-5 Crosswind Takeoff .....................................................7-5 Assisted ...................................................................7-5 Unassisted...............................................................7-6 Aerotow Climb-Out ....................................................7-6 Aerotow Release.........................................................7-8 Slack Line ...................................................................7-9 Boxing the Wake ......................................................7-10 Ground Launch Takeoff Procedures ............................7-11 CG Hooks .................................................................7-11 Signals ......................................................................7-11 Prelaunch Signals (Winch/Automobile) ...............7-11 Inflight Signals ......................................................7-12 Tow Speeds ..............................................................7-12 Automobile Launch ..................................................7-14 Crosswind Takeoff and Climb .................................7-14 Normal Into-the-Wind Launch .................................7-15 Climb-Out and Release Procedures ..........................7-16 Self-Launch Takeoff Procedures ..............................7-17 Preparation and Engine Start ....................................7-17 Taxiing .....................................................................7-18 Pretakeoff Check ......................................................7-18 Normal Takeoff ........................................................7-19 Crosswind Takeoff ...................................................7-19 Climb-Out and Shutdown Procedures ......................7-19 Landing .....................................................................7-21 Gliderport/Airport Traffic Patterns and Operations .....7-22 Normal Approach and Landing ................................7-22 Crosswind Landing ..................................................7-25 Slips ..........................................................................7-25 Downwind Landing ..................................................7-27 After Landing and Securing .....................................7-27viiiPerformance Maneuvers ..............................................7-27 Straight Glides ..........................................................7-27 Turns.........................................................................7-28 Roll-In ...................................................................7-29 Roll-Out ................................................................7-30 Steep Turns ...........................................................7-31 Maneuvering at Minimum Controllable Airspeed ...7-31 Stall Recognition and Recovery ...............................7-32 Secondary Stalls ....................................................7-34 Accelerated Stalls .................................................7-34 Crossed-Control Stalls ..........................................7-35 Operating Airspeeds .....................................................7-36 Minimum Sink Airspeed ..........................................7-36 Best Glide Airspeed..................................................7-37 Speed to Fly ..............................................................7-37 Chapter 8Abnormal and Emergency Procedures .............8-1 Introduction....................................................................8-1 Porpoising ......................................................................8-2 Pilot-Induced Oscillations (PIOs) ..............................8-2 PIOs During Launch ...................................................8-2 Factors Influencing PIOs ........................................8-2 Improper Elevator Trim Setting ..............................8-3 Improper Wing Flaps Setting ..................................8-3 Pilot-Induced Roll Oscillations During Launch .........8-3 Pilot-Induced Yaw Oscillations During Launch ........8-4 Gust-Induced Oscillations ..............................................8-5 Vertical Gusts During High-Speed Cruise .................8-5 Pilot-Induced Pitch Oscillations During Landing ......8-6 Glider-Induced Oscillations ...........................................8-6 Pitch Influence of the Glider Towhook Position ........8-6 Self-Launching Glider Oscillations During Powered Flight ...........................................................8-7 Nosewheel Glider Oscillations During Launchesand Landings ..............................................................8-7 Tailwheel/Tailskid Equipped Glider Oscillations During Launches and Landings ..................................8-8 Aerotow Abnormal and Emergency Procedures ............8-8 Abnormal Procedures .................................................8-8 Towing Failures........................................................8-10 Tow Failure With Runway To Land and Stop ......8-11 Tow Failure Without Runway To Land BelowReturning Altitude ................................................8-11 Tow Failure Above Return to Runway Altitude ...8-11 Tow Failure Above 800' AGL ..............................8-12 Tow Failure Above Traffic Pattern Altitude .........8-13 Slack Line .................................................................8-13 Ground Launch Abnormal and Emergency Procedures ....................................................................8-14 Abnormal Procedures ...............................................8-14 Emergency Procedures .............................................8-14 Self-Launch Takeoff Emergency Procedures ..............8-15 Emergency Procedures .............................................8-15 Spiral Dives ..................................................................8-15 Spins .............................................................................8-15 Entry Phase ...............................................................8-17 Incipient Phase .........................................................8-17 Developed Phase ......................................................8-17 Recovery Phase ........................................................8-17 Off-Field Landing Procedures .....................................8-18 Afterlanding Off Field .............................................8-20 Off-Field Landing Without Injury ........................8-20 Off-Field Landing With Injury .............................8-20 System and Equipment Malfunctions ..........................8-20 Flight Instrument Malfunctions ................................8-20 Airspeed Indicator Malfunctions ..........................8-21 Altimeter Malfunctions .........................................8-21 Variometer Malfunctions ......................................8-21 Compass Malfunctions .........................................8-21 Glider Canopy Malfunctions ....................................8-21 Broken Glider Canopy ..........................................8-22 Frosted Glider Canopy ..........................................8-22 Water Ballast Malfunctions ......................................8-22 Retractable Landing Gear Malfunctions ..................8-22 Primary Flight Control Systems ...............................8-22 Elevator Malfunctions ..........................................8-22 Aileron Malfunctions ............................................8-23 Rudder Malfunctions ............................................8-24 Secondary Flight Controls Systems .........................8-24 Elevator Trim Malfunctions .................................8-24 Spoiler/Dive Brake Malfunctions .........................8-24 Miscellaneous Flight System Malfunctions .................8-25 Towhook Malfunctions ............................................8-25 Oxygen System Malfunctions ..................................8-25 Drogue Chute Malfunctions .....................................8-25 Self-Launching Gliders ................................................8-26 Self-Launching/Sustainer Glider Engine Failure During Takeoff or Climb ..........................................8-26 Inability to Restart a Self-Launching/SustainerGlider Engine While Airborne .................................8-27 Self-Launching Glider Propeller Malfunctions ........8-27 Self-Launching Glider Electrical System Malfunctions .............................................................8-27 In-flight Fire .............................................................8-28 Emergency Equipment and Survival Gear ...................8-28 Survival Gear Checklists ..........................................8-28 Food and Water ........................................................8-28ixClothing ....................................................................8-28 Communication ........................................................8-29 Navigation Equipment ..............................................8-29 Medical Equipment ..................................................8-29 Stowage ....................................................................8-30 Parachute ..................................................................8-30 Oxygen System Malfunctions ..................................8-30 Accident Prevention .....................................................8-30 Chapter 9Soaring Weather ..................................................9-1 Introduction....................................................................9-1 The Atmosphere .............................................................9-2 Composition ...............................................................9-2 Properties ....................................................................9-2 Temperature............................................................9-2 Density ....................................................................9-2 Pressure ...................................................................9-2 Standard Atmosphere .................................................9-3 Layers of the Atmosphere ..........................................9-4 Scale of Weather Events ................................................9-4 Thermal Soaring Weather ..............................................9-6 Thermal Shape and Structure .....................................9-6 Atmospheric Stability .................................................9-7 Air Masses Conducive to Thermal Soaring ...................9-9 Cloud Streets ..............................................................9-9 Thermal Waves...........................................................9-9 Thunderstorms..........................................................9-10 Lifted Index ..........................................................9-12 K-Index .................................................................9-12 Weather for Slope Soaring .......................................9-14 Mechanism for Wave Formation ..............................9-16 Lift Due to Convergence ..........................................9-19 Obtaining Weather Information ...................................9-21 Preflight Weather Briefing........................................9-21 Weather-ReIated Information ..................................9-21 Interpreting Weather Charts, Reports, andForecasts ......................................................................9-23 Graphic Weather Charts ...........................................9-23 Winds and Temperatures Aloft Forecast ..............9-23 Composite Moisture Stability Chart .....................9-24 Chapter 10Soaring Techniques ..........................................10-1 Introduction..................................................................10-1 Thermal Soaring ...........................................................10-2 Locating Thermals ....................................................10-2 Cumulus Clouds ...................................................10-2 Other Indicators of Thermals ................................10-3 Wind .....................................................................10-4 The Big Picture .....................................................10-5Entering a Thermal ..............................................10-5 Inside a Thermal.......................................................10-6 Bank Angle ...........................................................10-6 Speed .....................................................................10-6 Centering ...............................................................10-7 Collision Avoidance ................................................10-9 Exiting a Thermal .....................................................10-9 Atypical Thermals ..................................................10-10 Ridge/Slope Soaring ..................................................10-10 Traps ......................................................................10-10 Procedures for Safe Flying .....................................10-12 Bowls and Spurs .....................................................10-13 Slope Lift ................................................................10-13 Obstructions ...........................................................10-14 Tips and Techniques ...............................................10-15 Wave Soaring .............................................................10-16 Preflight Preparation ...............................................10-17 Getting Into the Wave ............................................10-18 Flying in the Wave .................................................10-20 Soaring Convergence Zones ...................................10-23 Combined Sources of Updrafts ..............................10-24 Chapter 11Cross-Country Soaring .....................................11-1 Introduction..................................................................11-1 Flight Preparation and Planning ...................................11-2 Personal and Special Equipment ..................................11-3 Navigation ....................................................................11-5 Using the Plotter .......................................................11-5 A Sample Cross-Country Flight ...............................11-5 Navigation Using GPS .............................................11-8 Cross-Country Techniques ...........................................11-9 Soaring Faster and Farther .........................................11-11 Height Bands ..........................................................11-11 Tips and Techniques ...............................................11-12 Special Situations .......................................................11-14 Course Deviations ..................................................11-14 Lost Procedures ......................................................11-14 Cross-Country Flight in a Self-Launching Glider .....11-15 High-Performance Glider Operations and Considerations ............................................................11-16 Glider Complexity ..................................................11-16 Water Ballast ..........................................................11-17 Cross-Country Flight Using Other Lift Sources ........11-17 Chapter 12Towing ................................................................12-1 Introduction..................................................................12-1 Equipment Inspections and Operational Checks .........12-2 Tow Hook ................................................................12-2 Schweizer Tow Hook ...........................................12-2x。
效果强大的Photoshop滤镜插件推荐
效果强大的Photoshop滤镜插件推荐Photoshop是一款功能强大的图像处理软件,借助它的滤镜插件,用户能够进一步提升图像的效果和质量。
下面,我将推荐几款效果强大的Photoshop滤镜插件,让你在图像处理中事半功倍。
1. Topaz Labs:Topaz Labs是一家备受赞誉的软件开发公司,他们提供了一系列出色的Photoshop滤镜插件。
其中,Topaz Adjust可以帮助你快速增强图像的对比度、清晰度和颜色饱和度,让你的照片更加生动。
Topaz Denoise是一款强大的降噪工具,能够有效减少图像中的噪点,提高图像的清晰度。
除此之外,Topaz Labs还推出了许多其他优秀的插件,如Topaz Glow、Topaz ReMask等,可根据需求选择适合的插件。
2. Nik Collection:Nik Collection曾经是一款独立软件,但现在已被Google收购并整合到Photoshop中。
它包含了一系列先进的滤镜插件,如Color Efex Pro、Silver Efex Pro、Viveza等。
这些插件具备丰富的功能,例如调整色彩和对比度、模拟黑白摄影效果、选择性地调整图像的亮度和颜色等。
无论你是初学者还是专业摄影师,Nik Collection都能满足你的各种需求。
3. Alien Skin Exposure:Alien Skin Exposure是一款模拟胶片效果的滤镜插件,能够让你的数字照片看起来更像胶卷照片。
它提供了多种胶片模拟效果,如经典的Kodachrome、Fuji Velvia和Ilford等,让你的照片具有独特的质感。
此外,Alien Skin Exposure还包含了调整曝光、对比度、饱和度等参数的功能,能够帮助你为照片添加个性化的风格。
4. ON1 Effects:ON1 Effects是一款功能强大的PhotoShop滤镜插件,提供了丰富的特效和滤镜效果,如HDR、黑白转换、复古风格、模糊、镜头光晕等。
Native Instruments MASCHINE MIKRO MK3用户手册说明书
The information in this document is subject to change without notice and does not represent a commitment on the part of Native Instruments GmbH. The software described by this docu-ment is subject to a License Agreement and may not be copied to other media. No part of this publication may be copied, reproduced or otherwise transmitted or recorded, for any purpose, without prior written permission by Native Instruments GmbH, hereinafter referred to as Native Instruments.“Native Instruments”, “NI” and associated logos are (registered) trademarks of Native Instru-ments GmbH.ASIO, VST, HALion and Cubase are registered trademarks of Steinberg Media Technologies GmbH.All other product and company names are trademarks™ or registered® trademarks of their re-spective holders. Use of them does not imply any affiliation with or endorsement by them.Document authored by: David Gover and Nico Sidi.Software version: 2.8 (02/2019)Hardware version: MASCHINE MIKRO MK3Special thanks to the Beta Test Team, who were invaluable not just in tracking down bugs, but in making this a better product.NATIVE INSTRUMENTS GmbH Schlesische Str. 29-30D-10997 Berlin Germanywww.native-instruments.de NATIVE INSTRUMENTS North America, Inc. 6725 Sunset Boulevard5th FloorLos Angeles, CA 90028USANATIVE INSTRUMENTS K.K.YO Building 3FJingumae 6-7-15, Shibuya-ku, Tokyo 150-0001Japanwww.native-instruments.co.jp NATIVE INSTRUMENTS UK Limited 18 Phipp StreetLondon EC2A 4NUUKNATIVE INSTRUMENTS FRANCE SARL 113 Rue Saint-Maur75011 ParisFrance SHENZHEN NATIVE INSTRUMENTS COMPANY Limited 5F, Shenzhen Zimao Center111 Taizi Road, Nanshan District, Shenzhen, GuangdongChina© NATIVE INSTRUMENTS GmbH, 2019. All rights reserved.Table of Contents1Welcome to MASCHINE (23)1.1MASCHINE Documentation (24)1.2Document Conventions (25)1.3New Features in MASCHINE 2.8 (26)1.4New Features in MASCHINE 2.7.10 (28)1.5New Features in MASCHINE 2.7.8 (29)1.6New Features in MASCHINE 2.7.7 (29)1.7New Features in MASCHINE 2.7.4 (31)1.8New Features in MASCHINE 2.7.3 (33)2Quick Reference (35)2.1MASCHINE Project Overview (35)2.1.1Sound Content (35)2.1.2Arrangement (37)2.2MASCHINE Hardware Overview (40)2.2.1MASCHINE MIKRO Hardware Overview (40)2.2.1.1Browser Section (41)2.2.1.2Edit Section (42)2.2.1.3Performance Section (43)2.2.1.4Transport Section (45)2.2.1.5Pad Section (46)2.2.1.6Rear Panel (50)2.3MASCHINE Software Overview (51)2.3.1Header (52)2.3.2Browser (54)2.3.3Arranger (56)2.3.4Control Area (59)2.3.5Pattern Editor (60)3Basic Concepts (62)3.1Important Names and Concepts (62)3.2Adjusting the MASCHINE User Interface (65)3.2.1Adjusting the Size of the Interface (65)3.2.2Switching between Ideas View and Song View (66)3.2.3Showing/Hiding the Browser (67)3.2.4Showing/Hiding the Control Lane (67)3.3Common Operations (68)3.3.1Adjusting Volume, Swing, and Tempo (68)3.3.2Undo/Redo (71)3.3.3Focusing on a Group or a Sound (73)3.3.4Switching Between the Master, Group, and Sound Level (77)3.3.5Navigating Channel Properties, Plug-ins, and Parameter Pages in the Control Area.773.3.6Navigating the Software Using the Controller (82)3.3.7Using Two or More Hardware Controllers (82)3.3.8Loading a Recent Project from the Controller (84)3.4Native Kontrol Standard (85)3.5Stand-Alone and Plug-in Mode (86)3.5.1Differences between Stand-Alone and Plug-in Mode (86)3.5.2Switching Instances (88)3.6Preferences (88)3.6.1Preferences – General Page (89)3.6.2Preferences – Audio Page (93)3.6.3Preferences – MIDI Page (95)3.6.4Preferences – Default Page (97)3.6.5Preferences – Library Page (101)3.6.6Preferences – Plug-ins Page (109)3.6.7Preferences – Hardware Page (114)3.6.8Preferences – Colors Page (114)3.7Integrating MASCHINE into a MIDI Setup (117)3.7.1Connecting External MIDI Equipment (117)3.7.2Sync to External MIDI Clock (117)3.7.3Send MIDI Clock (118)3.7.4Using MIDI Mode (119)3.8Syncing MASCHINE using Ableton Link (120)3.8.1Connecting to a Network (121)3.8.2Joining and Leaving a Link Session (121)4Browser (123)4.1Browser Basics (123)4.1.1The MASCHINE Library (123)4.1.2Browsing the Library vs. Browsing Your Hard Disks (124)4.2Searching and Loading Files from the Library (125)4.2.1Overview of the Library Pane (125)4.2.2Selecting or Loading a Product and Selecting a Bank from the Browser (128)4.2.3Selecting a Product Category, a Product, a Bank, and a Sub-Bank (133)4.2.3.1Selecting a Product Category, a Product, a Bank, and a Sub-Bank on theController (137)4.2.4Selecting a File Type (137)4.2.5Choosing Between Factory and User Content (138)4.2.6Selecting Type and Character Tags (138)4.2.7Performing a Text Search (142)4.2.8Loading a File from the Result List (143)4.3Additional Browsing Tools (148)4.3.1Loading the Selected Files Automatically (148)4.3.2Auditioning Instrument Presets (149)4.3.3Auditioning Samples (150)4.3.4Loading Groups with Patterns (150)4.3.5Loading Groups with Routing (151)4.3.6Displaying File Information (151)4.4Using Favorites in the Browser (152)4.5Editing the Files’ Tags and Properties (155)4.5.1Attribute Editor Basics (155)4.5.2The Bank Page (157)4.5.3The Types and Characters Pages (157)4.5.4The Properties Page (160)4.6Loading and Importing Files from Your File System (161)4.6.1Overview of the FILES Pane (161)4.6.2Using Favorites (163)4.6.3Using the Location Bar (164)4.6.4Navigating to Recent Locations (165)4.6.5Using the Result List (166)4.6.6Importing Files to the MASCHINE Library (169)4.7Locating Missing Samples (171)4.8Using Quick Browse (173)5Managing Sounds, Groups, and Your Project (175)5.1Overview of the Sounds, Groups, and Master (175)5.1.1The Sound, Group, and Master Channels (176)5.1.2Similarities and Differences in Handling Sounds and Groups (177)5.1.3Selecting Multiple Sounds or Groups (178)5.2Managing Sounds (181)5.2.1Loading Sounds (183)5.2.2Pre-listening to Sounds (184)5.2.3Renaming Sound Slots (185)5.2.4Changing the Sound’s Color (186)5.2.5Saving Sounds (187)5.2.6Copying and Pasting Sounds (189)5.2.7Moving Sounds (192)5.2.8Resetting Sound Slots (193)5.3Managing Groups (194)5.3.1Creating Groups (196)5.3.2Loading Groups (197)5.3.3Renaming Groups (198)5.3.4Changing the Group’s Color (199)5.3.5Saving Groups (200)5.3.6Copying and Pasting Groups (202)5.3.7Reordering Groups (206)5.3.8Deleting Groups (207)5.4Exporting MASCHINE Objects and Audio (208)5.4.1Saving a Group with its Samples (208)5.4.2Saving a Project with its Samples (210)5.4.3Exporting Audio (212)5.5Importing Third-Party File Formats (218)5.5.1Loading REX Files into Sound Slots (218)5.5.2Importing MPC Programs to Groups (219)6Playing on the Controller (223)6.1Adjusting the Pads (223)6.1.1The Pad View in the Software (223)6.1.2Choosing a Pad Input Mode (225)6.1.3Adjusting the Base Key (226)6.2Adjusting the Key, Choke, and Link Parameters for Multiple Sounds (227)6.3Playing Tools (229)6.3.1Mute and Solo (229)6.3.2Choke All Notes (233)6.3.3Groove (233)6.3.4Level, Tempo, Tune, and Groove Shortcuts on Your Controller (235)6.3.5Tap Tempo (235)6.4Performance Features (236)6.4.1Overview of the Perform Features (236)6.4.2Selecting a Scale and Creating Chords (239)6.4.3Scale and Chord Parameters (240)6.4.4Creating Arpeggios and Repeated Notes (253)6.4.5Swing on Note Repeat / Arp Output (257)6.5Using Lock Snapshots (257)6.5.1Creating a Lock Snapshot (257)7Working with Plug-ins (259)7.1Plug-in Overview (259)7.1.1Plug-in Basics (259)7.1.2First Plug-in Slot of Sounds: Choosing the Sound’s Role (263)7.1.3Loading, Removing, and Replacing a Plug-in (264)7.1.4Adjusting the Plug-in Parameters (270)7.1.5Bypassing Plug-in Slots (270)7.1.6Using Side-Chain (272)7.1.7Moving Plug-ins (272)7.1.8Alternative: the Plug-in Strip (273)7.1.9Saving and Recalling Plug-in Presets (273)7.1.9.1Saving Plug-in Presets (274)7.1.9.2Recalling Plug-in Presets (275)7.1.9.3Removing a Default Plug-in Preset (276)7.2The Sampler Plug-in (277)7.2.1Page 1: Voice Settings / Engine (279)7.2.2Page 2: Pitch / Envelope (281)7.2.3Page 3: FX / Filter (283)7.2.4Page 4: Modulation (285)7.2.5Page 5: LFO (286)7.2.6Page 6: Velocity / Modwheel (288)7.3Using Native Instruments and External Plug-ins (289)7.3.1Opening/Closing Plug-in Windows (289)7.3.2Using the VST/AU Plug-in Parameters (292)7.3.3Setting Up Your Own Parameter Pages (293)7.3.4Using VST/AU Plug-in Presets (298)7.3.5Multiple-Output Plug-ins and Multitimbral Plug-ins (300)8Using the Audio Plug-in (302)8.1Loading a Loop into the Audio Plug-in (306)8.2Editing Audio in the Audio Plug-in (307)8.3Using Loop Mode (308)8.4Using Gate Mode (310)9Using the Drumsynths (312)9.1Drumsynths – General Handling (313)9.1.1Engines: Many Different Drums per Drumsynth (313)9.1.2Common Parameter Organization (313)9.1.3Shared Parameters (316)9.1.4Various Velocity Responses (316)9.1.5Pitch Range, Tuning, and MIDI Notes (316)9.2The Kicks (317)9.2.1Kick – Sub (319)9.2.2Kick – Tronic (321)9.2.3Kick – Dusty (324)9.2.4Kick – Grit (325)9.2.5Kick – Rasper (328)9.2.6Kick – Snappy (329)9.2.7Kick – Bold (331)9.2.8Kick – Maple (333)9.2.9Kick – Push (334)9.3The Snares (336)9.3.1Snare – Volt (338)9.3.2Snare – Bit (340)9.3.3Snare – Pow (342)9.3.4Snare – Sharp (343)9.3.5Snare – Airy (345)9.3.6Snare – Vintage (347)9.3.7Snare – Chrome (349)9.3.8Snare – Iron (351)9.3.9Snare – Clap (353)9.3.10Snare – Breaker (355)9.4The Hi-hats (357)9.4.1Hi-hat – Silver (358)9.4.2Hi-hat – Circuit (360)9.4.3Hi-hat – Memory (362)9.4.4Hi-hat – Hybrid (364)9.4.5Creating a Pattern with Closed and Open Hi-hats (366)9.5The Toms (367)9.5.1Tom – Tronic (369)9.5.2Tom – Fractal (371)9.5.3Tom – Floor (375)9.5.4Tom – High (377)9.6The Percussions (378)9.6.1Percussion – Fractal (380)9.6.2Percussion – Kettle (383)9.6.3Percussion – Shaker (385)9.7The Cymbals (389)9.7.1Cymbal – Crash (391)9.7.2Cymbal – Ride (393)10Using the Bass Synth (396)10.1Bass Synth – General Handling (397)10.1.1Parameter Organization (397)10.1.2Bass Synth Parameters (399)11Working with Patterns (401)11.1Pattern Basics (401)11.1.1Pattern Editor Overview (402)11.1.2Navigating the Event Area (404)11.1.3Following the Playback Position in the Pattern (406)11.1.4Jumping to Another Playback Position in the Pattern (407)11.1.5Group View and Keyboard View (408)11.1.6Adjusting the Arrange Grid and the Pattern Length (410)11.1.7Adjusting the Step Grid and the Nudge Grid (413)11.2Recording Patterns in Real Time (416)11.2.1Recording Your Patterns Live (417)11.2.2Using the Metronome (419)11.2.3Recording with Count-in (420)11.3Recording Patterns with the Step Sequencer (422)11.3.1Step Mode Basics (422)11.3.2Editing Events in Step Mode (424)11.4Editing Events (425)11.4.1Editing Events with the Mouse: an Overview (425)11.4.2Creating Events/Notes (428)11.4.3Selecting Events/Notes (429)11.4.4Editing Selected Events/Notes (431)11.4.5Deleting Events/Notes (434)11.4.6Cut, Copy, and Paste Events/Notes (436)11.4.7Quantizing Events/Notes (439)11.4.8Quantization While Playing (441)11.4.9Doubling a Pattern (442)11.4.10Adding Variation to Patterns (442)11.5Recording and Editing Modulation (443)11.5.1Which Parameters Are Modulatable? (444)11.5.2Recording Modulation (446)11.5.3Creating and Editing Modulation in the Control Lane (447)11.6Creating MIDI Tracks from Scratch in MASCHINE (452)11.7Managing Patterns (454)11.7.1The Pattern Manager and Pattern Mode (455)11.7.2Selecting Patterns and Pattern Banks (456)11.7.3Creating Patterns (459)11.7.4Deleting Patterns (460)11.7.5Creating and Deleting Pattern Banks (461)11.7.6Naming Patterns (463)11.7.7Changing the Pattern’s Color (465)11.7.8Duplicating, Copying, and Pasting Patterns (466)11.7.9Moving Patterns (469)11.8Importing/Exporting Audio and MIDI to/from Patterns (470)11.8.1Exporting Audio from Patterns (470)11.8.2Exporting MIDI from Patterns (472)11.8.3Importing MIDI to Patterns (474)12Audio Routing, Remote Control, and Macro Controls (483)12.1Audio Routing in MASCHINE (484)12.1.1Sending External Audio to Sounds (485)12.1.2Configuring the Main Output of Sounds and Groups (489)12.1.3Setting Up Auxiliary Outputs for Sounds and Groups (494)12.1.4Configuring the Master and Cue Outputs of MASCHINE (497)12.1.5Mono Audio Inputs (502)12.1.5.1Configuring External Inputs for Sounds in Mix View (503)12.2Using MIDI Control and Host Automation (506)12.2.1Triggering Sounds via MIDI Notes (507)12.2.2Triggering Scenes via MIDI (513)12.2.3Controlling Parameters via MIDI and Host Automation (514)12.2.4Selecting VST/AU Plug-in Presets via MIDI Program Change (522)12.2.5Sending MIDI from Sounds (523)12.3Creating Custom Sets of Parameters with the Macro Controls (527)12.3.1Macro Control Overview (527)12.3.2Assigning Macro Controls Using the Software (528)13Controlling Your Mix (535)13.1Mix View Basics (535)13.1.1Switching between Arrange View and Mix View (535)13.1.2Mix View Elements (536)13.2The Mixer (537)13.2.1Displaying Groups vs. Displaying Sounds (539)13.2.2Adjusting the Mixer Layout (541)13.2.3Selecting Channel Strips (542)13.2.4Managing Your Channels in the Mixer (543)13.2.5Adjusting Settings in the Channel Strips (545)13.2.6Using the Cue Bus (549)13.3The Plug-in Chain (551)13.4The Plug-in Strip (552)13.4.1The Plug-in Header (554)13.4.2Panels for Drumsynths and Internal Effects (556)13.4.3Panel for the Sampler (557)13.4.4Custom Panels for Native Instruments Plug-ins (560)13.4.5Undocking a Plug-in Panel (Native Instruments and External Plug-ins Only) (564)14Using Effects (567)14.1Applying Effects to a Sound, a Group or the Master (567)14.1.1Adding an Effect (567)14.1.2Other Operations on Effects (574)14.1.3Using the Side-Chain Input (575)14.2Applying Effects to External Audio (578)14.2.1Step 1: Configure MASCHINE Audio Inputs (578)14.2.2Step 2: Set up a Sound to Receive the External Input (579)14.2.3Step 3: Load an Effect to Process an Input (579)14.3Creating a Send Effect (580)14.3.1Step 1: Set Up a Sound or Group as Send Effect (581)14.3.2Step 2: Route Audio to the Send Effect (583)14.3.3 A Few Notes on Send Effects (583)14.4Creating Multi-Effects (584)15Effect Reference (587)15.1Dynamics (588)15.1.1Compressor (588)15.1.2Gate (591)15.1.3Transient Master (594)15.1.4Limiter (596)15.1.5Maximizer (600)15.2Filtering Effects (603)15.2.1EQ (603)15.2.2Filter (605)15.2.3Cabinet (609)15.3Modulation Effects (611)15.3.1Chorus (611)15.3.2Flanger (612)15.3.3FM (613)15.3.4Freq Shifter (615)15.3.5Phaser (616)15.4Spatial and Reverb Effects (617)15.4.1Ice (617)15.4.2Metaverb (619)15.4.3Reflex (620)15.4.4Reverb (Legacy) (621)15.4.5Reverb (623)15.4.5.1Reverb Room (623)15.4.5.2Reverb Hall (626)15.4.5.3Plate Reverb (629)15.5Delays (630)15.5.1Beat Delay (630)15.5.2Grain Delay (632)15.5.3Grain Stretch (634)15.5.4Resochord (636)15.6Distortion Effects (638)15.6.1Distortion (638)15.6.2Lofi (640)15.6.3Saturator (641)15.7Perform FX (645)15.7.1Filter (646)15.7.2Flanger (648)15.7.3Burst Echo (650)15.7.4Reso Echo (653)15.7.5Ring (656)15.7.6Stutter (658)15.7.7Tremolo (661)15.7.8Scratcher (664)16Working with the Arranger (667)16.1Arranger Basics (667)16.1.1Navigating Song View (670)16.1.2Following the Playback Position in Your Project (672)16.1.3Performing with Scenes and Sections using the Pads (673)16.2Using Ideas View (677)16.2.1Scene Overview (677)16.2.2Creating Scenes (679)16.2.3Assigning and Removing Patterns (679)16.2.4Selecting Scenes (682)16.2.5Deleting Scenes (684)16.2.6Creating and Deleting Scene Banks (685)16.2.7Clearing Scenes (685)16.2.8Duplicating Scenes (685)16.2.9Reordering Scenes (687)16.2.10Making Scenes Unique (688)16.2.11Appending Scenes to Arrangement (689)16.2.12Naming Scenes (689)16.2.13Changing the Color of a Scene (690)16.3Using Song View (692)16.3.1Section Management Overview (692)16.3.2Creating Sections (694)16.3.3Assigning a Scene to a Section (695)16.3.4Selecting Sections and Section Banks (696)16.3.5Reorganizing Sections (700)16.3.6Adjusting the Length of a Section (702)16.3.6.1Adjusting the Length of a Section Using the Software (703)16.3.6.2Adjusting the Length of a Section Using the Controller (705)16.3.7Clearing a Pattern in Song View (705)16.3.8Duplicating Sections (705)16.3.8.1Making Sections Unique (707)16.3.9Removing Sections (707)16.3.10Renaming Scenes (708)16.3.11Clearing Sections (710)16.3.12Creating and Deleting Section Banks (710)16.3.13Working with Patterns in Song view (710)16.3.13.1Creating a Pattern in Song View (711)16.3.13.2Selecting a Pattern in Song View (711)16.3.13.3Clearing a Pattern in Song View (711)16.3.13.4Renaming a Pattern in Song View (711)16.3.13.5Coloring a Pattern in Song View (712)16.3.13.6Removing a Pattern in Song View (712)16.3.13.7Duplicating a Pattern in Song View (712)16.3.14Enabling Auto Length (713)16.3.15Looping (714)16.3.15.1Setting the Loop Range in the Software (714)16.3.15.2Activating or Deactivating a Loop Using the Controller (715)16.4Playing with Sections (715)16.4.1Jumping to another Playback Position in Your Project (716)16.5Triggering Sections or Scenes via MIDI (717)16.6The Arrange Grid (719)16.7Quick Grid (720)17Sampling and Sample Mapping (722)17.1Opening the Sample Editor (722)17.2Recording Audio (724)17.2.1Opening the Record Page (724)17.2.2Selecting the Source and the Recording Mode (725)17.2.3Arming, Starting, and Stopping the Recording (729)17.2.5Checking Your Recordings (731)17.2.6Location and Name of Your Recorded Samples (734)17.3Editing a Sample (735)17.3.1Using the Edit Page (735)17.3.2Audio Editing Functions (739)17.4Slicing a Sample (743)17.4.1Opening the Slice Page (743)17.4.2Adjusting the Slicing Settings (744)17.4.3Manually Adjusting Your Slices (746)17.4.4Applying the Slicing (750)17.5Mapping Samples to Zones (754)17.5.1Opening the Zone Page (754)17.5.2Zone Page Overview (755)17.5.3Selecting and Managing Zones in the Zone List (756)17.5.4Selecting and Editing Zones in the Map View (761)17.5.5Editing Zones in the Sample View (765)17.5.6Adjusting the Zone Settings (767)17.5.7Adding Samples to the Sample Map (770)18Appendix: Tips for Playing Live (772)18.1Preparations (772)18.1.1Focus on the Hardware (772)18.1.2Customize the Pads of the Hardware (772)18.1.3Check Your CPU Power Before Playing (772)18.1.4Name and Color Your Groups, Patterns, Sounds and Scenes (773)18.1.5Consider Using a Limiter on Your Master (773)18.1.6Hook Up Your Other Gear and Sync It with MIDI Clock (773)18.1.7Improvise (773)18.2Basic Techniques (773)18.2.1Use Mute and Solo (773)18.2.2Create Variations of Your Drum Patterns in the Step Sequencer (774)18.2.3Use Note Repeat (774)18.2.4Set Up Your Own Multi-effect Groups and Automate Them (774)18.3Special Tricks (774)18.3.1Changing Pattern Length for Variation (774)18.3.2Using Loops to Cycle Through Samples (775)18.3.3Load Long Audio Files and Play with the Start Point (775)19Troubleshooting (776)19.1Knowledge Base (776)19.2Technical Support (776)19.3Registration Support (777)19.4User Forum (777)20Glossary (778)Index (786)1Welcome to MASCHINEThank you for buying MASCHINE!MASCHINE is a groove production studio that implements the familiar working style of classi-cal groove boxes along with the advantages of a computer based system. MASCHINE is ideal for making music live, as well as in the studio. It’s the hands-on aspect of a dedicated instru-ment, the MASCHINE hardware controller, united with the advanced editing features of the MASCHINE software.Creating beats is often not very intuitive with a computer, but using the MASCHINE hardware controller to do it makes it easy and fun. You can tap in freely with the pads or use Note Re-peat to jam along. Alternatively, build your beats using the step sequencer just as in classic drum machines.Patterns can be intuitively combined and rearranged on the fly to form larger ideas. You can try out several different versions of a song without ever having to stop the music.Since you can integrate it into any sequencer that supports VST, AU, or AAX plug-ins, you can reap the benefits in almost any software setup, or use it as a stand-alone application. You can sample your own material, slice loops and rearrange them easily.However, MASCHINE is a lot more than an ordinary groovebox or sampler: it comes with an inspiring 7-gigabyte library, and a sophisticated, yet easy to use tag-based Browser to give you instant access to the sounds you are looking for.What’s more, MASCHINE provides lots of options for manipulating your sounds via internal ef-fects and other sound-shaping possibilities. You can also control external MIDI hardware and 3rd-party software with the MASCHINE hardware controller, while customizing the functions of the pads, knobs and buttons according to your needs utilizing the included Controller Editor application. We hope you enjoy this fantastic instrument as much as we do. Now let’s get go-ing!—The MASCHINE team at Native Instruments.MASCHINE Documentation1.1MASCHINE DocumentationNative Instruments provide many information sources regarding MASCHINE. The main docu-ments should be read in the following sequence:1.MASCHINE MIKRO Quick Start Guide: This animated online guide provides a practical ap-proach to help you learn the basic of MASCHINE MIKRO. The guide is available from theNative Instruments website: https:///maschine-mikro-quick-start/2.MASCHINE Manual (this document): The MASCHINE Manual provides you with a compre-hensive description of all MASCHINE software and hardware features.Additional documentation sources provide you with details on more specific topics:►Online Support Videos: You can find a number of support videos on The Official Native In-struments Support Channel under the following URL: https:///NIsupport-EN. We recommend that you follow along with these instructions while the respective ap-plication is running on your computer.Other Online Resources:If you are experiencing problems related to your Native Instruments product that the supplied documentation does not cover, there are several ways of getting help:▪Knowledge Base▪User Forum▪Technical Support▪Registration SupportYou will find more information on these subjects in the chapter Troubleshooting.Document Conventions1.2Document ConventionsThis section introduces you to the signage and text highlighting used in this manual. This man-ual uses particular formatting to point out special facts and to warn you of potential issues.The icons introducing these notes let you see what kind of information is to be expected:This document uses particular formatting to point out special facts and to warn you of poten-tial issues. The icons introducing the following notes let you see what kind of information canbe expected:Furthermore, the following formatting is used:▪Text appearing in (drop-down) menus (such as Open…, Save as… etc.) in the software andpaths to locations on your hard disk or other storage devices is printed in italics.▪Text appearing elsewhere (labels of buttons, controls, text next to checkboxes etc.) in thesoftware is printed in blue. Whenever you see this formatting applied, you will find thesame text appearing somewhere on the screen.▪Text appearing on the displays of the controller is printed in light grey. Whenever you seethis formatting applied, you will find the same text on a controller display.▪Text appearing on labels of the hardware controller is printed in orange. Whenever you seethis formatting applied, you will find the same text on the controller.▪Important names and concepts are printed in bold.▪References to keys on your computer’s keyboard you’ll find put in square brackets (e.g.,“Press [Shift] + [Enter]”).►Single instructions are introduced by this play button type arrow.→Results of actions are introduced by this smaller arrow.Naming ConventionThroughout the documentation we will refer to MASCHINE controller (or just controller) as the hardware controller and MASCHINE software as the software installed on your computer.The term “effect” will sometimes be abbreviated as “FX” when referring to elements in the MA-SCHINE software and hardware. These terms have the same meaning.Button Combinations and Shortcuts on Your ControllerMost instructions will use the “+” sign to indicate buttons (or buttons and pads) that must be pressed simultaneously, starting with the button indicated first. E.g., an instruction such as:“Press SHIFT + PLAY”means:1.Press and hold SHIFT.2.While holding SHIFT, press PLAY and release it.3.Release SHIFT.1.3New Features in MASCHINE2.8The following new features have been added to MASCHINE: Integration▪Browse on , create your own collections of loops and one-shots and send them directly to the MASCHINE browser.Improvements to the Browser▪Samples are now cataloged in separate Loops and One-shots tabs in the Browser.▪Previews of loops selected in the Browser will be played in sync with the current project.When a loop is selected with Prehear turned on, it will begin playing immediately in-sync with the project if transport is running. If a loop preview starts part-way through the loop, the loop will play once more for its full length to ensure you get to hear the entire loop once in context with your project.▪Filters and product selections will be remembered when switching between content types and Factory/User Libraries in the Browser.▪Browser content synchronization between multiple running instances. When running multi-ple instances of MASCHINE, either as Standalone and/or as a plug-in, updates to the Li-brary will be synced across the instances. For example, if you delete a sample from your User Library in one instance, the sample will no longer be present in the other instances.Similarly, if you save a preset in one instance, that preset will then be available in the oth-er instances, too.▪Edits made to samples in the Factory Libraries will be saved to the Standard User Directo-ry.For more information on these new features, refer to the following chapter ↑4, Browser. Improvements to the MASCHINE MIKRO MK3 Controller▪You can now set sample Start and End points using the controller. For more information refer to ↑17.3.1, Using the Edit Page.Improved Support for A-Series Keyboards▪When Browsing with A-Series keyboards, you can now jump quickly to the results list by holding SHIFT and pushing right on the 4D Encoder.▪When Browsing with A-Series keyboards, you can fast scroll through the Browser results list by holding SHIFT and twisting the 4D Encoder.▪Mute and Solo Sounds and Groups from A-Series keyboards. Sounds are muted in TRACK mode while Groups are muted in IDEAS.。
Polycom SoundStation2 分析型会议电话说明书

DATA SHEETPolycom® SoundStation2™Analog conference phoneThe standard for everyday conferencing in small to midsize conference roomsSoundStation2 is the ideal conference phone for small to midsize conferencerooms that seat up to 10 participants. Polycom Acoustic Clarity™ technology delivers exceptional performance and voice quality, making your conference calls clearer and more productive. Industry-leading full duplex technology provides natural, simultaneous two-way conversation without clipping or drop-outs that are common in traditional speakerphones. Users can speak in a normal voice and be heard clearly up to ten feet away – making every call a more productive call. Dynamic Noise Reduction (DNR) actively removes background noise such as projectors and ventilation systems, while 360-degree microphone coverage with intelligent mixing highlights the person speaking, not the distracting ambient sounds, for crystal clear conferencing. It also features technology that resists interference from mobile phones and other wireless devices, delivering clear communications with no distractions. SoundStation2 provides users with advanced features, enabling conference calls that are more flexible and productive than ever before. The “EX” model supports up to two Expansion Microphones, ensuring that the microphone pickup reaches to all corners of a medium-sized conference room. The 2.5mm Applications Port allows you to connect the SoundStation2 to a mobile phone for conference calls from locations without analog phone lines, or to a computer for Internet calling*. A large backlit display offers easily visible call information and telephone functions. It connects to any standard analog telephone line, making it very easy to set up. With traditional telephone features like redial, mute, transfer, and hold, you have a conference phone that’s also familiar and easy to use.* Some features not available on all models – refer to chart on back for more details.Benefits• More productive calls – Patented Polycom Acoustic Clarity technology delivers crystal-clear conversations, making conference calls more productive• Hear and be heard clearly – Intelligent microphones and Dynamic Noise Reduction technology ensures everyone can be heard• Resists interference frommobile phones – Clearer calls with no distracting noise from wireless devices• Backlit display provides important information – Displays console phone number, number called, duration/progress of call and supports worldwide Caller ID*• Ability to increase microphone pickup – Optional extension microphones expand coverage for larger conference rooms• Connect to mobile phones and PCs – Applications Port offers unmatched flexibility for mobile phone and Internet calling*• Easy to use and install – Connects into any analog phone jack and can be connect to a PBX with ananalog extensionArchitecture• Tabletop console contains audio processing functions and keypad. Wall module contains power and telephone line interfaces.• Cables consist of 21 ft (6.4 m) single-cord connection to tabletop console and 7 ft (2.1 m) connection to RJ-11 telephone jack. Optional Extended microphone modules connect to console via 8 ft. (2.4 m) cables Console SpecificationsSize (L x W x H)• 14.5 x 12.25 x 2.5 in• (36.8 x 31.1 x 6.4 cm)Weight• 1.75 lb. (0.8 kg)Power• 110V 60Hz AC / 220V 50 Hz AC (depending on country-specific SKU) Network interface• Two-wire RJ-11 analog PBX or public switched telephone network interface Display*• 132x65 pixel backlit graphical LCDUser interface*• User selectable ring tones• Configurable soft keys for easy dialing of voice conferencing services• Multi-lingual support: English, German, French, Italian, Spanish, Portuguese, Norwegian• Password protected configuration settings for administratorsCaller ID and phone book*• Support for multiple Caller ID standards**: -Bellcore Type 1 (requires a telephonecompany subscription for activation)-ETSI-DTMF-British Telecom• Phone book/speed dial list – up to25 entries*Keypad• 12-key telephone keypad• On-hook/off-hook, conference,mute, volume up/down keys, menu,navigation keys*• 3 context sensitive soft keys*including redial, hold, programmableconference keyConsole loudspeaker• Frequency response: 300 to 3300 Hz• Volume: adjustable to 94 dBA SPL (peak)volume at 0.5 metersConsole microphones• 3 cardioid microphones 300 to 3500 HzAudio• Polycom Acoustic Clarity full duplex –IEEE 1329• Type 1• Up to 10 ft. microphone pick-up range• Gated microphones with intelligentmicrophone mixing• Dynamic noise reductionInterfaces• 2 EX microphone connections*• Applications Port* for connection to othercommunication devices such as mobilephones† and computers• RCA Auxiliary audio jackAccessories• 2 cardioid extension microphones 300 –3500 Hz (for EX model only)Regulatory compliance• NA Cl/C-UL• FCC Part 68• FCC Part 15 Class B• Canadian ICES-003• CE Mark (R & TTE Directive)• VCCI Class B (Japan)Environmental requirements• Operating temperature: 40° - 104°F(5° - 40°C)• Relative humidity: 20% - 85%(noncondensing)• Storage temperature: -22° - 131°F(-30° - 55°C)Recommended room conditions• Reverberation time: <0.5 seconds• Noise level: <48 dBaSoundStation2 ships with:• Tabletop phone console• 21 ft. (6.4 m) cord to console• 7 ft. (2.1 m) telco cable to RJ-11telephone jack• User documentation (user guide CD,quick installation guide, registration card)Warranty• 1 yearPart Numbers (North America)• 2200-15100-001: SoundStation2,non-expandable• 2200-16000-001: SoundStation2,non-expandable, with display• 2200-16200-001: SoundStation2,expandable, with display• 2200-16155-001: Extensionmicrophone kit* Not available on all models** D ue to the diversity of Caller ID standards,some features may not be available in all areas.In addition, the quality of the telephone lineconnection may affect Caller ID functionality.Caller ID service may require a subscription froma service provider in your area.† S oundStation2 uses a cable that connects toa standard 2.5mm headset connector. If yourmobile phone model does not support thistype of connection you will need an adapter(not included).Connecting the SoundStation2 to a mobile phoneis analogous to connecting a headset to a mobilephone. Not all mobile phone models recognize theSoundStation2 as a headset. For a list of mobilephones that are known to work with SoundStation2,please consult .Polycom, Inc.1.800.POLYCOM 3972_1212© 2012 Polycom, Inc. All rights reserved. Polycom ®, the names and marks associated with Polycom’s products are trademarks and/or service marks of Polycom, Inc. And are registered and/or common law marks in the United States and various other countries. All other trademarks are property of their respective owners. No portion hereof may be reproduced or transmitted in any form or by any means, for any purpose other than the recipient’s personal use, without the express written permission of Polycom.About PolycomPolycom is the global leader in standards-based unified communications (UC) solutions for telepresence, video, and voicepowered by the Polycom® RealPresence® Platform. The RealPresence Platform interoperates with the broadest range of business, mobile, and social applications and devices. More than 400,000 organizations trust Polycom solutions to collaborate and meet face-to-face from any location for more productive and effective engagement with colleagues, partners, customers, specialists, and prospects. Polycom, together with its broad partner ecosystem, provides customers with the best TCO, scalability, and security for video collaboration, whether on-premises, hosted, or cloud-delivered. Visit or connect withPolycom on Twitter, Facebook, and LinkedIn.。
AXIS P3215-V网络摄像头说明书
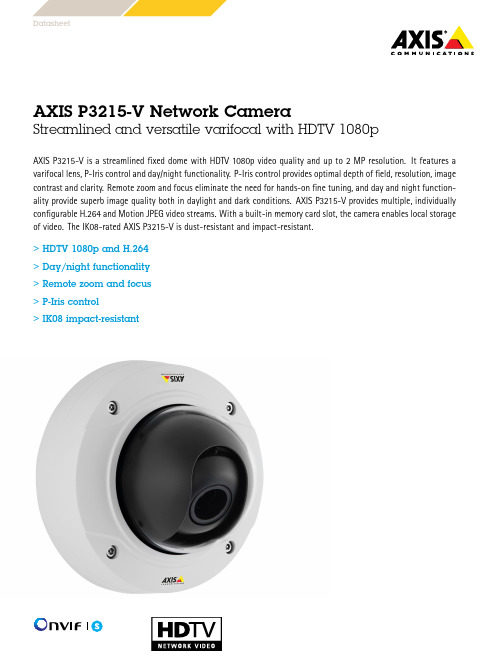
DatasheetAXIS P3215-V Network CameraStreamlined and versatile varifocal with HDTV1080pAXIS P3215-V is a streamlined fixed dome with HDTV1080p video quality and up to2MP resolution.It features a varifocal lens,P-Iris control and day/night functionality.P-Iris control provides optimal depth of field,resolution,image contrast and clarity.Remote zoom and focus eliminate the need for hands-on fine tuning,and day and night function-ality provide superb image quality both in daylight and dark conditions.AXIS P3215-V provides multiple,individually configurable H.264and Motion JPEG video streams.With a built-in memory card slot,the camera enables local storage of video.The IK08-rated AXIS P3215-V is dust-resistant and impact-resistant.>HDTV1080p and H.264>Day/night functionality>Remote zoom and focus>P-Iris control>IK08impact-resistantAXIS P3215-V Network Camera CameraImage sensor Progressive scan RGB CMOS1/2.8”Lens Varifocal,3.0-10.5mm,F1.4Horizontal angle of view:95°-34°Vertical angle of view:49°-20°Remote focus and zoom,P-Iris control,IR correctedDay and night Automatically removable infrared-cut filterMinimum illumination Color:0.25lux,F1.4 B/W:0.05lux,F1.4Shutter time1/33500s to2sCamera angleadjustmentPan±180°,Tilt90°,Rotation±95°VideoVideo compression H.264(MPEG-4Part10/AVC)Baseline,Main and Baseline Profile Motion JPEGResolutions1920x1080to160x90Frame rate Up to25/30fps with power line frequency50/60Hz in allresolutionsVideo streaming Multiple,individually configurable streams in H.264andMotion JPEGControllable frame rate and bandwidth,VBR/MBR H.264Multi-viewstreaming2individually cropped out view areasImage settings Compression,Color,Brightness,Sharpness,Contrast,Whitebalance,Exposure control(including automatic gain control),Exposure zones,Backlight compensation,Fine tuning of behaviorat different light levels,WDR-Dynamic Contrast,Text and imageoverlay,Mirroring of images,Privacy maskRotation:0°,90°,180°,270°,including Corridor FormatPan/Tilt/Zoom Digital PTZNetworkSecurity Password protection,IP address filtering,HTTPS a encryption,IEEE802.1X a network access control,Digest authentication,Useraccess log,Centralized Certificate ManagementSupported protocols IPv4/v6,HTTP,HTTPS a,SSL/TLS a,QoS Layer3DiffServ,FTP, CIFS/SMB,SMTP,Bonjour,UPnP TM,SNMP v1/v2c/v3(MIB-II), DNS,DynDNS,NTP,RTSP,RTP,SFTP,TCP,UDP,IGMP,RTCP,ICMP, DHCP,ARP,SOCKS,SSHSystem integrationApplication Programming Interface Open API for software integration,including VAPIX®and AXIS Camera Application Platform;specifications at AXIS Video Hosting System(AVHS)with One-Click Connection ONVIF Profile S,specification at Analytics Video motion detection,Active tampering alarmSupport for AXIS Camera Application Platform enablinginstallation of AXIS Video Motion Detection3,AXIS Cross Line Detection,AXIS Digital Autotracking andthird-party applications,see /acapEvent triggers Analytics,Edge storage eventsEvent actions File upload:FTP,SFTP,HTTP,HTTPS,network share and email Notification:email,HTTP,HTTPS,TCP and SNMP trapVideo recording to edge storagePre-and post-alarm video bufferingSend video clipOverlay textData streaming Event dataBuilt-ininstallation aidsRemote zoom,Remote focus,Pixel counterGeneralCasing Aluminum inner camera module with encapsulated electronicsIK08impact-resistant,dust-resistant,polycarbonate casing withdehumidifying membraneColor:White NCS S1002-BFor repainting instructions of skin cover or casing and impact onwarranty,contact your Axis partner.Memory256MB RAM,128MB FlashPower Power over Ethernet IEEE802.3af/802.3at Type1Class2Max4.8W,Typical3.5WConnectors RJ4510BASE-T/100BASE-TX PoEEdge storage Support for microSD/microSDHC/microSDXC cardSupport for recording to dedicated network-attached storage(NAS)For SD card and NAS recommendations see Operatingconditions0°C to50°C(32°F to122°F)Humidity10to85%RH(non-condensing)Storageconditions-40°C to65°C(-40°F to149°F)Approvals EN55022Class B,EN61000-6-1,EN61000-6-2,EN55024,EN50121-4,IEC62236-4,FCC Part15Subpart B Class A+B,ICES-003Class B,VCCI Class B,C-tick AS/NZS CISPR22Class B,IEC/EN/UL60950-1,IEC60068-2-1,IEC60068-2-2,IEC60068-2-6,IEC60068-2-14,IEC60068-2-27,IEC60068-2-78,IEC/EN60529IP42,IEC/EN62262IK08 Weight550g(1.2lb)Dimensions101x149x149mm(4.0x5.9x5.9in)IncludedaccessoriesInstallation Guide,Windows decoder1-user license,Mountingbracket,Cable gasket,Resistorx T20L-key,Drill template OptionalaccessoriesAXIS T90B IlluminatorsAXIS ACI Conduit Bracket BAXIS T94S01S Mounting BracketAXIS ACI Conduit AdaptersAXIS T94K01L Recessed MountAXIS T94K01D Pendant KitAXIS Skin Cover C,BlackVideomanagementsoftwareAXIS Camera Companion,AXIS Camera Station,Videomanagement software from Axis’Application DevelopmentPartners available on /techsup/software Languages German,French,Spanish,Italian,Russian,Simplified Chinese,Japanese,Korean,PortugueseWarranty Axis3-year warranty and AXIS Extended Warranty option,see/warrantya.This product includes software developed by the OpenSSL Project for use in the OpenSSL Toolkit.(),and cryptographic software written by Eric Young(*****************).More information is available at ©2014-2015Axis Communications AB.AXIS COMMUNICATIONS,AXIS,ETRAX,ARTPEC and VAPIX are registered trademarks or trademark applications of Axis AB in various jurisdictions.All other company names and products are trademarks or registered trademarks of their respective companies.We reserve the right to introduce modifications without notice.1 4 9 7 8 1 1 / E N / M 1 . 2 / 0 8 2 0 1 5。
视频后期制作必备技巧 Final Cut Pro插件介绍

视频后期制作必备技巧:Final Cut Pro插件介绍视频后期制作是将拍摄的素材进行剪辑、修饰和特效添加等工序,使得最终呈现的视频作品更加完美。
Final Cut Pro作为一款功能强大的视频编辑软件,凭借其丰富的特效库和插件,可以帮助视频编辑者实现丰富多样的后期制作效果。
本文将介绍几款常用的Final Cut Pro插件,帮助您提升视频编辑的效率和质量。
1. Color FinaleColor Finale是Final Cut Pro上一款强大的调色插件。
它提供了一套全面的调色工具,使编辑者能够自由调整视频的色彩、对比度和饱和度等参数。
通过Color Finale,您可以将素材的色调统一,增加视频的视觉效果,使得视频更加生动和吸引人。
2. UniverseUniverse是一套集成了多种实用特效和过渡效果的插件集合。
它提供了丰富多样的特效和过渡效果选项,包括电影效果、光效、胶片颗粒、色彩调整等等。
通过使用Universe插件,您可以轻松为视频添加专业的特效和过渡效果,增加观赏性和创意。
3. Neat VideoNeat Video是一款出色的降噪插件,可以有效降低视频中的噪点和颗粒感。
在拍摄中,由于光照不足或者高ISO设置等原因,视频可能会出现噪点。
通过使用Neat Video,您可以轻松消除这些噪点,提升视频的画质,使得视频更加清晰和细腻。
4. FilmConvertFilmConvert是一款模拟胶片效果的插件,能够赋予您的视频电影般的质感。
它提供了多种胶片模拟选项,包括经典胶片如Kodak、Fuji等。
通过FilmConvert,您可以为视频添加不同的胶片风格,增加视频的情感和艺术性。
5. SoundlySoundly是一款音频管理和编辑工具,可以帮助您更好地处理视频的音频部分。
它提供了丰富的音效库和音频编辑选项,包括剪辑、混音和背景音乐等。
通过Soundly,您可以为视频添加适合的音频素材,增强视听体验,使得视频更加丰富和生动。
改进视频质量 Final Cut Pro的降噪和增强功能
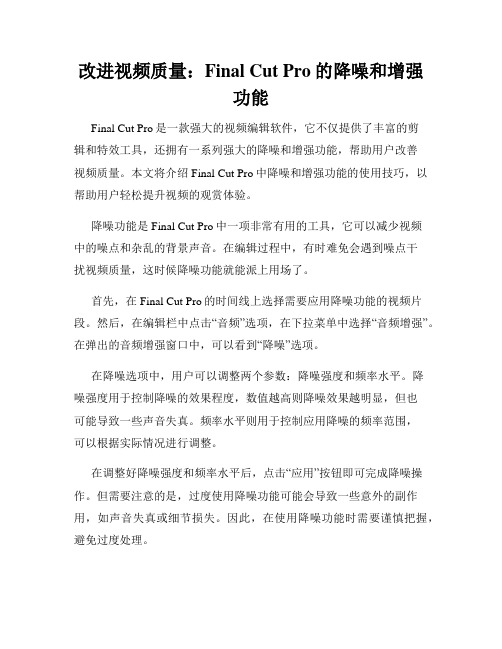
改进视频质量:Final Cut Pro的降噪和增强功能Final Cut Pro是一款强大的视频编辑软件,它不仅提供了丰富的剪辑和特效工具,还拥有一系列强大的降噪和增强功能,帮助用户改善视频质量。
本文将介绍Final Cut Pro中降噪和增强功能的使用技巧,以帮助用户轻松提升视频的观赏体验。
降噪功能是Final Cut Pro中一项非常有用的工具,它可以减少视频中的噪点和杂乱的背景声音。
在编辑过程中,有时难免会遇到噪点干扰视频质量,这时候降噪功能就能派上用场了。
首先,在Final Cut Pro的时间线上选择需要应用降噪功能的视频片段。
然后,在编辑栏中点击“音频”选项,在下拉菜单中选择“音频增强”。
在弹出的音频增强窗口中,可以看到“降噪”选项。
在降噪选项中,用户可以调整两个参数:降噪强度和频率水平。
降噪强度用于控制降噪的效果程度,数值越高则降噪效果越明显,但也可能导致一些声音失真。
频率水平则用于控制应用降噪的频率范围,可以根据实际情况进行调整。
在调整好降噪强度和频率水平后,点击“应用”按钮即可完成降噪操作。
但需要注意的是,过度使用降噪功能可能会导致一些意外的副作用,如声音失真或细节损失。
因此,在使用降噪功能时需要谨慎把握,避免过度处理。
除了降噪功能,Final Cut Pro还提供了一系列增强功能,用于增强视频的画面效果和细节。
其中,最常用的增强功能是对比度、饱和度和色彩校正。
在对比度调节中,用户可以调整视频的明亮度和暗度之间的差异。
较高的对比度可以增强画面的清晰度和层次感,但过高的对比度可能导致细节的丢失。
饱和度调节则用于控制视频的色彩鲜艳程度,适当的增加饱和度可以让画面更加生动鲜明。
而色彩校正则可以对视频的色温、色调和色阶进行调整,使画面更加符合预期的效果。
对于增强功能的操作,用户只需在编辑栏中点击“视频”选项,然后选择“视频增强”进行调整。
根据实际需要,可以对对比度、饱和度和色彩校正进行相应的调整,直至达到满意的效果。
音频特效和过滤器的高级应用
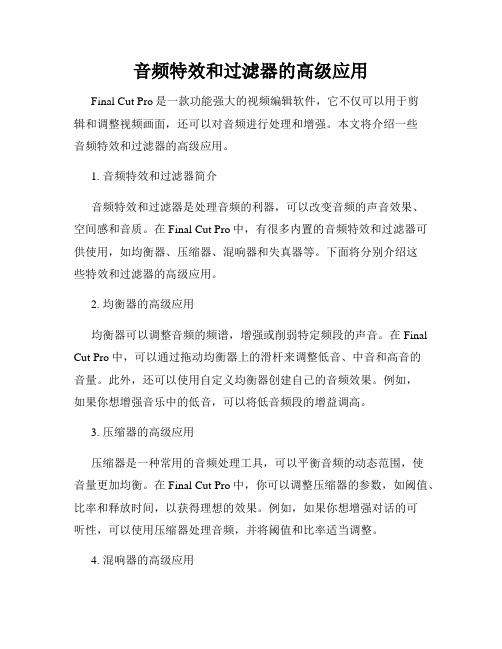
音频特效和过滤器的高级应用Final Cut Pro是一款功能强大的视频编辑软件,它不仅可以用于剪辑和调整视频画面,还可以对音频进行处理和增强。
本文将介绍一些音频特效和过滤器的高级应用。
1. 音频特效和过滤器简介音频特效和过滤器是处理音频的利器,可以改变音频的声音效果、空间感和音质。
在Final Cut Pro中,有很多内置的音频特效和过滤器可供使用,如均衡器、压缩器、混响器和失真器等。
下面将分别介绍这些特效和过滤器的高级应用。
2. 均衡器的高级应用均衡器可以调整音频的频谱,增强或削弱特定频段的声音。
在Final Cut Pro中,可以通过拖动均衡器上的滑杆来调整低音、中音和高音的音量。
此外,还可以使用自定义均衡器创建自己的音频效果。
例如,如果你想增强音乐中的低音,可以将低音频段的增益调高。
3. 压缩器的高级应用压缩器是一种常用的音频处理工具,可以平衡音频的动态范围,使音量更加均衡。
在Final Cut Pro中,你可以调整压缩器的参数,如阈值、比率和释放时间,以获得理想的效果。
例如,如果你想增强对话的可听性,可以使用压缩器处理音频,并将阈值和比率适当调整。
4. 混响器的高级应用混响器用于模拟不同的空间环境,为音频添加深度和立体感。
在Final Cut Pro中,你可以选择不同类型的混响器,并根据需要调整预设或自定义参数。
例如,如果你想让音频听起来像在大教堂内,可以选择“大教堂”混响效果,并调整混响时间和混响预延。
5. 失真器的高级应用失真器可以为音频添加一些独特的谐波和失真效果。
在Final CutPro中,失真器通常用于音乐和声效的处理。
你可以选择不同类型的失真器,如过载、凹凸、饱和和位移等,并调整强度和响应参数。
例如,如果你想增强摇滚音乐的力度和能量,可以使用失真器添加适量的过载效果。
总结:以上是音频特效和过滤器的高级应用介绍。
通过熟练掌握这些特效和过滤器的使用方法,你可以为你的视频音频增添更多的创意和艺术效果。
使用Final Cut Pro进行背景去噪的方法
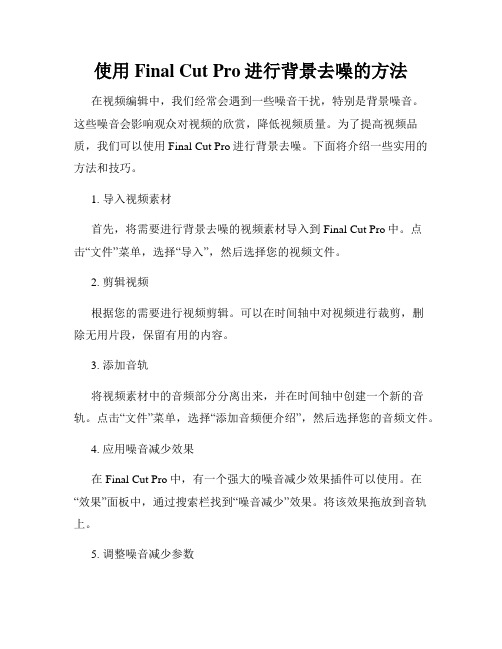
使用Final Cut Pro进行背景去噪的方法在视频编辑中,我们经常会遇到一些噪音干扰,特别是背景噪音。
这些噪音会影响观众对视频的欣赏,降低视频质量。
为了提高视频品质,我们可以使用Final Cut Pro进行背景去噪。
下面将介绍一些实用的方法和技巧。
1. 导入视频素材首先,将需要进行背景去噪的视频素材导入到Final Cut Pro中。
点击“文件”菜单,选择“导入”,然后选择您的视频文件。
2. 剪辑视频根据您的需要进行视频剪辑。
可以在时间轴中对视频进行裁剪,删除无用片段,保留有用的内容。
3. 添加音轨将视频素材中的音频部分分离出来,并在时间轴中创建一个新的音轨。
点击“文件”菜单,选择“添加音频便介绍”,然后选择您的音频文件。
4. 应用噪音减少效果在Final Cut Pro中,有一个强大的噪音减少效果插件可以使用。
在“效果”面板中,通过搜索栏找到“噪音减少”效果。
将该效果拖放到音轨上。
5. 调整噪音减少参数在应用噪音减少效果后,点击音轨上的效果图标,可以进一步调整参数。
根据您的需要,增加或减小噪音减少效果的强度,以获得最佳的背景去噪效果。
6. 预览和调整点击时间轴窗口中的播放按钮,预览视频和音频的效果。
如果发现噪音仍然存在或音质损失过大,可以继续调整参数直到满意。
7. 导出视频在完成去噪效果后,点击“文件”菜单,选择“导出”。
选择您想要导出的视频格式和设置,并保存导出文件。
最后,您可以通过Final Cut Pro将去噪后的视频发布到各种媒体平台或进行其他后期制作。
需要注意的是,去除背景噪音可能会损失一些原始音频的细节。
因此,在使用Final Cut Pro进行背景去噪时,请务必根据具体情况进行调整,以平衡去噪效果和音质损失之间的关系。
总结Final Cut Pro是一款功能强大的视频编辑软件,它提供了噪音减少效果插件,可以帮助我们轻松去除背景噪音。
通过正确使用该插件以及调整参数,我们可以获得高质量的去噪效果,并提升视频观赏体验。
实用插件推荐 Final Cut Pro影片增强技巧
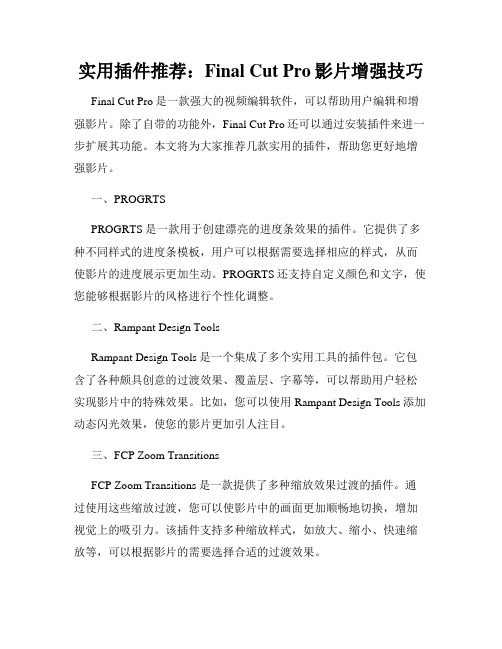
实用插件推荐:Final Cut Pro影片增强技巧Final Cut Pro是一款强大的视频编辑软件,可以帮助用户编辑和增强影片。
除了自带的功能外,Final Cut Pro还可以通过安装插件来进一步扩展其功能。
本文将为大家推荐几款实用的插件,帮助您更好地增强影片。
一、PROGRTSPROGRTS是一款用于创建漂亮的进度条效果的插件。
它提供了多种不同样式的进度条模板,用户可以根据需要选择相应的样式,从而使影片的进度展示更加生动。
PROGRTS还支持自定义颜色和文字,使您能够根据影片的风格进行个性化调整。
二、Rampant Design ToolsRampant Design Tools是一个集成了多个实用工具的插件包。
它包含了各种颇具创意的过渡效果、覆盖层、字幕等,可以帮助用户轻松实现影片中的特殊效果。
比如,您可以使用Rampant Design Tools添加动态闪光效果,使您的影片更加引人注目。
三、FCP Zoom TransitionsFCP Zoom Transitions是一款提供了多种缩放效果过渡的插件。
通过使用这些缩放过渡,您可以使影片中的画面更加顺畅地切换,增加视觉上的吸引力。
该插件支持多种缩放样式,如放大、缩小、快速缩放等,可以根据影片的需要选择合适的过渡效果。
四、Pixel Film StudiosPixel Film Studios是一家知名的Final Cut Pro插件厂商,提供了大量实用的插件供用户选择。
他们的插件包括各种过渡效果、颜色校正工具、音频效果等,可以帮助用户快速实现影片的增强。
比如,您可以使用他们的插件来添加独特的光线效果,使影片更加饱满和生动。
五、LUTsLUTs是一种可以改变影片颜色和色调的预设文件。
通过使用LUTs 插件,您可以轻松应用各种颜色滤镜和效果,为影片增添特殊的视觉效果。
LUTs插件提供了众多的预设选择,支持快速应用和调整,让您能够根据影片的需求迅速设置合适的颜色。
Final Cut Pro剪辑插件推荐 增强编辑功能
Final Cut Pro剪辑插件推荐:增强编辑功能Final Cut Pro是一款强大的视频编辑软件,被广泛用于电影制作、广告制作和个人创作等领域。
虽然软件本身提供了丰富的编辑功能,但是使用插件可以进一步增强编辑效果,提高工作效率。
以下是一些值得推荐的Final Cut Pro插件,它们将为你的编辑工作带来更多的可能性。
1. Color Finale颜色是视频编辑中非常重要的一部分,而Color Finale是一款功能强大的颜色校正插件。
它提供了直观的调色界面,让你可以轻松地调整图像的亮度、对比度、饱和度以及色调等参数。
此外,Color Finale 还支持LUT调色、多节点调色和色阶调整等高级功能,让你能够实现更精细的调色效果。
2. UniverseUniverse是RedGiant开发的一套视频特效和过渡插件。
它包含了各种各样的特效,如光线效果、颗粒效果、模糊效果和扭曲效果等。
通过使用Universe插件,你可以快速为视频添加复杂的特效,使得你的编辑作品更具艺术感和创意。
3. XeffectorXeffector是一款专为Final Cut Pro设计的图形和特效插件。
它提供了各种各样的图形元素和动画效果,如文字效果、图标效果、转场效果等。
使用Xeffector,你可以轻松地为视频添加各种各样的动态效果,为你的编辑作品增添一丝独特的风格。
4. FilmConvertFilmConvert是一款专为电影制作者设计的调色插件。
它提供了多种电影胶片的模拟效果,包括经典的Kodak和Fujifilm等品牌。
通过使用FilmConvert,你可以为视频添加电影般的色调和质感,使得你的作品更具影院感。
5. SoundlySoundly是一款强大的音频管理和配乐插件。
它提供了丰富的音频库,包括音效、音乐和语音等素材。
通过使用Soundly,你可以快速搜索并导入音频素材,为你的编辑作品提供优质的音效和配乐。
金士顿Canvas React Plus SD卡用户手册说明书

k i ngsto n.co m/fl a shCreativity and Inspiration in Professional QualityKingston’s Canvas React Plus SD card delivers high-performance speeds which are designed to work with industry-standard professional cameras for creatives that shoot 4K/8K videos and high-resolution photos. Designed with the latest UHS -II standards and top-of-the-line U3 and V90 speed classes, the Canvas React Plus SD enables you to shoot sequential burst-mode shots with recording speeds of up to 260MB/s 1. Execute your creativity without experiencing slow speeds and dropped frames while maximizing workflow and efficiency. With transfer speeds of up to 300MB/s 1, enhance your post-production process and handle heavy workloads with ease while capturing cinematic quality in high-resolutions.Kingston’s Canvas React Plus SD card is the go-to performance SD card for content creators making their way in digital filmmaking and professional photography.more >>›Ultimate speeds to support professional camera use ›Capture 4K/8K Ultra-HD high-speed shots without dropping frames›Top-of-the-lineperformance for professional content creators ›DurableCANVAS REACT PLUS SDKINGSTON PART NUMBERSUltimate speeds to support professional camera use — With transfer speeds of up to 300MB/s 1 for enhanced post-production workflow efficiency and recording speeds of up to 260MB/s 1, this card easily handles burst mode shots and high-performance video recording.High performance UHS-II standard for reliable high-resolution photography and video recording — Capture 4K and 8K Ultra-HD high-speed shots and videos without dropping frames.1. Based on internal testing performance will vary based on host device. Advertised speeds require Kingston MobileLite Plus Reader and compatible UHS-II host device. Backwards compatible with UHS-I devices.2. Some of the listed capacity on a Flash storage device is used for formatting and other functions and thus is not available for data storage. As such, the actual available capacity for data storage is less than what is listed on the products. For more information, go to Kingston’s Flash memory guide at /flashguide.SPECIFICATIONSFEATURES / BENEFITSTop-of-the-line performance for professional content creators — The Canvas React Plus leverages UHS Speed Class 3 (U3) and Video Speed Class 90 (V90) for peak performance with professional camcorders and digital cinema cameras.Capacities 232GB, 64GB, 128GB, 256GB Standard/ClassClass 10, UHS-II, U3, V90Performance 1300/260MB/s Read/Write Dimensions24mm x 32mm x 2.1mm (SD)FormatFAT32 (32GB) exFAT (64GB-256GB)Operating temperature -25°C~85°CStorage temperature -40°C~85°C Voltage 3.3VWarranty/support Lifetime。
全自动特效增强 Final Cut Pro视频插件技巧
全自动特效增强:Final Cut Pro视频插件技巧Final Cut Pro是一款专业的视频编辑软件,广泛用于电影、电视剧和广告制作等领域。
在编辑过程中,使用插件能够为视频添加各种特效和增强效果,提升视频制作的质量和视觉效果。
本文将介绍一些Final Cut Pro的视频插件技巧,帮助您实现全自动的特效增强。
1. 色彩校正插件: 通过调整视频的色彩、对比度和饱和度等参数,可以使画面更加生动鲜明。
Final Cut Pro内置了一些基本的色彩校正工具,但如果想要更精确的调整效果,可以使用第三方色彩校正插件,如Magic Bullet Looks等。
选择合适的插件后,您只需简单地拖拽插件到视频片段上,然后在插件面板中进行调整即可。
通过调整色调、曝光、对比度和饱和度等参数,您可以快速实现视频的色彩校正。
2. 音频增强插件: Final Cut Pro提供了一些基本的音频处理功能,如音量调整和混音等。
但如果想要增强音频效果,可以使用第三方音频增强插件,如iZotope RX等。
这些插件可以帮助您去除背景噪音、调整音频平衡和增加音效等,提升视频的音频质量。
使用插件后,您只需将插件拖拽到音频片段上,然后在插件面板中进行调整即可。
3. 特效滤镜插件: Final Cut Pro内置了一些基本的特效滤镜,如模糊、扭曲和过渡等。
但如果想要更多样化的特效滤镜,可以使用第三方插件,如Red Giant Universe等。
这些插件提供了各种各样的特效滤镜,如光晕、闪烁和镜头模糊等,让您的视频效果更加炫酷。
使用插件后,您只需将插件应用到片段或整个项目上,然后在插件面板中进行调整即可。
4. 动画效果插件: Final Cut Pro提供了一些基本的动画效果,如位移、旋转和缩放等。
但如果想要更复杂和生动的动画效果,可以使用第三方插件,如mTransition和mTitle等。
这些插件提供了各种各样的动画效果和转场效果,让您的视频更具有视觉冲击力。
剪辑生涯向前迈进 Final Cut Pro实用插件推荐
剪辑生涯向前迈进:Final Cut Pro实用插件推荐Final Cut Pro 是一款功能强大的视频剪辑软件,广泛应用于电影、电视剧、广告等领域。
为了提高剪辑效率和增加创意,很多剪辑师都会使用各种插件来增强软件功能。
本文将向大家推荐几款实用的Final Cut Pro插件,帮助剪辑师们更加顺利地迈进剪辑生涯。
1. Magic Bullet LooksMagic Bullet Looks 是Red Giant出品的一款颜色校正插件,它能为你的视频添加独特的色彩风格和效果。
通过使用Magic Bullet Looks,你可以轻松调整色彩饱和度、对比度、曝光等参数,从而使你的作品更加生动和有趣。
2. SapphireSapphire 是一款由Boris FX出品的特效插件集合,它包含了各种丰富多样的过渡效果、光效、模糊效果等。
借助Sapphire,你可以将视频制作得更加华丽并增加视觉冲击力。
3. Noise Industries FXFactoryNoise Industries的FXFactory是一个强大的插件平台,它提供了各种各样的视觉效果和转场效果。
FXFactory中提供的插件种类多样,从简单的颜色校正到复杂的模糊效果都有涵盖,可以满足不同剪辑需求。
4. FilmConvertFilmConvert 是一款能够模拟胶片风格的插件,它可以让你的数字视频看起来更像电影胶片。
通过使用FilmConvert,你可以轻松调整色彩和胶片噪点,从而为你的作品增添一种复古的魅力。
5. Neat VideoNeat Video 是一款强大的降噪插件,它能够有效降低视频中的噪点和杂色。
无论是拍摄于低光环境还是高ISO设置下的视频,Neat Video 都能为你的作品带来更清晰、更干净的画面。
6. Red Giant UniverseRed Giant Universe 是一个庞大的插件库,里面包含了各种各样的视频特效、过渡效果和文本效果等。
效果插件推荐 Final Cut Pro中的顶级效果插件介绍
效果插件推荐:Final Cut Pro中的顶级效果插件介绍Final Cut Pro是一款颇受专业视频编辑人员欢迎的软件,它提供了许多强大的功能和工具,使得视频编辑成为一项富有创造力和个性化的过程。
为了进一步增强视频的效果和表现力,许多编辑人员喜欢使用效果插件。
在本文中,我们将介绍几款Final Cut Pro中的顶级效果插件,帮助您提升视频编辑的水平。
首先是「Magic Bullet Looks」插件。
这款插件由著名的视频后期制作公司「Red Giant」开发,提供了丰富的调色预设和特殊效果,可以快速改变视频的色调和风格。
无论是模拟经典电影的质感,还是为视频添加独特的视觉风格,「Magic Bullet Looks」都能帮助您实现。
您可以通过选择和组合不同的颜色调整工具,自定义自己喜欢的视觉效果,为视频添加个性和魅力。
第二款推荐是「FilmConvert Pro」。
这款插件模拟了各种胶片的质感和特性,使得您的视频看起来像经典电影一样。
「FilmConvert Pro」具有精确的色彩还原功能,可以帮助您快速调整视频的色调和饱和度,达到理想的视觉效果。
同时,它还提供了多种胶片预设,让您可以轻松获得不同电影风格的效果。
无论是喜剧、惊悚还是古装剧,「FilmConvert Pro」都能满足您对视频风格的要求。
接下来是「Neat Video」插件。
这款插件主要用于降噪处理,可以帮助您消除视频中的噪点和图像噪声,提高视频的清晰度和质量。
在拍摄条件不佳或使用高ISO值拍摄时,视频常常会受到噪点的影响,「Neat Video」可以通过智能算法去除这些噪点,还原图像的细节和纯净度。
同时,它还具有可调节的参数,使您可以根据需要进行个性化的降噪处理,确保视频的质量达到最佳状态。
最后一款推荐是「mObject」插件。
这是一款用于创建引人注目的三维文字和图形效果的插件。
它提供了丰富的材质和动画选项,可以将静态文字转化为生动活泼的三维场景。
实用剪辑插件 Final Cut Pro推荐

实用剪辑插件:Final Cut Pro推荐Final Cut Pro 是一款业界知名的非线性视频编辑软件,它拥有丰富的功能和工具,可以帮助视频编辑师们快速高效地完成各种剪辑任务。
而在日常使用中,合理利用一些实用的剪辑插件可以进一步提升工作效率和编辑质量。
在本文中,我将为大家推荐几款在Final Cut Pro中非常实用的剪辑插件。
1. Magic Bullet LooksMagic Bullet Looks 是一个强大的颜色校正和电影级效果的插件,为您的影片增加一些独特的审美风格。
通过它,您可以快速调整颜色和对比度,添加各种滤镜和特效,使您的视频看起来更加生动有趣。
2. SapphireSapphire 是一个非常流行的视频特效插件,拥有超过250个效果和预设,可以帮助您创建各种令人惊叹的视觉效果。
无论您是在制作电影、广告还是动画,Sapphire 都可以是您实现创意想法的得力助手。
3. UniverseUniverse 是一套由Red Giant开发的插件,其中包含超过80种效果和过渡特效。
它提供了丰富多样的选项,例如光晕、模糊、人像修饰和镭射等特效,可以让您的视频脱颖而出,并赋予其独特的风格。
4. Neat VideoNeat Video 是一款强大的降噪插件,可以帮助您去除视频中的杂音和噪点。
无论您是在拍摄室内还是户外的素材,甚至在低光情况下拍摄的影片,Neat Video 都能够有效地提升视频的质量和清晰度。
5. Red Giant CompleteRed Giant Complete 是一个全套的视频插件包,其中包含了Magic Bullet Looks、Sapphire 和 Universe 等插件,同时还有一些其他实用的工具。
通过安装Red Giant Complete,您可以获得更多的创作选择,使您的影片更加精彩。
这些插件只是 Final Cut Pro 插件市场中的冰山一角,无论您是想要调整颜色、增加特效、修饰影像还是提升视频质量,总能找到适合您需求的插件。
- 1、下载文档前请自行甄别文档内容的完整性,平台不提供额外的编辑、内容补充、找答案等附加服务。
- 2、"仅部分预览"的文档,不可在线预览部分如存在完整性等问题,可反馈申请退款(可完整预览的文档不适用该条件!)。
- 3、如文档侵犯您的权益,请联系客服反馈,我们会尽快为您处理(人工客服工作时间:9:00-18:30)。
步骤一: 查看当年度部门AOP或参考主管的蓝筹
明确部门/百胜上台阶的改变是什么 步骤二: 起草个人的蓝筹 请思考你的蓝筹会怎样支持你的部门/YUM上台阶的变化 步骤三: 由主管和员工讨论蓝筹,并达成共识 步骤四: 由主管和员工确认蓝筹并存档
9
3 Categories of Blue Chips 3类蓝筹
12
Jigsaw of a Dream 梦的拼图
Create a great step-change goal
Jigsaw it down into small pieces, which is your SMART blue chips. When you complete all of those
Evaluate both the results & behaviors 衡量结果和 行为
5
Why Change 为什么要有这些变化?
+ THE ONLY WAY to get results in the 2nd Set is through the demonstration of the HWWT2 Principles
13
SMART Goals 符合SMART原则的目标
Specific
具体的
Describe exactly what is to be achieved 具体描述目标 Describe how you will measure success 描述你是如何衡量成果的 Within your control; you can take direct action 在你掌控之内,可以采取直接的行动
蓝筹所支持的公司或部门上台阶的改变是什么。
Core Accountabilities – Specific commitments that support function or company Blue Chips. 核心责任: 为了支持部门或公司蓝筹所需承担的具体义务
1. 2. 3. 4. 5.
今年绩效管理的新变化 联系蓝筹和上台阶的改变
如何综合评估结果和行为
2
Content 内容 Performance Management Change this year Link your Blue Chips with Step Change How to Evaluate both the Result and Behavior
Setting Blue Chips 设立蓝筹 What are this person’s Blue Chips for this year? 今年本人的蓝筹是什么? For L8+ managers, please describe what the step-change(s)of your function and Yum your blue chips are supporting 对于 L8 及以上的管理人员,请描述你
联系蓝筹和跃进目标ห้องสมุดไป่ตู้
Team Development Blue Chips – Specific commitments to building people and team capability 团队发展蓝筹:为了加强人员和团队能力所需承担的具体义务
1.
Personal Development Blue Chips – Specific commitments to becoming more personally effective 个人发展蓝筹:为了使个人更具效能所需承担的具体义务
+ It is a great way to recognize our associates for WALKING THE TALK of our HWWT2 principles!
+ New PA form is a simple but powerful tool which could enhance the demonstration of HWWT2 Principles.
今年绩效管理的新变化 联系蓝筹和上台阶的改变
如何综合评估结果和行为
7
Setting Blue Chips 设立蓝筹
Setting Blue Chips 设立蓝筹 What are this person’s Blue Chips for this year?
今年本人的蓝筹是什么
For L8+ managers, please describe what Step Change(s) of your function and Yum your blue chips are supporting 对于L8及以上的管理人员,请描述你蓝筹所支持的公司或部门上台阶的改变是什么。
Question 扪心自问
在我负责的领域,我现在能做什么 来支持部门和公司达到跃进的结果?
What Can I Do Now To Support My Function and YUM To Get Breakthrough Results In My Piece Of Yum?
11
Characteristics of Step-Changes: 上台阶的改变的特征 Shoot for the Moon Have a significant impact on your piece of Yum! Set at the “just less than impossible” level (Clouds Down) Can be multi-year with annual milestones(blue chips) 射向月球(挑战远大的目标) 在你负责的领域有着显著的影响 自云端而下(设定“略低于不可能的目标”) 需要多年达成但有年度的阶段性目标(年度蓝筹)
Individual 个人
Date 日期
4
change of This Year 今年的新变化
For L8+ managers, please link your Blue Chips with your function and Yum’s Step Change(s). 8级及以上管理人员, 请将蓝筹和部门和公司 跃进的目标相联系
展现并实践群策群力,百战百胜的原则是取得第二回合胜利的必经之 路 这是很好的方式,鼓励员工身体力行的实践群策群力,百战百胜的原 则。 新PA表格是简单有效的工具来促进群策群力,百战百胜原则的展现。
6
Content 内容 Performance Management Change this year Link your Blue Chips with Step Change How to Evaluate both the Result and Behavior
今年绩效管理的新变化 联系蓝筹和上台阶的改变
如何综合评估结果和行为
3
GOALS & RESULTS (through HWWT2) 目标与绩效结果(通过群策群力、百战百胜)
NAME 姓名 TITLE 职位
名称改变
MARKET/ FUNCTION 市场/功能
YEAR
SSN 员工编号
2010
1.
Results Achieved in This year 今年达成的结果 For each Blue Chip, describe the results achieved respectively. 针对每个蓝筹,描述达成的结果。
1. 2. 3. 4. 5. 6.
Describe what HWWT2 behaviors were demonstrated or not demonstrated .简述过程中展现的或没有展现的 HWWT2 行为。
Leveraging HWWT2 to Get Breakthrough Performance 实践HWWT2,追求跃进的绩效
Training and Development 培训发展部 2009. 12
1
Content 内容 Performance Management Change this year Link your Blue Chips with Step Change How to Evaluate both the Result and Behavior
1.
8
Key steps to Set Blue Chips 设立蓝筹的主要步骤
Step 1: Review function AOP or refer to your supervisor’s Blue Chips Identify the function / Yum step-changes Step 2: Draft Personal Blue Chips Please think and find out the function / Yum step-change that your blue chips support Step 3: Supervisor and employee discuss Blue Chips and reach an agreement Step 4: Supervisor and employee agree & record Blue Chips
1. 2. 3. 4.
综合评估结果和过程中展现的行为
Overall Performance Summary 绩效总体概括
Overall Rating 总评 Signature 签名
Significantly Below Target
远低于目标
Below Target
低于目标
On Target 达到目标
Above Target 超越目标
Significantly Above Target
