linux下heartbeat3.04编译安装步骤
Heartbeat原理及部署

Heartbeat原理及部署 ⼀,Heartbeat简介 ⼆,安装Heartbeat 环境查看 服务器规划IP⽤途主机名192.168.1.101主服务器hdp3192.168.1.102备服务器hdp4 初始配置 禁⽤防⽕墙systemctl disable firewalld 关闭senlinux 设置主机名并设置hosts⽂件 两台主机名不⼀样,hosts⽂件⼀样 # cat /etc/hosts192.168.1.101 hdp3192.168.1.102 hdp4 安装依赖包yum -y install glib2-devel libtool-ltdl-devl net-snmp-devel bzip2-devel ncurses-devel openssl-devel libtool libxml2 libxml2-devel gettext bison flex zlib-devel mailx which libxslt docbook-dtds docbook-style-xsl PyXML shadow-utils opensp autoconf 下载安装包Heartbeat 3.0.6:/heartbeat-STABLE_3_0/archive/958e11be8686.tar.bz2Cluster Glue 1.0.12:/glue/archive/0a7add1d9996.tar.bz2Resource Agents 3.9.6:https:///ClusterLabs/resource-agents/archive/v3.9.6.tar.gz 添加 haclient 组和 hacluster 账户,这个⽤户主要⽤来配置respawn的。
groupadd haclientuseradd -g haclient -M -s /sbin/nologin hacluster 安装Cluster Glue 1.0.12tar -xf 0a7add1d9996.tar.bz2cd Reusable-Cluster-Components-glue--0a7add1d9996/./autogen.sh./configure --prefix=/usr/local/heartbeat LIBS='/lib64/libuuid.so.1'make && make install 安装Resource Agentstar -xf v3.9.6.tar.gzcd resource-agents-3.9.6/./autogen.sh./configure --prefix=/usr/local/heartbeatmake && make install 安装heartbeat-3-0-6tar -xf 958e11be8686.tar.bz2cd Heartbeat-3-0-958e11be8686/#设置,否则安装会报错export CFLAGS="$CFLAGS -I/usr/local/heartbeat/include -L/usr/local/heartbeat/lib"#删除配置⽂件的最后⼀⾏sed -i '/^#define HA_HBCONF_DIR /d' /usr/local/heartbeat/include/heartbeat/glue_config.h./bootstrap./configure --prefix=/usr/local/heartbeat LIBS='/lib64/libuuid.so.1'make && make install 拷贝配置⽂件cd /usr/local/heartbeat/share/doc/heartbeatcp authkeys ha.cf haresources /usr/local/ heartbeat/etc/ha.d/ 设置配置⽂件权限及软连接cd /usr/local/heartbeat/etc/ha.dchmod 600 authkeysln -svf /usr/local/heartbeat/lib64/heartbeat/plugins/RAExec/* /usr/local/heartbeat/lib/heartbeat/plugins/RAExec/ln -svf /usr/local/heartbeat/lib64/heartbeat/plugins/* /usr/local/heartbeat/lib/heartbeat/plugins/ 编辑配置⽂件 192.168.1.101上的ha.cf⽂件内容如下# cat /usr/local/heartbeat/etc/ha.d/ha.cf# 保存调试信息⽂件debugfile /var/log/ha-debug# ⽇志⽂件logfile /var/log/ha-log# 表⽰使⽤系统⽇志logfacility local0# ⼼跳的时间间隔,单位秒keepalive 1# 超出该时间间隔未收到对⽅节点的⼼跳,则判定对⽅死亡deadtime 30# 超出该时间间隔未收到对⽅节点的⼼跳,则发出警告记录到⽇志中warntime 10# 在某系统上,系统启动或重启之后需要经过⼀段时间⽹络才能正常⼯作,该选项⽤于解决这种情况产⽣的时间间隔,取值⾄少为deadtime的2倍initdead 120# 设置⼴播通信使⽤的端⼝,694为默认使⽤的端⼝号udpport 694# 传播⼼跳的⼴播播⽹卡信息bcast eth0# 设置对⽅机器⼼跳检测的IP# 第⼆列为⽹卡名第三列为⼼跳IP,⽣产中⼼跳需要与数据⽹络分开ucast eth0 192.168.1.102# 在该选项设为on的情况下,⼀旦主节点恢复运⾏,则⾃动获取资源并取代从节点auto_failback off# 配置主从的节点信息node hdp3node hdp4# 如果ping不通该地址,就认为当前断⽹,需要转移vipping 192.168.1.9# 指定与heartbeat⼀同启动和关闭的进程,该进程被⾃动监视,遇到故障则重新启动。
Heartbeat安装与配置
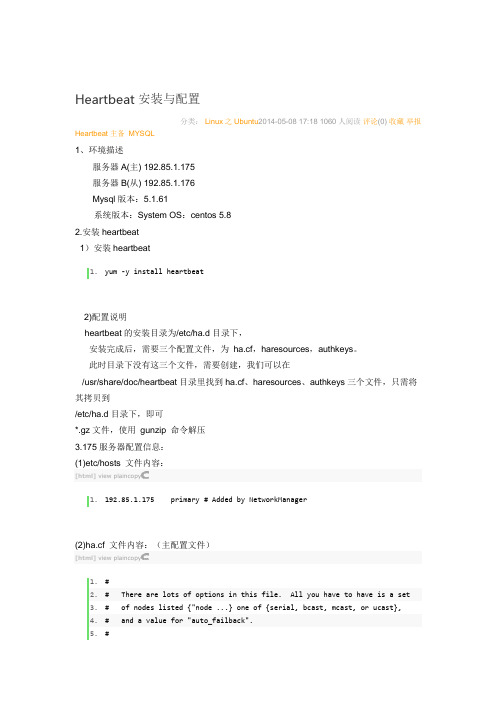
Heartbeat安装与配置分类:Linux之Ubuntu2014-05-08 17:18 1060人阅读评论(0) 收藏举报Heartbeat主备MYSQL1、环境描述服务器A(主) 192.85.1.175服务器B(从) 192.85.1.176Mysql版本:5.1.61系统版本:System OS:centos 5.82.安装heartbeat1)安装heartbeat1.yum -y install heartbeat2)配置说明heartbeat的安装目录为/etc/ha.d目录下,安装完成后,需要三个配置文件,为ha.cf,haresources,authkeys。
此时目录下没有这三个文件,需要创建,我们可以在/usr/share/doc/heartbeat目录里找到ha.cf、haresources、authkeys三个文件,只需将其拷贝到/etc/ha.d目录下,即可*.gz文件,使用gunzip 命令解压3.175服务器配置信息:(1)etc/hosts 文件内容:[html]view plaincopy1.192.85.1.175 primary # Added by NetworkManager(2)ha.cf 文件内容:(主配置文件)[html]view plaincopy1.#2.# There are lots of options in this file. All you have to have is a set3.# of nodes listed {"node ...} one of {serial, bcast, mcast, or ucast},4.# and a value for "auto_failback".5.#6.# ATTENTION: As the configuration file is read line by line,7.# THE ORDER OF DIRECTIVE MATTERS!8.#9.# In particular, make sure that the udpport, serial baud rate10.# etc. are set before the heartbeat media are defined!11.# debug and log file directives go into effect when they12.# are encountered.13.#14.# All will be fine if you keep them ordered as in this example.15.#16.#17.# Note on logging:18.# If all of debugfile, logfile and logfacility are not defined,19.# logging is the same as use_logd yes. In other case, they are20.# respectively effective. if detering the logging to syslog,21.# logfacility must be "none".22.#23.# File to write debug messages to24.debugfile /var/log/ha-debug #调试日志文件25.#26.#27.# File to write other messages to28.#29.logfile /var/log/ha-log #系统运行日志文件30.#31.#32.# Facility to use for syslog()/logger33.#34.logfacility local0 # 日志记录等级35.#36.#37.# A note on specifying "how long" times below...38.#39.# The default time unit is seconds40.# 10 means ten seconds41.#42.# You can also specify them in milliseconds43.# 1500ms means 1.5 seconds44.#45.#46.# keepalive: how long between heartbeats?47.#48.keepalive 2 #心跳频率,2表示2秒;200ms则表示200毫秒49.#50.# deadtime: how long-to-declare-host-dead?51.#52.# If you set this too low you will get the problematic53.# split-brain (or cluster partition) problem.54.# See the FAQ for how to use warntime to tune deadtime.55.#56.deadtime 30 #节点死亡时间,就是过了10秒后还没有收到心跳就认为主节点死亡57.#58.# warntime: how long before issuing "late heartbeat" warning?59.# See the FAQ for how to use warntime to tune deadtime.60.#61.warntime 10 #告警时间62.#63.#64.# Very first dead time (initdead)65.#66.# On some machines/OSes, etc. the network takes a while to come up67.# and start working right after you've been rebooted. As a result68.# we have a separate dead time for when things first come up.69.# It should be at least twice the normal dead time.70.#71.initdead 120 #初始化时间72.#73.#74.# What UDP port to use for bcast/ucast communication?75.#76.udpport 694 #心跳信息传递的udp端口77.78.#79.# What interfaces to broadcast heartbeats over?80.#81.bcast eth0 # Linux #采用udp广播播来通知心跳,建议在备用节点不只一台时使用82.#bcast eth1 eth2 # Linux83.#bcast le0 # Solaris84.#bcast le1 le2 # Solaris85.#86.# Set up a multicast heartbeat medium87.# mcast [dev] [mcast group] [port] [ttl] [loop]88.#89.# [dev] device to send/rcv heartbeats on90.# [mcast group] multicast group to join (class D multicast address91.# 224.0.0.0 - 239.255.255.255)92.# [port] udp port to sendto/rcvfrom (set this value to the93.# same value as "udpport" above)94.# [ttl] the ttl value for outbound heartbeats. this effects95.# how far the multicast packet will propagate. (0-255)96.# Must be greater than zero.97.# [loop] toggles loopback for outbound multicast heartbeats.98.# if enabled, an outbound packet will be looped back and99.# received by the interface it was sent on. (0 or 1)100.# Set this value to zero.101.#102.#103.#bcast eth0 225.0.0.1 694 1 0104.#105.# Set up a unicast / udp heartbeat medium106.# ucast [dev] [peer-ip-addr]107.#108.# [dev] device to send/rcv heartbeats on109.# [peer-ip-addr] IP address of peer to send packets to110.#111.ucast eth0 192.85.1.175112.113.auto_failback on #如果主节点重新恢复过来,主节点将主动将资源抢占过来,如果为off,则只当备用节点当掉后,主节点才取回资源114.115.watchdog /dev/watchdog #看门狗。
linux arm 内核编译流程

linux arm内核编译流程一、编译环境准备在开始编译Linux ARM内核之前,我们需准备以下环境:1.1硬件环境:一台支持ARM架构的计算机;1.2操作系统:安装Ubuntu等Linux发行版,并确保系统已经更新至最新版本;1.3开发工具链:安装ARM交叉编译工具链,可以通过apt-get 命令进行安装;1.4内核源码:下载最新的Linux ARM内核源码,并解压至本地。
二、配置内核选项2.1进入内核源码目录:使用cd命令进入解压后的内核源码目录;2.2配置内核选项:使用make menuconfig命令来配置内核选项,可以根据需要选择不同的功能和驱动;2.3保存配置:保存配置后,将生成.config文件,保存了当前配置选项。
三、开始编译3.1清理编译环境:使用make clean命令清理之前的编译环境,确保开始编译之前处于一个干净的状态;3.2编译内核:使用make命令开始编译内核,该过程可能持续一段时间,耐心等待;3.3生成内核镜像:编译完成后,将生成zImage或uImage等内核镜像文件,可以作为启动的内核使用。
四、安装内核4.1备份原有内核:在安装新内核之前,建议备份原有系统的内核,以防出现问题时可以回滚;4.2安装内核:将编译生成的内核镜像文件拷贝至目标设备,例如通过TFTP传输或使用SD卡等方式;4.3更新引导配置:根据不同的引导方式,更新引导配置文件以使用新内核。
五、验证内核5.1重启设备:在安装完新内核后,重启设备以加载新内核;5.2查看内核版本:使用uname-a命令查看当前内核版本,确认是否为编译安装的新内核;5.3测试功能和驱动:针对所需的功能和驱动,进行相应的测试,确保内核编译和安装没有问题。
六、常见问题解决在编译内核的过程中,可能会遇到一些常见的问题,例如编译错误、功能不正常等,可以通过以下方式解决:6.1查看编译日志:在编译过程中,可以查看编译日志以了解错误的原因;6.2网上搜索:使用搜索引擎搜索相关问题,可能会有其他开发者遇到类似问题并给出解决方案;6.3参考官方文档:阅读官方文档以获取更多关于编译和安装内核的详细信息。
linux系统如何安装软件 (详细文字教程)

linux系统如何安装软件 (详细文字教程)在Linux中安装软件时,我们经常要考虑到这样几个个问题:(1).怎样安装软件;(2).软件安装在什么地方;(3).如何卸载删除不要的软件......下面,我们就一起来认识一下这些方面的问题。
一.认识Linux应用软件安装包通常Linux应用软件的安装包有三种:1) tar包,如software-1.2.3-1.tar.gz。
它是使用UNIX系统的打包工具tar打包的。
2) rpm包,如software-1.2.3-1.i386.rpm。
它是Redhat Linux提供的一种包封装格式。
(现在用的全称叫RPM Package Manager,以前叫Redhat Package Manager)3) dpkg包,如software-1.2.3-1.deb。
它是Debain Linux提供的一种包封装格式。
而且,大多数Linux应用软件包的命名也有一定的规律,它遵循:名称-版本-修正版-类型例如:1) software-1.2.3-1.tar.gz 意味着:软件名称:software版本号:1.2.3修正版本:1类型:tar.gz,说明是一个tar包。
2) sfotware-1.2.3-1.i386.rpm软件名称:software版本号:1.2.3修正版本:1可用平台:i386,适用于Intel 80x86平台。
类型:rpm,说明是一个rpm包。
注:由于rpm格式的通常是已编译的程序,所以需指明平台。
在后面会详细说明。
而software-1.2.3-1.deb就不用再说了吧!大家自己练习一下。
二、了解包里的内容:一个Linux应用程序的软件包中可以包含两种不同的内容:1) 一种就是可执行文件,也就是解开包后就可以直接运行的。
在Windows中所有的软件包都是这种类型。
安装完这个程序后,你就可以使用,但你看不到源程序。
而且下载时要注意这个软件是否是你所使用的平台,否则将无法正常安装。
LINUX内核模块编译步骤
LINUX内核模块编译步骤编译Linux内核模块主要包括以下步骤:1.获取源代码2.配置内核进入源代码目录并运行make menuconfig命令来配置内核。
该命令会打开一个文本菜单,其中包含许多内核选项。
在这里,你可以配置内核以适应特定的硬件要求和预期的功能。
你可以选择启用或禁用各种功能、设备驱动程序和文件系统等。
配置完成后,保存并退出。
3. 编译内核(make)运行make命令开始编译内核。
这将根据你在上一步中进行的配置生成相应的Makefile,然后开始编译内核。
编译的过程可能需要一些时间,请耐心等待。
4.安装模块编译完成后,运行make modules_install命令将编译好的模块安装到系统中。
这些模块被安装在/lib/modules/<kernel-version>/目录下。
5.安装内核运行make install命令来安装编译好的内核。
该命令会将内核映像文件(通常位于/arch/<architecture>/boot/目录下)复制到/boot目录,并更新系统引导加载程序(如GRUB)的配置文件。
6.更新GRUB配置文件运行update-grub命令来更新GRUB引导加载程序的配置文件。
这将确保新安装的内核在下次启动时可用。
7.重启系统安装完成后,通过重启系统来加载新的内核和模块。
在系统启动时,GRUB将显示一个菜单,你可以选择要启动的内核版本。
8.加载和卸载内核模块现在,你可以使用insmod命令来加载内核模块。
例如,运行insmod hello.ko命令来加载名为hello.ko的模块。
加载的模块位于/lib/modules/<kernel-version>/目录下。
如果你想卸载一个已加载的内核模块,可以使用rmmod命令。
例如,运行rmmod hello命令来卸载已加载的hello模块。
9.编写和编译模块代码要编写一个内核模块,你需要创建一个C文件,包含必要的模块代码。
Linux系统编译安装常见错误处理方法

5.Configure: error: libjpeg.(a|so) not found
# yum install libjpeg libjpeg-devel
6.Configure: error: libpng.(also) not found.
# yum install libpng libpng-devel
13.Configure: error: Cannot find ldap.h
# yum install openldap-devel
本篇文章来源于 Linux公社网站() 原文链接:/Linux/2011-04/34622.htm
再php:~/:./configure …… --with-gd=/usr/local/gd2 ……
1) Configure: error: xml2-config not found. Please check your libxml2 installation.
Solutions :
Solutions :
Quote: # yum install unixODBC-devel
12) Configure: error: Cannot find pspell
Solutions :
Quote: # yum install pspell-devel
13) configure: error: mcrypt.h not found. Please reinstall libmcrypt.
7) Configure: error: freetype.h not found.
Solutions :
Quote: #yum install freetype-devel
Linux操作系统的编译和安装

Linux操作系统的编译和安装在正文规定的字数限制下,为了准确满足标题描述的内容需求,并确保内容排版整洁美观、语句通顺、全文表达流畅且无影响阅读体验的问题,本文将按照以下格式进行写作:一、简介Linux操作系统是一种开源的、自由的Unix-like操作系统,它广泛应用于各种领域,包括服务器、嵌入式设备等。
本文将重点介绍Linux 操作系统的编译和安装过程。
二、编译准备1. 下载源代码在编译Linux操作系统之前,首先需要从官方网站下载Linux内核的源代码包。
2. 安装必要的依赖软件在编译过程中,需要安装一些必要的软件和工具,如编译器、构建工具等。
三、编译步骤1. 解压源代码包使用解压命令将下载的源代码包解压到指定目录。
2. 配置编译选项进入源代码目录,并运行配置命令,根据需要选择不同的编译选项。
3. 执行编译命令运行编译命令开始编译操作系统内核,这个过程可能需要一段时间。
四、安装步骤1. 安装编译生成的内核镜像文件将编译生成的内核镜像文件复制到合适的位置,并修改相关配置文件以引导新编译的内核。
2. 安装相关系统文件运行安装命令,将其他必要的系统文件复制到适当的位置。
五、系统配置1. 修改引导加载程序根据系统的引导加载程序,如GRUB、LILO等,修改引导配置文件以支持新安装的内核。
2. 配置网络和驱动程序根据具体需求,配置网络设置和硬件驱动程序。
六、测试与验证1. 重新启动系统重新启动计算机,并选择新编译的内核进行引导。
2. 验证系统版本和功能运行相应的命令,验证新安装的Linux操作系统版本和功能是否正确。
七、常见问题解决1. 编译错误分析编译过程中出现的错误信息,根据错误提示进行逐步修复。
2. 硬件兼容性问题部分硬件设备可能需要额外的驱动程序或补丁文件才能正常运行,根据具体情况进行相应的处理。
八、总结通过本文的介绍,读者可以了解到Linux操作系统的编译和安装过程,同时了解到在实际操作中会遇到的一些常见问题及解决方法。
Linux平台Apache高可用双机集群Tomcat负载均衡集群配置手册
Linux平台Apache双机高可用集群+ Tomcat负载均衡集群配置手册在这个配置手册中,使用的操作系统和软件清单如下:操作系统:RedHat Enterprise Linux AS4 U4 64bit(安装时最好选择完全安装)软件:jdk-1_5_0_15-linux-amd64.binTomcat5.5.26httpd-2.0.63.tar.gzjakarta-tomcat-connectors-jk2-src-current.tar.gzipvsadm-1.24.tar.gzlibnet.tar.gzheartbeat-2.1.3-3.el4.centos.x86_64.rpmheartbeat-pils-2.1.3-3.el4.centos.x86_64.rpmheartbeat-stonith-2.1.3-3.el4.centos.x86_64.rpm因为是linux操作系统,所以在安装软件时请使用对应自己操作系统内核的软件,这是整个集群成功的第一步。
本配置手册中的软件都是对应RedHat Enterprise Linux AS4 U4 64bit 这个版本的软件。
jdk-1_5_0_15-linux-amd64.binJAVA环境包使用的是64位1.5版Tomcat版本为公司指定的5.5版本Apache为2.0.63版jakarta-tomcat-connectors-jk2-src-current.tar.gz是连接Apache和Tomcat的连接插件,具体可以去Tomcat网站上查找下载ipvsadm-1.24.tar.gzlibnet.tar.gz这两个是用于2台Apache服务器虚拟一个IP地址使用heartbeat-2.1.3-3.el4.centos.x86_64.rpmheartbeat-pils-2.1.3-3.el4.centos.x86_64.rpmheartbeat-stonith-2.1.3-3.el4.centos.x86_64.rpm这3个软件是用于2台Apache服务器之间的心跳检测结构图Apache1以以以以以Tomcat1Tomcat2Apache22台Tomcat服务器使用Tomcat软件可以自己做集群,2台Apache服务器需要其他的软件实现虚拟服务器功能,工作站访问虚拟IP地址访问2台Apache服务器,再通过Apache服务器访问Tomcat服务器第3 页总13 页1.安装JAVA环境包1)输入命令:./ jdk-1_5_0_15-linux-amd64.bin执行完毕后,会在当前目录下生成一个JDK-1.5.0_15的文件夹2)在 /usr/local/下新建一个名字为JAVA文件夹,将个JDK-1.5.0_15的文件夹拷入到该文件夹下3)设置环境变量。
castep在linux下的安装步骤

卸载:一)MS卸载:1.首先进入home/msi/Accelrys/Materials Studio40/etc/Gateway然后执行./msgateway_control_18888 stop,即停掉gateway网关2.用chkconfig删除与网关相关的文件:/sbin/chkconfig --del msgateway_control_188883.删除/etc/init.d/msgateway_control_18888 的文件:(用根用户删除)rm /etc/init.d/msgateway_control_18888 (感觉第二步和第三步不管用)4.删除与网关有关的所有配置,在Gateway的文件夹下执行./gwdeconfigureall5.用根用户删除所有的MS文件二)License卸载进入home/msi/Accelrys/Licenss_Pack/ Uninstaller,执行./uninstaller1.先加一个用户msi,密码为msi(在根用户下进行)在msi用户下建立一个文件夹tmpiso2.解压iso文件到tmpiso(在根用户下进行)mount -o loop zwt*.iso /home/msi/tmpiso/3.装并行编译hpmpi(在根用户下进行)rm -rf hpmpi/cd msi/tmpiso/UNIX/Linux_x86_64/hpmpi/rpm -ivh hpmpi-2.02.05.01-20070708r.x86_64.rpmls如果仅仅删除hpmpi的文件夹,再安装的时候会提示说已经安装,这时候可以用强制安装:rpm -ivh --force hpmpi-2.03.01.00-20090402r.x86_64.rpm4.进入msi用户进行安装chmod -R 777 UNIX(很多时候安装文件的时候没有权限,用这个命令把权限改过来)cd tmpiso/UNIX./installRunning Materials Studio installer for platform Linux_x86_64...Please specify an absolute destination path [/home/msi/Accelrys/MaterialsStudio43] :Please choose the package you wish to install:1. AmorphousCell Server2. Blends Server3. CASTEP Server4. CCDC Servers (ConQuest, Motif)5. Conformers Server6. DMol3 Server7. DPD Server8. Discover Server9. Equilibria Server10. Forcite Server11. GULP Server12. Gaussian Server13. MesoDyn Server14. Mesotek Server15. Morphology Server16. ONETEP Server17. Polymorph Server18. QMERA Server19. QSAR Models Server20. Reflex+ Server21. Reflex QPA Server22. Reflex Server23. Sorption Server24. Structures Library25. VAMP Server26. EverythingEnter items to install (e.g. 1,2,5) , or Q to quit : 26Starting installation...Install log in /home/msi/Accelrys/MaterialsStudio43/install.logInstalling everything...Checking for dependencies for AmorphousCellServer:6 Checking for dependencies for AmorphousCell: None Checking for dependencies for Licensing:1Checking for dependencies for LicensePack: NoneInitializing InstallShield Wizard........Launching InstallShield Wizard........-------------------------------------------------------------------------------Accelrys License Pack 7.5 - InstallShield WizardWelcome to the InstallShield Wizard for Accelrys License Pack 7.5The InstallShield Wizard will install Accelrys License Pack 7.5 on your computer.To continue, choose Next.Accelrys License Pack 7.5Accelrys Software Inc.Press 1 for Next, 3 to Cancel or 5 to Redisplay [1]-------------------------------------------------------------------------------Accelrys License Pack 7.5 - InstallShield WizardAccelrys License Pack 7.5 Install LocationPlease specify a directory or press Enter to accept the default directory.Destination Directory [/home/msi/Accelrys]Press 1 for Next, 2 for Previous, 3 to Cancel or 5 to Redisplay [1]-------------------------------------------------------------------------------Accelrys License Pack 7.5 - InstallShield WizardSelect the features for "Accelrys License Pack 7.5" you would like to install:Accelrys License Pack 7.5To select/deselect a feature or to view its children, type its number:1. [x] LicensePack2. [ ] Compatibility LicensePackThe Compatibility LicensePack is required for supporting Accelrys software shipped with License Packs 6.x or lower and to support IRIX and Solaris platforms. See License Pack documentation for complete list of Accelrys software supported by this License Pack.Other options:0. Continue installingEnter command [0]Press 1 for Next, 2 for Previous, 3 to Cancel or 5 to Redisplay [1]------------------------------------------------------------------------------- Accelrys License Pack 7.5 - InstallShield WizardAccelrys License Pack 7.5 will be installed in the following location: /home/msi/Accelrys/LicensePackwith the following features:LicensePackfor a total size:153.8 MBPress 1 for Next, 2 for Previous, 3 to Cancel or 5 to Redisplay [1]------------------------------------------------------------------------------- Accelrys License Pack 7.5 - InstallShield WizardInstalling Accelrys License Pack 7.5. Please wait...|-----------|-----------|-----------|------------|0% 25% 50% 75% 100% ||||||||||||||||||||||||||||||||||||||||||||||||||Creating uninstaller...Finalizing the Vital Product Data Registry. Please wait...Configuring License Pack-------------------------------------------------------------------------------Accelrys License Pack 7.5 - InstallShield WizardThe InstallShield Wizard has successfully installed Accelrys License Pack 7.5.Choose Finish to exit the wizard.Press 3 to Finish or 5 to Redisplay [3]Checking for dependencies for SharedSetup:4Checking for dependencies for IntelRuntime: NoneChecking for dependencies for HPMPI:1Do HP-MPI Installation -- MesoDyn server selected.Should HPMPI use SSH? [Y/n]: YConfiguring HP-MPI installationSetting up machines.LINUX file in /home/msi/Accelrys/MaterialsStudio43/share/data Checking for dependencies for GatewayTmp: NonePlease specify the location for temporary files (required for certaincomputational servers), e.g., /tmp or /usr/tmp. Enter ./tmp if you preferto create these files in the directory where the job is being run. Pleasenote that the ./tmp setting could create additional I/O overhead and therebyaffect performance [/tmp] :Checking for dependencies for GatewayScripts: NoneConfiguring environment setupSetting installation path in environment setup script filesChecking for dependencies for Gateway:2Configuring Gateway to use default portConfiguring Gateway for supported queueing systemsChecking for dependencies for PPComponents: NoneChecking for dependencies for Discover: NoneCreating Stand alone AmorphousCell script /home/msi/Accelrys/MaterialsStudio43/AmorphousCell/bin/RunAmorphousCell.shChecking for dependencies for CASTEPServer:7Checking for dependencies for CASTEP: NoneChecking for dependencies for MKL:1Creating Stand alone CASTEP script /home/msi/Accelrys/MaterialsStudio43/CASTEP/bin/RunCASTEP.shChecking for dependencies for DMol3Server:6Checking for dependencies for DMol3: NoneCreating Stand alone DMol3 script/home/msi/Accelrys/MaterialsStudio43/DMol3/bin/RunDMol3.shChecking for dependencies for DPDServer:7Checking for dependencies for DPD: NoneCreating Stand alone DPD script /home/msi/Accelrys/MaterialsStudio43/DPD/bin/RunDPD.sh Checking for dependencies for DiscoverServer:6Creating Stand alone Discover script /home/msi/Accelrys/MaterialsStudio43/Discover/bin/RunDiscover.shChecking for dependencies for EquilibriaServer:7Checking for dependencies for Equilibria: NoneCreating Stand alone Equilibria script /home/msi/Accelrys/MaterialsStudio43/Equilibria/bin/RunEquilibria.shChecking for dependencies for GaussianServer:5Checking for dependencies for Gaussian: NoneYou have chosen to install the Gaussian server but Gaussian seems not to beinstalled on this machine. Before using the Gaussian server please make surethat Gaussian is installed.Press ENTER to continue: Checking for dependencies for MesoDynServer:6Checking for dependencies for MesoDyn: NoneCreating Stand alone MesoDyn script /home/msi/Accelrys/MaterialsStudio43/MesoDyn/bin/RunMesoDyn.shChecking for dependencies for ReflexPlusServer:7Checking for dependencies for MatServer:30Checking for dependencies for xpcom: NoneChecking for dependencies for xpidl: NoneChecking for dependencies for perl: NoneChecking for dependencies for WinCE: NoneChecking for dependencies for MS3rdParty: NoneChecking for dependencies for ApplicationComponents: NoneChecking for dependencies for ApplicationLibraries: NoneChecking for dependencies for Container: NoneChecking for dependencies for ContainerInterfaces: NoneChecking for dependencies for ContainerRootConsumer: NoneChecking for dependencies for ContainerUtils: NoneChecking for dependencies for DataModel: NoneChecking for dependencies for Documents: NoneChecking for dependencies for DocumentsInterfaces: NoneChecking for dependencies for Libraries: NoneChecking for dependencies for SDK: NoneChecking for dependencies for Scripting: NoneChecking for dependencies for ViewersInterfaces: NoneChecking for dependencies for Visualizer: NoneChecking for dependencies for VisualizerInterfaces: NoneChecking for dependencies for QSAR: NoneChecking for dependencies for QSARApplications: NoneChecking for dependencies for Polymer: NoneChecking for dependencies for MSExampleData: NoneChecking for dependencies for Simulations: NoneChecking for dependencies for Analytical: NoneChecking for dependencies for ReflexServer:5Checking for dependencies for PowderIndexing: NoneChecking for dependencies for Structures:1Checking for dependencies for MSStructures: NoneChecking for dependencies for VAMPServer:6Checking for dependencies for VAMP: NoneCreating Stand alone VAMP script /home/msi/Accelrys/MaterialsStudio43/VAMP/bin/RunVAMP.shChecking for dependencies for QMERAServer:7Checking for dependencies for QMERA: NoneChecking for dependencies for GULP: NoneCreating Stand alone QMERA script /home/msi/Accelrys/MaterialsStudio43/QMERA/bin/RunQMERA.shChecking for dependencies for GULPServer:6Creating Stand alone GULP script /home/msi/Accelrys/MaterialsStudio43/GULP/bin/RunGULP.sh Checking for dependencies for ONETEPServer:6Checking for dependencies for ONETEP: NoneCreating Stand alone ONETEP script /home/msi/Accelrys/MaterialsStudio43/ONETEP/bin/RunONETEP.shChecking for dependencies for MesotekServer:6Checking for dependencies for Mesotek: NoneCreating Stand alone Mesotek script /home/msi/Accelrys/MaterialsStudio43/Mesotek/bin/RunMesotek.shChecking for dependencies for BlendsServer:3Checking for dependencies for Docking: NoneChecking for dependencies for ConformerSearchServer:3Checking for dependencies for ForciteServer:2Checking for dependencies for MorphologyServer:3Checking for dependencies for Crystallization: NoneChecking for dependencies for PolymorphServer:3Checking for dependencies for QSARModelsServer:2Checking for dependencies for FastDesc: NoneChecking for dependencies for ReflexQPAServer:3Checking for dependencies for SorptionServer:3Checking for dependencies for CCDCServers:4Checking for dependencies for CCDC: NoneYou have chosen to install the CCDC servers, but neither ConQuest nor Motifappear to be installed. Please make sure that these servers are present beforeattempting to use them.Press ENTER to continue: Creating Stand alone script /home/msi/Accelrys/MaterialsStudio43//bin/Run.shChecking for dependencies for AllMatServer:12Checking for dependencies for Meso: NoneChecking for dependencies for QSARInterfaces: NoneChecking for dependencies for Quantum: NoneIf you would like the Gateway at /home/msi/Accelrys/MaterialsStudio43/etcto be started automatically when the system is restartedyou will need to get your administrator to place a copy of/home/msi/Accelrys/MaterialsStudio43/etc/Gateway/msgateway_control_18888 in /etc/rc.d/init.d/msgateway_control_18888and run:/sbin/chkconfig --add msgateway_control_18888Please refer to the installation instructions for more details.A Materials Studio Gateway provides access to server componentsinstalled on your machine. By default the Gateway is configuredto use minimum security. You can use the Gateway configurationtools after installation to enforce higher levels of security.The servers in this installation will not be available from theMaterials Studio visualizer until the Gateway has been started.If you choose not to start the Gateway now you will need to startit manually after this installation has completed.Please refer to the help text on the CD for instructions on howto start, stop, and customize your Gateway configuration.Would you like to start the Gateway service now? [Y/n]: YStarting gateway...Registering XPCom components; this may take a while...System configuration details for HP-MPIThese checks assume that the default user authentication mechanism is beingused. Your System Administrator may have chosen to use an alternativemechanism. If you find that parallel jobs fail you should consult yourSystem Administrator and ask them to perform appropriate configurationwork. For further details please refer your System Administrator to theinstallation documentation under the info folder on your installation CDChecking remote shell settings for MPIThe HP-MPI installation included as part of this Materials Studio installationrequires that openssh-clients is installed and enabled. openssh-clients is not installedPlease ask your systems administrator to install openssh-clients. Parallel executionof Materials Studio servers will fail if openssh-clients is not installed./etc/hosts.equiv exists. However The HP-MPI installation included aspart of this Materials Studio requires that the uncommented lines in/home/msi/Accelrys/MaterialsStudio43/hosts.eqiv are present.Please ask your systems administrator to check and update /etc/hosts.equivas required.1) Enter temporary license password2) Set connection to license server3) List command line license administration tools99) Finished with license configurationChoose one of the above options: 99Exiting programPress ENTER to continue:Materials Studio installation has completed.5.装licensecd Accelrys/LicensePack/ etc/. lp_profilecd tmpiso/ Crack/lp_install msi.licmsi@linux-fkyc:~/tmpiso/Crack> lp_install msi.lic(这一步可以不要,直接把lic考到ccelrys/LicensePack/Licenses下就可以,MS5.5Licenses用windows下的4.3版本的就可以)This will replace the license file that is currently installed.Do you want to continue?(enter 'y' or 'Y' for YES; any other value for NO)yThe license file has been successfully installed under /home/msi/Accelrys/LicensePack/Licenses/msi.lic.License Pack version: 7.5.0Attempting checkout...Checked out license feature: License_Holder <v7.5> [for Unavailable] (1 copy)Checkout succeeded...Run lp_set_envORcsh: source /home/msi/Accelrys/LicensePack/etc/lp_cshrcsh: . /home/msi/Accelrys/LicensePack/etc/lp_profileto refresh shell license administration environment setup.msi@linux-fkyc:~/tmpiso/Crack> top。
Linux中安装软件的三种方式
Linux中安装软件的三种⽅式1、Linux中安装软件的三种⽅式1、哪三种⽅式?rpm安装yum安装源代码编译安装2、区别rpm安装类似于windows中的安装包,下载下来之后直接安装。
缺点是不能⾃⼰解决依赖。
yum安装基于rpm安装,也就是在rpm上增加了⾃动解决依赖的功能。
源代码安装:通过编译源代码,得到软件包。
优点是可以⾃定制软件包,缺点是⽐较复杂。
2、RPM安装Linux中安装软件的三种⽅式安装:rpm -ivh [软件包名称]卸载:rpm -e [软件包名称]升级:rpm -Uvh [软件包名称]1、下载安装包2、安装[root@localhost ~]# rpm -ivh zsh-5.0.2-34.el7_8.2.x86_64.rpmPreparing... ################################# [100%]Updating / installing...1:zsh-5.0.2-34.el7_8.2 ################################# [100%]3、卸载[root@localhost ~]# rpm -e zsh4、更新[root@localhost ~]# rpm -Uvh zsh-5.0.2-34.el7_8.2.x86_64.rpmPreparing... ################################# [100%]Updating / installing...1:zsh-5.0.2-34.el7_8.2 ################################# [100%]5、软件包名称zsh-5.0.2-34.el7_8.2.x86_64.rpm软件包名称:zsh版本号:5.0.2第多少次编译:34适⽤的平台:el7_8(CentOS 7)适⽤的系统位数:x86_64扩展名:rpm6、查看软件包的配置⽂件[root@localhost ~]# rpm -qc zsh7、查看是否安装某软件[root@localhost ~]# rpm -q zsh8、查看当前系统安装了哪些软件[root@localhost ~]# rpm -qa9、查看软件的安装路径,查看安装了哪些东西[root@localhost ~]# rpm -ql zsh上传与下载:yum install lrzsz -y3、yum安装基于rpm安装,⾃动解决依赖。
linux 安卓内核编译的方法

linux 安卓内核编译的方法Linux操作系统以其强大的功能和灵活的配置,吸引了越来越多的开发者。
安卓系统作为一款开源的移动设备操作系统,其内核编译对于开发者来说也是必不可少的技能。
本文将向大家介绍如何使用Linux系统进行安卓内核的编译。
一、准备工作1. 确保你的Linux系统已经安装了基本的开发工具,如gcc、make、patch等。
2. 下载安卓内核源码,可以选择从官网或者github获取。
3. 创建一个用于存放编译结果的目录,如/home/user/kernel_build。
二、配置内核1. 打开终端,导航到源码目录。
2. 使用patch工具对内核源码进行修补,确保源码与当前Linux 内核版本兼容。
3. 修改Makefile文件,指定编译选项和目标。
三、编译内核1. 运行make命令进行第一轮编译,生成中间文件。
2. 运行make menuconfig,进入配置界面,对内核选项进行进一步配置。
3. 退出menuconfig,再次运行make命令进行第二轮编译。
4. 等待编译完成,检查是否有错误信息。
四、安装驱动和模块1. 将驱动程序和模块提取出来,放在适当的目录下。
2. 运行make install命令,将驱动和模块安装到内核中。
3. 验证驱动和模块是否成功安装,可以运行一些测试程序来检查。
五、打包和测试1. 将编译后的内核映像打包,可以使用kimage工具或其他适合的打包工具。
2. 将打包后的内核映像刷入模拟器或实际设备中,进行测试。
3. 运行一些应用程序,检查内核是否能够正常工作。
4. 对测试结果进行分析和优化,根据实际需求进行进一步的调整和修改。
总结:安卓内核编译是一项需要一定技能的任务,但通过本文所述的步骤,你可以轻松完成这个过程。
在编译过程中,需要注意一些细节问题,如源码的兼容性、配置选项的选择等。
此外,为了确保编译的成功率,建议在虚拟机中进行操作,以避免对真实系统造成损坏。
Linux下软件的安装(包括mplayer、linphone和swf的安装)

• 4.执行解压缩后产生的一个名为configure的可执 行脚本程序。 功能:为随后的编译工作做准备。 命令为: #./configure *如果想把软件安装到指定目录,应该用 #./configure --prefix=/您自己指定的目录
• 5.检查通过后,将生成用于编译的MakeFile文件。 此时,可以开始进行编译了。 命令为: #make
• 2 .由于该文件是被压缩并打包的,应对其解压缩 。 命令为:#tar xvzf filename.tar.gz 如果是filename.tar.bz2格式的,应该是 tar jxvf filename.tar.bz2来解压 其他格式的解压方法
• 3. 通常在解压缩后产生的文件中,有“INSTALL” 的文件。该文件为纯文本文件,详细讲述了该软件 包的安装方法。
*解决方法:重装过fedora10系统,之后再安装 linphone。 *估计原因:安装fedora10的过程中某些选项设 置没有选对,造成linphone运行不起来。
4、linphone安装成功后,能通话,但是没有 声音。
*解决方法:设定声卡。
返回
四、过程中的收获
1、熟悉了Liunx的常用命令; 2、学会了在Linux系统下安装软件的基本方法和技 巧; 3、对Linux的学习决方法
1、mplayer安装完毕后,要找到相应的可执 行文件的路径,才能运行。
*解决方法:修改/etc/profile文件,通过 添加环境变量,将mplayer可执行文件的路径添加 上,之后就不需到其所在路径去执行。
2、安装linphone,在make过程中,会出现 linphone3.2.0/mediastreamer2/src/msconf.c:27 2和274行的SPEEX_PREPROCESS_GET_PSD_SIZE 和SPEEX_PREPROCESS_GET_PSD未定义的错误 。
linux系统如何安装软件(详细文字教程)

linux系统如何安装软件 (详细文字教程)在Linux中安装软件时,我们经常要考虑到这样几个个问题:(1).怎样安装软件;(2).软件安装在什么地方;(3).如何卸载删除不要的软件......下面,我们就一起来认识一下这些方面的问题。
一.认识Linu x应用软件安装包通常Linu x应用软件的安装包有三种:1) tar包,如softw are-1.2.3-1.tar.gz。
它是使用UN IX系统的打包工具t ar打包的。
2) rpm包,如softw are-1.2.3-1.i386.rpm。
它是Redh at Linux提供的一种包封装格式。
(现在用的全称叫RPMPackag e Manage r,以前叫Red hat Packag e Manage r)3) dpkg包,如softw are-1.2.3-1.deb。
它是Deba in Linux提供的一种包封装格式。
而且,大多数Lin ux应用软件包的命名也有一定的规律,它遵循:名称-版本-修正版-类型例如:1) softwa re-1.2.3-1.tar.gz 意味着:软件名称:softwa re版本号:1.2.3修正版本:1类型:tar.gz,说明是一个t ar包。
2) sfotwa re-1.2.3-1.i386.rpm软件名称:softwa re版本号:1.2.3修正版本:1可用平台:i386,适用于Int el 80x86平台。
类型:rpm,说明是一个r pm包。
注:由于rpm格式的通常是已编译的程序,所以需指明平台。
在后面会详细说明。
而softw are-1.2.3-1.deb就不用再说了吧!大家自己练习一下。
二、了解包里的内容:一个Linu x应用程序的软件包中可以包含两种不同的内容:1) 一种就是可执行文件,也就是解开包后就可以直接运行的。
Geoframe 4

Geoframe 4.3 Linux 安装详细流程Geofram 4.3支持RHEL 3.4-4.2版本的安装,可以从光盘镜像文件*.iso出发进行安装,也可以刻成光盘。
刻光盘时需要把iso文件展开,而不是直接刻录iso文件本身。
首先,需要确定你的linux系统是32位还是64位的。
以root用户登录,执行以下命令:uname -i如果是64位操作系统,无需打补丁,但必须安装64位的XXX。
如果是32位操作系统,则需要先打补丁:xxxxxxx,补丁在第13张盘:cd13_Oracle9204_32bits_lnx_1.iso中。
注意:安装需要gcc3.2.3,这是RHEL 3 Update 4 (AS/ES/WS)。
缺省自带的编译系统版本,在RHEL 4 Update 2 (AS/ES/WS)上缺省的gcc版本是3.4.4,因此在安装升级补丁前应该把它替换成gcc3.2.用root登录,按如下操作:cd /usr/binmv gcc gcc3442cp gcc32 gcc安装操作系统补丁:xxxxxxx。
先mount上第13张cd的iso光盘镜像(这是针对用光盘镜像的硬盘安装,如果直接用cd盘安装,直接插入光盘即可)。
mount -o loop -t iso9660 cd13_Oracle9204_32bits_lnx_1.iso/mnt执行:mnt/xxxxxxx/rhel3_pre_install.sh如果失败,可以用下面的命令取消这个补丁:echo ""。
/etc/ld.so.preload下面开始安装XXX 9.2.0.4.首先,创建一个用户,名字为dba,login shell采用/bin/bash,假设其home目录为/home/dba。
编辑它的启动文件/home/dba/.bashrc,加上下面的行:export LD_ASSUME_KERNEL=2.4.19umask 2退出root用户,用dba用户登录。
编译安装.config参数解释说明(转)

编译安装.config参数解释说明(转)Linux操作系统的Configure参数解释说明Linux环境下的软件安装,并不是⼀件容易的事情;如果通过源代码编译后在安装,当然事情就更为复杂⼀些;现在安装各种软件的教程都⾮常普遍;但万变不离其中,对基础知识的扎实掌握,安装各种软件的问题就迎刃⽽解了。
Configure脚本配置⼯具就是基础之⼀,它是autoconf的⼯具的基本应⽤。
与⼀些技巧相⽐,Configure显得基础⼀些,当然使⽤和学习起来就显得枯燥乏味⼀些,当然要成为⾼⼿,对基础的熟悉不能超越哦。
为此我转载了⼀篇关于Configure选项配置的详细介绍。
供⼤家参考'configure'脚本有⼤量的命令⾏选项。
对不同的软件包来说,这些选项可能会有变化,但是许多基本的选项是不会改变的。
带上'--help'选项执⾏'configure'脚本可以看到可⽤的所有选项。
尽管许多选项是很少⽤到的,但是当你为了特殊的需求⽽configure⼀个包时,知道他们的存在是很有益处的。
下⾯对每⼀个选项进⾏简略的介绍:--cache-file=FILE'configure'会在你的系统上测试存在的特性(或者bug!)。
为了加速随后进⾏的配置,测试的结果会存储在⼀个cache file⾥。
当configure⼀个每个⼦树⾥都有'configure'脚本的复杂的源码树时,⼀个很好的cache file的存在会有很⼤帮助。
--help输出帮助信息。
即使是有经验的⽤户也偶尔需要使⽤使⽤'--help'选项,因为⼀个复杂的项⽬会包含附加的选项。
例如,GCC包⾥的'configure'脚本就包含了允许你控制是否⽣成和在GCC中使⽤GNU汇编器的选项。
--no-create'configure'中的⼀个主要函数会制作输出⽂件。
linux内核编译过程解释
linux内核编译过程解释
Linux内核是操作系统的核心部分,它控制着系统的资源管理、任务调度、驱动程序等重要功能。
编译Linux内核是一项非常重要的任务,因为它决定了系统的性能、稳定性和可靠性。
下面我们来了解一下Linux内核的编译过程。
1. 下载内核源代码:首先,我们需要从官方网站上下载Linux
内核的源代码。
这里我们可以选择下载最新的稳定版本或者是开发版,具体取决于我们的需求。
2. 配置内核选项:下载完源代码后,我们需要对内核进行配置。
这一步通常需要使用make menuconfig命令来完成。
在配置过程中,我们需要选择系统所需的各种驱动程序和功能选项,以及定制化内核参数等。
3. 编译内核:配置完成后,我们可以使用make命令开始编译内核。
编译过程中会生成一些中间文件和可执行文件,同时也会编译各种驱动程序和功能选项。
4. 安装内核:编译完成后,我们可以使用make install命令将内核安装到系统中。
这一步通常需要将内核文件复制到/boot目录下,并更新系统的引导程序以便正确加载新内核。
5. 重启系统:安装完成后,我们需要重启系统以使新内核生效。
如果新内核配置正确,系统应该能顺利地启动并正常工作。
总的来说,Linux内核的编译过程是一个相对复杂的过程,需要一定的技术和操作经验。
但是,通过了解和掌握相关的编译技巧和命
令,我们可以轻松地完成内核编译工作,并为系统的性能和稳定性做出贡献。
Linux操作系统rpm包安装方式详细步骤
Linux操作系统rpm包安装方式详细步骤Linux操作系统rpm包安装方式详细步骤安装包(Install pack),即软件安装包,是可自行解压缩文件的集合,其中包括软件安装的所有文件。
运行这个安装包(可执行文件),可以将此软件的所有文件释放到硬盘上,完成修改注册表、修改系统设置、创建快捷方式等工作。
安装包文件多为exe格式。
以下是店铺帮大家整理的Linux操作系统rpm包安装方式详细步骤,仅供参考,大家一起来看看吧。
Linux操作系统rpm包安装方式详细步骤篇1在Windows下安装一个软件很轻松,只要双击.exe的文件,安装提示连续“下一步”即可,然而linux系统下安装一个软件似乎并不那么轻松了,因为我们不是在图形界面下。
所以你要学会如何在linux 下安装一个软件。
在前面的内容中多次提到的yum,这个yum是RedHat所特有的安装RPM程序包的工具,使用起来相当方便。
因为使用RPM安装某一个程序包有可能会因为该程序包依赖另一个程序包而无法安装。
而使用yum工具就可以连同依赖的程序包一起安装。
当然CentOS同样可以使用yum工具,而且在CentOS中你可以免费使用yum,但Redhat中只有当你付费后才能使用yum,默认是无法使用yum的。
在介绍yum之前先说一说RPM相关的东西。
【RPM工具】RPM是”Redhat Package Manager”的缩写,根据名字也能猜到这是Redhat公司开发出来的。
RPM 是以一种数据库记录的方式来将你所需要的套件安装到你的Linux 主机的一套管理程序。
也就是说,你的linux系统中存在着一个关于RPM的数据库,它记录了安装的包以及包与包之间依赖相关性。
RPM包是预先在linux机器上编译好并打包好的文件,安装起来非常快捷。
但是也有一些缺点,比如安装的环境必须与编译时的环境一致或者相当;包与包之间存在着相互依赖的情况;卸载包时需要先把依赖的包卸载掉,如果依赖的包是系统所必须的,那就不能卸载这个包,否则会造成系统崩溃。
SUSElinuxHA安装配置

SUSE linux HA安装配置目录1SUSE HA双机服务器根本配置 (2)升级kernel (2)服务器IP、主机名配置 (3)配置SSH无密码登录 (3)2安装SUSE 高可用组件 (4)配置软件安装源 (4)安装HA组件包 (5)3初始群集设置 (6)配置群集 (6)同步集群配置 (9)检查集群状态 (10)4使用 GUI 配置群集资源 (11)Linux HA Management Client (11)CRM配置 (12)创建资源组 (13)添加浮动ip资源 (15)创建克隆资源 (17)创建LVM (22)创建文件系统资源 (23)Oracle安装完毕后添加oracle、oracle监听资源。
(26)5配置完成后状态检查 (27)打开GUI界面、CRM命令检查状态 (27)CRM常用命令 (28)1SUSE HA双机服务器根本配置1.1升级kernel安装suse11 SP1kernel版本是2.6.32.12-0.7,将kernel升级包上传上两台主机,升级后的版本为2.6.32.59-0.7#cd /opt/packages#ls#rpm –ivh *.rpm升级完毕后,分别重启两台主机#init 6#uname –a检查Kernel版本是否升级成功1.2服务器IP、主机名配置配置服务器IP、主机名信息。
具体配置信息如下表:两台服务器均修改主机/etc/hosts文件,hosts文件内容如下:#cat /etc/hosts1.3配置SSH无密码登录在UIDBFS-1上使用root账户登录,执行以下操作#cd /root#ssh-keygen -t dsa#cp .ssh/id_dsa.pub .ssh/authorized_keys#scp -r .ssh UIDBFS-2:/root/执行SSH登录UIDBFS-2检查SSH无密码登录#ssh rootUIDBFS-22安装SUSE 高可用组件用 High Availability Extension 配置和管理群集所需的包在高可用性安装模式。
Linux环境SoTowerDE、BPM安装手册

省级计量中心生产调度平台SoTowerDE、BPM安装第1节SoTowerDE Server安装 (2)安装(Windows版) (2)安装(Linux版) (14)第2节安装BPM工作流 (27)第1节SoTowerDE Server安装安装(Windows版)安装准备:在Windows系列系统下安装SoTower DE Server前,需要以下准备工作:通过SoTower服务团队获取Windows版本的SoTower DE Server安装压缩包,把压缩包解压到本地某一磁盘空间;注意:由于安装包工具中自带内容比较多,解压出的文件内容比较大,建议在解压之前准备好足够的空间,建议1G以上磁盘空间。
检查操作系统是否为Windows XP/Windows 2003/Windows 7操作系统;安装步骤:以下是在windows操作系统下的安装步骤;步骤1:启动安装程序打开解压到本地磁盘的安装工具,双击或者右键打开install.cmd或者install.exe,如图3-1所示:图3-1启动安装程序步骤2:阅读安装简介阅读安装简介,如图3-2所示,单击<下一步>按钮。
图3-2安装简介步骤3:阅读许可声明阅读许可声明后,选择“本人接受许可协议条款”单选按钮,如图3-3所示,单击<下一步>按钮。
图3-3许可声明步骤4:License步骤4.1:注入license输入license授权码,如图3-4-1所示,单击<下一步>按钮。
图3-4-1 注入License步骤4.2:License版本提醒在点击<下一步>之后,当前页面会提示所注入的license是一个什么样的版本,如图3-4-2所示,点击<确定>按钮。
图3-4-2 注入License版本提醒步骤5:选择安装服务器选择所安装部署的服务器,如图3-5所示,单击<下一步>按钮。
图3-5 选择安装服务器类型步骤6:设置路径单击<浏览>按钮,从弹出的对话框中选择安装目录或者手动输入自定义路径(不存在的目录将自动创建),如图3-6所示。
linux mav的用法 -回复
linux mav的用法-回复Linux是一种开源的操作系统,被广泛应用于各种设备和场景中。
其中,一个重要的应用领域是机器人技术,而Mav(Micro Air Vehicle)则是Mavlink协议的一个实现,用于连接和控制飞行器。
本文将详细介绍Linux Mav的用法,包括安装、配置和使用。
第一步,安装Linux Mav。
为了安装Linux Mav,首先需要确保已经安装了Linux操作系统。
Linux操作系统有很多不同的发行版,如Ubuntu、Debian、Centos等。
首先,从Mavlink的官方网站(接下来,打开终端,并使用以下命令安装必要的软件包:sudo apt-get updatesudo apt-get install build-essential cmake git然后,使用以下命令编译并安装Mavlink库:cd mavlinkmkdir build && cd buildcmake ..makesudo make install安装完成后,可以使用以下命令验证Mavlink是否安装成功:mavlink_shell如果成功执行并打开了Mavlink Shell,则说明Mavlink已经成功安装。
第二步,配置Linux Mav。
在使用Linux Mav之前,需要配置一些参数。
首先,需要连接Mavlink设备,如飞行控制器(Flight Controller)。
可以通过USB、串口或者Wi-Fi等方式连接设备。
连接设备后,可以使用以下命令查看设备的端口:ls /dev/serial/by-id找到与设备对应的端口,如/dev/ttyUSB0或者/dev/ttyACM0等。
然后,使用以下命令将其配置为Mavlink设备:mavlink-routerd -e /dev/ttyUSB0:115200 -o 127.0.0.1:14550其中,/dev/ttyUSB0是设备的端口,115200是波特率,127.0.0.1是目标IP地址,14550是目标端口。
- 1、下载文档前请自行甄别文档内容的完整性,平台不提供额外的编辑、内容补充、找答案等附加服务。
- 2、"仅部分预览"的文档,不可在线预览部分如存在完整性等问题,可反馈申请退款(可完整预览的文档不适用该条件!)。
- 3、如文档侵犯您的权益,请联系客服反馈,我们会尽快为您处理(人工客服工作时间:9:00-18:30)。
Heartbeat3.0.4安装配置
1.heartbeat 3.0版不同与以前的版本,是由三个不同的项目组成,(下载地址/wiki/Downloads)Heartbeat,glue, agents,安装顺序为glue,agents , Heartbeat
2.安装软件包之前请确认你的系统中已经安装如下软件包(系统光盘中有):
libexslt
libexslt-devel
libgcrypt-devel
libxslt libxslt-devel
autoconf
automake
pkgconfig
libgpg-error-devel
libtool
sgml-common
opensp
openjade
xml-common
docbook-dtds
docbook-style
如果在编译安装过程中出错,很有可能是因为缺少了相关的软件包
3.下面开始安装
3.1 安装glue
grouadd haclient
useradd -g haclient -M -s /sbin/nologin hacluster
tar -xvf Reusable-Cluster-Components-glue--glue-1.0.7.bz2
cd Reusable-Cluster-Components-glue--glue-1.0.7
./autogen.sh
./configure
make
make install
注意:编译的时候保证系统能够连接外网
3.2 安装agents
tar -xvf Cluster-Resource-Agents-agents-1.0.3.bz2
cd Cluster-Resource-Agents-agents-1.0.3
./autogen.sh
./configure
make
make install
3.3 安装Heartbeat
tar -xvf Heartbeat-3-0-STABLE-3.0.4.bz2
cd Heartbeat-3-0-STABLE-3.0.4
./ConfigureMe configure
gmake
make install
如果安装过程不出错,现在一个基本的Heartbeat就安装完成了,但Heartbeat只提供主从备份功能,并不能对各节点的服务进点监控,因此需要配置ldirectord来对各节点服务进行监控
4. 安装ldirectord相关组件(需要安装ipvsadm软件包)
默认安装完上面的三个软件包之后,ldirectord已经安装到系统中,默认路径在/usr/etc/ ,由于ldirectord是由perl语言编写的,所以必须安装相关的软件包, 在此网站下载相关软件包
Socket6
libwww-perl
URI
MailTools
HTML-Parser
安装方法
perl Makefile.PL
make
make instal
5. 配置heartbeat
cp -a /usr/etc/ha.d /etc/
rm -fr /usr/etc/ha.d
ln -s /etc/ha.d /usr/etc
chkconfig add heartbeat
cp /usr/share/doc/haresources /etc/ha.d/
cp /usr/share/doc/authkeys /etc/ha.d
cp /usr/share/doc/ha.cf /etc/ha.d
chmod 600 /etc/ha.d/authkeys
5.1 修改配置文件
cd /etc/ha.d
5.1.1 vim authkeys
auth 2
#1 crc
2 sha1 HI!
#3 md5 Hello!
5.1.2 vim ha.cf
logfile /var/log/ha-log
logfacility local0
#心跳间隔
keepalive 2
#死亡阀值
deadtime 30
#警告时间
warntime 10
#首次启动heartbeat,等待多久才启动主服务资源
initdead 120
#连接端口
udpport 694
#心跳线接口
bcast eth1 # Linux
#备份机的心跳线接口与接口IP
ucast eth1 10.0.0.100
auto_failback on
node
node
ping 192.168.20.42
5.1.3 vim haresources
主节点hostname vip resource1 [::arg1 ::arg2] resource2 [::arg1 ::arg2]
5.1.4 配置ldirectord监控节点服务
复制安装文件ldirectord目录上的ldirectord.cf 到/etc/ha.d/conf下
mkdir /etc/ha.d/conf
cp ldirectord.cf /etc/ha.d/conf
vim ldirectord.cf (文件名任意),根据实际环境修改相关参数
#等待健康检查完成的时间
checktimeout=3
#检查间隙休息的时间
checkinterval=1
#fallback=127.0.0.1:80
#周期性检查配置文件的变化,并且在文件改变后自动应用它们
autoreload=yes
logfile="/var/log/ldirectord.log"
logfile="local0"
#emailalert="admin@x.y.z"
#emailalertfreq=3600
#emailalertstatus=all
#当节点在节点的checktimeout周期内响应失败时,节点的权重被设置为0(当此值为yes时)
quiescent=yes
#gate->DR ipip->Tun masq->NAT
# VIP
virtual=192.168.20.20:80
#RIP
real=192.168.20.3:80 gate
real=192.168.20.4:80 gate
#回环地址
fallback=127.0.0.1:80 gate
#服务
service=http
#调度方式
scheduler=rr
#persistent=600
#netmask=255.255.255.255
protocol=tcp
#监视VIP服务器的方法
checktype=negotiate
checkport=80
#请求的url文件
request="index.html"
#返回值
receive="OK"
#virtualhost=www.x.y.z
5.1.5 检验配置
ldirectord -d /etc/ha.d/conf/ldirectord.cf start
5.1.6 添加ldirectord到heartbeat 配置
vim /etc/ha.d/hareources
主节点hostname VIP ldirectord::ldirectord.cf
(备注:当某一节点服务出错后ldirectord会在ipvsadm表中自动清除相应的节点信息或者将相应节点权重设为0)
6.IPVS表有状态故障转移
当主DR崩溃并且ldirectord需要在备分DR上重构IPVS表时,原来活动的客户端连接不会自动转移到备份DR上,从而造成所有的客户端连接丢失,解决方法:在主DR上运行
ipvsadm --start-daemon master
同时在备份DR上运行
ipvsadm --start-daemon backup
终止同步状态守护进行
ipvsadm --stop-daemon
备注:主和备份DR都必须要支持多播才行,可以能过ifconfig 查看对应的网络接口中是否有MULTICAST。
