BeneCheck 管理软件操作说明
BEN-CREEL_cn_GV-SENS

安全操作维护前言BEN -CREEL V操作手册尊敬的客户:我们在此热烈欢迎您加入不断壮大的,用户满意的BENNINGER 产品大家庭。
我们非常感谢您对我们的信任,并衷心祝愿您的新设备能给您的工作带来许多快乐。
作为一个可信赖的企业,我们编写了使用说明书。
如果您认真按照下面的说明,您将会对设备的运转非常满意,进而也延长其使用寿命。
尽管如此,如果以后您的设备有问题,请深信不疑地向我们的客户服务中心寻求帮助。
电话:+41 (0)71 - 955 85 85 传真: +41 (0)71 - 955 84 90版权所有,不得翻印(C)(版权保护号 SN 210318)BENNINGER 股份公司, Uzwil (瑞士)安全目录:. . . . . . . . . . . . . . . . . . . . . . . . . . . . . . . . . . . . . . . . . . . . . . . . . . . . . . . . . . . . . . . . . . . . . . .11.一般说明 . . . . . . . . . . . . . . . . . . . . . . . . . . . . . . . . . . . . . . . . . 2 - 61.1操作安全说明 . . . . . . . . . . . . . . . . . . . . . . . . . . . . . . . . . . . . . . . . . . . . . . . . . . . . . 2 - 31.2操作流程说明 . . . . . . . . . . . . . . . . . . . . . . . . . . . . . . . . . . . . . . . . . . . . . . . . . . . . .31.3培训 . . . . . . . . . . . . . . . . . . . . . . . . . . . . . . . . . . . . . . . . . . . . . . . . . . . . . . . . . . . .41.4安全设备. . . . . . . . . . . . . . . . . . . . . . . . . . . . . . . . . . . . . . . . . . . . . . . . . . . . . . . . .41.5工具和辅助工具 . . . . . . . . . . . . . . . . . . . . . . . . . . . . . . . . . . . . . . . . . . . . . . . . . . .51.6按照规定使用 . . . . . . . . . . . . . . . . . . . . . . . . . . . . . . . . . . . . . . . . . . . . . . . . . . . . .51.7施工措施和设备 . . . . . . . . . . . . . . . . . . . . . . . . . . . . . . . . . . . . . . . . . . . . . . . . . . .51.8机器的改进 . . . . . . . . . . . . . . . . . . . . . . . . . . . . . . . . . . . . . . . . . . . . . . . . . . . . . . .62.关于机器的特别说明 . . . . . . . . . . . . . . . . . . . . . . . . . . . . . . . .71.一般说明1.1操作安全说明您在操作安全说明中所遇见的这个符号,表明危险会损伤身体。
安珂系统操作流程图文说明书
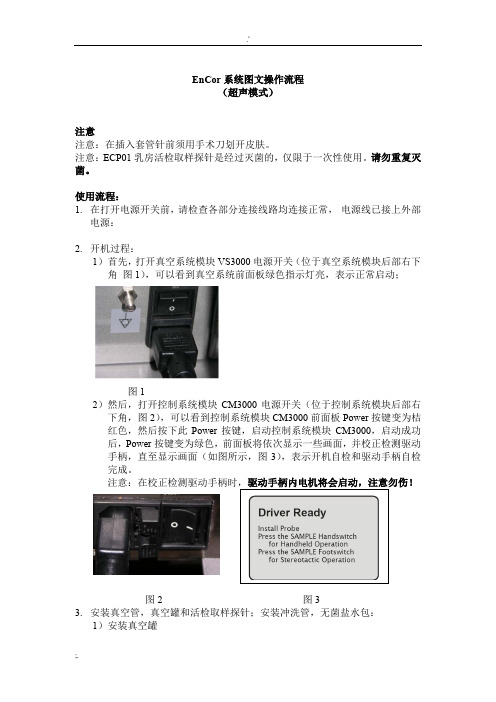
EnCor 系统图文操作流程(超声模式)注意注意:在插入套管针前须用手术刀划开皮肤。
注意:ECP01乳房活检取样探针是经过灭菌的,仅限于一次性使用。
请勿重复灭菌。
使用流程:1. 在打开电源开关前,请检查各部分连接线路均连接正常, 电源线已接上外部电源:2. 开机过程:1)首先,打开真空系统模块VS3000电源开关(位于真空系统模块后部右下角 图1),可以看到真空系统前面板绿色指示灯亮,表示正常启动;图12)然后,打开控制系统模块CM3000电源开关(位于控制系统模块后部右下角,图2),可以看到控制系统模块CM3000前面板Power 按键变为桔红色,然后按下此Power 按键,启动控制系统模块CM3000,启动成功后,Power 按键变为绿色,前面板将依次显示一些画面,并校正检测驱动手柄,直至显示画面(如图所示,图3),表示开机自检和驱动手柄自检完成。
图2 图33. 安装真空管,真空罐和活检取样探针;安装冲洗管,无菌盐水包:1)安装真空罐如图所示,将真空桶盖上的帽子盖好,并将桶盖盖在桶上。
打开真空系统VS3000前门,然后将盖好盖的桶放到真空系统中桶的位置,并将真空系统的管路如图所示,连上桶盖中央的圆孔。
2)安装真空管按照如图所示,将真空管卡入两个阀门。
3)连接冲洗管:将冲洗管真空包装打开后,如图所示安装冲洗管。
4)检查ECP01乳房活检取样探针包装,确保其完整性。
包装破损请勿使用。
拆开活检取样探针无菌包装,按如图所示装上取样探针a. 驱动手柄和活检取样探针上均有相对应的前卡扣和后卡扣,将取样探针的前卡扣对着驱动手柄的前卡扣对好后,只需轻轻一按取样探针的后部,听见“咔”一声响,后卡扣即安装好。
注意要对准卡扣。
b. 连接管路:如下图所示:将真空管和取样针真空管路末端连接,注意勿拧太紧,以免难以拆下。
如下图所示:将冲洗管上的保护帽拆下,连接上取样针上的冲洗管路。
(如果手术不需要冲洗切下的组织,可不用连接)冲洗管的另一端需要连接上无菌盐水包。
科箭操作手册
科箭操作手册
【原创版】
目录
1.科箭操作手册概述
2.科箭操作手册的内容
3.科箭操作手册的使用方法
4.科箭操作手册的优点
5.科箭操作手册的适用对象
正文
科箭操作手册是一款专业的操作指南,旨在帮助用户更好地理解和使用科箭软件。
本文将从以下几个方面详细介绍科箭操作手册。
首先,科箭操作手册概述。
科箭操作手册是一本全面的指南,涵盖了科箭软件的各个方面,包括功能、操作流程和技巧。
它不仅是一本初级用户入门的教程,也是一本进阶用户深入学习的参考书。
其次,科箭操作手册的内容。
科箭操作手册的内容详尽且系统,它从基础的软件安装、账号注册开始,逐步介绍了科箭软件的各项功能,包括数据管理、流程设计、报表生成等,让用户能够全面地了解和掌握科箭软件的使用。
再次,科箭操作手册的使用方法。
用户可以通过阅读手册,按照其中的步骤和指导进行操作,也可以在实际操作中遇到问题时,查阅手册寻找解决方案。
此外,手册中还提供了一些常见问题的解答,帮助用户快速解决使用过程中可能遇到的问题。
然后,科箭操作手册的优点。
科箭操作手册的最大优点在于它的全面性和系统性,能够帮助用户全面地了解和掌握科箭软件的使用。
此外,手册的内容更新及时,能够及时反映软件的更新和升级,保证用户使用的是
最新的操作方法和技巧。
最后,科箭操作手册的适用对象。
科箭操作手册适用于所有使用科箭软件的用户,无论是初学者还是进阶用户,都能够从中获得帮助。
科脉商业管理使用手册2【范本模板】
目录第一章初始设置 (5)§ 2。
1 单机版、网络版与分布式版本总部 (5)2。
1.1登录系统 (5)2。
1。
2公司信息 (5)2.1。
3一般位置 (6)2.1.4辅助设置 (7)2.1.5单据信息 (8)2。
1.6 POS设置 (8)2。
1.7界面显示 (9)2。
1。
8色彩设置 (10)§2。
2 分布式分店 (10)2。
2.1机构档案的建立 (10)2。
2.2总部设置 (10)2.2。
3 公司名称与机构代码 (11)2。
2。
4初始化与数据交换 (12)第三章通用操作 (14)§3.1 菜单操作和按钮介绍 (14)3.1。
1菜单操作 (14)3.1.2输入供应商资料方法说明 (14)3.1。
4 选择仓库或机构说明 (16)3.1。
5 单据按钮工具栏使用说明 (16)3。
1。
6 单据的设置 (17)§ 3.2 数据高级操作 (19)3。
2。
1业务单据中鼠标右键的使用 (19)第四章基本资料 (21)§ 4。
1 采购类 (21)4.1.1 区域档案 (21)4。
1.2 供应商档案 (21)4.1.3 期初帐款设置 (22)§4.2 商品类 (23)4.2。
1 类别 (23)4.2。
2商品包装单位 (24)4。
2。
3商品档案 (24)4。
2。
4有效性检查 (27)§4。
3 销售类 (28)4.3。
1客户档案 (28)4.3.2帐款设置 (28)§4。
4 POS类 (29)4。
4.1部类档案 (29)4.4.2 柜台档案 (29)4。
4。
3非营业收入 (30)4.4.4收银员档案 (30)§4。
5 帐款类 (31)4.5.1币种档案 (31)4.5.2付款方式档案 (32)§4。
6 库存类 (32)4。
6.1仓库机构档案 (32)4.6.2 机构指标设置 (33)4。
7.1商品料浏览的方法 (33)4.7.2 浏览供应商的方法 (34)4.7。
策泽门禁系统软件使用说明书 精品

一卡通管理系统(门禁)使用说明书第一章软件安装第1.1节软件系统对计算机的配置要求计算机设备:CPU Celeron 400MHz 或Pentium 133MHz以上内存最低要求128 MB [推荐256MB或以上]硬盘200MB以上的可用空间显示Super VGA (1024x768) 或更高分辨率的显示器(颜色设置为256 色或更高)鼠标Microsoft 鼠标或兼容的指点设备操作系统:Windows 2000中文简体版Windows XP中文简体版Microsoft Windows 20XX Windows NT 中文简体版第1.2节软件系统安装将安装光盘放入光盘驱动器中,运行光盘中的程序,出现如下页面。
有时安装包是通过网络传过来,请在安装包中直接点击运行程序。
页面中的姓名、组织、序列号等栏位都可以不用填写,直接点击【下一步(N) 】即进入到下一步安装页面,如下图。
按照上述页面提示,可以点击【取消】退出安装,也可以点击【下一步(N) 】进入到下一步安装页面,如下图。
特别提醒:本系统数据库为SQL SERVER2000网络型数据库,建议你购买微软正版的SQL SERVER2000企业标准版数据库系统。
同时,本安装包也包含了微软的桌面版SQL SERVER2000,你可以直接根据上述安装向导的指引安装微软的桌面版SQL SERVER2000并使用它。
上述数据库安装页面包括两个选项,即“创建数据库;创建客户端;”,请正确选择安装选项:如果网络内没有安装过本公司的数据库请选择第一项,如安装了本公司的数据库,则选择第二个选项“创建客户端”;如果你选择的是创建数据库,点击下一步:输入你的用户名和密码;1、并点击【下一步(N) 】进入到下一步安装页面(安装数据库),如下图:系统数据库缺省安装路径为“D:\DataBase”,建议你使用该缺省路径。
点击【下一步(N) 】进入到数据库的安装路径选择页面,如下图:点下一步;然后,按提示要求,简单点击相应按钮即可完成系统的安装,安装完毕后,你可以点击图标启动系统运行。
派贝克服装CAD操作手册2009
目录目录 (1)第一章系统介绍 (3)第一节派贝克®(PAYBACK)服装CAD系统简介 (3)第二节派贝克®(PAYBACK)服装CAD系统制作流程 (3)第三节派贝克®(PAYBACK)服装CAD系统的价值 (4)第二章软件操作说明(基础编) (5)第一节菜单栏介绍 (5)一.文件 (5)二.素材库 (5)三.输入 (7)四.系统设置 (9)五.尺码表 (11)第二节纸样中心 (12)一.纸样中心常用工具 (12)二.纸样中心专用工具 (15)I.画线工具组: (15)II.求点工具组: (18)III.专用工具组 (19)IV.点线编辑工具组 (21)V.省褶工具组; (23)VI.生成裁片 (26)第三节裁片中心 (26)一.裁片中心常用工具 (26)二.裁片中心专用工具 (29)I.裁片标识 (29)II.工艺线 (31)III.裁片分割 (32)IV.褶裥 (33)V.旋转修整 (34)VI.放码 (35)第四节排料中心 (38)一.设置 (38)二.排料 (39)三.显示 (40)四.检测 (41)五.清除 (41)六.对条格 (41)七.排料报告 (41)八.其它 (42)九.裁片区 (43)十.混排 (44)第五节打印输出 (44)一.绘图仪输出 (44)二.切割机输出 (46)三.打印机输出 (46)第六节文件格式转换 (47)一.PLT格式文件 (47)二.DXF格式文件 (47)I.打开DXF格式文件 (47)II.保存DXF格式文件 (47)三.裁床格式文件 (47)第七节帮助 (48)一.主题 (48)二.快捷键列表 (48)I.文件处理快捷键 (48)II.纸样中心快捷键 (48)III.显示快捷键 (48)IV.裁片中心快捷键 (49)V.排料中心快捷键 (49)三.关于 (49)第三章智能模式(高级编) (50)第一节纸样设计 (50)一.绘图功能 (50)二.编辑功能 (52)三.特殊功能 (55)四.右键菜单 (57)第二节裁片处理 (58)一.缝边标记 (58)二.缝角处理 (60)三.内部线及工艺线设置 (61)四.裁片分割 (62)五.移动裁片 (62)六.点放码 (62)七.右键菜单功能 (65)八.空白处右键功能 (67)第三节快捷键功能 (69)第四章实例 (69)第一节女短裙 (69)第二节女裤 (73)第三节女衬衫 (81)第四节八片开身西服 (86)第一章系统介绍第一节派贝克®(payback)服装CAD系统简介由上海千派服装科技有限公司最新推出的派贝克®(payback)智能服装CAD系统是至今为止智能化程度最高的服装CAD系统。
中文名字:帕森顿质量管理软件用户指南说明书

08
This part of the guide focuses on cancelling a registration order for a learner. This section assumes the registration order has previously been made against a qualification / apprenticeship.
save any amendments you have made.
07
Cancelling a
Registration Order
Section Overview
Please note, this can only be carried out by a Centre Administrator.
Create and Manage menus.
Within this guide, you will learn the steps required to manage the following activities:
• How to manage learner records • How to manage registration orders • How to manage external assessments (test bookings) • How to manage invoice data
and order details associated with the learner. To
add, delete or amend any of these details click Edit Learner Details at the bottom of the screen.
EK管理员手册mindo配置

E K管理员手册m i n d o配置The pony was revised in January 2021(下面此图可自行更换)文档控制/Document Control文档修改记录 日期 作者 版本 备注 2011年06月09日 杨建宏 全文编写 2014年2月13日 涂橙 补充 审阅记录日期 审阅人 版本 备注分发 日期 分发人 分发对备注蓝凌标准产品 配置 系统管理员手册目录第一章引言......................................... 错误!未定义书签。
概述....................................... 错误!未定义书签。
配置简介................................... 错误!未定义书签。
第二章详细介绍..................................... 错误!未定义书签。
基础配置................................... 错误!未定义书签。
数据库配置................................. 错误!未定义书签。
全局参数配置............................... 错误!未定义书签。
消息机制配置............................... 错误!未定义书签。
附件配置................................... 错误!未定义书签。
全文索引配置选项........................... 错误!未定义书签。
地址本配置................................. 错误!未定义书签。
启用JMX服务............................... 错误!未定义书签。
日志参数设置............................... 错误!未定义书签。
100点壁厚控制器说明书
1控制系统1.1控制系统硬件Control system hardware100点壁厚控制器采用贝加莱公司的新型多按键式人机操作面板(B&R PP252-1043-75)实现了胚型壁厚曲线成型﹑控制功能。
100 points parison wall thickness controller has adopted new multi-key human-machine operation panel (B&R PP252-1043-75) as display and control unit to realize the functions of parison wall thickness profile, parison wall thickness controller, etc.面板的按键布局Layout of keys on the panelFig. 1.11.2 面板上的按键Buttons on PanelIcon Definition Annotation改变壁厚曲线的编号Change thickness profile NoFunction button曲线变直线Change curve into lineFunction button曲线上半部分向右拉Upper curve moving rightwardFunction button曲线上半部分向左拉Upper line moving leftwardFunction button曲线下半部分向右拉Manual ejection outFunction button曲线上半部分向左拉Manual ejection backFunction button壁厚启动Start thickness controlFunction button壁厚封口Strart seal gapFunction button空缸Accumulator emptyFunction button满缸Accumulator fullFunction button标记MarkerFunction button口模上Core upFunction button口模下Core downFunction button+Enter 初始设定start setting parameter(no lock)State indication+Enter 口模设定Die gap tooling(no lock)State indication+Enter 储料设定(没有锁定时)Accumulator tooling(no lock)State indication+Enter 系统参数(没有锁定时)System parameter(no lock)State indication+Enter 运行记录(没有锁定时)Error logbook(no lock)State indication+Enter 锁定/解锁lock key / unlock keyState indication 中英文切换Chinese / EnglishChange interface 壁厚曲线控制Parison wall profileChange interface 壁厚跟踪曲线Parison wall traceChange interface 标记2-1Marker 2-1Change interface 标记2-2Marker 2-2Change interface 数据3-1Data 3-1Change interface 数据3-2Data 3-2Change interface 数据3-3Data 3-3Change interface 监控MonitorChange interface 存储recipeChange interface1.3 扩展图标Explanation of icons无警报State indication No alarm警报State indication Alarm没有启动壁厚的脉冲信号State indication No start thickness control pulse启动壁厚的脉冲信号State indication Start thickness control pulse没有壁厚终止﹑封口的脉冲信号State indication No thickness control end /seal pulse壁厚终止﹑封口的脉冲信号State indication Thickness control end /seal pulse非空缸State indication Accumulator is not empty空缸State indication Accumulator is empty非满缸State indication Accumulator is not full满缸State indication Accumulator is full没有标记脉冲State indication No marker pulse标记脉冲State indication Marker pulse连续式手动设定周期State indication Manual setting cycle time when continuous mode连续式自动设定周期State indication auto setting cycle time when continuous mode扩张型State indication Zero position upper收缩型State indication Zero position bottom无提示State indication No imply有提示State indication There is an imply口模的当前位置State indication Die gap current position储料缸的位置State indication Accumulator current position伺服输出State indication Out to servo valve配方编号State indication Recipe No中文界面Change interface Semi-Auto英文界面Change interface Auto连续式式时手动/自动周期设定切换Function button Manual/auto mode setting cycle time (continuemode)加调节分段线Function button Assert insert a segment line删除当前红色分段线Function button Erase current red segment line下载壁厚曲线Function button Download thickness profile切换到测试模式Function button Change into test mode修改配方名Function button Rename recipe name存储Function button Save recipe取出配方Function button Load recipe清空配方Function button Erase select recipe改名中State indication Renaming存储中State indication Saving取配方State indication Loading清空中State indication Empty连续式/ 储料式切换Function button Continuous mode / Accumulator mode扩张型/ 收缩型切换Function button Zero upper mode /Zero down mode手动调教/自动调教Function button Manual calibrate mode /Auto calibrate mode启动自动调教Function button Start auto calibrate确认零点(低点)位置Function button Assert zero position确认最大点(高点)位置Function button Assert Max positionFig. 2.2在此界面中,F1-F6分别可进入各个分支界面(参见图1.3中说明)。
Symantec企业版SEP客户端使用说明
Symantec企业版SEP客户端使用说明SEP版本:12.11.概述本文档用于介绍赛门铁克(Symantec)企业防病毒软件SEP的客户端如何使用。
1.1.SEP说明SEP是Symantec.Endpoint.Protection的缩写(以下简称SEP),也是它的简称,专门为企业用户定制的一款网络级别的防病毒系统。
通过在企业内部部署管理端和客户端,将整个企业的PC终端和网络都纳入整体防病毒保护之下,提供完整的企业级病毒防护方案。
2.安装下面介绍SEP的安装说明。
SEP有两种安装方式,一种是通过web页面下载安装包,一种是直接将安装包复制到电脑中进行安装。
打开安装包所在目录,双击setup.exe,运行安装程序:显示界面如下:点击“下一步”,显示授权许可协议窗口,勾选第一个我接受的选项:点击“下一步”,进入客户端类型选择窗口:这里需要解释下,选择“非受管客户端”就不会被管理端所控制和管理,但在企业中使用,一般选择是“受管客户端”,必须接受管理端管理。
点击“下一步”,进入“安装类型”窗口:此界面默认选择“典型”选项,一般用户不用选择“自定义”选项。
但有些情况下我们需要进行一些变动,如计算机性能一般的情况下,我们需要选择“自定义”选项,选择合适的功能。
我们这里选择“自定义”选项:此界面中,不做任何修改的情况即为上一个窗口中选择“典型”的情况。
如果是配置较低的计算机,此时将“主动型威胁防护”和“网络威胁防护”去除。
在选项上点击鼠标左键,显示如下界面:选择上图中的“整个功能将不可用”即可。
安装界面中的图标说明:选择好后,点击“下一步”,进入防护选项窗口:LiveUpdate是升级病毒库所用,我们以后再升级。
在此界面上,我们将“运行LiveUpdate”勾选项去除。
点击“下一步”,进入文件信誉数据提交窗口:一般不要将相关数据发送给symantec,建议去除此窗口勾选项。
点击“下一步”,进入准备安装程序窗口:一般不建议将收集的数据发送给symantec,建议去除此窗口勾选项。
百胜系统操作流程图
事业部
财务
岗位操作说明
文案大全
渠道调拨订单
内勤录单、审核 内勤执行
渠道调拨通知单
内勤审核 1
内勤凭盖有收讫订单发货 给客户
实用文档
前台打印订单
出纳收款后审核 2
渠道调拨单
点发出
商品会计记帐
1、 事业部内勤做完审核 1,通 知前台财务;
2、 前台财务打印订单给客户交 款,盖收讫盖的订单返还客 户两联,并自留一联
内勤审核 2 未注明内勤与发货处敬 姐货品交接流程
实用文档
内勤执行 商品移仓单 内勤发出 内勤验收
仓库退货组进行清 点,并将清点后的 明细交给仓库内勤 组,仓库内勤组执 行
根据退货组清点的实 物明细,如有差异则进 行修改,并通知事业 部。修改完成后,保存 商品移仓单
内勤打印单据
商品会计记帐
打印移仓单,其中一 联仓库留底、一联随 货返客户、最后一联 第二天一起交财务
销售收款单
减少应 付帐款
记录应 收帐款
财务帐款
三、 渠道调拨管理(批发业务-自提货流程)
事业部
仓库
财务
文案大全
渠道调拨订单
内勤录单、审核
内勤执行
渠道调拨通知单
内勤审核 1
如果客户下单后又 调整了数量可以直 接在数量栏进行修 改,修改完后,修改 方式参考操作手册, 保存。并跟客户确认 该单的有无问题,最 后进行审核 1
货款通知员:审核 2 内勤 :专人打印拣货单、执
行通知单 三、渠道调拨单: 仓库权限
内勤:修改、保存、发出、 打印
根据拣货组拣货单上修改的数 量来修改单据上的尺码和数 量。修改方式参考操作手册。 修改完后,保存。
财务权限: 会计:记帐
EKP10.0 用户手册_流程管理(J)

蓝凌标准产品流程管理用户手册文档控制/Document Control 文档属性模板修改记录文档修改记录审阅记录分发目录第一章引言 (3)1.1功能简介 (3)1.2业务流程 (3)第二章使用说明 (4)2.1进入流程管理系统 (4)2.2企业所有员工 (5)2.2.1提交申请 (5)2.2.2查阅申请 (7)2.2.3打印申请内容 (8)2.2.4传阅申请 (9)2.2.5指定反馈人 (9)2.2.6申请反馈 (10)2.2.7收藏申请文档 (11)2.3员工领导 (12)2.3.1审批员工申请 (12)2.4管理人员 (13)2.4.1模块设置 (13)2.4.1.1类别设置 (13)2.4.1.2通用表单模板设置 (14)2.4.1.3表单字段权限设置说明 (18)2.4.1.4表单数据存储设置 (22)2.4.1.5通用流程模板设置 (26)2.4.1.6流程模板设置 (26)2.4.1.7系统默认通知设置 (28)2.4.2申请文档维护 (29)2.4.2.1文档维护目录说明 (29)2.4.2.2转移申请文档模板 (29)2.4.2.3删除申请文档 (29)2.4.2.4删除传阅记录 (29)2.4.2.5删除反馈记录 (29)2.4.2.6修改单个申请的阅读及附件权限 (30)2.4.2.7批量修改权限 (30)2.4.3权限分配说明 (31)2.4.3.1模块角色说明及分配建议 (31)2.4.3.2具体操作权限说明 (31)第一章引言为了指导客户使用EKP系统流程管理,特制定本文档。
1.1 功能简介流程管理是协同办公系统的经典应用。
通过本系统能规范流程管理,提高工作效率,优化传统审批方式。
企业所有员工●提交流程申请:当员工本人有某件事情需要相关领导审批时,可提交本人流程申请,如出差流程或请假流程等。
●查阅流程申请:查阅自己可阅读的本人或他人的流程申请。
●打印流程申请内容:查阅流程申请时可打印申请内容。
企业管理手册-百事通餐饮管理软件用户操作说明手册新版XXXX支持点菜
百事通餐饮信息管理系统说明书北京九九归一科技有限公司目录第一章、前台收银 (5)一、开单 (5)二、点菜(输入菜单) (7)三、点菜单修改 (9)四、改单 (10)五、无线点菜 (12)六、结帐 (13)一)、结帐 (13)二)、折扣 (17)三、)优惠方案 (18)七、预定 (19)八、班结 (20)九、帐单 (20)一)、重打帐单 (21)二)、修改帐单 (21)十、会员 (23)十一、库存 (23)十二、查询报表 (27)第二章、预定后厨管理 (31)一、预定处理 (32)二、后厨处理 (35)第三章、后台管理 (36)一、用户管理 (36)一)、角色权限 (36)二)、用户设置 (37)三)、修改口令 (37)二、基础资料 (38)一)、收银点 (38)二)、营业区域 (38)三)、台号设置 (38)四)、一级菜单 (39)五)、二级菜单 (39)六)、菜单设置 (39)七)、套餐设置 (40)八)、菜单档案卡...............................................................................错误!未定义书签。
41 九)、退菜原因.. (41)十)、厨房做法 (42)十一)、厨房飞单 (42)三、系统设置 (43)一)、参数设置 (43)二)、系统初始化 (46)三)、营业数据设置 (46)四)、日报设置 (47)五、报表审核 (47)一)、帐单审核 (47)二)、交班记录 (48)三)、日结报表 (49)四)、营业月报表 (49)五)、销售明细 (50)六)、销售汇总 (50)七)、销售成本 (52)八)、退单记录 (52)九)、预定记录 (53)十)、服务员销售 (53)十一)、套餐销售 (54)十二)、餐饮入帐 (54)十二)、操作日志 (55)十三)营业日报 (56)十四)、收入汇总 (56)十五)、桌台消费统计 (56)六、会员管理 (57)一)、优惠方案 (57)二)、会员类型 (57)三)、会员帐户 (58)四)、礼品设置 (63)五)、礼品发放 (63)六)、发放报表 (63)七)、发卡统计 (64)八)、充值统计 (64)九)、消费统计 (64)十)、应收帐款 (64)十一)、付款记录 (65)十二)、帐龄分析 (66)七、库存管理 (66)一、基础设置 (66)一)、参数设置 (66)二)、仓库名称 (67)三)、供应商 (67)四)、领用部门 (68)二、物料库 (68)五)、物料仓库 (68)六)、进货入库 (70)七)、货品出库 (70)八)、直接采购 (71)九)、仓库盘点 (71)十)、出入库查询 (72)三、吧台库存 (73)一)、吧台库存 (73)二)、吧台入库 (73)三)、吧台出库 (74)四)、库存调拨 (74)五)、吧台盘点 (75)六)、出入库查询 (75)七)、单据查询 (75)八、成本控制 (76)一)、静态成本核算 (76)二)、成本卡控制 (77)三)、动态成本核算 (78)四)、配料组成核算 (78)五)、实际与理论值 (79)九、无线设备管理器 (80)百事通餐饮系统说明书 百事通餐饮管理系统由前台收银和后台管理组成,前台主要由无线点菜、预订、客人开单、点单收银、收银员交班、日结、吧台库存、厨师长餐标(包餐)处理、报表查询组成;后台由报表审核、会员管理、库存管理、成本管理、基础资料、系统设置和无线设备管理器等组成。
皮科特加热器操作手册和安全手册说明书

These instructions are for your personal safety. Always ensure that you have read and understood these instructions before using any of the Picote range of Tools. SAVE THESE INSTRUCTIONS FOR FUTURE REFERENCE.OPERATION & SAFETY MANUALDistributed by HammerHead Trenchless SAFETY INFORMATION & SYMBOLS3 GENERAL INFORMATION & TECHNICAL DATA 5 VOLTAGE & POWER SUPPLY6CE DECLARATION OF CONFORMITY 7 OPERATING INSTRUCTIONS 8 MAINTENANCE & SPARE PARTS 10 WARRANTY POLICY & PROCEDURE11To watch practical demonstration videos, or to download an electronic copy of these In-structions, please visit . Please note that videos are not intend-ed as a replacement or alternative to this operating and safety manual, but only as an additional learning tool.TABLE OF CONTENTSSAFETY INFORMATIONThis section contains important safety information. Failure to comply could result in serious injury or death.Safety SymbolsSafety symbols are used throughout this manual to draw attention to potential hazards.Personal Protective Equipment (PPE)Always use Personal Protective Equipment when using the Picote Heater, including suita-ble overalls / protective clothing & footwear and the following:Always wear suitable eye protection when using the Picote Heater to prevent dust from irritating your eyes.Always wear suitable ear protection when using the Picote Heater to prevent any hearing loss.Always wear suitable cut -resistant gloves when using the Picote Heater to prevent any hand injuries. Any open injuries or skin irritations should be covered at all times to avoid contact with sewage, chemicals or dust. Always wear a suitable respirator when using the Picote Heater to prevent any resin fumes from the curing coating being inhaled or consumed, which can cause occupational asthma or dermatitis as well as eye irritation.Before assembly, use, replacement of parts or maintenance, unplug the Picote Heater. Failure to comply may lead to serious injury including electric shock or injury from rotating parts!Danger risk of serious injury from rotating parts, follow instructions.Always rememberDanger risk of serious injury, follow instructions.GENERAL MACHINE SAFETY WARNINGSAFETY REQUIREMENTSAlways read all safety warnings and instructions. Failure to follow warnings and instructions may result in electric shock, fire and/or serious injury.1. Always wear eye protection, ear protection as well as cut -resistant gloves. Other personal protective equipment, such as dust mask and overalls should be worn when necessary. Dust produced when working can be dangerous to your health, inflammable or ex-plosive. Always wear appropriate protective equipment. Make sure the drain pipe has been opened and ventilated to stop any gases forming in the lateral drain where the work takes place.2. Always ensure that the machine is fully turned off and unplugged before inspection, maintenance, or installing any accessories to the machine. Always follow the instructions in the Picote Solutions manual.3. Before each use inspect the machine and hose carefully for any potential break or damage. Change damaged parts immediately.4. When in use, it is very important that the machine is stable and on an even surface at all times.5. Do not use the machine outdoors when raining or in otherwise wet conditions.6. If the working environment is extremely hot and humid, or badly polluted by conductive dust, use a GFCI -enabled power outlet to ensure the safety of the operator.7. Make sure that the job location is well ventilated before powering up the machine. The operator must wear a dust mask when using the Picote Heater. Notice that the machine blows the dust and fumes out from the pipes at any opening. Prepare the ventilation properly on these locations before powering up the Picote Heater.8. Ensure that the ventilation openings are kept clear when working in dusty conditions. If it should be-come necessary to clear dust, first unplug the machine.9. Only use this machine with the accessories and spare parts offered by the Picote Solutions. Accessories and spare parts should only be used in the manner intended and as described by the Picote Solutions. 10. Read the Picote Brush Coating ™ manual carefully before using the Picote Heater to speed up the curing process.This section contains important safety information. Failure to comply could result in serious injury or death .This section contains important safety information. Failure to comply could result in serious injury or death.TECHNICAL DATASize (mm/inches)Hoselength(m/ft)Drain Diameter(mm/inches)Max. AirVolume(m3/min)Output(W)PowerSourceWeight(kg/lbs)Max. AirCapacity(m/sec)IP Rating287x205x180 11”x8”x7”5 (16)DN50-DN300 (2”-12”) 2.201600ElectricMotor5.8 (12.8)75—10023INTENDED USEThis machine is intended for the following uses;1.Drying the pipes after water cleaning.2.Speeding up the curing process when using the Picote Brush Coating™ system. GENERAL INFORMATIONVOLTAGE & POWER SUPPLYEnsure that the supply voltage is correct. The voltage of the power source must match the value given on the nameplate of the machine within the tolerances of ±10 %. Machines with a 230V plate can be used in 220V mains and 110V machines in the 120V grid.The machine has been double sealed according to European standards. The power source has to be grounded.Power plugsFor safety purposes, use only grounded outlets. If the plug does not fit securely or match the outlet, do not force it —contact an electrician to determine required power supply. Never alter the plug in any way. Use the plug with an extension cord only if it can be fully inserted into the receptacle. Use the Picote Heater with a heavy duty extension cord only.If a power generator is used as power source, ensure that the power rating is sufficient.220-230V:EU Schuko 230V 16A. Power cable lead minimum thickness 1.5mm2 .110-125V: The Picote Heater is equipped with a 15 amp (125V) NEMA 5-15 plug. Power cable lead minimum thickness 2,5mm2 / 13 AWG. The must be supplied with sufficient power and pro per current rating. A minimum of 15 amps are needed to operate it safely andeffciently. When used with an extension cord, the cord must be a 3 prong, 15amp (125V). If power generator is used, minimum 3 kW required. Adapters may be necessary for generator connections. Contact your reseller or Picote technical support for more information.AUSTRALIA/UK: Picote Heaters in these regions have special plugs:Australia: CEE 16A 230V colour blue. Power cable minimum lead thickness 2.5mm2UK: UK Plug BSEN 60309 16A 110V colour yellow. Power cable lead minimumthickness 2,5mm2. Picote Heater requires a transformer to comply with the sitepower regulations and safe usage in UK.NOISE LEVEL & EMISSIONSThe typical A -weighted noise level determined according to EN60745:Sound pressure level (LpA): 78 dB (A)WEAR EAR PROTECTIONEmissions during actual use of the machine can differ from declared values depending on the ways that the machine is used. Safety measures to protect the operator should be determined by actual condi-tions, taking into account all aspects of the operating cycle.Due to continuing product development, the specifications herein are subject to change without notice. We Picote Solutions Oy Ltd as the responsible manufacturer, declare that the following Picote Solutions Oy Ltd machine:Picote Heateris of series production andConforms to the following EU Directive: 2006/42/ECAnd is manufactured in accordance with the following standards or standardised documents: EN60745The technical documentation is kept by our authorised representative in Europe who is:Picote Solutions Oy Ltd, Urakoitsijantie 806450 Porvoo, Finland1st February 2018CE DECLARATION OF CONFORMITYKatja Lindy -WilkinsonC.E.O.Picote Solutions Oy LtdUrakoitsijantie 8, 06450 Porvoo, FinlandThis section contains important safety information. Failure to comply could result in serious injury or loss of hearing.OPERATING INSTRUCTIONSBefore operation:• Before powering up, always make sure that all the openings are properly ventilated. • Ensure there is enough space for Picote Heater. Do not cover the air inlet.•The dust and fumes from the pipes will be blown out from any opening in pipe system. Prepare all these locations before powering up the Picote Heater.While in operation:•Always lay the machine down horizontally on the floor.STARTING & USING THE MACHINE1.Ventilate all the openings in pipe system properly before powering up the Picote Heater. Dust, fumes and gases can be dangerous to your health, inflammable or explosive.2. Place the hose inside the pipe. Secure the hose with hose clamps or nozzle piece.3.Inspect that the curing process has already begun before powering up the Picote Heater. The resin needs to be dust dry before the Picote Heater can be used which equals to 20 minutes curing. If the Picote Heater is powered before the curing has started, waves will be created to the coating layer.Tip! You can use outlet timer to make Picote Heater to begin the blowing process after 20 minutes and to blow up for pre -calculated time. In this way you can move on coating the next pipe line faster. 4.Plug the Picote Heater to the power source.5. Picote Heater speeds up the curing time of the coating resin 1h – 1.5h depending on the coating resin used.5.Let the machine blow up as long as needed. Normally at least 2h 30 min is normally needed for the coating layer to cure before a new layer is going to be added. The coating material needs to be touch dry before adding a new coating layer.6.If the next coat is applied after 24h, the original coat needs to be abraded with a Smart Cutter ™ first to make sure that the layers bond well.Note: Picote Heater air outlet temperature is limited to +55 o C (131 F). The machine has automatic thermal cut -out in both motor and heating element.This section contains important safety information. Failure to comply could result in serious injury.Please check Picote Mini & Maxi Coating Pump manualsand visit for moredetailed information.Guiding the Air into The PipeUse Hose Clamps to attach the hose to the Picote Heater and guide the air into the pipe. Secure thehose to the pipe with hose clamps, tape or nozzle piece.MAINTENANCE1. Before performing any maintenance always check that the machine is fully turned off and unplugged.2. Carefully inspect the hose to ensure that there are no signs of wear and tear. Replace when required.3. For safety and efficiency, always keep the machine and its air inlet clean.If there is s problem that you cannot resolve with this manual, please consult your Reseller or PicoteYou must use only the Picote Solutions accessories and attachments with the machine described in this operations manual. The use of other accessories or attachments couldpresent a risk of injury or death. The accessories or attachments should only be used in the proper and intended manner, and always follow Picote Solutions instructions.ACCESSORIES & SPARE PARTS1350000024Picote Heater 230v1350000024US Picote Heater 110v US 1350000024UK Picote Heater 110v UK 9990001099 Heater Spare Hose 5mFor information about product training and support contact Picote or your authorised Picote Reseller.TRAININGWARRANTY POLICY AND PROCEDURELimited Warranty:Picote warrants to the original End User that the Product purchased by such End User will operate in accordance with and substantially conform to their published specifications when shipped or otherwise delivered to the End User and for a period of one (1) year, except electric motors for which the warranty period shall be six (6) months, provided, however, that Picote does not warrant any claim or damage underthisWarranty if such claim or damage results from:1.Consumable parts or normal wear and tear resulting from use of the Products,2.Product overload or overheated motor,3.Regular periodic maintenance of Products,4.Misuse, neglect, or improper installation or maintenance of the Products, or use of Productsnot for their intended purpose,5.Products that have been altered, modified, repaired, opened or tampered with by anyoneother than Picote or an authorized Picote Service Centre, or unsuitable or unauthorized spareparts, accessories or third party products when using the Products or;6.the use of the Products not in compliance with their respective Documentation, user manuals,safety and maintenance instructions, and any usage restrictions contained therein, or7.accident, fire, power failure, power surge, or other hazard.Otherwise, the Products are sold AS IS. End User is responsible for using the Products withintheir specifications and instructions as contained in the Documentation.EXCEPT AS SPECIFIED IN THIS WARRANTY, ALL EXPRESS OR IMPLIED CONDITIONS, REPRESENTATIONS, AND WARRANTIES INCLUDING, WITHOUT LIMITATION, ANY IMPLIED WARRANTY OR CONDITION OF MERCHANTABILITY, FITNESS FOR A PARTICULAR PURPOSE, NONINFRINGEMENT, SATISFACTORY QUALITY OR ARISING FROM A COURSE OF DEALING, LAW, USAGE, OR TRADE PRACTICE, ARE HEREBY EXCLUDED TO THE EXTENT ALLOWED BY APPLICABLE LAW. TO THE EXTENT AN IMPLIED WARRANTY CANNOT BE EXCLUDED, SUCH WARRANTY IS LIMITED IN DURATION TO THE WARRANTY PERIOD. BECAUSE SOME STATES OR JURISDICTIONS DO NOT ALLOW LIMITATIONS ON HOW LONG AN IMPLIED WARRANTY LASTS, THE ABOVE LIMITATION MAY NOT APPLY. This disclaimer and exclusion shall apply even if the express warranty set forth above fails of its essential purpose.1112 Revision Date: 5 Feb. 2019Revision number: Rev. 1Author: Mikko LångvikAccepted: Dawn GreigPlease Contact:Your Reseller / Salesperson or Picote International OfficesFinland. United Kingdom. USA. Dawn Greig Global Business Development & Creative Director+44 7585116508************************Anthony DeCavitch Global Sales Director+1 219 440 1404************************Jake SaltzmanWorld Wide Technical Director +1 706 436 1892************************Richard Swan Head of Technical Client Services+44 (0)7827 223237***************************Technical Support Production & R&D Raudoittajantie 4 06450 Porvoo, Finland ***************************Distributed by HammerHead Trenchless。
全面英克系统操作手册 第一全版.doc
英克系统操作手册目录目录 (2)系统介绍 (2)请货 (5)请货单管理介绍 (5)创立一个请货单 (7)配送退货 (12)配送退货单管理 (12)货架管理 (16)查询系统维护了多少货架 (16)新增货架 (17)初始化库存 (20)目录系统介绍登录进入系统之后,你看到的界面就是下面这个样子〔见下列图1〕。
图1:〔1〕角色:代表现在你登录进入系统后,使用的是什么角色。
〔2〕部门:就是门店名。
操作员:就是你的姓名。
〔3〕登录:将鼠标放在登录上面,然后右键,系统就会提示如下信息。
可以切换用户,切换角色,设置密码等等。
〔4〕三个带有颜色的:依次代表缩小软件,放大软件以及关闭软件。
〔5〕最左边是导航栏:你可以去导航栏里面查找功能。
图2:〔6〕常用功能:类似于快捷键,你可以将常用的功能放到这里,我已经放了一些常用功能,例如处方维护,请货单管理等等。
如何将常用功能添加到这里,方法如下:先将鼠标放在常用功能上面〔图3〕,然后右键,就会出现“添加我的功能〞,点击它。
图3:,点击添加我的功能,就会弹出图4中的方框。
如何去掉常用功能:见图5和图6.#g4*,请货请货单管理介绍在“+〞号上面右键,然后运行新功能,输入QHDGL首拼,我们就翻开了请货单管理功能。
上面有很多按钮,我们来解释一下。
新增:表示新增一个总单。
删除:表示删除一个总单。
确认:表示将单子的状态从临时转为正式。
取消确定:表示将单子的状态从正式回退为临时。
新增细单:表示新增一个细单。
删除细单:表示删除一个细单。
图7:图8:创立一个请货单然后回车AMXL门店请货流程:门店创立请货单〔临时状态〕-> 门店确定〔单据正式〕-> 总部审批–> 审批通过后仓库开场配货-> 业务员送货-> 门店收货和验收。
门店在点击总单中的“确认“按钮前,需要确认好货品的相关信息:请货数量、厂家、规格等。
确认无误后,点击“确认〞。
总部审批过后,这些单据就无法修改了,你也无法“回退确认〞。
(企业管理手册)ANKEDC系统采购业务管理操作手册v
采购业务管理操作手册万科核心业务操作系统万科企业股份有限公司版本1.0作者修订目录1.介绍 (3)1.1.目标 (3)1.2.文档范围 (3)2.采购管理 (4)2.1.采购管理概览 (4)2.2.采购计划 (5)2.2.1.操作路径及说明 (5)2.2.2.操作-创建计划 (6)2.2.3.操作-查询计划 (8)2.2.4.操作-删除计划 (8)2.2.5.操作-修改计划 (9)2.2.6.操作-计划导出 (9)2.3.采购方案 (10)2.3.1.操作-创建采购方案 (10)2.3.2.操作-查询采购方案 (12)2.4.采购寻源 (13)2.4.1.操作-创建采购寻源 (13)2.4.2.操作-查询采购寻源 (15)2.4.3.操作-采购寻源审批 (16)2.4.4.操作-发布采购寻源 (17)2.4.5.操作-开标及决标 (18)2.4.6.操作-完成决标 (20)2.5.确定供应商依据 (21)2.5.1.操作-发起确定供应商依据 (21)2.5.2.操作-更新/删除确定供应商依据 (22)2.6.采购协议 (23)2.6.1.操作-创建采购协议 (23)2.6.2.操作-查询采购协议 (26)2.7.采购合同 (27)2.7.1.操作-创建采购合同 (27)2.7.2.操作-查询采购合同 (28)2.8.采购订单 (29)2.8.1.操作-创建采购订单 (29)2.8.2.操作-查询采购订单 (32)2.9.要货计划 (33)2.9.1.操作路径及说明 (33)2.10.订单接收 (35)2.10.1.操作路径及说明 (35)2.11.采购规划 (37)2.11.1.操作-手工创建采购规划 (37)2.11.2.操作-模板导入 (38)2.11.3.操作-审批采购规划 (39)3.报表查询 (41)3.1.1.操作路径及说明 (41)1.介绍1.1.目标本手册用于介绍万科核心业务系统采购管理相关操作。
志杰餐饮管理系统安装、维护说明书
志杰FBsmart3.5系统操作手册1数据初始化 (5)1.1 加密狗安装 (5)1.2 数据库连接 (6)1.3 数据初始化 (6)1.3.1工具栏的使用 (6)1.3.2数据维护 (7)1.3.3基础数据的录入 (7)1.3.4操作指南:(见示例“餐别维护”、“菜品维护”其余维护类似) (7)1.3.5数据维护顺序 (17)2客户会员管理部分 (23)2.1客户管理 (23)2.1.1客户管理(单位客户、个人客户、散客升级、客户拜访单、客户意见单、满意度登记、积分兑换、积分修改) (23)2.1.2会员卡发卡(卡类型、发卡管理、会员卡储值、卡信息修改、会员卡查询、会员卡结算) (25)2.1.3读卡器硬件初始化 (25)2.1.4读卡器软件初始化 (26)2.1.5字典维护(客户类型等) (27)2.1.6应收款管理(应收款入帐、预收款缴纳) (28)2.1.7报表管理(应收款消费明细,近日生日客户,会籍费查询,一卡通消费明细,单店卡消费明细) (28)2.1.8系统(管理、系统设置、退出) (28)2.1.9短信中心 (28)3前台点单收银部分 (30)3.1.1开台\加单 (30)3.1.2加台换台 (30)3.1.3退单 (31)3.1.4拆并帐 (31)3.1.5预定到达 (31)3.1.6结算 (31)3.1.7结算查看 (33)3.1.8关联客户 (34)3.1.9人数修改\未定数量修改 (34)3.1.10结班 (34)3.2其他功能介绍 (34)3.2.1沽清.特价菜品查看 (34)3.2.2系统设置 (34)3.2.3菜品刷新 (35)3.2.4会员卡信息查看 (35)3.2.5口令修改 (35)4 PDA点菜部分 (35)4.1无线网关的设置 (35)4.2常用业务操作 (35)4.2.1数据同步 (35)4.2.2预定信息查看 (36)4.2.3预定开台修改人数 (36)4.2.4开台 (36)4.2.5点菜 (36)4.2.6修改数量 (37)4.2.7制作方法\口味定义 (37)4.2.9份量选择 (37)4.2.10出菜方式 (37)4.2.11菜品复制 (38)4.2.12整桌要求 (38)4.2.13菜品催\叫\缓 (38)4.2.14手工打印服务划单 (38)5厨房打印部分 (38)5.1 定义 (39)5.2 安装和初始化 (39)5.3 常用操作 (44)5.4 打印机安装调试: (46)6经理查询部分 (47)6.1 模块说明 (47)6.2 功能说明 (47)7预定管理部分 (48)7.1 目标及功能 (48)7.2 常用业务操作 (48)7.2.1新增预定操作 (48)7.2.2修改预定 (49)7.2.3预定开单 (49)7.2.4预定取消 (49)7.2.5预定确认,取消确认 (49)7.2.6应到未到 (49)7.2.7预定打印 (50)7.2.8预定锁台及提示信息 (51)8.1 模块实现的功能 (52)8.2 操作说明 (52)8.3 餐厅空间的切换 (52)8.4 开台\点单\加单 (52)8.5 菜品信息修改 (53)8.6 菜品折扣处理 (53)8.7 起菜方式 (53)8.8移单 (53)8.9换桌处理 (54)8.10合并\拆分帐单 (54)8.11加桌\菜品复制 (54)8.12杂项 (54)9手持点菜器部分 (55)9.1 无线点菜器的原理 (55)9.2 各设备的连接方法 (56)9.3 程序的设置 (56)9.4 点菜器功能介绍 (57)10厨房划单控制部分 (58)10.1 说明 (58)10.2 初始化设置 (58)10.3 划单操作 (59)10.4 查找菜品 (60)10.5 补打菜品单 (61)10.6 错误划单处理 (61)10.7 菜品单损坏、丢失处理 (61)11.1 软件概叙 (62)11.1.1名词定义 (62)11.1.2功能特性 (62)11.1.3性能 (62)11.2 使用说明 (63)11.2.1安装初始化 (63)11.2.2常用业务操作 (63)11.2.3快速操作表 (67)11.2.4出错和回复 (68)12连锁管理部分 (69)12.1 连锁实施 (69)12.2 系统要求 (70)12.3 连接设置 (71)12.4 数据同步 (71)13来电通 (72)13.1来电通初始化 (72)13.2来电通使用 (72)1数据初始化1.1加密狗安装1. 把志杰加密狗接插到服务器并口(USB口),在安装目录里找到加密狗驱动(图标为)并双击安装此驱动程序;2. 待显示“驱动安装成功!”,点击“退出”。
- 1、下载文档前请自行甄别文档内容的完整性,平台不提供额外的编辑、内容补充、找答案等附加服务。
- 2、"仅部分预览"的文档,不可在线预览部分如存在完整性等问题,可反馈申请退款(可完整预览的文档不适用该条件!)。
- 3、如文档侵犯您的权益,请联系客服反馈,我们会尽快为您处理(人工客服工作时间:9:00-18:30)。
使用BeneCheck E-Health System软件管理您的检验结果
百捷多功能分析仪可利用USB或无线传输功能将您的检验结果下载到行动装置或个人计算机中,协助您长期完善管理健康计划。
请详阅本章节的指示,利用BeneCheck E-Health System软件作为下载及管理检验结果的工具。
第一章安装BeneCheck E-Health System 软件
BeneCheck E-Health System软件是由勤立生物科技股份有限公司所设计,我们提供适用于行动装置或个人计算机两种版本供您作为选择,您可利用此软件建立检验结果的数据库而不再受限于分析仪的记忆容量。
BeneCheck E-Health System软件兼容于Windows XP、Windows 7计算机操作系统(分辨率1024 x768),或是Android 4.0行动装置操作系统(分辨率1280 x 800)。
1. 请前往网站,进入下载区。
下载您所需要的BeneCheck E-Health System软件版本至行动装置中。
个人计算机
1. 选择E-Health System V1.
2.2.0 (Windows),开始下载文件。
2. 请点选BeneCheck E-Health System 文件夹中的「Setup」开始安装
软件。
当您的分析仪使用USB传输线连接计算机时,文件夹中的「The PL23003 Prolific Driver Installer」程序将会在BeneCheck E-Health system 软件安装完毕后自动启动。
请不要移除该程序,以避免USB传输失败。
3. 选择您需要的安装语言版本,即可依据安装精灵的指示开始安装.
4. 请在详阅许可协议后,点选「我接受合约」,并选择「下一步」
5. 依序选择BeneCheck E-Health System软件安装位置、快捷方式位置
后,即可开始安装软件。
8. BeneCheck E-Health System软件安装完毕后,点选「结束」即可开始使
用软件管理您的检验结果。
注意:「PL23003 Prolific Driver Installer」程序将会自动启动。
请不要移除此程序,以避免USB传输失败而无法下载检验结果。
行动装置
1. 安装行动装置的BeneCheck E-Health System应用程序,即可开始使用。
,
第二章下载与管理您的检验结果
BeneCheck E-Health System软件系统提供了各种功能,以协助您管理检验结果。
您可以从接口上方的菜单选择不同功能。
A. 个人计算机
1. 点选「新增使用者」以建立新的个人账户
2. 系统将进入「工具区」,请在「编辑个人资料」字段上输入个人资料后,点
选「存档」即可建立个人账户。
工具区内可同时设定「测试区间」与「血糖值设定」,在您检视「图表显示」时,「测试区间」的设定值可协助分类、分析您的检验结果。
3. 从上方的菜单选择「下载数据」
先选择您的个人账户,接着以USB传输线连接您的分析仪与个人计算机。
当分析仪与计算机连接时,分析仪将自动开机。
4. 点选「开始」,将检验结果下载到计算机中。
5. 当检验结果下载完毕时,您可以从「数据管理」处检视所有的检验结果。
6. 左侧的「数据类型」字段依照不同的检验项目进行分类,「选择范围」以及
「选择日期」则可依照检验时间范围进行分类,协助您检视检验结果。
管理您的血糖检验结果
BeneCheck E-Health System软件提供三种不同的分析图表协助您管理血糖检验结果。
您可点选菜单的「图表显示」选项,选择左侧列表中各种分析图示,将长期检验结果以折线图、圆饼图、柱状图呈现分析,协助您管理血糖指标的长期变化。
折线图:呈现每日的血糖检验结果
圆饼图:依照您的设定值进行各时段血糖测试值的正常/过高/过低百分比
柱状图:呈现一周七天内的血糖平均值
管理您的尿酸与总胆固醇检验结果
尿酸与总胆固醇的检验结果可藉由折线图呈现,协助您管理尿酸与总胆固醇指标的长期变化。
B. 行动装置
1. 开启BeneCheck E-Health System应用程序,点选主画面的「相关设定」
选项以设定您的个人信息。
2. 进入「相关设定」,点选接口左下方图标可输入您的个人信息;点选接口右下方图标可输入量测范围信息。
3. 从行动装置中的应用程序(App)列表选择〝设定〞项目。
4. 选择〝无线和网络〞项目后,进入〝蓝芽〞选项,选择〝开启蓝芽功能〞。
5. 请先将您的百捷利多功能分析仪开机,再启动「搜寻」选项,此时
「BeneCheck」将出现于可用装置列表中。
选择点选「BeneCheck」,开始装置配对。
6. 配对成功后,「BeneCheck」下方状态将显示「已配对」,
表示分析仪已经成功链接到您的行动装置。
7. 启动行动装置中的BeneCheck PC-link应用程序。
8. 点选主画面中的「下载设定」选项。
9. 当行动装置的蓝芽功能开启时,「支持状态」会呈现「蓝芽已启动」,接着将「蓝芽下载」设置成「开」。
10. 再次开启具有蓝芽功能的百捷多功能分析仪,并将分析仪放在行动装置邻近位置。
11. 启动〝BeneCheck PC-link〞应用程序,主页面将显示「尝试连接到BeneCheck」,表示装置正在搜寻百捷多功能分析仪。
11. 当分析仪屏幕显示PC字样时,行动装置将显示「成功联机到BeneCheck」。
11. 当屏幕显示「下载中…」,表示正在从百捷多功能分析仪下载分析仪所有的检验结果。
12. 下载完毕时,行动装置的接口将显示「下载完毕」,分析仪将自动关机。
13. 点选主画面中的「数据报告」选项,可检视所有下载的检验结果。
管理您的血糖检验结果
BeneCheck E-Health System软件系统提供三种不同的分析图表协助您管理血糖检验结果。
以折线图、圆饼图、柱状图呈现分析检验结果,协助您管理血糖指标的长期变化。
1. 点选主画面中的「数据图表」选项。
2. 操作接口上方可选择欲检视的检验模式,并选择呈现7天、14天、30或
90天内的检验结果。
接口下方可选择呈现的分析图种类。
折线图:呈现每日的血糖检验结果,可在屏幕上拖曳分析图以检视分析结果。
圆饼图:依照您的设定值进行各时段血糖测试的正常/过高/过低值百分比
柱状图:呈现一周七天内的血糖平均值
管理您的尿酸或总胆固醇检验结果
尿酸与总胆固醇的检验结果可藉由折线图呈现,协助您管理尿酸与总胆固醇指标的长期变化。
注意:
BeneCheck E- Health System提供血糖检验结果折线图、圆饼图以及柱状图的分析模式,尿酸与总胆固醇检验结果以折线图呈现。
响。
