JMS_Guide-20020611
Moxa ABC-02-USB自动备份配置器说明书
P/N: 1802000021022*1802000021022*ABC-02-USB Quick Installation GuideAutomatic Backup ConfiguratorEdition 2.1, July 2019Technical Support Contact Information/support Moxa Americas:Toll-free: 1-888-669-2872Tel: 1-714-528-6777Fax: 1-714-528-6778 Moxa China (Shanghai office): Toll-free: 800-820-5036 Tel: +86-21-5258-9955 Fax: +86-21-5258-5505 Moxa Europe:Tel: +49-89-3 70 03 99-0Fax: +49-89-3 70 03 99-99 Moxa Asia-Pacific: Tel: +886-2-8919-1230 Fax: +886-2-8919-1231 Moxa India:Tel: +91-80-4172-9088Fax: +91-80-4132-10452019 Moxa Inc. All rights reserved.OverviewThe ABC-02-USB Automatic Backup Configurator is a device that can save and load configuration files, backup event logs, and load firmware of Moxa’s managed switch via the USB (universal serial bus) interface. The ABC-02-USB is able to be accessed directly like a standard USB flash drive from a computer.The ABC-02-USB makes it easier to manage the backup of system parameters or perform configuration during the replacement of a switch. With the ABC-02-USB, users can quickly re-install a substitute switch (of the same model) without the need of a laptop computer. The ABC-02 can be used to recover the entire system configuration, including the IP address, if a switch failure occurs.Switches can load firmware from the ABC-02-USB and backup event logs to the ABC-02-USB. It is also an easy and fast diagnostics tool for automation engineers to retrieve configuration files and event logs in the field immediately, without the need for laptop computers. Package ChecklistThe ABC-02-USB is shipped with the following items. If any of these items is missing or damaged, please contact your customer service representative for assistance.• 1 x ABC-02-USB•Quick installation guide (printed)•Warranty cardFeatures•Widely used USB 2.0 interface•Click the switch rest button to back up the configuration file and event log to ABC-02•Automatic loading of system configuration after system reboot •Manual upgrade firmware from ABC-02 and backup event logs to ABC-02•Manual and saving system configuration through web console •Extend switch event log storage capability•Portable low-power design that requires no power supply•CE, FCC approvalHardware DescriptionProduct InstallationThe ABC-02-USB is designed for use with an USB 2.0 port. Plug the ABC-02 into the USB port of your Moxa managed switch. Securing the ABC-02 on the wall with an M4 screw is suggested.Avoid hanging the ABC-02 configurator from the switch without securing it onto the wall.Please refer to the Product Operation section for instructions on how to save and load the configuration, firmware, and event logs. Product OperationConfiguration Backup and Restore•Backup switch configuration on the ABC-02Use the switch web console to save the configuration file to theABC-02. This function is found under “System/System Files/Configuration Backup and Restore “. Then select “Auto BackupConfigurator (ABC-02)” in the web console. Click “Backup” to save the configuration file to the ABC-02. The file will be saved in the“:\Moxa” folder of the ABC-02. The file name is “Sys.ini”. •Restore the configuration file from the ABC-02 to the switchA. Manually operate in web consoleUse the switch web console to load configuration files from theABC-02 to the switch. This function is found under“System/System Files/ Configuration Backup and Restore”.Then select “Auto Backup Configurator (ABC-02)” in the webconsole. Click “Browse” to select the file you need. Then click“Restore” to start loading into your switch.B. Auto-load the configuration file from the ABC-02 to the systemwhen the switch boots upPower off your switch first, and then plug in the ABC-02. Thenpower on your switch, the system will detect the configurationfile on the ABC-02 automatically. The switch will recognize thefile name with following sequence priority:1. ”MAC address last 6 digits.ini*”2. “Sys.ini”. If no matching configuration file is found, the faultLED light will turn on. The switch will boot up normally.NOTE Please save your configuration files in the “:\Moxa” folder of the ABC-02. Auto-load will detect the configuration file using thispath only.Firmware UpgradeUpgrade the firmware from the ABC-02 to the switch. You can download the firmware file from /support/. Save the firmware file in the “:\Moxa” folder of the ABC-02.Plug in the ABC-02 into your switch. Use the switch web console to load the switch firmware file from the ABC-02. This function is found under “System/System Files/ Firmware Upgrade “. Then select “Auto Backup Configurator (ABC-02)” in the web console. Click “Browse” to select the file you need. Then click “Upgrade” to start loading the file into your switch.Log File BackupBackup the switch log file to the ABC-02Use the switch web console to save the configuration file to the ABC-02. This function is found under “System/System Files/ Log File Backup “. Then select “Auto Backup Configurator (ABC-02)” in the web console. Click “Backup” to save the configuration file to the ABC-02. The log file will be saved in the “:\Moxa” folder of the ABC-02. The file will be named “Sys.log”.One-click backupThe ABC-02 can backup configuration and log files from the switch. When the ABC-02 is plugged into the switch, “STATE” LEDs on the switch will start to blink slowly, and the reset function will be disabled automatically. Press the “reset” button once and the switch will start backing up configuration files and system logs to the ABC-02.The “RESET” button is located on the front panel of rackmount type switches and on the top panel of DIN-rail type switches.Auto backup to the ABC-02 when configurations changeThe ABC-02 is capable of backing up switch configuration files automatically. This function is found under “System/System Files/ Configuration Backup and Restore”. While the ABC-02 is plugged into the switch, enable the “Auto backup to ABC-02 when configuration change” option. Then click “Apply”. Once this configuration is modified, the switch will back up the current configuration under the “/His_ini” folder in the ABC-02. The file name will be the system date/time (MMDDHHmm.ini).Auto backup of the earliest 100 log entries to prevent overwritingThis function is designed to maintain a long-term record the switch log files. Moxa Ethernet switches are capable of saving 1000 entries of event logs. When the 1000-entry storage limit is reached, the switch will delete the oldest saved event log. The ABC-02 can help to backup these event logs. When switch log entries reach 1000, the ABC-02 will back up the earliest 100 entries of the switch.The function is found under “System/System Files/ Log File Backup”. Enable the “Auto backup the earliest 100 log entries to prevent overwriting”. Then click “Apply”. After that, when the ABC-02 is plugged into the switch, the event logs will always be saved to the ABC-02 automatically.NOTE For further details on the ABC-02 operation through the switch web console, please refer to the switch user manual.NOTE The status of the ABC-02 may be checked on the switch web console or by observing the switch front panel LEDs.Operation Switch LED statusThe switch detects ABC-02-USB plugged in STATE blinking slowly (1 time/ 2 seconds),Import/Export in progress* FAULT, MASTER, COUPLER LEDs Blink sequentially and circularlyImport/Export successful FAULT, MASTER, COUPLER LEDs light offSave/Load failed FAULT LED light on until ABC-02 isremoved or system rebootOperation ABC-02 LED status Power on ABC-02 STATE LED green light on Reading /Writing ABC-02 STATE LED blinking*Does not include “Auto backup to the ABC-02 when configuration change” and ”Auto backup the earliest 100 log entries to prevent overwritingSpecificationsOperating Temperature 0 to 60°C (32 to 140°F)Storage Temperature -40 to 85°C (-40 to 185°F) Connectors RS-232 RJ45 portPower Requirement 3 to 5 VDC, power input via RS-232 RTS Configuration via Moxa managed switch’s web console Casing PVC molding, IP40Weight 50 gInstallation M4 screw (> 4 mm)Dimension (W × D × H) 32.5 × 97 × 12 mmCable Length 35 cm, including connectors Operating Temperature 0 to 60°C (32 to 140°F)Storage Temperature -20 to 70°C (-4 to 158°F)Ambient Relative5 % to 95 % (non-condensing) HumidityEMI FCC Part 15, CISPR (EN55032) Class A EMS EN61000-4-2 (ESD), level 3EN61000-4-3 (RS), level 3EN61000-4-4 (EFT), level 3EN61000-4-5 (Surge), level 3EN61000-4-6 (CS), level 3Warranty 5 years。
aix常见问题整理
aix常见问题整理2009.01.21 15:21提纲:用feprom_update升级Firmware 2002-07-24CHRPSystems系统启动过程的LEDE1DC报错提示 2002-07-24 怎样在AIX5.1中建立热后备(hotspare)磁盘? 2002-07-24如何让非root用户有权限执行sar命令 2002-07-24使用errpt命令,产生0315-171错误 2002-07-24普通用户执行su命令时产生错误:Authenticationdenied. 2002-07-24查找文件或命令对应的文件集 2002-07-24AIX5L新特性(一):如何确认CPU的主频? 2002-07-24如何记录ftplog? 2002-07-24目前哪些RS/6000支持逻辑分区(LPAR)? 2002-07-11在移植安装(Migrationinstallation)中都有那些文件和数据保留下来? 2002-07-11如何在保留安装(Preservationinstallation)方式下自定义需要保留的文件? 2002-07-11PTF与APAR的区别? 2002-07-11将man命令查看的内容转换成普通文本文件 2002-07-11查看bootlog 2002-07-11inetd.conf文件的恢复 2002-07-11如何立刻断掉一个已经login的用户? 2002-07-11使用errdemon客户化系统错误日志文件 2002-07-11什么版本的Oracle数据库支持AIX5.1 2002-07-11IBMpSeries和RS/6000哪些型号可以安装SuSElinux?2002-07-11如何监控裸设备I/O? 2002-07-11在AIX上安装RPM格式软件包 2002-07-11gated 进程介绍和应用 2002-03-25如何处理 mountd 和 nfsd 无法正常启动 2002-03-25如何在图形登录和命令行登录方式见切换? 2002-01-29如何阻止某些用户远程登录,telnet,rlogin? 2002-01-29如何拒绝某些用户的ftp访问? 2002-01-29如何查看某用户共启动了多少进程? 2002-01-29如何在清理/tmp文件系统时找到过大的文件? 2002-01-29如何限制某用户在特定 pty 的访问。
超微 3632 系列交换机 快速安装指南说明书
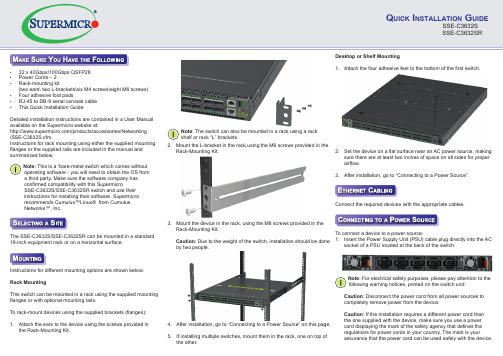
Q UICK I NSTALLATION G UIDESSE-C3632S SSE-C3632SR• 32 x 40Gbps/100Gbps QSFP28 • Power Cords – 2• Rack-mounting kit(two ears\ two L-brackets\six M4 screws\eight M6 screws)• Four adhesive foot pads• RJ-45 to DB-9 serial console cable • This Quick Installation GuideDetailed installation instructions are contained in a User Manual available on the Supermicro website at:/products/accessories/Networking /SSE-C3632S.cfm.Instructions for rack mounting using either the supplied mounting flanges or the supplied rails are included in the manual and summarized below.The SSE-C3632S/SSE-C3632SR can be mounted in a standard 19-inch equipment rack or on a horizontal surface.2. Mount the L-bracket in the rack,using the M6 screws provided in theRack-Mounting Kit.3. Mount the device in the rack, using the M6 screws provided in the Rack-Mounting Kit.Caution : Due to the weight of the switch, installation should be done by two people.4. After installation, go to “Connecting to a Power Source” on this page.5. If installing multiple switches, mount them in the rack, one on top of the other.Desktop or Shelf Mounting1. Attach the four adhesive feet to the bottom of the first switch.2. Set the device on a flat surface near an AC power source, making sure there are at least two inches of space on all sides for properairflow.3. After installation, go to “Connecting to a Power Source”.Note : For electrical safety purposes, please pay attention to the following warning notices, printed on the switch unit: Caution : Disconnect the power cord from all power sources tocompletely remove power from the device.Caution : If the installation requires a different power cord thanthe one supplied with the device, make sure you use a powercord displaying the mark of the safety agency that defines theregulations for power cords in your country. The mark is yourassurance that the power cord can be used safely with the device.Instructions for different mounting options are shown below:Rack MountingThis switch can be mounted in a rack using the supplied mountingflanges or with optional mounting rails.To rack-mount devices using the supplied brackets (flanges):1. Attach the ears to the device using the screws provided in the Rack-Mounting Kit.Connect the required devices with the appropriate cables.To connect a device to a power source:1. Insert the Power Supply Unit (PSU) cable plug directly into the ACsocket of a PSU located at the back of the switch. Note : The switch can also be mounted in a rack using a rack shelf or rack “L” brackets.Note : This is a “bare-metal switch which comes without operating software - you will need to obtain the OS from a third party. Make sure the software company has confirmed compatibility with this SupermicroSSE-C3632S/SSE-C3632SR switch and use their instructions for installing their software. Supermicro recommends Cumulus™Linux® from Cumulus Networks™, Inc.• The socket outlet must be near to the unit and easily accessible. You can only remove power from the unit by disconnecting the power cord from the outlet.• This unit operates under SELV (Safety Extra Low Voltage) conditions according to IEC 60950. The conditions are onlymaintained if the equipment to which it is connected also operates under SELV conditions.Caution : • Fiber Optic Port Safety. When using a fiber optic port, never look at the transmit laser while it is powered on. Also, never look directly at the fiber TX port and fiber cable ends when they are powered on.• This product does not contain any serviceable user parts.• Installation and removal of the unit must be carried out by qualified personnel only.• When connecting this device to a power outlet, connect the field ground lead on the tri-pole power plug to a valid earth ground line to prevent electrical hazards.• This switch uses lasers to transmit signals over fiber optic cable. The lasers are compliant with the requirements of a Class 1 Laser Product and are inherently eye safe in normal operation. However, you should never look directly at a transmit port when it is powered on.• Wear an anti-static wrist strap or take other suitable measures to prevent electrostatic discharge when handling this equipment.• Do not plug a phone jack connector in the RJ-45 port. This may damage this device.• Use only twisted-pair cables with RJ-45 connectors that conform to FCC standards. For more information and safety instruction go to:/manuals/network/Layer_2-3_SDN_Switches.pdfWeight : Net weight: 10.18kg (with 2 PSUs)LEDs:System Fan SFP+ Port 1: Status (Link/Activity)QSFP28 Ports 1~32: Status (Link/Activity)RJ-45 Port: Status (Link/Activity)Size: (W x D x H): 433.8 x 520 x 44 mm (17.07 x 20.47 x 1.73 inches)Temperature : Operating 0°C to 45 °C (32°F to 113°F)Humidity : Operating: 5% to 95% (non-condensing)AC Input : 100-127/200-240 V, 50/60 HzPower Supply:100-127/200-240 VAC, 50/60 Hz,F2B 800W @ 12V/65 A per module (For SSE-C3632S)100-127/200-240 VAC, 50/60 Hz,B2F 800W @ 12V/65 A per module (For SSE-C3632SR)Power Consumption : <650 WattsCE Mark : EN 55022 Class A, EN 55024: 2010, EN 61000-3-2 Class A,EN 61000-3-3.Immunity: EN 55024:2010, IEC 61000-4-2/3/4/5/6/8/11EMI (Class A) : FCC/VCCI/BSMISafety: UL (CSA 22.2 No 60950-1 & UL60950-1)/CB (IEC/EN60950-1)Caution : • Installation and removal of the unit must be carried out by qualified personnel only.• The unit must be connected to an earthed (grounded) outlet to comply with international safety standards.• Do not connect the unit to an A.C. outlet (power supply) without an earth (ground) connection.• The appliance coupler (the connector to the unit and not the wall plug) must have a configuration for mating with an EN 60320/ IEC 320 appliance inlet.CLASS 1LASER DEVICE 2. Plug the other end of the cable into a grounded, 3-pin, AC power source.Note : For use outside North America, you may need to change the AC line cord. You must use a line cord that has been approved for the connector type in your country. 3. Repeat steps 1 and 2 when a second PSU module is installed.Two installed PSU modules operate in a load-sharing mode andprovide 1+1 redundancy.To set up your management connection, the following parameters should be observed:• Console Interface – make sure your console settings are115200-N-8-1 (baud rate 115,200 bps).Ports:32 40Gbps/100Gbps QSFP28 transceiver slots 1 10Gbps SFP+ transceiver slotsNetwork Interface:Ports 1~32: 40Gbps/100Gbps QSFP28 Optical Transceivers:100GBASE-SR4,100GBASE-PSM4QSFP28 Direct Attach Cables can also be used in ports 1~32RJ-45 Port: RJ-45 connector, auto MDI/X 10BASE-T: RJ-45(100-ohm, UTP cable; Category 3 or better) 100BASE-TX: RJ-45(100-ohm, UTP cable; Category 5 or better) 1000BASE-T:RJ-45 (100-ohm, UTP or STP cable; Category 5, 5e or 6)*Maximum Cable Length - 100 m (328 ft)List of Transceivers and Cables :SSE-C3632SSSE-C3632SR E072014-AP-R01150200000828ATransceivers/Cables Vendor Vendor PN100GBASE-SR4Avago AFBR-89CDDZ Finisar FTLC9551REPM TL Luxtera LUX42604Molex1002971101100GBASE-SR4 100GBASE-PSM4100G DAC 1M 30AWG。
解决Linux下Oracle10g数据库em,dbca中文方块乱码问题
解决Linux下Oracle10g数据库em,dbca中文方块乱码问题解决 Linux 下 Oracle 10g 数据库 em,dbca 中文方块乱码问题今天在 linux 下装了 oracle 10g 数据库,装好后将 Linux 系统语言切换为中文后,发现Oracle 的em(Enterprise Manager)、dbca(database configuration assistant)中文界面、按钮全为方块或乱码,十分让人头痛。
通过Google,百度查找原因,经过多次尝试,终于解决看到了em、dbca 界面看到了可爱的中文。
先介绍一下我的系统坏境:操作系统 Oracle 版本 $LANG $ORACLE_HOME Red Hat Enterprise Linux AS 5 10.1.0.3 (10g) zh_CN.UTF-8 /opt/oracle/product/10.1.0/Db_1/linux 系统 oracle 10g 数据库 em,dbca 中文方块乱码问题具体解决方法:一、安装简体中文字体包fonts-chinese-3.02-9.6.el5:我们首先得安装rhel5.0 系统DVD 中自带的中文字体包fonts-chinese-3.02-9.6.el5.noarch.rpm,这是至关重要的。
如果没有安装此字体包,简体中文字体文件/usr/share/fonts/zh_CN/TrueType/zysong.ttf 和/usr/share/fonts/chinese/TrueType/zysong.ttf 就不存在的,中文显示就更无从说起了。
二、设置Linux 系统语言坏境: 1. export LANG=zh_CN.UTF-8三、拷贝替换 font.properties 文件,执行下面两条命令: 1. 2.3. # cd $ORACLE_HOME/jre/1.4.2/lib/ # cp font.properties.zh_CN.Redhat8.0 font.properties //注:也可以用font.properties.zh_CN_UTF8.Redhat,font.properties.zh_CN.* 替换font. properties。
OEM12c安装
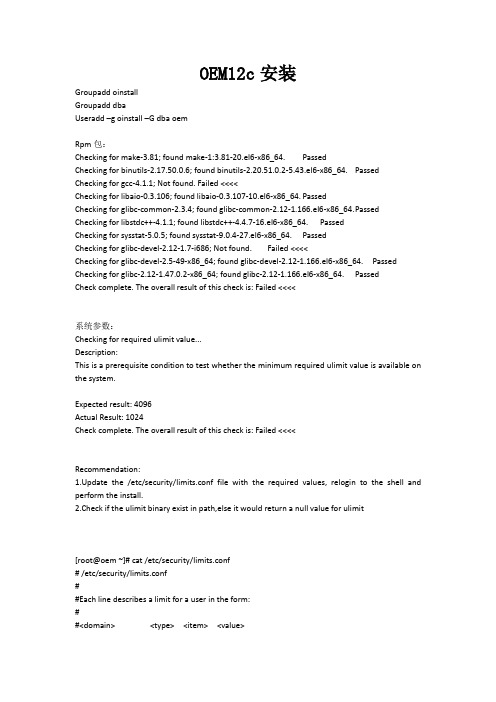
OEM12c安装GroupaddoinstallGroupadddbaUseradd–g oinstall–G dbaoemRpm包:Checking for make-3.81; found make-1:3.81-20.el6-x86_64. PassedChecking for binutils-2.17.50.0.6; found binutils-2.20.51.0.2-5.43.el6-x86_64. Passed Checking for gcc-4.1.1; Not found. Failed <<<<Checking for libaio-0.3.106; found libaio-0.3.107-10.el6-x86_64. PassedChecking for glibc-common-2.3.4; found glibc-common-2.12-1.166.el6-x86_64. P assed Checking for libstdc++-4.1.1; found libstdc++-4.4.7-16.el6-x86_64. PassedChecking for sysstat-5.0.5; found sysstat-9.0.4-27.el6-x86_64. PassedChecking for glibc-devel-2.12-1.7-i686; Not found. Failed <<<<Checking for glibc-devel-2.5-49-x86_64; found glibc-devel-2.12-1.166.el6-x86_64. Passed Checking for glibc-2.12-1.47.0.2-x86_64; found glibc-2.12-1.166.el6-x86_64. PassedCheck complete. The overall result of this check is: Failed <<<<系统参数:Checking for required ulimit value...Description:This is a prerequisite condition to test whether the minimum required ulimit value is available on the system.Expected result: 4096Actual Result: 1024Check complete. The overall result of this check is: Failed <<<<Recommendation:1.Update the /etc/security/limits.conf file with the required values, relogin to the shell and perform the install.2.Check if the ulimit binary exist in path,else it would return a null value for ulimit[root@oem ~]# cat /etc/security/limits.conf# /etc/security/limits.conf##Each line describes a limit for a user in the form:##<domain><type><item><value>##Where:#<domain> can be:# - a user name# - a group name, with @group syntax# - the wildcard *, for default entry# - the wildcard %, can be also used with %group syntax,# formaxlogin limit##<type> can have the two values:# - "soft" for enforcing the soft limits# - "hard" for enforcing hard limits##<item> can be one of the following:# - core - limits the core file size (KB)# - data - max data size (KB)# - fsize - maximum filesize (KB)# - memlock - max locked-in-memory address space (KB)# - nofile - max number of open file descriptors# - rss - max resident set size (KB)# - stack - max stack size (KB)# - cpu - max CPU time (MIN)# - nproc - max number of processes# - as - address space limit (KB)# - maxlogins - max number of logins for this user# - maxsyslogins - max number of logins on the system# - priority - the priority to run user process with# - locks - max number of file locks the user can hold# - sigpending - max number of pending signals# - msgqueue - max memory used by POSIX message queues (bytes) # - nice - max nice priority allowed to raise to values: [-20, 19]# - rtprio - max realtime priority##<domain><type><item><value>##* soft core 0#* hard rss 10000#@student hard nproc 20#@faculty soft nproc 20#@faculty hard nproc 50#ftp hard nproc 0#@student - maxlogins 4# End of fileoem soft core -1 oem soft rss -1 oem hard rss -1 oem soft nproc -1 oem hard nproc -1 oem soft nofile -1运行./runInstaller[root@oem ~]# cat /etc/hosts127.0.0.1 localhostlocalhost.localdomain localhost4 localhost4.localdomain4 ::1localhostlocalhost.localdomain localhost6 localhost6.localdomain6192.168.86.70 oemWeblogic: weblogic1 ; Node Manager Password: wangle123SYS Password: ora123若数据库主机上已安装了em,则需删除。
CommVault安装配置手册-Linux-Unix-文件备份篇

XXXX CommVault备份系统安装配置手册邵亮二〇二二年四月摘要:本手册是XXXX集中备份项目安装手册目录1.安装环境准备 (3)➢C OMM V AULT术语表 (3)➢安装环境 (3)✧网络要求 (3)✧安装介质说明 (4)2.LINUX/UNIX客户端软件安装 (5)➢安装前准备工作 (5)➢需要的配合工作 (5)✧安装过程中需应用维护人员配合工作 (5)➢详细安装步骤 (6)✧文件系统备份模块安装 (6)1.安装环境准备➢CommVault术语表CommVault术语说明CommServe 备份(管理)服务器。
是CommVault备份系统中的管理平台,该平台保存了整个备份系统中的所有客户端信息以及每个客户端的配置信息。
MA(MediaAgent) 介质服务器。
是CommVault备份系统中的介质管理平台,该平台负责配置及管理存储设备(包括磁带库及硬盘)。
客户端的备份数据也是通过该平台写入存储设备。
Client 客户端。
有数据需要备份的业务服务器,其上安装有CommVault客户端软件CommNet Server 报告服务器。
是抓取备份服务器数据库中的配置信息及作业信息并订制详细的图表方式的报告。
CommCell CV控制台。
是图形用户界面,能让你控制并管理整个备份管理域iDataAgent 也叫智能客户端代理。
CommVault所有客户端软件的统称Storage Policy 存储策略,定义了备份使用的介质服务器,存储介质以及备份数据的过期策略,可以创建副本,将满足条件的备份数据复制到次级存储上。
可以将备份子客户端与存储策略关联从而决定备份数据的数据流走向SubClient 子客户端,通过定义子客户端的内容可以决定备份哪些数据,将子客户端与存储策略关联可以决定备份数据流的走向,包括使用那台介质服务器,存放到哪些设备以及备份数据的过期策略➢安装环境✧网络要求备份服务器需保持与所有MA,客户端之间的8400~8403端口双向畅通需保持与其备份的客户端之间的8400~8425端口双向畅通MA需保持与CommServe8400~8403端口双向畅通需保持与其备份的客户端之间的8400~8425端口双向畅通客户端需保持与CommServe8400~8403端口双向畅通需保持与其相关的MA之间的8400~8425端口双向畅通安装介质说明ComVault安装介质分为安装盘及补丁包两部分,以下6个ISO文件为各个操作系统平台的软件安装盘。
修改硬盘固件的木马_V1.3(探索方程式(EQUATION)组织的攻击组件)
修改硬盘固件的木马_V1.3安天实验室修改硬盘固件的木马_V1.3——探索方程式(EQUATION)组织的攻击组件安天实验室首次发布时间:2015年03月05日10时00分本版本更新时间:2015年03月05日09时45分目录1背景 (4)2EQUATION组织使用的组件 (4)3组件DOUBLEFANTASY分析 (6)3.1检测安全软件 (6)3.2回传信息 (6)3.3通讯协议 (7)3.4新的版本、C&C、密钥 (7)4组件EQUATIONDRUG分析 (9)4.1检测安全软件 (10)4.2驱动模块MSNDSRV.SYS分析 (11)5组件GRAYFISH分析 (13)6硬盘固件重新编程模块NLS_933W.DLL分析 (14)7攻击硬盘固件的机理分析 (17)7.1硬盘的结构和工作原理 (17)7.2硬盘的信息安全脆弱性 (19)8小结 (21)附录一:参考资料 (23)附录二:事件日志 (23)附录三:关于安天 (23)1背景2015年2月18日,安天实验室根据紧急研判,对被友商称为“方程式(Equation)”的攻击组织所使用的攻击组件,开始了初步的分析验证。
后于2月25日正式组建了跨部门联合分析小组,于3月4日形成本报告第一版本。
事件相关背景为:卡巴斯基安全实验室在2月16日起发布系列报告(以下简称“友商报告”),披露了一个可能是目前世界上存在的最复杂的网络攻击组织——“方程式”组织(Equation Group)[1]。
据卡巴斯基实验室称,该组织使用的C&C早在1996年就被注册,这暗示了该组织可能已经活跃了20年之久。
多年以来,他们因总能比其他组织早发现漏洞,从而具有绝对的优势。
该组织拥有一套用于植入恶意代码的超级制式信息武器库(在友商报告中披露了其中6个),其中包括两个可以对数十种常见品牌的硬盘固件重编程的恶意模块,这可能是该组织掌握的最具特色的攻击武器,同时也是首个已知的能够感染硬盘固件的恶意代码。
ghost错误代码

扩展阅读:
1
Ghost 中文网站:/ghost/
2
DOS之家:/soft/
3
Ghost2系统盘下载:/
错误代码: 14030 原因或对策:未注册的Ghost版本遭遇文件的日期超过它的终止日期,请购买新的Ghost版本。
错误代码: 15010 15020 15030 15050 原因或对策:返回此类错误代码,可以试着使用Ghost -E去避免此类错误。
错误代码: 15040 原因或对策:执行Ghost时内存不够,请确认在config.sys中已经加入以下语句: device=himem.sys
错误代码: 15100 原因或对策:使用Ghost -OR去拒绝检查或更新到最新的版本以解决此难题。
错误代码: 15150 原因或对策:可能是已经损坏的映像文件,请先使用Local→Check→Image File命令来检查一下映像文件的完整性。 错误代码: 15165 原因或对策:Ghost在存取网络上的文件或硬盘时发生问题,请检查你的网络设备或者使用最新版本的Ghost解决此难题。 错误代码: 15170 原因或对策:来源硬盘未格式化或遇到了无效的分区。请确定来源硬盘已经被正确分区。
7
完整版win7Ghost安装流程图与下载:/systems/html/3-16.html
8
误Ghost数据恢复方法:/data-recovery/post/ghost数据恢复.htm
错误代码: 10001 原因或对策:使用者放弃了操作。
错误代码: 10060 原因或对策:读取了坏的来源文件或磁盘。检查磁盘或映像文件是否有问题,网络是否有冲突,光驱是否有了问题。 错误代码: 10082 原因或对策:Ghost的共享版本已过期,必须购买才能够使用。
emca配置oracle 10g的em
emca配置oracle 10g的emD:\Documents and Settings\xxx>emcaE:\oracle\product\10.2.0\db_1\bin\emca.bat [操作] [模式] [数据库类型] [标记] [参数]-h | --h | -help | --help: 打印此帮助消息-version: 打印版本-config dbcontrol db [-repos (create | recreate)] [-cluster] [-silent] [-backup][参数]: 配置数据库的 Database Control-config centralAgent (db | asm) [-cluster] [-silent] [参数]: 配置中心代理管理-config all db [-repos (create | recreate)] [-cluster] [-silent] [-backup] [参数]: 配置 Database Control 和中心代理管理-deconfig dbcontrol db [-repos drop] [-cluster] [-silent] [参数]: 取消配置Database Control-deconfig centralAgent (db | asm) [-cluster] [ -silent] [参数]: 取消配置中心代理管理-deconfig all db [-repos drop] [-cluster] [-silent] [参数]: 取消配置 Database Control 和中心代理管理-addInst (db | asm) [-silent] [参数]: 为新的 RAC 实例配置 EM-deleteInst (db | asm) [-silent] [参数]: 取消为指定的 RAC 实例配置 EM-reconfig ports [-cluster] [参数]: 重新明确分配 Database Control 端口-reconfig dbcontrol -cluster [-silent] [参数]: 重新配置 RAC Database Control 部署-displayConfig dbcontrol -cluster [-silent] [参数]: 显示有关 RAC Database Control 配置的信息-upgrade (db | asm | db_asm) [-cluster] [-silent] [参数]: 将较低版本的 EM 配置升级到当前版本-restore (db | asm | db_asm) [-cluster] [-silent] [参数]: 将当前版本的 EM 配置复原到较低版本参数和选项:[参数]: [ -respFile 文件名 ] [ -paramName paramValue ]*db: 对数据库 (包括使用 ASM 的数据库) 执行配置操作asm: 仅对 ASM 实例执行配置操作db_asm: 对数据库和 ASM 实例执行升级/复原操作-repos create: 创建新的 Database Control 资料档案库-repos drop: 删除当前的 Database Control 资料档案库-repos recreate: 删除当前的 Database Control 资料档案库并重新创建一个-cluster: 对 RAC 数据库执行配置操作-silent: 在不提示参数的情况下执行配置操作-backup: 配置数据库的自动备份单实例数据库的参数HOST: 数据库主机名SID: 数据库 SIDPORT: 监听程序端口号ORACLE_HOME: 数据库 ORACLE_HOMEHOST_USER: 自动备份的主机用户名HOST_USER_PWD: 自动备份的主机用户口令BACKUP_SCHEDULE: 自动备份调度 (HH:MM)EMAIL_ADDRESS: 通知的电子邮件地址MAIL_SERVER_NAME: 通知的发件 (SMTP) 服务器ASM_OH: ASM ORACLE_HOMEASM_SID: ASM SIDASM_PORT: ASM 端口ASM_USER_ROLE: ASM 用户角色ASM_USER_NAME: ASM 用户名ASM_USER_PWD: ASM 用户口令SRC_OH: 要升级的数据库的 ORACLE_HOMEDBSNMP_PWD: DBSNMP 用户的口令SYSMAN_PWD: SYSMAN 用户的口令SYS_PWD: SYS 用户的口令DBCONTROL_HTTP_PORT: Database Control HTTP 端口AGENT_PORT: EM 代理端口RMI_PORT: Database Control 的 RMI 端口JMS_PORT: Database Control 的 JMS 端口集群数据库的其它参数CLUSTER_NAME: 集群名DB_UNIQUE_NAME: 数据库的唯一名称SERVICE_NAME: 服务名EM_NODE: Database Control 节点名EM_SID_LIST: 代理 SID 列表 [以逗号分隔]启动报错testhost:{/oracle}$emctl start dbconsoleOC4J Configuration issue./oracle/app/oracle/product/10.2/oc4j/j2ee/OC4J_DBConsole_testhost_testdb not found.删除testhost:{/oracle/app/oracle/product/10.2/network/admin}$emca -repos drop STARTED EMCA at Oct 20, 2008 3:08:52 PMEM Configuration Assistant, Version 10.2.0.1.0 ProductionCopyright (c) 2003, 2005, Oracle. All rights reserved.Enter the following information:Database SID: testdbListener port number: 1521Password for SYS user:Password for SYSMAN user:Do you wish to continue? [yes(Y)/no(N)]: yOct 20, 2008 3:09:04 PM oracle.sysman.emcp.EMConfig performINFO: This operation is being logged at /oracle/app/oracle/product/10.2/cfgtoollogs/emca/testdb/emca_2008-10-20_03-08-5 2-PM.log.Oct 20, 2008 3:09:04 PM oracle.sysman.emcp.EMReposConfig dropRepositoryINFO: Dropping the EM repository (this may take a while) ...Oct 20, 2008 3:09:46 PM oracle.sysman.emcp.EMReposConfig invokeINFO: Repository successfully droppedEnterprise Manager configuration completed successfullyFINISHED EMCA at Oct 20, 2008 3:09:46 PMtesthost:{/oracle/app/oracle/product/10.2/network/admin}$创建testhost:{/oracle}$emca -repos createSTARTED EMCA at Oct 20, 2008 3:10:47 PMEM Configuration Assistant, Version 10.2.0.1.0 ProductionCopyright (c) 2003, 2005, Oracle. All rights reserved.Enter the following information:Database SID: testdbListener port number: 1521Password for SYS user:Password for SYSMAN user:Do you wish to continue? [yes(Y)/no(N)]: yOct 20, 2008 3:10:58 PM oracle.sysman.emcp.EMConfig performINFO: This operation is being logged at /oracle/app/oracle/product/10.2/cfgtoollogs/emca/testdb/emca_2008-10-20_03-10-4 7-PM.log.Oct 20, 2008 3:10:58 PM oracle.sysman.emcp.EMReposConfig createRepository INFO: Creating the EM repository (this may take a while) ...Oct 20, 2008 3:12:27 PM oracle.sysman.emcp.EMReposConfig invokeINFO: Repository successfully createdEnterprise Manager configuration completed successfullyFINISHED EMCA at Oct 20, 2008 3:12:27 PM配置testhost:{/oracle}$emca -config dbcontrol dbSTARTED EMCA at Oct 20, 2008 3:13:13 PMEM Configuration Assistant, Version 10.2.0.1.0 ProductionCopyright (c) 2003, 2005, Oracle. All rights reserved.Enter the following information:Database SID: testdbDatabase Control is already configured for the database testdbYou have chosen to configure Database Control for managing the database testdb This will remove the existing configuration and the default settings and perform.a fresh configurationDo you wish to continue? [yes(Y)/no(N)]: yListener port number: 1521Password for SYS user:Password for DBSNMP user:Password for SYSMAN user:Email address for notifications (optional):Outgoing Mail (SMTP) server for notifications (optional):-----------------------------------------------------------------You have specified the following settingsDatabase ORACLE_HOME ................ /oracle/app/oracle/product/10.2Database hostname ................ testhostListener port number (1521)Database SID ................ testdbEmail address for notifications ...............Outgoing Mail (SMTP) server for notifications ...............-----------------------------------------------------------------Do you wish to continue? [yes(Y)/no(N)]: yOct 20, 2008 3:13:43 PM oracle.sysman.emcp.EMConfig performINFO: This operation is being logged at /oracle/app/oracle/product/10.2/cfgtoollogs/emca/testdb/emca_2008-10-20_03-13-1 3-PM.log.Oct 20, 2008 3:13:45 PM oracle.sysman.emcp.util.DBControlUtil stopOMSINFO: Stopping Database Control (this may take a while) ...Oct 20, 2008 3:13:52 PM oracle.sysman.emcp.util.DBControlUtil secureDBConsole INFO: Securing Database Control (this may take a while) ...Oct 20, 2008 3:14:24 PM oracle.sysman.emcp.util.DBControlUtil secureDBConsole INFO: Database Control secured successfully.Oct 20, 2008 3:14:24 PM oracle.sysman.emcp.util.DBControlUtil startOMSINFO: Starting Database Control (this may take a while) ...Oct 20, 2008 3:16:05 PM oracle.sysman.emcp.EMDBPostConfig performConfiguration INFO: Database Control started successfullyOct 20, 2008 3:16:05 PM oracle.sysman.emcp.EMDBPostConfig performConfiguration INFO: >>>>>>>>>>> The Database Control URL is https://testhost:1158/em<<<<<<<<<<< Enterprise Manager configuration completed successfullyFINISHED EMCA at Oct 20, 2008 3:16:05 PMORACLE RAC数据库删除testhost1:{/oracle}$emca -repos drop -clusterSTARTED EMCA at Oct 20, 2008 4:07:33 PMEM Configuration Assistant, Version 10.2.0.1.0 ProductionCopyright (c) 2003, 2005, Oracle. All rights reserved.Enter the following information:Database unique name: nmyzdbListener port number: 1521Password for SYS user:Password for SYSMAN user:Do you wish to continue? [yes(Y)/no(N)]: yOct 20, 2008 4:07:48 PM oracle.sysman.emcp.EMConfig performINFO: This operation is being logged at /oracle/app/oracle/product/10.2/cfgtoollogs/emca/nmyzdb/emca_2008-10-20_04-07-33-PM.log.Oct 20, 2008 4:07:50 PM oracle.sysman.emcp.EMReposConfig dropRepositoryINFO: Dropping the EM repository (this may take a while) ...删除的时候会整体锁住数据库,对数据库的任何访问都没有反应,因此手工中断了删除创建testhost1:{/oracle}$emca -repos create -clusterSTARTED EMCA at Oct 20, 2008 4:24:30 PMEM Configuration Assistant, Version 10.2.0.1.0 ProductionCopyright (c) 2003, 2005, Oracle. All rights reserved.Enter the following information:Database unique name: nmyzdbListener port number: 1521Password for SYS user:Password for SYSMAN user: geDo you wish to continue? [yes(Y)/no(N)]: yOct 20, 2008 4:24:57 PM oracle.sysman.emcp.EMConfig performINFO: This operation is being logged at /oracle/app/oracle/product/10.2/cfgtoollogs/emca/nmyzdb/emca_2008-10-20_04-24-3 0-PM.log.Oct 20, 2008 4:24:59 PM oracle.sysman.emcp.EMReposConfig createRepository INFO: Creating the EM repository (this may take a while) ...Oct 20, 2008 4:28:31 PM oracle.sysman.emcp.EMReposConfig invokeINFO: Repository successfully createdEnterprise Manager configuration completed successfullyFINISHED EMCA at Oct 20, 2008 4:28:31 PMtesthost1:{/oracle}$配置testhost1:{/oracle}$emca -config dbcontrol db -clusterSTARTED EMCA at Oct 20, 2008 4:32:26 PMEM Configuration Assistant, Version 10.2.0.1.0 ProductionCopyright (c) 2003, 2005, Oracle. All rights reserved.Enter the following information:Database unique name: nmyzdbListener port number: 1521Cluster name: nmyzdbPassword for SYS user:Password for DBSNMP user:Password for SYSMAN user:Email address for notifications (optional):Outgoing Mail (SMTP) server for notifications (optional):-----------------------------------------------------------------You have specified the following settingsDatabase ORACLE_HOME ................ /oracle/app/oracle/product/10.2Database instance hostname ................ testhost1Listener port number (1521)Cluster name ................ nmyzdbDatabase unique name ................ nmyzdbEmail address for notifications ...............Outgoing Mail (SMTP) server for notifications ...............-----------------------------------------------------------------Do you wish to continue? [yes(Y)/no(N)]: yOct 20, 2008 4:33:03 PM oracle.sysman.emcp.EMConfig performINFO: This operation is being logged at /oracle/app/oracle/product/10.2/cfgtoollogs/emca/nmyzdb/emca_2008-10-20_04-32-2 6-PM.log.Oct 20, 2008 4:33:08 PM oracle.sysman.emcp.EMDBCConfig instantiateOC4JConfigFiles INFO: Propagating /oracle/app/oracle/product/10.2/oc4j/j2ee/OC4J_DBConsole_testhost1_testdb1 to remote nodes ...Oct 20, 2008 4:33:08 PM oracle.sysman.emcp.EMDBCConfig instantiateOC4JConfigFiles INFO: Propagating /oracle/app/oracle/product/10.2/oc4j/j2ee/OC4J_DBConsole_testhost2_testdb2 to remote nodes ...Oct 20, 2008 4:33:09 PM oracle.sysman.emcp.EMDBCConfig copyAndPropagateOC4JDir INFO: Propagating /oracle/app/oracle/product/10.2/oc4j/j2ee/isqlplus_testhost1 to remote nodes ...Oct 20, 2008 4:33:10 PM oracle.sysman.emcp.EMDBCConfig copyAndPropagateOC4JDir INFO: Propagating /oracle/app/oracle/product/10.2/oc4j/j2ee/isqlplus_testhost2 to remote nodes ...Oct 20, 2008 4:33:13 PM oracle.sysman.emcp.EMAgentConfig deployStateDirs INFO: Propagating /oracle/app/oracle/product/10.2/testhost1_testdb1 to remote nodes ...Oct 20, 2008 4:33:15 PM oracle.sysman.emcp.EMAgentConfig deployStateDirs INFO: Propagating /oracle/app/oracle/product/10.2/testhost2_testdb2 to remote nodes ...Oct 20, 2008 4:33:16 PM oracle.sysman.emcp.util.DBControlUtil secureDBConsole INFO: Securing Database Control (this may take a while) ...Oct 20, 2008 4:34:55 PM oracle.sysman.emcp.util.DBControlUtil startOMSINFO: Starting Database Control (this may take a while) ...Oct 20, 2008 4:36:48 PM oracle.sysman.emcp.EMDBPostConfig performConfiguration INFO: Database Control started successfullyOct 20, 2008 4:36:48 PM oracle.sysman.emcp.EMDBPostConfig performConfiguration INFO: >>>>>>>>>>> The Database Control URL is https://testhost1:1158/em<<<<<<<<<<< Oct 20, 2008 4:36:48 PM oracle.sysman.emcp.EMDBPostConfig showClusterDBCAgentMessageINFO:**************** Current Configuration ****************INSTANCE NODE DBCONTROL_UPLOAD_HOST---------- ---------- ---------------------testdb1 testhost1 testhosttestdb2 testhost2 testhostEnterprise Manager configuration completed successfullyFINISHED EMCA at Oct 20, 2008 4:36:48 PM数据库的端口修改后,需要修改以下的文件中的端口号,em才能访问:如果是RAC,那么两台机器都需要改/oracle/app/oracle/product/10.2/testhost1_testdb1/sysman/config/emoms.propertie s/oracle/app/oracle/product/10.2/testhost2_testdb2/sysman/config/emoms.propertie s/oracle/app/oracle/product/10.2/testhost1_testdb1/sysman/emd/targets.xml/oracle/app/oracle/product/10.2/testhost2_testdb2/sysman/emd/targets.xml。
赛门铁克产品中文知识库文档列表

1. 赛门铁克产品中文知识库文档列表 (1)2. Symantec Endpoint Protection (SEP) 简体中文文档汇总(持续更新) (2)3. Symantec Endpoint Protection 11.0 主要文章 (8)4. NetBackup (NBU) 简体中文文档汇总(持续更新) (12)5. Backup Exec for Windows Servers (BEWS) 简体中文文档汇总(持续更新) (20)6. Backup Exec System Recovery (BESR) 简体中文文档汇总(持续更新) (30)7. Symantec Brightmail Gateway (SBG) 简体中文文档汇总(增加中) (34)8. Symantec Information Foundation 产品简体中文文档归总(持续更新) (35)9. Cluster Server (VCS) 简体中文文档汇总(持续更新) (38)10. Enterprise Vault (EV) 简体中文文档汇总(持续更新) (39)11. Storage Foundation (SF) 简体中文文档汇总(持续更新) (41)12. Volume Manager(VxVM)简体中文文档汇总(持续更新) (44)13. Volume Replicator (VVR) 简体中文文档汇总(持续更新) (45)1.赛门铁克产品中文知识库文档列表service1.symantec./SUPPORT/INTER/ent-securitysimplifiedchinesekb.nsf/cn_docid/本文档翻译自英文文档。
原英文文档可能在本翻译版发布后进行过修改更新。
赛门铁克对本翻译文档的准确度不做保证。
情形按照产品分类,将现有中文知识库文档汇总,以方便各位查阅。
解释Security (安全产品)•Symantec Endpoint Protection (SEP)•Symantec Brightmail Gateway (SBG)•Symantec Mail Security for SMTP (SMS)Availability (存储产品)•Symantec Backup Exec (BEWS)•Symantec Backup Exec System Recovery (BESR)•Symantec Cluster Server (VCS)•Symantec Enterprise Vault (EV)•Symantec NetBackup (NBU)•Storage Foundation (SF)•Symantec Volume Manager (VxVM)•Symantec Volume Replicator (VVR)•文档号:最近更新: 2009-12-02Date Created: 2009-10-15产品: All Products2.Symantec Endpoint Protection (SEP) 简体中文文档汇总(持续更新)本文档翻译自英文文档。
IBM启动故障错误代码大全
Symptom / Error (开机错误代码)FRU / Action in Sequence(检查范围及解决方法)10X101: Interrupt failure;(中断故障)102: Timer failure;(计时器故障)103: Timer interrupt failure;(计时器中断故障)104: Protected mode failure;(保护模式故障)105: Last 8042 command not accepted;107: NMI test failure;(NMI 测试失败)108: Timer bus test failure.109: Low meg-chip select test. 1. System board. (主板问题)110(Planar parity.) (内存奇偶校验出错)1. Go to Memory Checkout2. DIMM card.3. Detach the expansion unit if it is attached to the computer.4. System board.111(I/O parity.) 1. Go to Memory Checkout2. Expansion unit or port replicator.3. System board.11XX1101: Serial_A test failure.(A 串行口测试失败)1. Serial device (串行设备)2. Communication cable (相关通讯电缆)3. System board (主板)12XX1201: Serial_B test failure.(B 串行口测试失败)1. System board (infrared) (检查主板:红外线口)158(Hard disk password was not set even though the supervisor password is set.) (超级用户密码已设,但硬盘密码没有设置) 1. Set the password for hard disk drive.(设置硬盘密码)159(Hard disk password is not set the same as the supervisor password.) (硬盘密码与超级用户密码不一样) 1. Set the correct password for hard disk drive.(设置正确的硬盘密码)161(Dead battery.) (CMOS 电池不行)1. Go to Checking the Backup Battery2. Backup battery.(CMOS 备份电池,在内存插槽旁边)3. System board. (主板)163(Time and date were not set.) (系统时间没有设好或混乱)1. Set time and date.(设置正确的系统时间)2. System board. (主板问题)173(Configuration data was lost.) (CMOS 设备配置信息丢失)1. Select OK in the error screen; then set the time and date.(在开机ERROR 画面上按OK,然后设置系统时间)2. Backup battery. (CMOS 电池需要更换)3. System board. (主板问题)174(Configuration error: Perform Checking the Installed Devices List before changing any FRUs.) 1. Check device configuration.2. Hard disk drive assembly.3. System board.175, 177, 178175: EEPROM CRC #1 error.177: Supervisor password check sum error.178: EEPROM is not functional. 1. System board. (检查主板)17XX1701: Hard disk controller failure. (硬盘控制器故障)1780, 1790: Hard disk 0 error. (主硬盘有问题)1781, 1791: Hard disk 1 error.(从硬盘有问题)1. Hard disk drive (检查硬盘)2. System board (检查主板)183(Incorrect password entered at the supervisor password prompt.) (超级用户开机密码不对)1. Have the user examine the password.(请用户检查密码)184(Power-on password check sum error.) (Power-on 密码有误)1. Reset the power-on password in Easy-Setup.(重设Power-on 密码)185(The startup sequence is not valid. Suspect that power was off when the startup sequence was being updated.) (系统启动顺序无效,怀疑是更新启动顺序时电源关掉)1. Reset the startup sequence in Easy-Setup.(在Easy-Setup 重设启动顺序)186 1. System board. (检查主板)190(A depleted battery pack was installed when the power was on.)(开机时,机内笔记本电池已快耗尽了) 1. Go to Checking the Battery Pack.(更换机内笔记本电池)191XX(PM initialization error.) (PM 初始化错误)1. System board. (检查主板)192(Fan error.) (CPU 散热风扇故障)1. Measure the voltage of the backup battery. If thevoltage is not correct, replace the backup battery.(检查CMOS 备份电池的电压,电压不行时更换电池)2. Fan (要更换CPU风扇)3. System board (主板问题)195(The configuration read from the hibernation area does not match the actual configuration.) (从休眠区域读到的系统配置信息与实际配置不同)1. Check if the configuration was changed. For example, check if the DIMM card is added.(检查配置是否改动,内存有无增加等)196(A read error occurred in the hibernation area of the hard disk drive.)(从硬盘的休眠区域中读写时,发生错误)1. Run the hard disk drive test. (测试硬盘)2. Hard disk drive.(检查硬盘)199XX(Resume error.) 1. System board.1XX 1. System board.2XX (内存问题)201: Memory data error.202: Memory line error 00-15.203: Memory line error 16-23.205: Memory test failure on on-boardmemory.221: ROM to RAM remap error. 1. Go to Memory Checkout.2. DIMM card.3. System board.225(Unsupported memory module.) 1. Check if the supported DIMM is installed.2. DIMM card.3. System board.301, 303, 304, 305, 3XX(301: Keyboard error.) (笔记本键盘故障,301这个故障经常出现,往往是笔记本刚开机时,不小心按住键盘所造成的,一般只要重启电脑即可;) 1. Go to Keyboard or Auxiliary Input Device Checkout2. Keyboard.3. External numeric keypad.4. External keyboard.5. Keyboard/mouse cable.6. System board.601, 6XX(601: Diskette drive or controller error.)(软驱或软驱控制器故障)1. Go to Diskette Drive Checkout.2. Diskette drive assembly. (软驱有没有装配好?)3. Diskette.4. System board. (检查主板)602(Diskette read error.);(软驱读故障)1. Go to Diskette Drive Checkout2. Diskette.3. Diskette drive assembly.(软驱有没有装配好?)604(Unacceptable ID was read from the diskette drive.);1. Go to Diskette Drive Checkout2. Diskette drive assembly.3. System board.2402 1. TV Out Card24XX(2401: System board video error.) ;(主板显示部分有问题)1. System board. (检查主板相关部分)808X8081: PCMCIA presence test failure.(PCMCIA revision number also checked.)8082: PCMCIA register test failure. 1. PC Card slot assembly.2. PCMCIA device.3. System board.860X(Pointing device error when TrackPoint is disabled.)(当指点杆禁用时,外接的指点设备有故障);8601: System bus error-8042 mouse interface.8602: External mouse error.(外接鼠标故障);8603: System bus error or mouse error. (总线或鼠标故障);1. External mouse. (检查外接鼠标);2. External keyboard. (检查外接键盘);3. System board.(检查主板);861X(Pointing device error when TrackPoint is enabled.)(当指点杆启用时,外接的指点设备有故障);8611: System bus error-I/F between 8042 and IPDC.8612: TrackPoint error.8613: System board or TrackPoint error. 1. Reseat the keyboard cable on the sub card.(把键盘连接主板的线,重插拔一下);2. Keyboard (检查键盘);3. External mouse (检查外接鼠标);4. Sub card (主板上连接键盘的子卡);5. System board (主板);I9990301I9990302I9990305I9990301: Hard disk error. (硬盘有故障);I9990302: Invalid hard disk boot record. (无效的硬盘引导纪录);I9990305: No bootable device. (无可用的启动引导设备);1. Check that the operating system is installed in the hard disk drive. If not, install the operating system.(检查硬盘上有否安装操作系统);2. Reseat the boot device.(重新设置可启动的设备);3. Check the startup sequence for the correct boot device.(检查启动顺序是否跟设备正确对应);4. Check that the operating system has no failure and is installed correctly.(检查电脑的操作系统是否安装正确);I9990303(Bank-2 flash ROM check sum error.) 1. System board.Other codes not listed above. 1. Go to Undetermined Problems。
【微计算机信息】_存储空间_期刊发文热词逐年推荐_20140725
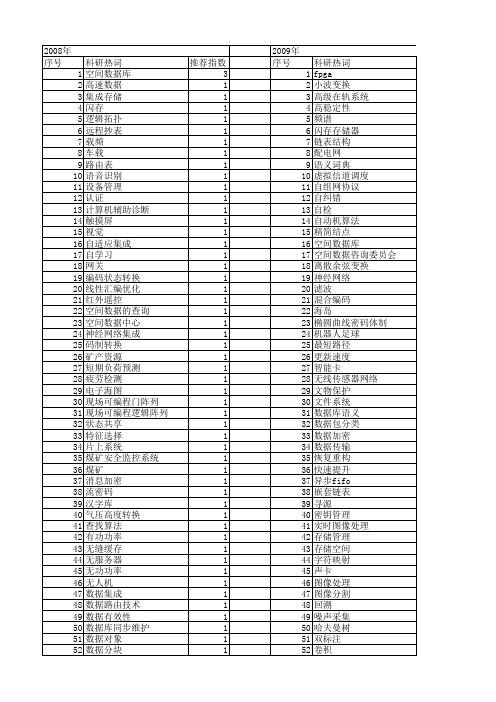
科研热词 fpga 小波变换 高级在轨系统 高稳定性 频谱 闪存存储器 链表结构 配电网 语义词典 虚拟信道调度 自组网协议 自纠错 自检 自动机算法 精简结点 空间数据库 空间数据咨询委员会 离散余弦变换 神经网络 滤波 混合编码 海岛 椭圆曲线密码体制 机器人足球 最短路径 更新速度 智能卡 无线传感器网络 文物保护 文件系统 数据库语义 数据包分类 数据加密 数据传输 恢复重构 快速提升 异步fifo 嵌套链表 寻源 密钥管理 实时图像处理 存储管理 存储空间 字符映射 声卡 图像处理 图像分割 回溯 噪声采集 哈夫曼树 双标注 卷积
科研热词 电子政务 文件系统 linux 骨干通信网络 风能资源 路由策略 质量因子 角度 视频压缩 观测评估系统 虹膜识别 虚拟化环境 耦合混沌映射 网络模拟 精细模式 精简fat文件系统 粗略模式 算法移植 目录服务 混沌加密系统 海量数据 正向最大匹配法 根文件系统配置 机械电子 有机发光显示器 最小生成树 星载存储器 无线传感器网络节点 旋转电子编码器 数据立方计算 数据压缩算法 数据仓库 控制电路 微处理器 彩色图像加密 并行计算 嵌入式系统 嵌入式实时操作系统 安全可靠 存储空间池 存储 多层次命名空间 地理信息系统 图像压缩 可扩展标记语言 压缩率 压栈式 单片机 动态管理 分布式并行索引 关系数据库 关系型数据库
2010年 序号 1 2 3 4 5 6 7 8 9 10 11 12 13 14 15 16 17 18 19 20 21 22 23 24 25 26 27 28 29 30 31 32 33 34 35 36 37 38 39 40 41 42 43 44 45 46 47 48 49 50 51 52
107 108 109 110 111 112 113 114 115 116 117 118 119 120 121 122 123 124 125 126 127 128
Storage Foundation 6.1 rac solaris 安装指南
Symantec Storage Foundation 6.0 安装指南目录1 硬件环境 (2)2 安装环境检测(可选) (2)3 安装Storage Foundation 5.1软件 (3)4 配置Storage Foundation 5.1 .......................... 错误!未定义书签。
4.1 初始化Volume Manger ......................... 错误!未定义书签。
4.2 配置SF5.1双机..................................... 错误!未定义书签。
4.3 验证双机状态........................................ 错误!未定义书签。
4.4 配置磁盘I/O Fencing (22)4.4.1 测试共享磁盘的IOfencing可用性 (22)4.4.2 配置磁盘IOfencing (24)4.5 关于Oracle资源组的配置说明 (27)作者:葛承平2011.81硬件环境主机系统准备完成后。
3个硬盘给客户端(2*2G,3*100m)2个2G的硬盘用来做数据盘,3个100mb用来做I/O fencing心跳磁盘。
2主机之间加上hosts解析。
并在两台服务器上添加信任主机/.rhosts2安装环境检测(可选)在两台服务器上传上SF安装包,并解压。
1) Veritas Dynamic Multi-Pathing (DMP)2) Veritas Cluster Server (VCS)3) Veritas Storage Foundation (SF)4) Veritas Storage Foundation and High Availability (SFHA)5) Veritas Storage Foundation Cluster File System HA (SFCFSHA)6) Symantec VirtualStore (SVS)7) Veritas Storage Foundation for Sybase ASE CE (SFSYBASECE)8) Veritas Storage Foundation for Oracle RAC (SF Oracle RAC)b) Back to previous menuSelect a product to perform pre-installation check for: [1-8,b,q] 8Enter the Solaris Sparc system names separated by spaces: [q,?] rac1 rac2Logs are being written to /var/tmp/installer-201205311435ACn while installer is in progressVerifying systems: 100%Estimated time remaining: (mm:ss) 0:008 of 8Checking system communication .................................................................................................... Done Checking release compatibility ................................................................................................... Done Checking installed product ....................................................................................................... DoneChecking prerequisite patches and packages ....................................................................................... Done Checking platform version ........................................................................................................ DoneChecking file system free space .................................................................................................. Done Checking product licensing ....................................................................................................... DonePerforming product prechecks ..................................................................................................... DonePrecheck report completedSystem verification checks completedThe following warnings were discovered on the systems:CPI WARNING V-9-30-2166 The CPU speed on rac1 is 450 MHz, the minimal CPU speed required by product SF Oracle RAC is 1024 MHz CPI WARNING V-9-40-3047 Nodes have difference in clock by more than 5 secCPI WARNING V-9-30-2166 The CPU speed on rac2 is 450 MHz, the minimal CPU speed required by product SF Oracle RAC is 1024 MHz installer log files, summary file, and response file are saved at:/opt/VRTS/install/logs/installer-201205311435ACnWould you like to view the summary file? [y,n,q] (n) yinstaller SummarySystem verification checks completedThe following warnings were discovered on the systems:CPI WARNING V-9-30-2166 The CPU speed on rac1 is 450 MHz, the minimal CPU speed required by product SF Oracle RAC is 1024 MHz CPI WARNING V-9-40-3047 Nodes have difference in clock by more than 5 secCPI WARNING V-9-30-2166 The CPU speed on rac2 is 450 MHz, the minimal CPU speed required by product SF Oracle RAC is 1024 MHz 3安装Storage Foundation 6.0软件root@rac1 # ./installerroot@rac1 # ./installerStorage Foundation and High Availability Solutions 6.0 Install ProgramCopyright (c) 2011 Symantec Corporation. All rights reserved. Symantec, the Symantec Logo are trademarks or registered trademarks of SymantecCorporation or its affiliates in the U.S. and other countries. Other names may be trademarks of their respective owners.The Licensed Software and Documentation are deemed to be "commercial computer software" and "commercial computer software documentation" asdefined in FAR Sections 12.212 and DFARS Section 227.7202.Logs are being written to /var/tmp/installer-201205311443Rej while installer is in progress.Storage Foundation and High Availability Solutions 6.0 Install ProgramSymantec Product Version Installed Licensed=============================================================================== =Symantec Licensing Utilities (VRTSvlic) are not installed due to which products and licenses are not discovered.Use the menu below to continue.Task Menu:P) Perform a Pre-Installation Check I) Install a ProductC) Configure an Installed Product G) Upgrade a ProductO) Perform a Post-Installation Check U) Uninstall a ProductL) License a Product S) Start a ProductD) View Product Descriptions X) Stop a ProductR) View Product Requirements ?) HelpEnter a Task: [P,I,C,G,O,U,L,S,D,X,R,?] IStorage Foundation and High Availability Solutions 6.0 Install Program1) Veritas Dynamic Multi-Pathing (DMP)2) Veritas Cluster Server (VCS)3) Veritas Storage Foundation (SF)4) Veritas Storage Foundation and High Availability (SFHA)5) Veritas Storage Foundation Cluster File System HA (SFCFSHA)6) Symantec VirtualStore (SVS)7) Veritas Storage Foundation for Sybase ASE CE (SFSYBASECE)8) Veritas Storage Foundation for Oracle RAC (SF Oracle RAC)b) Back to previous menuSelect a product to install: [1-8,b,q] 8Do you agree with the terms of the End User License Agreement as specified in thestorage_foundation_for_oracle_rac/EULA/en/EULA_SF_Oracle_Rac_Ux_6.0.pdf file present on media? [y,n,q,?] yVeritas Storage Foundation for Oracle RAC 6.0Install Program1) Install minimal required packages - 637 MB required2) Install recommended packages - 895 MB required3) Install all packages - 924 MB required4) Display packages to be installed for each optionSelect the packages to be installed on all systems? [1-4,q,?] (2) 3Enter the Solaris Sparc system names separated by spaces: [q,?] rac1 rac2Veritas Storage Foundation for Oracle RAC 6.0 Install Programrac1 rac2 Logs are being written to /var/tmp/installer-201205311443Rej while installer is in progress Verifying systems: 100%Estimated time remaining: (mm:ss) 0:008 of 8Checking systemcommunication .................................................................................................... Done Checking release compatibility ................................................................................................... DoneChecking installed product ....................................................................................................... DoneChecking prerequisite patches andpackages ....................................................................................... DoneChecking platform version ........................................................................................................ DoneChecking file system free space .................................................................................................. DoneChecking product licensing ....................................................................................................... DonePerforming productprechecks ..................................................................................................... DoneSystem verification checks completedThe following warnings were discovered on the systems:CPI WARNING V-9-30-2166 The CPU speed on rac1 is 450 MHz, the minimal CPU speed required by product SF Oracle RAC is 1024 MHzCPI WARNING V-9-30-2166 The CPU speed on rac2 is 450 MHz, the minimal CPU speed required by product SF Oracle RAC is 1024 MHzDo you want to continue? [y,n,q] (y)Systems have difference in clock by more than 5 secondsSystem clocks can be synchronized using one or more Network Time Protocol (NTP) serversDo you want to synchronize system clocks with NTP server(s)? [y,n,q] (y) nVeritas Storage Foundation for Oracle RAC 6.0 Install Programrac1 rac2The following Veritas Storage Foundation for Oracle RAC packages will be installed on all systems:Package Package DescriptionVRTSvlic Veritas LicensingVRTSperl Veritas Perl 5.12.2 RedistributionVRTSsfcpi60 Veritas Storage Foundation InstallerVRTSspt Veritas Software Support Tools by SymantecVRTSvxvm Veritas Volume Manager BinariesVRTSaslapm Veritas Volume Manager - ASL/APMVRTSob Veritas Enterprise Administrator Service by SymantecVRTSsfmh Veritas Storage Foundation Managed Host by SymantecVRTSvxfs Veritas File SystemVRTSfsadv Veritas File System Advanced Solutions by SymantecVRTSfssdk Veritas File System Software Developer KitVRTSllt Veritas Low Latency TransportVRTSgab Veritas Group Membership and Atomic BroadcastVRTSvxfen Veritas I/O Fencing by SymantecVRTSamf Veritas Asynchronous Monitoring Framework by SymantecVRTSvcs Veritas Cluster ServerVRTScps Veritas Cluster Server - Coordinated Point ServerVRTSvcsag Veritas Cluster Server Bundled Agents by SymantecVRTSvcsea Veritas Cluster Server Enterprise Agents by SymantecVRTSvbs Veritas Virtual Business ServiceVRTSdbed Veritas Storage Foundation DatabasesVRTSglm Veritas Group Lock ManagerVRTScavf Veritas Cluster Server Agents for Cluster File SystemVRTSgms Veritas Group Messaging ServicesVRTSodm Veritas Oracle Disk ManagerVRTSdbac Veritas Oracle Real Application Cluster Support Package by Symantec Press [Enter] to continue:Veritas Storage Foundation for Oracle RAC 6.0 Install Programrac1 rac2 Logs are being written to /var/tmp/installer-201205311443Rej while installer is in progress Installing SF Oracle RAC: 100%Estimated time remaining: (mm:ss) 0:0028 of 28Performing SF Oracle RAC preinstalltasks ........................................................................................ DoneInstalling VRTSvlic package ...................................................................................................... DoneInstalling VRTSperl package ...................................................................................................... DoneInstalling VRTSspt package ....................................................................................................... DoneInstalling VRTSvxvm package ...................................................................................................... DoneInstalling VRTSaslapmpackage .................................................................................................... DoneInstalling VRTSob package ........................................................................................................ DoneInstalling VRTSvxfs package ...................................................................................................... DoneInstalling VRTSfsadv package ..................................................................................................... DoneInstalling VRTSfssdk package ..................................................................................................... DoneInstalling VRTSllt package ....................................................................................................... DoneInstalling VRTSgab package ....................................................................................................... DoneInstalling VRTSvxfen package ..................................................................................................... DoneInstalling VRTSamf package ....................................................................................................... DoneInstalling VRTSvcs package ....................................................................................................... DoneInstalling VRTScps package ....................................................................................................... DoneInstalling VRTSvcsag package ..................................................................................................... DoneInstalling VRTSvcsea package ..................................................................................................... DoneInstalling VRTSdbed package ...................................................................................................... DoneInstalling VRTSglm package ....................................................................................................... DoneInstalling VRTScavf package ...................................................................................................... DoneInstalling VRTSgms package ....................................................................................................... DoneInstalling VRTSodm package ....................................................................................................... DoneInstalling VRTSdbac package ...................................................................................................... DoneInstalling VRTSsfcpi60 package ................................................................................................... DoneInstalling VRTSsfmh package ...................................................................................................... DoneInstalling VRTSvbs package ....................................................................................................... DonePerforming SF Oracle RAC postinstalltasks ....................................................................................... DoneVeritas Storage Foundation for Oracle RAC Install completed successfullyVeritas Storage Foundation for Oracle RAC 6.0 Install Programrac1 rac2To comply with the terms of Symantec's End User License Agreement, you have 60 days to either: * Enter a valid license key matching the functionality in use on the systems* Enable keyless licensing and manage the systems with a Management Server. For more details visit /sfhakeyless. Theproduct is fully functional during these 60 days.1) Enter a valid license key2) Enable keyless licensing and complete system licensing laterHow would you like to license the systems? [1-2,q] (2)Checking system licensingVeritas Storage Foundation for Oracle RAC 6.0 Install Programrac1 rac2Would you like to enable the Veritas Volume Replicator? [y,n,q] (n)Would you like to enable the Global Cluster Option? [y,n,q] (n)Registering SF Oracle RAC licenseWould you like to configure SF Oracle RAC on rac1 rac2? [y,n,q] (n)The updates to VRTSaslapm package are released via the Symantec SORT web page:https:///asl. To make sure you have the latestversion of VRTSaslapm (for up to date ASLs and APMs), download and install the latest package from the SORT web page.Veritas Storage Foundation for Oracle RAC cannot be started without configuration.Run the '/opt/VRTS/install/installsfrac -configure' command when you are ready to configure Veritas Storage Foundation for Oracle RAC.Checking online updates for Veritas Storage Foundation for Oracle RAC 6.0Attempted to connect to https:// to check for product updates, but connection failed.Please visit https:// to check for available product updates and information.installer log files, summary file, and response file are saved at:/opt/VRTS/install/logs/installer-201205311443RejWould you like to view the summary file? [y,n,q] (n) yinstaller SummarySystem verification checks completedThe following warnings were discovered on the systems:CPI WARNING V-9-30-2166 The CPU speed on rac1 is 450 MHz, the minimal CPU speed required by product SF Oracle RAC is 1024 MHzCPI WARNING V-9-30-2166 The CPU speed on rac2 is 450 MHz, the minimal CPU speed required by product SF Oracle RAC is 1024 MHzVeritas Storage Foundation for Oracle RAC Install completed successfullyThe All package set was selected for installationThe following packages were installed on rac1:VRTSvlicVRTSperlVRTSsptVRTSvxvmVRTSaslapmVRTSobVRTSvxfsVRTSfsadvVRTSfssdkVRTSlltVRTSgabVRTSvxfenVRTSamfVRTSvcsVRTScpsVRTSvcsagVRTSvcseaVRTSdbedVRTSglmVRTScavfVRTSgmsVRTSodmVRTSdbacPress [Enter] to continue:VRTSsfcpi60VRTSsfmhVRTSvbsThe All package set was selected for installationThe following packages were installed on rac2:VRTSvlicVRTSperlVRTSsptVRTSvxvmVRTSaslapmVRTSobVRTSvxfsVRTSfsadvVRTSfssdkVRTSlltVRTSgabVRTSvxfenVRTSamfVRTSvcsVRTScpsVRTSvcsagVRTSvcseaVRTSdbedVRTSglmVRTScavfVRTSgmsVRTSodmVRTSdbacVRTSsfcpi60VRTSsfmhVRTSvbsroot@rac1 #root@rac1 #root@rac1 # /opt/VRTS/install/installsfrac -configureVeritas Storage Foundation for Oracle RAC 6.0 Configure ProgramCopyright (c) 2011 Symantec Corporation. All rights reserved. Symantec, the Symantec Logo are trademarks or registered trademarks of SymantecCorporation or its affiliates in the U.S. and other countries. Other names may be trademarks of their respective owners.The Licensed Software and Documentation are deemed to be "commercial computer software" and "commercial computer software documentation" asdefined in FAR Sections 12.212 and DFARS Section 227.7202.Logs are being written to /var/tmp/installsfrac-201205311504PBm while installsfrac is in progress.Enter the Solaris Sparc system names separated by spaces: [q,?] rac1 rac2Veritas Storage Foundation for Oracle RAC 6.0 Configure Programrac1 rac2Logs are being written to /var/tmp/installsfrac-201205311504PBm while installsfrac is in progressVerifying systems: 100%Estimated time remaining: (mm:ss) 0:005 of 5Checking systemcommunication .................................................................................................... Done Checking release compatibility ................................................................................................... DoneChecking installed product ....................................................................................................... DoneChecking platform version ........................................................................................................ DonePerforming productprechecks ..................................................................................................... DoneSystem verification checks completedSystems have difference in clock by more than 5 secondsSystem clocks can be synchronized using one or more Network Time Protocol (NTP) serversDo you want to synchronize system clocks with NTP server(s)? [y,n,q] (y) nVeritas Storage Foundation for Oracle RAC 6.0 Configure Programrac1 rac21) Configure SF Oracle RAC sub-components2) SF Oracle RAC Installation and Configuration Checks3) Prepare to Install Oracle4) Install Oracle Clusterware/Grid Infrastructure and Database5) Post Oracle Installation Tasks6) Exit SF Oracle RAC ConfigurationChoose option: [1-6,q] (1)Veritas Storage Foundation for Oracle RAC 6.0 Configure Programrac1 rac2To configure VCS, answer the set of questions on the next screen.When [b] is presented after a question, 'b' may be entered to go back to the first question of the configuration set.When [?] is presented after a question, '?' may be entered for help or additional information about the question.Following each set of questions, the information you have entered will be presented for confirmation. To repeat the set of questions andcorrect any previous errors, enter 'n' at the confirmation prompt.No configuration changes are made to the systems until all configuration questions are completed and confirmed.Press [Enter] to continue:Veritas Storage Foundation for Oracle RAC 6.0 Configure Programrac1 rac2To configure VCS for SFRAC the following information is required:A unique cluster nameA unique cluster ID number between 0-65535Two or more NICs per system used for heartbeat linksAll systems are being configured to create one cluster.Enter the unique cluster name: [q,?] uecVeritas Storage Foundation for Oracle RAC 6.0 Configure Programrac1 rac21) Configure heartbeat links using LLT over Ethernet2) Configure heartbeat links using LLT over UDP3) Automatically detect configuration for LLT over Ethernetb) Back to previous menuHow would you like to configure heartbeat links? [1-3,b,q,?] (1)Discovering NICs on rac1 .................................................................................... Discovered hme0 hme1 hme2Enter the NIC for the first private heartbeat link on rac1: [b,q,?] (hme0) hme1Would you like to configure a second private heartbeat link? [y,n,q,b,?] (y)Enter the NIC for the second private heartbeat link on rac1: [b,q,?] (hme0) hme2Are you using the same NICs for private heartbeat links on all systems? [y,n,q,b,?] (y) Checking media speed for hme1 onrac1 ........................................................................................ 100 MbpsChecking media speed for hme2 onrac1 ........................................................................................ 100 MbpsChecking media speed for hme1 onrac2 ........................................................................................ 100 MbpsChecking media speed for hme2 onrac2 ........................................................................................ 100 MbpsEnter a unique cluster ID number between 0-65535: [b,q,?] (47907) 2012The cluster cannot be configured if the cluster ID 2012 is in use by another cluster. Installer can perform a check to determine if the clusterID is duplicate. The check will take less than a minute to complete.Would you like to check if the cluster ID is in use by another cluster? [y,n,q] (y) nVeritas Storage Foundation for Oracle RAC 6.0 Configure Programrac1 rac2 Cluster information verification:Cluster Name: uecCluster ID Number: 2012Private Heartbeat NICs for rac1:link1=hme1link2=hme2Private Heartbeat NICs for rac2:link1=hme1link2=hme2Is this information correct? [y,n,q,?] (y)Veritas Storage Foundation for Oracle RAC 6.0 Configure Programrac1 rac2 The following data is required to configure the Virtual IP of the Cluster:A public NIC used by each system in the clusterA Virtual IP address and netmaskDo you want to configure the Virtual IP? [y,n,q,?] (n) yActive NIC devices discovered on rac1: hme0Enter the NIC for Virtual IP of the Cluster to use on rac1: [b,q,?] (hme0)Is hme0 to be the public NIC used by all systems? [y,n,q,b,?] (y)Enter the Virtual IP address for the Cluster: [b,q,?] webipwebip is not a valid IP addressEnter the Virtual IP address for the Cluster: [b,q,?] 192.168.1.13Enter the NetMask for IP 192.168.1.13: [b,q,?] (255.255.255.0)Veritas Storage Foundation for Oracle RAC 6.0Configure Programrac1 rac2Cluster Virtual IP verification:NIC: hme0IP: 192.168.1.13NetMask: 255.255.255.0Is this information correct? [y,n,q] (y)Veritas Storage Foundation for Oracle RAC 6.0 Configure Programrac1 rac2Veritas Cluster Server can be configured in secure modeRunning VCS in Secure Mode guarantees that all inter-system communication is encrypted, and users are verified with security credentials.When running VCS in Secure Mode, NIS and system usernames and passwords are used to verify identity. VCS usernames and passwords are no longerutilized when a cluster is running in Secure Mode.Would you like to configure the VCS cluster in secure mode? [y,n,q,?] (n)Veritas Storage Foundation for Oracle RAC 6.0 Configure Programrac1 rac2The following information is required to add VCS users:A user nameA password for the userUser privileges (Administrator, Operator, or Guest)Do you wish to accept the default cluster credentials of 'admin/password'? [y,n,q] (y)Do you want to add another user to the cluster? [y,n,q] (n)Veritas Storage Foundation for Oracle RAC 6.0 Configure Programrac1 rac2 VCS User verification:User: admin Privilege: AdministratorsPasswords are not displayedIs this information correct? [y,n,q] (y)Veritas Storage Foundation for Oracle RAC 6.0 Configure Programrac1 rac2 The following information is required to configure SMTP notification:The domain-based hostname of the SMTP serverThe email address of each SMTP recipientA minimum severity level of messages to send to each recipientDo you want to configure SMTP notification? [y,n,q,?] (n)Veritas Storage Foundation for Oracle RAC 6.0 Configure Programrac1 rac2 The following information is required to configure SNMP notification:System names of SNMP consoles to receive VCS trap messagesSNMP trap daemon port numbers for each consoleA minimum severity level of messages to send to each consoleDo you want to configure SNMP notification? [y,n,q,?] (n)All SF Oracle RAC processes that are currently running must be stoppedDo you want to stop SF Oracle RAC processes now? [y,n,q,?] (y)Veritas Storage Foundation for Oracle RAC 6.0 Configure Programrac1 rac2Logs are being written to /var/tmp/installsfrac-201205311504PBm while installsfrac is in progressStopping SF Oracle RAC: 100%Estimated time remaining: (mm:ss) 0:0012 of 12Performing SF Oracle RAC prestoptasks ........................................................................................... DoneStopping vcsmm ................................................................................................................... DoneStopping lmx ..................................................................................................................... Done Stopping vxgms ................................................................................................................... DoneStopping vxglm ................................................................................................................... DoneStopping vxcpserv ................................................................................................................ DoneStopping had ..................................................................................................................... Done Stopping CmdServer ............................................................................................................... DoneStopping amf ..................................................................................................................... Done Stopping vxfen ................................................................................................................... DoneStopping gab ..................................................................................................................... Done Stopping llt ..................................................................................................................... DoneVeritas Storage Foundation for Oracle RAC Shutdown completed successfullyVeritas Storage Foundation for Oracle RAC 6.0 Configure Programrac1 rac2Logs are being written to /var/tmp/installsfrac-201205311504PBm while installsfrac is in progress。
Solaris 10 Sparc 安装Oracle 10g数据库
Solaris 10 Sparc 安装Oracle 10g数据库1.概述在基于Solaris10 for Sparc的操作系统上安装Oracle 10g (10.2.0.1.0)数据库并创建建数据库监听和数据库。
操作环境如下:2.检查系统包信息2.1.检查系统是否已安装Orale所需的包通过pkginfo –i查看是否安装如下的包bash-3.2# pkginfo -i SUNWarc SUNWbtool SUNWhea SUNWlibm SUNWlibms SUNWsprot SUNWsprox SUNWtoo SUNWi1of SUNWi1cs SUNWi15cs SUNWxwfnt //检查系统是否安装这些包system SUNWarc Lint Libraries (usr)system SUNWbtool CCS tools bundled with SunOSsystem SUNWhea SunOS Header Filessystem SUNWi15cs X11 ISO8859-15 Codeset Supportsystem SUNWi1cs X11 ISO8859-1 Codeset Supportsystem SUNWi1of ISO-8859-1 (Latin-1) Optional Fontssystem SUNWlibm Math & Microtasking Library Headers & Lint Files (Usr) system SUNWsprot Solaris Bundled toolssystem SUNWtoo Programming Toolssystem SUNWxwfnt X Window System platform required fontsERROR: information for " SUNWlibms" was not foundERROR: information for "SUNWsprox" was not found //提示这两个包未安装bash-3.2#2.2.安装未安装的包在原系统光盘中找到这些包的原文件并安装到系统中,安装了SUNWsprot包,SUNWsprox包可以忽略安装(在Solaris10光盘也找不到SUNWsprox包)。
- 1、下载文档前请自行甄别文档内容的完整性,平台不提供额外的编辑、内容补充、找答案等附加服务。
- 2、"仅部分预览"的文档,不可在线预览部分如存在完整性等问题,可反馈申请退款(可完整预览的文档不适用该条件!)。
- 3、如文档侵犯您的权益,请联系客服反馈,我们会尽快为您处理(人工客服工作时间:9:00-18:30)。
What is JMS API?
The Java Message Service is a Java API that allows applications to create, send, receive, and read messages. The JMS API enables communication that is not only loosely coupled but also Asynchronous A JMS provider can deliver messages to a client as they arrive; a client does not have to request messages in order to receive them. Reliable The JMS API can ensure that a message is delivered once and only once. Lower levels of reliability are available for applications that can afford to miss messages or to receive duplicate messages.
JMS API
TopicPublisher TopicSession MessageProducer QueueSender Session TopicSubscriber QueueSession MessageConsumer QueueReceiver LEGEND Inheritance (Extend) Message Flow
JMS API Architecture
• Administrative tools allow you to bind destinations and connection factories into a Java Naming and Directory Interface TM (JNDI) API namespace. • A JMS client can then look up the administered objects in the namespace and then establish a logical connection to the same objects through the JMS provider. JNDI NameSpace
Subscriber2
msg n
msg 7 : msg 6 : msg 5 msg 7 msg 6 msg 4 msg 5 msg 3 msg 4 2 msg 1 msg 3
msg 2 msg 1
: : msg n ::
consume
consume Subscriber1
Subscቤተ መጻሕፍቲ ባይዱiber1
Persistence and no-persistence message delivery no-
Administration Tool
bind
CF
N
JMS Client
Logic connection
JMS Provider
Relationship ------ JMS Provider, App Server, App
JMS Provider Server Session implements implements delivers messages to
Publisher3
publish
Publisher2
publish
Publisher1
Publisher1
msg n
msg n
consume
Subscriber2
msg 7 msg 6 msg 6 msg 5 msg 5 msg 4 msg 4 msg 3 msg 2 msg 3 msg 2 msg 1
Producer JMS Server Subscriber
JMS Message
A JMS message has three parts: A header Properties (optional) A body (optional)
Header Field JMSDestination JMSDeliveryMode JMSExpiration JMSPriority JMSMessageID JMSTimestamp JMSCorrelationID JMSReplyTo JMSType JMSRedelivered Set By send or publish method send or publish method send or publish method send or publish method send or publish method send or publish method Client Client Client JMS provider
JMS Specifications - Topics
• Publisher publishes and publish Publisher3 Subscribers consumes publish • Multiple Publisher1 Publisher2 publishers/subscribers per topic • Subscriber each receives own Publisher1 copy of messages consume • Priority effects message delivery order • Persistent and non-persistent delivery semantics
Connection Consumer
implements
App Server
control thread for
message a pool of
implements
Session Server Session Pool get a ServerSession from
delivers messages to
Properties
Body
The payload of the Message (one of five types)
JMS Message Type
ObjectMessage
MapMessage
Message
StreamMessage
TextMessage
XMLMessage
ByteMessage
is delivered messages for Destination With optional message selector supplies
Message Listener
implements App
Objects
ConnectionFactory - an administered object used by a client to create a Connection Connection - an active connection to a JMS provider Destination - an administered object that encapsulates the identity of a message destination Session - a single-threaded context for sending and receiving messages MessageProducer - an object created by a Session that is used for sending messages to a destination MessageConsumer - an object created by a Session that is used for receiving messages sent to a destination
JMS API Programming Model
Connection Factory
creates
Connection
creates
JMS
Next Generation Integration Platform
hJMS消息中间件开源项目 founder_chen@ 2002-06-03
JMS specification
Two message Models queues, topics Persistence and no-persistence message delivery noFive message types – text, byte, object, map and stream Synchronous and Asynchronous message consumption Selector, priority, queueBrowser Local and distributed transaction
Structure of JMS Message
Message Header
Optional name/value pairs, Can be use to filter messages Various standard flags for routing, identification, expiration etc.
msg 7
: :: :::
consume
consume
Subscriber1
msg 1
Subscriber1
P/S Messaging Domain
Each message may have multiple consumers. Publishers and subscribers have a timing dependency. A client that subscribes to a topic can consume only messages published after the client has created a subscription, and the subscriber must continue to be active in order for it to consume messages.
