Chalk Talk - Exchange Server 2010 Upgrading from Exchange 200x
Exchange 2010服务器安装和配置手册(图解)

目录Exchange 2010 边缘传输服务器的安装 (1)Exchange 2010 如何配置向外网收发邮件 (5)Exchange 2010 序列号输入和激活方法 (8)Exchange 2010安装前的准备工作 (9)配置登录OW A时不需要输入域名(域\用户名) (11)有关于Exchange 2010 证书的相关知识 (13)在Exchange 2010设置OW A的URL重定向 (16)重定向Exchange的OW A目录 (17)Exchange 2010 DAG 部署- 管理数据库可用性组成员 (19)Exchange 2010 语音邮件与统一消息 (22)功能说明: (23)Exchange 2010 增加电子邮件归档功能 (24)Exchange 2010中的单项恢复使用详解 (26)Exchange Server 2010强大的网络邮局功能 (28)Microsoft Exchange Server 2010 在手机终端上强大功能的体现 (31)修改Exchange 2010的OWA界面 (32)在Exchange 2010 GAL中显示用户照片 (38)Exchange 2010 边缘传输服务器的安装Exchange的边缘服务器安装比较简单,而已整个过程也不需要像安装Exchange 的其它服务器那样,需要做许多的准备工作。
Exchange的边缘服务器安装比较简单,而已整个过程也不需要像安装Exchange的其它服务器那样,需要做许多的准备工作。
准备工作:服务器上添加“应用程序服务器”角色,这样做的目地是为了将.NET Framework 3.5.1安装到服务器当中(Windows Server 2008已经内置了其安装,添加角色即可,不用再重新下载.NET Framework 相关安装包)。
边缘传输服务器需要添加一个“Acrive Directory轻型目录服务”的服务器角色。
Exchange Server 2010 SP1 新用户端生产力功能指引
課程大綱
• • • • • • • • OWA關鍵新功能與效能改善 行事曆發佈至網際網路 使用OWA存取IRM加密郵件 結合Outlook 2010改善設計 Exchange ActiveSync 改善設計 公告POP3/IMAP/SMTP連線組態 數位簽章與郵件加密 Q&A
OWA(SP1)關鍵改善
• 啟用OWA發佈至Internet設定
–Set-OWAVirtualDirectory –Identity <CAS> -CalendarPublishingEnabled $true
• 共用原則必須設定發佈至Internet組態
–Set-SharingPolicy –Identity
• 設定要發佈的行事曆 Set-MailboxCalendarFolder • 檢視與取得發佈的網址 Get-MailboxCalendarFolder
數位簽章與郵件加密
• OWA 實作範例
數位簽章與郵件加密
• OWA 實作範例
數位簽章與郵件加密
• OWA 實作範例
Q&A
更多參考資訊…
/profile.php?id=100000322352169
• TechNet
/zh-tw
OWA外部網址必須確認已設定
啟用與發佈OWA行事曆
使用者發佈行事曆
匿名存取共用行事曆
檢視行事曆發佈資訊
如何與非同盟組織分享行事曆
課程大綱
• • • • • • • • OWA關鍵新功能與效能改善 行事曆發佈至網際網路 使用OWA存取IRM加密郵件 結合Outlook 2010改善設計 Exchange ActiveSync 改善設計 公告POP3/IMAP/SMTP連線組態 數位簽章與郵件加密 Q&A
Exchange2010搜索内部部署exchange服务器时出现以下错误

Exchange2010搜索内部部署exchange服务器时出现以下错误搜索内部部署exchange服务器时出现以下错误:...连接到远程服务器失败,错误消息如下:WinRM客户端无法处理该请求.它无法确定从目标计算机得到的HTTP响应的内容类型。
内容类型缺少或无效.解决方案:第一招:打开“服务器管理器”——“功能”——然后卸载“WinRM IIS 扩展”,重启计算机之后,再安装WinRM IIS扩展,然后在命令行中键入: winrm quickconfig。
第二招:检查IIS设置打开IIS,打开Default Web Site, 双击Modules.检查Kerbauth module是否存在,如果存在,删除它。
打开PowerShell Virtual Directory, 双击Modules.检查Kerbauth module是否存在,如果不存在,添加该module,并注意它的Modules Type为Native。
检查ApplicationHost.config在Exchange 2010上打开下面的文件:C:\Windows\System32\Inetsrv\config\ApplicationHost.config 检查下面条目是否存在<globalModules><add name="WSMan"image="C:\Windows\system32\wsmsvc.dll" /><add name="kerbauth" image="C:\Program Files\Microsoft\Exchange Server\V14\Bin\kerbauth.dll" /> </globalModules>如果没有请把它们加入到ApplicationHost.config第三招:安装exchange2010 sp2补丁包在测试时,一般第一招不管用,第二招能搞定,我的是kerbauth 没有加入到C:\Windows\System32\Inetsrv\config\ApplicationHost.config中,第三招没试过。
Exchange 2010 配置
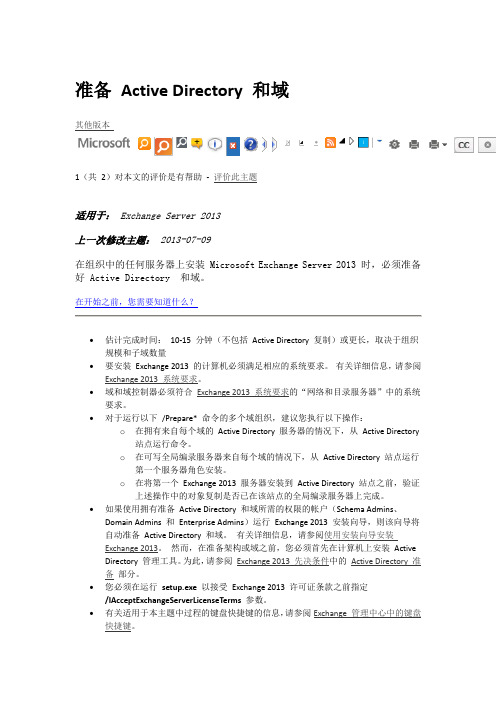
准备Active Directory 和域其他版本1(共2)对本文的评价是有帮助- 评价此主题适用于:Exchange Server 2013上一次修改主题:2013-07-09在组织中的任何服务器上安装 Microsoft Exchange Server 2013 时,必须准备好 Active Directory 和域。
在开始之前,您需要知道什么?∙估计完成时间:10-15 分钟(不包括Active Directory 复制)或更长,取决于组织规模和子域数量∙要安装Exchange 2013 的计算机必须满足相应的系统要求。
有关详细信息,请参阅Exchange 2013 系统要求。
∙域和域控制器必须符合Exchange 2013 系统要求的“网络和目录服务器”中的系统要求。
∙对于运行以下/Prepare* 命令的多个域组织,建议您执行以下操作:o在拥有来自每个域的Active Directory 服务器的情况下,从Active Directory 站点运行命令。
o在可写全局编录服务器来自每个域的情况下,从Active Directory 站点运行第一个服务器角色安装。
o在将第一个Exchange 2013 服务器安装到Active Directory 站点之前,验证上述操作中的对象复制是否已在该站点的全局编录服务器上完成。
∙如果使用拥有准备Active Directory 和域所需的权限的帐户(Schema Admins、Domain Admins 和Enterprise Admins)运行Exchange 2013 安装向导,则该向导将自动准备Active Directory 和域。
有关详细信息,请参阅使用安装向导安装Exchange 2013。
然而,在准备架构或域之前,您必须首先在计算机上安装Active Directory 管理工具。
为此,请参阅Exchange 2013 先决条件中的Active Directory 准备部分。
戴尔服务IT咨询,适用于Exchange Server 2010说明书

Dell ServicesIT Consulting for Exchange Server 2010Expert guidance and proven processes to help reduce the time, costs, and risk of transitioning to Exchange Server 2010Bring Your Communications Up-to-Date Effective and efficient communications –email, instant messaging, and voice –provide the backbone to any well-run organization. Exchange Server 2010 offers a rich user experience and anywhere access across the desktop, internet browser, or mobile phone. It is the first Microsoft server technology purpose-built to work onsite, as an online service or a hybrid.A successful Exchange Server 2010 implementation can help organizations lower costs, simplify administration, protect communications, and boost productivity.Take the Next Step with DellDell IT Consulting can assist at every stage of the Exchange Server 2010 implementation process. Our services include:•ESRP-validated Exchange reference architectures and repeatable consulting services that ensure email and calendaring platforms are optimized, flexible, efficient, and secure.• A single point of accountability for the entire email and calendaring solution including hardware, software, third-party products, transformational consulting services, and ongoing support services.•Industry-leading consultants with Microsoft Messaging and Unified Communication certifications and a 25-year strategic partnership with Microsoft.Let our Experience Guide Your MigrationOur Exchange architectures and proven consulting services can reduce the risk, cost, and time to a successful implementation. If email and calendaring are critical to your organization, now is the time to move to Exchange Server 2010. Business Performance. If your organization is approaching end-of-life on its current version of Exchange or considering a migration from Lotus Notes or Novell GroupWise, Dell can identify upgrade candidates, design a robust Exchange environment, and help you migrate email and calendaring to the new infrastructure.Operational Efficiency.If Exchange sprawl is a problem, Dell consultants can assess your current infrastructure and provide an Exchange Server 2010 design and implementation strategy to consolidate server and storage platforms. Reducing the number of physical units helps decrease power requirements and lowers operating costs. Stability. If business continuity or uptime is a concern, Dell can assess your downtime tolerance and design and test disaster recovery, high availability, and back-up systems that are appropriate for your business availability requirements and budgets.Understanding. If your Exchange Server is no longer functioning at peak performance, Dell consultants can assess the health of your environment and design a path that will restore user confidence and mitigate any drop in service levels.Product and service availability varies by country. © 2010 Dell Inc. All rights reserved.Applications Business Process Consulting Infrastructure SupportDell IT Consulting for Exchange Server 2010IT Consulting for Exchange Server 2010 is designed to assist customers in the evaluation, assessment, design, and implementation of an upgrade or complete migration to the newest version of Microsoft Exchange Server technology platform. Our services include the following offers:In addition to the above offers, a combined assessment and design Exchange 2010 consultingengagement is also available. For more information about any of our service offerings, please contact your Dell representative or visit /services.Workshop Assessment Design Implementation Manage/SupportOfferDescriptionWorkshopUnderstand the Potential•During this half-day engagement, Dell will conduct a high-level project planning exercise to map out business priorities and goals based on your unique pain points:•Interactively plan key project activity.•Considerations for capacity planning for Exchange Server 2010.•Disaster Recovery, High Availability, and Data Protection.•Consolidation strategies for Exchange environments. •Strategies to ensure operating health.•We will develop success factors that will be tracked throughout the Exchange Server 2010 migration.•The Workshop concludes with next steps and timelines.AssessmentMake Informed Decisions•This engagement provides a technical and consultative assessment of your current Exchange environment to help you make more informed decisions about Exchange Server 2010.•We provide a detailed on-site analysis of your environment and generate a roadmap to help you:•Upgrade/migrate to Exchange Server 2010.•Implement Exchange Server 2010.•Consolidate your Exchange environment.•Select an HA/DR/Backup solution that meets business continuity needs.DesignLay the Path for Success•In this engagement, we will help you design and validate a feature-rich Exchange Server 2010 solution that meets your business requirements.•Our lab-tested implementation plan reduces risk during the transition process.ImplementationCapture the Value•Our certified Dell experts will perform the implementation,which often lasts less than ten weeks.10112010 v3.0 DTISH。
当您启动 Exchange Server 2010 客户端访问服务器上的 Exchange 管理外壳程序的HTTP 状态代码的 403错误

当试图打开Microsoft Exchange Server 2010 客户端访问服务器上的Exchange 管理外壳程序(EMS) EMS 中收到以下错误消息:详细:连接到< 服务器名>[< 服务器名>] 连接到远程服务器失败,出现以下错误消息:从远程WS 管理服务的WinRM 客户端接收到的HTTP 状态码的403。
有关更多的信息,请参阅about_Remote_Troubleshooting 上的帮助主题。
+ CategoryInfo:OpenError:PSRemotingTransportException 上的(System.Manageme....RemoteRunspace:RemoteRunspace) []+ FullyQualifiedErrorId:PSSessionOpenFailed未能连接到当前站点中的所有Exchange 服务器。
请输入您要连接的服务器FQDN:原因:会发生此问题,是因为在要求使用SSL选项上,PowerShell启用Internet 信息服务(IIS) 管理器中的虚拟目录。
但是,不需要此选项设置,因为Exchange Server 2010 使用Kerberos 身份验证。
若要解决此问题,请按照下列步骤:1.在Exchange Server 2010 客户端访问服务器打开IIS 管理器。
2.找到PowerShell 虚拟目录在默认Web 站点,然后再单击SSL 设置在详细信息窗格中。
3.双击SSL 设置然后清除在要求使用SSL选项4.在详细信息窗格中单击应用以保存该设置在IIS 管理器。
5.重新启动IIS。
6.关闭的EMS,然后重新打开it.。
Exchange Server 2010安装教程
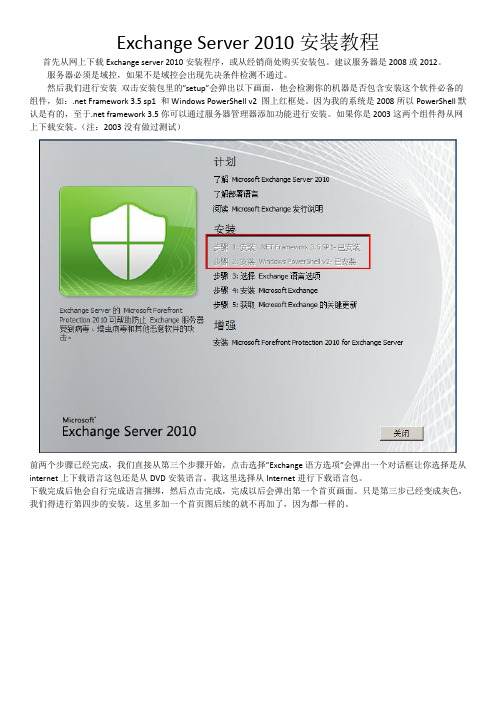
Exchange Server 2010安装教程首先从网上下载Exchange server 2010安装程序,或从经销商处购买安装包。
建议服务器是2008或2012。
服务器必须是域控,如果不是域控会出现先决条件检测不通过。
然后我们进行安装双击安装包里的”setup”会弹出以下画面,他会检测你的机器是否包含安装这个软件必备的组件,如:.net Framework 3.5 sp1 和Windows PowerShell v2 图上红框处。
因为我的系统是2008所以PowerShell默认是有的,至于.net framework 3.5你可以通过服务器管理器添加功能进行安装。
如果你是2003这两个组件得从网上下载安装。
(注:2003没有做过测试)前两个步骤已经完成,我们直接从第三个步骤开始,点击选择”Exchange语方选项”会弹出一个对话框让你选择是从internet上下载语言这包还是从DVD安装语言。
我这里选择从Internet进行下载语言包。
下载完成后他会自行完成语言捆绑,然后点击完成,完成以后会弹出第一个首页画面。
只是第三步已经变成灰色,我们得进行第四步的安装。
这里多加一个首页图后续的就不再加了,因为都一样的。
现在我们就可以正式”安装Microsoft Exchange”当我们点击步骤4后就会有一个弹窗这是一个文件缓存的操作(注:Exchange 2003是没有这个界面的)请不要关闭,很多时候我们第一次都不知什么东西怎么会出这样而不是Exchange 界面给关了。
当完成缓存操作就会弹出Exchange 安装界面。
这些安装界面我都会一一截图,如果没有什么特殊操作就不文字说明了。
下面我们得说一下,如果是新手建议选择典型的安装,这已经可以满足你要求。
至于有特殊功能要求的,你以后可以自行添加也可以选择自定义安装我这里直接选择典型安装。
以下会让我输入组织名称输入有意义的名称,你的公司名或是你的域名我这里输入域名前缀接下来会询问你客户端设置,如果你公司内部有人使用outlook 2003就选择是现在很多小型企业都选择第三方邮件客户端,如foxmai 雷鸟等……可以按默认的否。
Exchange2010安装,Exchange2010教程
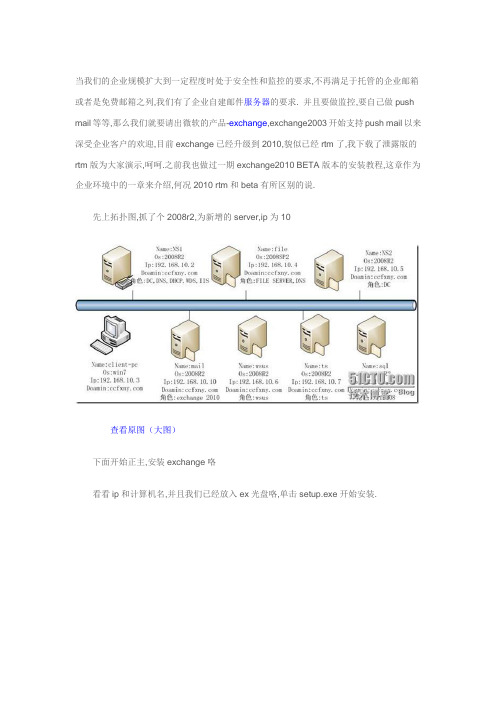
当我们的企业规模扩大到一定程度时处于安全性和监控的要求,不再满足于托管的企业邮箱或者是免费邮箱之列,我们有了企业自建邮件服务器的要求. 并且要做监控,要自己做push mail等等,那么我们就要请出微软的产品-exchange,exchange2003开始支持push mail以来深受企业客户的欢迎,目前exchange已经升级到2010,貌似已经rtm了,我下载了泄露版的rtm版为大家演示,呵呵.之前我也做过一期exchange2010 BETA版本的安装教程,这章作为企业环境中的一章来介绍,何况2010 rtm和beta有所区别的说.先上拓扑图,抓了个2008r2,为新增的server,ip为10查看原图(大图)下面开始正主,安装exchange咯看看ip和计算机名,并且我们已经放入ex光盘咯,单击setup.exe开始安装.查看原图(大图)出现画面,要求咱们安装.net查看原图(大图)从功能里面安装.net3.5然后顺便将iis所有功能也安装上,毕竟iis是owa的基础.查看原图(大图)安装完成查看原图(大图)选择语言选项,从dvd安装语言包查看原图(大图)然后选择安装exchange,查看原图(大图)直接下一步,无视提示了查看原图(大图)许可协议,接受吧查看原图(大图)错误报告,爱选不选查看原图(大图)选择安装功能,边缘传输是第二台exchange才能安装的,统一消息是接合电话系统的,可有可无,第一次安装典型安装即可查看原图(大图)组织名称查看原图(大图)根据需要选择查看原图(大图)是否面向外部查看原图(大图)客户体验计划,无视了呵呵,出错了,要求我们安装ldifde和扩展架构查看原图(大图)另外要求安装2007 office system convert这么一个插件查看原图(大图)OK,将iis所有角色都安装上查看原图(大图)然后从微软下载2008office转换器下载x64包查看原图(大图)下载完成,开始安装下一步默认选项咯安装完成下面使用命令servermanagercmd –I rsat-adds来安装ldifde安装完成查看原图(大图)当然也可以再功能安装安装向导中安装如下的功能,adds和ad lds工具和power shell查看原图(大图)从服务中找到netrcpportsharing服务,将启动类型改成自动启动OK,完成后重启系统,再次启动安装这次就通过验证了,只是有提示说升级后,网域内无法再安装ex07服务器,没所谓了查看原图(大图)安装完成查看原图(大图)所有角色都安装完成查看原图(大图)下篇咱们介绍下创建用户等操作.上篇我们已经安装好了exchange2010,呵呵本片简单介绍和看下ex2010的基本界面和使用安装完成打开exchange控制台如图所示查看原图(大图)汗,有试用限制,4个月的评估版,基本界面看起来跟2007并无差别。
Exchange Server2010系列之九:轻松配置脱机通讯簿
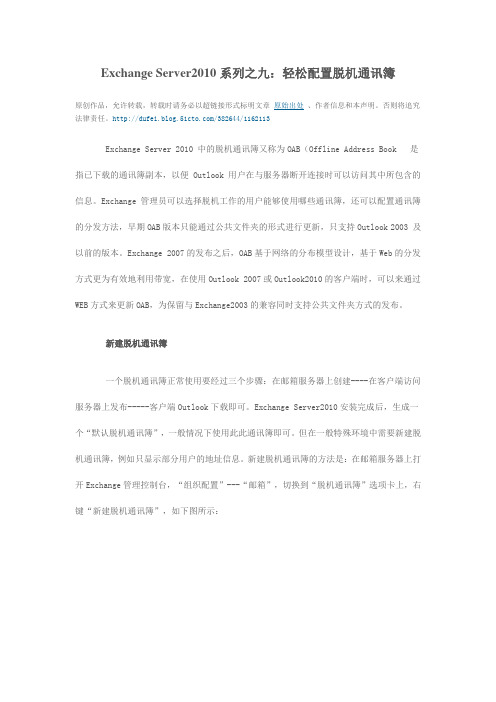
Exchange Server2010系列之九:轻松配置脱机通讯簿原创作品,允许转载,转载时请务必以超链接形式标明文章原始出处、作者信息和本声明。
否则将追究法律责任。
/382644/1162113Exchange Server 2010 中的脱机通讯簿又称为OAB(Offline Address Book 是指已下载的通讯簿副本,以便 Outlook 用户在与服务器断开连接时可以访问其中所包含的信息。
Exchange 管理员可以选择脱机工作的用户能够使用哪些通讯簿,还可以配置通讯簿的分发方法,早期OAB版本只能通过公共文件夹的形式进行更新,只支持Outlook 2003 及以前的版本。
Exchange 2007的发布之后,OAB基于网络的分布模型设计,基于Web的分发方式更为有效地利用带宽,在使用Outlook 2007或Outlook2010的客户端时,可以来通过WEB方式来更新OAB,为保留与Exchange2003的兼容同时支持公共文件夹方式的发布。
新建脱机通讯簿一个脱机通讯簿正常使用要经过三个步骤:在邮箱服务器上创建----在客户端访问服务器上发布-----客户端Outlook下载即可。
Exchange Server2010安装完成后,生成一个“默认脱机通讯簿”,一般情况下使用此此通讯簿即可。
但在一般特殊环境中需要新建脱机通讯簿,例如只显示部分用户的地址信息。
新建脱机通讯簿的方法是:在邮箱服务器上打开Exchange管理控制台,“组织配置”---“邮箱”,切换到“脱机通讯簿”选项卡上,右键“新建脱机通讯簿”,如下图所示:点击打开“新建脱机通讯簿”,出现简介对话框,如下图所示:在此界面中,输入此脱机通讯簿的名称,生成服务器也就是目标邮箱服务器,以及此通讯簿所使用的地址列表,在此我们使用“包括以下地址列表”,并添加我们前面已经创建的Branch分支机构这个地址列表,这样的话此通机通讯簿只包括此分支机构地址列表的信息。
Exchange Server 2010安装手册图解

关于Exchange Server 2010已经走进了很多企业中,为企业带来了良好的沟通环境与办公环境。
本文只介绍Exchange Server 2010的安装过程,并不对安装前的准备工作和所需条件做过多阐述。
在Server 2008 R2上进行Exchange Server 2010安装,在安装前请确认已做好:Microsoft ExchangeServer 2010 安装前的准备工作。
1、将安装光盘放入电脑后,运行Exchange Server 2010安装文件,弹出起初窗口。
因是在Server 2008 R2的环境下安装,所以,可以看到“Windows Powershell V2”已经被安装了。
我们进行“步骤1:安装.Net Framework 3.5 SP1”。
在Server 2008 R2中,若直接的下载安装程序来进行安装Framework 3.5 SP1会弹出错误提示:必须使用“角色管理工具”安装或配置Microsoft .NET Framework 3.5 SP1。
我们打开“服务器管理器”,在“角色”选项中选择“添加角色”并在“添加角色向导”中选择“应用程序服务器”,将其安装后就会提示安装.NET Framework 3.5,这样即可完成.NET Framework 3.5的安装。
也可通过“添加功能”处直接添加安装。
2、“选择Exchange 语言选项”至“仅从DVD安装语言”:3、选择“安装Microsoft Exchange”后经过一番文件的复制工作,可以看到Exchange Server 2010的安装向导界面:4、经过“许可协议”、“错误报告”到达“安装类型”界面,和Exchange 2007的功能界面无不同之处,选择“典型安装”:5、添写好“组织名称”:6、根据实际情况选择好“客户端设置”、“配置客户端访问服务器外部域”、“客户体验改善计划”到“准备情况检查”,经过一段长时间的检查后可以看到以下的结果:可以看到,好多的错误,下面是所出现错误的列和解决的方法:(1)打开Powershell 输入:servermanagercmd -irsat-adds 来安装Ldifde.exe(2)打开“服务器管理器”的“角色”面板,添加“Web服务器(IIS)”角色(注意:在Web服务器角色功能处需添加“管理工具”的全部角色功能)解决无法从元数据库读取数据(3)安装Microsoft 筛选包(Microsoft Filter Pack)|64位:/fwlink/?LinkId=123380(4)打开“服务器管理器”的“角色”面板,添加“应用程序服务器”角色,解决无法从元数据库读取数据(5)打开“服务器管理器”的“配置”下的“服务”选项,将“Net.Tcp Port Sharing Service”启动类型设置成为“自动”。
Exchange Server 2010分层通讯簿(结构化通讯簿HAB)
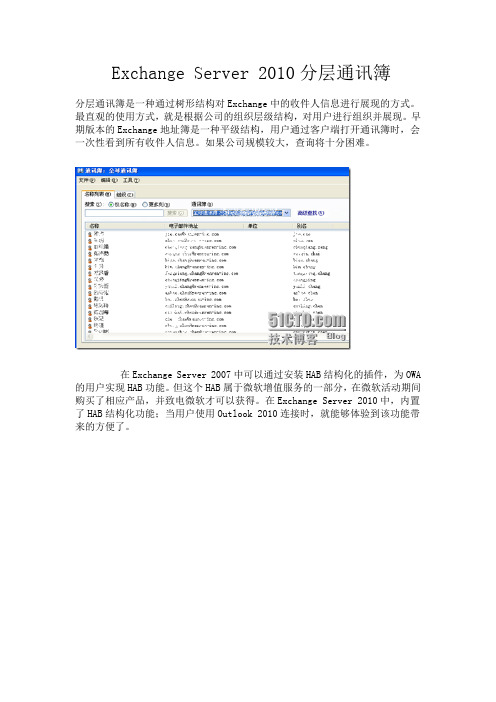
Exchange Server 2010分层通讯簿分层通讯簿是一种通过树形结构对Exchange中的收件人信息进行展现的方式。
最直观的使用方式,就是根据公司的组织层级结构,对用户进行组织并展现。
早期版本的Exchange地址簿是一种平级结构,用户通过客户端打开通讯簿时,会一次性看到所有收件人信息。
如果公司规模较大,查询将十分困难。
在Exchange Server 2007中可以通过安装HAB结构化的插件,为OWA 的用户实现HAB功能。
但这个HAB属于微软增值服务的一部分,在微软活动期间购买了相应产品,并致电微软才可以获得。
在Exchange Server 2010中,内置了HAB结构化功能;当用户使用Outlook 2010连接时,就能够体验到该功能带来的方便了。
图中分层通讯簿,右侧列表中的用户默认是按照字母排序的,同时支持自定义HAB的排序规则(比如设置每个部门的老板排第一位,依次类推)。
Exchange Server 2010设置HAB首先需要扩展AD DS架构,但如果是Exchange Server 2010 SP1以上版本则无须扩展AD DS架构。
扩展AD DS架构参考微软知识库:/kb/973788HAB中所有树状节点在Exchange中都是作为通讯组的形式存在的,低级别节点是高级别节点的组成员,结构列表中的用户也是组成员。
因此建立分层通讯簿,首先需要在Exchange中建立通讯组。
下面来看看如何建立分层通讯簿。
1、建立分层通讯簿首先要在AD中建立分层通讯簿所需的组织单位,一般情况下企业都已规划好相应的组织单位结构,若勿请自行建立。
本例已有OU(Beijing)及子OU。
2、准备好所需OU后,打开Exchange 2010 EMC建立需要在通讯薄显示出来的通用安全组,首先建立根组:收件人配置 -- 通讯组 -- 新建通讯组3、重复步骤2,建立所有的通讯组4. 在DC上打开ADSI编辑器开始–运行– adsiedit.msc 或则开始–管理工具– ADSI编辑器在ADSI编辑器中点击操作–连接到–默认命名上下文–确定5、双击打开默认命名上下文,依次展开DC=Contoso(组织名),DC=com –OU=Beijing – CN=全体员工,右键全体员工属性,在属性编辑器中找到distinguishedName –打开并复制其值6、在ADSI编辑器中点击操作–连接到–配置–确定7、双击打开配置,依次展开 CN=Configuration,DC=contoso(组织名),DC=com – CN=Services – CN= Microsoft Exchange – CN=contoso(组织名)–右键属性,属性编辑器中找到msExchHABRootDepartmentLink –打开将刚才复制的值粘贴到这里,并按确定。
Exchange Server 2010系列安装配置

Exchange Server 2010系列(1)——全新安装Exchange Server 2010 11月,微软重拳不断,WIN7&R2发布,TechED2009举办以及Exchange 2010RTM。
做为微软UC平台中的的重量级产品Exchange 2010尤为引起大家的关注(这点从TechED200 9统一沟通相关课程的火爆可见一斑)。
新的产品在服务的高可用性、消息的保护控制、安全性、移动性上都有所增强。
如果你现在徘徊在是否将2003升级至2007的问题上,不妨考虑直接升级至2010;如果你还在为2007实现高可用性的投入成本和管理成本以及消息的保护控制担忧,那你不妨考虑升级至2010。
每一个技术课程都是由浅至深的过程,我选择了最简单的安装做为Exchange Server 201 0系列的开篇,如果你安装过2003或是2007下面的过程应该不会陌生,因此这一篇的重点还是在如何做好组织及服务器的前提准备上。
在把视野放到安装服务器前,我们首先需要对环境中的组织结构进行评估。
这个步骤里我们需要考虑:1.现有域的功能级别。
Exchange Server 2010需要2003域功能级别,在提升功能级别前你需要考虑现有环境中的2000的域控制器,以及现有应用程序的兼容性。
2.保证每个Exchange AD站点包含Windows Server 2003 SP2 全局目录3.对环境现有状态进行评估,可以借助Addiag和EXRAP完成4.如果从旧有邮件服务器进行迁移需要为组织中的所有EX2003&07服务安装SP2补丁完成了上面的步骤,我们就可以在服务器上进行安装了(在实际部署中我们需要考虑的不止这些,比如带宽、比如站点拓扑、比如角色分离等等)。
服务器安装前提条件在安装Exchange Server 2010之前我们需要在服务器上做一些必要的准备,这里包括添加角色,功能,开启必要的服务以及安装支持的应用程序,进行这些前提条件的准备是我们下一步安装Exchange Server 2010的基础,相关操作请参考截图:1.安装IIS角色2.添加.NET Framework3.5.1(WCF激活必须选中)以及Windows PowerShell集成脚本环境(ISE)注:由于服务器上我使用了Windows Server 2008 R2操作系统,因此系统功能中集成了. NET Framework 3.5.1以及Windows PowerShell V2.0 如果你使用的是Windows Serve r 2008操作系统会发现系统中集成的是.NET Framework 3.0以及Windows PowerShell V 1.0 。
ExchangeServer2010信息保护和控制

练习三:查看日记归档的RMS保护邮件
疑问和解答
感谢您参与此会场! 您的意见与建议对我们非常重要。
请您填写反馈表。
© 2008 Microsoft Corporation. All rights reserved. Microsoft, Windows, Windows Vista and other product names are or may be registered trademarks and/or trademarks in the U.S. and/or other countries. The information herein is for informational purposes only and represents the current view of Microsoft Corporation as of the date of this presentation. Because Microsoft must respond to changing market conditions, it should not be interpreted to be a commitment on the part of Microsoft, and Microsoft cannot guarantee the accuracy of any information provided after the date of this presentation. MICROSOFT MAKES NO WARRANTIES, EXPRESS,
邮件仲裁
Microsoft Exchange Server 2010 管理员口袋顾问说明书

d eleted item retention on a per-user basis when necessary.
To set mailbox storage limits, in the Storage Quotas panel, clear the Use Mailbox Database Defaults check box. Then set one or more of the following storage limits:
use this tool to customize the presentation of contacts, users, groups, public
FIGUre 1-2 The Exchange Management Shell.
The basics of working with the Exchange Management Shell are straightforward: n Type get-command to get a full list of all available cmdlets on the server.
Click Scheduling Assistant to view the free/busy data for the invited users and the selected resources.
After you type a message to accompany the meeting request, click Send.
Exchange 2010常见问题排错

Q&A
知识
当前的组件如何 工作的
当前的组件与其 它组件的协作 当前的组件的依 存关系
观察
有一个基准线作 为比较
工具
内建的工具
系统工具
怎样的情况是正 常的
怎样的情况是不 正常的
高级排错工具
Exchange 排错工具
排错工具
Best Practices Analyzer Database Troubleshooter Mail Flow Troubleshooter Performance Troubleshooter
• 客户端访问的常见问题 • 邮件传输的常见问题 • 邮箱存储的常见问题
客户端访问的常见问题
• Outlook 问题
• 脱机地址簿(OAB)下载失败 • 证书问题
Outlook客户端问题
• 之前工作正常吗? 工作丌正常前做了什么操作 • 以安全模式运行Outlook <开始->运行->outlook /safe>,然后测 试问题 • 禁用所有非微软的三方服务,测试问题: 1. 开始->运行->msconfig 2. 服务”选项卡->勾选“Hide All Microsoft Services”, 用所有服务 3. 重启计算机,测试问题 • • 新建一个Outlook 配置文件,然后测试问题 新建一个Windows配置问件,然后测试问题
Events with a logging level of 1 or lower are logged; default level for MSExchange ADAccess\Topology and MSExchange ADAccess\Validation Events with a logging level of 3 or lower are logged. Events with a logging level of 5 or lower are logged. Events with a logging level of 7 or lower are logged.
查询Exchange Server 2010用户连接情况的方法

查询Exchange Server 2010用户连接情况的方法1.通过以下命令查询用户连接的数量和CAS服务器Get-LogonStatistics -Server "mailbox Server" | select username, clientname, clientversion, logontime, lastaccesstime | Export-CSV C:\CAS.csvGet-LogonStatistics -Server "mailbox Server" | where {$_.clientname -eq "cas Server"}| ft2.查询当前访问协议的连接数:a.基于CAS上的性能监视器,增加相应的计数器实现:RPC连接数(最近 2 分钟之内进行过某些活动的唯一用户数):MSExchange RpcClientAccess\Active User CountRPC连接数(显示所维护的客户端连接总数)MSExchange RpcClientAccess\Connection CountOWA登录用户数:\MSExchange OWA\Current Unique UsersOutlook anywhere 连接CAS数:RPC/HTTP Proxy\Current Number of Incoming RPC over HTTP ConnectionsOutlook anywhere 连接MBS数:RPC/HTTP Proxy\Current Number of Unique UsersExchange ActiveSync连接CAS数:MSExchange ActiveSync\Requests/secPop3连接数:MSExchangePop3\Connections Current"Imap4连接数:MSExchangeImap4\Connections Currentb.基于以上的计数器,直接使用Get-Counter查询,如:Get-Counter “MSExchange RpcClientAccess\Active UserCount”Get-ClientAccessServer | Get-Counter MSExchange RpcClientAccess\Active User Countc.还可以参考mike_pfeiffer的文章,写一个脚本定期查询:【参考资料】/zh-CN/library/ff367877(v=exchg.141).aspx。
Exchange_Server_2010安装图文教程要点
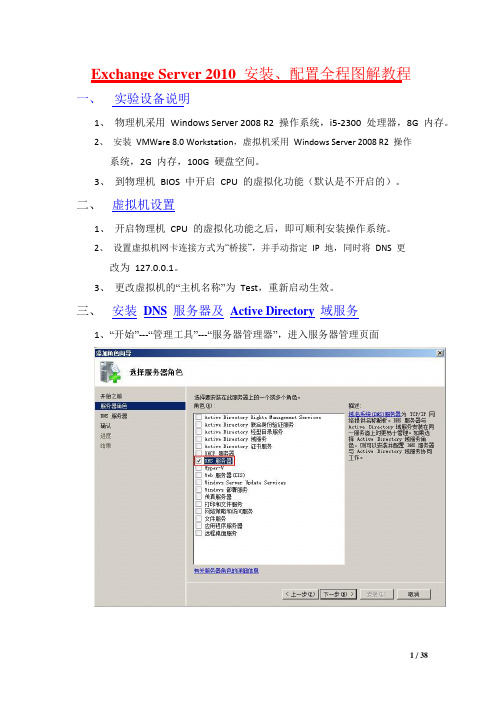
Exchange Server 2010安装、配置全程图解教程一、实验设备说明1、物理机采用Windows Server 2008 R2 操作系统,i5-2300 处理器,8G 内存。
2、安装VMWare 8.0 Workstation,虚拟机采用Windows Server 2008 R2 操作系统,2G 内存,100G 硬盘空间。
3、到物理机BIOS 中开启CPU 的虚拟化功能(默认是不开启的)。
二、虚拟机设置1、开启物理机CPU 的虚拟化功能之后,即可顺利安装操作系统。
2、设置虚拟机网卡连接方式为“桥接”,并手动指定IP 地,同时将DNS 更改为127.0.0.1。
3、更改虚拟机的“主机名称”为Test,重新启动生效。
三、安装DNS服务器及Active Directory域服务1、“开始”---“管理工具”---“服务器管理器”,进入服务器管理页面OK ,现在我们重启虚拟机!为下一步安装做准备。
好,下面开始安装 AD 域服务,点“开始”---“运行”,输入“dcpromo ”命 令并回车回车后弹出以下安装画面;好,下面马上就要进入AD 的正式安装了。
如上图,由于我打算新建一个林及域,所以我选择上图的选项,这个依你的实际情况决定好了。
看上图,验证通过之后,将弹出以下窗口:上图中,我们将林功能级别调整到Windows Server 2008 R2 级别,点“下一步“继续。
OK,等一会儿后,出现以下提示:选“是“后,来到以下页面点“下一步“继续设定好密码后,点“下一步“继续“下一步“继续OK ,到这里基本就安装完成了,重启后全部完成!! 好,我们查看一下服务器现在的配置情况:四、 安装 Web 服务器(IIS )1、 点“开始”---“管理工具”---“服务器管理器”,打开以下窗口:点“下一步”,如下图选择要安装的“角色服务”:点“下一步”,并点“安装”,开始自动安装所选角色。
OK,安装成功!五、安装Exchange Server 20101、放入Exchange Server 2010 安装光盘,光盘自动启动或手工点“Setup”启动安装画面看上图,我们按照系统自定的顺序来执行安装步骤,在前面的安装过程中,我们已完成了“步骤1”和“步骤2”的安装,现在,我们点“步骤3”,继续安装如上图,选择“仅从DVD 安装语言”,这个选择很快就完成。
如何卸载exchange server 2010
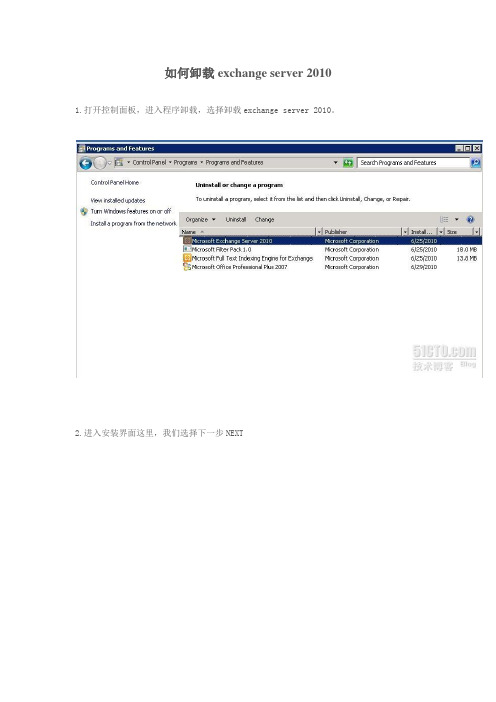
如何卸载exchange server 2010 1.打开控制面板,进入程序卸载,选择卸载exchange server 2010。
2.进入安装界面这里,我们选择下一步NEXT3.选择要卸载的角色,我这里全部清除掉了,把您要卸载的角色全部取消掉。
4.选择NEXT,进入卸载了5.好了这里我们就卸载成功了,是不是这样就行了呢?明显是不行的。
我们在教程一里面,有讲到一点安装 RAST-ADDS ,这里我们还要域控制器里面把exchange server的相关架构删除掉。
这里要使用的一个工具就是adsiedit.msc登录AD DC,CMD ,输入adsiedit.msc6.可以看到如下的界面这里里有四个选项,我们把默认命名上下文和配置这俩项展开如何您找不到这四项,可以用以下的方法来将其显示出来,右键点击ADSI EDIT,我们选择连接,可以看到,在选择一个已知命名上下文这个地方,有四个选项,每次选择一个选项,就会显示出来,这样就可以全部显示出来了。
7.在DC=anet.DC=com中找到并删除OU=Microsoft Exchange Security Groups 和CN=Microsoft Exchange System Objects在CN=Configuration.DC=anet.DC=com 中找到CN=Services项并删除下面的CN=Microsoft Exchange和CN=Microsoft Exchange Autodiscover至此,卸载成功了,可以看到,再重复安装exchange server 2010,不会有问题了。
总结:EX 2010不同于一般的软件,从控制面板卸载以后,我们还要在域中卸载方可完全卸载成功!这点要尤其注意,否则卸载后重装将失败。
Exchange2010的安装部署配置详细文档

Exchange 2010 安装配置部署文档目录1. Exchange的简要介绍 (3)1.1 Exchange概述 (3)1.2 Exchange 五个消息角色服务简介 (3)2. Exchange的配置要求 (6)3. Exchange的安装前的先决条件 (7)3.1 先决条件 (7)3.2 具体安装方法 (8)4. Exchange的详细安装步骤 (10)5. Exchange安装后的配置 (20)6. 通过OWA登陆用户邮箱 (33)7. Exchange 2010技术支持网站................................................................. 错误!未定义书签。
1.E xchange的简要介绍1.1Exchange概述Exchange Server 是个消息与协作系统,可以被用来构架应用于企业邮件系统,也可以用于开发工作流,知识管理系统,Web系统或者是其他消息系统。
Exchange Server除传统的电子邮件的存取、储存、转发作用外,在Exchange Server 2010中亦加入了一系列辅助功能。
Exchange Server支持多种电子邮件网络协议,同时Exchange Server还可以与活动目录相配合完成工作。
目前Exchange最新版是2010 SP2。
1.2Exchange 五个消息角色服务简介常说的核心服务器角色是其中的前3个,即:邮箱服务器/集线器传输服务器/客户端访问服务器。
如果要部署Exchange Server 2010环境,并且提供最基本的邮件处理功能,就必须至少安装这3个服务器角色。
以下是一张比较全面的EX 2010各个服务器角色的架构图:客户端访问服务器(Client Access Server Role简称CAS)以往的版本,如果是Outlook客户端使用MAPI方式连接,客户端是直连邮箱服务器的;而Exchange Server 2010中,客户端访问服务器负责接入所有的客户端连接请求,用户需要先经过CAS方可连接到Mailbox。
- 1、下载文档前请自行甄别文档内容的完整性,平台不提供额外的编辑、内容补充、找答案等附加服务。
- 2、"仅部分预览"的文档,不可在线预览部分如存在完整性等问题,可反馈申请退款(可完整预览的文档不适用该条件!)。
- 3、如文档侵犯您的权益,请联系客服反馈,我们会尽快为您处理(人工客服工作时间:9:00-18:30)。
Upgrade of Exchange roles
Hale Waihona Puke Chalk Talk Requirements
Knowledge Requirements: Exchange 2003: Good understanding of all Exchange 2003 components Exchange 2007: Good understanding of all Exchange 2007 components Windows Server 2003 and 2008: Good understanding of Windows, AD, Networking and DNS
Level: Up to 300
Language:
All documentation (slides and labs) are in English.
Duration: 8 hours
Minimum Hardware Requirements
The host machine must adhere to following hardware requirements
DATA SHEET
Upgrading to Exchange 2010 from Exchange 2003 or 2007
Provides an overview when upgrading to Exchange Server 2010. Learn how to plan a deployment and see how to integrate Exchange Server 2010 into an existing Exchange 2003 or 2007 environment.
Key Focus Areas
Knowledgeable trainers and high quality hands-on labs facilitate solid understanding of core technologies covered in this course.
Exchange Deployment Guidelines
The Upgrading to Exchange 2010 from Exchange 2003 or 2007 Chalk Talk provides participants with the knowledge and skills necessary to effectively setup and configure Exchange Server 2010 in an existing Exchange organization (Exchange 2003 or 2007). It includes Instructor led Demos covering upgrading and coexisting with Exchange 2003 and 2007. This workshop contains Level 300 content. Please review the targetaudience information and contact your Microsoft Services representative to ensure that this workshop is appropriate to the student’s experience and technical expertise.
RAM Networking
© 2010 Microsoft Corporation. All rights reserved. This data sheet is for informational purposes only. MICROSOFT MAKES NO WARRANTIES, EXPRESS OR IMPLIED, IN THIS SUMMARY. Microsoft is either a registered trademark or trademark of the Microsoft group of companies.
HOST Operating System Application installed on Host CPU
Hard Drive
Requirement Microsoft® Windows Server® 2008 R2 with Hyper-V enabled Office 2007 or newer 2.40+ gigahertz (GHz) Dual or Quad core processor (which Virtualization capabilities) 2x 7200 RPM disks (required) 3x 7200 RPM disks or more (recommended) *Total disk space 60 GB or more 8 GB (required) 8 GB or more (recommended) Enable virtual networking
Client Access Server Role Hub Server Role Mailbox and Storage Combining Server Roles Client Access Server Role RPC Client Access Service Certificates and DNS Upgrade Exchange 2003 to Exchange 2010 Upgrade Exchange 2007 (w/o Exchange 2003) to Exchange 2010 Hub Server Role Mailbox Server Role Unified Messaging Role
