apex__introduction
Apex Xavier 用户手册说明书
Apex Xavier 用户手册安全警示及使用注意事项简介 Brief产品清单产品规格 Specifications处理器模组 Processor接口 I/O供电 Power Supply结构 Mechanical环境 Environmental认证 Certification尺寸及安装 Install Dimension服务与支持技术支持保修接口说明及扩展安装方式接口说明正面接口左侧接口右侧接口EXPANSION PORT 接口信号定义EXPANSION PORT 接口信号定义GPIO接口定义背面接口IO转接线说明UART(TTL/232)连接线及引脚定义UART(232/422/485)连接线及引脚定义CAN连接线及引脚定义PPS连接线及引脚定义SYNC连接线及引脚定义功能按键扩展设备的安装方式M.2 B Key 4G支持清单功能介绍通用使用方法系统介绍烧写镜像开关机MIIVII SETTINGS的使用说明简介使用视频登陆功能说明系统状态系统设置系统升级账号管理日志导出功率模式设定IO使用方法GPIO接口配置方法UART接口配置方法GPS 对设备授时使用方法GPS支持型号连接方式授时功能配置检查授时是否成功故障排查1.查看GPS是否有输出2.查看GPS的pps信号是否有输出3.识别方法CAN口配置方法扩展设备配置方法扩展SSD硬盘使用无线设备配置方法WiFi配置方法4G模块配置方法同步功能使用说明同步功能介绍同步功能使用方法PPS同步模式Sync out 同步模式Sync in 同步模式同步误差测试方法通过示波器测量PPS脉冲间隔通过示波器测量Sync out脉冲间隔自行评估同步效果的方法同步sample code使用说明Sync out jitter测量Sync in jitter测量PPS jitter测量GMSL摄像头使用方法接口特性GMSL摄像头支持连线方式摄像头配置视频输出GMSL/GMSL2时间戳相关测试方法如何获取详细日志及日志说明?如何确认时间戳是否准确?如何确认时间戳精度?如何确认图像帧传输延迟是否稳定?确认摄像头图像帧传输延迟Apex Xavier IIApex Xavier和EVO TX2 GMSL2应用功能使用附录异常处理系统在线升级(OTA)的使用说明概述使用方式方法一(推荐):使用MIIVII SETTINGS进行版本升级和回退;方法二:使用命令行进行升级或者升级指定安装包使用命令行进行升级升级指定安装包Jetpack 4.4版本及以下镜像烧录Jetpack 4.5版本及以上镜像烧录1.功能介绍核心功能2.准备软件硬件2.1. 烧写主机准备2.2. 烧写软件环境准备2.3. 准备米文烧写工具和米文设备镜像2.3.1.刷机工具安装2.4. 准备硬件3.操作3.1. 硬件连接3.2软件使用3.2.1. 镜像烧写3.2.1.1在线模式镜像烧写3.2.1.2离线模式镜像烧写3.2.2. 镜像克隆附1. 烧写问题自检安全警示及使用注意事项请在使用本产品前仔细阅读本手册,未经授权的操作会导致错误或意外。
Salesforce Apex语言简介

Map<ID,Contact> m = new Map<ID, Contact>([select id, lastname from contact]);
Set<String> s = new Set<String>('a','b','c'); s.add(c'); System.assert(s.contains('b')); System.assert(s.size() == 3);
-----------------------------------------------------------一个列表(Lists)是一个元素的集合。当需要实现一个序列的时候使用,可以包含 重复的元素。 ------------------------------------------------------------
下面是一个类和接口实现的简单例子: ------------------------------------------------------------
public interface PurchaseOrder {
Double discount(); } public class CustomPurchaseOrder implements PurchaseOrder {
//List Exception handling code here } catch(Exception e) {
《Apexlegends》游戏简论(二)

在此主要向读者介绍《Apex legends 》游戏的人物模型机制,以及玩家在游玩中可以选择的另外4种角色。
HitboxHitbox 指:游戏中,各贴图的击中判定模型。
当射击Hitbox 时,视为击中目标。
在《Apex 》中,不同的传奇有着不同的Hitbox ,玩家在使用一部分传奇时,非常容易被敌人击中。
导致一些传奇虽然有着非常实用的技能,但玩家却很少在游戏中选择这名传奇。
通过对国内外论坛及视频查询并测试后得到结果如下:人物的Hitbox 从小到大依次是:恶灵、寻血猎犬、生命线、幻象、班加罗尔、探路者、侵蚀和直布罗陀,数值上,以恶灵为基准,各传奇约为:寻血猎犬、生命线=恶灵×112%幻象、班加罗尔=恶灵×133%探路者=恶灵×190%侵蚀=恶灵×205%直布罗陀=恶灵×240%班加罗尔充能时间:270秒命脉命脉是一名战地医护兵,相对于其他传奇,她可以更安全地救助队友,并且治疗他们。
被动技能———战斗医疗兵:更快地扶起被击倒的队友,并且救治期间在正面撑起一个无敌的护盾、使用治疗道具使用速度提高25%。
战术技能———D.O.C.治疗机器人:拿出一个治疗机器人,机器人会自动持续治疗附近的所有玩家。
绝招———空投舱:在空地上呼叫一个空投箱,空投内随机出现3个装备。
需要注意的是,呼叫空投后,附近的玩家也将会看到空投,使用者需要选择合适的时间呼叫,以免暴露自己。
直布罗陀直布罗陀是一名防护型的传奇,但需要注意的是,他的体型是游戏目前最为巨大的,非常容易被击中,玩家在使用的时候需要非常注意走位。
被动技能———枪盾:在瞄准时将部署枪盾,枪盾无法遮挡头部,护盾值约为80。
战术技能———保护圆顶:投放圆顶防护罩持续15秒,护盾半透明,所有伤害均无法穿过两侧护盾。
绝招———防御性轰炸:玩家使用烟雾手榴弹标记地点,该地点将在数秒后遭到迫击炮打击。
侵蚀腐蚀是游戏中唯一能放置陷阱的传奇。
apex user manual (apex用户手册)

BRUKER ADVANCED X-RAY SOLUTIONSUSER’S MANUALM86-E02015 -0800SMART APEX User’s ManualThis manual covers the SMART APEX software package. To order additional copies of this publication, request the part number shown at the bottom of this page.© 2000 Bruker AXS Inc. All world rights reserved.Printed in U.S.A.NoticeThe information in this publication is provided for reference only. All information contained in this publication is believed to be correct and complete. Bruker AXS Inc. shall not be liable for errors contained herein, nor for incidental or consequential damages in conjunction with the furnishing, performance, or use of this material. All product specifications, as well as the information contained in this publication, are subject to change without notice.This publication may contain or reference information and products protected by copyrights or patents and does not convey any license under the patent rights of Bruker AXS Inc. nor the rights of others. Bruker AXS Inc. does not assume any liabilities arising out of any infringements of patents or other rights of third parties.Bruker AXS Inc. makes no warranty of any kind with regard to this material, including but not limited to the implied warranties of merchantability and fitness for a particular purpose.© 2000 Bruker AXS Inc., Madison, Wisconsin 53711 USA, all world rights reserved. Printed in the United States of America. No part of this publication may be stored in a retrieval system, transmitted, or reproduced in any way, including but not limited to photocopy, photography, magnetic, or other record without prior written permission of Bruker AXS Inc.Address comments to:Marketing Communications DepartmentBruker AXS, Inc.5465 East Cheryl ParkwayMadison, Wisconsin 53711-5373USANote:1.Windows NT is a registered trademark of Microsoft.M86-E02015 -0800Table of Contents1Introduction.............................................................................................................................1-11.1SMART APEX Features..................................................................................................1-11.2How to Use This Manual..................................................................................................1-1 2Software Overview..................................................................................................................2-13Hardware Overview.................................................................................................................3-13.1SMART APEX System Components................................................................................3-13.23-axis Goniometer Module with SMART APEX Detector..................................................3-33.3Accessories.....................................................................................................................3-64Data Collection........................................................................................................................4-14.1Activate the Video Program.............................................................................................4-24.2Activate the SMART Program.........................................................................................4-34.3Optically Align the Sample..............................................................................................4-74.4Unit Cell Determination.................................................................................................4-124.5Data Collection..............................................................................................................4-144.6Least Squares Refinement............................................................................................4-15 5Data Integration.......................................................................................................................5-1 6Structure Determination & Refinement..................................................................................6-1M86-E02015 -0800iTable of Contents SMART APEX User’s Manual iiM86-E02015 -08001.1 SMART APEX FeaturesThe Bruker AXS SMART APEX system is the newest member the SMART CCD product line of instrumentation for single crystal X-ray diffraction. This system is completely redesigned and features a new CCD detector, based upon a 4K CCD chip. It also incorporates a new goniometer with an enhanced interface, all enclosed in a fail-safe X-ray enclosure system.From a software and operational viewpoint, the SMART APEX system shares many common features with its predecessors (SMART 1K, SMART 2K, SMART 1000, SMART 2000, SMART 1500, SMART 6000, and SMART 6500). These features are discussed in the SMART Reference Manual. Also, most of the information in the current SMART, SAINT, and ASTRO manuals applies to the SMART APEX system and the other SMART CCD systems.From a hardware viewpoint, the SMART APEX also shares common hardware components. Other members of this new generation of instruments include the D8 ADVANCE and D8 DISCOVER, and the D8 GADDS systems for general diffraction. Documentation on some of these common hardware and software components is available in the user’s manuals for the D8 family of instruments.1.2 How to Use This ManualThis manual covers basic tutorial steps to get you started using the SMART APEX X-ray diffractometer system.The manual leads you step-by-step through an actual data collection and structure determination experiment performed on a typical system. Additional reference is made (where necessary) to related program manuals (SMART, SAINT, ASTRO, and SHELXTL), appendices, other factory documentation, and standard crystallographic reference materials. And special notes are included where new users tend to have problems.Information is organized in this manual as follows:• Section 1, Introduction, presents system features and instructions on using thismanual.• Section 2, Software Overview, provides details on the software used with thesystem.1 IntroductionM86-E02015 -08001-1Introduction SMART APEX User ’s Manual1-2M86-E02015 -0800• Section 3, Hardware Overview, provides details on the system configuration for those not familiar with the equipment.Included is a brief description of each component as well as options available with the system.•Section 4, Data Collection, describes basic operation of the hardware and software of the SMART APEX system to collect single crystal X-ray diffraction data. Procedural steps are presented in a typical fashion that you would use to analyze an unknown sample.•Section 5, Data Integration, explains how to convert the raw frame data to a set of integrated intensities that can be used to solve and refine the crystal structure. This section will illustrate use of theSAINTPLUS interface program to carry out integration of a data set previously collected in Section 4.•Section 6, Structure Determination &Refinement, demonstrates how to use the reduced intensity data to produce a crystal structure. The SHELXTL suite of crystallographic programs will be described.Examples in this manual use the specimen sample 2-dimethylsulfuranylidene-indan-1, 3-dione (YLID)1, similar to the crystal provided with your system. By using a similar sample,you can duplicate the procedures described in this manual and obtain similar results to assure your understanding of the SMART programs. (That is, your results should match those outlined in this manual except for minor variations caused by slight differences in specimens or instrument parameters.)Note : Before using this manual, ensure that the system is in proper working condition (e.g.the X-ray tube is aligned) and that all software has been properly installed.The essential software components of the SMART APEX system (located in the Bruker AXS program folder on your Windows NT desktop) are:SMART program This on-line programcontrols the instrument tocollect the experimentaldata used by the otherprograms in the systemprogram suite.SMART program This off-line versionperforms many datadisplay and manipulationfunctions but cannotcontrol the instrument. VIDEO program This program controls thereal-time video imagesfrom the video camera.SAINTPLUSprogramThis program sets up andcarries out the integrationprocess.SHELXTLprogramsThis program suiteproduces a crystalstructure from theintegrated data.2 SoftwareOverviewM86-E02015 -08002-1Software Overview SMART APEX User’s Manual 2-2M86-E02015 -08003.1 SMART APEX SystemComponentsThe SMART APEX system (Figure 3-1) consists of the following basic components.•3-axis goniometer module with SMART APEX detector (see Section 3.2)•Radiation safety enclosure with interlocks and warning lights•D8 controller•Refrigerated recirculator for SMART APEX detector•Computer3 HardwareOverviewFigure 3-1. SMART APEX system componentsM86-E02015 -08003-1Hardware Overview SMART APEX User ’s Manual3-2M86-E02015 -0800Radiation safety enclosure with interlocks and warning lightsA common component of all systems in the D8 family is the radiation safety enclosure.This new design is fully leaded (leaded metal sides and panels, leaded windows) to protect you from stray radiation. The enclosure also includes warning lamps (a governmentrequirement) that alert you when X-rays are being generated. And, as a special feature,the enclosure incorporates interlocks (for both hardware and software)—an automaticsystem-interruption device that senses when the doors and panels are open and prevents use of the shutter and data collection until you close the doors.D8 controllerThe D8 controller is an electronic module enclosed in the rack behind the font panel of the instrument. It contains all of the electronics and firmware for driving goniometer angles, opening the X-ray shutters, and monitoring other instrumentfunctions, such as safety interlocks, generator status, and detector statuses.Refrigerated recirculator for SMART APEX detectorThe refrigerated recirculator uses Peltiertechnology to cool the CCD chip to a required -40° C to minimize dark currents.ComputerIncluded with the system is a high-speed computer, which is used for control of the experiment, storage of raw frame data,integration of data, and solution andrefinement of the structure. The computeruses the Microsoft Windows NT ®operating system and includes the software described in Section 2. Often the computer is attached to a network of similarly configured computers with access to local and/or network printers.SMART APEX User ’s Manual Hardware OverviewM86-E02015 -08003-33.23-axis Goniometer Module with SMART APEX DetectorThe 3-axis goniometer module and itsassociated SMART APEX detector comprise the unique hardware of the SMART APEX system. This is the part of the instrument that actually performs the experiment.Several components comprise the 3-axis goniometer module with SMART APEX detector (Figure 3-2).•Goniometer with fixed chi (χ)stage •X-ray source (including shielded X-ray tube, X-ray safety shutter, and graphite crystal monochromator)•SMART rotary shutter and incident beam collimator (with beam stop)•SMART APEX detector •K760 X-ray generator •Manual control module •Video cameraGoniometer with fixed chi stageThe standard SMART APEX system uses a horizontally oriented D8 PLATFORMgoniometer base (with 2-theta [2θ] and omega [ω] drives) with dovetail tracks for the X-ray source and the detector, and mounting posts for accessories such as the video camera and optional low-temperature attachment. The system also incorporates a fixed chi stageFigure 3-2. SMART APEX & goniometer module instrumentationHardware Overview SMART APEX User ’s Manual3-4M86-E02015 -0800with chi angle of approximately 54.74° and a phi drive with 360° rotation.All four axes (2θ, ω, φ, and χ) intersect within a volume of approximately 10 microns. These axes are shown in Figure 3-3.Figure 3-3. Fixed χ, 3-axis goniometerX-ray sourceThree components (Figure 3-2) comprise the X-ray source: a shielded X-ray tube, an X-ray safety shutter, and a graphite crystal monochromator.The sealed tube X-ray source, with amolybdenum (Mo) target, produces the X-ray beam used by the SMART APEX system.The X-ray safety shutter is built into the X-ray tube shield. The shutter opens upon initiation of a set of exposures and closes upon the end of collection. Status lamps on the shutter housing indicate when the shutter is open (green) and closed (red). The shutter is also interfaced to the controller and to the safety interlocks.A tunable graphite crystal monochromator selects only the K α line (λ=0.71073Å) emitted from the Mo X-ray source and passes it down the collimator system.SMART Rotary Shutter and Collimator The monochromatic X-ray beam then passes through the labyrinth, the SMART rotary shutter, and the incident beam collimator before striking the specimen.•The labyrinth is a spring-loaded device,which ensures that the collimator and the SMART shutter are tightly connected to prevent X-ray leakage.•The SMART shutter is a device which precisely controls the exposure time foreach frame during data collection. ItsSMART APEX User ’s Manual Hardware OverviewM86-E02015 -08003-5status lamps indicate when the shutter is open (ON) and closed (OFF). This assembly also houses an automatic attenuator.•The incident collimator is equipped with pinholes at both front (near crystal) and rear (near source). These pinholes help to define the size and shape of the incident X-ray beam that strikes the specimen. You will normally use a collimator with 0.5 mm pinholes. (Collimators are available in a variety of sizes, depending on your application.)•The beam stop (a hook-like assembly attached to the collimator) catches the remainder of the direct beam after it has passed the specimen. The beam stop has been aligned to minimize scattered X-rays and to prevent the direct beam from hitting the detector.The entire collimator assembly is supported by a collimator support assembly, which has been precisely aligned to guarantee that the X-ray beam passes through the center of the goniometer.SMART APEX detectorThe SMART APEX detector is specific to this system. It is mounted on a 2θ dovetail track.The track has a scale that is calibrated to indicate the distance from the crystal to the phosphor window (a typical distance is 6 cm).Status lamps on the detector housing indicate when the detector is on (green) and off (red).K760 X-ray generatorThe K760 X-ray generator is a high-frequency, solid-state X-ray generator, which provides a stable source of power for operations up to 60 kilovolts (kV) and 50milliamps (mA). For the SMART APEXsystem, power settings should never exceed the maximum power rating of the X-ray tube.(Typical maximum power settings for the SMART APEX system with a normal focus tube are 50 kV, 40 mA. The kV setting should not exceed 50 kV.) This generator isinterfaced to the controller, and the power settings may be adjusted either from front panel buttons or from within the SMART software.Manual control moduleThe manual control module is a remotedevice that you will use in certain operations to manually drive angles (particularly inoptical alignment of a specimen). The module is physically the same as in other D8 systems but has a different keypad and functions. In this application, you will use only the first three rows of buttons and the AXIS PRINT button.Video cameraThe video camera, an essential part of the system, allows you to visualize the crystal to optically align it in the X-ray beam and to measure the crystal dimensions and index crystal faces. The camera is interfaced to the computer and is operated through the VIDEO program. The camera is mounted in the accessories track of the goniometer base.Hardware Overview SMART APEX User’s Manual3.3 AccessoriesVarious devices can be mounted in anaccessories track on the goniometer base.These include an optional low-temperatureattachment.3-6M86-E02015 -0800We are now ready to begin actual operation of the instrument, using the YLID test crystal (mentioned in section 1). We assume that your system manager has set up the system properly and that all system default parameters have been set appropriately.At this time, double click the BrukerAXS Programs icon on the Windows NT desktop (Figure 4-1).Figure 4-1. Bruker AXS programs icon on desktopThe BrukerAXS Programs window appears (Figure 4-2), containing icons for the Bruker AXS Program modules described in Section 2.Figure 4-2. BrukerAXS programs window4 DataCo llectionM86-E02015 -08004-1Data Collection SMART APEX User’s Manual4-2M86-E02015 -08004.1 Activate the Video ProgramBefore starting the SMART program, you must first activate the video camera as follows:1. Double-click the Video (binoculars) icon(recall Figure 4-2) to start the Video program and display the main window (Figure 4-3).Figure 4-3. Video program’s main window2. Click File > New Image to open a new file(Figure 4-4).Figure 4-4. Create new video image3. Then press the green arrow button in thetoolbox to start the video frame grabber (Figure 4-5).Figure 4-5. Start video frame grabberThe video camera is now ready for later use.Continue now to the SMART Program sectionof this manual.SMART APEX User ’s Manual Data CollectionM86-E02015 -08004-34.2 Activate the SMART ProgramActivate the SMART program as follows:1. Double-click the SMART (goniometer)icon to start the SMART program.SMART establishes communication with the D8 controller, the SMART APEXdetector, and the X-ray generator. Then it displays its main screen without unit cell information (Figure 4-6).Figure 4-6. Main screen without unit cell informationThen SMART reminds you where you last worked and displays the next message (Figure 4-7).Figure 4-7. Return to project2. Press the Yes button (normal response).The program then informs you that it has changed directories and asks forconfirmation to continue (Figure 4-8).Figure 4-8. Confirmation of current directoryData Collection SMART APEX User ’s Manual4-4M86-E02015 -08003. Press OK (normal response). Theprogram then communicates with theinstrument, then loads the calibration files and parameters from the previous project (Figure 4-9).Figure 4-9. Screen showing data from previous projectNote : While presenting data(handshaking), the menu headings appear grayed (inactive). Once all data has been displayed (handshakingfinished), the menu headings return to black (active).4. Click Crystal > New Project to start a newproject. A new project options window appears (Figure 4-10).Figure 4-10. New project options window after entering information5. Fill in all available information as shown(Figure 4-11). Note that you must specify a Project Name (lines 1 and 2) and a Working Directory and a Data Directory (which may be the same). You should also enter additional information specific to your specimen so that it will appear in the final structure report. When you are finished, click OK.Figure 4-11. Options windowSMART APEX User ’s Manual Data CollectionM86-E02015 -08004-5The following save message appears (Figure 4-12).Figure 4-12. Save the current configuration6. Press Yes. Another message prompts youto create the new directory (Figure 4-13).The message will appear twice if the working directory and the data directory are not the same.Figure 4-13. Create the new directory7. Click Yes (normal response). SMARTthen asks you to load the system default settings (Figure 4-14).Figure 4-14. Project defaultsData Collection SMART APEX User ’s Manual4-6M86-E02015 -08008. Select Small Molecule, then press OK.SMART loads the system defaults and displays a SMART screen. This screen will contain the sample-to-detector plane distance, the current goniometer angle settings, current dark and flood files, and information concerning your project and its working and data directories. No unit cell information displays. (Figure 4-15.)Figure 4-15. SMART screen with loaded data9. Click Level > Level1 (Figure 4-16). Thislevel has a minimum number of options for routine problems, such as YLID, and will be used for this tutorial experiment.Level2 has more crystallography options required for special problems. Level3 is designed for use by a system manager only.Figure 4-16. Level menu10. Click Goniom > Zero to drive all angles tozero, and check the goniometer scales toensure that all angles read zero. Thefollowing drive message appears (Figure4-17).Figure 4-17. Drive all angles to zeroThe system is now ready for you to begin the experiment.CAUTION: Use extreme care whenhandling the goniometer head to preventdamage to your expensive sample on theend of the small glass fiber.11. Carefully remove from its case thegoniometer head containing the YLID testcrystal.12. Place the goniometer head onto its baseon the phi (φ) drive, aligning the head’skey slot with the key (pin) in the base.Snugly screw the head’s collar to the base such that the head does not move, but do not overtighten it.Note: At φ=0°, the key on the mountingbase of the goniometer head will be at the 12:00 position.13. Click Crystal > Generator to check the X-ray power. The Goniometer /GeneratorOptions panel appears (Figure 4-18).Figure 4-18. Goniometer /Generator Options panel14. Set appropriate values for kilovolts (kV)and milliamps (mA). For this experiment,we want 50 kV and 30 mA. Click OK toprogram these new settings.4.3 Optically Align the SampleTo obtain accurate unit cell dimensions and to collect good quality data, you must align the center of the sample with the center of the X-ray beam and maintain the alignment for the entire experiment. We assume that your video camera has been aligned so that the crosshairs of the video camera coincide with the center of the goniometer and the center ofthe X-ray beam.M86-E02015 -08004-74-8M86-E02015 -0800Align the sample as follows:1. Click Crystal > Evaluate to begin thealignment of the sample in the center of the X-ray beam.The alignment process combines optical alignment steps with rotational photo steps. The menu bar at the top of the SMART screen remains gray (Figure 4-19) until you complete the opticalalignment step and exit by pressing the ESC key.Figure 4-19. Grayed SMART screen menu bar during optical alignmentDuring the first stage (optical alignment),you will control the instrument from the manual control module (Figure 4-20)using buttons A and B.Figure 4-20. Manual control moduleAlso during optical alignment, you will adjust the goniometer head at screw locations shown in Figure 4-21. Use the goniometer wrench to unlock the axis adjustment locks and later lock them. Use the other end of thewrench to turn the adjustment screws.M86-E02015 -08004-9Figure 4-21. Goniometer head adjustment locations2. Click on the Video window to display thereal-time image of the crystal (Figure 4-22).Figure 4-22. Real-time image of the crystal3. Press the A button on the manual controlmodule to drive the goniometer angles to the base position (2θ = -30°, ω = -30°)and φ = 0° for optical alignment.Note : If you have difficulty seeing the image of the crystal, you may want to better illuminate the sample with a high-intensity lamp and/or temporarily place a light-colored piece of paper on the front of the detector.4. Adjust the goniometer head ’s Z-axisadjustment screw (recall Figure 4-21) until the crystal is near the crosshairsintersection on the video screen (Figure 4-23).Figure 4-23. Crystal near the crosshairs intersection4-10M86-E02015 -08005. Adjust the goniometer head ’s X-axisadjustment screw to center the crystal on the crosshairs intersection (Figure 4-24).Figure 4-24. Crystal centered on crosshairs (φ =0°)6. Press the A button again to rotate the phiby 180° and to verify that you have correctly centered the sample at both φ=0° and φ =180°. (Do not be concerned if the crystal moves away from its center as it rotates; you have not yet adjusted the Y axis.)Note : Repeat this process as many times as necessary. Each time you press the A button, the phi angle will rotate between 0° and 180°.7. Press the B button to rotate the phi angleto 90° for adjustment of the Y axis (Fig 4-25).Figure 4-25. Crystal oriented for Y-axis adjustment8. Adjust the goniometer head ’s Y-axisadjustment screw (Figure 4-19) to center the crystal on the crosshairs intersection (Figure 4-26).Figure 4-26. Crystal centered on crosshairs (φ =90°)M86-E02015 -08004-119. Press the B button again to rotate the phiangle to 270° and to verify that you have correctly centered the sample at both φ=90° and φ =270°.Note : Repeat this process as many times as necessary. Each time you press the B button, the phi angle will rotate between 90° and 270°.The center-of-mass of a properly aligned specimen should stay in the same place with respect to the center of the crosshairs in all angle settings.Note : If the video camera has become misaligned, the center of the crosshairs may need to be adjusted by your system manager.10. Cycle between the two positions of both Aand B one last time to ensure that the crystal remains centered in all positions.11. After the alignment has been completedusing A and B positions, you should verify the alignment by using the C and D buttons in a similar manner.12. When you have completed the opticalalignment steps, remove any paper you might have placed on the detector face and close the doors of the enclosure.13. Click on the SMART program window,then press the ESC key to exit the optical alignment stage. SMART then prompts for a rotation photograph (Figure 4-27).Figure 4-27. Prompt for a rotation photograph14. Press Y (normal response). SMART willthen perform a 60-second rotation photo.During this time, phi data on the screen will be highlighted and the shutter data will read: OPEN. Upon completion of the photo, the image frame will display on the screen (Figure 4-28).Figure 4-28. Image frame following 60-second rotationAt this time, proceed to Unit CellDetermination.4.4 Unit Cell Determination Perform a unit cell determination as follows: 1. From the SMART program, click Crystal> Unit Cell. The following messageappears, asking you to verify that thedistance and beam center are correct(Figure 4-29).Figure 4-29. Distance and beam center verification2. Ensure that the distance shown on thedetector scale agrees with the valueshown on the screen. Then press Yes.SMART then displays a set of defaultvalues for unit-cell determination andasks you to confirm them (Figure 4-30). Figure 4-30. Set of default values for unit-cell determination 3. Press OK (as these values areappropriate for this crystal). The program then collects three sets of 20 framescalled MATRIX0, MATRIX1, andMATRIX2 (Figure 4-31).Figure 4-31. Frame collection (MATRIX0, MATRIX1, and MATRIX2)When all frames have been collected,SMART performs the steps ofthresholding, indexing, Bravais latticedetermination, and least-squaresrefinement of cell constants. The YLIDtest crystal has an orthorhombic primitiveunit cell, as shown in Figure 4-32.4-12M86-E02015 -0800。
《Apex英雄》评测:3A品质的FPS游戏

《Apex英雄》评测:3A品质的FPS游戏作者:来源:《电脑知识与技术·经验技巧》2019年第04期《Apex英雄》继承自Respawn自家《泰坦陨落》系列的世界观和核心动作设计,套用了大逃杀的游戏框架。
如果拿《堡垒之夜》来比的话,对大逃杀的玩法框架改动其实并不大,国内玩家接受度会更高。
下面就给大家带来这款游戏评测,希望大家喜欢。
※远超绝大部分多人射击游戏的交流系统交流系统在解决多人射击游戏“我是谁,我在哪,我要做什么”这个问题上达到了相当不错的高度,其解决方法包括:1.丰富的指令系统:单击滚轮标记目的地,双击则是表示标记敌人,长按可以滚出类似moba游戏一样的指令轮盘,包括去那里、这里有人来过等标记。
也可以标记物品,点一下空缺的配件栏,就会自动发信息,同样,发现自己不需要的东西标记可以让队友知道等。
玩家再也不用大喊位置坐标。
2.自动语音:你做的所有事情都有一句角色语音,能替代你自己说话,比如你在停下来打血包,你的队友会听到自动语音说“我在打医疗包,请等一下”,当你搜东西不自觉跑远时,玩家的角色会语音告诉你“离开队友太远了”。
官方花了相当长的时间去专门改进陌生玩家信息交流的方式。
相信这个游戏的交流系统今后会成为多人游戏的标杆。
※丰富的角色职业系统和非常深的细节打磨角色职业系统则是这个游戏能长期运营下去的核心,也是和当前大逃杀类似游戏区别最大的地方。
单是这个设定就让它能比其他大逃杀游戏运营得更加灵活和长久,可以看产出EA和Respawn在这款游戏上非常有野心。
笔者目前还没体验过全部角色,暂时还不好说职业设计如何,目前职业设定粗略看起来有多种类型,因为限定3人组队,所以实际上没办法一次凑齐所有类型。
你可以组传统输出铁三角,也可以根据需要选择打野(侦查)等其他类型职业。
比起OW对职业的严格限制,《Apex英雄》则始终牢记自己是个射击游戏,无论什么职业,都可以依靠身法、枪法和战术来获胜,技能只能帮助玩家实现战术。
APEX 网络与主机安全最佳实践指南说明书

APEX™ Cybersecurity Best Practices MAN-00462 Revision 009Table of Contents1.0OVERVIEW (4)2.0INTRODUCTION (5)2.1.A UDIENCE (5)2.2.R EMARKS (5)2.3.D EFINITIONS,T ERMS AND A BBREVIATIONS (6)2.4.R EFERENCES (6)3.0NETWORK SECURITY (7)3.1.A CTIVE D IRECTORY (7)3.2.S EGMENTATION (7)3.3.1 VLANs (7)3.3.2 Firewall segmentation (7)3.3.E GRESS F ILTERING (7)3.4.N ETWORK M ONITORING (8)3.5.R EMOTE A DMINISTRATION (8)4.0HOST BASED SECURITY (9)4.1.A NTI-VIRUS P RODUCTS (9)4.2.H OST-BASED F IREWALLS (9)4.3.S YSTEM-LEVEL A UDITING (9)4.4.I NTERNET U SAGE (9)4.5.A UDITING (10)4.6.S YSTEM P ATCHING (10)5.0PHYSICAL SECURITY (10)5.1.D ESKTOP S ECURITY (11)5.2.O NSITE V ENDORS (11)6.0SECURING WINDOWS® (11)6.1.CPU H IBERNATION (11)6.2.N ULL S ESSIONS (11)6.3.D ISABLING S ERVICES (12)6.4.P ASSWORD S ECURITY (12)6.5.A CCOUNT L OCKOUT P OLICY (12)7.0FURTHER ASSISTANCE (13)© 2019 Hologic, Inc. Printed in the USA. This manual was originally written in English. Hologic, APEX™, and associated logos are trademarks and/or registered trademarks ofHologic, Inc., and/or its subsidiaries in the United States and/or other countries. All other trademarks, registered trademarks, and product names are the property of their respective owners.This product may be protected by one or more U.S. or foreign patents as identified at /patents.1.0OverviewHologic, Inc. develops and markets a full line of Bone products including the APEX™ system. Ensuring the integrity of our systems is a top priority for Hologic. This document provides a guide for user “best practices” to ensure the integrity of Hologic products through their lifecycle. Additionally, this document outlines the most common cybersecurity vulnerabilities and the appropriate methods for securing our products. Hologic uses Microsoft Windows 7 and Windows 10 operating systems in its Hologic DXA medical products. Although Hologic performs extensive testing prior to the deployment of our computer systems, ongoing computer security threats may pose a significant threat to the security of these systems on a daily basis. These Cybersecurity Best Practice recommendations have been performed in a laboratory environment and have undergone extensive testing. Adherence to these security recommendations will minimize the risk of cybersecurity threats. An experienced IT professional should be able to follow these instructions with minimal difficulty.2.0IntroductionHologic continually monitors the current state of computer and network security to assess potential threats to our systems. Once the concern has been identified and properly classified, Hologic performs a risk analysis to determine the potential consequences of cyber attacks. Additionally, the risk analysis will assess the potential consequences for actively mitigating the threat by inducing a product change.Hologic also has an on-going maintenance program for the entire life cycle of our products. The on-going maintenance program consists of:•Periodic Vulnerability Assessments•Laboratory evaluation of Anti-virus products•Critical security updates validation•Creation of a Cybersecurity teamHologic is committed to delivering and maintaining our products in the rapidly changing environment of cybersecurity threats. By following the Cybersecurity Best Practices below and incorporating them into your facilities security policies and protocols, your cybersecurity risk and vulnerabilities will be minimized.2.1.AudienceThis document contains information related to the Hologic DXA system. It is intended to aid in securing the customer’s network infrastructure and network environment that incorporates Hologic products.The reader of this document should be familiar with the OSI model, networking, and network security.2.2.RemarksIt is recommended that the customer implement and maintain a set of facility security policies and procedures. These security policies and procedures should address the following:•Discretionary access control•Methods of auditing•Disaster Recovery Plans / Business Continuity Plans•Password reset policy•Perimeter security (e.g., firewalls, IDS, proxy servers)•Internal security (e.g., network topology monitors, log file review, weekly vulnerability scans)•Physical Security (e.g., biometrics, locks, cameras)•Security AwarenessIt is the customer’s responsibility to ensure the confidentiality, integrity and availability of the information technology resources in its organization.2.3.Definitions, Terms and Abbreviations802.1q: The IEEE standard for VLAN taggingACL: Access control listCBAC: Content Based Access ControlCLOC: Cyber level of concernDAC: Discretionary Access ControlDHCP: Dynamic Host Configuration ProtocolDMZ: Demilitarized zoneEgress: Traffic destined outboundFTP: File Transfer ProtocolIP: Internet ProtocolISL: Inter-switch link protocolLAN: Local Area NetworkLayer 3: Any device that utilizes the 3rd layer of the OSI model (AppleTalk, IP, etc.)IDS: Intrusion Detection SystemOSI model: Open Systems Interconnection Reference ModelVLAN: Virtual LANTCP/IP: Transmission Control Protocol/Internet Protocol suiteTFTP: Trivial File Transfer Protocol2.4.References•FDA Guidance for Off-The-Shelf Software Use in Medical Devices, 2016•FDA General Principles of Software Validation ; Final Guidance for Industry and FDA Staff, 2002 •NEMA Patching Off-the-Shelf Software Used in Medical Information Systems, 20043.0Network Security3.1.Active DirectoryHologic APEX systems are compatible with Active Directory however connecting them to network domains may cause undesirable behavior because of transfer of domain policies and other configurations to Hologic systems Since domain controllers override Hologic APEX system’s factory settings, Hologic cannot support issues caused by domain policies and recommends you remove the system from network domain should unexpected behavior occur.3.2.SegmentationProperly segmenting Hologic’s products from the rest of your network can further increase the security of the systems. The goal with segmentation is to prevent unauthorized access to the system(s) by utilizing ACLs. 3.3.1 VLANsVLANs (or Virtual LAN) are a way to create several different broadcast domains on a single switch. VLAN capability is available on most modern switches.Utilizing VLANs allows you to apply some level of security (access control lists and CBAC) to protect certain extensions of your network. If implemented correctly, this creates a “virtual” DMZ.Resources needed:•VLAN capable switch•Layer 3 switch OR existing router capable of recognizing different VLAN tagging (i.e.: 802.1q, ISL) •Knowledge of networking and Cisco productsNote: VLANs were designed for management purposes and not for security. There are specific cybersecurity threats (attacks) where a user can “jump” VLANs. A more effective way of segmenting a LAN would be using a physical interface off of a firewall.3.3.2 Firewall segmentationMany hardware firewalls are equipped with a 3rd interface. This interface is typically used as a DMZ in small to mid-size network. However, this 3rd interface may also be utilized to create a dwelling for machines that need increased security.3.3.Egress FilteringIt is recommended that you employ egress filtering on your network. This will reduce the chances of external data theft and/or loss. In the beginning stages of a system compromise, one of the first things an attacker will do is TFTP or FTP to a remote server that stores privilege escalation tools. Implementing proper egress filtering will reduce the chances of this occurring.work MonitoringEffective monitoring of your network may detect the initial reconnaissance stages of a potential attack. This is vital information to capture, as it may indicate how and when a system may be compromised. Network monitoring can be accomplished by utilizing an Intrusion Detection System (IDS).3.5.Remote AdministrationHologic does not allow the installation of remote monitoring programs like LogMeIn or VNC on the Hologic DXA System. Any administration that needs to be accomplished should be done physically at the PC or using Hologic Connect™. Alternatively, you can contact your local service representative for assistance.4.0Host Based Security4.1.Anti-virus ProductsIt is recommended that you employ anti-virus software to protect your APEX™ system. While there are several “All in one” anti-virus products available on the market, Hologic does not recommend using these as they may compromise system stability. These “All in one” anti-virus products usually include: an Antivirus engine, Anti-spy ware and stateful firewall. These can significantly raise CPU usage and memory usage during regular usage, which may result in:•CPU Deprivation•System hangs•Performance degradation•Potential data corruptionHologic recommends that anti-virus products be configured for "on-demand" scanning and not "real-time protection." Real-time protection can significantly raise CPU usage and memory usage which may result in problems during image acquisition.In the event that real time protection or auto scans can’t be disabled, it is recommended to create exceptions for Hologic specific folders to exclude them from anti-virus scans.4.2.Host-based FirewallsHologic does not allow the installation of 3rd party host based firewalls on our systems. Some 3rd party host-based firewalls are vulnerable to denial of service attacks and if improperly configured, may let an intruder gain system level access to the system. The APEX™ system comes shipped with Windows built in firewall enabled.4.3.System-level AuditingHologic’s products are shipped with auditing enabled to track security events. This is to provide accountability and to help diagnose potential problems that may arise. Please do not attempt to disable auditing. It is recommended daily review of the logs be completed to ensure the integrity of the system.4.4.Internet UsagePlease do not allow any users or staff to access the Internet from any of the Hologic DXA systems. This exposes your systems to a plethora of vulnerabilities such as:•Viruses•Spyware•Trojans•Hostile code (embedded into webpages)Hologic's products are considered medical devices; therefore you are not permitted to installunauthorized software on your own. Peer to peer software can expose your entire hard drive to any individual running the same type of software.4.5.AuditingHologic depend upon auditing to provide for accountability and to track system changes. It also assists us with diagnosing potential problems that may arise. Hologic has tested the Hologic DXA system with auditing enabled and determined that proper operation is not compromised.To enable auditing:1.Click START > run, and type gpedit.msc.2.Browse to Computer Configuration > Windows® Settings > Security Settings > Local Policy >AuditPolicy.3.Define every object for both “Success” and “Failure.”4.Browse to Control Panel > Administrative Tools > Event Viewer.5.Right click on “Security” and select properties.Browse to Control panel > Administrative Tools. Double click “Event Viewer.” Expand “Event viewer (Local)” > “Windows Logs” in the tree in left pane. Right click “Security” and select properties. Ensure that auditing is set to overwrite as needed. Maximum log size should not be smaller than 1000Kb. Failure to ensure this setting is enabled may prevent access to the machine should the hard drive become full.NOTE: It is important the clock on your system is set correctly. If the time is set incorrectly, it will not provide proper accountability in the event of a system compromise. Hologic recommends using an in-house NTP server to synchronize the clock on all your systems (including all network based monitoring devices)4.6.System PatchingHologic’s products are considered medical devices, therefore you are not permitted to upgrade the operating system or apply service packs that have not been validated by Hologic. Hologic periodically performs regression testing on critical patches and service packs.5.0Physical SecurityIt is recommended you employ some method of physical security when dealing with our systems. This ensures only authorized personnel have access to Hologic’s products.There are several vulnerabilities a malicious user could exploit locally. Some examples are: •Theft of equipment•Local password cracking•Installation of hardware keyloggers5.1.Desktop SecurityIt is of vital importance to ensure desktop security is addressed in your environment. Some examples of desktop security are:•Log out of system when not in use•Utilize a form of close captioned monitoring•Physically segment the systems in a secure room5.2.Onsite VendorsIf your organization uses vendors to assist in the administration of your network infrastructure, please make them aware of the recently added Hologic products. Ensure they do not make any configuration changes in any network devices. Doing so may adversely affect the performance of our products. It is also advised that you do not permit any outside vendors near our systems unless there is an absolute need (i.e., faulty network drop).6.0Securing Windows®6.1.CPU HibernationAPEX systems are configured from factory to never hibernate. This eliminates the possibility of scan being interrupted due to unexpected sleep timeouts.6.2.Null SessionsNull sessions are a built-in part of Microsoft’s operating system. They allow systems and users to view available resources from other servers or domains. This can be useful if you manage a large enterprise. However, there are severe risks with null sessions. Null sessions do not require authentication and leave no trace if the proper auditing isn’t in place. Windows is protected against null sessions by default. However, improper configuration can resurrect this vulnerability. To ensure your machine is protected against Null Sessions, perform the following:1.Open up Administrative tools (via control panel).2.Double click Local Security Policies.3.Expand Local Security Policies and highlight “Security Options.”4.Locate the parameter titled “Network Access: Do Not Allow Anonymous Enumeration of Samaccounts.”5. Ensure this is set to “Enabled.”6. Perform the same for “Network Access: Do Not Allow Anonymous Enumeration of Sam accounts andshares.”Additionally, disabling NetBIOS over TCP/IP and Unbinding File and Print Sharing will remove all SMB based protocols in the Hologic DXA system. This will effectively thwart all SMB based password attacks.6.3.Disabling ServicesBrowse to Control Panel>Administrative Tools>ServicesLocate the following services. Set the services to a “stopped” and “disabled” state.•Remote Registry6.4.Password SecurityIn today’s world, passwords can be compromised in literally seconds by using a wide variety of tools and techniques. As new automated tools are invented each year, the more trivial it becomes to crack passwords (both remotely and locally). To lower the possibility of a compromised password, it is vital that a set of protocols be adhered to.•Choose a password between 7-10 characters (choosing a password 15 characters or greater ensures the password is not stored as LmHash).•Use special characters in the password (i.e., @ % & ).•Do not share your password.•Do not base your password on a pet, loved one or dictionary name.•Do not write down your password.•Make your password alphanumeric. This can trick a potential attacker (some tools only crack passwords upper-case).•Examine the back of your host computer system for hardware keyloggers.•Do not leave your account logged in.•Routinely examine the event viewer logs. Under the “Security” tab, look for failed attempts. This may be a sign of an attack.•Define an “Account lockout policy” (see below).Furthermore, your Hologic DXA system is configured so any local passwords are not stored as LANMAN. This will thwart most locally based password attacks.6.5.Account Lockout PolicyDefining an “Account Lockout Policy” ensures a user account will be locked out after a pre-defined amount of failed attempts. This is important to define, as it will protect your user account from being “brute forced attacked.”7.0Further AssistanceHologic is here to help. If at any time you need further assistance or just have general questions regarding the security of Hologic products, please do not hesitate to contact us at 800.321.4659. You may also reference our Security Center at https:///hologic-products/breast-skeletal/horizon-dxa-system。
APEX 3 APEXII DUO 快速使用指南说明书

APEX 3 / APEXII DUO Quick GuideTurning on the Low temperature (LT) device1.On the Cryostream Controller next to the APEX, press the START button (bluebutton/arrow in figure below).2.Once the controller is done starting up, and the “TEMP” display shows a temperature,press START again to begin cooling to 100 K. Wait ~30 minutes for the temperature to reach 100K and stabilize.3.If the crystal sample is no good and no one is going to be using the diffractometerafter you, please press the STOP button (red button/arrow in figure below) to turnoff the LT device.Login1.Click on Sample and select Login.2.Enter username (lowercase group name) and password (pjc).Create a New Sample1.Click or click Sample and select New.2.Enter sample name (e.g. 1234a).Note: Check white board or website to determine # of sample for your lab.3.Sample folder will be created in D:\frames\(username)\(sample name).Centering the CrystalNote: Take care when opening and closing the doors. DO NOT SLAM THE DOORS.When opening doors, an audible *click* should be heard when pressing the green“Open Doors” button. If the *click* is not heard, but the “Alarm” light is flashing,gently push in the handles until you hear the *click* then proceed to pull thehandles and open the doors. If the doors still won’t open, contact yourcrystallographer.ing APEXServer (monitor in enclosure), click Set Up on the left-hand menu andclick .2.On the bottom right, click Center.Note: If image is not moving, click in the VIDEO window.3.Screw the goniometer head on making sure the notches are aligned.e the goniometer key to adjust the crystal until centered in the crosshairs.5.On the right-hand side of the screen, click Spin Phi 90 to rotate the crystal andcontinue to adjust the position until centered. Repeat three more times and close the doors.Determine Unit Cell1.Click Evaluate on the left-hand menu.2.Click .3.Under “Manual Mode” on the right-hand side, click andclick Collect at the bottom right.Note: Spots should be well-defined circles and should not overlap. Samplesthat are twinned or multi-crystalline may have smeared or overlapping spots.If sample is stable, it may be worth finding another crystal.4.Click .5.Change the Min. I/sigma(l) value to 5 using the slider bar or manually enteringthe value.6.Click Harvest at the bottom right.Note: After the spots have been harvested, inspect the “Expected Resolution”table (see figure below). Crystals with an expected resolution greater than1.0Å for 20 s/° are generally too weak to give a publishable structure.Note: Click , and adjust the circle to check the best resolution spot at 10seconds, please use your best judgement for exposure time (better to err onthe side of caution and collect longer exposures).7.Click , then click Index at the bottom right.8.APEX3 will select the “best” unit cell. Click Accept at the bottom right.Note: If a method failed, two different unit cells were calculated or there area large number of overlapping/unselected spots, use CELL_NOW to calculatethe unit cell. (CELL_NOW instructions located at the end of the guide)9.Adjust the Tolerance value to 5.00 or move the slider all the way to the left.10.Click Refine until the Unit Cell parameters stop changing.11.Click Accept.12.Click .13.APEX3 will suggest possible Bravais lattices. Always select Triclinic P, unless yourcrystallographer suggests otherwise or you are performing a quick screening.Note: The correct lattice type may not always be the highest symmetrylattice. Therefore, collecting in Triclinic P ensures a sufficient amount of datafor any lattice option.14.Click .15.Adjust the Tolerance value to 5.00 or move the slider all the way to the left.16.Click Refine until the Unit Cell parameters stop changing.Note: Inspect the predicted overlay on the matrix frames. Make sure ALL thespots are picked/circled.17.Click Accept.18.Before setting up data c ollection…a.Inspect the “Expected resolution” table to determine the optimal exposuretime for good data for resolution out to 0.77Å.b.Check your unit cell versus known materials/starting materials using theX-ray facility website or the Cambridge Database.Note: If a full dataset is collected, you will be charged, regardless of whetherthe structure has been done before.c.Calculate the density of the crystal sample.e the formula: density = MW/V x 1.66 x Z, where MW is molecularweight and V is unit cell volume. Z can equal 1, 2, 4 or 8 depending onthe Bravais lattice. A reasonable density should be between 1.2 and2.0 g/cm3.Set Up Data Collection1.On the left-hand menu, click Collect, then .2.A djust “Resolution” in the top-right to 0.77Å for a heavy atom structure (Cl orheavier) or 0.83Å for a light atom structure (all atoms less than Cl).e the dropdown menu to a djust “Symmetry” to “Centrosymmetric (-1)” unlesscompound is known to be chiral. If compound is chiral, do not change originalselection of “Chiral (1).”4.Click and then click OK.Note: If crystal is possibly twinned or multi-crystalline, change “Crystal todetector distance” to 50-60mm.5.Click Select scan parameters… at the bottom.6.Adjust “Frame angle [degrees]” to 0.50.7.Adjust “Frame time [seconds]”(exposure time) according to “Expected resolution”table from Unit Cell Determination. (Max exposure of 30 seconds)8.Click OK. Take note of the “E xpected end time” listed at the bottom of the page.9.Pay attention to the “Average Multiplicity” value. If collecting as triclinic, but ahigher symmetry Bravais is possible, an “Average Multiplicity” of ~4 is acceptable. If crystal system is actually triclinic, click Determine strategy… and increase“Minimum multiplicity for 90% of the data” value until “Average Multiplicity” isgreater than 6 (usually 3.50 works).10.Click .11.Click in the bottom left corner.12.If the collection will end at night or over the weekend with no new sample to bemounted after, add “Thermostat Off” to the next available row.13.If exposure times are 5 seconds or less, change default “Exposures” from correlatedto uncorrelated using the dropdown menu.14.Click in the lower right corner.Note: If error occurs, resolve error. Typically, increasing detector distanceresolves issue. If error still occurs, contact your crystallographer.15.Click in lower right corner.Example experiment setup:Note: The above figure is an example, not all strategies will have the same number of scans.Integration of DataNote: Twinned and multi-crystalline samples require extra steps when processing data (integration, scaling, etc). Consult your crystallographer for further dataprocessing.1.On left-hand menu, click Reduce Data.2.Click .3.Change “Resolution Limit” value in top right corner to 0.77Å for heavy atomsstructures or 0.83Å for light atom structures.4.Click in the bottom right.5.Click More Options.6.C hange “Generate Mask with Fractional Lower Limit of Average Intensity” to 0.550and click OK.7.Click in the bottom right. Make sure the correct scan sets areselected and click Choose.8.ClickNote: Pay attention to the “Spot Shape Correlation” graph. The averagevalue should be around 0.6 or higher for usable data. Sudden drops in thegraph suggests something occurred during collection. Inspect the frames andconsult your crystallographer. In addition, pay attention to the “Spot ShapeProfile.” The spot should be well-defined and spherical.Scaling Data1.Click in left-hand menu.2.Pay attention to the “Input File,” which should be xxxx_0m.raw, and “Laue Group”and “Point Group,” which should match the Bravais lattice. (-1 for triclinic, 2/m for monoclinic, mmm for orthorhombic, etc.)3.Click in lower right corner.4.Click in the lower right corner.Note: Pay attention to the “Mean Weight” and “R(%).” Both graphs shouldplateau by the end of the refinement cycles. Mean Weight values >0.90 aregood and the lower the R(%), the better. If graph does not plateau/converge,increase “Number of Refinement Cycles” to >50. If it still does not converge,then the Bravais chosen is incorrect.5.Click Next in lower right corner.6.Click Finish in the bottom right corner.Generate .INS File.1.In left-hand menu, click Examine Data, then click2.Files for XPREP should be automatically selected, if not, browse for themo_xxxx_0m.p4p and mo_xxxx_0m.hkl files in the “work” folder.3.Click OK.4.In XPREP GUI window, press <Enter> on keyboard to accept default options.a.Make note of the R(sym) values for determining higher symmetry, lowervalues are better.b.Pay attention to the CFOM values as well as systematic absence values forspace group determination.c.When merging data sets, make note of the Completeness, Redundancy,Mean I/s values, and Rmerge/Rsigma values.Note: Completeness should be > 95% for publishable structure.5.When prompted, enter formula of compound. (Case and text sensitive)Note: XPREP will generate a Z value and calculated density based on formula.Reasonable density should be between 1.2 and 2.0.6.When prompted, enter output file name (no spaces). Default name is acceptable, ora custom name if testing multiple space groups.7.Continue pressing <Enter> until XPREP quits and window closes.Important!!: After the proper space group has been determined using XPREP,make sure to go back to “Determine Unit Cell” to change the Bravais to the correctsymmetry lattice, then re-integrate, re-scale and re-generate the .INS file.Structure Solution∙AUTOSTRUCTURE Method1.In the left-hand menu, click Find Structure.2.Click .3.Click and select appropriate .hkl file generated from XPREP.Note: Even though an .hkl file is loaded, you still need to reselect the latest.hkl file to update the unit cell parameters and lattice type determined fromthe .ins.4.Make sure the formula is correct (to the best of your knowledge) or the program willhave difficulty generating a solution.5.Click Start.∙Solve Structure Method1.Click .2.Click and select the appropriate .hkl/.ins files.3.Select the method for solving the structure and click Solve Structure.a.Intrinsic PhasingNote: Be sure that the unit cell and Bravais type match those from the XPREPand not the initial unit cell and lattice group from Determine Unit Cell.es XT to solve structure. Resulting .res has all atoms isotropicii.May generate more than one.res file, each solving the structure ina different, but related space group.iii.Select the appropriate .res file based on R values and Flack parameter (avoid 0.50 Flack value).iv.Be sure to select corresponding .res/.hkl files. The output files willhave “_a”, “_b”, and “_c” attached to file name.b.Direct Methodes XS, reads original space group determined in XPREP andrecorded in .ins file.ii.Output .res file will have some heavy atoms labeled, but all otheratoms will be Q-peaks.c.Patterson Methodi.Only recommended for difficult structures that did not work withprevious methods.es original space group determined in XPREP and recorded in .ins file.iii.Output .res file will only have heavy atoms assigned and Q-peakspresent.Note: If the molecule has disorder, AUTOSTRUCTURE will have troubleproducing a sensible solution. Be sure to try the other solution methods andlook for features in the Q-peaks such as phenyl rings, t-butyl groups, etc.stly, use the appropriate .res and .hkl files to refine the structure using theprogram of your choice. Have fun!Determine Unit Cell using CELL_NOW1.Click Evaluate on the left-hand menu.2.Click .3.Click .4.Adjust the Min. I/sigma(l) value to 1.75 by using the slider bar or manuallyentering the value.5.Click Harvest at the bottom right.6.Click Sample in the top-left corner of APEX3, then Export, then select P4P file…7.Under “Export For:”, select CELL_NOW.8.Leave the default .p4p name (samplename.p4p) and click OK.9.Click Sample in the top-left corner of APEX3, then click Run Command…10.Type “cell_now” and press <Enter>.11.Type in the name of the .p4p file, default is “samplename.p4p” and press <Enter>.12.Accept default .cn file name by pressing <Enter>.13.Begin the initial unit cell search by pressing <Enter>.14.Accept the default “superlattice threshold” by pressi ng <Enter>.15.Accept the default “minimum and maximum values for cell edge” by pressing<Enter>, unless cell lengths are less than 5 or greater than 45.a. A table of possible unit cells will be generated and ordered by calculatedFigure of Merit (FOM).16.Press <Enter> to accept default “Maximum deviation from integer index.”17.Press <Enter> to accept the best FOM unit cell. If a different cell is wanting to beselected, type the corresponding number from the list.18.Type “cell#a.p4p” as the first domain file name and press <Enter>.19.If a large number of “reflections not yet assigned to a domain” remains, press<Enter> to continue search for another domain and name as “cell#b.p4p.”Note: Make note of the FOM of the additional cells that are calculated (shouldbe greater than ~0.50).20.Type “Q” and press <Enter> to quit.21.Click Sample in the top-left corner of APEX3, then Import, then P4P/SPIN file.22.Click and select the last .p4p file made (e.g. cell1d if four domains werecalculated) and click Open.23.Select Import all and click OK.Note: The lattice type from CELL_NOW is not transferred when importing the.p4p file. If Bravais does not recognize the cell as the same type calculated inCELL_NOW (e.g P, C, etc.), then click Edit…next to the “Unit cells” box andmanually select the lattice type. You can skip the Bravais step if this is thecase.24.Click .25.APEX3 will suggest possible Bravais lattices. Always select Triclinic P, unless yourcrystallographer suggests otherwise or you are performing a quick screening.Note: The correct lattice type may not always be the highest symmetrylattice. Therefore, collecting in Triclinic P ensures sufficient data for any latticeoption.26.Click .27.Adjust the Tolerance value to 5.00 or move the slider all the way to the left.28.Click Refine until the Unit Cell parameters stop changing.Note: Inspect the predicted overlay on the matrix frames. Make sure ALL thespots are picked/circled.29.Click Accept.。
Apex 椅子用户手册说明书
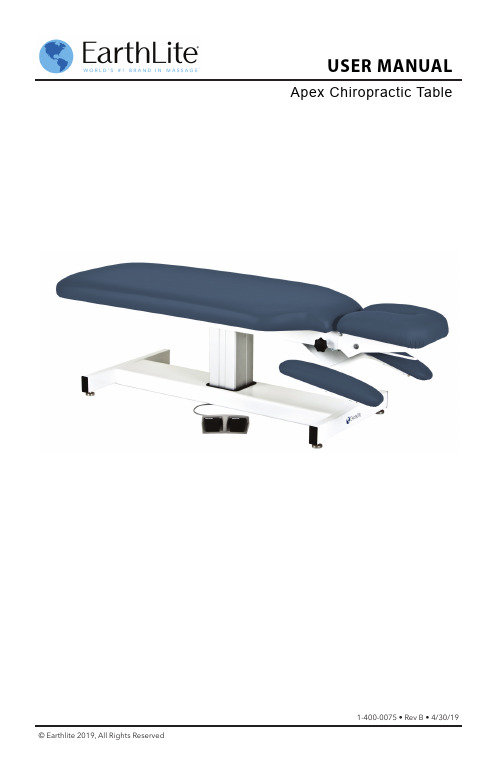
Apex Chiropractic TableUSER MANUAL1-400-0075 • Rev B • 4/30/19© Earthlite 2019, All Rights Reserved© Copyright 2019Earthlite®All rights res erved. This document or any portion thereof may not be repro-duced in any way, including photocopy-ing or trans lation to another language without the prior written permi ion from Earthlite.Earthlite® is a regis tered trademark of Earthlite, LLC.Legal NoticeThe information provided in this document is intended for informational purposes only and is subject to change without notice. The information provided in this docu-ment s hould not be cons trued as a commitment by Earthlite®.Earthlite® assumes no responsibility for the accuracy or s uitability of the information contained in this docu-ment. This document may contain technical inaccura-cies or errors. Earthlite® makes no expressed or implied warranties of any kind concerning the information con-tained in this document, including, but not limited to, the implied warranties of merchantability and fitness for purpose.Earthlite® shall not be liable for incidental or consequen-tial damages in connection with or aris ing out of the product, performance, or use of this document and the information and material it describes.IntroductionCongratulations on your purchase of the Apex treatment table. The table has been designed for maximum comfort and to meet the specific positioning needs of your clients.Earthlite tables are designed for licensed therapists and are intended to be used in a professional spa, massage studio, or similar commercial environment. While no special training is needed to operate the table, for safety reasons it is important that the instructions contained in this manual are reviewed in detail before the first use. This manual should be read in its entirety by each professional who will be operating the table to ensure the safety of both operator and client. This manual should be saved for future reference.The table should not be used in any other manner than described in this manual. Please read, understand, and follow all safety warnings, labels, and instructions. Misuse, use of unnecessary force, or using the product for unintended or unauthorized procedures can result in injury to operator, client, and/or equipment.Detailed instructions for use and maintenance can be found in this user manual. If you have further questions, please contact us at (800) 872-0560 for US customers, or (760) 599-1112 for **********************************************************************.Section 1: Safety InformationSafety SymbolsWarningsSection 2: Product OverviewProduct PhotosProduct Specifications Section 3: InstallationMoving InstructionsLeveling InstructionsWeight/Lift CapacitiesElectrical Specifications Section 4: Operating Instructions Foot Control OperationHead Rest AdjustmentManual Height Adjustment Section 5: Care & Maintenance Care InstructionsTroubleshootingWarranty InformationContact Us2 2-34 56 6 6 67 7 78 8 9Table of Contentsback coverIMPORTANT SAFETY INSTRUCTIONS - FOR COMMERCIAL USE ONLY Read all instructions before using this product.READ AND SAVE THESE INSTRUCTIONS2Safety SymbolsFamiliarize yourself with the following Safety & Warning symbols. They are designed to prevent damage and injury to you, your clients, and your new Earthlite product.IMPORTANT: The important safety instructions and warnings in this manual cannot cover all possible problems and conditions that can occur. Use common sense and caution when installing, operating, or maintaining this appliance.SECTION 1: SAFETY INFORMATIONINTERNATIONAL VERSIONS ONLYThis product is for use on a nominal 220V-240V cir-cuit and has a grounding plug (plug type varies by country). Make sure that the product is connected to an outlet having the same configuration as the plug. No adapter should be used with this product.NORTH AMERICA ONLYGROUNDING INSTRUCTIONS:POWER SUPPLY: (120V AC grounded) Electrical limitations: Do not use extension cord with this product, plug directly into grounded outlet. This product must be grounded. If it should malfunction or breakdown, grounding provides a path of least resistance for electric current to reduce the risk of electric shock. This product is equipped with a cord having an equipment-grounding conductor and a grounding plug. This three prong grounded plug will only fit into wall outlet one way. If the plug does not fit fully in the outlet, contact a qualified electrician to install the proper outlet. Do not change the plug in any way.SECTION 1: SAFETY INFORMATIONREAD AND SAVE THESE INSTRUCTIONS3SECTION 2 : PRODUCT OVERVIEWMeasurements may vary due to natural material variations. 4Tilting Head RestManual Height Adjustment BoltsFoot Glide Leveler Stationary ArmrestApex StationaryApex Lift Head RestAdjustmentKnobTilting Head RestElectric Lift ColumnFoot Glide LevelerStationaryArmrestHead RestAdjustmentFoo t ControlPaper RollPaper Roll5Product SpecificationsTable Width 24” Table Length 72” Height Range 22.5” - 31.5”Weight/Lift Capacity400 poundsFeatureApex StationaryApex LiftHeavy Duty Steel Frame X X Tilting Head Rest X X Stationary Armrest X X Seamless Natursoft™Upholstery X X 3” High Density FoamCushioning X X Paper Roll Holder andCutter X XManual Height Adjustment XElectric Lift Column Height Adjustment X Heavy Duty Foot ControlXIncluded FeaturesSECTION 2 : PRODUCT OVERVIEWSECTION 3 : INSTALLATIONLeveling Your TableLeveling, or balancing, your table is very important during initi al setup and routi ne maintenance.Your table is equipped with leveling feet that can adjust to uneven fl oors.To adjust the leveler feet:1. Place the table in the positi on you plan to use it.2. To determine which foot needs adjusti ng, att empt to “rock” your table. If there is any movement, the leg that is lift ing is the one that will need adjusti ng.4. Using your hand, or a wrench if necessary, turn the leveling foot in the needed directi on.(Counterclockwise will lower the overall height, clockwise will raise the overall height)6Your Apex table comes completely assembled and ready to use. Once the table is unpacked, follow the “Moving Your Table” instructi ons below.Moving Your TableLift your table by grasping fi rmly from the bott om of the frame underneath the upholstered top. Do not try to lift from the upholstered top.Your table is very heavy - extreme cauti on should be used to avoid injuryto yourself, others around you, and your table. DO NOT lift or move without using proper safety procedures/equipment.Weight & Lift CapacitiesThe Apex recommended weight capacity is 400 poundsElectrical Specifi cations (Apex Lift Only)Input Voltage 120 VAC Input Frequency 60 HzConsumpti on 2.5 Amps, 300 Watt s maxOutput 32 VDC Duty Cycle10%, 2 min/18 minSECTION 4 : OPERATING INSTRUCTIONS7Important Safety NotesFoot Control Operation (Apex Lift Only)Your hand control is already connected and ready for use. See below for a descripti on of each butt on’s functi onality.Always use extreme cauti on when making any height adjustments toyour table. Ensure all body parts and objects are clear from all moving parts.DO NOT store or place anything between the table and the base - this can damage the table and/or base and will void your warranty. The base of the table is not designed for storage or as an area to hold accessories, including foot pedal.Lower Entire TableManual Height AdjustmentHeightAdjustmentBoltsRequired Tools: ½” wrench and socket wrenchStep 1: Use wrench to loosen bolt while using socket wrench to hold nut on the other side.Step 2: Remove bolt completely and adjust table to desired height.Step 3: Reinstall bolt and nut, ti ghten securely.Head Rest AdjustmentStep 1: Supporti ng the head rest with one hand, turn and hold the head rest adjustment knob with your other hand.Step 2: Lift or lower the head rest to the desired positi on, and release the adjustment knob to lock into positi on.8SECTION 5: CARE & MAINTENANCEWith proper maintenance, your table is designed to give you years of trouble-free operation. To ensure your table will continue to function properly and keep its appearance, werecommend the following.Cleaning & Ongoing MaintenanceThis helpful troubleshooting guide will provide you with information about how to recognize a problem with your table, determine possible causes, and find a solution.In the event your specific situation is not covered in this guide, please contact Earthlite so our technical support department can assist you. Beyond the troubleshooting guide below, do not attempt to repair the table yourself. This can void your warranty.Unauthorized service will not be covered. Please be sure to contact Earthlite Customer Service first at (800) 872-0560, (760) 599-1112 Int’l.TroubleshootingDO NOT USE acetone, “Armor All” type cleaners, citrus-based cleaners, or industrial cleaners. These can seriously damage the upholstery. Such damage would not be covered under warranty.RISK OF ELECTRIC SHOCKAlways unplug this furnishing from the electrical outlet before cleaning.SECTION 5: CARE & MAINTENANCE Absolute Satisfaction Return PolicyIf you are not completely satisfied with your Earthlite portable table, chair, or accessory, you may return it within thirty (30) days for a full refund (excluding shipping & handling chargeson the original order). Standard stationary and lift tables may be returned within thirty (30) days for a refund (excluding shipping & handling charges on the original order) less a 20% restocking fee. Custom or upgraded products are non-returnable and non-refundable. Proofof purchase is required to obtain RMA (Return Material Authorization) and all returns mustbe in like-new condition and in the original packaging. Customers will be responsible for all shipping charges.Warranty InformationEarthlite offers an industry best warranty against defects in materials, design, and workman-ship, to the original owner, as follows:• Frame - lifetime warranty• Foam and upholstery covering - warranted for three (3) years• Lift motors, controls, electronics - warranted for two (2) years from the original date of purchase*• Accessories and options - warranted for one (1) year from the original date of purchase This warranty does not cover damage caused by normal wear and tear, misuse, accidents,or neglect, which includes tears in the upholstery and damage caused by cleaners. All war-ranties are limited to repair or replacement at Earthlite’s discretion, shipping not included. Proof of purchase is required to obtain RMA (Return Material Authorization) and customers may be required to return defective items. International customers are responsible for all associated return costs (inbound and outbound), as well as any applicable duties and taxes.*If within these two (2) years, there is a defect, malfunction, or failure of the lift motor or controls, Earthlite will replace or repair the defective component at our discretion; shipping not included. Parts are warranted for 90 days after replacement or 2 years from the original date of table purchase, whichever comes later.9Contact UsEarthlite 990 Joshua WayVista, CA. 92081(800) 872-0560(760) 599-1112 Int’l (760) 477-6071 fax ******************Hours of operation:Monday - Friday 8:00 a.m. to 5 p.m. PST Saturday - SundayClosed Visit us online at: Join us on Facebook Follow us onTwitter Connect with us on Linked In。
Apex Patio Awning 产品说明书
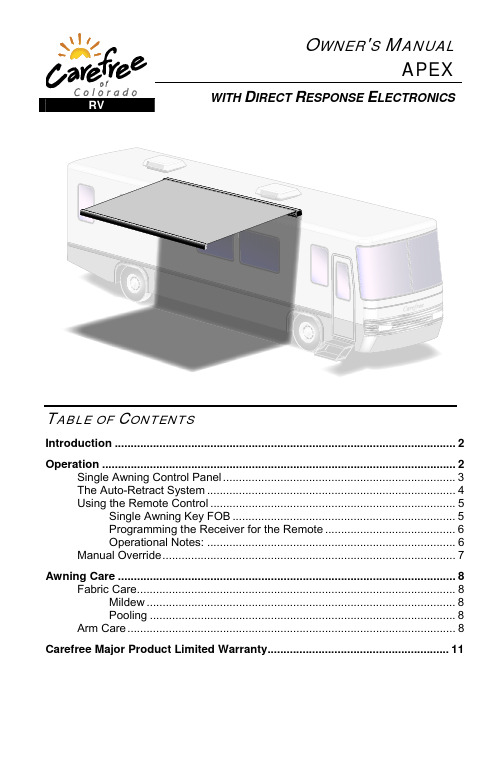
T ABLE OF C ONTENTSIntroduction (2)Operation (2)Single Awning Control Panel (3)The Auto-Retract System (4)Using the Remote Control (5)Single Awning Key FOB (5)Programming the Receiver for the Remote (6)Operational Notes: (6)Manual Override (7)Awning Care (8)Fabric Care (8)Mildew (8)Pooling (8)Arm Care (8)Carefree Major Product Limited Warranty (11)Carefree of ColoradoI NTRODUCTIONFrom it's beginning in the early 70's, Carefree of Colorado has emerged as the premier manufacturer of quality awnings and accessories for Recreational Vehicles (RVs). Our full line of products can provide the accessories that match your life style; no matter what type of RV you own. Check with your dealer to discover the products that can make your life more Carefree.The Apex Patio Awning offers the coach owner an awning system that provides as much or as little shade as required. The versatile awning system is available as a single awning or as a 2 or 4 awning combination with all awnings controlled at a single master control pad.Each unit is equipped with Apex lateral support arms that are the strongest available on the market. No vertical arms interfere with coach sidewalls or equipment that may be mounted on the roof. These arms can also be adjusted to vary the canopy pitch up to 2 feet (it is strongly recommended that service and adjustments be performed by trained technicians).The canopy is made from Sunbrella® acrylic fabric. The canopies are housed in an aluminum case that easily blends in with the coach roof.The unique and innovative 110V electronic control system provides Carefree’s Direct Response system with interior pushbutton controls for standard extend/retract functions. At the master control panel the auto-retract system can be engaged to automatically retract the awning in windy conditions. Sensitivity can be set to respond to a variety of wind speed conditions. An RF remote is included with the Direct Response system.O PERATIONThe Direct Response system provides a wide range of awning controls with control panel operation in one convenient location. The standard operation is straight-forward with the buttons clearly labeled. The control panel is designed to allow the user to control each awning individually or together. Each function is described below. These buttons operate the same with or without the auto-retract system turned on.Operational Notes:Ignition Lockout Sensors:If the optional Carefree EL ignition lockout is installed the system will disable the extend function while the vehicle ignition key is in the ON position.Special order RTL ignition lockouts will fully retract the awning and disable the extend function when the vehicle ignition key is in the ON position.Functions will return to normal operation when the ignition key is turned OFF.Coach manufacturers may install their own lockout design. Refer to the coach literature for AC power for accessories.Awning MotorThe awning motor is equipped with a thermal protection circuit to protect the motor from overheating. Operating the awning repeatedly over a short time period may cause the circuit to sense a overheat condition and shut off the motor. If this occurs, wait approximately 15 minutes to allow the motor to cool then operate the awning in normal fashion.23Extend Press and release. The awning will extend out to the full extensionand stop automatically. When the button is pushed, the LED willilluminate and stay on until another function is activated.During normal operation, the awning will extend out completely thenroll back slightly to provide tension to the fabric.NOTE: If the optional ignition lockout safety is installed, the systemdisables the extend function while the vehicle ignition is in the ON position.Stop Press and release. During extend and retract functions, the operator maystop the awning by pressing this button. When the button is pushed, theLED will illuminate and stay on until another function is activated.RetractPress and release. The awning will retract and stop automaticallywhen the awning is fully retracted. When the button is pushed, theLED will illuminate and stay on until another function is activated. The function LEDs (extend, retract and stop) perform a dual function. When the buttonis pressed, the LED illuminates. The LED stays illuminated during the selectedoperation and after the awning has fully extended or retracted. This provides anindicator of the awning position. When the stop button is pressed, the LED willilluminate and stay on until a function is pressed. If on, it indicates that the awning ispartially extended/retracted.NOTE: When 110VAC power is removed from the system, the controller doesnot retain previous positioning information. When power is restored, positioninginformation is updated when the first function is initiated.CAUTION At startup (110VAC applied) DO NOT press the retract buttonto update the positioning information. This can cause the motor to run in an overcurrent mode. If this occurs, the motor’s thermal protection device may shut offthe motor and the operator must wait approximately 15 minutes, for the motor tocool off, before operating the awning. To properly set the positioning, push theextend button, allow to run for 1 second then press the stop or retract button.Carefree of Colorado 4T HE A UTO -R ETRACT S YSTEMwill be on when the system is active.The Direct Response setting for your preferences.seconds or longer, the system will automaticallyretracts the awning. The control panel provides 5factory preset sensitivity values (threshold values). Gust detection is incorporated into the software. When the motion value is suddenlyand sharply increased above a safe maximum value, then the 2 second persistencemeasure is overridden and the awning closes immediately.NOTE: If the Auto-Retract LEDs flash when pressed on, this indicates thatthe motion sensor has be disengaged or otherwise disabled; the affectedawning is not protected by the auto-retract function. The awning must beretracted using the command buttons. Immediately contact a Carefreeservice center for service.T HE C AREFREE D IRECT R ESPONSE S YSTEM IS A PREMIERE ELECTRONIC AUTO -RETRACTSYSTEM THAT PROVIDES PROTECTION AGAINST ADVERSE ELEMENTS ; BUT NO AUTO -RETRACT SYSTEM IS A GUARANTEE AGAINST SEVERE OR DESTRUCTIVE WEATHER ; THEEFFECTS OF WIND AND RAIN ON AN AWNING ARE UNPREDICTABLE AND MAY CAUSESEVERE DAMAGE TO THE AWNING AND /OR VEHICLE . I F WIND OR EXTENDED PERIODS OFRAIN ARE EXPECTED , RETRACT THE AWNING .APEX 5 U SING THE R EMOTE C ONTROLA remote control is provided with the Direct Response system. In simple terms,the remote is a wireless key pad that functions in the same manner that thestationary control panel. The remote provides the advantage of allowing you tooperate the awning from any convenient location.The remote has a maximum operating range of 50 feet. Actual distance may varydepending on the specific installation and location of the receiver in the vehicle.To use: turn system power ON at the control panel.NOTE: The Auto-Retract system can only operated at the control panel.S INGLE A WNING K EY FOBA remote control Key FOB is furnished with the single awning installation. To use: turnsystem power ON.Extend Press and release. The awning will extendout to the full extension and stopautomatically.Retract Press and release. The awning will retractand stop automatically when the awning isfully retracted. Stop Press and release. During extend andretract functions, the awning may be stopped by pressing this button.Key FOB BatteryThe Gray Button remote uses a flat 3V Lithium Battery (p/n CR2032) that shouldprovide a long period of service. To access: carefully pry off the back of thecase. Lift the circuit board out then slide the old battery out of the battery holderand slide a new battery in. The + should face away from the circuit board.The Key FOB remote w/ antenna uses a battery (Radio Shack p/n 23-279 orequivalent) that should provide a long period of service. To access: Remove thesmall screw from the back of the case and carefully snap off the back. Lift theold battery out and insert the new battery.Batteries are available through your local battery outlets.Battery life is dependent on frequency of use, environmental conditions andcondition of remote.DR021Stop StopCarefree of Colorado 6P ROGRAMMING THE R ECEIVER FOR THE R EMOTEEarly transmitters & receivers operate on a frequency of 418MHz. Models for 2007 &on operate on 433MHz. The transmitter and receiver frequencies must match.Identifying the transmitter frequency is described under the operational notes below.1. Power to the control box must be on.2. Press and release the “Press to LearnTransmitter” button on the bottom of thereceiver box. The receiver is in program modewhen the red light comes on.3. For Gray Button Key FOBs: Press andrelease the ANY button on the remote. It is recommended to use the STOP button. Thered light will go out after the receiver learnsthe remote signal.4. For Key FOBS w/ Antenna: Press and release the STOP button on the remote. The red light will go out after the receiver learnsthe remote signal.NOTE: Pressing the stop button will cause the blue up arrow button todefault as the close (retract) function.If a function button is pressed to train the receiver, it will be programmed asthe open (extemd) button. Example: Pressing the bottom button willprogram the bottom button for extend and the top button as retract. I F A FUNCTION BUTTON IS PRESSED DURING THE LEARNING PHASE , THE BUTTON THAT ISPRESSED WILL BECOME THE EXTEND FUNCTION . T HE AWNING WILL THEN PERFORM THEFUNCTION (EXTEND ) WHEN THE RECEIVER LEARNS THE TRANSMITTER SIGNAL . U SE CARE TOAVOID UNEXPECTED AWNING MOVEMENT .5. Repeat for each additional remote.O PERATIONAL N OTES :∙ Transmitter and receiver must match infrequency (418 MHz or 433 MHz).The gray button Key FOBS are marked with alabel for 418MHz or 433MHz frequency. KeyFOBS w/ antenna are 433MHz.418 MHz receivers are marked "RR24". 433MHz receivers are marked "RR"i. The receiver exits the program mode after tenseconds. ∙ If the light does not come on above, thememory is full and must be cleared. ∙ If the light does not go out in above, the receiver already knows the transmitter'ssignal or the battery in the remote needs to be replaced.∙ To clear the memory: PRESS AND HOLD the transmitter learn button. While holding thebutton, the indicator light should be OFF for the full 5 seconds then come on.∙ The system may be programmed for up to 5 remotes.DR020Button LightDR026418 MHz 433 MHz StopStop FCC ID OJM-CMD-KEYX-XXX 315MHz 418MHz 433MHz FCC ID OJM-CMD-KEYX-XXX 315MHz 418MHz 433MHz 433 MHz OR Rear LabelAPEX 7 M ANUAL O VERRIDEIf 110V power is not available to the coach, the Apex awning can still be safelyretracted using the manual override.7mm HexRTA015a LH Motor RH Motor1. The bypass is located inside the case, near the end cap. To access, remove thelarge rubber plug on top of the awning located toward the rear of the caseon the motor side. 2.Chuck the supplied 7mm hex key into a 3/8” battery powered drill. 3.Insert the hex key into the manual override on the awning. 4.Operate the drill in the direction shown in the diagram to close the awning. Reverse the drill to open the awning. 5.When done, reinsert the rubber plug.Carefree of Colorado 8A WNING C AREMaintaining a Carefree Awning is easy. Just follow these basic steps:∙ Always operate the awning according to the instructions.∙ Periodically check that the fasteners are tight. Tighten if necessary.∙ Keep the awning fabric and arms clean.F ABRIC C ARED O NOT USE OIL BASED CLEANERS OR ANY CAUSTIC , GRANULATED , OR ABRASIVE TYPECLEANERS ON YOUR C AREFREE PRODUCT .1. One of the best ways to keep the fabric looking good and to delay the needfor deep or vigorous cleanings is to hose fabrics off on a monthly basis withclear water. This practice will help prevent dirt from becoming deeplyimbedded in the fabric. In most environments, a thorough cleaning will beneeded every two to three years.2. When it’s time for a thorough cleaning, the fabric can be cleaned while stillon the awning frame.∙ For Acrylic Fabric – Use a stiff brush and warm water with soap.3. When cleaning the fabric, it is important to observe the following:∙ Always use a natural soap, never detergent.∙ Water should be cold to lukewarm, never more than 100︒F.∙ Air-dry only. Never apply heat to the fabric.∙ Always allow the fabric to dry thoroughly before rolling up the awning.M ILDEWMildew is a fungus growth that looks like dirt. Under ordinary conditions, mildewwill not appear. However, in areas where high temperature and humidity arecommon, mildew can be a problem and required the material to be washed morefrequently. Thoroughly rinse the fabric with clean water and allow to air drycompletely before rolling up the awning.P OOLINGWhen water collects on the top of the fabric, this is known as "pooling". This can occurduring inclement weather or if a running air conditioner discharges over the awning.The water is dumped when the awning is retracted. It is recommended that if wateraccumulates on the top; retract the awning in steps (8"-12") to dump the water. This willhelp prevent the fabric from stretching or distorting.A RM C AREThe best method of keeping the arms and braces operating smoothly is to cleanthem.Periodically wash the spring arms with running water (i.e. a hose) to keep themclean. Lightly spray the arm joints with a dry silicone lubricant, after the armshave been cleaned and dried thoroughly.APEX NOTES:9Carefree of Colorado NOTES:10APEX C AREFREE M AJOR P RODUCT L IMITED W ARRANTYCarefree of Colorado (hereafter referred to as Carefree) warrants to the first retailPurchaser that the Carefree Product is free of defects in material andworkmanship within the terms and conditions as set forth in the warrantystatement available online at . Carefree’s obligationunder this warranty is limited to the repair or replacement, at Carefree’s option, ofany defective component with new or factory refurbished components.O WNER MUST RETAIN THE ORIGINAL PROOF OF PURCHASE AND/OR HAVE THE PRODUCTWARRANTY REGISTRATION ON FILE AT C AREFREE FOR WARRANTY CLAIMS.T HIS WARRANTY IS NOT TRANSFERABLE.For- Warranty Duration;- Warranty Coverage and Exclusions;- Warranty Terms of Coverage; and,- Warranty Claim ProceduresRefer to publication052580-111 "Carefree Major Product Limited Warranty"available online atRegister your Carefree products on-line at Publications available on-line @ :052522-002 Apex Installation Manual052522-201 Apex Owner's Manual, Single Awning052522-301 Apex Service ManualI MPORTANT N OTICE: It is strongly recommended that adjustments and repairs notdescribed in this book be performed by trained technicians at your AuthorizedCarefree Dealer. Work performed by non-authorized persons or businesses mayvoid warranty.11Carefree of Colorado 2145 W. 6th Avenue Broomfield, CO 80020 a Scott Fetzer company 052522-201r4 Printed in USA February, 2012。
APEX Drive产品说明书

The drives listed above have many identical features. In this manual, when we describe features that are the same on each drive, we will use the name APEX Drive. When we describe features that are not the same on all drives, we will identify each by its full name—APEX10 Drive, APEX20 Drive, or APEX40 Drive. This will help call attention to differences between the drives.
Rotor 1 Rotor 2 Stator 1 Stator 2 Stator 3 Stator 4 GND
Introduction 3
ADDITIONAL FEATURES
TWO AC POWER INPUTS
The drive has two AC inputs. One provides power for motor current, through the internal high-power three phase amplifier. The other input provides power for logic and control, through the internal low-voltage DC power supply. With these two separate inputs, you can remove power from the motor, but continue to power internal control circuits.
Apex Legends:新手入门指南说明书

by Josh GregoryApex Legends:Beginner’s Guide Century Skills INNOVATION LIBRARY 21st UNOFFICIALG U I D E SCentury Skills INNOVATION LIBRARY 21st CHERRY LAKE PUBLISHING • ANN ARBOR, MICHIGAN by Josh GregoryUNOFFICIALG U I D E S Apex Legends: Beginner’s GuidePublished in the United States of America by Cherry Lake PublishingAnn Arbor, MichiganReading Adviser: Marla Conn MS, Ed., Literacy specialist, Read-Ability, Inc. Copyright ©2020 by Cherry Lake PublishingAll rights reserved. No part of this book may be reproduced or utilized in any form or by any means without written permission from the publisher.Library of Congress Cataloging-in-Publication DataNames: Gregory, Josh, author.Title: Apex legends : beginner’s guide / Josh Gregory.Description: Ann Arbor, Michigan : Cherry Lake Publishing, 2020. |Series:21st century skills innovation library |Includes bibliographicalreferences and index. |Audience: Grades 4-6 |Summary: “In 2019, thesurprise launch of Apex Legends took the gaming world by storm. Offeringa fast-paced, team-based twist on the battle royale style of gameplaypopularized by titles such as Fortnite, it caught the attention of morethan 50 million players within the first month of its release. In thisbook, readers will find out everything they need to know to get startedand outdo their competitors in Apex Legends. Includes table of contents,author biography, sidebars, glossary, index, and informativebackmatter”-- Provided by publisher.Identifiers: LCCN 2019024704 |ISBN 9781534159679 (library binding) |ISBN 9781534161979 (paperback) |ISBN 9781534160828 (pdf) |ISBN9781534163126 (ebook)Subjects: LCSH: Video games—Juvenile literature. |Apex Legends (Videogame)Classification: LCC GV1469.3 .G735 2020 |DDC 794.8—dc23LC record available at https:///2019024704Cherry Lake Publishing would like to acknowledge the work of the Partnership for 21st Century Learning, a Network of Battelle for Kids. Please visit/networks/p21 for more information.Printed in the United States of AmericaCorporate GraphicsThe Battle Begins4 Meet the Legends 10 Welcome to Kings Canyon18 Staying Alive2430 Find Out More 3132About the Author 32Apex Legends takes place in a huge world that is packed with things to see and areas to explore.4If you have played Fortnite before, you should have no trouble getting started with Apex5Apex Legends has realistic graphics that are among the best of the major battle royale games.6APEX LEGENDS: Beginner’s GuideThere are huge amounts of weapons andother tools you can use to battle other playersin Apex Legends.people rushed to give it a try. Within three days ofApex’s release, more than 10 million players haddownloaded the game. That number rose to 25 mil-lion within the week and 50 million in less thana month. More than one million players could befound battling online at any given time. At the sametime, hundreds of thousands of people were watch-ing streams of the game on Twitch. A new gamehadn’t captured so much attention since Fortnite first7GUIDES UNOFFICIAL8Apex Legends was created by a team of developers at Respawn Entertainment. Respawnwas founded in 2010 by two of the original creatorsof the successful and influential Call of Duty series. The studio’s first game was Titanfall, released in 2014. It also released a sequel, Titanfall 2, in 2016. Both Titanfall games were first-person shooters with com-petitive online modes. As they battled, players could run up walls, zip across maps using grappling hooks, and even pilot huge robots called Titans. These abili-ties helped create a fast-paced style of movement that set the Titanfall games apart from the competition.Both Titanfall games sold well and were much-loved by critics and players alike. However, they were not massive hits. After the release of Titanfall 2, the team at Respawn started thinking of ways to make a third entry in the series stand out. One idea they tried was to combine the basic controls and feel of Titanfall with the battle royale game structure that was becom-ing popular at the time. After changing a few things from the Titanfall games, such as removing the giant robots, they found that the combination worked very well. However, they also realized that the project theyAPEX LEGENDS: Beginner’s Guide9UNOFFICIALGlossarydevelopersgames or other computer programsinfluentialbecome popular in the futuremicrotransactionscan be purchased for a small amount of money within a videogame or other computer programmodpassiverequiring a player to do anythingrespawnbeing defeatedskinsweapons can take on intactical30Find Out More BOOKSCunningham, Kevin.Michigan: Cherry Lake Publishing, 2016.Powell, Marie. Asking Questions About Video Games Michigan: Cherry Lake Publishing, 2016.WEBSITESApex Legends/games/apex-legendsCheck out the officialApex Legends Wikihttps:///Apex_Legends_Wiki This fan-made website offers up-to-date information on the latest additions toUNOFFICIALIndexammo, 19, 21attachments, 21,backpacks, 21banners, 14, 29battle royale games,communication,developers, 8–9downloads, 7, 14dropship, 15grenades, 23healing items, 21, 23helmets, 21, 23inventory, 21, 27About the AuthorJosh Gregory is the author of more than 150 books for kids. He haswritten about everything from animals to technology to history.A graduate of the University of Missouri–Columbia, he currently livesin Chicago, Illinois.32In 2019, the surprise launch of Apex Legends took the gaming world by storm. Offering a fast-paced,team-based twist on the battle royale style of gameplay popularized by titles such as Fortnite , it caught the attention of more than 50 million players within the first month of its release. In this book, readers will find out everything they need to know to get started and outdo their competitors in Apex Legends . Includes table of contents, author biography, sidebars, glossary, index, and informative backmatter.Read all the Apex Legends titles in the UnofficialGuides series:The Making of Apex LegendsApex Legends: Beginner’s GuideApex Legends: CharactersApex Legends: CombatApex Legends: EquipmentApex Legends: Guide to Kings CanyonApex Legends: MicrotransactionsApex Legends: TeamworkGR: V Century Skills INNOVATION LIBRARY21st UNOFFICIALG U I D E S。
APEX提案框架知识讲解

第十二部分:费用概算
费用构成
媒体费用: SP /PR行销 : VI系统:
万元 万元/地区 万元
提案费:
万元
制作物:
万元
共计:
约 万元
(不含CF、摄影等创作及制作费)
第十三部分:合作方式建议
诉求将整体活动主题进行设计
案 名
根据活动创意不同,提供以下几
称
设 种方案,具体方案可在执行部分详尽
计
介绍 (可由客户选择采用,几种方
案可同时进行,也可以穿插进行)
活动主 体
活
动
方 案
•时 间
一
•地 点
•内容及形式
活动辅助及预算
店内媒体配合
POP 海报 挂旗 条幅 单页 柜 台及货架 展 示 物 其他媒体配合 报 纸 、电 台 前期发布促 销 广告 软性文章配合炒作 活动预算粗估
明确总体战略规划
目录
第七部份
传播组合
第八部份
媒介组合及行程
第九部分 传播概念设定和广告语
第十部分 广告创作
第十一部分 营业推广
第十二部份 费用概算
接触点设计管理 如何根据预算有效组合媒体 确认核心传播内容和口号
如何打动消费者(pull) 如何进行有效的地面进攻(pus
费用构成及阶段规划
促
控制项目
销
活
动
完善事前调研,事中调控,事后评估的整体控
执 制体系,确保方案执行顺畅,效果圆满。
行
控
制
时间控制 流程控制
人员控制 资金控制
环境控制 媒体控制
营业推广活动控制范例
活动时间控制表
Äê ÔÂ
《Apexlegends》游戏简论(一)
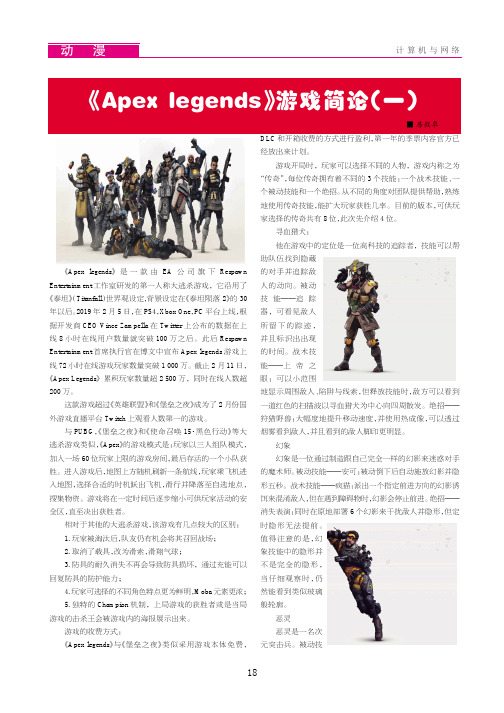
《Apex legends》游戏简论(一)《Apex legends》是一款由EA公司旗下Respawn Entertainment工作室研发的第一人称大逃杀游戏,它沿用了《泰坦》(Titanfall)世界观设定,背景设定在《泰坦陨落2》的30年以后。
2019年2月5日,在PS4,Xbox One,PC平台上线,根据开发商CEO Vince Zampella在Twitter上公布的数据在上线8小时在线用户数量就突破100万之后。
此后Respawn Entertainment首席执行官在博文中宣布Apex legends游戏上线72小时在线游戏玩家数量突破1000万。
截止2月11日,《Apex Legends》累积玩家数量超2500万,同时在线人数超200万。
这款游戏超过《英雄联盟》和《堡垒之夜》成为了2月份国外游戏直播平台Twitch上观看人数第一的游戏。
与PUBG,《堡垒之夜》和《使命召唤15·黑色行动》等大逃杀游戏类似,《Apex》的游戏模式是:玩家以三人组队模式,加入一场60位玩家上限的游戏房间,最后存活的一个小队获胜。
进入游戏后,地图上方随机刷新一条航线,玩家乘飞机进入地图,选择合适的时机跃出飞机,滑行并降落至自选地点,搜集物资。
游戏将在一定时间后逐步缩小可供玩家活动的安全区,直至决出获胜者。
相对于其他的大逃杀游戏,该游戏有几点较大的区别:1.玩家被淘汰后,队友仍有机会将其召回战场;2.取消了载具,改为滑索,滑翔气球;3.防具的耐久消失不再会导致防具损坏,通过充能可以回复防具的防护能力;4.玩家可选择的不同角色特点更为鲜明,Moba元素更浓;5.独特的Champion机制,上局游戏的获胜者或是当局游戏的击杀王会被游戏内的海报展示出来。
游戏的收费方式:《Apex legends》与《堡垒之夜》类似采用游戏本体免费,DLC和开箱收费的方式进行盈利,第一年的季票内容官方已经放出来计划。
开始使用Apex之Apex简介

开始使⽤Apex之Apex简介对于那些对新⼀代业务应⽤程序感兴趣的开发者⽽⾔,Apex代码是第⼀个多租户(multitenant)、按需(on-demand)编程的语⾔。
开发者在⽤户界⾯可以使⽤很多订制选项,如定义新的字段,对象,⼯作流程,批准流程;除此之外,从客户端程序还可以通过SOAP API来发起诸如delete(),upsert()之类的数据操作请求。
什么是Apex?Apex是⼀种强类型(strongly typed)的⾯向对象编程语⾔(object-oriented programming language),开发者可以通过调⽤ 中的API接⼝在服务器上操作流程,管理事务控制等。
Apex的语法规则与Java类似,但是其⾏为表现的与数据库的存储过程类似;Apex允许开发者在系统事件中添加业务逻辑,包括按钮点击、相关记录更新,VisualForce页⾯;Apex代码可以由Web服务请求和对象触发器发起。
作为⼀种开发语⾔,Apex具有以下特点:Apex是整合的(Integrated)Apex为通⽤的平台的编程提供了内在⽀持,包括:1.数据操作语⾔(Data Manipulation Language,DML)的使⽤,如INSERT、UPDATE、DELETE,并且提供了处理异常的接⼝DmlException;2.内联的salesforce对象查询语⾔(Salesforce Object Query Language,SOQL)和salesforce对象搜索语⾔(Salesforce Object Serach Language,SOSL),这两种语⾔⽤于返回sObjects对象集合;3.循环,⽤于⼀次批量处理多条数据4.锁定语法(Locking syntax),阻⽌记录更新冲突5.Custom public API calls that can be built from stored Apex methods6.当⽤户对正在被Apex引⽤的数据实⾏操作、删除时进⾏警告和报错提⽰;使⽤⽅便Apex是类Java语⾔,在变量、表达式、代码块、条件语句、循环语句、类、数组等的⽤法上有很多相似之处;所以使⽤过类似的语⾔,Apex是很容易上⼿的。
Apex英雄

《Apex英雄》共有18个传奇角色,三名玩家组成一个小队,第一个赛季将从3月份开始,并会推出季票,每 个赛季会带来新的武器、角色和皮肤等内容。
Apex英雄
Respawn研发的一款战术竞技游戏
01 背景设定
03 物品道具 05 获奖记录
目录
02 角色设定 04 场景地图 06 特色系统
07 配置要求
09 制作发行 011 赛季更新
目录
08 游戏评测 010 封禁情况
《Apex英雄》是由《泰坦天降》制作组Respawn研发的一款战术竞技游戏。于2019年2月5日发行。玩家在游 戏中将扮演外星战场上的星空战士。
《Apex英雄》次世代升级将于2022年3月30日上线,支持4K输出和HDR等功能,次世代版提供原生4K画质、 全60Hz游戏、更高分辨率的阴影贴图以及更高的LOD距离,游戏还将在未来更新120FPS,并对视觉、听觉和触觉 进行优化。 2022年5月,《Apex英雄》的PS5版登陆PSN港服商城。
2022年10月21日,重生娱乐发布了全新的《APEX英雄》“月食季”预告片,展示了游戏内容的多样性。
2022年7月26日,《Apex英雄》公开新英雄“Vantage”外域故事“生存”宣传片。玛拉的母亲给她指定的 唯一准则就是活下去,但在G.D.S万蒂奇的废墟中,这是件非常难以做到的事情。
2022年11月1日,《Apex英雄》第15赛季「日蚀」上线,本赛季不仅增加新地图,还将加入新英雄,一个被 称为“催化剂”的变性女性。
获奖记录
revolution apex 额定参数-概述说明以及解释

revolution apex 额定参数-概述说明以及解释1.引言1.1 概述革命是人类社会发展中一种重要的历史现象,通常被定义为对现存体制或制度进行彻底变革的行为。
革命不仅仅是一次暴力事件或政治交替,更是一种思想、制度以及社会变迁的全面革新。
在世界历史上,革命不时发生,各种不同类型的革命也给人类社会带来了深远的影响。
本文将就革命的定义、历史以及影响展开论述,从不同角度分析革命对社会的影响和意义。
通过研究革命这一历史现象,可以更好地理解人类社会的发展历程,探讨革命在不同历史时期的具体表现和意义。
Revolution apex额定参数希望通过本文的内容,能够给读者带来对革命这一重要话题的全面理解和启发。
1.2 文章结构文章结构部分将主要介绍本文的组织方式和内容安排。
本文分为引言、正文和结论三个部分。
在引言部分,将首先概述革命的概念及其重要性,然后介绍本文的结构和目的。
引言部分旨在引出本文的主题并概括整体内容。
接着是正文部分,将分为三个小节。
首先是革命的定义,通过对不同学者对革命的解释和理解进行讨论,探讨革命的本质和特点。
其次是革命的历史,将回顾历史上一些著名的革命事件,分析它们的背景、过程和结果。
最后是革命的影响,将探讨革命对社会、经济、政治等方面的影响和意义。
最后是结论部分,将对全文进行总结,展望革命的未来发展趋势,并得出结论。
结论部分将是整篇文章的收尾,给读者留下深刻印象和思考。
1.3 目的文章目的的主要目标是探讨革命在社会发展中的作用和影响,分析革命对历史和现实的重要性,探讨革命对人类社会的影响和改变,以及对未来社会发展的可能影响。
通过对革命的定义、历史和影响的分析,探讨革命对人类社会进步和发展的推动力量,为了更好地理解革命的本质、意义和价值,以及对人类社会未来的可能影响进行深入探讨。
希望通过本文的研究,能够更好地认识和理解革命的本质和重要性,以及对人类社会的深远影响。
2.正文2.1 革命的定义革命是指在社会、政治或经济领域发生的根本性变革或改变。
狼与狮子介绍英文作文

狼与狮子介绍英文作文Title: A Comparative Study of Wolves and Lions。
Introduction:Wolves and lions are both apex predators in their respective ecosystems, commanding respect and fascination from humans and other animals alike. Despite their shared position atop the food chain, these two species exhibit striking differences in behavior, social structure, hunting techniques, and ecological roles. In this essay, we will explore and compare the unique characteristics of wolvesand lions.Physical Characteristics:Wolves are known for their lean, muscular bodiesadapted for endurance and agility. They typically have shaggy fur in various shades of gray, brown, black, or white, with bushy tails and pointed ears. On the other hand,lions are robust and muscular, with tawny fur and a distinctive mane in males. Male lions are larger and more heavily built than females, while lionesses lack a mane and are more streamlined for hunting.Habitat and Distribution:Wolves are highly adaptable creatures found in diverse habitats ranging from forests and tundra to grasslands and deserts. They are distributed across North America, Europe, Asia, and even parts of Africa. In contrast, lions are primarily found in savannas, grasslands, and open woodlands of sub-Saharan Africa, with a small population persisting in the Gir Forest of India.Social Structure:One of the most significant differences between wolves and lions lies in their social structures. Wolves are highly social animals that live in packs, typically consisting of an alpha male and female, their offspring, and occasionally other subordinate members. The packstructure is essential for cooperative hunting, territory defense, and raising offspring. In contrast, lions form prides, which are family units consisting of related females, their offspring, and a coalition of one or more dominant males. Lions exhibit a more complex social hierarchy compared to wolves, with pride dynamicsinfluenced by factors such as dominance, kinship, and territoriality.Hunting Behavior:Wolves are skilled hunters that rely on teamwork and strategy to bring down prey. They use coordinated tactics such as chasing, encircling, and ambushing to target large herbivores like elk, deer, and bison. Wolves are also opportunistic scavengers, feeding on carrion when available. Lions, on the other hand, are renowned for their strength and power, often hunting in coordinated groups to take down large ungulates such as zebras, wildebeest, and buffalo. Unlike wolves, lions rely more on stealth and ambush tactics, with lionesses doing the majority of the hunting while males defend the pride's territory.Ecological Impact:Both wolves and lions play crucial roles in maintaining the balance of their respective ecosystems. As apex predators, they regulate prey populations, prevent overgrazing, and indirectly shape vegetation dynamics. The presence or absence of these predators can have cascading effects on the entire food web, influencing the abundance of other species and the overall health of the ecosystem.Conclusion:In conclusion, while wolves and lions share the status of apex predators, they differ significantly in their physical characteristics, habitat preferences, social structures, hunting behaviors, and ecological impacts. Understanding these differences not only enriches our knowledge of these fascinating animals but also highlights the importance of conserving their habitats and protecting their populations for the benefit of entire ecosystems.。
1、apex简介

我们走过的路——
1997年,公司为如下本土品牌服务:“兆峰”、“花水 湾”、“成都信达”、“成都蓝风集团”、“友源酒业”、 “川酒”、“泸州老窖”;公司为数十家企业公司提供包 括策划、媒体发布、广告平面制作、影视广告创意制 作服务; 1997年,为日本第三大百货公司伊藤洋华堂在成都 上市策划,并制作开业电视广告,伊藤洋华堂同年成 为成都最具竞争力的百货公司;
(酒业饮品类)
“双狮王碱性电池《动感篇》”获四川省第五届优秀广告作品影视
广告铜奖;(日用生活类)
“友源酒业”获四川省第五届优秀广告作品影视广告入围奖;(酒
业饮品类)
“双狮王碱性电池《酒吧篇》”获四川省第五届优秀广告作品影视
广告入围奖;(日用生活类)
“彩虹轰炸机杀虫剂”获四川省第五届优秀广告作品影视广告入围
17
营销及传播效果监 开盘及阶段信息反馈整理 阶段反馈信息分析 下阶段应对措施 广告效果测评 共计:10大项45小项
注:我们的房地产客户——武城集团-碧云天、 长富房产、绵阳中房集团、金雁房产-领秀别 墅、商润物业-北大花园、鹰冠国际中心、30 层电梯公寓“鑫渝花园”、38层“时代天 18
与阿佩克思共同成长的客户
27
管理部
管理部包括行政、人力资源两个职能部门。
28
财务部
财务部负责公司成本控制与财务核算、年度 计划等。
29
我们公司的主要架构——
阿佩克思集团公司
客
创
执
市场
影
管
财
户
作
行
研究
视
理
务
部
部
部
中心
部
部
部
客 户 一 部 ( 日
Apex的Trigger类简介
Apex的Trigger类简介Apex TriggersApex 触发器(Apex Triggers)是⼀种特殊的 Apex 类。
它的主要作⽤是在⼀条记录被插⼊、修改、删除之前或之后⾃动执⾏⼀系列的操作。
每⼀个 Trigger 类必须对应⼀种对象。
Trigger 的语法和普通的 Apex 类⼀样。
Salesforce 建议开发者在创建 Trigger 之前,考虑⼀下相同的操作可否通过 Salesforce 的设置界⾯中的功能完成,⽐如验证规则(Validation Rule)、⼯作流规则(Workflow Rule)等。
如果可以,则优先使⽤它们。
Trigger 结构与触发事件Trigger 的标准结构如下:trigger Trigger名字 on 对象名字 (触发事件) {// Do something}Trigger 类必须以关键字 “trigger” 开始,然后是此 Trigger 的名字。
接下来是 “on” 关键字,然后是 Trigger 对应的对象的名字。
对象名字后⾯的括号中写⼊触发 Trigger 的事件。
Trigger 的触发事件分为以下⼏种:before insert:插⼊数据之前before update:更新数据之前before delete:删除数据之前after insert:插⼊数据之后after update:更新数据之后after delete:删除数据之后after undelete:恢复数据之后⽐如:trigger HelloWorldTrigger on Account (before insert, before update) {System.debug('Hello World!');}这个 Trigger 在每⼀个 Account 对象插⼊或更新之前执⾏。
如果执⾏了如下代码:Account a = new Account(Name='test');insert a; = 'test2';update a;在这两个 DML 语句⽣效前,系统的⽇志中会添加 “Hello World!” 的记录。
- 1、下载文档前请自行甄别文档内容的完整性,平台不提供额外的编辑、内容补充、找答案等附加服务。
- 2、"仅部分预览"的文档,不可在线预览部分如存在完整性等问题,可反馈申请退款(可完整预览的文档不适用该条件!)。
- 3、如文档侵犯您的权益,请联系客服反馈,我们会尽快为您处理(人工客服工作时间:9:00-18:30)。
2009 Oracle Corporation – Proprietary
Oracle Technology Network (OTN)
Download latest Release Hosted Environment Getting Started Oracle By Examples Documentation & Tutorials Community & Partners
2009 Oracle Corporation – Proprietary
Oracle Application Express (APEX)
Database-centric Web application development tool
Unique Rapid Application Development (RAD) tool for the Oracle Database Browser based for Development, Deployment & Runtime Declaratively build professional Web 2.0 applications that are fast and secure Leverages full Oracle database capabilities and existing SQL & PL/SQL skills Fully supported, “no-cost” standard component with all editions of the Oracle Database
Interactive Reports
Out of the box declarative Web 2.0 reporting Dramatically enhances end-user capabilities
2009 Oracle Corporation
SQL Developer and Application Express
Charts
Calendar
Branches
Authorization Session State Management Logging & Monitoring
Templates
Web Services
Navigation
Email Services
2009 Oracle Corporation
2009 Oracle Corporation
History
2010Application Express 4.0 Websheets, Dynamic Actions, Plug-Ins, RESTful Web 2009 Application Express 3.2 Forms Conversion 2008 Application Express 3.1 Interactive Reports, BLOB 2007 Application Express 3.0 Flash Charts, PDF Printing, Access Application Migration 2006 Application Express 2.2 Packaged Applications 2006 Application Express 2.1 Oracle XE
2010 Oracle Corporation
Oracle Application Express Books
2010 Oracle Corporation
பைடு நூலகம்
Community Focus
Strong & Supportive Community Popular OTN Discussion Forum Consulting Companies Blogs, SIGs Commercial Applications Internet Applications
APEX Commercial Applications
Various delivery methods
On-premises, managed, hosted
Scalable solutions –
Supporting up to hundreds of thousands of users
Numerous use cases –
Enterprise suites, CRM, Workflow, Monitoring, EBS Add-ons
Customized user interfaces – Custom CSS, Integrated with Flash and AJAX, Mash-ups
2009 Oracle Corporation – Proprietary
2005 HTML DB 2.0 SQL Workshop 2004 HTML DB 1.6 Themes 2004 HTML DB 1.5 First Release
2009 Oracle Corporation
Targets the Rapid Application Development Community
2009 Oracle Corporation
Oracle Application Express Use Cases
Data-driven Applications
Develop opportunistic and departmental productivity applications
Oracle Forms Modernization
Departments work against IT,
2009 Oracle Corporation – Proprietary
The APEX Consolidated Model
Decentralized Development, Centralized Management
Consolidate departmental data and
Easy - Rapid - Empowering
2009 Oracle Corporation – Proprietary
Oracle Application Express Momentum
Developer community - 80k+ downloads / year – 4m page views / week Active Discussion Forum – 4.6 m views, #3 on OTN 100 Consulting companies, 60 BLOGs, 10 Hosting Partners User Groups: 30 @OOW-09, 50 @ODTUG, APEXposed User interface for Oracle Store and Oracle Audit Vault
2009 Oracle Corporation
APEX within Oracle
Oracle Store –
Multi-lingual, multicurrency, Web services and Apps integration ARIA People – Most reliable, heavily used application in Oracle
Leverage SQL & PL/SQL declarative programming skills to move Forms applications to HTML / Web 2.0
Online Reporting
Build SQL-based reporting applications on existing database schemas
the application development service into Oracle Database 11g with Application Express (APEX) Oracle Database 11g ensures that APEX applications are secure, reliable and scalable Departments maintain full control over application development IT provides professional data management End user experience is dramatically improved
2009 Oracle Corporation
Out of the Box Development Features
Reports Validations Translation Services Conditional Processing Authentication
Forms
Processes / Dynamic Actions Computations
Browse your Application Express Applications Export and Import Applications Drop Applications Deploy Applications Modify Applications Export Pages Tune your Queries Included Application Express Reports Custom Exception Reports Requires SQL Developer 1.2.1 + and Application Express 3.0.1 +
Project Management –
Software Projects, Customer Wikis, Consulting Summaries