OBIEE11g 回写
ORACLE 11G NEW 闪回数据归档

Oracle 11g new Flashback Data Archive概览闪回数据归档是一种历史记录数据存储。
Oracle Database 11g通过新的闪回数据归档后台进程FBDA自动跟踪和归档启用了闪回数据归档的表中的数据。
使用此功能可满足超过还原保留期的长期保留要求。
闪回数据归档可确保闪回查询能够获得对数据库对象版本的SQL 级别访问权限,而不会出现快照太旧的错误。
闪回数据归档由一个或多个表空间(或其中的几部分)组成。
您可以拥有多个闪回数据归档。
每个闪回数据归档都具有特定的保留持续时间。
您应根据保留持续时间的要求创建不同的闪回数据归档,例如,为必须保留一年的所有记录创建一个闪回数据归档,为必须保留两年的所有记录创建另一个闪回数据归档等。
FBDA将异步收集原始数据并将其写入闪回数据归档。
它并不包括原始索引,因为检索历史记录信息的模式与检索当前信息的模式可能大不相同。
注:可能需要针对历史记录查询持续时间创建适合的索引。
闪回数据归档比较闪回数据归档技术与闪回数据库的比较:? 使用闪回数据归档可以访问任意时间点的数据,而不会实际更改当前数据。
这与闪回数据库相反,闪回数据库会使数据库实际返回到某个时间点。
? 必须启用跟踪才能访问历史记录,而闪回数据库需要预配置。
闪回数据库属于脱机操作,需要资源。
闪回数据归档属于联机操作(历史记录访问与当前访问无缝共存)。
由于使用了新的后台进程,所以它对现有的进程几乎没有影响。
? 闪回数据归档在表级别启用,而闪回数据库只能在数据库级别运行。
? 使用闪回数据归档,可以返回到一个表的不同行或多个不同表的多个不同时间点,而使用闪回数据库则只能返回到特定调用的一个时间点。
闪回数据归档:体系结构闪回数据归档后台进程(FBDA) 随数据库启动。
1.FBDA首先对缓冲区高速缓存中的还原数据执行操作。
2.如果还原数据已不在缓冲区高速缓存中,FBDA也可以从还原段读取所需值。
3.FBDA将合并启用了闪回归档的表中的修改行,并将其写入相应的历史记录表,这些表将组成闪回数据归档。
obiee11g常见问题集锦资料

1biee如何实现下钻逻辑维? (4)2BIEE创建资料档案库时可选二进制文件和mds xml文档,这两者有什么区别? (4)3biee服务启动失败,请问到哪里查看错误日志? (5)4obiee content can not be displayed in the iframe这个问题怎么解决? (6)5biee做数据权限是不是要借助第三方软件?比如LDAP sever之类的。
(6)6BIEE analytics : nQSError:27004,表未解析 (6)7[nQSError: 22040] 要使用Ago 函数, 查询('[D10 期间.Period Key]') 的存储级别必须是静态级别 (7)8BIEE导入元数据报连接失败,怎么配置连接oracle数据库,需要装客户端吗? (9)9我想把一个老环境的biee内容搬到一个新环境上去,都需要copy哪些文件? (11)10BIEE Rpd保存报错:事务更新处理失败 (13)11BIEE可以支持左外关联吗?怎么弄? (14)12怎么修改BIEE的Logo? (14)13Rpd的表和字段特别多,如何能快速地定位到自己要找的表或字段? (15)14BIEE用归档的方式迁移,保存的数据格式没有迁移过来,如何解决? (15)15BIEE仪表盘提示的值能不能传到rpd总参与运算? (17)16为什么每修改一下rpd,都要去em中装载才能生效,哪里能设置一下,不这么麻烦?1917BIEE 已拒绝用户访问路径,错误代码:O9XNZMXB ,请问如何解决? (19)18BIEE如何批量给用户设置登陆默认页? (20)19BIEE会话日志中文乱码问题如何解决? (20)20BIEE中组和计算项的区别? (20)21数据库表里的数据修改了,为什么刷新报表数据没同步更新呢? (21)22BIEE迁移过后,登陆系统报“验证期间出错”,登陆rpd报GUID不匹配,如何解决?2123BIEE在哪里能看到报表最终在oracleDB中执行的sql? (22)24BIEE11g在哪里定义无结果时返回的内容?10g有,11g没找到在哪? (25)25BIEE的提示能否显示名称但是传值的时候将编码传给分析呢? (25)26BIEE 日志无法获取 (26)27OBIEE 高速缓存如何设置定期清理 (26)28如何实现合并单元格 (27)29biee11g目录使用“重命名,且勾选保留对此项的旧名称的引用”功能后,仪表盘菜单栏出现重复的目录 (27)30BIEE报表忽然无法显示 (28)31BIEE文本输入框问题 (28)32BIEE汇总行自定义条件时不起作用? (28)33BIEE EVALUATE函数 (34)34请问一下,当结束时间小于开始时间需要弹出一个对话框(提示时间选择有误),需要怎么做 (35)35BIEE跨库连接查询 (43)36安装biee的数据库信息在哪查看? (44)37BIEE 如何提高报表的查询效率 (44)38请问OBIEE的publisher与answer有什么区别,分别指代什么? (45)39BI分析的过滤条件要做类似月份>=201301 and (同比增长量<0 or 环比增长量<0)这种的该怎么做? (46)40请问下登录时的用户ID 改成账号,是要在哪里修改? (46)41关于BIEE报表出现‘撤销钻探并查看提示值’的问题 (46)42DEV_MDS,DEV_BIPLATFORM这两个用户的密码变了,BIEE需要修改哪些地方?. 47 43BIEE迁移过后,在设置用户登录默认页时报错:已拒绝用户访问路径/user/...... . 52 44各位大牛,BIEE的分析中,如果想做一个链接到别的报表,怎么在URL中取IP地址和Port啊? .. (55)45BIEE Answer中创建分析,过滤器可以用当前登录用户来过滤么? (55)46BI Answer的仪表盘提示如果用SQL语句的话,是否可以取一个(ID、DESC)对?5547rpd可以对单个的用户设置日志记录级别,但是我想对一个角色进行日志级别,如何设置呢 (57)48请问在BIEE Answer上能实现按钮功能么? (58)49biee 11g 验证和授权如何实现? (58)50Ago函数如何使用? (59)51如何保存报表到特定目录。
oracle11g还原数据库步骤__概述说明以及解释
oracle11g还原数据库步骤概述说明以及解释引言部分的内容可以按照如下方式撰写:1. 引言1.1 概述引言部分将介绍本篇文章的主题,即Oracle 11g数据库还原步骤。
数据库还原是一项至关重要的任务,它可以帮助恢复丢失或损坏的数据,并确保系统的连续性和可靠性。
在本文中,我们将深入探讨Oracle 11g数据库还原的步骤和过程,以及执行还原操作前需要注意的准备工作。
1.2 文章结构在本文中,我们将按照以下顺序来讨论Oracle 11g数据库还原:- 首先,我们将介绍Oracle 11g数据库还原的重要性,阐述为什么必须进行数据库还原操作。
- 其次,我们将概述Oracle 11g数据库还原的步骤,并列出每个步骤的简要说明。
- 第三部分我们将详细描述执行数据库还原操作前所需进行的准备工作。
- 接下来,我们将提供执行数据库还原操作的详细步骤,包括必要时涉及到的命令和工具。
- 最后,我们将讨论完成数据库还原后进行验证和测试的方法与技巧。
1.3 目的本文旨在为读者提供有关Oracle 11g数据库还原的全面指南。
通过学习本文,读者将能够了解数据库还原的重要性、掌握进行数据库还原操作的步骤和技巧,并且能够有效地验证和测试还原后的数据库。
我们希望这篇文章能够帮助读者在数据库还原过程中避免常见错误,并提供相关提示和建议。
2. 正文:2.1 Oracle 11g数据库还原的重要性在数据库管理中,数据的安全性和完整性是至关重要的。
由于各种原因,比如硬件故障、用户误操作或者系统遭受攻击,数据库可能会丢失或损坏。
因此,在这些情况下,数据库还原变得非常重要。
Oracle 11g数据库还原是指恢复已经丢失或被损坏的数据到其先前可用状态的过程。
2.2 Oracle 11g数据库还原的步骤概述数据库还原通常包括以下主要步骤:- 备份介质准备:确定可用的备份介质,并确保其处于良好状态。
- 目标库环境准备:在目标库上创建必需的目录结构,并配置参数以适应还原操作。
Oracle Database Mobile Server 11g 用户手册说明书
ORACLE DATABASE MOBILE SERVER ® 11g Oracle Database Mobile Server 11g is the best way to securely connect embedded devices and mobile applications to Oracle Database. Any organization with a mobile workforce or network of remote devices can benefit from using Oracle Database Mobile Server to safely and reliably link them into their existing enterprise infrastructure. Oracle Database Mobile Server is designed to work with Berkeley DB, Oracle’s high performance mobile data store. It is also compatible with SQLite, the popular open source project. Oracle Database Mobile Server Overview Oracle Database Mobile Server 11g is a reliable, secure way to link mobile applications and embedded devices into existing enterprise infrastructure. It is well suited for mission critical applications or any application where high performance and reliability are required. It extends the application grid to mobile devices, allowing access to enterprise data and applications in the absence of a network connection. When a network connection is available, Oracle Database Mobile Server uses data synchronization to allow reliable and secure data exchange with a backend Oracle Database. The three main components of Oracle Database Mobile Server are: 1) Mobile Client, resides on mobile platform to facilitate sync and remote management 2) The Sync Server itself, coupled with the Mobile Manager console, provide scalable, secure management of data, applications and devices. 3) Mobile Development Kit (MDK), a suite of tools for packaging, publishing and testing applications. Multi-Platform Mobile Client Oracle Database Mobile Server supports many different client platforms, including Java, Android, Blackberry, Windows Desktop & Mobile, and Linux. The Mobile Client provides support for either a SQLite database or Oracle Berkeley DB. • Berkeley DB is a widely deployed, mature embedded database library that provides enterprise class features, including high throughput, low-latency reads, non-blocking writes, data scalability and in-memory caching in a small memory footprint. Berkeley DB offers a SQL API that is SQLite compatible. Berkeley DB offers features that allow it to scale well beyond the limitations of the SQLite native library, while retaining the ease-of-use of the SQLite API. • SQLite is a very popular open source embedded database library and is widely used in smart phones, including Android and Blackberry devices. It is a small footprint, transactional database library that is self-administering, requiring no external DBA. The Mobile Client supports both databases with a rich set of data synchronization features. Data synchronization can be enabled in a variety of ways – automatic background sync, manual sync using a GUI, command line app, or even from another application using API calls.A device agent on the Mobile client allows administrators to remotely manage the device by sending commands or querying the system. Application life-cycle management can be achieved by enabling remote application updates.Enterprise Ready Mobile ServerAt the core of the Oracle Database Mobile Server product is the server itself, which can be deployed on commodity server hardware running industry standard operating systems including Windows, Linux, Solaris, HP-UX and IBM AIX. The Mobile Server provides a reliable, bi-directional synchronization system and a powerful administration interface.Robust and Scalable Synchronization SystemBased on the publish/subscribe or “pub-sub” model, the Oracle Database Mobile Server synchronization system allows efficient asynchronous and synchronous incremental data synchronization between thousands of mobile users and the Oracle Database.Oracle Database Mobile Server features a robust and resilient synchronization process. In the event of a network failure, the client will resume the function from the last acknowledged checkpoint rather than restart the transmission. The result is that a successful synchronization can be achieved even over unreliable network connections.Oracle Database Mobile Server is capable of analyzing information contained in the mobile application to automatically create the application's server-side synchronization logic. It provides a flexible architecture that enables customization of the synchronization process at multiple levels. Callback support enables interleaving various application-specific tasks during the various synchronization phases. Developers can choose to optimize only the resource intensive Compose phase of synchronization by implementing java classes that leverage their insights into the data model. Alternatively, developers can provide full control of the synchronization system by independently managing the data queues that contain the uploaded data and the client updates to be downloaded.Conflicts can occur when the same data has been modified by the server and the client, or by multiple clients. Oracle Database Mobile Server automatically detects such conflicts and resolves them based on a highly customizable rule set.Comprehensive Management and AdministrationOracle Database Mobile Server employs a secure, centralized repository to support a unified interface for distributing and managing software and data on remote systems. Mobile Manager, a web-based administration interface for Mobile Server, enables 100% server-side management of all mobile applications, devices, users and mobile servers. The administrator can create users and groups, assign application access privileges, send device commands and retrieve device diagnostic information from a single interface. Integration with enterprise Oracle OID and LDAP directories further simplifies user management. In addition, the administrator can manage the synchronization process by setting its frequency, resolving errors, or analyzing and tuning its performance from the same interface. A scripting language is available that can be used to batch administration functions minimize administrator overhead.Rapid Application Development SupportThe Mobile Development Kit (MDK) is included with Oracle Database Mobile Server. It consists of a set of tools, APIs, tutorials and code samples that accelerate the development of mobile applications.The main component of the MDK is the Mobile Database Workbench (MDW), a visual development tool for designing synchronized databases. Wizards in the MDW accelerate creation of synchronized databases by allowing developers to quickly define and customize snapshots of enterprise data models for incorporation into these databases. The Packaging Wizard enables bundling all application components (executables, libraries, images, help files etc.) into a JAR file for simple upload to the Mobile Server from where it can be deployed to mobile, embedded or lightweight business environments easily.Developers can use Oracle JDeveloper with ADF Mobile to visually develop applications that enable access to critical business data. Oracle Database Mobile Server includes support for deploying and managing applications created using JDeveloper and ADF Mobile.Oracle Database Mobile Server also supports familiar data access interfaces and open standards such as ODBC, JDBC, and . Tutorials and samples included in the documentation and MDK install highlight how to leverage specific features or develop applications on a particular platform.Table 1 Supported client platformsHigh Performance and ScalabilityOracle Database Mobile Server delivers impressive out-of-the-box performance, enabling users to access information quickly and efficiently. Support for multiprocessor systems and dynamic cache sizing ensure top performance for larger databases and greater numbers of connected users. Oracle Database Mobile Server provides tools to tune the performance of data synchronization.Oracle Database Mobile Server integrates with Oracle WebLogic Server to enable scaling of Mobile Server deployments by taking advantage of the load balancing features.On the mobile device side, Berkeley DB’s small footprint, extreme scalability, and fine-grain locking make it suitable for almost any application. It supports a high degree of concurrency, including support for concurrent Vacuum and Backup commands.Unparalleled Device and Application SecurityOracle Database Mobile Server provides standard device commands as well as the infrastructure to implement customized commands to support enterprise business processes and security best practices. For example, you can issue commands to synchronize the database, perform diagnostics, or change application settings. In the event of a device loss, theft, or other security concern, you can delete applications and databases, uninstall the client or reset the password. SSL based encryption protects data integrity while data is in transit between the device and the enterprise database.JavaN/A Yes N/A AndroidN/A Yes N/A BlackberryN/A Yes N/A Windows Desktopand MobileYes Yes Yes Linux Yes Yes N/ATable 2 Key Oracle Database Mobile Server featuresConclusionOrganizations of all types can leverage Oracle Database Mobile Server 11g to increase employee productivity, reduce operation costs, and improve customer satisfaction. Oracle Database Mobile Server has delivered demonstrable impact in a wide variety of roles, including sales force automation, data collection, customer relationship management (CRM), and field service applications. It has an established presence in a range of industries including financial services, healthcare, transportation, logistics, government, retail, military, and law enforcement. It is also commonly used as a building block for custom solutions by ISVs and System Integrators (SIs).Contact UsFor more information about Oracle Database Mobile Server, please visit or call +1.800.ORACLE1 to speak to an Oracle representative.Oracle is committed to developing practices and products that help protect the environmentCopyright © 2011, Oracle and/or its affiliates. All rights reserved.This document is provided for information purposes only and the contents hereof are subject to change without notice. This document is not warranted to be error-free, nor subject to any other warranties or conditions, whether expressed orally or implied in law, including implied warranties and conditions of merchantability or fitness for a particular purpose. We specifically disclaim any liability with respect to this document and no contractual obligations are formed either directly or indirectly by this document. This document may not be reproduced or transmitted in any form or by any means, electronic or mechanical, for any purpose, without our prior written permission.Oracle is a registered trademark of Oracle Corporation and/or its affiliates. Other names may be trademarks of their respective owners.• Footprint is 1 MB• Very broad platform support• High performance• Non-blocking writes• In-memory caching• Concurrent access bymultiple threads orprocesses• Full ACID transactions• Automatic recovery• Scales to TB of data ina single table• JDBC, ODBC, APIs• SQL API compatiblewith SQLite, SQL-92• 128-bit AES encryption • Fine-grain locking• Zero administration • Flexible & reliable bi- directional synchronization • Asynchronous architecture for high scalability • Multi-threaded architecture • Custom synchronization invocation • Automatic (background) Synchronization • Support for schema evolution • SSL encryption & data compression • Network failure recovery • Built-in and custom conflict detection / resolution • Ability to synchronize data and applications• EM compliant UI • Single Sign-On capability using Oracle Identity Management • Scripting language for batch administration • Extension APIs • User management • Application provisioning and deployment • Device management including remote diagnostics • Unified interface to monitor synchronization and resolve errors。
obiee11g常见问题集锦

1biee如何实现下钻逻辑维? (5)2BIEE创建资料档案库时可选二进制文件和mds xml文档,这两者有什么区别? (5)3biee服务启动失败,请问到哪里查看错误日志? (5)4obiee content can not be displayed in the iframe这个问题怎么解决? (7)5biee做数据权限是不是要借助第三方软件?比如LDAP sever之类的。
(7)6BIEE analytics : nQSError:27004,表未解析 (7)7[nQSError: 22040] 要使用Ago 函数, 查询('[D10 期间.Period Key]') 的存储级别必须是静态级别 (8)8BIEE导入元数据报连接失败,怎么配置连接oracle数据库,需要装客户端吗? . 10 9我想把一个老环境的biee内容搬到一个新环境上去,都需要copy哪些文件? (12)10BIEE Rpd保存报错:事务更新处理失败 (14)11BIEE可以支持左外关联吗?怎么弄? (15)12怎么修改BIEE的Logo? (15)13Rpd的表和字段特别多,如何能快速地定位到自己要找的表或字段? (16)14BIEE用归档的方式迁移,保存的数据格式没有迁移过来,如何解决? (16)15BIEE仪表盘提示的值能不能传到rpd总参与运算? (18)16为什么每修改一下rpd,都要去em中装载才能生效,哪里能设置一下,不这么麻烦?2017BIEE 已拒绝用户访问路径,错误代码:O9XNZMXB ,请问如何解决? (20)18BIEE如何批量给用户设置登陆默认页? (21)19BIEE会话日志中文乱码问题如何解决? (21)20BIEE中组和计算项的区别? (21)21数据库表里的数据修改了,为什么刷新报表数据没同步更新呢? (22)22BIEE迁移过后,登陆系统报“验证期间出错”,登陆rpd报GUID不匹配,如何解决?2223BIEE在哪里能看到报表最终在oracleDB中执行的sql? (23)24BIEE11g在哪里定义无结果时返回的内容?10g有,11g没找到在哪? (26)25BIEE的提示能否显示名称但是传值的时候将编码传给分析呢? (26)26BIEE 日志无法获取 (27)27OBIEE 高速缓存如何设置定期清理 (27)28如何实现合并单元格 (28)29biee11g目录使用“重命名,且勾选保留对此项的旧名称的引用”功能后,仪表盘菜单栏出现重复的目录 (28)30BIEE报表忽然无法显示 (29)31BIEE文本输入框问题 (29)32BIEE汇总行自定义条件时不起作用? (29)33BIEE EVALUATE函数 (35)34请问一下,当结束时间小于开始时间需要弹出一个对话框(提示时间选择有误),需要怎么做 (36)35BIEE跨库连接查询 (44)36安装biee的数据库信息在哪查看? (45)37BIEE 如何提高报表的查询效率 (45)38请问OBIEE的publisher与answer有什么区别,分别指代什么? (46)39BI分析的过滤条件要做类似月份>=201301 and (同比增长量<0 or 环比增长量<0)这种的该怎么做? (47)40请问下登录时的用户ID 改成账号,是要在哪里修改? (47)41关于BIEE报表出现‘撤销钻探并查看提示值’的问题 (47)42DEV_MDS,DEV_BIPLATFORM这两个用户的密码变了,BIEE需要修改哪些地方?. 48 43BIEE迁移过后,在设置用户登录默认页时报错:已拒绝用户访问路径/user/...... . 53 44各位大牛,BIEE的分析中,如果想做一个链接到别的报表,怎么在URL中取IP地址和Port啊? .. (56)45BIEE Answer中创建分析,过滤器可以用当前登录用户来过滤么? (56)46BI Answer的仪表盘提示如果用SQL语句的话,是否可以取一个(ID、DESC)对?5647rpd可以对单个的用户设置日志记录级别,但是我想对一个角色进行日志级别,如何设置呢 (58)48请问在BIEE Answer上能实现按钮功能么? (59)49biee 11g 验证和授权如何实现? (59)50Ago函数如何使用? (60)51如何保存报表到特定目录。
oracle 11g ssl 配置查询语句 -回复

oracle 11g ssl 配置查询语句-回复在Oracle 11g中配置SSL是一项重要的任务,以确保安全的数据库通信。
SSL(Secure Sockets Layer)是一种安全协议,用于加密客户端和服务器之间的通信,防止数据在传输过程中被窃取或篡改。
本文将为您详细介绍如何配置Oracle 11g的SSL功能,让您的数据库通信更加安全可靠。
首先,我们需要确保您已经获得了有效的SSL证书。
证书是一种数字证明,用于验证服务器身份并加密通信。
您可以从公认的认证机构(CA)或第三方供应商获得SSL证书。
现在,我们可以开始配置Oracle 11g的SSL功能。
请按照以下步骤进行操作:第一步:检查Oracle 11g是否已安装SSL支持在开始配置SSL之前,我们需要确保Oracle 11g已经安装了SSL支持。
要检查是否已安装SSL支持,您可以执行以下查询语句:SELECT * FROM voption WHERE parameter = 'Advanced Security';如果结果集中显示“TRUE”,这意味着已安装了Advanced Security选项,也就是SSL支持。
第二步:创建Oracle钱包钱包是存储SSL证书和密钥的文件容器。
要创建Oracle钱包,您需要执行以下步骤:1. 使用以下命令登录到数据库服务器:sqlplus / as sysdba2. 在SQL*Plus提示下,输入以下命令创建钱包:SQL> ADMINISTER KEY MANAGEMENT CREATE KEYSTORE'<wallet_directory>' IDENTIFIED BY '<password>' FORCE keystore_type [auto_login] [ENABLE] HSM;在上述命令中,您需要指定钱包的目录和密码。
obiee11g简单入门详解
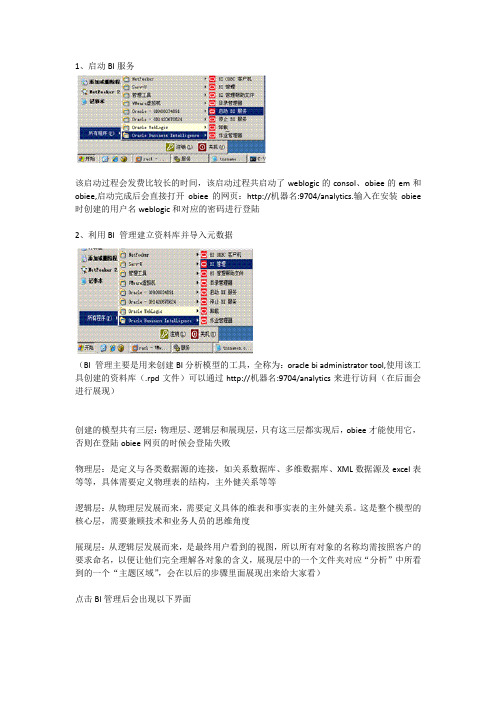
1、启动BI服务该启动过程会发费比较长的时间,该启动过程共启动了weblogic的consol、obiee的em和obiee,启动完成后会直接打开obiee的网页:http://机器名:9704/analytics.输入在安装obiee 时创建的用户名weblogic和对应的密码进行登陆2、利用BI 管理建立资料库并导入元数据(BI 管理主要是用来创建BI分析模型的工具,全称为:oracle bi administrator tool,使用该工具创建的资料库(.rpd文件)可以通过http://机器名:9704/analytics来进行访问(在后面会进行展现)创建的模型共有三层:物理层、逻辑层和展现层,只有这三层都实现后,obiee才能使用它,否则在登陆obiee网页的时候会登陆失败物理层:是定义与各类数据源的连接,如关系数据库、多维数据库、XML数据源及excel表等等,具体需要定义物理表的结构,主外健关系等等逻辑层:从物理层发展而来,需要定义具体的维表和事实表的主外健关系。
这是整个模型的核心层,需要兼顾技术和业务人员的思维角度展现层:从逻辑层发展而来,是最终用户看到的视图,所以所有对象的名称均需按照客户的要求命名,以便让他们完全理解各对象的含义,展现层中的一个文件夹对应“分析”中所看到的一个“主题区域”,会在以后的步骤里面展现出来给大家看)点击BI管理后会出现以下界面现在就可以通过这个页面来创建资料库了,点击“文件”来新建资料库接着会出现如下界面输入资料库名称sh111(我们是以11g数据库自带的sh用户来进行实验,请在做这之前先将oracle11g数据库中的sh用户解锁并设置密码为sh),然后选中导入元数据并输入资料库sh111.rpd的密码,可以自己设置,我设置的是12345678,设置完后按下一步(同时注意下资料库的存放位置,默认的所有资料库都是存放在该目录下),接下来会出现如下界面在连接类型处我们选择OCI10g/11g,也可以使用odbc,不过odbc使用非常麻烦,所以我选择了OCI10g/11g,接下来输入数据源名称及oracle11g数据库的sh用户名和密码。
weblogic11g补丁安装及回退
weblogic11g补丁安装及回退1Weblogic 11gWeblogic Server 10.3.5及以下版本,需要将BSU升级到3.3.0,具体步骤参见1.31.1Weblogic 11g补丁安装1)修改$BEA_HOME /utils/bsu/bsu.sh,将java heap增加到1024m2)在$BEA_HOME下创建目录patch ($BEA_HOME为weblogic 安装目录,如/home/weblogic) 3)上传补丁到$BEA_HOME/patch 4)解开补丁:如unzip p2*******_1036_Generic.zip5)将patch-catalog_*.xml复制到$BEA_HOME/util/bsu/cache_dir (如cache_dir不存在,则创建此目录)6)在$BEA_HOME/util/bsu下执行:./bsu.sh -prod_dir=$BEA_HOME/wlserver_10.3-patch_download_dir=$BEA_HOME/patch -patchlist=patchid -install -verbosePatchid为第3步解开后,jar文件的文件名,如LFAC如:./bsu.sh -prod_dir=/bea/weblogic/wlserver_10.3-patch_download_dir=/bea/weblogic/patch -patchlist=EJUW -install-verbose7)验证补丁安装Cd $BEA_HOME/wlserver_10.3/server/bin. ./setWLSEnv.shjava weblogic.version输出中包含补丁信息。
如果输出没有包含补丁信息,将整个weblogic目录及其下文件权限改为7551.2Weblogic 11g补丁回退1)在$BEA_HOME/util/bsu下执行:./bsu.sh -prod_dir=$BEA_HOME/wlserver_10.3 -patchlist=patchid-verbose -remove如:./bsu.sh -prod_dir=/bea/weblogic/wlserver_10.3 -patchlist=LFAC-verbose –remove1.310.3.5及以下版本bsu升级Weblogic Server 10.3.5及以下版本,需要将BSU升级到3.3.0:1.从/doc/2f6075104.html,下载补丁124268282.将补丁p1*******_1035_Generic.zip,获得patch-client-installer330_generic32.jar3.执行java -jar patch-client-installer330_generic32.jar -mode=consoleExtracting0%....................................................................................................100%<- Oracle WebLogic Smart Update - Oracle WebLogic Smart Update Installer 3.3 ...->Welcome:--------This installer will guide you through the installation of Oracle WebLogic Smart UpdateInstaller 3.3.0.0. Type "Next" or enter to proceed to the next prompt.If you want to change data entered previously, type "Previous". You may quitthe installer at any time by typing "Exit".Enter [Exit][Next]> (直接回车)<- Oracle WebLogic Smart Update - Oracle WebLogic Smart Update Installer 3.3 ...->Choose Middleware Home Directory:---------------------------------->1|* Create a new Middleware Home2|/oem/wls10363|/oem/wls1035Enter index number to select OR [Exit][Previous][Next]> 3 (注意:选择已有及正确的weblogic安装路径)<- Oracle WebLogic Smart Update - Oracle WebLogic Smart Update Installer 3.3 ...->Choose Install Type:--------------------Select the type of installation you wish to perform.->1|Typical| Install the following product(s) and component(s):| - Common Infrastructure Engineering| - Oracle WebLogic Smart Update2|Custom| Choose software products and components to install and perform optional|configuration.Enter index number to select OR [Exit][Previous][Next]> (直接回车)<- Oracle WebLogic Smart Update - Oracle WebLogic Smart Update Installer 3.3 ...-> Installing files..0% 25% 50% 75% 100%[------------|------------|------------|------------][***************************************************]Performing String Substitutions...<- Oracle WebLogic Smart Update - Oracle WebLogic Smart Update Installer 3.3 ...-> [Exit]><- Oracle WebLogic Smart Update - Oracle WebLogic Smart Update Installer 3.3 ...-> Clean up process in progress ...。
BIEE11g入门培训(详细资料)

BIEE11g入门培训教程编写:北京殷塞信息技术有限公司编写日期:2012/6/19版本:V1。
0目录BIEE11g入门培训教程 (1)1. ORACLE BIEE基础 (5)1.1. OBIEE 概述 (5)1。
1.1。
BIEE 历史 (5)1.1.2. 数据模型 (5)1。
2. BIEE 安装 (6)1.2.1. JDK要求 (6)1.2。
2. 下载BIEE (6)1。
2.3. 安装BIEE (7)1。
2。
4. Logs (9)1.3。
配置 (10)1.3.1. 安装后的目录 (10)1.3.2。
几个重要的配置文件 (10)1。
4。
预览Demo效果 (10)1。
4。
1。
启动BI服务和OC4J (10)1。
4。
2。
打开BIEE仪表盘 (11)2。
BIEE 开发步骤 (12)2.1。
数据库 (12)2。
1.1。
安装数据库 (12)2。
2。
创建资料库 (12)2.2.1。
资料库 (12)2。
3。
创建物理模型 (13)2.3。
1。
导入物理表 (13)2.3.2. 创建物理模型 (16)2.3.3。
新建主键和外键 (17)2.4。
创建逻辑模型 (20)2。
4.1. 创建逻辑层 (20)2。
4.2. 查看逻辑层 (21)2。
4.3. 修改逻辑层 (21)2。
5. 创建展现模型 (22)2.5.1。
创建展现层 (22)2。
6. 保存资料库 (22)2.6。
1。
保存资料库 (22)2。
6.2. 修改密码 (23)2。
7。
发布资料库 (23)2.7。
1. 修改NQSConfig。
INI (24)2。
7。
2。
重启Oracle BI Server (24)2.8. Answers –答复 (24)2.8.1. 登陆BI EE11g (24)2。
8.2。
选择主题 (25)2.8.4。
保存报表 (28)2。
9。
Dashboards –仪表盘 (29)2。
9.1。
创建仪表盘 (29)2。
9。
2。
编辑仪表盘 (29)2。
obiee11g常见问题集锦资料

1biee如何实现下钻逻辑维? (4)2BIEE创建资料档案库时可选二进制文件和mds xml文档,这两者有什么区别? (4)3biee服务启动失败,请问到哪里查看错误日志? (5)4obiee content can not be displayed in the iframe这个问题怎么解决? (6)5biee做数据权限是不是要借助第三方软件?比如LDAP sever之类的。
(6)6BIEE analytics : nQSError:27004,表未解析 (6)7[nQSError: 22040] 要使用Ago 函数, 查询('[D10 期间.Period Key]') 的存储级别必须是静态级别 (7)8BIEE导入元数据报连接失败,怎么配置连接oracle数据库,需要装客户端吗? (9)9我想把一个老环境的biee内容搬到一个新环境上去,都需要copy哪些文件? (11)10BIEE Rpd保存报错:事务更新处理失败 (13)11BIEE可以支持左外关联吗?怎么弄? (14)12怎么修改BIEE的Logo? (14)13Rpd的表和字段特别多,如何能快速地定位到自己要找的表或字段? (15)14BIEE用归档的方式迁移,保存的数据格式没有迁移过来,如何解决? (15)15BIEE仪表盘提示的值能不能传到rpd总参与运算? (17)16为什么每修改一下rpd,都要去em中装载才能生效,哪里能设置一下,不这么麻烦?1917BIEE 已拒绝用户访问路径,错误代码:O9XNZMXB ,请问如何解决? (19)18BIEE如何批量给用户设置登陆默认页? (20)19BIEE会话日志中文乱码问题如何解决? (20)20BIEE中组和计算项的区别? (20)21数据库表里的数据修改了,为什么刷新报表数据没同步更新呢? (21)22BIEE迁移过后,登陆系统报“验证期间出错”,登陆rpd报GUID不匹配,如何解决?2123BIEE在哪里能看到报表最终在oracleDB中执行的sql? (22)24BIEE11g在哪里定义无结果时返回的内容?10g有,11g没找到在哪? (25)25BIEE的提示能否显示名称但是传值的时候将编码传给分析呢? (25)26BIEE 日志无法获取 (26)27OBIEE 高速缓存如何设置定期清理 (26)28如何实现合并单元格 (27)29biee11g目录使用“重命名,且勾选保留对此项的旧名称的引用”功能后,仪表盘菜单栏出现重复的目录 (27)30BIEE报表忽然无法显示 (28)31BIEE文本输入框问题 (28)32BIEE汇总行自定义条件时不起作用? (28)33BIEE EVALUATE函数 (34)34请问一下,当结束时间小于开始时间需要弹出一个对话框(提示时间选择有误),需要怎么做 (35)35BIEE跨库连接查询 (43)36安装biee的数据库信息在哪查看? (44)37BIEE 如何提高报表的查询效率 (44)38请问OBIEE的publisher与answer有什么区别,分别指代什么? (45)39BI分析的过滤条件要做类似月份>=201301 and (同比增长量<0 or 环比增长量<0)这种的该怎么做? (46)40请问下登录时的用户ID 改成账号,是要在哪里修改? (46)41关于BIEE报表出现‘撤销钻探并查看提示值’的问题 (46)42DEV_MDS,DEV_BIPLATFORM这两个用户的密码变了,BIEE需要修改哪些地方?. 47 43BIEE迁移过后,在设置用户登录默认页时报错:已拒绝用户访问路径/user/...... . 52 44各位大牛,BIEE的分析中,如果想做一个链接到别的报表,怎么在URL中取IP地址和Port啊? .. (55)45BIEE Answer中创建分析,过滤器可以用当前登录用户来过滤么? (55)46BI Answer的仪表盘提示如果用SQL语句的话,是否可以取一个(ID、DESC)对?5547rpd可以对单个的用户设置日志记录级别,但是我想对一个角色进行日志级别,如何设置呢 (57)48请问在BIEE Answer上能实现按钮功能么? (58)49biee 11g 验证和授权如何实现? (58)50Ago函数如何使用? (59)51如何保存报表到特定目录。
Obiee 11G - 界面订制
Obiee 11G的界面大体归纳为三类:(皮肤)Skins、(风格) Styles、(信息) Messages。
我们大多数修改应用的有两项,Skins和Messages,修改的办法大体有三种,这里简单介绍一下如何修改。
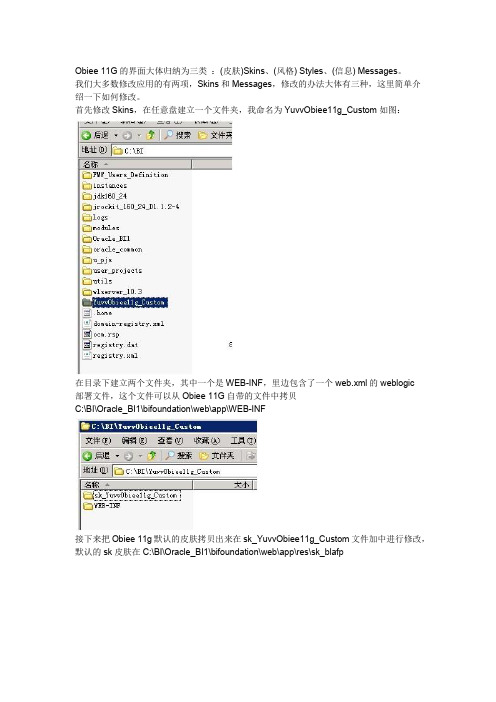
首先修改Skins,在任意盘建立一个文件夹,我命名为YuvvObiee11g_Custom如图:在目录下建立两个文件夹,其中一个是WEB-INF,里边包含了一个web.xml的weblogic部署文件,这个文件可以从Obiee 11G自带的文件中拷贝C:\BI\Oracle_BI1\bifoundation\web\app\WEB-INF接下来把Obiee 11g默认的皮肤拷贝出来在sk_YuvvObiee11g_Custom文件加中进行修改,默认的sk皮肤在C:\BI\Oracle_BI1\bifoundation\web\app\res\sk_blafp下面我们直接逐一修改,首先修改图片oralce_logo.png,这里的oralce_logo.png分为两个路径,一个是C:\BI\Oracle_BI1\bifoundation\web\app\res\sk_blafp\b_mozilla_4和C:\BI\Oracle_BI1\bifoundation\web\app\res\sk_blafp\login,为了便于区分,这里用不同的图片(119*25)来替换的原oralce_logo.png,如图:OK,下面我们来建立sk的指向。
打开C:\BI\instances\instance1\config\OracleBIPresentationServicesComponent\coreapplication_obips1下的instanceconfig.xml文件(这里不再解释为什么会是instances目录下的config 的OracleBIPresentationServicesComponent,可以去了解一下Siebel或Obiee 10g的服务,如BI server,BI PresentationServices,BI java等服务器作用。
Oracle WebLogic Server 11g Release Notes说明书

Oracle® WebLogic ServerRelease Notes11g Release 1 (10.3.3)for IBM: Linux on System zE15731-05May 2010This chapter describes issues associated with Oracle WebLogic Server installation andconfiguration. It includes the following topic:■Section1, "Installation Issues and Workarounds"■Section2, "Documentation Accessibility"1Installation Issues and WorkaroundsThis section describes the issues with WebLogic Server installation and workarounds.It includes the following topics:■Section1.1, "Improper Rollback to Previous Installation May Occur After Exitingan Upgrade Installation Prematurely"■Section1.2, "Installation Fails with Fatal Error"■Section1.3, "Process to Install and Configure WebLogic Server"■Section1.4, "Patch for NoClassDefFoundError While Using JACC in zLinux"1.1Improper Rollback to Previous Installation May Occur After Exiting anUpgrade Installation PrematurelyWhen using an Upgrade installer or Smart Update to upgrade an existing WebLogicServer 10.3.x installation to WebLogic Server 10.3.3, if you abort the upgrade beforecompletion, the installation should automatically roll back to the prior installation.This may not always occur, resulting in an unusable installation.1.2Installation Fails with Fatal ErrorThe installer does not verify whether sufficient disk space is available on the machineprior to completing the installation. As a result, if an installation cannot be completeddue to insufficient space, the installer displays the following error message and exits:Fatal error encountered during file installation. The installer will nowcleanup and exit!WorkaroundIf this problem occurs, restart the installer using the following command:$JAVA_HOME/bin/java -jar wls1033_generic.jar -log=log.out -log_priority=debugThe preceding command generates a log of the installation procedure, providing details about the exact cause of the failure. If the cause is indeed insufficient space, the log file indicates it explicitly.1.3Process to Install and Configure WebLogic ServerTo install and configure Oracle WebLogic Server 10.3.3, perform the following steps:1.Download the IBM Java 6 64-bit (SR6 or SR7) from IBM download site.2.Install IBM Java 6 on your system.3.Export $JAVA_HOME/bin into PATH where JAVA_HOME is the java installationpath. For example:export PATH=$JAVA_HOME/bin:$PATH4.Go to Oracle Technology Network./technology/software/products/ias/htdocs/wls_ main.html5.Download "Oracle WebLogic Server 11g R1 PS2 (10.3.3) - Package Installer" under"Additional Platforms" column.Note:For important information on downloading Oracle productssee Notes 762254.1 and 763603.1 on My Oracle Support.Oracle WebLogic Server can also be downloaded from OracleE-Delivery:/6.Install Oracle WebLogic Server using the instructions in "Starting .jar InstallationPrograms in Console-Mode" of Oracle Fusion Middleware Installation Guide for Oracle WebLogic Server. This section describes the process of installing .jar files in different modes.7.Download and install the following patches using the Oracle Smart Update tool:a.Patch ID: 1MIS Passcode: KTNAX6H1b.Patch ID: 8RLQ Passcode: CTH8ERF1For more information about Oracle Smart Update tool, refer to the Smart Update Installing Patches and Maintenance Packs Guide.1.4Patch for NoClassDefFoundError While Using JACC in zLinuxIn 11.1.1.3 Release, when JACC (Java Authorization Contract for Containers) enabled Oracle WebLogic Server 10.3.3 runs using Sun-specific PrincipalComparator, which is not supported on IBM JDK. It displays the NoClassDefFoundError.WorkaroundDownload and install the following patch using the Oracle Smart Update tool to resolve the issue:Patch ID: E1WM Passcode: H2746UPLFor more information about Oracle Smart Update tool, refer to the "Smart Update Tool":/docs/cd/E14759_01/index.htm2Documentation AccessibilityOur goal is to make Oracle products, services, and supporting documentation accessible to all users, including users that are disabled. To that end, our documentation includes features that make information available to users of assistive technology. This documentation is available in HTML format, and contains markup to facilitate access by the disabled community. Accessibility standards will continue to evolve over time, and Oracle is actively engaged with other market-leading technology vendors to address technical obstacles so that our documentation can be accessible to all of our customers. For more information, visit the Oracle Accessibility Program Web site at /accessibility/.Accessibility of Code Examples in DocumentationScreen readers may not always correctly read the code examples in this document. The conventions for writing code require that closing braces should appear on an otherwise empty line; however, some screen readers may not always read a line of text that consists solely of a bracket or brace.Accessibility of Links to External Web Sites in DocumentationThis documentation may contain links to Web sites of other companies or organizations that Oracle does not own or control. Oracle neither evaluates nor makes any representations regarding the accessibility of these Web sites.Access to Oracle SupportOracle customers have access to electronic support through My Oracle Support. For information, visit /support/contact.html or visit /accessibility/support.html if you are hearing impaired.Oracle WebLogic Server Release Notes, 11g Release 1 (10.3.3) for IBM: Linux on System zE15731-05Copyright © 2010, Oracle and/or its affiliates. All rights reserved.This software and related documentation are provided under a license agreement containing restrictions on use and disclosure and are protected by intellectual property laws. Except as expressly permitted in your license agreement or allowed by law, you may not use, copy, reproduce, translate, broadcast, modify, license, transmit, distribute, exhibit, perform, publish, or display any part, in any form, or by any means. Reverse engineering, disassembly, or decompilation of this software, unless required by law for interoperability, is prohibited.The information contained herein is subject to change without notice and is not warranted to be error-free. If you find any errors, please report them to us in writing.If this software or related documentation is delivered to the U.S. Government or anyone licensing it on behalf of the U.S. Government, the following notice is applicable:U.S. GOVERNMENT RIGHTS Programs, software, databases, and related documentation and technical data delivered to U.S. Government customers are "commercial computer software" or "commercial technical data" pursuant to the applicable Federal Acquisition Regulation and agency-specific supplemental regulations. As such, the use, duplication, disclosure, modification, and adaptation shall be subject to the restrictions and license terms set forth in the applicable Government contract, and, to the extent applicable by the terms of the Government contract, the additional rights set forth in FAR 52.227-19, Commercial Computer Software License (December 2007). Oracle USA, Inc., 500 Oracle Parkway, Redwood City, CA 94065.This software is developed for general use in a variety of information management applications. It is not developed or intended for use in any inherently dangerous applications, including applications which may create a risk of personal injury. If you use this software in dangerous applications, then you shall be responsible to take all appropriate fail-safe, backup, redundancy, and other measures to ensure the safe use of this software. Oracle Corporation and its affiliates disclaim any liability for any damages caused by use of this software in dangerous applications.Oracle is a registered trademark of Oracle Corporation and/or its affiliates. Other names may be trademarks of their respective owners.This software and documentation may provide access to or information on content, products, and services from third parties. Oracle Corporation and its affiliates are not responsible for and expressly disclaim all warranties of any kind with respect to third-party content, products, and services. Oracle Corporation and its affiliates will not be responsible for any loss, costs, or damages incurred due to your access to or use of third-party content, products, or services.。
Oracle BIEE 11g

2.界面内容组织更有条理,更清晰。 3.新增或改进功能: ——提示条:样式、类型。
Web界面及新增功能
——层结构:提示条、列。
Web界面及新增功能
——图形:滑块功能。
Web界面及新增功能
——表:用户拖拽。
Web界面及新增功能
——记分卡
Web界面及新增功能
资料库
4.在连接数据库的时候需要用到连接池数据源名称写全称,或者是在BIEE11g自带的 oracle客户端中重新配置一次TNS,然后用简称。
资料库
5.层结构可作为一个对象,拖到展现层中使用,下图为报表展现时的效果。
6.相对BIEE10g的版本来说,11g不能够直接在RPD中创建用户及用户组。
Web界面及新增功能
OBIEE 10g 无要求 不安装 45分钟左右
注:安装期间,请关闭防火墙、杀毒软件等。 附:《Oracle biee 11g 安装指引.doc》
工具
OBIEE 11g OBIEE 10g
BI 管理
目录管理器 作业管理器 BI ODBC 客户机
Administration
Catalog Manager Job Manager ODBC Client
——地理信息化
安全
安全架构图:
安全
用户及组的创建:
安全
应用程序角色创建及权限分配:
安全
数据权限设置:
安全
功能权限设置:
安全
OBIEE 11g 用户/组创建 应用程序角色创建及 权限分配 数据权限设置 功能权限设置 控制台
EM
OBIEE 10g 资料库 资料库 资料库 Web
资料库 Web
Oracle B2B 11g 技术文档说明书
Oracle B2B 11g Technical Note Technical Note: 11g_005Command-Line UtilitiesThis technical note lists the Command-line utilizes available to manage for Oracle B2BTable of ContentsSetup (2)jndi.properties Utility (3)Manage Key Store Utility (4)Validation Utility (5)Check CPA Utility (6)Deployment Utility (6)Export Utility (7)Import Utility (9)ebXML CPP/CPA Utilities (10)Purge Utility (12)Self-Service Utility (14)Resubmission Utility (15)Schedule Partner Downtime Utility (17)SetupPrerequisites1. To execute these command first set the environment variables;ORACLE_HOMEANT_HOMEJAVA_HOMEExampleset ORACLE_HOME=C:\oracle\wls_homeset ANT_HOME=%ORACLE_HOME%\modules\org.apache.ant_1.7.1set JAVA_HOME=%ORACLE_HOME%\jdk160_182. Create the jndi.properties file (Refer to utility details)Refer to:Oracle® Fusion Middleware User's Guide for Oracle B2B11g Release 1 (11.1.1 Part Number E10229-04)/docs/cd/E14571_01/integration.1111/e10229/toc.htm18 Oracle B2B Command-Line Tools/docs/cd/E14571_01/integration.1111/e10229/scrpt_imp_exp_dep.ht m#CEGBDIDBjndi.properties UtilityThe purpose of this utility is to create the jndi.properties for password protection of the command-line utilitiesb2bcreate-prop Utilitycd $ORACLE_HOME/binant -f ant-b2b-util.xml b2bcreate-propThis will create the jndi.properties.Edit file and include weblogic passwordManage Key Store UtilityCertificate expiry has to be identified and notified to the Administrator as it affects the message flow with security. Oracle B2B has exposed Public API/Ant command to check the certificate for expiry. Users can define a schedule and encapsulate these API for proper Alert mechanism.b2bmanagekeystore Utility ParametersExamplesGet the list of certificate alias:ant -f ant-b2b-util.xml b2bmanagekeystore-Dmode=listGet the status of the certificate:ant -f ant-b2b-util.xml b2bmanagekeystore-Dalias=”MarketInc_Cert”Get list of certificates expiring on future dateant -f ant-b2b-util.xml b2bmanagekeystore-Ddays=15Note:Pre-requisite, it is required to configure the java key store in B2BValidation UtilityThe purpose of this utility is to validate B2B metadata that includes agreements, partners, and documents. All agreements will be validated, if no Parameter specified.b2bvalidate Utility ParametersFilenames of thePartnerAgreementDocument protocolExamplesValidate all agreements:ant -f ant-b2b-util.xml b2bvalidateValidate agreement tpa_ID1234.xmlant -f ant-b2b-util.xml b2bvalidate-Dargs="/soa/b2b/tpa_ID1234.xml"Validate agreement tpa_ID1234.xmlant -f ant-b2b-util.xml b2bvalidate-Dargs="tpa_ID1234.xml"Validate Partner tp_MyCompany.xml and agreement tpa_ID1234.xml ant -f ant-b2b-util.xml b2bvalidate-Dargs="tp_MyCompany.xml, tpa_ID1234.xml"Check CPA UtilityThe purpose of this utility is to enable the user to check the availability of an agreement for a given CPAID and trading partner. Based on the result, the user can import the agreement with option overwrite=True/False.b2bcheckcpaid Utility Parametersant –f ant-b2b-util.xml b2bcheckcpaid–Dargs=”my_file.zip”Deployment UtilityThe purpose of this utility is to deploy validated agreements.Note: To turn off validation set Oracle B2B system property “b2b.deploy.validation” to false. b2bdeploy Utility ParametersExamplesDeploy all agreements in repository.ant -f ant-b2b-util.xml b2bdeployDeploy agreement OracleServices_001_Agr and MarketInc_001_Agrant -f ant-b2b-util.xml b2bdeploy-Dtpanames="OracleServices_001_Agr, MarketInc_001_Agr”Export UtilityThe purpose of this utility is to export metadata from the Oracle B2B repository. If no parameters then the entire repository is exportedb2bexport Utility Parameters1<M AgreementsIf multiple agreements exported zip file will haveequal # of zip filesPartner will be exported.o Policy details (user/role)o Supported Doc Def details truncatedo Any tpname, tpanames, or policiesExport agreements active stateUsed only with tpanamesExamplesE xport entire repository without policy details to “/tmp/export.zip”ant -f ant-b2b-util.xml b2bexportorant -f ant-b2b-util.xml b2bexport-Dexportfile="/tmp/export.zip"Export entire repository with policy details to /tmp/export.zipant -f ant-b2b-util.xml b2bexport-Dexportfile="/tmp/export.zip"-Dpolicies=trueExport entire repository w/o details to /tmp/exportinserver.zip on same server.ant -f ant-b2b-util.xml b2bexport-Dexportfile="/tmp/exportinserver.zip"-Dlocalfile=trueExport Partner OracleServices to /tmp/OracleServices.zipant -f ant-b2b-util.xml b2bexport-Dtpname="OracleServices"-Dexportfile="/tmp/OracleServices.zip"Export an agreement from design time with listening channel details to/tmp/OracleServices_001.zip. Listening channels will be deactivated, while exporting.ant -f ant-b2b-util.xml b2bexport-Dtpanames="OracleServices_001_Agr"-Dexportfile="/tmp/OracleServices_001.zip"Export multiple deployed and active agreements to /tmp/export.zip. No listening channels will be exported.ant -f ant-b2b-util.xml b2bexport-Dtpanames="OracleServices_001_Agr, MarketInc_001_Agr"-Dactive=trueImport UtilityThe purpose of this utility is to import the B2B metadata file into the repository. Only Basic validation will be performed.b2bimport Utility ParametersExampleimport data from export.zip with overwrite=falseant -f ant-b2b-util.xml b2bimport-Dlocalfile=true-Dexportfile="/tmp/export.zip"Note:The “Overwrite” parameter MUST be set to “true” whe n importing a B2B metadata file generated by the CPA/CPP Utility.Why? To optimize the performance, which includes validation of the ebMS ServiceHeader against the Collaboration-Protocol Agreement (CPA) Oracle B2B creates an index out of CPA and stores this index in the Document Type parameters.The attributes for the validation and that define the uniqueness of each document are: Action, Service, ServiceType, FromRole, ToRole, CPAId. The behavior is:“Overwrite=true”o The index is built/re-builto All other artifacts are overwritten“Overwrite=false”o The index is NOT built/re-builto Artifacts with a different name are appendedCertificateso No impacts, certificates are external to Oracle B2B in a JKS file.ebXML CPP/CPA UtilitiesThe purpose of these utilities is to covert to/from a standard ebXML CPA file in the Oracle B2B metadata.b2bcreate-cpaprop UtilityThe purpose of this utility is to create property file template that can be customizes andthen used to supply parameters for utilities:b2bcpaimport b2bcpaexportTemplate file variablesExample “import” cpp _cpp.propertiesoracle.tip.b2b.ebms.Document=/tmp/input/oracle_cpa.xml oracle.tip.b2b.ebms.OutputFolder=/tmp/output/oracle.tip.b2b.ebms.LogLevel=DEBUGoracle.tip.b2b.ebms.LogFolder=/tmp/output/log/ oracle.tip.b2b.ebms.LogType=textb2bcpaimport UtilityThe purpose of this utility is to convert a standard ebXML CPA file to Oracle B2B metadata file.b2bcpaexport UtilityThe purpose of this utility is to convert the Oracle B2B metadata file (.ZIP) to an ebXML standard cpa.xmlExamplesCreate cpp_cpa.properties file, where this command get run.ant -f ant-b2b-util.xml b2bcreate-cpapropConvert a standard ebXML CPA xml file to an Oracle B2B metadata file.ant -f ant-b2b-util.xml b2bcpaimport-Dpropfile="/tmp/cpp_cpa.properties"-Dstandard=trueConvert an Oracle B2B metadata file to a standard ebXML CPA xml file.ant -f ant-b2b-util.xml b2bcpaexport-Dpropfile="/tmp/cpp_cpa.properties"-Dstandard=truePurge UtilityThe purpose of this utility is to purge design or runtime data from the B2B repository. b2bpurge Utility ParametersRuntime:MsgstateFromdateTodatepurgecontrolnumberDesign time:TP: hostIn double-quotesdd/mm/yyyy hh:mm AM/PMIn double/quotesdd/mm/yyyy hh:mm AM/PMDeletes all messages withmessage stateIf msgstate used then start / enddate requiredExamplesPurges all design and runtime data. The environment is reset to install time.ant -f ant-b2b-util.xml b2bpurgePurges all design data.ant -f ant-b2b-util.xml b2bpurge-Dmode=DTPurges all runtime dataant -f ant-b2b-util.xml b2bpurge-Dmode=RTPurges all runtime data including the control numbersant -f ant-b2b-util.xml b2bpurge-Dmode=RT-Dpurgecontrolnumber=truePurges all messages between the dates with the given message state ant -f ant-b2b-util.xml b2bpurge-Dmode=RT-Dfromdate="19/12/2009 01:04 AM"-Dtodate="19/12/2009 01:05 AM"-Dmsgstate=MSG_COMPLETESelf-Service UtilityThe purpose of this utility is to create Oracle B2B metadata from an XML file which get created based on the selfservice.xsd.b2bselfservicexsd UtilityThi s utility creates “selfservice.xsd” This structure can then be use to create Oracle B2B metadata in XML formatb2bselfservice UtilityThis utility converts the selfservice xml to the standard Oracle B2B Metadata file.ExamplesCreate selfservice.xsd file, where this command get run.ant -f ant-b2b-util.xml b2bselfservicexsdConvert selfservice xml to Oracle B2B metadata ZIP file and stored in /tmp/soa.zip.ant -f ant-b2b-util.xml b2bselfservice-Dinput="/tmp/selfservice1.xml"Convert selfservice xml to Oracle B2B metadata ZIP file and stored in/tmp/as11b2b.zip.ant -f ant-b2b-util.xml b2bselfservice-Dinput="/tmp/selfservice1.xml"-Doutput="/tmp/as11b2b.zip"Resubmission UtilityThe purpose of this utility is to resubmit either Application or Wire messages for processing. Note:Refer to section on throttling to address the surge of messages that may occur by the resubmission.b2bresubmit Utility ParametersIn double-quotesdd/mm/yyyy hh:mm AM/PMIn double-quotesdd/mm/yyyy hh:mm AM/PMExamplesresubmit the outbound appmessage, which has a message Id as 12345 ant -f ant-b2b-util.xml b2bresubmit-Dmsgsource=APPMSG-Dmsgid=12345Other examples:ant -f ant-b2b-util.xml b2bresubmit-Dmsgsource=APPMSG-Ddoctype=”850”ant -f ant-b2b-util.xml b2bresubmit-Dmsgsource=APPMSG-Dfromdate="29/11/2009 05:40 AM"-Dtodate="30/11/2009 07:39 AM"ant -f ant-b2b-util.xml b2bresubmit-Dmsgsource=APPMSG-Dagreement="OracleServices_X12_4010_850"ant -f ant-b2b-util.xml b2bresubmit-Dmsgsource=WIREMSG-Dmsgstate=MSG_ERRORant -f ant-b2b-util.xml b2bresubmit-Dmsgsource=APPMSG-Dfromdate="29/11/2009 05:40 AM"-Dtodate="30/11/2009 07:39 AM"-Ddirection=OUTBOUNDant -f ant-b2b-util.xml b2bresubmit-Dmsgsource=APPMSG-Dfromdate="29/11/2009 05:40 AM"-Dtodate="30/11/2009 07:39 AM"-Ddirection=INBOUNDant -f ant-b2b-util.xml b2bresubmit-Dmsgsource=APPMSG-Dmsgid=”12345”-Dpayloadpath="/tmp/850.xml"Schedule Partner Downtime UtilityThe purpose of this utility is to schedule partner downtime.SetupThis process uses the Stacking infrastructure, which is based on a store and forward mechanism. To enable the following UI parameters must be set. Administration ConfigurationFor more details refer to (Configuring B2B System Parameters)/docs/cd/E14571_01/integration.1111/e10229/bb_config.htm#CEGEADFJ Note: Number of dispatchers depends on the load and configuration of the system.b2bschedule Utility ParametersStart of downtimeIn double-quotesdd/mm/yyyy hh:mm AM/PMEnd of downtimeIn double-quotesdd/mm/yyyy hh:mm AM/PMExtend the schedulesIn double-quotesdd/mm/yyyy hh:mm AM/PMExamples1. Schedule Partner downtime for a specific channel and durationant -f ant-b2b-util.xml b2bschedule-mode= SCHEDULE-Dtp=”OracleServices”-Dfromdate=”28/05/2010 06:10 AM”-Dtodate=’28/05/2010 06:15 AM”-Dchannelname=”MarketInc_AS2_DC”-Dschedulename= “Maintenance”2. Schedule a particular channel for downtimeant -f ant-b2b-util.xml b2bschedule-mode= SCHEDULE-Dtp=”MarketInc”-Dchannelname=”MarketInc_ebMS_DC”3. Schedule the Partner for downtimeAll channels of particular partner will be down for unknown duration. Executing the unscheduled command separately would bring back the partner to active.ant -f ant-b2b-util.xml b2bschedule-mode= SCHEDULE-Dtp=”MarketInc”4. Schedule downtime for a particular duration of timeant -f ant-b2b-util.xml b2bschedule-mode= SCHEDULE-Dtp=”MarketInc”-Dfromdate="28/05/2010 03:05 AM"-Dtodate="28/05/2010 03:08 AM"5. Un-scheduling the scheduled eventant -f ant-b2b-util.xml b2bschedule-Dmode=UNSCHEDULE-Dschedulename=”Maintenance”Note:Variants on date-based options areo NO start dateTriggers the down time immediately upon creation till the end date o NO end dateIndefinite downtime: Will unschedule operationThrottling MessagesPartner Downtime could cause a surge of messages sent to the Partner when the scheduled down time is over. This system parameter provides a delay.If you have Four (4) Outbound Dispatchers and set this property to 1000ms then the throughput will be 4 messages / secSystem PropertyNote: This setting can be as minimal as 10 msec depending on requirement.。
OracleBIEE 11g项目笔记及操作细节(江佑海棠原创)
项目笔记_操作方法与操作细节
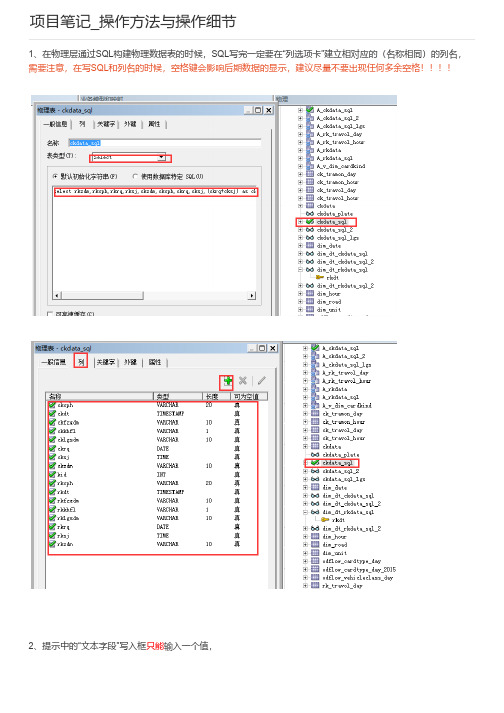
1、在物理层通过SQL构建物理数据表的时候,SQL写完一定要在“列选项卡”建立相对应的(名称相同)的列名,需要注意,在写SQL和列名的时候,空格键会影响后期数据的显示,建议尽量不要出现任何多余空格
2、提示中的“文本字段”写入框只能输入一个值,
3、在提示中要实现“输入多个值”的方法为(分隔符为分号):
4、过滤器中的百分号(%)代表默认全选
5、下拉框选择提示方式:
6、查询条件中的一些主要且重要的过滤器
7、两种方法,同一结果(第一种最好):
8、默认情况下,BIEE表中的数字会是整数型的,就算经过表达式计算之后也会默认为整数,要想根据业务需要变回小数,不仅需要在数据库中(或RPD或仪表盘编辑公式)中用数学函数round或者转换字符类型为可选小数类型,同时需要在仪表盘字段编辑的字段"列属性"中找到"数据格式"进行相应操作
9、BI_TOOLS中的维度层级修改命名必须在逻辑层弄好,展现层最好不要不要动层级中的内容。
OBIEE 11G SampleApp_Deploy_Instructions

OBIEE 11g SampleAppDeployment InstructionsThis document contains instructions to deploy SampleApp content on a pre-installed 11g OBIEE platform. SampleApp is a free content set, not maintained by Oracle as a licensed product.Build 811THE CONTENT OF THIS BUILD IS DRAFT AND WORK IN PROGRESS, REPORT RPD MODELLING BUGS in BUG DB UNDER 2025 / SAMPLEAPP COMPONENT.WEBCAT CONTENT IS NOT CODE COMPLETE YET, AND NOT EXPECTED FUNCTIONALWITH THIS BUILDImportant KNOWN BUG in this build, to be fixed manually during install : make sure to complete STEP 2.4.3.1 during installTable of Contents1Prerequisites (4)1.1Shiphome Build (4)1.2Oracle Database Connection (4)1.3Admintool Access (4)2Deploying SampleApp Core (Required) (5)2.1Copying Files into Appropriate Locations (5)2.2Creating Main SampleApp Oracle Data source (6)2.3Deploying Weblogic Server Users and Custom Apps (7)2.4OBIEE Configuration Edits and Starting (10)2.5Deploying SampleApp BIP Content (15)3Deploying SampleApp Action Framework Content (Optional) (16)3.1Prerequisites (16)3.2Deploying ActionSamples.ear (16)3.3Adding Required Credentials (18)3.4Configuring OBI EE Actions Framework files (19)3.5Restarting services and Verifying the install (19)4Deploying SampleApp Essbase Content (Optional) (20)4.1Prerequisites (20)4.2Creating Essbase Data source (20)4.3Configuration Edits and Server Starting (21)5Deploying SampleApp ORCL OLAP Content (Optional) (23)5.1Prerequisites (23)5.2Creating the OLAP Data source (23)5.3RPD Edits : (24)6Deploying SampleApp Mapviewer Content (Optional) (25)6.1Prerequisites (25)6.2Creating the Mapviewer Navteq Data source (25)6.3Configuration Edits and Server Starting (26)7Deploying SampleApp FOD Content (Optional) (30)7.1Prerequisites (30)7.2Creating a brand new FOD Data source (30)7.3Using a pre-existing FOD Data source that already exists (31)7.4Testing the Analytics connection (31)8Deploying SampleApp ODM (Oracle Data Mining) Content (Optional) (32)8.1Creating Datamining Datasource (32)8.2Creating the data mining models (32)8.3RPD edits (32)9Other Items (34)9.1Deploying Custom Skin (34)1Prerequisites1.1Shiphome Build∙This SampleApp build has been developed using Shiphome build June 11th∙RPD is upgraded to Encryption model (RPD pwd = Admin123)SampleApp builds must be deployed on RC5 or RC4 Shiphome builds. Deploying a SampleApp build on an old platform build will result in high risk of failure, or at best, of not having all content functional.1.2Oracle Database ConnectionIt is required that you have a connection to an 11g Oracle database from the machine where your BIEE platform is installed.Note : you may run SampleApp using an Express version of Oracle Db, but in that case you may not activate Geographical mapping, Datamining and OLAP options of Samples from this database.1.3Admintool AccessTo complete full options deployment, access to Admintool is required for small config edits to RPD (connectivity information). However, for Core (only) configuration, an alternative to Admintool access is provided by using XML patching, see 2.4.3.2 in this document.2Deploying SampleApp Core (Required)This paragraph describes how to deploy the SampleApp Core content. This content deployment is the base for any of SampleApp functionality to work, it is NOT an option.From your SampleApp install folder, navigate to subfolder 2_SampleApp_XXXX_Core. This folder contains all the necessary files for deploying SampleApp Core content.2.1Copying Files into Appropriate Locations2.1.1 Webcat :Copy both files SampleApp_webcat1.zip and SampleApp_webcat2.zip to subfolder and all unzip them there:\InstallHome\instances\instance1\bifoundation\OracleBIPresentationServicesComponent\coreapplication_obips1\catalog2.1.2 SampleAppFiles folder :Copy the “SampleAppFiles” subfolder and all its content to the directory in your BIEE install :\InstallHome\instances\instance1\bifoundation\OracleBIServerComponent\coreapplication_obis1\sample\FYI, this contains the XML extra datasource that is used in the SampleApp Federation example.2.1.3 analyticsRes folder :Copy all the content within the analyticsRes folder to the following location in your BIEE install :\InstallHome\instances\instance1\bifoundation\OracleBIPresentationServicesComponent\coreapplication_obips1\analyticsRes FYI, this contains all the custom files (custom images, writeback templates) that are consumed by SampleApp dashboards and reports. If some of the subfolders already exist within analyticsRes folder on your system, increment their content with the files from this SampleApp deployment.2.1.4 Other configuration files :2.1.4.1 Userpref_currencies.xml :Copy the Userpref_currencies.xml file into the directory in your BIEE install (override existing file if any) :\InstallHome\instances\instance1\config\OracleBIPresentationServicesComponent\coreapplication_obips1FYI, this file contains currency code setup examples for SampleApp currency showing reports2.1.5 Note about RPD file :The SampleApp.rpd file that is in the install directory does NOT need to be moved into your BIEE install. It will be used directly by EM administration process, and needs to be copied to the machine where you will run EM browser from.2.2Creating Main SampleApp Oracle Data sourceIt is required that you have a connection to an 11g Oracle database from the machine where your BIEE platform is installed. You need to create the SampleApp data source schema within that database, and populate with sample data. To do so, perform the following steps :2.2.1 Creating BISAMPLE USEROnly if this user does not exist on your DB yet :∙Open a connection to this db, with system or DBA privileges (system/system).∙Run the script BISAMPLE_USER.SQL located in the “SampleApp install files”.∙Once executed, verify that you can successfully connect as user BISAMPLE/BISAMPLE.IMPORTANT Note :The BISAMPLE user creation script defaults with the password …BISAMPLE‟ (same as user name) within the script. It is recommended that you keep this value unchanged, to simplify configuration. Should you change this password to something different, be aware that you will need to edit following configurations :∙RPD connection pools password value (for respective Connection Pools impacted) need to be updated with the correct password value∙In webcat, some objects of type Action (example …Annotate‟ action) contains the connection information to the database in its setups, including hardcoded password value. This needs to beupdated as well.2.2.2 Loading BISAMPLE SCHEMAThere are two options available to load the BISAMPLE schema data.Option 1 creates the tables and uses insert statements to populate data.Option 2 uses a database dump.Use one of the above options according to your convenience.2.2.2.1 Option 1 – Using insert statements∙First step is to create the tables in BISAMPLE schema. To do this, open a connection to the oracle db with BISAMPLE/BISAMPLE user. Run the script BISAMPLE_SCHEMA_XXXX.SQL located inthe “SampleApp install files”.∙Next step is populating the tables with data. Using a connection to the oracle db asBISAMPLE/BISAMPLE, run the script BISAMPLE_DATA_XXXX.SQL contained in the zip fileBISAMPLE_DATA_XXXX.zip located in the “SampleApp install files”.2.2.2.2 Option 2 – Using database dumpThe Oracle Database export file BISAMPLE.dmp is within the zip file BISAMPLE_DMP.zip. This needs to be imported into the BISAMPLE schema using the following import command, from the command line (Command Prompt in Windows) :c:\> imp BISAMPLE/BISAMPLE@connectString file=BISAMPLE.dmp FULL=YConnectString is the connection string to your Oracle Database 11g where the user BISAMPLE was created in the step above. Wait for the import process to complete successfully.2.2.3 Validation Test:Once BISAMPLE schema is loaded, verify that the tables have been created and populated by issuing the following command : SELECT * FROM SAMP_CHANNELS_D.2.3Deploying Weblogic Server Users and Custom Apps2.3.1 Start Weblogic AdminServerOn your server, navigate to :\InstallHome\user_projects\domains\bifoundation_domain\binand run startWebLogic.cmd or startWebLogic.sh depending on your environment OSYou will be prompted with your Administrator credentials created during platform install. Bringing up this service may take a few minutes depending on your environment, wait until the command line stops scrolling and indicates server in RUNNING mode. Keep this command window up to keep server up.2.3.2 Start Weblogic Managed Server (bi_server1)2.3.2.1 Option 1 : use WLS Console UI (recommended)∙Login onto http://localhost:7001/console using your Administrator credentials created during platform install.∙Under Environment block (mid of page, towards left side), click on Servers link.The bi_server1 line should show as shutdown state at this point∙Click on control page tab∙Select the bi_server1 line by clicking on the left tick box,∙Click start button at the top of the list and confirm starting this serviceState will update to “RUNNING” mode after a few minutes.2.3.2.2 Option 2 : use command lineFrom your sever location :\InstallHome\user_projects\domains\bifoundation_domain\binRun startManagedWebLogic.cmd or startManagedWebLogic.sh depending on your environment OS. You must add the following argument :startManagedWebLogic.cmd bi_server1You will be prompted with your Administrator credentials created during platform install. Bringing up this service may take a few minutes depending on your environment, wait until the command line stops scrolling and indicates server is up. Keep this command window up to keep server up.2.3.3 Deploy Custom content folder location in WLSThis step allows to point WLS to the file folder location where you have pasted custom files for SampleApp (Images, styles, messages…).∙Login to weblogic Administration console (http://localhost:7001/console use the login you created in BIEE installation to log in).∙Navigate to deployments area. Click on the Install button in the deployments area to install a new web application. (If Install button is not enabled, click on Lock & Edit on the left frame).∙In the Install Application Assistant dialog, provide the path\installhome\instances\instance1\bifoundation\OracleBIPresentationServicesComponent\coreapplication_obips1. This should give the option to select analyticsRes as a valid application to deploy.∙Select analyticsRes and click on Next.∙In the next screen, choose the default option …Install this deployment as an application‟ and click Next.∙Choose bi_server1 as the deployment target and click Next.∙In the next screen, under the Source Accessibility section, choose …I will make the deployment accessible from the following location’.∙Click Finish.∙In the deployment screen, confirm that the new application called analyticsRes is now available.∙Click on …Activate Changes‟.∙Once this completes, start the deployment called …analyticsRes‟.2.3.4 Import FMW Security users (Weblogic users)This step is required in order to have most of the SampleApp features to work. Make sure the FMW import happens properly on your environment.∙Open the weblogic Administration console online (http://localhost:7001/console use the login you created in BIEE installation to log in).∙From home screen, click on Security Realms link, then drill on myrealm.∙Go to the migration page tab. Go to the Import tab.∙In the 'Import Directory on Server', point to the directory where you saved the SampleApp Install files and navigate to the FMW_Users_Definition subdirectory within that.∙For eg:- /scratch/laliv/2_SampleApp_715_Install_Core/FMW_Users_Definition.∙Click on Save.This should import all the SampleApp users into your environment. To confirm it, click on Users and Groups tab. Verify that you can see the new users like abell, etc created now. You should be able to login using any of these users in OBIEE.2.3.5 ****** CREDENTIALS ********The list of users in this build is listed in the table below. Passwords for all SampleApp users imported, as well as the RPD encryption password is uniquely set to : Admin1232.4OBIEE Configuration Edits and Starting2.4.1 NQSConfig.ini Preliminary EditsOpen NQSConfig.ini file from the following location :\InstallHome\instances\instance1\config\OracleBIServerComponent\coreapplication_obis12.4.1.1 USER_REF_GUIDSMake sure the following tag is set as shown below in your NQConfig file and save it :->[SERVER]...FMW_UPDATE_ROLE_AND_USER_REF_GUIDS = YES;2.4.1.2 USAGE TRACKINGThe following entry is not mandatory, but will allow the usage tracking SampleContent to show data, it is advised that you set these tags as described :->[USAGE_TRACKING]ENABLE = YES;...DIRECT_INSERT = YES;PHYSICAL_TABLE_NAME = "XX - System DB (ORCL)"."Catalog"."dbo"."S_NQ_ACCT";CONNECTION_POOL = "XX - System DB (ORCL)"."UT Connection Pool";IMPORTANT Note :Replace XX - System DB (ORCL) with the database name in your rpd that connects to your system DB.Eg:-“09 - System DB (ORCL)"."Catalog"."dbo"."S_NQ_ACCT";2.4.2 Instanceconfig.xml EditsOpen Instanceconfig.xml file from the following location :\InstallHome\instances\instance1\config\OracleBIPresentationServicesComponent\coreapplication_obips1Make sure you have all the following tags in the file, within the existing <ServerInstance> tag. Some of these entries may already be present in your file. Ensure that entries are made only once and are in appropriate locations.<ServerInstance>...<SpatialMaps><LayerDataLayout><MaxRecords>1000</MaxRecords></LayerDataLayout></SpatialMaps><LightWriteback>true</LightWriteback>...<ps:Catalog xmlns:ps="oracle.bi.presentation.services/config/v1.1"><ps:UpgradeAndExit>false</ps:UpgradeAndExit><ps:UpdateAccountGUIDs>UpdateAndStartNormally</ps:UpdateAccountGUIDs></ps:Catalog>…</ServerInstance>2.4.3 RPD Edits *** IMPORTANT KNOW BUG TO FIX DURING INSTALL***You need to have access to offline editing of your RPD to edit necessary changes for connectivity to your database system. There are two alternative ways provided below to complete necessary RPD edits for your configuration ∙Option 1 (general case) : Use Admintool to edit your RPD file∙Option 2 : use RPD XML patching to update your RPD fileUse one of the above options according to your convenience.2.4.3.1 Option 1 (general case) : Use Admintool to edit your RPDOpen the SampleApp.RPD file offline from your installer location :RPD Password for opening offline : Admin1232.4.3.1.1.1 Edit BI_EE_HOME Variable Value :Navigate to Manage>Variables menu, double click on the BI_EE_HOME Repository Variable, update the default initializer string from its current value to the correct full path of the following directory on your BIEE install :\InstallHome\instances\instance1\bifoundation\OracleBIServerComponent\coreapplication_obis1For example, in a Linux environment, as an example, that value could be :/scratch/laliv/obi11g/instances/instance1/bifoundation/OracleBIServerComponent/coreapplication_obis12.4.3.1.1.2 Update variables that contain database connection informationThe connection pools setting uses repository variables to connect to the underlying database. You must update these variables to allow the RPD to properly connect. On the RPD click on Manage->Variables and update the following variables to appropriate values to connect to your database.∙DB_HOST - This variable holds the value of the database host machine.∙DB_PORT - This variable holds the value of the port.∙DB_SID - This variable holds the SID information.∙DB_USERNAME - This variable holds the database username. (Must be BISAMPLE)2.4.3.1.1.3 Update Database Password in RPD connection poolsIf you have not changed the OOB password for BISAMPL E user (pwd = …BISAMPLE‟), then there should be no edit needed in the RPD. If you have changed the value of the password for the BISAMPLE user or if you are not sure, you need to edit password values for all the Connection Pool entries in RPD that use the above variables. The password must be set to your correct password value.2.4.3.1.1.4 Fixing Consistency WarningsImportant note KNOW BUG TO FIX MANUALLY:Run a consistency check of your RPD. It is possible that you have many warnings coming up, one per physical db, with messages :[39028] The features in Database '02 - Sample App Xml Data' do not match the defaults. This can cause query problems.Should this be the case, you must fix each of these warnings by double clicking on each database icon in the physical layer, navigate to Features tab, and click the bottom button …Reset to Defaults‟. This must be done for each database that has the warning message.2.4.3.1.1.5 Save your offline RPD.2.4.3.2 Option 2 : use RPD XML patching to update your RPD fileAn alternate way of updating the RPD variables is by using an XML patch file. In this approach, you don‟t need to open the RPD through an Admin tool. Instead, the values of the variables will be updated in an XML file and then these values will be updated in the RPD by running a command line utility called biserverxmlexec. This will update the rpd in an offline mode. Open the SampleApp_Patch.xml file from the SampleApp Install files. Update the following entries to appropriate values depending on your setup.∙UPDATE - BI_EE_HOME_PATHLook for this entry and update it to the correct path on your BIEE install machine. After you make this update, the entry would look something like this on a windows setup<Expr><![CDATA['C:\BISHIPHOME\instances\instance1\bifoundation\OracleBIServerComponent\coreapplication_ obis1']]></Expr>On a Linux setup, an example entry would be<Expr><![CDATA['/scratch/laliv/obi11g/instances/instance1/bifoundation/OracleBIServerComponent/coreapplicatio n_obis1']]></Expr>∙UPDATE - DB_PORT_VALUELook for this entry and update it to the database port. After you make this update, the entry would look something like this.<Expr><![CDATA['1521']]></Expr>∙UPDATE - DB_HOST_VALUELook for this entry and update it to the database host machine. After you make this update, the entry would look something like this.<Expr><![CDATA['']]></Expr>∙UPDATE - DB_SID_VALUELook for this entry and update it to the database SID. After you make this update, the entry would look something like this.<Expr><![CDATA['ORCL']]></Expr>∙UPDATE - DB_USERNAME_VALUELook for this entry and update the value of the database username. (Value must be BISAMPLE).<Expr><![CDATA['BISAMPLE']]></Expr>∙UPDATE - ESSB_HOST_VALUENOTE:- This variable is only needed if you install the optional SampleApp Essbase content .Look for this entry and update it to the Essbase host machine. After you make this update, the entry would look something like this.<Expr><![CDATA['']]></Expr>∙After making the above edits, save the XML file and run the biserverxmlexec from a command prompt to update the rpd variables with the values in the XML file. Following is the syntax of thecommand.biserverxmlexec -P repository_password –I input_script_pathname –B base_repository_pathname –Ooutput_repository_pathname.Execute the command with the following parameter values-P – Admin123-I SampleApp_Patch.xml-B SampleApp.rpd-O SampleApp.rpd∙Once this is executed successfully, the output rpd (SampleApp.rpd) will have the variable values that you provided in the XML patch file. Set this as the default rpd using the steps described in2.4.3.12.4.1 Removing drop-shadow effect on graphsBy default, whenever a chart is created, there is a drop-shadow effect on it. This property makes it difficult to read some of the SampleApp charts. In order to turn it off this property, edit the file dvt-graph-skin.xml from the following location on your installation.\InstallHome\Oracle_BI1\bifoundation\web\msgdb\s_blafp\viewui\chartEdit the <Graph> tag, add the attribute visualEffects="NONE" so it looks like the following<Graph visualEffects="NONE">Save the file.2.4.2 Setting the default rpd and webcat paths through EMLogin to the EM administration screen using the url http://localhost:7001/em (Replace the hostname and port-number based on your setup)2.4.2.1 RPD and Webcat selection2.4.2.1.1.1 RPD selection∙Use the login you created in BIEE installation to log in to the EM console.∙Expand 'Business Intelligence' node on the left and choose Coreapplication.∙Now click on the Deployment tab on the right. Next, go to the Repository tab.∙Click on 'Lock and Edit Configuration' to enable you to change the default settings.∙In the 'Upload BI Server Repository' section, click on the Browse button and locate the SampleApp.rpd that you updated with correct connection information, on your client machine.∙Enter Admin123 as the password ( this is the offline password for SampleApp.rpd)Keep on the same configuration screen to update webcat selection2.4.2.1.1.2 Webcat selectionYour platform install, does not yet point to SampleApp catalog, you need to update the path at the bottom of the same EM screen, with the location looking like this.$ORACLE_INSTANCE/bifoundation/OracleBIPresentationServicesComponent/$COMPONENT_NAME/catalog/XXXXXX.∙Change the path from XXXXXX to SampleApp so the location looks like this.$ORACLE_INSTANCE/bifoundation/OracleBIPresentationServicesComponent/$COMPONENT_NAME/catalog/SampleApp.2.4.2.1.1.3 Apply changes∙Click on Apply (top right corner of screen)∙Click on 'Activate Changes‟2.4.2.2 Other online config editsCaching enablementEM screen also offers you the possibility of turning OBIEE cache on or off. Leaving cache set to off will allow to see physical SQL logs for every query. Performance should not be of issue with the low data volume in the sample database. To Switch Cache off, click on tab …Capacity Management‟, sub-tab …Performance‟. Disable cache there and click on Activate changes.2.4.3 Start BIEE services and login2.4.3.1 Starting services From EM screen∙Login to the EM administration screen using the url http://localhost:7001/em (Replace the hostname and port number based on your setup). Use the login you created in BIEE installation tolog in.∙Expand 'Business Intelligence' node on the left and choose Coreapplication.∙Click on the Overview Tab,∙Click on blue button …Restart‟ (or green button …Start‟) under the Manage System category, middle of screen,∙Click yes on dialog box to confirm the move. Wait for message that confirms successful restart.Note :If starting using EM is not successful and complaining about OPMNCTL not up, please follow starting process with OPMNCTL2.4.3.2 Start services using OPMNCTL∙Open a command prompt, navigate to \InstallHome \instances\instance1\bin∙run “opmnctl sta tus, this will show you status of all the OBIEE core services∙run “opmnctl startall” or “opmnctl stopall” depending on your need.2.4.3.3 Login into http://localhost:9704/analyticsThe list of possible users for If starting using EM is not successful and complaining about OPMNCT2.5Deploying SampleApp BIP Content2.5.1 DatasourcesThe BI Publisher Samples depend on a few data sources. Some of these are set up as part of the installation. Others will require manual configuration through the BI Publisher Admin pages. We will cover all here.From the web UI – :9704/analytics -- logged in as a user with Admin permissions, navigate to BI Publisher Admin pages: Administration -> Manage BI Publisher You‟re in the right spot when yo u see a single Administration tab and six groups of links e.g. in the upper left side you should see:Data Sources∙ JDBC Connection∙ JNDI Connection∙ File∙ LDAP Connection∙ OLAP ConnectionFrom Administration, click the link for JDBC Connection.2.5.1.1 Create the “BISAMPLE” JDBC connection.Click on the Add Data Source.Provide the following details about your database where BISAMPLE schema was installed,∙host,∙port,∙sid,∙and Username and PasswordUse the “Test Connection” button to ensure i t is connecting correctly. Note that you must name the JDBC connection exactly as BISAMPLE for many of the reports to run2.5.1.2 “Oracle BI EE” JDBC connectionInspect the “Oracle BI EE” JDBC connection. Us e the “Test Connection” button to ensure it is connectin g correctly.2.5.1.3 “demo” data sourceE dit the “demo” data source to use a real database connection. You will need to configure “demo” to use an oe (Order Entry) schema available in all Oracle Databases. You may need to unlock the OE schema. Like above, the d ata source needs to remain “demo”.I nspect the File data source “demofiles”. From the opera ting system see that there are .xml demo files present in the directory3Deploying SampleApp Action FrameworkContent (Optional)This paragraph describes how to deploy Action Framework SampleApp content with BIEE services.From your SampleApp install folder, navigate to subfolder 3_SampleApp_XXXX_Actions. This folder contains all the necessary files for deploying SampleApp Core content.3.1PrerequisitesAll the steps to deploy SampleApp Core content successfully completed. IN PARTICULAR : IT IS REQUIRED THAT YOU HAVE PROPERLY IMPORTED FMW_Users_Definition as part of the Sample App core install process. Make sure you have completed this step as described in the paragraph 2.3.3 of this document. To validate that this setup is properly active, you should be able to login in Answers with credentials abell/Admin123.3.2Deploying ActionSamples.ear3.2.1 Copying ActionsSamples.ear file3.2.1.1 Copying .ear file on your serverNavigate to subfolder 3_SampleApp_XXXX_Actions/ Actions_Definitions in your install directory, copy the file ActionSamples.ear to the following directory on your OBIEE server (the last folder …Actions‟ may need to be created on your server) :\InstallHome\instances\instance1\bifoundation\OracleBIServerComponent\coreapplication_obis1\sample\SampleAppFiles\Actio ns3.2.1.2 OPTIONAL: customizing Sample Actions services (editing Jdev Project)NOTE: the file " ActionsSamples V3 (Jdev_project).zip" included under the install directory :\InstallHome\instances\instance1\bifoundation\OracleBIServerComponent\coreapplication_obis1\sample\SampleAppFiles\Actio nsis the Jdev source project that was used to create this .ear file. This Jdev project is not needed to run SampleApp, but is included as part of the install incase user needs to customize the Sample actions services, or is interested in seeing the details of their setup.3.2.2 Deploying Sample Actions services in WLS∙Logon to weblogic Administration console using the url http://hostname:7001/console (use your hostname instead). Use the username/password that you provided while initial install of theproduct.∙Click on Deployments link under 'Domain Structure'. Click on the Install button on the Deployments page on the right. (If the Install button is not enabled, then click on the 'Lock & Edit' button underChange Center on the left)。
自己整理手动配置oracle11gem
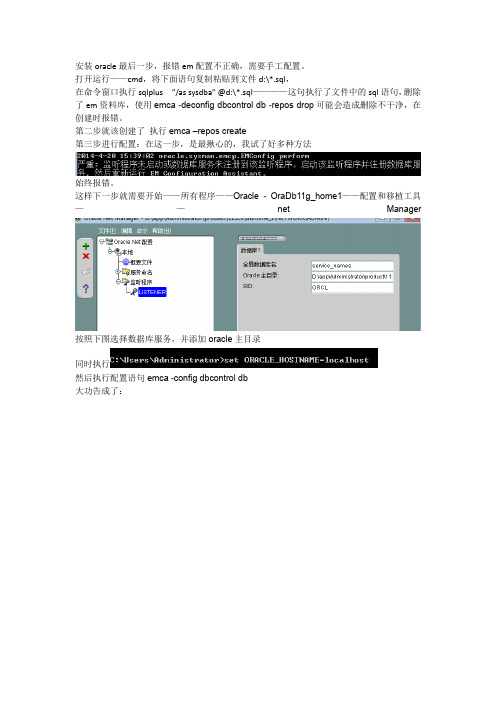
安装oracle最后一步,报错em配置不正确,需要手工配置。
打开运行——cmd,将下面语句复制粘贴到文件d:\*.sql,在命令窗口执行sqlplus“/as sysdba” @d:\*.sql————这句执行了文件中的sql语句,删除了em资料库,使用emca -deconfigdbcontroldb -repos drop可能会造成删除不干净,在创建时报错。
第二步就该创建了执行emca–repos create第三步进行配置:在这一步,是最揪心的,我试了好多种方法始终报错。
这样下一步就需要开始——所有程序——Oracle - OraDb11g_home1——配置和移植工具——net Manager按照下图选择数据库服务,并添加oracle主目录同时执行然后执行配置语句emca -configdbcontroldb大功告成了:D:\*.sqldrop user SYSMAN cascade;drop user MGMT_VIEW cascade;drop role MGMT_USER;drop public synonym MGMT_TARGET_BLACKOUTS; drop public synonym SETEMVIEWUSERCONTEXT;drop user sysman cascade;drop public synonym MGMT_ADMIN;drop public synonym MGMT_AS_ECM_UTIL;drop public synonym MGMT_AVAILABILITY;drop public synonym MGMT_COLLECTION_PROPERTIES; drop public synonym MGMT_CREDENTIAL;drop public synonym MGMT_CURRENT_METRICS;drop public synonym MGMT_CURRENT_METRIC_ERRORS;drop public synonym MGMT_CURRENT_SEVERITY;drop public synonym MGMT_DELTA;drop public synonym MGMT_DELTA_ENTRY;drop public synonym MGMT_DELTA_ENTRY_VALUES;drop public synonym MGMT_DELTA_IDS;drop public synonym MGMT_DELTA_ID_VALUES;drop public synonym MGMT_DELTA_VALUE;drop public synonym MGMT_DELTA_VALUES;drop public synonym MGMT_GLOBAL;drop public synonym MGMT_GUID_ARRAY;drop public synonym MGMT_GUID_OBJ;drop public synonym MGMT_IP_TGT_GUID_ARRAY;drop public synonym MGMT_JOB;drop public synonym MGMT_JOBS;drop public synonym MGMT_JOB_EXECPLAN;drop public synonym MGMT_JOB_EXECUTION;drop public synonym MGMT_JOB_EXEC_SUMMARY;drop public synonym MGMT_JOB_OUTPUT;drop public synonym MGMT_JOB_PARAMETER;drop public synonym MGMT_JOB_SCHEDULE;drop public synonym MGMT_JOB_TARGET;drop public synonym MGMT_LOG;drop public synonym MGMT_LONG_TEXT;drop public synonym MGMT_MESSAGES;drop public synonym MGMT_METRICS;drop public synonym MGMT_METRICS_1DAY; drop public synonym MGMT_METRICS_1HOUR;drop public synonym MGMT_METRICS_COMPOSITE_KEYS;drop public synonym MGMT_METRICS_RAW;drop public synonym MGMT_METRIC_COLLECTIONS;drop public synonym MGMT_METRIC_ERRORS;drop public synonym MGMT_METRIC_THRESHOLDS;drop public synonym MGMT_NAME_VALUE;drop public synonym MGMT_NAME_VALUES;drop public synonym MGMT_PREFERENCES;drop public synonym MGMT_SEVERITY;drop public synonym MGMT_SEVERITY_ARRAY;drop public synonym MGMT_SEVERITY_OBJ;drop public synonym MGMT_STRING_METRIC_HISTORY;drop public synonym MGMT_TARGET;drop public synonym MGMT_TARGETS;drop public synonym MGMT_TARGET_BLACKOUTS;drop public synonym MGMT_TARGET_PROPERTIES;drop public synonym MGMT_TYPE_PROPERTIES;drop public synonym MGMT_USER;drop public synonym MGMT_VIEW_UTIL;drop public synonym MGMT$DELTA_ORACLE_HOME;drop public synonym MGMT$DELTA_OS_COMPONENTS;drop public synonym MGMT$DELTA_OS_COMP_DETAILS;drop public synonym MGMT$DELTA_OS_KERNEL_PARAMS;drop public synonym MGMT$DELTA_PATCHSETS;drop public synonym MGMT$DELTA_PATCHSET_DETAILS;drop public synonym MGMT$DELTA_TABLESPACES;drop public synonym MGMT$DELTA_VENDOR_SW;drop public synonym MGMT$DELTA_VIEW;drop public synonym MGMT$DELTA_VIEW_DETAILS;drop public synonym MGMT$ECM_CURRENT_SNAPSHOTS;drop public synonym MGMT$ECM_VISIBLE_SNAPSHOTS;drop public synonym MGMT$GROUP_DERIVED_MEMBERSHIPS; drop public synonym MGMT$GROUP_FLAT_MEMBERSHIPS; drop public synonym MGMT$GROUP_MEMBERS;drop public synonym MGMT$HA_BACKUP;drop public synonym MGMT$HA_FILES;drop public synonym MGMT$HA_INFO;drop public synonym MGMT$HA_INIT_PARAMS;drop public synonym MGMT$HA_MTTR;drop public synonym MGMT$HA_RMAN_CONFIG;drop public synonym MGMT$HW_NIC;drop public synonym MGMT$METRIC_COLLECTION;drop public synonym MGMT$METRIC_CURRENT;drop public synonym MGMT$METRIC_DAILY;drop public synonym MGMT$METRIC_DETAILS;drop public synonym MGMT$METRIC_HOURLY;drop public synonym MGMT$MISSING_TARGETS;drop public synonym MGMT$MISSING_TARGETS_IN_GROUPS; drop public synonym MGMT$OS_COMPONENTS;drop public synonym MGMT$OS_FS_MOUNT;drop public synonym MGMT$OS_HW_SUMMARY;drop public synonym MGMT$OS_KERNEL_PARAMS;drop public synonym MGMT$OS_PATCHES;drop public synonym MGMT$OS_SUMMARY;drop public synonym MGMT$SOFTWARE_COMPONENTS;drop public synonym MGMT$SOFTWARE_COMPONENT_ONEOFF; drop public synonym MGMT$SOFTWARE_COMP_PATCHSET; drop public synonym MGMT$SOFTWARE_DEPENDENCIES;drop public synonym MGMT$SOFTWARE_HOMES;drop public synonym MGMT$SOFTWARE_ONEOFF_PATCHES; drop public synonym MGMT$SOFTWARE_OTHERS;drop public synonym MGMT$SOFTWARE_PATCHES_IN_HOMES; drop public synonym MGMT$SOFTWARE_PATCHSETS;drop public synonym MGMT$TARGET;drop public synonym MGMT$TARGET_COMPONENTS;drop public synonym MGMT$TARGET_COMPOSITE;drop public synonym MGMT$TARGET_PROPERTIES;drop public synonym MGMT$TARGET_TYPE;drop PUBLIC SYNONYM SMP_EMD_AVAIL_OBJ;drop public synonym EMD_MNTR;drop public synonym SMP_EMD_AVAIL_OBJ;drop public synonym SMP_EMD_DELETE_REC_ARRAY;drop public synonym SMP_EMD_INTEGER_ARRAY;drop public synonym SMP_EMD_INTEGER_ARRAY_ARRAY; drop public synonym SMP_EMD_NVPAIR;drop public synonym SMP_EMD_NVPAIR_ARRAY;drop public synonym SMP_EMD_STRING_ARRAY;drop public synonym SMP_EMD_STRING_ARRAY_ARRAY;drop public synonym SMP_EMD_TARGET_OBJ;drop public synonym SMP_EMD_TARGET_OBJ_ARRAY;drop public synonym ECM_UTIL;drop role mgmt_user;DROP USER sysman CASCADE;DROP USER mgmt_view CASCADE;DROP ROLE MGMT_USER;ALTER USER dbsnmp ACCOUNT UNLOCK;ALTER USER dbsnmp identified by dbsnmp;DROP PUBLIC SYNONYM SETEMVIEWUSERCONTEXT;DROP PUBLIC SYNONYM MGMT_TARGET_BLACKOUTS; DROP PUBLIC SYNONYM MGMT_AVAILABILITY;DROP PUBLIC SYNONYM MGMT_CURRENT_AVAILABILITY; DROP PUBLIC SYNONYM MGMT_SEVERITY_OBJ;DROP PUBLIC SYNONYM MGMT_SEVERITY_ARRAY;DROP PUBLIC SYNONYM MGMT_GUID_OBJ;DROP PUBLIC SYNONYM MGMT_GUID_ARRAY;DROP PUBLIC SYNONYM SMP_EMD_AVAIL_OBJ;DROP PUBLIC SYNONYM SMP_EMD_TARGET_OBJ;DROP PUBLIC SYNONYM SMP_EMD_TARGET_OBJ_ARRAY; DROP PUBLIC SYNONYM SMP_EMD_DELETE_REC_ARRAY; DROP PUBLIC SYNONYM MGMT_METRICS;DROP PUBLIC SYNONYM MGMT_TARGETS;DROP PUBLIC SYNONYM MGMT_TYPE_PROPERTIES;DROP PUBLIC SYNONYM MGMT_TARGET_PROPERTIES; DROP PUBLIC SYNONYM MGMT_METRICS_RAW;DROP PUBLIC SYNONYM MGMT_CURRENT_METRICS; DROP PUBLIC SYNONYM MGMT_STRING_METRIC_HISTORY; DROP PUBLIC SYNONYM MGMT_LONG_TEXT;DROP PUBLIC SYNONYM MGMT_METRICS_COMPOSITE_KEYS; DROP PUBLIC SYNONYM MGMT_METRICS_1HOUR;DROP PUBLIC SYNONYM MGMT_METRICS_1DAY;DROP PUBLIC SYNONYM MGMT_METRIC_ERRORS;DROP PUBLIC SYNONYM MGMT_CURRENT_METRIC_ERRORS; DROP PUBLIC SYNONYM EMD_MNTR;DROP PUBLIC SYNONYM MGMT_METRIC_COLLECTIONS; DROP PUBLIC SYNONYM MGMT_COLLECTION_PROPERTIES ; DROP PUBLIC SYNONYM MGMT_METRIC_THRESHOLDS; DROP PUBLIC SYNONYM SMP_EMD_NVPAIR;DROP PUBLIC SYNONYM SMP_EMD_NVPAIR_ARRAY;DROP PUBLIC SYNONYM SMP_EMD_STRING_ARRAY;DROP PUBLIC SYNONYM SMP_EMD_STRING_ARRAY_ARRAY; DROP PUBLIC SYNONYM SMP_EMD_INTEGER_ARRAY; DROP PUBLIC SYNONYM SMP_EMD_INTEGER_ARRAY_ARRAY; DROP PUBLIC SYNONYM MGMT_DELTA_IDS;DROP PUBLIC SYNONYM MGMT_DELTA_ID_VALUES;DROP PUBLIC SYNONYM MGMT_DELTA_ENTRY;DROP PUBLIC SYNONYM MGMT_DELTA_ENTRY_VALUES; DROP PUBLIC SYNONYM MGMT_DELTA_VALUE;DROP PUBLIC SYNONYM MGMT_DELTA_VALUES;DROP PUBLIC SYNONYM MGMT_NAME_VALUE;DROP PUBLIC SYNONYM MGMT_NAME_VALUES;DROP PUBLIC SYNONYM ECM_UTIL;DROP PUBLIC SYNONYM MGMT_DELTA;DROP PUBLIC SYNONYM MGMT_TARGET_MEMBERSHIPS; DROP PUBLIC SYNONYM MGMT_JOB;DROP PUBLIC SYNONYM MGMT_JOB_PARAMETER;DROP PUBLIC SYNONYM MGMT_JOB_TARGET;DROP PUBLIC SYNONYM MGMT_JOB_SCHEDULE;DROP PUBLIC SYNONYM MGMT_JOB_EXECPLAN;DROP PUBLIC SYNONYM MGMT_JOB_EXEC_SUMMARY; DROP PUBLIC SYNONYM MGMT_JOB_OUTPUT;DROP PUBLIC SYNONYM MGMT_JOB_EXECUTION;DROP PUBLIC SYNONYM MGMT_LOG;DROP PUBLIC SYNONYM MGMT_ADMIN;DROP PUBLIC SYNONYM MGMT_GLOBAL;DROP PUBLIC SYNONYM MGMT_TARGET;DROP PUBLIC SYNONYM MGMT_CREDENTIAL;DROP PUBLIC SYNONYM MGMT_JOBS;DROP PUBLIC SYNONYM MGMT_PREFERENCES; DROP PUBLIC SYNONYM MGMT_USER;DROP PUBLIC SYNONYM MGMT_SEVERITY;DROP PUBLIC SYNONYM MGMT_CURRENT_SEVERITY; DROP PUBLIC SYNONYM MGMT_PAF_PROCS_LATEST; DROP PUBLIC SYNONYM MGMT_PAF_JOBS;DROP PUBLIC SYNONYM MGMT_PAF$PROCEDURES; DROP PUBLIC SYNONYM MGMT_PAF$INSTANCES; DROP PUBLIC SYNONYM MGMT_PAF$STATES; DROP PUBLIC SYNONYM MGMT_PAF$APPLICATIONS; DROP PUBLIC SYNONYM MGMT_VIEW_UTIL; DROP PUBLIC SYNONYM MGMT_MESSAGES;。
- 1、下载文档前请自行甄别文档内容的完整性,平台不提供额外的编辑、内容补充、找答案等附加服务。
- 2、"仅部分预览"的文档,不可在线预览部分如存在完整性等问题,可反馈申请退款(可完整预览的文档不适用该条件!)。
- 3、如文档侵犯您的权益,请联系客服反馈,我们会尽快为您处理(人工客服工作时间:9:00-18:30)。
OBIEE 11.1.1.6.2BP1 Write back setup
Introduction:
As we all know we have a Writeback property in OBIEE with Insert, Update and deletion. Here I am going to provide complete document on OBIEE11g Writeback Update commentary
My System Config:
Windows 7 64bit, Google Chrome browser, OBIEE11.1.16.2BP1 and MS-SQL Server 2008 Step 1: created table
USE [obirep]
GO
/****** Object: Table [dbo].[Country_Adj] Script Date: 08/31/2012 12:43:54 ******/ SET ANSI_NULLS ON
GO
SET QUOTED_IDENTIFIER ON
GO
SET ANSI_PADDING ON
GO
CREATE TABLE [dbo].[Country_Adj](
[Country] [varchar](20) NOT NULL,
[Adjustment_SGD] [decimal](18, 0) NULL
) ON [PRIMARY]
GO
SET ANSI_PADDING OFF
GO
looks like below screen
Step 2: imported table into RPD (just do joins, Mapping..etc)
Step 3: Uncheck the cacheable option --> physical layer -RPD table(commentary table)
Step 4: Make writeable on your commentary column
Step 5: Make sure permission read and write radio button.
Step:6: Execute Direct DB request access give it required Application roles/users
that's all RPD end...:) :)-
Step 8: add writeback tag in your instanconfig.xml file refer the below,
C:\Oracle\Middleware\instances\instance1\config\OracleBIPresentationServicesComponent\ coreapplication_obips1\instanceconfig.xml (please take a back and do the changes)
<LightWriteback>true</LightWriteback>
Step 9: Restart all bi components by using OPMN command
Step 10: Example, try login below URL
http://deva-pc:9704/analytics/saw.dll?PrivilegeAdmin
Manage Privileges --> grand permission likes below
Step 11: Enable check box on your analysis view (commentary/writeback column) properties
looks like below,
Step 12:E dit the table properties and do the below
and save the changes.
Step 13: F ind the column id reference and note it finally you have to update on your WriteBack.xml file
Go to edit analysis of your commentary/writeback report-->then Click on the advanced tab of the analysis
Here under the Analysis XML box we want to note down all the columnID's that we will be using to populate the Writeback table with
Make a note of the columnIDs for the required columns. These will be used in the WriteBack.xml file after update this you need to restart OPMN Services via opmnctl command
Step:14
Create XML file as below and place it in
C:\Oracle\Middleware\instances\instance1\bifoundation\OracleBIPresentationServicesComp onent\coreapplication_obips1\msgdb\customMessages
Note:
$MW_HOME/instances/instance1/bifoundation/OracleBIPresentationServicesComponent/cor eapplication_obips1/analyticsRes/customMessages directory if the analytics res directory has been deployed.
Please see the Deploying analyticsRes for custom Messages post that we have created that wont ever get overwritten by Oracle Patches etc
If you dont want to use the analyticsRes custom messages folder then you can use the seeded folder
file name of mine is: WriteBack.xml and kept it below path
C:\Oracle\Middleware\instances\instance1\bifoundation\OracleBIPresentationServicesComp onent\coreapplication_obips1\msgdb\customMessages
<?xml version="1.0" encoding="utf-8" ?>
<WebMessageTables xmlns:sawm="com.siebel.analytics.web/message/v1">
<WebMessageTable lang="en-us" system="WriteBack" table="Messages">
<WebMessage name="WriteBack">
<XML>
<writeBack connectionPool="Connection Pool">
<insert></insert>
<update>UPDATE dbo.Country_Adj SET Adjustment_SGD =
@{c9d0b2f1347dbf526} WHERE Country = '@{c130d7af0c9f77c31}'</update>
</writeBack>
</XML>
</WebMessage>
</WebMessageTable>
</WebMessageTables>
looks like below path
restart bi components (if any changes on your xml file)
Step 16:T esting:
http://deva-
pc:9704/analytics/saw.dll?PortalGo&Action=prompt&path=%2Fshared%2FWriteback%2Ftest_writeback
Step17: Very the updated comments
after update India 11111 to India adjustment amount then its affected in our DB table ...see below results
Note: similarly you can try for insertion/deletion writeback comments
Thanks...
Till next time...;)。
