17Vee体感游戏大厅快速浏览指南说明书使用方法
《实况足球2017》图文攻略官方中文说明书

UEFA EUROPA LEAGUE:引导您的俱乐部走向 UEFA Europa League 的辉煌! AFC Champions League:为了 Master of Asia 的称号而拼搏。 LEAGUE:掌控您选择的一个俱乐部,引导他们度过艰苦的赛季,走 向胜利。 CUP:带领您的球队参加重大赛事,为荣耀而战。 在线比赛:参加在线举办的比赛。 足球生活 以俱乐部经理或球员身份参加竞猜的比赛 myClub(MC模式):创建属于您自己的俱乐部。引进合适的人才,充 分利用网络世界提供的资源。→ 请参阅 myClub 的说明 大师联赛:接管一家俱乐部,然后签约并培养合适的球员,引导他们 走向辉煌。 ·谈判:你将看到转会谈判中出现了很多的变化,例如:期限为 6 个月 的贷款转会以及购买选择权。此外,转会市场最后日期也将以小时为单位 进行倒计时,因而你就可以不紧不慢地谈判到最后一分钟,就像现实生活 中一样。 ·谈判:你将看到转会谈判中出现了很多的变化,例如:期限为 6 个月 的贷款转会以及购买选择权。此外,转会市场最后日期也将以小时为单位 进行倒计时,因而你就可以不紧不慢地谈判到最后一分钟,就像现实生活 中一样。 ·球队角色:自上一版本开始,备受欢迎的“球队角色”中又新增了诸 如“英雄”和“坏小子”等新角色,令角色数量增长到了 22 个。这赋予了你 的球队更加独特以及原汁原味的面貌。 ·发展:通过在训练模式中取得显著进步,球员们现在可以学习新技巧 以及踢球风格了。球员们还可以学习新的阵型。训练你的球员达到完美新 高度吧! 一球成名:作为一名球员,从入门一直到退休,力争载入游戏史册。 额外选项 尝试在“训练”中练习一些游戏内操作,或者在“系统设置”和“选项”中 按您的喜好自定义游戏。 TRAINING:通过教程或自由训练掌握游戏内控制,在自由训练中, 您可以模拟您选择的任何比赛情形。 EDIT:更改球队、球员和体育场。 S TAT I S T I C S : 大 略 地 看 任 何 重 要 的 在 线 信 息 。 ONLINE SETTINGS:配置您的在线设置
VR1600v 快速设置指南说明书
1Your Internode broadband is ready to use.Username:********************.netFor support call 13 66 33. Ref: A1234567Dear Internode Customer,We are pleased to advise that your Internodebroadband service is now provisioned.Please quote Service ID A1234567 if you need tocontact us for support.23What are you setting up today?Type of internetNBN™ Fibre to the Node / BuildingAlso known as NBN™ FTTN/BNBN™ Fibre to the CurbAlso known as NBN™ FTTCNBN™ Fibre to the PremisesAlso known as NBN™ FTTPNBN™ HFCAlso known as NBN™ CableNBN™ WirelessAlso known as NBN™ Fixed Wireless57968Turn to pageTo find out which type of internet you have • Check your email and/or SMS from us about your internet order; or•Check the service details of your customer invoice4Get to know your modemLight State MeaningPhone 1-2On VoIP phone is connected.OffVoIP phone is offline.WAN On Device plugged into modem’s WAN port.OffNo device plugged into modem’s WAN port.LAN 1-4On Device(s) plugged into modem’s LAN ports.OffNo device(s) plugged into modem’s LAN ports.USB On USB device is ready to use. Flashes while a new USB device is booting up.OffNo USB device plugged into the USB port.PowerDSL 5G WPS WANLAN 1Internet 2.4G Phone 1Phone 2LAN 2LAN 3LAN 4USBLight State MeaningPowerOn Modem has power. Flashes while booting up.OffModem has no power.DSL On Modem has established a connection.OffModem has no connection.Internet On Modem is online.OffModem is offline.2.4G/5G On 2.4GHz/5GHz WiFi is enabled.Off2.4GHz/5GHz WiFi is disabled.WPS OnFlashes during a WPS connection attempt (may take up to 2 minutes). Remains on for ~5 minutes after successful connection.OffWPS mode not in use.Plug in for NBN™ FTTN/B1. Use the supplied power cable to connect the power port to a power outlet and ensure it is turned on.2. Use the supplied Phone cable to connect the grey DSL port directly to the phone socket on the wall.Do not use a line filter.3. If you wish to use your VoIP phone service, connect a handset to the Phone1 port.4. You can use an additional Ethernet cable to connect a computer to any of the 4 LAN ports.Alternatively, follow the steps later in this guide to connect devices via WiFi.Turn to page 10 to continue your setup.1. Use the supplied power cable to connect the power portto a power outlet and ensure it is turned on.2. Use the supplied Ethernet cable to connect your modem’s blue WAN port to the yellow GATEWAY port on your NBN™Connection Device.3. If you wish to use your VoIP phone service, connect a phone handset to your modem’s Phone1 port.4. You can use an additional Ethernet cable to connect your computer to any of your modem’s 4 LAN ports.Alternatively, follow the steps later in this guide to connect devices via WiFi.Turn to page 10 to continue setup.1. Use the supplied power cable to connect the power portto a power outlet and ensure it is turned on.2. Use the supplied Ethernet cable to connect your modem’s blue WAN port to the UNI-D 1 port on your NBN™ ConnectionBox (note that some boxes may have one yellow LAN port instead).3. If you wish to use your VoIP phone service, connect a phone handset to your modem’s Phone1 port.4. You can use an additional Ethernet cable to connect your computer to any of your modem’s 4 LAN ports.Alternatively, follow the steps later in this guide to connect devices via WiFi.Turn to page 10 to continue setup.1. Use the supplied power cable to connect the power port to a power outlet and ensure it is turned on.2. Use the supplied Ethernet cable to connect your modem’s blue WAN port to the UNI-D 1 port on your NBN™Connection Box. If UNI-D1 doesn’t work, try each UNI-D port before contacting us for a hand.3. If you wish to use your Fibre Phone service, connect a phone handset to the UNI-V 1 port on your NBN™ Connection Box.4. You can use an additional Ethernet cable to connect your computer to any of your modem’s 4 LAN ports.Alternatively, follow the steps later in this guide to connect devices via WiFi.Turn to page 10 to continue setup.Plug in for NBN™ Wireless1. Use the supplied power cable to connect the power port to a power outlet and ensure it is turned on.2. Use the supplied Ethernet cable to connect your modem’s blue WAN port to the UNI-D 1 port on your NBN™Connection Box. If UNI-D1 doesn’t work, try each UNI-D port before contacting us for a hand.3. If you wish to use your VoIP phone service, connect a phone handset to your modem’s Phone1 port.4. You can use an additional Ethernet cable to connect your computer to any of your modem’s 4 LAN ports. Alternatively,follow the steps later in this guide to connect devices via WiFi.Turn to page 10 to continue setup.10Switch your modem on using the power button located on the back. By default, your broadband settings should configure automatically once your NBN™ service is active and your modem is powered on for 15 minutes.The Internet light on the front of your modem should be on.Is the internet light off?Ensure that you received an email from us advising that your NBN™ service is ACTIVE.If you haven’t received the email, your NBN™ service is not ACTIVE yet. Please check your last email from us for advice on your connection appointment. It will include a reference number in case you need to call with any concerns.If you have, please use the contact details on the back cover of this guide to call our Support Team for assistance.Powering on your Modem & VoIP SetupYour VoIP phone service should set up automatically once your services are active and your modem is online.If you’ve asked us to convert your existing phone number to a VoIP service, please allow up to 7 days after your NBN™ service is active for this porting process to complete.We’ll send you an email to confirm when your VoIP service is active and ready to use.Please DO NOT cancel or make any changes to your old phone service until the transfer is COMPLETE as this can prevent a successful transfer.Please note that this model cannot support any VoIP service that was not supplied with your Internode NBN™ service.WiFi (Wireless) SetupYour modem’s WiFi has been pre-configured. You’ll find 1.tablet, smartphone or other WiFi device.2. View the list of available WiFi networks on your WiFidevice and select the network that matches thenetwork name on your modem’s sticker.3. Enter the WiFi password exactly as printed on thesticker.WiFi & Router Security Customisation1. After logging into the modem interface athttp://192.168.1.1, you can customise your WiFi network details by selecting Basic > Wireless.2. 2.4Ghz Wireless Network and/or 5GHz WirelessNetwork must have Enable ticked. If Hide SSID isticked, your network name will not be visible to WiFidevices and you’ll have to enter it manually to connect.3. The Network name (SSID)s are the names of your WiFinetworks. You can change these to anything you’d like.4. Change the Password for your WiFi to something that’shard for others to guess but easy for you to remember.Make sure you write down your new WiFi details,otherwise you may need to factory reset your modem if you forget them.5. Click Save. After changing your WiFi details, you mayneed to reconnect your WiFi device(s) using the newname/password. If desired, you can change your modem's administrative username and password. This can be handy if you have tenants or meddling teens and you don’t want them to change your modem settings.Simply select Advanced > System Tools > Administration. You can change the username and/or password in the Account Management section.Here's a tip:If you ever forget your custom login details, you can factory reset the modem to return it to the default settings. However, you will also lose all other custom settings, so you’ll need to set up your modem again. Internet address:http://192.168.1.1Default username:adminDefault password:adminNotes1. How to claim under the warranty and your rights1.1 In order to claim under the warranty, you should contact us toadvise that you wish to claim under the warranty and answer anyquestions we have. We will assess whether you are eligible to claimunder the warranty and determine, at our option and in accordancewith any specific terms that apply to the relevant equipment,whether to repair or replace your equipment, or provide a credit.Internode:• Phone: 1300 788 233• Email:*********************.au1.2 If we determine that your equipment needs to be returned,you will be sent replacement equipment and a returnfreight bag in which to return the faulty equipment.1.3 If the faulty equipment is not returned to us, with all cables, accessoriesand components, within 21 days of you receiving the replacementequipment and return freight bag, you will be charged the full price for the purchase of the equipment that we sent to you, plus any shippingcosts relating to the prepaid satchel that was sent to you. You will also still be charged for the original equipment and if the original equipment has already been paid for, you will not be entitled to a refund.1.4 The warranty does not apply to faults caused byany of the following (Non Covered Events):a) any equipment not supplied by us;b) any interference with or modification to the equipment ora failure to use it in accordance with instructions; orc) damage caused by you or someone who has used the equipment(for example misuse or exposure to liquid or excessive heat); ord) an external event (for example a fire or flood).1.5 If on inspection of the returned equipment we determine that the faultwas caused by a Non Covered Event, you will be charged for the original equipment (or if the original equipment has already been paid for, you will not be entitled to a refund) and the replacement equipment, unless:a) you have not used the replacement equipment;b) and you return it to us in its unopened packaging, in which case, you will notbe charged for the replacement equipment.1.6 The repair or replacement of equipment may result in loss of data(such as loss of telephone numbers stored on your handset).1.7 Goods presented for repair may be replaced by refurbishedgoods of the same type rather than being repaired. Refurbishedparts may be used to repair the goods. If your equipment isreplaced with refurbished equipment, the warranty applies inrelation to that refurbished equipment from the remainder of theoriginal Warranty Period or thirty days, whichever is longer.1.8 The benefits given to you by this warranty are in additionto other rights and remedies you may have at law.1.9 Our goods come with guarantees that cannot be excluded underthe Australian Consumer Law. You are entitled to a replacementor refund for a major failure and compensation for any otherreasonably foreseeable loss or damage. You are also entitled to havethe goods repaired or replaced if the goods fail to be of acceptablequality and the failure does not amount to a major failure.1.10 This warranty is given by Internode Pty Ltd (ABN 82 052 008 581) of1/502 Hay Street, Subiaco, WA, 6008. You can contact us on 1300 788 ************************************.auifyouhaveanyquestions regarding this warranty.1.11 Latest Warranty Information: https:///pdf/legal/cra/internode-warranty-information-statement.pdf 2. Warranty PeriodPurchase: 24 MonthsRental: For the lifetime of the Rental Contract2.1 You must notify us of the fault with your equipment within the applicableWarranty Period (beginning from the date you purchased the equipment) 2.2 We will repair, replace or provide credit for faulty equipmentprovided by us at no cost to you, if you notify us of thefault within the applicable Warranty Period.2.3 However, we will charge you for the repair or replacement of faultyequipment, if the fault was caused by a Non Covered Event.2.4 If we decide to repair the equipment, you must giveus sufficient information to assess the fault, includingallowing us to test your personal computer.1300 788 233*********************.au Don’t leave your broadband behind! Call our movers team on 13 66 33 Moving house?。
CODE V 入门用户指南
第一章概述CODE V是设计和分析光学系统的一种工具。
本章的内容主要是向你介绍CODE V,描述可以帮助您学习和使用它的内容,并且简要地描述其用户界面和程序的结构。
目录第一章概述 (1)1.1 何谓CODE V? (2)1.2 手册与用户 (3)1.3 假设和术语 (4)1.4 CODE V的界面 (5)1.5 CODE V的结构 (6)1.6 启动、退出程序和技术支持 (7)1.7 手册中的一些设置 (7)1.1 何谓CODE V?1.1.1 光学设计的得力工具CODE V是解决光学问题一种强大、灵活的软件工具。
虽然CODE V的发展始于30多年前,但是它紧跟光学和计算机的发展步伐,得到不断地改进。
由于CODE V采用了可定制的窗口用户界面,有着丰富的帮助功能和优越的技术支持,所以它是十分容易学习和使用的,本手册将展示的这些特点。
1.1.2 CODE V典型的使用任务CODE V可应用于许多种场合。
下面列举一些典型的使用任务:●对现有光学系统进行评估和调整,以便决定是否适用于新场合或能否降低生产成本。
在重新设计过程中,对使用塑料、非球面、衍射元件或者现在元件进行评估。
●基于具体的产生或应用场合的要求创建新的设计形式。
●对光学系统进行公关分析,以合适制造,绘制生产图纸,甚至导出CAD用的IGES格式文件。
有哪里应用场合?从广义上来说,有三种应用领域:⏹成像系统⏹光电或通讯系统⏹照明和其它系统从历史上来看,CODE V在约80%或更多的应用大概是在成像系统方面。
例如照相镜头、变焦物镜、光盘系统、医用仪器、望远镜、分光镜、复印设备、投影仪、扫描仪、微光刻系统和许多包括军用和民用的航天领域。
虽然用于这些场合已经延续了多年,但是随着技术的发展,例如照相机的数码化、DVD取代CD等等,出现新的工作内容。
在近些年,光子学领域得到快速增长。
同时,由于CODE V有极大的灵活性,照明和其他系统也成为其重要的应用部分。
Wii简体中文操作手册2011
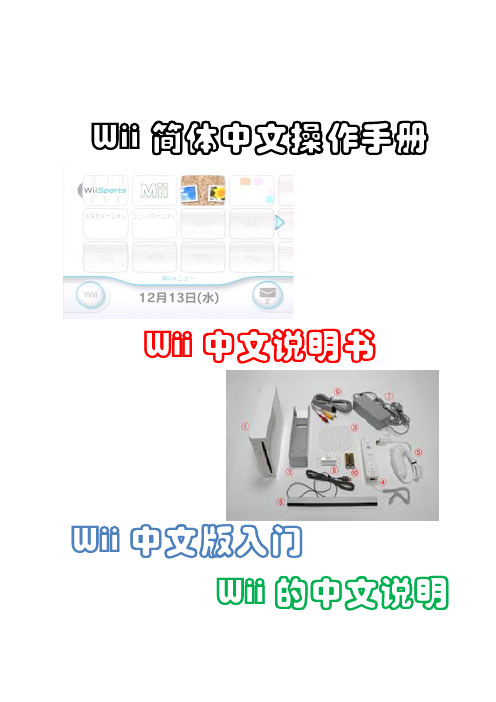
Wii简体中文操作手册Wii中文说明书Wii中文版入门Wii的中文说明目录Wii是什么?(购机指南) (3)Wii包装物品说明 (10)主机正面图示 (10)主机背面图示 (11)主机侧面图示 (12)WiiRemote手柄[正面背面] (13)Nunchuk手柄(双节棍手柄)感应器&支架 (14)电源AV线Wii主机架座主机托盘 (15)Wii主机系统说明 (16)Wii使用注意事项 (16)主机的放置 (17)连接AV线1 2 (18)防止电视屏幕损坏 (19)感应器的安装1 2 3 (20)电源安装如果Wii菜单没有出现在屏幕上 (22)Remote手柄的安装 1 2 3 (23)同步连接你的Remote手柄到Wii主机1 2 3 4 (24)Remote手柄的设置&基本操作 (26)Nunchuk(双节棍)手柄安装&使用说明 1 2 3 (27)Wii游戏系统说明 (29)使用游戏光盘 (29)注意事项 (30)游戏指引 (30)Wii记忆卡&NGC记忆卡使用事项 1 2 (31)Wii游戏故障说明 (32)使用教程Wii频道教学 (33)Wii 主机安装 (37)Wii 正面面板 (37)Wii 背面面板 (37)Wii 主机操作 (38)Wiimote 使用操作 (38)Wii Menu (选单) (38)管理好友 Wii Code (39)取得自己的Wii Code (40)留言板 (41)Mii 的使用 (41)Mii 介绍 (41)Mii 创造 (41)Mii 功能 (42)Mii 操作方式 (42)Mii 广场 (42)WiiChannels (44)功能特色 (44)功能介绍 (44)照片频道(Picture Channel) (44)Mii Channel (45)网络频道(Internet Channel) (45)购物频道(Shop Channel) (45)Disk Channel (45)天气频道(Weather Channel) (45)新闻频道(News Channel) (46)投票频道(Vote Channel) (46)留言板 (46)购买虚拟主机游戏 (47)Wii 设定 (47)网络连接设定 (47)WiiConnect24 设定 (52)感应棒设定 (53)年龄管制设定 (54)Wii 更新 (54)Wiimote 与 Wiimote 蓝芽配对设定 (56)多个 Wiimote 联机方法 (60)Wii本机初使化(重要提示) (60)记忆管理 (61)游戏纪录管理 (61)购物频道软件管理 (62)Wii是什么?(购机指南)1:Wii是什么?Wii是任天堂继GameCube(NGC)之后于2006年推出的新一代电视游戏主机。
HD中文快速指南

快速入門指南使用裝置之前,請先參閱本文件當您從包裝盒中取出電池時,電池尚未充電。
裝置充電時,請勿取出電池。
如果您打開或擅改裝置的外殼,產品保證即失效。
隱私權限制有些國家有權力要求您完全公開所有電話錄音,而且規定您在錄音時,必須告知對方。
在使用 PDA 電話的錄音功能時,提醒您要遵守當地相關法規,以免觸法。
免責條款HTC 對於提供的氣象資訊、股市資料、資料、文件,將不進行任何保證與技術支援。
依據現行法律允許的最大範圍,HTC 與其成員,對於提供的氣象資訊、股市資料、資料、文件或其它產品與服務,明確地拒絕任何陳述與保證、明示或隱喻、法律問題或其它方面。
包含對於氣象資訊、股市資料、資料或文件,無限制地暗示擔保、符合特定用途的法定擔保、無侵權、品質、準確度、完整性、效能、可靠度、可用性或暗示擔保商業行為、性能。
不限定前述的部分,您必須更深入了解的是,HTC 與其供應商將不會針對您對於氣象資訊、股市資料、資料或文件或其它使用上的濫用負責。
HTC 與其供應商將不保證或暗示擔保氣象資訊會如同預期般發生,對於氣象的不一致、不精確、遺漏等,我們對於任何人、組織、非締約組織並無任何責任與義務。
不限定前述的部分,您必須了解到氣象資訊、股市資料、資料或文件可能會不精確,而您需要依照常識與遵循標準安全預防措施來使用這些資料。
限制賠償依據現行法律允許的最大範圍,任何情況下,HTC 與其供應商將不對於任何直接、間接、特殊、無法避免的損害,針對使用者或第三方負責。
在合約與侵權行為中,收入損失、信譽損失、商業機會損失、資料損失、利益損失或運送、履行或不履行義務或使用氣象資訊、股市資料、資料或文件均不負責。
目錄目錄1. 歡迎使用 HTC Touch HD™快速入門指南 (5)2. 包裝盒內容 (5)3. 認識 HTC Touch HD™ (6)4. 安裝 SIM 卡、電池和儲存卡 (7)5. 為電池充電 (9)6. 準備事項 (9)7. TouchFLO™ 3D 首頁畫面 (10)8. 撥打電話 (12)9. 撥出視訊電話 (13)10. 輸入資訊 (14)11. 基本設定 (15)12. 新增好友連絡人 (17)13. 傳送簡訊 (18)14. 傳送 MMS 多媒體簡訊。
V-one Gaming Controller中文说明书
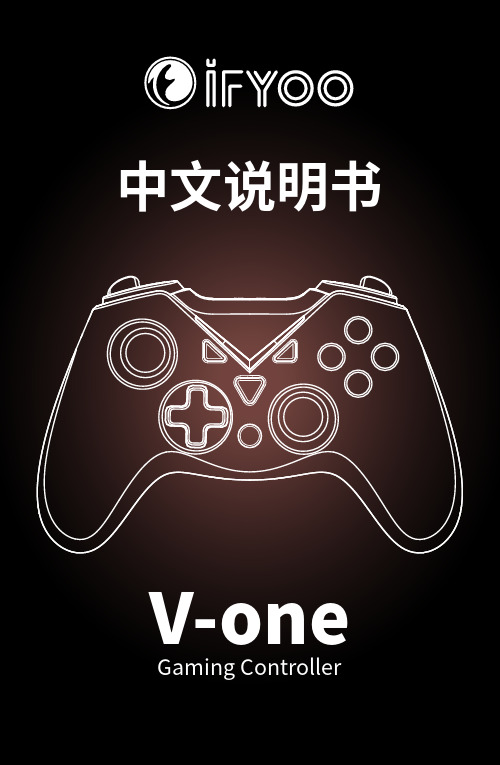
中文说明书V-one Gaming Controller警告:本产品包含细小部件,请勿吞咽。
儿童必须在成人的监督下使用本产品。
推荐用户年龄:12岁以上。
● 为了安全起见,请勿在无人看管的情况下对本产品进行充电,以免出现意外情况。
● 请使用包装内附带的配件进行充电。
请勿篡改电源线、适配器等任何配件。
● 如果本产品出现过热,异味或冒烟的情况,请立即将本产品与供电设备断开连接并与供应商联系。
为本产品充电时,确保良好的通风,并始终将本产品放置在不易燃的表面上。
● 为避免产品损坏,请勿将其暴露在雨中,高湿度环境或任何未指明的室外环境中。
请在干燥的环境中使用本设备。
● 请保持本设备清洁干燥,并避免水,灰尘或其他异物进入。
● 请勿将本产品放置在明亮的火焰附近,如蜡烛或类似物品。
● 请勿将设备放置在温度高的物体附近,如蜡烛或类似的发热物体。
● 请勿使用水,酒精或化学药品直接清洁设备。
清洁时,请断开设备与任何电源的连接。
● 请避免从高处跌落产品,以免损坏。
请使用正确的操作步骤来使用本设备。
● 请勿自行拆卸和修理本产品。
如果您遇到任何无法解决的问题,请与供应商联系。
警告:本产品内含一个锂电池。
不正确的使用会导致电池过热而导致火灾。
请不要长期闲置手柄,否则容易导致锂电池的损坏,缩短其使用寿命。
产品名称工作平台连接方式工作电压产品尺寸包装尺寸工作模式电池类型IFYOO V-one 游戏手柄PC Windows(XP / 7 / 8 / 10)Android(需4.0版或更高版本)蓝牙 / 2.4GHz无线3.7~5.5V DC160 x 110 x 52 mm185 x 140 x 70 mmXinput / Android高质量锂电池产品型号工作温度工作湿度无线距离充电时间充电电流充电电压USB接口产品净重电池容量IFYOO-V1080℃~+45℃20~80%推荐7米以内2~3 小时1~2 A5V DCUSB 2.0 / 3.0222g600mAHIFYOO V-one 游戏手柄(型号:IFYOO-V108)可以用通过蓝牙和2.4GHz两种方式连接,适用于PC Windows(XP/7/8/10),安卓设备(需4.0或更高版本,2.4GHz连接时,安卓设备需完全支持OTG功能)。
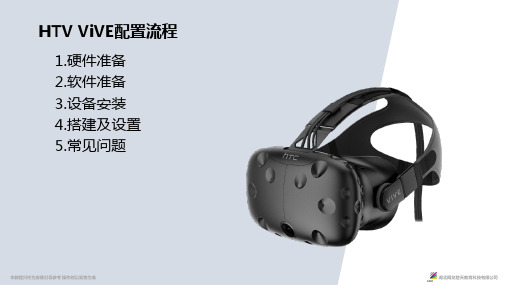
HTC vive使用指南ppt课件
湖北网龙楚天教育科技有限公司
4.搭建及设置
控制器:长按系统按钮开启。
本教程只作为安装引导参考 操作时以实物为准
湖北网龙楚天教育科技有限公司
4.搭建及设置
使用控制器设置显示器位置、地面高度、可活动范围等。
本教程只作为安公司
4.搭建及设置
本教程只作为安装引导参考 操作时以实物为准
3.设备安装
本教程只作为安装引导参考 操作时以实物为准
湖北网龙楚天教育科技有限公司
3.设备安装
本教程只作为安装引导参考 操作时以实物为准
湖北网龙楚天教育科技有限公司
3.设备安装
本教程只作为安装引导参考 操作时以实物为准
湖北网龙楚天教育科技有限公司
3.设备安装
本教程只作为安装引导参考 操作时以实物为准
类目数目细则总共部件眼镜手柄x2定位器x2连接盒耳机总共线缆连接盒usb连接盒hdmi定位器连线minidp线备用插电源的部件定位器x2连接盒电源线定位器电源线x2连接盒电源线充电部件手柄充电器手柄充电器x2湖北网龙楚天教育科技有限公司本教程只作为安装引导参考操作时以实物为准2
HTV ViVE配置流程
HDMI接口
DP接口 (PC显示器)
本教程只作为安装引导参考 操作时以实物为准
湖北网龙楚天教育科技有限公司
3.设备安装
本教程只作为安装引导参考 操作时以实物为准
湖北网龙楚天教育科技有限公司
3.设备安装
需要连接到电脑的线包括:Hdmi线、UBS数据线
需充电的VIVE组件包括:控制器手柄x2 需要连接电源的VIVE组件包括:
湖北网龙楚天教育科技有限公司
1.硬件准备
其他:可供悬挂外设的三脚架x2(或可钉在墙上的挂钩) PC附近:三孔电源插口x2 两孔电源插口x1 区角两侧:两孔电源插口x2(一角一个)
17Vee体感游戏大厅使用说明

17VEE体感游戏大厅使用说明一、体感设备连接1.安装游戏大厅将“17Vee software”光盘放入光驱,运行并安装“17Vee体感游戏大厅”。
选择大厅安装位置,按提示点击下一步即可完成安装(如下图所示)。
2、因为有些游戏需要新版本的DirectX驱动支持,在安装以上程序后,会提示您是否安装DirectX。
如果您的PC已经安装过此程序,可以选择“否”。
3、完成安装后,点击桌面的“17Vee体感游戏大厅”快捷图标打开体感游戏客户端程序,如下图所示:4、如果PC未连接体感接收器会出现如下提示5、在插入体感接收器后客户端会自动搜寻体感控制器客户端搜索到体感控制器后会自动更新驱动如下图:驱动更新完成后,按提示按下控制器上的A键即可完成连接点击完成,即可开始体感游戏之旅。
6、您也可以手动点击控制器按钮进入体感控制器管理界面如下图会显示出已经配对过得设备如想连接新的设备点击添加按钮按提示操作即可完成7、在体感控制器管理界面显示的已经配对过的设备可直接点击连接按钮然后按住体感控制器A键进行连接已经连接的设备显示如图手柄右侧现实的绿色圆点表示手柄已处于连接状态,左侧为手柄电量显示点击移除按钮可将体感控制器移除再次连接该设备需重新配对二.如何启动游戏1.打开体感游戏大厅,点击“体感社区”可直接访问17Vee游戏社区;其他的运动游戏、射击游戏、竞速游戏、格斗游戏、网游中心、其他游戏、经典游戏、Flash迷你小游戏、为不同的游戏类型板块,您可以点击进入相应版块启动游戏。
2.图中显示的灰色图标表示所对应的游戏已安装适配文件,但是尚未连接对应的游戏。
如果对应的游戏已安装在电脑上,只是做简单的适配,请点击搜索游戏;如未安装游戏,请点击下载推荐(1)搜索游戏您可通过下拉菜单选择游戏大概安装位置然后进行搜索,也可点击浏览选择游戏具体位置选择好位置后点击搜索按钮,客户端会根据您选择的位置进行搜索,如果搜索到游戏显示如图,点击保存后即可进行游戏(2)下载游戏点击下载推荐,系统即可开始下载,与您平时下载普通文件一样(3)点击彩色游戏图标启动游戏,进入游戏前请先看操作说明点击开始即可进行游戏体验体感游戏带来的乐趣。
体感游戏
体感游戏体感游戏(英文:Motion Sensing Game),简单点说就是用身体去感受各种电子游戏,和传统的键盘手柄游戏不同的是,体感游戏是通过身体的运动变化体验的新型游戏,通过肢体的运动变化来玩游戏。
早期的体感游戏出现在电动城等娱乐场所,就是我们经常看到的跳舞机,射击游戏等。
国外代表平台(Wii,PlayStation Move,Xbox360),国内代表平台(爱动体感运动机,17V ee),国内嵌入式代表平台(康佳8000D系列云智能电视平台、康佳网锐电视LED551S95N 平台、创维E70智能电视平台、海信XT710系列云智能电视平台、长虹A9000智能电视平台)代表游戏(Wii上的网球游戏,idong上的旋风乒乓、弥雅瑜伽、爱动网球等四十多个体感运动游戏,以及微软Xbox360的水果忍者、舞蹈世界等200多款体感游戏)。
目前,最新出现的体感游戏类型是采用嵌入式技术,以嵌入式技术为手段,以智能电视、高清电视、机顶盒为硬件平台,搭建嵌入层,并把公司自主产权的体感游戏植入各种机型电视机平台,为不同电视机平台全方位解决嵌入式体感游戏方案,称之为嵌入式体感游戏,目前,国内以广州代代星电子科技有限公司的代代星体感游戏为代表。
与早些年微软Kinect、Xbox360体感游戏机(自带主机)等不同的是,代代星嵌入式体感游戏模式无需独立主机,以各种设备硬件为嵌入式平台,以低成本、高技术密度、低耗能方式直接把体感游戏植入嵌入平台芯片,借助广阔电视机平台、数字机顶盒平台、广电系统平台大力普及体感游戏。
体感游戏基本都是以“游戏手柄”的形式协助游戏,与wii差不多样子。
目前,国内体感游戏研发和推广由广州代代星电子科技有限公司领头。
通过嵌入式的技术植入电视机、手机等终端显示来完成体感游戏的终端技术对接,也称为“电视体感游戏”。
代代星将全球率先展出嵌入式平台的3D体感游戏技术。
该3D体感游是目前全球首款商用的嵌入式平台3D体感游戏解决方案,目前已成熟用于TV、机顶盒产品。
Vr中文使用手册
Vr中文使用手册目录1. license 协议7. VRay 贴图2. VRay的特征8. VRay 阴影3. VRay软件的安装9. VRay的分布式渲染4. VRay的渲染参数10. Terminology术语5. VRay 灯光11. Frequently Asked Questions常见问题6. VRay 材质VRay的特征VRay光影追踪渲染器有Basic Package 和Advanced Package两种包装形式。
Basic Package具有适当的功能和较低的价格,适合学生和业余艺术家使用。
Advanced Package 包含有几种特殊功能,适用于专业人员使用。
Basic Package的软件包提供的功能特点·真正的光影追踪反射和折射。
(See: VRayMap)·平滑的反射和折射。
(See: VRayMap)·半透明材质用于创建石蜡、大理石、磨砂玻璃。
(See: VRayMap)·面阴影(柔和阴影)。
包括方体和球体发射器。
(See: VRayShadow)·间接照明系统(全局照明系统)。
可采取直接光照(brute force), 和光照贴图方式(HDRi)。
(See: Indirect illumination)·运动模糊。
包括类似Monte Carlo 采样方法。
(See: Motion blur)·摄像机景深效果。
(See: DOF)·抗锯齿功能。
包括fixed, simple 2-level 和adaptive approaches等采样方法。
(See: Image sampler)·散焦功能。
(See: Caustics )· G-缓冲(RGBA, material/object ID, Z-buffer, velocity etc.) (See: G-Buffer )Advanced Package软件包提供的功能特点除包含所有基本功能外,还包括下列功能:·基于G-缓冲的抗锯齿功能。
魅族17使用说明书

魅族17使用说明书运营商与网络•运营商支持全网通5G (运营商支持向下兼容)•网络模式双卡双待•SIM卡类型Nano-SIM卡+Nano-SIM卡•WiFi支持Wi-Fi 6•蓝牙支持蓝牙5.1•手机类型面部识别,拍照手机,全面屏,后置四摄,骁龙865,自拍神器,大屏手机,大容量电池,快充手机,指纹识别,支持NFC,5G手机机身信息•机身结构直板•手机颜色松深入墨,十七度灰,AG梦幻独角兽•手机尺寸160×77.2×8.5mm屏幕信息系统与硬件相机拍照影音娱乐定位与传感器基本功能包装配件保修信息便捷小窗用途多多Flyme系统的小窗使用体验长期以来受到了网友的一致好评,在Flyme 8上小窗功能也得到了升级。
很多用户在观看视频时,都经历过杂事打扰被迫切换到其它APP中从而导致观影体验“断断续续”的情况,而Flyme 8的视频小窗功能便可以很好地帮助用户解决魅族17上用户可以在手机桌面或者是其它应用上使用悬浮的视频小窗,还可以在全屏播放视频时通过小窗功能使用其它APP进行办公、聊天、阅读等操作。
借助Flyme 8的小窗功能,用户还可以实现在不同场景下进行快速回复。
当接到消息推送时,用户只需要点开通知框的小窗打开功能,聊天界面就会以小窗的形式悬浮在当前界面上,回复完消息,点击小窗外的区域即可关闭小窗。
此外,用户还可以使用手势从屏幕的下角向内滑动唤醒小窗功能,从而不需要关闭当前的应用便可以使用其他软件。
通知小窗回复游戏模式告别烦恼除了便捷的小窗功能之外,魅族17的游戏模式也同样可以在游戏的情况下为用户带来便捷的游戏内操作体验。
首先为了避免在游戏中弹出的系统输入法占据大半个屏幕的问题,魅族17的游戏模式内置了游戏悬浮小键盘功能,有了这个功能用户就可以随心在游戏内完成输入,无需担心过大的键盘面积遮挡游戏画面的问题。
游戏悬浮小键盘其次,为了解决不同游戏中按键振感适配的问题,用户可以通过游戏助手功能中的游戏振感设置手动设置振感的虚拟映射位置。
VRML使用说明
VRML工具使用说明一、浏览器使用说明1.常用快捷键Shift+鼠标前后托动:加速行走;ALT+鼠标托动:平移;CTRL+鼠标前后托动:抬头或低头2.导航工具栏二、VRML语法结构#VRML V2.0 utf8——文件头Group——主编组结点{Children——引出成员结点[Background——环境结点(FOG:大气效果;SOUND:声音结点;POINtlight\direction\spotlight:光照效果结点):空间背景(成员结点){skyAngle[1.308,1.570]——天空角(从X负向到Y正向到X正向)[天空角1,天空角2….]Y轴正向为0,X 正向为90度即水平面skyColor [0.5 0.1 0.9,0.0 0.5 1.0,1.0 0.5 6.0]——天空色[天空色0,….]groundAngle [1.308,1.570]——地面角(从X负向到Y负向到X正向)从Y负向开始groundColor [0.1 0.0 0.0,0.4 0.3 0.2,0.6 0.6 0.6]——颜色由R(红)G(绿)B(蓝)三色合成,数值范围从0.0—1.0,0.0最弱,1.0最强。
frontUrl []backUrl []leftUrl []rightUrl [] 此六个域用于为VRML虚拟空间分别添加前、后、左、右、上、下背景图像,以生成空topUrl [] 间立方体全景图像背景一般可不指定topUrl和bottomUrl从而使地面和天空透过全景显bottomUrl [] 示。
set_bind ——入事件,与isBound出事件用于进行VRML空间背景切换。
Ture\falseisBound——出事件,切换时为FALSE}}Fog——大气效果结点{Color r g b ——定义雾的颜色fogType type——密度类型,有两种值:“LINEAR”,“EXPONENTIAL”,默认为前者,在此中雾的浓度与浏览者观察物体的距离成正比,称线性雾;在后者中雾的浓度与之距离的平方成正比,也称指数雾。
RealBridge 玩家指南(修订版)说明书

RealBridge Player GuideRevised 16 November 2020At the tableWhen you arrive at the table, you will be able to see and talk to the other players. After the Director starts the first round, you will see your hand. When it is your turn to bid, a bidding box will be shown in the middle of the table.These are the main elements of the screen:During the auctionMaking a bidTo bid, simply click the bidding card. If you are using one-click mode, the bid will be made and will appear in front of you, just as when you bid in face-to-face bridge.If you are using two-tap mode (see Settings below) the bidding card is selected, and all the other bidding cards disappear. If the bid you wanted is shown, click it again to confirm the bid; if you had clicked the wrong bid, click somewhere else on the table to bring the bidding box back.Alerts and explanationsThe standard way of alerting in RealBridge is as in face-to-face bridge. When your partner makes a conventional bid, you click your alert card. The Alertcard will briefly be displayed against partner's bid. Partner's bidding card will change colour to indicate that it has been alerted.Explanations are as in face-to-face bridge too. An opponent asks you what the bid means by speaking, and you explain by speaking.RealBridge also allows "self alerts" and written explanations. This option will be explained in the Self alerts section in a subsequent edition of this guide. UndosIf you make a misclick, and if the rules of the event allow undos, clickthe Undo button. Each opponent will be prompted to accept or reject the undo. If they accept it, the bidding goes back to before your last call. If they don't accept it, you will see a message saying this.If there is any doubt or disagreement about whether an undo should be allowed, call the Director. The Director will be able to adjudicate according to the rules of the event.During the playWhen play starts, dummy appears on the table. The cards played to each trick are shown in the middle of the table. Some more buttons now become relevant:Playing a cardTo play, simply click the card you want to play. If you are using one-click mode, the card will be played and will appear in the middle of the table.If you are using two-tap mode (see Settings below) the card is moved partly out of your hand. To confirm the play, click anywhere in the bottom half of the table. To change the card, click somewhere else (for example, in your hand). When you first start using two-tap mode, RealBridge shows you the area to click to confirm a play. You can hide this by clicking the Hide button.ClaimsEither declarer or a defender can claim some or all of the remaining tricks. Click the Claim button, then select the number of tricks that you are claiming. Just as in face-to-face bridge, you should state your line of play at the same time as your claim.After you have claimed as declarer, both defenders are prompted to accept or reject your claim. If they both accept, the result is recorded and the deal ends. If either defender rejects the claim, the platform displays a message saying that the claim has been rejected. After a rejection, you should call the director to adjudicate the claim, or claim again (perhaps for a different number of tricks), or if everyone agrees you can also play on.If a defender claims, both declarer and the other defender are prompted to accept or reject the claim. (This is because a defender is allowed under Law 68B2 to object to his partner's claim.)If play continues after a claim, the non-claiming side can see all four hands. UndosUndos in the play work in the same way as undos in the bidding. If an undo is accepted, the play goes back to before your last play.Again, if there is any doubt or disagreement about whether an undo should be allowed, call the Director.SettingsIf you click the Settings icon, you will see various options for controlling the appearance and functionality of the screen:NotesIf you change your settings, Realbridge will remember them for the next time that you play, as long as you are using the same computer andweb-browser.With simplified cards, dummy is always oriented to face you. RecommendationsIf you are using a tablet, you may find it easier to use simplified cards and/or two-tap mode.Try the different options and choose a configuration that you like.Audio and video controlsThe screen also contains some buttons for controlling audio and video:The directorYou can call the Director by clicking the Director button. When the Director is at the table, you will see him in the top left-hand corner of the screen. You can see and talk to him just like with the other players.。
visitor 终端快速启动指南说明书
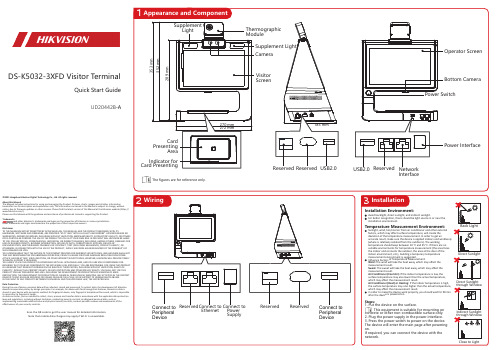
DS-K5032-3XFD Visitor TerminalQuick Start GuideUD20442B -A1.Put concrete2.Plug3.Press ©2021Hangzhou Hikvision Digital Technology Co.,Ltd.All rights reserved.About this ManualThe Manual includes instructions for using and managing the Product.Pictures,charts,images and all other information hereinafter are for description and explanation only.The information contained in the Manual is subject to change,without notice,due to firmware updates or other reasons.Please find the latest version of this Manual at the Hikvision website (https:///).Please use this Manual with the guidance and assistance of professionals trained in supporting the Product.Trademarksand other Hikvision’s trademarks and logos are the properties of Hikvision in various jurisdictions.Other trademarks and logos mentioned are the properties of their respective owners.DisclaimerTO THE MAXIMUM EXTENT PERMITTED BY APPLICABLE LAW,THIS MANUAL AND THE PRODUCT DESCRIBED,WITH ITSHARDWARE,SOFTWARE AND FIRMWARE,ARE PROVIDED “AS IS”AND “WITH ALL FAULTS AND ERRORS”.HIKVISION MAKES NO WARRANTIES,EXPRESS OR IMPLIED,INCLUDING WITHOUT LIMITATION,MERCHANTABILITY,SATISFACTORY QUALITY,OR FITNESS FOR A PARTICULAR PURPOSE.THE USE OF THE PRODUCT BY YOU IS AT YOUR OWN RISK.IN NO EVENT WILL HIKVISION BE LIABLE TO YOU FOR ANY SPECIAL,CONSEQUENTIAL,INCIDENTAL,OR INDIRECT DAMAGES,INCLUDING,AMONG OTHERS,DAMAGES FOR LOSS OF BUSINESS PROFITS,BUSINESS INTERRUPTION,OR LOSS OF DATA,CORRUPTION OF SYSTEMS,OR LOSS OFDOCUMENTATION,WHETHER BASED ON BREACH OF CONTRACT,TORT (INCLUDING NEGLIGENCE),PRODUCT LIABILITY,OR OTHERWISE,IN CONNECTION WITH THE USE OF THE PRODUCT,EVEN IF HIKVISION HAS BEEN ADVISED OF THE POSSIBILITY OF SUCH DAMAGES OR LOSS.YOU ACKNOWLEDGE THAT THE NATURE OF THE INTERNET PROVIDES FOR INHERENT SECURITY RISKS,AND HIKVISION SHALL NOT TAKE ANY RESPONSIBILITIES FOR ABNORMAL OPERATION,PRIVACY LEAKAGE OR OTHER DAMAGES RESULTING FROM CYBER-ATTACK,HACKER ATTACK,VIRUS INFECTION,OR OTHER INTERNET SECURITY RISKS;HOWEVER,HIKVISION WILL PROVIDE TIMELY TECHNICAL SUPPORT IF REQUIRED.YOU AGREE TO USE THIS PRODUCT IN COMPLIANCE WITH ALL APPLICABLE LAWS,AND YOU ARE SOLELY RESPONSIBLE FORENSURING THAT YOUR USE CONFORMS TO THE APPLICABLE LAW.ESPECIALLY,YOU ARE RESPONSIBLE,FOR USING THIS PRODUCT IN A MANNER THAT DOES NOT INFRINGE ON THE RIGHTS OF THIRD PARTIES,INCLUDING WITHOUT LIMITATION,RIGHTS OF PUBLICITY,INTELLECTUAL PROPERTY RIGHTS,OR DATA PROTECTION AND OTHER PRIVACY RIGHTS.YOU SHALL NOT USE THIS PRODUCT FOR ANY PROHIBITED END-USES,INCLUDING THE DEVELOPMENT OR PRODUCTION OF WEAPONS OF MASSDESTRUCTION,THE DEVELOPMENT OR PRODUCTION OF CHEMICAL OR BIOLOGICAL WEAPONS,ANY ACTIVITIES IN THE CONTEXT RELATED TO ANY NUCLEAR EXPLOSIVE OR UNSAFE NUCLEAR FUEL-CYCLE,OR IN SUPPORT OF HUMAN RIGHTS ABUSES.IN THE EVENT OF ANY CONFLICTS BETWEEN THIS MANUAL AND THE APPLICABLE LAW,THE LATER PREVAILS.Data ProtectionDuring the use of device,personal data will be collected,stored and processed.To protect data,the development of Hikvision devices incorporates privacy by design principles.For example,for device with facial recognition features,biometrics data is stored in your device with encryption method;for fingerprint device,only fingerprint template will be saved,which is impossible to reconstruct a fingerprint image.As data controller,you are advised to collect,store,process and transfer data in accordance with the applicable data protection laws and regulations,including without limitation,conducting security controls to safeguard personal data,such as,implementing reasonable administrative and physical security controls,conduct periodic reviews and assessments of the effectiveness of your security controls.Scan the QR code to get the user manual for detailed information.Note that mobile data charges may apply if Wi-Fi is unavailable.Regulatory InformationThis product and -if applicable -the supplied accessories too are marked with "CE"and comply therefore with the applicable harmonized European standards listed under the RE Directive 2014/53/EU,the EMC Directive 2014/30/EU,the RoHS Directive 2011/65/EU.2012/19/EU (WEEE directive):Products marked with this symbol cannot be disposed of as unsorted municipal waste in the European Union.For proper recycling,return this product to your local supplier upon the purchase ofequivalent new equipment,or dispose of it at designated collection points.For more information see:2006/66/EC (battery directive):This product contains a battery that cannot be disposed of as unsorted municipal waste in the European Union.See the product documentation for specific battery information.The battery is marked with this symbol,which may include lettering to indicate cadmium (Cd),lead (Pb),or mercury (Hg).For proper recycling,return the battery to your supplier or to a designated collection point.For more information see: FCC ConditionsThis device complies with part 15of the FCC Rules.Operation is subject to the following two conditions:1.This device may not cause harmful interference.2.This device must accept any interference received,including interference that may cause undesired operation.FCC InformationPlease take attention that changes or modification not expressly approved by the party responsible for compliance could void the user’s authority to operate the equipment.FCC compliance:This equipment has been tested and found to comply with the limits for a Class B digital device,pursuant to part 15of the FCC Rules.These limits are designed to provide reasonable protection against harmful interference in a residential installation.This equipment generates,uses and can radiate radio frequency energy and,if not installed and used in accordance with the instructions,may cause harmful interference to radio communications.However,there is no guarantee that interference will not occur in a particular installation.If this equipment does cause harmful interference to radio or television reception,which can be determined by turning theequipment off and on,the user is encouraged to try to correct the interference by one or more of the following measures:—Reorient or relocate the receiving antenna.—Increase the separation between the equipment and receiver.—Connect the equipment into an outlet on a circuit different from that to which the receiver is connected.—Consult the dealer or an experienced radio/TV technician for help.This equipment should be installed and operated with a minimum distance 20cm between the radiator and your body.Safety InstructionThese instructions are intended to ensure that user can use the product correctly to avoid danger or property loss.The precaution measure is divided into Warnings and Cautions:Warnings:Neglecting any of the warnings may cause serious injury or death.Cautions:Neglecting any of the cautions may cause injury or equipment damage.WarningsAll the electronic operation should be strictly compliancewith the electrical safety regulations,fire prevention regulations and other related regulations in your local region.Please use the power adapter,which is provided by normal company.The power consumption cannot be less than the required value.Do not connect several devices to one power adapter as adapter overload may cause over-heat or fire hazard.Please make sure that the power has been disconnected beforeyou wire,install or dismantle the device.When the product is installed on wall or ceiling,the device shall be firmly fixed.If smoke,odors or noise rise from the device,turn off the power at once and unplug the power cable,and then please contact the service center.If the product does not work properly,please contact your dealer or the nearest service center.Never attempt to disassemble the device yourself.(We shall not assume any responsibility for problems caused by unauthorized repair or maintenance.)CautionsDo not drop the device orsubject it to physical shock,and do notexpose it to high electromag-netism radiation.Avoid the equipment installation on vibrations surface or places subject to shock (ignorance can cause equipment damage).Do not place the device in extremely hot (refer to the specification of the devicefor the detailed operating temperature),cold,dusty or damp locations,and do not expose it to high electromagnetic radiation.The device cover for indoor use shall be kept from rain and moisture.Exposing the equipment to direct sun light,low ventilation or heat source such as heater or radiator is forbidden (ignorance can cause fire danger).Do not aim the device atthe sun or extra bright places.A blooming or smear mayoccur otherwise (which is not a malfunction however),and affecting the endurance of sensor at the same time.Please use the provided glovewhen open up the device cover,avoid directcontact with the device cover,because the acidic sweat of the fingers may erode the surface coating of the device cover.Please use a soft and drycloth when clean inside and outside surfaces of the device cover,do not use alkaline detergents.Please keep all wrappers after unpack themfor future use.In case of any failure occurred,you need to return the device to the factory with the original wrapper.Transportation without the original wrapper may result in damage on the device and lead to additional costs.Improper use or replacement of the battery may result in hazard of explosion.Replace with the same or equivalent type only.Dispose of used batteries according to the instructions provided by the battery manufacturer.Biometric recognition products are not completely a pplicable to anti-spoofing environments.If you require a higher security level,use multiple authentication modes.Indoor use.Ifinstalling the deviceindoors,the deviceshould be atleast 2metersaway from thelight,and at least 3meters away from the window or the door.Input voltage should meet both the SELV (Safety Extra Low Voltage)and the Limited Power Source with 100~240VAC or 12VDC according to the IEC60950-1standard.Please refer to technical specifications for detailed information.This device complies with Industry Canada licence-exempt RSS standard(s).Operation is subject to the following two conditions:(1)this device may not cause interference,and(2)this device must accept any interference,including interference that may cause undesired operation of the device.Le présent appareil est conforme aux CNR d'Industrie Canada applicables aux appareils radioexempts de licence.L'exploitation est autorisée aux deux conditions suivantes :(1)l'appareil ne doit pas produire de brouillage,et(2)l'utilisateur de l'appareil doit accepter tout brouillage radioélectrique subi,même si le brouillage est susceptible d'en compromettre le fonctionnement.Check Filter visitor Check。
HTC Vive Pro 快速入门指南说明书

HTC Vive Pro Quickstart GuideVR Expert*****************Demkaweg 11 030 71161583555HW, UtrechtIn the box●1x HTC Vive Pro Headset ●2x Controller 2.0●2x Lighthouses ●1x Linkbox 2.0●1x DisplayPort Kabel ●1x USB cable ●1x Headset cable connector ●1x Power cable ●2x Power Adapters for controllers ●2x Micro USB Cable ●2x Power Adapter for Lighthouse ●1x Sync cable ●2x Lanyard HardwareBefore you start ●Do not allow the lenses to come in contact with periods of direct sunlight . This will permanently damage the screen and does not fall under warranty. ●Make sure your computer is compatible with the HTC Vive or you will not be able to start. You can check your compatibility here: https:///eu/support/vive/ca tegory_howto/how-to-check-if-pc-meet s-system-requirements.html Headset button Lens adjusterMenu buttonTrack padSystem buttonGrip buttonSystem buttonTrack padTrigger Menu buttonHow to install1.Start your computer.2.Download and install the VIVE software. (https:///us/setup/)3.Download and install Steam. (https:///about/)4.Create a VIVE account and log in.5.Create a Steam account and log in.6.Download and install the Steam VR application from the Steam shop.7.Install the Lighthouses by plugging in the power adapters.8.Connect the Headset with linkbox via the headset cable connector (With thetriangle markup).. Then connect the linkbox with the Computer through the corresponding cables.a.Put the USB-C Cable into a USB 3.0 port of the Computer andlinkboxb.Insert the DisplayPort cable into the DisplayPort port on yourcomputer’s graphics card.c.Put the Power cable connect to the linkbox into the power socket.9.Turn on the Linkbox by clicking on the blue button at the Linkbox10.Connect the Controller by holding in the menu buttons. Paia.Start Steam VR.b.Click on the hamburg icon in the Steam VR window.c.Go to devices.d.Go to “Pairing Controller”.e.Follow the instructions.11.If small exclamation marks appear on the icons in the SteamVR window:a.The device should have a software update available and youshould update the device.b.Click on the hamburger icon.c.Go to devices.d.Go to “Actualise devices”.12.If the headset, controller and lighthouses are connected, follow theinstructions in the device. .13.You are ready to go - Enjoy the ride!.Main Menu in the device●Taskbar of the menu. (in the middle of the screen)Here you will find the most common applications like(Topsteamvr Apps - Environment- screenshots)●Sidebar. (On the left side of the screen)Here you will find social events like friends.(Rooms- Recent apps and Steam apps)How to download applications from the HTC Vive store●Click on the “Steam menu” button on your controller.●Click on “Store” in the HTC Vive main menu.●Search for the desired application in the store or search for it manually withthe search function. (Navigate -> Search)●Click on the application and then press download or buy.●The application will then appear in your library.Controllers●Menu buttonPress this button to start a shortcut menu. You will find the tutorial and settings here.●TrackpadWith the trackpad you will be able to select through the menu in the device●Menu buttonThis is the button for Steam. Here you will be able to search and download apps from Steam.●Trigger buttonTo confirm your choices and scale your room●Grip buttonChoose another skin for your controller.HTC VIVE PRO SPECIFICATIONS AND DETAILS JOE KEOGHVIVE PRO HMD includes•Headset• 2 x Sensors• 2 x Remotes•Headset cable (attached)•Face cushion (attached)•Cleaning cloth•Earphone hole cap (2)•Documentaion•Link box•Power adapter•DisplayPort™ cable•USB 3.0 cable•Mounting pad• 2 x Sensors• 2 x RemotesRecommended Computer SpecsProcessor: Intel® Core™ i5-4590 or AMD FX™ 8350, equivalent or better.Graphics: NVDIA® GeForce® GTX1060 or AMD Radeon ™ RX480, equivalent or better.View the complete list > Memory: 4 GB RAM or moreVideo out: DisplayPort 1.2 or newerUSB ports: 1x USB 3.0 or newer portOperating system: Windows® 8.1 or later, Windows® 10。
产品需求文档(游戏大厅)

游戏大厅产品需求文档3.2 游戏大厅一般来说,游戏大厅的一级按钮就只有这四个,每个按钮里都触发其他界面或按钮。
1.每日签到页面交互说明:●每天第一次登录,该面板会直接出现在大厅,此时大厅被一层黑色半透明的图片遮盖;●已经被签过到的天数会变按,并且有“已签”字样;●当前要签到的天数UI的周围会有亮光旋转;●用户点击当前要签的天数时会有获得金币的特效和面板;●如果用户连续签了7天,会弹出获得大礼包奖励的面板;●点击关闭,面板直接消失,黑色半透明的图片也消失。
页面逻辑如下:2.个人信息页面交互说明:●点击头像,页面蒙上一层黑色半透明图片,底部弹出几个按钮“拍照”、“从手机相册选择”、“保存图片”、“取消”,头像可以无数次修改;●等级随着用户升级角色而更新;●All combo数和闯关数随用户闯关而更新;●点击名字时,数字键盘从底部弹出,名字每周只能修改一次,限定在6个汉字字符以内;●奖杯数量随用户成功闯关而更新;●点击关闭,面板直接消失,黑色半透明的图片也消失。
●页面逻辑如下:3.我要反馈(1)总览图页面交互说明:●点击“我要反馈”,直接出现反馈界面;●点击“返回”,页面直接消失,出现游戏大厅;●点击“给个好评”,直接跳转到应用商城;●点击“文字输入框”,数字键盘从底部弹出,点击“发送”,画面右边会出现用户的文字框和虚拟头像,左边随机给出固定回复;●点击“相机”,底部弹出“从手机相册选择”、“取消”按钮;●页面可以上下滑动。
(2)QQ用户交流页面交互说明:点击“用户交流”,页面蒙上一层黑色半透明图片,并弹出加入QQ群的对话框,点击“否”,则关闭对话框,黑色半透明图片消失,点击“是”,跳出另一个是否打开“QQ”的对话框,点击“否”,则关闭对话框,黑色半透明图片消失,点击“是”,跳转到QQ。
(3)常见问题页面交互说明:●点击“常见问题”,直接出现另一个页面,可以上下滑动页面;●点击“返回”,直接回到“我要反馈”页面。
体感游戏对幼儿的运动能力培养的效用

体感游戏对幼儿的运动能力培养的效用摘要:采用文献资料法、问卷调查法、访谈法、数理统计法、逻辑分析法对体感游戏对幼儿运动能力培养的效用进行分析。
随着技术的不断发展,教育游戏的种类也越来越丰富,研究发现目前体感游戏已经随之开展,并且将体感游戏应用到幼儿、小学等的体育教育中,以此来提高幼儿学生的运动能力。
而在体育教学上,我们运用体感游戏的教学方式,在研究中突出体感游戏在体育教学中的积极作用,展现出应用体感游戏后的优势。
关键词:体感游戏;运动能力;效用1体感游戏的基本阐述本研究中的体感游戏是指在体感交互技术创建新型教学环境下,以发展幼儿感知运动能力和基本动作技能为目标,幼儿通过观看和模仿屏幕中呈现的游戏内容,理解自己与屏幕中动物的联动作用,并控制自己的身体完成相应动作最终达到目标的竞赛性游戏[1]。
体感游戏结合了人类的视觉、触觉、听觉和动作随着身体器官的广泛参与,以娱乐方式锻炼器官和身体动作。
1.1体感游戏的定义体感游戏顾名思义: 用身体去感受的电子游戏。
现在的体感游戏突破以往单纯手柄按键式的操作形式,成为一种通过身体动作变化来进行操作的新型电子游戏。
车力军在3G时代体感游戏的发展思考中这样定义:体感游戏是一种通过人的肢体动作变化来操作和感受的新型电子游戏[2]。
1.2体感游戏使用情况的调查研究随着体感技术的进步,体感游戏已经被广泛应用到教育和体能训练等方面。
2011年,17Vee率先在“体感平台”的基础上加入了网络游戏的理念,用户只需将手机与电脑相连,即可用手机作为手柄,挥动进行控制游戏角色。
在国内爱动体感运动机,有着全球领先的计算机视觉识别技术,代表着国内的体感游戏的最高水平[4]。
现阶段,国外的体感游戏平台有Wii、Play Station Move、x360box 等;国内以“嘿哈”、“华之聚”等为代表。
本研究采用“嘿哈科技”公司研发的体感游戏设备作为研究工具。
1.3体感游戏教学实施的影响因素1.3.1教师教学应用意识薄弱在教学中,教师通常按教学大纲规定的教学内容进行教学,但是现行教学大纲上的教学内容陈旧、单调,吸引不了学生的兴趣,而且在教学中还发现,学生对学习内容常常会感到枯燥乏味,导致学习的兴趣直线下降。
WITE中文快速上手指南

你想要全面了解电视机,就必须知道它的原理,看说明书是一个不错的方法,但是你要看电视,就不必知道那么多。
本指南,来自本人粗浅的经验,将告诉你,想要把WITE玩起来,其实没那么难(想要玩好就没那么容易了)。
1、设置:战争迷雾(FOW)要打开,因为朦胧美才是真的美,什么都被你看光了还有什么乐趣?移动动画设为0.01,机器不怎么好也可以考虑关闭;为了写好战报,可以把自动存档打开:其他为默认。
2、界面:地图区没什么好讲的,主要是这些工具条,最上方是类似IE的标签页(信息标签和管理标签就不讲了,查信息存档退出什么相信大家都懂),最后MOVE那个显示的当前状态(对应F1-F12那些键的);中间一排:隐藏单位|放大|缩小|显示地盘|显示工事|铁路状态|单位状态|显示孤立单位|显示工厂|合并分解|创建守备部队|自动分配HQ|天气|VP|软因素(士气、经验、补给、油料、附属支援单位、无)切换;F1:Move常规的模式;F2:春运,不铁路运输;F3:海运;F4:两栖运输;F5-F10:空军任务:侦查|轰炸单位|轰炸机场|轰炸城市|空运|转场;F11:显示战斗痕迹;F12:结束回合;最后是个Shift的替代键。
右边可以看到日期、回合、城市、AP(行政点数,那个数字,可以理解为本游戏唯一的货币,干什么不要花钱呢对吧)、天气和冰冻程度。
3、算子:每格只能3个,注意,这就使得合并/解散非常重要。
●算子数字有三种情况:①c-m、②c=d和③c?d,其中c表示战斗力(CV),m表示行动力(MP),d表示防御。
攻方显示为形式①,守方显示为形式②,如果侦测不够则为形式③;如果多个算子堆叠,c、d是各算子之和,而m则是各算子的最大值;●算子左上角颜色标块:从绿到红表示所处水平的不同,红色当然是低靡的意思。
那是什么东西的水平呢?即所谓的soft factor,如士气、经验、补给等等,具体可以用切换,一般情况下我们看士气就行了(因为补给油料在单位窗口看得到);●点取一个算子,会出现好几种颜色框,都是什么意思呢?紫色代表了你选中的单位,除此以外中心会被标红;橙色是上级领导所在;黄色是你的同级;蓝色表示这些部队原来是由同一个单位拆分而得的。
vr工具的使用流程
VR工具的使用流程1. 准备工作在开始使用VR工具之前,您需要完成以下准备工作:•确保您的计算机或设备支持VR技术,并已安装相关的软件和驱动程序。
•确定您的设备配备了VR头盔、手柄或其他交互设备。
•确保您拥有足够的空间来进行VR体验,避免障碍物和危险物品。
2. 连接设备在开始使用VR工具之前,您需要将所有设备正确连接并设置好。
具体步骤如下:1.将VR头盔的显示器和传感器线缆连接到计算机的相应接口上。
2.确保头盔的连接线缆没有扭结或损坏。
3.连接VR手柄或其他交互设备到计算机或VR头盔上。
3. 软件设置在完成设备连接后,接下来需要进行软件设置,以确保VR工具能够正常工作。
1.启动VR软件,进入设备设置界面。
2.选择您的VR设备,并进行相应的设备校准和处理器调整。
3.根据您的喜好和个人需求,对VR设置进行自定义。
例如,设置用户身高、手柄灵敏度等。
4.建议您开启VR的安全功能,如VR边界提醒、瞳距调节等。
4. VR体验完成设备和软件设置后,您便可以开始享受VR体验了。
以下是一些常见的VR 体验方式:•游戏体验:通过VR游戏或应用程序,您可以在虚拟世界中体验各种游戏,如射击、冒险、竞速等。
•虚拟旅游:利用VR技术,您可以在家中体验到世界各地的旅游景点,如大堡礁、巴黎铁塔等。
•艺术创作:一些VR应用程序还可以让您进行油画、雕塑等艺术创作,让您更加沉浸于创造的乐趣中。
•其他应用:还有许多其他的VR应用,如教育、培训、医疗等领域,让您可以以更直观、沉浸的方式学习和体验。
5. VR使用注意事项在使用VR工具时,需要注意以下事项以确保您的安全和体验质量:•使用过程中保持身体平衡,避免摔倒或碰撞到物体。
•在使用VR设备时,间隔一定时间休息,避免长时间盯着屏幕导致眼疲劳。
•避免长时间使用VR设备,特别是对于未成年人和久坐办公人员,请根据个人情况合理安排使用时间。
•不要在使用VR设备时驾驶车辆或从事需要专注的活动,以免造成危险。
- 1、下载文档前请自行甄别文档内容的完整性,平台不提供额外的编辑、内容补充、找答案等附加服务。
- 2、"仅部分预览"的文档,不可在线预览部分如存在完整性等问题,可反馈申请退款(可完整预览的文档不适用该条件!)。
- 3、如文档侵犯您的权益,请联系客服反馈,我们会尽快为您处理(人工客服工作时间:9:00-18:30)。
一、游戏大厅的安装
1.安装游戏大厅
首先请将光盘放入光驱内,会出现安装向导界面。
如果该界面没有出现,请手动执
行光盘中“17Vee”文件夹下的来安装“17Vee体感游戏大厅”。
选择大厅安装位置后,按提示点击下一步即可完成安装(如下图所示)。
2.安装游戏大厅因为有些游戏需要新版本的DirectX驱动支持,在安装以上程序后,
会提示您是否安装DirectX。
如果PC中未安装,请选择“是”并根据提示安装DirectX。
如果您的PC已经安装过此程序,可以选择“否”。
3、完成安装后,点击桌面的“17Vee体感游戏大厅”快捷图标打开体感游
戏客户端程序,如下图所示:
二、体感设备连接
1、如果PC未连接体感接收器(手机中为蓝牙适配器),会出现如下提示
2、在插入体感接收器(手机中为蓝牙适配器)后客户端会自动搜寻体感控制器(☆体感接收器分为有线体感接收器和无线感应条+BT适配器两种版本。
)
若体感设备为体感手柄时,按提示按下背面的SYNC键
客户端搜索到体感手柄后会自动更新驱动如下图:
驱动更新完成后,按提示按下体感手柄上的A键即可完成连接
点击完成,即可开始体感游戏之旅。
若体感设备为手机时,启动相关菜单中的“蓝牙游戏”选项,客户端搜索到体感设备后会自动更新驱动如下图:
当连接成功后,手机会有震动。
单击完成退出连接画面。
当显示的体感控制器连接状态为绿色时,说明体感设备已经连接。
如显示为红色,请点击连接按钮重新进行连接。
3、您也可以手动点击主菜单下方的控制器按钮进入体感控制器管理界面
如下图会显示出已经配对过得设备
如想连接新的体感设备请点击添加按钮
按提示操作即可完成
4、在体感控制器管理界面显示的已经配对过的设备可直接点击连接按钮
若体感设备为体感手柄时,按提示按住体感手柄A键进行连接
无需再进行配对
若体感设备为手机时,启动相关菜单中的“蓝牙游戏”选项,进行连接
已经连接的设备显示如图
5、在点击移除按钮可将体感控制器移除
再次连接该设备需重新配对
二.如何启动游戏
1.打开体感游戏大厅,点击“体感社区”可直接访问17Vee游戏社区;其他的运动游戏、射击游戏、竞速游戏、格斗游戏、网游中心、其他游戏、经典游戏、Flash迷你小游戏、为不同的游戏类型板块,您可以点击进入相应版块启动游戏。
2.图中显示的灰色图标表示所对应的游戏已安装适配文件,但是尚未连接对应的游戏。
如果对应的游戏已安装在电脑上,只是做简单的适配,请点击搜索游戏;如未安装游戏,请点击下载推荐
(1)搜索游戏
您可通过下拉菜单选择游戏大概安装位置然后进行搜索,也可点击浏览选择游戏具体位置
选择好位置后点击搜索按钮,客户端会根据您选择的位置进行搜索,如果搜索到游戏显示如图,点击保存后即可进行游戏
(2)下载游戏
点击下载推荐,系统将自动链接资源开始下载,与您平时下载普通文件一样(3)点击彩色游戏图标启动游戏,进入游戏前请先看操作说明
点击开始即可进行游戏体验体感游戏带来的乐趣。
三、光盘频道
请确认已放入体感游戏光盘,并点击“开始”按钮,自动运行游戏光盘
四、镜像频道
点击“镜像游戏”图标,添加已存在您电脑中的ISO光盘镜像游戏。
添加游戏
点击添加选项后会出现下图对话框
点击浏览,查找至镜像文件所在的文件夹地址,选择镜像文件后点击打开,选择所需游戏图片自行命名,点击保存。
保存后,点击所保存的游戏图片即可开始运行游戏。
请定期查看客户端升级日志,使您的客户端总是保持最新版本。
