COMP5426_Parallel Program_2013 Semester 1_lecture02-2-13
AIX topas命令中的Memory项% Comp% Noncomp% Client如何理解和分析
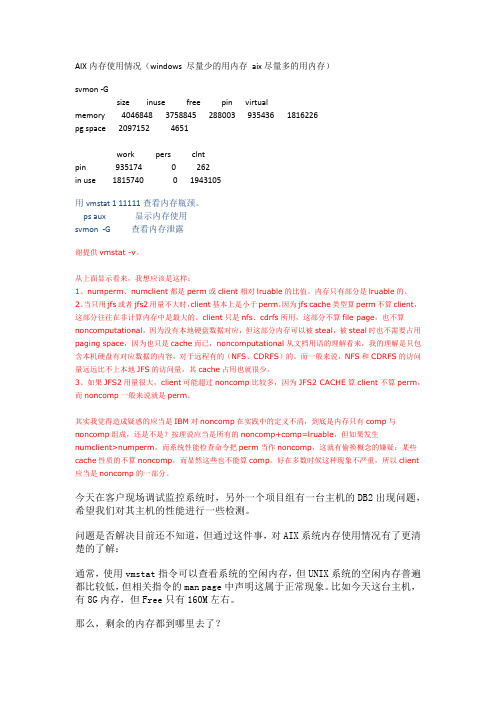
AIX内存使用情况(windows 尽量少的用内存aix尽量多的用内存)svmon -Gsize inuse free pin virtualmemory 4046848 3758845 288003 935436 1816226pg space 2097152 4651work pers clntpin 935174 0 262in use 1815740 0 1943105用vmstat 1 11111查看内存瓶颈。
ps aux 显示内存使用svmon -G 查看内存泄露谢提供vmstat -v。
从上面显示看来,我想应该是这样:1、numperm、numclient都是perm或client相对lruable的比值。
内存只有部分是lruable的。
2、当只用jfs或者jfs2用量不大时,client基本上是小于perm,因为jfs cache类型算perm不算client,这部分往往在非计算内存中是最大的。
client只是nfs、cdrfs所用,这部分不算file page,也不算noncomputational,因为没有本地硬盘数据对应,但这部分内存可以被steal,被steal时也不需要占用paging space,因为也只是cache而已,noncomputational从文档用语的理解看来,我的理解是只包含本机硬盘有对应数据的内容,对于远程有的(NFS、CDRFS)的。
而一般来说,NFS和CDRFS的访问量远远比不上本地JFS的访问量,其cache占用也就很少。
3、如果JFS2用量很大,client可能超过noncomp比较多,因为JFS2 CACHE算client不算perm,而noncomp一般来说就是perm。
其实我觉得造成疑惑的应当是IBM对noncomp在实践中的定义不清,到底是内存只有comp与noncomp组成,还是不是?按理说应当是所有的noncomp+comp=lruable,但如果发生numclient>numperm,而系统性能检查命令把perm当作noncomp,这就有偷换概念的嫌疑:某些cache性质的不算noncomp,而显然这些也不能算comp。
sentaurus2013安装各种问题汇总
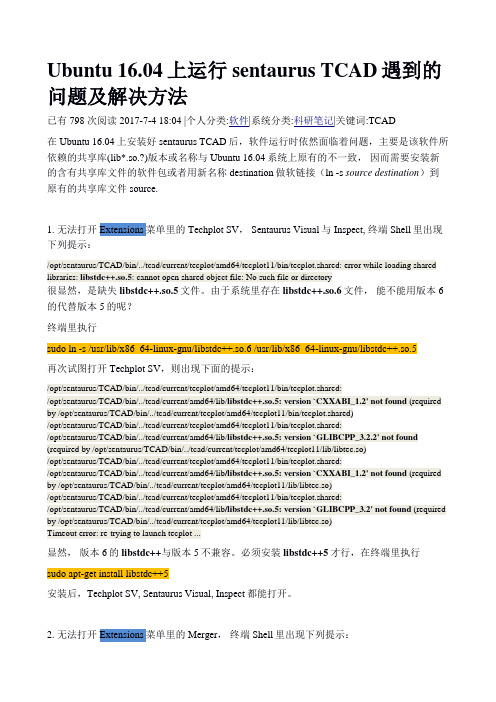
Ubuntu 16.04上运行sentaurus TCAD遇到的问题及解决方法已有 798 次阅读 2017-7-4 18:04 |个人分类:软件|系统分类:科研笔记|关键词:TCAD在Ubuntu 16.04上安装好sentaurus TCAD后,软件运行时依然面临着问题,主要是该软件所依赖的共享库(lib*.so.?)版本或名称与Ubuntu 16.04系统上原有的不一致,因而需要安装新的含有共享库文件的软件包或者用新名称destination做软链接(ln -s source destination)到原有的共享库文件source.1. 无法打开Extensions菜单里的Techplot SV, Sentaurus Visual与Inspect, 终端Shell里出现下列提示:/opt/sentaurus/TCAD/bin/../tcad/current/tecplot/amd64/tecplot11/bin/tecplot.shared: error while loading shared libraries: libstdc++.so.5: cannot open shared object file: No such file or directory很显然,是缺失libstdc++.so.5文件。
由于系统里存在libstdc++.so.6文件,能不能用版本6的代替版本5的呢?终端里执行sudo ln -s /usr/lib/x86_64-linux-gnu/libstdc++.so.6 /usr/lib/x86_64-linux-gnu/libstdc++.so.5再次试图打开Techplot SV,则出现下面的提示:/opt/sentaurus/TCAD/bin/../tcad/current/tecplot/amd64/tecplot11/bin/tecplot.shared:/opt/sentaurus/TCAD/bin/../tcad/current/amd64/lib/libstdc++.so.5: version `CXXABI_1.2' not found (required by /opt/sentaurus/TCAD/bin/../tcad/current/tecplot/amd64/tecplot11/bin/tecplot.shared)/opt/sentaurus/TCAD/bin/../tcad/current/tecplot/amd64/tecplot11/bin/tecplot.shared:/opt/sentaurus/TCAD/bin/../tcad/current/amd64/lib/libstdc++.so.5: version `GLIBCPP_3.2.2' not found (required by /opt/sentaurus/TCAD/bin/../tcad/current/tecplot/amd64/tecplot11/lib/libtec.so)/opt/sentaurus/TCAD/bin/../tcad/current/tecplot/amd64/tecplot11/bin/tecplot.shared:/opt/sentaurus/TCAD/bin/../tcad/current/amd64/lib/libstdc++.so.5: version `CXXABI_1.2' not found (required by /opt/sentaurus/TCAD/bin/../tcad/current/tecplot/amd64/tecplot11/lib/libtec.so)/opt/sentaurus/TCAD/bin/../tcad/current/tecplot/amd64/tecplot11/bin/tecplot.shared:/opt/sentaurus/TCAD/bin/../tcad/current/amd64/lib/libstdc++.so.5: version `GLIBCPP_3.2' not found (required by /opt/sentaurus/TCAD/bin/../tcad/current/tecplot/amd64/tecplot11/lib/libtec.so)Timeout error: re-trying to launch tecplot ...显然,版本6的libstdc++与版本5不兼容。
64位机-WIN7-VS2012-Intel Visual Fortran XE2013-SP1-MPICH2并行环境设置实现攻略
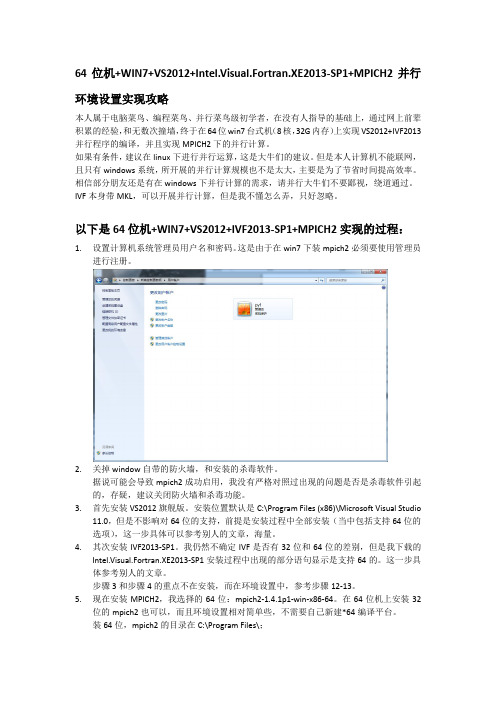
64位机+WIN7+VS2012+Intel.Visual.Fortran.XE2013-SP1+MPICH2并行环境设置实现攻略本人属于电脑菜鸟、编程菜鸟、并行菜鸟级初学者,在没有人指导的基础上,通过网上前辈积累的经验,和无数次撞墙,终于在64位win7台式机(8核,32G内存)上实现VS2012+IVF2013并行程序的编译,并且实现MPICH2下的并行计算。
如果有条件,建议在linux下进行并行运算,这是大牛们的建议。
但是本人计算机不能联网,且只有windows系统,所开展的并行计算规模也不是太大,主要是为了节省时间提高效率。
相信部分朋友还是有在windows下并行计算的需求,请并行大牛们不要鄙视,绕道通过。
IVF本身带MKL,可以开展并行计算,但是我不懂怎么弄,只好忽略。
以下是64位机+WIN7+VS2012+IVF2013-SP1+MPICH2实现的过程:1.设置计算机系统管理员用户名和密码。
这是由于在win7下装mpich2必须要使用管理员进行注册。
2.关掉window自带的防火墙,和安装的杀毒软件。
据说可能会导致mpich2成功启用,我没有严格对照过出现的问题是否是杀毒软件引起的,存疑,建议关闭防火墙和杀毒功能。
3.首先安装VS2012旗舰版。
安装位置默认是C:\Program Files (x86)\Microsoft Visual Studio11.0,但是不影响对64位的支持,前提是安装过程中全部安装(当中包括支持64位的选项),这一步具体可以参考别人的文章,海量。
4.其次安装IVF2013-SP1。
我仍然不确定IVF是否有32位和64位的差别,但是我下载的Intel.Visual.Fortran.XE2013-SP1安装过程中出现的部分语句显示是支持64的。
这一步具体参考别人的文章。
步骤3和步骤4的重点不在安装,而在环境设置中,参考步骤12-13。
5.现在安装MPICH2,我选择的64位:mpich2-1.4.1p1-win-x86-64。
MPCCI4.42+FLUENT16.0+ABAQUS6.13-1

MPCCI4.42+FLUENT16.0+ABAQUS6.13-1第⼀部分Fluent16.0+Vs2013各⾃按照⽹上的的教程安装好就⾏,相对容易需要注意的点:1,进⾏udf环境配置时,我因为C盘太⼩,把Vs2013安装在D盘,然后在“环境变量”的“⽤户变量”中设置“include”时,很长时间只是把VS2013中在D盘的含有include ⽂件的部分路径复制到了“Include”变量中的变量值中去,导致⼀直编译错误,解决⽅法:这种没有直接安装在C盘的,要全盘搜索含有Include⽂件的路径,然后把这些路径⼀股脑都复制粘贴进去,如:C:\Program Files (x86)\Windows Kits\8.1;D:\Program Files (x86)\Microsoft Visual Studio 12.0\VC\atlmfc;D:\Program Files (x86)\Microsoft Visual Studio 12.0\Common7\IDE\Extensions\Microsoft \Entity Framework Tools\Templates; D:\Program Files (x86)\Microsoft Visual Studio 12.0\VC;D:\Program Files (x86)\Microsoft Visual Studio 12.0\VC\UnitTest;C:\Program Files (x86)\Microsoft SDKs\Cpp Azure Mobile SDK for Visual Studio 2013\SDK;C:\Program Files (x86)\Microsoft SDKs\Cpp REST SDK for Visual Studio 2013\SDK;C:\Program Files (x86)\Microsoft SDKs\Windows\v7.1A;C:\Program Files (x86)\Microsoft SQL Server Compact Edition\v4.0;C:\Program Files (x86)\Windows Kits\8.0;如果不加C盘的路劲,就⼀直错,⼀直试。
Abaqus6.14+VS2013+IVF2013+帮助文档

Abaqus6.14+VS2013+IVF2013+帮助文档此为abaqus6.14安装子程序,安装帮助文档和安装主程序。
若不需要子程序,那就不需要安装一、二。
若不需要帮助文档,不需要安装三。
三者并无关联,但若都需要安装,安装顺序务必按照一二三四来!一、安装VS20131、cn_visual_studio_ultimate_2013_with_update_5_x86_dvd_6816649加载到虚拟光驱,安装并激活VS20132、点继续。
3、选择安装目录,勾选我同意按钮,下一步4、勾选1和3,点安装,安装完后点启动。
5、单击菜单栏的“帮助”菜单,在下拉子菜单中单击“注册产品”,弹出如下图所示的窗口,单击“更改我的产品许可证”,在弹出的对话框中输入破解Key即可。
二、安装IVFXE20131、打开w_fcompxe_novsshell_2013_sp1.1.1392、下一步;我同意,下一步;选择第三个,下一步3、选第二个,下一步4、找到Intel_Visual_Fortran_XE2013.lic ,下一步6、选NO,下一步7、选customize8、32位选第一个,64位选第二个;下一步9、下一步10、设置安装路径,下一步11、默认选第四个,下一步12、下一步13、安装三、安装ABAQUS帮助文档。
1、打开帮助文档中的setup.exe2、下一步3、下一步4、下一步5、默认选第一个,下一步6、下一步7、下一步8、选择安装目录,下一步,选yes,点安装,等待安装完成。
9、选done ,完成、四、安装abaqus主程序1、把ABAQUS_6.14-1_x64_Win_Linux.iso 载入虚拟光驱,运行2、选第一个3、next4、ok5、next6、next7、默认选第一个,next8、复制好hostname,等下要用,点next9.选第二个,next10、选择许可证的安装路径,然后next11、done12、先别next,打开License文件夹,用记事本打开ABAQUS.lic,用hostname替换红圈内,不要多空格13、把License文件夹内所有文件复制到*\SIMULIA\License内,并替换。
COMP5426_Parallel Program_2013 Semester 1_lecture07-12
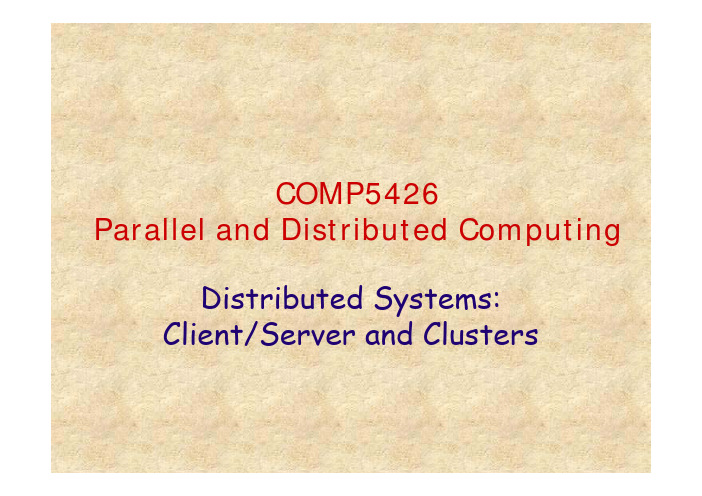
Generic Client/Server Architecture
Client/Server Applications
The key feature of a client/server architecture is the allocation of application-level tasks between clients and servers Hardware and the operating systems of client and server may differ These lower-level differences are irrelevant as long as a client and server share the same communications protocols and support the same applications
A client/server configuration differs from other types of distributed processing:
there is a heavy reliance on bringing user-friendly applications to the user on his or her own system there is an emphasis on centralizing corporate databases and many network management and utility functions there is a commitment, both by user organizations and vendors, to open and modular systems networking is fundamental to the operation
fortran90常见错误

1、运行fortran时出现forrt1:severe<59>:list-directed I/O syntax error,unit 1,file G:\1\1\meat.dat怎么办这是通道1 ,链接到文件meat.dat 的读写出错了。
这问题你得认真检查类似read( 1 , * ) 或write( 1 , * ) 这样的语句,错误原因挺多的。
比如二进制文件用了文本方式读取,比如变量列表与文件不匹配。
问:另外forrt1:severe<161>:program exception -array bounds exceeded是怎么回事?回答:数组越界,也是很常见的错误。
比如real a(100)如果你使用了a(101) 就会越界,因为a 数组只有100 个元素。
2、fortran运行提示error M6201:math-**,现将代码贴出,求高手帮忙看看,急求解答!我不能确定你的错误是怎么引起的。
可能咱们的编译器不同。
你的代码在我这里的问题是:虚参和实参精度不同。
在程序中,你定义了部分real*8,但是对应的虚参和返回值却定义为real。
比如主程序里的z1(双精度),传入函数g里面的x却定义为单精度。
主程序Do 死循环了。
z2_jiashe 和 z2_suan 每一次循环都没有发生改变,于是永远跳不出循环。
我给你的建议是:同一个程序,统一使用real*8 或real*4,尽量不要混用,除非你很自信能理清他们的关系。
检查Do 循环,尤其是z2_jiashe 和z2_suan,是否应该每次循环不同?fortran_排除错误(2012-04-20 23:22:44)安装好VISUAL FORTRAN后1、运行Developer studio即可开始编译FORTRAN程序2、选择File菜单中的New选项3、在弹出的对话框选择projects标签,其他标签不用管,projects格式选用Fortran console application;在project name里命名(最好英文名),点击“ok ”4、接下来画面中,选择“an empty project”,点击“finish”5、接下来画面点击“ok”6、再选择一次File菜单中的new7、对话框选用files标签,选择Fortran free format source file ,并在file里命名8、点击“ok”数Source Files 放源文件(.c、.cpp)程序的实现代码全放在这里Header Files 放头文件(.h)声明放在这里Resource Files 资源文件(.rc)放图标、图片、菜单、文字之类的,主要用来做界面的东东一般都放这里External Dependencies 除上三种以外的,程序编译时用到的文件全放这里fortran内部函数出错信息解释内部函数出错信息解释[sourcefile(line)]run-time error M62××MATH错误号函数级数学错误信息M6201 functionnames:DOMAIN error函数的自变量超出了约定的取值域,例如sqrt(-1)M6202 functionname:SING error无意义的变量。
IAR620编译错误

IAR620编译错误IAR 6.20编译错误清单1、①错误描述:Tool Internal Error:Internal Error: [CoreUtil/General]: Access violation (0xc0000005) at 007588A5 (reading from address 0x0)Internal Error: [CoreUtil/General]: Access violation (0xc0000005) at 007588A5 (reading from address 0x0)Error while running C/C++ Compiler②错误原因:High配置设置为Size,应该为Low2、①错误描述:Fatal Error[Pe1696]: cannot open source file "inc/hw_types.h" E:\StellarisWareM3_9D92\boards\dk-lm3s9b96\boot_demo2\boot_demo2.c 25②错误原因:C/C++ Complier(Assember)->Preprocessor->Additional include directories:$PROJ_DIR$\.$PROJ_DIR$\..$PROJ_DIR$\..\..\..3、①错误描述:Fatal Error[Pe1696]: cannot open source file "lwip/opt.h"E:\StellarisWareM3_9D92\utils\lwiplib.h 44②错误原因:C/C++ Complier-(Assember)>Preprocessor->Additional include directories:$PROJ_DIR$\..\..\..\third_party\lwip-1.3.2\apps$PROJ_DIR$\..\..\..\third_party\bget$PROJ_DIR$\..\..\..\third_party\lwip-1.3.2\ports\stellaris\include$PROJ_DIR$\..\..\..\third_party\lwip-1.3.2\src\include$PROJ_DIR$\..\..\..\third_party\lwip-1.3.2\src\include\ipv4$PROJ_DIR$\..\..\..\third_party\lwip-1.3.2\src\include\lwip$PROJ_DIR$\..\..\..\third_party4、①错误描述:Fatal Error[Pe035]: #error directive: Unrecognized COMPILER! E:\StellarisWareM3_9D92\boards\dk-lm3s9b96\drivers\set_pinout.h 59Error while running C/C++ Compiler②错误原因:C/C++ Complier-(Assember)>Preprocessor->Defined symbols: ewarm5、①错误描述:Error[Pe020]: identifier "ROM_pvAESTable" is undefined E:\StellarisWareM3_9D92\third_party\aes\aes.c 319②错误原因:6、①错误描述:Error[Li005]: no definition for "main" [referenced from cmain.o(rt7M_tl.a)]Error while running Linker②错误原因:定义函数:int main(void) { return (0); }7、①错误描述:Error[Li005]: no definition for "main" [referenced from cmain.o(rt7M_tl.a)]Error while running Linker②错误原因:如果是库是库函数,在:General Options->Output->Output file:选择:Library项4、①错误描述:Fatal Error[Pe1696]: cannot open source file "uip.h" E:\StellarisWareM3_9D92\third_party\uip-1.0\apps\dhcpc\dhcpc.c 37②错误原因:5、①错误描述:②错误原因:$PROJ_DIR$\..\..\..\third_party\lwip-1.3.2\apps$PROJ_DIR$\..\..\..\third_party\bget$PROJ_DIR$\..\..\..\third_party\lwip-1.3.2\ports\stellaris\include$PROJ_DIR$\..\..\..\third_party\lwip-1.3.2\src\include$PROJ_DIR$\..\..\..\third_party\lwip-1.3.2\src\include\ipv4$PROJ_DIR$\..\..\..\third_party$PROJ_DIR$\..\..\..\third_party\uip-1.0$PROJ_DIR$\..\..\..\third_party\uip-1.0\uip$PROJ_DIR$\..\..\..\third_party\uip-1.0\apps$PROJ_DIR$\..\..\..\third_party\\speex-1.2rc1\include$PROJ_DIR$\..\..\..\third_party\\speex-1.2rc1\include\speex$PROJ_DIR$\..\..\..\third_party\\speex-1.2rc1\stellaris6、①错误描述:Fatal Error[Pe035]: #error directive: You now need to define either FIXED_POINT or FLOATING_POINT E:\StellarisWareM3_9D92\third_party\speex-1.2rc1\libspeex\arch.h 65②错误原因:7、①错误描述:Fatal Error[Pe035]: #error directive: "Unrecognized/undefined driver for DISK0!"E:\StellarisWareM3_9D92\third_party\fatfs\port\dual-disk-driver.c 62Error while running C/C++ Compiler②错误原因:UART_BUFFEREDDISK0_DK_LM3S9B96DISK1_USB_MSCINCLUDE_BGET_STATS8、①错误描述:Error[Pe020]: identifier "ROM_pvAESTable" is undefined E:\SWM3_9D92(6.20)\third_party\aes\aes.c 359 Error while running C/C++ Compiler②错误原因:10、①错误描述:Fatal Error[Pe035]: #error directive: You now need to define either FIXED_POINT or FLOATING_POINT E:\SWM3_9D92(6.20)\third_party\speex-1.2rc1\libspeex\arch.h 65Error while running C/C++ Compiler②错误原因:11、①错误描述:Error[Li005]: no definition for "ROM_SysCtlClockSet" [referenced from E:\SWM3_9D92(6.20)\boards\dk-lm3s9b96\safertos_demo\Debug\Obj\safertos_demo.o] Error[Li005]: no definition for "ROM_FlashUserGet" [referenced from E:\SWM3_9D92(6.20)\boards\dk-lm3s9b96\safertos_demo\Debug\Obj\lwip_task.o] Error[Li005]: no definition for"ROM_IntPrioritySet" [referenced from E:\SWM3_9D92(6.20)\boards\dk-lm3s9b96\safertos_demo\Debug\Obj\lwip_task.o] Error[Li005]: no definition for "ROM_GPIOPinTypeGPIOOutput" [referenced from E:\SWM3_9D92(6.20)\boards\dk-lm3s9b96\safertos_demo\Debug\Obj\led_task.o]Error[Li005]: no definition for "ROM_GPIOPinWrite" [referenced from E:\SWM3_9D92(6.20)\boards\dk-lm3s9b96\safertos_demo\Debug\Obj\led_task.o]Error[Lp011]: section placement failed: unable to allocate space for sections/blocks with a total estimated minimum size of 0x11e54 bytes in<[0x20000000-0x2000ffff]> (total uncommitted space 0x10000).Error while running Linker②错误原因:12、①错误描述:Error[Lp011]: section placement failed: unable to allocate space for sections/blocks with a total estimated minimum size of 0x11e54 bytes in <[0x20000000-0x2000ffff]> (total uncommitted space 0x10000).Error while running Linker。
IBM Spectrum Protect Plus 简易安装配置手册说明书

IBM Spectrum Protect Plus 简易安装配置手册(包含免费试用版)目录SPP软件安装 (4)系统需求 (4)试用版软件下载 (4)SPP软件安装(VMWare vSphere方法) (6)导入虚拟机SPP (7)修改SPP虚拟机的资源 (14)启动SPP虚拟机 (16)得到SPP的IP地址 (17)用浏览器访问SPP虚拟机 (18)安装vCenter Server Appliance (21)把这个vCenter加入到SPP中 (46)SPP软件配置 (49)SPP进行备份的大概步骤如下: (49)创建/导入vSnap (49)进入vCenter,导入OVF (49)启动vSnap (54)在vSnap中修改root账号密码 (57)在vSanp中创建用户 (57)在SPP中登记vSnap (58)初始化vSnap (59)定义备份策略SLA (62)创建新的SLA (62)管理需要备份的虚机 (63)通过vCenter添加或删除需要备份的虚机 (63)选择需要备份的虚机 (63)可在SLA里面的Actions里面选择是否需要立即执行或终止备份策略 (64)查看备份状态 (64)数据恢复 (66)查找备份文件 (66)恢复单个文件 (67)恢复整个虚机 (67)SPP软件安装系统需求请确保你的系统满足下面需求以安装运行IBM Spectrum Protect Plus。
虚机环境要求:IBM Spectrum Protect Plus 是安装在虚机环境中的,请确认已经具备下面环境来安装配置IBM SPP。
•VMware 或者Microsoft Hyper-V template•vSphere5.5,6.0,6.5 或者Microsoft Hyper-V Server 2016硬件最低要求:•64位双核机器•32GB 内存浏览器要求:下面浏览器经过测试可以支持SPP.•Firefox 55.0.3•Google Chrome 60.0.3112•Microsoft Edge 40.15063试用版软件下载可以访问下面IBM官方网址下载30天试用,下载前系统会要求提供联系方式。
withanemphasison

MSU NSCL DAQ School—Notre Dame 2006
More to Read
• MSU NSCL DAQ:
– Everything: /daq/index.php
– Software project: /projects/nscldaq
– Tree parameter GUI for powerful manipulation of the definition of parameters, spectra, variables, and gates
– Xamine for easy display and operations of histograms – Tcl/Tk for user-tailorable control GUI and easy extension of
SpectroDaq Data Server
SpecTcl Xamine
Scalers
Scaler Configuration
offline analysis
MSU NSCL DAQ School—Notre Dame 2006
Disk
Hardware Setup
¾ Caen v785, 32-ch ADC ¾ Caen v775, 32-ch TDC ¾ Caen v830, 32-ch Scaler ¾ Trigger to be upgraded
• SpecTcl
– Home: /daq/spectcl/ – Project: /projects/nsclspectcl – Tree Parameters:
/daq/spectcl/treeparam/TreeParameter.html – Tcl/Tk: /
Win7 64位系统Abaqus软件及其子程序编译软件配置
Abaqus6.13+Vs2012+IntelFortran2013─Abaqus6.13中Fortran编译器的配置本人为了在WIN7 64位系统上装Abaqus及其子程序编译软件(Visual studio/Frotran),搞了一个星期,为了64位WIN7与Abaqus/Visual studio/Frotran三软件互相兼容的问题,将有的软件装了卸,卸了装,最终锁定Abaqus 6.13-1,IntelParallel Studio XE 2013 Fortran Compiler 与visual studio 2012。
想要在Abaqus里用子程序,必须安装Intel Visual Fortran,而安装Intel Visual Fortran前需要安装Microsoft Visual Studio,做好相关设置后通过Abaqus Verification测试子程序以及其他Abaqus功能是否能正常使用。
下面的介绍是引用我所搜集使用的资料,并对其进行了一些补充说明:一、ABAQUS 与Intel Fortran及Visual Studio的兼容性介绍:大家知道ABAUQS如果需要用User Subroutine必须有Intel Fortran,而Intel Fortran又必须在Visual Studio的环境下运行。
三者之间存在的两两兼容问题,必须引起注意。
Abaqus 6.9.3、Intel Fortran v10.1与Visual Studio2005在32位Windows XP系统上安装使用没有问题,但在64位WIN7系统上安装不行。
目前用的比较多的配搭:Abaqus 6.9+VS2005+Intel Fortran 9.1/10.0/10.1Abaqus 6.10/6.11/6.12+VS2008+Intel Fortran 10.1Abaqus 6.13-1+VS2012+Intel Fortran XE2013 -SP1(我所使用的)二、ABAQUS 、Intel Fortran、Visual Studio的安装顺序及安装方法:(1)、安装顺序:step1、安装visual studio(VS)(必须在Intel Fortran XE2013安装之前):一般而言安装VS没有任何难度,需要注意的一点是对于64位系统需要安装64位支持,而在有些版本中该模块是默认安装中没有选中的。
HP服务器的一些启动报错的原因和解决办法(中英双语)
304-Keyboard or System Unit Erroraudible beeps: nonepossible cause: keyboard, keyboard cable, mouse controller, or system board failure.action:1. be sure the keyboard and mouse are connected.only authorized technicians trained by hp should attempt to remove the system board. if you believe the system board requires replacement, contact hp technical support before proceeding.2. run insight diagnostics ("hp insight diagnostics" on page 101) and replace failed components as indicated.400 serieslist of messages:40x-parallel port x address assignment conflict404-parallel port address conflict detected40x-parallel port x address assignment conflictaudible beeps: 2 shortpossible cause: both external and internal ports are assigned to parallel port x.action: run the server setup utility and correct the configuration.404-parallel port address conflict detected......a hardware conflict in your system is keeping some system components from working correctly. if you have recently added new hardware remove it to see if it is the cause of the conflict. alternatively, use computer setup or your operating system to insure that no conflicts exist.audible beeps: 2 shortpossible cause: a hardware conflict in the system is preventing the parallel port from working correctly.action:1. if you have recently added new hardware, remove it to see if the hardware is the cause of the conflict.2.run the server setup utility to reassign resources for the parallel port and manually resolve the resource conflict.3. run insight diagnostics ("hp insight diagnostics" on page 101) and replace failed componentsas indicated.600 serieslist of messages:601-diskette controller error602-diskette boot record error605-diskette drive type error611-primary floppy port address assignment conflict612-secondary floppy port address assignment conflict601-diskette controller erroraudible beeps: nonepossible cause: diskette controller circuitry failure occurred.action:1. be sure the diskette drive cables are connected.2. replace the diskette drive, the cable, or both.3. run insight diagnostics ("hp insight diagnostics" on page 101) and replace failed components as indicated.602-diskette boot record erroraudible beeps: nonepossible cause: the boot sector on the boot disk is corrupt.action:1. remove the diskette from the diskette drive.2. replace the diskette in the drive.3. reformat the diskette.605-diskette drive type error.audible beeps: 2 shortpossible cause: mismatch in drive type occurred.action: run the server setup utility to set the diskette drive type correctly.611-primary floppy port address assignment conflictaudible beeps: 2 shortpossible cause: a hardware conflict in the system is preventing the diskette drive fromoperating properly.action:1. run the server setup utility to configure the diskette drive port address and manually resolve the conflict.2. run insight diagnostics ("hp insight diagnostics" on page 101) and replace failed components as indicated.612-secondary floppy port address assignment conflictaudible beeps: 2 shortpossible cause: a hardware conflict in the system is preventing the diskette drive from operating properly.action:1. run the server setup utility to configure the diskette drive port address and manually resolve the conflict.2. run insight diagnostics ("hp insight diagnostics" on page 101) and replace failed components as indicated.1100 serieslist of messages:1151-com port 1 address assignment conflict1151-com port 1 address assignment conflictaudible beeps: 2 shortpossible cause: both external and internal serial ports are assigned to com x.action: run the server setup utility and correct the configuration.1600 serieslist of messages:1609 - the server may have a failed system battery. some1610-temperature violation detected. - waiting 5 minutes for system to cool1611-cpu zone fan assembly failure detected. either1611-cpu zone fan assembly failure detected. single fan1611-fan failure detected1611-fan x failure detected (fan zone cpu)1611-fan x failure detected (fan zone i/o)1611-fan x not present (fan zonecpu)1611-fan x not present (fan zone i/o)1611- power supply zone fan assembly failure detected. either1611-power supply zone fan assembly failure detected. single fan1611-primary fan failure (fan zone system)1611-redundant fan failure (fan zone system)1612-primary power supply failure1615-power supply configuration error1615-power supply configuration error1615-power supply failure, power supply unplugged, or power supply fan failure in bay x 1616-power supply configuration failure1609 - the server may have a failed system battery. some......configuration settings may have been lost and restored to defaults. refer to server documentation for more information. if you have just replaced the system battery, disregard this message.audible beeps: nonepossible cause: real-time clock system battery has lost power. the system will lose its configuration every time ac power is removed (when the system is unplugged from ac power source) and this message displays again if a battery failure has occurred. however, the system will function and retain configuration settings if the system is connected to the ac power source.action: replace battery (or add external battery).1610-temperature violation detected. - waiting 5 minutes for system to coolaudible beeps: nonepossible cause: the ambient system temperature exceeded acceptable levels.action: lower the room temperature.1611-cpu zone fan assembly failure detected. either......the assembly is not installed or multiple fans have failed in the cpu zone.audible beeps: nonepossible cause: required fans are missing or not spinning.action:1. check the fans to be sure they are installed and working.2. be sure the assembly is properly connected and each fan is properly seated.3. if the problem persists, replace the failed fans.4. if a known working replacement fan is not spinning, replace the assembly.1611-cpu zone fan assembly failure detected. single fan......failure. assembly will provide adequate cooling.audible beeps: nonepossible cause: required fan not spinning.action: replace the failed fan to provide redundancy, if applicable.1611-fan failure detectedaudible beeps: 2 shortpossible cause: required fan not installed or spinning.action:1. check the fans to be sure they are working.2. be sure each fan cable is properly connected and each fan is properly seated.3. if the problem persists, replace the failed fans.1611-fan x failure detected (fan zone cpu)audible beeps: 2 shortpossible cause: required fan not installed or spinning.action:1. check the fans to be sure they are working.2. be sure each fan cable is properly connected, if applicable, and each fan is properly seated.3. if the problem persists, replace the failed fans.1611-fan x failure detected (fan zone i/o)audible beeps: 2 shortpossible cause: required fan not installed or spinning.action:1. check the fans to be sure they are working.2. be sure each fan cable is properly connected, if applicable, and each fan is properly seated.3. if the problem persists, replace the failed fans.1611-fan x not present (fan zonecpu)audible beeps: 2 shortpossible cause: required fan not installed or spinning.action:1. check the fans to be sure they are working.2. be sure each fan cable is properly connected, if applicable, and each fan is properly seated.3. if the problem persists, replace the failed fans.1611-fan x not present (fan zone i/o)audible beeps: 2 shortpossible cause: required fan not installed or spinning.action:1. check the fans to be sure they are working.2. be sure each fan cable is properly connected, if applicable, and each fan is properly seated.3. if the problem persists, replace the failed fans.1611- power supply zone fan assembly failure detected. either......the assembly is not installed or multiple fans have failed.audible beeps: nonepossible cause: required fans are missing or not spinning.action:1. check the fans to be sure they are installed and working.2. be sure the assembly is properly connected and each fan is properly seated.3. if the problem persists, replace the failed fans.4. if a known working replacement fan is not spinning, replace the assembly.1611-power supply zone fan assembly failure detected. single fan......failure. assembly will provide adequate cooling.audible beeps: nonepossible cause: required fan not spinning.action: replace the failed fan to provide redundancy, if applicable.1611-primary fan failure (fan zone system)audible beeps: nonepossible cause: a required fan is not spinning.action: replace the failed fan.1611-redundant fan failure (fan zone system)audible beeps: nonepossible cause: a redundant fan is not spinning.action: replace the failed fan.1612-primary power supply failureaudible beeps: 2 shortpossible cause: primary power supply has failed.action: replace power supply.1615-power supply configuration erroraudible beeps: nonepossible cause: the server configuration requires an additional power supply. a moving bar is displayed, indicating that the system is waiting for another power supply to be installed.action: install the additional power supply.1615-power supply configuration error- a working power supply must be installed in bay 1 for proper cooling.- system halted!audible beeps: nonepossible cause: the server configuration requires an additional power supply. a moving bar is displayed, indicating that the system is waiting for another power supply to be installed.action: install the additional power supply.1615-power supply failure, power supply unplugged, or power supply fan failure in bay x audible beeps: nonepossible cause: the power supply has failed, or it is installed but not connected to the system board or ac power source.action: reseat the power supply firmly and check the power cable or replace power supply.1616-power supply configuration failure-a working power supply must be installed in bay 1 for proper cooling.-system halted!audible beeps: nonepossible cause: power supply is improperly configured.action: run the server setup utility and correct the configuration.304键盘或系统组合误差听见蜂鸣声:无可能的原因:键盘,键盘线,鼠标控制器或系统板故障。
Intel Parallel Studio XE 2013 for Windows 安装指南和发行
Intel® Parallel Studio XE 2013for Windows*Installation Guide and Release Notes Document number: 323803-003US25 June 2013Table of Contents1 Introduction (1)1.1 What’s New (1)1.1.1 Changes from Intel Parallel Studio XE 2011 (2)1.2 Product Contents (2)1.3 System Requirements (2)1.4 Documentation (4)1.5 Technical Support (4)2 Installation (4)2.1 Pre-Installation Steps (4)2.1.1 Configure Visual Studio for 64-bit Applications (4)2.2 Installation (4)2.2.1 Using a License Server (5)3 Disclaimers, Notices and Legal Information (5)1 IntroductionThis document describes system requirements and how to install Intel® Parallel Studio XE 2013. Additional release notes for each component, with details of changes and additional technical information, can be found after installation, in the respective components’ Documentation folder.First-time users should view the Getting Started page that is displayed at the end of installation.1.1 What’s NewThis section highlights important changes from the previous product version and changes in product updates. For information on what is new in each component, please read the individual component release notes.Update 4 – June 2013∙Component products updated to current versionsUpdate 3 – March 2013∙Component products updated to current versionsUpdate 2 – February 2013∙Component products updated to current versionsUpdate 1 – October 2012∙Component products updated to current versions1.1.1 Changes from Intel Parallel Studio XE 2011∙Intel® Advisor XE is a new component included in this product.∙Other components updated to current versions∙Support added for Microsoft Windows 8* and Microsoft Windows Server 2012*∙Microsoft Visual Studio 2012* is now supported∙Microsoft Visual Studio 2005* is no longer supported∙Microsoft Windows Vista* and Microsoft Windows Server 2003* are no longer supported ∙Microsoft Windows XP* is deprecated – support will be removed in a future release1.2 Product ContentsIntel® Parallel Studio XE 2013 includes the following components:∙Intel® C++ Composer XE 2013 Update 5 - includes Intel® Integrated Performance Primitives (Intel® IPP), Intel® Threading Building Blocks (Intel® TBB) and Intel® MathKernel Library (Intel® MKL)∙Intel® Visual Fortran Composer XE 2013 Update 5 - includes Intel® Math Kernel Library (Intel® MKL)∙Intel® Advisor XE 2013 Update 3∙Intel® Inspector XE 2013 Update 6∙Intel® VTune™ Amplifier XE 2013 Update 9∙Sample programs∙On-disk documentation1.3 System RequirementsFor an explanation of architecture names, see http://intel.ly/mXIljK∙ A PC based on an IA-32 or Intel® 64 architecture processor supporting the Intel® Streaming SIMD Extensions 2 (Intel® SSE2) instructions (Intel® Pentium® 4 processor or later, or compatible non-Intel processor)o Incompatible or proprietary instructions in non-Intel processors may cause the analysis capabilities of this product to function incorrectly. Any attempt to analyzecode not supported by Intel® processors may lead to failures in this product.o For the best experience, a multi-core or multi-processor system is recommended ∙2GB RAM∙8GB free disk space for all product features and architectures∙Microsoft Windows XP*, Microsoft Windows 7*, Microsoft Windows 8*, Microsoft Windows Server 2012* or Microsoft Windows Server 2008*; 32-bit or “x64” editions -embedded editions not supportedo Support of Microsoft Windows XP is deprecated – a future major release of Intel® Parallel Studio XE will not support Windows XP∙One or more of:o Microsoft Visual Studio 2012* Professional Edition (or higher edition) with C++ component installedo Microsoft Visual Studio 2010* Professional Edition (or higher edition) with C++ and “x64 Compiler and Tools” components installed [1]o Microsoft Visual Studio 2008* Standard Edition (or higher edition) SP1 with C++ and “x64 Compiler and Tools” components installed [1]o For Intel® Visual Fortran, Intel® Advisor XE, Intel® Inspector XE and Intel® VTune™ Amplifier XE use only, Microsoft Visual Studio 2010* Shell and Librariesfrom the Intel® Visual Fortran Composer XE installationo For Intel® Visual Fortran, Intel® Advisor XE, Intel® Inspector XE and Intel® VTune™ Amplifier XE use only, Microsoft Visual Studio 2008* Shell and Librariesfrom an earlier version of Intel® Visual Fortran Composer XE or Intel® VisualFortran Compiler Professional EditionNotes:1. Microsoft Visual Studio 2008 Standard Edition installs the “x64 Compiler and Tools”component by default –the Professional and higher editions require a “Custom” install to select this. Microsoft Visual Studio 2010 and Visual Studio 2012 include this component by default.2. The default for the Intel® compilers is to build IA-32 architecture applications that requirea processor supporting the Intel® SSE2 instructions - for example, the Intel® Pentium®4 processor. A compiler option is available to generate code that will run on any IA-32architecture processor. However, if your application uses Intel® Math Kernel Library,Intel® Integrated Performance Primitives or Intel® Threading Building Blocks, executing the application will require a processor supporting the Intel® SSE2 instructions.3. Applications built with Intel® Compilers can be run on the same Windows versions asspecified above for development. Applications may also run on non-embedded 32-bitversions of Microsoft Windows earlier than Windows XP, though Intel does not test these for compatibility. Your application may depend on a Win32 API routine not present inolder versions of Windows. You are responsible for testing application compatibility. You may need to copy certain run-time DLLs onto the target system to run your application.1.4 DocumentationProduct documentation can be accessed through the Help menu in Microsoft Visual Studio. It can also be found, along with “Getting Started” information, in the Windows “Start” menu und er Intel Parallel Studio XE 2013. Please note that if you view the documentation in Microsoft Internet Explorer*, the browser may display a security warning when you click on links to open a documentation set. If you see this warning, you should click the option to proceed.1.5 Technical SupportIf you did not register your compiler during installation, please do so at the Intel® Software Development Products Registration Center. Registration entitles you to free technical support, product updates and upgrades for the duration of the support term.For information about how to find Technical Support, Product Updates, User Forums, FAQs, tips and tricks, and other support information, please visit/software/products/supportNote: If your distributor provides technical support for this product, please contact them for support rather than Intel.2 Installation2.1 Pre-Installation Steps2.1.1 Configure Visual Studio for 64-bit ApplicationsIf you will be developing 64-bit applications you may need to change the configuration of Visual Studio to add 64-bit support.If you are using Visual Studio 2008 Standard Edition, Visual Studio 2012 or Visual Studio 2010, no configuration is needed to build 64-bit applications. For other editions:1. From Control Panel > Add or Remove Programs, sele ct “Microsoft Visual Studio 2008 >Change/Remove. The Visual Studio Maintenance Mode window will appear. Click Next.2. Click Add or Remove Features3. Under “Select features to install”, expand Language Tools > Visual C++4. If the box “X64 Compiler and Tools” is not checked, check it, then click Update. If thebox is already checked, click Cancel.2.2 InstallationThe installation of the product requires a valid license file or serial number. If you are evaluating the product, you can also choose the “Evaluate this product (no serial number required)” option during installation.If you received your product on DVD, insert the first product DVD in your computer’s DVD drive; the installation should start automatically. If it does not, open the top-level folder of the DVD drive in Windows Explorer and double-click on setup.exe.If you received your product as a downloadable file, double-click on the executable file (.EXE) to begin installation. Note that there are several different downloadable files available, each providing different combinations of components. Please read the download web page carefully to determine which file is appropriate for you.You do not need to uninstall previous versions or updates before installing a newer version –the new version will coexist with the older versions. If you want to remove older versions, you may do so before or after installing the newer one.2.2.1 Using a License ServerIf you have purchased a “floating” license, see http://intel.ly/oPEdEe for information on how to install using a license file or license server. This article also provides a source for the Intel® License Manager for FLEXlm* product that can be installed on any of a wide variety of systems.3 Disclaimers, Notices and Legal InformationINFORMATION IN THIS DOCUMENT IS PROVIDED IN CONNECTION WITH INTEL(R) PRODUCTS. NO LICENSE, EXPRESS OR IMPLIED, BY ESTOPPEL OR OTHERWISE, TO ANY INTELLECTUAL PROPERTY RIGHTS IS GRANTED BY THIS DOCUMENT. EXCEPT AS PROVIDED IN INTEL'S TERMS AND CONDITIONS OF SALE FOR SUCH PRODUCTS, INTEL ASSUMES NO LIABILITY WHATSOEVER, AND INTEL DISCLAIMS ANY EXPRESS OR IMPLIED WARRANTY, RELATING TO SALE AND/OR USE OF INTEL PRODUCTS INCLUDING LIABILITY OR WARRANTIES RELATING TO FITNESS FOR A PARTICULAR PURPOSE, MERCHANTABILITY, OR INFRINGEMENT OF ANY PATENT, COPYRIGHT OR OTHER INTELLECTUAL PROPERTY RIGHT.Intel may make changes to specifications and product descriptions at any time, without notice. Designers must not rely on the absence or characteristics of any features or instructions marked "reserved" or "undefined." Intel reserves these for future definition and shall have no responsibility whatsoever for conflicts or incompatibilities arising from future changes to them.The information here is subject to change without notice. Do not finalize a design with this information.The products described in this document may contain design defects or errors known as errata which may cause the product to deviate from published specifications. Current characterized errata are available on request.Contact your local Intel sales office or your distributor to obtain the latest specifications and before placing your product order.Copies of documents which have an order number and are referenced in this document, or other Intel literature, may be obtained by calling 1-800-548-4725, or go to:/design/literature.htmCeleron, Centrino, Cilk, Intel, Intel logo, Intel386, Intel486, Intel Atom, Intel Core, Itanium, MMX, Pentium, VTune, and Xeon are trademarks of Intel Corporation in the U.S. and other countries. * Other names and brands may be claimed as the property of others.Copyright © 2013 Intel Corporation. All Rights Reserved.。
Siesta-TranSiesta-Smeagol并行安装笔记

Siesta-TranSiesta-Smeagol安装笔记公开安装笔记的目的有二:①使新手少走弯路②望高手不吝赐教!致谢:非常感谢北京大学沈鑫,马国辉,山东大学侯栋,以及张少龙老师在我安装学习过程中提供的无私帮助,也由衷的感谢导师王传奎教授的大力支持,感谢北大侯士敏教授提供的学习机会!说明:由于本人初学且水平有限,难免出现笨拙之笔,希望高手不吝赐教!(均以非root用户为例)一、安装mkl1.将l_mkl_p_10.0.2.018.tgz和*.lic文件拷贝到一个临时的目录里面(如tem)2.解压文件:$tar -zxvf l_mkl_p_10.0.2.018.tgz3.进入解压后的目录:$cd l_mkl_p_10.0.2.0184.启动安装:$./install.sh 依次选择选项:3(用当前的用户安装)——>1(安装)——>2(提供.lic文件的绝对路径)——>提供你的.lic文件的绝对路径(例如:/home/zgp/tem/l_mkl_p_10.0.2.018.lic) ——>2(不用RPM数据)——> <Enter> ——> <Enter> ——> 一直空格accept ——> <Enter>(确认默认安装路径或者键入自己的安装路径)——><Enter>——><Enter>(完成安装)5.环境设置:vi ~/.bashrc (打开文件.bashrc,按i进入编辑状态)添加source /home/zgp/intel/mkl/10.0.2.018/tools/environment/mklvarsem64t.sh(如果用的不是bash而是用的csh,就用mklvarsem64t.csh)关闭之后 source ~/.bashrc(使设置起作用,以后再新进入shell之后mkl可以直接使用)注意:卸载mkl,必须到安装目录下找到uninstall.sh$./uninstall.sh二、安装Fortran编辑器PGI安装:1.将pgilinux86-64-707.tar.gz文件拷贝到一个临时的目录里面(如tem)2. 解压文件:$tar -zxvf pgilinux86-64-707.tar.gz3. 开始安装$./install 安装选项:一直空格——> accept ——>1 ——>y ——>一直空格——> accept ——>/home/zgp/software/pgi——>提供信息——>n4.环境设置:vi ~/.bashrc (打开文件.bashrc,按i进入编辑状态)添加:PGI=/home/test/software/pgiexport PGIMANPATH=$MANPATH:$PGI/linux86-64/7.0-7/manexport MANPATHLM_LICENSE_FILE=$PGI/license.datexport LM_LICENSE_FILEPATH=$PGI/linux86-64/7.0-7/bin:$PATHexport PATH关闭之后 source ~/.bashrc(使设置起作用,以后再新进入shell之后pgi可以直接使用并且成为默认的编译器)5.测试PGI是否可用:$pgf90$pgf77注意:PGI卸载,可以直接删除安装文件ifort安装:1. 将l_fortran-compiler_p_10.1.012.tar.gz和*.lic文件拷贝到一个临时的目录里面(如tem)2. 解压文件:$tar -zxvf l_fortran-compiler_p_10.1.012.tar.gz3. 进入解压后的目录:$cd l_fc_p_10.1.0124. 启动安装:$./install.sh依次选择选项:3(用当前的用户安装)——>1(安装)——>2(提供.lic文件的绝对路径)——>1提供你的.lic文件的绝对路径(例如:/home/zgp/tem/ l_fortran-compiler_p_10.1.012.lic) ——>1(典型安装)——><Enter> 一直空格accept ——> <Enter>(确认默认安装路径或者键入自己的安装路径)——><Enter>(确认默认安装路径或者键入自己的安装路径)——><Enter>(确认默认安装路径或者键入自己的安装路径)——><Enter>——><Enter>(确认默认安装路径或者键入自己的安装路径)——><Enter>——><Enter> (完成安装)5.环境设置:vi ~/.bashrc (打开文件.bashrc,按i进入编辑状态)添加source /home/zgp/intel/fce/10.1.012/bin/ifortvars.sh(如果用的不是bash而是用的csh,就用ifortvars.csh)关闭之后 source ~/.bashrc(使设置起作用,以后再新进入shell之后ifort可以直接使用并且成为默认的编译器)6.测试$ifort出现ifort: command line error: no files specified; for help type "ifort -help"说明ifort 安装成功注意:卸载ifort,必须到安装目录下找到uninstall.sh$./uninstall.sh三、安装mpiMPICH的安装:(各种版本的下载地址/research/projects/mpich2/)1.将mpich-1.2.7.tar.gz文件拷贝到一个临时的目录里面(如tem)2.解压文件:$tar -zxvf mpich-1.2.7.tar.gz3.进入解压后的目录:$cd mpich-1.2.74. $./configure -prefix=/home/zgp/software/mpich-1.2.7 -fc="pgf77-Mx,119,0x200000"\ -f90="pgf90 -Mx,119,0x200000"\ -without-romio --without-mpe -opt=-O -rsh=ssh(若要使用的是ifort编译则设置成$./configure-prefix=/home/zgp/software/mpich-1.2.7 -fc=ifort -f90=ifort –f77=ifort -rsh=ssh)5. $make6. $make install7环境配置:vi ~/.bashrc (打开文件.bashrc,按i进入编辑状态)添加export PATH=/home/zgp/software/mpich-1.2.7/bin:$PATH关闭之后 source ~/.bashrc(使设置起作用,以后再新进入shell之后直接可以用mpirun)8.测试:$cd examples$make$mpirun –np 4 cpi$The authenticity of host 'localhost (127.0.0.1)' can't be established.RSA key fingerprint is c0:48:84:0c:31:93:29:9a:d6:f6:07:08:7b:cc:33:db.Are you sure you want to continue connecting (yes/no)?$yes$Warning: Permanently added 'localhost' (RSA) to the list of known hosts.$zgp@localhost's password:这时连续输入3次密码出现$Process 0 on localhostProcess 2 on localhostProcess 3 on localhostProcess 1 on localhostpi is approximately 3.1416009869231249, Error is 0.0000083333333318wall clock time = 0.003906表明安装成功。
深入理解C++SFINAE(匹配失败不是错误)
深入理解C++SFINAE(匹配失败不是错误)这个概念我也是最近才听说到的,来源是《Extended STL, Volume 1: Collections and Iterators》,在其第13章。
SFINAE,即Substitution Failure Is Not an Error!可以理解为匹配失败不是错误,更严格的说应该是参数匹配失败不是一个编译时错误。
光看这些解释我想除了少部分C++专家之外基本上都会迷糊,当然我不是专家,所以我迷糊了。
本着不知道就Google的态度,我Google了,不过得到的资料并不多,在维基百科上面找到点资料但是看过之后并不是很明白。
当然,不明白不等于不去探索了,这有违我的行为准则,后来我在其它的书上找到了类似的东西,现在跟大家分享。
看这样的一段代码:#include <iostream>using namespace std;void print( int iNum ) {cout<<"int print( int )"<< endl;}template < typename _Ty >void print( _Ty tt ){typename _Ty::value_type vt_someval;cout<<"template < typename _Ty >"<< endl;}int main(){short siNum = 10;print( siNum );-return 0;}这段代码能否通过编译呢?实践证明,这段代码无法通过编译,比如说我在Visual Studio 2008 SP1下面的错误:1>e:\documents\visual studio 2008\projects\baidu\main.cpp(13) : error C2825: '_Ty': 当后面跟“::”时必须为类或命名空间1> e:\documents\visual studio 2008\projects\baidu\main.cpp(20): 参见对正在编译的函数模板实例化“void print<short>(_Ty)”的引用1> with1> [1> _Ty=short1> ]1>e:\documents\visual studio 2008\projects\baidu\main.cpp(13) : error C2039: “value_type”: 不是“`global namespace'”的成员1>e:\documents\visual studio 2008\projects\baidu\main.cpp(13) : error C2146: 语法错误 : 缺少“;”(在标识符“vt_someval”的前面)1>e:\documents\visual studio 2008\projects\baidu\main.cpp(13) : error C2065: “vt_someval”: 未声明的标识符如何解决这个编译错误呢?有很多方法,比如说我们可以特化short类型:template <>void print<short>( short st ){cout<<"short st"<<endl;}实践证明,这可以解决这个错误,但是我们这里讨论的是SFINAE。
最新MA5680T-V800R011C00SPC102-升级指导书-01(CLI-国内定制)
M A5680T-V800R011C00S P C102 -升级指导书-01(C L I-国内定制) ------------------------------------------作者xxxx……………………………………………………………最新资料推荐…………………………………………………SmartAX MA5680TV800R011C00SPC102升级指导书文档版本01发布日期2013—02-28版权所有©华为技术有限公司2013。
保留一切权利。
非经本公司书面许可,任何单位和个人不得擅自摘抄、复制本文档内容的部分或全部,并不得以任何形式传播。
商标声明和其他华为商标均为华为技术有限公司的商标。
本文档提及的其他所有商标或注册商标,由各自的所有人拥有.注意您购买的产品、服务或特性等应受华为公司商业合同和条款的约束,本文档中描述的全部或部分产品、服务或特性可能不在您的购买或使用范围之内。
除非合同另有约定,华为公司对本文档内容不做任何明示或默示的声明或保证.由于产品版本升级或其他原因,本文档内容会不定期进行更新。
除非另有约定,本文档仅作为使用指导,本文档中的所有陈述、信息和建议不构成任何明示或暗示的担保。
华为技术有限公司地址:深圳市龙岗区坂田华为总部办公楼邮编:518129网址:http://www.huawei。
com客户服务邮support@huawei.com箱:客户服务电4008302118话:前言内容介绍本升级指导书适用于主控板类型为SCUN/SCUL的MA5680T系列设备,包括MA5680T/MA5683T.文档中以配置SCUN主控板的MA5680T为例介绍升级到MA5600V800R011C00SPC102的升级过程。
如果不同主控板类型之间或不同设备类型之间有差异,会在文档中说明。
在对设备升级前,请您仔细阅读升级目标版本的版本说明书和本升级指导书.●请确保执行升级操作的工程师已经参加过升级相关培训.●在升级操作过程中如果遇到未知问题,请停止操作并咨询技术支持人员。
64位MPICH2+64位Win7+VS2013并行计算环境的搭建
64位MPICH2+Win7+VS2013并行计算环境的搭建一、软硬件条件1.硬件:四核心CPU,4G内存,320G硬盘,台式机一台;2.软件环境:64位Windows7企业版,Visual Studio2013(以下简称VS2013),64位的mpich2-1.4.1p1-win-x86-64.msi。
二、软件安装1.VS2013的安装;2.MPICH2的安装(64位版):1)使用Administrator登陆,安装MPICH2对Win7系统,由于系统用户权限比较复杂,一定要用Administrator 用户进行登录才可以安装MPICH2。
用其它用户登录,即便是属于Administrators管理组的用户,安装后MPICH2所需要的smpd.exe进程都无法启动。
所以,若当前登录用户不是Administrator,请先注销后用Administrator用户登录来安装MPICH2。
安装过程中若提示有进程要通过防火墙,点允许即可,安装以默认选项及路径安装即可,一共就十几兆,也不大,不需要更改路径。
安装结束后,可注销Administrator用户,再以常用用户登录系统。
Win7下使用Administrator用户登录的方法是:计算机->管理->本地用户和组->用户->Administrator->属性,去掉帐户已禁用前面的勾。
切换用户,就可使用Administrator登陆了。
图表 1 使用Administrator登陆安装完成后,可以通过查看任务管理器里面是否有smpd.exe进程来看安装是否成功。
若有,安装成功;否则,安装不成功。
2)创建MPICH2登录用户右击桌面上的计算机,并选管理,在计算机管理窗口左边选“本地用户和组->用户”,然后在右边空白处右击选新建用户;在新建用户窗口中新建mpich2用户并设置密码,取消其中的“用户下次登录必须修改密码”,选中“用户不能更改密码”和“密码永不过期”,如图2所示。
mpirun each processor is running a duplicate job

mpirun each processor is running a
duplicate job
这个错误提示表明在使用 `mpirun` 运行 MPI 程序时,每个处理器都在运行相同的任务,而不是分配给不同的任务。
这种情况可能发生的原因有以下几种:
1. 你可能在使用 `mpirun` 命令时没有正确指定任务的数量或分配任务给不同的处理器。
请确保你使用正确的参数来指定要运行的任务数量,并将任务分配给不同的处理器。
2. 你的 MPI 程序可能没有正确地实现任务分配。
请检查你的程序代码,确保在初始化阶段正确地分配任务给不同的处理器。
3. 你的 MPI 实现可能存在问题。
尝试使用不同的 MPI 实现(如 OpenMPI、MPICH 等),看看问题是否仍然存在。
4. 你的硬件环境可能存在问题。
检查你的计算机是否支持 MPI 并行计算,并且确保所有的处理器都正常工作。
为了解决这个问题,你可以尝试以下步骤:
1. 检查你的 `mpirun` 命令参数,确保正确指定了任务数量和处理器分配。
2. 检查你的程序代码,确保在初始化阶段正确地分配任务给不同的处理器。
3. 尝试使用不同的 MPI 实现。
4. 检查你的硬件环境。
如果你仍然遇到问题,请提供更多的上下文和错误信息,以便更深入地了解问题所在并给出更具体的解决方案。
COMP5426_Parallel Program_2013 Semester 1_lecture05-1-12
7
Creating Threads
Initially, only a single, default thread. All other threads must be explicitly created by the programmer. routine: pthread_create(thread,attr,start_routine,arg)
12
Example
int main(int argc, char *argv[]) { pthread_t threads[NUM_THREADS]; int rc, t, tids[NUM_THREADS]; for(t=0;t<NUM_THREADS;t++){ printf("In main: creating thread %d\n", t); tids[t] = t; rc = pthread_create(&threads[t], NULL, PrintHello, (void *) &tids[t]); if (rc){ printf("ERROR; return code from pthread_create() is %d\n", rc); exit(-1); } } } pthread_exit(NULL);
thread: unique identifier for the new thread (pthread_t) attr: attribute object used to set thread attributes. (pthread_attr) You can specify a thread attributes object, or NULL for the default values. start_routine: C routine that the thread will execute. arg: A single argument that may be passed to start_routine. It must be passed by reference. NULL may be used if no argument is to be passed.
Compaq Visual Fortran 6.6 并行编程环境的配置
Compaq Visual Fortran 6.6 并行编程环境的配置Windows平台并行编程环境的配置所用的软件:mpich2-1.0.5-win32-ia32.msiCompaq Visual Fortran 6.61、如果本机上没有安装过Microsoft .NET .Framework,安装1.0.5这个版本的mpich2时,那么会提示你安装,我装的是2.0版本dotnetfx.exe,2.0版本以上的都行,然后把mpich2-1.0.5装上。
2、mpich2安装成功后,为了使用命令行方式执行程序的方便,将mpi路径C:\ProgramFiles\MPICH2\bin添加到环境变量path中,这样就可以在任何地方使用mpiexec了。
3、CVF安装没什么,就是序列号老记不住,再写一遍,33206-050-0010743-00007。
然后将mpich2的include和lib路径添加到CVF的搜索路径,在Tools=>Options=>Directories的Include files和Library files中。
4、解决头文件问题。
在fortran77的固定格式程序中,要加入一行include 'mpif.h',头文件mpif.h中定义了MPI的一些常量。
90程序就有点麻烦了,因为在fortran90程序中,习惯使用module,书上也说在90程序中要用use mpi来替代include'mpif.h',可是mpich2-1.0.5中的lib和include文件夹里都没有那个mpi.mod,其他的mpich版本好像也没有,至少mpich.nt.1.2.5.exe没有。
解决办法:1)、在90程序中也使用include 'mpif.h',而且要把mpif.h中以C 开头的注释前加上!,还有三行以CDEC$开头,也要用!来注释,不然出错。
- 1、下载文档前请自行甄别文档内容的完整性,平台不提供额外的编辑、内容补充、找答案等附加服务。
- 2、"仅部分预览"的文档,不可在线预览部分如存在完整性等问题,可反馈申请退款(可完整预览的文档不适用该条件!)。
- 3、如文档侵犯您的权益,请联系客服反馈,我们会尽快为您处理(人工客服工作时间:9:00-18:30)。
Interconnection Networks
6
Interconnection Networks
Processors talk to the network via a network interface. The network interface may hang off the I/O bus or the memory bus. In a physical sense, this distinguishes a cluster from a tightly coupled multicomputer. The relative speeds of the I/O and memory buses impact the performance of the network.
9
Static Network Topologies: Star Connected
Every node is connected only to a common node at the center. Distance between any pair of nodes is O(1). However, the central node becomes a bottleneck.
15
Static Network Topologies: Tree-Based Networks
16
Static Network Topologies: Tree-Based Networks
The distance between any two nodes is no more than 2logp. Links higher up the tree potentially carry more traffic than those at the lower levels. For this reason, a variant called a fat-tree, fattens the links as we go up the tree. Trees can be laid out in 2D with no wire crossings. This is an attractive property of trees.
17
Static Network Topologies: Fat Trees
18
Dynamic Network Topologies: Buses
All processors access a common bus for exchanging data. The distance between any two nodes is O(1) in a bus. The bus also provides a convenient broadcast media. However, the bandwidth of the shared bus is a major bottleneck. Typical bus based machines are limited to dozens of nodes.
23
Dynamic Network Topologies: Multistage
24
Dynamic Network Topologies: Omega Network
19
Dynamic Network Topologies: Buses
20
Dynamic Network Topologies: Crossbar
21
Dynamic Network Topologies: Crossbar
The cost of a crossbar of p processors grows as O(p2). This is generally difficult to scale for large values of p. Examples of machines that employ crossbars include the Sun Ultra HPC 10000 and the Fujitsu VPP500.
4
Interconnection Networks
Static networks form all connections when the machine is designed rather than when the connection is needed. In a static network, messages must be routed along established links. This means a single message must hop through intermediate processors on its way to its destination. Dynamic networks establish a connection between two or more nodes on the fly as messages are routed along the links.
Distributed Memory
•Implicit global data structure •Decomposition of data determines assignment of work •Communication is explicit
•Explicit synchronization (need to •Synchronization is implicit (data avoid race condition and overbuffered till received) writing)
11
Static Network Topologies: Linear Arrays
(a)
(b)
Linear arrays: (a) with no wraparound links; (b) with wraparound link.
12
Static Network Topologies: Two- and Three Dimensional Meshes
3
Interconnection Networks
Interconnection networks carry data between processors and to memory. Interconnects are made of switches and links (wires, fiber). static or dynamic. Static networks consist of point-to-point communication links among processing nodes and are also referred to as direct networks. Dynamic networks are built using switches and communication links. Dynamic networks are also referred to as indirect networks.
Two and three dimensional meshes: (a) 2-D mesh with no wraparound; (b) 2-D mesh with wraparound link (2-D torus); and (c) a 3-D mesh with no wraparound.
COMP5426 Parallel and Distributed Computing
Parallel Architectures (cont.)
Architecture of Interest
2
Parallel Architectures
Shared Memory
•Explicit global data structure • Decomposition of work is independent of data layout •Communication is implicit
22
Dynamic Network Topologies: Multistage
Crossbars have excellent performance scalability, but poor cost scalability. Buses have excellent cost scalability, but poor performance scalability. Multistage interconnects strike a compromise between these extremes.
7
Network Topologies
A variety of network topologies have been proposed and implemented. These topologies tradeoff performance for cost and scalability. Commercial machines often implement hybrids of multiple topologies for reasons of packaging, cost, and available components.
10
Static Network Topologies: Linear Arrays, Meshes, and hypercube
In a linear array, each node has two neighbors, one to its left and one to its right. If the nodes at either end are connected, we refer to it as a 1-D torus or a ring. A generalization to 2 dimensions has nodes with 4 neighbors, to the north, south, east, and west. A further generalization to d dimensions has nodes with 2d neighbors. A special case of a d-dimensional mesh is a hypercube. Here, d = log p, where p is the total number of nodes.
