歌森灯光200w光束灯说明书
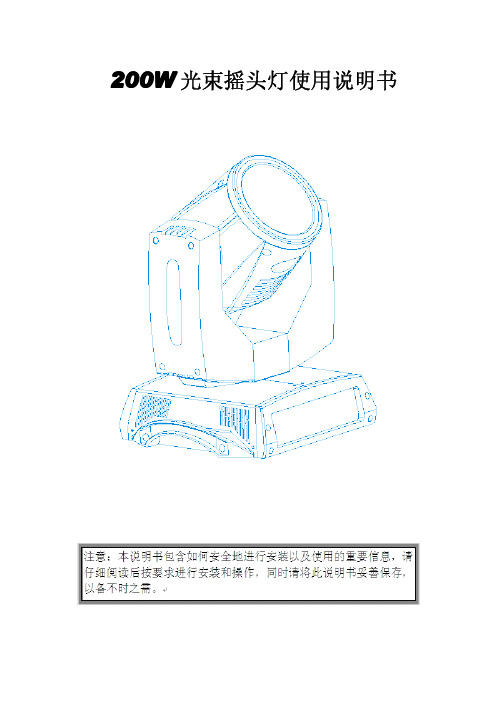
200W光束灯中文说明书
CH5: 水平垂直速度
0-255
快-慢
10
CH6: 调光 0-255
灭-亮
CH7: 频闪 0 1--50 51--240 241--255
关 开
频闪慢--快 开
CH8: 雾镜 0-255
无-雾化
CH9: 颜色 0-8 8-15 16-23 24-31 32-39 40-47 48-55 56-63 64-71 72-79 80-87 88-95 96-103 104-111 112-127 128-191 192-255
9
控制方式: 国际标准DMX512 通道数量: 20通道 其它功能:机械闭光时光源功率自动减半 防护等级: IP20 尺寸:345MM(臂宽)X 475MM(总高) X 405MM(底宽)
航空箱包装尺寸:730MM X 465MM X 690MM 纸箱包装尺寸:460MM X 385MM X 550MM 净重: 17KG
200W 光束摇头灯使用说明书
200W光束摇头灯
1.安全信息………………………………………… 2 2.安装和启动……………………………………… 4 3.菜单设置………………………………………… 8 4.技术信息………………………………………… 9 5.通道功能………………………………………… 10
重点:
◆ 生产厂家将不对任何未说明书正常操作使用和未经许可则私自更改设备所 引起的任何事故和损失负责。 ◆ 请注意:对任何随意更改说明书所引起的设备故障将不在保修范围内。 ◆ 不要使电源线与其它电线连在一起!特别注意电源电压与主机的标示电压一 致!确保有效电压未超过后部窗口上的标示电压。 ◆ 保证电源插头插入电源座。确保连接设备到主电源前电源开关设为 OFF/关的 位置。 ◆ 确保电源线不要被折断或被锋利物割破或损坏,定时检查设备及电源线。 ◆ 当设备未被使用或在清洁前请断开主电源。拉电源线时请通过插头拉动,不 要在拖电源线时把插头拔出。 ◆ 此设备的保护级别为I 级,所以请把黄/绿连接线接地。 ◆ 线路连接、维修及服务都必须由专门的技术人员来进行。 ◆ 不要把设备连接在调光设备上。 ◆ 不要在间隔很短时间内连续不断的打开或关闭设备,否则会缩短灯泡的使用 寿命。 ◆ 在第一次使用本设备时可能会有一些烟或气味出现。这是正常想象并不是代 表设备有什么问题。 ◆ 在设备使用过程中不要直接用手触摸设备表面(因为机箱表面已很热)! ◆ 更换使用的灯泡时,请确保功率与原灯泡相同。 ◆ 注意!小心眼睛!避免直视光源(特别是癫痫患者)!
200W LED工矿灯产品规格书-加亮照明
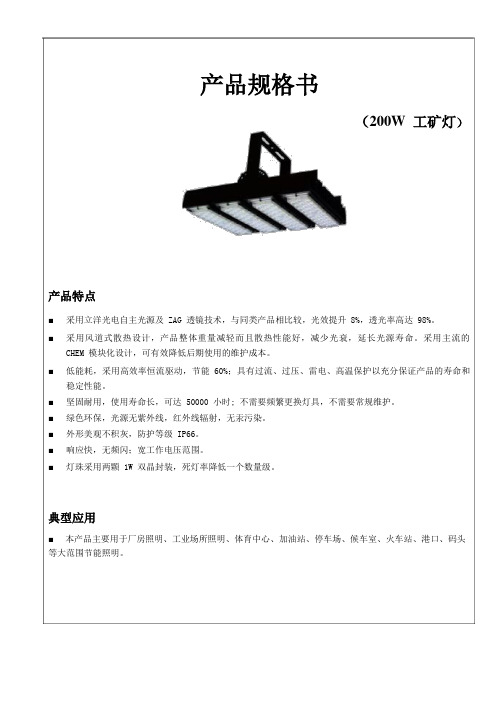
产品规格书(200W工矿灯)产品特点■采用立洋光电自主光源及 ZAG 透镜技术,与同类产品相比较,光效提升 8%,透光率高达 98%。
■采用风道式散热设计,产品整体重量减轻而且散热性能好,减少光衰,延长光源寿命。
采用主流的CHEM 模块化设计,可有效降低后期使用的维护成本。
■低能耗,采用高效率恒流驱动,节能 60%;具有过流、过压、雷电、高温保护以充分保证产品的寿命和稳定性能。
■坚固耐用,使用寿命长,可达 50000 小时; 不需要频繁更换灯具,不需要常规维护。
■绿色环保,光源无紫外线,红外线辐射,无汞污染。
■外形美观不积灰,防护等级 IP66。
■响应快,无频闪;宽工作电压范围。
■灯珠采用两颗 1W 双晶封装,死灯率降低一个数量级。
典型应用■本产品主要用于厂房照明、工业场所照明、体育中心、加油站、停车场、候车室、火车站、港口、码头等大范围节能照明。
技术参数序号名称标称值1 型号LY-HL104-2002 功率200W3 色温4000K4 发光角度60°5 光源品牌普瑞6 光源数量120pcs7 显色指数≥708 光效117Lm/W9 总光通量23400lm10 防护等级IP6611 工作电压185-265V12 工作环境温度-40℃~50℃,20%~90% H.R13 存储温度-40℃~85℃10%~90% H.R.14 电源效率93%15 功率因素>0.9516 灯具寿命50000H17 灯体材料AL6063-T518 灯具尺寸385*289*110mm ±5mm19 包装尺寸435*345*242mm ±5mm20 灯具净重 6.65kg ±0.1kg 平面照度、配光曲线60°平面照度图产品尺寸图安装图示、说明1、切断电源,用 M10 不锈钢固定螺栓把灯具提手锁在灯杆上;2、把灯具电源线与工程电源线按照上图蓝线接零线、棕线接火线、黄绿线接地线;3、调节灯具两侧的调节螺丝,按照实际要求调整灯具的照射方向和角度;4、把电线塞入灯杆内。
ThermaCELL电子蚊子扑杀灯说明书
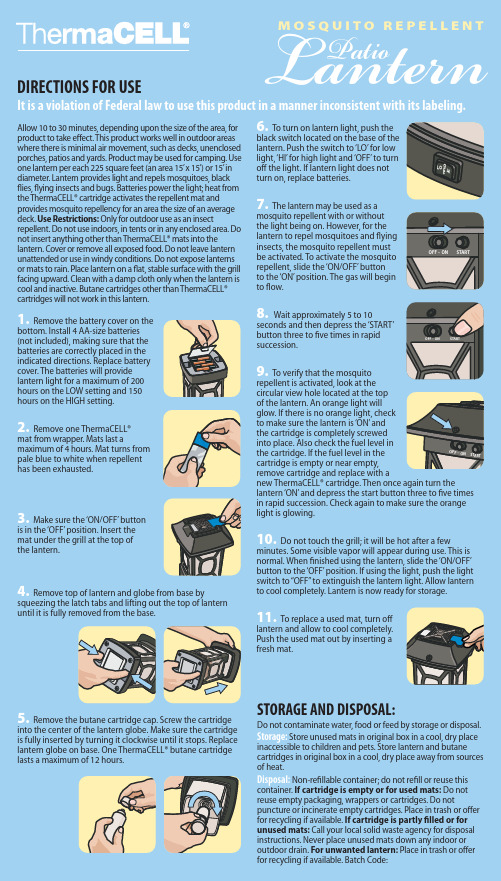
Patio Allow 10 to 30 minutes, depending upon the size of the area, for product to take e ect. This product works well in outdoor areas where there is minimal air movement, such as decks, unenclosed porches, patios and yards. Product may be used for camping. Use one lantern per each 225 square feet (an area 15’ x 15’) or 15’ in diameter. Lantern provides light and repels mosquitoes, black ies, ying insects and bugs. Batteries power the light; heat from the ThermaCELL® cartridge activates the repellent mat and provides mosquito repellency for an area the size of an average deck. Use Restrictions: Only for outdoor use as an insect repellent. Do not use indoors, in tents or in any enclosed area. Do not insert anything other than ThermaCELL® mats into the lantern. Cover or remove all exposed food. Do not leave lantern unattended or use in windy conditions. Do not expose lanterns or mats to rain. Place lantern on a at, stable surface with the grill facing upward. Clean with a damp cloth only when the lantern is cool and inactive. Butane cartridges other than ThermaCELL® cartridges will not work in this lantern.1. Remove the battery cover on the bottom. Install 4 AA-size batteries (not included), making sure that the batteries are correctly placed in the indicated directions. Replace battery cover. The batteries will provide lantern light for a maximum of 200 hours on the LOW setting and 150 hours on the HIGH setting.2. Remove one ThermaCELL® mat from wrapper. Mats last a maximum of 4 hours. Mat turns from pale blue to white when repellent has been exhausted.3. Make sure the ‘ON/OFF’ button is in the ‘OFF’ position. Insert the mat under the grill at the top of the lantern.4. Remove top of lantern and globe from base by squeezing the latch tabs and lifting out the top of lantern until it is fully removed from the base.5. Remove the butane cartridge cap. Screw the cartridge into the center of the lantern globe. Make sure the cartridge is fully inserted by turning it clockwise until it stops. Replace lantern globe on base. One ThermaCELL® butane cartridge lasts a maximum of 12 hours.6. To turn on lantern light, push the black switch located on the base of the lantern. Push the switch to ‘LO’ for low light, ‘HI’ for high light and ‘OFF’ to turn o the light. If lantern light does not turn on, replace batteries.7. The lantern may be used as a mosquito repellent with or without the light being on. However, for the lantern to repel mosquitoes and ying insects, the mosquito repellent must be activated. To activate the mosquito repellent, slide the ‘ON/OFF’ button to the ‘ON’ position. The gas will begin to ow.8. Wait approximately 5 to 10 seconds and then depress the ‘START’ button three to ve times in rapid succession.9. To verify that the mosquitorepellent is activated, look at the circular view hole located at the top of the lantern. An orange light will glow. If there is no orange light, check to make sure the lantern is ‘ON’ and the cartridge is completely screwed into place. Also check the fuel level in the cartridge. If the fuel level in the cartridge is empty or near empty, remove cartridge and replace with a new ThermaCELL® cartridge. Then once again turn the lantern ‘ON’ and depress the start button three to ve times in rapid succession. Check again to make sure the orange light is glowing.10. Do not touch the grill; it will be hot after a few minutes. Some visible vapor will appear during use. This is normal. When nished using the lantern, slide the ‘ON/OFF’ button to the ‘OFF’ position. If using the light, push the light switch to “OFF” to extinguish the lantern light. Allow lantern to cool completely. Lantern is now ready for storage.11. To replace a used mat, turn o lantern and allow to cool completely. Push the used mat out by inserting a fresh mat.M O S Q U I T O R E P E L L E N T DIRECTIONS FOR USE It is a violation of Federal law to use this product in a manner inconsistent with its labeling.STORAGE AND DISPOSAL: Do not contaminate water, food or feed by storage or disposal.Storage: Store unused mats in original box in a cool, dry place inaccessible to children and pets. Store lantern and butane cartridges in original box in a cool, dry place away from sources of heat.Disposal: Non-re llable container; do not re ll or reuse this container. If cartridge is empty or for used mats: Do not reuse empty packaging, wrappers or cartridges. Do not puncture or incinerate empty cartridges. Place in trash or o er for recycling if available. If cartridge is partly lled or for unused mats: Call your local solid waste agency for disposal instructions. Never place unused mats down any indoor or outdoor drain. For unwanted lantern: Place in trash or o er for recycling if available. Batch Code:O F F – O N ST A RT L O H I O F F OFF – ON START。
200W工矿灯规格书

★主要技术参数:输入电压Input voltage AC85V-265V 产品图片Picture 电源频率Freqency range 50HZ-60HZ总谐波失真Tatal harmonic distortion ≤9%功率因素Power factor >0.98LED 工作电压Working voltage DC30-36VLED 数量LED quantity 4PCSLED 功率LED consumption 200WLED光源LED lingt source 晶元LED电源LED power supply 亮牌LED 发光效率LED luminous efficiency 110-120LM/WLED 初始光通量LED luminous 暖白Warm white 20500LM 尺寸参数图Dimension 正白Pure white 21000LM冷白Cold white 20800LM灯具效率Lamp's efficiency >91%平均照度Average illuminance 高度(height)为6M >408LUX 高度(height)为8M >280LUX 高度(height)为10M >197LUX光斑面积Illuminance area 高度(height)为6M ¢6.5M 圆形高度(height)为8M ¢8.3M 圆形高度(height)为10M ¢10.4M 圆形照度均匀度Illuminance uniformity >0.8相关色温Color temperature 暖白Warm white 2700-3200K 正白Pure white 5500-6500K 冷白Cold white 7000-10000K显色指数Color rendering index 暖白WW Ra>78 正/冷白PW/CW Ra>80配光曲线Light distribution 对称式/圆形光斑配光方式Light design LED+反光罩二次配光LED 结点温升Junction temperature ≤ 75℃工作环境温度Working temperature -40℃——+50℃储藏环境温度Storage temperature -25℃——+65℃防护等级IP Grade IP54 配光曲线Light distribution 光源使用寿命Working life-span >50,000H电源连接线Connect wire 棕色Brown L 火线蓝色Blue N 零线黄/绿Yellow/Green G 地线灯头外壳颜色Color of lamp shell 银色Silver认证,证书Certificate CE, RoHS,CQC(CCC)光束角Beam angle 120度/90度(可选任一发光角度)产品净重/毛重Lamp weight : G.W./N.W. 6.5 Kg/7.05 Kg包装尺寸(CM)Lamp packing dimension 34.0*34.0*36.0 cm★使用说明1. 产品使用工作电压:AC 85V~265V 50/60Hz,请勿超出工作电压范围。
330W 光束灯说明书
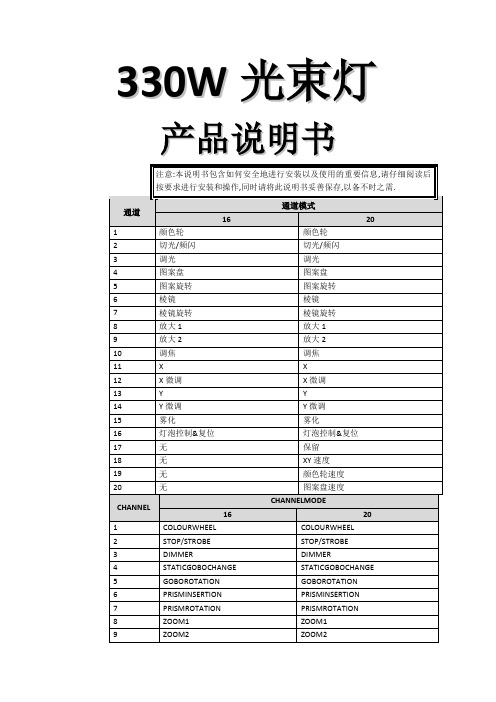
20
GOBO4
15
GOBO3
10
GOBO2
5
GOBO1
0
WHITE
EFFECTGOBOROTATION5
BIT 255 ……
EFFECT FASTROTATION ……
…… 脉冲频闪 光闸打开 频闪 …… 频闪 光闸关闭
由调光通道控制
效果 亮度 100% …… 亮度 0%
备注
效果 图案 7 快速抖动 …… 图案 7 速抖动 ……(图案 3 到图案 6) 图案 2 快速抖动 …… 图案 2 慢速抖动 图案 1 快速抖动 …… 图案 1 慢速抖动 快速旋转(正向) …… 慢速旋转(正向) 停止(白色) 慢速旋转(反向) …… 快速旋转(反向) 图案 7 图案 6 图案 5 图案 4 图案 3 图案 2 图案 1 白色
BIT
EFFECT
255 ……
100% ……
0
0%
STATICGOBOCHANGE-channel4
BIT
EFFECT
255 ……
GOBO9SHAKE,FASTSPEED ……
251
GOBO9SHAKE,SLOWSPEED
……
……
230
GOBO2SHAKE,FASTSPEED
……
……
226
GOBO2SHAKE,SLOWSPEED
20 COLOURWHEEL STOP/STROBE DIMMER STATICGOBOCHANGE GOBOROTATION PRISMINSERTION PRISMROTATION ZOOM1 ZOOM2
10
FOCUS
11
PAN
12
PANFINE
歌森灯光200w光束灯说明书
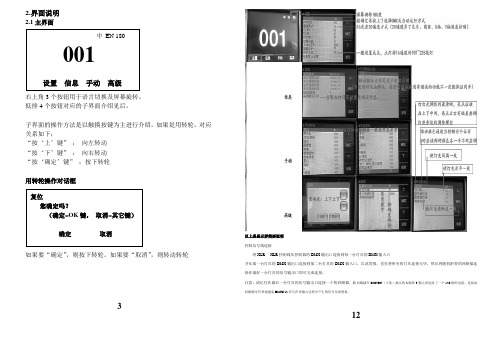
2.界面说明
2.1主界面
右上角3个按钮用于语言切换及屏幕旋转。
低排4个按钮对应的子界面介绍见后。
子界面的操作方法是以触摸按键为主进行介绍,如果是用转轮,对应关系如下;
“按‘上’键”;向左转动
“按‘下’键”;向右转动
“按‘确定’键”;按下转轮
用转轮操作对话框
如果要“确定”,则按下转轮。
如果要“取消”,则转动转轮
3 以上是显示屏简要说明
控制信号线连接
将XLR----XLR控制线从控制器的DMX输出口连接到每一台灯具的DMX输入口
并从第一台灯具的DMX输出口连接到第二台灯具的DMX输入口,以此类推,直至将所有的灯具连接完毕,然后将随机附带的回路插连接在最好一台灯具的信号输出口即可完成连接。
注意;请记住在最后一台灯具的信号输出口连接一个的回路插,此回路插在CANON(卡依)插头的2脚和3脚之间连接了一个120欧的电阻,连接此回路插可有效地避免DMX512信号在传输入过程中产生的信号反射现象。
12。
火亮灯光200W光束灯参数说明
型号:200W光束灯/HL-Beam200
200W摇头光束灯技术参数:
电压:100-240V,50/60Hz
镇流器:电子镇流器
功率:350W
灯泡:200W,色温:8500K
显示:中英文界面切换,LCD显示屏或触摸屏(高配版)颜色:14种颜色+空白
图案:17个固定图案片+空白
棱镜:8或16棱镜,可以双向旋转
镜头:光学组合镜
调焦:线性调焦
调光:0-100%线性调节
投射光范围:X向540度,Y向250度,可自动校正定位光束角度:平行光束角:0–5°
频闪:双片式频闪(1-12次/秒)
马达数量:共11个超静音马达,16Bit驱动
控制方式:国际标准DMX512
通道数量:16/20通道
其它功能:远程控制灯泡开关功能
外观:耐高温塑料
防护等级:IP20
规格:340x400x490mm
重量:16kg。
KTV 长条射灯说明书

KTV 长条射灯说明书
一、工艺流程:
灯架、灯具安装→配接引下线→试灯
二、灯架、灯具安装:
1、按设计要求测出灯具(灯架)安装高度,在电杆上划出标记。
2、将灯架、灯具吊上电杆(较重的灯架、灯具可使用滑轮、大绳吊上电杆),穿好抱箍或螺栓,按设计要求找好照射角度,找好平正度后,将灯架紧固好。
成排安装的灯具其仰角应保持一致,排列整齐。
三、配接引下线:将针式绝缘子固定在灯架上,将导线的一端在绝缘子上绑好回头,并分别与灯头线、熔断器进行连接。
橡胶布和黑胶布半幅重叠各包扎一层。
然后,将导线的另一端拉紧,并与路灯干线背扣后进行缠绕连接。
四、灯具的相线应装有熔断器,且相线应接螺口灯头的中心端子。
五、线与路灯干线连接点距杆中心应为400~600mm,且两侧对称一致。
六、引下线凌空段不应有接头,长度不应超过4m,超过时应加装固定点或使用钢管引线。
七、导线进出灯架处应套软塑料管,并做防水弯。
八、试灯:全部安装工作完毕后,送电、试灯,并进一步调整灯具的照射角度。
200W光束灯说明书
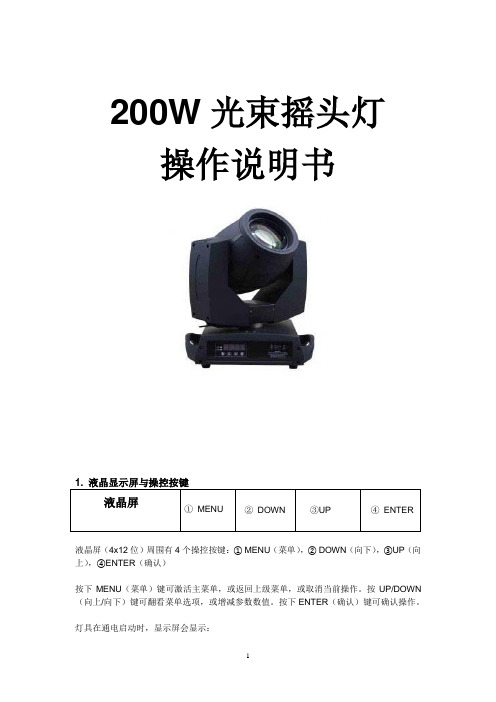
200W光束摇头灯操作说明书液晶屏①MENU ②DOWN ③UP ④ENTER液晶屏(4x12位)周围有4个操控按键:① MENU(菜单),② DOWN(向下),③UP(向上),④ENTER(确认)按下MENU(菜单)键可激活主菜单,或返回上级菜单,或取消当前操作。
按UP/DOWN (向上/向下)键可翻看菜单选项,或增减参数数值。
按下ENTER(确认)键可确认操作。
灯具在通电启动时,显示屏会显示:如果灯具已经接好了DMX此时,灯具已经可已经可以接受控制器操控(“ADDR”表示灯具当前的DMX地址码。
)2. 菜单选项2.1 主菜单选项200摇头灯主菜单选项包括:DMX Address, Reset, DMX Config.., Information, Lamp Control, Display Opt, Personality, Operation和User Memory。
2.2 DMX Address在主菜单中选择“此时,灯具的DMX地址码处于设置状态,按UP/DOWN(向上/向下)键可调整地址码数值。
按ENTER(确认)键确认。
DMX地址码可在001-512范围内设置。
2.3 Reset在主菜单中选择“Reset”。
该选项下有三个子项:All Reset, Internal Rst和Factory Rst,按UP/DOWN(向上/向下)键可翻看。
“轴以外的所有配置。
选择这两个子项时,显示屏会提示“Sure Reset?”。
此时,按下ENTER(确认)键可确认操作,或按下MENU(菜单)键取消操作。
“Factory Rst”可恢复灯具的出厂设置。
选择此子项时,显示屏会提示“Sure Restore, Press 2, 3, 4”。
此时,你需要同时按下② DOWN(向下)、③ ENTER(确认)和④ UP(向上)三个按键,并且按住不动,过一会儿,操作才能生效;或者按下MENU(菜单)键取消操作。
科熠Bema200W光束灯使用说明书
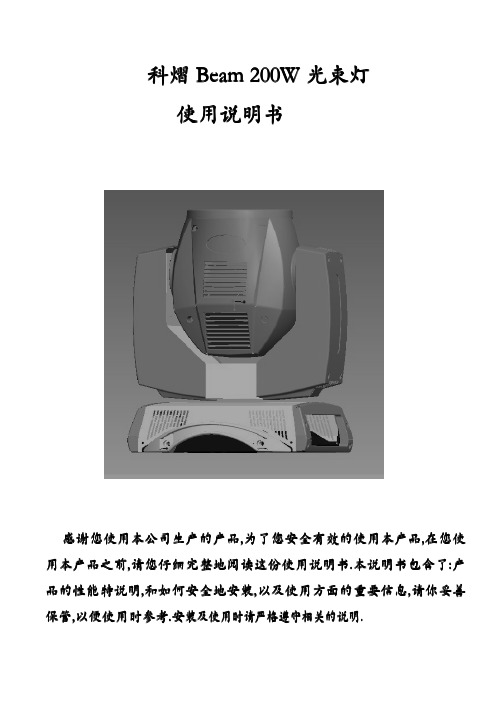
: 灯具的安装说明 灯具的安装说明:
本灯具可水平放置 ,斜挂和倒挂 ,斜挂和倒挂时一定要注意安装方法 . 本灯具可水平放置, 斜挂和倒挂, 斜挂和倒挂时一定要注意安装方法. 灯具固定安装 :在对灯具定位前 ,要确保安装地点的稳固性 .在反转吊挂安装时 ,必须确 1. 1.灯具固定安装 灯具固定安装: 在对灯具定位前, 要确保安装地点的稳固性. 在反转吊挂安装时, ,要用安全绳索 穿过支撑架 和灯具提手 ,进行辅助吊挂 保灯具不要在支撑架上跌落下来 保灯具不要在支撑架上跌落下来, 要用安全绳索穿过支撑架 穿过支撑架和灯具提手 和灯具提手, .防止灯具坠落和滑动 .灯具在安装调试时 ,下方禁止行人通过 .定期检查安全 以确保安全 以确保安全. 防止灯具坠落和滑动. 灯具在安装调试时, 下方禁止行人通过. 、 .如果因为吊挂安装不稳固 ,导致灯具坠落而 绳索是否出现磨损 绳索是否出现磨损、 挂钩螺丝是否出现松动 挂钩螺丝是否出现松动. 如果因为吊挂安装不稳固, 产生的一切后果 ,生产厂商不承担任何责任 . 产生的一切后果, 生产厂商不承担任何责任.
火亮灯光200W 230W摇头光束灯中文说明书
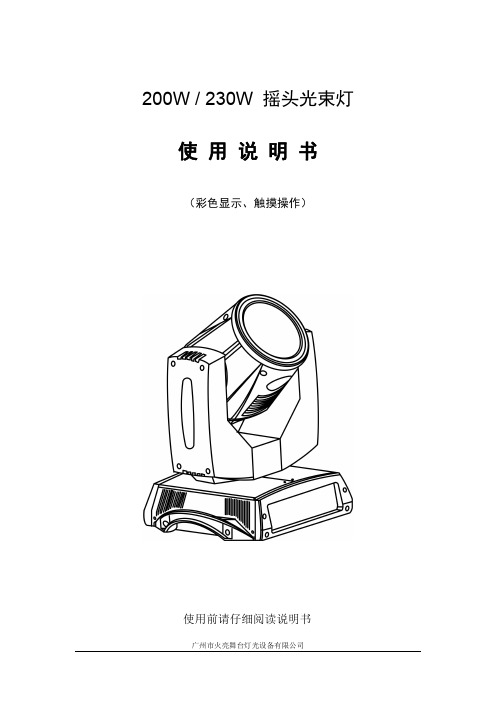
200W/230W摇头光束灯使用说明书(彩色显示、触摸操作)使用前请仔细阅读说明书目录第1章注意事项与安装 (1)1.维护保养 (1)2.声明 (1)3.产品注意事项 (1)4.产品介绍 (1)5.信号线连接(DMX) (2)6.灯具安装 (2)第2章面板操作 (3)1.概述 (3)2.操作 (3)1.使用直观触摸或编码器操作灯具 (3)2.参数数值输入 (3)3.设置布尔值参数 (4)4.子页面(参数) (4)3.功能操作及参数设置 (4)1.设置DMX地址码 (4)2.设置灯具工作模式 (5)3.设置面板显示设置 (6)4.测试灯具 (6)5.设置灯具工作参数 (7)6.查看灯具当前状态 (7)第3章通道描述 (8)4.通道表 (8)5.通道明细表 (8)1.颜色通道(COLOR) (8)2.图案通道(GOBO) (9)3.水平/垂直轴通道(PAN/TILT) (9)4.调光与频闪 (10)5.光路效果通道 (10)6.复位与开关灯炮 (10)6.通道表注意点 (10)第4章常见故障及使用注意 (12)1.常见故障处理 (12)2.使用注意事项 (13)第1章注意事项与安装1.维护保养●本灯具应保持干燥,避免在潮湿环境下工作。
●间歇性的使用会有效地延长本灯具的寿命。
●为了获得良好的通风效果和灯光效果,要注意经常清洁风扇和风扇网以及透镜。
●请勿用酒精等有机溶剂擦试灯具外壳,以免造成损坏。
2.声明本产品在出厂进时,性能完好,包装完整。
所有使用者应严格遵守以上所陈述的警告事项和操作说明,任何因误用而导致的损坏不在本公司的保证之内,对忽视操作手册而导致的故障和问题亦不在经销商负责的范围内。
本手册如有技术改动,恕不另行通知。
3.产品注意事项●为保证产品的使用寿命,本产切勿摆放在潮湿或漏水的地方,更不能在温度超过60度以上的环境工作●不要将本产品放置在易松动或易震动的地方。
●为避免触电的危险,本产品的维修请求助专业人士维修。
whelen 工程有限公司蜂窝灯闪光灯说明书
©2005 Whelen Engineering Company Inc.Form No.14015E (112008)A u t o m o t i v e : For warranty information regarding this product, visit /warranty•Proper installation of this product requires the installer to have a good understanding of automotive electronics, systems and procedures.•Whelen Engineering requires the use of waterproof butt splices and/or connectors if that connector could be exposed to moisture.•Any holes, either created or utilized by this product, should be made both air- and watertight using a sealant recommended by your vehicle manufacturer.•Failure to use specified installation parts and/or hardware will void the product warranty.•If mounting this product requires drilling holes, the installer MUST be sure that no vehicle components or other vital parts could be damaged by the drilling process. Check both sides of the mounting surface before drilling begins. Also de-burr the holes and remove any metal shards or remnants. Install grommets into all wire passage holes.•If this manual states that this product may be mounted with suction cups, magnets, tape or Velcro®, clean the mounting surface with a 50/50 mix of isopropyl alcohol and water and dry thoroughly.•Do not install this product or route any wires in the deployment area of your air bag. Equipment mounted or located in the air bag deployment area will damage or reduce the effectiveness of the air bag, or become a projectile that could cause serious personal injury or death. Refer to your vehicle owner’s manual for the air bag deployment area. The User/Installer assumes full responsibility to determine proper mounting location, based on providing ultimate safety to all passengers inside the vehicle.•For this product to operate at optimum efficiency, a good electrical connection to chassis ground must be made. The recommendedprocedure requires the product ground wire to be connected directly to the NEGATIVE (-) battery post (this does not include products that use cigar power cords).•If this product uses a remote device for activation or control, make sure that this device is located in an area that allows both the vehicle and the device to be operated safely in any driving condition.•Do not attempt to activate or control this device in a hazardous driving situation.•This product contains either strobe light(s), halogen light(s), high-intensity LEDs or a combination of these lights. Do not stare directly into these lights. Momentary blindness and/or eye damage could result.•Use only soap and water to clean the outer lens. Use of other chemicals could result in premature lens cracking (crazing) and discoloration. Lenses in this condition have significantly reduced effectiveness and should be replaced immediately. Inspect and operate this product regularly to confirm its proper operation and mounting condition. Do not use a pressure washer to clean this product.•It is recommended that these instructions be stored in a safe place and referred to when performing maintenance and/or reinstallation of this product.•FAILURE TO FOLLOW THESE SAFETY PRECAUTIONS AND INSTRUCTIONS COULD RESULT IN DAMAGE TO THE PRODUCT OR VEHICLE AND/OR SERIOUS INJURY TO YOU AND YOUR PASSENGERS!Warnings to InstallersWhelen’s emergency vehicle warning devices must be properly mounted and wired in order to be effective and safe. Read and follow all of Whelen’s written instructions when installing or using this device. Emergency vehicles are often operated under high speed stressful conditions which must be accounted for when installing all emergency warning devices. Controls should be placed within convenient reach of the operator so that they can operate the system without taking their eyes off the roadway. Emergency warning devices can require high electrical voltages and/or currents. Properly protect and use caution around live electrical connections.Grounding or shorting of electrical connections can cause high current arcing, which can cause personal injury and/or vehicle damage, including fire. Many electronic devices used in emergency vehicles can create or be affected by electromagnetic interference. Therefore, after installation of any electronic device it is necessary to test all electronic equipment simultaneously to insure that they operate free of interference from other components within the vehicle. Never power emergency warning equipment from the same circuit or share the same grounding circuit with radio communication equipment. All devices should be mounted in accordance with the manufacturer’s instructions and securely fastened to vehicle elements of sufficient strength to withstand the forces applied to the device. Driver and/or passenger air bags (SRS) will affect the way equipment should be mounted. This device should be mounted by permanent installation and within the zones specified by the vehicle manufacturer, if any. Any device mounted in the deployment area of an air bag will damage or reduce the effectiveness of the air bag and may damage or dislodge the device. Installer must be sure that this device, its mounting hardware and electrical supply wiring does not interfere with the air bag or the SRS wiring or sensors. Mounting the unit inside the vehicle by a method other than permanent installation is not recommended as unit may become dislodged during swerving; sudden braking or collision. Failure to follow instructions can result in personal injury. Whelen assumes no liability for any loss resulting from the use of this warning device. PROPER INSTALLATION COMBINED WITH OPERATOR TRAINING IN THE PROPER USE OF EMERGENCY WARNING DEVICES IS ESSENTIAL TO INSURE THE SAFETY OF EMERGENCY PERSONNEL AND THE PUBLIC.Warnings to UsersWhelen’s emergency vehicle warning devices are intended to alert other operators and pedestrians to the presence and operation of emergency vehicles and personnel. However, the use of this or any other Whelen emergency warning device does not guarantee that you will have the right-of-way or that other drivers and pedestrians will properly heed an emergency warning signal. Never assume you have the right-of-way. It is your responsibility to proceed safely before entering an intersection, driving against traffic, responding at a high rate of speed, or walking on or around traffic lanes. Emergency vehicle warning devices should be tested on a daily basis to ensure that they operate properly. When in actual use, the operator must ensure that both visual and audible warnings are not blocked by vehicle components (i.e.: open trunks or compartment doors), people, vehicles, or other obstructions. It is the user’s responsibility to understand and obey all laws regarding emergency warning devices. The user should be familiar with all applicable laws and regulations prior to the use of any emergency vehicle warning device. Whelen’s audible warning devices are designed to project sound in a forward direction away from the vehicle occupants. However, because sustained periodic exposure to loud sounds can cause hearing loss, all audible warning devices should be installed and operated in accordance with the standards established by the National Fire Protection Association.Safety FirstThis document provides all the necessary information to allow your Whelen product to be properly and safely installed. Before beginning the installation and/or operation of your new product, the installation technician and operator must read this manual completely. Important information is contained herein that could prevent serious injury or damage.WARNING: This product can expose you to chemicals including Methylene Chloride which is known to the State of California to cause cancer, and Bisphenol A, which is known to the State of California to cause birth defects or other reproductive harm. For more information go to .Installation Guide:Inner Edge® Interior Lightbarwith MR8 Take-downs51 Winthrop RoadChester, Connecticut 06412-0684Phone: (860) 526-9504Internet: Salese-mail:*******************CustomerServicee-mail:*******************®ENGINEERING COMPANY INC.IMPORTANT! Do not install this product or route any wires in the deployment area of your air bag (see air bag warning on first page).IMPORTANT! The lightbar should be located a minimum of 16" from any radio antennas!Important installation note for Chevrolet Impalas:When mounting this product in a Chevrolet Impala, an optical gasket must be installed as shown here and below. Failure to do so could result in reflected light within the passenger compartment.Installation:1.Locate and install the rubber window the lower, leading edge of the housing.2.Using an appropriately sized Torx head screwdriver, loosen the three screws securing the driver-side visor swivel bracket to the vehicle. Do not remove these screws.3.Remove the screws securing the visor clip all hardware.4.Locate the driver-side mounting bracket with a “D” label) and orient as shown.5.Slide the mounting bracket fingers swivel bracket and the headliner. The 6.in this position, remount the visor clip in original hardware.7.8.Wiring:IMPORTANT: All customer supplied wires that connect to the positive terminal of the battery must be sized to supply at least 125% of the maximum operating current and FUSED at the battery to carry that load. DO NOT USE CIRCUIT BREAKERS WITH THIS PRODUCT!Operation:With the lightbar on:•Applying +12 volts to the WHT/BLK wire activates the take-downs.•With the take-downs activated, applying +12 volts to the BLUE wire will cause the take-down lights to flash.•Applying +12 volts to the ORANGE wire causes all lightheads to flash.•Apply +12 volts to the WHT/ORG wire to activate the steady burn lightheads (optional).Scan-Lock™ / WHITE/GREENTo change a flash pattern, turn on the desired lighthead:CYCLE THROUGH ALL PATTERNS: To cycle forward, apply +12 volts to the WHT/GRN wire for less than 1 second and release. To cycle backward, apply +12 volts to the WHT/GRN wire for more than 1 second and release.SET A PATTERN AS DEFAULT: When the desired pattern is displayed allow it to run for more than 5 seconds and this pattern will become the default pattern.RESET TO THE FACTORY DEFAULT PATTERN: Turn off power and apply +12 volts to the WHT/GRN wire while turning power on.A Normally Open Momentary Switch can be used to control Scan-Lock.Available Scan-Lock™ Flash Patterns: Signal Alert™ 75 Alternating > Signal Alert™ 75 In-Out > SignalAlert™ 75 Left to Right > SingleFlash 90 Alternating >SingleFlash 90 In-Out SingleFlash 90 Left to Right > CometFlash® 75 Alternating >CometFlash® 75, In-Out > CometFlash® 75, Left to Right > SingleFlash 75Alternating SingleFlash 75 In-Out > SingleFlash 75 Left to Right > SingleFlash 150Alternating > SingleFlash 150 In-Out > SingleFlash 150 Left to Right DoubleFlash 75Alternating > DoubleFlash 75 In-Out > DoubleFlash 75 Left to Right > ActionFlash™Alternating > ActionFlash™ In-Out > ActionFlash™ Left to Right > RandomFlash >ActionScan™ Alternating > ActionScan™ In-Out > ActionScan™ Left to Right.Hi/Low Power / BROWNThis feature allows the user to step the unit down to low power operation for nighttime use. The type of switch used depends on how the operator wishes the Hi/Low feature to function:Latching Mode: By applying positive voltage to the BROWN wire for less than 1 second, the lightbar is “latched” into low power. The unit must be turned off and then back on to restore normal, high power operation (A momentary switch is preferred).Level Mode: Applying positive voltage to the BROWN wire for more than 1second holds the lightbar in low power mode until voltage is removed (A toggle switch is preferred).9.Using the hardware provided (#10-32 x 3/8” black oxide screws),secure the lightbar to the mounting brackets. Tighten this hardware firmly. Route lightbar cable down vehicle A-pillar to your control head. Make wiring connections as shown here.。
Litemons LED摄影灯 LA150D LA200D 说明书
深圳市神牛摄影器材有限公司GODOX PHOTO EQUIPMENT CO.LTDLitemons LED摄影灯Litemons LED LightLA150D LA200D前言感谢您购买Litemons系列LED摄影灯!LA150D/LA200D是Litemons系列全新推出的两款高性价比LED 灯。
灯具小巧易携,磨砂外壳,质感优越。
拥有高亮度,高显指、能够无极调节亮度、蓝牙无线控制,模拟8种光效等诸多产品特性。
标准工业保荣卡口,能够与现有的保荣卡口灯光附件通用,根据不同的场合,搭配不同附件使用,创造出令人惊叹的控光效果。
该灯适用于人物采访、电商直播、短视频拍摄、静物拍摄等拍摄场景。
主要特点拥有8种FX光效模式,模拟真实光效场景,创意无限。
亮度无极调节,精准用光,调节范围:0%-100%。
通用工业保荣卡口,兼容更多实用灯光附件,交互性强。
警告使用器材时,应始终遵循基本的安全预防措施,具体如下:使用前,请阅读并理解所有说明。
儿童请勿靠近或者使用该设备,当儿童靠近或使用设备时,监护人有必要进行密切监督。
在使用过程中,请勿将设备置于无人看管状态。
、该设备工作时有发热现象,请小心触摸!请勿在电源线损坏的情况下操作设备,请勿私自拆卸产品,如产品出现故障须由本公司或授权的维修人员进行检查维修。
请放置好电源线,防止操作人员被电源线绊倒,禁止拉扯电源线以免导致设备断电,且电源线不可接触灼热表面。
在清洁和维修之前,请务必从电源插座上拔下电源插头。
不使用时。
切勿拉扯电线将插头从插座中拔出。
应当抓住插头并拉动拔出。
该设备没有防水功能,为减少危险,请勿将本产品浸入水中或其他液体。
需要维修时,应将其交给本公司或授权的维修人员进行检查维修。
不正确的维修行为,可能在随后使用设备时出现触电情况。
本产品工作时,请勿遮挡散热口,请勿直视COB灯珠;任何情况下请勿触摸COB灯珠。
部件1.灯体2.LED灯珠3.锁定把手4.方向调节按钮5.显示屏6.灯珠保护罩7.亮度调节旋钮8.保荣卡口9.FX旋钮10.卡口推制11.FX按键12.反光罩13.伞孔14.蓝牙按键15.电源开关16.散热口17.电源插口18.套筒支架19.锁定旋钮物品清单灯体*1、反光罩RFT-19*1、灯头保护罩*1、适配器*1、电源线*1、说明书*1可选购附件可搭配本公司以下摄影附件使用,以获得最佳的拍摄效果和使用体验:柔光箱、反光伞、灯架、蜂巢、雷达罩、束光筒等。
EATON FlexiTech EW 数字消防灯说明书
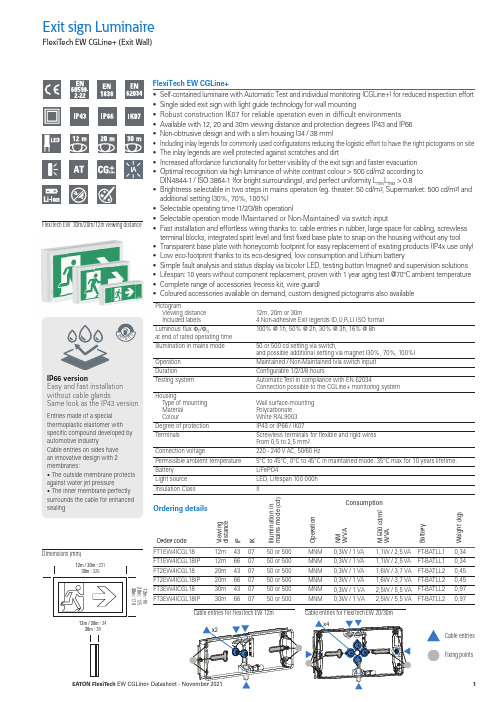
Ordering detailsi n e (c d )²ConsumptionPictogramViewing distance Included labels12m, 20m or 30m4 Non-adhesive Exit legends (D,U,R,L) ISO format Luminous fl ux ΦE /ΦNat end of rated operating time 100% @ 1h, 50% @ 2h, 30% @ 3h, 16% @ 8hIllumination in mains mode 50 or 500 cd setting via switch,and possible additional setting via magnet (30%, 70%, 100%)OperationMaintained / Non-Maintained (via switch input)Duration Confi gurable 1/2/3/8 hoursTesting system Automatic Test in compliance with EN 62034Connection possible to the CGLine+ monitoring system HousingType of mounting Material Colour Wall surface-mounting Polycarbonate White RAL9003Degree of protection IP43 or IP66 / IK07TerminalsScrewless terminals for fl exible and rigid wires From 0,5 to 2,5 mm²Connection voltage220 - 240 V AC, 50/60 HzPermissible ambient temperature 5°C to 45°C, 0°C to 45°C in maintained mode. 35°C max for 10 years lifetime.Battery LiFePO4Light source LED, Lifespan 100 000h Insulation ClassIIFlexiTech EW 30m/20m/12m viewing distanceDimensions (mm)12m / 20m : 23130m : 32612m : 8620m : 12530m: 17812m / 20m : 3430m : 38FlexiTech EW CGLine+• Self-contained luminaire with Automatic Test and individual monitoring (CGLine+) for reduced inspection effort • Single sided exit sign with light guide technology for wall mounting• Robust construction IK07 for reliable operation even in difficult environments • Available with 12, 20 and 30m viewing distance and protection degrees IP43 and IP66• Non-obtrusive design and with a slim housing (34 / 38 mm)• Including inlay legends for commonly used configurations reducing the logistic effort to have the right pictograms on site • The inlay legends are well protected against scratches and dirt• Increased affordance functionality for better visibility of the exit sign and faster evacuation • O ptimal recognition via high luminance of white contrast colour > 500 cd/m2 according to DIN4844-1 / ISO 3864-1 (for bright surroundings), and perfect uniformity L min/L max > 0.8• Brightness selectable in two steps in mains operation (eg. theater: 50 cd/m², Supermarket: 500 cd/m²) and additional setting (30%, 70%, 100%)• Selectable operating time (1/2/3/8h operation)• Selectable operation mode (Maintained or Non-Maintained) via switch input• Fast installation and effortless wiring thanks to: cable entries in rubber, large space for cabling, screwless terminal blocks, integrated spirit level and first fixed base plate to snap on the housing without any tool • T ransparent base plate with honeycomb footprint for easy replacement of existing products (IP4x use only)• Low eco-footprint thanks to its eco-designed, low consumption and Lithium battery• Simple fault analysis and status display via bicolor LED, testing button (magnet) and supervision solutions • Lifespan: 10 years without component replacement, proven with 1 year aging test @70°C ambient temperature • Complete range of accessories (recess kit, wire guard)• Coloured accessories available on demand, custom designed pictograms also availableAccessories Black matRAL9005Dark GreyRAL7015Silver glossRAL9007FT1-RK Recess Kit for FlexiTech EW 12m FT1-RK-B FT1-RK-DG FT1-RK-SFT2-RK Recess Kit for FlexiTech EW 20m, metal FT2-RK-B FT2-RK-DG FT2-RK-SFT3-RK Recess Kit for FlexiTech EW 30m, metal FT3-RK-B FT3-RK-DG FT3-RK-SMetal cover for FlexiTech EW 12m FT1EWSU-MC-B FT1EWSU-MC-DG FT1EWSU-MC-SMetal cover for FlexiTech EW 20m FT2EWSU-MC-B FT2EWSU-MC-DG FT2EWSU-MC-SMetal cover for FlexiTech EW 30m FT3EWSU-MC-B FT3EWSU-MC-DG FT3EWSU-MC-S FT2-WG Wire Guard, compatible with FlexiTech EW 12m and 20mFT3-WG Wire Guard, compatible with FlexiTech EW 30mFT1-RB Recess box / plaster & brick for FlexiTech EW 12mEMN Eaton Magnet for confi guration and testsFT-BATLL1Battery LiFePO4 long life, 3,2V / 600mAhFT-BATLL2Battery LiFePO4 long life, 3,2V / 1500mAhFT1-4I Set of 4 pictos for FlexiTech EW, 12m (D, L, R, U), ISO formatFT2-4I Set of 4 pictos for FlexiTech EW, 20m (D, L, R, U), ISO formatFT3-4I Set of 4 pictos for FlexiTech EW, 30m (D, L, R, U), ISO formatPictogramsFT2EWEC-PICTO-VL FT3EWEC-PICTO-VL Picto, ISO7010-E001 VL, Exit Vertical LeftFT2EWEC-PICTO-VR FT3EWEC-PICTO-VR Picto, ISO7010-E002 VR, Exit Vertical RightFT2EWEC-PICTO-VD FT3EWEC-PICTO-VD Picto, ISO7010-E002 VD, Exit Vertical DownFT2EWEC-PICTO-UR FT3EWEC-PICTO-UR Picto, ISO7010-E002 U/R, Exit Up RightFT2EWEC-PICTO-DR FT3EWEC-PICTO-DR Picto, ISO7010-E002 D/R, Exit Down RightFT2EWEC-PICTO-DL FT3EWEC-PICTO-DL Picto, ISO7010-E001 D/L, Exit Down LeftFT2EWEC-PICTO-UL FT3EWEC-PICTO-UL Picto, ISO7010-E001 U/L, Exit Up LeftFT2EWEC-PICTO-DMD FT3EWEC-PICTO-DMD Picto, FDX08-040-3 T28, Man in wheelchair door & arrow downFT2EWEC-PICTO-DML FT3EWEC-PICTO-DML Picto, FDX08-040-3 T28, Man in wheelchair door & arrow leftFT2EWEC-PICTO-DMR FT3EWEC-PICTO-DMR Picto, FDX08-040-3 T28, Man in wheelchair door arrow rightFT2EWEC-PICTO-DMU FT3EWEC-PICTO-DMU Picto, FDX08-040-3 T28, Man in wheelchair door arrow upFT2EWEC-PICTO-DML1FT3EWEC-PICTO-DML1Picto, DIN4844, Man in wheelchair & arrow leftFT2EWEC-PICTO-DMR1FT3EWEC-PICTO-DMR1Picto, DIN4844, Man in wheelchair & arrow rightFT2EWEC-PICTO-DMD1FT3EWEC-PICTO-DMD1Picto, DIN4844, Man in wheelchair & arrow downFT2EWEC-PICTO-EWL FT3EWEC-PICTO-EWL Picto, ISO7010-E016, Escape Window LeftFT2EWEC-PICTO-EWR FT3EWEC-PICTO-EWR ISO7010-E016, Escape Window RightFT2EWEC-PICTO-EWD FT3EWEC-PICTO-EWD Picto, ISO7010-E016, Escape Window DownFT2EWEC-PICTO-RWL FT3EWEC-PICTO-RWL Picto, ISO7010-E017, Rescue Window LeftFT2EWEC-PICTO-RWR FT3EWEC-PICTO-RWR Picto, ISO7010-E017, Rescue Window RightFT2EWEC-PICTO-RWD FT3EWEC-PICTO-RWD Picto, ISO7010-E017, Rescue Window DownFT2EWEC-PICTO-MP FT3EWEC-PICTO-MP Picto, ISO7010-E007, Meeting PointFT2EWEC-PICTO-CR FT3EWEC-PICTO-CR Picto, ISO7010-E003, First-AidFT2EWEC-PICTO-H FT3EWEC-PICTO-H Picto, HydrantFT2EWEC-PICTO-FEX FT3EWEC-PICTO-FEX Picto, ISO7010-F001, Fire ExtinguisherFT2EWEC-PICTO-FHO FT3EWEC-PICTO-FHO Picto, ISO7010-F002, Fire HoseFT2EWEC-PICTO-INFO FT3EWEC-PICTO-INFO Picto, ISO7001/P-I PF001, INFOFT2EWEC-PICTO-WC FT3EWEC-PICTO-WC Picto, ISO7001/P-I PF003, WC。
Appletone FL Series 2区和22区防爆灯光说明书

Lighting — FluorescentATEX/IEC/NBR IEC ZONE 2 RATED — AREAATEX/IEC:Zone 2 and 22 II 3 GD IP65/67A T E X /I E C /NB R I EC Z O N E 2 R A T ED — A RE AOrder using catalog numbering guide below or select catalog number from tables on following pages.Catalog Numbering Guide — FL Series Non-Metallic Fluorescent Lighting FixturesFLB118BUPACSeries:FL - FL Series Zone 2 and 22ATEX/IEC CertifiedWattage:18 - 18 Watt 36 - 36 Watt 58 - 58 WattCable Type:A - Armored M20Lamp Type:B - Bi-pin (G13)Voltage:BU - 110 to 254 Vac/Vdc,50/60 HzBK - 220 to 240 Vac/Vdc,50/60 HzOptions:E - 3H Emergency (combined) -Battery 6 V - 4 AhNumber of Lamps:1 - Single 2 - DoubleMounting Version:S - Surface/Suspension Mount Standard Wiring L - Surface/Suspension Mount Dual Loop in/outThrough Wiring (single phase)ATEX/IEC:Zone 2 and 22 II 3 GD+75 °C (+167 °F)2 x 18 W T6T5T51 x 36 W +83 °C (+181 °F)T6T6T52 x 36 WT6T6T51 x 58 W +91 °C (+196 °F)T5T5T52 x 58 WT5T5T5Lighting — FluorescentATEX/IEC/NBR IEC ZONE 2 RATED — AREAATEX/IEC:Zone 2 and 22 II 3 GDStandard Version for Armored and Unarmored CableSupplied with one M20 cable entry at each end plus two locknuts, two earth continuity and one blanking plug. 2 2236110/2547.0 (15.43)38.0 (2318.90)FLB236BUSAE 258110/2547.5 (16.53)45.0 (2746.07)FLB258BUSAE① Surface/suspension mount with standard wiring standard. For surface/suspension mount with dual loop in/out through wiring (single phase), replace the letter S in the 9th position with the letter L ; example: FLB118BK L A.② To add silicone coating for added protection in H2S hydrogen sulfide environments. add suffix -C at the end of the catalog number.For 3H emergency (combined) - battery V - 4 Ah, add suffix -E at the end of the catalog number.For unit without safety switch, add suffix -N at the end of the catalog number.For unit with 4 entries, add suffix -X at the end of the catalog number.A T E X /I E C /NB R I EC Z O N E 2 R A T ED — A RE AATEX/IEC:Zone 2 and 22 II 3 GD IP65/67Set of two brackets for surface installation Zinc plated steel FEFBZ 316 stainless steelFEFBSBrackets for Surface MountingSet of twoAluminium (gray painted)FESBA 316 stainless steelFESBSM8 Ring BoltsSet of twoZinc plated steelFERBM8ZHalf Clamps Brackets for Pole MountingSet of twoDiameter: 42 to 49 mm (1.65 to 1.93") pole — 31.8 to 38.1 mm (1.25 to 1.5") tube Zinc plated steel FEHC49Z 316 stainless steelFEHC49SDiameter: 60 mm (2.36") pole — 50.8 mm (2") tube Zinc plated steelFEHC60Z 316 stainless steelFEHC60SHinged BracketsSet of two brackets for adjusting luminaire Aluminium FEHBA 316 stainless steelFEHBSFall Prevention KitRetains fixture temporarily to ease installation. For M20 cable entry 1.20 meter (3.94 foot) stainless steel chainFDSCSLighting — FluorescentATEX/IEC/NBR IEC ZONE 2 RATED — AREAEfficiency 67.8%NF C 71-121: 0.58 H + 0.09 TEfficiency 68.9%NF C 71-121: 0.60 H + 0.09 T65311086535107702395702490。
灯光仪操作手册.pptx

灯箱摄像头调整 (二)
1)
.
2)
,.
3) .
4) (F14 F16), .
灯箱摄像头调整 (三)
5) (11.5"x15") , a 4
灯箱地址设置 (九)
修改完临时地址后,要修改激光头正确的地址,点击右 上角【 】按钮,如下图所示:
灯箱地址设置
(十)
点击点击右上角【 】按钮,该对话框会变成如下图所 示:
灯箱地址设置 (十一)
选择 ,可以看出,原来阴影的文本框变 成了可编辑的 文本框。 将上面的 改成 。 现在可以将需要配置的正确的地址和子网掩码,网管输入 到文本框中。每个位置的激光头都有相应的地址,配置规 则如下所示:
灯箱地址设置 (十二)
名称及地址的设置规则参考如下所示:
名称: 地址:10.254.100.10 子网掩码:255.255.255.0 默认网关:10.254.100.1
工控机对应的地址可参考设置为: 地址:10.254.100.1 子网掩码:255.255.255.0
灯箱地址设置 (十三)
打开激光头图像查看软件,可以通过开始>程序> > 2.0> 打开该软件。
检测软件启动 (二)
在程序启动时,要进行连接、灯箱摄像头网络连接、检查设 备的传感器状态。此时请注意以下内容:
1. 所有机械模块是否归位。
2. 如果启动软件时报类似 13弹出错误窗口,则条码枪未 连接上,请检查条码枪与模块电源及网络是否畅通。
检测软件启动 (三)
【VIP专享】赤焰200W光束灯使用说明书
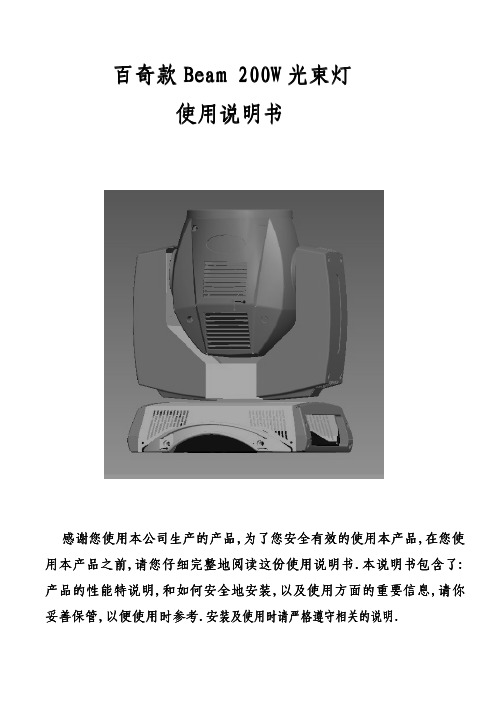
百奇款Beam 200W 光束灯使用说明书感谢您使用本公司生产的产品感谢您使用本公司生产的产品,,为了您安全有效的使用本产品为了您安全有效的使用本产品,,在您使用本产品之前用本产品之前,,请您仔细完整地阅读这份使用说明书请您仔细完整地阅读这份使用说明书..本说明书包含了本说明书包含了::产品的产品的性能特说明性能特说明性能特说明,,和如何安全地安装如何安全地安装,,以及使用方面的重要信息以及使用方面的重要信息,,请你妥善保管妥善保管,,以便使用时参考以便使用时参考..安装及使用时请严格遵守相关的说明装及使用时请严格遵守相关的说明..产品描述产品描述::百奇款Beam 200W 光束灯光束灯,,摇头灯新的革命摇头灯新的革命!!更轻…总质量只有总质量只有17KG 17KG 17KG!!更快…X/X/YY 移动速度更快移动速度更快,,运行更平滑运行更平滑、、噪音更小噪音更小!!更亮…3合一光学镜头组合合一光学镜头组合,,色温达色温达8500K 8500K 8500K、、比700W 700W、、1500W 光束灯的亮度、色温更高!更低…灯泡功率只有灯泡功率只有200W 200W 200W,,总功率只有创造创造220W,220W,220W,低功耗低功耗低功耗!!更强…光束感更强光束感更强,,平行光平行光更锐利更锐利更锐利!!更多…功能更多功能更多,,更强大,16CH 通道通道:14:14:14款颜色、款颜色、款颜色、171717款图案、旋转款图案、旋转款图案、旋转88棱镜、雾化、频闪棱镜、雾化、频闪!!技术参数:电源电源:AC220V-240V :AC220V-240V 频率频率:50Hz-60Hz :50Hz-60Hz (可选可选100-120V/50-60Hz)100-120V/50-60Hz)总功率总功率:220W :220W 保险丝保险丝:7A:7A 镇流器镇流器::电子镇流器或传统镇流器电子镇流器或传统镇流器((可选可选))光源光源::飞利浦飞利浦(5R)(5R)(5R)灯泡灯泡灯泡功率灯泡功率:200W :200W 色温色温:8500K:8500K 平均寿命平均寿命:2000H :2000H :2000H(灯泡和反光杯整体封装(灯泡和反光杯整体封装(灯泡和反光杯整体封装,,光效更高使用寿命长光效更高使用寿命长))控制信号控制信号::国际标准DMX512外观外观::耐高温塑料耐高温塑料++模压合金材料灯体颜色灯体颜色::黑色防护等级防护等级::IP20纸箱包装尺寸纸箱包装尺寸:46*42*55cm :46*42*55cm 净重净重::17.KG功能简介功能简介::1.1.国际标准控制信号国际标准控制信号国际标准控制信号:DMX512:DMX5122.2.通道数量通道数量通道数量:16CH :16CH 通道3.3.马达数量马达数量马达数量::共1111个静音马达个静音马达4.4.液晶屏显示液晶屏显示5.X 轴水平旋转轴水平旋转540540540℃℃、Y 轴垂直转动轴垂直转动270270270℃℃、带自动校正定位带自动校正定位..6.X 6.X、、Y 轴运转可调和微调7.7.调光调光调光::0-100%100%线性调节线性调节8.8.频闪频闪频闪::双片式频闪双片式频闪(0.5(0.5(0.5--9次/秒),完全的线性调光和可变的频闪速度9.9.颜色轮颜色轮颜色轮::带有带有141414种颜色种颜色种颜色++空白空白((能创造出锐利的空中光束效果能创造出锐利的空中光束效果))10.10.图案轮图案轮图案轮::带有带有171717款固定图案片款固定图案片款固定图案片++空白空白((让你快速改变光束形状让你快速改变光束形状))11.11.棱镜棱镜棱镜::旋转八面棱镜旋转八面棱镜,,可以双向旋转可以双向旋转,,旋转速度快慢可调旋转速度快慢可调,,令图案投射效果更丰富12.12.雾化雾化雾化::柔光效果柔光效果,,轻松实现柔和梦幻的图案效果。
Viscor VRUo-LRC LED 天花板灯说明书

IP65ICRATEDIK10HousingPrecision die formed and welded 16 gauge cold rolled steel housing with specified material (see product ordering key).MountingFlange installation is supported by swing style mounting brackets.Door FrameSingle piece overlapping style die formed 16 gauge cold rolled steel or stainless steel. Corners are TIG welded and blended. Tamper resistant TORX ® Head with center pin fasteners secure door frame to housing.LEDAvailable in three standard colour temperatures 3500K, 4000K, 5000K. Additional LED night light available (consult ordering key).Lens & Lens RetentionMultiple lens choices available (see product key for options). Lens sealed to door frame with continuous retention system and supported with stainless steel aircraft cables.FinishPolyester powder painted white finish features a high reflectivity coating for improved performance and efficiency.ElectricalLong life LED’s coupled with high efficiency drivers provide quality illumination. Rated to deliver an L80 performance >50,000 hours. The standard driver has a THD of <10%. Standard low-voltage dimming (0-10v). All electrical components are CSA or UL approved. A ½” EMT hole is provided for wiring connections.Warranty5 year limited warranty. For complete warranty, click here:DimensionsTop ViewEnd ViewSide ViewCutoutConsult installation guide for exact dimensions.Product DescriptionThe VRUo-LRC series by Certolux is a vandal-resistant specification-grade recessed luminaire for flanged, or security ceilings. Anti-Ligature is a standard feature of this series. The luminaire also features tamper-resistant fasteners to protect from unauthorized fixture penetration and security lenses to maximize impact resistance. The full assembly is tested to exceed the rating of IK10 for impact resistance.Feature Options • LED Night Light• Emergency Lighitng Battery Pack • IP65 RatingApprovals• Approved to CSA and UL standards.• UL listed for insulated ceilings, wet locations.• Government accepted for use in areas of high risk.P82 - .040 White Frosted Acrylic(Not for external use)P13 - .125 Prismatic AcrylicP42 - .156 Prismatic PolycarbonateNote: Maximum lens thickness combined is .625”P08 - .250 Clear Polycarbonate P47 - .375 Clear Polycarbonate P48 - .500 Clear Polycarbonate Note: Maximum lens thickness combined is .625”Order KeyLED Performance DataEXAMPLE: VRUO2X2B/BLED840K070LUNV-P82/P08Photometrics。
OSRAM VIP Super高压氧化合cury发光灯说明书.pdf_1701942943.2180

Page 1 of 3
121798
Product Safety Data Sheet for OSRAM Videoprojection Lamps
---------------------------------------------------------------------------------------------------------------------------------------------------------------IV. FIRE & EXPLOSION HAZARDS
THERE ARE NO KNOWN HEALTH HAZARDS FROM EXPOSURE TO LAMPS THAT ARE INTACT.
The following information is for the arc-tube portion of the bulb only, and does not include materials used in the reflector or
---------------------------------------------------------------------------------------------------------------------------------------------------------------Flammability: ignition temperature of front-cap material: 595°C Fire Extinguishing Materials: Use extinguishing agents suitable for surrounding fire, such as water spray, foam, dry powder, or CO2. Special Firefighting Procedure: Use a self-contained breathing apparatus to prevent inhalation of dust and/or fumes that may be generated from broken lamps during firefighting activities. Unusual Fire and Explosion Hazards: When exposed to high temperature, toxic fumes may be released from broken lamps. Fire Fighting Protective Equipment: A self-contained breathing apparatus and suitable protective clothing should be worn in fire conditions. Hazardous Decomposition Products: CO, CO2
