ibmpowervm安装配置手册
Power-750--PowerVM安装配置手册
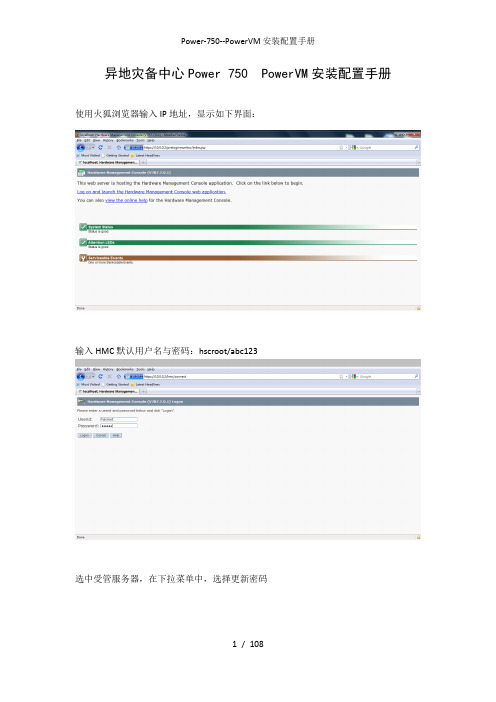
异地灾备中心Power 750 PowerVM安装配置手册使用火狐浏览器输入IP地址,显示如下界面:输入HMC默认用户名与密码:hscroot/abc123选中受管服务器,在下拉菜单中,选择更新密码输入HMC默认密码abc123输入ASMI默认密码admin选中受管服务器,下拉菜单>操作>开机开机选项,选择“正常”选择受管服务器,下拉菜单>属性将“关闭所有逻辑分区后关闭系统”选项去掉将受管服务器下的全分区关闭选择立即关闭选择“yes”选择“no”全分区已经关闭,如下图所示:再次选择受管服务器,下拉菜单>属性服务分区选择“未分配”选中受管服务器的全分区,将全分区删除选择“ok”选中受管服务器,下拉菜单>配置>创建分区>AIX or Linux分区名输入“test”概要文件输入“test_profile”选择专有处理器按下图配置CPU按下图配置内存将下列设备添加为“必须”(未完待续)将下列设备添加为“必须”添加后如下图所示:添加后如下图所示:一直单击下一步,直到出现如下画面,单击完成创建后的分区如下图所示:将系统诊断光盘放入光驱中,并激活test分区选择打开终端窗口,并点击高级按钮单击“ok”浏览器弹出如下窗口,选择“始终信任此发行者的内容”,单击是输入“0”后回车系统启动界面如下:服务器需要扫描新硬件,时间比较长,请耐心等待(大约50分钟左右),如下图输入“1”并回车出现如下画面,并回车如下画面,输入“3”并回车输入“vt100”并回车回车后出现如下画面:使用键盘的“向下方向键”移动到如下画面,选择“Raid Array Manager”并回车选择“IBM SAS Disk Array Manager”并回车选择“List SAS Disk Array Configuration”并回车选择“sissas0 Available 00-00 PCI Express x8 Ext Dual-x4 3Gb SAS Adapter”并回车sissas0 与sissas2 两块SAS卡位HA的关系,下面共有5块300GB SAS 硬盘,如下图所示:按住ESC+3 返回,选择“sissas1 Available 01-00 PCI Express x8 Ext Dual-x4 3Gb SAS Adapter”并回车Sissas1 与sissas3 两块SAS卡位HA的关系,下面共有5块300GB SAS 硬盘如下图所示:按ESC+3 返回,选择“Create an Array Candidate pdisk and Format to 528 Byte Sectors”回车选择“sissas0 Available 00-00 PCI Express x8 Ext Dual-x4 3Gb SAS Adapter”并回车,如果出现如下画面按ESC+3 返回,选择与sissas0 同一组的另外一块SAS卡sissas2,如下图所示:按ESC+7 选择全部的5块硬盘回车,如下图所示:出现确认窗口后回车:回车后出现如下画面,此过程时间较长,请耐心等待格式化完成5块硬盘全部格式化完毕后,如下图所示:回车后如下图所示:回车后,选择“sissas1 Available 01-00 PCI Express x8 Ext Dual-x4 3Gb SAS Adapter”回车后如下图所示:按ESC+7键选择所有5块硬盘,如下图所示:出现确认对话框,回车开始格式化磁盘,格式化时间比较长,请耐心等待,如下图所示:格式化完成后如下图所示:回车后如下图所示。
IBM服务器虚拟化PowerVM介绍
IBM Cloud Infrastructure(云架构 ) 之 “服务器虚拟化 PowerVM”云架构 L3 级课程© Copyright IBM Corporation 2010L3级课程云架构“PowerCloud 之虚拟化 PowerVM” 内容安排ØPowerVM 虚拟化概述 ØPowerVM 虚拟化技术特点 ØPowerVM 高级虚拟化(LPM,AMS) ØPowerVM 虚拟化优势Page 2L3级课程云架构PowerVM 虚拟化概述Page 3L3级课程云架构IBM 虚拟化的领导者A 40+ year tradition continues with PowerVM™1967IBM develops hypervisor that would become VM on the mainframe1973IBM announces first machines to do physical partitioning1987IBM announces LPAR on the mainframe1999IBM announces LPAR on POWER™2004IBM intro’s POWER Hypervisor™ for System p™ and System i™200720082009IBM announces POWER6™, the first UNIX® servers with Live Partition MobilityIBM announces PowerVMPowerVM is the leading virtualization platform for UNIX, IBM i and Linux® clientsü üUnify virtualization branding & technology for AIX®, i and Linux Exploit 40 years of IBM virtualization leadershipPage 4L3级课程云架构什么是 PowerVM?为IBM Power系统提供基于AIX, i, Linux操作系统的业界领先的统一虚拟化平台PowerVM 提供如下功能: 微分区 虚拟 I/O 服务器 集成虚拟化管理器 活动分区迁移 主动内存共享 Lx86 SupportMicro-Partitioning™ SubsystemsWorkload Partitions Live Application Mobility动态逻辑分区Page 5L3级课程云架构PowerVM虚拟化架构工作负载管理和控制AIX Partitions 分区 硬件 管理 控制台Linux Partitions 分区i5/OS i Partitions 分区虚拟 I/O 服务器 虚拟 适配器 虚拟 磁盘Unassigned 没有分配的 On Demand 随需应变的 Resources 资源POWER Hypervisor 固件 POWER 服务器 硬件 服务 子系统虚拟网络 虚拟处理器 处理器 内存 I/O 扩展槽 本地设备和存储 虚拟内存网络和网络存储Page 6L3级课程云架构PowerVM 的三种版本ExpressPowerVM 版本Standard JS12/22/23/43 Power560/570/ 770*/595/780 10 per core (up to 1000) VMControl IVM, HMC ü Enterprise JS12/22/23/43 Power560/570/ 770/595*/780* 10 per core (up to 1000) VMControl IVM, HMC ü ü ü System i*, System p* ü AIX / Linux / i ü ü AIX / Linux / i ü System i*, System p* ü AIX / Linux / i üPowerVM 提供如下功能: 微分区 虚拟 I/O 服务器服务器Power 520/550/750 PS700/701* 2 per server + VIOS VMControl IVM ü最大分区数 管理平台集成虚拟化管理器 活动分区迁移 Lx86 量身定制虚拟IO服务器 分区在线迁移 动态内存共享 多CPU共享池 共享专有分区 客户分区支持 Lx86Multiple Shared Processor Pools are supported by POWER6 and HMC managed environments Live Partition Mobility works with AIX V5.3 and above and Linux on POWERPage 7* POWER6 processor-based servers onlyL3级课程云架构PowerVM的功能与PowerVM版本,处理器以及操作系统的兼容性Feature LPAR Licensed by All Editions (limited on Express) Processor support POWER4,5 and 6 Operating System supporta AIX 5.3 and 6.1 SLES 9, 10 for POWER (not POWER4) RHEL 4, 5 for POWER (not POWER4 AIX 5.3 and 6.1 SLES 9, 10 for POWER RHEL 4, 5 for POWER (5.1 for POWER6) AIX 5.3 and 6.1 SLES 9, 10 for POWER RHEL 4, 5 for POWER AIX 5.3 and 6.1 SLES 10 update 1 for POWER RHEL 5.1 for POWER AIX 5.3 and 6.1 SLES 10 for POWER6 RHEL 5.1 for POWER6 Virtual I/O Server Integrated Virtualization Manager AIX 5.3 and 6.1 SLES 10 for POWER RHEL 4, 5, 5.1 for POWER AIX 5.3 and 6.1 SLES 9 for POWER (10 for POWER6) RHEL 4, 5 for POWER (5.1 for POWER6) AIX 6.1 AIX 6.1 TL3 No AIX 5.3 support SUSE Linux Enterprise Server 11 IBM i 6.1 plus PTF SI32798 AIX 5.3 and 6.1 SLES 10 update 1 for POWER RHEL 5.1 for POWERCapacity Upgrade on DemandAll Editions (specific models)POWER4, 5 and 6Micro-PartitioningAll EditionsPOWER5 and 6Shared Dedicated CapacityAll EditionsPOWER6Multiple Shared Processor Pools Virtual I/O Server IVM Virtual SCSIPowerVM SE and EE All Editions PowerVM Express, SE and EE All EditionsPOWER6 with HMC POWER5 and 6 POWER5 and 6 POWER5 and 6Virtual EthernetAll EditionsPOWER5 and 6 POWER4, 5 and 6Workload Partitions (WPARs)Workload Partitions managerActive memory sharingPowerVM Enterprise EditionPOWER6Live Partition Page Mobility 8PowerVM Enterprise EditionPOWER6L3级课程云架构PowerVM 虚拟化技术特点Page 9L3级课程云架构PowerVM 技术特点概览灵活动态逻辑分区/微分区/WPAR Shared Dedicated Processor1 1 CPU CPU Virtual I/O server Virtual I/O server partition partitionIVM IVM Storage sharing Storage sharing Ethernet sharing Ethernet sharingLive Partition Mobility / Live Application Mobility 分区迁移 / 应用迁移4 4 CPUs CPUs4 4 CPU CPU1 1 CPUs CPUs4 4 CPUs CPUsLinux LinuxLinux LinuxAIX AIXAIX AIXAIX AIX22Hypervisor HypervisorVirtual I/O paths Virtual I/O pathsAIX AIXAIX AIXApp1 App2 3App3 App1 App2 App336 6 CPUs CPUs Micro-Partitioning Micro-PartitioningApp4 App4VIOS Virtual SCSI/FC/Ethernet SupportActive Memory Sharing 活动内存共享x86 Linux的支持IBM Systems Director VMControl 简化IT操作/降低成本Page 10A I X 5L V 5.3Dedicated processor partition (LPar)2 CPUsAIX 5L V5.3LinuxAIX6V6.1VIOS IVMIntegrated Virtualization ManagerIntegrated Virtualization MgrP P P Dedicated / SharedDedicatedProcessorsPlanned Dedicated Shared ProcessorsDonation option enabled, a dedicated partition donates its excesscycles to the uncapped partitions. Unused processor cycles are utilized.提高系统使用率Dedicated CoreShared Core2 partitions§Uncapped§Evenly weighted1 partitionTwo evenly weighted 1-way uncapped partitions ( 100% Utilized )Unused processor cycles in dedicated partition are wasted usedoverL3级课程云架构专用和共享资源的转换Development/Test/QA DB-Server ProductionDB-Server Test 1 Test 2 Permantenly load balancing within the shared poolApp 1App 2App 3Shared Pool Move dedicated resources to the shared poolDynamic movement of resources from/to dedicated LPARsPage 21QAL3级课程云架构虚拟I/O服务器虚拟 I/O服务器* AIX 或 Linux AIX 或 Linux 虚拟 I/O服务器*虚拟 SCSI 功能虚拟以太网功 能以太网FC以太网BB’虚拟以太网功 能虚拟 SCSI 功能Hypervisor以太网 B A 以太网 B’Ø 虚拟I/O架构l lØ 优势l l虚拟及/或物理设备的组合 支持多个VIO服务器*减少适配器、I/O抽屉和端口数量 加快部署速度Ø 虚拟SCSIl l lØ 虚拟以太网l l l虚拟 SCSI、光纤通道和DVD 逻辑和物理卷虚拟磁盘 多路径和冗余选项VLAN和链路汇聚支持 LPAR之间的虚拟局域网 高可用性选项* 通过PowerVM特性在Power Systems上提供。
PowerVM配置文档及原理详解

VIO配置文档一、创建VIO SERVER (2)二、安装VIO系统 (7)三、配置映射关系(原理参考SG247940) (9)1、VSCSI映射关系 (9)2、SEA映射关系 (13)四、创建VIO CLIENT (16)五、双VIO原理 (21)1、存储冗余实现原理 (22)1.1内部存储: (22)1.2外部存储: (22)2、网络冗余实现原理 (23)2.1SEA_Failover方式 (23)2.2NIB方式 (24)六、双VIO配置步骤 (25)1、创建两个VIO S ERVER端 (25)2、存储冗余 (25)2.1 内置硬盘冗余: (25)2.2外置硬盘冗余: (27)2.3 多链路冗余测试 (32)3、网卡冗余(以SEA_FAILOVER为例) (33)4、测试网卡(以SEA_FAILOVER为例) (38)附: (43)1、双VIO网卡注意事项 (43)2、以下情况触发网卡切换(SEA_FAILOVER方式) (43)3、MPIO参数调优及解释: (43)4、链路优先级查看与修改 (44)一、创建VIO Server1、在HMC中创建VIO server.2、前面与创建Lpar过程类似…(步骤略)到创建I/O选项时,选择此VIO server需要的设备,并设置为Required。
3、创建Virtual Adapters (虚拟适配器)3.1、创建Ethernet Adapter (虚拟网卡)3.2、配置虚拟网卡参数➢Adapter ID:虚拟网卡的系统Location➢VLAN ID:虚拟交换机编号(相同VLAN ID指向同一个交换机,相同VLAN ID才能通信)➢IEEE 802.1q compatible adapter:多个VLAN ID并存。
➢Access external network:连接外部网络,在Server端做SEA时必选。
Trunk Priority(优先级别):多个VIO server中选择优先激活的SEA设备(多VIO时只能同时激活一条网络通路,需要优先级别告诉系统谁最先被激活,后面搭建双VIO会提到)。
PowerVM常用命令手册
PowerVM常用命令手册目录目录 (1)1. 基本操作 (3)2. 创建VIOS分区 (3)3. VIOS配置 (7)3.1 创建共享以太网卡SEA(Shared Ethernet Adapter) (7)3.2 创建VSCSI虚拟磁盘 (7)3.3 NPIV配置 (12)3.4 参数调整 (16)3.5 VIO测试 (18)3.6 设置VIO Server分区自动启动 (19)4. VIOS巡检工作 (21)5. 虚拟资源的调整 (22)6. VIOS、VIOC配置实例 (25)7. WPAR技术 (32)7.1 创建Application WPAR (33)7.2 创建System WPAR (34)7.3 如何确定当前是在Global Environment中还是在WPAR中 (36)7.4如何关闭WPAR (36)7.5 如何重启WPAR (37)7.6修改WPAR的名字 (39)7.7 WPAR的状态 (39)7.8 删除WPAR (40)7.9 WPAR中的文件系统管理 (41)7.10 同步WPAR配置 (45)7.11备份、恢复、克隆WPAR (45)7.12 WPAR用户和组管理 (46)7.13 恢复WPAR中的用户口令 (46)7.14修改MPIO磁盘的hcheck_interval属性 (47)8. 存在多个VLAN ID的TCP/IP网络 (47)9. Active Memory Expansion(AME)技术 (50)10. 备份和恢复VIO Server (53)10.1 备份VIO Server (53)10.2 恢复VIO Server (55)11. 故障处理 (56)11.1 收集虚拟资源配置信息 (56)11.2更换VIO Server的SEA物理网卡 (56)12. topas性能监控 (58)1. 基本操作默认用户:padmin默认无密码默认用户环境为受限的Korn Shell切换到AIX root用户环境命令:oem_setup_env安装VIOS系统installios接受VIOS License文件命令:license -accept升级VIOS版本命令:updateios -commitupdateios -accept -install -dev /dev/cd0ioslevelshutdown -restart备份VIOS的配置:viosbr -backup -file /home/padmin/<backupfile_name>恢复VIOS的配置:viosbr -restore -file <backupfile_name>.tar.gz备份VIOS系统backupiosroot用户环境下输入VIOS配置命令:/usr/ios/cli/ioscli lsmap -all查看分区的CPU、内存配置lparstat -i2. 创建VIOS分区一个shared、uncapped Processor分区作为VIOS分区即可,在同一台服务器上可以部署多个VIOS分区,例如在网络IO和磁盘IO都很繁忙的应用环境,可以部署四个VIOS分区,其中两个VIOS负责处理Virtual Ethernet,另外两个VIOS负责处理Virtual Disk。
IVM配置操作手册

本页仅作为文档封面,使用时可以删除This document is for reference only-rar21year.MarchIVM 配置操作手册V1.02013/7/5文档密级:[ ]机密[√]内部公开[ ]对外公开文档状态:[ √]草案[ ]正式发布[ ]正在修订2013-07-05 创建目录第1 章IVM 架构介绍 (1)1.1 IVM 架构介绍 (1)1.2 IVM 系统要求 (2)1.2.1 服务器硬件要求 (2)1.2.2 固件和操作系统要求 (2)1.3 IVM 与HMC 区别 (3)第2 章IVM 创建新分区 (6)第3 章分区操作系统安装前ISO 镜像准备 (12)第4 章常见维护操作 (17)集成虚拟化管理器(IVM) 是PowerVM® 版硬件功能部件的一个组件,可用于管理虚拟I/O 服务器和客户机逻辑分区。
集成虚拟化管理器(IVM) 提供基于Web 的系统管理界面和命令行界面,可使用它们来管理某些使用IBM® 虚拟I/O 服务器的IBM Power Systems 服务器和IBM BladeCenter® 刀片服务器。
在受管系统上,您可以创建逻辑分区、管理虚拟存储器和虚拟以太网以及查看服务器的相关服务信息。
IVM 与虚拟I/O 服务器包括在一起,但它仅在没有硬件管理控制台(HMC) 的特定平台上可用。
如果将虚拟I/O 服务器安装在受支持的服务器上,并且在安装虚拟I/O 服务器时没有HMC 连接至该服务器,那么会在该服务器上启用IVM。
然后可使用IVM来通过虚拟I/O 服务器配置受管系统。
IVM在VIOS中的架构图如下:IVM会产生一个新的虚拟设备VMC (Virtual Management Channel),用于与power hypervisor交互。
通过在VIOS上执行命令可以看到ibmvmc0设备。
$ lsdev -virtual | grep ibmvmc0ibmvmc0 Available Virtual Management Channelvmc正常运行需满足以下要求:硬件虚拟化特征开启。
PowerVM第一部分:HMC部署手册

HMC部署手册——Vmware下部署HMC浪潮软件质保中心作者:胡立军日期:2012年2月24日HMC部署手册 (1)——Vmware下部署HMC (1)正文 (2)1HMC介绍 (2)2创建HMC虚拟机 (3)3修改HMC虚拟机文件 (6)4安装HMC (6)5配置HMC (9)6激活PowerVM (20)7HMC单用户模式 (23)正文1HMC介绍IBM硬件管理控制台(Hardware Management Console), 是一个图形界面的软件,运行在经过定制的red hat linux之上, 提供了标准的用户接口来配置和管理Power System系列服务器以及服务器上的分区。
系统管理员通过HMC这个口连接网线来控制管理小型机,包括安装操作系统、对Power System服务器上的分区进行配置和日常管理。
在Vmware中安装HMC所需要的工具有:4.1.Vmware7.14.2.HMC_Recovery_V7R720_1.iso、HMC_Recovery_V7R720_2.iso(ftp:///software/server/hmc/recovery_images)4.3.HMC.rom文件hmc_rom.zip2创建HMC虚拟机2.1.打开Vmware,新建虚拟机向导,选择“标准”类型的虚拟机;2.2.选择“我以后再安装系统”。
2.3.选择“Linux→Other Linux 2.4.x kernel”2.4.输入虚拟机名称,选择位置。
2.5.指定磁盘容量至少40GB2.6.点击“完成”2.7.编辑虚拟机设置,修改:内存:1024MB硬盘必须设置为:IDE,大小为40GB以上.安装完后实际约7.5GB CD使用HMC的ISO文件网络适配器:桥接3修改HMC虚拟机文件3.1.将文件“hmc.rom”复制到虚拟机目录下,并使用UE打开HMCv7.vmx文件3.2. 在HMCv7.vmx中增加一行,hmc.rom为绝对路径名4安装HMC4.1.打开运行该虚拟机,加载后显示如下,选择“Install”后,点击“Next”;4.2.选择“Install from media”,点击4.3.点击“Finish”后进行安装HMC,约30分钟完成第一张盘4.4.过程截图:提示选择另一张光盘,从光盘中选择第二张盘,并且连接后,在此界面输入1,并回车确认,再按回车继续。
IBM PowerLinux操作手册

#yuminstalltftp-server
若软件包已经安装并且版本不需要更新,则会提示无需安装/更新,请转步骤2。
可以看到,tftp服务软件依赖于xinetd服务包,这是因为在linux系统里,xinetd是一种网络服务进程的“总控进程”,习惯上叫做“超级服务器”,意为其它网络服务进程是在xinetd的调度下运行的。
当然也有不受控于xinetd的独立网络服务程序,如nfs-server。
注意yum可以自动发现软件包之间的关联并自动安装依赖的软件包,这与其它软件安装程序如rpm相比具有很大的便利性。
输入”y”确认,完成安装过程:
2)配置tftp服务
系统默认状态下tftp服务是disable的。
打开tftp服务的配置文件,将disable=yes改为disable=no
3)启动tftp服务。
IBM Power Development Platform 安装指南说明书
IBM Power Development Platform Setup guide for the IBM Industry Application PlatformDavid Carew IT Architect,IBM CorporationIBM Systems ISV Business StrategyJan, 2014© Copyright IBM Corporation, 2014. All Rights Reserved.Table of contentsAbstract (1)Introduction (1)WebSphere application server 7.0.0.13 (1)DB2 WorkGroup Server Edition 9.7.3a (2)WebSphere MQ 7.0.1.3 (2)Installation (2)Installation prerequisites (2)Installing the IBM Industry application platform on AIX (3)Verifying the installation (4)Working with the IBM Industry application platform (7)File-system locations (7)Starting and stopping WebSphere application server (7)Starting and stopping the WebSphere MQ default queue manager (8)Starting and stopping the DB2 Workgroup Server Edition instance (8)Network ports (8)Using Rational development tools with WebSphere application server (8)Applying fixes to the embedded products (9)Summary (10)Resources (11)About the author (12)Trademarks and special notices (13)PDP setup guide for the IBM Industry application platformAbstractThis document explains how to install and configure the IBM Industry application platform on the IBM Power Development Platform (PDP). Specifically, it shows you how to install this preconfigured instance of IBM WebSphere application server (or WebSphere MQ) on an IBM AIX operating-system image for development, testing and validation purposes.IntroductionThe IBM® Industry application platform is a preconfigured instance of IBM WebSphere® application server, IBM DB2® and WebSphere MQ that is available for your IBM AIX® 7.1 and AIX® 6.1 operating-system images on the IBM Power Development Platform (PDP). You can use PDP to develop, test and validate applications by using these products. After reserving your PDP partition, which includes choosing the hardware configuration and operating system, install the IBM Industry application platform on that partition. The IBM Industry application platform contains the following software components:• WebSphere application server v7.0.0.13• DB2 Workgroup server edition 9.7.3a• WebSphere MQ 7.0.1.3• IBM Rational® agent controller v8.3WebSphere application server 7.0.0.13For WebSphere application server 7.0.0.13, the IBM Industry application platform product configuration includes the following settings:Server profile created: A stand-alone WebSphere application server profile has been created and is started for you during the initialization of the image.WebSphere Security enabled: WebSphere application server security is enabled, with the virtuser user ID serving as the WebSphere application server administrator ID. During the initialization of the IBM Industry application platform, you are required to set the password for the virtuser ID.Sample Application: WebSphere application server is preconfigured with the “DayTrader” application, a sample application that uses WebSphere application server, DB2 and WebSphere MQ.Rational agent controller started: Rational agent controller v8.3 is started to enable remote access to the WebSphere application server profile in the image. Developers can use Rational application developer v8.0, Rational application developer v7.5., Rational Software Architect v8.0, or Rational Software Architect v7.5 integrated development environments (IDEs) on their local machines and deploy, test and debug their WebSphere application server programs on the PDP image. This offloads much of the work from your local machine and still gives you seamless access to the application server in the PDP image. The IDEs, in concert with rational agent controller, automatically transports and installs your IDE applications on the application server that runs in the image whenever you make changes to the applications. You can also test, debug and profile the application performance from directly inside the IDEs.PDP setup guide for the IBM Industry application platform1DB2 WorkGroup Server Edition 9.7.3aFor DB2 WorkGroup Server Edition 9.7.3a, the IBM Industry application platform product configuration includes the following settings:DB2 instance created: An instance with user ID db2inst1 is created for you. During the initialization of the image, you are required to set the password for the db2inst1 user ID.DB2 database created: A database named DAYTRADR is created for the DayTrader sample application.WebSphere MQ 7.0.1.3Default queue manager created: A queue manager named iap.queue.manager has been created for you and is started during image initialization.Queues and topics created: Queues and topics for the DayTrader application are created for you.InstallationThe following section provides details about installing the IBM Industry application platform.Installation prerequisitesThe IBM Industry application platform requires AIX 6.1 or AIX 7.1 with a 64-bit kernel on IBM POWER7™ processor-based hardware. The installation script terminates with an error message if these requirements are not met.PDP setup guide for the IBM Industry application platform2Installing the IBM Industry application platform on AIXFollow the steps listed next to install the IBM Industry application platform on your AIX system. These are intended as reference only, so you must verify that they are appropriate for your setup:1. Become root by entering the following command:$ su–2. Run the following installation command:# /stage/middleware/IndustryFrameworks/iap/setup.sh1 Create a password for virtuser. This user is used to start and stop WebSphere application server and WebSphere MQ. When prompted by the script, enter a password for the virtuser user and then verify the password. You need to remember this password so that you can manage WebSphere application server and WebSphere MQ.2 Create a password for the DB2 users db2inst1, dasusr1 and db2fenc1. The DB2 instance creates these users and, for convenience, they are set to the same password that you create.3 When prompted by the script, enter a password for these users and then verify the password. Remember this password so that you can connect to DB2 and can perform DB2 System Administration tasks. The script runs for several minutes. Wait for a completion message, such as the one shown in Figure 1 before continuing:. Figure 1. Completion messagePDP setup guide for the IBM Industry application platform3Verifying the installationAfter the installation has been completed, you can access the DayTrader sample application. DayTrader is an end-to-end Web application that is modeled after an online stock brokerage. DayTrader uses Java™ 2 Platform, Enterprise Edition (J2EE) components such as servlets, JavaServer Pages (JSP) files, Java Persistence API (JPA) entities, enterprise beans, message-driven beans (MDBs) and Java Database Connectivity (JDBC) to provide a set of user services such as login and logout, stock quotes, buy, sell, account details, and so on through standards-based HTTP and Web-services protocols.1. To start using DayTrader, access the following URL from your browser:http://<PDP-image-ip-address>:9080/daytrader2. Click Configuration, as shown in Figure 2:Figure 2. Clicking the Configuration tabPDP setup guide for the IBM Industry application platform43. Click (Re)-populate DayTrader Database, as shown in Figure 3:Figure 3. Repopulating the DayTrader databasePDP setup guide for the IBM Industry application platform54. Wait for the confirmation that 200 users were created, as shown in Figure 4:Figure 4. Waiting for confirmation5. If you click the Trading & Portfolios tab, you can simulate the trading of stocks. The primitives tab has aseries of operations that you can use as the basis for performance tests and to exercise certain parts of the applications (for example, message-driven beans). The FAQ tab has general information about running DayTrader and the configuration tab has various settings that can be changed.PDP setup guide for the IBM Industry application platform6Working with the IBM Industry application platformThe following sections include useful information for working with the IBM Industry application platform.File-system locations The products in the IBM Industry application platform are located in the directories listed in Table 1: Table 1. WebSphere application server 7.0.0.13 directories Table 2. DB2 Workgroup Server Edition v9.7.3a directoriesTable 3. WebSphere MQ V7.0.1.3 directories Starting and stopping WebSphere application serverUse the administrative console (http://<PDP-image-ip-address>:9060/ibm/console) or the startServer.sh and stopServer.sh shell scripts, respectively, to start and stop the application-server profile.• Open a Secure Shell (SSH) session and enter the following to start the application-server profile:$ su -virtuser $ /opt/IBM/WebSphere/AppServer/profiles/AppSrv01/bin/startServer.sh server1• To stop the applicationserver profile, enter the following code:$ su -virtuser $ /opt/IBM/WebSphere/AppServer/profiles/AppSrv01/bin/stopServer.sh server1• To start the Rational Agent Controller, enter the following as root:$ /opt/IBM/SDP/AgentController/RACStart.sh• To stop the Rational Agent Controller, enter the following as root:$ /opt/IBM/SDP/AgentController/RACStop.shPDP setup guide for the IBM Industry application platform 7Item LocationWebSphere Application Server 7.0.0.13 /opt/IBM/WebSphere/AppServerApplication server profile (/infocenter/wasinfo/v7r0/index.jsp?topic=/com.ibm.websphere.base.doc/info/aes/ae/welcappservers.html)/opt/IBM/WebSphere/AppServer/profiles/AppSrv01 Update Installer (/infocenter/wasinfo/v7r0/index.jsp?topic=/com.ibm.websphere.installation.base.doc/info/aes/ae/tins_ptfLevels.html)/opt/IBM/WebSphere/AppServer/UpdateInstaller Rational Agent Controller 8.3 /opt/IBM/SDP/AgentControllerLocation DB2 Workgroup Server Edition v9.7.3a/opt/IBM/db2/V9.7 Instance home /home/db2inst1Location WebSphere MQ v7.0.1.3/opt/mqmImportant: With the stopServer.sh script, you must specify the administrative user, virtuser, and the password that you provided when installing the IBM Industry application platformStarting and stopping the WebSphere MQ default queue managerThe WebSphere MQ default queue manager (iap.queue.manager) is started when the IBM Industry ApplicationPlatform is installed.• Open a secure-shell session and enter the following to start the default queue manager:$ su -virtuser$ strmqm• To stop the default queue manager, enter:$ su -virtuser $ endmqm -iiap.queue.managerStarting and stopping the DB2 Workgroup server edition InstanceThe DB2 Workgroup Server Edition instance (db2inst1) is started when the IBM Industry application platform is installed.• Open a secure-shell session and enter the following to start the DB2 Workgroup Serverinstance:$ su -db2inst1$ db2start• To stop the DB2 Workgroup Server Edition instance, enter:$ su -db2inst1$ db2stopNetwork portsTable 4 is a list of ports that are used for external access to the products in the IBM Industry application platform. This information is useful if you have to navigate through one or more firewalls to get to the PDP image that is running on the IBM Industry application platform.Description50000 Port used for external access to DB2 instance1414 Port used for external access to the WebSphere MQ default queue manager9080 Default HTTP port for the WebSphere Application Server instance9043 Default HTTPS administrative port for the WebSphere Application Server instance 9060 Default HTTP administrative port for the WebSphere Application Server instance 8880 Default SOAP port for the WebSphere Application Server instance used for remote administration10002 Port used for external access to Rational Agent Controller10003 Port used for external access to Rational Agent Controller10005 Port used for external access to Rational Agent ControllerTable 4. Ports used for external access to products in the IBM Industry application platformUsing rational development tools with WebSphere application serverUsers can use locally installed versions of rational application developer or Rational Software Architect to deploy, test and debug applications running on the instance of WebSphere ApplicationPDP setup guide for the IBM Industry application platform8Server that is included with the IBM Industry application platform. Within Rational applicationdeveloper and Rational Software Architect, create a new server with the following properties: • Server host name: IP address of your PDP image• Server type: IBM WebSphere application server v7.0• Server name: Default value• Server runtime environment: Default value• • Server connection types and administrative ports: Manually provide connection settings • Connection Type: RMI• Port: 2809• Security is enabled on this server: Selected• • Current active authentication settings• User ID: virtuser• Password: Password that youdefine when the installation script forthe IBM Industry application platformruns• Application server name: server1Note: This procedure assumes that you have successfully connected your system that runs rational application developer and Rational Software Architect to your PDP image by using the appropriate VPN client.Applying fixes to the embedded productsInformation about applying fixes to the various products in the IBM Industry application platform is listed below.WebSphere application server v7.0.0.13 can be serviced on the PDP instance of the IBM Industry application platform just like other native installation of this software. Corrective service packages, such as interim fixes (which address a particular product issue) or fix packs (which are regular, cumulativeroll-ups of interim fixes into a single installable unit) are available to be downloaded from IBM support for WebSphere application server v7.0.From this site, you can search by using problem symptoms and receive information on IBM Technotes, IBM Redbooks® and fixes that might address your problem.WebSphere MQ v7.0.1.3 can be serviced on the PDP instance of the IBM Industry application platform just like other native installation of this software. Corrective service packages, such as interim fixes or fix packs are available to be downloaded from IBM support for WebSphere MQ v7.0. From this site, you can search using problem symptoms and receive information on technotes, Redbooks and fixes that might address your problem.DB2 Workgroup Server Edition v9.7.3a can be serviced on the PDP instance of the IBM Industry application platform just like other native installation of this software. Corrective service packages, such as interim fixes or fix packs are available to be downloaded from IBM support for DB2 Workgroup Server Edition 9.7.3a. From this site, you can search using problem symptoms and receive information on technotes, Redbooks and fixes that might address your problem.PDP setup guide for the IBM Industry application platform9SummaryThis document discusses the process of installing and configuring the IBM Industry application platform on PDP. There was a discussion of how to install this preconfigured instance of IBM WebSphere application server (or WebSphere MQ) on an AIX image for development, testing and validation purposes.PDP setup guide for the IBM Industry application platform10ResourcesThese web sites provide useful references to supplement the information contained in this document: • IBM Power Systems Information Center /infocenter/pseries/index.jsp• IBM Power Systems on IBM PartnerWorld® /partnerworld/systems/p• AIX on IBM PartnerWorld® /partnerworld/aix• IBM Systems on IBM PartnerWorld® /partnerworld/systems• IBM Publications Center/public/applications/publications/cgibin/pbi.cgi?CTY=US• IBM Redbooks® /redbooks• IBM developerWorks® /developerWorks• PDP-SAC User Guide /partnerworld/wps/static/pdf/PDP_sac_uguide.pdf• PDP How-to Web page with tutorials and documents /partnerworld/wps/pub/systems/PDP/howto • Software Mall -IBM Software Access Catalog/partnerworld/wps/pub/overview/B7000• IBM DB2 Workgroup Server Edition v9.7 Information Center/infocenter/db2luw/v9r7/index.jsp• IBM WebSphere MQ v7 Information Center/infocenter/wmqv7/v7r0/index.jsp• IBM WebSphere ApplicationServer v7 Information Center/infocenter/wasinfo/v7r0/index.jsp?topic=/com.ibm.websphere.base.doc/info/aes/ae/welcome_base.htmlPDP setup guide for the IBM Industry application platform11About the authorDavid Carew is a senior IT Architect for IBM ISV and Developer Relations in Austin, Texas, providing education, enablement, and consulting to IBM Business Partners.PDP setup guide for the IBM Industry application platform12Trademarks and special notices© Copyright IBM Corporation 2014. All rights Reserved.References in this document to IBM products or services do not imply that IBM intends to make them available in every country.IBM, the IBM logo, and are trademarks or registered trademarks of International Business Machines Corporation in the United States, other countries, or both. If these and other IBM trademarked terms are marked on their first occurrence in this information with a trademark symbol (® or ™), these symbols indicate U.S. registered or common law trademarks owned by IBM at the time this information was published. Such trademarks may also be registered or common law trademarks in other countries. A current list of IBM trademarks is available on the Web at "Copyright and trademark information" at/legal/copytrade.shtmlOther company, product, or service names may be trademarks or service marks of others.Information is provided "AS IS" without warranty of any kind.PDP setup guide for the IBM Industry application platform13。
IBM PowerLinux操作手册
5.安装telnet测试yum安装源安装成功5:配置网络服务tftp,telnet,nfs学习Linux网络服务的基本概念和配置方法,掌握服务进程的管理操作方法。
1.配置tftp服务1)安装tftp服务软件包首先用yum命令安装tftp-server。
运行#yuminstalltftp-server若软件包已经安装并且版本不需要更新,则会提示无需安装/更新,请转步骤2。
可以看到,tftp服务软件依赖于xinetd服务包,这是因为在linux系统里,xinetd是一种网络服务进程的“总控进程”,习惯上叫做“超级服务器”,意为其它网络服务进程是在xinetd的调度下运行的。
当然也有不受控于xinetd的独立网络服务程序,如nfs-server。
注意yum可以自动发现软件包之间的关联并自动安装依赖的软件包,这与其它软件安装程序如rpm相比具有很大的便利性。
输入”y”确认,完成安装过程:2)配置tftp服务系统默认状态下tftp服务是disable的。
打开tftp服务的配置文件,将disable=yes改为disable=no3)启动tftp服务前面提到,tftp服务是有xinetd超级服务程序管理的,上面修改的配置文件实际是供xinetd使用的。
因此,为了启动tftp服务,需要通知xinetd,使其重新load配置文件。
首先启动xinetd服务,如果还没启动的话:#servicexinetdstart然后,向xinetd进程发送SIGHUP通知其重新load所以配置文件:可以看到,tftp服务端口已经成功打开,表明tftp服务已经启动。
2.配置telnet服务Linux上的telnet服务与上述的tftp在配置管理上很相似,二者都是由xinetd管理的网络服务。
请参照tftp的配置步骤,完成telnet服务的配置。
3.配置NFS服务。
IBM服务器安装系统教程
IBM服务器安装系统教程在企业级服务器领域中,IBM服务器是广泛应用于各类企业的可靠且高性能的服务器之一。
为了充分发挥IBM服务器的优势,正确安装操作系统是至关重要的一步。
本教程将向您介绍IBM服务器安装系统的详细步骤和注意事项。
一、准备工作在开始安装操作系统之前,您需要准备以下事项:1. 操作系统镜像:确保您有所需操作系统版本的安装镜像,并将其存储在可访问的位置上,例如USB驱动器或网络共享文件夹。
2. 驱动程序:根据服务器型号和操作系统要求,下载和准备所需的最新驱动程序。
将驱动程序保存在与操作系统镜像相同的位置。
3. 安装工具:下载并准备IBM提供的服务器安装工具。
这些工具可帮助您管理和组织服务器安装过程。
二、系统引导设置在安装系统之前,您需要按照以下步骤进行系统引导设置:1. 开机并进入BIOS设置:启动服务器并按下指定键进入BIOS设置界面。
通常,这个键是F2或Delete。
在BIOS设置中,您可以更改启动顺序以使服务器从所需设备引导。
2. 设置首选设备:将服务器引导设备设置为您存储操作系统镜像的位置,例如USB驱动器或光盘驱动器。
确保将该设备设置为首选设备。
3. 保存并退出:在BIOS设置界面中,保存您所做的更改并退出。
服务器将重新启动,并从您选择的引导设备启动。
三、操作系统安装一旦您完成了系统引导设置,就可以按照以下步骤安装操作系统:1. 启动服务器:确保操作系统镜像所在的设备已连接到服务器,并启动服务器。
2. 进入安装界面:根据操作系统镜像类型,您将看到一个启动菜单或直接进入安装界面。
按照提示选择相应的选项进入安装界面。
3. 选择语言和时区:在安装界面上,选择适当的语言和时区设置,并继续下一步。
4. 接受许可协议:阅读并接受操作系统的许可协议,然后继续安装过程。
5. 确定安装位置:选择安装操作系统的磁盘分区或存储设备。
确保选择正确的设备以避免数据丢失。
6. 设置管理员密码:为操作系统设置管理员密码以确保系统的安全性。
ibm powervm安装配置手册

PowerVM 安装配置手册Version 1.1目录1虚拟IO服务器安装配置 (3)1.1 ......................................................... 虚拟IO服务器创建31.1.1........................................ 虚拟IO服务器分区Profile文件创建31.1.2.................................................. 虚拟IO 服务器软件安装121.1.3................................................. 安装虚拟IO服务器升级包161.2 ............................................... VIOS S HARED E THERNET A DATPER创建161.3 ....................................................... VIOS VIRTUAL DISK映射181.4 ............................................................ VIOS NPIV映射191.5 ...................................................... V IOS VIRTUAL CDROM映射201.6 ....................................................... VIOS VIRTUAL TAPE映射222 .......................................................... 分区服务器安装配置232.1 ............................................................ 分区服务器创建232.2 .................................................... 分区服务器虚拟光驱配置262.3 ............................................................ 分区服务器安装322.4 ........................................................ 分区服务器磁盘配置322.5 .................................................... 分区服务器SAN存储配置332.6 ........................................................ 分区服务器网络配置333 ......................................................... 动态逻辑分区资源调整333.1 .............................................................. 分区资源调整333.2 .............................................................. 查看分区资源354 ........................................................... 在线分区迁移(LPM) 364.1 ............................................................... 迁移前准备364.2 .............................................................. 分区迁移验证364.3 ................................................................. 迁移分区385 ................................................................... 设备维护415.1 ............................................................... 光纤卡更换416.2网卡更换 (42)5.3 ........................................................... R OOTVG备份与恢复426 ..................................................................相关红皮书437 ................................................................ 常见问题排错437.1 ................................................................. 性能监控437.2 ................................................................. 常见问题431虚拟IO服务器安装配置1.1虚拟IO 服务器创建请依照如下步骤创建VIOS分区1.1.1虚拟IO服务器分区Profile文件创建1) 如下图在HMC所管理的服务器上选择左侧server菜单下的POWER服务器建立虚拟IO 服务器分区,选择Configuration -> Create Logic Partition -> VIO Server2) 输入Partition ID 和Partition name, 完成后继续选择Next3)输入Profile name,完成后继续选择Next4)选择CPU的配置。
HMC powerVM实施文档
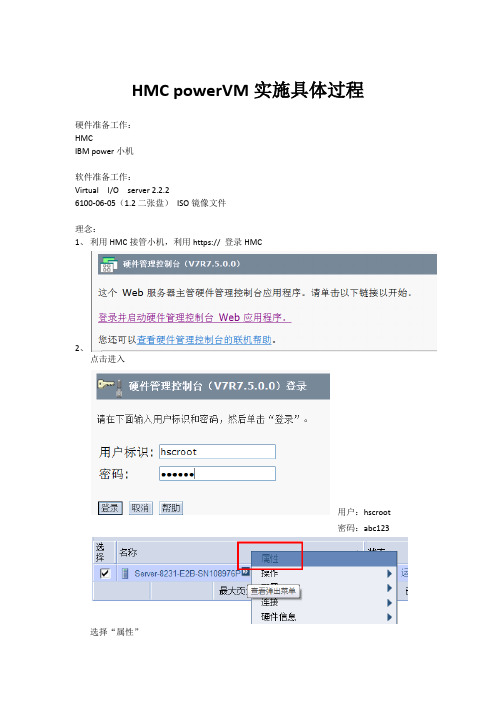
HMC powerVM实施具体过程硬件准备工作:HMCIBM power小机软件准备工作:Virtual I/O server 2.2.26100-06-05(1.2二张盘)ISO镜像文件理念:1、利用HMC接管小机,利用https:// 登录HMC2、点击进入用户:hscroot密码:abc123选择“属性”将此处的“在所有逻辑分区断电后对系统断电”关掉后“确定”直接点击“”进入分区菜单,里面有一个原机器生成的分区,选择关掉分区,再返回到机器层面。
将此处的服务分区选择成“未分配”再次进入系统分区菜单,删除机器自带的分区返回机器层面创建分区此处“共享”和“专用”要分清楚,如果有的机器不能选择“共享”那是因为没有购买CPU虚拟上面可用处理单元中,分区创建完成后生效的都是”期望”对话框中的值,虚拟一定要是物理单元的10倍以上,比如:上面的期望是0.1 那以下面的虚拟期望一定要>1下面的权重主要用于不同分区对于CPU的争抢时做抉择的!值大的分区优先分配CPU。
这里内存没有虚拟,所以只能看到物理分配设置,和CPU的设置一样,也是期望内存是分区完成后的内存值。
如果内存也要虚拟动态分配,要在后面机器中对内存进行虚拟,就是创建一个内存池,把机器内存都放在池中,那样所有的分区都可以动态使用机器内存了。
(具体操作这里就不详加解析了)我们创建的第一个分区是用来安装VIOS系统的。
所以我们要将所有的I/O硬件都虚拟化。
注意:上面红色标注的在选择了所有的I/O后一定要“添加为必需插槽”,这样后面才会出现“必需”的状态。
这里VIOS系统分区要创建虚拟网卡和SCIS总线。
网卡的数量和SCIS的数量要根据机器物理网卡口的个数和要创建多少个分区有关,机器后面我们要用多少个网口来通信我们就要创建几个虚拟网卡,我们要创建几个虚拟分区,我们就要创建几条SCIS总线。
这里的红色标注,我们创建的虚拟网卡是用来和机器的物理网卡进行桥接用的。
powerVM配置
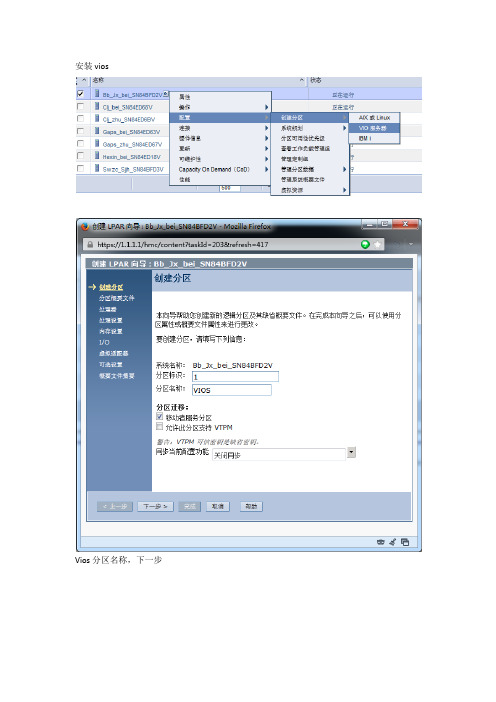
Vios分区名称,下一步
填写概要文件名称,下一步
选择共享
配置CPU。最小,期望,最大全部是1
配置内存。最小,期望,最大都是8GB
物理I/O选择全部硬件,选择为必须
最大虚拟数量为100,
默认下一步
完成
创建完成并激活安装vios
按0选择启动
选择1
选择5
选择1
选择7
选择24光驱
选择2正常安装
选择1
下一步
默认下一步
完成
虚拟机分区建立完成
下面打开VIOS的管理概要文件来和VIOC同时配置虚拟适配器
在VIOS上建立以太网络适配器
填写ID,现在VLAN标识,适配器必须,以太网桥接
建立光驱用SCSI适配器
填写ID,选择任何客户机分区都可以连接
建立之后用于映射硬盘用的SCSI适配器,每块硬盘一个。填写ID,选择连接的虚拟机分区名称和标识。
建立光纤通道适配器
选择编号和虚拟机名称
这样,一台虚拟机的适配器就都建立好了。同样在虚拟机上也建立相同的适配器
网络
SCSI适配器(光驱VIOS上是任ห้องสมุดไป่ตู้连接,虚拟机上是指定分区)
光纤通道适配器
两边做一下对比,在把另外一台jxdb虚拟机的适配器一同样的方法完成配置即可
全部建立完成,开始在VIOS里做绑定
打开VIOS
lsdev –virtual查看所有虚拟设备
oem_setup_env进入AIX输入环境
#smitty etherchannel配置网卡聚合
选择网口
回车即可
Ent10,ent11就是绑定后的聚合网口
查看ent8的对应关系在C2-T1和之前建立虚拟网卡ID相同
ibmpowervm安装配置手册

ibmpowervm安装配置手册PowerVM 安装配置手册Version 1.1目录1 虚拟I O 服务器安装配置 (3)1.1 虚拟I O 服务器创建 (3)1.1.1 虚拟I O 服务器分区Profile 文件创建 (3)1.1.2 虚拟I O 服务器软件安装 (12)1.1.3 安装虚拟I O 服务器升级包 (16)1.2 VIOS S HARED E THERNET A DATPER创建 (16) 1.3 VIOS VIRTUAL DISK 映射 (18)1.4 VIOS NPIV 映射 (19)1.5 VIOS VIRTUAL CDROM 映射 (20)1.6 VIOS VIRTUAL TAPE 映射 (22)2 分区服务器安装配置 (23)2.1 分区服务器创建 (23)2.2 分区服务器虚拟光驱配置 (26)2.3 分区服务器安装 (32)2.4 分区服务器磁盘配置 (32)2.5 分区服务器SAN 存储配置 (33)2.6 分区服务器网络配置 (33)3动态逻辑分区资源调整 (33)3.1 分区资源调整 (33)3.2查看分区资源 (35)4 在线分区迁移(LPM) (36)4.1 迁移前准备 (36)4.2 分区迁移验证 (36)4.3 迁移分区 (38)5设备维护 (41)5.1 光纤卡更换 (41)6.2 网卡更换 (42)5.3 ROOTVG备份与恢复 (42)6 相关红皮书 (43)7 常见问题排错 (43)7.1 性能监控 (43)7.2 常见问题 (43)1虚拟I O服务器安装配置1.1 虚拟I O 服务器创建创建VIOS 分区请依照如下步骤1.1.1虚拟I O服务器分区Profile文件创建1) 如下图在HMC 所管理的服务器上选择左侧s erver 菜单下的POWER 服务器建立虚拟I O 服务器分区,选择Configuration -> Create Logic Partition -> VIO Server2)输入Partition ID 和Partition name, 完成后继续选择Next3)输入Profile name,完成后继续选择Next4)选择CPU 的配置。
IBM PowerVM 实战手册
IBM PowerVM 实战手册,第 1 部分: 前言及设计前言为什么服务器需要虚拟化∙可以有效控制服务器数量,提高资源利用率。
利用 IBM 的 PowerVM 技术,我们实现了 1 台 p570 划分 20 个分区,如果实际购买机器,至少需要 20 台 p510。
∙节能减排,降低投资 .显而易见,服务器虚拟化可以省电省散热省空间,大量减少 PCI 卡等等投资。
拿宝信实验室举例,1 台 p55A 能顶掉原来 10 台 p52A,空间节省 75%,电节省 80%,散热减少 80%,投资也至少减少 70%,长期下来节能效果相当惊人。
∙简化服务器的部署、管理利用 IBM 的 PowerVM 技术,可以使得服务器的环境完全一致,使得加上NIM 安装技术的成功率大大提高,可以在短短 60 分钟内,部署 8 台以上的虚拟服务器,由于 APV 和 IBM 硬件控制台(HMC)密不可分,也就可以很方便地实现了这些虚拟服务器远程管理,包括启停、调整系统资源等等。
∙模拟各类操作系统和各个资源不同的机器,实现良好的学习测试实验环境。
对于 IBM 的 PowerVM 技术,目前支持 AIX5.3、AIX6.1,部分 Linux,可以模拟多台从 0.1CPU,128 MB 到小于物理机器资源的机器。
回页首PowerVM 的主要组成部分及概念最新的 PowerVM 是在基于 IBM POWER 处理器的硬件平台上提供的具有行业领先水平的虚拟化技术家族。
它是 IBM Power System 虚拟化技术全新和统一的品牌(逻辑分区,微分区,Hypervisor,虚拟 I/O 服务器,APV,PowerVM Lx86,Live Partition Mobility)。
大家对 2004 年即出现的 APV 应该记忆犹新,随着 Power6 的推出和 i 和 p 系列的合并,APV 也发展成为 PowerVM。
PowerVM 有三个版本,分别是 PowerVM Express Edition,PowerVM Standard Edition,PowerVM Enterprise Edition。
ibm powervm虚拟化方案
IBM PowerVM虚拟化方案简介IBM PowerVM是一种高级虚拟机管理器,旨在提供高性能、高可用性的虚拟化解决方案。
它是基于IBM Power Systems服务器的虚拟化平台,可以将物理服务器资源划分为多个独立的虚拟服务器,从而提高资源利用率和灵活性。
PowerVM采用了一种称为微分区域(Micro-Partitioning)的技术,通过将物理资源划分为较小的部分,每个部分可以分配给一个独立的虚拟服务器。
这种方式可以实现更高的资源利用率,同时确保每个虚拟服务器能够独立分配资源,避免资源冲突。
主要功能1. 资源虚拟化PowerVM提供了对CPU、内存、网路和存储等物理资源的虚拟化。
通过虚拟化,PowerVM可以将物理服务器的资源划分为多个虚拟服务器,实现资源的共享和更好的利用率。
PowerVM支持多种虚拟化模式,包括微分区域、共享 CPU、内存超分配等。
2. 高可用性和容错性PowerVM具备出色的高可用性和容错性能,通过配置冗余组件和自动故障处理,可以实现系统级别的容错和故障恢复。
例如,PowerVM支持动态迁移功能,可以在不停机的情况下将虚拟服务器从一个物理服务器迁移到另一个物理服务器,以确保应用程序的持续可用性。
3. 管理和监控PowerVM提供一套完整的管理和监控工具,帮助管理员轻松管理虚拟化环境。
管理员可以使用这些工具来创建、配置和删除虚拟服务器,监视资源使用情况,进行性能调优等。
PowerVM还提供了丰富的API和命令行接口,方便集成到自动化管理系统中。
4. 节能和环保PowerVM采用精确的资源管理技术,可以动态地分配和回收物理服务器资源,避免资源的浪费和过度配置。
这不仅可以提高资源利用率,还可以降低能耗和碳足迹,实现节能和环保。
适用场景1. 企业数据中心PowerVM适用于大型企业数据中心,帮助企业提高服务器资源的利用率和灵活性。
企业可以将多个应用程序部署在独立的虚拟服务器上,通过灵活的资源管理,实现资源的共享和优化。
IBM Power Systems 混合多云指南说明书
Contents1Life in a hybrid multicloud world 2Hybrid multicloudmotivators and use cases3High-levelreference architecture4Reference journey to the hybrid multicloud 5IBM hybridmulticloud solutions6Seamlessly integrate withIBM Power SystemsIntroduction | Life in a hybrid multicloud worldLife in a hybrid multicloud worldCloud computing has undoubtedly changed how enterprise IT is delivered. It has opened the door to compute and storage resources without limits, as well as a wealth of cloud services (e.g., artificial intelligence, weather data, etc.) for IT administrators to leverage and create the next wave of enterprise innovation. This paper provides a practical guide for IBM Power System™ users to gain an understanding of the POWER® cloud portfolio and how to map out a journey to a secure and reliable hybrid multicloud world.Navigating a complex IT infrastructure Today, cloud computing provides many opportunitiesto run your enterprise infrastructure more effectively including on-demand access to compute resources, disaster recovery solutions, invisible infrastructure maintenance, security patches and more. Whether you’re creating an on-premises private cloud, leveraging oneor more off-premises public clouds (i.e., multicloud)or taking a hybrid cloud approach, cloud infrastructure enablement can expand your business opportunities. Given this broad range of technologies, how can IBM Power Systems users, running IBM AIX®, IBM i and Linux®enterprise apps, understand these capabilities and create a technology roadmap in an approachable and methodical manner? A clear visionA recent Gartner survey showed that 81% of organiza-tions utilizing public cloud services are using morethan one public cloud provider.1 And, according to the RightScale 2019 State of Cloud report, “Enterprisesare prioritizing a balance of public and private clouds.”2 Hybrid multicloud has become a reality for enterprise and technology leaders. Yet, there is a need for a clear vision of how to enter and operate in this world.What is hybrid multicloud?A hybrid cloud is a computing environment combines a private cloud and a public cloud by allowing applications and data to be shared between them. A multicloud refers to a cloud approach made of up more than one cloud service, from more than one cloud vendor. Thus, a hybrid multicloud combines a private cloud, a public cloudand more than one cloud service, from more than one cloud vendor.A multicloud strategy can unlock tremendous organiza-tional value because it combines the best of both private cloud and public cloud. It allows organizations to run mission-critical applications and host sensitive data on-premises. It offers the flexibility of public cloud. And, it enables the movement of information between the private and public services.81% organizations using more than one public cloud provider1Hybrid multicloud motivators and use casesThere are several motivators driving enterprises to construct a hybrid multicloud platform. Let’s explore some of the more prevalent scenarios for POWER customers (several of them are often pursued in parallel):Deliver streamlined deployment of enterprise resources, including AIX, IBM i and Linux virtual machines (LPARs)Users have grown to expect easy and on-demand accessto IT resources through an on-premises private cloud experience. Developers, QA engineers and line-of-business users want simplified access to infrastructure and applications. IT administrators want trusted enterprise-grade security and simplified operations. Streamlining all ofthese processes is made possible by adopting POWER cloudtechnologies and processes within the data center.Increase operational and budgetary flexibilityby way of levering IBM Power Systems in apublic cloudOne of public cloud’s major advantages is that it provideseffectively limitless access to compute capacity billed asan operational expense. With a few clicks of the mouse orswipe of a credit card, users get immediate access to newvirtual machines or containers.Modernize existing applications to adoptcloud-native software development principles(e.g., containers and microservices)Containers have unquestionably transformed howsoftware is packaged, installed and operated — pavingthe way for new software delivery models. To that end,enterprises worldwide are exploring container technologyand developing plans on how to integrate them into theirenterprise, while delicately balancing the ongoing businessneed to deploy, manage, operate and integrate withvirtual machines.Integrate IBM Power Systems with thebroader cloud strategyAs the industry shifts towards hybrid multicloud, acomprehensive cloud management strategy has becomeincreasingly important. According to the RightScale 2019State of Cloud Report, “enterprises, optimizing cloud costs(84 percent in 2019 vs. 80 percent in 2018) and cloudgovernance (84 percent in 2019 vs. 77 percent in 2018) aregrowing challenges.”2 Long gone are the days of buildingsiloed infrastructures. Enterprises are striving towards amodel of interconnectedness so that the collective strengthof their platforms and cloud providers can be leveraged tocreate the next wave of innovation.High-level reference architectureShown here in Figure 1: Cloud ArchitectureIBM Z® and x86. From a Power Systems perspective, PowerVC provides the Infrastructure-as-a-Service (IaaS)layer on-premises. Additionally, Power Systems enterpriseservers are available in the IBM public cloud, providing on-demand access to AIX and IBM i virtual machines. Red Hat®OpenShift™ provides the universal Platform-as-a-Service(PaaS) solution, spanning the entire hybrid multicloudlandscape. With Red Hat OpenShift, users can run theirsoftware of choice, including IBM’s enterprise softwaredelivered via IBM Cloud Paks™, ISV software, open-sourcesoftware and custom enterprise software. And finally,technologies such as IBM Multicloud Manager or VMware®vRealize® can integrate the historically separate cloudinfrastructures into a single interconnected cloud fabric.Figure 1: Cloud ArchitectureAccelerators Migration and transformation tools Certified products and cloud services offerings Best practices, methods and reference architectures Core platform offerings Infrastructure-independent common operating environment Open | Consistent | Multicloud | Portable | Scalable | Integrated | Secure | Certified and supported – C ommon services – R ed Hat OpenShift IBM Cloud Garages and Red Hat Innovation LabsInfrastructure offerings – I BM Power Systems – I BM Z and Storage– I BM Cloud Bare Metal and IaaS – O ther cloud providers – P artnersPrivate cloudinfrastructure IBM public cloud infrastructure Other public cloud infrastructure Hybrid multicloudEcosystem, certification and support 5– Red Hat Enterprise Linux, IBM PowerVC, IBM Cloud Infrastructure Center, OpenStack, RHV, VMware – Red Hat Satellite– Red Hat CloudFormsIBM hybrid multicloud solutionsIBM HMC and Cloud Management Console The Hardware Management Console (HMC) is the primary hardware management product used to administer Power Systems enterprise servers. It is used to update firmware and report problems.IBM Cloud Management Console (CMC) runs as a servicein the IBM Cloud™ and provides dynamic views of performance, inventory and logs for a complete Power Systems enterprise. It also provides management for Power Enterprise Pools 2.0 for deeper infrastructure insights that help administrators troubleshoot problems faster right from their mobile devices, tablets or PC.Enterprise poolsIBM Power Enterprise Pools 2.0 (PEP 2.0) provides enhanced multisystem resource sharing and by-the-minute consumption of on-premises compute resources to users who deploy and manage private cloud infrastructure. PEP 2.0 allows a user to purchase a pool of resource credits (processor and/or memory) such that when the pool’s base resource usage exceeds the entitled amounts, the pool will be debited in real-time. This provides an innovative and flexible resource consumption model for users. At this time, PEP 2.0 only allows Power E980 servers in the pool.IBM Power Virtualization Center (PowerVC) IBM Power Virtualization Center (PowerVC) provides on-premises enterprise virtualization management for Power Systems, inclusive of AIX, IBM i and Linux guests. Built on OpenStack, it provides a multi-tenant Infrastructure-as-a-Service (IaaS) layer in the cloud software stack, allowing administrators to quickly provision new virtual machinesin minutes. It also provides numerous operational benefits such as one-click system evacuation for simplified servermaintenance, dynamic resource optimization (DRO) tobalance server usage during peak times, automated vir-tual machine restart to recover from failures, importingand exporting virtual machine images for cloud mobilityand more. It also enables DevOps capabilities such as“infrastructure as code” by way of HashiCorp Terraform.Terraform can provision POWER resources through PowerVCby leveraging the out-of-box OpenStack provider. PowerVCprovides the foundational technology on top of which therest of the POWER cloud stack is built.Red Hat OpenShiftRed Hat OpenShift is the industry-leading Platform-as-a-Service (PaaS) technology built on Kubernetes, hardenedfor the enterprise and fully enabled and supported on IBMPower Systems. OpenShift provides an infrastructure-independent common operating environment that servesas a common foundation across both the private and publiccloud, making it the de-facto standard fabric for hybridcloud infrastructures.OpenShift provides a platform to build new cloud-native,container-based applications. It also provides a broad set ofopen-source software, IBM enterprise middleware (via IBMCloud Paks) and ISV software.When paired with the IBM Cloud Pak for MulticloudManagement and IBM Cloud Automation Manager, userscan build composite applications that are comprisedof both containers and virtual machines. This way,select components of an application can be modernizedwith microservices, while leaving the mission-criticalcomponents (e.g., databases) on the most robust operatingsystems like AIX and IBM i.IBM Cloud PaksIBM Cloud Paks are enterprise-ready, containerizedsoftware solutions that provide an open, faster and moresecure way to move core business applications to anycloud. They are lightweight and easy to run, certified by IBMand Red Hat OpenShift. Each Cloud Pak sits atop Red HatOpenShift and can run anywhere on-premises, in the cloudor at the edge.Cloud Paks are comprised of a set of containerized IBMmiddleware and common software services. IBM currentlyoffers five Cloud Paks: IBM Cloud Pak for Applications, IBMCloud Pak for Data, IBM Cloud Pak for Integration, IBMCloud Pak for Automation,IBM Cloud Pak for MulticloudManagement, and IBM Cloud Pak for Security. Each offeringprovides a broad set of capabilities for a particular domain.IBM Power Systems Virtual Serverson IBM CloudIBM Power Systems Virtual Servers on IBM Cloud integratesAIX and IBM i capabilities into the IBM Cloud experience.Users receive fast, self-service provisioning, flexiblemanagement and access to a stack of enterprise IBM Cloudservices with pay-as-you-use billing. Users can easilyexport virtual machine images in the standard OVA formatfrom PowerVC and upload them into the IBM Cloud foreasy back-and-forth image mobility. With this public cloudsolution, POWER users can grow at their own pace and runenterprise workloads when and where they choose, with avariety of flexible operating systems, compute, storage andnetworking configurations.IBM Cloud Pak for Multicloud Management IBM Cloud Pak for Multicloud Management , running on Red Hat OpenShift, provides consistent visibility, governance and automation across the entire hybrid multicloud landscape. Offered as part of this Cloud Pak are two critically important management applications to hybrid multicloud—IBM Cloud Automation Manager and IBM Multicloud Manager.IBM Cloud Automation Manager IBM Cloud Automation Manager (CAM) provides advanced multicloud management capabilities. Using HashiCorp Terraform as its underlying engine, CAM enables connectivity to numerous cloud infrastructures, including PowerVC (OpenStack), IBM Cloud, AWS®, Azure®, Google® and several others. CAM can provision virtual machines, including LPARs via PowerVC, as well as containers. This allows users to create software catalog entries that build complex multi-tier applications with a single click. And because CAM is delivered as part of an IBM Cloud Pak, it inherently runs on Red Hat OpenShift, creating a centralized management plane from which you can deploy all your applications.IBM Multicloud ManagerIBM Multicloud Manager (MCM) provides a single multicloud dashboard that enables organizations to oversee multiple cloud endpoints on public or private cloud. MCM provides consistent visibility, governance and automation across a hybrid multicloud environment as shown on the right in Figure 3, IBM Multicloud Manager.VMware vRealize automation and operations VMware vRealize Automation™ speeds up the delivery of infrastructure and application resources through a policy-based self-service portal, on-premises and in public cloud. In addition to x86 VMware-based virtual machines, vRA is able to provision POWER virtual machines (including AIX, IBM i and Linux) by way of PowerVC, providing the ability to orchestrate deployments across hybrid cloud.VMware vRealize Operations for IBM Power Systems brings together all management functions including performance management, capacity, cost analytics, planning, topology analysis and troubleshooting in one integrated, highly intuitive, scalable and extensible platform. It also provides deep insights and key performance indicators for enterprise applications, including SAP HANA, Db2, Oracle, and several others. This comprehensive monitoring solution is a perfect complement to a cloud management software stack as it provides a broad and deep perspective as to what’s happening in the cloud.We hope our commitment to delivering open and flexible solutions for your hybrid multicloud journey will help you leverage partner cloud technologies and seamlessly integrate POWER with the rest of your data center.Figure 3:IBM Multicloud Manager。
- 1、下载文档前请自行甄别文档内容的完整性,平台不提供额外的编辑、内容补充、找答案等附加服务。
- 2、"仅部分预览"的文档,不可在线预览部分如存在完整性等问题,可反馈申请退款(可完整预览的文档不适用该条件!)。
- 3、如文档侵犯您的权益,请联系客服反馈,我们会尽快为您处理(人工客服工作时间:9:00-18:30)。
PowerVM 安装配置手册Version目录1虚拟IO服务器安装配置............................................................................................... 错误!未定义书签。
虚拟IO服务器创建............................................... 错误!未定义书签。
虚拟IO服务器分区Profile文件创建........................... 错误!未定义书签。
虚拟IO 服务器软件安装....................................... 错误!未定义书签。
安装虚拟IO服务器升级包..................................... 错误!未定义书签。
VIOS S HARED E THERNET A DATPER创建.................................... 错误!未定义书签。
VIOS VIRTUAL DISK映射 ............................................. 错误!未定义书签。
VIOS NPIV映射................................................... 错误!未定义书签。
VIOS VIRTUAL CDROM映射............................................ 错误!未定义书签。
VIOS VIRTUAL TAPE映射 ............................................. 错误!未定义书签。
2分区服务器安装配置................................................. 错误!未定义书签。
分区服务器创建.................................................. 错误!未定义书签。
分区服务器虚拟光驱配置 .......................................... 错误!未定义书签。
分区服务器安装.................................................. 错误!未定义书签。
分区服务器磁盘配置.............................................. 错误!未定义书签。
分区服务器SAN存储配置 .......................................... 错误!未定义书签。
分区服务器网络配置.............................................. 错误!未定义书签。
3动态逻辑分区资源调整............................................... 错误!未定义书签。
分区资源调整.................................................... 错误!未定义书签。
查看分区资源.................................................... 错误!未定义书签。
4在线分区迁移(LPM) .................................................. 错误!未定义书签。
迁移前准备...................................................... 错误!未定义书签。
分区迁移验证.................................................... 错误!未定义书签。
迁移分区........................................................ 错误!未定义书签。
5设备维护........................................................... 错误!未定义书签。
光纤卡更换...................................................... 错误!未定义书签。
网卡更换 .............................................................. 错误!未定义书签。
ROOTVG备份与恢复................................................. 错误!未定义书签。
6相关红皮书......................................................... 错误!未定义书签。
7常见问题排错....................................................... 错误!未定义书签。
性能监控........................................................ 错误!未定义书签。
常见问题........................................................ 错误!未定义书签。
1虚拟IO服务器安装配置1.1虚拟IO 服务器创建请依照如下步骤创建VIOS分区1.1.1虚拟IO服务器分区Profile文件创建1) 如下图在HMC所管理的服务器上选择左侧server菜单下的POWER服务器建立虚拟IO 服务器分区,选择Configuration -> Create Logic Partition -> VIO Server2) 输入Partition ID 和Partition name, 完成后继续选择Next3)输入Profile name,完成后继续选择Next4)选择CPU的配置。
(虚拟处理器一般是物理CPU的2倍)5)内存的使用视具体情况而定。
7)选择Desired及Required 实际IO资源8)Virtual Adapter设置i)对于共享Ethernet的系统,根据需要共享的Ethernet总线数量建立相应数量的Virtual Ethernet Adapter个数(心跳用的虚拟卡不需要访问外网。
访问外网的网卡优先级不要相同,vlan id 也不要一样)ii) 根据需要建立的Client分区个数建立相应数量的Virtual SCSI Adapterii) 根据需要NPIV规划建立相应数量的Virtual SCSI Adapter完成以上两类Virtual Adapter建立后,选择Next9)预览Profile配置信息,如果确认完成,选择Finish. VIO Server Profile 配置建立完成1.1.2虚拟IO 服务器软件安装激活该分区,并选择SMS模式启动选择Open Terminal Windows打开终端进入SMS菜单,更改启动顺序选择CD安装作为第一启动顺序进入欢迎界面选择全新安装选择一块硬盘安装VIO Server操作系统,然后回车开始安装开始安装,安装完后会自动启动进入操作系统安装完成后输入如下命令接受虚拟IO服务器软件应用许可:$ license –accept检查当前虚拟IO服务器版本:$ ioslevel检查当前虚拟IO服务器的时间,日期及时区信息:$ date输入如下命令获得虚拟IO服务器的root权限:$ oem_setup_env如果需要,请设置虚拟IO服务器的时间,日期及时区信息:# smitty chtz_date1.1.3安装虚拟IO服务器升级包可以从 IBM VIOS 网站下载虚拟IO服务器的升级包,将升级包刻录成CD放入光驱中,运行如下命令开始升级过程:$ updateios –dev /dev/cd0 -install –accept升级完成后重新启动虚拟IO服务器:$ shutdown –restart重启虚拟IO服务器后,检查虚拟IO服务器办版本:$ ioslevel1.2 VIOS Shared Ethernet Adatper创建SEA(Shared Ethernet Adapter)工作原理如图所示,将一块物理网卡与虚拟网卡绑定生成SEA,则客户分区(相同vlan id)就可以通过SEA访问外部网络,SEA在这里起到类似网桥的作用。
为了提高虚拟网络的可用性,本次配置中为生产网络配置了Etherchannel设备,在网络绑定设备上配置了SEA设备。
# lsdev -Cc adapterent0 Available Logical Host Ethernet Port (lp-hea)ent1 Available 02-00 2-Port 10/100/1000 Base-TX PCI-Express Adapter ()ent2 Available 02-01 2-Port 10/100/1000 Base-TX PCI-Express Adapter ()ent3 Available 06-00 2-Port 10/100/1000 Base-TX PCI-Express Adapter ()ent4 Available 06-01 2-Port 10/100/1000 Base-TX PCI-Express Adapter ()ent5 Available 09-00 2-Port 10/100/1000 Base-TX PCI-Express Adapter ()ent6 Available 09-01 2-Port 10/100/1000 Base-TX PCI-Express Adapter ()ent7 Available 0B-00 2-Port 10/100/1000 Base-TX PCI-Express Adapter ()ent8 Available 0B-01 2-Port 10/100/1000 Base-TX PCI-Express Adapter ()ent9 Available 0C-00 2-Port 10/100/1000 Base-TX PCI-Express Adapter () ent10 Available 0C-01 2-Port 10/100/1000 Base-TX PCI-Express Adapter () ent11 Available Virtual I/O Ethernet Adapter (l-lan)ent12 Available Virtual I/O Ethernet Adapter (l-lan)ent13 Available Virtual I/O Ethernet Adapter (l-lan)ent14 Available Virtual I/O Ethernet Adapter (l-lan)ent15 Available Virtual I/O Ethernet Adapter (l-lan)ent16 Available Virtual I/O Ethernet Adapter (l-lan)ent17 Available Virtual I/O Ethernet Adapter (l-lan)ent18 Available Virtual I/O Ethernet Adapter (l-lan)ent19 Available Virtual I/O Ethernet Adapter (l-lan)ent20 Available Virtual I/O Ethernet Adapter (l-lan)ent21 Available Virtual I/O Ethernet Adapter (l-lan)ent22 Available Virtual I/O Ethernet Adapter (l-lan)创建网络接口聚合方法(示例):750A_VIO_1 750B_VIO_1#mkvdev -lnagg ent1 ent4 -attr backup_adapter=ent9 mode=8023adent23 Availableen23et23ent23为网卡绑定设备,采用ent1和ent4聚合作为主通道,ent9作为备份通道。
