RelativeResourceManager1
北鲲云用户手册说明书

北鲲云用户手册Table of contents:登录一. 如何登录二. 下载客户端基本概念一. 计算区二. SSH连接三. 工作站四. 模板提交作业五. 镜像中心收费标准一. 收费项目二. 查看硬件资源价格功能介绍一. 仪表盘二. 应用中心三. 作业管理四. SSH连接五. 图形界面六. 文件传输七. 数据集八. 镜像中心提交作业模板提交命令行提交图形界面提交作业监控和查看结果视频专区一、 文件传输二、提交作业三、作业监控和查看结果四、镜像中心版本介绍一. 版本差别二. 功能介绍一. 个人中心二. 费用中心三. 代金券四. 收费标准计费规则五. 网络策略安全管理一. 基础设置二. 密钥对管理三. 网络策略管理四. 操作审计团队管理一. 用户管理二. 子用户管理配额管理一. 配额管理二. 配额申请存储目录介绍二. 其它隐藏目录(文件)介绍文件传输一. Windows数据传输二. Linux数据传输三. 结果文件下载四. 文件同步查询平台预装软件一. 使用命令行查询软件二. Python/Conda环境的查询三. 工作站软件的查询四. 未查询到所需软件加载预装软件一. SSH命令行加载软件环境1. 使用module工具查询和加载软件2. 加载Python/Conda虚拟环境二. 工作站启动软件自定义安装软件一. 安装须知如何选择安装方式?二. SSH连接命令行安装软件Linux编译安装软件Python/Conda环境安装软件三. Windows工作站安装软件四. Linux工作站安装软件五. 镜像中心安装软件如何提交作业模板提交一. 提交流程二. 操作步骤三. 提交后的监控命令行提交一. 操作步骤二. 计算节点资源使用率监控图形界面提交一. Windows工作站提交二. Linux工作站提交AlphaFold2一. 模板提交二. 命令行提交三. 结果文件介绍四. 使用PyMOL对结果进行图形化展示 Amber一. 模板提交二. 命令行提交CPU版 Amber 作业示例GPU Amber 作业示例Ansys CFX一. 图形界面提交二. 模板提交三. 命令行提交Ansys Fluent一. 图形界面提交二. 模板提交三. 命令行提交Ansys LS-DYNA一. 图形界面提交AutoDock-Vina一. 模板提交二. AutoDockToolsCOMSOL Multiphysics一. 图形界面提交二. 命令行提交CONVERGE一. 命令行提交CP2K一. 命令行提交步骤ColabFold一. 模板提交二. 命令行提交GROMACS一. 模板提交二. 命令行提交GPU版GROMACS作业示例CPU版GROMACS作业示例 Gaussian一. 模板提交二. 命令行提交三. GaussView 6对结果进行图形化展示 Jupyter Notebook一. 图形界面提交LAMMPS一. 模板提交二. 命令行提交LS-DYNA一. 图形界面提交二. 模板提交三. 命令行提交NAMD一. 模板提交二. 命令行提交ORCA一. 命令行提交PyTorchRoseTTAFold一. 模板提交二. 使用PyMOL对结果进行图形化展示STAR-CCM+一. 图形界面提交二. 模板提交三. 命令行提交TensorFlow一. 命令行提交TeraChem一. 命令行提交VASP一. 模板提交二. 命令行提交VirtualFlow一. 模板提交二. 后置处理失败基本功能使用问题1. 我该如何提交作业?2. 我该如何上传文件到服务器?3. 你们平台 文件传输 上传下载速度是否有限制,大文件无法上传如何解决?4. 我在通用计算区配置的环境在其它计算区怎么使用不了?5. 我在账号下创建一个子用户,子用户的目录和主用户进入的目录一样吗?6. 你们平台的模板功能,主要用于哪些场景?7. 我在您们平台提交作业,多核机器速度和自己本地电脑算起来速度没有快多少,会是什么原因呢?8. 可以设置工作站计算完自动释放吗?9. 作业结束后会有通知吗?10. 能看到下载到本地的文件在哪个目录下么?11. 请问下现在我们的WebSSH终端大概闲置多久才会断开连接?12. 我在通知设置里设置了闲置工作站自动释放,为什么没有释放?13. 您们平台是否支持自定义安装Linux系统其它发行版本?16. 停机与释放有什么区别?17. 我的作业为什么会执行失败?18. 使用模板提交方式,作业执行失败,我该怎么处理?19. 平台总共有哪些类型的节点,它们各自代表什么含义?应用软件使用问题2. 平台没有我要使用的软件怎么办?3. 你们平台是否提供商业软件?4. 普通用户没有权限安装软件,能否获取root权限?5. 每次登录都需要使用module add命令加载软件,可不可以实现自动加载?6. 使用slurm命令报错:“slurm_load_jobs error: Unable to contact slurm controller(connect failure)”如何解决?7. 执行module命令报错“Lmod has detected the following error:”,如何解决?8. 什么是队列?9. 为什么有些硬件资源无法选择?10. 使用Material Studio软件(Windows)时,CPU核数如何修改?11. Jupyter Notebook 如何远程使用虚拟环境?计费问题1. 平台是如何收费的?2. 如何充值?3. 如何查看消费记录?4. 工作站如何查看节点配置价格?5. 为什么我没有使用,还在一直扣费?6. 工作站停机还会收费吗?7. 已经赠送免费核时,但余额显示为零?8. 平台可以开发票吗?9. 节点选择经济型和标准型有什么区别?其他问题1. 我测试为什么工作站与本地笔记本同等CPU配置没有本地笔记本算的快?2. 提交作业需要排队吗?3. 节点启动需要多久?4. 超算资源有时候跑着跑着就被强制回收了,你们也会有这种情况吗?5. 为什么我的 CPU 使用率最高显示为 50%?6. 为什么我连接登录到Windows工作站没有看到H或者S盘,请问如何找回呢?7. 没有我想要的数据集怎么办?镜像中心使用问题1. 镜像中心有什么作用?2. 在哪里设置为默认镜像,如何启动默认镜像?3. 制作镜像需要多久,我已经制作了半个小时了还没结束?4. 我之前制作的镜像怎么不见了?5. 什么是容器镜像?6. 镜像中心磁盘大小设置方法Slurm作业管理系统1. 查看分区状态2. 查看作业队列3. 查看所有作业详细信息4. 取消作业号为20的作业二. 提交作业的方式1. 使用sbatch批处理模式提交作业2. 使用salloc分配模式提交作业 Module的使用一. 常用命令二. 使用例子Conda的使用一. 使用北鲲云的Conda环境二. Conda管理环境三. Conda管理包四. Conda/Pip软件安装进阶操作 Linux的常用命令linux快捷键以及帮助手册快捷键帮助手册软件安装yum用户和文件权限管理查看用户使用root查看文件权限变更文件所有者修改文件权限目录及文件操作基本目录操作基本文件操作搜索文件whichwhereislocatefind文件解压缩rartar管道与一些文本命令&& 和 ||管道文本处理sortcoltrpaste重定向重定向文件描述符永久重定向以及“丢弃”输出进程的基本操作前台/后台切换终止进程管理topps提交作业Body Attributes(Body属性)Request(请求)Response(响应) - 200Response Body Attributes(响应Body属性) 取消作业Body Attributes(Body属性)Request(请求)Response(响应) - 200Response Body Attributes(响应Body属性) 查询作业状态URL ParametersRequest(请求)Response(响应) - 200Response Body Attributes(响应Body属性) 获取文件服务器TokenRequest(请求)Response(响应) - 200查询集群配置Body Attributes(Body属性)Request(请求)Response(响应) - 200Response Body Attributes(响应Body属性) 修改集群配置Body Attributes(Body属性)Request(请求)Response(响应) - 200Response Body Attributes(响应Body属性)登录欢迎来到北鲲云一站式云超算平台!本文档提供了一些链接来帮助您登录。
容器技术智慧树知到期末考试章节课后题库2024年山东劳动职业技术学院
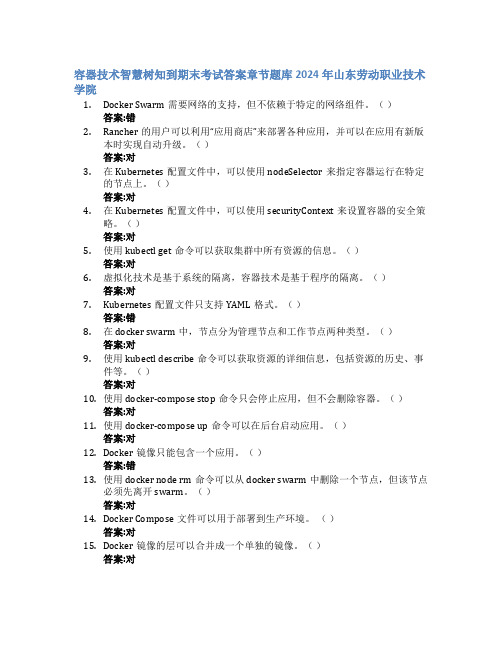
容器技术智慧树知到期末考试答案章节题库2024年山东劳动职业技术学院1.Docker Swarm需要网络的支持,但不依赖于特定的网络组件。
()答案:错2.Rancher的用户可以利用“应用商店”来部署各种应用,并可以在应用有新版本时实现自动升级。
()答案:对3.在Kubernetes配置文件中,可以使用nodeSelector来指定容器运行在特定的节点上。
()答案:对4.在Kubernetes配置文件中,可以使用securityContext来设置容器的安全策略。
()答案:对5.使用kubectl get命令可以获取集群中所有资源的信息。
()答案:对6.虚拟化技术是基于系统的隔离,容器技术是基于程序的隔离。
()答案:对7.Kubernetes配置文件只支持YAML格式。
()答案:错8.在docker swarm中,节点分为管理节点和工作节点两种类型。
()答案:对9.使用kubectl describe命令可以获取资源的详细信息,包括资源的历史、事件等。
()答案:对10.使用docker-compose stop命令只会停止应用,但不会删除容器。
()答案:对11.使用docker-compose up命令可以在后台启动应用。
()答案:对12.Docker镜像只能包含一个应用。
()答案:错13.使用docker node rm命令可以从docker swarm中删除一个节点,但该节点必须先离开swarm。
()答案:对14.Docker Compose文件可以用于部署到生产环境。
()答案:对15.Docker镜像的层可以合并成一个单独的镜像。
()答案:对16.docker CE是社区版Docker。
()答案:对17.在docker swarm中,一个节点只能同时担任管理节点和工作节点的角色。
()答案:错18.Rancher的组成主要包括基础设施编排、容器编排与调度、应用商店和企业级权限管理。
()答案:对19.使用docker-compose rm命令可以删除已停止的Compose应用,包括容器和网络,但不会删除卷和镜像。
系统管理员版本6.3 Manager(Windows版)复制设置指南(ExpressCluster
SystemManager Version 6.3 Manager (Windows Version) Duplication Setup Guide (ExpressCluster X Edition)June 2016CONTENTSChapter 1Preface (3)Chapter 2Configuration Procedure (4)2.1Setting up ExpressCluster X (4)2.2Setting up MasterScope SystemManager (10)2.3Set up the start setting of MasterScope SystemManager (12)Chapter 3Uninstalling SystemManager (16)3.1Uninstalling SystemManager (16)3.2Deleting Files (16)Chapter 4Other Notes (16)4.1Registering Licenses (16)DisclaimerThe contents of this document are subject to change without notice.NEC Corporation takes no responsibility for any technical or editorial errors, or omissions, in this document.In addition, you are responsible for installing and using the software in accordance with the descriptions in this document in order to obtain the expected results.NEC Corporation owns the copyright to the contents of this document. You are not permitted to reproduce, modify, or translate this document in whole or in part without the permission of NEC Corporation.Trademark informationCLUSTERPRO® X is a registered trademark of NEC Corporation.Microsoft and Windows are registered trademarks of Microsoft Corporation in the United States and other countries.Other product names and slogans in this document are trademarks or registered trademarks of their respective companies.Other system names, company names, and product names are trademarks or registered trademarks of their respective companies.Chapter 1 PrefaceThis document provides an example procedure for using ExpressCluster X to set up a cluster configuration that has two nodes (for duplication). ExpressCluster X is an NEC product that can be used to switch running processes between nodes in a duplicated system.In this document, a host system included in a cluster is referred to as a node.Supplemental informationUpgrading an OSIf the incorrect procedure is used to upgrade the OS on a cluster server, failovers might occur at unexpected times. In the worst case, this might damage the system.Only upgrade the OS in accordance with the procedure on the setup card.This also applies when applying a service pack.Application rangeThis document describes ExpressCluster X 1.0 for Windows.ExpressCluster X® is a registered trademark of NEC Corporation.Microsoft® and Windows®are either registered trademarks or trademarks of Microsoft Corporation in the United States and/or other countries.Other system names, company names, and product names are trademarks or registered trademarks of their respective companies.Chapter 2 Configuration ProcedureThis chapter provides a procedure for configuring a MasterScope SystemManager cluster environment.2.1 Setting up ExpressCluster XThis document assumes that ExpressCluster X is installed and that a cluster environment has been set up. For details about how to configure a cluster environment, also see the ExpressCluster X documents.* These documents can be downloaded from the following website: /en/global/prod/expresscluster/en/support/manuals.html?Creating failover groupsFor ExpressCluster X, nodes connected to the cluster are managed using units called failover groups (referred to as groups below).For details about how to create groups, see the relevant ExpressCluster X document (chapter 5 in the Installation and Creation Guide).Figure 2-1 WebManagerSetting up shared resourcesThe following describes how to set up shared resources for a failover group.Here, the following shared resources are assumed:⏹Floating IP address: 192.168.1.10⏹Shared (mirror) disk: Y drive⏹Service:Manager: MasterScope UMF Operations Manager_n (The italicized n representsa number.)Start Builder, and then select a failover group. (Here, select [MasterScope].)Figure 2-2 Group PropertiesRight click the group, and then select [Add Resource] from the displayed pop-up menu. The [Definition of a resouce] dialog box is displayed.First, set up the shared disk. For [Type], select [disk resource] or [mirror disk resource], and then enter the group name of the shared disk in the [Name] text box. Set up the disk in accordance with the instructions in the dialog box.Figure 2-3 Definition of a resouce (Shared Disk)Next, set up the floating IP address. Right click the group, select [Add Resource] from the displayed pop-up menu, select [floating ip resource] for [Type], and then enter the group name in the [Name] text box.Figure 2-4 Definition of a resouce (Floating IP Address)Specify the floating IP address in the [IP Address] text box.Figure 2-5 Floating IP Address AdditionSwitching between connected nodesTo switch between the active and standby nodes, use the following method.Open a command prompt, and then enter the following command:* A direct command can be entered because the environment variable PATH isregistered when ExpressCluster X is installed.The nodes can also be switched by right clicking the icon next to a group namedisplayed in the left WebManager pane and then selecting [Move] from the displayedpop-up menu.Figure 2-6 Switching Between Connected Nodes2.2 Setting up MasterScope SystemManagerInstall the MasterScope SystemManager manager on the Windows computers to be used as active and standby servers.For details about how to do so, see the Release Notes supplied with the product.As described in 2.1 Setting up ExpressCluster X, the following shared resources are assumed:∙Virtual host name: vhost1∙Shared disk: Y driveNotes* Install MasterScope SystemManager on the active server first, and then on the standby server.* It must be possible to reference the shared disk when installing the active server manager.* Use the same drive and folder as the installation destination for MasterScope SystemManager on the active and standby servers.* vhost1 is a host name that can be resolved to a floating IP address (192.168.1.10).The following describes the procedure for installing the MasterScope SystemManager manager.First, start up the cluster from the active node, and then install MasterScope SystemManager on the active node.In the installation settings window, specify the following settings:\Manager\sg is automatically added to the data area folder, and settings that must be shared are stored here.After installation finishes, confirm that \Manager\sg has been created in the data area folder.Next, set up the MasterScope SystemManager manager on the standby node.In the installation settings window, specify the following settings:After installation finishes, change the service startup attributes on both the active and standby nodes.In the [Start] menu, click [Administrative Tools] and then [Services]. Next, stop the [MasterScope UMF Operations Manager_1] service, and then change the [Startup type] in the properties from [Automatic] to [Manual].Figure 2-7 Service Properties* If using the bundled DB, change the [Startup type] for the bundled DB service to [Manual] in the same way.2.3 Set up the start setting of MasterScope SystemManagerSet up the service. Right click the group, select [Add Resource] from the displayed pop-up menu, select [execute resource] for [Type], and then enter the group name in the [Name] text box.Figure 2-8 Definition of a resouce (Service)Specify the Windows service name for the product in the [Service Name] text box.Figure 2-9 Service Name SpecificationThe service name varies depending on the node, so enter the following service name.* serial-number represents a number. Check the actual value in the Windows [Administrative Tools].To set up the dependencies, clear the [Follow the default dependence] check box, and then add resources that depend on the floating IP address and shared disk.Figure 2-10 Dependency SpecificationAfter specifying the settings, return to the failover group properties, and then confirm that the settings have been applied (by confirming that the window is like the one shown in Figure 2-2).* If using the bundled DB, add the resource for the bundled DB service in the same way. Set up the resource dependencies so that the bundled DB is dependent on SystemManager.Service name is [fdb_wfdbn].n indicates a service number of 1 or higher.(The value is set during installation of MasterScope products.)This manual describes startup settings for failover groups.Separately set up service monitoring in accordance with the relevant ExpressCluster X document.This concludes the ExpressCluster X setup.Chapter 3 Uninstalling SystemManager3.1 Uninstalling SystemManagerTo uninstall SystemManager, perform the procedure described in the SystemManager Release Memo (relememo.pdf).3.2 Deleting FilesAfter uninstalling SystemManager, files and directories remain on the shared disk.Manually delete directories on the shared disk specified during installation.Chapter 4 Other Notes4.1 Registering LicensesRegister licenses for a cluster environment on both the active and standby nodes.。
flutter-map tilelayeroptions 参数 -回复

flutter-map tilelayeroptions 参数-回复FlutterMap是一个用于在Flutter应用程序中集成地图功能的插件。
TileLayerOptions是FlutterMap中用于设置地图图层的选项类。
它提供了很多参数可以用来自定义地图图层的外观和行为。
在本文章中,我将一步一步回答关于TileLayerOptions参数的问题,帮助读者更好地理解和使用它。
1. 什么是TileLayerOptions类?TileLayerOptions类是FlutterMap插件中的一个选项类,用于设置地图图层的外观和行为。
它是TileLayerWidget的配置类之一,用于定义地图的底图图层。
2. TileLayerOptions类中有哪些重要的参数?TileLayerOptions类中有很多参数,以下是一些比较常用和重要的参数:- urlTemplate: 定义了地图瓦片的URL模板。
使用字符串替换符号来表示不同缩放级别和坐标的变量,并从服务器动态请求瓦片。
- additionalOptions: 可选的配置参数,可以设置例如授权令牌、请求头等其他瓦片服务相关的选项。
- attributionBuilder: 定义了地图底部的归属标志,可以自定义显示的文本和样式。
- minZoom: 定义了地图的最小缩放级别。
- maxZoom: 定义了地图的最大缩放级别。
- tileSize: 定义了瓦片的大小。
- tileProvider: 设置地图瓦片的提供者。
3. 如何设置地图瓦片的URL模板?在TileLayerOptions类的urlTemplate参数中,我们可以定义一个URL模板来请求地图瓦片。
URL模板中使用一些特定的替换符号,用于表示不同缩放级别和坐标的变量。
例如,{z}表示缩放级别,{x}和{y}表示瓦片的网格坐标。
一个常用的URL模板示例如下:这个模板是使用OpenStreetMap服务的,{s}表示服务器名称,{z}、{x}和{y}分别表示缩放级别、瓦片的网格坐标。
横河PRM安装及设置可修改文字
二、PRM SERVER 配置
4)Devices connected locally 当hart 设备通过 hart 调制解调器连接到 PRM 时,设备路径与通
过 multiplexers 连接到 hart 设备时的路径是一样的。 在这种情况下, 你必须指定“ mmss”9999。 PRM 直接连接到模块的通信端口,无需通过 多路复用器进行路由.设备路径按以下格式指定:xxxxxxxx-cc-mmss xxxxxxxx: Project name cc: Port number mm: Master number ss: Slave number mmss = 9999 Example: PJT01-01-9999
打开方式: select [Start] > [All Programs] > [YOKOGAWA PRM] > [Tool] > [PRM Setup Tool]。
12
二、PRM SERVER 配置
2)Devices connected to CENTUM 导出 device paths from CENTUM: 、确保 centum 项目为当前使用项目,与现场硬件相匹配; 、在CENTUM HIS or ENG station运行下面文件,路径如下: <CENTUM installation folder>\ENG\TOOL\BKEngDataExportForPRM.exe 、在“项目名称”框中,键入希望从中导出设备路径的centum 项目的名称; 、单击[ ... ]按钮以选择导出文件的位置,将出现一个文件选择对话框 、选择要导出文件的文件夹。可以使用文件名、 devicepath.txt 或键入 新的文件名; 单击[保存]。选定 centum 项目的设备路径被导出到指定位置的文件中。 导入 device paths from CENTUM: 、使用 PRM 设置工具,打开设备路径配置窗口,并选择要导入设备路径配 置文件的 fieldcommunications 服务器。 Click [Import]. 在文件选 择对话框中,选择要导入的设备配置文件; Click [Open].树视图和设备 路径列表显示从文件导入的设备路径;Click [Apply]保存导入的设备路径.
les AS gR学生手册英文

Deploying with Oracle JDeveloper
To deploy an application with JDeveloper, perform the following steps: 1. Create the deployment profile. 2. Configure the deployment profile. 3. Create an application server connection to the target
第十六页,共33页,
Planning the Deployment Process
The deployment process includes:
1. Packaging code as J2EE applications or modules
2. Selecting a parent application
including those in a cluster
第十页,共33页,
Deploying with admin_client.jar
The admin_client.jar tool: • Is a command-line utility • Is executed by using the following basic command:
– defaultDataSource to select the data source used by the application for management of data by EJB entities
– dataSourcesPath to specify a application-specific data sources
ResourceBundle MissingResourceException 追踪
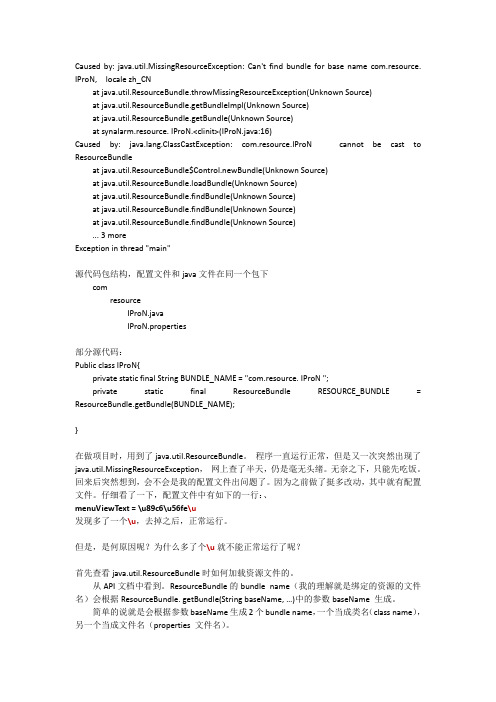
Caused by: java.util.MissingResourceException: Can't find bundle for base name com.resource. IProN, locale zh_CNat java.util.ResourceBundle.throwMissingResourceException(Unknown Source)at java.util.ResourceBundle.getBundleImpl(Unknown Source)at java.util.ResourceBundle.getBundle(Unknown Source)at synalarm.resource. IProN.<clinit>(IProN.java:16)Caused by: ng.ClassCastException: com.resource.IProN cannot be cast to ResourceBundleat java.util.ResourceBundle$Control.newBundle(Unknown Source)at java.util.ResourceBundle.loadBundle(Unknown Source)at java.util.ResourceBundle.findBundle(Unknown Source)at java.util.ResourceBundle.findBundle(Unknown Source)at java.util.ResourceBundle.findBundle(Unknown Source)... 3 moreException in thread "main"源代码包结构,配置文件和java文件在同一个包下comresourceIProN.javaIProN.properties部分源代码:Public class IProN{private static final String BUNDLE_NAME = "com.resource. IProN ";private static final ResourceBundle RESOURCE_BUNDLE = ResourceBundle.getBundle(BUNDLE_NAME);}在做项目时,用到了java.util.ResourceBundle。
LabWindows CVI 2015 Release Notes说明书
RELEASE NOTESLabWindows /CVI Version 2015These release notes introduce LabWindows ™/CVI ™ 2015. Refer to this document for system requirements, installation and activation instructions, and information about new features in LabWindows/CVI.ContentsLabWindows/CVI System Requirements (1)Installing LabWindows/CVI (2)Before Installation (2)Running the Installation (2)Activating LabWindows/CVI (4)What’s New in LabWindows/CVI? (4)Upgraded Version of Clang (4)Improved Source Code Browsing (4)Include Runtime Installers in Distributions (5)Include Driver and Component Files in Patch Distributions (5)Updated Windows SDK (5)Improved Installer Messages and Errors (6)Bug Fixes (6)LabWindows/CVI Resources...................................................................................................6LabWindows/CVI System Requirements To run LabWindows/CVI, you must have the following:•Personal computer using a Pentium 4/M or equivalent processor •Microsoft operating systems:–Windows 8.1 (32-bit and 64-bit)–Windows 8.0 (32-bit and 64-bit)–Windows 7 (32-bit and 64-bit), including Starter Edition –Windows Server 2012 R2 (64-bit)–Windows Server 2008 R2 Service Pack 2 (64-bit)Note LabWindows/CVI supports only R2 editions of Windows Server.•1024 × 768 resolution (or higher) video adapter •Minimum of 512 MB of RAM, 2 GB recommended™™•7 GB free hard disk space for full installation, which includes the Windows SDK 8.1 and the Microsoft .NET Framework 4.5.2; additional space needed for National Instruments Device Drivers•Microsoft-compatible mouseInstalling LabWindows/CVIThe LabWindows/CVI Platform DVD includes LabWindows/CVI and the following modules and toolkits:Modules•Real-Time Module•Vision Development ModuleToolkits•Real-Time Execution Trace Toolkit•SQL Toolkit•Signal Processing Toolkit•PID Toolkit•Execution Profiler Toolkit•ECU Measurement and Calibration Toolkit•Automotive Diagnostic Command SetIf you purchased any of these modules or toolkits, you can install them using the LabWindows/CVI Platform DVD. If you want to evaluate any of these modules or toolkits before purchasing them, you can install these add-ons from the LabWindows/CVIPlatform DVD.Before InstallationKeep the following points in mind before you install LabWindows/CVI:•If you already have a different version of LabWindows/CVI installed on your computer, be sure to install version 2015 in a different directory. If you want to install to an existing directory, uninstall the other version before installing LabWindows/CVI 2015.•You must have administrator privileges to install LabWindows/CVI.•If your software is part of a V olume License Agreement (VLA), contact your VLA administrator for installation instructions.Running the InstallationComplete the following steps to install LabWindows/CVI:LabWindows/CVI Runtime with the LabWindows/CVI 2015 Runtime. To restore theprevious runtime, uninstall LabWindows/CVI 2015, the LabWindows/CVI 20152||LabWindows/CVI Release NotesLabWindows/CVI Release Notes |© National Instruments |3Runtime, and any previous versions of LabWindows/CVI and LabWindows/CVIRuntimes on the computer. Then reinstall the LabWindows/CVI version you want to use, along with any additional National Instruments software you might haveinstalled.1.Insert the LabWindows/CVI media into the disk drive. If the media does not runautomatically, open Windows Explorer, right-click the disk drive icon, and selectAutoPlay .2.On installation startup, the National Instruments LabWindows/CVI 2015 screen appears. Click Install LabWindows/CVI, Modules, and Toolkits .3.Continue to follow the instructions on the screen.Note If you have a serial number for the product you want to install, enter thenumber during installation when you are prompted. You also can activate the product after installation. For more information about finding serial numbers, refer to/info and enter SerialNumbers_en as the Info Code.Each product on the LabWindows/CVI Platform DVD has a different serial number, with the possible exception of the LabWindows/CVI Execution Profiler Toolkit.The Execution Profiler Toolkit does not require a separate license if youhave a LabWindows/CVI Full Development System license. If you have theLabWindows/CVI Base Package, you can install the Execution Profiler Toolkit for evaluation.4.If you select Device Drivers in the Features panel, the LabWindows/CVI installer promptsyou to insert the National Instruments Device Drivers media, which is available on . The NI Device Drivers media is required only if you want to upgrade existing driver software to the latest version. Otherwise, you can ignore this prompt.5.If you have an active Internet connection, the installer prompts you to select Windows SDK components to install. The components you select are downloaded and installed from the Microsoft website. For more information about the components, refer to /info and enter the Info Code CVI2015_WindowsSDK .If you do not have an active Internet connection, LabWindows/CVI installs all Windows SDK components, which might not be the latest components available on the Microsoft website.Note If you cancel the Windows SDK installation, LabWindows/CVI will notfunction properly. You can download the Windows SDK from one of the following places:•The Microsoft website•—Visit /info and enter the Info CodeDownloadMSDTWindowsSDK4| |LabWindows/CVI Release Notes6.Install hardware. Refer to your device documentation, such as printed manuals or PDFs, for information about installing your NI hardware.7.To activate a National Instruments product, refer to the What’s New in LabWindows/CVI? section of this document.Activating LabWindows/CVIIf you did not enter a serial number during installation, click Activate Products in the License Status dialog box to launch the NI Activation Wizard.Once you choose your activation method and launch the NI Activation Wizard, follow the instructions on the screen to activate LabWindows/CVI. For more information about activation, refer to the Activating Your Software topic in the LabWindows/CVI Help .Note If you are unable to activate LabWindows/CVI, refer to the web page at/activate .What’s New in LabWindows/CVI?This section includes information about changes and enhancements in LabWindows/CVI 2015.Upgraded Version of ClangLabWindows/CVI has updated the Clang 2.9 compiler to Clang 3.3. This upgrade provides the following features:•New warning flags and warnings messages •Improved detection of unintialized local variables •Improved stability when building large files •Up to 21% faster execution speed for 64-bit binariesNote The compiler backend is particularly suited for optimizing resources used in mathematical calculations, so you will see the highest performance gains if youperform complex computation, mathematics, or analysis.Improved Source Code BrowsingIn addition to the updated compiler, source code browsing also has been improved. These improvements include the following features:•Improved array support for the function prototype tooltip, Select Variable dialog box, and documentation generation from source code •Improved preprocessor support with macros •Improved stability due to various fixesLabWindows/CVI Release Notes |© National Instruments |5Include Runtime Installers in DistributionsSelect the Only display runtime installers option in the Drivers & Components tab of the Edit Installer dialog box to show which runtime installers are available for deployment. This option makes it easy to distinguish between full installers and runtime installers. Runtime installers are typically smaller in size, allowing you more control over the size of your distribution.Include Driver and Component Files in Patch DistributionsYou now can include NI components and driver files in your patch distributions. You also can choose to include in your patch all products with upgrades or patches by selecting the Include driver updates option in the Drivers & Components tab of the Edit Installer dialog box.Updated Windows SDKThis version of LabWindows/CVI installs the Windows SDK 8.1. Refer to MSDN for a complete list of enhancements. Some of the features provided by the Windows SDK include the following items:•Handle processes and threads—You can use functions such asSetProcessInformation to lower the priority of processes that perform background operations, GetProcessInformation to get the memory priority of a process, SetThreadInformation to lower the priority of a thread that does not need to run immediately, and GetThreadInformation to get the priority of a thread.•Get the firmware type—Call GetFirmwareType to find the firmware type of your users’ computers.•Speed up operations that access the same file data repeatedly—Call OperationStart and OperationEnd .•Take advantage of better virtual memory handling—Call functions such asPrefetchVirtualMemory , OfferVirtualMemory , ReclaimVirtualMemory , and DiscardVirtualMemory .•Take advantage of better physical memory handling—Call functions such as GetMemoryErrorHandlingCapabilities ,RegisterBadMemoryNotification , andUnregisterBadMemoryNotification .•Call helpers for National Language Support functions—For example, you can call IsValidNLSVersion to determine whether a version is valid for a National Language Support function.To use the Windows SDK 8.1, include the following in the Compiler Defines dialog box: _WIN32_WINNT=_WIN32_WINNT_WIN8 or WINVER=_WIN32_WINNT_WIN8.NoteThe Windows SDK 8.1 requires Windows 7 (minimum).Improved Installer Messages and ErrorsErrors and warning messages you receive when you create installers provide more useful information.Bug FixesFor a list of bugs fixed in LabWindows/CVI 2015, refer to the NI web page at /info and enter the Info Code exmvwx.LabWindows/CVI ResourcesHow do I get started?Read the Getting Started with LabWindows/CVI manual, which provides a tutorial for learning basic LabWindows/CVI program development techniques.Are there known issues or late-breaking information?Refer to the LabWindows/CVI Readme, which you can access from Start»All Programs»National Instruments»LabWindows CVI 2015»LabWindows CVI 2015 Documentation. The readme file contains information about known issues.Where can I find reference information?The LabWindows/CVI Help contains complete reference information. Use the Search tab in the LabWindows/CVI Help to quickly locate specific information.Where can I find examples?Find examples with the NI Example Finder, which you can access by selecting Help»Find Examples.LabWindows/CVI example programs are located in the following location:C:\Users\Public\Documents\National Instruments\CVI2015\samples.Is there a list of LabWindows/CVI documentation?The Guide to LabWindows/CVI Documentation topic describes documentation available for new users and upgrade users. In addition, this topic provides links to LabWindows/CVI documentation, including manuals and web resources. You can access the Guide to LabWindows/CVI Documentation topic through the LabWindows/CVI Help.Where else can I go for LabWindows/CVI information?Visit the LabWindows/CVI w ebsite at for the most up-to-date information about LabWindows/CVI.6||LabWindows/CVI Release NotesRefer to the NI Trademarks and Logo Guidelines at /trademarks for more information on National Instruments trademarks. Other product and company names mentioned herein are trademarks or trade names of their respective companies. For patents covering National Instruments products/technology, refer to the appropriate location: Help»Patents in your software, the patents.txt file on your media, or the National Instruments Patents Notice at /patents. You can find information about end-user license agreements (EULAs) and third-party legal notices in the readme file for your NI product. Refer to the Export Compliance Information at /legal/export-compliance for the National Instruments global trade compliance policy and how to obtain relevant HTS codes, ECCNs, and other import/export data. NI MAKES NO EXPRESS OR IMPLIED WARRANTIES AS TO THE ACCURACY OF THE INFORMATION CONTAINED HEREIN AND SHALL NOT BE LIABLE FOR ANY ERRORS. U.S. Government Customers: The data contained in this manual was developed at private expense and is subject to the applicable limited rights and restricted data rights as set forth in FAR 52.227-14, DFAR 252.227-7014, and DFAR 252.227-7015.© 2003–2015 National Instruments. All rights reserved.373607N-01Aug15。
fetchassetswithlocalidentifiers 使用 -回复

fetchassetswithlocalidentifiers 使用-回复fetchassetswithlocalidentifiers是Photos框架中的一个方法,用于根据本地标识符(local identifiers)获取相应的资源。
本地标识符是由系统分配给每个媒体资源的唯一标识符。
Photos框架是iOS中用于访问和管理用户的照片和视频的基础框架。
使用fetchassetswithlocalidentifiers方法可以实现在应用程序中获取、显示和编辑用户存储在设备中的照片和视频。
在本篇文章中,我们将一步一步解析fetchassetswithlocalidentifiers方法的使用,并介绍一些使用此方法的实例。
文章的内容如下:第一部分:简介- 介绍Photos框架和fetchassetswithlocalidentifiers方法的作用和功能。
第二部分:fetchassetswithlocalidentifiers方法的参数和返回值- 详细解释fetchassetswithlocalidentifiers方法的参数,包括本地标识符数组和选项。
- 解释fetchassetswithlocalidentifiers方法的返回值,包括获取到的资源数组。
第三部分:使用fetchassetswithlocalidentifiers方法获取照片- 根据本地标识符获取用户的照片资源。
- 将获取到的照片资源显示在应用程序的界面上。
- 实现对照片资源的基本操作,如放大、缩小、旋转等。
第四部分:使用fetchassetswithlocalidentifiers方法获取视频- 根据本地标识符获取用户的视频资源。
- 将获取到的视频资源显示在应用程序的界面上。
- 实现对视频资源的基本操作,如播放、暂停、快进等。
第五部分:使用fetchassetswithlocalidentifiers方法的其他应用- 使用fetchassetswithlocalidentifiers方法获取用户的照片和视频资源,并进行批量处理。
IDEA里面的facets和artifacts的讲解
IDEA⾥⾯的facets和artifacts的讲解Facets:Facets表述了在Module中使⽤的各种各样的框架、技术和语⾔。
这些Facets让Intellij IDEA知道怎么对待module内容,并保证与相应的框架和语⾔保持⼀致。
使⽤Facets能让我们下载并配置framework所必须的组件,会⾃动⽣成各种各样的描述符,并存储在适当的位置,等等。
⼤多数Facets可以⽆冲突得添加到Module中。
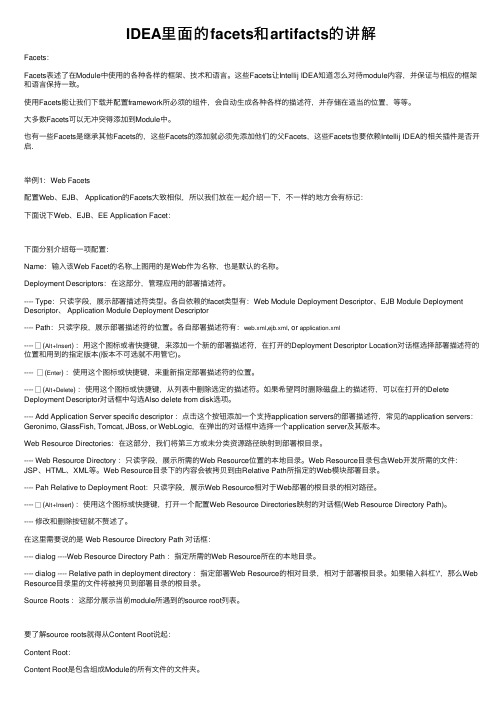
也有⼀些Facets是继承其他Facets的,这些Facets的添加就必须先添加他们的⽗Facets,这些Facets也要依赖Intellij IDEA的相关插件是否开启.举例1:Web Facets配置Web、EJB、 Application的Facets⼤致相似,所以我们放在⼀起介绍⼀下,不⼀样的地⽅会有标记:下⾯说下Web、EJB、EE Application Facet:下⾯分别介绍每⼀项配置:Name:输⼊该Web Facet的名称,上图⽤的是Web作为名称,也是默认的名称。
Deployment Descriptors:在这部分,管理应⽤的部署描述符。
---- Type:只读字段,展⽰部署描述符类型。
各⾃依赖的facet类型有:Web Module Deployment Descriptor、EJB Module Deployment Descriptor、 Application Module Deployment Descriptor---- Path:只读字段,展⽰部署描述符的位置。
各⾃部署描述符有:web.xml,ejb.xml, or application.xml---- (Alt+Insert) :⽤这个图标或者快捷键,来添加⼀个新的部署描述符,在打开的Deployment Descriptor Location对话框选择部署描述符的位置和⽤到的指定版本(版本不可选就不⽤管它)。
robolectric 高级用法
robolectric 高级用法什么是Robolectric?Robolectric是一个用于Android应用程序单元测试的框架。
在传统的Android测试中,开发者需要运行在设备或模拟器上才能执行的Instrumentation测试。
而使用Robolectric,开发者可以在本地的JVM 上运行测试,从而加快测试的速度和减少测试的依赖。
Robolectric 高级用法一、集成Robolectric到项目中RObolectric是一个独立的测试框架,并不是Android的标准库。
为了集成Robolectric到项目中,我们需要修改项目的Gradle 配置文件。
首先,在项目的根目录下的build.gradle 文件中,加入以下代码:allprojects {repositories {...其他的仓库配置maven { url " }}}然后,在app模块的build.gradle 文件中,加入以下依赖:testImplementation "org.robolectric:robolectric:4.5.1"接下来,我们需要创建一个自定义的测试的TestRunner类。
在app模块的src/test/java/目录下创建一个新的Java类文件,并且继承RobolectricTestRunner 类。
例如,我们创建一个类名为CustomTestRunner 的类:@RunWith(CustomTestRunner.class)public class CustomTestRunner extends RobolectricTestRunner { 自定义的逻辑代码}在这个类中,我们可以根据需要添加一些自定义的逻辑,例如指定Android版本等。
配置完成后,我们就可以开始使用Robolectric进行单元测试了。
二、使用Robolectric创建测试用例1. 创建一个测试类在app 模块的test/java 目录下,创建一个新的Java 类文件,用于编写测试用例。
fetchassetswithlocalidentifiers 使用 -回复

fetchassetswithlocalidentifiers 使用-回复关于fetchassetswithlocalidentifiers的使用,我将为您提供一篇1500-2000字的文章,逐步回答您的问题。
第一步:了解fetchassetswithlocalidentifiers在开始讨论fetchassetswithlocalidentifiers的使用之前,让我们先了解一下它是什么。
fetchassetswithlocalidentifiers是一个在iOS开发中使用的方法,它用于根据本地标识符(local identifier)获取照片或视频资源。
在iOS设备中,每个照片或视频资源都有一个唯一的本地标识符,可以用来标识该资源。
通过fetchassetswithlocalidentifiers方法,我们可以根据这些本地标识符,快速准确地获取到对应的照片或视频资源。
第二步:使用fetchassetswithlocalidentifiers获取照片或视频资源下面我们将介绍如何使用fetchassetswithlocalidentifiers方法来获取照片或视频资源。
首先,我们需要导入Photos框架,以便能够使用fetchassetswithlocalidentifiers方法。
在代码中添加以下导入语句:swiftimport Photos接下来,我们可以通过本地标识符数组调用fetchassetswithlocalidentifiers方法来获取照片或视频资源。
以下是一个示例代码:swiftlet localIdentifiers = ["localIdentifier1", "localIdentifier2", "localIdentifier3"]let fetchResult = PHAsset.fetchAssets(withLocalIdentifiers: localIdentifiers, options: nil)在上面的代码中,我们创建了一个本地标识符数组localIdentifiers,并将需要获取的资源的本地标识符添加到数组中。
容器监控cAdvisor原理分析
容器监控cAdvisor原理分析cAdvisor是⼀款强⼤的 Docker Container 监控⼯具,⽅便容器⽤户,对运⾏中的容器进⾏资源使⽤和性能分析。
⽤于收集、聚合、处理和导出运⾏中容器的信息。
cAdvisor提供了对Docker容器的原⽣⽀持,并且应该⽀持任何其他容器类型。
Kubelet内置了对cAdvisor的⽀持,⽤户可以直接通过Kubelet组件获取给节点上容器相关监控指标。
本系列⽂章cAdvisor代码,以v0.37.5代码为例。
cAdvisor主函数分析以下是main函数代码,会对代码进⾏简单注解,并对代码进⾏⼀定程度上的精简,其代码路径为:/cadvisor/cmd/cadvisor.go根据以下代码可以总结cAdvisor主要完成了以下⼏个⼯作:提供API给外部使⽤,包括⼀般API接⼝和prometheus接⼝可实现第三⽅数据存储,⽀持 bigquery、es、influxdb、kafka、redis、statsd、stdout收集数据包括 container、process、machine、Go runtimefunc main() {klog.InitFlags(nil)defer klog.Flush()flag.Parse()if *versionFlag {fmt.Printf("cAdvisor version %s (%s)\n", ["version"], ["revision"])os.Exit(0)}// 拿到所有需要收集的metrics类型,即从全量的metrics类型中,排除掉flag.disable_metrics,剩余的metrics集// 返回的值⼤概为container.MetricSet{// CpuUsageMetrics: struct{}{}, //cpu// ProcessSchedulerMetrics: struct{}{}, //sched// PerCpuUsageMetrics: struct{}{}, //precpu// ....}includedMetrics := toIncludedMetrics(ignoreMetrics.MetricSet)// 利⽤cpu个数或是flag.max_procs,设置最⼤可执⾏的cpu个数setMaxProcs()//1. 初始化本地内存//2. 初始化存储介质,可初始化多个,⽀持:bigquery,es,influxdb,kafka,redis,statsd,stdout【⽤flag.storage_driver】//3. 定时将数据存⼊存储介质中【flag.storage_duration】??memoryStorage, err := NewMemoryStorage()if err != nil {klog.Fatalf("Failed to initialize storage driver: %s", err)}// 系统fs对象sysFs := sysfs.NewRealSysFs()// 利⽤证书,创建http 的 clientcollectorHttpClient := createCollectorHttpClient(*collectorCert, *collectorKey)// 创建resourceManagerresourceManager, err := manager.New(memoryStorage, sysFs, housekeepingConfig, includedMetrics, &collectorHttpClient, strings.Split(*rawCgroupPrefixWhiteList, ","), *perfEvents) if err != nil {klog.Fatalf("Failed to create a manager: %s", err)}mux := http.NewServeMux()if *enableProfiling {mux.HandleFunc("/debug/pprof/", pprof.Index)mux.HandleFunc("/debug/pprof/cmdline", pprof.Cmdline)mux.HandleFunc("/debug/pprof/profile", pprof.Profile)mux.HandleFunc("/debug/pprof/symbol", pprof.Symbol)}// Register all HTTP handlers.err = cadvisorhttp.RegisterHandlers(mux, resourceManager, *httpAuthFile, *httpAuthRealm, *httpDigestFile, *httpDigestRealm, *urlBasePrefix)if err != nil {klog.Fatalf("Failed to register HTTP handlers: %v", err)}containerLabelFunc := metrics.DefaultContainerLabelsif !*storeContainerLabels {whitelistedLabels := strings.Split(*whitelistedContainerLabels, ",")containerLabelFunc = metrics.BaseContainerLabels(whitelistedLabels)}// Register Prometheus collector to gather information about containers, Go runtime, processes, and machinecadvisorhttp.RegisterPrometheusHandler(mux, resourceManager, *prometheusEndpoint, containerLabelFunc, includedMetrics)// Start the manager.if err := resourceManager.Start(); err != nil {klog.Fatalf("Failed to start manager: %v", err)}// Install signal handler.installSignalHandler(resourceManager)klog.V(1).Infof("Starting cAdvisor version: %s-%s on port %d", ["version"], ["revision"], *argPort)rootMux := http.NewServeMux()rootMux.Handle(*urlBasePrefix+"/", http.StripPrefix(*urlBasePrefix, mux))addr := fmt.Sprintf("%s:%d", *argIp, *argPort)klog.Fatal(http.ListenAndServe(addr, rootMux))}其中resourceManager类型是manager,粗略浏览下manager结构的字段以及相关功能type manager struct {// 当前受到监控的容器存在⼀个map中 containerData结构中包括了对容器的各种具体操作⽅式和相关信息containers map[namespacedContainerName]*containerData// 对map中数据存取时采⽤的LockcontainersLock sync.RWMutex// 缓存在内存中的数据主要是容器的相关信息memoryCache *memory.InMemoryCache// host上的实际⽂件系统的相关信息fsInfo fs.FsInfo// 系统fs对象,⾥⾯有⼀些查询系统⽂件的⽅法sysFs sysfs.SysFsmachineMu sync.RWMutex // protects machineInfo// machine的相关信息 cpu memory network system信息等等machineInfo info.MachineInfo// ⽤于存放退出信号的channel manager关闭的时候会给其中的channel发送退出信号quitChannels []chan error//cadvisor本⾝所运⾏的那个容器(如果cadvisor运⾏在容器中)cadvisorContainer string// 是否在hostnamespace中?inHostNamespace bool// 对event相关操作进⾏的封装eventHandler events.EventManager// manager的启动时间startupTime time.Time// 在内存中保留数据的时间也就是下次开始搜集容器相关信息并且更新内存信息的时间maxHousekeepingInterval time.Duration// 是否允许动态设置dynamic housekeepingallowDynamicHousekeeping boolincludedMetrics container.MetricSetcontainerWatchers []watcher.ContainerWatchereventsChannel chan watcher.ContainerEventcollectorHTTPClient *http.ClientnvidiaManager stats.ManagerperfManager stats.ManagerresctrlManager stats.Manager// List of raw container cgroup path prefix whitelist.rawContainerCgroupPathPrefixWhiteList []string}cAdvisor数据采集分析cAdvisor的数据采集分为两个部分machineInfo和containerInfo。
HUE安装部署

HUE安装部署【环境】组件名称组件版本Hadoop Hadoop-2.6.0-cdh5.7.0-src.tar.gzjdk jdk-8u45-linux-x64.gzhive hive-1.1.0-cdh5.7.0.tar.gzhue hue-3.9.0-cdh5.7.0【下载依赖##root⽤户下进⾏】[root@hadoop001 ~]#yum -y install ant asciidoc cyrus-sasl-devel cyrus-sasl-gssapi gcc gcc-c++ krb5-devel libtidy libxml2-devel libxslt-devel openldap-devel python-devel sqlite-devel openssl-devel mysql-devel gmp-devel【下载hue并解压】[hadoop@hadoop001 app]$ pwd/home/hadoop/app[hadoop@hadoop001 app]$ ll-rw-r--r-- 1 hadoop hadoop 66826791 Apr 18 19:56 hue-3.9.0-cdh5.7.0.tar.gz[hadoop@hadoop001 app]$ tar -xzvf hue-3.9.0-cdh5.7.0.tar.gz[hadoop@hadoop001 app]$lldrwxr-xr-x 11 hadoop hadoop 4096 Apr 18 21:51 hue-3.9.0-cdh5.7.0-rw-r--r-- 1 hadoop hadoop 66826791 Apr 18 19:56 hue-3.9.0-cdh5.7.0.tar.gz【配置环境变量】[hadoop@hadoop001 app]vim ~/.bash_profileexport HUE_HOME=/home/hadoop/app/hue-3.9.0-cdh5.7.0export PATH=$HUE_HOME/build/env/bin:$PATH[hadoop@hadoop001 app]source ~/.bash_profile[hadoop@hadoop001 app]$ echo $HUE_HOME/home/hadoop/app/hue-3.9.0-cdh5.7.0【修改配置⽂件】vi $HUE_HOME/desktop/conf/hue.ini【desktop】[desktop]http_host=0.0.0.0 # 监听地址http_port=8888 # 启动端⼝# Time zone nametime_zone=Asia/Shanghai # 时区【hadoop】[hadoop]fs_defaultfs=hdfs://hadoop001:8020webhdfs_url=http://hadoop001:50070/webhdfs/v1【yarn_clusters】[[yarn_clusters]][[[default]]]# Enter the host on which you are running the ResourceManagerresourcemanager_host=hadoop001# The port where the ResourceManager IPC listens on## resourcemanager_port=8032# Whether to submit jobs to this clustersubmit_to=True# Resource Manager logical name (required for HA)## logical_name=# Change this if your YARN cluster is Kerberos-secured## security_enabled=false# URL of the ResourceManager APIresourcemanager_api_url=http://hadoop001:8088# URL of the ProxyServer APIproxy_api_url=http://hadoop001:8088# URL of the HistoryServer APIhistory_server_api_url=http://hadoop001:19888[beeswax]# Host where HiveServer2 is running.# If Kerberos security is enabled, use fully-qualified domain name (FQDN).hive_server_host=hadoop001# Port where HiveServer2 Thrift server runs on.hive_server_port=10000 # hiveserver2的启动端⼝,如果改了这⾥要同步# Hive configuration directory, where hive-site.xml is locatedhive_conf_dir=/home/hadoop/app/hive/conf #hive的conf⽬录【MySQL】## [[[mysql]]]# Name to show in the UI.nice_name="My SQL DB"# For MySQL and PostgreSQL, name is the name of the database.# For Oracle, Name is instance of the Oracle server. For express edition# this is 'xe' by default.name=mysqldb# Database backend to use. This can be:# 1. mysql# 2. postgresql# 3. oracleengine=mysql# IP or hostname of the database to connect to.host=hadoop001# Port the database server is listening to. Defaults are:# 1. MySQL: 3306# 2. PostgreSQL: 5432# 3. Oracle Express Edition: 1521port=3306# Username to authenticate with when connecting to the database.user=root# Password matching the username to authenticate with when# connecting to the database.password=123456【HADOOP配置修改】vi $HADOOP_HOME/etc/hadoop/hdfs-site.xml<property><name>dfs.webhdfs.enabled</name><value>true</value></property><property><name>dfs.permissions.enabled</name><value>false</value></property>vi $HADOOP_HOME/etc/hadoop/core-site.xm<property><name>hadoop.proxyuser.hue.hosts</name><value>*</value></property><property><name>hadoop.proxyuser.hue.groups</name><value>*</value></property><property><name>hadoop.proxyuser.hadoop.hosts</name><value>*</value></property><property><name>hadoop.proxyuser.hadoop.groups</name><value>*</value></property>vi $HADOOP_HOME/etc/hadoop/yarn-site.xml<!--打开HDFS上⽇志记录功能--><property><name>yarn.log-aggregation-enable</name><value>true</value></property><!--在HDFS上聚合的⽇志最长保留多少秒。
SLURM资源管理系统使用入门
批处理模式 - yhbatch
• 脚本文件:第一行应以“#!”开头,指定脚本文件的解释程序;在脚本中,如果一
行以“#SBATCH”开头,则该行中的其余部分被当作命令行选项,被yhbatch处理 $ cat job.sh #!/bin/sh #SBATCH -N 16 -t 100 -n 16 -c 4 yhrun -n 16 hostname
• 运行后,生成输出文件
$ ls hpl-2.0 iotest job.sh NPB3.3-MPI slurm-53.out test.sh
分配模式 - yhalloc
• 分配模式
1.提交资源分配请求 2.作业排队等待资源分配 3.执行用户指定的命令 4.命令执行结束,释放资源
• 交互模式作业与批处理模式作业的结合
• 提供高效的资源与作业管理
– – – – 状态监控 资源管理 作业调度 用量记账
• 是用户使用计算资源的接口
– – – – 作业提交 / 运行 任务加载 作业控制 状态查看
资源管理系统组成
• 主要组成部分
– 控制进程 – 记账存储进程 – 节点监控进程 – 作业管理进程 – 命令工具
资源管理系统组成
• 控制进程:Slurmctld
– – – – – 运行在管理节点 是资源管理系统的控制中枢 记录节点状态 进行分区管理 进行作业管理、作业调度、资源分配
• 记账存储进程:Slurmdbd
– – – – 运行在管理节点 将作业信息保存到数据库 记录用户、帐号、资源限制、 QOS 等信息 用户认证和安全隔离
– 节点数量 – 作业数量 – 时间限制
主要内容
• 1.资源管理系统概述
– 系统组成 – 系统实体
yarn的架构及原理
yarn的架构及原理1. YARN产⽣背景MapReduce本⾝存在着⼀些问题:1)JobTracker单点故障问题;如果Hadoop集群的JobTracker挂掉,则整个分布式集群都不能使⽤了。
2)JobTracker承受的访问压⼒⼤,影响系统的扩展性。
3)不⽀持MapReduce之外的计算框架,⽐如Storm、Spark、Flink等。
与旧MapReduce相⽐,YARN采⽤了⼀种分层的集群框架,具有以下⼏种优势。
1)Hadoop2.0提出了HDFSFederation;它让多个NameNode分管不同的⽬录进⽽实现访问隔离和横向扩展。
对于运⾏中NameNode的单点故障,通过 NameNode热备⽅案(NameNode HA)实现。
2) YARN通过将资源管理和应⽤程序管理两部分剥离开来,分别由ResourceManager和ApplicationMaster进程来实现。
其中,ResouceManager专管资源管理和调度,⽽ApplicationMaster则负责与具体应⽤程序相关的任务切分、任务调度和容错等。
3)YARN具有向后兼容性,⽤户在MR1上运⾏的作业,⽆需任何修改即可运⾏在YARN之上。
4)对于资源的表⽰以内存为单位(在⽬前版本的 Yarn 中没有考虑 CPU的占⽤),⽐之前以剩余 slot 数⽬为单位更合理。
5)⽀持多个框架,YARN不再是⼀个单纯的计算框架,⽽是⼀个框架管理器,⽤户可以将各种各样的计算框架移植到YARN之上,由YARN 进⾏统⼀管理和资源分配,由于将现有框架移植到YARN之上需要⼀定的⼯作量,当前YARN仅可运⾏MapReduce这种离线计算框架。
6)框架升级容易,在YARN中,各种计算框架不再是作为⼀个服务部署到集群的各个节点上(⽐如MapReduce框架,不再需要部署JobTracker、 TaskTracker等服务),⽽是被封装成⼀个⽤户程序库(lib)存放在客户端,当需要对计算框架进⾏升级时,只需升级⽤户程序库即可。
local-path-provisioner rancher 扩容 原理

local-path-provisioner rancher 扩容原理
Local-path-provisioner是一个基于Rancher的本地存储卷插件,它通过在节点上创建专用文件夹来提供持久性的本地存储。
当需要扩容时,Local-path-provisioner会按需在其他节点上创建
新的文件夹,并将新的存储卷分配给应用程序。
Local-path-provisioner的扩容原理如下:
1. 当应用程序需要更多的存储容量时,Local-path-provisioner
会检查当前节点上是否有空闲的文件夹可用。
如果有可用的文件夹,则会将其分配给应用程序,并更新相应的持久卷。
2. 如果当前节点上没有足够的可用文件夹,则Local-path-provisioner会通过Rancher控制平面查找其他节点上的空闲文
件夹。
它会选择其中一个节点,并通过创建一个新的文件夹来为该节点提供额外的存储容量。
3. 一旦新的文件夹在其他节点上创建成功,Local-path-provisioner会将其分配给需要扩容的应用程序,并更新相应的
持久卷。
应用程序可以立即开始使用新的存储容量。
需要注意的是,Local-path-provisioner使用的是本地存储,数
据不会跨节点复制。
这意味着在扩容时,新的存储容量只会在其所在的节点上可见,并不会在其他节点上复制。
所以在使用Local-path-provisioner时,需要确保应用程序对存储的位置和
复制进行了适当的处理,以保证数据的可靠性和高可用性。
HDFS-接口
HDFS-接⼝命令⾏接⼝接⼝语法hadoop fs:可以操作任何⽂件系统(包括本地磁盘⽂件系统和HDFS⽂件系统)Usage: hadoop fs [generic options][-appendToFile <localsrc> ... <dst>][-cat [-ignoreCrc] <src> ...][-checksum <src> ...][-chgrp [-R] GROUP PATH...][-chmod [-R] <MODE[,MODE]... | OCTALMODE> PATH...][-chown [-R] [OWNER][:[GROUP]] PATH...][-copyFromLocal [-f] [-p] [-l] [-d] <localsrc> ... <dst>][-copyToLocal [-f] [-p] [-ignoreCrc] [-crc] <src> ... <localdst>][-count [-q] [-h] [-v] [-t [<storage type>]] [-u] [-x] <path> ...][-cp [-f] [-p | -p[topax]] [-d] <src> ... <dst>][-createSnapshot <snapshotDir> [<snapshotName>]][-deleteSnapshot <snapshotDir> <snapshotName>][-df [-h] [<path> ...]][-du [-s] [-h] [-x] <path> ...][-expunge][-find <path> ... <expression> ...][-get [-f] [-p] [-ignoreCrc] [-crc] <src> ... <localdst>][-getfacl [-R] <path>][-getfattr [-R] {-n name | -d} [-e en] <path>][-getmerge [-nl] [-skip-empty-file] <src> <localdst>][-help [cmd ...]][-ls [-C] [-d] [-h] [-q] [-R] [-t] [-S] [-r] [-u] [<path> ...]][-mkdir [-p] <path> ...][-moveFromLocal <localsrc> ... <dst>][-moveToLocal <src> <localdst>][-mv <src> ... <dst>][-put [-f] [-p] [-l] [-d] <localsrc> ... <dst>][-renameSnapshot <snapshotDir> <oldName> <newName>][-rm [-f] [-r|-R] [-skipTrash] [-safely] <src> ...][-rmdir [--ignore-fail-on-non-empty] <dir> ...][-setfacl [-R] [{-b|-k} {-m|-x <acl_spec>} <path>]|[--set <acl_spec> <path>]][-setfattr {-n name [-v value] | -x name} <path>][-setrep [-R] [-w] <rep> <path> ...][-stat [format] <path> ...][-tail [-f] <file>][-test -[defsz] <path>][-text [-ignoreCrc] <src> ...][-touchz <path> ...][-truncate [-w] <length> <path> ...][-usage [cmd ...]]Generic options supported are:-conf <configuration file> specify an application configuration file-D <property=value> define a value for a given property-fs <file:///|hdfs://namenode:port> specify default filesystem URL to use, overrides 'fs.defaultFS' property from configurations. -jt <local|resourcemanager:port> specify a ResourceManager-files <file1,...> specify a comma-separated list of files to be copied to the map reduce cluster-libjars <jar1,...> specify a comma-separated list of jar files to be included in the classpath-archives <archive1,...> specify a comma-separated list of archives to be unarchived on the compute machinesThe general command line syntax is:command [genericOptions] [commandOptions]hdfs dfs|hadoop dfs:只能操作HDFS⽂件系统[hadoop@pg1 soft]$ hdfs dfsUsage: hadoop fs [generic options][-appendToFile <localsrc> ... <dst>][-cat [-ignoreCrc] <src> ...][-checksum <src> ...][-chgrp [-R] GROUP PATH...][-chmod [-R] <MODE[,MODE]... | OCTALMODE> PATH...][-chown [-R] [OWNER][:[GROUP]] PATH...][-copyFromLocal [-f] [-p] [-l] [-d] <localsrc> ... <dst>][-copyToLocal [-f] [-p] [-ignoreCrc] [-crc] <src> ... <localdst>][-count [-q] [-h] [-v] [-t [<storage type>]] [-u] [-x] <path> ...][-cp [-f] [-p | -p[topax]] [-d] <src> ... <dst>][-createSnapshot <snapshotDir> [<snapshotName>]][-deleteSnapshot <snapshotDir> <snapshotName>][-df [-h] [<path> ...]][-du [-s] [-h] [-x] <path> ...][-expunge][-find <path> ... <expression> ...][-get [-f] [-p] [-ignoreCrc] [-crc] <src> ... <localdst>][-getfacl [-R] <path>][-getfattr [-R] {-n name | -d} [-e en] <path>][-getmerge [-nl] [-skip-empty-file] <src> <localdst>][-help [cmd ...]][-ls [-C] [-d] [-h] [-q] [-R] [-t] [-S] [-r] [-u] [<path> ...]][-mkdir [-p] <path> ...][-moveFromLocal <localsrc> ... <dst>][-moveToLocal <src> <localdst>][-mv <src> ... <dst>][-put [-f] [-p] [-l] [-d] <localsrc> ... <dst>][-renameSnapshot <snapshotDir> <oldName> <newName>][-rm [-f] [-r|-R] [-skipTrash] [-safely] <src> ...][-rmdir [--ignore-fail-on-non-empty] <dir> ...][-setfacl [-R] [{-b|-k} {-m|-x <acl_spec>} <path>]|[--set <acl_spec> <path>]][-setfattr {-n name [-v value] | -x name} <path>][-setrep [-R] [-w] <rep> <path> ...][-stat [format] <path> ...][-tail [-f] <file>][-test -[defsz] <path>][-text [-ignoreCrc] <src> ...][-touchz <path> ...][-truncate [-w] <length> <path> ...][-usage [cmd ...]]Generic options supported are:-conf <configuration file> specify an application configuration file-D <property=value> define a value for a given property-fs <file:///|hdfs://namenode:port> specify default filesystem URL to use, overrides 'fs.defaultFS' property from configurations. -jt <local|resourcemanager:port> specify a ResourceManager-files <file1,...> specify a comma-separated list of files to be copied to the map reduce cluster-libjars <jar1,...> specify a comma-separated list of jar files to be included in the classpath-archives <archive1,...> specify a comma-separated list of archives to be unarchived on the compute machinesThe general command line syntax is:command [genericOptions] [commandOptions]基本操作上传⽂件到HDFS# 将本地磁盘上的jdk-8u202-linux-x64.tar.gz的⽂件上传到HDFS⽂件系统上的根⽬录hdfs dfs -put ./jdk-8u202-linux-x64.tar.gz /从HDFS下载⽂件到本地磁盘hdfs dfs -get /jdk-8u202-linux-x64.tar.gz /tmp/HDFS⽂件访问权限r:只读权限读取⽂件或列出⽬录内容时需要只读权限w:写⼊权限写⼊⼀个⽂件或在⼀个⽬录上新建及删除⽂件或⽬录需要写⼊权限x:可执⾏权限访问⼀个⽬录的⼦项时需要可执⾏权限Hadoop运⾏模式通过在hdfs-site.xml⽂件的配置参数dfs.permissions.enable属性控制是否启⽤权限检查模式。
- 1、下载文档前请自行甄别文档内容的完整性,平台不提供额外的编辑、内容补充、找答案等附加服务。
- 2、"仅部分预览"的文档,不可在线预览部分如存在完整性等问题,可反馈申请退款(可完整预览的文档不适用该条件!)。
- 3、如文档侵犯您的权益,请联系客服反馈,我们会尽快为您处理(人工客服工作时间:9:00-18:30)。
i t ’s good and good for youChapter 1 Marketing: Creating and Capturing Customer ValueCopyright © 2012 Pearson Education1- 1Creating and Capturing Customer ValueTopic Outline• • • • • • • What Is Marketing? Understand the Marketplace and Customer Needs Designing a Customer-Driven Marketing Strategy Preparing an Integrated Marketing Plan and Program Building Customer Relationships Capturing Value from Customers The Changing Marketing LandscapeCopyright © 2012 Pearson Education1- 2What Is Marketing?Marketing is a process by which companies create value for customers and build strong customer relationships to capture value from customers in returnCopyright © 2012 Pearson Education1- 3What Is Marketing?The Marketing ProcessCopyright © 2012 Pearson Education1- 4Understanding the Marketplace and Customer NeedsCustomer Needs, Wants, and DemandsCopyright © 2012 Pearson Education1- 5Understanding the Marketplace and Customer Needs• Market offerings are some combination of products, services, information, or experiences offered to a market to satisfy a need or want • Marketing myopia is focusing only on existing wants and losing sight of underlying consumer needsCopyright © 2012 Pearson Education1- 6Understanding the Marketplace and Customer NeedsCustomer Value and Satisfaction ExpectationsCopyright © 2012 Pearson Education1- 7Understanding the Marketplace and Customer Needs Exchange is the act of obtaining a desiredobject from someone by offering something in returnCopyright © 2012 Pearson Education1- 8Understanding the Marketplace and Customer NeedsMarkets are the set of actual and potential buyers of a productCopyright © 2012 Pearson Education1- 9Designing a Customer-Driven Marketing StrategyMarketing management is the art and science of choosing target markets and building profitable relationships with them– What customers will we serve? – How can we best serve these customers?Copyright © 2012 Pearson Education1- 10Designing a Customer-Driven Marketing StrategySelecting Customers to ServeMarket segmentation refers to dividing the markets into segments of customers Target marketing refers to which segments to go afterCopyright © 2012 Pearson Education1- 11Designing a Customer-Driven Marketing StrategyChoosing a Value PropositionValue proposition Set of benefits or values a company promises to deliver to customers to satisfy their needsCopyright © 2012 Pearson Education1- 12Designing a Customer-Driven Marketing StrategyMarketing Management OrientationsCopyright © 2012 Pearson Education1- 13Designing a Customer-Driven Marketing StrategyMarketing Management OrientationsProduction concept is the idea that consumers will favor products that are available or highly affordableCopyright © 2012 Pearson Education1- 14Designing a Customer-Driven Marketing StrategyMarketing Management OrientationsProduct concept is the idea that consumers will favor products that offer the most quality, performance, and features. Organization should therefore devote its energy to making continuous product improvements.Copyright © 2012 Pearson Education1- 15Designing a Customer-Driven Marketing StrategyMarketing Management OrientationsSelling concept is the idea that consumers will not buy enough of the firm’s products unless it undertakes a large scale selling and promotion effortCopyright © 2012 Pearson Education1- 16Designing a Customer-Driven Marketing StrategyMarketing Management OrientationsCopyright © 2012 Pearson EducationMarketing concept is the idea that achieving organizational goals depends on knowing the needs and wants of the target markets and delivering the desired satisfactions better than competitors do1- 17Designing a Customer-Driven Marketing StrategyMarketing Management Orientations Societal marketing concept is the idea that a company should make good marketing decisions by considering consumers’ wants, the company’s requirements, consumers’ long-term interests, and society’s longrun interestsCopyright © 2012 Pearson Education1- 18Designing a Customer-Driven Marketing StrategyCopyright © 2012 Pearson Education1- 19Preparing an Integrated Marketing Plan and ProgramThe marketing mix: set of tools (four Ps) the firm uses to implement its marketing strategy. It includes product, price, promotion, and place. Integrated marketing program: comprehensive plan that communicates and delivers the intended value to chosen customers.Copyright © 2012 Pearson Education1- 20Building Customer RelationshipsCustomer Relationship Management (CRM) • The overall process of building and maintaining profitable customer relationships by delivering superior customer value and satisfactionCopyright © 2012 Pearson Education1- 21Building Customer RelationshipsRelationship Building Blocks: Customer Value and SatisfactionCopyright © 2012 Pearson Education1- 22Building Customer RelationshipsCustomer Relationship Levels and ToolsCopyright © 2012 Pearson Education1- 23Building Customer RelationshipsThe Changing Nature of Customer Relationships• Relating with more carefully selected customers uses selective relationship management to target fewer, more profitable customers • Relating more deeply and interactively by incorporating more interactive two way relationships through blogs, Websites, online communities and social networksCopyright © 2012 Pearson Education1- 24Building Customer RelationshipsThe Changing Nature of Customer RelationshipsCustomer-managed relationships Marketing relationships in which customers, empowered by today’s new digital technologies, interact with companies and with each other to shape their relationships with brands.Copyright © 2012 Pearson Education1- 25Building Customer RelationshipsPartner relationship management involves working closely with partners in other company departments and outside the company to jointly bring greater value to customersCopyright © 2012 Pearson Education1- 26Building Customer RelationshipsPartner Relationship Management• Partners inside the company is every function area interacting with customers– Electronically – Cross-functional teams• Partners outside the company is how marketers connect with their suppliers, channel partners, and competitors by developing partnershipsCopyright © 2012 Pearson Education1- 27Building Customer RelationshipsPartner Relationship Management• Supply chain is a channel that stretches from raw materials to components to final products to final buyers • Supply chain managementCopyright © 2012 Pearson Education1- 28Capturing Value from CustomersCreating Customer Loyalty and Retention• Customer lifetime value is the value of the entire stream of purchases that the customer would make over a lifetime of patronageCopyright © 2012 Pearson Education1- 29Capturing Value from CustomersGrowing Share of CustomerShare of customer is the portion of the customer’s purchasing that a company gets in its product categoriesCopyright © 2012 Pearson Education1- 30Copyright ©2012 Pearson Education Capturing Value fromCustomersCustomer equity isthe total combinedcustomer lifetimevalues of all of thecompany’scustomersCopyright ©2012 Pearson Education Capturing Value from Customers•Right relationships with the right customers involves treating customers as assets that need to be managed and maximized•Different types of customers require different relationship managementstrategiesBuilding Customer EquityCopyright ©2012 Pearson Education The Changing MarketingLandscapeUncertain Economic Environment•New consumer frugality•Marketers focus on value for the customerCopyright ©2012 Pearson Education The Changing MarketingLandscapeUncertain Economic Environment•New consumer frugality•Marketers focus on value for the customerCopyright ©2012 Pearson Education The Changing MarketingLandscapeDigital Age•People are connected continuously to people and information worldwide•Marketers have great new tools to communicate with customers•Internet + mobile communication devices creates environment for online marketingCopyright ©2012 Pearson Education The Changing MarketingLandscape•Rapid Globalization•Sustainable Marketing•Not-for-Profit MarketingCopyright ©2012 Pearson Education So, What Is Marketing?Pulling It All TogetherClass ExercisePlease write down in paper and submit in class :1.Your personal basic needs, wants anddesires ;2.When a customer come to buy i-phonefrom you, what does he/she wants tofrom the product (values) ;3.What else do you sell actually apart fromthe product ??Copyright ©2012 Pearson EducationCopyright ©2012 Pearson Education Assessments Schedules (10%)1.Sep 11Quiz in class (Wk 3)2.Oct week MIF Visit Reporting [submiton the weekend of the MIF closing date]3.Oct 31 or Nov 7 Seminar -Q&A4.Nov + 1 ‘4Ps’-Team Presentation[last 4 weeks of the semester ie. wk 11,12, 13 & 14]Copyright ©2012 Pearson Education All rights reserved. No part of this publication may be reproduced, stored in a retrieval system, or transmitted, in any form or by any means, electronic, mechanical, photocopying, recording, or otherwise, without the prior writtenpermission of the publisher. Printed in the United States of America.Copyright ©2012 Pearson Education。
