Ch26HullOFOD10thEdition
Roland Handsonic 10 HPD-10 Hand Percussion Pad 用户指
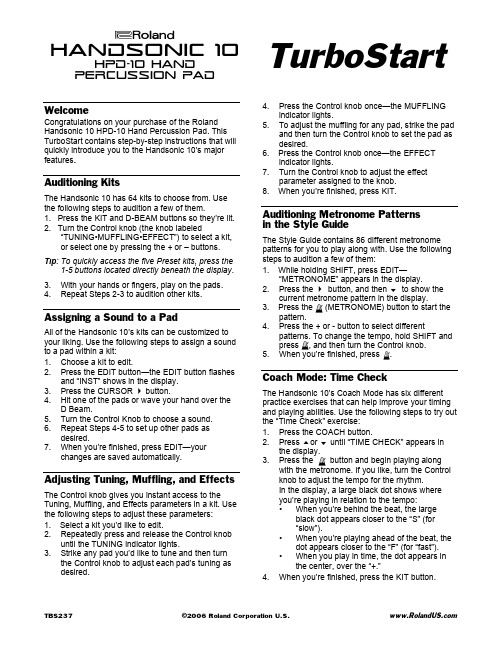
®ÂØÒňÎHandsonic 10HPD-10 HandPercussion PadTurboStartTBS237 ©2006 Roland Corporation U.S. WelcomeCongratulations on your purchase of the Roland Handsonic 10 HPD-10 Hand Percussion Pad. This TurboStart contains step-by-step instructions that will quickly introduce you to the Handsonic 10’s major features .Auditioning KitsThe Handsonic 10 has 64 kits to choose from. Use the following steps to audition a few of them.1. Press the KIT and D-BEAM buttons so they’re lit.2. Turn the Control knob (the knob labeled“TUNING•MUFFLING•EFFECT”) to select a kit, or select one by pressing the + or – buttons. Tip : To quickly access the five Preset kits, press the1-5 buttons located directly beneath the display . 3. With your hands or fingers, play on the pads. 4. Repeat Steps 2-3 to audition other kits.Assigning a Sound to a PadAll of the Handsonic 10’s kits can be customized to your liking. Use the following steps to assign a sound to a pad within a kit:1. Choose a kit to edit.2. Press the EDIT button—the EDIT button flashesand “INST” shows in the display. 3. Press the CURSOR button.4. Hit one of the pads or wave your hand over theD Beam.5. Turn the Control Knob to choose a sound.6. Repeat Steps 4-5 to set up other pads asdesired.7. When you’re finished, press EDIT—yourchanges are saved automatically.Adjusting Tuning, Muffling, and EffectsThe Control knob gives you instant access to the Tuning, Muffling, and Effects parameters in a kit. Use the following steps to adjust these parameters: 1. Select a kit you’d like to edit.2. Repeatedly press and release the Control knobuntil the TUNING indicator lights.3. Strike any pad you’d like to tune and then turnthe Control knob to adjust each pad’s tuning as desired.4. Press the Control knob once—the MUFFLINGindicator lights.5. To adjust the muffling for any pad, strike the padand then turn the Control knob to set the pad as desired.6. Press the Control knob once—the EFFECTindicator lights.7. Turn the Control knob to adjust the effectparameter assigned to the knob. 8. When you’re finished, press KIT.Auditioning Metronome Patterns in the Style GuideThe Style Guide contains 86 different metronome patterns for you to play along with. Use the following steps to audition a few of them:1. While holding SHIFT, press EDIT—“METRONOME” appears in the display.2. Press the button, and then to show thecurrent metronome pattern in the display.3. Press the (METRONOME) button to start thepattern.4. Press the + or - button to select differentpatterns. To change the tempo, hold SHIFT and press , and then turn the Control knob. 5. When you’re finished, press .Coach Mode: Time CheckThe Handsonic 10’s Coach Mode has six different practice exercises that can help improve your timing and playing abilities. Use the following steps to try out the “Time Check” exercise:1. Press the COACH button.2. Press or until “TIME CHECK” appears inthe display.3. Press the button and begin playing alongwith the metronome. If you like, turn the Control knob to adjust the tempo for the rhythm.In the display, a large black dot shows where you’re playing in relation to the tempo:• When you’re behind the beat, the largeblack dot appears closer to the “S” (for “slow”).• When you’re playing ahead of the beat, thedot appears closer to the “F” (for “fast”). • When you play in time, the dot appears inthe center, over the “+.”4. When you’re finished, press the KIT button.。
Autodesk Nastran 2023 参考手册说明书
FILESPEC ............................................................................................................................................................ 13
DISPFILE ............................................................................................................................................................. 11
File Management Directives – Output File Specifications: .............................................................................. 5
BULKDATAFILE .................................................................................................................................................... 7
UHF无线麦克风系统 UwMic10 用户手册说明书
UHF Wireless Microphone System UwMic10User ManualStatementThis user manual is available for these packages:• U wMic10 RX10+TX10, a portable receiver and a body-pack transmitter.• U wMic10 RX10+TX10+TX10, a portable receiver and two body-pack transmitters.• UwMic10 HU10, a hand-held microphone transmitter.• UwMic10 TX10, a body-pack transmitter.Please read this manual carefully before using and strictly operate and store in accordance with the instructions. Please save it for your future reference.If the user manual can not help you to solve certain problems, please ask your retailer for help or email us: info@saramonic. com.Cautions1. Do not use the unit under water, don't expose it to rain.Please store it in a cool, dry place.2. Please use and store it in normal temperature. Donot move it from overheated to supercooled conditionfrequently as well as keep away from heat sources such as heater and oven.3. When using and storing, please pay attention to dust andmoisture.4. Be careful to violent collision.5. To avoid acoustical feed-back, do not hold the microphoneclose to the loudspeakers.6. For the best sound pick-up pattern do not hold your handagainst the microphone head.7. Remove the batteries from the battery compartment whenthe device is not used for a long time.CONTENTSGeneral Introduction (2)Portable Receiver UwMic10-RX10 (2)Introduction (2)Product Structure (2)Attaching Accessories (4)LCD Display Operation Guide (5)Body-pack Transmitter UwMic10-TX10 (8)Introduction (8)Product Structure (8)Attaching Accessories (10)LCD Display Operation Guide (11)Hand-held Microphone UwMic10-HU10 (14)Introduction (14)Product Structure (14)Setup Guide (15)Operation Guide (16)Specification (20)Receiver RX10 (20)Transmitter TX10 and HU10 (21)Packing list (22)/ 1General IntroductionThe Saramonic UwMic10 UHF wireless microphone systemis intended for portable wireless operation and can be usedin several environments for applications such as DSLR video, field recording, broadcast TV, electronic news gathering (ENG), on-the-spot interviews, and more.Portable Receiver UwMic10-RX10 IntroductionThe Saramonic UwMic10-RX10 is a camera-mountable integrated wireless receiver. It features a wide switchingRF bandwidth, an easy-to-read LCD display and infrared synchronization between transmitter and receiver. Equipped with an auto-scan function, the RX10 can automatically search for an available transmission frequency. The phone jack enables real-time monitoring of receiver via headphones, especially useful for cameras that lack a monitor output.Product Structure①②⑤⑦③④⑥⑧⑩⑨⑪/ 2① Antennas② P ower buttonPress to turn on or off the RX10.③ SET buttonLong press the SET button to enter the displayed menu.Then, short press the SET button to confirm your option or long press again to exit without saving.④ POWER indicatorIndicates the battery level as follows:Green light: Sufficient battery level.Red light: Low battery level.⑤ RF indicator and infrared transmitter portThe infrared transmitter port sends the set frequency to a transmitter.RF indicator displays the RF input level as follows:Green light: RF signal is strong.Red light: RF signal is weak or disconnected.⑥ + or – buttonSelects functions or values shown on the display.⑦ LCD displayDisplay menus, please refer to "LCD Display OperationGuide" (page 5) for more details.⑧ Battery compartmentOperates on two AA batteries (not included).⑨ PHONE jackIt is a 3.5mm diameter and stereo mini headphone jack.Connect a headphone to monitor the audio output.Note: Please do not connect a headphone with a mona-ural mini jack. As this may short-circuit the headphonejack and distorted sound output.⑩ OUTPUT jackConnect the RX10 to a video camera, camcorder, mixer or amplifier with the supplied output cable.⑪ Standard cold shoe/ 3/ 4Attaching Accessories1 Connect the supplied cable to the output jack.2 A ttach a belt clip. Please Refer to “Attaching Accessories" (page 10).3 Attach the shoe mount adapter .① P lug the supplied cable into the OUTPUT jack.② F or a secure connection, turn to lock the connector.①②①③②① P lease attach the belt clip upside-down before attach-ing the shoe mount adapter .② P ush the bottom of the belt clip to make some spacebetween the belt clip and thereceiver .③ A lign the belt clip with the two vertical grooves on theshoe mount adapter andinsert the adapter in thedirection of the arrow.④ P ush the shoe mount adap-ter in fully until the belt clip fits into the horizontal grooveon the adapter holds./ 5LCD Display Operation GuideHome screen. If no operation is performed for 20 seconds onthe other screens, the display will automatically return to the home screen.① Group icon Indicates the power of group A is turned off.Indicates the power of group A is turned on. ② RF level indicatorIndicates the current reception level.③ Battery level indicator Displays the battery level. Please replace both batteries immediately when the indicator starts flashing.④ Name of the channel group ⑤ Current channelDisplays the current channel number .⑥ Audio input level meter Displays the audio input level.2Power key. Long press the SET button to unlocked or locked the power key. Lock the power key to prevent the receiver being turned off unwittingly while using.• U nlocked: Long press the power key to turn the receiver on or off (System default).• L ocked: The receiver will not be turned off even after pressing the power key.①②②③④⑤⑥①1Note: If the batteries are removed and reinserted while the power key is set to Locked, the lock state of the Power key will not be changed. You can turn on the receiver by long pressing the power button.38Power of the Group. When you only use one group signal, please turn off the other group to save battery. To save battery, system default of the Group B is power off while the Group A is power on.When operating two transmitters simultaneously, please set each transmitter to a different group to prevent interference or noise.49Select channel. Details of operation, please refer to "Manually setting the receiver channel" (page 18).The system default of Group A is in RF frequence 614.560MHz, Channel 01.The system default of Group B is in RF frequence 656.510MHz, Channel 01.510Set output volume. Set the volume of output audio within the range 0 to 30. The setting is retained even after the power is turned off. Default is 30./ 6/ 7Auto scan function. Automatically scan an available and clear channel. Details of operation, please refer to "Using the auto scan function" (page 17).7Group Matc h with TX ettings12 Group Matc h with TX ettings Infrared matching function. Match the receiver andtransmitter via infrared. Details of operation, please refer to "Match the channel of receiver and transmitter" (page 18).13Set backlight. Set the backgroud LED light to ON or Delay 60 /30 /10 seconds or OFF. Default is “Delay 10s.”14Restore settings. Confirm it then the parameters of RX10 are restored to their factory default settings.15Version of the UwMic-RX10.①⑦⑧⑨②③⑤④⑥Serial Number.Body-pack Transmitter UwMic10-TX10 IntroductionThis transmitter is a compact transmitter that employs a crystal-controlled PLL synthesizer. It is equipped with a muting function and a BMP-type microphone input connector. The RF power output can be switched among high, middle and low.Product Structure/ 8① Antenna② AUDIO indicator / IR (infrared detector)AUDIO indicator: Indicates the audio input level.IR (infrared detector): Gets the frequency from the receiver Solid Green: Audio input level is appropriate.Flashing Red: Audio is muted (i.e., disabled).For details on setting the mute function, please refer to"Set Mute key" (page 12).③ POWER indicatorIndicates the battery level as follows:Solid Green: Sufficient battery level.Solid Red: Battery is getting low.④ Audio input connector (BMP type)Connect to the supplied lavalier microphone.⑤ + or – buttonSelects functions or values shown on the display.⑥ Battery compartmentAccepts two AA batteries (alkaline, nickel metal hydride,or lithium batteries).⑦ Power / Mute buttonFunction OperationPower ON Press button for one second or longerPower OFF Press button until it turns offMute ONShort press buttonMute OFF⑧ SET buttonLong press the SET button to enter the displayed menu.Then, short press the SET button to confirm your option or long press again to exit without saving.⑨ LCD displayDisplay menus, please refer to "LCD Display OperationGuide" (page 11) for more details.Attaching Accessories1Attach a belt clip.Insert one end of the belt clipinto one of two holes on eitherside of the transmitter, andthen insert the other end intothe hole on the other side.2 Connect the mcirophone.For a secure connection, turnto lock the connector.Note: Please turn off thetransmitter before attach orremove the microphone.LCD Display Operation GuideH ome screen. If no operatIon is performed for 20 seconds on the other screens, the display will automatically return to the home screen.① RF transmission power indicatorIndicates the current transmission power level.For details on setting the level, please see “Select RF power level” (page 12).② Channel group indicator Indicates the channel group. ③ Mute indicatorMute OFF Mute ON④ Battery level indicatorDisplays the battery level. Please replace both batteries immediately when the indicator starts flashing.⑤ Name of the channel group ⑥ Channel and frequencyIndicate the current channel and frequency.⑦ The statue of Power / Mute button.12⑤⑦⑥①①②③④① M enu display section. Displays various functions. Press the + or - button to switch functions.Set Power key. Select Unlocked or Locked.Set ”Locked” to lock the power button to prevent the unit being turned off or muted unwittingly while using. Default is “Unlocked.”Select Channel. There are 96 channels with carrier frequency ranging from 614MHz to 696MHz. Default is “Channel 01” and “614.560MHz.”4Select Group. You can choose “A” or “B” channel group. Each group has 96 channels. Default is “Group A.”5Select RF power level. You can set the transmitted RF power to High, Middle or Low. Default is “High.”6Set Mute key. If you want to mute the audio, please select “Enable” first and then short press the power button. Default is “Enable.”IR Match. Set to match with the receiver. The screen will display “Matching” when in process. After successful matching, it will indicate “Match finished.”8Set Backlight. Select ON, OFF or Delay 10 / 30 /60 seconds. Default is “Delay 10s.”9Restore default setting.10Version of the UwMic10-TX10.11Serial Number.② Power / Mute buttonPower: Long press to turn on/off the HU10.Mute: Short press the button while transmitting, the audio will be muted. Press it again to restore the audio output.Note: In muting, the audio signal is not output but an RF signal is still transmitted.③ Antenna⑤① LCD screenA. Channel Groups.Two channel groups: A and B. Each group has 96 channels.B. Channel number.C. Battery level indicator .D. MUTE. Audio is muted.This LCD display indicates it isoperating on channel 96 of group A.①②③④A B CDHand-held Microphone UwMic10-HU10IntroductionSaramonic HU10 is a handheld wireless UHF microphonetransmitter features a compact metallic body, an easy-to-read LCD display, a RF power switch and a PLL synthesizer . The broadcast quality microphone will capture crystal clear and rich sound. It has a built-in antenna, a muting function and power lock function. The channel of HU10 is synced up with the receiver via infrared.Product Structure④ Operation panelONOFF HIGHLOW LOCKUHFRFBA CA. Infrared detector. Receives the frequency set on the receiver.B. Lock switch. Set to ON will lock the power button. It will prevent the power being turned off inadvertently during transmission.N ote: The lock switch will not lock the mute function.C. RF power. Set the transmit output level to HIGH or LOW.⑤ Battery compartmentOperates on two AA batteries (not included).You could use alkaline, lithium or nickel metal hydride batteries.Setup Guide1 Install the batteries. Refer to "UwMic10-HU10" (page 16).2 (Option) Set the lock switch to ON or OFF.3 (Option) Set the RF power to HIGH or LOW. The transmitpower level varies depending on the model.4 Press the power button to turn on the HU10.5 T urn on the receiver UwMic10-RX10 and sync with thetransmitter HU10. Details of operation, please refer to "For HU10" (page 19).6 W hen sync successfully, the screen of HU10 will show the group and channel same as the receiver .7 Close the grip in the direction of the arrows.8 Now it is ready to use.Operation Guide1 Install the batteries.① UwMic10-RX10 and UwMic10-TX10:② UwMic10-HU10• L ong press the Power key to turn the unit off.• S lide the two catches inward and pull out the battery compartment.• I nsert two AA size batteries according to the polarity indicators and close the compartment. Please be sure the battery compartment is locked securely.• L ong press the power button to turn the power off.• T urn the grip in the direction of the arrow, and pull the grip down until the battery compartment is visible.• I nsert two new AAbatteries into the battery compartment with and polarities in the correct orientation.Note:① P lease remove the batteries from the battery compartment when the device is not used for a long time.② Please always use sets of the same type of battery.③ R eplacing the batteries during operation may generate noise. Please make sure that the unit is turned off before replacing batteries.• U se the + or – button todisplay the auto scan screen on the receiver .• L ong press the SET button to select “Auto scan?”• P ress the SET button to confirm.• T he channel with the least noise and interference will be displayed.A. Indicates the current least noise channel is CH 03 and ask you if you would like to use it. You can short press the SET button to confirm the channel in 20 seconds or long press the SET button to exit the displayed menu without saving.B. Counting down 20 secondNote:① A fter 20 seconds have elapsed, the display returns to the home screen without saving.② S ome noise may occur when power is turned on, you could turn down the audio input level of devices connected to the receiver accordingly.A B2 C onnect the receiver to the mic jack of a camera,camcorder or mixer with the supplied cable.3 Turn on the receiver by long pressing the power button.4 Set the channel of the receiver by two ways:① Using the auto scan function② Manually setting the receiver channel.• U se the + or – button to display the channel menu on the receiver.• Long press the SET button to select the menu.• U se the + or – button to select the desired channel and confirm it by short pressing the SET button.5 Match the channel of receiver and transmitter.① U sing infrared transmission to transfer the frequency seton the receiver to a transmitter.For TX10• Turn on the transmitter by long pressing the power button.• U se the + or – button to display the “Match with TX” menu on receiver.• U se the + or – button to display the “Match with RX” menu on transmitter.• B oth long press the SET button to select the menu and short press it to confirm.• P lace the infrared transmitter port on the receiver near the infrared detector on the transmitter.• I f “Match finished” displayed on the LCD screen, the frequency for use on the transmitter is set.• A fter matching successfully, press the SET button of receiver to return to the previous menu.For HU10• Turn the transmitter power on.• U se the + or – button to display the “Match with TX” menu on receiver.• P lace the infrared transmitter port on the receiver near the infrared detector on the transmitter.• I f sync successfully, the group and channel of HU10 are the same as the receiver's.• A fter matching successfully, press the SET button of receiver to return to the previous menu.Note: When using the infrared link, please place the receiver and transmitter within about 20cm of each other within20 seconds. After 20 seconds have elapsed, the infrared transmission finishes and the display returns to the previous menu./ 19② M anually setting the transmitter channel (Only availableon the UwMic10-TX10).• Turn on the transmitter by long pressing the power button.• U se the + or – button to display the channel setting menu on the transmitter.• Long press the SET button to select the menu.• U se the + or – button to select the same channel as the receiver and confirm it by short pressing the SET button.6 A ttach the accessories you need for the receiver andtransmitter. Refer to "Attaching Accessories" (page 4 and page 10).7 You are ready to record.SpecificationReceiver RX10Channel number96Channel group A and BOscillator type PLL synthesizerAudio output connector 3.5 mm mini jackAntenna1/4λ wire antennaAudio output level–60 dBVHeadphone output level30mW (16 Ω)Receive frequencies614 MHz - 696 MHzReceive sensitivity-95 dBmSignal to noise ratio70 dB or moreVoice delay12 msReference deviation±5 kHz (–60 dBV, 1 kHz input)Frequency response40 Hz to 18 kHz (+/-3dB)Distortion0.5% or less/ 20Spur suppression-60 dBWeight Approx. 218.7g (excluding batteries) Battery Two AA size batteries Dimensions170.9 × 63.5 × 30.0 mm Operating temperature0 °C to 50 °CStorage temperature–20 °C to +55°CTransmitter TX10 and HU10Channel number96Channel group A or BOscillator type PLL synthesizerCarrier frequencies614 MHz - 696 MHzReference deviation±5 kHz (–60 dBV, 1 kHz input) Signal to noise ratio70 dB or moreSpur suppression-60 dBVoice delay12 msAntenna1/4λ wire antennaAudio input connector TX10: 3.5mm mini jack HU10: noneReference audio input level–60 dBV (MIC input, 0 dB attenuation) RF output level30mW/20mW/10mW selectable Distortion0.5% or lessWeight TX10: Approx. 211.4g (excluding batteries) HU10: Approx. 338.2g (excluding batteries)Battery Two AA size batteriesDimensions TX10: 170.9 × 63.5 × 30.0 mm HU10: 254.0 × 52.0 × 52.0 mmOperating temperature0°C to 50°CStorage temperature–20°C to +55°C/ 21Packing listTX10• Body-pack transmitter: TX10• Omni-directional lavalier microphone • Microphone holder clip• Wind screen• Belt clip/ 22RX10• Portable receiver: RX10• Shoe mount adapter• Belt clip• XLR-BMP audio output cable• 3.5mm plug-bmp audio cableHU10• Hand-held microphone: HU10Warranty cardUser manual/ 23/ 24The Saramonic logo is trademark which is registered and owned by Saramonic International.COPYRIGHT 2011-2021 SARAMONIC INTERNATIONAL ( A brand of DSQN ) Email: info@。
Defender HD 1080p 4 Channel 1TB DVR 安全系统及4根bullet摄

ENGINEERED TO DELIVERFour HD 1080p bullet cameras made of ultra-lightweight polycarbonateresin, built to protect against vandals. IP66 rated for dust and heavyrainfall protection.DESIGNED FOR EVERYONEExperience live or recorded video from your desktop, TV or mobile device, Defender® HD 1080p 4 Channel 1TB DVRSecurity System and 4 Bullet CamerasHD1T4B4We set out to create an incredibly easy to usesecurity system that provides striking clarity.The result? Defender HD. 1080p, weatherresistant, easy to install yourself and availablewherever you are. Keeping watch 24/7. Thisis what a security system should be.Designed for everyone. Set-up is easy and viewing your videoclips is even easier. Check in right from your desktop or mobiledevice. The intuitive app and web login lets you manage youraccount, set your recording schedule, receive motion alertsand customize everything the way you want it. We have ahelp menu, but you won’t need it.ON THE GOWeb viewing with 24/7 live streaming, footage playback and accountmanagement. Compatible with Internet Explorer, Safari and Firefox.EASY AS 1,2,3Hassle free setup with color-coded wiring,numbered ports and a three-step setup.S P E C I F ICertifications• FCC• CE Certified• RoHS• CUL/ ULComponent/Model # HD1T4HDD Size 1TBVideo Compression H.264Operation System Linux (embedded)Audio Input 1CH Inputs /1CH (RCA)/Output(RCA)RecordResolution 1080P/720P/960HSpeed 1080P:15fps (each ch)720P:30fps (each ch)960H:30fps (each ch)Synchronous Playback 4CHHDD Interface 1SATA HDD, up to 8TBUSB 2 x USB (For Mouseand Backup/Upgrade)PTZ Compatible Yes (RS485)VGA/HDMI 1024*768, 1280*1024,1440*900, 1920*1080W orking Temperature -10°C~+55°CDimensions (WxDxH) 9.86in x 8.54in x 1.85in(250.5mm x 217mm x47mm) PROTECTWHAT YOUVALUE MOSTHigh Definition1080p Live View& RecordingFast, SimpleOnline Setup InUnder 5 MinutesSecure, User FriendlyBrowser-based WebUser InterfaceMobile App FeaturesInclude Live View, Playback,Push Notifications & MoreHigh Definition1080p ResolutionUp to 100ftNight VisionTrue WeatherResistance75° WideAngle LensVandal ResistantDesignCAMERADVR。
Sennheiser HME 26-II HD 26 PRO HMD 26-II 安全说明书
HME 26-II HD 26 PROHMD 26-II Broadcast HMDC 26-IIImportant safety instructionsImportant safety instructions•Please read this instruction manual carefully and com-pletely before using the product.•Make this instruction manual easily accessible to all users at all times.•Always include this instruction manual when passing the product on to third parties.•The product is capable of producing sound pressure levels exceeding 85 db (A). In many countries 85 db (A) is the maximum legally permissible level for continuous noise exposure during the working day. Exposure to sounds of higher volume levels or for longer durations can perma-nently damage your hearing.•Never repair or attempt to repair a defective product yourself. Contact your Sennheiser partner or the Sennheiser Service Department.•Only replace those parts of the product whose replace-ment is described in this instruction manual. Only use attachments, accessories or spare parts specified by Sennheiser. All other parts of the product must be replaced by your Sennheiser agent.•Protect the product from humidity. Use only a dry cloth to clean the product. For information on how to clean the headset, contact your Sennheiser partner.1Important safety instructionsIntended useIntended use includes :•having read and this instruction manual, especially the chapter “Important safety instructions”.•using the product within the operating conditions and limitations described in this instruction manual. Improper useImproper use means using the product other than as described in this instruction manual, or under operating con-ditions which differ from those described herein.2The 26-II headset series and the HD 26 PRO headphonesThe 26-II headset seriesand the HD 26 PRO headphonesThe HMD 26-II/HME 26-II/HMDC 26-II headsets and the HD 26 PRO headphones feature dynamic, closed head-phones. The noise-compensating microphone of the HMD 26-II and HMDC 26-II ensures excellent speech trans-mission even in noisy environments.The headsets have been designed for broadcast use, e.g. for outdoor broadcast or broadcast van applications. The HMDC 26-II features NoiseGard™ professional active noise compensation. The HME 26-II is available with an omni-direc-tional or a cardioid microphone, making it suitable for either outdoor or studio use.Features•Lightweight•Extremely comfortable to wear, even for extended lis-tening, due to the patented two-piece automatic head-band and soft ear pads•ActiveGard™ (switchable) safeguards you from volume peaks above 105 db (HME 26-II/HMD 26-II/HD 26 PRO)•NoiseGard™ professional active noise compensation reduces ambient noise by up to 18 db (HMDC 26-II)•“Flip-away” headphone allows single-sided listening3Package contents•Detailed, linear sound reproduction for demanding appli-cations•Flexible microphone boom, can be worn on either left or right-hand side•Noise-compensating dynamic microphone ensures excel-lent speech transmission (HMD 26-II/HMDC 26-II)•Omni-directional condenser microphone with extremely linear frequency response (HME 26-II)•Single-sided cable, easy to replacePackage contents1HMD 26-II / HME 26-II / HMDC 26-II / HD 26 PRO1cable clip1wind and pop screen (except HD 26 PRO)1headband padding, large1instruction manual4Operation5OperationTurning the microphone boomthe head.Putting on the headsetheadset, the patented two-automatically.Operation6Positioning the microphoneBend the flexible microphone boom so that the microphone is placed at the corner of the mouth. Maintain a distance of 2 cm between microphone and mouth. Always use the sup-plied wind and pop screen.Do not position the microphone directly in front of your mouth as it will pick up your breathing and plosive noises from your mouth. In addition, moisture can adversely affect the sound and performance of your microphone.sound inlet basket, makeplace with an audibleclick.the sound inlet.Operation7Flipping away one ear cupThe headset’s “flip-away” ear cup can be flipped backwards by approx. 45°, allowing for singled-sided listening.Connecting the HD 26 PRO headphones to the audio system ̈If necessary, screw the screw-on adapter for ¼“ (6.3 mm) jack plug onto the 3.5 mm jack plug.Operation8Adjusting the volume on the audio systemConnect the headset to the corresponding sockets of your audio system.̈Adjust the volume directly on the audio system.This headset is capable of producing high sound pressure levels. Higher volumes or longer durations can damage your hearing!̈Set the volume to a medium level. Make sure that you can hear critical environmental sounds.OperationSwitching ActiveGard™ on and off(HME 26-II/HMD 26-II/HD 26 PRO)ActiveGard™ safeguards your ears from volume peaks above 105 db, which can be transmitted via the audio system or radio equipment.9OperationControl unit for HMDC 26-II in conjunction with cable -B-7Switching NoiseGard™ on and off (HMDC 26-II)The NoiseGard™ ON /OFF switch 1 allows you to switch the NoiseGard™ active noise compensation on or off. With Noise-Gard™ switched off, the headset can be used as a conven-tional headset.̈Set the NoiseGard™ ON /OFF switch 1 to the desired position:1NoiseGard™ ON /OFFswitch2LED Position FunctionON NoiseGard™ is switched on.The LED 2 lights up, indicating the battery chargestatus.OFFNoiseGard™ is switched off.The LED 2is off.OperationPowering NoiseGard™ via two (rechargeable) batteries̈Insert two 1.5 V AA alkaline batteries (IEC LR 6) or two1.2 V AA rechargeable batteries (IEC LR 6). Observecorrect polarity when inserting the batteries.The operating time with batteries/rechargeable batteries is approx. 60 hours. With NoiseGard™ switched on, the LED 2 provides information on the remaining battery/ rechargeable battery capacity:LED 2Meaninglights up yellow The battery capacity is sufficient.lights up red The batteries are flat. Replace the batteries.Care and maintenanceCare and maintenanceCleaning and maintaining the headseẗOnly use a soft, dry cloth to clean the product.Replacing the ear padsFor reasons of hygiene, you should replace the ear pads annually.̈Grasp the edge of the ear pad and pull sharply.̈Attach the new ear pad to the ear cup by pressing firmly around the ear pad until you hear all 12 latches lock intoCAUTIONLiquids can damage the product!Liquids entering the product can short-circuit the electronics or damage the mechanics. Solvents or cleansing agents can damage the surface of the product.̈Keep all liquids far away from the product.Care and maintenanceReplacing the headband paddingsFor reasons of hygiene, you should replace the headband paddings at least once annually.̈Pull the Ziploc type fastening strips of the old headband̈̈Attach the new headband paddings by joining the fasten-ings strips.The tongue and groove of the fastening strips click into place.Care and maintenanceCleaning the sound inlet baskeẗCarefully pull the sound inlet basket from the capsule.̈Moisten a small brush (bristle brush or toothbrush) with isopropyl alcohol.̈inlet basket.̈Allow the sound inlet basket toair dry for approx. 1 hour sothat the remaining isopropylalcohol can evaporate.̈basket to the capsule so that itlocks into place with an audibleclick.When attaching the sound inletbasket, make sure not to coverthe sound inlet.SpecificationsSpecificationsHeadphonesTransducer principle dynamic, closedEar coupling supra-auralFrequency response20 to 18,000 HzImpedance HMD 26-II-600:300 Ω mono/600 Ω stereoHMD 26-II-600S:600 Ω monoHMD 26-II-100:50 Ω mono/100 Ω stereo Characteristic SPL ActiveGard™ switched on:105 dB SPL at 1 kHz, 1 mWActiveGard™ switched off:HMD 26-II-600/-600S:107 dB SPL at 1 kHz, 1 VHMD 26-II-100:115 dB SPL at 1 kHz, 1 V Max. SPL ActiveGard™ switched on:105 dB SPL at 1 kHzActiveGard™ switched off:HMD 26-II-600/-600S:127 dB SPL at 1 kHz, 200 mWHMD 26-II-100:128 dB SPL at 1 kHz, 200 mW THD< 0,5% at 1 kHzContact pressure HMD 26-II-600/-100:approx. 3.9 NHMD 26-II-600S:approx. 4.0 NMicrophoneType BMD 424Transducer principle dynamic, noise-compensating, hyper-cardioid Frequency response40 to 16,000 HzOutput voltage0.4 mV/Pa at 1 kHzImpedance300 ΩGeneral dataTemperature range operation:–15 °C to 55 °Cstorage:–55 °C to 70 °CWeight without cable HMD 26-II-600/-100:approx. 200 gHMD 26-II-600S:approx. 130 gHMD 26-II-600/-600S/-100SpecificationsHMDC 26-II-600HeadphonesTransducer principle dynamic, closedEar coupling supra-auralFrequency response20 to 18,000 HzImpedance600 Ω mono/1200 Ω stereoCharacteristic SPL ActiveGard™ switched on:108 dB SPL at 1 kHz, 1 mWActiveGard™ switched off:110 dB SPL at 1 kHz, 1 VMax. SPL120 dB SPL at 1 kHzActive noisecompensation≥ 18 dB (100 to 300 Hz)Attenuation(active/passive)15 to 30 dBTHD< 0.5% at 1 kHzContact pressure approx. 3.9 NMicrophoneType BMD 424Transducer principle dynamic, noise-compensating, hyper-cardioid Frequency response40 to 16,000 HzOutput voltage0.4 mV/Pa at 1 kHzImpedance300 ΩGeneral dataTemperature range operation: –15 °C to 55 °Cstorage: –55 °C to 70 °CWeight without cable approx. 210 gPower supply for Noise-Gard™2x 1.5 V AA alkaline battery (IEC LR 6) or2x 1.2 V AA rechargeable battery (IEC LR 6), operating time approx. 60 hSpecificationsHME 26-II-600/-100HeadphonesTransducer principle dynamic, closedEar coupling supra-auralFrequency response20 to 18,000 HzImpedance HME 26-II-600:300 Ω mono/600 Ω stereoHME 26-II-100:50 Ω mono/100 Ω stereo Characteristic SPL ActiveGard™ switched on:105 dB SPL at 1 kHz, 1 mWActiveGard™ switched off:HME 26-II-600:107 dB SPL at 1 kHz, 1 VHME 26-II-100:115 dB SPL at 1 kHz, 1 V Max. SPL ActiveGard™ switched on:105 dB SPL at 1 kHzActiveGard™ switched off:HME 26-II-600:127 dB SPL at 1 kHz, 200 mWHME 26-II-100:128 dB SPL at 1 kHz, 200 mW THD< 0.5% at 1 kHzContact pressure approx. 3.9 NMicrophoneType BKE 4-2Transducer principle pre-polarized condenser microphone,omni-directionalFrequency response40 to 20,000 HzOutput voltage 4 mV/Pa ±2.5 dBMax. SPL150 dB at 1 kHz, 0.5 % THDTerminating impedance min. 4.7 kΩSupply voltage 5 to 15 V DCGeneral dataTemperature range operation: –15 °C to 55 °Cstorage: –55 °C to 70 °CWeight without cable approx. 200 gSpecificationsHME 26-II-600(4)/-100(4)HeadphonesTransducer principle dynamic, closedEar coupling supra-auralFrequency response20 to 18,000 HzImpedance HME 26-II-600(4):300 Ω mono/600 Ω stereoHME 26-II-100(4):50 Ω mono/100 Ω stereo Characteristic SPL ActiveGard™ switched on:105 dB SPL at 1 kHz, 1 mWActiveGard™ switched off:HME 26-II-600(4):107 dB SPL at 1 kHz, 1 VHME 26-II-100(4):115 dB SPL at 1 kHz, 1 V Max. SPL ActiveGard™ switched on:105 dB SPL at 1 kHzActiveGard™ switched off:HME 26-II-600(4):127 dB SPL at 1 kHz, 200 mWHME 26-II-100(4):128 dB SPL at 1 kHz, 200 mW THD< 0.5% at 1 kHzContact pressure approx. 3.9 NMicrophoneType BKE 4-4Transducer principle pre-polarized condenser microphone, cardioid Frequency response40 to 20,000 HzOutput voltage 4 mV/Pa ±2.5 dBMax. SPL150 dB at 1 kHz, 0.5 % THDTerminating impedance min. 4.7 kΩSupply voltage 5 to 15 V DCGeneral dataTemperature range operation: –15 °C to 55 °Cstorage: –55 °C to 70 °CWeight without cable approx. 200 gSpecificationsHD 26 PROHeadphonesTransducer principle dynamic, closedEar coupling supra-auralFrequency response20 to 18,000 Hz Impedance100 Ω stereo Characteristic SPL ActiveGard™ switched on:105 dB SPL at 1 kHz, 1 mWActiveGard™ switched off:115 dB SPL at 1 kHz, 1 V Max. SPL ActiveGard™ switched on:105 dB SPL at 1 kHzActiveGard™ switched off:128 dB SPL at 1 kHz, 200 mW THD< 0.5% at 1 kHzContact pressure approx. 3.9 NGeneral dataTemperature range operation: –15 °C to 55 °Cstorage: –55 °C to 70 °C Weight without cable approx. 180 gManufacturer DeclarationsManufacturer DeclarationsWarrantySennheiser electronic GmbH & Co. KG gives a warranty of 24 months on this product.For the current warranty conditions, please visit our website at or or contact your Sennheiser partner.FOR AUSTRALIA ONLYSennheiser goods come with guarantees that cannot be excluded under the Australian Consumer Law. You are enti-tled to a replacement or refund for a major failure and com-pensation for any other reasonably foreseeable loss or damage. You are also entitled to have the goods repaired or replaced if the goods fail to be of acceptable quality and the failure does not amount to a major failure.This warranty is in addition to other rights or remedies under law. Nothing in this warranty excludes, limits or modifies any liability of Sennheiser which is imposed by law, or limits or modifies any remedy available to the consumer which is granted by law.To make a claim under this warranty, contactSennheiser Australia Pty Ltd, Unit 3, 31 Gibbes Street Chatswood NSW 2067, AUSTRALIA.Phone:(02)99106700,email:**********************.au. 20Manufacturer DeclarationsAll expenses of claiming the warranty will be borne by the person making the claim.The Sennheiser International Warranty is provided by Sennheiser Australia Pty Ltd (ABN 68 165 388 312), Unit 3, 31 Gibbes Street Chatswood NSW 2067 Australia.CE Declaration of Conformity•RoHS Directive (2011/65/EU)•EMC Directive (2004/108/EC)The declaration is available at .In compliance withEurope EMC EN 55103-1/-2ChinaTrademarksSennheiser and NoiseGard TM professional are registered trademarks of Sennheiser electronic GmbH & Co. KG.Other product and company names mentioned in this instruction manual may be the trademarks or registered trademarks of their respective owners.FCC User InformationNOTE: This equipment has been tested and found to comply with the limits for a Class B digital device of the FCC Rules, pursuant to part 15 of the FCC Rules and ICES 003 of Industry21Manufacturer DeclarationsCanada. These limits are designed to provide reasonable pro-tection against harmful interference in a residential installa-tion. This equipment generates, uses and can radiate radio frequency energy and, if not installed and used in accordance with the instructions, may cause harmful interference to radio communications. However, there is no guarantee that interference will not occur in a particular installation. If this equipment does cause harmful interference to radio or tele-vision reception, which can be determined by turning the equipment off and on, the user is encouraged to try to correct the interference by one or more of the following measures:•Reorient or relocate the receiving antenna.•Increase the separation between the equipment and receiver.•Connect the equipment into an outlet on a circuit dif-ferent from that to which the receiver is connected.•Consult the dealer or an experienced radio/ TV technician for help.Changes or modifications made to this equipment not expressly approved by Sennheiser electronic Corp. may void FCC authorization to operate this equipment.22Sennheiser electronic GmbH & Co. KGAm Labor 1, 30900 Wedemark, Germany Printed in Germany, Publ. 12/15, 552002/A02。
惠威HR70遥控器使用说明书
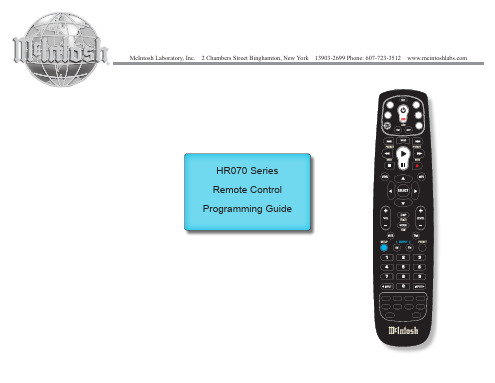
HR070 Series Remote Control Programming Guide
6. Repeat steps 1 to 5 for the other components you want to control. For future reference, write down each working component code below:
HR Series Remote Control Programming
Assigned Push-button Component Program Code
TV
CBL
SAT
AUX
DVR
Push-buttons available for Programming
Flashes during Programming
4
Used to activate Programming Mode
with the most popular code first. If the component
responds, go to step 7.
6. If the component does not respond, press LEVEL+
Push-button and the Remote Control will test
The HR70 Series Remote Controls have stored in permanent memory the necessary information to send the correct commands to the component to be controlled. By entering a five digit numeric code the commands for controlling the component is activated.
Sennheiser 26-II HD 26 PRO 头戴式耳机用户手册说明书
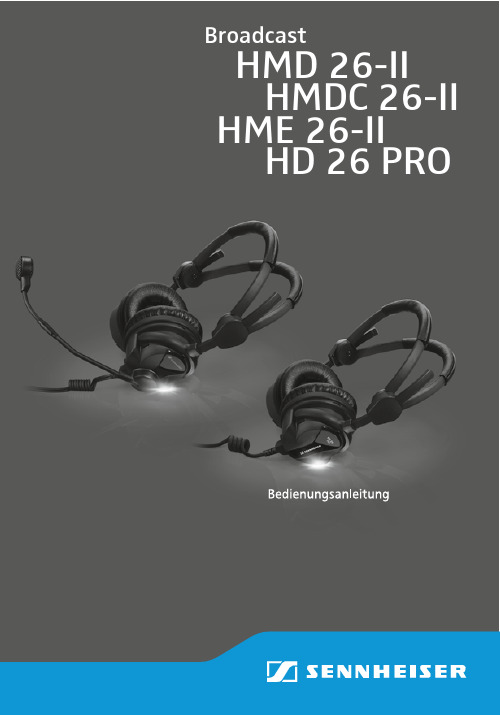
HME 26-II HD 26 PROHMD 26-II Broadcast HMDC 26-IIWichtige SicherheitshinweiseWichtige Sicherheitshinweise•Lesen Sie diese Bedienungsanleitung sorgfältig und voll-ständig, bevor Sie das Headset benutzen.•Bewahren Sie die Bedienungsanleitung für die weitere Nutzung so auf, dass sie jederzeit für alle Benutzer zugänglich ist.•Geben Sie das Produkt an Dritte stets zusammen mit der Bedienungsanleitung weiter.•Das Produkt kann Schalldrücke über 85 dB(A) erzeugen.Dies ist der maximal zulässige Wert, der über die Dauer eines Arbeitstages auf Ihr Gehör einwirken darf. Höhere Lautstärken oder eine längere Einwirkzeit können Ihr Gehör schädigen.•Reparieren Sie ein defektes Produkt nicht selbst. Wenden Sie sich an Ihren Sennheiser-Vertriebspartner oder den Sennheiser-Kundendienst.•Wechseln Sie nur die Teile aus, deren Austausch in dieser Bedienungsanleitung beschrieben ist. Verwenden Sie ausschließlich von Sennheiser zugelassene Anbau-, Zubehör- und Ersatzteile. Alle anderen Teile tauscht Ihnen Ihr Sennheiser-Vertriebspartner aus.•Schützen Sie das Produkt vor Nässe. Reinigen Sie es aus-schließlich mit einem trockenen Tuch. Fragen zur Reini-gung des Produkts besprechen Sie mit Ihrem Sennheiser-Vertriebspartner.1Wichtige SicherheitshinweiseBestimmungsgemäßer GebrauchDer bestimmungsgemäße Gebrauch schließt ein,•dass Sie diese Bedienungsanleitung und insbesondere das Kapitel …Wichtige Sicherheitshinweise“ gelesen haben.•dass Sie das Produkt innerhalb der Betriebsbedingungen, die in dieser Bedienungsanleitung beschrieben sind, einsetzen.Nicht bestimmungsgemäßer GebrauchAls nicht bestimmungsgemäßer Gebrauch gilt, wenn Sie das Produkt anders einsetzen, als es in dieser Bedienungsanlei-tung beschrieben ist oder die Betriebsbedingungen nicht einhalten.2Die Headsetserie 26-II und der Kopfhörer HD 26 PRODie Headsetserie 26-II undder Kopfhörer HD 26 PRODas Headset HMD 26-II/HME 26-II/HMDC 26-II und der Kopf-hörer HD 26 PRO sind mit dynamischen, geschlossenen Hörer-systemen ausgestattet. Das geräuschkompensierende Mik-rofon der Headsets HMD 26-II und HMDC 26-II gewährleistet auch in lärmerfüllter Umgebung hohe Sprachverständlichkeit. Die Headsets wurden für den Einsatz im Broadcast-Bereich, z. B. bei Außenübertragung oder im Ü-Wagen konzipiert. Das HMDC 26-II ist mit aktiver Lärmkompensation NoiseGard™ professional ausgestattet. Das HME 26-II ist, je nach Anwen-dung im Außen- oder Studiobereich, mit einem Mikrofon mit Kugel- oder Nierencharakteristik ausgestattet. Merkmale•geringes Gewicht•erstklassiger Tragekomfort über mehrere Stunden durch patentierten automatischen Spreizkopfbügel und weiche Ohrpolster•ActiveGard™ (abschaltbar) schützt vor Lautstärkespitzen über 105 dB (HME 26-II/HMD 26-II/HD 26 PRO)•aktive Lärmkompensation NoiseGard™ professional redu-ziert Lärm um bis zu 18 dB (HMDC 26-II)•schwenkbares Hörersystem für einohriges Hören3Lieferumfang•detailgetreue, lineare Wiedergabe für anspruchsvolle Anwendungen•flexibler Mikrofonarm, links oder rechts tragbar•geräuschkompensierendes, dynamisches Mikrofon für brillante Sprachübertragung (HMD 26-II/HMDC 26-II)•Kondensatormikrofon omnidirektional mit sehr linearem Frequenzgang (HME 26-II)•einseitige Kabelführung, Kabel leicht austauschbarLieferumfang1HMD 26-II / HME 26-II / HMDC 26-II / HD 26 PRO1Kabelklemme1Windschirm (nicht beim HD 26 PRO)1Kopfpolster, breit1Bedienungsanleitung4Bedienung5BedienungMikrofonarm drehenauch linksseitig tragen.Headset aufsetzenWenn Sie das Headset auf-setzen, klappt der paten-tierte Spreizkopfbügel auto-matisch auseinander.Bedienung6Mikrofon ausrichtenBiegen Sie den flexiblen Mikrofonarm so, dass das Mikrofon am Mundwinkel sitzt. Der Abstand zum Mund sollte 2 cm betragen. Verwenden Sie grundsätzlich den mitgelieferten Windschirm.Vermeiden Sie eine Positionierung direkt vor dem Mund, da das Mikrofon sonst verstärkt Atemgeräu-sche aufnimmt und Feuchtigkeit das Klangbild verän-dern kann.aufgesteckt wird.Beachten Sie dabei unbe-dingt die Einsprechrich-tung.Bedienung7Hörersystem nach hinten schwenkenDas Headset hat ein schwenkbares Hörersystem, das Sie für einohriges Hören ca. 45° nach hinten schwenken können.Kopfhörer HD 26 PRO mit Audiosystem verbinden̈Schrauben Sie ggf. den Schraubadapter für 6,3-mm-Klinkenstecker auf den 3,5-mm-Klinkenstecker.Bedienung8Lautstärke am Audiosystem einstellenVerbinden Sie das Headset mit den Buchsen des jeweiligen Audiosystems.̈Stellen Sie die Lautstärke direkt am Audiosystem ein.Das Headset kann hohe Schalldrücke erzeugen. Höhere Lautstärken oder eine längere Einwirkzeit können Ihr Gehör schädigen!̈Stellen Sie eine mittlere Lautstärke ein, sodass Sie wichtige Umgebungsgeräusche hören können.BedienungActiveGard™ ein- und ausschalten (HME 26-II/HMD 26-II/ HD 26 PRO)Die Funktion ActiveGard™ schützt vor Lautstärkespitzen über 105 dB, die über das Audiosystem oder Funkgerät über-tragen werden können.9BedienungBedienteil für HMDC 26-II in Verbindung mit Kabel -B-7NoiseGard™ ein- und ausschalten (HMDC 26-II)Mit dem ON /OFF -Schalter 1 können Sie die aktive Lärmkom-pensation NoiseGard™ ein- bzw. ausschalten. Ist NoiseGard™ ausgeschaltet, können Sie das Headset wie ein gewöhnliches Headset einsetzen.̈Schieben Sie den ON /OFF -Schalter 1 für die NoiseGard™-Funktion in die gewünschte Position:1ON /OFF -Schalter fürNoiseGard™2LED Position FunktionON NoiseGard™ ist eingeschaltet.Die LED 2 leuchtet und zeigt den Ladezustand derBatterien/Akkus an.OFFNoiseGard™ ist ausgeschaltet.Die LED 2leuchtet nicht.BedienungNoiseGard™ über Batterien oder Akkus mit Spannung versorgen̈Setzen Sie zwei Alkaline-Batterien (Typ LR 6 = AA, 1,5 V) oder zwei Akkus (Typ LR 6 = AA, 1,2 V) ein. Achten Sie dabei auf die Polarität.Die Betriebszeit mit Batterien oder Akkus beträgt ca. 60 Stunden. Ist NoiseGard™ eingeschaltet, informiert Sie die LED 2 über den Betriebszustand der Batterien oder Akkus:LED 2Bedeutungleuchtet gelb Der Ladezustand der Batterien oder Akkus istausreichend.leuchtet rot Der Ladezustand der Batterien oder Akkusreicht nur noch für eine kurze Betriebszeit.Pflege und WartungPflege und WartungHeadset reinigen und pflegen̈Reinigen Sie das Produkt ausschließlich mit einem weichen, trockenen Tuch.Ohrpolster austauschenAus hygienischen Gründen sollten Sie die Ohrpolster jährlich wechseln.̈Fassen Sie in das Ohrpolster und ziehen Sie kräftig.̈Befestigen Sie das neue Ohrpolster auf der Hörerkappe, indem Sie das Ohrpolster rundherum fest andrücken, bisVORSICHTProduktschäden durch Flüssigkeit!Flüssigkeit kann in das Produkt eindringen, einen Kurz-schluss in der Elektronik verursachen oder die Mechanik beschädigen. Löse- oder Reinigungsmittel können die Produktoberflächen beschädigen.̈Halten Sie Flüssigkeiten jeglicher Art vom Produkt fern.Pflege und WartungKopfpolster austauschenAus hygienischen Gründen sollten Sie die Kopfpolster min-destens 1 x jährlich wechseln.̈Lösen Sie von der Seite eines Kopfpolsters aus die Form-̈̈Befestigen Sie die neuen Kopfpolster, indem Sie die Form-profile auf der Oberseite zusammendrücken.Die Nut und Feder der Formprofile rasten hörbar ein.Pflege und WartungEinsprachekorb reinigen̈Ziehen Sie den Einsprachekorb vorsichtig von der Kapsel ab.̈Benetzen Sie eine kleine Bürste (Borstenpinsel oder Zahn-bürste) mit Isopropanol.̈Bürsten Sie den Einsprachekorbvorsichtig ab.̈etwa 1 Stunde offen trocknen,damit sich noch vorhandenesIsopropanol verflüchtigt.̈wieder auf den Mikrofonarm, biser hörbar mit einem Klick ein-rastet.die Einsprechrichtung.Technische DatenTechnische DatenHMD 26-II-600/-600S/-100 KopfhörerWandlerprinzip dynamisch, geschlossenAnkopplung an das Ohr ohraufliegendÜbertragungsbereich20 bis 18.000 HzImpedanz HMD 26-II-600:300 Ω mono/600 Ω stereoHMD 26-II-600S:600 Ω monoHMD 26-II-100:50 Ω mono/100 Ω stereo Kennschalldruckpegel ActiveGard™ eingeschaltet:105 db SPL bei 1 kHz, 1 mWActiveGard™ ausgeschaltet:HMD 26-II-600/-600S:107 db SPL bei 1 kHz, 1 VHMD 26-II-100:115 db SPL bei 1 kHz, 1 V Max. Schalldruckpegel ActiveGard™ eingeschaltet:105 db SPL bei 1 kHzActiveGard™ ausgeschaltet:HMD 26-II-600/-600S:127 db SPL bei 1 kHz, 200 mWHMD 26-II-100:128 db SPL bei 1 kHz, 200 mW Klirrfaktor< 0,5 % bei 1 kHzAndruckkraft HMD 26-II-600/-100:ca. 3,9 NHMD 26-II-600S:ca. 4,0 NMikrofonTyp BMD 424Wandlerprinzip dynamisch, geräuschkompensierend, Hyperniere Übertragungsbereich40 bis 16.000 HzAusgangsspannung0,4 mV/Pa bei 1 kHzImpedanz300 ΩAllgemeine DatenUmgebungstemperatur Betrieb:–15 °C bis 55 °CLagerung:–55 °C bis 70 °CGewicht ohne Kabel HMD 26-II-600/-100:ca. 200 gHMD 26-II-600S:ca. 130 gTechnische DatenHMDC 26-II-600KopfhörerWandlerprinzip dynamisch, geschlossenAnkopplung an das Ohr ohraufliegendÜbertragungsbereich20 bis 18.000 HzImpedanz600 Ω mono/1200 Ω stereo Kennschalldruckpegel ActiveGard™ eingeschaltet:108 db SPL bei 1 kHz, 1 mWActiveGard™ ausgeschaltet:110 db SPL bei 1 kHz, 1 VMax. Schalldruckpegel120 db SPL bei 1 kHzAktiveLärmkompensation≥ 18 db (100 bis 300 Hz)Lärmdämpfung(aktiv/passiv)15 bis 30 dbKlirrfaktor< 0,5 % bei 1 kHzAndruckkraft ca. 3,9 NMikrofonTyp BMD 424Wandlerprinzip dynamisch, geräuschkompensierend, Hyperniere Übertragungsbereich40 bis 16.000 HzAusgangsspannung0,4 mV/Pa bei 1 kHzImpedanz300 ΩAllgemeine DatenUmgebungstemperatur Betrieb: –15 °C bis 55 °CLagerung: –55 °C bis 70 °CGewicht ohne Kabel ca. 210 gStromversorgung für NoiseGard™2 x 1,5 V-Alkaline-Batterie (Typ LR 6 = AA) oder 2 x 1,2 V-Akku (Typ LR 6 = AA)Betriebszeit ca. 60 hTechnische DatenHME 26-II-600/-100KopfhörerWandlerprinzip dynamisch, geschlossenAnkopplung an das Ohr ohraufliegendÜbertragungsbereich20 bis 18.000 HzImpedanz HME 26-II-600:300 Ω mono/600 Ω stereoHME 26-II-100:50 Ω mono/100 Ω stereo Kennschalldruckpegel ActiveGard™ eingeschaltet:105 db SPL bei 1 kHz, 1 mWActiveGard™ ausgeschaltet:HME 26-II-600:107 db SPL bei 1 kHz, 1 VHME 26-II-100:115 db SPL bei 1 kHz, 1 V Max. Schalldruckpegel ActiveGard™ eingeschaltet:105 db SPL bei 1 kHzActiveGard™ ausgeschaltet:HME 26-II-600:127 db SPL bei 1 kHz, 200 mWHME 26-II-100:128 db SPL bei 1 kHz, 200 mW Klirrfaktor< 0,5 % bei 1 kHzAndruckkraft ca. 3,9 NMikrofonTyp BKE 4-2Wandlerprinzip dauerpolarisiertes Kondensatormikrofon,omnidirektionalÜbertragungsbereich40 bis 20.000 HzAusgangsspannung 4 mV/Pa ±2,5 dbGrenzschalldruckpegel150 db bei 1 kHz, 0,5 % THD Abschlussimpedanz min. 4,7 kΩVersorgungsspannung 5 bis 15 V DCAllgemeine DatenUmgebungstemperatur Betrieb: –15 °C bis 55 °CLagerung: –55 °C bis 70 °CGewicht ohne Kabel ca. 200 gTechnische DatenHME 26-II-600(4)/-100(4)KopfhörerWandlerprinzip dynamisch, geschlossenAnkopplung an das Ohr ohraufliegendÜbertragungsbereich20 bis 18.000 HzImpedanz HME 26-II-600(4):300 Ω mono/600 Ω stereoHME 26-II-100(4):50 Ω mono/100 Ω stereo Kennschalldruckpegel ActiveGard™ eingeschaltet:105 db SPL bei 1 kHz, 1 mWActiveGard™ ausgeschaltet:HME 26-II-600(4):107 db SPL bei 1 kHz, 1 VHME 26-II-100(4):115 db SPL bei 1 kHz, 1 V Max. Schalldruckpegel ActiveGard™ eingeschaltet:105 db SPL bei 1 kHzActiveGard™ ausgeschaltet:HME 26-II-600(4):127 db SPL bei 1 kHz, 200 mWHME 26-II-100(4):128 db SPL bei 1 kHz, 200 mW Klirrfaktor< 0,5 % bei 1 kHzAndruckkraft ca. 3,9 NMikrofonTyp BKE 4-4Wandlerprinzip dauerpolarisiertes Kondensatormikrofon,NierencharakteristikÜbertragungsbereich40 bis 20.000 HzAusgangsspannung 4 mV/Pa ±2,5 dbGrenzschalldruckpegel150 db bei 1 kHz, 0,5 % THD Abschlussimpedanz min. 4,7 kΩVersorgungsspannung 5 bis 15 V DCAllgemeine DatenUmgebungstemperatur Betrieb: –15 °C bis 55 °CLagerung: –55 °C bis 70 °CGewicht ohne Kabel ca. 200 gTechnische DatenHD 26 PROKopfhörerWandlerprinzip dynamisch, geschlossen Ankopplung an das Ohr ohraufliegendÜbertragungsbereich20 bis 18.000 HzImpedanz100 Ω stereo Kennschalldruckpegel ActiveGard™ eingeschaltet:105 db SPL bei 1 kHz, 1 mWActiveGard™ ausgeschaltet:115 db SPL bei 1 kHz, 1 V Max. Schalldruckpegel ActiveGard™ eingeschaltet:105 db SPL bei 1 kHzActiveGard™ ausgeschaltet:128 db SPL bei 1 kHz, 200 mW Klirrfaktor< 0,5 % bei 1 kHz Andruckkraft ca. 3,9 NAllgemeine DatenUmgebungstemperatur Betrieb: –15 °C bis 55 °CLagerung: –55 °C bis 70 °C Gewicht ohne Kabel ca. 180 gHerstellererklärungenHerstellererklärungenGarantieSennheiser electronic GmbH & Co. KG übernimmt für dieses Produkt eine Garantie von 2 Jahren.Die aktuell geltenden Garantieleistungen können Sie über das Internet unter oder Ihren Sennheiser-Partner beziehen.CE-Konformität•RoHS-Richtlinie (2011/65/EU)•EMV-Richtlinie (2004/108/EG)Die Erklärung steht im Internet unter zur Verfügung.Anforderungen werden erfüllt fürEuropa EMV EN 55103-1/-2ChinaWarenzeichenSennheiser und NoiseGard TM professional sind eingetragene Warenzeichen der Sennheiser electronic GmbH & Co. KG. Andere in dieser Bedienungsanleitung erwähnten Produkt- und Firmennamen können Marken- oder Handelsnamen ihrer jeweiligen Inhaber sein.20Sennheiser electronic GmbH & Co. KGAm Labor 1, 30900 Wedemark, Germany Printed in Germany, Publ. 12/15, 552002/A02。
斑马技术公司DS8108数字扫描仪产品参考指南说明书
BackBeat GO 810 耳机用户指南说明书

BackBeat GO serie 810 Guida dell'utenteSommarioAssociazione3Procedura di associazione3Associazione di un secondo dispositivo3Associazione a Mac3Ricarica4Ricarica4Operazioni preliminari5Panoramica dell'auricolare5Accensione/spegnimento5Riproduzione/Pausa di un brano musicale5Selezione delle tracce5Attivazione della funzione vocale6Esecuzione/ricezione/termine di chiamate6Esclusione microfono6Cancellazione del rumore attiva6Impostazione dell'EQ6Trovate il vostro prodotto ideale6Supporto712••312Selezionare "PLT serie BBGO800" nelle impostazioni Bluetooth del dispositivo.Se il dispositivo Mac dispone della funzione Bluetooth, è possibile associarvi le cuffie.1Impostare le cuffie in modalità di associazione (far scorrere e tenere il pulsante di accensione versol'icona Bluetooth). Si sentirà "pairing" (associazione) e i LED lampeggeranno in rosso e blu.2Sul dispositivo Mac, selezionare menu Apple > Preferenze di Sistema > Bluetooth .3Fare clic su Imposta nuovo dispositivo o su "+", selezionare "PLT serie BBGO800 stereo" e seguirele istruzioni visualizzate.AssociazioneProcedura di associazioneAssociazione di un secondo dispositivoAssociazione a MacLa ricarica completa dell'auricolare richiede fino a 120 minuti. I LED si spengono una volta che laricarica è completa.accensione/Bluetooth mentre si indossa l'auricolare. L'auricolare deve trovarsi in stato inattivo.L'auricolare garantisce fino a 22 ore di ascolto con cancellazione del rumore attiva (ANC) attivata e 28 ore di ascolto con cancellazione del rumore attiva (ANC) disattivata.RicaricaRicaricaCancellazion e del rumore attiva Cancellazione del rumore attiva Comandi di aumento del volume Comandi di diminuzione del volume Ricerca traccia in avanti Riproduzione/Pausa di un brano musicale Ricerca traccia indietro Pulsante di chiamata Siri, Google Now Funzione vocale Pulsante di associazione Bluetooth Accensione/spegnimento LED sulle cuffie Esclusione/riattivazione microfono Impostazioni EQ Far scorrere l'interruttore per accendere o spegnere.Toccare il pulsante di riproduzione/pausa .Toccare il pulsante avanti o indietro per controllare la selezione dei brani.Operazioni preliminariPanoramica dell'auricolareAccensione/spegnimentoRiproduzione/Pausa di un brano musicaleSelezione delle tracceSe lo smartphone dispone di una funzione vocale, tenere premuto il pulsante di riproduzione/pausa per 2 secondi e attendere la richiesta di comando vocale.Risposta e termine di una chiamata Toccare il pulsante di riproduzione/pausa .Rifiuto di una chiamata Tenere premuto il pulsante di riproduzione/pausa per 2 secondi.Richiamare l'ultimo numero (smartphone)Per chiamare l'ultimo numero che è stato composto, toccare due volte il pulsante di riproduzione/pausa .Durante una chiamata attiva, toccare il pulsante EQ/esclusione cancellazione del rumore attiva (ANC) riduce i rumori esterni e migliora la qualità della musica e dell'audio.1Tenere premuti i pulsanti di aumento e riduzione del volume per due secondi per attivare o disattivare la cancellazione del rumore attiva (ANC).2È possibile personalizzare ulteriormente la cancellazione del rumore attiva (ANC) con l'app BackBeat scegliendo:•Basso: opzione consigliata per l'ufficio •Elevato: opzione consigliata per l'aereo È possibile personalizzare l'audio e scorrere le modalità EQ toccando il pulsante EQ. È possibile anche cambiare modalità EQ attraverso l'app BackBeat.•Bilanciato (impostazione predefinita): ottimizza le frequenze per ottenere un suono migliore adatto a diversi generi di musica con bilanciamento dei bassi, medi e alti.•Alti : potenzia le frequenze degli alti per aumentare il livello di dettaglio e di nitidezza della musica e rendere il parlato più intelligibile.Nella maggior parte dei casi, l'auricolare si trova sotto i sedili dell'auto, in tasca o in un cassetto disordinato. Per le posizioni meno ovvie, potete trovare l'auricolare inviando un segnale acustico.1Scaricate l'app BackBeat visitando l'Apple App Store, Google Play o /software .2Trovate il vostro dispositivo smarrito usando la funzione Find MyHeadset all'interno dell'app.Attivazione della funzione vocaleEsecuzione/ricezione/termine di chiamateEsclusione microfonoCancellazione del rumore attivaImpostazione dell'EQTrovate il vostro prodotto idealeSupportoULTERIORI INFORMAZIONI/supportPlantronics, Inc.Plantronics B.V.345 Encinal Street Santa Cruz, CA 95060 United States Scorpius 171 2132 LR Hoofddorp Netherlands© 2018Plantronics, Inc. BackBeat e Plantronics sono marchi di Plantronics, Inc. registrati negli Stati Uniti e in altri paesi e Plantronics Hub è un marchio registrato di Plantronics, Inc. Bluetooth è un marchio registrato di Bluetooth SIG, Inc. e il suo uso da parte di Plantronics è concesso su licenza. Tutti gli altri marchi sono di proprietà dei rispettivi proprietari.Brevetti in attesa di approvazione.212987-16 (08.18)。
HD26使用说明书
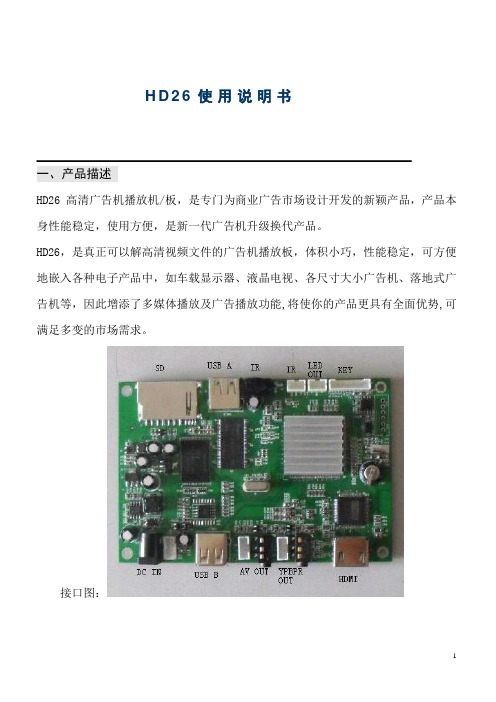
H D26使用说明书一、产品描述HD26高清广告机播放机/板,是专门为商业广告市场设计开发的新颖产品,产品本身性能稳定,使用方便,是新一代广告机升级换代产品。
HD26,是真正可以解高清视频文件的广告机播放板,体积小巧,性能稳定,可方便地嵌入各种电子产品中,如车载显示器、液晶电视、各尺寸大小广告机、落地式广告机等,因此增添了多媒体播放及广告播放功能,将使你的产品更具有全面优势,可满足多变的市场需求。
接口图:二、产品功能:1.支持真正全高清到标清1080P,1080I,720P,576P,480P,576I,480I视频文件播放2.支持HDMI,YPBPR同时高清输出;支持AV输出3.解码格式:高清/标清影音文件:支持MPEG1/2/3/4,H264,rmvb等数码照片文件:支持JPEG/BMP4.支持SD,USB直接播放影音文件5.支持滚动字幕播放6.支持照片间隔时间及特效的选择设定7.支持视频的参数设定8.具有开机自动播放的功能9.具有自动播放照片+mp3功能10.支持各种文件混播放功能11.具有定时开关机功能,每天4段定时时间设定12.红外线遥控(32键),方便易用13.12V电源输入14.时间显示功能15.OTG功能,自动或者手动将U盘的新内容拷贝到SD卡里面三、使用及操作A、使用前准备1.SD卡需要高速的卡,U盘需要高速的U盘2.在SD卡或者U盘的根目录下创建1个文件夹,命名为AD,把需要播放的内容放在这个文件目录里,机器可以记忆循环播放这个文件夹内容注意事项:1.机器切勿热插播操作2.启动时需要等待10S时间,黑屏的开机画面属于正常B、操作步骤1.插上SD卡或者U盘,然后上电,机器会自动循环播放AD目录下的文件2.在播放过程中,如需打开菜单页。
用遥控器按setup键。
出现以下显示:3.根据需要功能,遥控器上下键选择,若退出,请按停止键,机器重新开始播放4.按enter键进入显示菜单设置▲显示:1080P/1080I/480p/576p/720p 若确定某一选项,则enter键确定,然后按停止键(正方形键为停止键)退出▲模式:16:9 / 4:3若确定某一选项,则enter键确定,然后按停止键(正方形键为停止键)退出▲图片音乐混播:关/ 开若修改了此项,需再次重启机器▲时间显示:关、开,5.按enter键进入语言设置页方向键选择语言,英语/中文简体/中文繁体,按enter键确定,停止键退出6.按enter键进入图片设置页▲图片剪裁:正常显示/全屏显示/图片拉伸▲图片播放间隔:3秒/5秒/10秒/20秒/59秒▲入图效果:开/关7.按enter键进入时间设置页方向键调整好当前时间,按enter键确认,按停止键退出8.按enter键进入定时设置页每天有4段定时时间,选择关闭/开启,选择开启则进入某段定时时间的设置,如下图:方向键调整开关机时间,enter键确定,停止键退出9.按enter键进入字幕设置页▲位置:底部/顶部▲字体大小:中/大/小▲字体颜色:蓝色/绿色/黑色/白色▲背景颜色:透明/半透明/黑色/白色/绿色/蓝色▲滚动速度:中/慢/快按enter键确认,按停止键退出10.恢复出厂设置/关于/升级,此功能一般情况下不用。
富斯-i6遥控器中文说明书
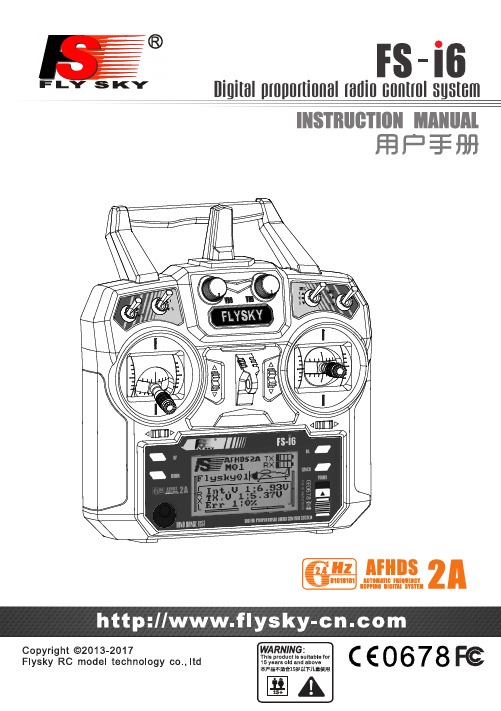
1. Introduction (2)简介2. Service (2)服务3. Special symbols (3)特殊标志4. Safety guide (3)安全指导5. 2.4GHz System 2.4G (5)系统6.System characteristic s 系统特征 (6)7. Transmitter specifications 发射机参数 (7)8.FS-iA6Receiver FS -iA6接收机..................................................................................................................7-109. FS-IA6B Receiver operation instruction 接收机操作说明.10-16..................................................................................10. O n Off 开机关机17........................................................................................................................................11. Definition of key functions 按键定义. (17)12. Warning 警告 ..............................................................................................................................................1813. ...................................................................................Right and left stick can be adjustable. 左右手摇杆模式调整1914. Main screen 开机画面 (20)15. Main menu (21)主菜单16. System settings ............................................................................................................................21 系统设置 16.01. Model select .........................................................................................................................模型选择2116.02. Model name 模型名称 (22)Type select 类型选择.........................................................................................................................16.03.22Model copy 模型复制....................................................................................................................... ..16.04.22 Model reset 模型重置16.05. ...................................................................................................................... ...23 16.06. Trainer mode 教练模式......................................................................................................................23 16.07. Student mode ..................................................................................................................... 学员模式23 16.08. Sticks mode 摇杆模式........................................................................................................................ 24 RX setup 接收机设置.....................................................................................................................16.09. 24-2616.10. LCD brightness 显示屏亮度 (27)Firmware version 固件版本................................................................................................................16.11. 27Firmware update 固件升级.................................................................................................................16.12. 27Factory reset 恢复工厂设置................................................................................................................16.13. 2817. Functions settings (28)功能设置 17.01.Reverse .................................................................................................................................. 正逆转2817.02. End points .................................................................................................................... 舵机最大行程2917.03. Display ....................................................................................................................................... 显示2917.04. Auxiliary channels ............................................................................................................... 辅助通道2917.05.Sub trim ..................................................................................................................................... 微调3017.06.Dual rate / exponential .............................................................................................. 双重比例/指数3017.07.Throttle curve ..................................................................................................................... 油门曲线3017.08. Pitch curve (variable pitch helicopter only).............................. 螺距曲线(仅适用于螺距可变直升机)31 17.09. Swash AFR ................................................................................................. .. 直升机螺距混控系统 3117.10. Mix ............................................................................................................................................. 混控31 升降舵(仅适用于飞机)17.11.Elevon (airplane only) (32)17.12.V tail (airplane only)..................................................................................... V 型尾翼(仅适用于飞机)3217.13.Gyroscope (helicopter only)....................................................................... 陀螺仪(仅适用于直升机)3217.14.Switches assign ................................................................................................................. 开关分配 3317.15. Throttle hold ........................................................................................................................ 油门锁定3318. Packaging content 34包装内容.....................................................................................................................19. FCC Statement 声明.. (34)Table of contentsDigital proportional radio control system多人一起操作的时候 间距至少要20CM以上。
索尼Alpha7S II镜头说明书

Key Features1920x1080 Full HD 24p/60p w/24.5MP Exmor R ® CMOS SensorCreate cinematic video in high de nition 1920 x 1080 24p/60p and high quality 24.5MP stillimages. Experience stunning low-light sensitivity with improved image clarity and drasticallyreduced grain with Sony’s back-illuminated Exmor R ® CMOS sensor. Designed for compactcameras and camcorders, the Exmor R ® CMOS sensor relocates the photo diodes above thesupport circuitry, maximizing the light gathering area per pixel so you can shoot with better resultsin lower lighting conditions.Balanced Optical SteadyShot™ image stabilizationOn standard Optical SteadyShot™ camcorders a single “shi lens” is moved in the optical blockto o set camera shake. Balanced Optical SteadyShot™ w/ Active Mode moves the entireoptical block at once, maintaining the integrity of the optical path and reducing shake. It alsoreduces vignetting (light fallo towards the edge of a scene) and lowers distortion in videos andstill photos.Project ~200” videos w/ 50lm built-in projector via HDMI ®Enjoy your favorite memories virtually anywhere with the high-contrast 50 lumen projector built-into the LCD panel. The HDMI ® multi-terminal allows you to connect external devices that have anHDMI output (smartphones, laptops, tablets, etc.) and use the camcorder’s projector to enjoyother forms of entertainment such as video games and streaming videos from the Internet. Thecamcorder even has built-in Auto Keystone Adjustment, which corrects the dimensions of theprojected image when you cannot situate the device straight on to the wall.Manual Control (Iris/Shutter/Exposure/White Balance)Get the most out of your camcorder with enhanced manual controls. The assignable dial allowsfor control of focus, exposure, white balance, iris, and shutter speed.Wireless control, transfer, data backup via Wi-Fi ®/NFC 1Built-in Wi-Fi ®/NFC makes for easy one touch connection to compatible mobile devices 1. Turnyour mobile phone and/or tablet into a remote control/viewing device, transfer your les to yourmobile device wirelessly for instant sharing, Back up your data on your PC and even enjoy yourvideos and photos on a TV without wires.Wide Angle G lens to capture more of what you wantExperience the pinnacle of Sony lens technology with the professional-quality G Lens. Engineeredfor superior optical performance, Sony G lenses deliver brilliant, accurate color reproductionand sharp, amazingly detailed images. In addition, the 26.8mm focal length in Photo and VideoModes o ers a broader perspective for enhanced wide angle shooting.Color EVF (0.27” 201K) crisp clear video monitoringA color EVF (electronic view nder) provides clear crisp representation of your video allowing forproper framing, battery conservation, and increased stability.3.0” Xtra Fine LCD™ display (921K) touch screen w/ WhiteMagic™The 3.0” (16:9) Xtra Fine LCD™ screen (921K) displays sharp, bright, vivid images, letting youcompose a shot more easily -- even outdoors, while enabling you to change settings to bestrepresent the scene. Easily scroll through menus and view footage thanks to WhiteMagic™technology that dramatically increases visibility in bright daylight. The large display deliversbrilliant-quality still images and movies while enabling easy focusing operation.5.1ch surround sound mic w/ new audio record controlsHDR-P J810/BFull HD 60p/24p Camcorder w/ advanced Manual ControlsCapture special occasions in the stunningly-sharp, 24p/60p HD they deserve with silky-smooth Balanced Optical SteadyShot™ image stabilization that keeps your memories looking their best. You can also share your family’s special moments up to 200” with the built-in projector for an instant at-the-movies feel. Feeling artistic? Manual control of iris, shutter and more let you express your personal style.Dolby® Digital 5.1 channel recording captures active sounds coming from all directions, so you can experience your home movies the way you experienced them while recording. Premium sound features such as Auto Wind Noise Reduction and Premium Closer Voice make it even easier to attain ideal sound quality in various situations.Get creative w/ 7 picture e ects for video and still photosPicture E ects add a new level of expression and creativity to video and photos. Sevenpicture e ects (Toy Camera, Pop Color, So High Key, Partial Color, Retro Photo, High Contrast Monochrome, and Posterization) are available in both photo and video modes. Shooting with these special modes will provide you an easy way to instantly transform your memories without any post editing so ware needed.Up to FPO hours of recording with 32GB embedded Flash MemoryThe built-in 32GB embedded Flash memory can record and store up XX hours XX minutes of high de nition video footage (HD LP mode).Speci cations1. Requires NFC-compatible mobile device. Check device’s user manual for compatibility.© 2014 Sony Electronics Inc. All rights reserved. Reproduction in whole or in part without written permission is prohibited. Sony, Exmor R, BIONZ and the Sony logo are trademarks of Sony Corporation. All other trademarks are trademarks of their respective owners. Features and speci cations subject to change without notice. / UPC:/ Updated: December 19, 2013。
Logicube Windows 7, 8, and 10 Cloning Guidelines –
Cloning Windows® 7, 8, and 10with Legacy Logicube® DuplicatorsLogicube, Inc.Chatsworth, CA 91311USAPhone: 818 700 8488Fax: 818 700 8466Version: 1.0WIN7_8_10-GUIDE-LEGACYDate: 11/08/2017 Windows 7, 8, and 10 Cloning Guidelines – Legacy v1.0 Page I of 10 Revised 11/08/2017TABLE OF CONTENTS1.0 INTRODUCTION (3)1.1 CLONING TO SMALLER CAPACITY DRIVES (3)1.2 PARTITIONING SCHEMES (4)1.3 CLONING METHODS (4)1.3.1M IRROR C OPY M ETHOD (5)1.3.2C LEVER C OPY M ETHOD (5)1.3.3S ELECTIVE P ARTITIONS M ETHOD (5)1.4 ECHO PLUS CLONING LIMITATIONS (5)1.4.1M IRROR C OPY L IMITATIONS (5)1.4.2C LEVER C OPY L IMITATIONS (5)1.5 OMNICLONE 2XI/5XI/10XI CLONING LIMITATIONS (5)1.5.1M IRROR C OPY L IMITATIONS (6)1.5.2C LEVER C OPY L IMITATIONS (AVAILABLE AS AN OPTION) (6)1.5.3S ELECTIVE P ARTITIONS L IMITATIONS (AVAILABLE AS AN OPTION) (6)1.6 OMNISAS CLONING LIMITATIONS (7)1.6.1M IRROR C OPY L IMITATIONS (7)1.6.2C LEVER C OPY L IMITATIONS (7)1.6.3S ELECTIVE P ARTITIONS L IMITATIONS (7)1.7 SUPERSONIX LIMITATIONS (7)1.7.1M IRROR C OPY L IMITATIONS (7)1.7.2C LEVER C OPY L IMITATIONS (8)1.7.3S ELECTIVE P ARTITIONS L IMITATIONS (8)1.8 ZCLONE (8)1.8.1M IRROR C OPY L IMITATIONS (8)1.8.2C LEVER C OPY L IMITATIONS (9)1.9 LOOK-UP CHARTS - INTRODUCTION (9)TECHNICAL SUPPORT INFORMATION (10)1.0 IntroductionThis document provides guidelines on how drives with Windows 7, Windows 8/8.1, and Windows 10 can be cloned using the following legacy Logicube drive duplicators: •Echo Plus™•OmniClone™ 2Xi, 5Xi, 10Xi•OmniSAS™•SuperSonix®•ZClone™1.1 Cloning to Smaller Capacity DrivesTarget drives should be at least the same capacity or larger than the Master drive. Specifically, each Target drive must have the same number of sectors (or Logical Block Addresses/LBAs) or a larger number of sectors or LBAs than the Master.If the Master drive is larger in capacity than any Target drive, it is still possible to clone the drive, but there are some adjustments that will need to be made to the Master drive. The following applies to any Operating System:•The total partition sizes on the Master drive need to be adjusted to be less than the capacity/size of the smallest Target drive.•The partitions on the Master drive need to be adjusted so that the free/unallocated space is at the end of the drive.It is highly recommended to make a backup copy of the Master drive byperforming a Mirror copy of the drive to make sure there is an exact duplicatebackup of the Master drive before changing partition sizes and positions.Logicube cannot provide support on how to re-size, shrink, or move partitions.There are several articles and software/utilities/tools available on the internet onhow to re-size, shrink, or move partitions.Sample original drive (1 TB drive):Windows 7, 8, and 10 Cloning Guidelines – Legacy v1.0 Page 3 of 10 Revised 11/08/2017Sample of a properly adjusted drive (from a 1 TB drive to fit a 750 GB drive):Sample of an adjusted drive that will not work (from a 1 TB drive to fit a 750 GB drive):Once the partitions have been adjusted to properly fit the Target drive, it can be cloned using any of the cloning methods. Depending on the Operating System, cloning method, and Logicube device used, there may be limitations to cloning the drive. See Section 1.4for limitations based on the cloning method, drive capacities, and Logicube Device being used.1.2 Partitioning SchemesThere are two common partitioning schemes currently being used for Windows 7, Windows8/8.1, and Windows 10: MBR and GPT. Both partitioning schemes are supported with the Logicube products listed in this document.MBR (Master Boot Record) – An older partitioning scheme.GPT (GUID Partition Table) – A newer partitioning scheme.1.3 Cloning MethodsDifferent cloning methods are available on each of the Logicube products listed at the beginning of this document. Please refer to the respective User’s Manual of your Logicub e device for complete instructions on how to use each cloning method.Windows 7, 8, and 10 Cloning Guidelines – Legacy v1.0 Page 4 of 10 Revised 11/08/20171.3.1 Mirror Copy MethodAll the Logicube products listed at the beginning of this document have theMirror Copy method and will support the cloning of any Operating System usingthis method. Mirror Copy method performs a bit-for-bit copy of the Masterdrive, producing an exact duplicate of that drive.1.3.2 Clever Copy MethodAll the Logicube products listed at the beginning of this document have theClever Copy method (an additional option for the OmniClone Xi) and willsupport the cloning of any Operating System using this method. Clever Copycopies only the sectors with data from the Master drive.1.3.3 Selective Partitions MethodSelective Partition Copy method allows you to specify how each partition isgoing to be copied (Mirror or Clever) and is available only on the followingproducts:•OmniClone Xi (an additional software option)•OmniSAS•SuperSonix1.4 Echo Plus Cloning LimitationsThe Echo Plus has two cloning methods available and has the following limitations:1.4.1 Mirror Copy Limitations•The Target drives should be the same capacity or larger. If the Targetdrive is smaller in capacity, please see Section 1.1.1.4.2 Clever Copy Limitations•Windows 7, 8/8.1, or 10 is not supported with Clever Copy. Use MirrorCopy method.1.5 OmniClone 2Xi/5Xi/10Xi Cloning LimitationsThe OmniClone Xi series has three cloning methods available and has the following limitations: Windows 7, 8, and 10 Cloning Guidelines – Legacy v1.0 Page 5 of 10 Revised 11/08/20171.5.1 Mirror Copy Limitations•The Target drives should be the same capacity or larger. If the Targetdrive is smaller in capacity, please see Section 1.1.•Set the percentage setting to clone the proper percentage of the drive(for example, if the Target drive is 750 GB and the Master is 1 TB,clone no more than 75% of the drive).If the partitions are not adjusted and the percentage setting isnot set, the cloning task may start, but will not copy any datapast the capacity of the Target drive.1.5.2 Clever Copy Limitations (available as an option)•The Master drive must use the MBR partitioning scheme.•The Master drive must contain no more than 3 partitions.•The Operating System partition must be the last partition on the drive.•The Target drives should be the same capacity or larger. If the Targetdrive is smaller in capacity, please see Section 1.1.•Windows 8, 8.1, and 10 were released after the last OmniClone Xisoftware was released and although not officially supported, may workwhen using Clever Copy. If Clever Copy does not work, try the SelectivePartitions method or Mirror Copy.1.5.3 Selective Partitions Limitations (available as an option)•The Master drive must use the MBR partitioning scheme.•The Master drive must contain no more than 3 partitions.•The Operating System partition must be the last partition on the drive.•The Target drives should be the same capacity or larger. If the Targetdrive is smaller in capacity, please see Section 1.1.•All System Restore, Recovery, and OEM partitions should set to Mirrorand the Operating Partition (last partition on the list) should be set toClever.•Windows 8, 8.1, and 10 were released after the last OmniClone Xisoftware was released and although not officially supported, may workwhen using Selective Partitions. If Selective Partitions does not work,use Mirror Copy.Windows 7, 8, and 10 Cloning Guidelines – Legacy v1.0 Page 6 of 10 Revised 11/08/20171.6 OmniSAS Cloning LimitationsThe OmniSAS has three cloning methods available and has the following limitations:1.6.1 Mirror Copy Limitations•The Target drives should be the same capacity or larger. If the Targetdrive is smaller in capacity, please see Section 1.1.•Set the percentage setting to clone the proper percentage of the drive(for example, if the Target drive is 750 GB and the Master is 1 TB,clone no more than 75% of the drive).If the partitions are not adjusted and the percentage setting isnot set, the cloning task may start, but will not copy any datapast the capacity of the Target drive.1.6.2 Clever Copy Limitations•Windows 7, 8/8.1, or 10 is not supported with Clever Copy on theOmniSAS. Use Mirror Copy.1.6.3 Selective Partitions Limitations•The Windows 7, 8/8.1, or 10 is not supported with Selective Partitionson the OmniSAS. Use Mirror Copy.1.7 SuperSonix LimitationsThe SuperSonix has three cloning methods available and has the following limitations:1.7.1 Mirror Copy Limitations•The Target drives should be the same capacity or larger. If the Targetdrive is smaller in capacity, please see Section 1.1.•Set the percentage setting to clone the proper percentage of the drive(for example, if the Target drive is 750 GB and the Master is 1 TB,clone no more than 75% of the drive).If the partitions are not adjusted and the percentage setting isnot set, the cloning task may start, but will not copy any datapast the capacity of the Target drive.Windows 7, 8, and 10 Cloning Guidelines – Legacy v1.0 Page 7 of 10 Revised 11/08/20171.7.2 Clever Copy Limitations•The Master drive must use the MBR partitioning scheme.•The Master drive must contain no more than 3 partitions.•The Operating System partition must be the last partition on the drive.•The Target drives should be the same capacity or larger. If the Targetdrive is smaller in capacity, please see Section 1.1.•Windows 10 was released after the last SuperSonix software wasreleased and although not officially supported, may work when usingClever Copy. If Clever Copy does not work, try Selective Partitions orMirror Copy.1.7.3 Selective Partitions Limitations•The Master drive must use the MBR partitioning scheme.•The Master drive must contain no more than 3 partitions.•The Operating System partition must be the last partition on the drive.•The Target drives should be the same capacity or larger. If the Targetdrive is smaller in capacity, please see Section 1.1.•All System Restore, Recovery, and OEM partitions should set to Mirrorand the Operating Partition (last partition on the list) should be set toClever.•Windows 10 was released after the last SuperSonix software wasreleased and although not officially supported, may work when usingSelective Partitions. If Selective Partitions does not work, use MirrorCopy.1.8 ZClone LimitationsThe ZClone has two cloning methods available and has the following limitations:1.8.1 Mirror Copy Limitations•The Target drives should be the same capacity or larger. If the Targetdrive is smaller in capacity, please see Section 1.1.•Set the percentage setting to clone the proper percentage of the drive(for example, if the Target drive is 750 GB and the Master is 1 TB,clone no more than 75% of the drive).Windows 7, 8, and 10 Cloning Guidelines – Legacy v1.0 Page 8 of 10 Revised 11/08/20171.8.2 Clever Copy Limitations•All System Restore, Recovery, and OEM partitions should not beexpanded.•The Target drives should be the same capacity or larger. If the Targetdrive is smaller in capacity, please see Section 1.1.•Windows 10 was released after the last ZClone software was releasedand although not officially supported, may work when using CleverCopy. If Clever Copy does not work, use Mirror Copy.1.9 Look-Up Charts - IntroductionHere are two quick look-up charts for Windows 7, 8/8.1, and 10. The first chart is for Master drives with the MBR partitioning scheme (maximum capacity is 2TB). The second chart is for Master drives with the GPT partitioning scheme.The following chart is for Windows 7, 8/8.1, and 10 with the MBR partitioning scheme:Windows 7, 8, and 10 Cloning Guidelines – Legacy v1.0 Page 9 of 10 Revised 11/08/2017The following chart is for Windows 7, 8/8.1, 10 with the GPT partitioning scheme:Technical Support InformationWindows 7, 8, and 10 Cloning Guidelines – Legacy v1.0 Page 10 of 10 Revised 11/08/2017。
用于 HP ProLiant Gen9 服务器的 HP UEFI Shell 用户指南

2 UEFI Shell 命令参考....................................................................................8
无线竞技、快意游戏雷神HL10真无线游戏耳机

无线竞技、快意游戏雷神HL10真无线游戏耳机作者:***来源:《微型计算机》2020年第18期隨着EDC(日常携带)理念的深入人心,越来越多的游戏外设产品开始采用无线连接搭配轻量化的设计,让其具备更出色的便携性。
而这之中最具EDC特性的无疑是耳机产品,特别是这两年涌现出越来越多的真无线耳机之后,游戏耳机仿佛有了新的设计方向,不少外设厂商开始尝试推出真无线游戏耳机,市场也呈现出了新的活力。
而以游戏本为起点,已经完成外设布局的雷神也发现了这块市场的潜力,并于近期推出了旗下首款真无线游戏耳机——HL10。
科幻外观,便携性高问市面上的真无线耳机外观上五花八门,但大多数还是采用了呈椭圆形状的充电盒,而雷神HL10真无线游戏耳机采用了菱形一般的充电盒,更显科幻气息。
充电盒外壳采用了类肤喷涂工艺,并且表面印刻了雷神的英文Logo,让它的质感非常不错。
同时,它在前面设计了三条电量指示灯,充电时也会给予玩家提醒,后背则采用了USB-C充电接口,方便玩家充电时盲插。
在打开盒子准备使用耳机时,充电盒里面也有背光灯以做装饰,比较特别。
耳机方面,雷神HL10真无线游戏耳机采用了入耳式设计,同时耳套设计了耳挂部分,放在耳蜗会更为稳定。
相比起Airpods,雷神HL10真无线游戏耳机的耳机腔体略大一些,并且和充电盒保持了一样的科幻风格,采用了更多的棱角设计,并且耳机外壳具备背光灯效,不仅能起到装饰作用,同时在连接时可以起到提示玩家的作用。
用料方面,雷神HL10真无线游戏耳机的外壳主要由类肤喷涂的塑料外壳与中间透光的亚克力材质组成,质感不错。
在颜色上,这款产品采用了通体黑色的设计,搭配蓝色的背光效果,看上去更有科幻气息。
由于采用触点充电,所以耳机内侧设计了触点,对应到充电盒内也是如此。
另外,为了方便玩家更换耳挂,雷神HL10真无线游戏耳机还额外附赠了一套耳套,比较人性化。
游戏模式,低延迟更轻松在首次接入时,雷神HL10真无线游戏耳机会闪烁蓝色背光灯,提示玩家进行设备连接。
华科尔遥控器刷回官方固件方法
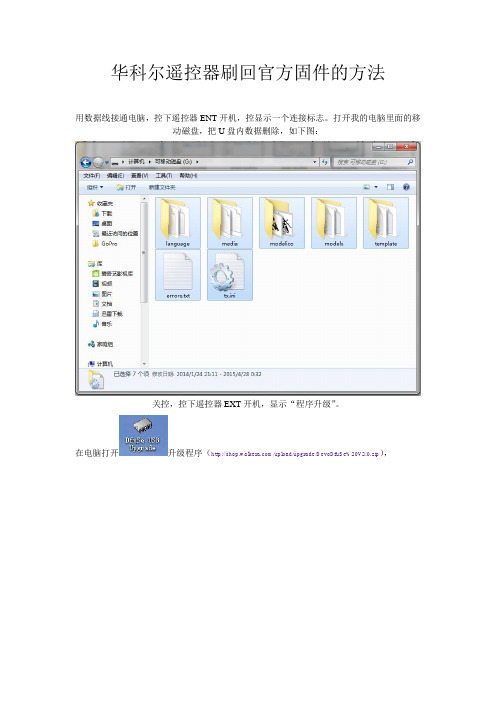
华科尔遥控器刷回官方固件的方法
用数据线接通电脑,控下遥控器ENT开机,控显示一个连接标志。
打开我的电脑里面的移
动磁盘,把U盘内数据删除,如下图:
关控,控下遥控器EXT开机,显示“程序升级”。
在电脑打开升级程序(/upload/upgrade/DevoDfuSe%20V2.0.zip),
在FILE项选择加载官方D-10固件的文件夹,(/upload/radio/Devo10-0.7A-100mw.zip)。
其它固件(/upload/radio/)
官方固件内有两个文件打开“DEVO-10 Fw v0.7A.dfu”
点UPGRADE开始写入
选Y
进度条走两次
主程序加载完成
点LIBRARY项
在UPGRADE OR VENTY FILE项内选择官方固件文件夹内的“DEVO-10 Lib v0.2.dfu”
点UPGRADE开始加载
选Y
进度条走两次
图形及文字文件加载完成。
回复官方固件完成。
关控重新开控,控内的设置回复到刷万能固件前的设置。
哈曼卡顿SB26高级声道带蓝牙和有源无线低音炮使用手册说明书
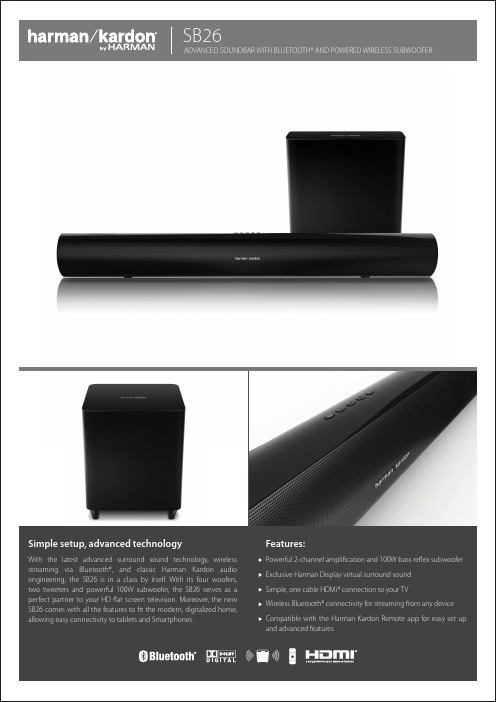
driver in a ported enclosure
• Soundbar amplifier power: 30W x 2
Surround Processing • Harman Display Surround Virtual Speaker surround mode
• Adjustable subwoofer crossover lets you achieve a smooth transition of bass between the subwoofer and the soundbar for a variety of different rooms and subwoofer locations
110mm x 920mm x 89mm; 3.6kg
• Subwoofer: 365mm x 320mm x 320mm; 15.0kg
HARMAN International Industries, Incorporated 8500 Balboa Boulevard, Northridge, CA 91329 USA
• Wireless subwoofer that you can place anywhere in your room
without loudspeaker wires
• Optional IR repeater. In case the soundbar is blocking your
television’s IR receiver, insert the IR repeater into the back of your soundbar and place it in front of the IR receiver of the television.
HMD 26 专业级清晰语音传输动态耳机和头戴式耳机说明说明书

HMD 26-100 HMD 26-600
502451 100 Ohm per system, dynamic microphone, without cable
502463 600 Ohm per system, dynamic microphone, without cable
HMD 26-600S 502465 600 Ohm single-sided, dynamic microphone, without cable
cable-H-X4F cable-H-X5
Item no. Description 502360 steel cable with open ends,
2 m length
502459 steel cable with connector XLR-3 and jack 6,3 mm, 2 m length
HMD 26-600
dynamic, closed supraaural
20 – 18,000 Hz 300 O mono/600 O stereo < 0.5 % at 1 kHz 105 dB SPL at 1 kHz, 1 mW 107 dB SPL at 1 kHz, 1 V (ActiveGard™ Off)
Lightweight broadcast headset Extremely comfortable to wear, even for extended listening, due to a twopiece automatic headband and soft ear pads Single-sided cable Headphones for high maximum SPL ActiveGard™ (switchable) – protects the user against volume peaks above 105 dB “Flip-away” headphone allows single-sided listening Dynamic microphone (hyper-cardioid) with linear frequency response Flexible microphone boom, can be worn on either left or right-hand side Microphone mutes when the boom arm is upright Cable, microphone boom and ear pads can be changed easily (modular concept) 2-year guarantee
- 1、下载文档前请自行甄别文档内容的完整性,平台不提供额外的编辑、内容补充、找答案等附加服务。
- 2、"仅部分预览"的文档,不可在线预览部分如存在完整性等问题,可反馈申请退款(可完整预览的文档不适用该条件!)。
- 3、如文档侵犯您的权益,请联系客服反馈,我们会尽快为您处理(人工客服工作时间:9:00-18:30)。
Options, Futures, and Other Derivatives, 10th Edition, Copyright © John C. Hull 2017
1Types ຫໍສະໝຸດ f ExoticsPackages Perpetual American calls and puts Nonstandard American options Gap options Forward start options Cliquet options Compound options Chooser options Barrier options Binary options Lookback options Shout options Asian options Options to exchange one asset for another Options involving several assets Volatility and Variance swaps
Chooser Option “As You Like It”
(page 601-602)
Option starts at time 0, matures at T2 At T1 (0 < T1 < T2) buyer chooses whether it is a put or call This is a package!
K a1 1 S a1 1 a1 K
a1
1
The value of a perpetual put is similarly
K a2 1 S a2 1 a2 K
a2
Options, Futures, and Other Derivatives, 10th Edition, Copyright © John C. Hull 2017
13
Barrier Options (continued)
Stock price must hit barrier from below
‘Up’ options
Stock price must hit barrier from above
‘Down’ options
Option may be a put or a call Eight possible combinations
Asset-or-nothing: pays ST if ST > K, otherwise pays nothing.
Value = S0e-qT N(d1)
Options, Futures, and Other Derivatives, 10th Edition, Copyright © John C. Hull 2017
Options, Futures, and Other Derivatives, 10th Edition, Copyright © John C. Hull 2017 9
Compound Option (page 600-601)
Option to buy or sell an option
Call on call Put on call Call on put Put on put
5
Non-Standard American Options
(page 598)
Exercisable only on specific dates (Bermudans) Early exercise allowed during only part of life (initial “lock out” period) Strike price changes over the life (warrants, convertibles)
f f 1 2 2 2 f (r q) S S rf 2 t S 2 S
1 (r q )a a(a 1) 2 r 2
when
This has solutions a1>0 and a2<0 The value of the derivative is therefore a QS H 1
Options, Futures, and Other Derivatives, 10th Edition, Copyright © John C. Hull 2017
6
Gap Options
Gap call pays ST − K1 when ST > K2 Gap put pays off K1 − ST when ST < K2 Can be valued with a small modification to BSM
‘In’ options
Option dies if stock price hits barrier before option maturity
‘Out’ options
Options, Futures, and Other Derivatives, 10th Edition, Copyright © John C. Hull 2017
1
Options, Futures, and Other Derivatives, 10th Edition, Copyright © John C. Hull 2017
8
Cliquet Option
A series of call or put options with rules determining how the strike price is determined For example, a cliquet might consist of 20 atthe-money three-month options. The total life would then be five years When one option expires a new similar atthe-money is comes into existence
7
Forward Start Options (page 600)
Option starts at a future time, T1 Implicit in employee stock option plans Often structured so that strike price equals asset price at time T1 Value is then e qT times the value of similar option starting today
Options, Futures, and Other Derivatives, 10th Edition, Copyright © John C. Hull 2017
11
Chooser Option as a Package
At timeT1 the valueis max(c, p ) From put - callparity p c e r (T2 T1 ) K S1e q (T2 T1 ) T he valueat timeT1 is therefore c e q (T2 T1 ) max(0, Ke ( r q )(T2 T1 ) S1 ) T hisis a callmaturingat timeT2 plus a positionin a put maturingat timeT1
Options, Futures, and Other Derivatives, 10th Edition, Copyright © John C. Hull 2017
12
Barrier Options (page 602-604)
Option comes into existence only if stock price hits barrier before option maturity
Gap call S 0 N (d 1 ) K 1 N (d 2 ) Gap put K 1e rT N (d 2 ) S 0 e qT N (d 1 ) d1 ln(S 0 K 2 ) (r q 2 2)T T
d 2 d1 T
Options, Futures, and Other Derivatives, 10th Edition, Copyright © John C. Hull 2017
2
Options, Futures, and Other Derivatives, 10th Edition, Copyright © John C. Hull 2017
Packages (page 596-597)
Portfolios of standard options Examples from Chapter 11: bull spreads, bear spreads, straddles, etc Often structured to have zero cost One popular package is a range forward contract (see Chapter 17)
Options, Futures, and Other Derivatives, 10th Edition, Copyright © John C. Hull 2017 4
Perpetual American Options continued
Consider next a perpetual American call option with strike price K a ( H K ) S H If it is exercised when S=H the value is This is maximized when H K a1 (a1 1) The value of the perpetual call is therefore
