戴尔电脑文稿
dell latitude 5340 5440 5540 中文用户手册说明书
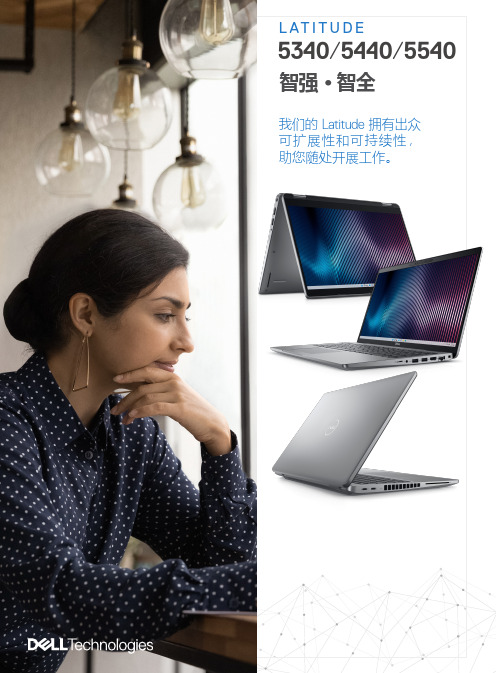
并且能够灵活地远程工作。
使用 100% 回收和可再生包装18, 包括更加环保的多件包装。
Intelligent Privac y 功能: 提醒您注意 旁观者,保护屏幕上显示的您不看屏幕时,系统会感知到,并调暗屏幕以保护隐私和节省电增强的音频效果改善音频质量,优化协作体验。
触控板升级,改善了触感以提高生产力。
ExpressConnect 智能双网连接支持同时利用 2 个或更多网络连接,该同时多网络连接技术可加快数据和视频下载速度。
主流商用笔记本的大部分安全选项14 配备的选项包括接触式/非接触式智能卡、TPM 、Control Vault 3、指纹读取器、 楔形钥匙锁插槽、摄像头隐私挡板、Windows Hello/红外摄像头和 Intelligent Privacy 。
更多可扩展性能选项 全新英 13 代 U 和 系列处理器。
提供各种内存 LPDDR5 (13”)、可,以及独立。
ExpressSign-in 智慧感知登录功能可在您靠近时唤醒您的系统,并在您离开时将其锁定。
适合每一类用户的显示屏入门级屏幕和摄像头升级为全高清,并且可选选项。
13电池续航时间的面板,能够尽可能提高生产力,还可以让您体验Glass 屏幕。
卓越的多功能性13” 可作为笔记本电脑或二合一笔记本。
出色的运行时间,并可以利用ExpressCharge 快速充电更快完成充电提供多种电池选项,电池容量最高 54 瓦时,以及下一代可延长电池续航时间的面板。
Intelligent Audio 智能音频,采用神经降噪功能借助基于 AI 的背景噪声消除功能,自信地开展协作。
拥有出众可持续性的 Latitude 系列Latitude 5000 中使用的可回收塑料和可再生 塑料增加了 64%(按重量)14,生物基/ PCR 含量扩展到 B/C/D 护盖、扬声器外壳、掌托和内框架。
所有尺寸全部支持 Wi-Fi 6E 17 和 5G 网络。
在桌面办公或出差时保持联网。
戴尔Latitude 5540 用户手册

Latitude 5540用户手册4 2023注意、小心和警告:“注意”表示可帮助您更好地使用产品的重要信息。
:“小心”表示可能会导致硬件损坏或数据丢失,并告诉您如何避免问题。
:“警告”表示可能会导致财产损坏、人身伤害甚至死亡。
© 2023 Dell Inc. 或其子公司。
保留所有权利Dell Technologies、Dell 和其他商标均是 Dell Inc. 或其子公司的商标。
其他商标可能是其各自所有者的商标。
章 1: Latitude 5540的视图 (8)右 (8)左侧 (9)顶部 (10)正面 (11)背面 (12)底部 (12)服务编号 (12)电池电量和状态指示灯 (13)章 2: 设置 Latitude 5540 (14)章 3: Latitude 5540 的规格 (16)尺寸和重量 (16)处理器 (16)芯片组 (17)操作系统 (18)内存 (18)外部端口 (19)内部插槽 (19)以太网 (19)无线模块 (20)WWAN 模块 (20)音频 (21)存储 (22)介质卡读卡器 (22)键盘 (22)键盘功能键 (23)摄像头 (24)触控板 (24)电源适配器 (25)电池 (26)显示屏 (27)指纹读取器(可选) (28)传感器 (28)GPU —集成 (29)GPU —独立 (29)外部显示屏支持 (29)硬件安全性 (29)智能卡读卡器 (30)非接触式智能卡读卡器 (30)接触式智能卡读卡器 (31)操作和存储环境 (32)戴尔支持政策 (32)目录3Dell Optimizer 戴尔智能调优软件 (33)章 4: 拆装计算机内部组件 (34)安全说明 (34)拆装计算机内部组件之前 (34)安全防范措施 (35)静电放电— ESD 保护 (35)ESD 现场服务工具包 (36)运输敏感组件 (36)拆装计算机内部组件之后 (36)BitLocker (37)建议工具 (37)螺钉列表 (37)Latitude 5540的主要组件 (38)章 5: 卸下和安装客户可更换部件 (CRU) (41)SIM 卡托盘(可选) (41)卸下 SIM 卡托盘(可选) (41)安装 SIM 卡托盘(可选) (42)基座护盖 (43)卸下底座护盖 (43)安装底座护盖 (45)无线网卡 (48)卸下 WLAN 卡 (48)安装 WLAN 卡 (49)WWAN 卡(可选) (50)卸下 4G WWAN 卡(可选) (50)安装 4G WWAN 卡(可选) (51)卸下 5G WWAN 卡(可选) (53)安装 5G WWAN 卡(可选) (54)内存模块 (55)卸下内存模块 (55)安装内存模块 (56)固态驱动器 (57)卸下插槽 1 中的 M.2 2230 固态硬盘 (57)在插槽 1 中安装 M.2 2230 固态硬盘 (58)卸下插槽 1 中的 M.2 2280 固态硬盘 (59)在插槽 1 中安装 M.2 2280 固态硬盘 (60)卸下插槽 2 中的 M.2 2230 固态硬盘 (61)在插槽 2 中安装 M.2 2230 固态硬盘 (62)风扇 (63)卸下风扇 (63)安装风扇 (63)章 6: 卸下和安装现场可更换部件 (FRU) (65)电池 (65)锂离子电池预防措施 (65)4目录组件内框架 (69)卸下组件内框架 (69)安装组件内框架 (70)扬声器 (72)卸下扬声器 (72)安装扬声器 (73)币形电池 (74)卸下钮扣电池 (74)安装钮扣电池 (75)散热器 (76)卸下散热器(独立 GPU) (76)安装散热器(独立 GPU) (77)卸下散热器(集成 GPU) (78)安装散热器(集成 GPU) (79)系统板 (80)卸下系统主板 (80)安装系统主板 (83)电源按钮 (86)卸下电源按钮 (86)安装电源按钮 (87)电源按钮,带可选的指纹读取器 (88)卸下带可选指纹读取器的电源按钮 (88)安装带可选指纹读取器的电源按钮 (89)键盘 (90)卸下键盘 (90)安装键盘 (92)显示屏部件 (94)卸下显示屏组件 (94)安装显示屏组件 (97)显示屏挡板 (99)卸下显示屏挡板 (99)安装显示屏挡板 (99)显示屏面板 (100)卸下显示屏面板 (100)安装显示屏面板 (103)摄像头模块 (106)卸下摄像头模块 (106)安装摄像头模块 (107)显示屏转轴 (108)卸下显示屏转轴 (108)安装显示屏转轴 (109)显示屏后盖 (110)卸下显示屏后盖 (110)安装显示屏后盖 (111)显示屏线缆 (112)卸下显示屏线缆 (112)安装显示屏线缆 (113)传感器板 (114)目录5指纹读取器(可选) (116)卸下指纹读取器(可选) (116)安装指纹读取器(可选) (117)智能卡读卡器 (119)卸下智能卡读卡器 (119)安装智能卡读卡器 (119)虚拟 SIM 卡插槽填充挡片 (120)卸下虚拟 SIM 卡插槽填充挡片 (120)安装虚拟 SIM 卡插槽填充挡片 (121)掌托部件 (122)卸下掌托组件 (122)安装掌托组件 (124)章 7: 软件 (126)操作系统 (126)驱动程序与下载 (126)章 8: BIOS 设置 (127)进入 BIOS 设置程序 (127)导航键 (127)一次性启动菜单 (127)系统设置选项 (128)更新 BIOS (138)在 Windows 中更新 BIOS (138)在 Linux 和 Ubuntu 环境中更新 BIOS (138)在 Windows 环境中使用 USB 驱动器更新 BIOS (138)从 F12 一次性启动菜单更新 BIOS (139)系统密码和设置密码 (139)分配系统设置密码 (140)删除或更改现有的系统设置密码 (140)清除 CMOS 设置 (141)清除 BIOS(系统设置)和系统密码 (141)章 9: 故障排除 (142)处理膨胀锂离子电池 (142)找到戴尔计算机的服务编号或快速服务代码 (142)Dell SupportAssist 启动前系统性能检查诊断程序 (142)运行 SupportAssist 启动前系统性能检查 (143)内置自检 (BIST) (143)M-BIST (143)液晶屏电源导轨测试 (L-BIST) (143)液晶屏内置自检 (BIST) (144)系统诊断指示灯 (144)恢复操作系统 (145)实时时钟 (RTC) 重置 (145)备份介质和恢复选项 (146)Wi-Fi 重启 (146)6目录耗尽剩余弱电(执行硬重置) (146)章 10: 获取帮助和联系戴尔 (147)目录7Latitude 5540的视图右1.microSD 卡插槽针对 microSD 卡进行读取和写入。
戴尔XPS 13 笔记本电脑快速入门指南说明书

2Finish Windows setupTuntaskan penataan Windows | 完成 Windows 設定Locate your Dell appsCari lokasi aplikasi Dell Anda | 定位您的 Dell 應用程式Learn how to use WindowsPelajari cara menggunakan Windows | 學習如何使用 WindowsMy DellDell Saya | 我的 DellConnect the power adapter and press the power buttonHubungkan adaptor daya dan tekan tombol daya 連接電源轉接器然後按下電源按鈕1Register your computerDaftarkan komputer Anda | 註冊您的電腦Dell Backup and RecoveryPencadangan dan Pemulihan Dell | Dell Backup and Recovery2014-10Product support and manuals Manual dan dukungan produk 產品支援與手冊/support/support/manuals /windows8Contact DellHubungi Dell | 與 Dell 公司聯絡/contactdellRegulatory and safetyRegulasi dan keselamatan | 管制與安全/regulatory_compliance Regulatory modelModel Regulatori | 安規型號P54G Regulatory typeJenis regulatori | 安規類型P54G001Computer modelModel komputer | 電腦型號XPS 9343© 2014 Dell Inc.© 2014 Microsoft Corporation.Printed in China.Help and TipsBantuan dan Tips | 說明與秘訣Enable security and updatesAktifkan keamanan dan pembaruan 啟用安全性與更新Connect to your network Sambungkan ke jaringan Anda 連接網路NOTE: If you are connecting to a secured wireless network, enter the password for the wireless network access when prompted.CATATAN: Jika Anda menghubungkan ke jaringan nirkabel aman,masukkan kata sandi untuk akses jaringan nirkabel tersebut saat diminta.註:如果連接的是一安全的無線網路,請在提示出現時輸入密碼以存取無線網路。
戴尔计算机说明书

Me and My Dell面向 Inspiron、G 系列、XPS 和 Alienware 计算机1 2021注意、小心和警告:“注意”表示帮助您更好地使用该产品的重要信息。
:“小心”表示可能会损坏硬件或导致数据丢失,并告诉您如何避免此类问题。
:“警告”表示可能会导致财产损失、人身伤害甚至死亡。
© 2011-2021 Dell Inc. 或其子公司。
保留所有权利。
Dell、EMC 和其他商标是 Dell Inc. 或其附属机构的商标。
其他商标可能是其各自所有者的商标。
章 1: 设置计算机 (7)连接到互联网 (7)使用 LAN 连接互联网 (7)使用 WLAN 连接互联网 (7)使用 WWAN 连接互联网 (8)设置音频 (8)配置 5.1 和 7.1 音频 (9)连接 5.1 扬声器 (9)连接 7.1 扬声器 (10)设置打印机 (10)Windows 10 和 8.1 (10)Windows 7 (11)设置网络摄像头 (11)集成网络摄像头 (11)外部网络摄像头 (11)设置蓝牙 (11)连接多个显示器 (11)Windows 10 (11)Windows 8 (12)Windows 7 (12)章 2: 关于您的计算机 (13)电源适配器 (13)电池 (13)币形电池 (14)触摸板 (14)显示器 (14)触摸屏 (14)3D (14)无线显示 (14)摄像头 (15)网络摄像头 (15)3D 摄像头 (15)Intel RealSense 3D 摄像头 (15)无线显示 (15)键盘 (15)物理键盘 (15)屏幕键盘 (16)键盘连接类型 (17)服务标签和快速服务代码 (17)找到您计算机上的标签 (17)存储设备 (17)内部存储设备 (18)可移除存储设备 (18)目录3芯片组 (20)处理器 (20)计算机风扇 (21)散热器 (21)散热膏 (21)视频卡 (21)电视调谐器 (22)扬声器 (22)2.1 音频 (23)5.1 音频 (23)7.1 音频 (23)网络摄像头 (23)网络 (23)局域网 (23)无线局域网 (23)无线广域网 (24)无线个人局域网 (24)调制解调器 (24)路由器 (24)网络接口控制器 (24)无线局域网适配器 (24)无线广域网适配器 (24)蓝牙 (24)近场通信 (25)章 3: 使用计算机 (26)为电池充电 (26)使用键盘 (26)键盘快捷方式 (26)Windows 8.1 和 Windows RT 的键盘快捷方式 (27)自定义键盘 (28)在笔记本电脑上使用数字键盘 (29)使用触摸板 (29)触摸板手势 (29)使用触摸屏 (30)触摸屏手势 (31)使用蓝牙 (32)将蓝牙设备与您的计算机配对 (33)使用网络摄像头 (33)章 4: 端口和接口 (35)音频 (35)音频端口类型 (35)USB (36)USB 端口 (36)USB 标准 (36)eSATA (37)4目录DisplayPort (37)HDMI (38)SPDIF (38)章 5: 软件和应用程序 (39)Absolute (39)Dell SupportAssist (39)PC 检查 (39)Quickset (40)NVIDIA 3D 应用程序 (40)章 6: 还原操作系统 (42)系统恢复选项 (42)Dell Backup and Recovery (42)Dell Backup and Recovery Basic (43)Dell Backup and Recovery premium (43)Dell Factory Image Restore (44)系统还原 (45)Windows 10 (45)Windows 8.1 (46)Windows 7 (46)操作系统光盘 (46)系统重装介质 (47)章 7: 故障排除 (48)基本故障排除步骤 (48)诊断程序 (48)预引导系统评估 (48)增强型 PSA (48)LCD BIST (49)哔声代码 (50)章 8: BIOS (51)更改 BIOS 设置 (51)进入 BIOS 设置程序 (51)重设 BIOS 密码 (51)Boot Sequence (52)章 9: 获取帮助和联系戴尔 (53)章 10: 参考资料 (54)计算机维护 (54)Power management(电源管理) (54)配置电源设置 (54)配置电源按钮行为 (55)Dell Power Manager (55)目录5人机工程学说明 (56)Dell 与环境 (57)法规合规性政策 (58)6目录设置计算机设置程序根据您的计算机而有所不同。
戴尔 Inspiron 15 5515 笔记本电脑说明书
Inspiron 15 5515设置和规格9 2021注意、小心和警告:“注意”表示帮助您更好地使用该产品的重要信息。
:“小心”表示可能会损坏硬件或导致数据丢失,并告诉您如何避免此类问题。
:“警告”表示可能会导致财产损失、人身伤害甚至死亡。
© 2021 Dell Inc. 或其子公司。
保留所有权利。
Dell、EMC 和其他商标是 Dell Inc. 或其附属机构的商标。
其他商标可能是其各自所有者的商标。
章 1: 设置 Inspiron 15 5515 (4)章 2: Inspiron 15 5515的视图 (6)右 (6)左侧 (6)顶部 (7)正面 (8)底部 (9)章 3: Inspiron 15 5515 的规格 (10)尺寸和重量 (10)处理器 (10)芯片组 (11)操作系统 (11)内存 (11)外部端口 (12)内部插槽 (12)无线模块 (13)音频 (13)存储 (14)介质卡读取器 (14)键盘 (14)摄像头 (15)触控板 (15)电源适配器 (16)电池 (16)显示屏 (17)指纹读取器 (18)GPU —集成 (18)计算机环境 (18)章 4: 戴尔 ComfortView (19)章 5: 键盘快捷方式 (20)章 6: 获取帮助和联系戴尔 (21)目录3设置 Inspiron 15 5515:根据您所订购的配置,本文档中的图像可能与您的计算机有所差异。
1.连接电源适配器,然后按下电源按钮。
: 在运输过程中,电池可能会进入节能模式,以节省电池电量。
首次开机时,确保电源适配器已连接到计算机。
2.完成 Windows 设置。
按照屏幕上的说明完成设置。
设置时,戴尔建议您执行以下操作:●Windows 更新。
: 如果您正在连接到加密的无线网络,请在出现系统提示时输入访问无线网络所需的密码。
● Microsoft 帐户登录或创建 Microsoft 帐户。
如果未连接到互联网,则创建离线帐户。
DELL电脑产品介绍-商业主题-PPT模板
Dell Confidential
Operating Systems:
台式机 戴尔的客户可以在两个系列 的台式机系统中选择。 OptiPlexTM 台式机适合那些在 网络环境中需要高可靠性,稳定 性,可治理型和易服务性系统的 企业及机构,戴尔 DimensionTM 台式机为着眼于 快速获得技术回报以及高性能计 算功能的小型企业和家庭用户设 计。最新的高性能组件会应用在 DimensionTM 产品系列。
Page 6
Dell Confidential
Operating Systems:
软件及外设产品 戴尔以极具竞争力的价格提供了一 系列软件及外设产品,包括软件、显示 器、投影仪、软件、内存、笔记本附件 和打印机等。 服务 戴尔通过客户支持,治理部署,专 业服务、培训和认证提升了客户体验。 戴尔提供的服务将客户技术的性能和价 值最大化的同时将费用和复杂性降到最 低。
Dell Confidential
Page 2
Server Product Portfolio
Operating Systems:
存储产品 Dell | EMC以及戴尔 PowerVaultTM 及为客户提供了 具备卓越治理能力,灵活的协同 工作能力和可靠的性能的综合解 决方案系列,保护他们当前的重 要信息的同时,提供了当他们数 据库需求增长时的可扩展性。戴 尔存储产品包括外部存储,磁带 备份产品,网络附加存储,光纤 通道,存储区域网络和机架式解 决方案
Operating Systems:
服务器 戴尔 PowerEdgeTM 网络服 务器基于标准化设计,为客户所有 业务要害型应用,包括电子邮件、 数据库和高性能计算环境提供了价 格合理的高性能、高可靠性和可扩 展性。大型企业客户可以选择高性 能的机架式和塔式服务器,小型企 业和网络可以选择价格极具竞争力 的塔式服务器。
戴尔笔记本电脑使用说明书.pdf_1700840703.9113853
Microsoft Windows 7: Guide de mise en routeConfiguration de Windows 7Votre ordinateur Dell est préconfiguré avec lesystème d'exploitation Microsoft® Windows® 7si vous l'avez sélectionné au moment de l'achat.Pour installer Windows la première fois, suivezles instructions qui s'affichent. Ces étapes sontobligatoires et peuvent prendre un certain temps.Les écrans de configuration Windows vous guidentdans différentes procédures, notammentl'acceptation des contrats de licence, la définitiondes préférences et la configuration d'uneconnexion Internet.PRÉCAUTION: N'interrompez pas leprocessus d'installation du systèmed'exploitation. Cela pourrait rendre votreordinateur inutilisable, vous devriez alorsréinstaller le système d'exploitation.REMARQUE: Pour des performancesoptimales de votre ordinateur, il estrecommandé de télécharger et d'installer lesdernières versions du BIOS et des pilotespour votre ordinateur, disponibles à l'adresse.Connexion à l'Internet (facultatif)Pour vous connecter à Internet, vous devezdisposer d'un modem externe ou d'une connexionréseau et d'un fournisseur d'accès Internet (FAI).Si votre commande ne comportait pas de modemUSB ou adaptateur de réseau sans fil externe, vouspouvez en acheter un à l'adresse .Octobre 2009Configuration d'une connexion filaire•Si vous utilisez une connexion d'accèsàdistance, branchez une ligne téléphonique au modem externe USB en option sur votreordinateur et à la prise téléphonique muraleavant de configurer la connexion Internet. •Si vous utilisez une connexion DSL ou modemcâble/satellite, contactez fournisseur d'accèsInternet (FAI) ou opérateur téléphonique mobile pour obtenir des instructions de configuration. Pour terminer la configuration de votre connexion Internet filaire, suivez les instructions de la section «Configuration de votre connexion Internet». Configuration d'une connexion sans filAvant de pouvoir utiliser votre connexionàl'Internet sans fil, vous devez vous connecteràvotre routeur sans fil.Pour configurer votre connexion à un routeur sans fil:1Assurez-vous que le réseau sans fil est activé sur votre ordinateur.2Enregistrez et fermez tous les fichiers ouverts et quittez tous les programmes en coursd'exécution.3Cliquez sur Démarrer → Panneau deconfiguration→Centre Réseau et partage→Connexion à un réseau.4Pour effectuer la configuration, suivez les instructions qui s'affichent à l'écran. Configuration de la connexion Internet Les fournisseurs d'accès Internet (FAI) et leurs offres varient selon les pays. Prenez contact avec votre fournisseur d'accès Internet pour connaître les offres disponibles dans votre pays.Si vous ne pouvez pas vous connecter à Internet alors que vous l'avez déjà fait auparavant, il est possible que le fournisseur d'accès Internet subisse une interruption de services. Contactez votre FAI pour vérifier l'état du service ou essayez de vous connecter ultérieurement.2Assurez-vous de disposer des informations fournies par votre fournisseur d'accès Internet (FAI). Si vous ne disposez pas d'un FAI, l'assistant ConnexionàInternet peut vous aider à en trouver un.Pour configurer votre connexion Internet:1Enregistrez et fermez tous les fichiers ouverts et quittez tous les programmes en coursd'exécution.2Cliquez sur Démarrer→Panneau deconfiguration.3Cliquez sur Centre Réseau et partage→Configurer une connexion ou un réseau→ConnecteràInternet.La fenêtre Connexion à Internet s'affiche.REMARQUE: Si vous ne savez pas quel typede connexion choisir, cliquez sur Commentchoisir ou prenez contact avec votre FAI.4Suivez les instructions à l'écran pour utiliser les informations de configuration fournies par votre FAI et terminez la configuration.Fonctionnalités de base de Windows 7Personnalisation du bureauVous pouvez personnaliser votre bureau pour en modifier la présentation, la résolution, l'arrière-plan, l'écran de veille ou d'autres fonctions.Pour personnaliser votre bureau:1Cliquez avec le bouton droit sur une zone vide du bureau.2Cliquez sur Personnaliser, pour ouvrir la fenêtre Modifier les effets visuels et les sons de votre ordinateur et en savoir plus sur les options depersonnalisation.Transfert d'informations vers un nouvel ordinateurPour transférer des informations vers un nouvel ordinateur1Cliquez sur Démarrer→Panneau deconfiguration.342Tapez dans la case de rechercher Transfert puis cliquez sur Transférer des fichiers d'un autre ordinateur .3Suivez les instructions de l'assistantWindows Easy Transfer .Sauvegarde de vos donnéesNous vous conseillons de régulièrementsauvegarder les fichiers et dossiers qui figurent sur votre ordinateur.Pour sauvegarder des fichiers :1Cliquez sur Démarrer → Panneau de configuration → Système et sécurité→ Sauvegarde et restauration .2Cliquez sur Sauvegarder et restaurer....3Suivez les instructions de l'assistant Configurer la sauvegarde .Réinstallation de Windows 7Le processus de réinstallation peut prendre de 1à2heures. Après avoir réinstallé le système d'exploitation, vous devez réinstaller les pilotes de périphériques, le programme antivirus ainsi que d'autres logiciels.Pour réinstaller Windows 7:1Enregistrez et fermez tout fichier ouvert et quittez tous les programmes d'application en cours d'exécution.2Insérez le disque Operating System .3Cliquez sur Quitter si le message Installer Windows apparaît.4Redémarrez l'ordinateur.5Lorsque le logo DELL apparaît, appuyez immédiatement sur <F12>. REMARQUE : Si vous attendez trop longtemps et que le logo du système d'exploitation apparaît, patientez jusqu'à ce que le bureau de Microsoft Windows s'affiche ; éteignez alors votre ordinateur et faites une nouvelle tentative.REMARQUE: La procédure ci-dessousmodifie la séquence de démarrage pour unseul démarrage. Au démarrage suivant,l'ordinateur démarre en fonction despériphériques définis dans le programme deconfiguration du système.6Lorsque la liste des périphériques d'amorçages'affiche, sélectionnez Lecteur CD/DVD/CD-RWet appuyez sur <Entrée>.7Appuyez sur une touche pour sélectionner Bootfrom CD-ROM (Démarrer sur CD-ROM).Suivez les instructions qui s'affichent pourterminer l'installation.__________________Les informations de ce document sont sujettes à modification sanspréavis.©2009Dell Inc.Tous droits réservés. Imprimé en Irlande.La reproduction de ce document de quelque manière que ce soit sansl'autorisation écrite de Dell Inc. est strictement interdite.Marques utilisées dans ce document: Dell et le logo DELL sont desmarques de Dell Inc; Microsoft et Windows sont des marques ou desmarques déposées de Microsoft Corporation aux Etats-Unis et dansd'autres pays.Les autres marques et noms de produits pouvant être utilisés dans cedocument sont reconnus comme appartenant à leurs propriétairesrespectifs. Dell Inc. rejette tout intérêt dans l'utilisation des marqueset des noms commerciaux ne lui appartenant pas.56。
戴尔笔记本电脑说明书.pdf_1701115644.4817057
正面视图左侧视图右侧视图背面视图底部视图1 显示屏7 扬声器(2)2 电源按钮8 定点杆/触摸板按钮3 设备状态指示灯9 定点杆4 键盘10 音量控制按钮5 触摸板11 静音按钮6 显示屏闩锁12 键盘和无线状态指示灯在计算机打开时亮起,在计算机处于电源管理模式时闪烁。
在计算机读取或写入数据时亮起。
注意:为避免数据丢失,切勿在 指示灯闪烁时关闭计算机电源。
如果计算机已连接至电源插座,则 指示灯的状态包括:如果计算机使用电池电量运行,则 指示灯的状态包括:键盘上方的绿色指示灯表示以下信息:启用数字小键盘时亮起。
启用无线设备时亮起。
启用大写字母功能时亮起。
蓝牙无线技术是计算机上的可选功能,因此仅当您随计算机一起订购了蓝牙无线技术,系统才会显示 图标。
有关详情,请参阅蓝牙无线技术附带的说明文件。
1 安全缆线孔 4 PC 卡插槽2 音频连接器(2) 5 智能卡插槽3 红外线传感器注:计算机在变热时会打开风扇。
风扇噪音是正常现象,并不表示风扇或计算机有问题。
连接器用于连接耳机或扬声器。
连接器用于连接麦克风。
右侧视图1 网络连接器 (RJ-45) 6 串行连接器视频连接器交流适配器将交流电源转换为计算机所需的直流电源。
无论计算机处于打开或关闭状态,您均可以连接交流适配器。
警告:此交流适配器可以与世界各地的电源插座配合使用。
但是,电源连接器和配电电盘或电源插座可能会引起火灾或损坏设备。
注意:从计算机上断开交流适配器电缆的连接时,请握住连接器(而不是电缆本身),并稳而轻地将其拔出,以免损坏电缆。
1 内存模块护盖 5 对接设备插槽2 电池槽释放闩锁 6 风扇3 电池电量表7 小型 PCI 卡/调制解调器护盖4 电池8 硬盘驱动器内存模块护盖—用于保护安装内存模块的凹槽。
请参阅“添加和更换部件返回目录页面附录Dell Precision™ M20 移动工作站用户指南Macrovision 产品通告Macrovision 产品通告本产品采用了版权保护技术,它通过申请属于 Macrovision Corporation 和其他产权所有者的美国专利权以及其它知识产权来进行保护。
戴尔 Latitude E6420 和 E6420 ATG 所有者手册说明书
Dell Latitude E6420 和 E6420 ATG 所有者手册管制型号 P15G管制类型 P15G001, P15G002注、警告和严重警告备注: “注”表示可以帮助您更好地使用计算机的重要信息。
小心: “小心”表示如果不遵循说明,就有可能损坏硬件或导致数据丢失。
警告: “严重警告”表示可能会造成财产损失、人身伤害甚至死亡。
本文中的信息如有更改,恕不另行通知。
© 2011 Dell Inc. 版权所有,翻印必究。
未经 Dell Inc. 书面许可,严禁以任何形式复制这些材料。
本文中使用的商标: Dell™、 DELL 徽标、 Dell Precision™、 Precision ON™、ExpressCharge™、 Latitude™、Latitude ON™、 OptiPlex™、 Vostro™和 Wi-Fi Catcher™是 Dell Inc. 的商标。
Intel®、 Pentium®、 Xeon®、Core™、 Atom™、 Centrino®和 Celeron®是 Intel Corporation 在美国和/或其他国家或地区的注册商标。
AMD®是注册商标, AMD Opteron™、 AMD Phenom™、 AMD Sempron™、 AMD Athlon™、 ATI Radeon™和ATI FirePro™是 Advanced Micro Devices, Inc. 的商标。
Microsoft®、 Windows®、 MS-DOS®、Windows Vista®、Windows Vista 开始按钮和 Office Outlook®是 Microsoft Corporation 在美国和/或其他国家或地区的注册商标。
Blu-ray Disc™是 Blu-ray Disc Association (BDA) 拥有的商标,经其许可在磁盘和播放器上使用。
戴尔_灵越_Dell_Inspiron_15R7520_简体中文说明书
戴尔_灵越_Dell_Inspiron_15R7520_简体中文说明书Dell Inspiron 15R 用户手册计算机型号:Inspiron 5520/7520管制型号:P25F 管制类型:P25F001注、小心和警告注:“注”表示可以帮助您更好地使用计算机的重要信息。
小心:“小心”表示如果不遵循说明,就有可能损坏硬件或导致数据丢失。
警告:“警告”表示可能会造成财产损失、人身伤害甚至死亡。
____________________本说明文件中的信息如有更改,恕不另行通知。
2012 Dell Inc. 版权所有,翻印必究。
未经 Dell Inc. 书面许可,严禁以任何形式复制这些材料。
本文件中使用的商标:Dell 、 DELL 徽标和 Inspiron 是 Dell Inc. 的商标; Microsoft、Windows 和Windows 开始按钮徽标是 Microsoft corporation 在美国和 / 或其他国家和地区的商标或注册商标; Bluetooth 是 Bluetooth SIG Inc. 拥有的注册商标,并许可Dell 使用。
本说明文件中可能使用其他商标和商品名称来指拥有相应标记和名称的公司或其产品。
Dell Inc. 对不属于自己的商标和商品名称不拥有任何所有权。
2012 年 4 月Rev. A01目录 1 开始之前 . . . . . . . . . . . . . . . . . . . . . . . . . . . . . . . 7 关闭计算机及其连接的设备 . . . . . . . . . . . . . . . . . . 7 安全说明 . . . . . . . . . . . . . . . . . . . . . . . . . . . . . . . 7 建议工具 . . . . . . . . . . . . . . . . . . . . . . . . . . . . . . . 8 2 拆装计算机内部组件之后 . . . . . . . . . . . . . . . . . . . 9 3SWITCH . . . . . . . . . . . . . . . . . . . . . . . . . . . . . . . 11 卸下SWITCH . . . . . . . . . . . . . . . . . . . . . . . . . . 11 装回SWITCH . . . . . . . . . . . . . . . . . . . . . . . . . . 12 4 电池 . . . . . . . . . . . . . . . . . . . . . . . . . . . . . . . . . . 13 取出电池 . . . . . . . . . . . . . . . . . . . . . . . . . . . . . . 13 装回电池 . . . . . . . . . . . . . . . . . . . . . . . . . . . . . . 13 5 键盘 . . . . . . . . . . . . . . . . . . . . . . . . . . . . . . . . . . 15 卸下键盘 . . . . . . . . . . . . . . . . . . . . . . . . . . . . . . 15 装回键盘 . . . . . . . . . . . . . . . . . . . . . . . . . . . . . . 16 6 基座盖 . . . . . . . . . . . . . . . . . . . . . . . . . . . . . . . .17 卸下基座盖 . . . . . . . . . . . . . . . . . . . . . . . . . . . . 17 装回基座盖 . . . . . . . . . . . . . . . . . . . . . . . . . . . . 18 7 内存模块 . . . . . . . . . . . . . . . . . . . . . . . . . . . . . . 19 卸下内存模块. . . . . . . . . . . . . . . . . . . . . . . . . . . 19 装回内存模块. . . . . . . . . . . . . . . . . . . . . . . . . . . 20 8 硬盘驱动器 . . . . . . . . . . . . . . . . . . . . . . . . . . . . . 21 卸下硬盘驱动器 . . . . . . . . . . . . . . . . . . . . . . . . . 21 装回硬盘驱动器 . . . . . . . . . . . . . . . . . . . . . . . . . 22 9 光盘驱动器 . . . . . . . . . . . . . . . . . . . . . . . . . . . . . 23 卸下光盘驱动器 . . . . . . . . . . . . . . . . . . . . . . . . . 23 装回光盘驱动器 . . . . . . . . . . . . . . . . . . . . . . . . . 24 目录 3 10 掌垫 . . . . . . . . . . . . . . . . . . . . . . . . . . . . . . . . . .25 卸下掌垫 . . . . . . . . . . . . . . . . . . . . . . . . . . . . . . 25 装回掌垫 . . . . . . . . . . . . . . . . . . . . . . . . . . . . . . 28 11 电源适配器端口 . . . . . . . . . . . . . . . . . . . . . . . . . 29 卸下电源适配器端口 . . . . . . . . . . . . . . . . . . . . . . 29 装回电源适配器端口 . . . . . . . . . . . . . . . . . . . . . . 30 12 显示屏部件 . . . . . . . . . . . . . . . . . . . . . . . . . . . . . 31 卸下显示屏部件 . . . . . . . . . . . . . . . . . . . . . . . . . 31 装回显示屏部件 . . . . . . . . . . . . . . . . . . . . . . . . . 33 卸下显示屏挡板 . . . . . . . . . . . . . . . . . . . . . . . . . 33 装回显示屏挡板 . . . . . . . . . . . . . . . . . . . . . . . . . 34 卸下铰接帽 . . . . . . . . . . . . . . . . . . . . . . . . . . . . 35 装回铰接帽 . . . . . . . . . . . . . . . . . . . . . . . . . . . . 36 卸下显示屏面板 . . . . . . . . . . . . . . . . . . . . . . . . . 36 装回显示屏面板 . . . . . . . . . . . . . . . . . . . . . . . . . 39 13 摄像头模块 . . . . . . . . . . . . . . . . . . . . . . . . . . . . . 41 卸下摄像头模块 . . . . . . . . . . . . . . . . . . . . . . . . . 41 装回摄像头模块 . . . . . . . . . . . . . . . . . . . . . . . . . 43 14 系统板 . . . . . . . . . . . . . . . . . . . . . . . . . . . . . . . . 45 卸下系统板 . . . . . . . . . . . . . . . . . . . . . . . . . . . . 45 装回系统板 . . . . . . . . . . . . . . . . . . . . . . . . . . . . 48 在 BIOS 中输入服务标签 . . . . . . . . . . . . . . . . . . . 49 15 散热部件 . . . . . . . . . . . . . . . . . . . . . . . . . . . . . . 51 卸下散热部件. . . . . . . . . . . . . . . . . . . . . . . . . . . 51 装回散热部件. . . . . . . . . . . . . . . . . . . . . . . . . . . 52 16 处理器 . . . . . . . . . . . . . . . . . . . . . . . . . . . . . . . . 53 卸下处理器 . . . . . . . . . . . . . . . . . . . . . . . . . . . . 53 装回处理器 . . . . . . . . . . . . . . . . . . . . . . . . . . . . 55 17 币形电池 . . . . . . . . . . . . . . . . . . . . . . . . . . . . . . 57 取出币形电池. . . . . . . . . . . . . . . . . . . . . . . . . . . 57 装回币形电池. . . . . . . . . . . . . . . . . . . . . . . . . . . 594 目录18 扬声器 . . . . . . . . . . . . . . . . . . . . . . . . . . . . . . . . 61 卸下扬声器 . . . . . . . . . . . . . . . . . . . . . . . . . . . . 61 装回扬声器 . . . . . . . . . . . . . . . . . . . . . . . . . . . . 6219 读卡器 . . . . . . . . . . . . . . . . . . . . . . . . . . . . . . . . 63 卸下读卡器 . . . . . . . . . . . . . . . . . . . . . . . . . . . . 63 装回读卡器 . . . . . . . . . . . . . . . . . . . . . . . . . . . . 6520 子板 . . . . . . . . . . . . . . . . . . . . . . . . . . . . . . . . . .67 卸下子板 . . . . . . . . . . . . . . . . . . . . . . . . . . . . . . 67 装回子板 . . . . . . . . . . . . . . . . . . . . . . . . . . . . . . 6921 小型插卡 . . . . . . . . . . . . . . . . . . . . . . . . . . . . . . 71 卸下小型插卡. . . . . . . . . . . . . . . . . . . . . . . . . . . 71 装回小型插卡. . . . . . . . . . . . . . . . . . . . . . . . . . .7222 刷新BIOS . . . . . . . . . . . . . . . . . . . . . . . . . . . . . 75 目录56 目录1 开始之前关闭计算机及其连接的设备小心:为避免数据丢失,请在关闭计算机之前,保存并关闭所有打开的文件,并退出所有打开的程序。
戴尔 OptiPlex XE 服务手册 — 小型计算机说明书

Dell™ OptiPlex™ XE 服务手册 — 小型计算机注、警告和严重警告如果您购买的是 Dell™ n 系列计算机,则本说明文件中有关 Microsoft ® Windows ® 操作系统的任何参考信息均不适用。
本说明文件中的信息如有更改,恕不另行通知。
© 2010 Dell Inc. 版权所有,翻印必究。
未经 Dell Inc. 书面许可,严禁以任何形式复制本材料。
本文中使用的商标:Dell 、DELL 徽标和 OptiPlex 是 Dell Inc. 的商标;Intel 、Pentium 、Celeron 和 Core 是 Intel Corporation 的商标或注册商标;Bluetooth 是 Bluetooth SIG, Inc. 拥有的注册商标,并许可 Dell 使用;TouchStrip 是 Zvetco Biometrics, LLC 的商标;Blu-ray Disc 是 Blu-ray Disc Association 的商标;Microsoft 、Windows 、Windows Server 、Windows Vista 和 Windows Vista 开始按钮是 Microsoft Corporation 在美国和/或其他国家和地区的商标或注册商标;Adobe 、Adobe 徽标和 Adobe Flash Player 是 Adobe Systems Incorporated 的商标;Wi-Fi 是 Wireless Ethernet Compatibility Alliance, Inc. 的注册商标。
本说明文件中述及的其他商标和商品名称是指拥有相应标记和名称的公司或其制造的产品。
Dell Inc. 对其他公司的商标和商品名称不拥有任何所有权。
2010 年 3 月 Rev.A00拆装计算机卸下和装回部件规格诊断程序系统设置程序系统板布局注:“注”表示可帮助您更好地使用计算机的重要信息。
DELL SC2000存储管理手册 中文版
Dell Storage Center Update Utility 管理员指南注、小心和警告注: “注”表示可以帮助您更好地使用计算机的重要信息。
小心: “小心”表示可能会损坏硬件或导致数据丢失,并说明如何避免此类问题。
警告: “警告”表示可能会造成财产损失、人身伤害甚至死亡。
版权所有© 2015 Dell Inc. 保留所有权利。
本产品受美国、国际版权和知识产权法律保护。
Dell™和 Dell 徽标是 Dell Inc. 在美国和 / 或其他管辖区域的商标。
所有此处提及的其他商标和产品名称可能是其各自所属公司的商标。
2015 - 04Rev. A00目录关于本指南 (4)修订历史记录 (4)读者对象 (4)联系 Dell (4)1 简介 (5)应用程序概览 (5)禁用 SupportAssist (5)安装 Storage Center Update Utility (6)更新 Storage Center 软件 (7)3关于本指南本指南介绍如何使用 Storage Center Update Utility (SCUU) 更新存储系统。
SCUU 用于更新无法连接到 Dell SupportAssist 服务器的 Storage Center。
SCUU 更新运行版本 6.6.2 软件或更高版本的所有 SC2000 系列存储系统上的 Storage Center 操作系统和固件。
修订历史记录说明文件编号:6DWTH读者对象本指南中提供的信息旨在帮助无法使用 Dell SupportAssist 功能的用户来执行 Storage Center 更新。
小心: 没有支持协助,Storage Center 软件或系统状态将无法恢复。
Dell 建议在启动任何更新之前备份系统。
联系 DellDell 提供了几种联机和电话支持与服务选项。
可用的选项因国家/地区和产品而不同,某些服务在您所在的区域可能并不提供。
戴尔 Inspiron 7560 高性能笔记本说明书
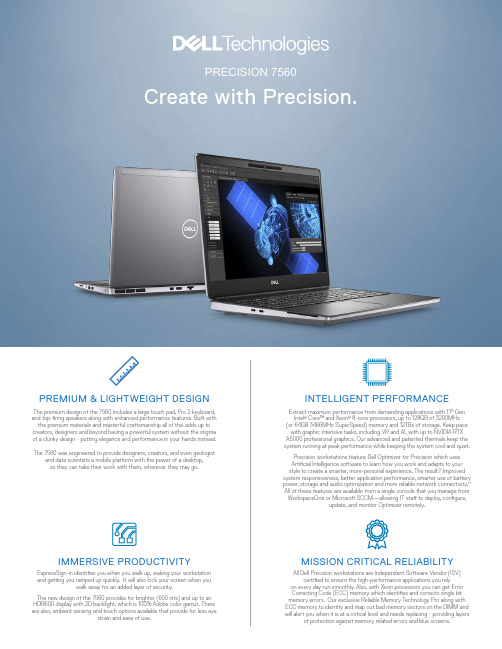
PREMIUM & LIGHTWEIGHT DESIGNThe premium design of the 7560 includes a large touch pad, Pro 2 keyboard, and top-firing speakers along with enhanced performance features. Built with the premium materials and masterful craftsmanship all of this adds up to creators, designers and beyond having a powerful system without the stigma of a clunky design - putting elegance and performance in your hands instead.The 7560 was engineered to provide designers, creators, and even geologistand data scientists a mobile platform with the power of a desktop, so they can take their work with them, wherever they may go.Extract maximum performance from demanding applications with 11th Gen Intel ® Core™ and Xeon ® 8-core processors, up to 128GB of 3200MHz (or 64GB 3466MHz SuperSpeed) memory and 12TBs of storage. Keep pace with graphic intensive tasks, including VR and AI, with up to NVIDIA RTX A5000 professional graphics. Our advanced and patented thermals keep the system running at peak performance while keeping the system cool and quiet.Precision workstations feature Dell Optimizer for Precision which uses Artificial Intelligence software to learn how you work and adapts to your style to create a smarter, more-personal experience. The result? Improved system responsiveness, better application performance, smarter use of battery power, storage and audio optimization and more reliable network connectivity.** All of these features are available from a single console that you manage from WorkspaceOne or Microsoft SCCM—allowing IT staff to deploy, configure,update, and monitor Optimizer remotely.INTELLIGENT PERFORMANCEAll Dell Precision workstations are Independent Software Vendor (ISV)certified to ensure the high-performance applications you relyon every day run smoothly. Also, with Xeon processors you can get Error Correcting Code (ECC) memory which identifies and corrects single bit memory errors. Our exclusive Reliable Memory Technology Pro along with ECC memory to identify and map out bad memory sectors on the DIMM and will alert you when it is at a critical level and needs replacing - providing layersof protection against memory related errors and blue screens.MISSION CRITICAL RELIABILITYExpressSign-in identifies you when you walk up, waking your workstation and getting you ramped up quickly. It will also lock your screen when youwalk away for an added layer of security.The new design of the 7560 provides for brighter (600 nits) and up to an HDR600 display with 2D backlight, which is 100% Adobe color gamut. There are also, ambient sensing and touch options available that provide for less eyestrain and ease of use.IMMERSIVE PRODUCTIVITYON-THE-GOAT-THE-DESKCREATORS AND ENGINEERSJABRA EVOLVE2 85Engineered to keep you focused. The best headset for concentration, collaboration and productivity. All-day comfort with leather-feel earcushions and on-the-ear design.DELL PRO HYBRID BRIEFCASEBACKPACK | PO1520HBProtect your laptop from impact with this earth friendly backpack that is lined with EVA foam cushioning. Easilyconvert from backpack to briefcase mode andtravel with ease.DELL PERFORMANCE DOCK | WD19DCSDell’s most powerful dock * for our most powerful workstations * delivers the ultimate productivity experience. Charge your system faster, support up to three 4K displays and connect to your peripherals via a single cable with dual USB-C connectors for up to 240W of power delivery.DELL ULTRASHARP 32 4K USB-CMONITOR | U3219QExperience outstanding screen performance on this 31.5” 4K USB-C monitor featuring VESA DisplayHDR™ 400, InfinityEdge and multitaskingcapabilities.DELL PREMIUM WIRELESSKEYBOARD AND MOUSE | KM7321WMulti-task seamlessly across 3 devices with this premium full size keyboard and sculpted mouse combo with programmable shortcuts and 36months battery life.DELL ULTRASHARP 32 HDRPREMIERCOLOR MONITOR | UP3221QCreate phenomenal 4K HDR content on the world’s first professional monitor with 2K mini-LED direct backlit dimming zones.**Based on Dell analysis of publicly available data,July 2020.3DCONNEXION SPACEMOUSE WIRELESS3Dconnexion’s patented 6-Degrees-of-Freedom (6DoF) sensor is specifically designed to manipulate digital content or camera positions in the industry-leading CAD applications. Simply push, pull, twist or tilt the 3Dconnexion controller capto intuitively pan, zoom and rotate your 3D drawing.DELL USB-C MOBILE ADAPTER | DA310Compact and portable 7-in-1 USB-C mobile adapter provides superb video, data connectivityand up to 90W power pass-through to your PC.HTC VIVE PRO EYE 3D VR HEADSEThe VIVE Pro Eye VR is designed to meet the needs of discerning commercial clients. Improve simulations, insights, and processing with precision eye-tracking technology that enables you to see what your users see and actaccordingly.Feature Dell Precision 7560T echnical SpecificiationsProcessor1Intel Xeon W-11955M, 24MB Cache, 8 Cores, 2.60GHz to5.00GHz, 45W, vProIntel Xeon W-11855M, 18MB Cache, 6 Cores, 3.20GHz to4.90GHz, 45W, vPro11th Gen Intel Core i9-11950H, 24MB Cache, 8 Cores, 2.60GHz to5.00GHz, 45W, vPro11th Gen Intel Core i7-11850H, 24MB Cache, 8 Cores, 2.50GHz to4.80GHz, 45W, vPro11th Gen Intel Core i7-11800H, 24MB Cache, 8 Cores, 2.30GHz to4.60GHz, 45W11th Gen Intel Core i7-11600H, 18MB Cache, 6 Cores, 2.90GHz to4.60GHz, 45W11th Gen Intel Core i5-11500H, 12MB Cache, 6 Cores, 2.90GHz to4.60GHz 45W, vProOperating System2Windows 10 Home (64-bit)Windows 10 Professional (64-bit) Windows 10 Enterprise (64-bit) Windows 10 Pro Education (64-bit) Windows 10 Professional China (64-bit) Windows 10 Pro for Workstations (64-bit) Ubuntu 20.04 LTS 64-bitRedHat 8.4Chipset Intel Mobile WM590Memory38 GB, 1 x 8 GB, DDR4, 3200MHz ECC, SODIMM16 GB, 2 x 8 GB, DDR4, 3200MHz, ECC, SODIMM32 GB, 2 x 16 GB, DDR4, 3200MHz, ECC, SODIMM32 GB, 4 x 8 GB, DDR4, 3200MHz, ECC, SODIMM64GB, 2 x 32GB, DDR4, 3200MHz, ECC, SODIMM64 GB, 4 x 16 GB, DDR4, 3200MHz, ECC, SODIMM96GB, 2x 32GB + 2x 16GB, DDR4, 3200MHz, ECC, SODIMM128 GB, 4 x 32 GB, DDR4, 3200MHz, ECC, SODIMM8 GB, 1 x 8 GB, DDR4, 3200MHz, Non-ECC, SODIMM16 GB, 2 x 8 GB, DDR4, 3200MHz, Non-ECC, SODIMM32 GB, 2 x 16 GB, DDR4, 3200MHz, Non-ECC, SODIMM32 GB, 4 x 8 GB, DDR4, 3200MHz, Non-ECC, SODIMM64GB, 2 x 32GB, DDR4, 3200MHz, Non-ECC, SODIMM64 GB, 4 x 16 GB, DDR4, 3200MHz, Non-ECC, SODIMM96GB, 2x 32GB + 2x 16GB, DDR4, 3200MHz,Non-ECC, SODIMM128 GB, 4 x 32 GB, DDR4, 3200MHz, Non-ECC, SODIMM16GB, 2 x 8GB, DDR, 3466MHz SuperSpeed,Non-ECC, SODIMM32GB, 2 x 16GB, DDR, 3466MHz SuperSpeed,Non-ECC, SODIMM32GB, 4 x 8GB, DDR, 3466MHz SuperSpeed,Non-ECC, SODIMM64GB, 4 x 16GB, DDR, 3466MHz SuperSpeed,Non-ECC, SODIMMGraphics3Intel® UHD GraphicsNVIDIA T1200, 4GB, GDDR6NVIDIA RTX A2000, 4GB, GDDR6NVIDIA RTX A3000, 6GB, GDDR6NVIDIA RTX A4000, 8GB, GDDR6NVIDIA RTX A5000, 16GB, GDDR6Display Options15-inch, FHD, 1920 x 1080, 60 Hz, Anti-Glare, Non-T ouch,45% NTSC, 220 Nits, WVA15-inch, FHD, 1920 x 1080, 60 Hz, Anti-Glare, Non-T ouch,100% DCIP3, 500 Nits, WVA15-inch, FHD, 1920 x 1080, 60 Hz, T ouch, 100% DCIP3,500 Nits, WVA15.6”, UHD HDR 600, 3840 x 2160, Anti-Glare Nontouch100% Adobe, 600 Nits, 2D backlight Case CoverKeyboardAluminum Titan Gray LCD CoverQwerty, White backlit keyboard, 10 key keypad, Spill-resistant,Multimedia keysStorageOptions4Support for 3 storage devices: Three M.2 PCIe solid state drivesM.2 2230 256 GB, Gen 3 PCIe x4 NVMe, SSDM.2 2280, 256 GB, Gen 3 PCIe x4 NVMe, SSDM.2 2280, 512 GB, Gen 3 PCIe x4 NVMe, SSDM.2 2280, 512 GB, Gen 3 PCIe x4 NVMe, SED SSDM.2 2280, 1 TB, Gen 3 PCIe x4 NVMe, SSDM.2 2280, 512GB, Gen 4 PCIe x4 NVMe, SSDM.2 2280, 1TB, Gen 4 PCIe x4 NVMe, SSDM.2 2280, 2TB, Gen 4 PCIe x4 NVMe, SSDM.2 2280, 4TB, Gen 4 PCIe x4 NVMe, SSDNote: Quickly access and swap M.2 storage with the QuickAccess Door located on the bottom of the chassis.Supports RAID 0, 1, & 5CommunicationOptions5Qualcomm Snapdragon X55 Global 5G Modem (DW5930E)Intel® Wi-Fi 6E AX210, (6GHz), 2x2 with BT5.2Multimedia Dual integrated high quality speakers andoptional dual integrated noise cancellingdigital array microphonesMaxxAudio® Pro by WavesHD Camera (optional)IR camera (optional)I/O Ports andConnectorsProductivitySoftware1 RJ-45 port 10/100/1000 Mbps1 USB 3.2 Gen 1 T ype-A port1 USB 3.2 Gen 1 T ype-A port with PowerShare2 USB 3.2 Gen 2 T ype-C Thunderbolt 4 ports1 HDMI 2.1 port1 Mini DisplayPort 1.41 Universal Audio Jack1 SD card slot1 Smart card reader slot1 Micro SIM card slotMicrosoft Office 30 Day TrialMicrosoft Office Home and Business 2019Microsoft Office Professional 2019Security6Intel® vPro™ T echnology (iAMT 12) (optional, requires IntelWiFi® Link WLAN and a vPro compatible processor), DellClient Command Suite available (/command),Factory Installed Dell Client Command | Update, DellCommand | Power Manager,Wedged-shaped lockHardware Security TPM 2.0 discreteFIPS 140-2 certification for TPMTCG Certificatication for TPM (Trusted Computing Group)ControlVault 3 Advanced Authentication with FIPS 140-2 Level 3CertificationFingerprint Reader with Control Vault 3Contacted Smart Card and Control Vault 3Contactless Smart Card, NFC, and Control Vault 3FIPS 201 Full Scan FPR and Control Vault 3Statement of Non-VolatilitySecuritysoftwareMcAfee® Small Business Security 30 Day Free TrialMcAfee® Small Business Security 12-month subscriptionMcAfee® Small Business Security 36-month subscription Dimensions andWeight7Width X = 14.1” (360mm)Depth Y= 9.5” (242mm)Height Z= front .98” (25.mm) – rear 1.08” (27.36mm)Starting at 5.4lbs, 2.45kgFeature Dell Precision 7560T echnical SpecificiationsBattery6-cell, 68 WHr, Lithium-ion, ExpressChargeBoost™6-cell, 95 WHr, Lithium-ion, ExpressChargeBoost™6-cell, 95 WHr, Lithium-ion LLC, Long Life Cycle Power Adaptor180W adapter, 7.4mm barrelRegulatory and Environmental8 Compliance Regulatory Model: P74FRegulatory T ype: P74F002ENERGY STAR 8.0 QualifiedEPEAT Gold Registered. For specific country participation andrating, please see BFR/PVC free9Trade Agreements Acts (TAA) configurations availableWarranty 3 Years Hardware Service with Onsite/In-Home Service AfterRemote Diagnosis4 Years Hardware Service with Onsite/In-Home Service afterRemote Diagnosis5 Years Hardware Service with Onsite/In-Home Service afterRemote Diagnosis3 Years ProSupport with Next Business Day Onsite Service4 Years ProSupport with Next Business Day Onsite Service5 Years ProSupport with Next Business Day Onsite Service3 Years ProSupport Plus with Next Business Day Onsite Service4 Years ProSupport Plus with Next Business Day Onsite Service5 Years ProSupport Plus with Next Business Day Onsite ServiceAccidentalDamageServices3 Years Accidental Damage Service4 Years Accidental Damage Service5 Years Accidental Damage ServiceMANAGE Dell Client Command Suite + VMware Workspace ONE offers integrated capabilities that deliver a unified endpoint management experience for IT, enabling them to manage firmware, OS, and apps from one console, while also creating seamless experiences for end users.SECURE Dell Trusted Devices provide a foundation to a modern workforce environment with invisible and seamless protection to ensure smarter, faster experiences. End users stay productive and IT stays confident with modern security solutions for the Dell Trusted Device.Experience a new way to work with Dell Technologies Unified Workspace Intelligence built in.Modernization built on.We know that having the right device is just the start to a great workday. Employees need intelligent, intuitive and responsive experiences that allow them to work productively and without interruption. According to research, 1 out of every 4 users would question their job and the company they work for if they had a negative experience with their technology.1 Dell Technologies Unified Workspace is transforming the employee experience and ensuring IT has proactive, predictive and automated solutions to deliver on the promise of a modern workday, while simplifying their ability to deploy, secure, manage and support their environment.ProDeploy in the Unified Workspace allows IT to move away from traditional,high-touch, manual deployment, and instead, ship devices preconfigured withcompany apps and settings from the Dell factory directly to their end users—having end users up and working on day one.DEPLOYProSupport resolves hardware issues up to 11x faster than the competition.ProSupport for PCs offers 24x7 access to in-region ProSupport engineerswho contact IT when critical issues arise,2 so you can focus on what’s next,not what just happened.ProSupport Plus helps IT stay a step ahead andvirtually eliminate unplanned downtime due to hardware issues. You get all thecapabilities of ProSupport, as well as AI-driven alerts to prevent failures andrepairs for accidents.31 ESG Research Report. 2019 Digital Work Survey. December 2019.2 Based on a Principled Technologies test report, “Spend Less Time and Effort Troubleshooting Laptop Hardware Failures” dated April 2018. T estingcommissioned by Dell, conducted in the United States. Actual results will vary. Full report: http://facts.pt/L52XKM3 Based on a Principled Technologies test report, “Dell ProSupport Plus with SupportAssist warns you about hardware issues so you can fix them before theycause downtime” dated April 2019. T esting commissioned by Dell, conducted in the United States. Actual results will vary. Full report: http://facts.pt/0xvze8. Hardware issues detected by SupportAssist include hard drives, solid state drives, batteries and fans.SUPPORTSome options available only in select regions; ISV certification applies to select configurations:1 Intel Turbo Boost mode only available on Xeon, Core i7 and Core i5 processors. Intel Integrated HD graphics only available with select processors.2 A 64-bit operating system is required to support 4GB or more of system memory.3 System memory may be used to support graphics, depending on system memory size and other factors.4 Hard Drive capacity varies with preloaded material and will be less.5 Miracast wireless technology: requires a compatible media adapter (sold separately) and an HDMI-enabled display.6 Computrace is not a Dell offer. See /en/about/legal/agreements.7 Weights vary depending on configuration and manufacturing variability.8 See for specific registration rating/status by country. For a complete listing of declarations & certifications, see Dell’s regulatory & compliance homepage at /regulatory_compliance.Availability and terms of Dell Services vary by region. For more information, visit /servicecontracts/global; Limited Hardware Warranty available by writing Dell USA LP, Attn: WarrantiesOne Dell Way, Round Rock, TX 78682 or See /warranty.; Onsite Service after Remote Diagnosis is determination by online/phone technician of cause of issue; may involve customer access to inside of system and multiple or extended sessions. If issue is covered by Limited Hardware Warranty and not resolved remotely, technician and/or part will be dispatched, usually within 1 business day following completion of Remote Diagnosis. Availability varies. See /servicecontracts/US. Other conditions apply.*With up to 95% coverage of the DCI-P3 color space, based on Dell analysis of publicly available data of competitive monitors, Aug 2019.**Not all Dell Optimizer for Precision features are available on every Dell Precision workstation and some features may be available after the initial launch of the product. Check with your Dell Sales Representative to learn more.Dell, EMC, and other trademarks are trademarks of Dell Inc. or its subsidiaries. Other trademarks may be trademarks of their respective owners. Intel and the Intel logo are trademarks of Intel Corporation in the U.S. and/or other countries. Microsoft and Windows are trademarks of Microsoft Corporation in the U.S. and/or other countries.。
戴尔D上电时序图文稿

戴尔D上电时序文件管理序列号:[K8UY-K9IO69-O6M243-OL889-F88688]D620上电顺序RTC_CELL 主板钮扣电池电压3.3V 给EMC4000,ICH7,MEC5004供电+DC_IN 电源适配器电压输入﹒﹒+SDC_IN +DC_IN通过一个0欧姆得到+SDC_IN+PWR_SRC +SDC_IN或电池电压通过自动切换电路得到,此电压为所有单元提供电力支持ALWON MEC5004芯片(EC)向系统供电芯片发出一个ALWON信号,打开系统供电芯片SHDN开关THERM_STP﹟ EMC4000芯片SYS_SHDN#脚发出此信号,与ALWON一起去打开系统供电芯片SHDN+3VALW 系统供电芯片SHDN打开后,内部变压产生3.3V线性电压,脚27出+5VALW 系统供电芯片SHDN打开后,内部变压产生5V线性电压MAX8734,脚15出ACAV_IN 充电芯片检测到+DC_IN电压,由ACOK脚向EC发出一个可充电信号,同时此信号会到达自动切换电路,让+SDC_IN作为PWR_SRC的提供者,无此信号时由电池供电充电芯片MAX8731,脚13出VCCIRST MEC5004芯片的VCC1脚得到+3VALW的3.3V电压POWER_SW# 电源开关或键盘产生的一个低电压信号,EC芯片接收此开机信号 EC脚126,127收SUS_ON EC芯片收到开机信号后,向系统供电芯片发出SUS_ON信号,以打开ON3,ON5 EC脚94出+5VSUS 系统供电芯片ON5打开后,5V部分开始工作,产生5V的SUS电压MAX8734,脚4收脚21出+15VSUS 5VSUS通过变压器产生15V的SUS电压+3VSUS 系统供电芯片ON3打开后, 3V部分开始工作,产生3.3V的SUS 电压 MAX8734,脚3收脚27出SUSPWROK_5v 系统供电芯片正常工作后,发出一个PGD复位信号MAX8734,脚2出+1.8VSUS 供电芯片工作产生1.8V的SUS电压 ISL88550,脚27收到MAX8734的信号,19脚出SUSPWROK_1P8v内存供电芯片发出一个PGD信号 ISL88550,脚5出SUSPWROK 所有SUS电源的复位信号汇聚到一起产生SUSPWROK信号,由EMC4000和南桥接收EMC脚21SIO_SLP_S5# 南桥向EC发出的一个信号 EC脚97收SIO_SLP_S3# 南桥向EC发出的一个信号 EC脚98收RUN_ON EC芯片向各供电单元发出的一个RUN打开信号EC脚95出+5VRUN RUNON信号导通MOS管,自+5VSUS得到+5VRUN+1.8VRUN RUNON信号导通MOS管,自+1.8VSUS得到+1.8VRUN+0.9V_DDR_VTTP RUNON信号打开内存供电芯片,打开0.9V开关,产生0.9V电压ISL88550,脚7收脚12出+VCC_GFX_CORERUNON信号打开显卡管理芯片 MAX8632,脚27收。
Dell PowerEdgeR900 系统硬件用户手册(精品)20110402

Dell™ PowerEdge™ R900 系统硬件用户手册安装系统组件建议使用的工具内部组件卸下和安装顶盖硬盘驱动器更换硬盘驱动器托盘电源设备系统风扇冷却导流罩SAS 控制器卡RAID 电池配置引导设备PCI Express 添加式插卡光盘驱动器更换光盘驱动器固定托架系统内存处理器系统电池激活NIC TOEI/O 提升卡安装DRACSAS 背板(仅维修过程)电源插入器板(仅维修过程)系统板(仅维修过程)本节介绍了如何拆装系统以及如何安装以下系统组件:∙硬盘驱动器∙更换硬盘驱动器托盘∙电源设备∙系统风扇∙冷却导流罩∙SAS 控制器卡∙RAID 电池∙配置引导设备∙PCI Express 添加式插卡∙光盘驱动器∙系统内存∙处理器∙系统电池∙激活NIC TOE∙I/O 提升卡∙DRAC∙SAS 背板(仅维修过程)∙电源插入器板(仅维修过程)∙系统板(仅维修过程)建议使用的工具要执行本节中的步骤,需要使用以下工具:∙系统键锁的钥匙∙ 2 号梅花槽螺丝刀∙普通螺丝刀∙接地腕带∙导电泡沫垫(建议)内部组件警告:只有经过培训的维修技术人员才能卸下主机盖并拆装任何内部组件。
有关安全预防措施、拆装计算机内部组件和防止静电损害的完整信息,请参阅《产品信息指南》。
图3-1 显示了卸下主机盖后系统的内部组件。
图3-1. 内部组件卸下和安装顶盖警告:如果系统安装在机架中,请确保牢固地固定机架,以便在扩展服务器时机架不会向前倾斜。
如果机架前倾,会有压伤的危险。
可能会造成严重的伤害和/或死亡。
警告:只有经过培训的维修技术人员才能卸下主机盖并拆装任何内部组件。
有关安全预防措施、拆装计算机内部组件和防止静电损害的完整信息,请参阅《产品信息指南》。
注意:要获得适当的冷却和通风,请勿在卸下主机盖后运行服务器超过四分钟。
请及时合上机箱盖或装回系统风扇;否则会减弱系统冷却。
注意:服务器附带的可拆卸顶盖使您可以热拔插系统风扇和维修其它系统组件。
Dell Inspiron 5100 5150 说明书

Dell™ Inspiron™ 5100 和 5150用户手册型号:PP07L 和 PP08Lw w w.d e l l.c o m|s u p p o r t.a p.d e l l.c o m注、注意和警告注:注表示可以帮助您更好地使用计算机的重要信息。
注意:注意表示可能会损坏硬件或导致数据丢失,并告诉您如何避免此类问题。
警告:警告表示可能会导致财产损失、人身伤害甚至死亡。
缩写词和缩略词要获得缩写词和缩略词的完整列表,请参阅如何使用帮助文件。
要查看帮助文件,请参阅第76 页。
____________________本说明文件中的信息如有更改,恕不另行通知。
©2003Dell Computer Corporation。
版权所有,翻印必究。
未经 Dell Computer Corporation 书面许可,严禁以任何形式进行复制。
本文中使用的商标:Dell、DELL徽标、AccessDirect、UltraSharp、Inspiron、Dell Precision、Dimension、OptiPlex、Latitude、Dell TrueMobile和Dellnet是 Dell Computer Corporation 的商标;Intel、Pentium和Celeron是 Intel Corporation 的注册商标;Microsoft和Windows是 Microsoft Corporation 的注册商标;EMC 是 EMC Corporation 的注册商标;Bluetooth是 Bluetooth SIG, Inc. 拥有的商标,并许可 Dell Computer Corporation 使用。
本说明文件中述及的其它商标和产品名称是指拥有相应商标和产品名称的公司或其制造的产品。
Dell Computer Corporation 对其它公司的商标和产品名称不拥有任何专利权。
型号:PP07L 和 PP08L2003 年 7 月P/N P1520Rev. A02目录警告:安全说明 (9)一般原则 (9)电源 (10)电池 (11)乘飞机旅行 (12)EMC 说明 (12)使用计算机 (13)符合人机工程学的操作习惯 (14)拆装计算机内部组件 (14)防止静电损害 (15)电池的处理 (15)1计算机概览正面视图 (18)左侧视图 (21)右侧视图 (22)背面视图 (24)底部视图 (27)2设置计算机调整字体和图标大小 (30)调整字体大小 (30)调整图标大小 (30)目录3Dell™ QuickSet 功能 (31)单击 QuickSet 图标 (31)双击 QuickSet 图标 (31)在 QuickSet 图标上单击鼠标右键 (31)连接至 Internet (32)设置 Internet 连接 (32)调制解调器和 Internet 连接问题 (33)电子邮件问题 (34)将信息转移到新计算机 (34)设置打印机 (36)打印机电缆 (36)连接 USB 打印机 (36)打印机问题 (37)电源保护设备 (38)电涌保护器 (38)线路调节器 (38)不间断电源设备 (38)关闭计算机 (39)3使用电池电池性能 (42)检查电池电量 (43)电表 (43)电池低电量警告 (43)为电池充电 (43)取出电池 (44)安装电池 (44)4目录存放电池 (44)电池和电源问题 (45)如果电池未在充电 (45)如果电池使用时间较短 (45)4使用键盘和触摸板Dell™ AccessDirect™ 按钮 (48)重新设置按钮 (48)数字小键盘 (48)键盘快捷键 (49)系统功能 (49)显示功能 (49)电源管理 (50)扬声器功能 (50)Microsoft® Windows®徽标键功能 (50)触摸板 (51)自定义触摸板 (51)触摸板或鼠标问题 (52)外部键盘问题 (53)意外字符 (53)5使用 CD、DVD 和其它多媒体使用 CD 和 DVD (56)CD 或 DVD 问题 (56)如果无法播放 CD、CD-RW、DVD 或 DVD+RW (56)如果无法弹出 CD、CD-RW、DVD 或 DVD+RW 驱动器托盘.56如果听到不熟悉的刮擦声或摩擦声 (56)如果 CD-RW 或 DVD+RW 驱动器停止写入 (57)目录5声音和扬声器问题 (57)如果集成扬声器出现问题 (57)如果外部扬声器出现问题 (57)将电视连接至计算机 (58)S 视频连接 (58)复合视频连接 (60)启用电视的显示设置 (62)6设置家庭和办公网络连接至网络适配器 (66)网络安装向导 (67)网络问题 (67)连接至无线局域网 (68)确定网络类型 (68)在 Windows XP 中连接至网络 (69)完成网络连接(安全设置) (70)7解决问题查找解决方案 (74)查看帮助 (76)错误信息 (76)视频和显示屏问题 (77)如果显示屏为黑屏 (77)如果显示屏不清楚 (78)如果仅部分显示屏显示图像 (79)扫描仪问题 (79)6目录驱动器问题 (80)如果无法将文件保存到软盘驱动器 (80)如果硬盘驱动器出现问题 (81)PC 卡问题 (81)一般程序问题 (82)程序崩溃 (82)程序停止响应 (82)出现错误信息 (82)解决其它技术问题 (83)如果计算机受潮 (83)如果计算机跌落或损坏 (84)驱动程序 (85)什么是驱动程序? (85)识别驱动程序 (85)重新安装驱动程序 (86)手动重新安装 Windows XP 的驱动程序 (87)解决软件与硬件不兼容的问题 (88)使用系统还原 (89)创建还原点 (89)将计算机还原到先前的运行状态 (89)撤消上次系统还原 (90)重新安装 Microsoft® Windows® XP (91)重新安装之前 (91)重新安装 Windows XP (91)8添加和更换部件添加或更换部件之前 (96)内存 (96)目录7调制解调器和小型 PCI 卡 (99)添加调制解调器 (99)添加小型 PCI 卡 (100)硬盘驱动器 (102)将硬盘驱动器退回 Dell (104)CD 或 DVD 驱动器 (104)键盘 (106)9附录规格 (110)使用系统设置程序 (117)概览 (117)查看系统设置程序屏幕 (118)系统设置程序屏幕 (118)常用选项 (118)优化系统和电池性能 (120)系统性能概览 (120)优化耗电量和电池充电时间 (120)变速风扇 (120)与 Dell 联络 (121)管制通告 (137)索引 (139)8目录警告:安全说明遵循以下安全原则有助于确保您的人身安全并防止您的计算机和工作环境受到潜在的损害。
戴尔 Vostro 3591 笔记本电脑 维修手册说明书

戴尔 Vostro 3591(不带光驱)服务手册注意、小心和警告:“注意”表示帮助您更好地使用该产品的重要信息。
:“小心”表示可能会损坏硬件或导致数据丢失,并告诉您如何避免此类问题。
:“警告”表示可能会导致财产损失、人身伤害甚至死亡。
© 2020 Dell Inc. 或其子公司。
保留所有权利。
Dell、EMC 和其他商标是 Dell Inc. 或其附属机构的商标。
其他商标可能是其各自所有者的商标。
2020 - 02Rev. A001 拆装计算机内部组件 (6)安全说明 (6)拆装计算机内部组件之前 (6)静电放电— ESD 保护 (7)ESD 现场服务套件 (7)运输敏感组件 (8)拆装计算机内部组件之后 (8)2 卸下和安装组件 (9)建议工具 (9)螺钉列表 (9)安全数字卡 (10)卸下安全数字卡 (10)安装安全数字卡 (11)基座护盖 (12)卸下基座护盖 (12)安装基座护盖 (13)电池 (15)锂离子电池预防措施 (15)卸下电池 (15)安装电池 (16)内存模块 (17)卸下内存模块 (17)安装内存模块 (18)WLAN 卡 (19)卸下 WLAN 卡 (19)安装 WLAN 卡 (20)固态硬盘/英特尔傲腾(可选) (21)卸下 M.2 2230 固态硬盘 (21)安装 M.2 2230 固态硬盘 (22)卸下 M.2 2280 固态驱动器或英特尔傲腾内存模块 - 可选 (24)安装 M.2 2280 固态硬盘或英特尔傲腾内存模块 - 可选 (24)币形电池 (25)卸下纽扣电池 (25)安装钮扣电池 (26)硬盘驱动器 (27)卸下硬盘部件 (27)安装硬盘部件 (29)系统风扇 (31)卸下系统风扇 (31)安装系统风扇 (32)散热器 (34)卸下散热器 (34)安装散热器 (34)目录3扬声器 (36)卸下扬声器 (36)安装扬声器 (37)IO 板 (37)卸下 IO 板 (37)安装 IO 板 (39)触摸板 (40)卸下触摸板部件 (40)安装触摸板部件 (42)显示屏部件 (44)卸下显示屏部件 (44)安装显示屏部件 (47)显示屏挡板 (49)卸下显示屏挡板 (49)安装显示屏挡板 (49)电源按钮板 (50)卸下电源按钮板 (50)安装电源按钮板 (51)电源按钮 (52)卸下电源按钮 (52)安装电源按钮 (53)系统板 (54)卸下系统板 (54)安装系统板 (56)电源适配器端口 (58)卸下电源适配器端口 (58)安装电源适配器端口 (59)摄像头 (60)卸下摄像头 (60)安装摄像头 (61)显示屏面板 (62)卸下显示屏面板 (62)安装显示屏面板 (64)显示屏铰接部件 (66)卸下显示屏转轴 (66)安装显示屏转轴 (67)显示屏电缆 (68)卸下显示屏线缆 (68)安装显示屏线缆 (69)显示屏后盖和天线部件 (70)卸下显示屏后盖 (70)安装显示屏后盖 (72)掌垫和键盘部件 (73)卸下掌托和键盘部件 (73)3 系统设置程序 (75)引导菜单 (75)4目录一般选项 (76)系统信息 (76)视频 (77)安全性 (77)Secure Boot(安全引导) (78)英特尔软件防护扩展 (79)Performance(性能) (79)Power management(电源管理) (80)POST Behavior(POST 行为) (81)Virtualization support(虚拟化支持) (81)无线 (82)维护屏幕 (82)System logs(系统日志) (82)SupportAssist 系统分辨率 (82)系统密码和设置密码 (83)分配系统设置密码 (83)删除或更改现有的系统设置密码 (83)4 故障排除 (85)增强型预引导系统评估 (ePSA) 诊断程序 (85)运行 ePSA 诊断程序 (85)系统诊断指示灯 (85)刷新 BIOS(USB 闪存盘) (86)刷新 BIOS (86)备份介质和恢复选项 (87)WiFi 重启 (87)弱电释放 (87)5 获取帮助 (88)联系戴尔 (88)目录5拆装计算机内部组件安全说明前提条件遵循以下安全原则可防止您的计算机受到潜在损坏并确保您的人身安全。
戴尔 Inspiron 14-3451 Inspiron 14-3458 说明书

4 USB 3.0 端口
连接存储设备、打印机等外设。提供高达 5 Gbps 的数据传 输速率。
5 介质卡读取器
从介质卡读取数据和写入数据到介质卡。
规格 正面
右侧
视图
左侧 右侧 机身 显示屏
1
2
3
1 耳机端口
连接耳机、麦克风或耳机和麦克风组合(头戴式耳机)。
2 USB 2.0 端口(2 个)
连接存储设备、打印机等外设。提供最高 480 Mbps 的数据 传输速率。
指示电源和电池充电状态。按下 Fn+H 以在硬盘驱动器活 动指示灯和电池状态指示灯之间切换该指示灯。
稳定的白色 黄色恒亮
不亮
电源适配器已连接,且电池电量超过 5%。
计算机使用电池作为电源运行并且电池电量 低于 5%。
• 电源适配器已连接,电池已充满电。 • 计算机使用电池作为电源运行且电池电量
超过 5%。 • 计算机处于睡眠、休眠或关机状态。
规格 正面
左侧
视图
左侧 右侧 机身 显示屏
1
2
3
4
5
1 电源适配器端口
连接电源适配器,为计算机提供电源以及为电池充电。
2 网络端口(仅限 Inspiron 14-3458)
连接路由器或宽带调制解调器的以太网 (RJ45) 电缆来进行 网络或互联网访问。
3 HDMI 端口
连接电视或其他支持 HDMI 输入的设备。提供视频和音频 输出。
双通道 DDR3L 1600 MHz
2 GB、4 GB、6 GB 和 8 GB
尺寸和重量
系统信息
内存
端口和接口
通信
视频
音频
存储时
介质卡读取器
戴尔 Inspiron 笔记本电脑产品生命周期结束说明说明书
Product End-of-Life InstructionsPRODUCT FAMILYInspiron LaptopsPURPOSEThe intent of this document is to provide guidance to recyclers on the presence of materials and components at the product / family level, as required by the EU WEEE Directive 2012/19/EU. This document should also help direct recyclers to proper methods for removing parts and general product disassembly instructions.PRODUCT DISASSEMBLY INSTRUCTIONSMost parts can be removed easily by hand. In some cases common household tools such as Philips and/or flat-head screw drivers may be necessary. To remove discrete components such as the electrolytic capacitors, needle-nose pliers may be helpful. Instructions for removing parts in each product can be found in the User Documentation originally provided with the product. This documentation can be found online:https:///support/home/en-pr/products/laptop/laptop_inspironPRODUCT MATERIAL INFORMATIONThe following substances, preparations, or components should be disposed of or recovered separately from other WEEE in compliance with Article 4 of EU Council Directive 75/442/EEC.DELL CORPORATE ENVIRONMENTAL INFORMATIONInformation on Dell’s Environmental initiatives, policies, programs and goals can be found at /environment.*Some parts may not be applicable to all products in this family or may be made with material other than plastics。
- 1、下载文档前请自行甄别文档内容的完整性,平台不提供额外的编辑、内容补充、找答案等附加服务。
- 2、"仅部分预览"的文档,不可在线预览部分如存在完整性等问题,可反馈申请退款(可完整预览的文档不适用该条件!)。
- 3、如文档侵犯您的权益,请联系客服反馈,我们会尽快为您处理(人工客服工作时间:9:00-18:30)。
电子商务物流案例
【案例背景】
戴尔公司是商用桌面PC市场的第二大供应商,其销售额每年以40%的增长率递增,是该行业平均增长率的两倍。
年营业收入达100亿美元的业绩,使它位居康柏、IBM、苹果和NEC之后位居第五位。
戴尔公司每天通过网络售出的电脑系统价值逾1200万美元,面对骄人的业绩,总裁迈克尔•戴尔简言地说,这归因于物流电子商务化的巧妙运用。
【案例简介】
(1)戴尔公司电子商务化物流取得的效果
戴尔公司的日销量超过1200万美元,但其销售全是通过国际互联网和企业内部网进行的。
在日常的经营中戴尔公司仅保持两个星期的库存(行业的标准是超过60天),存货一年周转30次以上。
基于这些数字,戴尔公司的毛利率和资本回报率分别是21%和106%。
戴尔公司实施电子商务化物流后取得的物流效果是:①1998年成品库存为零;②零部件仅有2.5亿美元的库存量(其盈利为168亿美元);③年库存周转次数为50次;④库存期平均为7天;
⑤增长速度4倍于市场成长速度;⑥增长速度两倍于竞争对手。
(2)戴尔公司电子商务化物流的八个步骤
在戴尔的直销网站()上,提供了一个跟踪和查询消费者订货状况的接口,供消费者查询已订购的商品从发出订单到送到消费者手中全过程的情况。
戴尔对待任何消费者(个人、公司或单位)都采用定制的方式销售,其物流服务也配合这一销售政策而实施。
第一,订单处理。
第二,预生产。
第三,配件准备。
第四,配置。
第五,测试。
第六,装箱。
第七,配送准备。
第八,发运。
戴尔的物流从确认订货开始。
确认订货是以收到货款为标志的,在收到用户的货款之前,物流过程并没有开始,收到货款之后需要2天时间进行生产准备、生产、测试、包装、发运准备等。
戴尔在我国的福建厦门设厂,其产品的销售物流委托国内的一家货运公司承担。
由于用户分布面广,戴尔向货运公司发出的发货通知可能十分零星和分散,但戴尔承诺在款到后2-5天送货上门;同时,在中国对某些偏远地区的用户每台计算机还加收200-300元人民币的运费。
【问题】
1.戴尔的电子商务化物流有什么优势?2.它提供的增值服务有哪些?
3.戴尔物流存在的问题是什么?如何应对?。
