HP+DL380+G8操作系统安装手册文库
HP_DL_380G8-安装手册

使用Intelligent Provisioning引導安裝win 2008 x641.1 ProLiant Generation 8 and Windows Server 2008 is supported when utilizing Service Pack 2 ONLY1.2 ProLiant Genenration 8 and Windows Server 2008 R2 is supported by HP when2. 配置好陣列後,將作業系統光碟放入光碟機內,使用Intelligent Provisioning①(以下簡稱IP)引導安裝win 2008 R2 64bit sp1開機進入自檢畫面如圖1圖1在自檢畫面底部出現F9 Setup F10 Intelligent Provisioning F11 Boot Menu後,按F10 進入IP引導。
如圖2圖2進入IP引導介面選擇“配置和安裝”。
如圖3圖3步驟1 硬體設置,設置好硬體後下一步。
如圖4圖4跳過更新切記這邊不要去動陣列步驟2作業系統選擇,選擇要安裝的作業系統及安裝方式。
如圖5選擇要安裝的作業系統類別圖5步驟3 作業系統資訊。
如圖6圖6 選要裝的OS項目這邊是需求決定是否安裝在此更改磁碟分割大小步驟4 審核。
確認系統資訊後下一步。
如圖7圖7安裝作業系統。
如圖8圖8到27%時彈出作業系統使用者授權合約。
如圖9圖9接受後繼續安裝。
如圖10圖10安裝完成,第一次登錄作業系統。
由於之前未設置密碼,OS會要求設置密碼。
如圖11圖11進入系統後,將自動安裝驅動。
如圖12圖12所有驅動載入成,至此作業系統已安裝成功。
如圖13圖13①Intelligent Provisioning集成在主機板上的晶片,代替Smart Start 光碟。
②Windows & Vmware作業系統能完全引導,除此之外的作業系統可以使用”手動安裝”提供關鍵驅動③AMS (Agent Management Services ) 自動將伺服器的系統資訊保存在ILO晶片中,即時更新。
Proliant Gen8服务器硬件、系统安装

HP Proliant Gen8硬件及软件安装第一部分硬件 (1)1.1 HP Proliant BL460c Gen8 (1)1.2 HP ProLiant SL230s Gen8 (4)1.3 HP ProLiant SL250s Gen8 (4)1.4 HP ProLiant SL270s Gen8 (5)第二部分软件 (5)2.1 DL360 Gen8 开机自检和Intelligent Provisioning界面设置 (5)2.2 G8服务器—P420i ORCA界面 (17)2.3 DL360 Gen8引导安装Windows 2008 (24)2.4 G8服务器—intelligent provisioning智能引导安装Win2008 (52)2.5 G8服务器—SPP安装 (59)2.6 DL360 G8安装ESXI 5.0 (68)第一部分硬件1.1 HP Proliant BL460c Gen8概述安装BL 460c Gen8 需要完成下面步骤●安装和配置刀片机箱笼子(C7000、C3000)●安装刀片服务器选件●在机箱中相应的位置安装互联模块●连接互联模块到用户的网络●在机箱笼子中安装刀片●刀片服务器的完全配置C7000 的机箱的将BL460C Gen8 连入用户的网络。
C3000 机箱在安装时要注意,机箱后面的互连模块和对应刀片中的mezzanime卡的对应关系,这样更好的将BL460C Gen8 连入用户的网络。
安装BL460C Gen81.移除C3000或C7000 前面的刀片位置空白盒子2.移除BL460c Gen8 后面的连接盖3.从C3000和C7000 前面放入BL460c Gen8 ,放入的时候尽量小心,以避免把后面的连接器撞坏。
1.2 HP ProLiant SL230s Gen8HP ProLiantSL230s Gen8.doc1.3 HP ProLiant SL250s Gen8HP ProLiantSL250s Gen8.doc1.4 HP ProLiant SL270s Gen8HP ProLiantSL270s Gen8.doc第二部分软件2.1 DL360 Gen8 开机自检和Intelligent Provisioning界面设置 开机自检按下F10后颜色发生变化F12 Network BootF10进入 Intellingent ProvisoningIntellingent Provisoning 初始化可以选择中文,但是字体不统一向右箭头进入IRS设置没有CMS主机,稍后注册回到主界面点击执行维护后进入维护界面点击配置和安装进入硬件设置和系统安装提示重置所有磁盘可以引导安装Windows系统,但是RedHat只能手动安装2.2 G8服务器—P420i ORCA界面软件环境:□操作系统: Win2008□驱动程序版本:□ HP自带软件:□第三方软件:□其它:连接方式:□直接连接□ LPT □USB □COM□网络连接□ Client-Server □Direct connect to Hub or Switch □Wireless1、DL380P G8服务器启动过程中P420i处按F8进入ORCA配置界面。
HP DL380G8安装windows server2003系统

HP DL380G8安装2003简介
一、更改Bios设置“按F9 进入Bios中”
1.更改光驱
选择第1项“System Options”
选择第7项“SATA Controller Options”
无需理会弹出的红色警告框,选择“Enable SATA Legacy Support”
二、配置RAID
方法一:
开机进入以下界面时按F5进入ACU配置阵列。
选择阵列卡
建array
添加硬盘
创建逻辑盘
选择阵列级别,保存。
方法二:
开机进入以下界面时按F8进入简易配置界面。
创建阵列逻辑盘
选择硬盘和阵列级别
确认阵列
保存配置
检查配置好的阵列
选择要参看的阵列
阵列状态
三、安装2003
将光盘放入光驱,开机,开始安装2003操作系统。
四、安装设备驱动
强装显卡。
设备管理器选中有叹号的显卡,右键选择属性。
在驱动程序页面选择更新驱动程序.
选择第一项,下一步。
\ 选择第二项,下一步。
选择第二项,下一步。
选择从磁盘安装,下一步。
点击浏览,选择要安装的驱动文件,确定。
下一步。
安装光盘镜像:/QtLAYYrhCdLXA 如有问题可email我:xx7298291@。
HP DL380 G8操作系统安装手册文库
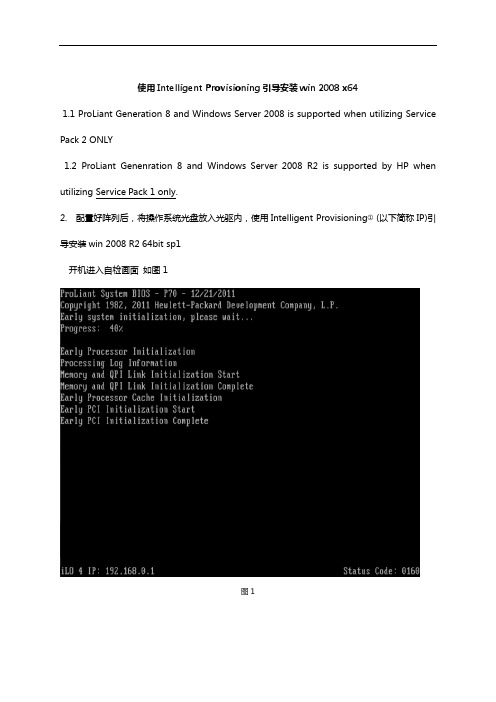
使用Intelligent Provisioning引导安装win 2008 x641.1 ProLiant Generation 8 and Windows Server 2008 is supported when utilizing Service Pack 2 ONLY1.2 ProLiant Genenration 8 and Windows Server 2008 R2 is supported by HP when utilizing Service Pack 1 only.2. 配置好阵列后,将操作系统光盘放入光驱内,使用Intelligent Provisioning①(以下简称IP)引导安装win 2008 R2 64bit sp1开机进入自检画面如图1图1在自检画面底部出现F9 Setup F10 Intelligent Provisioning F11 Boot Menu后,按F10 进入IP引导。
如图2图2进入IP引导界面选择“配置和安装”。
如图3图3步骤1 硬件设置,设置好硬件后下一步。
如图4A在此,若选择“自定义”则进入ACU界面图4步骤2操作系统选择,选择要安装的操作系统及安装方式。
如图5②图5步骤3 操作系统信息。
如图6图6 选择相应的OS选择是否安装AMS③SNMP④WBEM⑤可以在此更改系统分区大步骤4 审核。
确认系统信息后下一步。
如图7图7安装操作系统。
如图8图8到27%时弹出操作系统最终用户许可协议。
如图9图9接受后继续安装。
如图10图10安装完成,第一次登录操作系统。
由于之前未设置密码,OS会要求设置密码。
如图11图11进入系统后,将自动安装驱动。
如图12图12所有驱动加载成,至此操作系统已安装成功。
如图13图13①Intelligent Provisioning集成在主板上的芯片,代替Smart Start 光盘。
②Windows & Vmware操作系统能完全引导,除此之外的操作系统可以使用”手动安装”提供关键驱动③AMS (Agent Management Services ) 自动将服务器的系统信息保存在ILO芯片中,实时更新。
HP+DL380+G8操作系统安装手册

使用Intelligent Provisioning引导安装win 2008 x641.1 ProLiant Generation 8 and Windows Server 2008 is supported when utilizing Service Pack 2 ONLY1.2 ProLiant Genenration 8 and Windows Server 2008 R2 is supported by HP when2. 配置好阵列后,将操作系统光盘放入光驱内,使用Intelligent Provisioning①(以下简称IP)引导安装win 2008 R2 64bit sp1开机进入自检画面如图1图1在自检画面底部出现F9 Setup F10 Intelligent Provisioning F11 Boot Menu后,按F10 进入IP引导。
如图2图2进入IP引导界面选择“配置和安装”。
如图3图3步骤1 硬件设置,设置好硬件后下一步。
如图4A在此,若选择“自定义”则进入ACU界面图4步骤2操作系统选择,选择要安装的操作系统及安装方式。
如图5②图5步骤3 操作系统信息。
如图6图6 选择相应的OS选择是否安装AMS③SNMP④WBEM⑤可以在此更改系统分区大步骤4 审核。
确认系统信息后下一步。
如图7图7安装操作系统。
如图8图8到27%时弹出操作系统最终用户许可协议。
如图9图9接受后继续安装。
如图10图10安装完成,第一次登录操作系统。
由于之前未设置密码,OS会要求设置密码。
如图11图11进入系统后,将自动安装驱动。
如图12图12所有驱动加载成,至此操作系统已安装成功。
如图13图13①Intelligent Provisioning集成在主板上的芯片,代替Smart Start 光盘。
②Windows & Vmware操作系统能完全引导,除此之外的操作系统可以使用”手动安装”提供关键驱动③AMS (Agent Management Services ) 自动将服务器的系统信息保存在ILO芯片中,实时更新。
HP ProLiant DL380服务器-安装windows 2003操作系统
HP ProLiant DL380服务器-安装wind ows 2003操作系统前言:北京ADC企业托管邮箱服务器出现故障,恢复业务时需要重新安装windos2003的操作系统,之前也在虚拟机上安装过同样的系统,并未出现问题,因此对安装这个系统还是比较自信的,结果在hp proliant dl380 g5的服务器上进行安装时并不顺利,出现网卡驱动无法识别,通过下载多个网卡驱动进行安装,仍然不能识别,折腾时间比较长,后来在公司曹总的指导下重新进行了安装,最终解决了问题,因此将安装过程写出来,希望对大家以后的工作有所帮助。
安装过程:1,安装前需要准备好操作系统的驱动引导盘和操作系统盘,如果是新买的服务器,一般会自带相关的驱动引导盘,如果没有,则需要制作一个驱动引导盘,可在/tigertea/item/2b4d391d4ac1777c7b5f25f2此博客下寻找连接进行下载,然后刻成CD盘即可;系统安装盘需要提前备好;2,使用SmartStart CD引导安装之前的准备工作:首先,建议用户先根据自己的需要配置好RAID,可以使用开机自检检测到阵列卡时按F8进入ORCA的方法配置。
其次,需要确认BIOS中启动顺序的设置是光驱优先引导,可以开始时按F10键进入BIOS,然后到Standard Boot Order下确认。
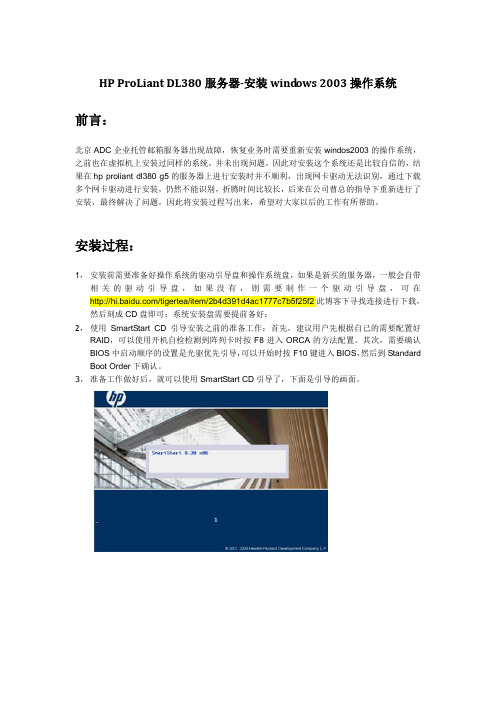
3,准备工作做好后,就可以使用SmartStart CD引导了,下面是引导的画面。
4,接下来,我们会看到用户界面的第一步,选择安装语言和键盘语言,目前还不支持中文,没有特殊需要的用户,这步默认为英语即可。
5,然后是终端用户授权许可,点击Agree才能继续下一步。
6,接下来,到了操作选择页面,此页面可供选择的操作有:Install、Maintenance、System Erase 和Reboot。
Maintenance中包含ACU,可以借此进行阵列配置,也包含Insight Diagnostic,可以用来进行服务器硬件诊断,这里就不做详细介绍,System Erase和Reboot,顾名思义,一个系统擦除、一个重启。
DL380p Gen8 用Intelligent Provisioning引导安装2008作业系
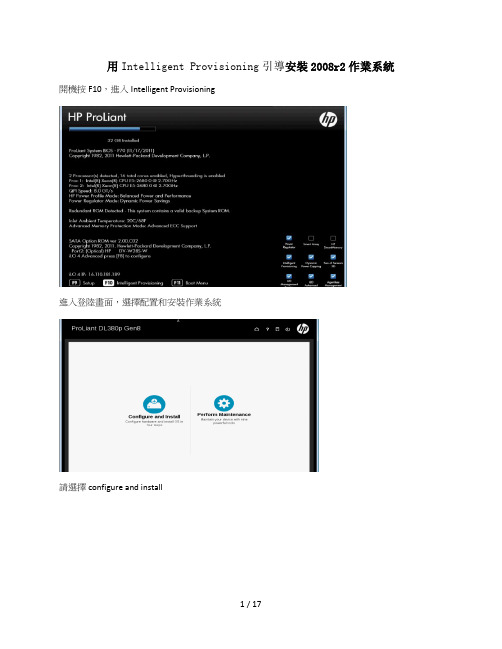
開機按F10,進入Intelligent Provisioning
進入登陸畫面,選擇配置和安裝作業系統
請選擇configure and instare
是否變更陣列設定
下一步,
選擇需要安裝的系統,來源,是否手動安裝。
系統安裝完畢。
我們直接掛的系統,沒有使用引導任何引導光碟,但開機桌面會有HP Systerm Mangement,說明按F10的安裝系統會自動安裝HP Systerm Mangement
在開始功能表下有相應的HP工具
F10安裝系統,會自動所有設備都正常驅動,如陣列卡,網卡,ILO等。
控制台上會有Agenless Management,此Agent可以説明收集硬體健康狀況
將系統光碟進行掛載上。點擊繼續,即開始安裝系統。
選擇需要安裝的作業系統
檢測設定。
複製檔案
確認同意
繼續複製
開始安裝
開始複製windows檔案
安裝更新
重新開機,完成安裝
準備第一次使用
第一次登陸之前必須要更改密碼
輸入密碼,確認密碼
密碼已經更新
安裝驅動程式軟體,選擇信任broadcom的軟體,安裝
繼續安裝
個人化設定,windows會自動1分鐘之內重新開機
這裡可以開啟或者關閉Agentless Management
DL380 solaris系统安装
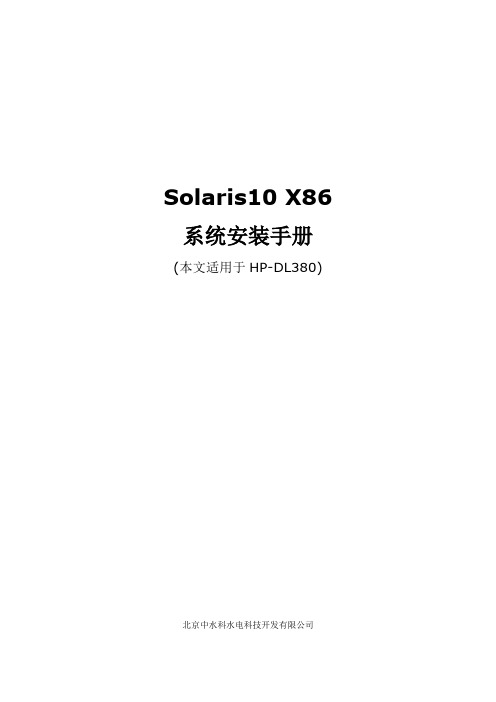
Solaris10 X86 系统安装手册(本文适用于HP-DL380)北京中水科水电科技开发有限公司本文包含以下内容:一、主机磁盘阵列配置二、系统安装前安装磁盘补丁三、系统初始安装过程四、系统IP配置五、建立ems用户六、其他环境变量七、安装sunstudio软件八、显卡补丁安装一、磁盘阵列配置(若要重新做系统则不需要此步骤)1. 开机至自检信息中可以判断出,机器加的阵列卡为SmartArray 642 阵列卡一块。
2. 按上面提示信息,进入阵列卡的配置程序需要按F8 进入阵列卡的配置程序。
可以看到机器阵列卡的配置程序有4个初始选项:∙Create Logical Drive 创建阵列∙View Logical Driver 查看阵列∙Delete Logical Driver 删除阵列∙Select as Boot Controller 将阵列卡设置为机器的第一个引导设备注意:最后一个选项,将阵列卡设置为机器的第一个引导设备。
这样设置后,重新启动机器,就会没有该选项。
3. 选择"Select as Boot Controller",出现红色的警告信息。
选择此选项,服务器的第一个引导设备是阵列卡(SmartArray 642),按"F8"进行确认。
4. 按完"F8",确认之后,提示,确认改变,必须重新引导服务器,改变才可以生效。
5. 按"ESC"之后,返回到主界面,现在看到三个选项了。
6. 进入"Create Logical Drive"的界面,可以看到4部分的信息7. 按回车进行确认,提示已经创建一个RAID 0的阵列,再重新选择上一个RAID1(1+0)按F8 进行保存即可。
8. 按"F8"进行保存。
9. 提示配置已经保存,按回车。
10. 进入"View Logical Drive" 界面,可以看到刚才配置的阵列,状态是"OK",RAID 的级别是RAID 1(0+1)。
linux_6.2_系统安装及配置forNC2000 V1.1(20130225修正)
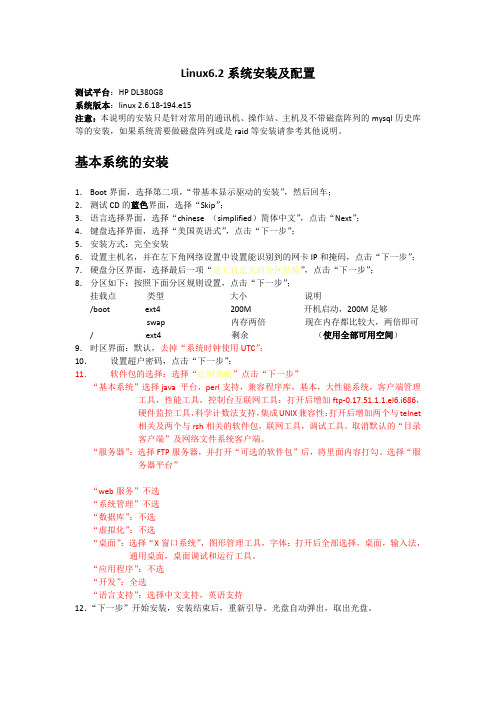
Linux6.2系统安装及配置测试平台:HP DL380G8系统版本:linux 2.6.18-194.e15注意:本说明的安装只是针对常用的通讯机、操作站、主机及不带磁盘阵列的mysql历史库等的安装,如果系统需要做磁盘阵列或是raid等安装请参考其他说明。
基本系统的安装1.Boot界面,选择第二项,“带基本显示驱动的安装”,然后回车;2.测试CD的蓝色界面,选择“Skip”;3.语言选择界面,选择“chinese (simplified)简体中文”,点击“Next”;4.键盘选择界面,选择“美国英语式”,点击“下一步”;5.安装方式:完全安装6.设置主机名,并在左下角网络设置中设置能识别到的网卡IP和掩码,点击“下一步”;7.硬盘分区界面,选择最后一项“建立自定义的分区结构”,点击“下一步”;8.分区如下:按照下面分区规则设置,点击“下一步”;挂载点类型大小说明/boot ext4 200M 开机启动,200M足够swap 内存两倍现在内存都比较大,两倍即可/ ext4 剩余(使用全部可用空间)9.时区界面:默认,去掉“系统时钟使用UTC”;10.设置超户密码,点击“下一步”;11.软件包的选择:选择“定制系统”点击“下一步”“基本系统”选择java 平台,perl支持,兼容程序库,基本,大性能系统,客户端管理工具,性能工具,控制台互联网工具:打开后增加ftp-0.17.51.1.1.el6.i686,硬件监控工具,科学计数法支持,集成UNIX兼容性:打开后增加两个与telnet相关及两个与rsh相关的软件包,联网工具,调试工具。
取消默认的“目录客户端”及网络文件系统客户端。
“服务器”:选择FTP服务器,并打开“可选的软件包”后,将里面内容打勾。
选择“服务器平台”“web服务”不选“系统管理”不选“数据库”:不选“虚拟化”:不选“桌面”:选择“X窗口系统”,图形管理工具,字体:打开后全部选择,桌面,输入法,通用桌面,桌面调试和运行工具。
HP工作站操作系统安装说明
HP工作站操作系统安装说明操作系统的安装一直是使用计算机的第一步。
对于HP工作站来说,安装操作系统是为了提供更好的性能和功能。
下面是一份关于如何安装操作系统的详细说明,帮助用户顺利完成安装过程。
1.准备工作在开始安装操作系统之前,您需要做一些准备工作。
-首先,检查您的HP工作站的硬件配置是否满足操作系统的最低要求。
-确保您有操作系统的安装介质(光盘、USB驱动器等)和操作系统的产品密钥。
-备份您的重要数据,因为安装操作系统可能会导致数据丢失。
2.BIOS设置在启动HP工作站时,您需要进入BIOS设置来配置引导选项。
按下电源键启动计算机,然后按下相应的按键(通常是F2、F10、DEL键)进入BIOS设置。
在BIOS设置中,找到引导选项,将光驱或USB设备设置为首选启动设备。
然后将更改保存并退出BIOS设置。
3.启动安装媒体将操作系统的安装介质插入HP工作站的光驱或USB端口。
重新启动计算机,并按下相应的按键(通常是F12、F9、ESC键)进入启动设备菜单。
从菜单中选择光驱或USB设备以启动安装程序。
4.安装过程一旦系统开始从安装介质启动,您将进入操作系统的安装菜单。
按照屏幕上的提示进行操作,选择语言和其他首选项。
然后,您将进入分区和格式化硬盘的阶段。
根据您的需求和磁盘大小,选择适当的分区方案,并格式化硬盘。
5.输入产品密钥与授权一些操作系统需要输入产品密钥和进行授权。
在安装过程中,您将被要求输入产品密钥。
确保输入正确的产品密钥,并遵循操作系统的授权流程。
6.安装驱动程序和更新7.配置网络和安全设置根据您的需求和网络环境,配置网络设置。
连接到无线网络或有线网络,并确保网络连接正常。
安装防病毒软件和其他必要的安全工具来保护您的工作站。
8.安装必要的软件根据您的需求和用途,安装必要的软件。
例如,如果您是一位开发人员,您需要安装开发工具和编程环境。
9.完成安装一旦您完成了以上步骤,您的HP工作站的操作系统安装就算完成了。
HP ProLiant DL380p Gen8 Server 数据中心标准说明书
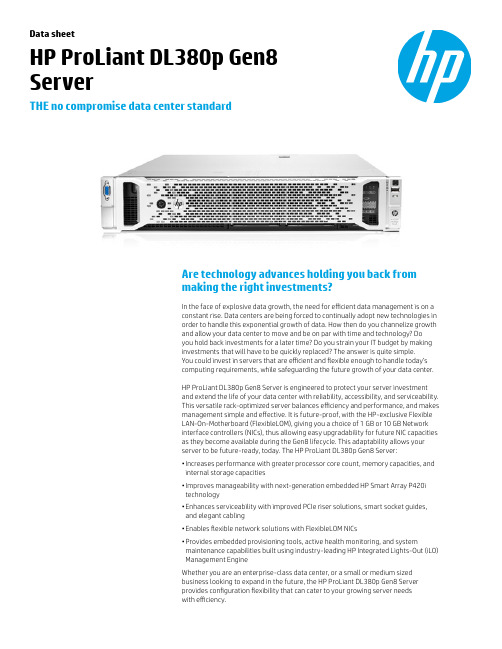
Data sheetHP ProLiant DL380p Gen8ServerTHE no compromise data center standardAre technology advances holding you back frommaking the right investments?In the face of explosive data growth, the need for efficient data management is on aconstant rise. Data centers are being forced to continually adopt new technologies inorder to handle this exponential growth of data. How then do you channelize growthand allow your data center to move and be on par with time and technology? Doyou hold back investments for a later time? Do you strain your IT budget by makinginvestments that will have to be quickly replaced? The answer is quite simple.You could invest in servers that are efficient and flexible enough to handle today’scomputing requirements, while safeguarding the future growth of your data center.HP ProLiant DL380p Gen8 Server is engineered to protect your server investmentand extend the life of your data center with reliability, accessibility, and serviceability.This versatile rack-optimized server balances efficiency and performance, and makesmanagement simple and effective. It is future-proof, with the HP-exclusive FlexibleLAN-On-Motherboard (FlexibleLOM), giving you a choice of 1 GB or 10 GB Networkinterface controllers (NICs), thus allowing easy upgradability for future NIC capacitiesas they become available during the Gen8 lifecycle. This adaptability allows yourserver to be future-ready, today. The HP ProLiant DL380p Gen8 Server:• Increases performance with greater processor core count, memory capacities, andinternal storage capacities• Improves manageability with next-generation embedded HP Smart Array P420itechnology• Enhances serviceability with improved PCIe riser solutions, smart socket guides,and elegant cabling• Enables flexible network solutions with FlexibleLOM NICs• Provides embedded provisioning tools, active health monitoring, and systemmaintenance capabilities built using industry-leading HP Integrated Lights-Out (iLO)Management EngineWhether you are an enterprise-class data center, or a small or medium sizedbusiness looking to expand in the future, the HP ProLiant DL380p Gen8 Serverprovides configuration flexibility that can cater to your growing server needswith efficiency.21 “Intel® NDA Benchmark,” Intel, July 2011.2 A dditional internal storage capacities over G7(total LFF Storage Capacity = 36 TB SAS, 36 TBSATA, 4.8 TB SSD) (Supporting SSD/SAS/SATA inSFF/LFF)3 M ore I/O bandwidth to the processor resulting inlower latency as compared with G7 version(Gen8 = 40 lanes/processor, G7 = 24 lanes/processor)4 H P Gen8 Smart Arrays bring significantenhancement, starting with a 2x increase inperformance (final results awaited)5 “HP internal lab testing,” HP, 20116 A s compared to G7 version that has up to 384G12 DIMM x 32G 4R, whilst Gen8 has 786G24 DIMM x 32G 2R.Key features and benefitsIntel® Xeon® E5-2600 series with dual QuickPathInterconnect (QPI)Up to 80 percent more performance 14 Channels per DIMM and 24 memory DIMM slots2x the memory capacity over G7 with 768 GB max memory Up to 25 small form factor (SFF) or 12 large formfactor (LFF) hard drivesUp to two times the internal storage capacity 2Flexible Network options (FlexibleLOM)Flexibility of choice with 4x1G or 2x10G Ethernet; or 2x10G FlexFabric Up to 6 PCIe Gen3 slots200 percent more I/O capacities with PCIe-Gen33HP SmartStorage SolutionUp to 200 percent more performance with HP SmartDrives, HP Smart Array 4iLO Management Engine4th generation iLO manageability Active Health Always-on diagnostics, 5x faster root cause diagnostics 5Helps increase performance, durability, and storage capacity• Offers higher performance, better power efficiency, and more adaptability with the built-inIntel Xeon E5-2600 processor family, including Intel QuickPath, Integrated Memory Controller,Turbo Boost, Intelligent Power Technologies, and Trusted Execution Technology.• Creates greater memory bandwidth, DIMM count, and new memory health programs with lessdowntime with HP SmartMemory; new memory slots allow up to 768 GB of maximum memoryand 128 GB at maximum speeds of 1,600 MHz.• Provides complete data protection with embedded HP Smart Array P420i RAID controller,transportable Flash Back Write Cache (FBWC), and RAID 6 options.• Renders quicker access to data and increases storage bandwidth forcutting-edge storage performance with up to 25 serial-attached SCSI (SAS) drives and newembedded Smart Array RAID controllers.• Communicates with HP Intelligent power distribution unit (PDU) with high-efficiencyHP Platinum Plus common-slot power supplies (460 W, 750 W, or 1200 W) to enableredundant supplies to be plugged into redundant power PDUs.• Qualifies ENERGY STAR® ProLiant DL380p Gen8 Server configurations.• Enables ambidextrous cable management arm option with cabling flexibility and management for quick access to the server.• Installs quickly with new universal tool-free sliding rails. Quick release levers allow fast server access.Enables improved application, storage, and I/O performance • Supports RDIMM, UDIMM, and LRDIMM with up to 768 GB capacity and 128 GB capacity at 1,600 MHz. HP SmartMemory delivers up to 2x more memory capacity over previous generations.6• Reduces data loss with long-term data retention with FBWC standard. New embedded HP Smart Array P420i RAID controller and support for HP SmartStorage, including PCIe 3.0, HP SmartDrives, and HP FBWC with capacity up to 2 GB. Choice of up to 25 2.5-inch SFF or 12 3.5-inch LFF SAS, Serial ATA (SATA), and Solid State (SS) drives with optical media.• Converges the ability to customize server networking today and meet future needs withFlexibleLOM. Currently, provides choice of bandwidth between 1G and 10G, with the ability toupgrade to 20G and 40G when the technology becomes available. Fabric (Ethernet, FCoE, orInfiniBand) supports Wake-On-LAN (WOL) and offers a shared iLO port for ease of use.HP ProLiant DL380p Gen8 Server unique optionsPart description SKUHP 380/385 Gen8 8-SFF Cage/Backplane Kit (Additional 8 SFF Hard Drive Cage, allowing for up to 16 SFF Drive Bays)662883-B21 HP DL380/385GN 3 slot PCIe Riser Kit (Additional PCIe Gen3 Riser Card [quantity 1x16, 1x8, 1x4] for up to 6 total PCIe slots)653206-B21 HP DL380GN 2 slot x16 Riser Kit (Additional PCIe Gen3 Riser Card [quantity 2x16] for up to 5 total PCIe slots)653208-B21 x16 PCIe slot Aux Power Cable for graphics support up to 150 W669777-B21 HP DL380p Gen8 Double Wide Graphics Riser Cage Kit (to support nVidia Q6000 graphics card)662885-B21 HP DL380p NEBS Conversion Cage Kit (to meet NEBS/ETSI certified environments)707865-B21Technical specificationsProcessor Intel Xeon E5-2600 Series (up to 8 cores, up to 3.3 GHz)Chipset Intel C6XXMemory(24) DDR3, RDIMM, up to 1,600 MHz, ECC, Online SpareMax memory768 GB (24 DIMMs x 32G 2R)Internal storage SATA, SAS, SSD(8 or 25) 2.5" hot plug bays/(8 or 12) 3.5" hot plug baysSmart Array P420i controllerOptional: +8 SFF for 8 SFF ModelMax internal storage25 TB SAS (SFF); 36 TB SATA (LFF)Networking(1) FlexibleLOMChoice of: 4x1G, 2x10G Ethernet, or 2x10G FlexFabricI/O slots(6) PCIe 3.0:Riser 1(1) x16 FL/FH; (1) x8 HL/FH; (1) x4 (PCIe 2.0) HL/FH;Riser 2(1) x16 FL/FH; (1) x8 HL/FH; (1) x8 HL/FH; or (1) x16 FL/FH; (1) x16 HL/FHPorts Front: (2) USB; Rear: (4) USB, video (1600 x 1200), network; Internal: (1) USB, (1) SD CardPower supplies460, 750, 1200 W (92 or 94%)Integrated management HP iLO Management EngineAdditional features Support for two nVidia Q4000 or one nVidia Q6000 GPUForm factor2P/2U RackQuickSpecs URL /products/quickspecs/14212_div/14212_div.html3Sign up for updates /go/getupdated © Copyright 2012 Hewlett-Packard Development Company, L.P . The information contained herein is subject to change without notice. The only warranties for HPproducts and services are set forth in the express warranty statements accompanying such products and services. Nothing herein should be construed as constituting an additional warranty. HP shall not be liable for technical or editorial errors or omissions contained herein.ENERGY STAR is a registered mark owned by the U.S. government. Intel and Intel Xeon are trademarks of Intel Corporation in the U.S. and other countries. 4AA3-9615ENW, December 2012, Rev. 1Removes tedious, time-consuming tasks with intuitive, configurable management system • Takes strengths from products like HP SmartStart, HP Smart Update Manager, and HP ProLiant Support Packs on Intelligent Provisioning and enhances them with the latest ease-of-use features as well as places them, where they can be used instantly on the system board.• Starts working the moment a power cord and an Ethernet cable are connected to the server. Agentless hardware monitoring and alerting capabilities are built into the server with HP Agentless Management (runs on iLO 4 chipset). • Provides 24x7 continuous health monitoring with HP Active Health System that logs 100 percent configuration changes, and helps quicken analysis of problems with HP Service and Support.7Redefines server experience • Automated Energy Optimization improves the server’s ability to analyze and respond to “3D sea of sensors” data within the server, as well as self-identify location and inventory through HP Insight Control for maximum workload optimization across the entire data center.• Precise control of server fans to direct cooling and reduce unnecessary fan power with the first 3D array of temperature sensors that is part of the HP-unique Thermal Discovery. • Dynamic Workload Acceleration delivers smarter data protection for ever-increasing drive capacities, real-time workload-aware analysis to optimize and adapt storage performance and6x faster solid state performance versus previous generation.• User-inspired design features—HP SmartDrive carriers, smart socket guide, “Snap and Go”rails, flat cabling design, and easy tool-less access—anticipate your needs and help eliminatecommon issues that result in downtime of all customer serviceable components.HP ServicesHP Technology Services offers a set of consultancy, deployment, and support solutions designed to meet the lifecycle needs of your IT environments. HP Care Pack Services for industry-standard servers include support for qualified options at no additional cost.HP Foundation Care services delivers scalable support packages for HP industry-standardservers and software. You can choose the type and level of service that is most suitable for yourbusiness needs. New to this portfolio is HP Collaborative Support. This service offers a singlepoint of contact for server problem diagnosis, hardware problem resolution, basic softwareproblem diagnosis, fault isolation, and resolution if available to HP. In case the issue is withHP or supported third-party software product and cannot be resolved by applying known fixes,HP will contact the third-party vendor and create a problem incident on your behalf.If you are running business-critical environments, HP offers HP Proactive Care or HP CriticalAdvantage . These services help you deliver high levels of application availability throughproactive service management.All service options include HP Insight Remote Support for secure remote monitoring, diagnosis,and problem resolution. Also included is the HP Support Center that provides access toinformation, tools, and experts to support HP business products.For more information, visit /go/services .Entry models1 Intel Xeon Processor (80 W)4G DDR3 RDIMM MemoryFlexibleLOM: 4x1G Ethernet3 PCIe slots8 SFF HD Bays1 x 460 W Power Supply (92% Efficient)Fixed Rail KitBase models1 or2 Intel Xeon Processor (95 W)16G DDR3 RDIMM MemoryFlexibleLOM: 4x1G Ethernet3 PCIe slots8 SFF HD Bays1 x 460 W Power Supply (94% Efficient)Rail Kit/CMA standardPerformance models2 Intel Xeon Processor (95 W)32G DDR3 RDIMM MemoryFlexibleLOM: 4x1G Ethernet or 2x10G Ethernet6 PCIe slots8 SFF HD Bays2 x 750 W Power Supply (94% Efficient)Rail Kit/CMA standardHP Insight Control For more informationDiscover server efficiency with technology thatis designed to integrate with the demands of thefuture. Be future-ready today and tomorrow, visit/servers/DL380p-gen87 “HP internal lab testing,” HP, 2011.Rate this document。
HPDL380服务器机架安装示意图
HPDL380服务器机架安装示意图
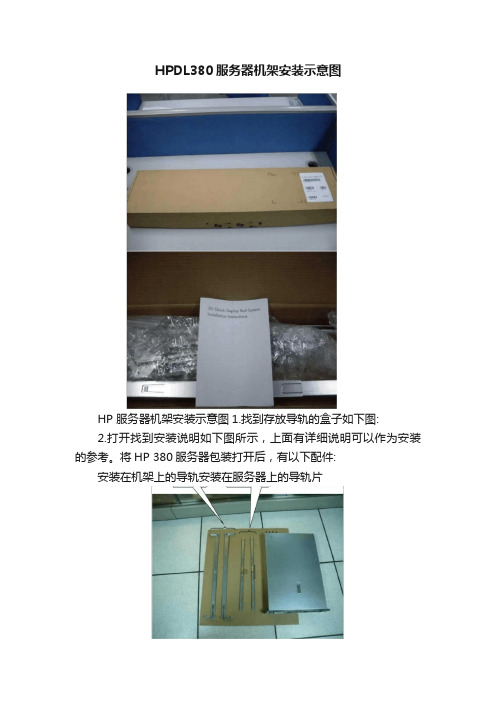
HP 服务器机架安装示意图1.找到存放导轨的盒子如下图:
2.打开找到安装说明如下图所示,上面有详细说明可以作为安装的参考。
将HP 380服务器包装打开后,有以下配件:
安装在机架上的导轨安装在服务器上的导轨片
将导轨片安装在服务器两侧,如下图所示:
上机架的导轨上分别标有“ REAL RlGHT ”和“ REAL LEFT ”,表示这端安装在机架的后面,而标有“ FRoNT RIGHT ”和“ FRoNT LEFT ”的两端则安装在机架的前面:
例如,将标有“ REAL RIGHT ”的一端扣在机架后面的孔上,如下图:
将标有“ FRoNT RIGHT ”的一端扣在机架前面的孔上,如下图:
最终,右侧的导轨安装在机架上如下图所示:。
HPDL388G8服务器安装OS
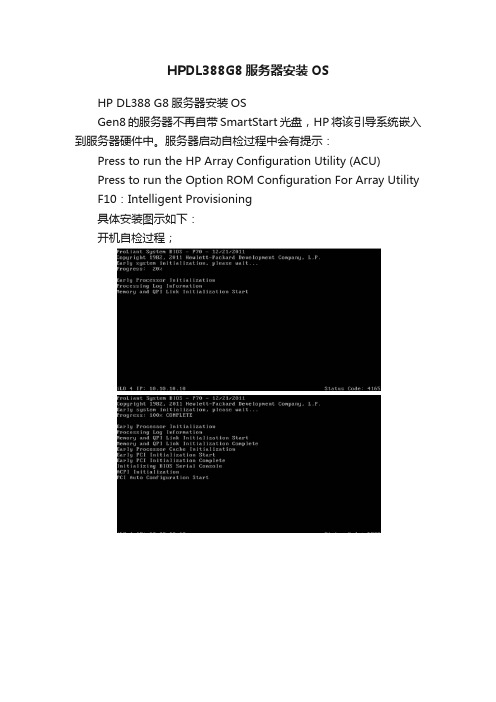
F10:Intelligent Provisioning
具体安装图示如下:
开机自检过程;
说明:
F5:进入ACU;
F8:进入阵列卡配置界面;
F10:进入“智能导航界面”(SmartStart CD)
配置界面,选择“Configure and Install”
注意:滑动指针已调整系统盘(C盘)大小
安装OS过程Байду номын сангаас
复制完成后会自动重启,系统自动开始配置
后面的安装与以往相同。
HPDL388G8服务器安装OS
HP DL388 G8服务器安装OS
Gen8的服务器不再自带SmartStart光盘,HP将该引导系统嵌入到服务器硬件中。服务器启动自检过程中会有提示:
Press to run the HP Array Configuration Utility (ACU)
HP_DL_380G8-安装手册

使用Intelligent Provisioning引導安裝win 2008 x641.1 ProLiant Generation 8 and Windows Server 2008 is supported when utilizing Service Pack 2 ONLY1.2 ProLiant Genenration 8 and Windows Server 2008 R2 is supported by HP when2. 配置好陣列後,將作業系統光碟放入光碟機內,使用Intelligent Provisioning①(以下簡稱IP)引導安裝win 2008 R2 64bit sp1開機進入自檢畫面如圖1圖1在自檢畫面底部出現F9 Setup F10 Intelligent Provisioning F11 Boot Menu後,按F10 進入IP引導。
如圖2圖2進入IP引導介面選擇“配置和安裝”。
如圖3圖3步驟1 硬體設置,設置好硬體後下一步。
如圖4圖4跳過更新切記這邊不要去動陣列步驟2作業系統選擇,選擇要安裝的作業系統及安裝方式。
如圖5選擇要安裝的作業系統類別圖5步驟3 作業系統資訊。
如圖6圖6 選要裝的OS項目這邊是需求決定是否安裝在此更改磁碟分割大小步驟4 審核。
確認系統資訊後下一步。
如圖7圖7安裝作業系統。
如圖8圖8到27%時彈出作業系統使用者授權合約。
如圖9圖9接受後繼續安裝。
如圖10圖10安裝完成,第一次登錄作業系統。
由於之前未設置密碼,OS會要求設置密碼。
如圖11圖11進入系統後,將自動安裝驅動。
如圖12圖12所有驅動載入成,至此作業系統已安裝成功。
如圖13圖13①Intelligent Provisioning集成在主機板上的晶片,代替Smart Start 光碟。
②Windows & Vmware作業系統能完全引導,除此之外的作業系統可以使用”手動安裝”提供關鍵驅動③AMS (Agent Management Services ) 自動將伺服器的系統資訊保存在ILO晶片中,即時更新。
dl380pgen8安装系统(2)
dl380pgen8安装系统(2)
DL380P GEN8 安装win2008r2 1,开机启动(速度特别快⼤概⼀分钟左右)
2,开机启动完成,准备进⼊开机⾃检画⾯
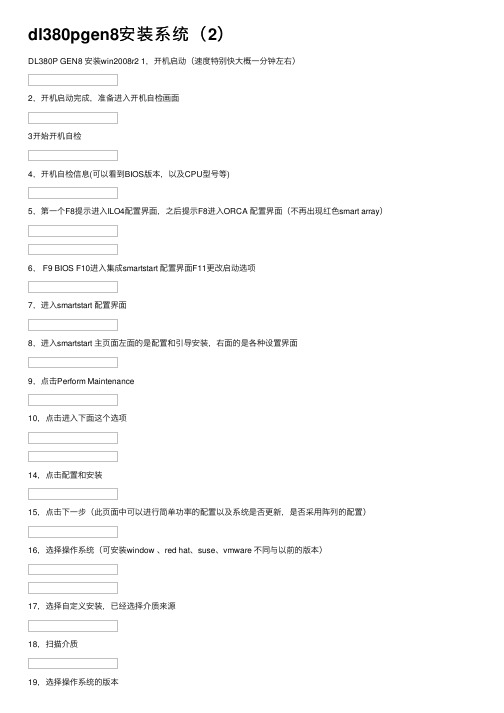
3开始开机⾃检
4,开机⾃检信息(可以看到BIOS版本,以及CPU型号等)
5,第⼀个F8提⽰进⼊ILO4配置界⾯,之后提⽰F8进⼊ORCA 配置界⾯(不再出现红⾊smart array)
6, F9 BIOS F10进⼊集成smartstart 配置界⾯F11更改启动选项
7,进⼊smartstart 配置界⾯
8,进⼊smartstart 主页⾯左⾯的是配置和引导安装,右⾯的是各种设置界⾯
9,点击Perform Maintenance
10,点击进⼊下⾯这个选项
14,点击配置和安装
15,点击下⼀步(此页⾯中可以进⾏简单功率的配置以及系统是否更新,是否采⽤阵列的配置)
16,选择操作系统(可安装window 、red hat、suse、vmware 不同与以前的版本)
17,选择⾃定义安装,已经选择介质来源
18,扫描介质
19,选择操作系统的版本
20,选择时区
21,管理员密码以及另外三项,不填写。
22,点击下⼀步,会弹出提⽰,点击继续
23,正在安装。
dl388g8安装
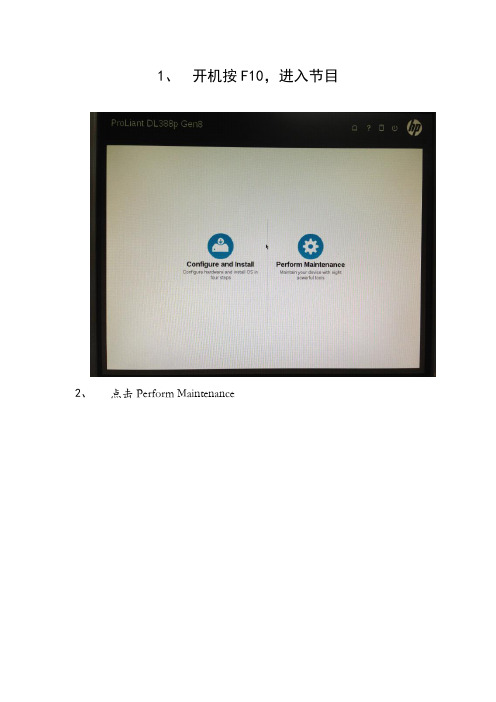
1、开机按F10,进入节目
2、点击Perform Maintenance
3、点击Arry Configuration Utility
4、选中一个raid5的阵列,点击delete,有其他阵列的一样操作,
先完全删除
5、全部未赋值的状态,选中Unassigned Drives然后点击Create
Array
6、按bay数值顺序选中你要做的哪几块硬盘,然后点击OK(bay1、
2我已经做完了,忘记拍照,所以从3、4、5开始)
7、然后选中你要做的Unused space ,然后点击Creaet Logical Drive 7、3块盘我们做raid5,选中raid5后,点击save
8、这样就制作成功,Logical Drive 2变成了RAID5,可用容量也变成了(少一块盘容量)其他硬盘一样操作,全部制作完成后点击EXIT ACU
9、点击Configure and Install
10、不做改变,点击右下角
11、选中Customized Install,其他不做改变,点击右下角
12、默认安装
13、讲Operating System改为我们要安装的版本,然后
处为C盘的容量,由于这次要求前2块盘做raid1,给操作系统使用,故不调整大小
14、选中参数预览确定,点击右下角
15、这样就安装了
16、在I HAVE…前打钩
17、不做改变,点击Next,默认安装,剩下步骤不用管,等着安装成功,需要你更改密码进入桌面。
G8服务器——intelligent provisioning智能引导安装Win2008
G8服务器—intelligent provisioning智能引导安装Win2008 实验时间:2012 年 1 月 12 日实验人员:孟祥伟实验目的:掌握G8服务器Smart Start光盘引导安装Win2008方法。
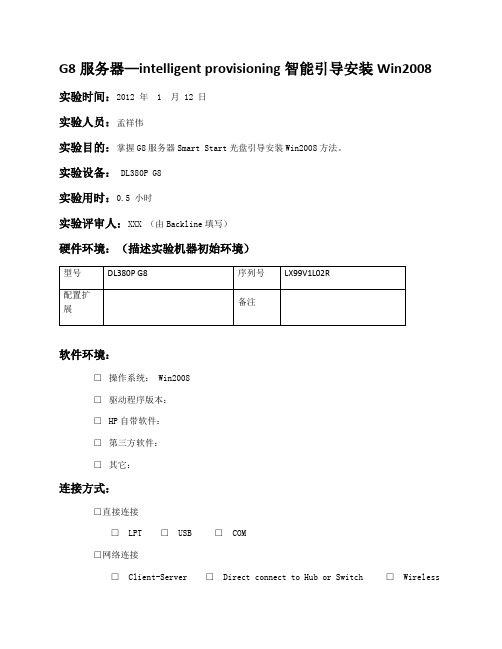
实验设备: DL380P G8实验用时:0.5 小时实验评审人:XXX (由Backline填写)硬件环境:(描述实验机器初始环境)软件环境:□操作系统: Win2008□驱动程序版本:□HP自带软件:□第三方软件:□其它:连接方式:□直接连接□LPT □USB □COM□网络连接□Client-Server □Direct connect to Hub or Switch □Wireless1、G8服务器出现检测CPU和内存等的界面特别快,给人一种启动很快的感觉。
右下角的Smart Array不是蓝色代表没有加入SAAP的License。
HP SmartMemory不是蓝色可能代表没有采用新一代Smart内存(待进一步确认)。
2、检测到哪个设备,都会有一个进度条,如果卡在哪里了,基本说明这个设备出现问题。
3、所有G8服务器都把Smart Start光盘集成到了ILO4芯片中的空间内,因此无需光盘,只要按F10(按下后F10会变成白色选中状态),然后过一会儿就会进入intelligent provisioning智能设置。
4、开始引导Smart Start。
5、然后进入引导界面,可以选择配置安装或者管理服务器,选择第一项configure and install。
6、可以快捷的设置电源模式、是否在安装系统前先升级firmware、是否配置阵列等基本设置。
7、我们本次选择跳过firmware升级。
8、下一步后,选择安装什么类型的系统,我们选择windows系列、也可以选择linux和vmware 等,但是安装类型会变成manual install。
install methmod中recommended install是安装完后打上驱动;customized install是自定义装那些驱动;manual install是手动安装驱动。
HP服务器安装操作系统
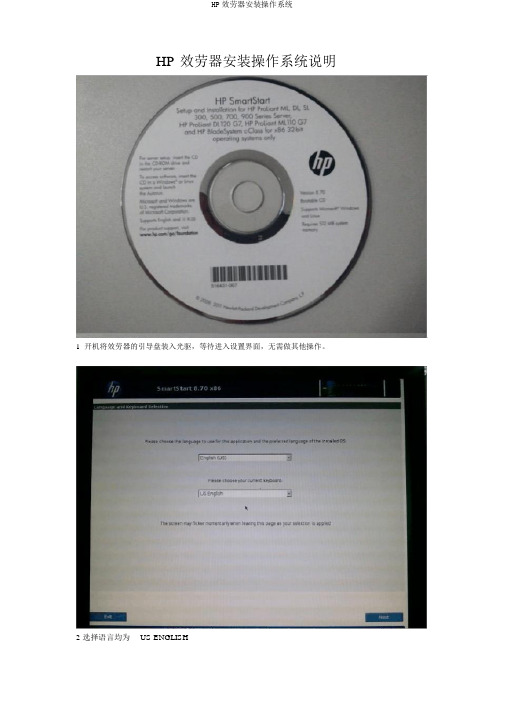
HP 效劳器安装操作系统说明1开机将效劳器的引导盘装入光驱,等待进入设置界面,无需做其他操作。
2 选择语言均为US ENGLISH3 单击 Agree4 点击 Install 图标5 确认磁盘容量,由于做了Raid1 后,显示Disk 容量为实质容量的一半。
点击Next。
6 选纲要安装的操作系统,张开Operating System下的Retail Media,再张开Microsoft Windows 2021 x32 Edition 。
选中 Microsoft Windows Server 2021 Enterprise Edition。
点击Next。
7 保持默认的DVD-ROM Media和Standard folder/directory format (default),单击Next。
8 设置为 NTFS , Select Boot Partition Size 选择中 Custom 将 Size 设置为 102400,也就是将操作系统所在的 C 盘容量设置为 100GB。
点击 Next 。
9 Computer Name 依照需要设置效劳器名称,注意不要使用下划线“_〞,也尽量防范使用特殊符号。
设置 Administrator Password 管理员密码,并重复。
依照实质情况设置 Organization Name 和 Owner Name。
Product Key 全为 1。
Time Zone 选择〔 GMT+08:00 〕 Beijing 。
单击 Next 。
10 Install SNMP选择Yes。
依照实质情况选择安装HP 管理工具,一般选择NO。
单击 Next 。
11 这里保持默认设置,单击Next 。
12 PSP Installation Mode 选择 Express。
单击 Next。
13 确认上述信息,若是没有问题单击Next 。
15安装界面16 大体安装到27%的时候,会出现换光盘的提示,Waiting for valid media to be inserted 。
- 1、下载文档前请自行甄别文档内容的完整性,平台不提供额外的编辑、内容补充、找答案等附加服务。
- 2、"仅部分预览"的文档,不可在线预览部分如存在完整性等问题,可反馈申请退款(可完整预览的文档不适用该条件!)。
- 3、如文档侵犯您的权益,请联系客服反馈,我们会尽快为您处理(人工客服工作时间:9:00-18:30)。
使用Intelligent Provisioning引导安装win 2008 x64
1.1 ProLiant Generation 8 and Windows Server 2008 is supported when utilizing Service Pack 2 ONLY
1.2 ProLiant Genenration 8 and Windows Server 2008 R2 is supported by HP when utilizing Service Pack 1 only.
2. 配置好阵列后,将操作系统光盘放入光驱内,使用Intelligent Provisioning①(以下简称IP)引导安装win 2008 R2 64bit sp1
开机进入自检画面如图1
图1
在自检画面底部出现F9 Setup F10 Intelligent Provisioning F11 Boot Menu后,按F10 进入IP引导。
如图2
图2
进入IP引导界面选择“配置和安装”。
如图3
图3
步骤1 硬件设置,设置好硬件后下一步。
如图4
A在此,若选择“自定义”则
进入ACU界面
图4
步骤2操作系统选择,选择要安装的操作系统及安装方式。
如图5
②
图5
步骤3 操作系统信息。
如图6
图6 选择相应的OS
选择是否安装AMS③
SNMP④WBEM⑤
可以在此更改系统分区大
步骤4 审核。
确认系统信息后下一步。
如图7
图7
安装操作系统。
如图8
图8
到27%时弹出操作系统最终用户许可协议。
如图9
图9
接受后继续安装。
如图10
图10
安装完成,第一次登录操作系统。
由于之前未设置密码,OS会要求设置密码。
如图11
图11
进入系统后,将自动安装驱动。
如图12
图12
所有驱动加载成,至此操作系统已安装成功。
如图13
图13
①Intelligent Provisioning集成在主板上的芯片,代替Smart Start 光盘。
②Windows & Vmware操作系统能完全引导,除此之外的操作系统可以使用”手动安装”提供关键驱动
③AMS (Agent Management Services ) 自动将服务器的系统信息保存在ILO芯片中,实时更新。
推荐安装
④SNMP (Simple Network Management Protocol)简单网络管理协议,安装后可以抓取服务器硬件信息。
⑤HP WBEM 为Homepage 提供硬件信息数据,推荐安装。
