CentOS永久开启某个端口
CentOS 5防火墙开启关闭及开放指定端口

CentOS 5.5 防火墙开启、关闭以及开放指定端口之前有讲过公司新买的服务器使用的是CentOS5.5,部署好Tomcat之后却发现输入114.80.*.*:8080(即ip:8080)却无法显示Tomcat默认的首页。
因为以前部署在Win Server的VPS,Linux开发时也只用到localhost,所以就有点头大。
好吧,G一下网上有说是防火墙的问题,敲入/etc/init.d/iptables stop关闭之后再次查看114.80.*.*:8080(即ip:8080)发现果然成功。
但是貌似安全隐患大大增加……使用/etc/init.d/iptables status查看防火墙信息,可以看到打开的端口。
那么我们把需要使用的端口打开应该是一个比较可行的办法了,命令如下:/sbin/iptables -I INPUT -p tcp --dport 8080 -j ACCEPT #8080为指定端口/etc/rc.d/init.d/iptables save #将更改进行保存/etc/init.d/iptables restart #重启防火墙以便改动生效,当然如果不觉得麻烦也可重启系统(命令:reboot)当然了,还有另外直接在/etc/sysconfig/iptables中增加一行:-A RH-Firewall-1-INPUT -p tcp -m state --state NEW -m tcp --dport 8080 -j ACCEPT关于CentOS防火墙总结(其他Linux发行版可参考)查看防火墙信息/etc/init.d/iptables status开启指定端口/sbin/iptables -I INPUT -p tcp --dport 8080 -j ACCEPT/etc/rc.d/init.d/iptables save或者编辑/etc/sysconfig/iptables添加行:-A RH-Firewall-1-INPUT -p tcp -m state --state NEW -m tcp --dport 80 -j ACCEPT #也可使用-I INPUT -p tcp --dport 8080 -j ACCEPT使更改的防火墙生效/etc/init.d/iptables restart #不推荐使用重启系统方式关闭防火墙服务/etc/init.d/iptables stop永久关闭防火墙chkconfig –level 35 iptables off #此方法源自网络,未实验,安全考虑拒绝使用此方法原文链接----------------------------在我们使用CentOS系统的时候,CentOS防火墙有时是需要改变设置的。
CentOS7docker开启tcp端口并进行客户端远程连接
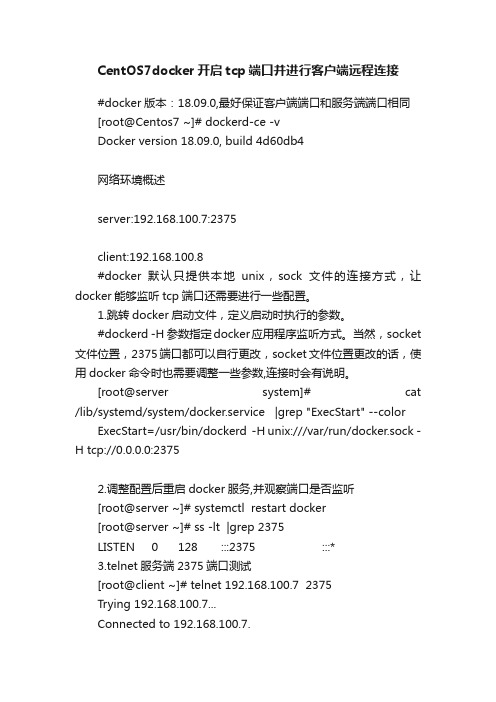
CentOS7docker开启tcp端口并进行客户端远程连接#docker版本:18.09.0,最好保证客户端端口和服务端端口相同[root@Centos7 ~]# dockerd-ce -vDocker version 18.09.0, build 4d60db4网络环境概述server:192.168.100.7:2375client:192.168.100.8#docker默认只提供本地unix,sock文件的连接方式,让docker能够监听tcp端口还需要进行一些配置。
1.跳转docker启动文件,定义启动时执行的参数。
#dockerd -H 参数指定docker应用程序监听方式。
当然,socket 文件位置,2375端口都可以自行更改,socket文件位置更改的话,使用docker命令时也需要调整一些参数,连接时会有说明。
[root@server system]# cat /lib/systemd/system/docker.service |grep "ExecStart" --color ExecStart=/usr/bin/dockerd -H unix:///var/run/docker.sock -H tcp://0.0.0.0:23752.调整配置后重启docker服务,并观察端口是否监听[root@server ~]# systemctl restart docker[root@server ~]# ss -lt |grep 2375LISTEN 0 128 :::2375 :::*3.telnet服务端2375端口测试[root@client ~]# telnet 192.168.100.7 2375Trying 192.168.100.7...Connected to 192.168.100.7.Escape character is '^]'.^]telnet> quit#如果telnet不通,可能是server端防火墙存在限制,添加下方规则后在测试连接。
CentOS 查看IP,端口 修改IP,打开端口生效

CentOS 查看IP,端口修改IP,打开端口生效你知道,在windows中习惯了ipconfig,在CentOS中查看IP是感觉麻烦了好多;今天收集的资料,就集中解决IP 端口的问题:1.查看IPifconfig eth0 →查看IP 不过输出的信息多一些ifconfig|grep 'Bcast' →这个输出的信息要清晰多了2.修改IP并生效编辑/etc/sysconfig/network-scripts/ifcfg-eth0,按如下设置DEVICE=eth0BOOTPROTO=staticHWADDR=ONBOOT=yesTYPE=EthernetIPADDR=<你的IP>NETMASK=255.255.255.0其中MAC地址可用ifconfig eth0命令查看设置好后,重启network服务即可:service networkrestart3.CentOS系统安装好,默认只打开了22端口,如果希望开放其他端口的话,需要打开所需端口。
vi /etc/sysconfig/iptables然后在CentOS系统中添加Java代码-A RH-Firewall-1-INPUT -m state --state NEW -m tcp -p tcp --dport 3001 -j ACCEPT-A RH-Firewall-1-INPUT -m state --state NEW -m tcp -p tcp --dport 3001 -j ACCEPT最后CentOS系统要重新启动服务Java代码/sbin/service iptables restart/sbin/service iptables restart查看端口是否开放Java代码/sbin/iptables -L –n原文地址:CentOS 修改IP地址, DNS, 网关作者:寒灵一、CentOS修改IP地址修改对应网卡的IP地址的配置文件# vi /etc/sysconfig/network-scripts/ifcfg-eth0 电信# vi /etc/sysconfig/network-scripts/ifcfg-eth0:1 网通修改以下内容DEVICE=eth0 #描述网卡对应的设备别名,例如ifcfg-eth0的文件中它为eth0BOOTPROTO=static #设置网卡获得ip地址的方式,可能的选项为static,dhcp或bootp,分别对应静态指定的ip地址,通过dhcp协议获得的ip地址,通过bootp协议获得的ip地址BROADCAST=192.168.0.255 #对应的子网广播地址HWADDR=00:07:E9:05:E8:B4 #对应的网卡物理地址IPADDR=12.168.1.2 #如果设置网卡获得ip地址的方式为静态指定,此字段就指定了网卡对应的ip地址IPV6INIT=noIPV6_AUTOCONF=noNETMASK=255.255.255.0 #网卡对应的网络掩码NETWORK=192.168.1.0 #网卡对应的网络地址ONBOOT=yes #系统启动时是否设置此网络接口,设置为yes时,系统启动时激活此设备二、CentOS修改网关修改对应网卡的网关的配置文件[root@centos]# vi /etc/sysconfig/network修改以下内容NETWORKING=yes(表示系统是否使用网络,一般设置为yes。
CentOs7使用iptables开启关闭端口(转载)

CentOs7使⽤iptables开启关闭端⼝(转载)介绍iptables命令是Linux上常⽤的防⽕墙软件,是netfilter项⽬的⼀部分iptables⽂件设置路径:命令:vim /etc/sysconfig/iptables-config注意事项如果说你以前使⽤的是contos7 那么默认使⽤的防⽕墙那么就是Firewall 这样的话,就要先把Firewall 给关闭在使⽤iptables关闭Firewall 命令命令:systemctl stop firewalld #关闭防⽕墙命令:systemctl disable firewalld #禁⽌开机启动检查是否安装了iptables命令:service iptables status安装iptables命令:yum install -y iptables升级iptables命令:yum update iptables安装iptables-services命令:yum install iptables-services开启防⽕墙命令:systemctl start iptables.service #启动防⽕墙命令:systemctl enable iptables.service #设置开机⾃启动关闭防⽕墙命令:systemctl stop iptables.service #关闭防⽕墙命令:systemctl disable iptables.service #禁⽌开机启动查看iptables状态命令:systemctl status iptables.service查看iptables现有规则命令:iptables -L -n重点:清除默认的防⽕墙规则11.1 安装完成基本配置-允许所有请求防⽌悲剧⾸先在清除前要将policy INPUT改成ACCEPT,表⽰接受⼀切请求。
这个⼀定要先做,不然清空后可能会直接悲剧设置 INPUT ⽅向所有的请求都允许命令:iptables -P INPUT ACCEPT11.2 安装完成基本配置-清空所有默认规则命令:iptables -F11.3 安装完成基本配置-清空所有⾃定义规则命令:iptables -X11.4 安装完成基本配置-所有计数器归0命令:iptables -Z重点:配置规则12.1允许来⾃于lo接⼝的数据包如果没有此规则,你将不能通过127.0.0.1访问本地服务,例如ping 127.0.0.1命令:iptables -A INPUT -i lo -j ACCEPT12.2开启某个端⼝iptables -A INPUT -p tcp --dport 端⼝ -j ACCEPT12.2.1例⼦:开启80,22端⼝命令:iptables -A INPUT -p tcp --dport 80 -j ACCEPT命令:iptables -A INPUT -p tcp --dport 22 -j ACCEPT12.3允许icmp包通过,也就是允许ping命令:iptables -A INPUT -p icmp -m icmp --icmp-type 8 -j ACCEPT12.4允许所有对外请求的返回包本机对外请求相当于OUTPUT,对于返回数据包必须要接收啊,这相当于INPUT了命令:iptables -A INPUT -m state --state ESTABLISHED -j ACCEPT12.5如果要添加内⽹ip信任(接受其所有TCP请求)iptables -A INPUT -p tcp -s 192.168.1.50(改为允许的内⽹IP即可) -j ACCEPT12.6过滤除iptables规则之外的所有请求命令:iptables -P INPUT DROP重点:保存规则注意:设置完成以后先执⾏命令iptables -L -n看⼀下配置是否正确。
CentOS7使用firewalld打开关闭防火墙与端口
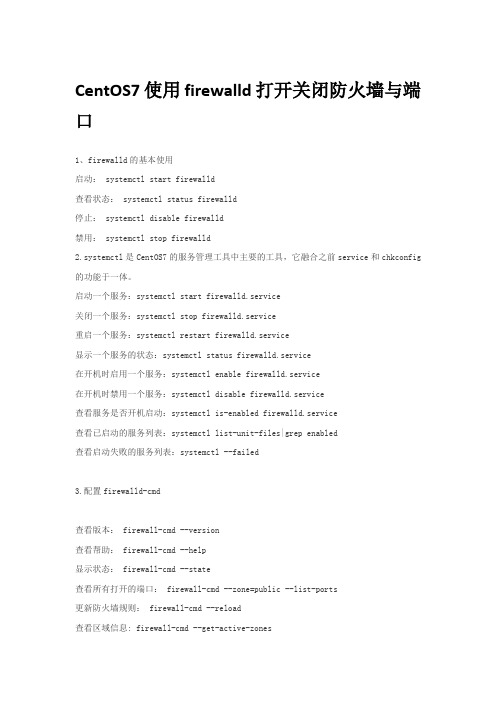
CentOS7使用firewalld打开关闭防火墙与端口1、firewalld的基本使用启动: systemctl start firewalld查看状态: systemctl status firewalld停止: systemctl disable firewalld禁用: systemctl stop firewalld2.systemctl是CentOS7的服务管理工具中主要的工具,它融合之前service和chkconfig 的功能于一体。
启动一个服务:systemctl start firewalld.service关闭一个服务:systemctl stop firewalld.service重启一个服务:systemctl restart firewalld.service显示一个服务的状态:systemctl status firewalld.service在开机时启用一个服务:systemctl enable firewalld.service在开机时禁用一个服务:systemctl disable firewalld.service查看服务是否开机启动:systemctl is-enabled firewalld.service查看已启动的服务列表:systemctl list-unit-files|grep enabled查看启动失败的服务列表:systemctl --failed3.配置firewalld-cmd查看版本: firewall-cmd --version查看帮助: firewall-cmd --help显示状态: firewall-cmd --state查看所有打开的端口: firewall-cmd --zone=public --list-ports更新防火墙规则: firewall-cmd --reload查看区域信息: firewall-cmd --get-active-zones查看指定接口所属区域: firewall-cmd --get-zone-of-interface=eth0拒绝所有包:firewall-cmd --panic-on取消拒绝状态: firewall-cmd --panic-off查看是否拒绝: firewall-cmd --query-panic那怎么开启一个端口呢添加firewall-cmd --zone=public --add-port=80/tcp --permanent (--permanent永久生效,没有此参数重启后失效)重新载入firewall-cmd --reload查看firewall-cmd --zone=public --query-port=80/tcp删除firewall-cmd --zone=public --remove-port=80/tcp --permanent。
Centos查看端口占用情况和开启端口命令详解

Centos查看端⼝占⽤情况和开启端⼝命令详解Centos查看端⼝占⽤情况命令,⽐如查看80端⼝占⽤情况使⽤如下命令:
lsof -i tcp:80
列出所有端⼝
netstat -ntlp
1、开启端⼝(以80端⼝为例)
⽅法⼀:
/sbin/iptables -I INPUT -p tcp --dport 80 -j ACCEPT 写⼊修改
/etc/init.d/iptables save 保存修改
service iptables restart 重启防⽕墙,修改⽣效
⽅法⼆:
vi /etc/sysconfig/iptables 打开配置⽂件加⼊如下语句:
复制代码代码如下:
-A INPUT -p tcp -m state --state NEW -m tcp --dport 80 -j ACCEPT 重启防⽕墙,修改完成
2、关闭端⼝
⽅法⼀:
/sbin/iptables -I INPUT -p tcp --dport 80 -j DROP 写⼊修改
/etc/init.d/iptables save 保存修改
service iptables restart 重启防⽕墙,修改⽣效
⽅法⼆:
vi /etc/sysconfig/iptables 打开配置⽂件加⼊如下语句:
复制代码代码如下:
-A INPUT -p tcp -m state --state NEW -m tcp --dport 80 -j DROP 重启防⽕墙,修改完成
3、查看端⼝状态
/etc/init.d/iptables status
以上就是本⽂的全部内容,希望对⼤家的学习有所帮助,也希望⼤家多多⽀持。
CentOS永久开启某个端口

CentOS永久开启某个端口1.输入命令(找到3000的所在端口pid):netstat -tulpn | grep 3000当然,你会看到-->tcp00 127.0.0.1.30000.0.0.0:*LISTEN1877/ruby2.输入命令(杀死被占用的pid):kill -9 18773.重新启动ruby script/server 即可第二种方法:用ps命令查看当前终端中开启的所有进程,当然,你会发现一个标明是ruby的进程,我们可以看到它的PID(假定PID为6523)。
所以执行下面的命令kill -9 6532然后重新进入rails工程里面,启动ruby script/server即可装载系统的时候只开启了22端口。
结果再装完Nginx+php+mysql 后不能访问网站。
================================================================ ============iptables -L -n查看防火墙设置发现没开启80端口由于Linux防火墙默认是关闭的。
可以用两种方式,一个是关闭防火墙,另一个就是让防火墙开放这个端口。
关闭防火墙命名:service iptables stop (不推荐)开放8080端口的解决步骤如下:1、修改/etc/sysconfig/iptables 文件,增加如下一行:-A RH-Firewall-1-INPUT -m state --state NEW -m tcp -p tcp --dport 8080 -j ACCEPT重启iptablesservice iptables restart2、重启防火墙,这里有两种方式重启防火墙a) 重启后生效开启:chkconfig iptables on关闭:chkconfig iptables offb) 即时生效,重启后失效开启:service iptables start关闭:service iptables stop开放一个范围的端口3000到5000-A RH-Firewall-1-INPUT -m state --state NEW -m tcp -p tcp --dport 3000:5000 -j ACCEPT===============================================================================首先,用netstat –lntp 看看你的服务器启动了不,如果启动了不能访问那就该看防火墙了,由于CentOS6.0默认安装防火墙而且不开放WEB服务器需要的端口,所以,如果你的WEB服务器不能访问,就要把以下规则加入防火墙。
Centos系统的nginx启动、重启、关闭

Centos系统的nginx启动、重启、关闭一、查看Nginx是否启动[root@localhost ~]# ps -ef | grep nginx二、启动[root@localhost ~]# cd /usr/local/nginx/sbin[root@localhost ~]#./nginx三、重启,更改配置重启nginx[root@localhost ~]# kill -HUP 主进程号或进程号文件路径或者使用[root@localhost ~]# cd /usr/local/nginx/sbin[root@localhost ~]#./nginx -s reload或者使用[root@localhost ~]# service nginx restart(如果是这个命令,则看下面的第六大点)四、判断配置文件是否正确[root@localhost ~]# nginx -t -c /usr/local/nginx/conf/nginx.conf 或者[root@localhost ~]# cd /usr/local/nginx/sbin[root@localhost ~]#./nginx -t五、关闭查询nginx主进程号[root@localhost ~]# ps -ef | grep nginx从容停止 kill -QUIT 主进程号快速停止 kill -TERM 主进程号强制停止 kill -9 nginx若nginx.conf配置了pid文件路径,如果没有,则在logs目录下kill -信号类型 '/usr/local/nginx/logs/nginx.pid'六、 Nginx设置成服务并开机自动启动在/etc/init.d下创建文件nginx[root@localhost ~]# vim /etc/init.d/nginx其内容参考nginx官方文档需要注意的配置:nginx=”/usr/local/nginx/sbin/nginx” // (注意里面的双引号要英文的) 修改成nginx执行程序的路径。
CentOS添加永久静态路由
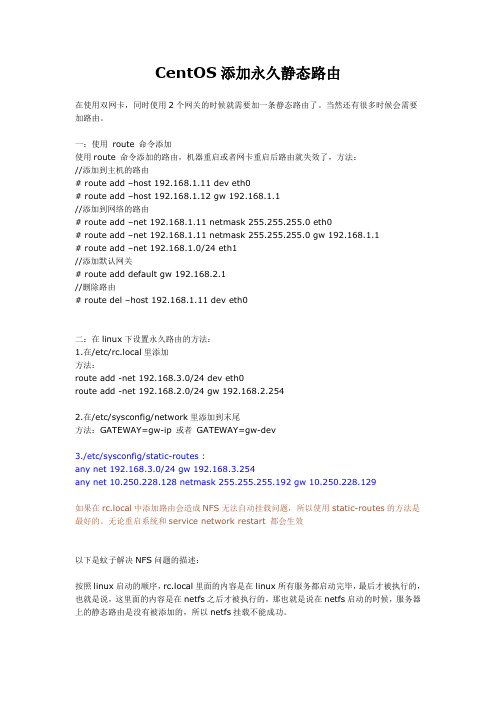
CentOS添加永久静态路由在使用双网卡,同时使用2个网关的时候就需要加一条静态路由了。
当然还有很多时候会需要加路由。
一:使用route 命令添加使用route 命令添加的路由,机器重启或者网卡重启后路由就失效了,方法://添加到主机的路由# route add –host 192.168.1.11 dev eth0# route add –host 192.168.1.12 gw 192.168.1.1//添加到网络的路由# route add –net 192.168.1.11 net m ask 255.255.255.0 eth0# route add –net 192.168.1.11 net m ask 255.255.255.0 gw 192.168.1.1# route add –net 192.168.1.0/24 eth1//添加默认网关# route add default gw 192.168.2.1//删除路由# route del –host 192.168.1.11 dev eth0二:在linux下设置永久路由的方法:1.在/etc/rc.local里添加方法:route add -net 192.168.3.0/24 dev eth0route add -net 192.168.2.0/24 gw 192.168.2.2542.在/etc/sysconfig/network里添加到末尾方法:GATEWAY=gw-ip 或者GATEWAY=gw-dev3./etc/sysconfig/static-routes :any net 192.168.3.0/24 gw 192.168.3.254any net 10.250.228.128 net mask 255.255.255.192 gw 10.250.228.129如果在rc.local中添加路由会造成NFS无法自动挂载问题,所以使用static-routes的方法是最好的。
CentOS7使用firewall-cmd打开关闭防火墙与端口以开放8080端口为例
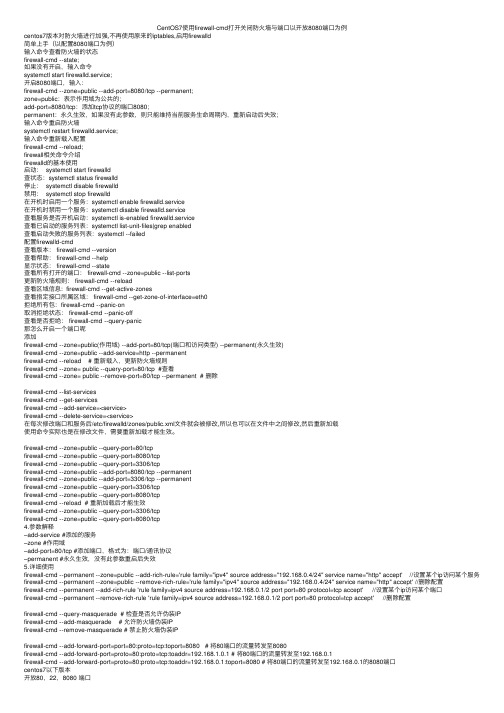
CentOS7使⽤firewall-cmd打开关闭防⽕墙与端⼝以开放8080端⼝为例centos7版本对防⽕墙进⾏加强,不再使⽤原来的iptables,启⽤firewalld简单上⼿(以配置8080端⼝为例)输⼊命令查看防⽕墙的状态firewall-cmd --state;如果没有开启,输⼊命令systemctl start firewalld.service;开启8080端⼝,输⼊:firewall-cmd --zone=public --add-port=8080/tcp --permanent;zone=public:表⽰作⽤域为公共的;add-port=8080/tcp:添加tcp协议的端⼝8080;permanent:永久⽣效,如果没有此参数,则只能维持当前服务⽣命周期内,重新启动后失效;输⼊命令重启防⽕墙systemctl restart firewalld.service;输⼊命令重新载⼊配置firewall-cmd --reload;firewall相关命令介绍firewalld的基本使⽤启动: systemctl start firewalld查状态:systemctl status firewalld停⽌: systemctl disable firewalld禁⽤: systemctl stop firewalld在开机时启⽤⼀个服务:systemctl enable firewalld.service在开机时禁⽤⼀个服务:systemctl disable firewalld.service查看服务是否开机启动:systemctl is-enabled firewalld.service查看已启动的服务列表:systemctl list-unit-files|grep enabled查看启动失败的服务列表:systemctl --failed配置firewalld-cmd查看版本: firewall-cmd --version查看帮助: firewall-cmd --help显⽰状态: firewall-cmd --state查看所有打开的端⼝: firewall-cmd --zone=public --list-ports更新防⽕墙规则: firewall-cmd --reload查看区域信息: firewall-cmd --get-active-zones查看指定接⼝所属区域: firewall-cmd --get-zone-of-interface=eth0拒绝所有包:firewall-cmd --panic-on取消拒绝状态: firewall-cmd --panic-off查看是否拒绝: firewall-cmd --query-panic那怎么开启⼀个端⼝呢添加firewall-cmd --zone=public(作⽤域) --add-port=80/tcp(端⼝和访问类型) --permanent(永久⽣效)firewall-cmd --zone=public --add-service=http --permanentfirewall-cmd --reload # 重新载⼊,更新防⽕墙规则firewall-cmd --zone= public --query-port=80/tcp #查看firewall-cmd --zone= public --remove-port=80/tcp --permanent # 删除firewall-cmd --list-servicesfirewall-cmd --get-servicesfirewall-cmd --add-service=<service>firewall-cmd --delete-service=<service>在每次修改端⼝和服务后/etc/firewalld/zones/public.xml⽂件就会被修改,所以也可以在⽂件中之间修改,然后重新加载使⽤命令实际也是在修改⽂件,需要重新加载才能⽣效。
Centos7.1防火墙开放端口快速方法
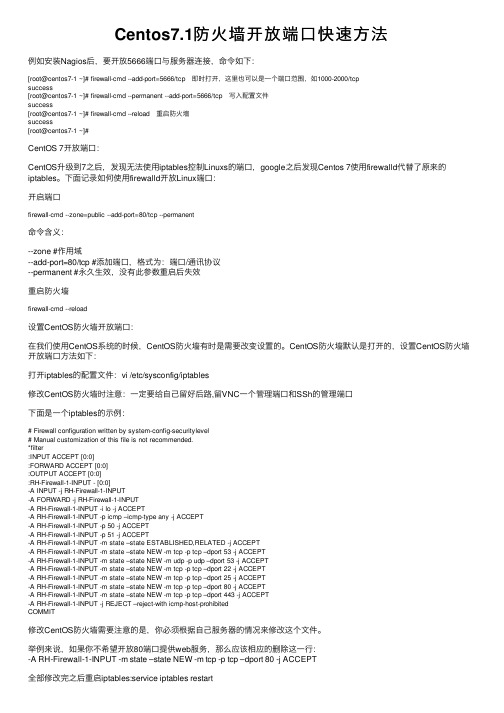
Centos7.1防⽕墙开放端⼝快速⽅法例如安装Nagios后,要开放5666端⼝与服务器连接,命令如下:[root@centos7-1 ~]# firewall-cmd --add-port=5666/tcp 即时打开,这⾥也可以是⼀个端⼝范围,如1000-2000/tcpsuccess[root@centos7-1 ~]# firewall-cmd --permanent --add-port=5666/tcp 写⼊配置⽂件success[root@centos7-1 ~]# firewall-cmd --reload 重启防⽕墙success[root@centos7-1 ~]#CentOS 7开放端⼝:CentOS升级到7之后,发现⽆法使⽤iptables控制Linuxs的端⼝,google之后发现Centos 7使⽤firewalld代替了原来的iptables。
下⾯记录如何使⽤firewalld开放Linux端⼝:开启端⼝firewall-cmd --zone=public --add-port=80/tcp --permanent命令含义:--zone #作⽤域--add-port=80/tcp #添加端⼝,格式为:端⼝/通讯协议--permanent #永久⽣效,没有此参数重启后失效重启防⽕墙firewall-cmd --reload设置CentOS防⽕墙开放端⼝:在我们使⽤CentOS系统的时候,CentOS防⽕墙有时是需要改变设置的。
CentOS防⽕墙默认是打开的,设置CentOS防⽕墙开放端⼝⽅法如下:打开iptables的配置⽂件:vi /etc/sysconfig/iptables修改CentOS防⽕墙时注意:⼀定要给⾃⼰留好后路,留VNC⼀个管理端⼝和SSh的管理端⼝下⾯是⼀个iptables的⽰例:# Firewall configuration written by system-config-securitylevel# Manual customization of this file is not recommended.*filter:INPUT ACCEPT [0:0]:FORWARD ACCEPT [0:0]:OUTPUT ACCEPT [0:0]:RH-Firewall-1-INPUT - [0:0]-A INPUT -j RH-Firewall-1-INPUT-A FORWARD -j RH-Firewall-1-INPUT-A RH-Firewall-1-INPUT -i lo -j ACCEPT-A RH-Firewall-1-INPUT -p icmp –icmp-type any -j ACCEPT-A RH-Firewall-1-INPUT -p 50 -j ACCEPT-A RH-Firewall-1-INPUT -p 51 -j ACCEPT-A RH-Firewall-1-INPUT -m state –state ESTABLISHED,RELATED -j ACCEPT-A RH-Firewall-1-INPUT -m state –state NEW -m tcp -p tcp –dport 53 -j ACCEPT-A RH-Firewall-1-INPUT -m state –state NEW -m udp -p udp –dport 53 -j ACCEPT-A RH-Firewall-1-INPUT -m state –state NEW -m tcp -p tcp –dport 22 -j ACCEPT-A RH-Firewall-1-INPUT -m state –state NEW -m tcp -p tcp –dport 25 -j ACCEPT-A RH-Firewall-1-INPUT -m state –state NEW -m tcp -p tcp –dport 80 -j ACCEPT-A RH-Firewall-1-INPUT -m state –state NEW -m tcp -p tcp –dport 443 -j ACCEPT-A RH-Firewall-1-INPUT -j REJECT –reject-with icmp-host-prohibitedCOMMIT修改CentOS防⽕墙需要注意的是,你必须根据⾃⼰服务器的情况来修改这个⽂件。
CentOS7防火墙快速开放端口配置方法
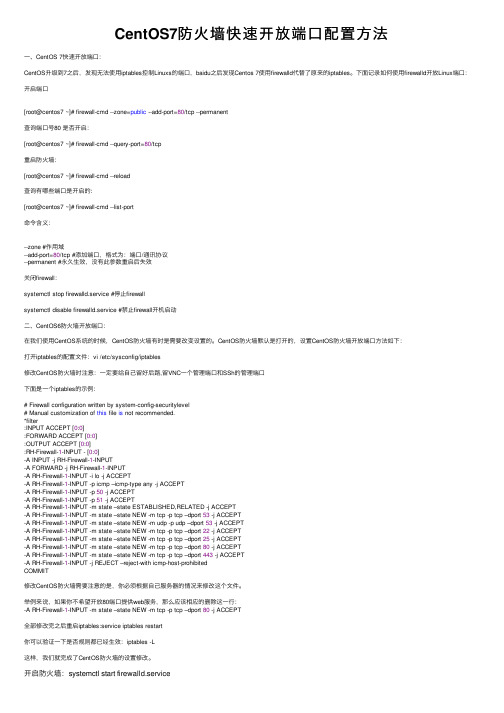
CentOS7防⽕墙快速开放端⼝配置⽅法⼀、CentOS 7快速开放端⼝:CentOS升级到7之后,发现⽆法使⽤iptables控制Linuxs的端⼝,baidu之后发现Centos 7使⽤firewalld代替了原来的iptables。
下⾯记录如何使⽤firewalld开放Linux端⼝:开启端⼝[root@centos7 ~]# firewall-cmd --zone=public --add-port=80/tcp --permanent查询端⼝号80 是否开启:[root@centos7 ~]# firewall-cmd --query-port=80/tcp重启防⽕墙:[root@centos7 ~]# firewall-cmd --reload查询有哪些端⼝是开启的:[root@centos7 ~]# firewall-cmd --list-port命令含义:--zone #作⽤域--add-port=80/tcp #添加端⼝,格式为:端⼝/通讯协议--permanent #永久⽣效,没有此参数重启后失效关闭firewall:systemctl stop firewalld.service #停⽌firewallsystemctl disable firewalld.service #禁⽌firewall开机启动⼆、CentOS6防⽕墙开放端⼝:在我们使⽤CentOS系统的时候,CentOS防⽕墙有时是需要改变设置的。
CentOS防⽕墙默认是打开的,设置CentOS防⽕墙开放端⼝⽅法如下:打开iptables的配置⽂件:vi /etc/sysconfig/iptables修改CentOS防⽕墙时注意:⼀定要给⾃⼰留好后路,留VNC⼀个管理端⼝和SSh的管理端⼝下⾯是⼀个iptables的⽰例:# Firewall configuration written by system-config-securitylevel# Manual customization of this file is not recommended.*filter:INPUT ACCEPT [0:0]:FORWARD ACCEPT [0:0]:OUTPUT ACCEPT [0:0]:RH-Firewall-1-INPUT - [0:0]-A INPUT -j RH-Firewall-1-INPUT-A FORWARD -j RH-Firewall-1-INPUT-A RH-Firewall-1-INPUT -i lo -j ACCEPT-A RH-Firewall-1-INPUT -p icmp –icmp-type any -j ACCEPT-A RH-Firewall-1-INPUT -p 50 -j ACCEPT-A RH-Firewall-1-INPUT -p 51 -j ACCEPT-A RH-Firewall-1-INPUT -m state –state ESTABLISHED,RELATED -j ACCEPT-A RH-Firewall-1-INPUT -m state –state NEW -m tcp -p tcp –dport 53 -j ACCEPT-A RH-Firewall-1-INPUT -m state –state NEW -m udp -p udp –dport 53 -j ACCEPT-A RH-Firewall-1-INPUT -m state –state NEW -m tcp -p tcp –dport 22 -j ACCEPT-A RH-Firewall-1-INPUT -m state –state NEW -m tcp -p tcp –dport 25 -j ACCEPT-A RH-Firewall-1-INPUT -m state –state NEW -m tcp -p tcp –dport 80 -j ACCEPT-A RH-Firewall-1-INPUT -m state –state NEW -m tcp -p tcp –dport 443 -j ACCEPT-A RH-Firewall-1-INPUT -j REJECT –reject-with icmp-host-prohibitedCOMMIT修改CentOS防⽕墙需要注意的是,你必须根据⾃⼰服务器的情况来修改这个⽂件。
centos防火墙设置与端口开放的方法

CentOS防火墙设置与端口开放的方法1. 介绍CentOS是一种基于Linux的操作系统,在网络安全中起到了非常重要的作用。
防火墙是保护服务器免受来自网络的攻击的重要组成部分。
本文将介绍如何在CentOS上设置防火墙并开放端口。
2. 为什么要设置防火墙防火墙是一种网络安全设备,用于控制进出网络的流量,并保护计算机和网络免受恶意攻击和未经授权的访问。
设置防火墙可以有效减少网络攻击的风险,保护服务器上的数据和应用程序。
3. CentOS防火墙简介CentOS默认使用的防火墙是iptables,它是Linux上一个非常强大的防火墙工具。
然而,在最新的CentOS版本中,iptables已经被nftables取代。
本文将介绍如何在CentOS上使用iptables进行防火墙设置。
4. 检查防火墙状态在设置防火墙之前,需要先检查防火墙的状态,确定是否已经启用。
可以使用以下命令检查防火墙状态:systemctl status firewalld如果结果显示firewalld处于active状态,则表示防火墙已经启用。
如果状态为inactive,则表示防火墙未启用。
5. 启用防火墙如果防火墙未启用,可以使用以下命令启用防火墙:systemctl start firewalld可以使用以下命令设置防火墙在系统启动时自动启用:systemctl enable firewalld6. 查看防火墙规则启用防火墙后,可以使用以下命令查看当前的防火墙规则:iptables -L该命令将显示当前的防火墙规则,包括允许和禁止的规则。
7. 打开端口要在防火墙上打开特定端口,可以使用以下命令:iptables -A INPUT -p tcp --dport 端口号 -j ACCEPT将上述命令中的“端口号”替换为您要打开的实际端口号。
在添加完以上规则后,需要保存并应用规则,可以使用以下命令:service iptables save8. 永久打开端口如果想要永久打开某个端口,可以使用以下命令:firewall-cmd --zone=public --add-port=端口号/tcp --permanent将上述命令中的“端口号”替换为您要打开的实际端口号。
CentOS7防火墙放行端口
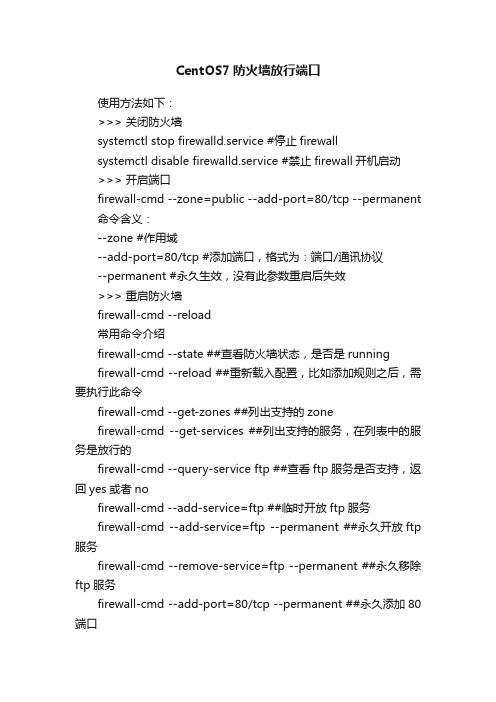
CentOS7防火墙放行端口使用方法如下:>>> 关闭防火墙systemctl stop firewalld.service #停止firewallsystemctl disable firewalld.service #禁止firewall开机启动>>> 开启端口firewall-cmd --zone=public --add-port=80/tcp --permanent 命令含义:--zone #作用域--add-port=80/tcp #添加端口,格式为:端口/通讯协议--permanent #永久生效,没有此参数重启后失效>>> 重启防火墙firewall-cmd --reload常用命令介绍firewall-cmd --state ##查看防火墙状态,是否是runningfirewall-cmd --reload ##重新载入配置,比如添加规则之后,需要执行此命令firewall-cmd --get-zones ##列出支持的zonefirewall-cmd --get-services ##列出支持的服务,在列表中的服务是放行的firewall-cmd --query-service ftp ##查看ftp服务是否支持,返回yes或者nofirewall-cmd --add-service=ftp ##临时开放ftp服务firewall-cmd --add-service=ftp --permanent ##永久开放ftp 服务firewall-cmd --remove-service=ftp --permanent ##永久移除ftp服务firewall-cmd --add-port=80/tcp --permanent ##永久添加80端口iptables -L -n ##查看规则,这个命令是和iptables的相同的man firewall-cmd ##查看帮助更多命令,使用 firewall-cmd --help 查看帮助文件>>> CentOS 7.0默认使用的是firewall作为防火墙,使用iptables必须重新设置一下1、直接关闭防火墙systemctl stop firewalld.service #停止firewallsystemctl disable firewalld.service #禁止firewall开机启动2、设置 iptables serviceyum -y install iptables-services如果要修改防火墙配置,如增加防火墙端口3306vi /etc/sysconfig/iptables增加规则-A INPUT -m state --state NEW -m tcp -p tcp --dport 3306 -j ACCEPT保存退出后systemctl restart iptables.service #重启防火墙使配置生效systemctl enable iptables.service #设置防火墙开机启动最后重启系统使设置生效即可。
浅谈简单使用CentOS7防火墙及开放端口

浅谈简单使⽤CentOS7防⽕墙及开放端⼝(官⽅有更为详细的说明哦)Firewalld提供动态管理的防⽕墙,⽀持⽹络/防⽕墙区域,⽤于定义⽹络连接或接⼝的信任级别。
它⽀持IPv4,IPv6防⽕墙设置,以太⽹桥和IP集。
运⾏时和永久配置选项分开。
它还为服务或应⽤程序提供了直接添加防⽕墙规则的接⼝。
既然是简单使⽤, 那必须教会你怎么查看防⽕墙状态, 以及防⽕墙的关闭和开启之类的, 我们都知道那既然防⽕墙都开启了, 那么它必定是有⼀些端⼝的限制, 不能说你想通过哪些端⼝就通过哪些端⼝, 就能访问到我们的主机(也就是服务器了), 换句说话, 我开放了哪些端⼝, 你才可以通过我开放的这些端⼝对我的主机进⾏访问, 要不然我们还要防⽕墙⼲嘛, 谁想进来就进来(还是通过任意端⼝), 防⽕墙不就成了摆设不成, 说到防⽕墙要还要多说⼀句, 防⽕墙有软件层⾯的和物理设置层⾯的(⽹络内的⼀台专业物理设备), 那我们这⾥是所说的是软件层⾯的防⽕墙也就是Firewalld, CentOS7以下版本普遍使⽤的软件防⽕墙是Firewalld,为什么说是CentOS7以下版本普遍使⽤的呢? 这是因为之前的CentOS版本都是使⽤的iptables防⽕墙, 那要往深处说, 这就要追溯到CentOS7的发展历程及RedHad之间的关系啦, 扯远了哈, 我们使⽤防⽕墙的主要⽬的是对我们的主机进⾏安全管理, 其中主要的⼀部分就是端⼝管理了!查询防⽕墙状态shell# systemctl status firewalldexecute[warnerwu@localhost ~]$ systemctl status firewalld● firewalld.service - firewalld - dynamic firewall daemonLoaded: loaded (/usr/lib/systemd/system/firewalld.service; disabled; vendor preset: enabled)Active: inactive (dead)Docs: man:firewalld(1)启动防⽕墙注意:防⽕墙只有管理员或管理员⽤户组有权限进⾏管理操作, 普通⽤户则不可以shell# systemctl start firewalldexecute[root@localhost~]# systemctl start firewalld[root@localhost~]#你会发现什么也没有, 玩 linux 或 osx 系统的⼩伙伴都知道, 没有提⽰那就是最好的提⽰, 说明已经成功啦, 有提⽰时则⼀会有问题哦再次查看防⽕墙状态shell# systemctl status firewalldexecute[root@localhost ~]# sudo systemctl status firewalld● firewalld.service - firewalld - dynamic firewall daemonLoaded: loaded (/usr/lib/systemd/system/firewalld.service; disabled; vendor preset: enabled)Active: active (running) since 五 2018-09-07 00:04:55 CST; 5min agoDocs: man:firewalld(1)Main PID: 11339 (firewalld)CGroup: /system.slice/firewalld.service└─11339 /usr/bin/python -Es /usr/sbin/firewalld --nofork --nopid9⽉ 07 00:04:55 izj6c3bcx7adgva5dda2e0z systemd[1]: Starting firewalld - dynamic firewall daemon...9⽉ 07 00:04:55 izj6c3bcx7adgva5dda2e0z systemd[1]: Started firewalld - dynamic firewall daemon.9⽉ 07 00:04:55 izj6c3bcx7adgva5dda2e0z firewalld[11339]: WARNING: ICMP type 'beyond-scope' is not supported by the kernel for ipv6.9⽉ 07 00:04:55 izj6c3bcx7adgva5dda2e0z firewalld[11339]: WARNING: beyond-scope: INVALID_ICMPTYPE: No supported ICMP type., ignorin...-time. 9⽉ 07 00:04:55 izj6c3bcx7adgva5dda2e0z firewalld[11339]: WARNING: ICMP type 'failed-policy' is not supported by the kernel for ipv6.9⽉ 07 00:04:55 izj6c3bcx7adgva5dda2e0z firewalld[11339]: WARNING: failed-policy: INVALID_ICMPTYPE: No supported ICMP type., ignori...-time.9⽉ 07 00:04:55 izj6c3bcx7adgva5dda2e0z firewalld[11339]: WARNING: ICMP type 'reject-route' is not supported by the kernel for ipv6.9⽉ 07 00:04:55 izj6c3bcx7adgva5dda2e0z firewalld[11339]: WARNING: reject-route: INVALID_ICMPTYPE: No supported ICMP type., ignorin...-time. Hint: Some lines were ellipsized, use -l to show in full.嗯嗯, 你会发现在已经在运⾏啦, 就是这样⼦哦, 还要多说⼀句, 那如果你对 CentOS7 或 RedHat7 ⾜够了解的话, 你会很熟悉systemctl是个什么东东, 她呀, 就是系统服务管理⼯具, 是系统⼯具, ⽤来管理系统服务的, 就这么理解就可以不会错的! 之前的CentOS版本都是使⽤的 service 进⾏系统服务管理的哦, 关于更多 systemctl 或 service 的信息请动⼿百度或 Google, 我们简单的说完了, 查看防⽕墙状态以及怎么启动防⽕墙, 那我们的就来说说怎么来开放端⼝!查看防⽕墙开放端⼝列表防⽕墙的端⼝管理是通过 firewall-cmd 命令来进⾏管理的哦, 这⼀点必须要明确, 也是你管理系统端⼝的关键所在, 嗯嗯, 是她,是她, 就是她, 她就是这么的如此风骚, 哈哈, 你拿她⼀点办法都没有, 不你可以把她玩的服服贴贴的, 什么呀!你想多了, 我什么也没有说哦, 是你⾃⼰这样想的~shell# firewall-cmd --list-allexecute[root@localhost ~]# firewall-cmd --list-allpublictarget: defaulticmp-block-inversion: nointerfaces:sources:services: ssh dhcpv6-clientports:protocols:masquerade: noforward-ports:source-ports:icmp-blocks:rich rules:你会发现它如此空旷, 没有任何开放端⼝, 嗯, 这是⼀台新装linux系统, 你的也许会跟我这个⼀样, 也许会不⼀样, 这个要注意⼀下添加开放端⼝到防⽕墙⽐如我们让80端⼝开放, 其它⽤户可以访问我的站点shell// Step1: 加⼊开放端⼝到配置⽂件# firewall-cmd --zone=public --add-port=80/tcp --permanent--zone=public 添加时区--add-port=80/tcp 添加端⼝--permanent 永久⽣效// 加载防⽕墙新配置⽂件( 以 root ⾝份输⼊以下命令,重新加载防⽕墙,并不中断⽤户连接,即不丢失状态信息. )firewall-cmd --reload再次查看防⽕墙开放端⼝列表shell# firewall-cmd --list-allexecute[root@localhost ~]# firewall-cmd --list-allpublictarget: defaulticmp-block-inversion: nointerfaces:sources:services: ssh dhcpv6-clientports: 80/tcpprotocols:masquerade: noforward-ports:source-ports:icmp-blocks:rich rules:这次你会发现 ports 对应的多了⼀个 80/tcp, 那说明就已经添加到了防⽕墙开放列表中了1、firewalld的基本使⽤启动: systemctl start firewalld关闭: systemctl stop firewalld查看状态: systemctl status firewalld开机禁⽤: systemctl disable firewalld开机启⽤: systemctl enable firewalld2.systemctl是CentOS7的服务管理⼯具中主要的⼯具,它融合之前service和chkconfig的功能于⼀体。
Centos7防火墙开放端口,查看状态,查看开放端口
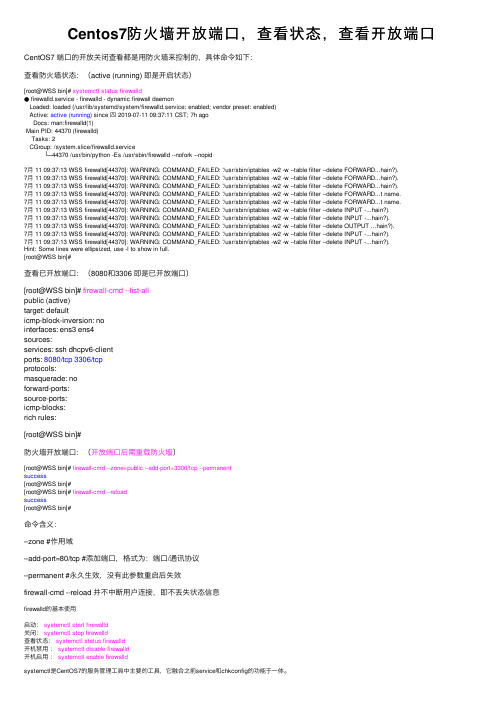
Centos7防⽕墙开放端⼝,查看状态,查看开放端⼝CentOS7 端⼝的开放关闭查看都是⽤防⽕墙来控制的,具体命令如下:查看防⽕墙状态:(active (running) 即是开启状态)[root@WSS bin]# systemctl status firewalld● firewalld.service - firewalld - dynamic firewall daemonLoaded: loaded (/usr/lib/systemd/system/firewalld.service; enabled; vendor preset: enabled)Active: active (running) since 四 2019-07-11 09:37:11 CST; 7h agoDocs: man:firewalld(1)Main PID: 44370 (firewalld)Tasks: 2CGroup: /system.slice/firewalld.service└─44370 /usr/bin/python -Es /usr/sbin/firewalld --nofork --nopid7⽉ 11 09:37:13 WSS firewalld[44370]: WARNING: COMMAND_FAILED: '/usr/sbin/iptables -w2 -w --table filter --delete FORWARD...hain?).7⽉ 11 09:37:13 WSS firewalld[44370]: WARNING: COMMAND_FAILED: '/usr/sbin/iptables -w2 -w --table filter --delete FORWARD...hain?).7⽉ 11 09:37:13 WSS firewalld[44370]: WARNING: COMMAND_FAILED: '/usr/sbin/iptables -w2 -w --table filter --delete FORWARD...hain?).7⽉ 11 09:37:13 WSS firewalld[44370]: WARNING: COMMAND_FAILED: '/usr/sbin/iptables -w2 -w --table filter --delete FORWARD...t name.7⽉ 11 09:37:13 WSS firewalld[44370]: WARNING: COMMAND_FAILED: '/usr/sbin/iptables -w2 -w --table filter --delete FORWARD...t name.7⽉ 11 09:37:13 WSS firewalld[44370]: WARNING: COMMAND_FAILED: '/usr/sbin/iptables -w2 -w --table filter --delete INPUT -...hain?).7⽉ 11 09:37:13 WSS firewalld[44370]: WARNING: COMMAND_FAILED: '/usr/sbin/iptables -w2 -w --table filter --delete INPUT -...hain?).7⽉ 11 09:37:13 WSS firewalld[44370]: WARNING: COMMAND_FAILED: '/usr/sbin/iptables -w2 -w --table filter --delete OUTPUT ...hain?).7⽉ 11 09:37:13 WSS firewalld[44370]: WARNING: COMMAND_FAILED: '/usr/sbin/iptables -w2 -w --table filter --delete INPUT -...hain?).7⽉ 11 09:37:13 WSS firewalld[44370]: WARNING: COMMAND_FAILED: '/usr/sbin/iptables -w2 -w --table filter --delete INPUT -...hain?).Hint: Some lines were ellipsized, use -l to show in full.[root@WSS bin]#查看已开放端⼝:(8080和3306 即是已开放端⼝)[root@WSS bin]# firewall-cmd --list-allpublic (active)target: defaulticmp-block-inversion: nointerfaces: ens3 ens4sources:services: ssh dhcpv6-clientports: 8080/tcp 3306/tcpprotocols:masquerade: noforward-ports:source-ports:icmp-blocks:rich rules:[root@WSS bin]#防⽕墙开放端⼝:(开放端⼝后需重载防⽕墙)[root@WSS bin]# firewall-cmd --zone=public --add-port=3306/tcp --permanentsuccess[root@WSS bin]#[root@WSS bin]# firewall-cmd --reloadsuccess[root@WSS bin]#命令含义:–zone #作⽤域–add-port=80/tcp #添加端⼝,格式为:端⼝/通讯协议–permanent #永久⽣效,没有此参数重启后失效firewall-cmd --reload 并不中断⽤户连接,即不丢失状态信息firewalld的基本使⽤启动:systemctl start firewalld关闭:systemctl stop firewalld查看状态:systemctl status firewalld开机禁⽤:systemctl disable firewalld开机启⽤:systemctl enable firewalldsystemctl是CentOS7的服务管理⼯具中主要的⼯具,它融合之前service和chkconfig的功能于⼀体。
Centos7查看防火墙状态,开放特定端口

Centos7查看防⽕墙状态,开放特定端⼝1.查看防⽕墙状态⽅式⼀:systemctl status firewalld.service⽅式⼆:firewall-cmd --state2.临时开启和关闭防⽕墙(服务器重启之后,防⽕墙会重置成开启状态)防⽕墙是防⽌服务器被攻击的重要安全保障之⼀,在平常开发时可以临时关闭防⽕墙,但是在⽣产环境不建议关闭防⽕墙,只需要对外开放特定端⼝就好。
# 临时关闭防⽕墙systemctl stop firewalld.service# 开启防⽕墙systemctl start firewalld.service3.服务器开放和关闭端⼝注意:开启和关闭端⼝之后,⼀定要重新刷新⼀下防⽕墙配置,不然不⽣效# 开放8848端⼝firewall-cmd --zone=public --add-port=8848/tcp --permanent# 关闭8848端⼝firewall-cmd --zone=public --remove-port=8848/tcp --permanent#刷新防⽕墙配置firewall-cmd --reload4.查看防⽕墙所有开放的端⼝firewall-cmd --zone=public --list-ports5.查看监听的端⼝netstat -lnpt6.查看程序是否启动ps -ef | grep nacos7.查看程序的端⼝是否启动netstat -anpl | grep 88488.查看进程详情ps 26109.中⽌进程# 操作系统从内核级别强制杀死⼀个进程kill -9 2610# 操作系统发送⼀个通知告诉应⽤主动关闭kill -15 2610可以理解kill -9 是电脑强制关机(拔电源),kill -15 是正常关机(点关机按钮)。
linux下防火墙开启某个端口号及防火墙常用命令使用(详解)
linux下防⽕墙开启某个端⼝号及防⽕墙常⽤命令使⽤
(详解)
1、永久性⽣效,重启后不会复原
开启:chkconfigiptables on
关闭:chkconfigiptables off
2、即时⽣效,重启后复原
重启防⽕墙
⽅式⼀:/etc/init.d/iptables restart
⽅式⼆:service iptables restart
关闭防⽕墙:
⽅式⼀:/etc/init.d/iptables stop
⽅式⼆:service iptables stop
启动防⽕墙
⽅式⼀:/etc/init.d/iptables start
⽅式⼆:service iptables start
开启相关接⼝
1、找到防⽕墙配置⽂件并修改
⽬录在/etc/sysconfig/iptables
在⾥⾯增加⾏代码,代码如下:
-A RH-Firewall-1-INPUT -p tcp -m state –state NEW -m tcp –dport 8088 -j ACCEPT
此代码必须放在以下代码之上
-A RH-Firewall-1-INPUT -j REJECT –reject-with icmp-host-prohibited之上,否则不会起作⽤具体的配置⽂件如下图:
2、重启防⽕墙以便改动⽣效
service iptables restart
以上这篇linux下防⽕墙开启某个端⼝号及防⽕墙常⽤命令使⽤(详解)就是⼩编分享给⼤家的全部内容了,希望能给⼤家⼀个参考,也希望⼤家多多⽀持。
CentOS7如何快速开放端口

CentOS7如 何 快 速 开 放 端 口
CentOS升级到7之后,发现无法使用iptables控制Linuxs的端口,google之后发现Centos 7使用firewalld代替了原来的 iptables。下面记录如何使用firewalld开放Linux端口:
开启端口
firewall-cmd --zone=public --add-port=80/tcp --permaneபைடு நூலகம்t
命令含义: --zone #作用域 --add-port=80/tcp #添加端口,格式为:端口/通讯协议 --permanent #永久生效,没有此参数重启后失效
重启防火墙
firewall-cmd --reload
以上就是本文的全部内容,希望对大家的学习有所帮助,也希望大家多多支持。
- 1、下载文档前请自行甄别文档内容的完整性,平台不提供额外的编辑、内容补充、找答案等附加服务。
- 2、"仅部分预览"的文档,不可在线预览部分如存在完整性等问题,可反馈申请退款(可完整预览的文档不适用该条件!)。
- 3、如文档侵犯您的权益,请联系客服反馈,我们会尽快为您处理(人工客服工作时间:9:00-18:30)。
============================================================================
iptables -L -n
查看防火墙设置发现没开启80端口
由于Linux防火墙默认是关闭的。可以用两种方式,一个是关闭防火墙,另一个就是让防火墙开放这个端口。
1.输入命令(找到3000的所在端口pid):
netstat -tulpn | grep 3000
当然,你会看到-->
tcp 0 0 127.0.0.1.3000 0.0.0.0:* LIS死被占用的pid):
kill -9 1877
3.重新启动ruby script/server 即可
开启: service iptables start
关闭: service iptables stop
开放一个范围的端口3000到5000
-A RH-Firewall-1-INPUT -m state --state NEW -m tcp -p tcp --dport 3000:5000 -j ACCEPT
第二种方法:
用ps命令查看当前终端中开启的所有进程,当然,你会发现一个标明是ruby的进程,我们可以看到它的PID(假定PID为6523)。所以执行下面的命令
kill -9 6532
然后重新进入rails工程里面,启动ruby script/server即可
装载系统的时候只开启了22端口。结果再装完Nginx+php+mysql 后不能访问网站。
然后保存:
#/etc/rc.d/init.d/iptables save
查看打开的端口:
# /etc/init.d/iptables status
补充说明:
#关闭防火墙
/etc/init.d/iptables stop
service iptables stop # 停止服务
#永久关闭防火墙
chkconfig –level 35 iptables off #此方法源自网络,未实验,安全考虑拒绝使用此方法
关闭防火墙命名:
service iptables stop (不推荐)
开放8080端口的解决步骤如下:
1、修改/etc/sysconfig/iptables 文件,增加如下一行:
-A RH-Firewall-1-INPUT -m state --state NEW -m tcp -p tcp --dport 8080 -j ACCEPT
#/sbin/iptables -I INPUT -p tcp –dport 80 -j ACCEPT
#/sbin/iptables -I INPUT -p tcp –dport 22 -j ACCEPT
#/sbin/iptables -I INPUT -p tcp –dport 3306 -j ACCEPT
===============================================================================
首先,用netstat –lntp 看看你的服务器启动了不,如果启动了不能访问那就该看防火墙了,由于CentOS6.0默认安装防火墙而且不开放WEB服务器需要的端口,所以,如果你的WEB服务器不能访问,就要把以下规则加入防火墙。 以下内容收集自网络:
重启iptables
service iptables restart
2、重启防火墙,这里有两种方式重启防火墙
a) 重启后生效
开启: chkconfig iptables on
关闭: chkconfig iptables off
b) 即时生效,重启后失效
#将更改进行保存
/etc/rc.d/init.d/iptables save
另外直接在/etc/sysconfig/iptables中增加一行:
-A RH-Firewall-1-INPUT -m state –state NEW -m tcp -p tcp –dport 8080 -j ACCEPT
#查看防火墙信息
/etc/init.d/iptables status
#开放端口:8080
/sbin/iptables -I INPUT -p tcp –dport 8080 -j ACCEPT
#重启防火墙以便改动生效:(或者直接重启系统)
/etc/init.d/iptables restart