STAC Software Tuning Panels For Autonomic Control
NuMicro N9H30系列开发板用户手册说明书

NuMicro®FamilyArm® ARM926EJ-S BasedNuMaker-HMI-N9H30User ManualEvaluation Board for NuMicro® N9H30 SeriesNUMAKER-HMI-N9H30 USER MANUALThe information described in this document is the exclusive intellectual property ofNuvoton Technology Corporation and shall not be reproduced without permission from Nuvoton.Nuvoton is providing this document only for reference purposes of NuMicro microcontroller andmicroprocessor based system design. Nuvoton assumes no responsibility for errors or omissions.All data and specifications are subject to change without notice.For additional information or questions, please contact: Nuvoton Technology Corporation.Table of Contents1OVERVIEW (5)1.1Features (7)1.1.1NuMaker-N9H30 Main Board Features (7)1.1.2NuDesign-TFT-LCD7 Extension Board Features (7)1.2Supporting Resources (8)2NUMAKER-HMI-N9H30 HARDWARE CONFIGURATION (9)2.1NuMaker-N9H30 Board - Front View (9)2.2NuMaker-N9H30 Board - Rear View (14)2.3NuDesign-TFT-LCD7 - Front View (20)2.4NuDesign-TFT-LCD7 - Rear View (21)2.5NuMaker-N9H30 and NuDesign-TFT-LCD7 PCB Placement (22)3NUMAKER-N9H30 AND NUDESIGN-TFT-LCD7 SCHEMATICS (24)3.1NuMaker-N9H30 - GPIO List Circuit (24)3.2NuMaker-N9H30 - System Block Circuit (25)3.3NuMaker-N9H30 - Power Circuit (26)3.4NuMaker-N9H30 - N9H30F61IEC Circuit (27)3.5NuMaker-N9H30 - Setting, ICE, RS-232_0, Key Circuit (28)NUMAKER-HMI-N9H30 USER MANUAL3.6NuMaker-N9H30 - Memory Circuit (29)3.7NuMaker-N9H30 - I2S, I2C_0, RS-485_6 Circuit (30)3.8NuMaker-N9H30 - RS-232_2 Circuit (31)3.9NuMaker-N9H30 - LCD Circuit (32)3.10NuMaker-N9H30 - CMOS Sensor, I2C_1, CAN_0 Circuit (33)3.11NuMaker-N9H30 - RMII_0_PF Circuit (34)3.12NuMaker-N9H30 - RMII_1_PE Circuit (35)3.13NuMaker-N9H30 - USB Circuit (36)3.14NuDesign-TFT-LCD7 - TFT-LCD7 Circuit (37)4REVISION HISTORY (38)List of FiguresFigure 1-1 Front View of NuMaker-HMI-N9H30 Evaluation Board (5)Figure 1-2 Rear View of NuMaker-HMI-N9H30 Evaluation Board (6)Figure 2-1 Front View of NuMaker-N9H30 Board (9)Figure 2-2 Rear View of NuMaker-N9H30 Board (14)Figure 2-3 Front View of NuDesign-TFT-LCD7 Board (20)Figure 2-4 Rear View of NuDesign-TFT-LCD7 Board (21)Figure 2-5 Front View of NuMaker-N9H30 PCB Placement (22)Figure 2-6 Rear View of NuMaker-N9H30 PCB Placement (22)Figure 2-7 Front View of NuDesign-TFT-LCD7 PCB Placement (23)Figure 2-8 Rear View of NuDesign-TFT-LCD7 PCB Placement (23)Figure 3-1 GPIO List Circuit (24)Figure 3-2 System Block Circuit (25)Figure 3-3 Power Circuit (26)Figure 3-4 N9H30F61IEC Circuit (27)Figure 3-5 Setting, ICE, RS-232_0, Key Circuit (28)Figure 3-6 Memory Circuit (29)Figure 3-7 I2S, I2C_0, RS-486_6 Circuit (30)Figure 3-8 RS-232_2 Circuit (31)Figure 3-9 LCD Circuit (32)NUMAKER-HMI-N9H30 USER MANUAL Figure 3-10 CMOS Sensor, I2C_1, CAN_0 Circuit (33)Figure 3-11 RMII_0_PF Circuit (34)Figure 3-12 RMII_1_PE Circuit (35)Figure 3-13 USB Circuit (36)Figure 3-14 TFT-LCD7 Circuit (37)List of TablesTable 2-1 LCD Panel Combination Connector (CON8) Pin Function (11)Table 2-2 Three Sets of Indication LED Functions (12)Table 2-3 Six Sets of User SW, Key Matrix Functions (12)Table 2-4 CMOS Sensor Connector (CON10) Function (13)Table 2-5 JTAG ICE Interface (J2) Function (14)Table 2-6 Expand Port (CON7) Function (16)Table 2-7 UART0 (J3) Function (16)Table 2-8 UART2 (J6) Function (16)Table 2-9 RS-485_6 (SW6~8) Function (17)Table 2-10 Power on Setting (SW4) Function (17)Table 2-11 Power on Setting (S2) Function (17)Table 2-12 Power on Setting (S3) Function (17)Table 2-13 Power on Setting (S4) Function (17)Table 2-14 Power on Setting (S5) Function (17)Table 2-15 Power on Setting (S7/S6) Function (18)Table 2-16 Power on Setting (S9/S8) Function (18)Table 2-17 CMOS Sensor Connector (CON9) Function (19)Table 2-18 CAN_0 (SW9~10) Function (19)NUMAKER-HMI-N9H30 USER MANUAL1 OVERVIEWThe NuMaker-HMI-N9H30 is an evaluation board for GUI application development. The NuMaker-HMI-N9H30 consists of two parts: a NuMaker-N9H30 main board and a NuDesign-TFT-LCD7 extensionboard. The NuMaker-HMI-N9H30 is designed for project evaluation, prototype development andvalidation with HMI (Human Machine Interface) function.The NuMaker-HMI-N9H30 integrates touchscreen display, voice input/output, rich serial port serviceand I/O interface, providing multiple external storage methods.The NuDesign-TFT-LCD7 can be plugged into the main board via the DIN_32x2 extension connector.The NuDesign-TFT-LCD7 includes one 7” LCD which the resolution is 800x480 with RGB-24bits andembedded the 4-wires resistive type touch panel.Figure 1-1 Front View of NuMaker-HMI-N9H30 Evaluation BoardNUMAKER-HMI-N9H30 USER MANUAL Figure 1-2 Rear View of NuMaker-HMI-N9H30 Evaluation Board1.1 Features1.1.1 NuMaker-N9H30 Main Board Features●N9H30F61IEC chip: LQFP216 pin MCP package with DDR (64 MB)●SPI Flash using W25Q256JVEQ (32 MB) booting with quad mode or storage memory●NAND Flash using W29N01HVSINA (128 MB) booting or storage memory●One Micro-SD/TF card slot served either as a SD memory card for data storage or SDIO(Wi-Fi) device●Two sets of COM ports:–One DB9 RS-232 port with UART_0 used 75C3232E transceiver chip can be servedfor function debug and system development.–One DB9 RS-232 port with UART_2 used 75C3232E transceiver chip for userapplication●22 GPIO expansion ports, including seven sets of UART functions●JTAG interface provided for software development●Microphone input and Earphone/Speaker output with 24-bit stereo audio codec(NAU88C22) for I2S interfaces●Six sets of user-configurable push button keys●Three sets of LEDs for status indication●Provides SN65HVD230 transceiver chip for CAN bus communication●Provides MAX3485 transceiver chip for RS-485 device connection●One buzzer device for program applicationNUMAKER-HMI-N9H30 USER MANUAL●Two sets of RJ45 ports with Ethernet 10/100 Mbps MAC used IP101GR PHY chip●USB_0 that can be used as Device/HOST and USB_1 that can be used as HOSTsupports pen drives, keyboards, mouse and printers●Provides over-voltage and over current protection used APL3211A chip●Retain RTC battery socket for CR2032 type and ADC0 detect battery voltage●System power could be supplied by DC-5V adaptor or USB VBUS1.1.2 NuDesign-TFT-LCD7 Extension Board Features●7” resolution 800x480 4-wire resistive touch panel for 24-bits RGB888 interface●DIN_32x2 extension connector1.2 Supporting ResourcesFor sample codes and introduction about NuMaker-N9H30, please refer to N9H30 BSP:https:///products/gui-solution/gui-platform/numaker-hmi-n9h30/?group=Software&tab=2Visit NuForum for further discussion about the NuMaker-HMI-N9H30:/viewforum.php?f=31 NUMAKER-HMI-N9H30 USER MANUALNUMAKER-HMI-N9H30 USER MANUAL2 NUMAKER-HMI-N9H30 HARDWARE CONFIGURATION2.1 NuMaker-N9H30 Board - Front View Combination Connector (CON8)6 set User SWs (K1~6)3set Indication LEDs (LED1~3)Power Supply Switch (SW_POWER1)Audio Codec(U10)Microphone(M1)NAND Flash(U9)RS-232 Transceiver(U6, U12)RS-485 Transceiver(U11)CAN Transceiver (U13)Figure 2-1 Front View of NuMaker-N9H30 BoardFigure 2-1 shows the main components and connectors from the front side of NuMaker-N9H30 board. The following lists components and connectors from the front view:NuMaker-N9H30 board and NuDesign-TFT-LCD7 board combination connector (CON8). This panel connector supports 4-/5-wire resistive touch or capacitance touch panel for 24-bits RGB888 interface.Connector GPIO pin of N9H30 FunctionCON8.1 - Power 3.3VCON8.2 - Power 3.3VCON8.3 GPD7 LCD_CSCON8.4 GPH3 LCD_BLENCON8.5 GPG9 LCD_DENCON8.7 GPG7 LCD_HSYNCCON8.8 GPG6 LCD_CLKCON8.9 GPD15 LCD_D23(R7)CON8.10 GPD14 LCD_D22(R6)CON8.11 GPD13 LCD_D21(R5)CON8.12 GPD12 LCD_D20(R4)CON8.13 GPD11 LCD_D19(R3)CON8.14 GPD10 LCD_D18(R2)CON8.15 GPD9 LCD_D17(R1)CON8.16 GPD8 LCD_D16(R0)CON8.17 GPA15 LCD_D15(G7)CON8.18 GPA14 LCD_D14(G6)CON8.19 GPA13 LCD_D13(G5)CON8.20 GPA12 LCD_D12(G4)CON8.21 GPA11 LCD_D11(G3)CON8.22 GPA10 LCD_D10(G2)CON8.23 GPA9 LCD_D9(G1) NUMAKER-HMI-N9H30 USER MANUALCON8.24 GPA8 LCD_D8(G0)CON8.25 GPA7 LCD_D7(B7)CON8.26 GPA6 LCD_D6(B6)CON8.27 GPA5 LCD_D5(B5)CON8.28 GPA4 LCD_D4(B4)CON8.29 GPA3 LCD_D3(B3)CON8.30 GPA2 LCD_D2(B2)CON8.31 GPA1 LCD_D1(B1)CON8.32 GPA0 LCD_D0(B0)CON8.33 - -CON8.34 - -CON8.35 - -CON8.36 - -CON8.37 GPB2 LCD_PWMCON8.39 - VSSCON8.40 - VSSCON8.41 ADC7 XPCON8.42 ADC3 VsenCON8.43 ADC6 XMCON8.44 ADC4 YMCON8.45 - -CON8.46 ADC5 YPCON8.47 - VSSCON8.48 - VSSCON8.49 GPG0 I2C0_CCON8.50 GPG1 I2C0_DCON8.51 GPG5 TOUCH_INTCON8.52 - -CON8.53 - -CON8.54 - -CON8.55 - -NUMAKER-HMI-N9H30 USER MANUAL CON8.56 - -CON8.57 - -CON8.58 - -CON8.59 - VSSCON8.60 - VSSCON8.61 - -CON8.62 - -CON8.63 - Power 5VCON8.64 - Power 5VTable 2-1 LCD Panel Combination Connector (CON8) Pin Function●Power supply switch (SW_POWER1): System will be powered on if the SW_POWER1button is pressed●Three sets of indication LEDs:LED Color DescriptionsLED1 Red The system power will beterminated and LED1 lightingwhen the input voltage exceeds5.7V or the current exceeds 2A.LED2 Green Power normal state.LED3 Green Controlled by GPH2 pin Table 2-2 Three Sets of Indication LED Functions●Six sets of user SW, Key Matrix for user definitionKey GPIO pin of N9H30 FunctionK1 GPF10 Row0 GPB4 Col0K2 GPF10 Row0 GPB5 Col1K3 GPE15 Row1 GPB4 Col0K4 GPE15 Row1 GPB5 Col1K5 GPE14 Row2 GPB4 Col0K6GPE14 Row2GPB5 Col1 Table 2-3 Six Sets of User SW, Key Matrix Functions●NAND Flash (128 MB) with Winbond W29N01HVS1NA (U9)●Microphone (M1): Through Nuvoton NAU88C22 chip sound input●Audio CODEC chip (U10): Nuvoton NAU88C22 chip connected to N9H30 using I2Sinterface–SW6/SW7/SW8: 1-2 short for RS-485_6 function and connected to 2P terminal (CON5and J5)–SW6/SW7/SW8: 2-3 short for I2S function and connected to NAU88C22 (U10).●CMOS Sensor connector (CON10, SW9~10)–SW9~10: 1-2 short for CAN_0 function and connected to 2P terminal (CON11)–SW9~10: 2-3 short for CMOS sensor function and connected to CMOS sensorconnector (CON10)Connector GPIO pin of N9H30 FunctionCON10.1 - VSSCON10.2 - VSSNUMAKER-HMI-N9H30 USER MANUALCON10.3 - Power 3.3VCON10.4 - Power 3.3VCON10.5 - -CON10.6 - -CON10.7 GPI4 S_PCLKCON10.8 GPI3 S_CLKCON10.9 GPI8 S_D0CON10.10 GPI9 S_D1CON10.11 GPI10 S_D2CON10.12 GPI11 S_D3CON10.13 GPI12 S_D4CON10.14 GPI13 S_D5CON10.15 GPI14 S_D6CON10.16 GPI15 S_D7CON10.17 GPI6 S_VSYNCCON10.18 GPI5 S_HSYNCCON10.19 GPI0 S_PWDNNUMAKER-HMI-N9H30 USER MANUAL CON10.20 GPI7 S_nRSTCON10.21 GPG2 I2C1_CCON10.22 GPG3 I2C1_DCON10.23 - VSSCON10.24 - VSSTable 2-4 CMOS Sensor Connector (CON10) FunctionNUMAKER-HMI-N9H30 USER MANUAL2.2NuMaker-N9H30 Board - Rear View5V In (CON1)RS-232 DB9 (CON2,CON6)Expand Port (CON7)Speaker Output (J4)Earphone Output (CON4)Buzzer (BZ1)System ResetSW (SW5)SPI Flash (U7,U8)JTAG ICE (J2)Power ProtectionIC (U1)N9H30F61IEC (U5)Micro SD Slot (CON3)RJ45 (CON12, CON13)USB1 HOST (CON15)USB0 Device/Host (CON14)CAN_0 Terminal (CON11)CMOS Sensor Connector (CON9)Power On Setting(SW4, S2~S9)RS-485_6 Terminal (CON5)RTC Battery(BT1)RMII PHY (U14,U16)Figure 2-2 Rear View of NuMaker-N9H30 BoardFigure 2-2 shows the main components and connectors from the rear side of NuMaker-N9H30 board. The following lists components and connectors from the rear view:● +5V In (CON1): Power adaptor 5V input ●JTAG ICE interface (J2) ConnectorGPIO pin of N9H30Function J2.1 - Power 3.3V J2.2 GPJ4 nTRST J2.3 GPJ2 TDI J2.4 GPJ1 TMS J2.5 GPJ0 TCK J2.6 - VSS J2.7 GPJ3 TD0 J2.8-RESETTable 2-5 JTAG ICE Interface (J2) Function●SPI Flash (32 MB) with Winbond W25Q256JVEQ (U7); only one (U7 or U8) SPI Flashcan be used●System Reset (SW5): System will be reset if the SW5 button is pressed●Buzzer (BZ1): Control by GPB3 pin of N9H30●Speaker output (J4): Through the NAU88C22 chip sound output●Earphone output (CON4): Through the NAU88C22 chip sound output●Expand port for user use (CON7):Connector GPIO pin of N9H30 FunctionCON7.1 - Power 3.3VCON7.2 - Power 3.3VCON7.3 GPE12 UART3_TXDCON7.4 GPH4 UART1_TXDCON7.5 GPE13 UART3_RXDCON7.6 GPH5 UART1_RXDCON7.7 GPB0 UART5_TXDCON7.8 GPH6 UART1_RTSCON7.9 GPB1 UART5_RXDCON7.10 GPH7 UART1_CTSCON7.11 GPI1 UART7_TXDNUMAKER-HMI-N9H30 USER MANUAL CON7.12 GPH8 UART4_TXDCON7.13 GPI2 UART7_RXDCON7.14 GPH9 UART4_RXDCON7.15 - -CON7.16 GPH10 UART4_RTSCON7.17 - -CON7.18 GPH11 UART4_CTSCON7.19 - VSSCON7.20 - VSSCON7.21 GPB12 UART10_TXDCON7.22 GPH12 UART8_TXDCON7.23 GPB13 UART10_RXDCON7.24 GPH13 UART8_RXDCON7.25 GPB14 UART10_RTSCON7.26 GPH14 UART8_RTSCON7.27 GPB15 UART10_CTSCON7.28 GPH15 UART8_CTSCON7.29 - Power 5VCON7.30 - Power 5VTable 2-6 Expand Port (CON7) Function●UART0 selection (CON2, J3):–RS-232_0 function and connected to DB9 female (CON2) for debug message output.–GPE0/GPE1 connected to 2P terminal (J3).Connector GPIO pin of N9H30 Function J3.1 GPE1 UART0_RXDJ3.2 GPE0 UART0_TXDTable 2-7 UART0 (J3) Function●UART2 selection (CON6, J6):–RS-232_2 function and connected to DB9 female (CON6) for debug message output –GPF11~14 connected to 4P terminal (J6)Connector GPIO pin of N9H30 Function J6.1 GPF11 UART2_TXDJ6.2 GPF12 UART2_RXDJ6.3 GPF13 UART2_RTSJ6.4 GPF14 UART2_CTSTable 2-8 UART2 (J6) Function●RS-485_6 selection (CON5, J5, SW6~8):–SW6~8: 1-2 short for RS-485_6 function and connected to 2P terminal (CON5 and J5) –SW6~8: 2-3 short for I2S function and connected to NAU88C22 (U10)Connector GPIO pin of N9H30 FunctionSW6:1-2 shortGPG11 RS-485_6_DISW6:2-3 short I2S_DOSW7:1-2 shortGPG12 RS-485_6_ROSW7:2-3 short I2S_DISW8:1-2 shortGPG13 RS-485_6_ENBSW8:2-3 short I2S_BCLKNUMAKER-HMI-N9H30 USER MANUALTable 2-9 RS-485_6 (SW6~8) FunctionPower on setting (SW4, S2~9).SW State FunctionSW4.2/SW4.1 ON/ON Boot from USB SW4.2/SW4.1 ON/OFF Boot from eMMC SW4.2/SW4.1 OFF/ON Boot from NAND Flash SW4.2/SW4.1 OFF/OFF Boot from SPI Flash Table 2-10 Power on Setting (SW4) FunctionSW State FunctionS2 Short System clock from 12MHzcrystalS2 Open System clock from UPLL output Table 2-11 Power on Setting (S2) FunctionSW State FunctionS3 Short Watchdog Timer OFFS3 Open Watchdog Timer ON Table 2-12 Power on Setting (S3) FunctionSW State FunctionS4 Short GPJ[4:0] used as GPIO pinS4Open GPJ[4:0] used as JTAG ICEinterfaceTable 2-13 Power on Setting (S4) FunctionSW State FunctionS5 Short UART0 debug message ONS5 Open UART0 debug message OFFTable 2-14 Power on Setting (S5) FunctionSW State FunctionS7/S6 Short/Short NAND Flash page size 2KBS7/S6 Short/Open NAND Flash page size 4KBS7/S6 Open/Short NAND Flash page size 8KBNUMAKER-HMI-N9H30 USER MANUALS7/S6 Open/Open IgnoreTable 2-15 Power on Setting (S7/S6) FunctionSW State FunctionS9/S8 Short/Short NAND Flash ECC type BCH T12S9/S8 Short/Open NAND Flash ECC type BCH T15S9/S8 Open/Short NAND Flash ECC type BCH T24S9/S8 Open/Open IgnoreTable 2-16 Power on Setting (S9/S8) FunctionCMOS Sensor connector (CON9, SW9~10)–SW9~10: 1-2 short for CAN_0 function and connected to 2P terminal (CON11).–SW9~10: 2-3 short for CMOS sensor function and connected to CMOS sensorconnector (CON9).Connector GPIO pin of N9H30 FunctionCON9.1 - VSSCON9.2 - VSSCON9.3 - Power 3.3VCON9.4 - Power 3.3V NUMAKER-HMI-N9H30 USER MANUALCON9.5 - -CON9.6 - -CON9.7 GPI4 S_PCLKCON9.8 GPI3 S_CLKCON9.9 GPI8 S_D0CON9.10 GPI9 S_D1CON9.11 GPI10 S_D2CON9.12 GPI11 S_D3CON9.13 GPI12 S_D4CON9.14 GPI13 S_D5CON9.15 GPI14 S_D6CON9.16 GPI15 S_D7CON9.17 GPI6 S_VSYNCCON9.18 GPI5 S_HSYNCCON9.19 GPI0 S_PWDNCON9.20 GPI7 S_nRSTCON9.21 GPG2 I2C1_CCON9.22 GPG3 I2C1_DCON9.23 - VSSCON9.24 - VSSTable 2-17 CMOS Sensor Connector (CON9) Function●CAN_0 Selection (CON11, SW9~10):–SW9~10: 1-2 short for CAN_0 function and connected to 2P terminal (CON11) –SW9~10: 2-3 short for CMOS sensor function and connected to CMOS sensor connector (CON9, CON10)SW GPIO pin of N9H30 FunctionSW9:1-2 shortGPI3 CAN_0_RXDSW9:2-3 short S_CLKSW10:1-2 shortGPI4 CAN_0_TXDSW10:2-3 short S_PCLKTable 2-18 CAN_0 (SW9~10) Function●USB0 Device/HOST Micro-AB connector (CON14), where CON14 pin4 ID=1 is Device,ID=0 is HOST●USB1 for USB HOST with Type-A connector (CON15)●RJ45_0 connector with LED indicator (CON12), RMII PHY with IP101GR (U14)●RJ45_1 connector with LED indicator (CON13), RMII PHY with IP101GR (U16)●Micro-SD/TF card slot (CON3)●SOC CPU: Nuvoton N9H30F61IEC (U5)●Battery power for RTC 3.3V powered (BT1, J1), can detect voltage by ADC0●RTC power has 3 sources:–Share with 3.3V I/O power–Battery socket for CR2032 (BT1)–External connector (J1)●Board version 2.1NUMAKER-HMI-N9H30 USER MANUAL2.3 NuDesign-TFT-LCD7 -Front ViewFigure 2-3 Front View of NuDesign-TFT-LCD7 BoardFigure 2-3 shows the main components and connectors from the Front side of NuDesign-TFT-LCD7board.7” resolution 800x480 4-W resistive touch panel for 24-bits RGB888 interface2.4 NuDesign-TFT-LCD7 -Rear ViewFigure 2-4 Rear View of NuDesign-TFT-LCD7 BoardFigure 2-4 shows the main components and connectors from the rear side of NuDesign-TFT-LCD7board.NuMaker-N9H30 and NuDesign-TFT-LCD7 combination connector (CON1).NUMAKER-HMI-N9H30 USER MANUAL 2.5 NuMaker-N9H30 and NuDesign-TFT-LCD7 PCB PlacementFigure 2-5 Front View of NuMaker-N9H30 PCB PlacementFigure 2-6 Rear View of NuMaker-N9H30 PCB PlacementNUMAKER-HMI-N9H30 USER MANUALFigure 2-7 Front View of NuDesign-TFT-LCD7 PCB PlacementFigure 2-8 Rear View of NuDesign-TFT-LCD7 PCB Placement3 NUMAKER-N9H30 AND NUDESIGN-TFT-LCD7 SCHEMATICS3.1 NuMaker-N9H30 - GPIO List CircuitFigure 3-1 shows the N9H30F61IEC GPIO list circuit.Figure 3-1 GPIO List Circuit NUMAKER-HMI-N9H30 USER MANUAL3.2 NuMaker-N9H30 - System Block CircuitFigure 3-2 shows the System Block Circuit.NUMAKER-HMI-N9H30 USER MANUALFigure 3-2 System Block Circuit3.3 NuMaker-N9H30 - Power CircuitFigure 3-3 shows the Power Circuit.NUMAKER-HMI-N9H30 USER MANUALFigure 3-3 Power Circuit3.4 NuMaker-N9H30 - N9H30F61IEC CircuitFigure 3-4 shows the N9H30F61IEC Circuit.Figure 3-4 N9H30F61IEC CircuitNUMAKER-HMI-N9H30 USER MANUAL3.5 NuMaker-N9H30 - Setting, ICE, RS-232_0, Key CircuitFigure 3-5 shows the Setting, ICE, RS-232_0, Key Circuit.NUMAKER-HMI-N9H30 USER MANUALFigure 3-5 Setting, ICE, RS-232_0, Key Circuit3.6 NuMaker-N9H30 - Memory CircuitFigure 3-6 shows the Memory Circuit.NUMAKER-HMI-N9H30 USER MANUALFigure 3-6 Memory Circuit3.7 NuMaker-N9H30 - I2S, I2C_0, RS-485_6 CircuitFigure 3-7 shows the I2S, I2C_0, RS-486_6 Circuit.NUMAKER-HMI-N9H30 USER MANUALFigure 3-7 I2S, I2C_0, RS-486_6 Circuit3.8 NuMaker-N9H30 - RS-232_2 CircuitFigure 3-8 shows the RS-232_2 Circuit.NUMAKER-HMI-N9H30 USER MANUALFigure 3-8 RS-232_2 Circuit3.9 NuMaker-N9H30 - LCD CircuitFigure 3-9 shows the LCD Circuit.NUMAKER-HMI-N9H30 USER MANUALFigure 3-9 LCD Circuit3.10 NuMaker-N9H30 - CMOS Sensor, I2C_1, CAN_0 CircuitFigure 3-10 shows the CMOS Sensor,I2C_1, CAN_0 Circuit.NUMAKER-HMI-N9H30 USER MANUALFigure 3-10 CMOS Sensor, I2C_1, CAN_0 Circuit3.11 NuMaker-N9H30 - RMII_0_PF CircuitFigure 3-11 shows the RMII_0_RF Circuit.NUMAKER-HMI-N9H30 USER MANUALFigure 3-11 RMII_0_PF Circuit3.12 NuMaker-N9H30 - RMII_1_PE CircuitFigure 3-12 shows the RMII_1_PE Circuit.NUMAKER-HMI-N9H30 USER MANUALFigure 3-12 RMII_1_PE Circuit3.13 NuMaker-N9H30 - USB CircuitFigure 3-13 shows the USB Circuit.NUMAKER-HMI-N9H30 USER MANUALFigure 3-13 USB Circuit3.14 NuDesign-TFT-LCD7 - TFT-LCD7 CircuitFigure 3-14 shows the TFT-LCD7 Circuit.Figure 3-14 TFT-LCD7 CircuitNUMAKER-HMI-N9H30 USER MANUAL4 REVISION HISTORYDate Revision Description2022.03.24 1.00 Initial version NUMAKER-HMI-N9H30 USER MANUALNUMAKER-HMI-N9H30 USER MANUALImportant NoticeNuvoton Products are neither intended nor warranted for usage in systems or equipment, anymalfunction or failure of which may cause loss of human life, bodily injury or severe propertydamage. Such applications are deemed, “Insecure Usage”.Insecure usage includes, but is not limited to: equipment for surgical implementation, atomicenergy control instruments, airplane or spaceship instruments, the control or operation ofdynamic, brake or safety systems designed for vehicular use, traffic signal instruments, all typesof safety devices, and other applications intended to support or sustain life.All Insecure Usage shall be made at customer’s risk, and in the event that third parties lay claimsto Nuvoton as a result of customer’s Insecure Usage, custome r shall indemnify the damagesand liabilities thus incurred by Nuvoton.。
AutoCAD性能提升指南说明书

AutoCAD TipsInstallation settings to speed up performance:1. Do not install VBA enabler (tremendously slows down performance)2. Enable Information System (2013 will not run without it when set up to communicate with AutoDesk 360)Initial commands to speed up performance (type the following at the command prompt):UCSDETECT (set to 0) – this will disable Dynamic UCSQPMODE (set to 0) – disables Quick Properties Palette for items selected in the drawingDRAWORDERCTL (set to 0) – speeds up regeneration when switching tilemodes and when regenerating in model space HPDLGMODE (set to 1) – displays hatch/gradient box for items selected in drawingHPQUICKPREVIEW (set to 0) – disables hatch previewVTENABLE (set to 0) – disables smooth view transitions when zooming in/out (makes zooming instantaneous) LAYERDLGMODE (set to 0) – speeds up loading of layers paletteMBUTTONPAN (set to 0) – middle button brings up snap menu, (set to 1) – middle button is PAN command ROLLOVERTIPS (set to 0) – disables rollover tipsSELECTIONPREVIEW (set to 0) – disables selection previewingSELECTIONCYCLING (set to 0) – turns selection cycling/overlapping offPICKADD (set to 1) – enables subsequent selections when modifying propertiesAUTOCOMPLETE – set to OFFLOCKUI (set to 0) – unlocks toolbars and windows (Note: when toolbars are locked, performance is better. Only use this command if you use the layers palette window in lieu of the layers toolbar.AUTOSNAP (set to 16) – Restricts F8 (ortho) from disabling F10 (polarmode)Initial settings to speed up performance:1. If your windows "Aero" theme is enabled, you need to disable it. Turn off Windows transparency also.2. Plug your mouse directly in to your laptop. Do not plug it in to the dock.2. Right click on your AutoCAD desktop icon and disable digital signatures.3. Type CONFIG at the command line and do the following:A. Under the display tab:- turn off scroll bars, status bar, tooltips, rollover tooltips. Shrink cursor size to speed up performanceB. Under open and save tab:- enable maintain visual fidelity and size compatibilityC. Under user preferences tab:- disable double click editing and shortcut menus in drawing areaD. Under drafting tab:- disable all auto track settings- under autosnap settings enable autosnap aperture boxE. Under selection tab:- disable object grouping and enable implied windowing- disable selection previewAutoCAD Tips(continued)Initial settings:1. Type DSETTINGS at the command prompt:-enable polar tracking (or press F10)- disable pointer input, enable dimension input where possible, click show only one dimension- disable quick properties palette- disable selection cycling2. Type 3DCONFIG at the command prompt:- enable adaptive degradation- click manual tune and enable hardware acceleration3. Pull down menus, go to:- Tools/Customize/Edit Program Parameters (ACAD.pgp) – for those of you that edit command abbreviations Commands to reduce drawing size and speed up performance:1. Type PURGE and AUDIT regularly, will remove errors, unused blocks, layers and trash files2. Type SCALELISTEDIT, will remove unused scales in the drawing3. Type –EXPORTTOAUTOCAD, Make sure all layers are on, thawed and unlocked before executing this command4. Type FLATSHOT will explode any 3D entities that are presentNote: For both of the below commands, select only small portions of the drawing at a time for this to be effective5. Type FLATTEN, will flatten any objects in the Z axis6. Type OVERKILL, will remove lines that are stacked on top of one anotherTo change the new offset command to the old one. If you use icons, modify your toolbar macro command to initiate "exoffset" instead of "offset". Or edit your PGP file to show the exoffset command.。
Windows进程名称

COM+ Event System 支持系统事件通知服务(SENS),此服务为订阅组件对象模型(COM)组件事件提供自动分布功能。如果停止此服务,SENS 将关闭,而且不能提供登录和注销通知。如果禁用此服务,显式依赖此服务的其他服务将无法启动。 已启动 手动 本地系统
Distributed Transaction Coordinator 协调跨多个数据库、消息队列、文件系统等资源管理器的事务。如果停止此服务,则不会发生这些事务。如果禁用此服务,显式依赖此服务的其他服务将无法启动。 手动 网络服务
DNS Client 为此计算机解析和缓冲域名系统 (DNS) 名称。如果此服务被停止,计算机将不能解析 DNS 名称并定位 Active Directory 域控制器。如果此服务被禁用,任何明确依赖它的服务将不能启动。 已启动 自动 网络服务
Logical Disk Manager 监测和监视新硬盘驱动器并向逻辑磁盘管理器管理服务发送卷的信息以便配置。如果此服务被终止,动态磁盘状态和配置信息会过时。如果此服务被禁用,任何依赖它的服务将无法启动。 已启动 自动 本地系统
Logical Disk Manager Administrative Service 配置硬盘驱动器和卷。此服务只为配置处理运行,然后终止。 手动 本地系统
Remote Access Auto Connection Manager 无论什么时候当某个程序引用一个远程 DNS 或 NetBIOS 名或者地址就创建一个到远程网络的连接。 手动 本地系统
主板上的英文字母都代表什么

英文字母都代表什么1.L----电感.电感线圈2.C----电容.3.BC---贴片电容4.R----电阻5.9231 芯片-----脉宽6.74 门电路-----它在主板南桥旁边7.PQ----场效应管8.VT、Q、V----三级管9.VD、D---二级管10.RN----排阻11. ZD----稳压二极管12.W-----电位器13.IC---稳压块14.IC、N、U----集成电路15.X、Y、G、Z----晶振16.S-----开关17.CM----频率发生器(一般在晶振14.31818 旁边)2. 计算机开机原理开机原理:插上ATX 电源后,有一个静态5V电压送到南桥,为南桥里面的ATX 开机电路提供工作条件(ATX 电源的开机电路是集成南桥里面的),南桥里面的ATX 开机电路将开始工作,会送一个电压给晶体,晶体起振工作,产生振荡,发出波形。
同时ATX 开机电路会送出一个开机电压到主板的开机针帽的一个脚,针帽的另一个脚接地。
当打开开机开关时,开机针帽的两个脚接通,而使南桥送出开机电压对地短路,拉低南桥送出的开机电压,而使南桥里的开机电路导通,拉低静态5V电压,使其变为0 电位。
使电源开始工作,从而达到开机目的。
(ATX 电源里还有一个稳压部分,它需要静态5V变为0 电位才能工作)。
3. 主板时钟电路工作原理时钟电路工作原理:3.5 电源经过二极管和电感进入分频器后,分频器开始工作,和晶体一起产生振荡,在晶体的两脚均可以看到波形。
晶体的两脚之间的阻值在450---700 欧之间。
在它的两脚各有1V左右的电压,由分频器提供。
晶体两脚常生的频率总和是14.318M。
总频(OSC)在分频器出来后送到PCI槽的B16 脚和ISA的B30 脚。
这两脚叫OSC测试脚。
也有的还送到南桥,目的是使南桥的频率更加稳定。
在总频OSC 线上还电容。
总频线的对地阻值在450---700 欧之间,总频时钟波形幅度一定要大于2V 电平。
oc引导 attempting system restart

“OC引导attempting system restart”是一个与计算机系统和操作系统相关的术语。
OC通常指的是OpenCore,一个用于引导macOS的开源引导加载程序。
当你看到“OC引导attempting system restart”这样的消息时,它通常意味着OpenCore正在尝试重新启动你的计算机系统。
这可能发生在几种情况下:
系统更新:当操作系统或固件需要更新时,可能需要重新启动系统以完成安装过程。
系统故障:如果系统遇到严重故障或错误,可能需要重新启动以恢复到正常状态。
配置更改:如果你对系统的配置进行了更改(例如更改了启动参数或硬件设置),可能需要重新启动以使更改生效。
在大多数情况下,“OC引导attempting system restart”是正常的,并且是为了确保系统的稳定性和安全性。
然而,如果系统频繁地尝试重新启动,或者无法成功完成重新启动过程,那么可能存在更深层次的问题,需要进一步调查和解决。
Nissan车型信息面板说明书

Instrument PanelDriver Information InterfaceThe driver information interface shows information such as the estimated travelable distance and fuel economy of the vehicle. It also displays messages such as warnings and other helpful information.■Accessing contents in the main displayPress the (home) button, then roll the left selector wheel to scroll to the content you want to see. Press the left selector wheel to see detailed information.■Switching the Display1Switching the DisplayTo go back to the previous screen, press the (back) button.You can edit, add, or delete the meter contents using the audio/information screen.2Customizing the Meter P.272Instrument Panel(Home) Button Left Selector WheelRoll the left selectorwheel.WarningsP.Safety SupportP.MaintenanceP.Rear Seat BeltsP.Driver AttentionP.Driving SupportP.Traffic SignP.NavigationP.Power/ChargeP.Eco DriveP.Power FlowP.Range & FuelP.Fuel EconomyP.Speed & Time P.AudioP.PhoneP.Instrument Panel■Sub displayPress the TRIP button to change the display.Shows the total number of miles or kilometers that your vehicle has accumulated.■OdometerOdometerOutside TemperatureTrip A Trip BTRIP ButtonInstrument Panel Shows the total number of miles or kilometers driven since the last reset. Meters Aand B can be used to measure two separate trips.■Resetting a trip meterTo reset a trip meter, display it, then press and hold the TRIP Button. The trip meteris reset to 0.0.Shows the outside temperature in Fahrenheit (U.S.) or Celsius (Canada).■Adjusting the outside temperature displayAdjust the temperature reading by up to ±5°F or ±3°C if the temperature readingseems incorrect.■Trip Meter■Outside Temperature1Trip MeterSwitch between trip meter A and trip meter B bypressing the TRIP Button.1Outside TemperatureThe temperature sensor is in the front bumper.Road heat and exhaust from another vehicle canaffect the temperature reading when your vehiclespeed is less than 19 mph (30 km/h).It may take several minutes for the display to beupdated after the temperature reading has stabilized.You can adjust the temperature reading.2Customized Features P.357Instrument PanelRoll the left selector wheel to switch between trip computer A and trip computer B.■Range & FuelLeft Selector WheelRollInstrument Panel ■Trip meterShows the total number of miles or kilometers driven since the last reset. Meters Aand B can be used to measure two separate trips.Resetting a trip meterTo reset the trip meter, display it, then press the left selector wheel and then selectReset.u The trip meter is reset to 0.0.■Average fuel economy (Avg. Fuel)Shows the estimated average fuel economy of each trip meter in mpg or l/100 km.The display is updated at set intervals. When a trip meter is reset, the average fueleconomy is also reset.■Instant fuel economyShows the instant fuel economy as a bar graph in mpg or l/100 km.■RangeShows the estimated distance you can travel on the remaining power and fuel. Thisestimated distance is based on the vehicle’s current fuel economy.1Trip meterSwitch between trip meter A and trip meter B byrolling the left selector wheel.When resetting the trip meter in the Range & Fuel,the trip meter in the sub display resets at the sametime.1Average fuel economy (Avg. Fuel)You can change when to reset the average fueleconomy.2Customized Features P.357Instrument PanelRoll the left selector wheel to switch between trip computer A and trip computer B.■Speed & TimeRollLeft Selector WheelInstrument Panel ■Trip meter2Trip meter P.148■Elapsed timeShows the time elapsed since Trip A or Trip B was reset.■Average speed (Avg. Speed)Shows the average speed in mph or km/h since Trip A or Trip B was reset.1Elapsed timeYou can change when to reset the elapsed time.2Customized Features P.3571Average speed (Avg. Speed)You can change when to reset the average speed.2Customized Features P.357Instrument Panel■CompassShows the compass screen.■Turn-by-Turn DirectionsWhen driving guidance is provided by the navigation system *, Android Auto or Apple CarPlay, turn-by-turn directions to your destination appear.2Refer to the Navigation System Manual 2Android Auto P.3262Apple CarPlay P.320■Navigation1NavigationYou can select whether to have the turn-by-turn display come on or not during the route guidance.2Customized Features P.357Turn-by-turn directions may not be available for all apps.When the compass or turn-by-turn directions are displayed, you can control some navigation system functions on the driver information interface by scrolling the left selector wheel.2Refer to the navigation systemModels with navigation systemCompassTurn-By-Turn Driving Directions*Not available on all modelsInstrument Panel2Driver Information Interface Warning andInformation Messages P.115Shows the remaining oil life and MaintenanceMinder TM.2Maintenance Minder TM P.533■Warnings1WarningsIf there are no Warnings, None message appears onthe driver information interface.If there are multiple warnings, you can roll the leftselector wheel to see other warnings.(Example)■MaintenanceInstrument PanelShows the current phone information.2Bluetooth ® HandsFreeLink ® P.381■PhoneInstrument Panel■Electric motorThe degree to which the electric motor isbeing powered is displayed by the readings onthe POWER side.■Battery charge in progressThe degree to which the High Voltage batteryis being charged is displayed by the readingson the CHARGE side.■Speed/Distance UnitsEnables you to show another unit on thedriver information interface, head-up display*and audio/information screen and set thedisplayed measurements to read in eithermiles and mph or km and km/h.Press and hold the left selector wheel whenyou select Power/Charge on the driverinformation interface. Each time you do this,the unit will change from miles, mph to km,km/h or vice versa. After this, a confirmationscreen will appear for a few seconds.■POWER/CHARGE Gauge*Not available on all modelsInstrument PanelShows the current audio information.2Audio System Basic Operation P.257Shows the traffic sign recognition system.2Traffic Sign Recognition System P.493■Audio■Traffic Sign Recognition SystemInstrument PanelAppears when any of the rear seat belts arelatched or unlatched.2Seat Belt Reminder P.46■Rear Seat Belt ReminderInstrument PanelThe Driver Attention Monitor analyzes steering inputs to determine if the vehicle is being driven in a manner consistent with drowsy or inattentive driving. If it determines that the vehicle is being driven in such a manner, it will display the degree of the driver’s attention on the driver information interface.When you select Driver Attention on thedriver information interface, bars on it light upin white to indicate the degree of the driver’sattention.2Accessing contents in the main displayP.143■Driver Attention Monitor 1Driver Attention Monitor The Driver Attention Monitor cannot always detect if the driver is tired or inattentive.Regardless of the system’s feedback, if you arefeeling tired, stop in a safe location and rest for as long as needed.Driver InformationInterfaceLeft Selector Wheel(Home) Button LevelInstrument Panel If two bars light up, the Driver Attention Level Low message will appear.If one bar lights up, the Driver Attention Level Low. Time For A Break message will appear, a beep will sound, and the steering wheel will vibrate.If this message appears, stop in a safe location and rest for as long as needed.The message will disappear when the left selector wheel is pressed or when the system has determined that the driver is driving normally.If the driver does not take a break and the monitor continues to detect that the driver is very tired, the message will appear again after approximately 15 minutes, accompanied by a beep and steering wheel vibrations.The message does not appear when thetraveling time is 30 minutes or less.Instrument Panel■The Driver Attention Monitor resets when:•The power system is turned off.•The driver unfastens the seat belt and opens the door while the vehicle is stopped.■For the Driver Attention Monitor to function:•The vehicle must be traveling above 25 mph (40 km/h).•The electric power steering (EPS) system indicator must be off.■Depending on driving conditions or other factors, the Driver Attention Monitor may not function in the following circumstances:•The steering assist function of the Lane Keeping Assist System (LKAS) is active.2Lane Keeping Assist System (LKAS) P.480•The condition of the road is poor, e.g. the surface is unpaved or bumpy.•It is windy.•The driver is frequently operating the vehicle in an assertive manner such as changing lanes or accelerating.■CustomizingYou can change the Driver Attention Monitor settings. Select Tactile And Audible Alert , Tactile Alert , or OFF .2Customized Features P.3571For the Driver Attention Monitor to function:The bars on the driver information interface remain grayed out unless the Driver Attention Monitor isfunctioning.Instrument PanelShows the distance between your vehicle andthe vehicle detected ahead.Informs you whether ACC with Low SpeedFollow and/or LKAS is activated or not. If ACCwith Low Speed Follow is activated, the setfollowing interval is displayed. If LKAS isactivated, the displayed lane marks change toindicate that LKAS is activated.2Adaptive Cruise Control (ACC) with LowSpeed Follow P.4642Lane Keeping Assist System (LKAS) P.480■Driving Support Information1Driving Support InformationIn case ACC with Low Speed Follow is not activated,when the distance between your vehicle and thevehicle ahead becomes too small, the section behindthe vehicle icon turns amber and alerts you.Amber gradation Icon of vehicle aheadDistance to vehicle aheadWhen ACC with Low Speed Follow andLKAS are OnSet Vehicle IntervalACC with Low Speed Follow on: The section behind the vehicle icon turns green.LKAS on: The lane outlines appear on the display.LKAS starts: The lane lines change to solid ones.LKAS suspend: The lane lines change to dotted ones.Instrument PanelIndicates the status of RDM, Low Speed Braking Control *, CMBS TM , and blind spot information system *, such as On, Off, or Failure, by color and letters.The following colors indicate the status of any of the above mentioned systems:•Green: The system is on.•Gray: The system is off.•Amber: There is a problem with the system.■Safety Support 1Safety Support If a system is indicated by the color amber, have your vehicle checked by a dealer immediately.To turn on or off each system, first rotate the leftselector wheel to switch displays. From the next display you can select which system to turn on or off.2RDM On and Off P.4912CMBS TM On and Off P.4532Blind spot information system on and offP.4452System On and Off P.461You can also confirm the status of each function bythe color of the safety support indicator.2Safety Support Indicator (Amber) P.1112Safety Support Indicator (Green/Gray)P.114Even when the Low Speed Braking Control icon is green, if the parking sensor is turned off for the rearonly, the brake assist will not operate when reversing.2Turning off All Rear Sensors P.518Models with Low Speed Braking ControlBraking Control Icon and Status *Not available on all modelsInstrument PanelShows the average fuel economy for the lastthree driving cycles (1-3), and the currentdriving cycle (0) in mpg or l/100 km.Each time you set the power mode to ON, thedisplay is updated, and the oldest record isdeleted.■Average Fuel Economy Recordsuu Gauges and Displays u Driver Information Interface Instrument Panel■Eco Drive Display The vehicle icon on the display moves forward or backward while driving.The more aggressive the acceleration is, the further the icon moves forward.The more aggressive the deceleration is, the further the icon moves backward.Keep the icon near the center of the circle for better fuel economy while driving.■Eco Drive Display/Drive Cycle Score/Lifetime Points 1Eco Drive Display Switch between the average fuel economy A and average fuel economy B by rolling the left selector wheel.Decelerationuu Gauges and Displays u Driver Information InterfaceInstrument Panel ■Drive Cycle Score/Lifetime PointsAppear for a few seconds when you set the power mode to VEHICLE OFF. Each has three stages. Depending on your driving style, the leaf icon(s) and the gauge increase or decrease to indicate that you have reached a different stage of fuel economy.■Resetting the Drive Cycle Score1.Make sure the shift position is in P. Turn the power mode to ON.2.If ECON mode is on, press the ECON button to turn it off.3.Turn the power mode to VEHICLE OFF.4.Turn the power mode to ON again.u Make sure to complete steps from 4 through 6 within 30 seconds.5.Depress the brake pedal twice.6.Press the ECON button twice.u The color of the ambient meter will turn to monochrome.7.Turn the power mode to VEHICLE OFF.Lifetime PointsAdvancinguu Gauges and Displays u Driver Information Interface Instrument Panel Displays the power flow of the motor and engine, indicating the vehicle’s power source and whether the battery is being charged.■Power Flow Monitor 1Power Flow Monitor While the vehicle is stationary with the engine running, the following may appear on the driverinformation interface.Power is supplied by the motor and the engine.Hybrid (HV)The engine is running and the motor is charging the HighVoltage battery.Power is being supplied by the engine only.Engine ONEngine OFFPower is supplied by the motor.Electric Vehicle (EV)The engine is running and the motor is charging the HighVoltage battery.Engine (Direct Drive)The motor is charging the High Voltage battery.Regeneration。
Autodesk Vault Server ASP 安装检查状态故障诊断指南说明书

Autodesk®Installing Autodesk Vault Server ASP Check Status TroubleshootingGuideThe purpose of this checklist is to provide step by step processes to get past the asp check status errors. This is designed to address the issues Autodesk has uncovered as possible reasons for pre-check failures.You may need to complete all steps noted below in order for the ASP pre-checks to clear and have a successful installation.NOTE: DO NOT REMOVE OR IIS as noted in the steps.You will render the windows 8, 8.1 or server user interface unusable if you removeClearing APS Pre-CheckContents1. Vault Server Installation (3)2. Review link (4)3. Review Link (5)4. Set User Permissions on Default Web Site (6)5. Step 4 IIS Manager (7)6. Application Pools (8)7. Static Page (9)Clearing APS Pre-Check31. Vault Server InstallationBefore proceeding with any Vault Server Installation Ensure: 1. UAC is off in its UI 2. Firewall is off in its UI3. Firewall is off in Services.msc4. AntiVirus is off or uninstalled5.Local Security Policy>Local Policy>Security Options User Account Control Settings are all offa. The above steps may require a reboot of the OS if you have to turn these features off.6. You are logged in as <LocalComputerName>\Administratora. NO OTHER USER accountb. Of course this is only a recommendation to save you headaches during installClearing APS Pre-CheckAutodesk [and other products] are registered trademarks or trademarks of Autodesk, Inc., and/or its subsidiaries and/or affiliates in the USA and/or other countries. All other brand names, product names, or trademarks belong to their respective holders. Autodesk reserves the right to alter product and services offerings, and specifications and pricing at any time without notice, and is not responsible for typographical or graphicalerrors that may appear in this document. © 2013 Autodesk, Inc. All rights reserved.2. Review link1. /view/VAULT/2015/ENU/?guid=GUID-47A9F7E6-2840-4797-9F00-D8977B17F5F4a. NOTE: DO NOT REMOVE OR IIS as noted in the steps. You will render the server user interface unusable if you remove 2. IISRESET3. Reattempt pre-check and allow install to complete if possible4. Open Web Browser enter LOCALHOST in the address bar. Do you see the IISDisplay screen?5. Were able to successfully install ADMS after reviewing this step. If not, see nextpage.Clearing APS Pre-Check53. Review Link1. /view/VAULT/2015/ENU/?guid=GUID-C69CA646-9377-40D0-ACFC-DCB9E17453E7a. NOTE: DO NOT REMOVE OR IIS as noted in the steps. You will render the server user interface unusable if you remove 2. IISRESET3. Reattempt pre-check and allow install to complete if possible4. Open Web Browser enter LOCALHOST in the address bar. Do you see the IISDisplay screen?5. Were able to successfully install ADMS after reviewing this step. If not, see nextpage.Clearing APS Pre-CheckAutodesk [and other products] are registered trademarks or trademarks of Autodesk, Inc., and/or its subsidiaries and/or affiliates in the USA and/or other countries. All other brand names, product names, or trademarks belong to their respective holders. Autodesk reserves the right to alter product and services offerings, and specifications and pricing at any time without notice, and is not responsible for typographical or graphicalerrors that may appear in this document. © 2013 Autodesk, Inc. All rights reserved.4. Set User Permissions on Default Web Site1. Set user and group rights on the default web site2. Right click Default Web Site1. Edit the IIS_IUSRS user group in the Security window2. Give full control rights to IIS_IUSRS3. IISRESET6.Open Web Browser enter LOCALHOST in the address bar. Do you see the IIS Display screen?7. Were able to successfully install ADMS after reviewing this step. If not, see nextpage..Clearing APS Pre-Check75. Step 4 IIS Manager1. Open IIS Manager and select the IIS Server header2. Find ISAPI and CGI restrictions3. Review, are they set to deny or allow? Which ones do you think are required to beallowed if they are set to deny? Test and find out.4. IISRESET5. Reattempt pre-check and allow install to complete if possible6. Open Web Browser enter LOCALHOST in the address bar. Do you see the IISDisplay screen?7. Were able to successfully install ADMS after reviewing this step If not, see nextpage.Clearing APS Pre-CheckAutodesk [and other products] are registered trademarks or trademarks of Autodesk, Inc., and/or its subsidiaries and/or affiliates in the USA and/or other countries. All other brand names, product names, or trademarks belong to their respective holders. Autodesk reserves the right to alter product and services offerings, and specifications and pricing at any time without notice, and is not responsible for typographical or graphicalerrors that may appear in this document. © 2013 Autodesk, Inc. All rights reserved.6. Application Pools1. Go to the default application pools in IIS manager2. Find LOAD USER PROFILE and Enable 32-Bit Application3. What is it set to? Change it to the opposite setting.a. Hint: Enable 32 bit needs to be false, as does load user profile.4. IISRESET5. Reattempt pre-check and allow install to complete if possible6. Were able to successfully install ADMS after reviewing this step? If not, seenext page.Clearing APS Pre-Check97. Static PageClear the ASPNETStatic.txt problem 1. Go to Add Roles and Features2. Click through the next two dialogs3. Add the roles highlighted belowClearing APS Pre-CheckAutodesk [and other products] are registered trademarks or trademarks of Autodesk, Inc., and/or its subsidiaries and/or affiliates in the USA and/or other countries. All other brand names, product names, or trademarks belong to their respective holders. Autodesk reserves the right to alter product and services offerings, and specifications and pricing at any time without notice, and is not responsible for typographical or graphicalerrors that may appear in this document. © 2013 Autodesk, Inc. All rights reserved.4. Clear any warnings that are noted.5. Find connection timeout and set it to 12006. IISRESET7. Reattempt pre-check and allow install to complete if possible8. Were able to successfully install ADMS after reviewing this step. If not, pleasereply to the case and let your support representative know you have completed all steps. Please note, by providing you these steps, your support rep will assume you have thoroughly completed each step and will not attempt these steps toinstall. It is your responsibility to ensure you have completed these steps. Failure to do these steps, will result in a delay in your problem being resolved.。
潍柴汽车产品说明书

I
INDEX
v w
Main Menu
Index
Changing Oil How to......................................... 147 When to...................................Байду номын сангаас... 135
Charging System Indicator .... 46, 186 Checklist, Before Driving............. 123 Child Safety ...................................... 29
Booster Seats ............................... 38 Child Seats.................................... 34 Important Safety Reminders ...... 32 Larger Children ........................... 37 Risk with Airbags ........................ 30 Small Children.............................. 33 Child Seats........................................ 34 Cleaning Seat Belts........................ 160 Clock.................................................. 54 Clutch Fluid.................................... 154 CO in the Exhaust ......................... 207 Cold Weather, Starting in ............. 124 Compact Spare Tire....................... 174 Consumer Informationˎ................ 212 Controls, Instruments and.............. 43 Convertible Top ............................... 70 Convertible Top Cover................ 72 Lowering the Convertible Top... 70 Maintenance................................. 74 Raising the Convertible Top ...... 73
计算机组装 集成外部设备设置界面

计算机组装集成外部设备设置界面该菜单内的选项主要用于控制主板上的USB接口、IDE/SATA接口、集成网卡等设备,此外在板载设备与独立安装的板卡设备产生某些冲突时,也可通过调整该菜单内的某些选项来解决问题,其界面如图10-12所示。
图10-12 Integrated Peripherals选项界面●IDE Function Setup此项用于调整IDE端口设置,在选择该项并按下Enter键后,即可在弹出界面内进行激活IDE通道等操作。
●RAID Config当用户准备利用多块硬盘组建磁盘阵列时,便需要在该选项内调整磁盘阵列的各项参数。
如果计算机内只有一块硬盘,则无须调整该项。
●OnChip USB此选项用于控制USB接口所要执行的标准,默认设置为1.1+2.0,也就是即支持1.1标准的USB设备,也支持2.0标准的设备。
●USB Memory Type该项对于控制主板对内存盘存储器类型的识别情况,由于是针对控制器的调节,因此默认将其设置为SHADOW即可。
●USB Keyboard/Storeage/Mouse Supp此项用于设置USB键盘、USB存储设备、USB鼠标的支持情况。
如果在不支持USB或者没有USB驱动的操作系统(如DOS)下使用USB键盘、存储器或鼠标,便需要将此项设置为Enabled。
该项默认设置为Disabled。
●HD Audio该项用于调整HD音效,按照默认参数将其设置为Auto即可。
●Auto Onboard Lan Control此项用于对板载网卡的设置,当参数值为Enabled时将会启用板载网卡;而当将其设置为Disabled时则会禁用板载网卡。
提示在安装独立网卡后如果总是出现未知问题,可尝试禁用板载网卡,并观察问题是否已经解决。
●IDE HDD Block Mode该项用于设置IDE硬盘是否采用快速块交换的模式来传输数据。
如果将其关闭,则有时候将会出现IDE硬盘无法引导操作系统的问题。
泰克 DSA8200, TDS CSA8000 系列产品软件使用说明书

Read thisfirstTektronix DSA8200,TDS/CSA8000series product softwareRead this document before using this software package.This version of productsoftware:Ensures that your instrument and modules work with the latest features andproduct enhancements.Supports the DSA8200,CSA8000Series,and TDS8000Series instruments.The installation program detects the instrument and installs the appropriatesoftware.Runs only on the Microsoft Windows XP operating system.Contact Tektronixfor operating system upgrade information if your instrument is not runningWindows XP.How to use How you use this package depends on how you received it:If you received this software package with your new oscilloscope,keepthis software:To reinstall the product software,replacing a damaged or corruptedinstallation.To rebuild the operating system,either as a part of a product softwareinstall(sometimes required)or after repairing a corrupted or damaged OS.If you received this software package with a sampling module,the modulemay require the supplied software to be installed to use the module or amodule e the Product Software CD-ROM to install the latestversion TekScope application and related software on the instrument.Beforeinstalling,check that the software versions(as listed on the CD-ROM)arenewer than the current product software installed on you instrument beforeinstalling(see How to check the current product software version).Thisproduct software only installs on instruments running the Microsoft WindowsXP operating system.Be sure to read the installation booklet supplied withthe CD-ROM disc.If you ordered this package to upgrade to the latest version of productsoftware,use the Product Software CD-ROM to install the TekScopeapplication and connectivity software on the instrument that is to be upgraded.This version of product software only installs on instruments running theMicrosoft Windows XP operating system.Be sure to read the installationbooklet supplied with the CD-ROM disc.Copyright©Tektronix*P071205104*071-2051-04Read thisfirstHow to check the current product software version 1.With your instrument TekScope application running,click Help>About<instrument_name>.2.Check the listed version number.If the version number shown is lower thanthe version listed on the CD-ROM label,use this Product Software CD-ROM to upgrade your product software.Other information Read the Release Notes.These can be found on the Product Software CD-ROMand on the hard drive of the instrument.Read the Product Software CD-ROM install booklet if you need to install/reinstallthe product software.If you need to repair or restore the operating system,read the Quick Start Usermanual provided with your instrument.If your instrument came with OperatingSystem Restore software,read the installation instructions provided with thesoftware.Visit the Tektronix Web site at for the latest upgrades ofproduct software and for DSA8200information.NOTE.Tektronix encourages you to keep your TekScope and related applicationsoftware updated to the latest version appropriate for your Microsoft WindowsOperating System.2Read thisfirst:Tektronix DSA8200,TDS/CSA8000series product software。
惠普激光打印机LaserJet Pro MFP M225和M226入门指南说明书

2. 选择软件和驱动程序。 3. 下载适用于您的打印机型号和操作系统的软件。 4. 通过单击所需的 .exe 或 .zip 文件,启动安装文件。
方法 3:从打印机 CD 安装(仅限 Windows)
对于 Windows,在打印机附带的 CD 上提供软件安装文件。 对于 OS X,CD 上的安装程序文件中含有从 Web 下载文件的链接。 1. 将打印机 CD 插入计算机。 2. 继续执行“7. 安装软件”。
2
7. 安装软件
Windows 完整解决方案
1. 将打印机 CD 插入计算机,或启动从 Web 下载的软件安装 文件。
3. 使用键盘输入通行短语,然后轻触 “确定”按钮。
4. 等待打印机建立网络连接。 5. 在打印机控制面板上,轻触“网络” 按钮。如果已列出
IP 地址,则网络连接已建立。 如果未列出,请等待几分钟,然后重试。 请记下 IP 地址以备安装软件时使用。 IP 地址示例:192.168.0.1 6. 要从计算机进行打印,请继续执行“6. 找到或下载软件安装 文件”。要仅从手机或平板电脑进行打印,请继续执行 “8. 移动和无线打印”。
LaserJet Pro MFP M225 and M226 入门指南
2
Getting Started Guide
重要信息:
执行打印机硬件设置海
报上的步骤 1 - 3,
然后执行下一页上的步 骤 4。
ZHCN 4. 在控制面板上进行初始设置...................2 5. 选择一种连接方式并准备安装软件........2 6. 找到或下载软件安装文件........................2 7. 安装软件....................................................3 8. 移动和无线打印(可选)........................3 9. 设置通过电子邮件的 HP ePrint(可选)..................................... 4 10. 为网络上的打印机设置扫描功能 (仅限无线型号 - 可选)......................... 4 11. 设置传真(可选)....................................5 故障排除..........................................................6
NVIDIA OptiX 2.5.1 光线追踪引擎与SDK说明书

Release Notes for theNVIDIA® OptiX™ ray tracing engineVersion 2.5.1 May 2012Welcome to the latest release of the NVIDIA OptiX ray tracing engine and SDK, with support for all CUDA-capable GPUs. This package contains the libraries required to experience the latest technology for programmable GPU ray tracing, plus pre-compiled samples (with source code) demonstrating a broad range of ray tracing techniques and highlighting basic functionality.Support:Please post comments or support questions on the new NVIDIA developer forum that can be found here:/devforum/categories/tagged/optix&catid=151 (use the optix tag for all OptiX related posts). Questions that require confidentiality can be e-mailed to ********************* and someone on the development team will respond. The OptiX download page is/optix.System Requirements (for running binaries referencing OptiX) Graphics Hardware:∙CUDA capable devices (G80 or later) are supported on GeForce, Quadro, or Tesla class products.Multiple devices/GPUs are onl y supported on “GT200” or “Fermi” class GPUs. Out-of-core raytracing of large datasets is only supported on Quadro and Tesla GPUs.Graphics Driver:∙The CUDA R275 or later driver is required. The latest drivers available are highly recommended (285.86 or later for Windows, 290.10 for Linux and the CUDA 4.0 driver extension for Mac). Forthe Mac, the driver extension module supplied with CUDA 4.0 or later will need to be installed.Driver versions beginning with 285.53 include very large speedup to OptiX compile times.∙Windows Vista and 7 use the Windows Display Driver Model (WDDM). This driver is suboptimal for GPU computation, so Nvidia has introduced the Tesla Compute Cluster (TCC) driver. Bydefault, Tesla products use the TCC driver, which does not support OpenGL or D3D, and does notsupport interoperating with WDDM cards in CUDA and OptiX. An OptiX context must use onlyWDDM devices or only TCC devices. This situation should be resolved later this year. In themeantime, placing your Tesla hardware into WDDM mode will allow it to work in a multi-GPUconfiguration with other WDDM devices such as Quadro brand parts.Operating System:∙Windows XP/Vista/7 32-bit or 64-bit; Linux RHEL 4.8 - 64-bit only, Ubuntu 10.10 - 64-bit; OSX10.6+ (universal binary with 32 and 64-bit x86).Development Environment Requirements (for compiling with OptiX) All Platforms (Windows, Linux, Mac OSX):∙CUDA Toolkit 2.3, 3.0, 3.1, 3.2, 4.0, 4.1, 4.2.OptiX 2.5 has been built with CUDA 4.0, but any specified toolkit should work when compiling PTX forOptiX. If an application links against both the OptiX library and the CUDA runtime on Mac and Linux, it is recommended to use CUDA 4.0. CUDA 4.1 and 4.2 are now supported. CUDA 4.1 and 4.2 code oftencontains a moderate performance penalty due to loads and stores not being vectorized anymore. Forthis reason CUDA 4.0 is generally preferred.∙C/C++ CompilerVisual Studio 2005, 2008 or 2010 is required on Windows systems. gcc 4.2 and 4.3 have been tested onLinux. The 3.2 Xcode development tools have been tested on Mac OSX 10.6.∙GLUTMost OptiX samples use the GLUT toolkit. Freeglut ships with the Windows OptiX distribution. GLUT isinstalled by default on Mac OSX. A GLUT installation is required to build samples on Linux.Fixes since OptiX 2.5.0 final release:∙CUDA 4.2 support.∙Linux distribution is now universal across 64-bit Linux distributions.∙Fixed slowdown with Lbvh builder in multi-GPU configurations.∙Optimized replacing a buffer with another of the same size, for faster stereo rendering∙Reduced overhead of kernel launches and recompiles when API state changes have occurred.∙Fixed texture unit assignment bug.∙Fixed optixpp issue where object->destroy() failed and checkError called object->getContext().∙Fixed bug in zoneplate sample.∙Fixed bug with BVH refit.∙Fixed matrix variable changes not being propagated to device.∙Fixed accesses to private variable in matrix class.∙Fixed CPUTraversal memory leak.∙Fix 32-bit kernel / 64-bit application paging problems.Fixes since OptiX 2.5.0 RC 3:∙User PTX code compiled for SM 2.0 using CUDA 4.1 now works correctly.∙Minor optimizations.∙Fixed bug with texture unit numbers.∙Fixed bug with transform node with null child.∙Fixed bug with BVHs that have no children.∙Fixed a debug assert with Lbvh and MedianBvh.Fixes since OptiX 2.5.0 RC 2:∙The environment v ariable “OPTIX_API_CAPTURE” may now be used in release builds to createa dump of all API calls. This is useful for sending bug reproducers to the OptiX developmentteam, and for diagnosing application behavior.∙Better load balancing across GPUs with diffe rent number of SM’s, for example a Quadro 2000 and a Tesla C2075.∙Multiple GPUs of differing minor SM version, such as SM 2.0 and SM 2.1, may now work together.∙Decreased host memory footprint during acceleration structure builds.∙Fixed serialization for “Lbvh” builder.∙Fixed ‘h’ key in Whirligig sample.∙Fixed bug with paging where some threads would execute some instructions multiple times on a page fault.∙Fixed bug with acceleration structure builds.Fixes since OptiX 2.5.0 RC 1:∙“-m” flag and “m” key in many samples now display whether paging is happening or not.∙Out of memory error bug fix. This bug happened while paging if a buffer was selected to be non-paged but still couldn't be allocated.∙Customer bug fix in OptiX compiler when exceptions and paging were turned on together.∙Customer bug fix regarding TextureSamplers.∙Fix for multiple rtIntersectChild calls in a loop.∙Fixed mcmc_sampler sample.Enhancements from OptiX 2.1.1:∙Out-of-Core Memory Paging– scene sizes can now exceed the amount of physical memory on professional GPUs (Quadro or Tesla) to the extent there is host RAM available. This support is automatic, but can be overridden. The resulting performance will vary according to the amount the scene is paging –which is a combination of how much is exceeding GPU memory, how much of the scene is visible to thecamera, and the extent of secondary rays in use. Some of the related changes include:o New BVH traverser –“BvhCompact” can compress data by up to a factor of four.o Added rtuCreateClusteredMesh() and rtuCreateClusteredMeshExt() for laying out data in a paging friendly manner.o Whether or not paging has been enabled can be queried with the rtContextGetAttribute() API call and specifying RT_CONTEXT_ATTRIBUTE_GPU_PAGING_ACTIVE.o Paging support can be disabled by calling the rtContextSetAttribute() API function with RT_CONTEXT_ATTRIBUTE_GPU_PAGING_FORCED_OFF.∙Unlimited Textures– when not using graphics interop textures, the first 127 textures will continue to take advantage of Texture Units, while any additional texture is now automatically stored in Global Memory ata minor performance cost.∙GPU BVH Builder– the original Lbvh builder has been replaced with the HLBVH2 algorithm to deliver far faster acceleration structure building than is possible via the CPU. The resulting traversal performance is comparable to CPU builders.∙Further optimizations for Fermi GPUs.∙Improved run time when using 64-bit PTX.∙Visual Studio 2010 support.∙Added RT_TIMEOUT_CALLBACK and rtContextSetTimeoutCallback(). OptiX can now periodically call a user provided function. This function can instruct OptiX to stop and return control to the caller withoutfinishing the call. See programming guide for more information.∙Added new RTcontext attributes that can be queried or set.o RT_CONTEXT_ATTRIBUTE_CPU_NUM_THREADS – for specifying the number of CPU threads OptiX can use for various tasks such as parallel CPU acceleration structure builds.o RT_CONTEXT_ATTRIBUTE_USED_HOST_MEMORY – Get the amount of host memory OptiX is consuming be tween API calls (note that this isn’t a high water mark).o RT_CONTEXT_ATTRIBUTE_GPU_PAGING_ACTIVE – Indicates if paging has been enabled. Once paging has been enabled it cannot be forced off.o RT_CONTEXT_ATTRIBUTE_GPU_PAGING_FORCED_OFF – Force paging to be off regardless of whether OptiX attempts to enable it.Enhancements from OptiX 2.1.1 (continued):∙Errors are now generated during compilation when calling an OptiX function in an illegal location (see table in Programming guide).∙Reduction in compile times for scenes with multiple ray types and programs only used by a single ray type.∙Added ability to throw an exception when rtIntersectChild() and rtReportIntersection() are called with an invalid index.∙Added rtContextSetAttribute().∙Added rtDeviceGetD3D9Device(), rtDeviceGetD3D10Device(), and rtDeviceGetD3D11Device().These functions return the OptiX device ordinal that corresponds to the given D3D device.∙Added support for VS2010 in RTU's rtuCUDACompileString() and rtuCUDACompileFile().∙For GCC targets, symbol exports are now controlled using visibility attributes. Thus, OptiX now only exports the same set of symbols that the windows version exports.∙Updates to optixu headerso Added Matrix3x3 make_matrix3x3(Matrix4x4) function.o Fixed variable liveness issues with optix::intersect_triangle() and optix::refract().o Added luminanceCIE(float3).o Added operator== and operator!= for (uint3,uint3).o Added ContextObj::getDeviceName(), ContextObj::getDeviceAttribute() andContextObj::getUsedHostMemory().o Added ContextObj::getCPUNumThreads(), ContextObj::getGPUPagingActive(),ContextObj::getGPUPagingForcedOff(), ContextObj::setCPUNumThreads() andContextObj::setGPUPagingForcedOff() to match new context properties.o OptixPP's destroy methods now set the underlying pointer to zero, so the container can be queried to determine if it is still valid.∙Samples and sample infrastructureo Added new sample that illustrates a method of doing displacement surfaces without having to pretessellate the surface. All tessellation happens during intersection.o Added sample_phong_lobe(), get_phong_lobe_pdf() and tonemap() to samples/cuda/helpers.h.o Refactored much of the code that made use of meshes in the samples into a MeshScene class.o The path_tracer sample now comes with a multiple importance sampling mode. Use the -mis flag to try it.∙CMakeo Look in paths that are installed by CUDA 4.0.o Added support for files with the same basename but different paths in the same target.o Working directory is now a subdirectory of CMakeFiles instead of the current binary directory.o Support for CUDA Toolkit installed in UNC paths.o Better support for flags and paths with spaces and quotes.Known limitations with version 2.5.0:∙Out-of-core dataset paging does not presently work with GeForce cards.∙The Lbvh builder has been completely replaced with the HLBVH2 algorithm. Note that specifying Lbvh as the builder in a 64-bit host application while using 32-bit PTX will cause the MedianBvh builder to beutilized. The internal format for Acceleration Structure data has changed. Previous cached data will not be usable with 2.5 and must be regenerated.∙Support for building host-based acceleration structures in parallel has been disabled on Linux in this version of OptiX.∙OptiX currently does not support running with NVIDIA Parallel Nsight. In addition, it is not recommended to compile PTX code using any -g (debug) flags to nvcc.∙Use of OpenGL and DirectX interop causes OptiX to crash when SLI is enabled. As noted below, SLI is not required to achieve scaling across multiple GPUs.∙All GPUs used by OptiX must be of the same MAJOR compute capability, such as compute capability 1.x or2.x. OptiX will automatically select the set of GPUs of the highest major compute capability and only usethose. For example, in a system with a GeForce GTX 460 (compute 2.1) and a GeForce GTX 480 (compute2.0), both will be used, but in a system with a Quadro 5800 (compute 1.3) and a Quadro 6000 (compute2.0) only the compute 2.0 device would only be selected. Applications may explicitly choose which GPUsto run, as is done in the progressive photon mapper sample, ppm.cpp, at the start of initScene(), but if the application requests a set of devices of different major compute capability an error will be returned.∙Texture arrays and MIP maps are not yet implemented.∙malloc(), free(), and printf() do not work in device code.∙Applications that use RT_BUFFER_INPUT_OUTPUT or RT_BUFFER_OUTPUT buffers on multi-GPU contexts must take care to ensure that the stride of memory accesses to that buffer is compatible with the PCIebus payload size. Using a buffer of type RT_FORMAT_FLOAT3, for example, will cause a massiveslowdown; use RT_FORMAT_FLOAT4 instead. Likewise, a group of parallel threads should present acontiguous span of 64 bytes for writing at once on an Intel chipset to avoid massive slowdowns, or 16bytes on NVIDIA chipsets to avoid moderate slowdowns.∙Linux only: due to a bug in GLUT on many Linux distributions, the SDK samples will not restore the original window size correctly after returning from full-screen mode. A newer version of freeglut may avoid thislimitation.∙The CUDA release notes recommend the use of -malign-double with GCC. However, on Mac OSX systems(10.5 with GCC 4.0.1 and 4.2.1 and 10.6 with GCC 4.2.1) this flag can produce miscompiles withstd::stream based classes in host code when compiling to 32 bits. If the structs are different sizes between device and host code, consider manually padding the structure rather than using this compiler flag.Performance Notes:∙OptiX performance tracks very closely to a GPU's CUDA core count and core clock speed for a given GPU generation.∙OptiX takes advantage of multiple GPUs without using SLI. It is not recommended to configure GPUs in SLI mode for OptiX applications. Multi-GPU scalability will vary with the workload being done, with longerand complex rendering (e.g., path tracing) scaling quite well with fast and simple rendering (e.g. Whitted or Cook) scaling much less.∙Mixing board types will reduce the memory size available to OptiX to that of the smallest GPU.∙Performance will be better when the entire scene fits within a single GPU’s memory. Adding additional GPUs increases performance, but does not increase the available memory beyond that of the smallestboard. If paging is disabled (see above), the entire scene must fit on the GPU.∙For compute-intensive rendering, performance is currently fairly linear in the number of pixels displayed/rendered. Reducing resolution can make development on entry level boards or laptops more practical.∙Performance on Windows Vista and 7 may be somewhat slower than Windows XP due to the architecture of the Windows Display Driver Model (WDDM).∙Uninitialized variables can increase register pressure and negatively impact performance.∙Pass arguments by reference instead of value whenever possible when calling local functions for optimal performance.Other Notes:∙CMake 2.8.6 (at least 2.6.3; 2.8.6 is the current version and also works.)/cmake/resources/software.htmlThe executable installer /files/v2.8/cmake-2.8.6-win32-x86.exe is recommended for Windows systems.。
CPU模块安装指南说明书

s #1Phillips screwdriver s Padded ESD mats Grounding wrist strapsTorque screwdriver,set to 6inch-poundsHot-Plug FeatureCaution–If the message:NOTICE:Hot Plug not supported in this system is displayed during boot,do NOT attempt to remove or install a board while the system is powered on.If you install a hot-pluggable board in a running system,you must reboot to add the board to the system configuration.Caution –Do not hot-plug an Enterprise system component ifthe peripheral power supply (PPS),in the 6x 00/5x 00/4x 00system,or the peripheral power supply/AC input (PPS/AC),in the 3x 00system,is inoperative.These power supplies provide the precharge voltage required for eprtdiag(1M)to determine the peripheral power supply status.Precautionss Use a grounding wrist strap for these procedures.s Hold the CPU module only by the edges to prevent heatsink breakage.s Do not touch the connector pins,to prevent corrosion.sUse a padded ESD mat for the CPU/Memory board.The padding prevents breakage of parts on the bottom of the board.Removing the CPU/Memory Board1.Ensure that the board is in low-power mode and ready for removal.If the board is not in low-power mode,halt the system and turn off the power before proceeding.The board is in low-power mode if one of the following is true:s The three LEDs on the board are not lit (board has no power).sThe outer two green LEDs are not lit and the middle yellow LED is lit.Caution –Use a grounding wrist strap to prevent static damage.2.With a #1Phillips screwdriver,turn the two quarter-turn access slots to the unlocked position ().3.Simultaneously pull the ends of both extraction levers toward you to disconnect the board from the centerplane.Pull both levers simultaneously to avoid twisting the board and bending the connector pins.4.Pull the board out of the card cage.Do not let the components on the board catch on any surrounding surfaces as you pull the board.Caution –The heatsinks on the board may be hot.Handle withcare.5.Place the board on a padded ESD mat.The padding protects components on the bottom of the board.Suggestions for Maximum Performance1.Fill all the CPU 0slots before using any CPU 1slots.2.Start with the CPU/Memory board in the lowest numbered slot.3.After all CPU 0slots are filled,use CPU 1slots,again starting with the CPU/Memory board in the lowest numbered slot.Caution –Use a grounding wrist strap to prevent static damage.1.On the board and the module,inspect the connectors for dust.If necessary,clean the connectors with a dry,stiff toothbrush.2.Holding the module by the edges,align it over the board connectors.3.Firmly but gently press the module straight down until the standoff post snaps into place and the connectors are fully seated.4.Tighten the hex screws of the module as follows:e the torque screwdriver to partially tighten the five 3/32hex screws in the tightening sequence shown.IMPORTANT:Partially tighten the screws in order until they just touch the compression connectors,beginning with screw 1.e the torque screwdriver to tighten the five screws an additional half-turn in the tightening sequence shown.c.Finish the module installation by tightening all the screws to 6inch-pounds in the same tightening sequence.Caution –Do not over-torque or under-torque the screws.Excessive force can warp the connector.Insufficient force can cause an incomplete electrical connection.!!!Extraction leverQuarter-turnaccess slotCPU 0CPU 1!4132541325Tightening sequence!1.If you are installing a new board,refer to the Enterprise server system manual for rules for selecting a board slot.Caution –Use a grounding wrist strap to prevent static damage.2.Open the extraction levers by pulling the ends of both levers toward you.s For a front slot in a 16-slot or 8-slot card cage,orient the board with the component-side down.s For a rear slot in a 16-slot or 8-slot card cage,orient the board component-side up.sFor a 4-or 5-slot card cage with vertical slots,orient the board with the component side to the right.3.Insert the board into the card cage,then simultaneously press both extraction levers to seat the board on the centerplane.Caution –When inserting a board into slot 4or slot 10of a16-slot card cage,lift the board slightly to avoid damage to the centerplane connectors.!Rear viewFront view!Sun ™ Enterprise ™6x 00/5x 00/4x 00/3x 00 Systems CPU Module Installation GuideCaution –The heatsinks on the board can bedamaged by incorrect handling.Do not touch the heatsinks while installing or moving the board.Hold the board only by the edges.If a heatsink is loose or broken,obtain a replacement board.Caution –The heatsinks on the board can bedamaged by improper packaging.When storing or shipping the board,ensure that the heatsinks have sufficient protection.Requirementss250MHz UltraSPARC™modules must not be mixed with different speed UltraSPARC modules.sIf this is the first 250MHz UltraSPARC module in your xx 00system,you require the clock board upgrade package (part number:UG-ENT-CLOCKBD).This upgrade package includes a clock board (501-4286),the CD,Flash PROM Update 1.4,and instructions.sWhen a 250MHz UltraSPARC module is installed in a system running the Solaris™2.5.1operating environment,you must install the software patch #103640(version -06or higher).!!Sun Documentation on the WebThe web site enables you to access Sun technicaldocumentation on the Web.You can browse the archive or search for a specific book title or subject at:Sun Welcomes Your CommentsWe are interested in improving our documentation and welcome your comments and suggestions.You can email your comments to us at:*****************Please include the part number of your document in the subject line of your email.to the locked position ().5.If the system is running,look for a system message similar to the following example for a CPU/Memory board in slot 5:6.Reboot the system or schedule a later time to reboot when system disruption will be minimized.The system does not recognize the new board until the system is rebooted.NOTICE: CPU Board Hotplugged into Slot 5NOTICE: Board 5 is ready to removePart Number: 802-5031-13Revision A of April 1998Copyright 1998 Sun Microsystems, Inc. All rights reserved. Use is subject to license terms. Third-party software, including font technology, is copyrighted and licensed from Sun suppliers. Sun, SunMicrosystems, the Sun Logo, SunDocs, and Solaris are trademarks or registered trademarks of Sun Microsystems, Inc. in the U.S. and other countries.RESTRICTED RIGHTS : Use, duplication, ordisclosure by the U.S. Government is subject to restrictions of FAR 52.227-14(g)(2)(6/87) and FAR 52.227-19(6/87), or DFAR 252.227-7015(b)(6/95) and DFAR 227.7202-3(a).Copyright 1998 Sun Microsystems, Inc. Tous droits réservés. Distribué par des licences qui enrestreignent l’utilization. Le logiciel détenu par des tiers, et qui comprend la technologie relative aux polices de caractères, est protégé par un copyright et licencié par des fournisseurs de Sun. Sun, SunMicrosystems,le logo Sun,SunDocs,et Solaris sont des marques de fabrique ou des marques déposées de Sun Microsystems, Inc. aux Etats-Unit et dans d’autres pay.Sun Microsystems Computer Company •901San Antonio Road •Palo Alto,CA 94303-4900USA •650960-1300•Fax 650969-9131s #1Phillips screwdriver s Padded ESD mats Grounding wrist strapsTorque screwdriver,set to 6inch-poundsHot-Plug FeatureCaution–If the message:NOTICE:Hot Plug not supported in this system is displayed during boot,do NOT attempt to remove or install a board while the system is powered on.If you install a hot-pluggable board in a running system,you must reboot to add the board to the system configuration.Caution –Do not hot-plug an Enterprise system component ifthe peripheral power supply (PPS),in the 6x 00/5x 00/4x 00system,or the peripheral power supply/AC input (PPS/AC),in the 3x 00system,is inoperative.These power supplies provide the precharge voltage required for eprtdiag(1M)to determine the peripheral power supply status.Precautionss Use a grounding wrist strap for these procedures.s Hold the CPU module only by the edges to prevent heatsink breakage.s Do not touch the connector pins,to prevent corrosion.sUse a padded ESD mat for the CPU/Memory board.The padding prevents breakage of parts on the bottom of the board.Removing the CPU/Memory Board1.Ensure that the board is in low-power mode and ready for removal.If the board is not in low-power mode,halt the system and turn off the power before proceeding.The board is in low-power mode if one of the following is true:s The three LEDs on the board are not lit (board has no power).sThe outer two green LEDs are not lit and the middle yellow LED is lit.Caution –Use a grounding wrist strap to prevent static damage.2.With a #1Phillips screwdriver,turn the two quarter-turn access slots to the unlocked position ().3.Simultaneously pull the ends of both extraction levers toward you to disconnect the board from the centerplane.Pull both levers simultaneously to avoid twisting the board and bending the connector pins.4.Pull the board out of the card cage.Do not let the components on the board catch on any surrounding surfaces as you pull the board.Caution –The heatsinks on the board may be hot.Handle withcare.5.Place the board on a padded ESD mat.The padding protects components on the bottom of the board.Suggestions for Maximum Performance1.Fill all the CPU 0slots before using any CPU 1slots.2.Start with the CPU/Memory board in the lowest numbered slot.3.After all CPU 0slots are filled,use CPU 1slots,again starting with the CPU/Memory board in the lowest numbered slot.Caution –Use a grounding wrist strap to prevent static damage.1.On the board and the module,inspect the connectors for dust.If necessary,clean the connectors with a dry,stiff toothbrush.2.Holding the module by the edges,align it over the board connectors.3.Firmly but gently press the module straight down until the standoff post snaps into place and the connectors are fully seated.4.Tighten the hex screws of the module as follows:e the torque screwdriver to partially tighten the five 3/32hex screws in the tightening sequence shown.IMPORTANT:Partially tighten the screws in order until they just touch the compression connectors,beginning with screw 1.e the torque screwdriver to tighten the five screws an additional half-turn in the tightening sequence shown.c.Finish the module installation by tightening all the screws to 6inch-pounds in the same tightening sequence.Caution –Do not over-torque or under-torque the screws.Excessive force can warp the connector.Insufficient force can cause an incomplete electrical connection.!!!Extraction leverQuarter-turnaccess slotCPU 0CPU 1!4132541325Tightening sequence!1.If you are installing a new board,refer to the Enterprise server system manual for rules for selecting a board slot.Caution –Use a grounding wrist strap to prevent static damage.2.Open the extraction levers by pulling the ends of both levers toward you.s For a front slot in a 16-slot or 8-slot card cage,orient the board with the component-side down.s For a rear slot in a 16-slot or 8-slot card cage,orient the board component-side up.sFor a 4-or 5-slot card cage with vertical slots,orient the board with the component side to the right.3.Insert the board into the card cage,then simultaneously press both extraction levers to seat the board on the centerplane.Caution –When inserting a board into slot 4or slot 10of a16-slot card cage,lift the board slightly to avoid damage to the centerplane connectors.!Rear viewFront view!Sun ™ Enterprise ™6x 00/5x 00/4x 00/3x 00 Systems CPU Module Installation GuideCaution –The heatsinks on the board can bedamaged by incorrect handling.Do not touch the heatsinks while installing or moving the board.Hold the board only by the edges.If a heatsink is loose or broken,obtain a replacement board.Caution –The heatsinks on the board can bedamaged by improper packaging.When storing or shipping the board,ensure that the heatsinks have sufficient protection.Requirementss250MHz UltraSPARC™modules must not be mixed with different speed UltraSPARC modules.sIf this is the first 250MHz UltraSPARC module in your xx 00system,you require the clock board upgrade package (part number:UG-ENT-CLOCKBD).This upgrade package includes a clock board (501-4286),the CD,Flash PROM Update 1.4,and instructions.sWhen a 250MHz UltraSPARC module is installed in a system running the Solaris™2.5.1operating environment,you must install the software patch #103640(version -06or higher).!!Sun Documentation on the WebThe web site enables you to access Sun technicaldocumentation on the Web.You can browse the archive or search for a specific book title or subject at:Sun Welcomes Your CommentsWe are interested in improving our documentation and welcome your comments and suggestions.You can email your comments to us at:*****************Please include the part number of your document in the subject line of your email.to the locked position ().5.If the system is running,look for a system message similar to the following example for a CPU/Memory board in slot 5:6.Reboot the system or schedule a later time to reboot when system disruption will be minimized.The system does not recognize the new board until the system is rebooted.NOTICE: CPU Board Hotplugged into Slot 5NOTICE: Board 5 is ready to removePart Number: 802-5031-13Revision A of April 1998Copyright 1998 Sun Microsystems, Inc. All rights reserved. Use is subject to license terms. Third-party software, including font technology, is copyrighted and licensed from Sun suppliers. Sun, SunMicrosystems, the Sun Logo, SunDocs, and Solaris are trademarks or registered trademarks of Sun Microsystems, Inc. in the U.S. and other countries.RESTRICTED RIGHTS : Use, duplication, ordisclosure by the U.S. Government is subject to restrictions of FAR 52.227-14(g)(2)(6/87) and FAR 52.227-19(6/87), or DFAR 252.227-7015(b)(6/95) and DFAR 227.7202-3(a).Copyright 1998 Sun Microsystems, Inc. Tous droits réservés. Distribué par des licences qui enrestreignent l’utilization. Le logiciel détenu par des tiers, et qui comprend la technologie relative aux polices de caractères, est protégé par un copyright et licencié par des fournisseurs de Sun. Sun, SunMicrosystems,le logo Sun,SunDocs,et Solaris sont des marques de fabrique ou des marques déposées de Sun Microsystems, Inc. aux Etats-Unit et dans d’autres pay.Sun Microsystems Computer Company •901San Antonio Road •Palo Alto,CA 94303-4900USA •650960-1300•Fax 650969-9131。
Sennheiser ew 100 G3 无线系统快速操作指南说明书

Quick Guide | Kurzanleitung | Guide rapide | Guida rapida | Guía de iniciorápido | Guia rápido | Beknopte handleiding | Krótka instrukcja obsługi | Snabbguide | Kort vejledning | Pikaohje | Γρήγορος οδηγός | Kısa Kılavuz | Краткая инструкция | | | | |Sennheiser electronic GmbH & Co. KGAm Labor 1, 30900 Wedemark, Germany, Printed in Germany, Publ. 03/17, 575813/A01BatteryLow BatterySetupOnOffStandard display MultichannelMenu SE T533.875 e w 100 G 320.12M HzP-100402510-20-30AFRF 100 %70 %30 %> 8 h 4 - 6 h 2 - 3 hLOW BATTew100 G3MHz 533.875PAF123EUKOR CNUS UKAU 1231236.3 mmXLR-3OR OR533.875 e w100 G 320.12M Hz0ORew100 G3MHz 533.875PAFSK/SKMEM short long on on/RX mute onon/RF muteORMuteEM/SK/SKM longoff543.200 ew100 G31. 1P0 MHz543.200 ew100 G31. 1PEAKMUTEP-100402510-20-30AFRF MHzMHz 543.200ew100 G3MUTE AFMHz 543.200ew100 G3MUTEAFMHz543.200B.Ch: 1.1MUTE AFB.Ch: 1.1MUTEAFew100 G3Name FrequencyRadiofrequency level ABCACPilot tone Pilot tone RF onAudio level SensitivityAudio level DiversityMuteBattery440 HzMUTE0EMSK SKMChange frequencySensitivityMuteBatteryBAuto lockAuto lockSquelchPeak hold Instruction ManualExtended menu “Advanced Menu”TuneMute ModeCable Emulation Pilot Tone LCD Contrast ResetSoftware Revision ExitTunePilot Tone LCD Contrast ResetSoftware Revision ExitExtended menu “Advanced Menu”Squelch Easy SetupFrequency Preset Name AF Out Equalizer Auto Lock Advanced ExitMain menu “Menu”Reset ListCurrent ListScan New List Exit“Easy Setup”Tune Guitar TunerPilot Tone LCD Contrast ResetSoftware Revision ExitExtended menu “Advanced Menu”EMSKSKSKMSKMON/OFF ESCSETUPDOWN UPDOWNUPDOWNSET Main menu “Menu”SensitivityFrequency Preset Name Auto Lock Advanced ExitSETON/OFF ESC ON/OFF ESCSETSET2 31 12 32 32 41 21 32 32 51 34 72 32 61 88 92 3Bank Ch.Bank Ch.Bank Ch.Bank Ch.max.12 ChannelsBank 1 . . . 20; U Channel 1 . . . 12Instruction ManualBank . Channel Frequency SyncChange frequencySquelchChange frequency New frequencySyncAF outSensitivityAuto lockSKMME 3-IIMuteME 2 | ME 4402510RFHigh Middle LowLowSquelch PEAK-100402510-20-30AFRF SETSETSET SETSETSETSETEasy Setup EMFrequency Preset EM, SK, SKMSKM/SK off!Easy SetupMenuScan New ListEasy SetupEasy Setup Free: 0 ...12Easy SetupSync 758.200 MHzB.Ch: 1. 1...12StoredScan New List 734 . . . 776 MHzWAIT 30sFrequency PresetMenuB.Ch: 1.1Frequency Preset 767.900 MHz B.Ch. 15.6Frequency Preset 767.900 MHzB.Ch. 15. 6StoredInstruction ManualBank 1 (20)No frequency Squelch: Middle ...OROR10 c m (4")Instruction Manual–48 dB . . . 0 dB–60 dB . . . 0 dBAF PEAKLEVELPEAK-100-20-30PEAK-100-20-30AF AFSensitivityMenu- 24 dBAFAF OutMenu + 18 dBLocked Unlock?SETSETSETSETSETLockedUnlock?SET Locked Unlock?Auto lock10 sInstruction ManualMHz543.200ew100 G3MUTERFAdvancedMenuMute ModeAdvanced AF On/Off AF On/OffMute Mode RF On/OffMute Mode SETshortAF/RF OnM U T EAF/RF OffSETSETSETMHz 543.200ew100 G3MUTERFReset Factory defaultMHz MHz MHzRF Mute On?RF Mute Off?SETRF OnAF Off RF OffshortRF OffInstruction ManualRF Mute On?RF Mute Off?SET2...3 cm (1")25 cm (10")ME 2ME 4SKMEMSK1231456123123123。
BIOS设置冲突出现错误故障解析
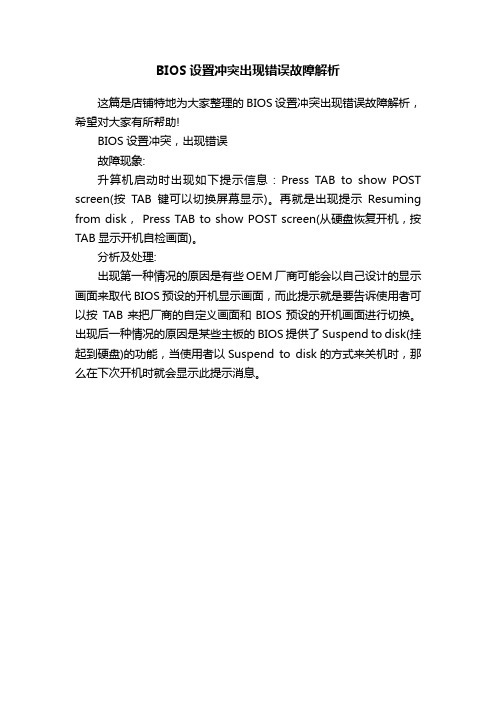
BIOS设置冲突出现错误故障解析
这篇是店铺特地为大家整理的BIOS设置冲突出现错误故障解析,希望对大家有所帮助!
BIOS设置冲突,出现错误
故障现象:
升算机启动时出现如下提示信息:Press TAB to show POST screen(按TAB键可以切换屏幕显示)。
再就是出现提示Resuming from disk, Press TAB to show POST screen(从硬盘恢复开机,按TAB显示开机自检画面)。
分析及处理:
出现第一种情况的原因是有些OEM厂商可能会以自己设计的显示画面来取代BIOS预设的开机显示画面,而此提示就是要告诉使用者可以按TAB来把厂商的自定义画面和BIOS预设的开机画面进行切换。
出现后一种情况的原因是某些主板的BIOS提供了Suspend to disk(挂起到硬盘)的功能,当使用者以Suspend to disk的方式来关机时,那么在下次开机时就会显示此提示消息。
技嘉显卡说明书英文版

NVIDIA® Graphics Accelerator User's ManualRev. 102Copyright© 2012 GIGABYTE TECHNOLOGY CO., LTDCopyright by GIGA-BYTE TECHNOLOGY CO., LTD. (“GBT”). No part of this manual may be reproduced or trans-mitted in any form without the expressed, written permission of GBT.TrademarksThird-party brands and names are the properties of their respective owners.NoticePlease do not remove any labels on this graphics card. Doing so may void the warranty of this card.Due to rapid change in technology, some of the specifications might be out of date before publication of this this manual.The author assumes no responsibility for any errors or omissions that may appear in this document nor does the author make a commitment to update the information contained herein.Rovi Product Notice:This product incorporates copyright protection technology that is protected by U.S. patents and other intellectual property e of this copyright protection technology must be authorized by Rovi Corporation, and is intended for home and other limited viewing uses only unless otherwise authorized by Rovi Corporation. Reverse engineering or disassembly is prohibited.Table of Contents1. Introduction (3)1.1. Minimum System Requirements (3)2. Hardware Installation (5)2.1. SLI Technology (5)3. Software Installation (7)3.1. Driver and Utility Installation (7)3.1.1. Driver Installation (7)3.1.2. GIGABYTE OC Guru II (9)3.2. Display Properties Pages (19)3.3. Accessing NVIDIA Control Panel (20)4. Troubleshooting Tips (28)5. Appendix (29)5.1. Regulatory Statements (29)1. Introduction1.1. Minimum System Requirements•Hardware- Intel® Pentium® 4 or AMD Athlon TM XP class- 2GB system memory (4GB recommended)- Optical drive for software installation (CD-ROM or DVD-ROM drive)•Operating System- Windows® 7- Windows® Vista- Windows® XP2.1. Hardware InstallationNow that you have prepared your computer, you are ready to install your graphics card.Step 3.Connect the appropriate cable to the card and the display.To Flat Panel Display To Flat Panel Display To HDMI MonitorTo D-sub MonitorTo Mini HDMI MonitorTo Mini DisplayPort MonitorStep 1.Locate the PCI Express x16 slot. If necessary, remove the metalcover from this slot; then align your graphics card with the PCIExpress x16 slot, and press it in firmly until the card is fullyseated.Step 2.Replace the screw to fasten the card in place, and replace thecomputer cover.Make sure that the gold edge connector of the graphics card issecurely inserted.To Mini DisplayPort MonitorHow NVIDIA ®SLI TM (Scalable Link Interface) technology works:SLI Configuration:3-Way SLI Configuration:SLI bridge connector(provided by motherboard manufacturer)3-Way SLI bridge connector(provided by motherboard manufacturer)Two SLI-ready graphics cards of the same type.(Example: GV-N28-1GH-B)Two SLI-ready graphics cards of the same type.(Example: GV-N28-1GH-B)If you are planning on using this graphics card as part of an SLI system, the following are required:- An SLI certified motherboard with two/three PCIe x16 slots and correct chipset driver - An SLI bridge connector or 3-way SLI bridge connectorIn an SLI configuration, two/three SLI-ready graphics cards of the same model and the same manufacturers are connected together via SLI bridge connector in a system that provides two/three x16 PCI Express slots to scale graphics performance. The picture below shows that two and three graphics cards are linked in parallel in an SLI configuration.3. Software InstallationNotice the following guidelines before installing the drivers:1. First make sure your system has installed DirectX 9 or later version.2. Make sure your system has installed the appropriate motherboard drivers (for the motherboarddrivers, please contact the motherboard manufacturer.)3.1. Driver and Utility Installation3.1.1. Driver InstallationAfter installing the operating system, insert the driver disk into your optical drive. The driver Autorun screen is automatically displayed which looks like that shown in the screen shot below. (If the driver Autorun screen does not appear automatically, go to My Computer, double-click the optical drive and execute the setup.exeprogram.)For software MPEG support in Windows XP, you must install DirectX first. Users who run Windows XP with Service Pack 2 or above do not need to install DirectX separately.Step 1:Click the Install Display Driver item.Step 2:Click the AGREE AND CONTINUEbutton.Step 4:Check the Install NVIDIA Update then click the NEXT button.The system is installing the components.Step 5:Click the RESTART NOW button to restart thecomputer. Then the driver installation is completed.Step 3:Check the Express then click the NEXTbutton.3.1.2. GIGABYTE OC Guru IIStep 1:Click the GIGABYTE OC Guru II item.Step 2:Choose the language for the installation and click the OK button.Step 3:Choose the Typical and click the Next button Step 4:Click the Finish button. Then the installation of the GIGABYTE OC Guru II is completed.The system is installing the components.OC GURU II: ProfilesUsers have 5 Profiles, 1/ 2/ 3/ 4/ 5 , to set different profiles.By clicking 1/ 2/ 3/ 4/ 5, users can switch around these profilesThis page indicates where users can set up MONITORING、GPU CLOCK、MEMORY CLOCK、FAN、MINIMUM VOLTAGE、POWER TARGET、OSD、ONLINE SUPPORT.Function: When it’s locked, GPU CLOCK/MEMORY CLOCK/MINIMUM VOLTAGE/POW-ER TARGET can not be changed.Function: When it’s unlocked, GPU CLOCK/MEMORY CLOCK/MINIMUM VOLTAGE/POWER TARGET can be adjusted.Function: Apply to what has just been setup.Function: Return to the previous applied setup.Function: Restore the default setup.MONITORING:MONITORING PANEL:Show real time GPU Clock/MEMORY ClockClick MORE to MONITORING PANELFunction: Monitoring Panel Settings.Function: Start recording.Function: Stop recording.Monitoring panel settings:Function: Set up a folder to save the recorded files.Function: Show the chosen items on the MONITORING PANEL.Function: Return to MONITORING Page.Function: Save the settings.Function: Restore the default setup.GPU CLOCKUnder nVIDIA new structure, there are BASE and BOOST CLOCK under GPU Clock.BASE CLOCK is the combination of DEFAULT BASEC LOCK and OFFSET.BOOST CLOCK is the combination of DEFAULT BOOST CLOCK and OFFSET.Under most cases, BASE CLOCK is smaller/ equal to BOOST CLOCK.MEMORY CLOCK:When changing DEFAULT CLOCK, represents PLUS and represents MINUS. Show GPU OFFSET, users can enter numbers directly to change GPU OFFSET.MEMORY CLOCK is the combination of DEFAULT CLOCK and OFFSET.When changing MEMORY CLOCK, represents PLUS and represents MINUS.Show MEMORY OFFSET, users can enter numbers directly to change MEMORY OFFSET.FANShow real time fan speed and fan modeSETTINGS:SPEED: shows real time fan speed, it will show 0% if using a passive graphics card.MODE: shows Auto mode or Manual mode, users can set up in SETTINGSAUTO mode, fans will be controlled automatically.MANUAL mode, users can adjust fan behavior by adjusting the blue point on the fan graph.Return to PROFILES page.MINIMUM VOLTAGEUsers can enter numbers directly to change MINIMUM VOLTAGE.Show and set up MINIMUM VOLTAGEWhen changing MINIMUM VOLTAGE, represents PLUS and represents MINUS.POWER TARGETShow and set up POWER TARGETWhen changing POWER TARGET, represents PLUS and represents MINUS.Show OSD HOT KEY and OSD locationClick SETTINGS to OSD settingsOSD settings:Function: Return to SETTINGS Page.Function: Set up where OSD will show during games through clicking on one of the 9 squares.Function: Setup a shortcut key for SOFTWARE On-Screen Display (OSD).Function: Setup shortcut keys and a folder to save screenshots.The settings can be adjusted by clicking on or by dragging the scrollbar.ONLINE SUPPORT1.Update BIOS:Click to enter ONLINE SUPPORTONLINE SUPPORT:The BIOS version of your VGA is shown in the page. By clicking theitem while you are connected to the internet, the software detects ifthere is an updated BIOS version available. You can download the up-dated BIOS version and it installs automatically.2.Update DriverThe DRIVER version of your VGA is shown in the page.By clicking the item while you are connected to the internet, the softwaredetects if there is an updated DRIVER version available. You can down-load the updated DRIVER version and it installs automatically.3.Update OC GURUThe OC GURU version of your VGA is shown in the page.By clicking the item while you are connected to the internet, the soft-ware detects if there is an updated OC GURU version available. Youcan download the updated OC GURU version and it installs automati-cally.4.PRODUCT INFOWhen you are connected to the internet, clicking the item will link to theoffi cial GIGABYTE product page.5.CONTECT US6.FAQ When you are connected to the internet, clicking the item will link to the offi cial GIGABYTE CONTECT US page.When you are connected to the internet, clicking the item will link to the official GIGABYTE product FAQ page.3.2. Display Properties PagesDisplay Settings (Resolutions and Color Quality for Windows)To accessDisplay Settings page, right-click on desktop and select Personalize, then the Personalization windows will show up. Select Display Settings to adjust the screen resolution and color quality settings.3.3. Accessing NVIDIA Control PanelAfter installation of the display driver, right-click on the desktop and select NVIDIA Control Panel.The NVIDIA Control Panel is used to configure all your graphics card settings.Right-click on the desktop and select NVIDIA Control Panel.In the NVIDIA Control Panel, select a category to alterspecific NVIDIA display settings.⏹3D settings⏹Display⏹Stereoscopic 3D⏹Video⏹ Adjust Image Settings with PreviewIf you are unfamiliar with 3D technology or not an advanced graphics user, use the Adjust Im-age Settings with Preview page to preview any changes you make for improved image quality and rendering.⏹ Manage 3D SettingsThe Manage 3D Settings page enables you to establish default 3D settings to use for all your Direct3D or OpenGL applications and to estab-lish a unique set of 3D settings for a particular game or application.⏹ Set PhysX confiqurationNVIDIA ® PhysX ® is a powerful physics engine that can utilize GPU acceleration to provide amazing real-time physics effects.3D SettingsTasks in the 3D Settings pages allow you to do the following:• Change the image and rendering settings of your 3D applications and games that utilize Direct3D and OpenGL technology.• Override the shipped clocked frequencies of your GPU and GPU memory to increase your GPU perfor -mance.• Assign specific 3D settings to a game so that these settings automatically load when a game is launched.DisplayA variety of display features enable you to further manipulate and configure your display settings to optimize the use of your displays. Tasks in the Display pages allow you to do the following:• Move CRT screen position• Change resolution• Adjust desktop color settings• Rotate display• Manage custom resolutions• Set up multiple displaysChange ResolutionUsing the Change Resolution controls, youcan change the color setting, reduce screenflickering, or adjust the amount of informationappearing on your display.⏹Adjust Desktop Color SettingsUse this page to set the contrast, sharpness, and color depth (Digital Vibrance) of the images on your desktop. These changes will not affect any video playback. To change video color set-tings, go to Adjust Video Color Settings under the Video and TV section from the Start page.⏹Rotate DisplayThe NVIDIA Rotate features enable you to change the orientation of your desktop to portrait, landscape, and inverted modes. This is useful if you have rotated your physical display and need to rotate the desktop to match the orientation of your display.⏹View HDCP statusUse this page to check if your system is HDCP-capable.⏹Adjust Desktop Size and PositionYou can adjust desktop size and position for yourdisplays.Dual-Monitor SetupYou can set the display to output from two monitors on the Set Up Multiple Displays page.Select your preferred nView display modes here.• Only use one display (Single)• The same on both display (Clone)• Configured independently from each other(Dualview)• As one large horizontal desktop (Horizontal span)• As one large vertical desktop (Vertical span)⏹Set Up Multiple DisplaysNVIDIA nView technology enables you to viewyour desktop in one of several multi-displaymodes to make the best use of the displays(monitors) that are connected to your computer.(4) As one large vertical desktop (Vertical span)Vertical Span mode indicates that both displays in the display pair function as one tall virtual desktop. The height of each display is half the height of the total virtual desktop height.Vertical Span Mode(3) As one large horizontal desktop (Horizontal span)Horizontal Span mode indicates that both displays in the display pair function as one wide virtual desktop. The width of each display is half the width of the total virtual desktop width.Horizontal Span Mode(1) The same on both display (Clone)Clone mode indicates that both displays in the display pair show images of the same desktop.Clone Mode(2) Configured independently from each other (Dualview)Dualview mode indicates that both displays in the display pair function as one virtual desktop. Unlike Horizontal Span or Vertical Span mode, Dualview treats each display as a separate device. This means that the taskbar will not be stretched across displays and 3D applications are not accelerated as efficientlyas when the application spans displays.Dualview Mode⏹Set Up Stereoscopic 3DYou can enable stereoscopic 3D, set depth, andset your 3D displays and 3D glasses. (To en-able stereoscopic 3D function, you will need 3Ddisplays and glasses. The details: http://www./object/3d-vision-main.html)⏹View Compatibility With GamesYou can view stereoscopic 3D compatibility withgames.Stereoscopic 3DTasks in the Stereoscopic 3D pages allow you to do the following:• Set up stereoscopic 3D• View compatibility with gamesVideo & TelevisionVideo and television features are similar to those for analog for optimal viewing. Tasks in the Video & Televi-sion pages allow you to do the following:• Adjust your television picture quality and video color settings for the best possible viewing in itsenvironment.• Change the position and size of the desktop video to best fit your television screen.⏹Adjust Video Color SettingsUse the controls on this page to fine tune thecolor settings for video content on your display.Select one of the test images to monitor yourchanges. For best results, play a video while youmake adjustment to view the changes as theyhappen.⏹Adjust Video Image SettingsUse the controls on this page to fine tune theimage settings for video content on your display.You can choose to use inverse telecine, adjustedge sharpness, or apply noise filtering. For bestresults, play a video while you make adjustmentto view the changes as they happen.Note:Support for some features under Windows Vista isin development and may not be available with yourForceWare graphics driver version. Consult the re-lease notes for updated information onsupported features.4. Troubleshooting TipsThe following troubleshooting tips may help if you experience problems. Contact your dealer or GIGABYTE for more advanced troubleshooting information.⏹Check that the card is seated properly in the PCI Express x16 slot.⏹Ensure that the display cable is securely fastened to the card's display connector.⏹Make sure that the monitor and computer are plugged in and receiving power.⏹If necessary, disable any built-in graphics capabilities on your motherboard. For moreinformation, consult your computer's manual or manufacturer.(NOTE: Some manufacturers do not allow the built-in graphics to be disabled or to become thesecondary display.)⏹Make sure you selected the appropriate display device and graphics card when you installthe graphics driver.⏹Restart your computer.Press <F8> on your keyboard after system starts up. When the Windows Advanced OptionsMenu appears, select Safe Mode and press <Enter>.After getting into Safe Mode, in Device Manager check whether the driver for the graphics cardis correct.⏹For more assistance, use the Troubleshooting Guide located in the Windows Help or contactyour computer manufacturer.⏹If you are not able to find the desired monitor color/resolution settings:The color and screen resolution options available for selection depend on the graphics cardbeing installed.If necessary, adjust your monitor's setting using monitor's adjust panel to make the screen look focused, crisp, and sharp. (Please refer to the monitor's manual.)Regulatory NoticesThis document must not be copied without our written permission, and the contents there of must not be imparted to a third party nor be used for any unauthorized purpose. Contravention will be prosecuted. We believe that the information contained herein was accurate in all respects at the time of printing. GIGABYTE cannot, however, assume any responsibility for errors or omissions in this text. Also note that the information in this document is subject to change without notice and should not be construed as a commitment by GIGA-BYTE.Our Commitment to Preserving the EnvironmentIn addition to high-efficiency performance, all GIGABYTE motherboards fulfill European Union regulations for RoHS (Restriction of Certain Hazardous Substances in Electrical and Electronic Equipment) and WEEE (Waste Electrical and Electronic Equipment) environmental directives, as well as most major worldwide safety requirements. To prevent releases of harmful substances into the environment and to maximize the use of our natural resources, GIGABYTE provides the following information on how you can responsibly recycle or reuse most of the materials in your "end of life" product.Restriction of Hazardous Substances (RoHS) Directive StatementGIGABYTE products have not intended to add and safe from hazardous substances (Cd, Pb, Hg, Cr+6, PBDE and PBB). The parts and components have been carefully selected to meet RoHS requirement. More-over, we at GIGABYTE are continuing our efforts to develop products that do not use internationally banned toxic chemicals.Waste Electrical & Electronic Equipment (WEEE) Directive StatementGIGABYTE will fulfill the national laws as interpreted from the 2002/96/EC WEEE (Waste Electrical and Elec-tronic Equipment) directive. The WEEE Directive specifies the treatment, collection, recycling and disposal of electric and electronic devices and their components. Under the Directive, used equipment must be marked, collected separately, and disposed of properly.WEEE Symbol Statementmust not be disposed of with other waste. Instead, the device should be taken to the wastecollection centers for activation of the treatment, collection, recycling and disposal procedure.The separate collection and recycling of your waste equipment at the time of disposal will help purchased the product for details of environmentally safe recycling.♦When your electrical or electronic equipment is no longer useful to you, "take it back" to your local or re-gional waste collection administration for recycling.♦If you need further assistance in recycling, reusing in your "end of life" product, you may contact us at the Customer Care number listed in your product's user's manual and we will be glad to help you with your ef-5.1. Regulatory StatementsFinally, we suggest that you practice other environmentally friendly actions by understanding and using the energy-saving features of this product (where applicable), recycling the inner and outer packaging (including shipping containers) this product was delivered in, and by disposing of or recycling used batteries properly. With your help, we can reduce the amount of natural resources needed to produce electrical and electronic equipment, minimize the use of landfills for the disposal of "end of life" products, and generally improve our quality of life by ensuring that potentially hazardous substances are not released into the environment and are disposed of properly.China Restriction of Hazardous Substances TableThe following table is supplied in compliance with China's Restriction of Hazardous Substances (China RoHS) requirements:。
自动化即服务 (AaaS) flyer说明书
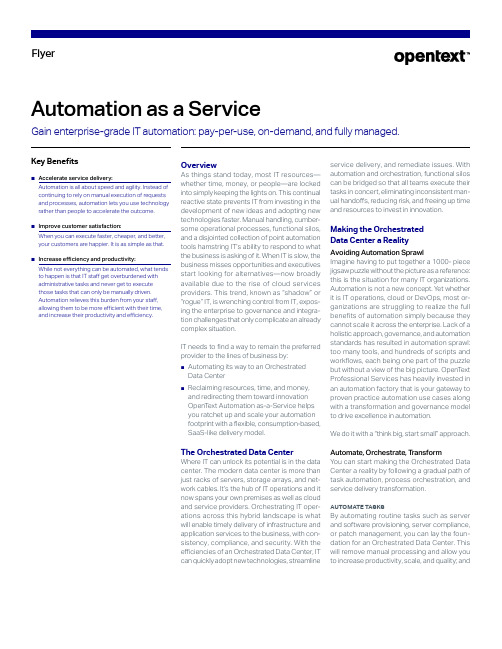
FlyerAutomation as a ServiceGain enterprise-grade IT automation: pay-per-use, on-demand, and fully managed.Key Benefits■Accelerate service delivery:A utomation is all about speed and agility. Instead ofcontinuing to rely on manual execution of requests and processes, automation lets you use technology rather than people to accelerate the outcome.■I mprove customer satisfaction:W hen you can execute faster, cheaper, and better, your customers are happier. It is as simple as that.■ I ncrease efficiency and productivity:W hile not everything can be automated, what tends to happen is that IT staff get overburdened withadministrative tasks and never get to executethose tasks that can only be manually driven.Automation relieves this burden from your staff,allowing them to be more efficient with their time,and increase their productivity and efficiency.OverviewAs things stand today, most IT resources—whether time, money, or people—are lockedinto simply keeping the lights on. This continualreactive state prevents IT from investing in thedevelopment of new ideas and adopting newtechnologies faster. Manual handling, cumber-some operational processes, functional silos,and a disjointed collection of point automationtools hamstring IT’s ability to respond to whatthe business is asking of it. When IT is slow, thebusiness misses opportunities and executivesstart looking for alternatives—now broadlyavailable due to the rise of cloud servicesproviders. This trend, known as “shadow” or“rogue” IT, is wrenching control from IT, expos-ing the enterprise to governance and integra-tion challenges that only complicate an alreadycomplex situation.IT needs to find a way to remain the preferredprovider to the lines of business by:■Automating its way to an OrchestratedData Center■Reclaiming resources, time, and money,and redirecting them toward innovationOpenT ext Automation as-a-Service helpsyou ratchet up and scale your automationfootprint with a flexible, consumption-based,SaaS-like delivery model.The Orchestrated Data CenterWhere IT can unlock its potential is in the datacenter. The modern data center is more thanjust racks of servers, storage arrays, and net-work cables. It’s the hub of IT operations and itnow spans your own premises as well as cloudand service providers. Orchestrating IT oper-ations across this hybrid landscape is whatwill enable timely delivery of infrastructure andapplication services to the business, with con-sistency, compliance, and security. With theefficiencies of an Orchestrated Data Center, ITcan quickly adopt new technologies, streamlineservice delivery, and remediate issues. Withautomation and orchestration, functional siloscan be bridged so that all teams execute theirtasks in concert, eliminating inconsistent man-ual handoffs, reducing risk, and freeing up timeand resources to invest in innovation.Making the OrchestratedData Center a RealityAvoiding Automation SprawlImagine having to put together a 1000- piecejigsaw puzzle without the picture as a reference:this is the situation for many IT organizations.Automation is not a new concept. Y et whetherit is IT operations, cloud or DevOps, most or-ganizations are struggling to realize the fullbenefits of automation simply because theycannot scale it across the enterprise. Lack of aholistic approach, governance, and automationstandards has resulted in automation sprawl:too many tools, and hundreds of scripts andworkflows, each being one part of the puzzlebut without a view of the big picture. OpenT extProfessional Services has heavily invested inan automation factory that is your gateway toproven practice automation use cases alongwith a transformation and governance modelto drive excellence in automation.We do it with a “think big, start small” approach.Automate, Orchestrate, T ransformYou can start making the Orchestrated DataCenter a reality by following a gradual path oftask automation, process orchestration, andservice delivery transformation.AUTOMATE TASKSBy automating routine tasks such as serverand software provisioning, server compliance,or patch management, you can lay the foun-dation for an Orchestrated Data Center. Thiswill remove manual processing and allow youto increase productivity, scale, and quality; andFlyerAutomation as a Servicemost importantly, free your staff to invest their time in higher value activities. ORCHESTRATE PROCESSESOnce automated building blocks are available, you can use them to construct automated end-to-end processes such as:■DevOps; continuous integration and testing, or continuous release and deployment■Cloud: Infrastructure as Code■Service request fulfillment: Hands-off processing of common user requests (e.g., setting up group file server)■Event remediation: Kick off self-healing recovery scripts when servers or applications are down■Change request processing: Automatically apply low-risk changesto the production environment TRANSFORM SERVICE DELIVERYOnce you can orchestrate end-to-end pro-cesses, you can deliver them through a self-service mechanism. You can offer your users a service catalog, allow them to request and activate services, and even back-charge it to their department, all in an automated, hands-free manner.Key FeaturesAutomation as-a-service from ProfessionalServices provides you with comprehensive ITautomation capabilities delivered in a flexible,consumption-based subscription model. UsingOpenT ext Data Center Automation Suite, we:■Architect and deploy the technologyplatform■Establish an automation factory■Manage both technology and automationcontent on an ongoing basisY our mission is to deliver the services your cus-tomers need. This means you need to engageyour customers, and spend time with them tounderstand what they need, what the demandis, and what you need to do to meet it. Whatyou don’t need is to become a product expertovernight or spend precious resources in de-ploying and managing technology. EngagingProfessional Services lets you leverage ourexperience and expertise so you can focus onyour core mission and deliver the services yourcustomers want and need.AUTOMATION AT AN ENTERPRISE SCALEIt is likely that you have pockets of automa-tion that deliver value. However, scaling au-tomation to an enterprise level is challenging.Automation as-a-service is designed to meetthis challenge.DEPLOYMENTWe deploy the automation solution onto yourpreferred infrastructure (on premise, cloud,hosted). Should you choose to deploy onto apublic cloud, we can even help you manage theinfrastructure post deployment. We can alsoleverage an already existing deployment if youhave one.THE AUTOMATION FACTORYThis is our expertise and knowledge hub,bringing together our technology expertiseand our implementation experience. The au-tomation factory is a virtual automation en-gineering team. It implements the workflowsyou need but this is much more than just man-power. Through the factory, you gain access torecommended practices, common use cases,automation standards, and operating proce-dures that we have collected through manyprevious engagements.Governance is an important part of the au-tomation factory. Architectural governanceensures that implementation follows recom-mended practices, and program governanceis where we measure implementation successand guard against automation sprawl.SOLUTION MANAGEMENTLike any solution, both the technology platformand its contents and configuration need ongo-ing management. Whether it is adding/remov-ing users, fixing issues, or modifying flows, wetake care of it as part of the service, so you canfocus on using the automation platform to getyour job done rather than spending time andeffort on its maintenance and support. Figure 1. Automation as a ServiceCOMMERCIAL MODELAutomation as-a-service offers a flexible, con-sumption-based subscription model. In this model, we classify automation flows into sim-ple, medium, and complex, with a fixed price per type. You choose your level of subscrip-tion (i.e., how many flows per period) and you simply pay as you consume. If you find that you require capacity beyond your subscription, the same automation factory can provide you with on-demand extra capacity. The initial outlay (e.g., deployment) can be either a one-off pay-ment or amortized through monthly payments. BenefitsAccelerate Service DeliveryAutomation is all about speed and agility. Instead of continuing to rely on manual exe-cution of requests and processes, automation lets you use technology rather than people to accelerate the outcome.Reduce IT Costs, Increase IT ValueY our most expensive resource is your people. But unlike technology, they don’t have unlim-ited bandwidth, and there is only so much any individual can do. So when your workload in-creases, the only solution is to add more peo-ple—i.e., more costs. By automating, you break this dependency and free your people to do what people do best—innovate. You reduce your costs and get more value from your staff. Increase Efficiency and ProductivityWhile not everything can be automated, what tends to happen is that IT staff get overbur-dened with administrative tasks and never get to execute those tasks that can only be man-ually driven. Automation relieves this burden from your staff, allowing them to be more effi-cient with their time, and increase their produc-tivity and efficiency.Improve Customer SatisfactionWhen you can execute faster, cheaper, and better, your customers are happier. It is as simple as that.In House When ReadyAutomation as-a-service lets you gain exper-tise—OpenText’s expertise—rapidly, giving you the runway you need to ramp up your own knowledge and skills. Since you own the licenses and the content, you can decide to redeploy the solution in house, when you are ready, on your own terms.The Professional Services Difference OpenT ext provides unmatched capabilities with a comprehensive set of cloud and automation consulting services and unique intellectual property that help you automate and optimize your data center operations and set a solid foundation for your cloud journey.■Fast time-to-value: We help you rapidly realize business value by leveraging our deep expertise in OpenT ext’s cloud and automation solutions and our structured, focused implementation approach■Flexibility: A modular and progressive solution set to meet your current and future needs enables you to implement now, knowing that your investment is protected with a path for future expansion ■Proven cloud and automation solution implementation track record with more than 20 years of experience helping large, complex, global organizations realize value from their OpenT ext Software investments■Rich intellectual property and unparalleled reach into product engineering■T echnology-agnostic implementation approach with no vendor lock-in, no rip- and-replace■Education and support services to ensure adoptionOnly Professional Services brings together consulting expertise and the industry-leading IT Performance Suite software to help you per-form better.Learn more at/en-us/ professional-services/overview/opentext。
解决ubuntu

解决ubuntu intelnvidia双显卡问题nvidia的optimus技术让电脑在平时使⽤集成显卡渲染,⽽在⾼性能需要时(⽐如玩游戏)智能切换到独⽴显卡进⾏渲染,这样在能耗,发热与性能之间达到⼀个很好的平衡。
外国的技术论坛⽤了neat<灵巧的>这个单词来形容这项技术。
但是optimus 仅仅⽀持windows,nvidia还说没有打算要⽀持linux平台。
这也是linus Torvals⼤骂nvidia的原因吧。
以前我给⾃⼰和⼥朋友的电脑上都是⽤wubi安装的,没有发现这个问题,但前两天我卸载了windows 7,硬盘安装ubuntu 12.04就发现了这个问题。
1---终端:lspci |grep VGA 可以看到两个显卡都是打开的,电脑噪⾳和发热明显。
2---基本上所有的游戏都不能玩:⽐如:Teeworlds, supertux 2, Heros of newerth....3---⾕歌地图完全不能初始化,XBMC错误提⽰3D加速⽆效,virtualbox安装win 8预览版提⽰宿机不⽀持3D加速。
到这⾥应该已经看出问题的严重性了吧,这电脑差不多成了半个废品了。
所以必须解决这个问题,于是我国内国外逛ubuntu论坛,askubuntu,IRC,wiki.... 找到了国外社区开发的bumblebee<⼤黄蜂>(还有个衍⽣版ironhide<变形⾦刚>就不讲了)花了两天最终完美解决问题,下⾯我就把我⽤的⽅法总结出来⽅便⼤家使⽤不同的电脑可能会有差异,请谨慎参考!1,添加ppa源:sudo add-apt-repository ppa:bumblebee/stable2,如果你是11.04或者更早版本或者你想要最新驱动sudo add-apt-repository ppa:ubuntu-x-swat/x-updatessudo apt-get update(驱动会升级到beta版)3,安装软件:sudo apt-get install bumblebee bumblebee-nvidia(后者不必要,会⾃动安装的)最新版已经⾮常傻⽠化了,基本不需要什么配置,全程⾃动完成4,重启电脑rango@aspire:~$ lspci |grep VGA00:02.0 VGA compatible controller: Intel Corporation 2nd Generation Core Processor Family Integrated Graphics Controller (rev 09)01:00.0 VGA compatible controller: NVIDIA Corporation Device 0dea (rev ff)可以看到nvidia显卡已经关闭,噪⾳明显变⼩,散热减少,总之前⾯提到的问题全部解决,我所试过的程序都能智能切换显卡。
DELL服务器系统提示错误解决的若干办法(20210123055207)

确保
DIMMs<x>disabled-DDRtrainingfailure
或处理器插
槽可能沾上
内存模块连
接器干净并
DIMMs<x>disabled-Simplememorytestfailure
灰尘。
且在有效配
DIMMs<x>disabled-Simplememorytestfailure
DIMMpopulationviolation:DIMM<x>LockstepPairDIMM<x&y>.
Thememoryconfigurationisnotoptimal.
内存 配置无效。 系统将运 行,但是性 能会降低。
请确 保内存模块 安装在有效 的配置中。 请参阅。如 果问题仍然 存在,请参 阅。
内存模块连 接器干净。
尘。
内存 模块出现故 障。
DIMMpopulationviolation:DIMM<x>LockstepPairDIMM<x&y>(s)wi
thlargestnumberofranksinthelowestslot.
不同 级别的内存 模块存在于 无效的配置 中。
请确 保内存模块 安装在有效 的配置中。 请参阅。
的系统配
为以前的配
置。
置。如果系 统引导时不 再显示此警 告,则表明 此电源设备 不支持新更 换的组件。 请参阅。
Alert!Redundantmemorydisabled!
虽然
请检
系统设置程
查内存模块
Memoryconfigurationdoesnotsupportredundantmemory.
- 1、下载文档前请自行甄别文档内容的完整性,平台不提供额外的编辑、内容补充、找答案等附加服务。
- 2、"仅部分预览"的文档,不可在线预览部分如存在完整性等问题,可反馈申请退款(可完整预览的文档不适用该条件!)。
- 3、如文档侵犯您的权益,请联系客服反馈,我们会尽快为您处理(人工客服工作时间:9:00-18:30)。
STAC:Software Tuning Panels For Autonomic Control Elizabeth Dancy and James R.CordySchool of Computing,Queen’s University,Kingston,Ontario,Canada{dancy,cordy}@cs.queensu.caAbstractOne aspect of autonomic computing is the abil-ity to identify,separate and automatically tune parameters related to performance,security,ro-bustness and other properties of a software sys-tem.Often the response to events affecting these properties consists of adjusting tuneable system parameters such as table sizes,time-out limits,restart checks and so on.One can think of these tuneable parameters as a set of knobs that can be tweaked or switched to adapt the system to environmental or usage changes.In many ways these tuneable param-eters correspond to the switches and poten-tiometers on the control panel of many hard-ware devices.While modern software systems designed for autonomic control may make these parameters easily accessible,in legacy systems they are often scattered or deeply hidden in the software source.In this paper we intro-duce Software Tuning Panels for Autonomic Control(STAC),a system for automatically re-architecting legacy software systems to fa-cilitate autonomic control.STAC works to iso-late tuneable system parameters into one visi-ble area of a system,producing a resulting ar-chitecture that can be used in conjunction with an autonomic controller for self-maintenance and tuning.A proof-of-concept implementa-tion of STAC using source transformation is Copyright c 2006.Permission to copy is hereby granted provided the original copyright notice is repro-duced in copies made.presented along with its application to the au-tomatic re-architecting of two open source Java e of the new architecture in mon-itoring and autonomic control is demonstrated on these examples.1IntroductionThe time is approaching when the rate of soft-ware development so outweighs human exper-tise that there may be a software maintenance crisis.The domain of autonomic computing aims to proactively combat this problem by working towards the production of self-controlling and self-maintaining systems.However,it is futile to attempt to completely replace all ex-isting software with autonomic equivalents be-cause this just produces an analagous race against time.It then becomes pertinent to look at ways to automate the conversion from legacy sys-tems to autonomic systems.To do so with the goal of facilitating self-maintenance and self-tuning requires access to numerous tuneable system parameters.At present,these parame-ters are often scattered throughout source code and sometimes hidden,forcing each access to involve a timely search operation.In order to automate the re-architecture of programs so that the tuneable parameters are accessible without a search,we propose STAC, Software Tuning Panels for Autonomic Con-trol,a system to automatically re-architect legacy source code with respect to marked up tuneableparameters.The result is a system with iden-tical functionality which can now give a main-tainer,autonomic or otherwise,localized access to these tuneable parameters for instrumenta-tion,tuning and maintenance purposes.STAC has two main steps.First,a tune-able parameter of interest must be identified and each reference to this parameter traced throughout the source code.Second,a new program module must be automatically gener-ated which encapsulates all actions on that pa-rameter during program execution.In STAC this new module is called the Control Panel.The remainder of this paper is organized as follows.Section2describes the general ap-proach and implementation of STAC.Section3 provides two examples of STAC re-architectures on two real world open source applications.Sec-tion4demonstrates three applications of the STAC Control Panel created for these systems. Section5provides a synopsis of related work and Section6analyzes the results of STAC and suggests future work in the area.2ApproachThe prototype STAC re-architecture process for Java programs consists of a Java Front End in combination with a series of source trans-formations written in the TXL programming langauge[6].These language choices were de-liberate but not necessary as STAC could be implemented using other languages.To begin the STAC implementation,the orig-inal source code is normalized for transforma-tion.To do so,the original Java software pack-age isfirst sent through a Front End File Fil-ter,where it is sorted down into only source codefiles and organized into one contiguous textfile to prepare the input for TXL transfor-mation.Special XML tag delimiters separate each sourcefile and other tags denote where each original source folder begins and ends so that the package can be recreated following re-architecture.The merged source textfile is run through a series of transformations which are responsible for the actual re-architecting of the source code and the generation of the Control Panel mod-ule housing the tuneable parameters ofinterest.Figure1:Overview of the STAC Process Finally,the transformed contiguous sourcefile is passed back into the Front End to be sorted into its originalfile and package structure,with the addition of the Control Panel.Figure1out-lines this process graphically.The most challenging technical parts in Fig-ure1are the TXL transformations which iden-tify and transform the tuneable parameter ref-erences,as well as those transformations which create the Control Panel module.Details of these two integral parts are explained below.It is pertinent to note that before this stage,a series of unique renaming transformations are applied to distinguish different variables with the same name.In the STAC prototype the user must man-ually mark up the declaration of each tuneable parameter of interest directly in the source code using XML tags.After this step,the remain-der of the transformation process is automated and hidden from the user.The main architectural changes to a system are the addition of a new program module,the Control Panel,and the redirection of tuneable parameter references to the Control Panel.Fig-ure2is a conceptual view of how a system is re-architected using STAC.The left-hand side shows the tuneable parameter references(rep-resented by hollow circles)before the transfor-mation.After the transformation,these ref-erences refer to the newly generated Control Panel module seen at the bottom.2Figure2:STAC Re-Architecting2.1Control Panel Generation Creating the Control Panel class requires track-ing of the tuneable parameters by searching for the XML markup around each tuneable param-eter’s declaration.Each marked up parameter is added to the Control Panel,one at a time. Each variable of interest is represented within the Control Panel as its own class,named af-ter the tuneable parameter it represents.The left-hand side of Figure3shows an original Java class with a variable numUsers which has been marked up.The right-hand side of Fig-ure3shows the resulting Control Panel for nu-mUsers.Not all Control Panel classes are as triv-ial as Figure3.In a typical program,several tuneable parameters would be marked up and each of those may have many references to it. Due to Java inheritance,tuneable parameters which are created in subclasses of other classes containing tuneable parameters will have other objects which refer to them.The Control Panel must create a separate reference class for each copy of a variable which is explicitly created in the code to accommodate for this inheritance property.For example,in the class InteractiveSystem we have marked up the global variable numUsers as a tuneable parameter before the transfor-mation.The Control Panel must contain a new copy of numUsers for each direct instan-tiation of InteractiveSystem.Of course,there are many extensions of this rule for otherJavaFigure3:NumUsers Markup and Control PanelCreationFigure4:Control Panel with Nesting scenarios which would allow another pointer to the same numUsers variable.Figure4showsa Control Panel with nesting to accommodatean instance of InteractiveSystem named Sys-tem1,where each System1object has an In-tercativeSystem object.This process continues recursively.2.2Reference ChangingWhile the above Control Panel serves its pur-pose,thus far the variables in the Control Panel 3classes are completely separate from those that were originally in the code.They must be linked with the code in order to serve any real use,as monitoring or changing the values inside the Control Panel as it stands thus far will not in any way alter the actual variables to which those variables in the Control Panel refer.The second major step in the TXL transformation involves changing all the original program ref-erences to the tuneable parameter variables to point to the Control Panel.This transforma-tion completes the link between the original program source and the Control Panel.The biggest challenge of this step is ensuring seman-tic equivalence.The TXL transformation must therefore cre-ate a suitable,semantically equivalent refer-ence,which is also syntactically valid,to in-sert in the place of all original references to the marked up parameters.For example,a con-structor which is marked up must be replaced with a call to the constructor method in the Control Panel.Even though references may be of the same kind(such as constructors,assign-ment statements or variable calls),they may have to take on several different forms.For ex-ample,a constructor in Java can be either a constructor with an initialized variable or one without an initial value given.These can be further broken down into those which list sev-eral variable names in the same constructor, and those which declare only one.Therefore, each kind of reference may require several dif-ferent TXL rules to handle the different cases.The left-hand side of Figure5shows two kinds of constructors marked up for transfor-mation by the STAC tool.The right-hand side shows how they have been changed by the STAC transformation in the source code.These con-structors now refer to the Control Panel gener-ated by STAC.No matter how complex the reference,the TXL transformations must have rules which can match and transform all forms of references (within the scope of this project)to point to the Control Panel.Furthermore,the transforma-tion must be careful not add any unnecessary source code,to ensure that the code remains maintainable.The next section explores this complicated issue through the use of two real-worldexamples.Figure5:Reference Changing 3ExamplesOnce a system has been transformed by STAC,a user(or autonomic controller)has completecontrol over the tuneable parameters that have been marked up.This section details the entire re-architecting process through the use of a two real-world open source examples.Each original architecture isfirst outlined and then a STAC transformation is stepped through.3.1JHotDrawJHotDraw[4]is an open source graphical user interface Java application which serves as a tool for creating graphical editing programs.One can also use it as a graphics editor itself.The source code for JHotDraw is openly available and comes packaged in several layers.In to-tal,the JHotDraw version used for STAC con-tains eighteen Java source code packages,in-cluding classfiles,jarfiles and required im-ages.It contains approximately32,500(total) lines and16,000logical lines of code after it has beenfiltered in preparation for the STAC trans-formation.The general structure of the code is one class per attribute for each application, as well as the DrawApplication class.JHot-Draw is chosen as a proof of concept system for STAC because it is a widely used medium-sized Java application which is also available as open source.43.1.1Tuneable ParametersOnce JHotDraw has been selected and ana-lyzed for its main properties,the discovery of tuneable parameters can begin.In the present prototype this identification is performed man-ually.Once found,the constructor of each tune-able parameter is marked up by hand.In the STAC proof-of-concept prototype,candidates for parameters of interest must meet the con-dition that they are either stored as a scalar type or in a Vector.Since the class DrawApplication.java is a class included in every application in JHotDraw, we start there.One possible candidate is the int winCount,declared as a static global vari-able,representing the number of open windows in the application at one time,and initialized to zero in DrawApplication.This will serve as the first example because winCount is contained in one class and keeps track of several different components during runtime.The declaration for winCount is shown in Figure6and its ref-erences are also highlighted.3.1.2TransformationThe XML tags in Figure6mark winCount as a tuneable parameter.After the transforma-tion,the class DrawApplication.java is changed in the following ways:it imports the Control Panel(stored in a new package in the same home directory as the entire source package), and all the references to winCount,including the constructor,have been changed to refer to the Control Panel(Cpanel)class.In addi-tion,the XML markup has been removed.Fig-ure7shows this change,while Figure8shows the new Cpanel class.Notice the constructor, accessor and mutator methods for winCount within the class Cpanel.winCount.These are generated for every tuneable parameter which is marked up,giving a maintainer the power to modify and create variables within the Control Panel.3.2Babylon ChatBabylon Chat[1]is a Java instant messaging system which can be used for internet confer-ences or for group meetings on a local host. Like JHotDraw,it is also freely available.ItFigure6:WinCount Declaration and Refer-encesboasts special white board capabilities to al-low all parties to view an image during a group conference.It also allows for public and private chat rooms and user authentication.Babylon Chat can be run as a Java applet within a web page or as a Java application.It is simple to set up a local host on one computer.3.2.1Tuneable ParametersThe same features of Babylon Chat which dif-ferentiate its architecture from that of JHot-Draw also lend it to the use of different styles of tuneable parameters.Because it is not as clearly modularized,Babylon Chat uses many global lists and shared global variables to keep track of system parameters.Examples include variables which keep track of the online traffic 5Figure 7:WinCount References After Trans-formationFigure 8:Cpanel Class For WinCount and chat room variables.For instance,the vari-ables representing window height and width for each application are both stored globally in the Babylon.java class.These can be used in a sim-ilar way to how the winCount variable was used in the last section.There are two main complications associ-ated with the Babylon Chat code in comparison with the more structured JHotDraw code.The first is that the most useful global attributes are stored in Vectors.Because our proof of concept of STAC was originally designed to monitor only scalar types,Vectors were of little use but realistically of a lot of interest.Therefore,theSTAC transformations (in TXL)were altered during the implementation phase to include the ability to mark up a Vector.In keeping with the scalar type limitation however,only the at-tribute Vector.size()is actually monitored within the Control Panel.This allows the program to track the number of elements currently in-side of a Vector (by using the trimToSize()and size()methods in the Vector class)and watch as it grows and changes.In a way this creates a second reference to the Vector which can be thought of as a copy.The second pertinent complication associ-ated with the source code structure of Babylon Chat is that because many variables are stored and passed globally,there are many more refer-ences to tuneable parameters scattered through-out the program.This presents the opportu-nity to test STAC’s true capabilities at chang-ing all types of references.As a consequence of the large number of references,there are also many different references to the same variable name.This requires an added layer of transfor-mation by STAC because STAC must ensure that each reference to the Control Panel repre-sents a unique instance (where applicable),and consequently,unique renaming and updating of these names across the source code is required.This is a major technical challenge of STAC and will be detailed by the examples later in this section.3.2.2TransformationConsider the variable clientId ,declared as a global in the class babylonPanel .Initially,the value of clientId is set to 0.The purpose of this variable is to assign a new clientId to each client thread so that they can be referenced by this index.ClientId may not seem very useful for monitoring or tuning but this example illus-trates how one scalar type can require dozens of reference replacements as well as unique re-naming by the STAC transformation in order to work properly.To understand the challenge of this transformation,consider that over ten separate classes and instances of those classes refer to a clientId .For example,the class baby-lonClient declares a mainPanel which is of type babylonPanel and therefore must have its own copy of clientId .However,eight other classes6do the same thing,all calling their panel main-Panel.If the Control Panel were to create just one copy of mainPanel and within that,one variable for clientId,there would be nine dif-ferent objects sharing this variable in the Con-trol Panel when in fact there should be nine different copies.To resolve this conflict,the STAC trans-formation has a detailed process that checks the names of all marked up parameters as well as the Objects which may reference their own copy of each parameter.In this case,this means renaming each mainPanel as a unique string called mainPanel#where the number sign is filled in with a number from1-9(Figure9). Such name changes must be propagated through-out each class.This works well in Babylon Chat because the Panel declarations are local to each class.Thus,it is a matter offinding the unique renaming associated with a class and then changing all other mainPanel references within that class to the appropriate mainPanel#. Note that this form of Control Panel incorpo-rates nested if-statements as a way to decipher which Object called a Control Panel method at runtime.This also requires adding a pa-rameter representing the calling Object’s name to the methods in the home class(class where the variable is originally declared and marked up).After the initial method uses the param-eter representing the calling Object’s name,it is replaced with null in the subsequent method calls.Now that a difficult example of scalar types has been discussed,it is pertinent to show some Vector transformations.These,as stated above, are the most useful type of tuneable param-eters for a STAC transformation on Babylon Chat.Consider the variable userList,which is declared as a Vector in the class babylon-Client.java.This variable stores information about the active users online during any given time.By using STAC to create a Control Panel capable of tuning the size()attribute of the userList,it is possible to monitor the number of active users online at one time.Thefirst step in this process is to mark up the tuneable parameter declaration.Because this tuneable parameter is a Vector type rather than a scalar type,special<vector param>tags are used,to indicate to the transformationrulesFigure9:Control Panel with Renaming that the size()attribute of this particular Vec-tor is to be added to the Control Panel.Fig-ure10shows the initial markup in the baby-lonClient class.This example is interesting be-cause the babylonClient class serves as a very central Object in the Babylon Chat system.In particular,each babylonPanel has a specific client associated with it,declared as a global variable in the babylonPanel class.Further-more,many of the other classes create their own Panel to reference when adding attributes to the system.Each of these panels abstractly has its own copy of a client,as discussed in the previous example using clientId.Therefore, this example contains three levels of references which must be changed to either point to the Control Panel or be renamed to preserve se-7Figure10:Tuneable Parameter Initial Markup of Bablylon Chat Client Classmantics in the face of multiple variable refer-ences to variables which have the same name.These necessary reference changes take place during the reference tracing and identification phase of the STAC process.Similar to the mainPanel example,each client needs to be re-named and then these renamings must be prop-agated correctly to avoid confusion in other classes where the client variable is used.For example,if the client variable in class babylon-Chat becomes client1,then every class that ex-tends babylonChat or instantiates a new baby-lonChat Object must propagate this change to its client reference.4ApplicationsOnce the STAC tool has been applied,the re-sulting Control Panel provides complete isola-tion of tuneable parameters and acts like the harness under the hood of a car,allowing lo-calized tuning and complete control in a cen-tral location.The uses of the control panel are many and include variable monitoring and both static and dynamic variable tuning.Monitoring of tuneable parameters can be implemented as a visualization of parameters at runtime.To demonstrate this for STAC,we have chosen to use JFreeChart[3],a graphics package freely available that has the capability to create dynamic time-based plots at runtime. With JFreeChart,the Cpanel class can be in-strumented and then visualized dynamically at runtime.Going back to the JHotDrawexam-Figure11:Visualization of JHotDraw Win-Countple,where the winCount variable was marked up and isolated in the Control Panel,only a few simple lines of instrumentation code are needed in the Control Panel to implement dynamic visualization.Because the winCount variable simply keeps track of various JHotDraw appli-cation windows which are open at one time, and because in creating a drawing editor it may be necessary to have several windows open at one time,Figure11illustrates a screen shot of the dynamic visualization of several JHot-Draw windows running simultaneously.The four windows are all separate applications of JHotDraw.The visualization was started be-fore thefirst JHotDraw program was opened.Therefore,it starts at zero.The dynamic plot shows time increasing as each new window is opened,resulting in a stepwise function be-cause they were opened at comparable inter-vals.If several more were opened,the value of the winCount variable would increase accord-ingly.If any of the windows were closed,it would decrease and this would be visualized in real time.Figure12shows the minimal instrumenta-tion necessary inside the Cpanel class to ex-tract this information.Inside the set()method for winCount,all that is needed is some sim-ple writing of values to a buffer which is read by the JFreeChart graphing program as data.Every time the value of winCount is updated, this value is written out,and then displayed by the dynamic plot shown above.Note that orig-inally there were four references to winCount 8Figure12:Control Panel Instrumentation for JHotDraw WinCount Visualizationwithin the DrawApplication class.Without the STAC re-architecture,the system would require four different references every time it wanted to change the winCount variable.Keeping in mind that this is a notably simple example, scaling this up would provide a tremendous in-crease in control as well as a decrease in neces-sary maintenance time.In addition to parameter visualization,the STAC Control Panel can be used to tune each parameter of interest either retroactively,after a visualization,or on-the-fly at runtime.For very accurate tuning of specific values,or for tuning which requires some sample data before analysis,static tuning can be applied to the Control Panel after run-time.The isolation of tuneable parameters aids in this process,elimi-nating multiple program accesses,although for co-dependent variables some program manipu-lation may be required.The dynamic tuning powers enabled by STAC are also intriguing.Through simple value com-parison,a tuneable parameter can be moni-tored until it goes beyond a certain threshold and then reset to a more desirable value.This does not apply well to winCount because re-setting the winCount would not serve a useful purpose for system tuning.However,sanity-checking the values in the Control Panel and then redirecting the program to correct an er-ror is also possible and is nicely illustrated with the winCount variable.Suppose during the program execution,one wanted to minimize overcrowding of theworkspace Figure13:Adding Threshold Checking in the Control Panelwith respect to JHotDraw application windows.To do so,one could dynamically tune the Con-trol Panel to monitor the winCount variable and react if the number of open JHotDraw Win-dows becomes larger than a certain threshold size by tiling the rest of the Windows equally and setting the current Window on top.To do so,all that is needed are some simple additionsto the Control Panel.Within the Control Panel,a simple Robot object can be created.The Robot class,foundin the AWT package,allows a Robot Object tobe created which can itself create native eventsin Java at runtime.These events include keystrokes as well as mouse movements and mouse events. Therefore,this allows us to mimic a user,in keeping with the autonomic undertone of this experiment.The Robot can then be instan-tiated and can perform a specific autonomic action whenever the winCount variable goes above its threshold.Figure13shows the Con-trol Panel with a Robot being created for a threshold of4.Figure14details the Desktop view both before,when the number of open win-dows is4,and Figure15shows after,when there arefive open windows.Notice the new arrangement of Windows on the desktop.Because the Robot methods can throw an AWTException,each call to the Control Panel get()method must now catch this exception. However,this was all handled locally within the Control Panel by adding an extends clause forcing the Exception to be propagated to the Control Panel and not requiring any additional post-transformations on the original code.As an extension to the above example,the9Figure14:Before Dynamic Tuning ofDesktopFigure15:After Dynamic Tuning of Desktop Control Panel can continue in a loop,monitor-ing the current value of the winCount variable the entire time the application windows are open.If the number of Windows gets beyond seven,then the tiling could be considered too crowded and all but the current Window(most recently opened),will be minimized.Because the loop will continue monitoring the number of Windows,if the user closes a JHotDraw appli-cation window later,the tiling will re-appear. Figure16shows the Desktop when the number of open Windows has reached seven and all but the current Window have been minimized.Fig-ure17shows later on in the application,when one window has been closed,and the tiling has been reset.Some of the potential of STAC hasbeenFigure16:MinimizedWindowsFigure17:After Re-tilinginvestigated and confirmed in this section us-ing examples of STAC transformations on bothJHotDraw and Babylon Chat.However,thereis still much work to be done.The followingsection examines what limiting assumptions have been made at this point,and what future projects may evolve from the current STAC project.5Related WorkThe STAC project draws on three main areasof current research in computing.These areautonomic computing,automated refactoring,and source transformation.Although the domain of autonomic com-puting is new,there are a few projects whichparallel STAC in their attempts to implement 10。