oraclebackup脚本书写
linuxoracle自动备份脚本
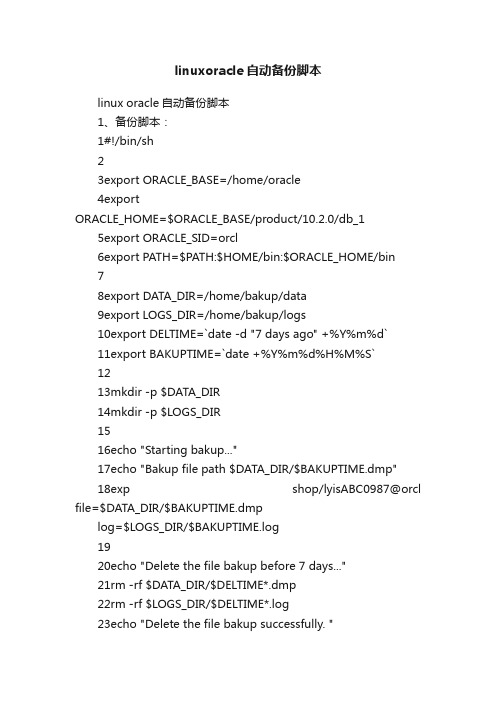
linuxoracle自动备份脚本linux oracle自动备份脚本1、备份脚本:1#!/bin/sh23export ORACLE_BASE=/home/oracle4exportORACLE_HOME=$ORACLE_BASE/product/10.2.0/db_1 5export ORACLE_SID=orcl6export PATH=$PATH:$HOME/bin:$ORACLE_HOME/bin78export DATA_DIR=/home/bakup/data9export LOGS_DIR=/home/bakup/logs10export DELTIME=`date -d "7 days ago" +%Y%m%d`11export BAKUPTIME=`date +%Y%m%d%H%M%S`1213mkdir -p $DATA_DIR14mkdir -p $LOGS_DIR1516echo "Starting bakup..."17echo "Bakup file path $DATA_DIR/$BAKUPTIME.dmp"18exp shop/lyisABC0987@orcl file=$DATA_DIR/$BAKUPTIME.dmplog=$LOGS_DIR/$BAKUPTIME.log1920echo "Delete the file bakup before 7 days..."21rm -rf $DATA_DIR/$DELTIME*.dmp22rm -rf $LOGS_DIR/$DELTIME*.log23echo "Delete the file bakup successfully. "2425echo "Bakup completed."2、添加到任务调度crontab -u oracle -e* 3 * * * /home/bakup/bakup.sh即每天凌晨3点进行备份如需每天备份多次,可设置不同时间段备份:例如:* 3,13,18 * * * /home/bakup/bakup.sh,即每天3点、13点、18点进行备份。
Oracle数据库在linux和windows下自动备份脚本
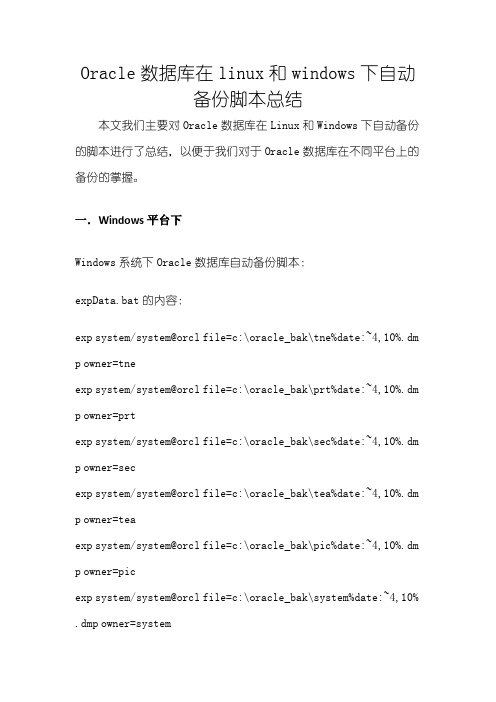
Oracle数据库在linux和windows下自动备份脚本总结本文我们主要对Oracle数据库在Linux和Windows下自动备份的脚本进行了总结,以便于我们对于Oracle数据库在不同平台上的备份的掌握。
一.Windows平台下Windows系统下Oracle数据库自动备份脚本:expData.bat的内容:exp system/system@orcl file=c:\oracle_bak\tne%date:~4,10%.dm p owner=tneexp system/system@orcl file=c:\oracle_bak\prt%date:~4,10%.dm p owner=prtexp system/system@orcl file=c:\oracle_bak\sec%date:~4,10%.dm p owner=secexp system/system@orcl file=c:\oracle_bak\tea%date:~4,10%.dm p owner=teaexp system/system@orcl file=c:\oracle_bak\pic%date:~4,10%.dm p owner=picexp system/system@orcl file=c:\oracle_bak\system%date:~4,10% .dmp owner=systempath=D:\WinRAR3.20rar a Data%date:~4,10%.rar*%date:~4,10%.dmp del*%date:~4,10%.dmp二.Linux平台下功能:1、每天数据库exp全备份2、自动删除7天前的备份,系统只保留当前7天的备份1.系统用户一览2.Oracle环境变量3.邮件设置4.创建备份目录使用oracle创建备份文件存储目录4.创建备份脚本使用oracle用户创建自动备份脚本脚本内容如下,其中的红色部分需要根据实际情况调整当前备份设置删除1个月之前的备份文件注意:date -d "1 month ago" 命令代表获取当前1个月之前的时间date -d "1 week ago"命令代表获取当前1周之前的时间date -d "1 day ago"命令代表获取当前1天之前的时间提升权限手动测试一下5.设置脚本定时执行要检查cron服务是否开启/sbin/service crond start // 启动服务/sbin/service crond stop // 关闭服务/sbin/service crond restart // 重启服务使用root执行命令用法* * * * * :代表执行时间间隔● oracle :执行脚本的用户●/home/oracle /backup.sh:执行脚本的路径Linux系统下Oracle数据库的备份:FIELNAME=/home/oracle/dmp/`date+%Y%m%d`.dmpecho$FIELNAME>/home/oracle/dmp/filename/home/oracle/product/9.2/bin/exp ccbip/'und\=2008CN(Y|N) full=y file=$FIELNAMEbzip2$FIELNAME注:创建的文件都是Oracle用户oinstall组的。
oracle11g自动备份
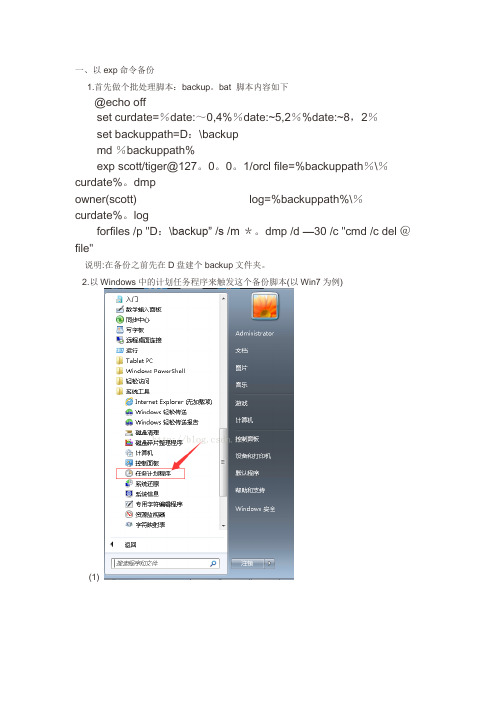
一、以exp命令备份1.首先做个批处理脚本:backup。
bat 脚本内容如下@echo offset curdate=%date:~0,4%%date:~5,2%%date:~8,2%set backuppath=D:\backupmd %backuppath%exp scott/tiger@127。
0。
0。
1/orcl file=%backuppath%\%curdate%。
dmpowner(scott) log=%backuppath%\%curdate%。
logforfiles /p "D:\backup” /s /m *。
dmp /d —30 /c "cmd /c del @file"说明:在备份之前先在D盘建个backup文件夹。
2.以Windows中的计划任务程序来触发这个备份脚本(以Win7为例)(1)完成配置,这个自动备份脚本会在每天10:43的时候执行,将数据备份到D:\backup文件夹下格式为:20151212。
dmp2。
导入dmp文件的命令spool log.txt;drop user scott cascade;drop tablespace SCOTT including contents and datafiles;create tablespace SCOTT loggingdatafile ’D:\orcl\SCOTT 。
dbf'size 50mautoextend onnext 50m maxsize 20480mextent management local;create user scott identified by tiger default tablespace SCOTT;grant connect,resource to scott;grant dba to scott;spool off;exit;在dos窗口输入命名导入数据文件 imp scott/tiger@ORCLfile=20151212.dmp full=Y二、以expdp命名备份脚本如下create directory mydmp as 'D:\backup' —-directory指定导出到本地目录—-授权给操作用户这个mydmp目录的权限grant read, write on directory mydmp to scott-—需要超级管理员的账号 sysdba—-查看一下是否存在该目录select * from dba_directories;执行脚本如下@echo offrem set backupfile=%date:~0,4%%date:~5,2%%date:~8,2%。
oracle自动备份

oracle自动备份oracle自动备份解决Oracle 自动备份建议一:利用任务计划、批处理文件和ORACLE的E_P导出功能,可以根据日期自动生成ORACLE备份文件,大大方便了ORACLE数据备份。
:1,批处理文件backup.bat\.e_p system/manager file=d:\backup\oracle\oracle%date:_0,10%.dmp owner=system log=d:\backup\oracle\oracle%date:_0,10%.log将生成oracle____-01-09.dmp文件e_p system/manager file=d:\backup\oracle\oracle%date:_11,3%.dmp owner=system log=d:\backup\oracle\oracle%date:_11,3%.log将生成oracle星期一.dmp文件,则每周循环保留一个备份文件,共7个备份文件循环2,添加一个任务计划利用任务计划向导,根据备份策略设置自动执行任务的时间频率(例如每天零时),执行d:\oracle\backup.bat3、以后每天将在目录中生成形如“oracle____-08-31.dmp和oracle____-08-31.log”的备份和日志文件。
说明:1、%date%的值在不同的系统、语言版本下可能是不一样的,控制面板里面区域选项的设定也会改变%date%的值。
请先在命令行中测试 echo %date% 的返回值。
%date:_4,10% 是返回日期函数,_后的第一个参数是要截取的起始位置(从0开始),第二个参数是要截取的长度,如没有则是截取到最后,参数可酌情修改。
2、如需要准确的时间做为文件名,请用%time%函数,参数同上。
建议二:@echo offset filename=e:\data_bak\%date:_8,2%日e_p userid=user/pass@esdata file=%filename%.dmp owner=user INDE_ES=y grants=y constraints=y compress=y log=%filename%.lograr a %filename%.rar %filename%._del %filename%.dmpdel %filename%.log放计划任务里面定时执行,文件名以日期的day部分来命名备份后调用rar进行压缩这样可以保存一个月的历史数据注意:需要把program files/winrar目录下的rar.e_e拷贝到系统system32目录下如果是以星期命名,则需要将set filename=e:\data_bak\%date:_8,2%日修改为set filename=e:\data_bak\%date:_0,3%建议三:以下为ORACLE 自动备份批处理文件内容,请配合任务计划实现 @ECHO OFF SET BACKPATH=d:\ECHO 准备备份数据库REM 7天一个循环IF E_IST %BACKPATH%\ONE GOTO ONEIF E_IST %BACKPATH%\TWO GOTO TWOIF E_IST %BACKPATH%\THREE GOTO THREEIF E_IST %BACKPATH%\FOUR GOTO FOURIF E_IST %BACKPATH%\FIVE GOTO FIVEIF E_IST %BACKPATH%\SI_ GOTO SI_IF E_IST %BACKPATH%\SEVEN GOTO SEVENECHO E _gt; %BACKPATH%\ONE:ONESET BACKPATH_FULL=%BACKPATH%\ONE REN %BACKPATH%\ONE TWOGOTO BACK:TWOSET BACKPATH_FULL=%BACKPATH%\TWO REN %BACKPATH%\TWO THREEGOTO BACK:THREESET BACKPATH_FULL=%BACKPATH%\THREE REN %BACKPATH%\THREE FOURGOTO BACK:FOURSET BACKPATH_FULL=%BACKPATH%\FOUR REN %BACKPATH%\FOUR FIVEGOTO BACK:FIVESET BACKPATH_FULL=%BACKPATH%\FIVE REN %BACKPATH%\FIVE SI_GOTO BACK:SI_SET BACKPATH_FULL=%BACKPATH%\SI_ REN %BACKPATH%\SI_ SE。
Oracle数据库RMAN的自动备份脚本

#
# author:songrh
# week:1,3,6 Level 0 backup
# 2,4,5,0 Level 1 backup
# Copyright by ChenLong Tec
#--------------------------------------------
release channel c0;
}
#crosscheck backup;
#delete noprompt expired backup;
#delete noprompt obsolete;
EOF
db_l1_backup.sh一级备份程序
#!/bin/bash
L1_PATH=$1
DAY_TAG=`date "%Y-%m-%d"`
backup tag 'L1_spfile_bak' format '$L1_PATH/L1_%d_SPFILE_s.%s_p.%p_%T.bak' spfile;
backup tag 'L1_ctl_bak' format '$L1_PATH/L1_%d_CTL_s.%s_p.%p_%T.bak' current controlfile;
ftp -d -i -n pen $_IP
user $_FTPUSER $_FTPPASS
cd $_FTPROOT/$_WEEK
bi
mdelete *
mput *
bye
FTPIT
FTP目录维护程序
#!/bin/bash
_IP=$1
_FTPUSER=$2
ORACLE备份策略(ORACLEBACKUPSTRATEGY)

ORACLE备份策略(ORACLEBACKUPSTRATEGY)ORACLE备份策略(ORACLE BACKUP STRATEGY)前言这篇文章,本是我为CSDN写的,面向对象为中低用户,但考虑到这里也有人问过这样的问题,偶就往这里也复制一份。
在读该文章之前,建议对ORACLE构架有所了解,因为ORACLE的备份与恢复,都是与ORACLE的构架紧密相关的,特别是ORACLE的SCN。
关于备份与恢复的文章,网上也有不少,进入Google,输入ORACLE备份,点击搜索,我相信搜索出来的记录没有一个人能读完,但是大部分不是太老,也就是太不完全,很早我就想总结一下了,我的这篇文章,主旨并不是说大家读了这篇文章,就会了备份的相关知识,它仅仅也是一个提示,希望大家能从中得到益处。
回复:ORACLE备份策略(ORACLE BACKUP STRATEGY)概要1、了解什么是备份2、了解备份的重要性3、理解数据库的两种运行方式4、理解不同的备份方式及其区别5、了解正确的备份策略及其好处一、了解备份的重要性可以说,从计算机系统出世的那天起,就有了备份这个概念,计算机以其强大的速度处理能力,取代了很多人为的工作,但是,往往很多时候,它又是那么弱不禁风,主板上的芯片、主板电路、内存、电源等任何一项不能正常工作,都会导致计算机系统不能正常工作。
当然,这些损坏可以修复,不会导致应用和数据的损坏。
但是,如果计算机的硬盘损坏,将会导致数据丢失,此时必须用备份恢复数据。
其实,在我们的现实世界中,已经就存在很多备份策略,如RAID 技术,双机热备,集群技术发展的不就是计算机系统的备份和高可用性吗?有很多时候,系统的备份的确就能解决数据库备份的问题,如磁盘介质的损坏,往往从镜相上面做简单的恢复,或简单的切换机器就可以了。
但是,上面所说的系统备份策略是从硬件的角度来考虑备份与恢复的问题,这是需要代价的。
我们所能选择备份策略的依据是:丢是数据的代价与确保数据不丢失的代价之比。
Oracle自动备份脚本

Oracle⾃动备份脚本废话不多说了,直接给⼤家贴代码了,具体代码如下所⽰:#!/bin/sh#******************************************************************# File: oraclebak.sh# Creation Date: 2014/1/22 17:57:32# Last Modified: 2014/1/22 17:57:34# 脚本功能:oracle备份脚本# 执⾏⽅法:1、第⼀次执⾏需要root⽤户执⾏,脚本会以询问的⽅式创建备份⽬录和相关参数# 2、脚本会⾃动写⼊crontab调度⾥⾯定时执⾏,crontab设置是在第⼀次执⾏的时候⾃动添加的#******************************************************************echo $USERif [ $USER != root ]thenecho "检测到安装⽤户不是root⽤户,请⽤root⽤户登录再执⾏安装⽂件"exit 1fiecho "开始安装oracle数据库备份⼯具.........................."echo "请输⼊备份程序的安装⽬录:"read installdirmkdir -p $installdirresult=$?while [ $result -ne 0 ]doecho "⽆法创建⽬录,请重新输⼊或退出安装。
输⼊y重新输⼊,输⼊n退出安装。
"read redoif [ $redo != y ]thenecho "⽤户退出安装。
"exit 0fiecho "请输⼊备份程序的安装⽬录:"read installdirmkdir $installdirresult=$?doneecho "安装⽬录创建完成。
oracle数据库自动备份文档

ORACLE自动备份
1、新建一个TXT文档,在里面输入一行代码:
exp user/password@orcl_127.0.0.1 file=e:\backup\%date:~0,10%.dmp log=e:\backup\%date:~0,10%.log
其中user为数据库的用户名
password为密码(连接sqlplus的用户名及密码)
orcl为数据库的sid,127.0.0.1为本机地址(根据实际自改ip)
backup为自己添加的文件夹,这样将其备份文件自动备份到其文件夹下
%date:~0,10% 为当前日期,即将备份直接命名为2008-XX-XX.dmp
Log之后为备份出日志的语句,可要可不要(建议带上)
完成后将文档命名为数据库备份.bat,名字可任意,只要以.bat结尾即可
2、打开控制面板—>任务计划
然后添加到任务计划—>下一步
浏览到目标程序,即数据库备份.bat
选择自动备份的周期
设置自动备份的时间
将自己机器用户名和密码输入然后点击完成即可(注:添加任务一定要有权限才可添加,最好用超级管理员即administrator来添加任务)。
Windows环境下Oracle数据库的自动备份脚本
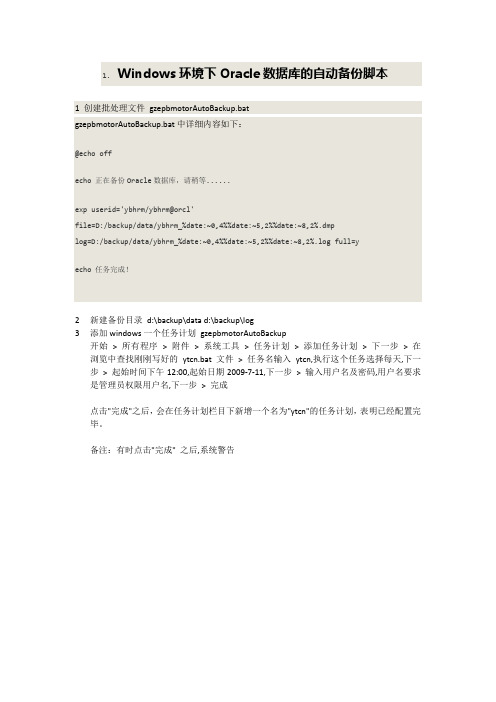
1.Windows环境下Oracle数据库的自动备份脚本
1 创建批处理文件gzepbmotorAutoBackup.bat
gzepbmotorAutoBackup.bat中详细内容如下:
@echo off
echo 正在备份Oracle数据库,请稍等......
exp userid='ybhrm/ybhrm@orcl'
file=D:/backup/data/ybhrm_%date:~0,4%%date:~5,2%%date:~8,2%.dmp
log=D:/backup/data/ybhrm_%date:~0,4%%date:~5,2%%date:~8,2%.log full=y
echo 任务完成!
2新建备份目录d:\backup\data d:\backup\log
3添加windows一个任务计划gzepbmotorAutoBackup
开始> 所有程序> 附件> 系统工具> 任务计划> 添加任务计划> 下一步> 在浏览中查找刚刚写好的ytcn.bat 文件> 任务名输入ytcn,执行这个任务选择每天,下一步> 起始时间下午12:00,起始日期2009-7-11,下一步> 输入用户名及密码,用户名要求是管理员权限用户名,下一步> 完成
点击"完成"之后,会在任务计划栏目下新增一个名为"ytcn"的任务计划,表明已经配置完毕。
备注:有时点击"完成" 之后,系统警告
4 5。
linux 环境下 oracle备份脚本
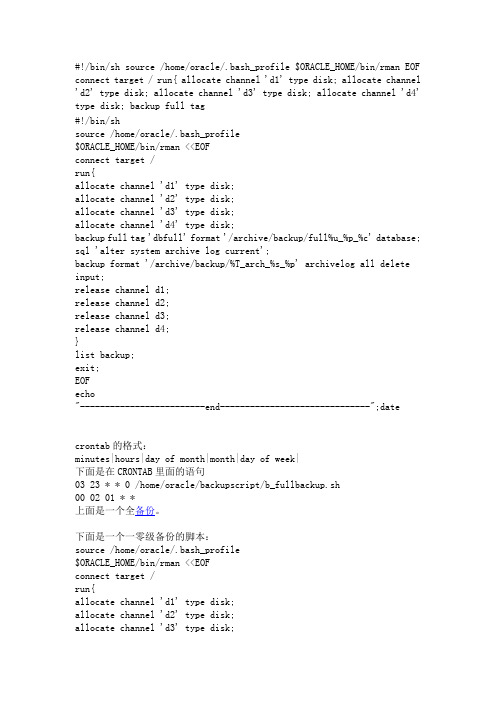
#!/bin/sh source /home/oracle/.bash_profile $ORACLE_HOME/bin/rman EOF connect target / run{ allocate channel 'd1' type disk; allocate channel 'd2' type disk; allocate channel 'd3' type disk; allocate channel 'd4' type disk; backup full tag#!/bin/shsource /home/oracle/.bash_profile$ORACLE_HOME/bin/rman <<EOFconnect target /run{allocate channel 'd1' type disk;allocate channel 'd2' type disk;allocate channel 'd3' type disk;allocate channel 'd4' type disk;backup full tag 'dbfull' format '/archive/backup/full%u_%p_%c' database; sql 'alter system archive log current';backup format '/archive/backup/%T_arch_%s_%p' archivelog all delete input;release channel d1;release channel d2;release channel d3;release channel d4;}list backup;exit;EOFecho"-------------------------end------------------------------";datecrontab的格式:minutes|hours|day of month|month|day of week|下面是在CRONTAB里面的语句03 23 * * 0 /home/oracle/backupscript/b_fullbackup.sh00 02 01 * *上面是一个全备份。
linux oracle自动备份脚本

#!/bin/sh
export ORACLE_BASE=/u01/oracle/app
export ORACLE_HOME=$ORACLE_BASE/product/11.2.0/dbhome_1
export ORACLE_SID=orcl
export PATH=$PATH:$HOME/bin:$ORACLE_HOME/bin
export DATA_DIR=/home/backup/data
export LOGS_DIR=/home/backup/logs
export DELTIME=`date -d "7 days ago" +%Y%m%d`
export BACKUPTIME=`date +%Y%m%d%H%M%S`
一般启动服务用 /sbin/service crond start 若是根用户的cron服务可以用 sudo service crond start, 这里还是要注意 下 不同版本linux系统启动的服务的命令也不同 ,像我的虚拟机里只需用 sudo service cron restart 即可,若是在根用下直接键入service cron start就能启动服务
mkdir -p $DATA_DIR
mkdir -p $LOGS_DIR
echo "Starting backup..."
echo "Bakup file path $DATA_DIR/$BACKUPTIME.dmp"
exp shop/lyisABC0987@orcl file=$DATA_DIR/$BACKUPTIME.dmp log=$LOGS_DIR/$BACKUPTIME.log
一个优秀的oracle 自动备份脚本(exp for windws)
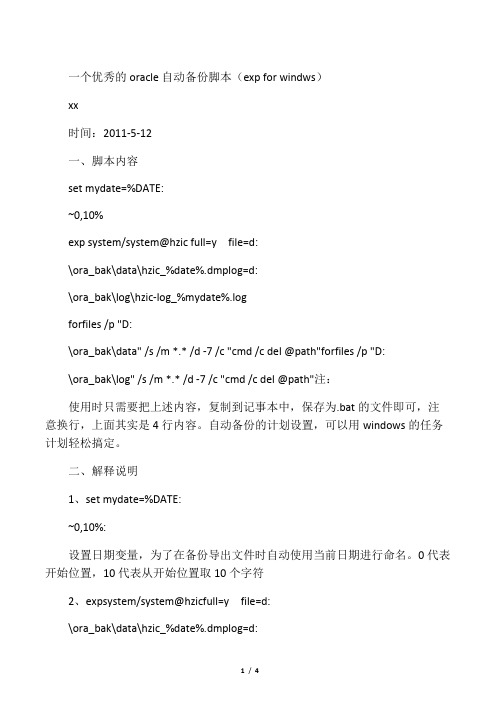
一个优秀的oracle自动备份脚本(exp for windws)xx时间:2011-5-12一、脚本内容set mydate=%DATE:~0,10%exp system/system@hzic full=y file=d:\ora_bak\data\hzic_%date%.dmplog=d:\ora_bak\log\hzic-log_%mydate%.logforfiles /p "D:\ora_bak\data" /s /m *.* /d -7 /c "cmd /c del @path"forfiles /p "D:\ora_bak\log" /s /m *.* /d -7 /c "cmd /c del @path"注:使用时只需要把上述内容,复制到记事本中,保存为.bat的文件即可,注意换行,上面其实是4行内容。
自动备份的计划设置,可以用windows的任务计划轻松搞定。
二、解释说明1、set mydate=%DATE:~0,10%:设置日期变量,为了在备份导出文件时自动使用当前日期进行命名。
0代表开始位置,10代表从开始位置取10个字符2、expsystem/system@hzicfull=y file=d:\ora_bak\data\hzic_%date%.dmplog=d:\ora_bak\log\hzic-log_%mydate%.log:使用sytem账号进行全库导出,备导出的数据文件存放在d:\ora_bak\log目录下,导出的日志文件存放在d:\ora_bak\log目录下3、forfiles /p "D:\ora_bak\log" /s /m *.* /d -7 /c "cmd /c del @path":自动删除7天前的备份,详细说明见后面附件附件FORFILES [/P pathname] [/M searchmask] [/S]描述:选择一个文件(或一组文件)并在那个文件上执行一个命令。
Oracle数据库自动备份方案

Oracle数据库⾃动备份⽅案1、新建 backup.bat脚本1@echo off2echo ================================================3echo Windows环境下Oracle数据库的⾃动备份脚本4echo 1. 使⽤当前⽇期命名备份⽂件。
5echo ================================================6::以“YYYYMMDD”格式取出当前时间。
7set BACKUPDATE=%date:~0,4%%date:~5,2%%date:~8,2%8::设置⽤户名、密码和要备份的数据库。
9set USER=⽤户名10set PASSWORD=密码11set DATABASE=数据库实例名12::创建备份⽬录。
13if not exist "E:\backup\backuptempdir" mkdir E:\backup\backuptempdir1415set DATADIR=E:\backup\backuptempdir16 expdp '%USER%/%PASSWORD%@%DATABASE% as sysdba' directory=dump_dir dumpfile=data_%BACKUPDATE%.dmp full=y; 17exit创建 windows任务计划:3、编写拷贝程序1import java.io.*;2import java.util.*;3import .URL;4import java.text.SimpleDateFormat;56public class BackupFile{78//1、获取当前路径9//2、读取当前路径下的属性⽂件,获取源⽂件夹和⽬标⽂件夹所在⽬录 10//3、拷贝源⽂件夹下的所有内容⾄⽬标⽂件夹11//4、清空源⽂件夹12//5、保留30天以内的数据库备份13public static void main(String args[]){1415//获取当前路径16 String path = getCurrentPath();17 File file = new File(path + "/dirIndex.properties" );1819if(!file.exists()){20 System.out.println("配置⽂件不存在!");21 System.exit(1);22 }2324//读取当前路径下的属性⽂件,获取源⽂件夹和⽬标⽂件夹所在⽬录 25 Map<String,String> dirConfig = getCopyPath();2627 String source = dirConfig.get("sourceDir");28 String dest = dirConfig.get("destinationDir");30 File sourceDir = new File(source);//源⽂件夹31 File destinationDir = new File(dest);//⽬标⽂件夹3233if(!sourceDir.exists()){34 System.out.println("源⽂件夹不存在!");35 System.exit(1);36 }3738if(!destinationDir.exists()){39 System.out.println("⽬标⽂件夹不存在!");40//清空源⽂件夹41 deleteSourceFileChildren(source);42 System.exit(1);43 }4445//拷贝源⽂件夹下的所有⽂件⾄⽬标⽂件夹46 copyFiles(source,dest);4748//清空源⽂件夹49 deleteSourceFileChildren(source);5051//保留30天以内的数据库备份52 retainData(dest);53 }5455/**56 * 获取当前路径57*/58public static String getCurrentPath(){59 String path = Thread.currentThread().getContextClassLoader().getResource("").getPath(); 60return path;61 }6263/**64 * 读取当前路径下的属性⽂件,获取源⽂件夹和⽬标⽂件夹所在⽬录65*/66public static Map<String,String> getCopyPath(){67 Map<String, String> propMap = new HashMap<String, String>();6869 ClassLoader loader = Thread.currentThread().getContextClassLoader();70 URL url = loader.getResource("dirIndex.properties");71 InputStream in = null;72try {73 in = url.openStream();74 Properties props = new Properties();75 props.load(in);76// 加载属性列表77 Iterator<String> it = props.stringPropertyNames().iterator();78while (it.hasNext()) {79 String key = it.next();80 String value = props.getProperty(key);81 propMap.put(key, value);82 }83 } catch (IOException ioe) {84 ioe.printStackTrace();85 }finally{86try {87 in.close();88 } catch (IOException e) {89 e.printStackTrace();90 }91 }92return propMap;93 }9495/**96 * 拷贝源⽂件夹下的所有内容⾄⽬标⽂件夹97*/98public static void copyFiles(String sourceFile,String destinationFile){99 Date date = new Date();100 SimpleDateFormat sbf = new SimpleDateFormat("yyyyMMdd");101 String fileName = sbf.format(date);102 System.out.println(fileName);103 String destFileStr = destinationFile + "/" + fileName;104 File destFile = new File(destFileStr);105if(destFile.exists()){106 deleteDir(destFile);//如果存在,删除该⽬录107 }108109try{110 destFile.mkdirs();111112 File inputFile = new File(sourceFile);114 File[] files = inputFile.listFiles();115 FileInputStream input = null;116 FileOutputStream output = null;117118long start = System.currentTimeMillis();119120 copyFile(sourceFile,destFileStr);//拷贝所有内容⾄⽬标⽂件夹121122long end = System.currentTimeMillis();123 System.out.println("共耗时:" + (end - start) + "ms." );124125 }catch(Exception e){126 e.printStackTrace();127 }128129 }130131//清空源⽂件夹132public static void deleteSourceFileChildren(String sourceFilePath){133 File file = new File(sourceFilePath);134if(file.exists()){135 deleteDir(file);136 file.mkdirs();137 }138 }139140//保留30天以内的数据库备份141public static void retainData(String dataPath){142 File file = new File(dataPath);143 File[] children = file.listFiles();144145try{146 Date date = new Date();147 SimpleDateFormat sbf = new SimpleDateFormat("yyyyMMdd");148 String dateStr = sbf.format(date);149 String dirNames[] = new String[children.length];150for(int i=0; i<dirNames.length; i++){151 File child = children[i];152if(child.isDirectory()){153 dirNames[i] = child.getName();154 }155 }156 System.out.println("⽂件夹长度:" + dirNames.length);157//如果备份数量⼩于30,则不删除158if(dirNames.length <= 30){159 System.out.println("备份⽂件⼩于等于30份,不做删除。
ORACLE备份脚本示例
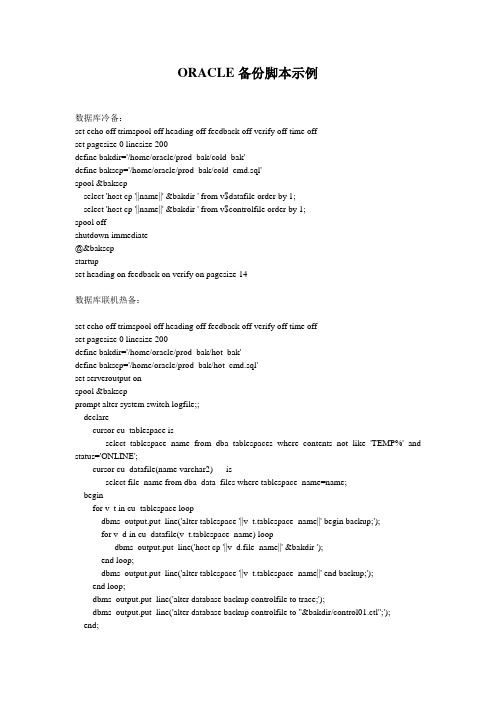
ORACLE备份脚本示例数据库冷备:set echo off trimspool off heading off feedback off verify off time offset pagesize 0 linesize 200define bakdir='/home/oracle/prod_bak/cold_bak'define bakscp='/home/oracle/prod_bak/cold_cmd.sql'spool &bakscpselect 'host cp '||name||' &bakdir ' from v$datafile order by 1;select 'host cp '||name||' &bakdir ' from v$controlfile order by 1;spool offshutdown immediate@&bakscpstartupset heading on feedback on verify on pagesize 14数据库联机热备:set echo off trimspool off heading off feedback off verify off time offset pagesize 0 linesize 200define bakdir='/home/oracle/prod_bak/hot_bak'define bakscp='/home/oracle/prod_bak/hot_cmd.sql'set serveroutput onspool &bakscpprompt alter system switch logfile;;declarecursor cu_tablespace isselect tablespace_name from dba_tablespaces where contents not like 'TEMP%' and status='ONLINE';cursor cu_datafile(name varchar2) isselect file_name from dba_data_files where tablespace_name=name;beginfor v_t in cu_tablespace loopdbms_output.put_line('alter tablespace '||v_t.tablespace_name||' begin backup;');for v_d in cu_datafile(v_t.tablespace_name) loopdbms_output.put_line('host cp '||v_d.file_name||' &bakdir ');end loop;dbms_output.put_line('alter tablespace '||v_t.tablespace_name||' end backup;');end loop;dbms_output.put_line('alter database backup controlfile to trace;');dbms_output.put_line('alter database backup controlfile to ''&bakdir/control01.ctl'';');end;/spool off@&bakscpset heading on feedback on verify on pagesize 14RMAN增量备份:RMAN 0级备份#!/usr/bin/bashexport ORACLE_SID=orclexport ORACLE_BASE=/u01/app/oracleexport ORACLE_HOME=$ORACLE_BASE/product/10.2.0export PA TH=$PATH:$ORACLE_HOME/binrman target / <<EOFrun{sql 'alter system switch logfile';allocate channel c1 type disk;allocate channel c2 type disk;backup incremental level 0 database format '/backup/backupfile/backupfile/%d_%s_%p_inc0.bak' include current controlfile plus archivelog format '/backup/backupfile/archbackup/%U_arch.bak' delete all input;delete noprompt obsolete;sql 'alter system switch logfile';}exit;EOFRMAN 1级备份#!/usr/bin/bashexport ORACLE_SID=orclexport ORACLE_BASE=/u01/app/oracleexport ORACLE_HOME=$ORACLE_BASE/product/10.2.0export PA TH=$PATH:$ORACLE_HOME/binrman target / <<EOFrun{sql 'alter system switch logfile';allocate channel c1 type disk;allocate channel c2 type disk;backup incremental level 1 database format '/backup/backupfile/backupfile/%d_%s_%p_inc1.bak' include current controlfile plus archivelog format '/backup/backupfile/archbackup/%U_arch1.bak' delete all input;delete noprompt obsolete;sql 'alter system switch logfile';}exit;EOFRMAN 2级备份#!/usr/bin/bashexport ORACLE_SID=orclexport ORACLE_BASE=/u01/app/oracleexport ORACLE_HOME=$ORACLE_BASE/product/10.2.0export PA TH=$PATH:$ORACLE_HOME/binrman target / <<EOFrun{sql 'alter system switch logfile';allocate channel c1 type disk;allocate channel c2 type disk;backup incremental level 1 database format '/backup/backupfile/backupfile/%d_%s_%p_inc2.bak' include current controlfile plus archivelog format '/backup/backupfile/archbackup/%U_arch2.bak' delete all input;delete noprompt obsolete;sql 'alter system switch logfile';}exit;EOF。
Oracle数据库高效存储与数据backup解决方案说明书

Oracle Database Troubleshooting and Problem Resolution with Storage SnapshotsOver recent years, we’ve seen an explosion in data growth, driven by the realisation of the business value of data generated and the insights we can gain from its analysis.The need to store more data and for longer periods of time to support new AI/ML processes and regulatory and compliance requirements has resulted in the need for additional storage infrastructure, more efficient ways of working, and at the same time, ways to address data security, governance, and management challenges.Business Data Loss and CorruptionWith an ever-increasing dependency on data for all business functions and decision-making, the need for highly available application and database architectures has never been more critical.Modern space-efficient storage infrastructure has helped reduce cost and complexity, increased availability, and provided greater capacity, allowing us to support these ever-growing data set demands.However, even with highly resilient IT infrastructure, database professionals frequently find themselves needing to quickly respond to a loss or corruption of production data due to hardware issues, human error, or software bugs.With many organisations delivering customer-facing applications, any outage can have a significant impact onservice availability, revenue, and customer satisfaction. Data Loss and CorruptionWriting this post made me recall a now infamous Reddit post about a junior software developer who destroyed a production database on their first day and lost their job.Allegedly, what should have been a simple local development environment set-up went wrong with a copy/paste switch-up. By inputting the wrong values, tests that should have been run in a personal DB instance ran on a production database, clearing all existing data and replacing it with fake data. We can’t be sure if this actually happened as described, but let’s consider some of the data protection and recovery options we have available to us to recover from this scenario.Storage ReplicationWhat about storage replication? Many databases use storage replication for high availability (HA) and disaster recovery (DR). These can provide great protection from data centre failures. However, they don’t provide protection against a physical data block corruption or logical mistakes. As a result, these corruptions would be replicated intact.Database ReplicationWhat about database replication?Oracle database block corruptions can be identified by database replication technologies, for example, Oracle Data Guard. However, they’re more likely to be undetected and only identified much later by Oracle Recovery Manager (RMAN) block validation. Logical data corruptions will continue to be replicated without any issues being raised, removing the option of failing over to a standby database.Storage SnapshotsIf you have a modern all-flash storage array and have been taking regular recoverable,crash-consistent snapshots, the quickest and simplest approach will be to take the application and database offline and instantly roll back to the last-known good snapshot.Tip: Before you perform any form of restore or recovery, take a storage snapshot of your current environment since you may need to reference or use it in the event this is the best youhave.Traditional Oracle Database RecoveryDatabase restores and recoveries using RMAN backups, file system copies, or database exports are slow compared to the use of storage snapshots. These are our belts and braces (or belts and suspenders, for US readers). Hopefully, we won’t need them, but if we do, we need to know they’re usable. Remember to keep checking and testing them.All of the above will result in some loss of data, an application outage, and possible coordination and corrective actions in other related applications or software-as-a-service (SaaS) solutions.In-place Surgical Data FixAn alternative approach you may want to consider first is whether you can perform an in-place surgical data fix to correct the logical corruption or missing data, for example.Here’s how to perform an in-place surgical data fix:1.Perform a storage snapshot of database volume(s).2.If the majority of the application is unaffected and application architecture is able to support it, limit access to be read-only for the impacted module(s).Alternatively, shut down application servers and stop remote database access.Create a database clone using the storage snapshot for 3.the support and development teams.4.Investigate issues, develop data fixes, and agree on resolutions with the application owner.5.Apply data fixes to the production database with confidence and confirm the issue has been resolved.6.Re-enable full access to the database and application. An in-place surgical data fix can provide the following benefits over other methods:Maintain service availability and reduce the impact to end users of the application.Reduce impact on other related applications and SaaS solutions.Remove the need for remedial action on replication targets.For more information on how FlashArray™ volume snapshots can be used with database management systems, read the technical reference guide: “Using FlashArray Volume Snapshots with Databases.” If you want to try out managing FlashArray for yourself, take a test drive.。
oracle数据全备份与增量备份脚本

set NLS_LANG=american_america.zhs16gbk
rman target /<<EOF
Run {
allocate channel c1 type disk
format 'd:/存放备份的目录结构';
backup incremental level=2
(database);
allocate channel c2 type disk;
backup
format 'd:/目录结构'
archivelog all delete input;
crosscheck backupset of database;
}
exit
EOF
2、脚本名称是rman_bk_2.sh 这是增量备份脚本,安需要设置执行的频率
set ORACLE_BASE=/oracle
set ORACLE_HOME=$ORACLE_BASE/product/10.2.0/db_1
set ORA_CRS_HOME=$ORACLE_BASE/product/10.2.0/crs
set ORACLE_SID=ncdb1
set PATH=$PATH:$ORACLE_HOME/bin:$ORA_CRS_HOME/bin
set LD_LIBRARY_PATH=$ORACLE_HOME/lib:/lib:/usr/lib
set CLASSPATH=$ORACLE_HOME/JRE:$ORACLE_HOME/jlib:$ORACLE_HOME/rdbms/jlib
oracle数据库自动备份方案(参考模板)

目的编写本文档的目的为实现ORACLE数据库的自动备份,为不动产数据增加一份数据安全按保障。
软件环境数据库服务器:oracle 11g atabase x64 v11.2.0.4.0客户端:Oracle client x64 v11.2.0.4.0注意:数据库服务器和客户端版本必须保持一致,否则会出现无法预知的错误。
实施方案编写数据库自动备份脚本脚本内容如下,将文件存储为oraclebackup.bat:@echo offecho 删除10天前的备分文件和日志forfiles /p "D:\oraclebackup" /m *.dmp /d -10 /c "cmd /c del @path"forfiles /p "D:\oraclebackup" /m *.log /d -10 /c "cmd /c del @path"echo 正在备份 oracle 数据库,请稍等……exp BDCDJ_CP/BDCDJ_CP@10.6.161.70/orcl file=D:/oraclebackup/BDCDJ_CP%date:~0,4%%date:~5,2%%date:~8,2%.dmplog=D:/oraclebackup/BDCDJ_CP%date:~0,4%%date:~5,2%%date:~8,2%.logecho 任务完成!注意:1)修改数据库连接用户名、密码、数据库地址和实例名2)修改备份文件存储地址,以上脚本存储位置为D:\oraclebackup新建任务计划1)打开任务计划程序2)打开创建基本任务,输入任务名称、选择任务执行时间和执行的脚本,完成任务计划创建。
oracle备份脚本

oracle备份脚本利⽤EXP导出全库,必须⽤SYSTEM或者DBA⽤户来导出。
具体脚本实现如下全库导出(fullbackup):#!/bin/bashbname=`date +%Y%m%d`cd /backup/fullbackupsu - oracle -c "/oracle/product/11.2.0/bin/exp system/manager file=/backup/fullbackup/db$bname.dmp log=/backup/fullbackup/log/log$bname.log inctype=complete FULL=Y "tar -zcvf /backup/fullbackup/db$bname.dmp.tar.gz /backup/fullbackup/db$bname.dmprm -rf /backup/fullbackup/db$bname.dmpfind /backup/fullbackup/ -name "*.*" -mtime +15 |xargs rm -rffind /backup/fullbackup/log/ -name "*.*" -mtime +15 |xargs rm -rf增量导出(increatbackup):#!/bin/bashbname=`date +%Y%m%d`cd /backup/fullbackupsu - oracle -c "/oracle/product/11.2.0/bin/exp system/manager file=/backup/increatbackup/db$bname.dmp log=/backup/increatbackup/log/log$bname.log inctype=incremental FULL=Y "tar -zcvf /backup/increatbackup/db$bname.dmp.tar.gz /backup/increatbackup/db$bname.dmp rm -rf /backup/increatbackup/db$bname.dmpfind /backup/increatbackup/ -name "*.*" -mtime +15 |xargs rm -rffind /backup/increatbackup/log/ -name "*.*" -mtime +15 |xargs rm -rf累计导出():#!/bin/bashbname=`date +%Y%m%d`cd /backup/fullbackupsu - oracle -c "/oracle/product/11.2.0/bin/exp system/manager file=/backup/cumulativebackup/db$bname.dmp log=/backup/cumulativebackup/log/log$bname.log inctype=incremental FULL=Y " tar -zcvf /backup/cumulativebackup/db$bname.dmp.tar.gz /backup/cumulativebackup/db$bname.dmp rm -rf /backup/cumulativebackup/db$bname.dmpfind /backup/cumulativebackup/ -name "*.*" -mtime +15 |xargs rm -rffind /backup/cumulativebackup/log/ -name "*.*" -mtime +15 |xargs rm -rf然后再crontab 中添加定时任务:085 * * * /backup/scripts/cumulativebackup.sh095 * * * /backup/scripts/increatbackup.sh105 * * * /backup/scripts/fullbackup.shoracle 增量导出/导⼊⼀、导出/导⼊(Export/Import)---- 利⽤Export可将数据从数据库中提取出来,利⽤Import则可将提取出来的数据送回Oracle数据库中去。
