solids_mechanics_ch_2_ver_2005_last
SOLIDWIRKS软件
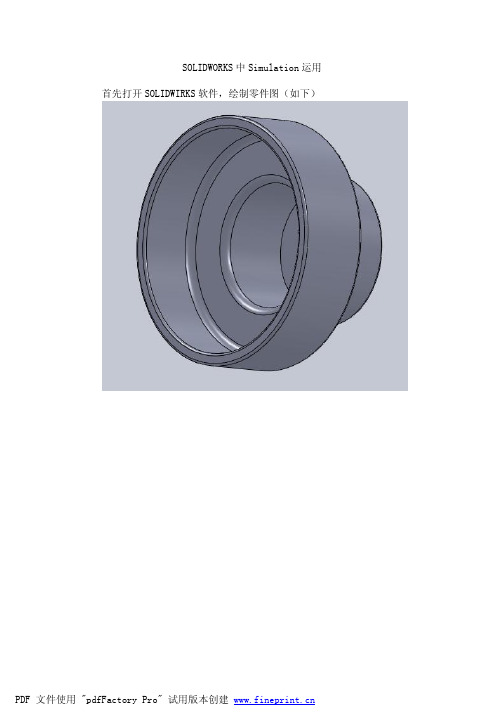
PDF 文件使用 "pdfFactory Pro" 试用版本创建
零件 1-算例 1-应力-应力 1 ..........................................................18 零件 1-算例 1-位移-位移 1 ..........................................................19 零件 1-算例 1-应变-应变 1 ..........................................................20
PDF 文件使用 "pdfFactory Pro" 试用版本创建
说明
在此项上总结 FEM 分析: 零件 1
假设
模型信息
文档名称
配置
零件 1
默认
文档路径
修改日期
算例属性
算例名称 分析类型 网格类型: 解算器类型 平面内效果: 软弹簧: 惯性卸除: 热力效果: 零应变温度 单位 包括 SolidWorks Flow Simulation 中的
液压效应 摩擦: 为表面接触忽略间隙 使用自适应方法:
算例 1 Static 实体网格 FFEPlus 关闭 关闭 关闭 输入温度 298.000000 Kelvin 关闭
关闭 关闭 关闭
单位
单位系统: 长度/位移 温度 角速度 应力/压力
公制 m Kelvin rad/s kgf/cm^2
材料属性
号数 1
实体名称 零件 1
材料 普通碳钢
质量 0.799705
体积 0.000102526
PDF 文件使用 "pdfFactory Pro" 试用版本创建
Solidworks自顶向下设计

设计坐堂,如何用好SW的自顶向下装配设计?设计不仅仅是将零件的三维模型和二维工程图做出来,设计还包含零部件的计算分析,干涉检查,运动模拟及分析,另外设计要考虑的问题很多,如:表面质量,修改方便性等。
这样,如何在设计最初就有一个好的整体规划就显得尤为重要,他将直接影响到你后续设计的方便性等。
如下是一幅图片,此模型论坛提供下载,将以发动机为例讲述在SW中的一种设计思路,图片仅供参考。
一提到发动机,我们最先想到的就是曲柄连杆机构,那么在此项设计中曲柄连杆就是整个发动机运动之筋骨。
设计之初,很多因素不确定,而且很多零件还不知道在将来的装配环境中合不合理,是否能够如期而动?但是设计并非无迹可寻,因为要做一个产品,你首先得有一个大体轮廓,或是根据已有产品进行改型。
例如做减速机设计,各齿轮之大体中心距,输入输出功率等都应是已知因素,那么设计的任务就是根据这些已知因素来求出一些未知因素。
在零件没有设计出来以前,就对整个零部件进行运动验证是一个好的思路,它能保证你没有大错误,但是零件的特征一个一个的建立总是麻烦的,所以我们在SW中用线条来代替实体的零件进行运动模拟,以期在设计之初最大程度的减少工作量,而直接看到最终运动结果。
这也如在3D Max在做人物动画时先绘制骨骼,然后再往上赋予肌肉的原理是一样的。
上图的线架构运动模拟是如何建立的??第一步,建立曲轴线模型如图,然后将其存成一个零件。
注意在其曲拐中间部位建立一基准平面,以备后来装配之需。
同时大家也注意到,此图片是用JPEG格式存成的,所以不太清晰,而同类图片(颜色不丰富)的话用GIF格式则效果较好,以下的图片全采用了GIF格式。
第二步,建立连杆线条模型。
第三步,建立活塞线条模型。
本来是可以用一个圆圈代替的,但为了形像一点用了两个圆。
第四步,建立缸套。
简单一点,用一个圆代替。
第五步,建立一装配体,将以上四文件拖入装配体中,注间将拖入的第一个零件高为浮动,我在此先拖入曲轴。
各版本solidworks及CAM插件下载地址

各版本solidworks及CAM插件下载地址.txt如果你同时爱几个人,说明你年轻;如果你只爱一个人,那么,你已经老了;如果你谁也不爱,你已获得重生。
积极的人一定有一个坚持的习惯。
solidworks2009 sp0.0 32位下载地址:ed2k://|file|%5BSolidWorks.2009.%E5%AE%98%E6%96%B9%E6%AD%A3%E5%BC%8F%E7%89%88%5D .SolidWorks.2009.SP0.0.Multilingual.Win32.Final.DVDISO.iso|5013739520|d41430b1eb 5c856891c072d6dc492686|h=cv36en45ojhrghdz4hotwo6amxai7zsp|/solidworks2009 sp0.0 64位下载地址:ed2k://|file|%5BSolidWorks.2009.%E5%AE%98%E6%96%B9%E6%AD%A3%E5%BC%8F%E7%89%88%5D .SolidWorks.2009.SP0.0.Multilingual.Win64.Final.DVDISO.iso|5060214784|0b9a2ab0f8 54035c01265689b2e7af7b|h=xqxehjtxf4ksgmz3q6kepeqedg3xqoon|/solidworks2009sp0.0破解文件下载地址:ed2k://|file|%5BSolidWorks.2009.%E7%A0%B4%E8%A7%A3%E6%AA%94%5D.SolidWorks.2009.S P0.0.Multilingual.Final.x32_x64.Cracks-illmaR.rar|3102986|46cf24754cc2cbeb0ded4e 3bb150d987|h=b45nz3jjidx6ohd56vhixqjesikuq3ai|/solidworks2010 sp0.0 32位下载地址:ed2k://|file|%5B%E8%A1%8C%E4%B8%9A3D.%E8%AE%BE%E8%AE%A1%E8%BD%AF%E4%BB%B6%5D.Sol idWorks.2010.SP0.0.Multilingual.Win32.Full.DVDiSO.iso|5360013312|a1e9b5f27f1d79f 46f3b64629b0bfdd5|/solidworks2010 sp0.0 64位下载地址:ed2k://|file|%5B%E4%B8%89%E7%BB%B4%E6%9C%BA%E6%A2%B0%E8%AE%BE%E8%AE%A1%E7%B3%BB% E7%BB%9F%5D.TLF-SOFT-SOLIDWORKS.2010.SP0.0.MULTILANGUAGE.WIN64.ISO-LZ0.iso|53892 25984|3f2dfa10f78753e6a69e0d6f7d85c5b8|h=q3yju2eyjqifnlnjyxn5vp5i4utxc7a7|/solidworks2010 sp0.0破解地址:ed2k://|file|%5B%E8%A1%8C%E4%B8%9A3D.%E8%AE%BE%E8%AE%A1%E8%BD%AF%E4%BB%B6%5D.Sol idWorks.2010.SP0.0.Win32_64.Cracks-SolidSQUAD.rar|7384519|4d969e01b7dbf6adf2cd86 1ad0c9b3f2|/solidworks2011 sp0.064位下载地址:ed2k://|file|%5B%E4%B8%89%E7%BB%B4%E6%9C%BA%E6%A2%B0%E8%AE%BE%E8%AE%A1%E7%B3%BB% E7%BB%9F%5D.SolidWorks.v2011.SP0.0.x64.Multilingual-SSQ.iso|5737273344|1eb458e97 140f381e4eb2f63dc29d325|h=jdnthnawgnuknhwgp5uwelbwmhekq26n|/solidworks2011 sp0.032位下载地址:ed2k://|file|%5B%E4%B8%89%E7%BB%B4%E6%9C%BA%E6%A2%B0%E8%AE%BE%E8%AE%A1%E7%B3%BB% E7%BB%9F%5D.SolidWorks.v2011.SP0.0.x86.Multilingual-SSQ.iso|5434238976|8a40836ae 7b0ad4c7df17e91e5510164|/solidworks2011 sp0.0破解地址:ed2k://|file|%5B%E4%B8%89%E7%BB%B4%E6%9C%BA%E6%A2%B0%E8%AE%BE%E8%AE%A1%E7%B3%BB% E7%BB%9F%5D.SolidWorks.v2011.SP0.0.fixed.crack-22.10.2010-SSQ.7z|2452328|abdc83e e21c4bc3bb9f9f0f0723cccac|h=wpt3zlbdbbbn6z5uf4mjwwzvchxmid5w|/solidcam2009简体中文版 sp4地址:ed2k://|file|SolidCAM_2009_SP4_ChineseSimpl-Eng.iso|611487744|620398C191B30DB307 C101D89D9D6E6E|h=CYMWPXNB7GBNSKUQILMDD6IELAN6PVGB|/CAMWorks2010.SP2.1中文多国语言版64位下载地址:ed2k://|file|%5B%28SolidWorks%E5%8A%A0%E5%B7%A5%2FCAM%E6%8F%92%E4%BB%B6%29CAMWor ks2010.SP2.1%E4%B8%AD%E6%96%87%E5%A4%9A%E5%9B%BD%E8%AF%AD%E8%A8%80%E7%89%88%5D.C W2010x64-SP2.1.exe|467085742|199739bcde2fed6b85713f7080bc9e1e|h=e545tvusid5lvlwp wcdnga4dgq4hqvzf|/CAMWorks2010.SP2.1中文多国语言版64位破解文件下载地址:ed2k://|file|%5B%28SolidWorks%E5%8A%A0%E5%B7%A5%2FCAM%E6%8F%92%E4%BB%B6%29CAMWor ks2010.SP2.1%E4%B8%AD%E6%96%87%E5%A4%9A%E5%9B%BD%E8%AF%AD%E8%A8%80%E7%89%88%5D.c amworks2k10sp2.1_win64_SSQ.rar|4438208|018b83f766b281d5885eaec8434dcd57|h=vrlwty pj3ddfpwxptmvpeyi7awwzi5hg|/CAMWorks2010.SP2.1中文多国语言版32位下载地址:ed2k://|file|%5B%28SolidWorks%E5%8A%A0%E5%B7%A5%2FCAM%E6%8F%92%E4%BB%B6%29CAMWor ks2010.SP2.1%E4%B8%AD%E6%96%87%E5%A4%9A%E5%9B%BD%E8%AF%AD%E8%A8%80%E7%89%88%5D.C W2010-SP2.1.exe|441258452|9ebd38d04b0919c9f2bbe657327ac9a7|h=ygejzjrcxmjj6urbaa3 2s7hxprvazpm5|/CAMWorks2010.SP2.1中文多国语言版32位破解文件下载地址:ed2k://|file|%5B%28SolidWorks%E5%8A%A0%E5%B7%A5%2FCAM%E6%8F%92%E4%BB%B6%29CAMWor ks2010.SP2.1%E4%B8%AD%E6%96%87%E5%A4%9A%E5%9B%BD%E8%AF%AD%E8%A8%80%E7%89%88%5D.c amworks2k10sp2.1_win32_SSQ.rar|4078658|df4516e4d31ed5dfccbc5e3f9c5b06a0|h=n4tzcn bzej2yz6dzp2eje3i3uzzs2mtt|/CAMWorks.2010.SP2.1安装和破解方法下载地址:ed2k://|file|CAMWorks.2010.SP2.1%E5%AE%89%E8%A3%85%E5%92%8C%E7%A0%B4%E8%A7%A3%E6 %96%B9%E6%B3%95.rar|9199101|d38e36ba0cafcf780bedc94065204b08|h=pyp4vrx4cyxd5ji4o bvpxswok27fe7pf|/。
adams问题补充(Adamsquestionsadded)
adams问题补充(Adams questions added)Research on dynamic performance and crash safety of electric bicycle under man vehicle road environmentAnalysis of bicycle frame based on ADAMS and ANSYSJoint simulation of self balancing dual wheel electric vehicle system based on ADAMS and MatlabApplication of ADAMS software in dynamic simulation analysis of micro electric vehicleSteering system design and ADAMS simulation of micro inverted three wheeled electric vehicleResearch on the control of running mechanism of two wheeled electric vehicleMaster's performance test and analysis system for electric vehiclesA review of two wheeled self balancing robots a review of the stability control of two wheeled self balancing robotsResearch on control method of two wheeled robot based on sliding mode strategyApplication of DSP in parallel dual wheeled electric vehicle control systemResearch on vehicle handling stability based on VirtualPrototyping TechnologyMajor: Vehicle EngineeringKeywords: virtual prototype, vehicle multi-body system dynamics, handling stability, electric power steering, PID controlClassification number: U469.4Research on vehicle handling stability based on Virtual Prototyping TechnologyResearch on joint simulation of EPS based on ADAMS and MATLABReduction Ratio is rack translation 1mm, steering wheel turn angle (in radians)So the Reduction Ratio unit should be rad/mm, not 1The rack ratio is used in vehicle simulation to define the variable (displacement, force, etc.) input of the steering column to control.Reduction ratio for steering input.For rack and pinion steering, it seems that the curve and the power curve of the template in the share can not be used to achieve the steering back and steering handiness. I see an article written before a steering column and a steering column with a three force, and I don't know how to write it... I don'tknow if you feel the same wayLeft_tire_forces inside the lateral, you can see the lateral force of the tireCornering force refers to the steering resistance of the tire, not the lateral forceAt the static load setup interface, the cornering force (steering force at the tire ground) includes the static friction torque,Blue for no power, red for power, you can observe, without power when the steering wheel required to enter a greater torque, this is clearly established.At the same time, some problems are found in the middle of the simulation results. For example, the input torque of the steering wheel is observed, and the maximum is 300N-mm, 0,3N-m,It's obviously small. Another angel=0 degrees, that is, the steering wheel in the middle, the steering wheel input torque is 0, in other words, with only a little force, steering wheelIt starts to rotate. This ignores the existence of static friction resistance between the tire and the road. Only when the input torque is greater than a certain value will the steering wheel startTurn.Analysis reason:Adams is actually a parameterized model, and the accuracy of the simulation results is related to the parameters that are filled. The mechanical parameters are better, fill in the wheelbase, load,The key is that the tire parameters on the static load settings interface are not filled. The tires are important components of the car, and its structural parameters andMechanical characteristics determine the main driving performance of a car.So the problem that needs to be solved now is..,How do you determine the correct tyre parameters on the static load settings interface, including back torque, steering force?,Brake force, traction force, vertical input, vertical input, overturning torque, rolling resistance, lateral force, and lateral force acting on the radius of the carcass.Since my simulation condition is a local steering on the plane, the speed is 0, so the braking force and traction force can not be filled. Due to the study of steering performance, rather thanRide comfort, so vertical input selection and vertical input can not be filled. Since the model is on the plane, there is no roll, so the overturning moment can not be filled.As the speed is 0, the wheel does not roll, so the rolling resistance and lateral force can not be filled. Therefore, the key is to measure the positive torque and steering force.As for the 2 parameters, I have considered them in 2 directions. One is to calculate the theoretical values from the point of view of the kinetic model and the existing parameter values. The other one isThe simulation results are obtained from the tool Tire Testrig, which comes with Adams, but the results are not satisfactory, and some even fail to be theoreticalCv_ is the prefix of the communicator variableSelect Pick Feature custom.-After studying for a few days, Adams people are talking about the simulation of vehicle dynamics. There is one of the most basic problems. Do you know what is the use of modeling?Very simple, right? My model is more accurate so that the leader will believe it! That makes sense! Blunder! What are you going to study based on the model? What are some of the useful information about the project, if you can not recognize this level, your behavior is not a rigorous engineering behavior, don't say the government always engage in performance face job, think of yourself first, you such a person as a civil servantis the same, if you really want to do for Chinese to improve your own heart to self cultivation. (it does not contradict or oppose or criticize some incorrect behavior.)If your vehicle model test has nothing else to do except that you do it, can you understand the design elements of no ground for blame, suspension K&C characteristics, understand what is anti brake nod, driving anti squat, understand why only the pitch center above the wheel center, drive shaft have good anti squat you, you may even even pitch center do not know, the more important the related concepts of the roll center and clear? It's not clear. It doesn't matter. You need to have a mind to think about, not something that has nothing to do with technology. It takes up most of your day. If you don't have a think of the heart, you want to rely on professors and experts will be taught, it is not the right attitude, the ultimate point is like a proud man took the money and said, you give me, I will look at the results, but the chassis performance design process in this field, the result is. For a vehicle, especially the reverse models, at the design stage, the most important is to understand the suspension parameters (size and stiffness) influence on the performance of suspension systems, such processes in the adjustment, how to adjust the You'll see. The value of whole vehicle simulation in modern chassis engineering (two years' new car cycle) lies in the contrast of different design schemes, which makes you find the problem,Verify the solution is correct, such as a car that the vertical stiffness is very large, uncomfortable, a look at the results through the analysis of the original design of the vertical bushing has a greater coupling to movement and lateral movement,so I this bush outwards from the axis of down about which direction to the right? Analysis - Design - vehicle simulation verification - adjustment, closed loop, problem solving.For the most simple example, you have seen the lotus, Porsche give you do not die simulation research. They can't check it, you can experience, we can also check, but one is limited to engineering practice is not necessary, on the other hand is in the world, a vehicle system research, now mainly used forin-depth study on the impact on the dynamics of the automobile chassis design, research of high speed characteristics, model testing needs have a certain basis, for example, to understand the tire model, such as the lateral stiffness in several large stiffness units, vehicle steering characteristics there will be some changes, because the test can not be absolutely accurate, so to be integrated according to the experience in the test data, the load status of the bushing test results, tire test results, comprehensive find a correction value. So, what do you think you need if you do that? How long will it take? So, go steady, one of the simplest, perhaps the most convincing reference, you see how the lotus do.Different plants have different cooperation in mind, we did find a group of like-minded partners, these people are friends as well as students or teachers, make people feel that the car China hope, mainly that the spirit of hard work. If you don't have the spirit to do this, we advise you to think more, the leaders of the country to call everyone should hold together, no matter from life or work on all should think how to benefit the development of things, learn about Scientific Outlook on Development!1., I built the vehicle model, after repeated debugging, and finally add tires and road to add success, but in the process of simulation, the following error occurred:ERROR:, The, simulation, stopped, at, time = 3.38783E-04. ADAMS, cannot, solveThe equations of motion.The, greatest, error, in, an, equation, is, 16.131, in, theEquation, for, GFORCE, JEEP.WHEEL4.forceThe, greatest, change, in, a, variable, is, 1.97857E-16, the, inVariable, for, PART, JEEP.Right_KnuckleTry, the, following, in, this, order:1., Use, the, MAXIT, argument, on, the, EQUILIBRIUM, IC, KINEMATICS,Or, INTEGRATOR, command, to, increase, the, maximum, number, ofIterations.The "Temporarily change the value of the PATTERN argument on the"EQUILIBRIUM, IC, KINEMATICS, or, INTEGRATOR, command, toPATTERN = T.The "Temporarily increase the value of the ERROR argument on the"EQUILIBRIUM, IC,运动学,或积分命令。
solidwsorks第七章工程手册应用与动画制作
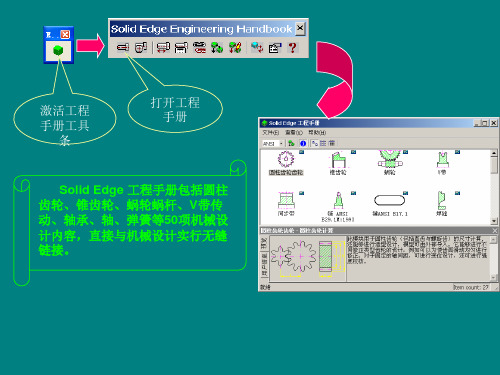
用户每次输入数据后,单击计算(Calculate)按钮进行计算以刷新 数据。单击数据库(Data base)按钮,则弹出正齿轮(Spur gearing)对话 框 , 单击设计(Design)则回到齿轮设计计算(Spur Gearing Calculation) 对话框, 单击创建(Generate)按钮,系统进入三维设计界面,生成齿轮 三维实体模型,另外也可点击Edit编辑进行数据修改。
在尺寸标注(Dimensions)选项卡上,可以选择设计主动齿轮或被动齿 轮。在公差(Tolerance)选项卡上可以选择齿轮设计精度等级和齿轮侧 隙。在载荷(Load)选项卡上,可以输入功率p (Power)、效率η (Efficiency)、转速n (Speed)和扭矩Mk (Torque),如图所示。
此时圆柱齿轮已经 按照所输入的数据 创建完成,再根据 齿轮的类型进行结 构设计。
2.运动仿真
仿真选项 智能仿真向导 插入联接 插入弹簧 模拟仿真 拖动零件 删除仿真结果 播放 ”弹出条、“重设置 干涉检查 输出AVI文件 输出VRML2文件 播放器
四杆机构的运动仿真
打开Solid Edge Tra首先给出“增加新零件吗?”对话框,单击否 。
仿真设置选项卡
仿真选项卡中,将延时置为1秒,总帧 数置为50,并选中模拟期间动画。单 击右侧的“模拟”按钮,系统即进行 动画演示。
SolidWorks类资料_17.5G(solidworks教程_插件教程)
[SolidWorks.Motion.Simulation建模,机构,结构综合实训教程(第二版)].(随书光盘).iso (1.92 GB)[SolidWorks.視頻教程].TLF-SOFT-SolidWorks.2009-2010.Personal.Edition.Video.Tutorial-QUASAR.iso (4.89 GB)《计算机辅助设计与制造》东南大学·许超·40讲.rar (985.46 MB)12个舍弃.ProE.而选用.SolidWorks.的理由.txt (12.41 KB)2010年新书SolidWorks.Simulation基础教程(2010版).PDF.配书光盘.rar (245.08 MB) 2010年新书SolidWorks高级教程简编(2010版).PDF.配书光盘.rar (283.43 MB)poser.Essentials.官方教程.pdf (31.22 MB)COSMOSMotion.07官方教程.pdf (63.08 MB)COSMOSMotion.07光盘.iso (169.42 MB)COSMOSWorks.Designer.07官方教程.pdf (78.9 MB)COSMOSWorks.Designer.07光盘.iso (136.94 MB)COSMOSWorks.Professional.07官方教程.pdf (45.06 MB)COSMOSWorks.Professional.07光盘.iso (11.91 MB)COSMOSWorks2009视频教学.rar (21.05 MB)e6认证培训教程.SOLIDWORKS高级零件和曲面建模.pdf (18.18 MB)PDF.3D机械图.rar (31.23 MB)PhotoView.360.视频教程.rar (212.03 MB)soildwork技巧.doc (101 KB)SolidWorks.2003.教程未知.zip (13.62 MB)SolidWorks.2004年模具设计实例精解_0.rar (12.39 MB)Solidworks.2005.精通篇.pdf (20.72 MB)Solidworks.2007中文版产品模具设计入门一点通.pdf (19.67 MB)SolidWorks.2007中文版机械设计专家指导教程.ISO (384.2 MB)SolidWorks.Simulation基础教程(2010版).pdf (139.81 MB)SolidWorks.二次开发与API.07官方教程.pdf (113.94 MB)SolidWorks.二次开发与API.07光盘.iso (59.29 MB)Solidworks.高级实例教程.pdf (16.74 MB)Solidworks.工程图转换为AutoCAD图纸全攻略.rar (319.92 KB)SolidWorks.冷冲压模具设计教程及光盘.rar (47.03 MB)SolidWorks.应用技巧(长篇).txt (25.99 KB)SolidWorks_Simulation__基础教程.pdf (130.4 MB)solidworks2000教程.rar (1.64 MB)SolidWorks242快捷.rar (18.26 KB)solidworks扳金--官方认证教材.pdf (16.22 MB)SOLIDWORKS钣金实例解析.pdf (22.58 MB)SOLIDWORKS产品设计赏析.rar (789.64 KB)SolidWorks常见问题一览表.pdf (412.87 KB)Solidworks动画演示与运动分析实例解析.iso (463.43 MB)SolidWorks高级培训课程.rar (13.95 MB)Solidworks高级培训手册.rar (6.79 MB)solidworks高级曲线曲面实例解析.rar (33.21 MB)solidworks工程师高级教程.iso (155.67 MB)SolidWorks工程图教程(2010版).rar (214.09 MB)SolidWorks工程图中筋的处理方法.pdf (148.89 KB)SOLIDWORKS公司原版系列培训教程.CSWP全球专业认证考试培训教程.SOLIDWORKS基础教程:零件与装配体_11761676.pdf (38.69 MB)solidworks官方认证培训钣金教程.rar (10.67 MB)SOLIDWORKS官方认证视频教程.2005版.exe (39.59 MB)Solidworks结合AutoCAD与3DMAX实现机械产品设计.pdf (378.44 KB)SolidWorks精彩实例_0.rar (7.07 MB)SolidWorks有限元分析实例解析.pdf (28.57 MB)SolidWorks自上而下设计方法初探.pdf (782.16 KB)SOLID实例-100多个实例例.doc (26.97 MB)SW.GB助手drawing.rar (12.04 KB)SW.Routing管道设计的基本原理.pdf (1.09 MB)SW.工程图出图“偷梁换柱”.zip (1.58 MB)SW.夹具类标准零件库.rar (16.84 MB)SW.将机电一体化纳入到设计过程中来.pdf (834.84 KB)SW.螺纹切除扫描教程.rar (492.15 KB)SW.图框A0-A4.rar (155.49 KB)SW04.自顶向下设计教程.rar (1.64 MB)SW07.Aniamtor视频A.rar (481.61 MB)SW07.Aniamtor视频B.rar (474.92 MB)SW07.cosmonmotion视频A.rar (678.06 MB)SW07.cosmonmotion视频B.rar (434.01 MB)SW07.COSMOSWorks视频.rar (628 MB)SW07.photowords教程A.rar (378.75 MB)SW07.photoworks教程B.rar (428.68 MB)SW07高级建模A.rar (875.01 MB)SW07高级建模B.rar (422.58 MB)SW07高级建模C.rar (338.23 MB)SW07基础教程A.rar (401.07 MB)SW07基础教程B.rar (424.08 MB)SW07基础教程C.rar (410.99 MB)SW07入门教程.rar (463.78 MB)SW08.英文官网视频教程.rar (137.05 MB)SW2001教程.rar (7.18 MB)SW3个.动画演示.rar (2.69 MB)SW板金.pdf (22.44 MB)SW波形垫片画法.rar (848.03 KB)SW成形工具制作.jpg (130.82 KB)SW齿轮凸轮制作工具软件和使用方法.rar (61.78 MB)SW弹簧教程.rar (2.26 MB)SW高级零件教程2009.pdf (62.36 MB)SW高级零件教程2009配套光盘.iso (82.42 MB)SW官方认证培训教程PhotoWorks效果渲染.pdf (35.17 MB)SW管路与布线.教程及光盘.rar (82.35 MB)SW画奥迪R8视频.avi (226.89 MB)SW绘制鼠标教程.英文.pdf (2.79 MB)SW螺纹配合.rar (1.36 MB)SW能自动生成的压缩弹簧,非常好用.rar (553.88 KB)SW疲劳强度分析COSMOS.pdf (1.56 MB)SW三维钣金展开放样及实例.pdf (26.49 MB)SW示例文件.螺旋五角星.rar (627.85 KB)SW示例文件.一个公司图标.rar (745.44 KB)SW下宏应用.ojx带界面曲线宏V1[1].1.rar (30.64 KB)SW新手起步教程.rar (56.46 MB)sw渲染材质参数手册.rar (1.79 KB)SW学习心得.网上下载.rar (412.15 KB)SW用长仿宋体.rar (2.94 MB)SW圆柱螺旋压缩弹簧模板.zip (4.16 MB)SW锥形弹簧.zip (665.28 KB)北京盛维创展solidworks基础教程.rar (99.39 MB)弹簧制作教程-solidwork篇.pdf (383.98 KB)仿真弹簧.动画制作教程.免费设计教程网~~~~~photoshop教程,flash教程,,3Dsmax教程,LightSacpe教程,免费教程等等.files.zip (658.04 KB)封面1.SW画奥迪R8视频.jpg (58.82 KB)封面2.SW画奥迪R8视频.jpg (33.14 KB)封面3.SW画奥迪R8视频.jpg (56.49 KB)封面4.SW画奥迪R8视频.jpg (112.32 KB)夸克工作室的SW98教程.ISO (158.12 MB)让你的SW飞起来!(SW人必看).rar (324.58 KB)提高SOLIDWORKS绘图速度.rar (29.2 KB)細說SolidWorks熔接特徵.rar (715.08 KB)向SW高手推荐一本好书.rar (2.53 MB)怎样利用Solidworks2004版本出符合国标的工程图.pdf (1.19 MB)最全的Solidworks2007最新使用技巧大全.rar (17.33 KB)。
mechanic的破解
mechanic的破解-----在源程序包里SHooTERS文件夹中,复制ptc.pro mechanica.wildf ire.3.0.generic-patch,第一次粘贴到D:PTCmechWildf ire 3.0i486_nt bin中,运行此文件,点patch,在弹第二次粘贴到D:PTCmechWildf ire 3.0i486_ntobj中,运行此文件,点patch,在弹出的对话框中点“否”,直至patch done,点exit。
第三次粘贴到D:PTCmechWildf ire 3.0i486_ntptc中,运行此文件,点patch,在弹出的对话框中点“否”,直至 patch done,点exit。
或者:前面的步骤也可以直接运行ptc.pro mechanica.wildf ire.3.0.generic-patch,先点“是”,找到右边需要破解的文件,依次是bin下面的mdb2mnf.exe,继续点“是”,obj下面的plpf_status.exe,点“是”ptc下面的ptcxfce.exe,点“是”bin下面的mech.exe,一共是4个文件。
最后设置一下mechanic的路径-----D:PTCPROEWILDFIRE 3.0 bin中用写字板(记事本)打开proe1,在ENV=MECH_LP=后面加上mechanica 的安装路径D:\Program Files\PTC\proe 3.0\mechWildf ire 3.0,保存。
具体是:下面红色的地方// PTC - PSF file: proe//PRODUCT=Pro/ENGINEERDESC=Pro/ENGINEER(ȱʡ)ENV=INTRALINK_DIR=ENV=ILINK_CMD_NAME=ENV=INTRALINK_CMD=%INTRALINK_DIR%\bin\%ILINK_CMD_NAME%ENV=MECH_LP=d:\Program Files\mechWildfire 3.0ENV=MECH_HOME=%MECH_LP%\%PRO_MACHINE_TYPE%PSF=%MECH_LP%\install\nt\mech.psfENV=PRO_MECH_COMMAND="%PRO_DIRECTORY%\bin\proe.exe""%PRO_DIRECTORY%\bin\proe1.psf"ENV=PA TH+=%PRO_DIRECTORY%\%PRO_MACHINE_TYPE%\deflibENV=PA TH-=%PRO_DIRECTORY%\%PRO_MACHINE_TYPE%\libENV=PA TH-=%INTRALINK_DIR%\%PRO_MACHINE_TYPE%\illibENV=PTCNMSPORT=1239ENV=NMSD_TIMEOUT=300ENV=PRO_COMM_MSG_EXE=%PRO_DIRECTORY%\%PRO_MACHINE_TYP E%\obj\pro_comm_msg.exeENV=PROE_START=%PRO_DIRECTORY%\bin\proe.exeENV=CDRS_DA TA=%PRO_DIRECTORY%ENV=PRO_IMAGE_CONVERTER=%PRO_DIRECTORY%\%PRO_MACHINE_T YPE%\obj\convert_image.exeENV=GALAXYHOME=%PRO_DIRECTORY%\%PRO_MACHINE_TYPE%ENV=PROGUIDE_DIRECTORY=%PRO_DIRECTORY%\uifdocENV=SPG_DIRECTORY=%PRO_DIRECTORY%ENV=PRO_USRMAIN=%PRO_DIRECTORY%\usrprog\umain\usrmain.cENV=PROTABLE_DIRECTORY=%PRO_DIRECTORY%\protableENV=PROTAB=%PRO_DIRECTORY%\%PRO_MACHINE_TYPE%\obj\protab.e xeENV=ZIP_EXEC=%PRO_DIRECTORY%\%PRO_MACHINE_TYPE%\obj\zip.exe ENV=CLHOME=%PRO_DIRECTORY%\text\pcldataENV=PVIEW_PVEXPORT_HOME=%PRO_DIRECTORY%\apps\prodviewENV=PVIEW_PVIMPORT_HOME=%PVIEW_PVEXPORT_HOME%ENV=CV_ENV_HOME=%PRO_DIRECTORY%\%PRO_MACHINE_TYPE%\CV1 02ENV=VC_VCONF_START=%PRO_DIRECTORY%\%PRO_MACHINE_TYPE%\ obj\ptcvconf.exeENV=PTC_D_LICENSE_FILE-=D:\Program Files\ptc_licfile.datENV=PROE_FEATURE_NAME=PROE_DDiTy ()RUN="%MECH_LP%\install\nt\pro_mech_env.bat"RUN="%PRO_DIRECTORY%\%PRO_MACHINE_TYPE%\nms\nmsd.exe"-noservice -timeout %NMSD_TIMEOUT% &RUN="%PRO_DIRECTORY%\%PRO_MACHINE_TYPE%\obj\xtop.exe"// USER - PSF// Add User specific environment or run applications below here。
solidworks_Floworks2005流体分析

Floworks2005简单旋转流体分析几周前曾跟一个朋友讨论流体分析的问题,简单研究了一下,发个教程。
笨笨很少接触旋转流体,所以只是初级的。
而且分析成功率非常低,还是功夫不到家。
笨笨将向导一步步解释一遍。
其他分析问题大同小异。
欢迎讨论简单介绍:COSMOS/Floworks 2005是最新的流体力学分析插件。
也是全世界第一款,和目前唯一的全嵌入自动化网络划分的流体分析软件。
因此节省了模型修补和网络划分这两个常规分析软件中占工作量90%的工作,操作非常简单。
但是由于流体问题的复杂性和自动化网络的单一也造成分析成功率、结果可信度偏低。
使用中一定要注意简化模型。
原因有2:1、全嵌入SW2005,模型无损的进行分析容易造成细节偏多,虽然有省略细节,但是不如人工简化来得好。
分析计算时间可能成倍的节省,有时反而会提高分析精度!2、自动网络划分不是万能的。
看看其他软件手工画的网络就知道流体的网络有多复杂了。
而COSMOS的自动网络笨笨不敢恭维,实在太菜。
简化模型可以大大提高网络划分的速度和完好率,有利于分析。
首先,引入模型。
在SW里面就是启动向导。
然后给分析起个名字3、选择单位制4、流体设置。
主要是设定液体还是气体,以及对热传导、重力、时间曲线的分析5、对旋转体的设置。
注意这页,主要是开启和轴、转速设置6、气流环境选择,主要是选择外流分析还是内流分析。
内流需要指定流体的出入口7、表面粗糙度8、流体种类的选择10、实体÷流体交界热传导选择,第一项是不传导11、宏观环境参数。
设定密度、气压等等大气环境,以及气流速度12、结果的显示设置,可以不管后面调这样就可以完成初步的设置。
下面添加需要计算的分析结果,包括热、密度、速度、力、力矩、剪力等等最后点此处开始分析分析结果:水平面压强纵剖面压强涡流桨面压强气流。
solidworks与simmechanics的插件安装说明及仿真操作

solidworks与simmechanics的插件安装说明及仿真操作solidworks与simmechanics的插件安装说明及仿真操作下面以Solidworks2009以及MatlabR2009a为例说明安装过程:1. 选择对应的solidworks及matlab版本的插件下载(mathwork公司免费),以后不需要解压然后你打开MATLAB;2. 将下载的两个文件所aaaa在目录置为MATLAB当前路径;3. 在MATLAB命令窗口输入install_addon('')命令,引号内的是你下载的压缩文名字;4. 然后MATLAB就会将这个插件装上的:Installing smlink...Extracting archive smlink31.win32.zip to C:\Program Files\MATB\R2009a... Adding directories for smlink to path...Installation of smlink complete.To view documentation, type "doc smlink".5.最后在关联solidworks,主要分两步:1)在matlab命令窗口运行smlink_linksw,提示成功;2)打开solidworks,点击工具,选择插件,再选择SimMechanics Link,将会看到SimMechanics Link 新的菜单(注意需要在打开装配体*.SLDASM时才能看到)。
-----------------安装好后,即可以联合仿真了,具体步骤如下:1 在solidworks建立机械装配体并保存 *.SLDASM;2 利用另存为再分别保存成 *.xml (新建个子文件夹)和 *.wrl格式;3 启动VRML编辑工具(<matlab< p="">root>\toolbox\sl3d\vrealm\program\vrbuild2.exe),打开上面刚存的robot.wrl文件,再另存为*_vrml97.wrl;4 启动matlabR2009a,在命令窗口运行import_physmod,在对话框中打开第1步中存储的robot.XML,将生成相应的SimMechanics模块;5 在生成的SimMechanics模块中添加VR Sink 模块,双击打开对话框中打开*_vrml97.wrl,进行相应的配置,然后连接相应的数据即可进行仿真。
proe的mechanica模块安装

proe的mechanica安装方法电脑重装后,proe也跟着重装,在安装mechnaica时,遇上了问题,不能在整合模式下运行。
因为很长时间没有装过,记不太清楚了,于是上网找了找资料,可惜很少这方面的资料,ivproe里有个比较详细的,但是是比较早的版本。
找不到资源,只好自己摸索了,试了几次后,终于搞定。
因为我想可能会有许多网友不能正确安装mechanica,也为了自己下次再重装的时候可以参照,因此我就把这次的安装经验记录下来,呵呵重新安装实验室操作系统,然后装PROEs tep 1:正确安装proestep 2:正确安装mechanica(到此你的mechanica应该可以在单独模式下运行了,不过我想大家用的比较多的还是整合模式,呵呵,说实话在单独模式下我看都看不明白)(回到SHooTERS文件夹,复制ptc.pro mechanica.wildfire.3.0.m090-patch.exe到Pro/ENGINEE Mechanica安装目录下\i486_nt\bin和i486_nt\obj和i486_nt\ptc ,双击运行,点patch,待运行完至此完成安装!!!安装破解好了以后没有时间的限制!)step 3:配置与其它产品的互用性(如果你想在整合模式下使用mechanica,你就得配置这一步,可以参考ptc的安装Help),具体步骤见下:A:找到proe的安装目录下的bin目录,运行ptcsetup.bat(也就是大家常说的超级安装)B:在"可选配置步骤"选项卡里,将"配置与其它产品的互用性"这一项勾选C:接着在"产品互用性配置"选项卡里,将mechanica的安装位置定位在你的mechanica的安装目录(例如:C:\Program Files\mechWildfire 3.0),然后一路next下去,重装配置一次以后就OK了.后来我又发现另一种方法也可以直接对启动命令采用手工编辑的方法:使用编辑器(如记事本)打开启动命令文件proe1.psf(位于ProeWildfire 3.0\bin目录下),将“ENV=MECH_LP=”右侧的“_MECH_DIR_”替换为mechanica的安装路径(可以参照我的配置ENV=MECH_LP=C:\Program Files\mechWildfire 3.0)。
中文版SolidWorks中最好添加英文材质库

中文版SolidWorks中最好添加英文材质库
问题描述:
SolidWork s软件原版采用英语作为软件语言,针对中国用户进行了汉化。
但是经过笔者使用发现,由于材质库的汉化问题,在对材质数据的调用时会出现以下问题(目前已经暴露的问题是这两个):
1. 采用中文材料库的材料参数在Simulation算例中进行材料定义后,运行算例时提示“未指定弹性模量参数”。
2. 在Simulation中进行疲劳仿真时没法查看或添加疲劳SN曲线
注:此类问题目前为SolidWorks 汉化版Bug,随着版本的更新,会被解决。
解决方法:
1. 在“工具—系统选项—文件位置—材质数据库”添加英文材质数据库“SolidWorks安装目录\SolidWorks Corp\SolidWorks\lang\english\ sldmaterials”,之后再进行Simulation分析时,选择英文材质库中的材料
2. 在Simulation选项中指定英文版曲线数据库“SolidWorks安装目录
\SolidWorks Corp\SolidWorks\Simulation\CWLang\English”
例名称上点击右键,便可“定义函数曲线”。
ICP DAS CAN-2024D设备网络从机设备说明书
Copyright © 2011 is reserved by ICP DAS.
Trademark
The brand name ICP DAS as a trademark is registered, and can be used by other authorized companies.
CAN-2024D User’s Manual (v1.00, March/2011)
4
1.3 Features
z DeviceNet general I/O slave devices. z Comply with DeviceNet specification Volume I, Release 2.0 &
Warning
ICP DAS revises the manual at any time without notice. However, no responsibility is taken by ICP DAS unless infringement act imperils to patents of the third parties.
3 DeviceNet Profile Area .........................................................................13 3.1 DeviceNet Statement of Compliance..........................................13 3.2 Identity Object (Class ID: 0x01) ..................................................14 3.3 Connection Object (Class ID:0x05) ............................................15 3.4 Assembly Object (Class ID: 0x04) ..............................................16 3.5 Application Object1 (Class ID: 0x64)..........................................19 3.6 Application Object2 (Class ID: 0x65)..........................................21
SolidEdge实用教程应用篇

目录•SolidEdge基础操作•草图绘制与编辑•三维建模与装配设计•工程图生成与标注•钣金设计与模具开发应用•渲染、动画与仿真分析功能介绍SolidEdge基础操作安装步骤01下载SolidEdge安装包。
02运行安装包,按照提示进行安装。
03选择安装目录和组件。
启动方法完成安装后,重启计算机。
通过开始菜单找到SolidEdge程序组,点击启动。
在桌面或任务栏创建快捷方式,双击启动。
01菜单栏包含文件、编辑、视图等基本操作。
02工具栏提供常用命令的快捷按钮。
设计窗口显示三维模型或二维图纸。
属性管理器显示和编辑对象的属性。
零件设计创建和编辑三维零件。
装配设计将零件组装成完整的产品。
工程图设计生成零件的二维工程图纸。
钣金设计针对钣金件进行专业设计。
010203使用鼠标单击选择单个对象。
使用鼠标拖动选择多个对象。
选择对象01使用快捷键进行快速选择。
02视图操作02使用鼠标滚轮进行缩放。
按住鼠标中键进行平移。
使用快捷键进行旋转和定向视图。
编辑技巧01使用“撤销”和“重做”功能纠正错误操作。
02使用快捷键提高操作效率。
03利用属性管理器批量修改对象属性。
01 02 03文件管理使用“保存”和“另存为”功能保存设计成果。
设置自动保存以避免意外丢失数据。
定期备份重要文件以防止数据损坏。
版本控制利用SolidEdge的版本管理功能,记录设计历史。
在团队中共享文件时,确保使用统一的版本控制策略。
定期检查和清理旧版本文件,以节省存储空间。
草图绘制与编辑在SolidEdge 中,首先需要选择一个合适的草图平面,可以是已有的平面、基准面或工作平面。
选择草图平面根据需要,为图形添加几何约束(如平行、垂直、相等等),以确保图形的稳定性和正确性。
添加约束在选定的草图平面上,点击“创建草图”按钮,进入草图绘制模式。
创建草图使用各种绘图工具(如直线、圆、弧等)在草图平面上绘制所需的图形。
绘制图形使用尺寸标注工具对图形进行尺寸标注,确保图形的准确性和可制造性。
solidworksaddinprogram 用法 -回复

solidworksaddinprogram 用法-回复关于SolidWorks Add-in程序的用法SolidWorks是一款十分强大的三维建模软件,它提供了许多易于使用的工具和功能,可帮助工程师和设计师创建各种复杂的产品设计。
除了其强大的功能外,SolidWorks还支持自定义插件程序的使用,这些插件被称为Add-in程序。
这篇文章将详细介绍SolidWorks Add-in程序的用法,并提供一步一步的指导。
第一步:创建一个SolidWorks Add-in要创建一个SolidWorks Add-in,首先需要打开SolidWorks并选择“新建”菜单下的“项目”选项。
在弹出窗口中,选择“”或“C#”模板,并命名您的插件。
点击“确定”按钮后,Visual Studio将自动为您生成一个空白的插件项目。
第二步:配置插件的属性要配置插件的属性,先右键单击项目,在弹出菜单中选择“属性”。
在属性窗口中,您可以设置插件的名称、说明、版本号等信息。
还可以设置插件所需的SolidWorks版本和.NET框架版本等。
完成配置后,保存项目设置。
第三步:编写插件代码在插件项目中,可以添加Class模块,然后开始编写插件代码。
您可以使用SolidWorks提供的API来访问和操作SolidWorks软件的各种功能和对象。
例如,您可以使用API创建零件、装配体或绘图等。
您还可以为插件添加自定义的工具栏按钮、菜单和快捷键等,以便用户可以方便地调用插件功能。
第四步:调试和测试插件完成插件代码编写后,您可以使用Visual Studio的调试功能进行调试和测试。
在“调试”菜单下,您可以选择“开始调试”或“开始无调试”选项来运行SolidWorks,并加载您的插件。
在运行过程中,您可以使用Visual Studio的调试工具监视变量、设置断点等,以便定位和修复可能的错误或问题。
第五步:编译和发布插件当插件开发工作完成后,您可以将插件项目编译为可执行文件。
SolidWorks 2005 安装方法
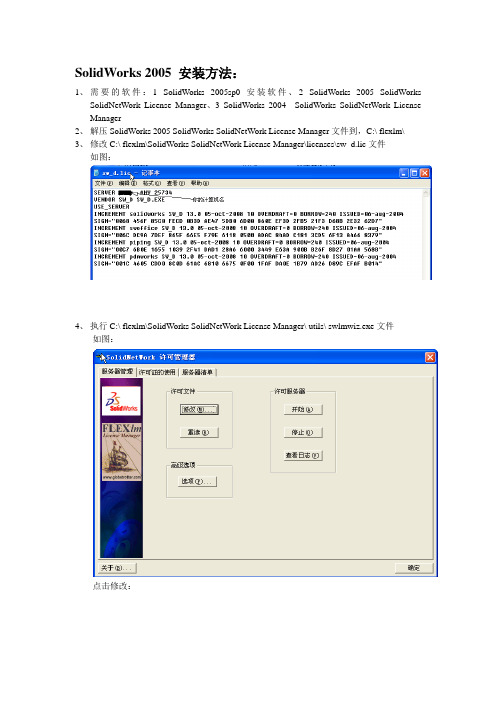
SolidWorks 2005 安装方法:1、需要的软件:1 SolidWorks 2005sp0安装软件、2 SolidWorks 2005 SolidWorksSolidNetWork License Manager、3 SolidWorks 2004 SolidWorks SolidNetWork License Manager2、解压SolidWorks 2005 SolidWorks SolidNetWork License Manager文件到,C:\ flexlm\3、修改C:\ flexlm\SolidWorks SolidNetWork License Manager\licenses\sw_d.lic文件如图:4、执行C:\ flexlm\SolidWorks SolidNetWork License Manager\ utils\ swlmwiz.exe文件如图:点击修改:如图:点击下一步如图:点击完成:许可证已注册完成。
5、安装SolidWorks 2005sp0:执行安装软件目录\ swwi\ SwSetup.exe文件选择Solidworks Office professional安装方式序列号输入:8818 8888 8888 7637一路下一步安装完成6、修补SolidWorks目录下的10个文件执行SolidWorks 2004 SolidWorks SolidNetWork License Manager\ SW2004 FlexECCPatch.exe文件:如图:点击确定:如图:点击预览(Browse)如图:选择SolidWorks安装路径:点击确定:如图:点击修补Patch显示修补过的文件OK 重新启动计算机。
启动你心爱的sw2005如果你想试试时间限制,再返回现在的系统时间,启动sw2005是如显示一下图示:你就要再次激活许可证:开始\程序\SolidWorks 2005\SolidWorks 工具\SolidNetWork 许可管理员:重复4、步骤。
solidworks导入adams和solidworks部分教程
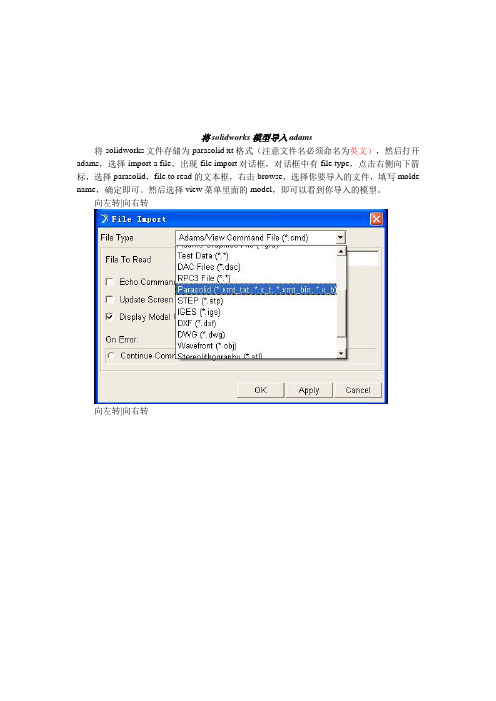
将solidworks模型导入adams将solidworks文件存储为parasolid xt 格式(注意文件名必须命名为英文),然后打开adams,选择import a file,出现file import对话框,对话框中有file type,点击右侧向下箭标,选择parasolid,file to read 的文本框,右击browse,选择你要导入的文件,填写molde name,确定即可。
然后选择view菜单里面的model,即可以看到你导入的模型。
向左转|向右转向左转|向右转SolidWorks 2006三维建模实例教程2第1章SolidWorks基础与建模技术本章要点SolidWorks是一个在Windows环境下进行机械设计的软件,是一个以设计功能为主的CAD/CAE/CAM软件,其界面操作完全使用Windows风格,具有人性化的操作界面,从而具备使用简单、操作方便的特点。
SolidWorks是一个基于特征、参数化的实体造型系统,具有强大的实体建模功能;同时也提供了二次开发的环境和开放的数据结构。
本章介绍SolidWorks的环境和简单的造型过程,让读者快速了解这个软件的使用。
第1章SolidWorks基础与建模技术3本章内容❑SolidWorks环境简介❑SolidWorks建模技术❑简单演练SolidWorks 2006三维建模实例教程41.1SolidWorks环境简介SolidWorks是美国SolidWorks公司开发的三维CAD产品,是实行数字化设计的造型软件,在国际上得到广泛的应用。
同时具有开放的系统,添加各种插件后,可实现产品的三维建模、装配校验、运动仿真、有限元分析、加工仿真、数控加工及加工工艺的制定,以保证产品从设计、工程分析、工艺分析、加工模拟、产品制造过程中的数据的一致性,从而真正实现产品的数字化设计和制造,并大幅度提高产品的设计效率和质量。
通过本节的学习,读者应熟悉SolidWorks的界面,以及常用工具条的使用。
SolidWorks练习题目3D设计

SolidWorks练习题目1. SolidWorks是___B___原创的三维实体建模软件。
(A)UNIX (B)Windows (C)Linix2. SolidWorks中使用快捷方式复制对象时,应按下以下哪个热键?_A____(A)Ctrl (B)Shift (C)Alt3. 以下选项中,__C___由SolidWorks第一个推出,并获得美国专利?(A)三维建模〔B〕参数化设计〔C〕特征管理员FeatureManager4. SolidWorks一向很关注中国市场,从___B__版本开始,增加了中国国标〔GB〕标注(A)2001 (B)2001plus (C)20035. 在SolidWorks2003中增加了应力分析工具,名称是__C____(A) Cosmos/M (B)Cosmos/Works (C) CosmosXpress6. eDrawing是第一个通过电子邮件的方式交流的工具,可以将三维模型和二维图纸压缩成一个文件,完整的包含了模型的所有信息。
以下哪种格式是eDrawing不能生成的?__C__(A).exe (B).htm (C).txt7. 以下几项功能中,__B___是SolidWorks2003的新增功能。
(A)计算模型的体积〔B〕多实体运算 (C)生成模具型腔8. SolidWorks是市面上的主流三维软件之一,能够与绝大多数CAD软件进行格式转换,以下哪种格式不能被读取?__A___(A)EXB (B) IGES (C)DWG9. SolidWorks有众多与之无缝集成的插件,当您设计完模型之后,要对它进行渲染,应该启动的插件是__A___(A)PhotoWorks (B)FeatureWorks (C)Animator10. SolidWorks模型由零件、装配体和工程图组成,它们的文件格式分别为___C___(A) sldasm,sldprt,slddrw (B)sldprt,slddrw,sldasm (C)sldprt, sldasm, slddrw11. SolidWorks的模板有两个存放地址,以下哪个路径是其中一个存放地址?__B____(A)安装目录\data\user (B)安装目录\data\templates (C)安装目录\samples12. SolidWorks的图标使用起来很方便,并且可以根据实际要求来定制,当我们要将一类图标命令〔目前没有显示〕调出来使用,以下哪种方法不能做到?___C___(A) 在图标栏的空白区域点击右键,从中挑选(B) 从菜单“工具〞下翻开“自定义〞,从中选择(C)从菜单“工具〞下翻开“选项〞,从中选择13. 在FeatureManager设计树中,默认的有几个基准面?____B___(A)2个 (B)3个 (C)4个14. SolidWorks视图区域的大小可以拖动调整,也最多可以分割成_A___个局部,便于观察不同视角。
- 1、下载文档前请自行甄别文档内容的完整性,平台不提供额外的编辑、内容补充、找答案等附加服务。
- 2、"仅部分预览"的文档,不可在线预览部分如存在完整性等问题,可反馈申请退款(可完整预览的文档不适用该条件!)。
- 3、如文档侵犯您的权益,请联系客服反馈,我们会尽快为您处理(人工客服工作时间:9:00-18:30)。
∑ F =F + F − 150 = 0⎤ ⎥ , (a ) = − = M F c (150) 0 ⎥ ∑ ⎦
y y y A′ y
step 3.2 ( geometry )
δ A = δ B , (b) →
δA
LA
=
δB
LA
=
δB
1.3
=2
δB
2.6
=2
δB
LB
, (c )
step 3.3 ( force-deformation relation )
<- (d)
step 3.2 for the springs
hC L + a = , hD L − a
δ C = h − hC ,
δ D = h − hD
step 3.3 for the springs
FC = k δ C ,
FD = k δ D
7 eqns for the 7 unknowns FC , FD , hC , hD , δ C , δ D , b
step 3.2 step 3.3
δ B = (δ A + δ C )
1 2
δA =
FA F F , δ B = B , δC = C kA kB kC
6 eqns for the 6 unknowns FA , FB , FC , δ A , δ B , δ C
=>
δA = P
2 kC − λ ( k B + 2 kC ) k A k B + 4 k A kC + k B kC
FA = k Aδ A ,
FB = k Bδ B
(linear springs with k A & k B )
Solving the 4 equations for the 4 unknowns FA , FB , δ A , δ B =>
FA kA FB kB = , = F k A + kB F k A + kB
step 3.2
δ T pr 2 t = (1 + ) δR = 2π 2r tE
pr 2 ≈ tE , for t 1 2r
Thick-walled ring or cylinder ( → § 5.7 )
Eg 2.8 Simple system for testing engine Brake band cross section : 1.6 F = 0
All the other equations are identities. -> 1 equation for 2 unknown
FA , FB (-> Stat. Indet. Prob.)
step 3.2 step 3.3
for the springs : δ A = δ B = δ
Force-deformation relation (Step 3.3)
δ BD δ CD
FL 28.3(4.242 ×10³ ) =( ) BD = = 1.19mm (extension) AE 0.491×10⁻³ (205 ×106 ) FL 20(3 × 10³ ) =( )CD = = 0.0915mm (compression) AE 3.2 × 10⁻³ (205 ×106 )
δA
LA
= 0.001m / m , δ A = δ B = 1.3mm
→ (a) →
c = 0.355m
FA = 182kN , FB = 118kN , δ A = δ B = 1.69mm c = 0.393m
For the load of 300kN
Eg 2.7
Ring with inner pressure. deformation? System : Fig(c) step 3.1
Eg 2.6
Determine c such that the beam AB will still be horizontal in the deflected position. Note the nonlinear nature of the copper bars. System : beam AB [Fig(c)] Assume AB -> A′B′ w/o rotation under 150kN step 3.1
The examples of 2.1, 2.2, 2.3 are all statically indeterminate problems, which requires the solution of simultaneous equations of step 3.1, 3.2, 3.3.
2.2 Uniaxial Loading and Deformation
E=
P/ A PL or δ = δ /L AE
k=
AE L δ = 205 GN / m =
P
2.3 Statically Determinate Situations
Eg 2.4
Force equilibrium (step 3.1) Eg 1.3 -> FBD=28.3kN (tension), FCD=20kN (compression)
FR = 0 by symmetry
[cf. Fig(d)]
+ FP = p[b(r +θ )] + Fy =+ FP ⋅ sin θ = p[b(r+θ )] ⋅ sin θ
→
∑ F = ∫θ
y
θ =π
=0
pbr sin θ dθ − 2 FT = 0
→ FT = prb
step 3.3
t FT [2π (r + )] 2 FL 2 = 2π pr (1 + t ) δT = = (bt ) E 2r AE tE
P δ = f( ) : A L
[ Fig b]
, (d )
nonlinear
(a) →
F FB 150 FA FB 150 × 103 + = , + = = 115MN / m 2 , (e) −6 AA AA AA AA AB 1300 ×10
Select arbitrary value of
δB
LB
→ Fig (b) →
FB F , A → (e) AB AA
satisfied? otherwise try again
⎡ ⎢ ⎢ ⎢ → ⎢ ⎢ ⎢ ⎢ ⎢ ⎣
FA = 74MN / m 2 , AA FB = 41MN / m 2 , AB
FA = 96.2kN FB = 53.3kN
2. Introduction to Mechanics of Deformable Bodies
2.1 Analysis of Deformable Bodies
Analysis steps 1. Selection of the system or system identification 2. Simplification or idealization 3. Application of the principles of mechanics 3.1 Study of forces and equilibrium requirements 3.2 Study of deformation & geometric-fit conditions 3.3 Application of force-deformation relations Eg 2.1 Forces & deformations of the springs A & B FBD of the piston step 3.1 ->
, δA = δB =
FA F = k A k A + kB
Light, stiff wood plank supported by two springs (L, a, h, k : given) h -> 0 as the man approaches the location x=b (W : given) Value of b ? FBD of the wood plank
δ AC = (
FL 16, 670(5) ) AC = AE 4(10 × 106 ) = 0.00208 ft (comp.)
δ AD = ( δ CD
FL ) AD = 0.00267 ft (ext.) AE FL )CD = 0 =( AE
By combination of deformed triangle, we can figure out the over-all deformed configuration. Placing AB horizontally as shown we can fix the whole deformed configuration. => Deflection of point D etc. Cumbersome calculation ! => Better & advanced method • Computer program method ◉ Energy method (Castigliano's theorem) : § 2.6
thick wide
Friction coefficient f=0.4 Tension 40kN in BC section, Elongation in AB section? First system of interest : Fig(c) nonuniform tension & normal forces unknown TAD Second system infinitesimal element of the band : Fig(d) with resultant external forces
