CY直光烤鸭炉说明书
C Y直光烤鸭炉说明书

C Y-850型燃气木炭两用烤鸭炉使用说明书广州金博机械有限公司燃气木炭两用旋转烤鸭炉操作要领一、开始工作时,首先打开门,后再点火。
二、煤气瓶必须为低压阀(往上松,燃气缩小,往下压,燃气加大),如果压力太大(会造成很难点燃火,用木炭加温时,必须先拿出炉胆,把木炭点燃后,无烟再放进机内)。
三、有时气压正常,点火难燃火,原因是点火器嘴和通气管不正,用手轻轻按一下点火器嘴即可。
四、点火时请把双门打开,关门点火是不允许操作的,经过多次点火不着,炉内存有大量煤气,如果点着了,也会将门自动打开,造成不安全因素,不要把头伸进炉内,造成烧伤。
五、本机点火开关,铜管离点火嘴比普通的家用煤气炉长许多,所以再点火是将开关多打几次,火点燃不能马上松手,等燃烧火有点红,才能松手,敬请客户仔细阅读。
CY-850型燃气木炭旋转烤鸭炉一、产品特点:采用进口不锈钢制成,具有耐腐型强,选用多种燃气及代号,液化气(Y)燃气(T)煤制气(尺),独特设计,操作简便,节约能源,而且比电烤能源消耗35%,烤出食品更香更佳。
按企业标志检验合格玻璃幕一目了然。
而且体积小,装有方向脚轮,因此搬动轻方便。
二、产品技术性能和参数:耗气量(小于)m3/n0.3热负荷7km电压220v减速电机60w电机转速40y/min照明150w烤制温度150—250度烤鸡时间(仅供参考)min,28—45烤鸡数量9—24烤桃酥min12桃花生min15面包min12蛋糕min9月饼min12三、结构性能原理和烘烤系统1、由陶硅散热膜和耐热金属网组成燃烧器。
2、红色软胶管外套有耐温热锌管组成供气管。
3、由接气阀门与煤气自动点火开关供气。
四、烤食品工作系统和性能原理:1由减速电机直接与转轴、转圈、不锈钢钩子组成旋转能使食品烤的均匀。
2、本机使用和家用煤气灶大致相同,把鸭挂到钩子上,然后挂转圈中间(一层12只)。
3、接通电源,接受供管,打开气源阀门即开液化气罐阀。
4、按进开关逆转90角度,发出啼嗒一声,开始弱火燃烧,直到火烧旺时放开关。
烘干炉操作说明
烘干炉操作说明烘干炉分自动手动两种操作方式,自动方式由PLC程序系统启动停止各个风机及燃烧器,手动方式由人工启动停止每个设备,使烘干炉正常运行1,检查各设备的启动电源(断路器)是否闭合。
2,检查控制电源(控制柜“控制开关”)是否打开,即PLC电源上电和直流电源上电指示灯亮。
3,手动状态:将手动/自动旋钮开关旋转到手动位,依次按下各个风机的启动按钮(绿色),风机启动后相应指示灯亮,停止风机时按下所需停止风机的停止按钮(红色)。
注意:启动各风机时应有一定延迟时间,待启动风机指示灯亮时再启动一下风机,严禁短时间内按下多个风机启动按钮。
4,自动状态:将手动/自动旋钮开关旋转到自动位,按下自动启动按钮(绿色),各风机一定顺序自动启动。
停止时按下自动停止按钮(红色),各风机停止,排废气风机和热循环风机需延时一段时间后停止。
5,燃烧器的启动与停止:风机启动后需一定的吹扫时间后燃烧器才可以启动。
控制柜风机手动启动时燃烧器需本地启动,启动时需手动按下启动按钮,停止时需手动按下停止按钮。
控制柜自动启动时燃烧器需远程启动,不需人工操作。
注意:燃烧器与循环风机设有安全连锁,务必确保先启动热循环风机后启动燃烧器,先关闭燃烧器后关闭热循环风机的开关机顺序。
6,一般问题的解决:1)热循环风机频繁启动会有热过载保护,导致风机不能启动。
解决方法:复位热过载保护按钮,过一段时间后再启动风机。
2)控制电源(钥匙旋钮开关)合上后电源指示灯不亮。
解决方法:控制电源断路器跳闸,重新合闸。
3)风机风压开关报警。
解决方法:因为风压开关动作灵敏易误动作,风压开关报警时需到现场确认是否为误动作,确认风机无皮带断裂停转等故障时,可按下故障复位和该风机的启动按钮,报警可消除。
6燃元炉膛烤烟烤烤烤烤器的使用说明书
INSTRUCTIONMANUALFOR6 BURNER UNITS WITH GAS GRILL AND OVEN WITH BATTERY POWERED IGNITIONFOR DOMESTIC USE ONLYGAS COOKERSGAS STOVES INSTRUCTIONSIntroduction:Congratulations, you have acquired a good quality gas association approved product.Please read this manual carefully and fully before attempting installation and operation.1. Where to installThis is a freestanding appliance and should not be installed. This appliance should only be used with a 9kg gas bottle. The gas bottle should be freestanding and should not to be placed in an enclosed area e.g. in a cupboard.Place your cooker away from objects that are flammable or which have low resistance to heat. Avoid draughts. Do not place the cooker in front of windows or doors.The side and rear should be at least 5cm from the walls and cupboards and suction fans should be at least 85cm above the top of the cooker. Do not place the cooker in damp areas.2. Connecting the gas supplyThis stove is designed to use LPG GAS ONLY.If you need to convert to another type of gas, contact a qualified gas technician.Your appliance is fitted with a SABS approved gas hose and a gas association approved regulator. This stove requires an operating pressure of 2.8 kPa. The gas bottle should be a distance of between 300mm to 500mm away from the appliance.3.Fitting of battery for ignitorFit one D cell 1.5 volt battery into the battery compartment located on the rear of the unit. Observe that the polarity is correct.(batteries not supplied)Electric light (lamp)The unit is not fitted with this feature.PrecautionsVentilation is vital for the efficient and safe performance of this appliance.When the stove is being used always keep the room well ventilated.If a gas leak occurs close the gas shut off valve and open all doors and windows for maximum ventilation.DO NOT IGNITE A FLAME OR SWITCH ON A LIGHT.In the event of a burn back, close the corresponding gas valve, and relocate the burner cap correctly. Always ensure that the burner injectors (jets) are not blocked by food spillages.Do not leave plastic or any flammable objects near the flame.When the stove is not going to be used for some time: i.e. (when on holiday, etc) ensure that the gas supply is turned off at the cylinders.4. Specifications of burners BURNERSMAX POWERMIN POWER Medium (2Burner)2.0 kW (1,721k cal/h) 1.15 kW (990 kcal/h)Small (4Burner) 1.7 kW (1,463k cal/h)1.15 kW (990 kcal/h)Oven Burner(1) 3.0 kW (2,581k cal/h) 1.5 kW (1,290 kcal/h)5.KnobsThe cooker knobs are designed with safety locks to prevent them from being turned on accidentally. To operate push the knob inwards and turn in an anticlockwise direction from the maximum to minimum position. The dot symbol indicates when the flames have been extinguished.I.e. off position.6. Variable flame controlThe burner control system allows for a fully variable flame from the maximum to minimum heat without extinguishing the flame.7. Igniting the upper burnersWith electronic ignitor fitted Turn the knob to the maximum position and ignite the gas by holding down the ignitor switch located on the right hand side of the knobs.8. Igniting the oven burnerWith electronic ignitor fittedTurn the oven knob to the halfway position and push it in firmly. Ignite the gas by holding down the ignitor switch located on the front of the control panel on the right hand side.Hold the gas knob in firmly for at least 30 seconds before releasing. Check to see that the oven has ignited correctly before carefully closing oven door.Be careful not to close the door too suddenly to avoid extinguishing the flame.Ignitor switchTop Burner knobsTop Burner knobs Grill & Oven knobs9. How to use the oven correctlyThe oven is designed to distribute the heat evenly.Preheat the oven for ten minutes before placing food in it.Do not open the door unnecessarily as this will result in heat loss and could affect the cooking.Never place anything directly on the oven floor.When using roasting pans place them centrally on the oven grate leaving about 3 to 5cms between the sides of the dish and the oven walls. Meats and dough’s should be placed on the second level in the oven.10. Using the grillThe grill (irradiation griller)is fixed to the upper portion of the oven, which enables you to brown and give a special touch to food with a lot more refinement and easiness.Note:The oven and grill can be used at the same time.Please use the heat shield supplied as directed in the instructions below.Never use the grill with the top glass cover in the lowered position.Turn the grill knob to the halfway position and push it in firmly. Ignite the gas by holding down the ignitor switch located on the front of the control panel on the right-hand side. Hold the gas knob in firmly for at least 30 seconds before releasing. Check to see that the grill has ignited correctly before carefully closing oven door. Be careful not to close the door too suddenly to avoid extinguishing the flame.Hints:To obtain the best results from your grill:∙Light the grill 8 or 10 minutes before placing the food in the oven.∙Check the distance between the food and grill. Use the shelf graduation for a better location.∙Centralize the food dish on the shelf to obtain best results.∙Before closing the oven door check that the flame is burning.6 Burner S/S OVEN AND GRILLOPERATION INSTRUCTIONSNB: When operating the oven and grill function of the appliance at the same time it is of utmost importance that the heat shield is fitted.1.Open the oven door2.Fit the heat shield11. Choosing the appropriate dishThe size and type of the dish used can affect how the food is cooked, aluminum dishes that heat up very quickly and evenly are recommended for cakes, cookies and small breads, etc. Pies will have better results in Pyrex type dishes. When baking a cake, if the dish is too small, it will rise over the brim and dirty the oven. If the dish is too large the cake will not rise sufficiently, possibly go limp or over cook. Always place the dish centrally to allow for even circulation of the heat. If more than one dish is being used they should be placed about 3 to 5cm apart.12. Cleaning (For units without self-cleaning function)It is recommended that the oven be cleaned after each use to avoid an accumulation of grime.When cleaning the flame spreaders, never leave them soaking in vinegar or lemon juice.After washing the burners and spreaders, dry them properly before re-use.To clean the upper section, remove the trivet (burner grid), the burners and spreaders.Avoid any leftovers or liquids falling into the gas injectors.To clean the enamel and stainless steel parts, use a sponge or cloth moistened with household soap,then wipe with a dry cloth.After the burners have dried place them back in the correct manner. At the bottom of the burner you will see a one pin longer than the others. This pin must be lined up with the hole on the oven top. See figure 1. Nowplace the brass flame spreaders on top of the burners.See figure 2.3. Close the oven door. Now both oven and grill functions canbe operated at the same time.To clean the oven, use a sponge with household soap preferably while it is still warm, but not hot, to remove any fat and dirt. Any fat that sticks to the inside of the oven can be removed using steel wool. It is important never to use corrosive cleaning products.13. Self-cleaning oven(Metallic electronic ignition model only)In the models with the self-cleaning feature, the oven internal walls, back panel except for the door and bottom (Lower portion) are lined with a type of special microporous enamel which, when submitted to high temperatures reacts with fat providing the reduction of the content of oil and fat that adhere to internal oven walls while using the oven. This type of lining is non-toxic and does not release gasses with toxic properties. It also does not affect the quality and/or cooking time. The oven is cleaned by the self-cleaning feature performed during its normal operation. The following care should be taken with the self-cleaning oven: Do not spill substances such as oil, fats, pastas, gravies or any other material which may stain the self-cleaning enamel, so as not to saturate the self-cleaning lining. Alternate the use of the oven between fatty and non-fatty foods.Should the oven need additional cleaning use a sponge with household soap preferably while it is still warm, but not hot, to remove any fat and dirt.Figure1Figure214. Burner Positioning15. TroubleshootingBefore attempting any work on the stove ensure that the main gas supply has been closed.Possible causes for the stove not functioning correctly could be:∙The gas supply being very low i.e. there is insufficient pressure for the gas to reach the burners.∙The regulator is leaking.∙The burners and spreaders are clogged.∙The gas is not igniting with the igniting switch: (Make sure that you have plugged the igniter power plug into the wall plug and that the wall plug is switched on.16. GuaranteeNever allow any unqualified person to attempt a repair to the stove.Not only could this be dangerous but it may also nullify the guarantee.17. Guarantee DetailsThis product is covered by a 12 month guarantee for defective parts and workmanship. Any improper use nullifies the guarantee.18. ServiceAt least once every 12 months the following maintenance items should be carried out:∙Check all gas connections for leaks with soapy water.∙Visually inspect seals on the regulator for signs of deterioration and damage.∙Visually inspect the gas hose for signs of deterioration and damage.。
旋转烤鸭炉 烤鸭炉价格
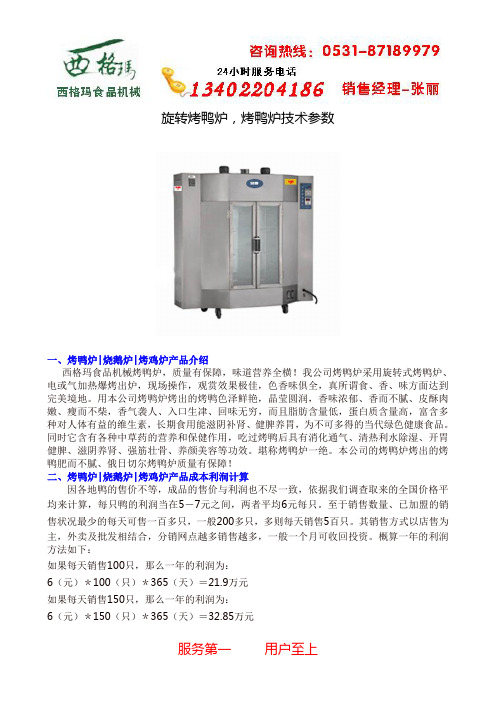
旋转烤鸭炉,烤鸭炉技术参数一、烤鸭炉|烧鹅炉|烤鸡炉产品介绍西格玛食品机械烤鸭炉,质量有保障,味道营养全横!我公司烤鸭炉采用旋转式烤鸭炉、电或气加热爆烤出炉,现场操作,观赏效果极佳,色香味俱全,真所谓食、香、味方面达到完美境地。
用本公司烤鸭炉烤出的烤鸭色泽鲜艳,晶莹圆润,香味浓郁、香而不腻、皮酥肉嫩、瘦而不柴,香气袭人、入口生冿、回味无穷,而且脂肪含量低,蛋白质含量高,富含多种对人体有益的维生素,长期食用能滋阴补肾、健脾养胃,为不可多得的当代绿色健康食品。
同时它含有各种中草药的营养和保健作用,吃过烤鸭后具有消化通气、清热利水除湿、开胃健脾、滋阴养肾、强筋壮骨、养颜美容等功效。
堪称烤鸭炉一绝。
本公司的烤鸭炉烤出的烤鸭肥而不腻、俄日切尔烤鸭炉质量有保障!二、烤鸭炉|烧鹅炉|烤鸡炉产品成本利润计算因各地鸭的售价不等,成品的售价与利润也不尽一致,依据我们调查取来的全国价格平均来计算,每只鸭的利润当在5-7元之间,两者平均6元每只。
至于销售数量、已加盟的销售状况最少的每天可售一百多只,一般200多只,多则每天销售5百只。
其销售方式以店售为主,外卖及批发相结合,分销网点越多销售越多,一般一个月可收回投资。
概算一年的利润方法如下:如果每天销售100只,那么一年的利润为:6(元)*100(只)*365(天)=21.9万元如果每天销售150只,那么一年的利润为:6(元)*150(只)*365(天)=32.85万元如果每天销售200只,那么一年的利润为: 6(元)*200(只)*365(天)=43.8万元 如果每天销售300只,那么一年的利润为:6(元)*300(只)*365(天)=65.7万元 其他项目利润不作一一分析,投资者可以自己做市场调查,客观预算。
三、烤鸭炉|烧鹅炉|烤鸡炉性能及技术参数一、24型燃气旋转式烤鸭炉、烤禽箱,烤鸭机:高质量机械,烤出好口味,赚钱好帮手! 旋转烤鸭炉又称燃气啤酒烤鸭炉、啤酒烤鸭炉、啤酒鸭炉、啤酒鸭烧烤炉、烤禽箱、立式烤禽箱 ,该产品效率高,烧烤食品色泽鲜艳,肉质嫩滑可口。
Star-Max Series 气炉烧烤机产品说明书
StarManufacturing International Inc.10 Sunnen DriveSt. Louis, M O 63143Phone: (314) 781-2777 Fax: (314) 781-3636Installation and Operating Instructions Instructions d’installationet d’opérationSTAR-MAX GAS CHARBROILERMODELS6015CBB-LP, 6024CBB-LP,6036CBB-LP, 6048CBB-LP,6115RCBB-LP, 6124RCBB-LP,6136RCBB-LP, and 6148RCBB-LPBARBECUE A GAZ STAR-MAXMODELES6015CBB-LP, 6024CBB-LP,6036CBB-LP, 6048CBB-LP,6115RCBB-LP, 6124RCBB-LP,6136RCBB-LP, et 6148RCBB-LP2M-Z5137 Rev. - 12/21/01GENERAL INSTALLATION DATACAUTIONThis equipment is designed and sold for commercial use only by personnel trained and experienced in its operation and is not sold for consumer use in and around the home nor for use directly by the general public in food service locations. For equipment to be used by the general public, please contact the factory.The Star-Max series gas charbroiler is equipped for the type of gas indicated on the nameplate mounted on the front panel. All units are shipped from the factory for use with natural gas. The unit can easily be converted for use with propane gas: see propane gas.-IMPORTANT-INSTALLATION: INSTALL IN NON-COMBUSTIBLE LOCATIONS ONLY! Clearance from non-combustible construction must be 6" from back and sides.The installation of the Appliance mustconform to the NATIONAL FUEL GAS CODE "ANSI Z223.1 - LATEST EDITION" AND ALL LOCAL GAS COMPANY RULES ANDREGULATIONS.IN CANADA INSTALLATION SHALL BE INACCORDANCE WITH THE CURRENT CAN/ CGA-B149.1 NATURAL GAS INSTALLATION CODE OR CAN/CGA-B149.2 PROPANE INSTALLATION CODE AND LOCALCODES WHERE APPLICABLE.FOR YOUR SAFETYDO NOT STORE OR USE GASOLINE OR OTHER FLAMMABLE VAPORS AND LIQUIDS IN THE VICINITY OF THIS OR ANY OTHER APPLIANCE. KEEP THE APPLIANCE AREA CLEAR AND FREE FROM COMBUSTIBLES. This appliance, its pressure regulator and its individual shutoff valve must be disconnected from the gas supply piping system during any pressure testing of that system at test pressures in excess of 1/2 PSIG. This appliance and its pressure regulator must be isolated from the gas supply piping system by closing its individual manual shutoff valve during any pressure testing of the gas supply piping system at test pressures equal to or less than 1/2 PSIG. For your protection, we recommend a qualified installing agency install this appliance. They should be familiar with gas installations and your local gas requirements. In any case, your gas company should be called to approve the final installation. In addition, there should be posted, in a prominent location, detailed instructions to be followed in the event the operator smells gas. Obtain the instructions from the local gas supplier.LEVELING UNITThis charbroiler is supplied with 4 feet which must be screwed into the body. Level unit by adjusting the (4) feet which have an adjustment of 1-3/4" for accurate and perfect line-up with other units. CAUTION: DO NOT INSTALL WITHOUT ATTACHING FEET - DO NOT REMOVE FEET. GAS INPUT TO CHARBROILER:Models 6015CBB and 6115RCBB 35,000 BTU/HT, PROP Models 6024CBB and 6124RCBB 70,000 BTU/HR, PROP35,000 BTU/HR/BURNER, PROPModels 6036CBB and 6136RCBB 105,000 BTU/HR, PROP 35,000 BTU/HR/BURNER, PROPModels 6048CBB and 6148RCBB 140,000 BTU/HR, PROP 35,000 BTU/HR/BURNER, PROPWARNING: Improper installation, adjustment, alteration, service or maintenance can cause property damage, injury or death. Read the installation, operating and maintenance instructions thoroughly before installing or servicing the equipment.GAS PIPINGGas piping shall be of such size and so installed as to provide a supply of gas sufficient to meet the full gas input of the appliance. If the appliance is to be connected to existing piping, it shall be checked to determine if it has adequate capacity. Joint compound (pipe dope) shall be used sparingly and only on the male threads of the pipe joints. Such compounds shall be resistant to the action of L.P. gases. WARNING: Any loose dirt or metal particles which are allowed to enter the gas lines on this appliance will damage the valve and affect its operation. When installing this appliance, all pipe and fittings must be free from all internal loose dirt.GAS PRESSURE REGULATORA convertible pressure regulator is provided with each charbroiler. It should be connected to the inlet pipe at the rear of the unit. The gas supply is then connected to it. It is shipped set for 10" water column manifold pressure for use with propane gas. Allow 6" clearance from back of unit to wall for servicing and installation. CONNECTING GAS SUPPLY LINEThe gas inlet of the charbroiler is sealed at the factory to prevent entry of dirt. Do not remove this seal until the actual connection is made to the gas supply line.MANUAL SHUT OFF VALVEA manual shut off valve should be installed upstream from the manifold and within six feet of the charbroiler.CHECKING FOR GAS LEAKSSoap and water solution or other material acceptable for the purpose, shall be used in locating gas leakage. Matches, candle flame or other sources of ignition shall not be used for this purpose. Check entire piping system for leaks. PILOT LIGHTING INSTRUCTIONSThe charbroiler is equipped with standing pilots, and should be lit immediately after the gas is turned on.1.Turn off main valve to unit and wait 5 minutesto clear gas.2.Turn off all knobs and pilot valves.3.Turn on main valve and light all pilots.4.Turn burner knobs to desired setting.5.To turn burners off, turn knobs off. SHUTTING DOW N INSTRUCTIONS1.Turn the burner valve knobs to the off positionto turn burners off.PILOT LIGHT REGULATIONThe pilot lights on this broiler have been turned off at the factory. Adjust pilot light flames as small as possible, but high enough to light burner immediately when burner valve is turned on high. BURNER OPERATIONTo ignite burners, turn burner valve knob to "HI" position. Each burner is controlled by an individual high-low, on-off valve. An infinite number of broiling temperatures may be obtained by turning the burner valve knob to any position between high and low.BURNER ADJUSTMENT1.Turn burner valve knob to "HI" position.2.Slowly decrease openings of air shutters togive a soft blue flame having luminous tips,then slowly increase openings to a point where the yellow tips disappear and a hard blue flame is obtained.EXHAUST CANOPYOpen hearth broilers inherently create a good deal of heat and smoke and should be installed under an efficient exhaust hood with flame proof filters. A vertical distance of not less than 48" shall be provided between the top of the appliance and filters or any other combustible material.AIR SUPPLYProvisions for adequate air supply must be provided.OPERATING INSTRUCTIONS LIGHTINGWhen broiler is first lit, it will smoke until the preservation oils and impurities are burned off. BROILINGTurn valves on and pre-heat unit on "HI" before attempting to broil. You will have to experiment with the grill settings and the valve settings for your particular meat products. We recommend that you set the grate at the full tilt position to start with. This position allows the grease to run down the grate into the grease tray, reducing flare ups. Check water pans frequently and add a sufficient amount of water when necessary. Hot water vapors rising from the water pans and through the combustion chamber helps reduce flare ups. Exercise care when using your broiler. TILTING THE GRATERaise or lower the grate to the next step by lifting the grate at the back of the charbroiler where the grate rests. Use potholders or gloves to reposition.CAUTION CHARBROILERS ARE HOT! NEVER ATTEMPT TO CHANGE THE GRILL POSITION WHILE MEAT PRODUCTS ARE COOKING. FLARE UPS CAN OCCUR UNEXPECTEDLY. TURN OFF CHARBROILER, AND ALLOW THE CHARBROILER TO COOL.DO NOT PUT MORE THAN 5 LB. LAVA ROCK PER EACH BURNER ADJUSTING HEAT PATTERNIt is possible through this arrangement to have a high heat or searing section, while having a low heat finishing or holding section. For the searing operation, set the valves for the section at a position of "HI" or close to it. For holding or finishing, set the valves closer to the "LOW" position on the dial. You select the heat pattern you like, and set the valves accordingly. CLEANINGClean regularly. Remove grate section to sink for washing. Brush out carboned particles. Remove and wash water pan. Wipe exterior surfaces with detergent and a cloth. A non-abrasive cleaner can be used on caked areas.WATER PANThe water pan is located at the bottom of the unit, and is easily removed from the front of the unit. Water should be added to the water pan and replaced as necessary. The water pan helps prevent flare ups and catches grease.AIR INTAKES IN BOTTOMAir for combustion enters from the bottom of the unit. Do not obstruct this area. MAINTENANCE AND REPAIRSContact the factory or one of its representatives or a local service company for service or maintenance if required.RETAIN THIS MANUAL FOR FUTURE REFERENCE Part No. 2M-Z5137Rev. - 12/21/01Star Manufacturing International, Inc.。
烤鸭烤炉使用方法
烤鸭烤炉使用方法
烤鸭烤炉使用方法一般包括以下步骤:
1. 准备烤鸭:先将新鲜鸭子宰杀,并去除内脏和杂物。
然后彻底清洗鸭子,并用厨房纸巾擦干。
2. 腌制鸭子:将鸭子放入一个大碗或者盘子中,然后涂抹上自己喜欢的调料,如盐、胡椒、姜粉、蒜粉、五香粉、料酒等。
腌制时间根据个人口味可以选择20分钟到数小时不等。
3. 烤鸭的准备:将烤炉预热至适宜的温度,一般为180-200摄氏度。
同时,取一个烤盘,将鸭子放入烤盘中。
4. 烤鸭的烹饪:将鸭子烤入烤炉中,烤制时间一般为1.5-2小时,取决于鸭子的大小和烤炉的温度。
烤制过程中,要定期轻轻地翻转鸭子,使其均匀受热。
5. 上色与表面脆皮:烤制大约50分钟之后,可以用调料刷在鸭子外表上,以增加上色和风味。
过程中还可以用勺子将烤盘下面的汁液舀起,在鸭子表面涂抹,帮助鸭子表面变得更加酥脆。
6. 鸭子烤制完毕:根据个人口味和烤制时间,确认鸭子已经烤熟,可以根据需要进行覆盖盖子继续烤制一段时间增加外表酥脆的口感。
7. 切割与享用:将烤熟的鸭子取出,放在砧板上,用刀将鸭子切割成肉片或块。
可以配以葱段、黄瓜丝、甜面酱和鸭汁等食用。
提醒:使用烤鸭烤炉时,请注意安全,并根据烤炉的使用说明进行操作。
烤鸭炉使用规范和操作流程
烤鸭炉使用规范和操作流程下载提示:该文档是本店铺精心编制而成的,希望大家下载后,能够帮助大家解决实际问题。
文档下载后可定制修改,请根据实际需要进行调整和使用,谢谢!本店铺为大家提供各种类型的实用资料,如教育随笔、日记赏析、句子摘抄、古诗大全、经典美文、话题作文、工作总结、词语解析、文案摘录、其他资料等等,想了解不同资料格式和写法,敬请关注!Download tips: This document is carefully compiled by this editor. I hope that after you download it, it can help you solve practical problems. The document can be customized and modified after downloading, please adjust and use it according to actual needs, thank you! In addition, this shop provides you with various types of practical materials, such as educational essays, diary appreciation, sentence excerpts, ancient poems, classic articles, topic composition, work summary, word parsing, copy excerpts, other materials and so on, want to know different data formats and writing methods, please pay attention!烤鸭炉使用规范和操作流程引言烤鸭是中国传统美食之一,而烤鸭炉则是制作美味烤鸭的必备设备。
商用旋转烤鸡炉使用说明

商用旋转烤鸡炉使用说明嘿,朋友们!今天咱们来谈谈商用旋转烤鸡炉的使用,是不是听起来有点高大上?别慌,其实就是那种能把鸡翅膀变得香喷喷的家伙,让你的餐厅充满诱人的烤鸡香味!拿到新玩意儿的第一步总是研究使用说明书。
虽然说说明书这东西有时候比解密密码还难懂,但别怕,我们今天就解锁它!烤鸡炉的大体操作就是把鸡串到架子上,然后设定时间和温度,然后坐等鸡变香!关于设置温度,别想得太复杂,就像调个手机屏幕亮度那么简单。
有时候炉子会有几个档位,挑个合适的就好,不要太担心,这不是让你去登月!烤鸡的时间也很重要,不过这得看你想要的熟度。
像我们说的,“一分烤鸡一分香”,慢慢来,保证你的鸡肉又嫩又多汁,香味直冲云霄!烤鸡炉里面的灯光可别小看,那可是灵魂的存在!有时候看到自己的鸡在里面转,就像看到自己的孩子长大一样感动,是不是有点夸张?但那感觉真的是特别满足!清洁方面也得留意,别让油脂在炉子里发黑变糊,那可不好处理。
平时记得用湿布擦一擦,或者有些烤鸡炉还能拆卸零件清洗,别懒嘛,爱惜设备它才会更爱你的鸡!还有就是,有时候鸡腿可能会烤得比翅膀快,别急,这完全正常。
你可以适当调整炉子内鸡的位置,保证各个部位都能均匀受热,这样烤出来的鸡才会全面美味!对了,万一烤鸡炉出了点小故障,别慌张。
有时候可能是电线没插紧或者温度传感器有点小问题,别像小学考试那样急得跳脚。
检查一下细节,调整一下操作,很多时候问题就不翼而飞了!用完烤鸡炉记得关掉电源,这可是省电环保的重要一步!别让设备空转浪费电,烤鸡炉不但要烤鸡,还得有环保意识!商用旋转烤鸡炉是个厨房的神器,让你的烹饪更轻松更有趣。
掌握了基本操作,你就能轻松驾驭这个“烤鸡之王”,每天都能享受到新鲜出炉的美味,让顾客们都惊艳到没朋友!希望这些小贴士能帮到你,记得多练习多尝试,用心去烤,你的烤鸡必定会成为城市传奇!享受烤鸡炉带来的乐趣吧,祝你烤出一锅锅香喷喷的成功!。
禽类加工厂设备操作规程

禽类加工厂设备操作规程1、目的为了规范车间生产设备操作,提高设备完好率、延长设备使用周期,以确保满足其生产过程规定的要求。
适用于公司加工厂生产过程所用设备。
3、具体操作3.1挂鸭输送机3.1.1当进厂鸭子完毕,清理输送带;3.1.2生产结束后关闭电源开关。
3.2电晕机3.2.1使用前调整设置好击晕电压,按下起动按钮即可投用;3.2.2用完后关闭电源开关。
3.3浸烫机3.3.1开班前加满水,开启蒸汽阀门,当温度达到浸烫工艺温度时关闭气阀,开启搅拌风机;3.3.2使用过程中适时开启气阀调整水温;3.3.3生产结束后,放掉内部污水进行清洗。
3.4脱羽机3.4.1开班前根据生产鸭源调整脱羽机打毛位置;3.4.2按下电源按钮,投入使用;3.4.3生产结束后,用清水进行清洗。
3.5浸蜡机3.5.1开班前,开启蒸汽阀门,先将蜡油溶解;3.5.2使用过程中适量添加蜡油;3.5.3使用完关闭气阀,清理现场卫生。
3.6宰杀链条3.6.1根据生产产品工艺要求,调整吊链电机速度;3.6.2开启链条电机,即可使用;3.6.3使用完后,清理链条挂拍,按下关闭电机按钮即可。
3.7打包机3.7.1根据包装产品要求,装上打包带;3.7.2开启打包机电源按钮,根据包装箱尺寸,调整出带长度及加热时间;3.7.3将功能开关开在自动状态,及可使用;3.7.4使用完毕,关闭电源按钮。
3.8剥肫机3.8.1按下电源按钮,即可使用;3.8.2使用完毕,关闭电源,清洗机器即可。
3.9喷码机3.9.1使用前,开启电源按钮,预热30分钟;3.9.2根据产品需喷印内容,设置喷印信息后,即可使用;3.9.3使用完毕后,清洗喷头,关闭电源按钮即可。
3.10制冷机3.10.1开机3.10.1.1开机前首先查看前一班人员的操作记录表判断压缩机有无故障或异常情况;3.10.1.2开启油泵待油压大于排气压0.2-0.3MPa时方可开启压缩机(能量调节杆须处于减载位置);3.10.1.3按下压缩机启动按钮待压缩机电机的电流第二次转换后方可调平能量调节杆并同时开启压缩机吸气阀门10%左右;3.10.1.4开启对应机器的低循环氨泵进行供液循环,氨泵开启正常运转电流4A;3.10.1.5待压缩机器油温升至40℃以后方可调节能量,调节杆进行加载工作按10%次递增并视吸气压力状况缓慢开启吸气阀,并开启油冷却器阀门给予降温处理(视温度状况过量开启水阀门)避免因油温过低导致“液击”状况;3.10.1.6各种阀门须开启缓慢平稳操作,做到“勤看、细听、勤摸”第一时间发现并处理异常状况;3.10.1.7按能量和吸气阀同时每次 10%,逐渐缓慢递增直至能量加至 80%-90%吸气阀开启90%-100%时停止,机器已运转正常最高电流三150A,否则须减载调整;3.10.1.8做好值班记录表,记录压缩机运转状况。
餐饮行业烤鸭炉使用说明书

餐饮行业烤鸭炉使用说明书尊敬的用户:欢迎您购买使用我们的餐饮行业烤鸭炉。
为了您更好地使用和了解产品,我们特别提供本使用说明书,请您仔细阅读并按照指引操作。
下面将为您介绍该产品的使用方法和注意事项。
一、产品概述餐饮行业烤鸭炉是一种专业用途的烹饪设备,适用于餐厅、酒店、火锅店等各类餐饮场所。
本产品采用高品质不锈钢材料制造,具有独特的烹饪技术,可使食材在高温下均匀加热,达到理想的烤制效果。
该炉具有节能、环保、易于清洗等特点,是一款非常实用和耐用的设备。
二、产品使用方法:1. 灌注燃料:首先将烤鸭炉放置在通风良好的地方,确保周围没有易燃物。
打开炉门,在炉底灌注适量燃料,建议使用环保型燃气或液化气。
严禁使用易爆易燃物质作为燃料。
2. 预热炉体:将炉门关闭,打开燃气阀门,选择适当的火焰大小,点火并调整燃气控制开关,使火焰保持稳定。
预热时间视具体要求而定,一般需要5-10分钟,直到炉体温度达到要求。
3. 放入食材:预热完成后,打开炉门,将待烤食材放置在烤叉或烤架上,再次关闭炉门。
4. 定时烤制:根据食材的种类和大小,选择适当的烤制时间和温度。
注意不要过度烤制,以免食材烤焦或变得干燥。
5. 烤制结束:待食材达到预期效果后,关闭炉门和燃气阀门,等待炉体冷却后进行清洁和维护。
三、注意事项:1. 请在使用前检查烤鸭炉的燃气连接是否牢固,确保燃气管道没有泄漏情况。
2. 切勿在使用产品时触摸炉体以及燃气管道,以免造成烫伤或其他伤害。
3. 在烤制食材时,请勿过度靠近炉体,以防被热气和火焰烫伤。
4. 如需更换燃气罐或接通电源,请先将炉体断电并关闭燃气阀门,以确保自身安全。
5. 烤鸭炉应放置在平稳的工作台面上,以确保产品的稳定性和安全性。
6. 使用结束后,请将炉体冷却后进行清洁。
切勿用硬物或金属刷子清洁炉体表面,以免刮花或损坏不锈钢面板。
7. 定期对烤鸭炉进行维护保养,检查燃气管道、燃气阀门等是否正常。
如有故障或异常现象,请立即停用并联系售后服务。
烤鸭炉使用
一、烤制火候烤制是使鸭坯从生到熟的过程,这个过程主要应控制温度高低和成熟时间的长短,使辐射稳定,行话称为”看火候”。
火候对鸭坯烤制质量有很大的影响。
既不能欠火,也不能过火。
欠火,即烤鸭不熟,肌肉里含有血丝,颜色不正,无光泽,表皮不酥脆,香味不浓,鲜味不足,外形不饱满,入口饱满,入口含有血腥味。
过火,则烤鸭表皮焦糊、乌黑,失去光泽,不酥香,肉不嫩,稍有苦味,外形有塌瘪或破裂现象,因此,须正确掌握烤制火候。
二、燃料的选择传统的烤鸭制作采用明炉(即挂炉)果柴(亦称劈柴、果木)烤制法。
烤鸭的最佳燃料是枣木,枣木具有烟青火硬,火力均匀,耐烧等特点,它在燃烧时可分解出芳香特质,这种物质附着在鸭坯表层,可使烤鸭含有清香特色,如果没有枣木,选用桃,柿,杏,梨等果木作烤制燃料亦可,但一定不可使用带有异味的松,柏,椿等木柴,因为它们在燃烧过程中冒出的烟含有一股怪味,会污染鸭坯,并使烤鸭外形不美,使食者无法接受。
选好的果柴,可锯成60厘米左右的长段,即与炉门等宽或略短一点,圆木要破开,破成柴,尽量使柴粗些,过细碎虽易燃烧但火力不够均匀。
三、生火,添火和封火1.生火(即点火,烤炉生火亦称烘炉,掀炉)生火前做准备工作,将一根或两根粗木靠炉门或者两边放置,粗木的一头在炉膛内靠火挡与炉门垂直作为枕木(用炉灰埋住,使其不致烧掉)。
然后将长柴搭于枕木上,短柴可搭一端,左右交叉放置,堆放的木柴要高于火挡,至炉门三分之一高度处,各柴间应留有缝隙,底部有空气流通,使之易于燃烧,减少冒烟,生火时把扣火铁锅移开(扣的是炉口处前一日留下的炭火),用铁铲铺开炭火,然后按照生火方法将堆放好的木柴加入燃烧,生火的同时可清理车间卫生,取出炉油送交厨房提炼。
2.添火(亦称架柴)。
即在炉门口处加添燃料,使炉火处于持续燃烧状态。
添火要根据用火量加柴,如进餐时间用火量大,此时柴要加足,以保持炉内足免高的温度,使烤制顺利进行,另外,加柴要及时,要不断地观察底炭火,根据火力大小,确定架柴多少,使火焰稳定,防止温度偏高或偏低,一次加柴不可太多,要注意燃烧程度与通风情况,以免造成炉温下降或烧柴的浪费。
烤鸭炉操作保养规程

烤鸭炉操作保养规程前言烤鸭是火爆的美食,而烤鸭炉是烤鸭关键的设备之一。
因此,我们必须非常注重烤鸭炉的使用和保养,以确保烤出的烤鸭口感和卫生安全。
本文将详细介绍烤鸭炉的操作和保养规程,旨在全面提升烤鸭制作的质量和效率。
烤鸭炉操作规程1. 开炉在开炉之前,我们要检查烤鸭炉的设备是否正常,如炉内气流是否通畅,炉门是否严密,烤盘是否放置正确等。
同时,在烤鸭炉开启前,我们必须确保室内通风良好,燃气管道是否打开以及烤鸭炉前的安全区域是否清扫干净等。
如果这些条件已经被满足,接下来我们就可以开始正式操作了:•开启燃气阀门,并将火力调至中等或以上,以便快速升温•点燃火源,引燃烤鸭炉中的燃气•将烤龙头调至适当位置,使烤盘受热均匀,避免出现烤不熟或者烤糊的情况2. 挂鸭在炉温达到适宜的温度后,我们需要将半成品鸭挂在烤架上,以保证烤鸭的均匀加热。
事先应在烤盘上放置一块烤肉网,以避免鸭子直接接触到烤盘并产生不必要的卫生问题。
我们要用绳子将鸭子的两翅捆绑在烤架上,使鸭子挂直,并且翅膀不能碰到烤盘。
这样可以保证鸭子烤出的皮脆肉嫩,并且整个烤制过程更加卫生。
3. 烤制当鸭子挂好后,我们需要将烤架放入烤鸭炉内,让鸭子随着烤盘的转动均匀受热。
过程中,我们需要用毛刷将油涂在鸭子表面,以增强其口感和香味。
应根据鸭子大小和烤炉温度等因素,合理掌握烤制时间。
烤制结束后应及时关掉燃气和电源开关,并将鸭子取下。
4. 关炉处理完鸭子后,我们需要清洗烤盘和烤架,将其放置在干燥通风的地方,等待下一次使用。
同时,烤鸭炉内的油脂也需要进行清理和维护。
最后,我们要检查烤鸭炉的各项设备和接口是否正常,切断电源、关闭燃气和燃气阀门,并拧紧相关螺丝,以确保工作环境的整洁和安全。
烤鸭炉保养规程烤鸭炉作为一种长期使用的设备,其保养和维护显得尤为重要。
以下是我们需要注意的几点:•定期检查和清洗烤鸭炉的各部件,以确保其正常运转•定期更换燃气罐或检测燃气管道•定期检查烤鸭炉的电源和插头,确保电气线路的安全•定期更换烤架、烤盘等易损件,以保证设备质量•定期清理设备表面,保持其美观和卫生•定期涂抹防锈油,避免烤鸭炉生锈总结烤鸭炉在烹制烤鸭过程中发挥着至关重要的作用。
烤鸭炉介绍及使用注意事项

烤鸭炉介绍及使用注意事项炸鸭炉又称为燃气烤鸭炉,电热烤鸭炉,啤酒烤鸭炉,烤鸭炉,啤酒鸭烧烤炉,烤鸭炉是根据市场需求设计制造的新型节能型烤禽设备,适用于饭店、食堂及各种个体户使用。
烤鸭炉采用高质进口不锈钢板制造,耐高温,耐腐蚀,外形设计*,操作简便,耗气量低,效率高。
电热、燃气等多种的新型烤鸭炉,采用不锈钢原料,选装点火器,旋转电机,宽大耐温度钢化玻璃,视物一目了然,配装远红处加热管和远红外燃气加热器,双电机立式旋转烘烤,中空双层玻璃,宽大玻璃视窗,透明直观,适合烤制北京烤鸭,啤酒烤鸭,芝麻烤鸭,鸡腿,鸡翅,鸭脖子等产品,是理想的肉类烤制工具。
1.把前门打开,把随机附带的油箱放在锅下面的放油处,关闭锅下放油阀,用清洁精泡温水冲洗锅内污质,,处理干净,放水晾干,在关闭锅下放油阀,把油箱内水倒掉,放回原处。
锅内放入钢蓝,加入植物油约30kg。
2.按通电源开关灯亮,把温度选择钮设定到120℃,按通加温灯亮,锅内开始加温,温度若达到所设定的温度时,加温开关指示灯会自动熄灭,,此时即可把食物放进锅内,把锅盖压下,分别把锅边的两只螺杆合入螺孔,压下密封,以防漏气。
3.每日油炸完毕打开锅下放油阀,把油倒入箱内,让杂物自然沉淀到箱底,在把国内油污清理干净。
到第二次使用时,把沉淀物处理掉。
注意事项1、在使用燃气炸鸭炉之前,必须加装抽烟管,并将加装的抽烟管引到室外。
2、炸鸭炉所用气罐必须装随机配用的的家用减压阀,且各接头处不得泄漏气体。
3、炸鸭炉气罐周围不准接触热源烤之,更不准存放危险品,以免爆炸。
4、在炸鸭炉操作过程中,操作人员不准远离燃气炸鸭炉,若发现炉内的的燃烧熄火,应立即关闭点开关,关闭气源阀门,查明原因排除,吹尽炉内燃气气味后,再重新点火。
5、炸鸭炉使用时必须接好安全保护接地线。
6、在使用燃气炸鸭炉的房间内,必须通风条件很好。
电烤炉说明书
卞小芳英语101 1031015电烤炉说明书一、特点该电烤炉是根据我厂多年生产经验、对国内外同类产品比较、综合各电烤炉优点开发的新型高效节能电炉,烤制品味道纯正。
具有节能安全、卫生方便、提温快、性能稳定、耗电少、运行成本低、使用寿命长、操作维护简便等优点,其烘烤质量均达到食品卫生标准及国际出品标准。
二、用途及工作原理本机主要用于食品加工业,豆类、果仁类、坚果类(如花生、乳白米、水煮五香花生、瓜子、杏仁、板栗、蚕豆)等降低水分烘干、烤制熟品。
本机以电热管为热源,采用回转滚笼、热传导、热辐射原理,设有自动控温装置;以热空气为干燥介质,将热能作用在被烘烤物体上,在烘烤过程中被烘烤物在笼内由推进装置不断推进,形成不间断循环,使之受热均匀,有效的保证了烘烤质量。
三、操作使用注意事项1、开机前应检查电源、传动部分是否正常,然后按动正转电钮使转笼空转3-5分钟,一切无异常时开启炉温开关升温,在升温过程中,转笼不能停止转动以防高温下变形。
2、一般加花生果75公斤左右,花生米100公斤左右。
3、每更换花生米或花生果的原料时,因所含水分不同,应先烤1-2炉摸出数据后,才能成批投入生产。
4、当工作结束时先关掉控温开关,转笼不停炉温下降到50度左右时方能使转笼停止,以防高温下静止受热变形。
四、维护及保养1、开机前应检查转笼的电控系统是否正常,转动部分的螺栓是否松动,温控仪显示是否正常,完好时(开启)升温。
2、转笼炉的减速机,轴两端轴承,应按时检查注齿轮油和润滑脂以防止缺油损坏。
3、转笼底部通过抽屉应及时检查,清除所聚集的分泌灰渣等杂物,防止冒烟着火污染被烘烤物。
4、如有新设计产品,另行通知。
Introduction of an Electric Oven1.FeaturesAccording to the many-year production experience of our factory, to the comparison of domestic and foreign similar products, we have developed the electric oven combined with advantages of various electric ovens, which is new and efficient and the baked food tastes pure. With the advantages of energy saving, safety, sanitation and convenience, rapid temperature raising, stable performance, less power consumption, low running cost, long service life, convenient operation and maintenance and other advantages, the baking quality meets the food hygiene standards and the international product standards.e and Working PrinciplesThis machine is mainly used in food processing industry, beans, nuts category, nuts ( such as peanuts, white rice, boiled spiced peanuts, melon seeds, almonds, chestnut, broad bean) to reduce the water drying and to roast cooked products.This machine with electric heating tube for the heat source adopts the rotary cage, heat conduction and heat radiation theory, with automatic temperature control device, takes the hot air as drying medium and puts the heat effect on the baked object. In the baking process, the baked object is advanced ceaselessly by the propulsion device in a cage. So it forms a continuous loop which guarantees uniform heating and the baking quality efficiently.3.Operation Points for Attention in Use(1), Check whether power and drive parts are normal, then click on button to make the rotating cage idling for 3-5 minutes. With nothing abnormal, then open temperature switch to increase temperature. In the heating process, you cannot stop the rotating cage in case of deformation at high temperature.(2), Generally 75 kilograms of peanut fruit or 100 kilograms of peanuts are allowed.(3), During each replacement of peanuts or peanut fruit raw materials, due to the moisture of different, you should first baked 1-2 furnace touch and work out data, then put onto mass production. (4), When finished, turn off the control switch. The rotating cage does not stop until the temperature dropped to 50 degrees in case of static thermal deformation under high temperature.4.Maintenance(1), Check whether the rotating cage control system is normal, the rotating part of the bolt is loosened, temperature control instrument display is normal, intact (open ) warming.(2), Check the rotating cage furnace speed reducer and shaft bearings at both ends in time, and inject gear oil and lubricating grease to prevent damage of oil starvation.(3), Check the rotating cage bottom through the drawer in time, clear the aggregation of secretory ash and other debris in order to prevent smoke polluting the baked.(4), If the new design product comes out, we will inform you.。
Bakers Pride CTB-72R GS 烤烟炉说明书

BAKERS PRIDE
Figure C
122
9
111
7
55
Burner / Accessories / Supports
100 3
1166 1144
155 113
4
11
88
6
22
2200
188
177
211 199
222
Item Part # Description
1 R3136X Hood Orifice #54 (LP) 2 R3130X Hood Orifice #44 (Nat) 3 L5077X Burner, Center Feed 4 R3032X Gas Valve 5 S1094X Knob, Gas Valve 6 R3128X Gas Valve (used w/Pilot Safety) 7 S1301X Knob, Gas Valve, CE (used w/Pilot Safety) 8 G5064K Pilot Bracket (used w/Pilot Safety) 9 M1359X Pilot Burner (used w/Pilot Safety) 10 M1358X Thermocouple, 10" (used w/Pilot Safety) 11 G5028U Burner Support Assy, 17" /2
30 G5175K Control Panel, CE-72 31 U1324A Control Panel Overlay-72 32 U1329A Control Panel Overlay, CE-72 33 R1123A Manifold-72 34 G5163K Front Trim-72 35 G5167K Back Trim-72 36 G5043K Top Grate Support, 22 1/2" /3 37 G5155K Outer Back-CTB72 38 G5054K Outer Side, Left-CTB 39 G5055K Outer Side, Right-CTB 40 G5179K Drip Pan, 28 1/2" /1 41 G5068K Drip Pan, 32 1/2" /1 42 S1014Y Legs, 4" (Standard) each 43 S1014X Legs, 4" (Standard) Set/4 44 G5136K Work Deck-72 45 G5125U Front Brace Assy-72 46 G5284K Work Deck-72, 10" 47 G5285U Front Brace Assy-72, 10" 48 G5314K Work Deck-72, 12" 49 G5315U Front Brace Assy-72, 12" 50 T1209U Breakfast Griddle, 11"W (Optional) 51 T1208U Wire Rack, 33" /2 52 G5131U Left Wire Rack Guide Assy 53 G5132U Right Wire Rack Guide Assy 54 G5180U Smoker Box Assy (No Drawer) 55 G5187U Drawer, Smoker Box 56 G5182U Log Support (Optional) 57 G5186K Bottle Holder, RH (Optional)
- 1、下载文档前请自行甄别文档内容的完整性,平台不提供额外的编辑、内容补充、找答案等附加服务。
- 2、"仅部分预览"的文档,不可在线预览部分如存在完整性等问题,可反馈申请退款(可完整预览的文档不适用该条件!)。
- 3、如文档侵犯您的权益,请联系客服反馈,我们会尽快为您处理(人工客服工作时间:9:00-18:30)。
C Y直光烤鸭炉说明书 Company number【1089WT-1898YT-1W8CB-9UUT-92108】C Y-850型燃气木炭两用烤鸭炉使用说明书广州金博机械有限公司燃气木炭两用旋转烤鸭炉操作要领一、开始工作时,首先打开门,后再点火。
二、煤气瓶必须为低压阀(往上松,燃气缩小,往下压,燃气加大),如果压力太大(会造成很难点燃火,用木炭加温时,必须先拿出炉胆,把木炭点燃后,无烟再放进机内)。
三、有时气压正常,点火难燃火,原因是点火器嘴和通气管不正,用手轻轻按一下点火器嘴即可。
四、点火时请把双门打开,关门点火是不允许操作的,经过多次点火不着,炉内存有大量煤气,如果点着了,也会将门自动打开,造成不安全因素,不要把头伸进炉内,造成烧伤。
五、本机点火开关,铜管离点火嘴比普通的家用煤气炉长许多,所以再点火是将开关多打几次,火点燃不能马上松手,等燃烧火有点红,才能松手,敬请客户仔细阅读。
CY-850型燃气木炭旋转烤鸭炉一、产品特点:采用进口不锈钢制成,具有耐腐型强,选用多种燃气及代号,液化气(Y)燃气(T)煤制气(尺),独特设计,操作简便,节约能源,而且比电烤能源消耗35%,烤出食品更香更佳。
按企业标志检验合格玻璃幕一目了然。
而且体积小,装有方向脚轮,因此搬动轻方便。
二、产品技术性能和参数:耗气量(小于)m3/n0.3热负荷7km电压220v减速电机60w电机转速40y/min照明150w烤制温度150—250度烤鸡时间(仅供参考)min,28—45烤鸡数量9—24烤桃酥min12桃花生min15面包min12蛋糕min9月饼min12三、结构性能原理和烘烤系统1、由陶硅散热膜和耐热金属网组成燃烧器。
2、红色软胶管外套有耐温热锌管组成供气管。
3、由接气阀门与煤气自动点火开关供气。
四、烤食品工作系统和性能原理:1由减速电机直接与转轴、转圈、不锈钢钩子组成旋转能使食品烤的均匀。
2、本机使用和家用煤气灶大致相同,把鸭挂到钩子上,然后挂转圈中间(一层12只)。
3、接通电源,接受供管,打开气源阀门即开液化气罐阀。
4、按进开关逆转90角度,发出啼嗒一声,开始弱火燃烧,直到火烧旺时放开关。
5、即按旋转开关电机电机转轴盆圈旋转。
6、烤蛋糕,月饼、桃酥花生、面包等食品烤类同样操作。
(配模盆外加)7、停止工作时关闭气源阀门和电源开关,观察机器关闭完毕,操作人员方可离开(以免意外)。
五、注意事项:1、用户收到机器后,即试机前要检查绝缘状态,安装地线,周围稍留空隙,以免意外。
2、并加装抽烟管,将加装抽烟管。
引到室外,以便室内空气畅通。
3、操作时各处接头和阀门不得渗漏气体,确保人身安全,气罐周围不准接近热源,更不准存放,危险品以免爆炸。
4、在操作过程中,操作人员不准远离燃气烤炉,如果发现炉两侧燃烧器、熄火,首先液化气源关闭,即开烤炉门1-2分钟(防止炉内液化气)再按程序操作。
5、此烧烤炉因装有耐温玻璃,操作人员不留心损坏玻璃,去公司销售点按出厂价维修。
6、烤炉两侧每侧装有陶硅散热膜,伍粒用胶水和石膏粉混合,粘成一体,如果用户试用过程中,发现接头盒边缘有漏气,会发生熄火现象,取下金属网用石膏粉和胶水重补即可。
六、制作方法及配方:(一)、宰杀→烫毛→拔毛→开膛→挖内脏→水洗→跺小脚→煮制→填料→整形→上色→烧烤→刷油。
(二)、配料标准按体重1公斤的鸡计算,水1.2市斤,其它用量为:黄酒10克,食盐50克,党参2克,小茴香2克,大茴香(八角)8克,花椒2克,陈皮1克,甘草3克,丁香1克,砂仁0.5克,白芷0.5克,豆蔻0.5克,山奈0.5克。
蜂蜜12克,鲜姜2片。
香油(芝麻油)5克,香菇1朵,大葱1株,食盐夏天要多加些,冬天少加些。
三、把剁掉双脚的鸡白挂钩上凉净待熬1、煮制:黄酒、鲜姜、大茴香、小茴香、花椒、陈皮、桂皮、丁香、砂仁、白芒、豆蔻、党参、山奈、甘草等都装入布袋中,缝上袋口,作为料包放在少量的水中浸泡半小时以后反复煮熬,便成料汤,料包可煮二次,直至料袋粘软,闻之无香味时弃掉。
(待煮出料汤后加食盐)2、浸泡:将料汤冷却到常温,到入上口直径大一些的缸内然后将净膛鸡浸泡在此料汤内,时间为2小时左右目的将料汤味浸入鸡体内。
3填料:将浸泡好的净膛鸡取出,在腹内放入香菇,大葱鲜姜、大茴香、按比例1公斤鸡,取出食盐50克,味精5克,放入碗中搅拌均匀,然后在鸡胸胸内擦上已配好的食盐和味精,用右手指伸入鸡胸,以使佐料进入鸡腹内,外表皮全部擦一次已配好的食盐和味精,擦时动作要轻,擦要均匀,全部擦遍后,放入面盆中腌制10-15分钟(目的将佐料全部浸透鸡肉中间),然后在开口处用铁针(缝麻布针或自行车钢丝制成针)缝好,目的是顾客购鸡后开膛出香气。
4、整形:将净鸡膛的双翅分别在背后,鸡头夹在翅下,用挂鸡钩有腹向鸡背的双翅下挂好。
5、上色:取一个铝锅(放入水时将一只直立的鸡体能完全浸住为准),将水烧开,再加入蜂蜜(或用糖稀,不宜太多),然后再加入少许色素,使之呈淡紫红色(5公斤水加10克色素左右)并搅拌均匀。
将整形好的鸡用手拿住挂鸡钩,将鸡进浸泡约30秒钟左右取出来,使鸡体周围外观颜色均匀一致即可(此汤要保持在95-100℃。
)6、烤制:先将机器接上电源,把定时器拔到直通位置,便可预热加温,然后将定钮设在250℃,当机器温度升到250℃时,关闭开关,把已备好的鸡挂在箱内挂钩上或放在烤禽篮内,然后关机门,拔通开关,定时拔到20分钟(为确保安全同时以手表计时)箱内升温,拔开箱背排气孔,5分钟关闭箱背排气也,使水气和油烟排出,在250℃温度下,烤20分钟,关闭开关。
便可出炉。
(注:计提烘烤时间和温度克根据自己实际情况而定,因鸡有大小)。
7、刷油:将烤制好的鸡,拔出铁针,然后用毛刷焦香油(芝麻油)均涂鸡身,以防鸡肉干缩,减轻分量,并可延长存放时间,增加香味和关泽,保持颜色鲜美,将涂好有的鸡,胸脯朝上摆在盆里,即为成品。
(四)、产品特色鸡体完整,色泽均匀,呈枣红色,有鸡香味,皮脆柔嫩,酥而不散,清香油润,入口不腻,回味尤佳。
五、烧烤鸭的配料秘方及工艺1、配料标准(按鸭白500克计算):水600克黄酒20克食盐100克蜂蜜24克生姜5片香油10克党参4克小茴香15克花椒4克陈皮2克甘草6克桂皮6克丁香1克砂仁1克豆蔻1克山奈1克肉精粉(进口)少量。
2、汤料煮制:将全部中药及生姜等装入布袋,扎紧袋口放在少量水中浸泡半小时,然后加入蜂蜜、香油、再加适量水反复煮熬,便成汤料。
中药料包可煮三次,直至料袋粘软,闻之无香时弃掉(注意:须待锅沸腾煮出香味后加入黄酒、食盐)将汤料冷却至常温,倒入口径大一些的缸内,随时可用。
3、浸泡入味方法:鸭去内脏,收拾干净,稍微晾干,放在案板上,从小腿骨节处(膝盖骨下处半厘米)掉双脚,然后用刀子、剪刀或粗铁丝将鸭腿及肚下鸡肉丰厚的部位割开一道口子,或用铁丝捅开一个个洞孔,使汤料易渗入鸭体,也容易炸透。
浸泡时间一般为2-3小时,冬天要浸长久一些。
如果方便门,也可直接将鸭白放在汤料中用文火煮,烧至鸭肉半熟即可,千万不可烧太熟,否则影响风味。
下面介绍几种炸制食谱:(一)家常烤鸭主料:鸭白配料:党参大茴香小茴香花椒甘草桂皮丁香砂仁豆蔻山奈食盐味精生姜黄酒等。
制法:将鸭白洗净、晾干,放在佐料的汤汁里浸泡2小时(或用文火煮10分钟至半熟),然后装入网篮内放进炸锅炸制即可。
炸锅温度:200℃。
时间设定:10分钟。
特点:色泽金黄、皮脆肉嫩、味道鲜美(二)麻辣烤鸭佐料:整鸭白或鸡腿配料:黄酒食盐蜂蜜大茴香小茴香肉桂花椒丁香豆蔻砂仁白芷山奈黑胡椒白胡椒辣椒粉面料等。
制法:将黑胡椒、白胡椒、辣椒粉、面粉等研制成粉状。
把洗净沥干的鸭白切成六大块。
经浸料入味(或文火煮入味)的鸭块均匀地粘上粉状果料,然后装进网篮即可入锅炸制。
炸锅温州:200℃。
时间设定:7分钟特点:鲜香、麻辣。
(三)十得醉烤鸭主料:整鸭白配料:花生仁去皮核桃仁白芝麻黑芝麻大蒜小茴香大茴香党参花椒陈皮桂皮丁香砂仁白芷豆蔻山奈生姜白糖味精香油面粉等。
制法:把花生仁、核桃仁、黑芝麻、白芝麻分别下锅炒香后研成粉末,再将大蒜、白糖、味精、香油、面粉拌均匀待用。
将洗净浸料(或微煮)入味后的鸭白,全身内外抹遍调料,略腌片刻,然后装入网篮,入锅炸制。
炸锅温度:200℃时间设定:10分钟特点:色泽金黄、鸭白香嫩、五味俱全。
(四)烤鸭大腿主料:鸭大腿(或大鸭块)配料:胡椒粉葱姜蜂蜜党参小茴香大茴香陈皮桂皮丁香砂仁豆蔻白芷山奈等。
制法:净鸭腿浸料入味后,再用葱、姜、蜂蜜、味精、胡椒粉等佐料在鸭腿四周擦抹均匀,并使略腌入味,即可入锅炸制。
炸锅温度:180℃时间设定:7分钟。
特点:皮脆肉嫩、味道鲜美、色泽金黄。
(五)烤鸭翅主料:鸭翅膀配料:葱姜胡椒粉料酒味精白糖大茴香小茴香丁香桂皮砂仁豆蔻白芷山奈等。
制法:将净鸭翅用文火在料汤内煮十分钟捞出。
葱、姜汁、胡椒粉、料酒、味精等调成汁,将鸭翅在料汁中拖出蘸匀,即可入锅炸制。
炸锅温度:180℃时间设定:7分钟(六)烤啤酒鸭主料:整鸭白配料:爆烤鸭香精5067(详情请阅香精说明书)六、保寸时间:夏季2天,冬季5天(放在冰箱里可延长存放时间)此配料秘方及生产工艺是本厂师傅祖传秘方,由该配方烤制的烤鸡,具有独特风味,故轰动北京、上海、天津、四川、云南、杭州、武汉、郑州等大城市。
