Cbox 插件
Atom 插件推荐
Atom 插件推荐Atom是专门为程序员推出的一个跨平台文本编辑器。
具有简洁和直观的图形用户界面,并有很多有趣的特点:支持CSS,HTML,JavaScript等网页编程语言。
它支持宏,自动完成分屏功能,集成了文件管理器。
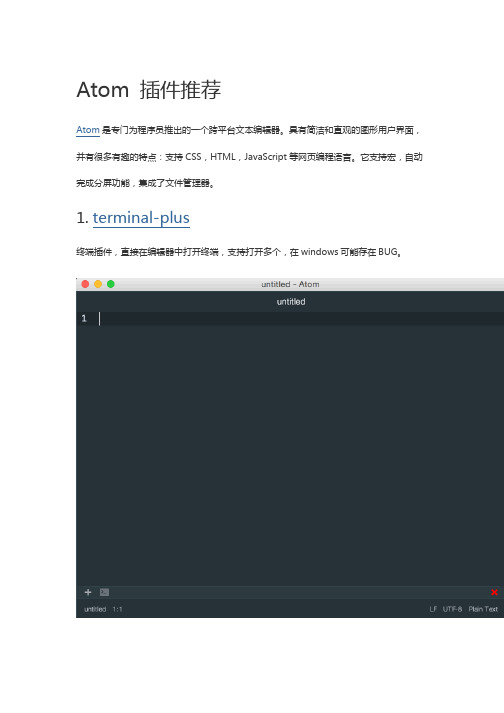
1.terminal-plus终端插件,直接在编辑器中打开终端,支持打开多个,在windows可能存在BUG。
2.color-picker取色工具3.pigments编辑器中直接查看代码所代表的颜色,工具虽小但是很实用。
4.minimap仿sublime text的缩略代码查看,想找的地方一目了然。
5.highlight-selected选择某段代码自动高亮相同代码6.minimap-highlight-selected 实现minimap高亮选择内容,需安装前2个插件7.emmetHTML开发必备神奇,大大提高你的工作效率官方地址及演示:http://docs.emmet.io/8.docblockr智能代码注释,让注释更有规范9.atom-ternjs支持多种语言代码补全,例如:ES5, ES6 (JavaScript 2015), Node.js, jQuery, Angular …10.atom-beautify支持多种语言格式化,例如:HTML, CSS, JavaScript, PHP, Python, Ruby, Java, C, C++, C#, Objective-C, CoffeeScript, TypeScript, Coldfusion, SQL …11.linter代码错误提示,需要配合相应的规则插件进行使用,例如:linter-eslint12.linter-eslint根据eslint规则进行js代码检验,需要安装linter插件13.project-manager快速打开储存的项目14.autocomplete-paths 自动补全文件路径15.atom-react-native-autocomplete react-native代码补全插件nguage-javascript-jsx/language-babel 代码高亮,支持ES6,ES7, React JSX…17.es6-javascriptES6代码快捷键18.react-snippetsreact代码快捷键19.monokai(主题)monokay主题。
有哪些方法可以去到网页小广告

有哪些方法可以去到网页小广告我们浏览网页时候,最不想看到的就是满屏的小广告,一不小心点进去甚至还会中毒,有没有办法去掉呢?教你通过两款小插件终结浏览器网页和视频广告,清爽上网!那今天小编就教大家如何通过结合两款小插件来实现浏览器网页和视频零广告,轻松上网。
这里以Chrome浏览器为例说明。
在Chrome浏览器中,我们打开Chrome网上应用店。
PS:如果你所在网络无法直接访问应用店,可以先在浏览器安装上一款名为“谷歌访问助手”的拓展插件,安装并激活后就能轻松访问应用店了。
①.在应用店里面搜索adblock,在搜索结果页面中我们将“adblock plus”点击右侧的添加按钮添加进来。
②.接着继续搜索另一款广告拦截插件“广告净化器”并将其添加进来。
在这里或许有些朋友可能会有疑问,adblock plus已经是很强大了,为什么要安装两款?adblock虽然是拦截广告能手,但是它主要的功能还是发挥在页面广告拦截上,而对于视频广告的拦截需配合广告净化器来使用,这样便能实现网页和视频零广告。
先确保我们刚所安装的拓展程序是在运行当中,简单的一个判断方法就是在地址栏右侧有它们的拓展图标显示,或者右上角设置——更多工具——拓展程序可以查看拓展是否启用状态。
接下来我们就是要看下这两款插件结合应用后它的去广告能力了。
先来看下广告净化后的图对比文章开篇时候首图,这时候我们可以看到页面非常的清爽简洁,不含任何广告成分了。
接着再来看下它们两者结合对视频广告的拦截效果吧。
这里以主流视频网站爱奇艺为例说明。
打开视频后可以看到会直接跳过冗长的广告而直接进去视频播放。
这时候你可以试验一下的,单单启用adblock而停用广告净化器再来播放视频,结果就是视频广告无法拦截。
关于如何通过结合两款小插件来去除浏览器页面和视频广告的方法小编就介绍到这里了,如果你跟小编一样,厌恶各种弹窗广告,那赶紧动手起来,终结广告吧!相关阅读:电脑维护小技巧Part1:不要用电池玩游戏校园里由于空间和供电的关系,笔记本也就成为了宿舍里游戏的主力平台。
声音视频素材的获取与处理详细
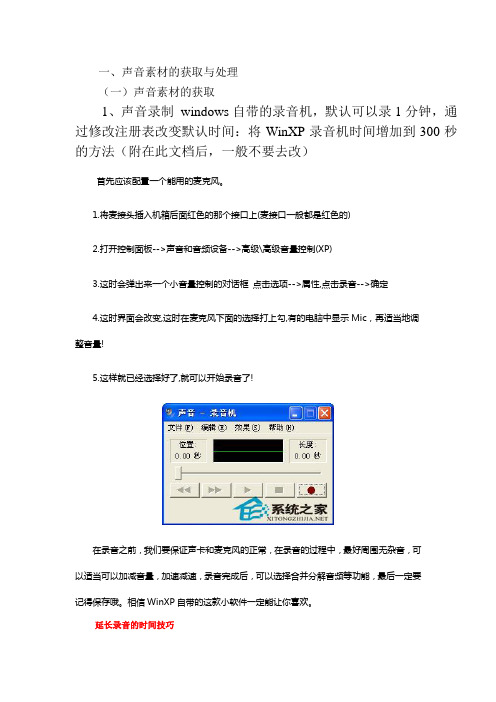
一、声音素材的获取与处理(一)声音素材的获取1、声音录制windows自带的录音机,默认可以录1分钟,通过修改注册表改变默认时间:将WinXP录音机时间增加到300秒的方法(附在此文档后,一般不要去改)首先应该配置一个能用的麦克风。
1.将麦接头插入机箱后面红色的那个接口上(麦接口一般都是红色的)2.打开控制面板-->声音和音频设备-->高级\高级音量控制(XP)3.这时会弹出来一个小音量控制的对话框点击选项-->属性,点击录音-->确定4.这时界面会改变,这时在麦克风下面的选择打上勾,有的电脑中显示Mic,再适当地调整音量!5.这样就已经选择好了,就可以开始录音了!在录音之前,我们要保证声卡和麦克风的正常,在录音的过程中,最好周围无杂音,可以适当可以加减音量,加速减速,录音完成后,可以选择合并分解音频等功能,最后一定要记得保存哦。
相信WinXP自带的这款小软件一定能让你喜欢。
延长录音的时间技巧单击“开始”菜单,依次选择“开始→程序→附件→娱乐→录音机”,就会启动录音机程序,准备好你的麦克风,只要点一下录音键,录音过程就开始了,快对着话筒尽情地说和唱吧,不过,系统提供的默认录音时间是60秒,所以当录音进行到60秒时就会自动停止,再次点击录音键,时间自动增加60秒。
2、网上搜索下载(酷我音乐盒、百度音乐客户端)中国音乐网(/)3、从视频文件中提取背景音乐:狸窝全能视频转换器(打开输出预置方案选框的右边高级选项面板,选择去掉【视频】勾选即可)4、用语音朗读软件(语音朗读精灵、朗读女、用WPS文字但生产声音文件时要收费)把文字变成语音(二)声音的处理1、windows自带的录音机剪辑、合并(编辑—插入)、混音、调整音量、调整速度、添加回音2、goldwave软件的使用(去除声音噪音、声音的截取)二、视频的获取与处理(一)视频的获取:1、56网、酷6网、土豆网、暴风影音、PPTV 、cntv-cbox网络电视等常用视频播放软件中视频的搜索与下载/watch/05805874914767281027.html?page=vid eoMultiNeed(苹果手机用户的行踪记录)2、对于不是主流视频网站的视频,我们可以通过查找临时文件夹的方式寻找视频,利用浏览器的历史文件/flash/story/1480.html(铁杵成针)/login(继教网学习)浏览器在线观看,此时视频是以临时文件的形式保存个人数据或者临时目录中,具体目录可以通过如下方法查找:a:在IE中点击”工具“中的”Internet选项”,进入“Internet选项” Internet属性界面。
bx_limiter 真实峰值插件手册说明书
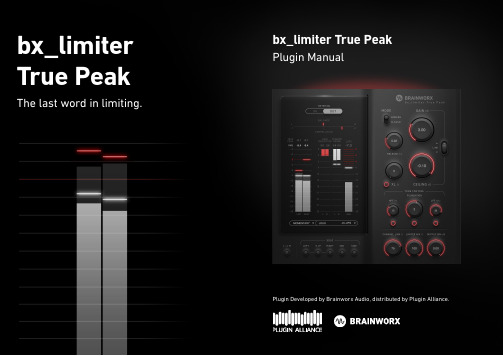
Intro - One limiter to rule them all.The new bx_limiter True Peak is the first true peak limiter you will love listening to: It took brainworx & Dirk Ulrich over 2 years to achieve the perfect blend of a tighter overall sound, punchy transients, solid bottom and a stable stereo image. All this while giving you the option to dial in more character or clarity.This is the limiter to end all limiters: Be it on a master bus or on tricky to mix drums, the bx_limiter True Peak has your back.Using brainworx Selective Oversampling and an advanced look-ahead technology, the bx_limiter True Peak is better sounding than all previ-ously available limiters: Perfect transients, no clipping, no artifacts, no distorsion! This is why you can crank this baby up to 11 and it will still sound solid.And to make sure it lives up to the hype, brainworx consulted various top mastering studios making this limiter probably the last you will truely ever need.And did we mention it has a sleek new user-interface that you can even customize? Yes it does!Pro TipYou can use the bx_limiter True Peak in combination with bx_masterdesk and tools like ADPTR Audio Metric AB or SPL HawkEye to get a perfect in-the-box mastering solution! For even more mastering goodness, whynot add the HG-2MS tube saturation plugin?In UseThe bx_limiter True Peak is a very versatile plugin with an easy-to-grasp parameter-set. A lot goes on in the background so you can focus on your task.The limiter plugin provides two disctinct Limiter Modes:CLASSIC is the original and safe behaviour of the limiters like the classic bx_limiter, while MODERN being a faster and louder approach more suited to towards genres with harsh transients like EDM.The Tone Control Section (HPF, Foundation, LPF) offers you a wide variety of filter controls while the Foundation feature lets you fine tune the frequency response and general coloration of the sound. All these features give you a clear and punchy sound while never sounding harsh and keeping things in control.We also have your monitoring needs covered: Featuring M/S Solo (mid-side), Left/Right Solo and a highly accurate output meter, gain reduction metering, true peak metering and industry compliant loudness metering to evaluate your final output.OverviewAlthough it was designed as the ultimate mastering limiter, the bx_limiter True Peak can also be used on single tracks to get more balance and control. Especially with drum tracks or guitar busses it can really deliver some heavy hitting bottom end with great overall volume without distortsion or changing the overall sonic signature.The Foundation control even allows you to further shape your sound towards the character you want: Turn it up to enhance the bass response. This is very useful for kick drums as well as bass tracks.With a flick of the MODE switch you can turn on the modern mode which features even faster response times and is well suited for more modern genres of music like EDM or Hip-Hop.The metering section allows you to precisely monitor the output.And last but not least, the brand new brainworx user interface has been designed in order to accommodate a modern and easy workflow and looking good while doing it. Also included is the new UI Color feature which offers 9 different colors to change the controls and meter indicators according to taste. Altough we definitely like red the most.Features .1GainGain increases or decreases the input signal to bring the level towards the threshold and works in conjunction with the ceiling control.2CeilingDetermines the True Peak level to which the processed signal will be limited. 3LinkThis powerful feature lets you adjusts Ceiling and Gain Boost proportio-nally from just a single control.4Limiter ModeCLASSIC is a safe and less punchy mode, whereas MODERN is a faster, more punchy mode, suited very well for many modern music genres.1342The …Link” knob is a another powerful new feature that allows you to lets you adjusts Ceiling and Gain Boost proportionally from just a single control. This creates some powerful options to maximize loudness while maintaining an even sounding mix.Additionally the added XL Saturation control will not just help to get tighter sound and add colour to the mix but also to get vocals, bass, acoustic guitars and many other elements sticking out in mixes without having to raise their volume in the mix.5Limiter MixThe Limiter Mix parameter continuously blends in the dry input signal with the processed output of the limiting stage.Please note that clipping can occur with Mix values below 100% (if the INPUT level is clipping already, for example).6Output DimThe Output Dim defines the final output level of the plugin.Use this control if you want to safely hit a (or multiple) True Peak target value(s), while retaining the same dynamics and sound determined by the other Parameters.*Some streaming services or TV stations may require masters to be delivered at -1dB peak. In this case dialing back the OUTPUT DIM to -1dB will do the trick without altering the limiting and sound of the signal.21ReleaseDetermines the Release time which the limiter takes to smoothly return from a limiting state to applying no gain reduction.2XL ActiveActivates or deactivates the well-known XL Saturation section.3XL Saturation This parameter determines the amount of XL Saturation blended in to the signal before it hits the limiting stage. 4Channel LinkChannel Link sets the continuously variable linking of the channels in the limiter’s sidechain. With the control set to 100%, the sidechain of both channels is fully linked, so that the channel with highest level determines the gain reduction for both channels. This will keep the stereo image intact.With a fully unlinked sidechain (0%) the limiter will work independently for both channels, each channel just affecting the gain reduction for itself.*The DEFAULT setting and our recommendation for this parameter for music mastering is 75%3154614 6532Tone Control1High-Pass ActiveActivates or deactivates the high-pass filter, so it only affects the signal when you want it to.2High-Pass FrequencyThis control determines the Frequency of the tone shaping high-pass filter that feeds into the limiter section.3Low-Pass ActiveActivates or deactivates the low-pass filter, so it only affects the signal when you want it to.4Low-Pass FrequencyThis control determines the Frequency of the tone shaping low-pass filter that feeds into the limiter section.5Foundation ActiveActivates or deactivates the Foundation feature, so it only affects the signal when you want it to.6FoundationA tone shaping tool that increases or decreases the foundation of your signal before hitting the limiter stage.This parameter lets you fine tune the frequency response in accordance to changed perception that might come with the limiting process.With the Foundation control you adjust the overall tonality of your mix (Low End vs Treble), and set a nice bass foundation which you will build your master upon. Higher values give you a more bass heavy foundation which sounds pretty BIG for most genres.Pro TipFoundation can be used to really alter the character of a track. Maybe even add it on a kickdrum to give it some extra heavy bottom end?231 Metering1True Peak L+RShows Peak values as True Peak measurement in dBTP according to EBU/ITU standards. The readout will hold the maximum True Peak value that occurred in the signal until the meter is manually reset.Switches between input or output signal with Meter Position control. Click anywhere on the metering area to reset the meters, including the maximum True Peak and maximum Momentary Loudness value.The True Peak (dBTP) measurement is a standard specified by EBU R 128 and ITU BS.1770 resolutions. It is used to anticipate real world Intersample Peaks (ISPs) that can occur when converting back from the digital to analog domain. As the technical of True Peak detection is not rigidly defined, there will be some variance between dBTP values in meters by different manufacturers.2RMS L+RShows RMS value of the signal selected with the Meter Position Control (input/output) 3Gain Reduction L+RShows the amount of gain reduction in dB that the limiter is causing.4Dynamic Range L+RDisplays the dynamic range or crest factor of the signal at the selected position (input or output). This is a helpful tool to determine the density and dynamics of the material in addition to the newer standardized loudness measurement.5LoudnessDisplays the percieved loudness of the selected source signal (input/ output) in LUFS (Loudness Units Full Scale) according to EBU/ITU recom-mendations. The selected Loudness Target determines a white “safe zone” and red overshoot range to monitor the real time loudness.The time scale can also be switched between momentary with a window of 400ms or short term, averaging over 3 seconds. With momentary selected, the readout will hold the maximum momentary value that occurred in the signal until the meter is manually reset.4 51BalanceThis meter shows the position of the signal in the stereo field.2CorrelationThis meter shows the correlation of the left and right channel. +1 means both sides are completely in phase and there is no difference between listening in mono and stereo. The Track has no stereo width.0 means there is the same amount of …In-phase“ signal and …Out-of-phase“ signal in the left and right channel. The track fills the complete stereo field, while still being mono-compatible.-1 means the left and right channel have opposite phase and would cancel each other out when listening in mono so in other words the track would not be mono compatible at all. Thematerial is positioned outside of the stereo field.3Loudness Time ScaleThis menu provides the option to switch between the 2 EBU recommended scales for real time loudness measurement.2341564Loudness TargetThe Loudness Target menu offers different options to add a visual guideline to the LUFS meter depending on the purpose and destination of your material. The custom option lets you specify a target loudness to aim for.5Meter PositionSwitches the position of the metering section (naturally excluding Gain Reduction) in the signal chain. This determines whether you are viewing the corresponding values for the input signal before the limiter section (In) or the output signal after the limiter section (Out).6MonitoringThe Solo buttons control which part of the output signal is monitored. Either one of the channels L, R, as well as the mid (M) or side band (S) can be selected.With a second click on the active button, the current solo option will be deactivated and return to default Stereo monitoring.Pro TipFor a fully featured EBU-mode compliant loudness meter, use ADPTR211Stereo SwapThe Stereo Swap parameter will invert the channels of monitored Stereo signal, when the “L<>R” button is active. This can be useful to better evaluate the stereo balance or possible flaws of a mix and listen to the same material with fresh ears. Only affects the signal with Monitoring control set to Stereo.2S.I.P. - Solo in PlaceWith the “In Place” control activated, the output signal from L or R solo settings (see Monitoring parameter) will appear in the respective speaker only, otherwise the signal will be centered.Top Toolbar1PowerThis serves as an additional input gain control.2Compact ModeThis feature turns off the Metering section of the plugin.3Undo / RedoYou can undo and redo changes you made to the controls of the plugin at any time. The Undo / Redo will work for as many as 32 steps.4Settings (A/B/C/D)The plugin offers four internal settings (A/B/C/D) which will be stored with every preset. So, one preset can contain up to four settings. You may use similar settings with more or less compression in one setup / preset.Now, the SETTINGS can be automated in your DAW! This way it´s possible to use different sounds for your lead vocals or drums in various sections of the song. Automate the A/B/C/D settings, and you can still tweak knobs of the individual settings without overriding multiple parameters in your DAW, which would be time-consuming.5Copy / PasteTo set up variations of similar sounds you don´t have to dial in the settingsseveral times. Let´s say you like your setting A and want to use the same sound, just with less compression, as setting B.• Simply press Copy while you are in setting A.• Switch to setting B by pressing ‘B’ in the settings section.• Press PASTE, now setting B is identical to setting A.• Reduce the compression on the B setting.Now you can switch between A & B and decide which one sounds best or automate different settings for various sections of your session. 6Input TrimAttenuates the input signal to the plugin even before the input meter. Use this for proper gain staging, so the Gain and Ceiling controls can be used as intended even on exceedingly hot mixes.7UI ColorChanges the primary color of controls and meter indicators.In the “about” window the currently selected color can be applied as system default, so new instances will open up with your favorite color first.4312566Bottom Toolbar1PA LogoClicking the Plugin Alliance logo takes you to the Plugin Alliance website via your web browser, that´s if your computer is online.2License TypeThe toolbar displays information about the type of license you’re running: Trial licenses will be displayed along with the number of days until expiration; there is no note for full licenses as these are unlimited.3$ (Icon)If you are using a demo / trial version of our products, you can always click this icon to open a browser that redirects you to the respective product page in the Plugin Alliance store. This is where you can easily purchase a product without having to look it up on our website.4Key (Icon)Clicking on the key icon brings up the activation dialog, allowing you to manually reauthorize a device in the event of a license upgrade or addition. You can also use this feature to activate additional computers or USB Flash Drives.5? (Icon)Clicking the ? icon opens up a context menu that links to the product manual PDF, as well as other helpful links, e.g. to check for product updates online. You must have a PDF reader installed on your computer to be able to read the manual.54321System Requirements & FAQ (Links)For latest System Requirements & Supported Platformshttps:///en/systemrequirements.htmlParticular details for your producthttps:///en/products.htmlInstallation, Activation, Authorization and FAQ´shttps:///en/support.htmlArtist PresetsNo two mixes sound the same, so it‘s hard to make presets for mastering plugins without hearing your music. But we have made some for you as a suggestion or a starting point and to demo some of the tones and features you can get out of the PluginBased on the level of your mix you may have to adjust at least the VOLUMEknob with some of our presets, to adapt them to your mix.。
华表插件安装说明优秀文档

华表插件安装说明优秀文档(可以直接使用,可编辑实用优质文档,欢迎下载)华表插件安装说明1.在下载链接中,点击“下载”把华表插件文件下载到电脑(注意:记住文件存放的目录路径),2.插件文件下载完毕后,对插件文件进行解压,3.解压完毕后,打开3HCellRegister文件夹,4.注册华表:打开3HCellRegister文件夹后,点击批处理文件“点击注册.bat”,等待自动注册即可。
5.如果需要取消注册华表,点击批处理文件“点击取消注册.bat”,等待自动取消注册即可。
BCC插件中英文对照表一、BCC 3D Objects三维物体BCC Extruded EPS 内置图形挤压成3D图形BCC Extruded Spline挤压样条曲线BCC Extruded Spline Curves挤出的样条曲线BCC Extruded Text挤压文本BCC Extrusion Bevel Curves挤压锥曲线BCC Extrusion Side Curves挤压边曲线BCC Extrusion Text Paths挤压文本路径BCC Layer Deformer层变形BCC Title Studio 文字标题效果插件BCC Type On Text类型文本二、BCC Art Looks视觉艺术BCC Artist's Poster招贴画BCC Bump Map凹凸贴图BCC Cartoon Look漫画BCC Cartooner艺术画效果BCC Charcoal Sketch木炭画BCC Halftone中间色BCC Median中间的BCC Pencil Sketch素描BCC Posterize色调分离BCC Spray Paint Noise喷漆噪声BCC Tile Mosaic马赛克瓷砖BCC Water Color水彩画三、BCC Blur滤镜BCC Directional Blur方向模糊滤镜BCC Fast Lens Blur快镜头模糊BCC Gaussian Blur高斯模糊BCC Lens Shape透镜BCC Motion Blur动态模糊BCC Pyramid Blur金字塔模糊BCC Radial Blur径向模糊滤镜BCC Spiral Blur旋转模糊BCC Unsharp Mask反锐化模糊BCC Z-Blur四、BCC Color & Tone色彩与色调BCC 3 Way Color Grade色彩分级BCC Brightness-Contrast亮度对比BCC Color Balance色彩平衡BCC Color Correction色彩校正BCC Color Match色彩搭配BCC Colorize着色BCC Correct Selected Color正确选择颜色BCC Gradient梯度变化曲线BCC Hue-Sat-Lightness明亮色调BCC Invert Solarize反转曝光BCC Levels Gamma水平BCC Lift Gamma Gain增益BCC MultiTone Mix多频组合BCC Safe Colors安全颜色BCC Tritone三色调BCC Videoscope视频内窥镜五、BCC Film Style电影风格BCC Deinterlace帧速控制工具BCC Fast Film Glow快速感光片BCC Fast Film Process快速成膜过程BCC Film Damage膜损伤BCC Film Grain胶片颗粒BCC Match Grain杂点匹配BCC Two Strip Color两条颜色BCC Vignette装饰图案六、BCC Image Restoration图像复原法BCC Beauty Studio美肤美容插件BCC Dropout Fixer 恢复基于磁带的损坏画面BCC Dust and Scratches去除划痕BCC DV Fixer DV固定器BCC Flicker Fixer日落延时BCC Lens Correction镜头校订BCC Magic Sharp敏锐的BCC Motion Key运动路径关键帧BCC Noise Reduction噪声降低BCC Optical Stabilizer光稳定剂BCC Pixel Fixer亮点修复BCC Reframer分辨率转换工具BCC Remover 填补缺失的像素,自动填充选取对象BCC Smooth Tone平滑的色调BCC UpRezBCC Wire Remover去除线形划伤七、BCC Key & Blend 关键与交融BCC Alpha Process透明BCC Chroma Key 色度键BCC Chroma Key Studio 色度键工作室BCC Composite 混合成BCC Composite Choker 复合物BCC Light Wrap 光包BCC Linear Color Key 线性色键BCC Linear Luma Key 线性亮度键BCC Make Alpha Key阿伐电键BCC Matte Choker 蒙版抑制BCC Matte Cleanup 蒙板边缘修复BCC Pixel Chooser 像素选择器BCC Premult 预乘BCC RGB Blend三原色BCC Two Way Key 双向钥匙八、BCC Lights 光源BCC Edge Lighting 边缘加光BCC Glare 眩光BCC Glint 闪烁BCC Glitter 闪光BCC Laser Beam 激光束BCC Lens Flare 3D 镜头光晕3dBCC Lens Flare 3D Ray Type三维射线透镜光斑BCC Light Leaks 漏光BCC Light Sweep 扫光BCC Lightning 闪电BCC Rays Cartoon 边缘的放射光BCC Rays Puffy 射线浮肿BCC Rays Radiant Edges 射线辐射的边缘BCC Rays Radiant Spotlight 射线辐射的聚光灯BCC Rays Ring 环状放射光BCC Rays Ripply 波纹状放射光BCC Rays Streaky 条纹状放射光BCC Rays Textured 射线纹理BCC Rays Wedge 光楔BCC Reverse Spotlight 相反的聚光灯BCC Spotlight 聚光灯BCC Stage Light 舞台灯光九、BCC Match Move 匹配移动BCC Corner Pin 边角定位BCC Match Move 匹配移动BCC WitnessProtection证人保护十、BCC Obsolete 过时的BCC Alpha Pixel Noise 阿尔法像素噪声BCC Alpha Spotlight阿尔法聚光灯BCC Blur 模糊BCC Boost Blend混合BCC Color Palette 调色板BCC DeGrain 粒面经过处理BCC DeNoise 降噪BCC Film Glow 电影的光芒BCC Film Glow Dissolve 薄膜发光溶解BCC Film Process 膜状过程BCC Fire 火BCC Glow 辉光BCC Glow Matte 辉光锍BCC Lens Blur 镜头模糊BCC Lens Flare 镜头光晕BCC Lens Flare Advanced镜头眩光BCC Lens Transition 镜头转换BCC Light Matte 光雾BCC Light Zoom 光放大BCC Noise Map 噪声地图BCC Rough Glow 粗糙的光芒BCC Sequencer 音序器BCC Star Matte 星雾BCC Super Blend 超级混合BCC Z Space I以一定间隔BCC Z Space IIBCC Z Space III十一、BCC Particles 颗粒BCC 2D Particles 2D粒子BCC Comet 彗星BCC Organic Strands 有机链BCC Particle Array 3D 粒子阵列3D BCC Particle Emitter 3D 粒子发射器3d BCC Particle System 粒子系统BCC Pin Art 3D 销3D技术BCC Rain 雨BCC Snow雪花BCC Sparks 火花BCC Wild Cards 百搭十二、BCC Perspective 透视的BCC 3D Extruded Image Shatter三维挤压图像破碎BCC 3D Image Shatter 三维图像粉碎BCC Cube 立方体BCC Cylinder 圆柱体BCC DVE 分布式虚拟环境; BCC DVE Basic分布式虚拟环境BCC Fast Flipper 镜像效果BCC Page Turn 翻转卷页BCC Pan and Zoom 摇全景和变焦距BCC Sphere球体BCC Sphere Transition 球过渡十三、BCC Stylize 风格化BCC Color Choker 彩色项链BCC Colorize Glow 彩色的辉光BCC Damaged TV 损坏的电视BCC Drop Shadow 阴影BCC Edge Grunge 边的垃圾BCC Emboss 浮雕BCC Glow Alpha Edges色彩鲜艳BCC Grunge 难看的或乏味的BCC LED 发光二极管BCC Misalignment 错位BCC Mosaic 马赛克BCC Multi Shadow 多重阴影效果BCC Prism 棱镜BCC RGB Edges红绿兰彩色值的边缘BCC RGB Pixel Noise红绿兰彩色值像素噪声BCC Scanline 扫描线BCC Scatterize 散射效果BCC Video Glitch信号干扰画面损坏特效十四、BCC Textures 纹理BCC Brick 砖BCC Caustics 腐蚀性的BCC Cloth 布BCC Clouds 云BCC Fractal Noise 分形杂波BCC Granite 花岗岩BCC Mixed Colors 混合的颜色BCC Noise Map 2噪声地图2BCC Rays 光束BCC Reptilian 爬虫类BCC Rock 岩石BCC Stars 星星BCC Steel Plate 钢板BCC Veined Marble 大理石纹理BCC Weave 编织BCC Wood Grain 木材纹理BCC Wooden Planks 木地板效果十五、BCC Time 时间BCC Beat Reactor 节拍反应器BCC Beat Reactor Integrated 集成反应器BCC Jitter 抖动BCC Jitter Basic 抖动的基本BCC Looper 活套BCC Optical Flow 光流BCC Posterize Time 抽帧BCC Temporal Blur 时间模糊BCC Time Displacement 时间位移BCC Trails 跟踪,追踪BCC Trails Basic 创新的基础BCC Velocity Remap 速度映射十六、BCC Transitions 过渡、转场BCC Transitions 过渡转场BCC Blur Dissolve 模糊溶解BCC Burnt Film烧伤的BCC Checker Wipe 划格擦除BCC Composite Dissolve溶解为液体BCC Criss-Cross Wipe 网格状图案划像BCC Cross Glitch 信号干扰画面损坏转场BCC Cross Melt 特殊视觉转场BCC Cross Zoom 缩放转场BCC Damaged TV Dissolve电视溶解BCC Fast Film Glow Dissolve 快膜辉光溶解BCC Flutter Cut 飞剪BCC Grid Wipe 小黑点渐变BCC Lens Blur Dissolve 镜头模糊转场BCC Lens Distortion Wipe光学畸变BCC Lens Flare Dissolve 镜头光晕溶解BCC Lens Flare Round镜头眩光BCC Lens Flare Spiked 镜头光晕添加BCC Lens Flash 镜头闪BCC Light Leaks Dissolve 炫光光晕曝光转场BCC Light Wipe 轻抹BCC Linear Wipe 线性擦除BCC Multi Stretch Wipe 多伸展擦拭BCC Multi Stripe Wipe 多条擦BCC Radial Wipe 径向擦拭BCC Rays Dissolve 光线消失BCC Rectangular Wipe 不规则多边形划像BCC Ribbon Wipe 带擦拭BCC Rings Wipe 戒指擦BCC Ripple Dissolve 波纹溶解BCC Swish Pan 快速摇摄BCC Textured Wipe 纹理擦拭BCC Tile Wipe 瓦擦BCC Tritone Dissolve 三全音溶解BCC Twister 旋风BCC Vector Blur Dissolve 模糊向量溶解BCC Vignette Wipe 一个个擦BCC Water Waves Dissolve 水波溶解十七、BCC Warp 弯曲BCC Bulge 凸起BCC Displacement Map 画面偏移BCC Morph 变换图像BCC Polar Displacement 极位移BCC Ripple 涟漪BCC Turbulence 湍流BCC Twirl 旋转BCC Vector Displacement 位移矢量BCC Video Morph 视频变形BCC Warp 弯曲BCC Wave 波浪CA TIA工程图标题栏和明细表插件详解有关插件运行之前的准备工作:1.首先,在CATIA的安装文件夹下如:将文件放入其中,然后关闭窗口,这就完成了对CATIA图纸的相关设置,而且是根据国家标准制作的图纸页面。
【Chrome插件】Chrome插件修改教程
【Chrome插件】Chrome插件修改教程前述1. 本⽂系本⼈于疫情期间在2020-7-8 17:50 发布于《吾爱破解》论坛,于本账号为同⼀作者,今转载整合与本博客2. 教程所⽰仅为⽅法,本⽂所述版本存在⼀个严重bug,不适合⽤于⽇常使⽤,本⼈于2020年10⽉12⽇于吾爱破解论坛更新版本当时最新版已混淆,关键词和流程均有⼤改动,需要动态调试(本⽂中有教程)可以下载⽐较3. 本⽂仅为学习研究插件的修改与改善提供思路与⽅法演⽰,请勿⽤于⾮法⽤途!准备⼯作因为很多⼈需要,⽽且没有在吾i破解论坛都没有找到那就我来抛砖引⽟吧。
需要使⽤的⼯具1. 脑⼦。
当然不是说⼤脑,是思维。
举个例⼦吧,之前有⼈问我,为什么把⽀付失败的字符串改成⽀付成功后,只弹出成功,没有效果。
这个问题⽐较深奥,我⽆法解释。
(当时我就说我不会。
)2. 正确的上⽹⽅式(⾮必须)你改插件,总不能改⼆⼿的吧。
3. js,HTML(H5),CSS基础(*)这些很重要!巧妇难为⽆⽶之炊,万丈⾼楼平地起,离不开。
吾爱。
咳咳4. 习惯⽤的编辑器。
⼀个好的编辑器可以让你事半功倍当然理论上notepad也成,就是太费眼。
这⾥我推荐的两款是notepad++和sublime咳咳,⾄于前者,本来挺喜欢的(只对软件本⾝),后来事情发⽣了就果断卸载。
如果你确定满⾜并且想⼀起研究的话,就继续吧。
正式开始。
插件安装与提取从⾕歌商店提取因为我是Chrome的⽤户(曾经的某6某忠实粉丝hhh劝退)理论上Chromium内核的浏览器插件修改起来应该都差不多吧。
⽬标:Octotree官⽹:Chrome插件下载地址(⾕歌商店):下载&安装⾕歌商店⼀键安装。
安装安装完成(感觉这⼏张都是废图。
)提取插件安装包chrome://extensions/管理页⾯中,查看刚才安装后的插件的ID如图所⽰,本例的ID是bkhaagjahfmjljalopjnoealnfndnagc(只需要看⾸尾就⾜够了。
图解玩转DM800插件(2)

图解玩转DM800插件(2)作者:山水评测室来源:《卫星电视与宽带多媒体》2010年第15期本文介绍了更换中文字库、字体大小编辑插件、黑屏插件、HD皮肤系统信息插件、蓝色镜面(GBP)插件、第二信息条设置、多功能快捷键、码流检测、电子书阅读器、更换HD_GLASS皮肤、BA多系统汉化插件这11个插件的安装使用方法。
更换中文字库一般DM800机器中文IMG版本采用默认的微软雅黑中文字库,对于看惯了这种字体的用户,不妨更换另一款字体试一试。
所谓更换中文字库,就是更换/usr/share/fonts文件夹里的nmsbd.ttf文件。
不过手动更换对一些初学者可能有一定的技术困难,如中文矢量字库寻找问题,更换后,字体无法显示的问题。
为此,《山水评测室》服务器开辟了【中文字库下载】插件,使用《山水评测室》DM800G2-500#76整合版的用户,下载安装很简单。
以更换机器内的nmsbd.ttf字库文件为粗圆中文字体为例,选择01,按OK键进行下载。
下载完成后,机器自动执行安装,待出现如图73画面,就可以按OK键选择重启GUI,这样就更换为你心仪的中文字库了,就这么简单!为了增强中文字体的可观赏性,《山水评测室》优选了粗圆、微软雅黑、方正姚体、华文新魏、华文彩云、华文行楷、华文楷体、黑体、隶书、华文细黑、幼圆、华文中宋、方正兰亭中黑这13种中文字库打包制作,可到《山水评测室》服务器的【中文字库下载】里选择下载安装(图74~图83)。
对于已安装容量较大的字库使得机器剩余空间变小,而无法安装另外容量大的字库时,可以先安装容量小的字库,待机器释放剩余空间后,再安装所需要的容量大的字库。
字体大小编辑插件更换DM800皮肤的用户总觉得一些皮肤的字体稍大,显示时有“缺胳膊少腿”之感,而另外一些皮肤的字体过小,看不太清楚。
虽然我们可以在该皮肤的skin.xml文件中,对“scale(尺度)”参数进行编辑,不过只能是统一的放大或缩小。
s_系列插件(转)

s_系列插件(转)想做⼀个泼墨的特技效果.想了⼀天.终于发现⽤s_warpbubble可以做出来,于是我就找啊找的.终于被我找到了.原来是在GenArts Sapphire⾥.现在的版本是1.061不光⽀持AE还⽀持PR.哈.爽了.记录下⾯当做资料GenArts Sapphire 1.041.Sapphire AdjustsS_ClampChroma(⾊度和亮度的钳位调整)S_DuoTone(双⾊调渐变的⾊彩替换)S_Gamma(RGB反差系数调整,不错)S_Hotspots(可控⾼亮区域的调整,不错)S_HueSatBright(⼀个HSL⾊彩空间调⾊器)S_Monochrome(灰度化,不错)S_Threshold(针对各⾊彩通道的对⽐度强化)S_Tint(双⾊调的着⾊器)2.Sapphire Blur+SharpenS_Blur(多种⽅式的模糊,不错)S_BlurChannels(多种⽅式的通道模糊)S_BlurChroma(少见的⾊度模糊,不错)S_BlurMoCurves(带有变形效果的运动模糊)S_BlurMotion(区域运动模糊效果,不错)S_DefocusPrism(带有⾊散的虚焦模糊)S_EdgeBlur(边缘模糊,⽤于字幕的效果不错)S_GrainRemove(降噪,速度较快)S_RackDefocus(可调项较多的虚焦模糊)S_RackDfComp(双层的虚焦模糊合成)S_Sharpen(简单的锐化)S_SoftFocus(柔焦效果)S_ZDepthCueBlur(模拟变焦模糊,不错)3.Sapphire CompositeS_EdgeFlash(加光的层叠加效果)S_MathOps(多种数学运算⽅式的层混合效果)S_MatteOps(通道边缘噪声处理,多⽤于抠像)S_MatteOpsComp(处理通道噪声并进⾏层叠加)S_ZComp(Z⽅向的层叠加效果)4.Sapphire DistortS_Distort(⾃定义镜头变形效果,不错)S_DistortBlur(带有模糊的⾃定义镜头变形效果)S_DistortChroma(带有⾊散的⾃定义镜头变形效果)S_DistortRGB(带RGB通道分离的⾃定义镜头变形效果,好)S_Shake(镜头震动效果)S_WarpBubble(噪波变形效果)S_WarpBubble2(双重的噪波变形效果)S_WarpChroma(连续的⾊相扭曲,可以模仿某些空间观测的⾊散效果,好)S_WarpDrops(⾃定义的⽔波纹效果,不错)S_WarpFishEye(鱼眼镜头效果)S_WarpPerspective(平⾯图像的透视叠放,好)S_WarpPolar(圆盘状扭曲)S_WarpPuddle(较简单的⽔波纹效果)S_WarpPuff(以⾃⾝为镜头层的液化变形)S_WarpRepeat(复制⾃⾝并进⾏平均化,不错)S_WarpTransform(多种线性变形效果的综合)S_WarpVortex(漩涡变形,好)S_WarpWaves(波动变形)S_WarpWaves2(双重的波动变形)5.Sapphire LightingS_DropShadow(简单的阴影)S_EdgeRays(边缘光效果)S_Glare(虹状眩光效果)S_Glint(光斑效果)S_GlintRainbow(虹⾊星光效果)S_GlowAura(条纹光斑效果)S_GlowDarks(暗区加光效果)S_GlowDist(透射加光效果)S_GlowEdges(边缘加光效果)S_GlowNoise(加光噪波效果)S_GlowOrthicon(超正析摄象管效果,增强了边缘对⽐并降低亮度)S_GlowRainbow(多层⾊散透射效果)S_GlowRings(彩⾊光环效果,不错)S_LensFlare(镜头眩光效果)S_LensFlareAutoTrack(仿真镜头眩光效果,不错)S_Rays(光芒放射效果)S_SpotLight(聚光灯效果)S_Streaks(胶⽚曝光效果,类似加光的运动模糊)6.Sapphire RenderS_Clouds(简单的云状噪波)S_CloudColorSmooth(杂⾊噪波)S_CloudsMultColor(彩⾊云状噪波)S_CloudsPerspective(有景深的云状噪波)S_CloudsPsyko(⾊散噪波效果)S_CloudsVortex(漩涡状噪波)S_Gradient(简单的线性渐变⾊填充)S_GradientRadial(环形渐变⾊填充)S_Grid(⽹格效果)S_Sparkles(星光镜效果)S_TextureCells(细胞噪波效果)S_TextureChromaSpiral(带有⾊散的螺旋状噪波效果)S_TextureFolded(褶皱噪波效果)S_TextureMoire(摩尔纹效果)S_TextureNoiseEmboss(⽔⾯反射效果)S_TextureNoisePaint(⽔彩笔触噪波,不错)S_TextureSpots(点状噪波,不错)S_TextureWeave(编织物效果)S_Zap(闪电效果)S_ZapFrom(放射闪电效果)S_ZapTo(闪电充填效果)7.Sapphire StylizeS_AutoPaint(油漆效果)S_BandPass(放射线余辉效果)S_Diffuse(弥散效果)S_EdgeColorize(边缘加⾊效果)S_EdgeDetect(突出边缘效果)S_EdgeDetectDouble(双重的突出边缘效果)S_EdgesInDirection(⽅向性的突出边缘效果)S_Emboss(浮雕效果)S_EmbossDistort(变形浮雕效果)S_EmbossGlass(带有⾊散的变形浮雕效果)S_EmbossShiny(加光的浮雕效果)S_Etching(雕版印刷效果)S_FilmEffect(模仿胶⽚效果,有少量模板)S_FlysEyeCircles(圆形复眼效果)S_FlysEyeHex(六⾓形复眼效果)S_FlysEyeRect(矩形复眼效果)S_Grain(噪点效果)S_GrainStatic(随机噪点效果)S_HalfTone(双⾊点阵效果)S_HalfToneColor(彩⾊点阵效果)S_HalfToneRings(双⾊环形纹理效果)S_JpegDamage(模仿JPEG压缩造成的图像损失)S_Kaleido(多边形万花筒效果)S_KaleidoPolar(圆形万花筒效果)S_PseudoColor(热成像效果)S_PsykoBlobs(⽔⾯油渍效果)S_PsykoStripes(条纹油渍效果)S_ScanLines(模仿电视效果)S_ScanLinesMono(模仿⿊⽩电视效果)S_Sketch(⼿绘效果)S_Solarize(负⽚效果)S_Zebrafy(扭曲的单⾊底⽚效果)S_ZebrafyColor(带有⾊彩漂移和扭曲的底⽚效果)S_ZFogExponential(指数增长的蒙雾效果)S_ZFogLinear(线性增长的蒙雾效果)8.Sapphire TimeS_Feedback(延迟视频回馈效果)S_FeedbackBubble(带有变形的延迟视频回馈效果)S_FieldRemove(去场⼯具)S_Flicker(随机闪烁效果)S_FlickerMatch(同步闪烁效果)S_FlickerMatchMatte(指定区域的同步闪烁效果)S_FlickerMatchColor(对⾊彩通道的同步闪烁效果)S_FlickerMchMatteColor(同时带有变⾊和蒙板的同步闪烁效果)S_FlickerRemove(去除闪烁)S_FlickerRemoveMatte(指定区域的消除闪烁)S_FlickerRemoveColor(去除⾊彩闪烁)S_FlickerRmMatteColor(去除指定区域的⾊彩闪烁)S_FreezeFrame(跳帧效果,不错)S_GetFrame(静帧效果)S_JitterFrames(随机抽帧效果)S_MotionDetect(帧变化检测,好)S_NearestColor(检测指定的⾊彩部分)S_RandomEdits(帧乱序播放,好)S_ReverseEdits(指定区段帧的反序播放,不错)S_TimeAverage(指定帧平均合成,类似于追迹效果)S_TimeDisplace(动态贴图替换)S_TimeSlice(参数与时间有关的帧切分效果)S_TimeWarpRGB(⾊偏移效果)S_Trails(追迹效果)S_TrailsDiffuse(带有像素扩散的追迹效果)9.Sapphire TransitionsS_DissolveBlur(模糊过渡,不错)S_DissolveBubble(液化过渡,不错)S_DissolveDiffuse(像素扩散过渡)S_DissolveLuma(各种亮度过渡)S_DissolvePuddle(⽔波纹过渡,不错)S_DissolveSpeckle(可控斑点过渡)S_DissolveStatic(随机像素过渡)S_DissolveVortex(漩涡过渡)S_DissolveWaves(波浪过渡)S_WipeBlobs(⽓泡转场,不错)S_WipeBubble(液化划像,不错)S_WipeCells(细胞结构过渡)S_WipeChecker(⽹格划像)S_WipeCircle(圆形划像)S_WipeClock(扇形划像)S_WipeClouds(云雾转场,少见)S_WipeDiffuse(像素扩散划像)S_WipeDots(点阵划像)S_WipeDoubleWedge(双楔形划像)S_WipeFourWedges(四楔形划像)S_WipeLine(线性划像)S_WipePixelate(随机像素块划像)S_WipeRings(多重环形划像)S_WipeStar(星形划像)S_WipeStripes(条纹划像)S_WipeTiles(多边形划像)S_WipeWedge(楔形划像)共177种滤镜,⼤⽽全的插件包,常见的效果均包括在内,但只有变形、风格化及与时间相关的效果较好。
Bose Videobar VB-S 安全说明说明书

V I D E O B A R V B‑S请阅读并保留所有安全、安全性和使用说明。
重要安全说明有关 Bose Videobar VB‑S(包括配件和替换件)的更多信息,请参阅/VBSDownloads上的用户指南或联系 Bose 客户服务。
请保留这些说明。
请注意所有警告。
只能使用干布进行清洁。
本产品包含 ¼"–20 UNC 螺纹插件。
如果您使用该插件,应确保其连接的附件能够支撑产品重量,不会发生倾覆或掉落的危险。
有关与本产品配合使用的其他附件和配件的信息,请访问/VBSDownloads。
如果使用推车,则在移动推车/设备时应格外小心,以免因倾倒而造成伤害。
任何维修事宜均请向专业人员咨询。
如果设备有任何损坏(例如电源线或插头受损、液体溅入或物体落入设备内、设备受淋或受潮、不能正常工作或跌落),均需进行维修。
警告/小心此符号表示产品箱体内存在未绝缘的危险电压,可能会造成触电危险。
此符号表示本指南中有重要操作和维护说明。
本产品含有磁性材料。
有关这是否会影响到您的植入式医疗器械,请咨询您的医生。
包含可能导致窒息危险的小部件。
不适合 3 岁以下的儿童使用。
所有 Bose 产品的安装都必须遵守当地、州、联邦和行业规范。
安装人员有责任确保扬声器和安装系统的安装都符合适用的法规,包括当地的建筑法规和规定。
安装本产品前,请咨询拥有司法权的当地监管机构。
放置产品时,确保其不会堵塞您显示屏上的通风口。
请参阅您显示屏的用户指南,并按照制造商的说明进行安装。
未经授权切勿改装本产品。
若需要替换电池,仅可使用 AAA/LR03 碱性电池。
此产品随附的电池如果处理不当、更换不当或更换为不正确的类型,可能存在起火、爆炸或化学灼伤危险。
如果处理不当,电池可能导致着火或化学灼伤。
请勿对其进行充电、拆解、加热或焚烧。
请勿让儿童接触电池。
如果电池漏液,请避免让液体与皮肤或眼睛接触。
如果接触到了液体,请咨询医生。
请勿将含有电池的产品置于过热区域(例如避免阳光直射并远离火源等)。
借助插件为火狐浏览器添加个性实用功能

借助插件为火狐浏览器添加个性实用功能作者:天涯衰草来源:《电脑爱好者》2021年第07期Vivaldi浏览器提供一个所谓非常有特色的功能,就是当用户浏览某个网页时,浏览器窗口的颜色会随着该网页域名图标的主要颜色而改变,看上去非常有个性。
如果想在火狐浏览器中实现类似的功能,我们可以点击浏览器右上角的“打开菜单”按钮,在弹出的菜单中选择“附加组件”,在打开的页面中搜索关键词“VivaldiFox”,找到后安装即可。
以后当我们打开某个网页时,该功能扩展会自动识别该网站图标的主要颜色,随即就会将标签页、工具栏等更改为对应的颜色。
比如百度的图标是一个蓝色的熊掌,那么相关的颜色就会修改为对应的蓝色(图1)。
谷歌浏览器在不断地优化标签页,如增加了网页内容预览、网页信息提示等相关功能。
但是火狐浏览器并没有提供这样的功能,所以我们只能借助于功能扩展来弥补,比如按照前面介绍的方法在“附加组件”里搜索并安装TabCenter Redux。
安装完后它会自动调用浏览器的侧边栏,然后将当前打开的所有标签页通过列表的形式显示出来,在列表中可以看到每一个标签页的缩略图、网页名称、网址等(图2)。
用鼠标右键点击某一个标签页,还可以进行固定标签页、重新加载标签页、关闭标签页等操作。
很多浏览器都支持的鼠标手势能提高上网时的操作效率,不过火狐浏览器至今沒有提供该功能,好在我们可以借助Gesturefy这款功能扩展来实现。
同样按照前面介绍的方法搜索并安装它,之后点击工具栏中的扩展图标,在打开的设置页面中切换到左侧的“手势”选项,这时可以看到其默认的手势功能。
把鼠标移动到某一个手势上时,会通过动画的方式告知用户如何进行操作。
比如按住鼠标右键从右向左进行滑动,表示后退(图3)。
如果觉得默认手势不方便使用的话,可以将鼠标移动到它的右上角,点击红色的删除按钮将其删除。
接着再点击“新建手势”命令,在弹出对话框的“命令”列表中点击设置命令并选择动作名称,比如这里选择“新建隐私浏览窗口”。
Photoshop各类插件的使用方法

Photoshop各类插件的使用方法1、字体的使用方法把下载的字体默认安装到盘的windows下fonts里,然后按下图操作。
图1有时安装的在Photoshop里没有中文显示怎么办?先打开编辑菜单——首选项(8.0版本是预置)——文字(8.0是显示与光标),等待弹出对话框。
图2出现如图界面,将“以英文显示字体名称”的勾选去掉,确定,重启一下photoshop即可。
图32、笔刷的使用选择Photoshop<strong class="kgb" onmouseover="isShowAds =false;isShowAds2 = false;isShowGg =true;InTextAds_GgLayer="_u753B_u7B14";KeyGate_ads.ShowGgAds(this,"_u7 53B_u7B14",event)" style="border-top-width: 0px; padding-right: 0px; padding-left: 0px; font-weight: normal; border-left-width: 0px;border-bottom-width: 0px; padding-bottom: 0px; margin: 0px; cursor: hand; color: #0000ff; padding-top: 0px; border-right-width: 0px;text-decoration: underline"onclick="javascript:window.open(" /pagead/iclk?sa=l&ai=BMWFxn_J9R6yRJ4vy6wPDyOjFAbCV-xP0796bAsCNtwGA4gk QAhgCIK2F0A0oFDgAUNPDqPX9_____wFgnYHVgbQFqgEKMjAwMDAzNzU0MbIBD3d3dy5r bm93c2t5LmNvbcgBAdoBImh0dHA6Ly93d3cua25vd3NreS5jb20vMzU3NTk5Lmh0bWyAA gGpArNbiI0XdII-qAMB6APxA-gDnQLoA071AwQAAAA&num=2&adurl=http://www.str &client=ca-pub-5186439242807756");GgKwClickStat("画笔","","afc","2000037541");" onmouseout="isShowGg = false;InTextAds_GgLayer="_u753B_u7B14"">画笔<strong class="kgb" onmouseover="isShowAds = false;isShowAds2 = false;isShowGg =true;InTextAds_GgLayer="_u5DE5_u5177";KeyGate_ads.ShowGgAds(this,"_u5 DE5_u5177",event)" style="border-top-width: 0px; padding-right: 0px; padding-left: 0px; font-weight: normal; border-left-width: 0px;border-bottom-width: 0px; padding-bottom: 0px; margin: 0px; cursor: hand;color: #0000ff; padding-top: 0px; border-right-width: 0px;text-decoration: underline"onclick="javascript:window.open(" /pagead/iclk?sa=l&ai=BMWFxn_J9R6yRJ4vy6wPDyOjFAbCV-xP0796bAsCNtwGA4gk QAhgCIK2F0A0oFDgAUNPDqPX9_____wFgnYHVgbQFqgEKMjAwMDAzNzU0MbIBD3d3dy5r bm93c2t5LmNvbcgBAdoBImh0dHA6Ly93d3cua25vd3NreS5jb20vMzU3NTk5Lmh0bWyAA gGpArNbiI0XdII-qAMB6APxA-gDnQLoA071AwQAAAA&num=2&adurl=http://www.str &client=ca-pub-5186439242807756");GgKwClickStat("工具","","afc","2000037541");" onmouseout="isShowGg = false;InTextAds_GgLayer="_u5DE5_u5177"">工具,然后如图操作。
KX最基础的插件知识

KX最基础的插件知识KX基础在2001年的春天,一位独立的开发者成功地开发出了一个重新把创新声卡的潜力拿回到最终用户手中的WDM驱动程序,并且向为10kx声卡开发无任何限制的、实用软件的人开发敞开了大门。
这位勇猛并且热情的开发者就是Eugene Gavrilovx(尤金?加弗利莱),kX工程是一个完全独立开发的工程,其目的是在新的操作系统下(Win98SE以后)为与Kx兼容的声卡提供WDM 音频驱动。
kX工程是由Eugene Gavrilov, Max Mikhailov和Hanz Petrov 主持开发的。
我们的使命是给予使用与kX兼容声卡的用户无约束地使用所有的特性,促进应用程序支持的开发,并且鼓励所有的使用与kX驱动兼容声卡的用户自由地进行信息交流,以推进相关软件的进一步开发。
些问题关系到创新公司生产的Live!,Audigy系列声卡,与E-mu公司的APS声卡无关。
所有基于EMU10kX芯片的创新声卡的音频数字信号为了产生模拟输出而要经过DAC(数字到模拟的转换器)。
通常来说,这个任务是交给AC97 Codecs(编码解码器,下同)或I2S Codecs来完成的。
而创新的声卡的“前置”和“中央/低音”输出使用AC97 Codec,而“后置”的输出则由I2S Codec负责。
AC97 Codec也同时被用作ADC(由模拟到数字的转换器),并且还要对声卡上所有的模拟输入负责。
(要注意LiveDrives和其他的主板集成的声卡使用不同的方法实现)。
相对于I2S Codecs来说,在SB Live!使用的 AC97 Codecs是一个会产生较多杂音的设备,并且这将导致最终输出的声音出现一些质量上的问题。
因此可以这样说,由于使用了I2S Codecr,SBLive后置输出有着更出色的信噪比(SNR),总谐音失真(THD)与声道分离度(acs) 。
因此,如果想要在音乐欣赏中获得更好的声音质量,建议把音箱插到声卡的“后置输出”插孔,然后启用kX混音器的“前置与后置互换”这个功能(前后互换默认是启用的)。
Setup SketchCassette II 插件说明书

modulation meter next to the Flutter Rate knob.
sine wave or a random signal, in addition to a smoothed saw wave
and reverse smoothed saw for the Wow modulator. Sine wave modulation results in a vibrato-like effect, random noise
Setup
SketchCassette II supports the following formats and operating systems: Windows 7 or later - VST3 and AAX at 64-bit macOS 10.10 Yosemite or later - AU, VST3, and AAX at 64-bit - Intel or Apple Silicon
Type I tapes are the most common and inexpensive tapes, known for their good low-frequency response and reduced highs. Type II tapes have significantly better high-frequency response than Type I, in some instances even boosting the highs by several dB. Type IV Metal tapes have the flattest and most extended frequency response, in some cases comparable to that of CDs.
A10 字幕插件使用手册

新奥特(北京)视频技术有限公司
9.单击“图像文件”,使用左键拉出一个矩形框,大小根据 LOGO 的尺寸。 10. 在弹出的对话框选择 LOGO 所在文件夹,选择 LOGO 文件,单击“确
定”
11. 的
新奥特(北京)视频技术有限公司
第二章 AVX 字幕制作
第一节 制作唱词字幕
一、 制作唱词
1.进入字幕编辑界面后,在右上角单击“文本编辑器”窗口。
打开
2.导入唱词文本(只支持 TXT 文档)。
3.选中要生成唱词的文本,单击“生成唱词”,再单击“唱词生成”窗口的 “确定”
2.选中的文本
新奥特(北京)视频技术有限公司
3.单元行数 1 3.确定
第二节 字幕插件设置..........................................................................................6 第二章 AVX字幕制作 ................................................................................................. 8
新奥特(北京)视频技术有限公司
1.选中的文本
2.单击“基本属性”
8.下面设置唱词字幕为白字黑边,首先在“二维属性”面板中设置 “面” 的“基本属性”,打开调色板,用鼠标选取白色。
9.单击“确定”,唱词的面属性变成白色
新奥特(北京)视频技术有限公司
10. 在“二维属性”面板中设置 “外边”的“基本属性” 11. 打开调色板,用鼠标选取黑色。
Adobeaudition插件说明

Adobe Audition 插件简介作者:守望者 2007-06-03 14:23:16标签:Adobe Audition 插件简介安装完毕后,我们须在Adobe Audition 的单轨模式下先“效果->启用DirectX效果”。
经过启用并刷新后,插件的效果可以在“效果->DirectX”里面找到。
1、BBE Sonic MaximizerBBE对于人声,以及木吉他等原声乐器的动态激励作用效果非常明显。
可以让原声变的颗粒十足,充满质感。
配合混响等修饰用效果器,可以很好的美化声音。
首先,请选择需要加激励效果的段落,然后“效果->DirectX”选择BBE Sonic Maximizer。
这一窗口就是BBE的控制窗口,比较简单,简要说明一下这三个按钮的功能:LO CONTOUR: 调节低频激励的量,调整低频部分的相位补偿量PROCESS: 调节高频激励的量,调整高频部分的相位补偿量OUTPUT LEVEL: 调节处理后信号的电平。
可以有效的避免当音频经过处理后,因为电平过载所产生的爆音。
具体效果要根据不同的情况进项调节,通常我们只须选择预置的调节值即可。
对于人声,我们应选最后一项。
然后就是“预演”试听一下,满意后就“确定”吧2、,界面也简单易用。
我们以,来认识一下他的操作。
首先,请选择需要加混响效果的段落,然后“效果->VST”选择Native Reverb Plus。
这一窗口就是,来认识一下它的操作定义。
左边中间的是控制声音输入和声音输出的电平大小,一般没有特别需要,就都保留默认的0dB吧。
左下的“MIX”比较重要,进行干湿声的调节。
所谓干声就是没有进入效果器的声音;湿声就是进入效果器后的声音。
这个滑块就是在你右边的效果参数中选定了所有设置后,在这里实施主控制需要处理声音的比例。
下面的File 按钮可以调用TC里预设的一些混响效果。
中间这个三角形就是调整混响时间的地方这里的设置要亲耳试听调节才行。
jBox 2.3基于jquery的最新多功能对话框插件 常见使用问题解答
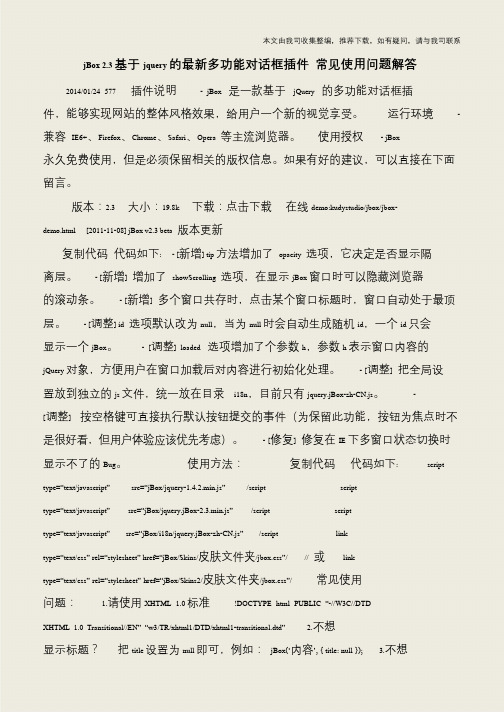
本文由我司收集整编,推荐下载,如有疑问,请与我司联系jBox 2.3 基于jquery 的最新多功能对话框插件常见使用问题解答2014/01/24 577 插件说明- jBox 是一款基于jQuery 的多功能对话框插件,能够实现网站的整体风格效果,给用户一个新的视觉享受。
运行环境-兼容IE6+、Firefox、Chrome、Safari、Opera 等主流浏览器。
使用授权- jBox 永久免费使用,但是必须保留相关的版权信息。
如果有好的建议,可以直接在下面留言。
版本:2.3 大小:19.8k 下载:点击下载在线demo:kudystudio/jbox/jbox- demo.html [2011-11-08] jBox v2.3 beta 版本更新复制代码代码如下: - [新增] tip 方法增加了opacity 选项,它决定是否显示隔离层。
- [新增] 增加了showScrolling 选项,在显示jBox 窗口时可以隐藏浏览器的滚动条。
- [新增] 多个窗口共存时,点击某个窗口标题时,窗口自动处于最顶层。
- [调整] id 选项默认改为null,当为null 时会自动生成随机id,一个id 只会显示一个jBox。
- [调整] loaded 选项增加了个参数h,参数h 表示窗口内容的jQuery 对象,方便用户在窗口加载后对内容进行初始化处理。
- [调整] 把全局设置放到独立的js 文件,统一放在目录i18n,目前只有jquery.jBox-zh-CN.js。
- [调整] 按空格键可直接执行默认按钮提交的事件(为保留此功能,按钮为焦点时不是很好看,但用户体验应该优先考虑)。
- [修复] 修复在IE 下多窗口状态切换时显示不了的Bug。
使用方法:复制代码代码如下: script type=“text/javascript”src=“jBox/jquery-1.4.2.min.js”/script script type=“text/javascript”src=“jBox/jquery.jBox-2.3.min.js”/script script type=“text/javascript”src=“jBox/i18n/jquery.jBox-zh-CN.js”/script link type=“text/css”rel=“stylesheet”href=“jBox/Skins/皮肤文件夹/jbox.css”/// 或link type=“text/css”rel=“stylesheet”href=“jBox/Skins2/皮肤文件夹/jbox.css”/常见使用问题: 1.请使用XHTML 1.0 标准!DOCTYPE html PUBLIC “-//W3C//DTD XHTML 1.0 Transitional//EN”“w3/TR/xhtml1/DTD/xhtml1-transitional.dtd” 2.不想显示标题?把title 设置为null 即可,例如:jBox(‘内容’, { title: null }); 3.不想。
Becky!插件应用评测

Becky!插件应用评测
qianw
【期刊名称】《软件》
【年(卷),期】2003(000)003
【摘要】我最喜欢的功能就是可以把新闻组的文章全部下载到本地,然后结合Becky!2的线索模式和多语种支持轻轻松松看文章。
然后再要说Bknews毕竟是个插件,不能把他当作常规软件来看待,它只是使用了Becky!2的功能做了一点小动作。
要经过特殊的设置才能正常的使用【添加为默认动作】我认为只是作者的对未来版本的一种展望,反正我是没有试验成功。
要想正常使用必须要这样做……
【总页数】6页(P24-29)
【作者】qianw
【作者单位】无
【正文语种】中文
【中图分类】TP393.098
【相关文献】
1.利用AE跟踪插件求反摄像机——3D跟踪插件Camera Tracker在《梦想改造家》中的应用 [J], 俞胤
2.提供第三方软件评测服务愿为信息化应用保驾护航——访上海市软件评测中心有限公司董事长王蕾 [J], 蔡丽玲
3.语言智能评测理论研究与技术应用——以英语作文智能评测系统为例 [J], 周建设;张凯;罗茵;娜仁图雅;张跃;刘小力;
4.语言智能评测理论研究与技术应用r——以英语作文智能评测系统为例 [J], 周建设;张凯;罗茵;娜仁图雅;张跃;刘小力
5.插件光效在婚礼微电影片头中的应用研究——以trapcode系列插件为例 [J], 王小敏
因版权原因,仅展示原文概要,查看原文内容请购买。
