Betterwmf图文教程(1)
如何使用BETTER WMF截取CAD图形
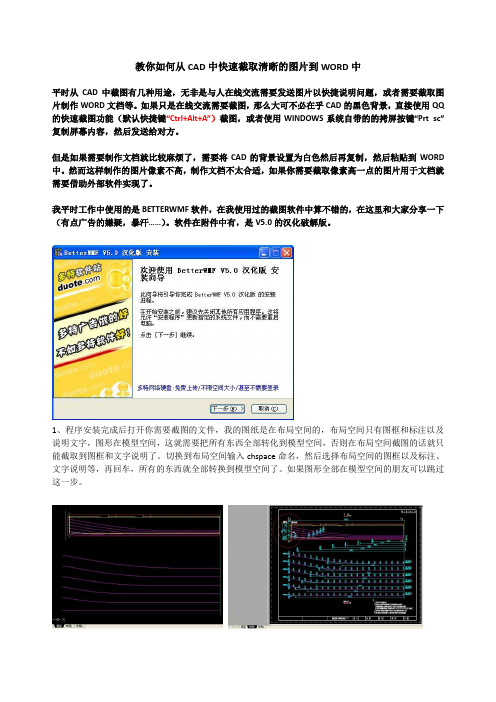
教你如何从CAD中快速截取清晰的图片到WORD中平时从CAD中截图有几种用途,无非是与人在线交流需要发送图片以快捷说明问题,或者需要截取图片制作WORD文档等。
如果只是在线交流需要截图,那么大可不必在乎CAD的黑色背景,直接使用QQ 的快速截图功能(默认快捷键“Ctrl+Alt+A”)截图,或者使用WINDOWS系统自带的的拷屏按键“Prt sc”复制屏幕内容,然后发送给对方。
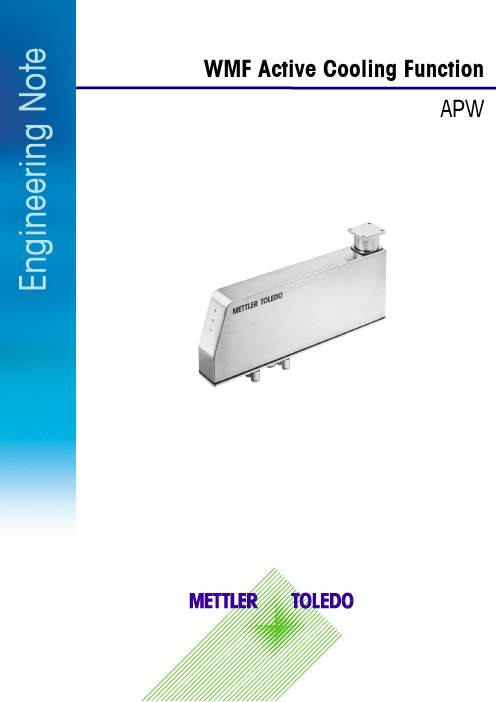
但是如果需要制作文档就比较麻烦了,需要将CAD的背景设置为白色然后再复制,然后粘贴到WORD 中。
然而这样制作的图片像素不高,制作文档不太合适,如果你需要截取像素高一点的图片用于文档就需要借助外部软件实现了。
我平时工作中使用的是BETTERWMF软件,在我使用过的截图软件中算不错的,在这里和大家分享一下(有点广告的嫌疑,暴汗……)。
软件在附件中有,是V5.0的汉化破解版。
1、程序安装完成后打开你需要截图的文件,我的图纸是在布局空间的,布局空间只有图框和标注以及说明文字,图形在模型空间,这就需要把所有东西全部转化到模型空间,否则在布局空间截图的话就只能截取到图框和文字说明了。
切换到布局空间输入chspace命名,然后选择布局空间的图框以及标注、文字说明等,再回车,所有的东西就全部转换到模型空间了。
如果图形全部在模型空间的朋友可以跳过这一步。
2、打开刚才安装的BETTERWMF,出现下图的界面,然后根据你的需要设置各选项。
建议将“线和文字”以及“填充颜色”都设置为“全部修改为黑色”,因为如果你图纸里有黄色、红色等线条,那么截取图片到WORD里面之后因为WORD是白色背景,那么线条就看不清楚。
常规选项里的“移除AutoCAD背景颜色”也根据你的需要设置,一般把勾勾点上就好。
设置完成后点“应用”。
3、切换到CAD,选中你所需要截图的部分:4、按“Ctrl+C”复制,在你的光标附近出现一个小框框,提示“剪贴板中的数据已被BetterWMF修改”,表示已经截图成功:5、打开WORD,按“Ctrl+V”粘贴,你所需要的图片就出现了,图片大小刚好就是你所复制的线条等CAD 元素的外轮廓大小,然后你可以根据需要调整图片的大小或者再次裁剪图片:图片可以放大,放大之后图片还是很清晰。
非常好的CAD图形转换到WORD的程序(betterwmf)
⾮常好的CAD图形转换到WORD的程序(betterwmf)BetterWMF 是⼀款可以将AutoCAD 中的DWG 图形拷贝到Word 中的软件。
它的独特之处是在拷贝时可以⾃动去除那令⼈烦
恼的⿊⾊背景并具有⾃动修剪图形的空⽩边缘、⾃动填充颜⾊、⾃动将DWG 格式的图形⽂件转变为WMF 图像格式的功能,另外它还能对图形进⾏缩放、旋转,并能根据使⽤者的需要对线条的宽度和颜⾊进⾏设置。
如果你是⼀位专业制图⼈员,或者你是⼀位需要经常编辑制图资料的编辑⼈员,那么BetterWMF ⼀定可以作为你的⾸选。
使⽤⽅法:使⽤BetterWMF很简单:在安装完BetterWMF后,打开它,然后打开
要插⼊的AUTO-CAD图形,选中要插⼊的图形部分,复制(Ctrl+C);然后回到Word⽂档中,粘贴(Ctrl+V)即可
说明:BetterWMF能够根据⽤户的设置⾃动改善所粘贴的AUTOCAD图形,⽽并不需要⽤户进⼀步的交互操作,具体能够完善以下功能。
1.修剪所选择的图形任意拉伸和缩⼩;
2.去除⿊⾊背景使图形更清晰;
3.设置所有线条宽度为⾮0的任意数值或依据颜⾊设置不同颜⾊的线条为所需的宽度;
4.给予插⼊在Word⽂档的AUTO-CAD图形精确的边框尺⼨;
5.可合并图纸空间和视图;
6.可按⽐例改变所插⼊图形⼤⼩;
7.重新分配AUTOCAD图形中256⾊为灰度⾊或任意Windows真彩⾊。
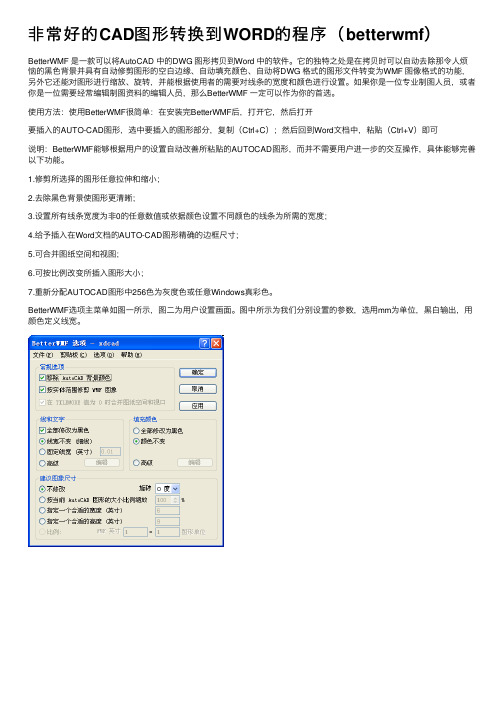
BetterWMF选项主菜单如图⼀所⽰,图⼆为⽤户设置画⾯。
图中所⽰为我们分别设置的参数,选⽤mm为单位,⿊⽩输出,⽤颜⾊定义线宽。
把CAD制图转成清晰矢量格式WMF避免发图片客户看不清楚失真现象
把CAD转成清晰矢量格式WMF,避免发图片客户看不清楚失真现象刚一同事问我怎么把CAD转成图片又不失真,又看的清楚,OUTJPG什么的方法肯定不理想,然后我在度娘查找,果真找到了一款不错的工具,稍微研究了一下。
上图吧。
这款工具的功能还蛮多,我就不一一介绍了,之前有一帖子也有发过这款工具,但没有介绍我说的这功能,因此我主要把这个非常实用且操作简单的功能使用步骤说一下。
工具介绍:BetterWMF 是一款可以将AutoCAD 中的DWG 图形拷贝到Word 中的软件。
它的独特之处是在拷贝时可以自动去除那令人烦恼的黑色背景并具有自动修剪图形的空白边缘、自动填充颜色、自动将DWG 格式的图形文件转变为WMF 图像格式的功能,另外它还能对图形进行缩放、旋转,并能根据使用者的需要对线条的宽度和颜色进行设置。
如果你是一位专业制图人员,或者你是一位需要经常编辑制图资料的编辑人员,那么BetterWMF 一定可以作为你的首选。
新版本支持AutoCAD R14 - 2007 及AutoCAD LT 97 - LT 2007。
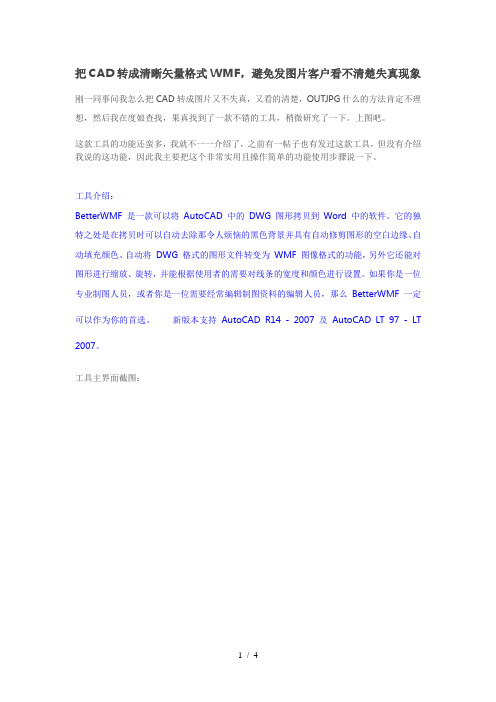
工具主界面截图:转为wmf格式后截图:转WMF矢量格式步骤:1,打开你要转的CAD文件并复制到剪贴板上,说白了就是CTRL+C。
2,打开工具包,解压并安装BetterWMF6.msi,安装完成后它不会像常见软件一样在桌面生成快捷方式,需要找到它到“开始”-“所有程序”-“BetterWMF”,点击它使用。
注意:单点右上角的X是退出不掉工具的,只是最小化了,在电脑右下角可以找到它。
3,打开工具出现如上图主界面,选择工具栏上的“剪贴板”-“另存为WMF格式文件”,找个存储路径保存就行了,操作这步之前是你已经把你要的文件“CTRL+C”了。
4,以上三步做好了也就完了,简单吧。
普及知识:《WMF格式》图元文件。
图元文件的扩展名包括.wmf和.emf两种。
它们是属于矢量类图形,是由简单的线条和封闭线条(图形)组成的矢量图,其主要特点是文件非常小,可以任意缩放而不影响图像质量。
Betterwmf图文教程(1)
如何使用Betterwmf把CAD清晰插入WORD教程
步骤一:安装Betterwmf软件,记住安装路径(建议单独新建文件夹进行安装)。
步骤二:安装完成后,在文件夹中双击右侧图标,
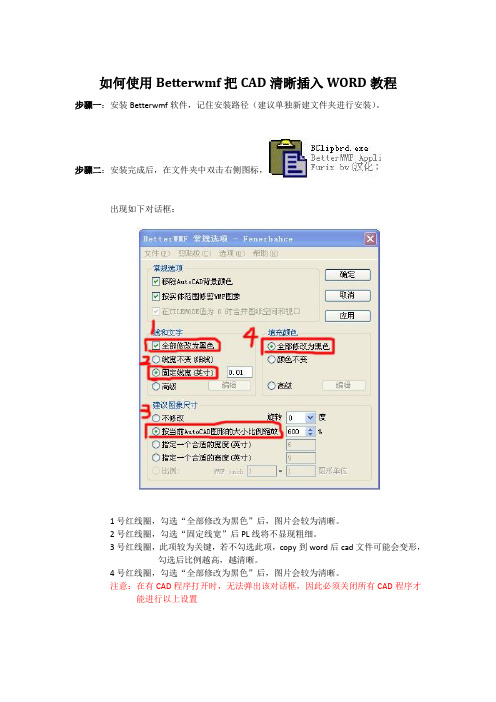
出现如下对话框:
1号红线圈,勾选“全部修改为黑色”后,图片会较为清晰。
2号红线圈,勾选“固定线宽”后PL线将不显现粗细。
3号红线圈,此项较为关键,若不勾选此项,copy到word后cad文件可能会变形,勾选后比例越高,越清晰。
4号红线圈,勾选“全部修改为黑色”后,图片会较为清晰。
注意:在有CAD程序打开时,无法弹出该对话框,因此必须关闭所有CAD程序才能进行以上设置
步骤三:按个人需求设置完Betterwmf各项参数后,关闭对话框,调出任务管理器,在进程中关闭Bclipbrd.exe选项(如果不进行此项操作,在CAD中无法运行Betterwmf进
行复制),然后打开cad文件,输入“arx”命令,之后按“L”,根据自己cad的版
本点击Bwmf.arx文件,如图:
然后按要求框选自己需要COPY到WORD中的区域,CTRL+C。
步骤四:在WORD中插入图片,直接CTRL+V,调整文件格式、大小即可。
高新到绘图效率GOHFER v8.3.1 1CD
MSC.Marc.Mentat.2016.0 1DVD
Gemcom.Whittle.v4.5.1.Win32_64 1CD
Bentley ProStructures V8i (SELECTseries 8) v08.11.14.195 1DVD
GOHFER v8.3.1 1CD
ProtaStructure.Suite.Enterprise.2016.SP6 1CD
AeroHydro MultiSurf 8.8.402.0 Win64 1CD
AeroHydro SurfaceWorks 8.7.392.0 Win64 1CD
Autodesk.FeatureCAM.2017.SP1 1DVD
Autodesk.PowerInspect.2017.SP1 1CD
poser.R2017.HF1.Win64 1DVD
Furix.BetterWMF.2017.v7.20 1CD
pareDWG.2017.v7.20 1CD
Intel Parallel Studio XE 2017 1DVD
Optitex 15.3.415 1DVD
Wolfram Mathematica 11.0.0.0 Linux 1DVD
Wolfram Mathematica 11.0.0.0 Windows 1DVD
Intel Parallel Studio XE 2017 1DVD
Oasys ADC 8.4.0.13 1CD
Oasys Alp 19.2.0.22 1CD
Autodesk.Delcam.2017.SP2.Suite 6CD
CAD中用betterWMF截图 BetterWMF使用教程
CAD中用betterWMF截图BetterWMF使用教程
很多人写文章或者论文时,需要用CAD画图,画出图之后,要用截图软件,大多数人用QQ截图,但是非常模糊,怎么办!!
方法/步骤
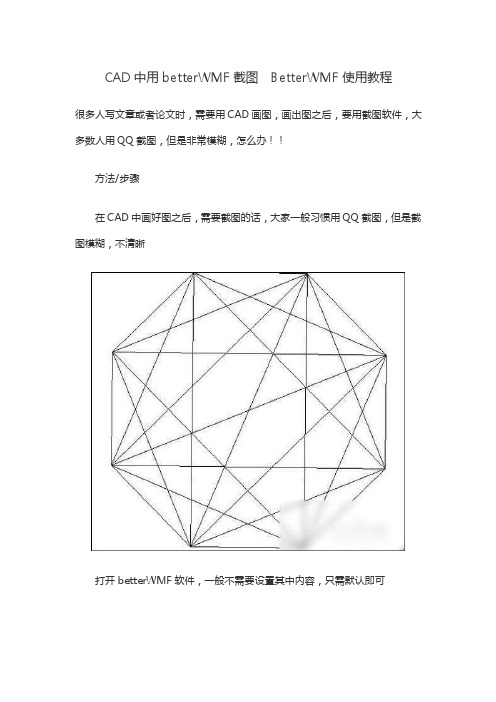
在CAD中画好图之后,需要截图的话,大家一般习惯用QQ截图,但是截图模糊,不清晰
打开betterWMF软件,一般不需要设置其中内容,只需默认即可
在CAD中选择所需要的图形,选择复制
打开betterWMF软件,点击剪切板中的立即修改与替换
最重要的一步是,在word中点击粘贴或者WPS都可以,不能再其他需要粘贴的地方使用,这样你粘贴出来的图的中心正好是你画的图形的中心
更多内容可登陆CAD:了解。
BetterWMF图片处理教程
设 置 填充 线 条 的 线宽 和 颜色
2011-06-11
教材图处理教程
1 2
郭向明制作
3
水 10
12
第 5 个步骤 提到的剪 切板
第 4 个步骤提 到的选项菜 单
图 22-40
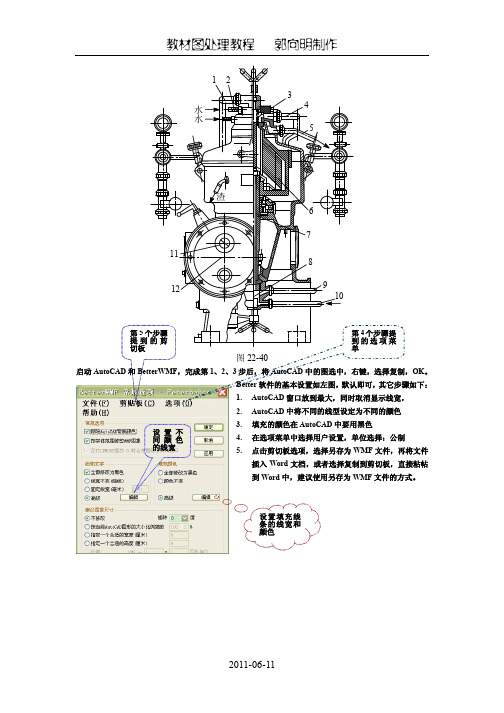
启动 AutoCAD 和 BetterWMF,完成第 1、2、3 步后,将 AutoCAD 中的图选中,右键,选择复制,OK。 Better 软件的基本设置如左图, 默认即可,其它步骤如下: 1. 2. 设 置 不 同 颜 色 的线宽 3. 4. 5. AutoCAD 窗口放到最大,同时取消显示线宽, AutoCAD 中将不同的线型设定为不同的颜色 填充的颜色在 AutoCAD 中要用黑色 在选项菜单中选择用户设置,单位选择:公制 点击剪切板选项,选择另存为 WMF 文件,再将文件 插入 Word 文档,或者选择复制到剪切板,直接粘帖 到 Word 中,建议使用另存为 WMF 文件的方式。
betterwmf使用方法
betterwmf使用方法嘿,朋友们!今天咱来唠唠 betterwmf 这个好用的东西咋用!你说这 betterwmf 啊,就像是一把神奇的钥匙,能打开图形处理的奇妙大门。
想象一下,你在绘图软件里精心绘制了一幅超棒的图,就像你用心雕琢的一件艺术品。
可当你想把它挪到其他地方去的时候,哎呀,咋就那么麻烦呢!这时候,betterwmf 就闪亮登场啦!首先呢,你得把这个小宝贝安装好。
安装过程就跟你平时装其他软件差不多,没啥特别难的。
等安装好了,你就可以开启你的奇妙之旅啦!当你要使用它的时候,就打开你的绘图软件,比如 CAD 啥的,画好你的图。
然后嘞,在 betterwmf 的界面里,你可以设置各种参数,就像是给你的图穿上合适的衣服一样。
你可以调整线条的粗细啊,颜色啊,还有透明度啥的。
这多有意思啊!比如说,你想让你的图线条更粗一点,嘿,在那里面调一调,立马就变得粗粗的,多显眼呐!或者你想给图加点特别的颜色,让它一下子就从众多图里跳出来,也没问题呀!还有哦,它还能帮你把图复制到其他地方去的时候,保持最完美的状态。
就像你有个魔法口袋,不管啥时候拿出来,东西都还是好好的。
你看啊,这betterwmf 多好用啊!它能让你的工作变得轻松又愉快。
不用再为了图形的转移和处理而头疼啦!它就像是你的绘图小助手,随时都在那等着你召唤呢!咱再举个例子,你画了一个超级复杂的机械图,那线条密密麻麻的。
要是没有 betterwmf,你得费多大劲去处理啊!但有了它,轻松搞定,一下子就把图变得清清爽爽的,多棒啊!反正啊,我是觉得 betterwmf 真的是个超实用的东西。
大家都去试试呗,保证你会爱上它的!别再犹豫啦,赶紧去和这个神奇的小工具来一场美妙的邂逅吧!。
在Word中插入AutoCAD图形比例和线宽的技巧
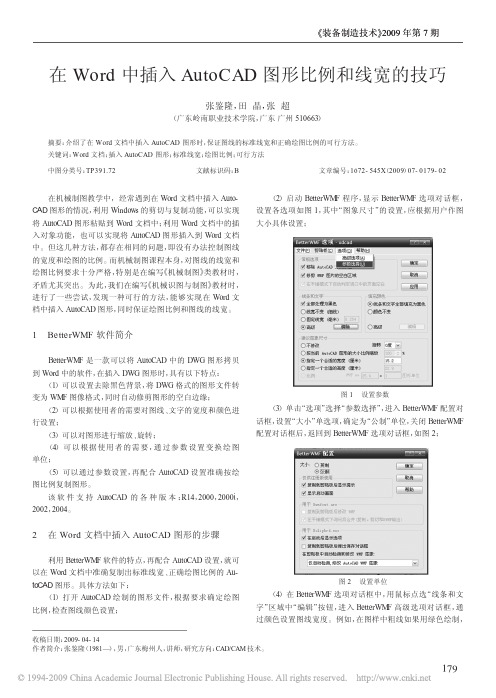
《装备制造技术》2009年第7期在机械制图教学中,经常遇到在Word文档中插入Auto-CAD图形的情况,利用Windows的剪切与复制功能,可以实现将AutoCAD图形粘贴到Word文档中;利用Word文档中的插入对象功能,也可以实现将AutoCAD图形插入到Word文档中。
但这几种方法,都存在相同的问题,即没有办法控制图线的宽度和绘图的比例。
而机械制图课程本身,对图线的线宽和绘图比例要求十分严格,特别是在编写《机械制图》类教材时,矛盾尤其突出。
为此,我们在编写《机械识图与制图》教材时,进行了一些尝试,发现一种可行的方法,能够实现在Word文档中插入AutoCAD图形,同时保证绘图比例和图线的线宽。
1BetterWMF软件简介BetterWM F是一款可以将AutoCAD中的DWG图形拷贝到Word中的软件,在插入DWG图形时,具有以下特点:(1)可以设置去除黑色背景,将DWG格式的图形文件转变为WM F图像格式,同时自动修剪图形的空白边缘;(2)可以根据使用者的需要对图线、文字的宽度和颜色进行设置;(3)可以对图形进行缩放、旋转;(4)可以根据使用者的需要,通过参数设置变换绘图单位;(5)可以通过参数设置,再配合AutoCAD设置准确按绘图比例复制图形。
该软件支持AutoCAD的各种版本:R14,2000,2000i,2002,2004。
2在Word文档中插入AutoCAD图形的步骤利用BetterWM F软件的特点,再配合AutoCAD设置,就可以在Word文档中准确复制出标准线宽、正确绘图比例的Au-toCAD图形。
具体方法如下:(1)打开AutoCAD绘制的图形文件,根据要求确定绘图比例,检查图线颜色设置;(2)启动BetterWM F程序,显示BetterWM F选项对话框,设置各选项如图1,其中“图象尺寸”的设置,应根据用户作图大小具体设置;(3)单击“选项”选择“参数选择”,进入BetterWM F配置对话框,设置“大小”单选项,确定为“公制”单位,关闭BetterWM F 配置对话框后,返回到BetterWM F选项对话框,如图2;(4)在BetterWM F选项对话框中,用鼠标点选“线条和文字”区域中“编辑”按钮,进入BetterWM F高级选项对话框,通过颜色设置图线宽度。
把CAD转成清晰矢量格式WMF,避免发图片客户看不清楚失真现象
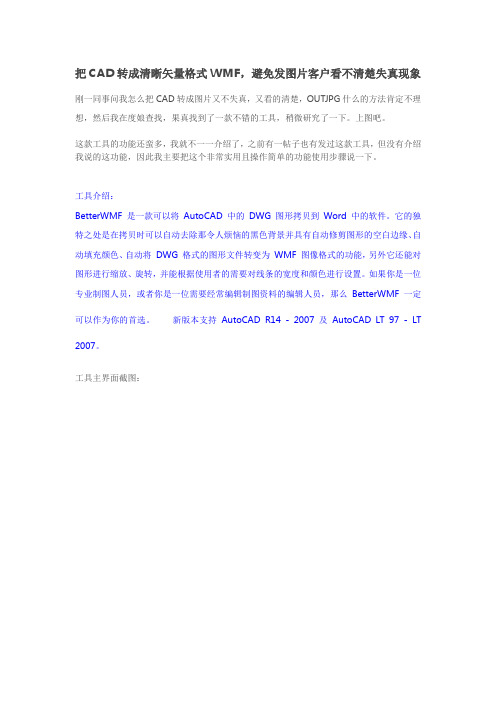
把CAD转成清晰矢量格式WMF,避免发图片客户看不清楚失真现象刚一同事问我怎么把CAD转成图片又不失真,又看的清楚,OUTJPG什么的方法肯定不理想,然后我在度娘查找,果真找到了一款不错的工具,稍微研究了一下。
上图吧。
这款工具的功能还蛮多,我就不一一介绍了,之前有一帖子也有发过这款工具,但没有介绍我说的这功能,因此我主要把这个非常实用且操作简单的功能使用步骤说一下。
工具介绍:BetterWMF 是一款可以将AutoCAD 中的DWG 图形拷贝到Word 中的软件。
它的独特之处是在拷贝时可以自动去除那令人烦恼的黑色背景并具有自动修剪图形的空白边缘、自动填充颜色、自动将DWG 格式的图形文件转变为WMF 图像格式的功能,另外它还能对图形进行缩放、旋转,并能根据使用者的需要对线条的宽度和颜色进行设置。
如果你是一位专业制图人员,或者你是一位需要经常编辑制图资料的编辑人员,那么BetterWMF 一定可以作为你的首选。
新版本支持AutoCAD R14 - 2007 及AutoCAD LT 97 - LT 2007。
工具主界面截图:转为wmf格式后截图:转WMF矢量格式步骤:1,打开你要转的CAD文件并复制到剪贴板上,说白了就是CTRL+C。
2,打开工具包,解压并安装BetterWMF6.msi,安装完成后它不会像常见软件一样在桌面生成快捷方式,需要找到它到“开始”-“所有程序”-“BetterWMF”,点击它使用。
注意:单点右上角的X是退出不掉工具的,只是最小化了,在电脑右下角可以找到它。
3,打开工具出现如上图主界面,选择工具栏上的“剪贴板”-“另存为WMF格式文件”,找个存储路径保存就行了,操作这步之前是你已经把你要的文件“CTRL+C”了。
4,以上三步做好了也就完了,简单吧。
普及知识:。
WMF 厨房用具说明书

Preparing with WMF Resharpen your knife – your chopping board is already in place.Get your spice, salt and pepper mills at the ready. Your helpers for all your cutting tasks:1341 Electric salt/pepper mill battery-powered, oak housing, Cromargan®, acrylic, height 21.5 cm, 06 6737 45002 Chopping board with bowl oiled oak, 36 x 26 cm, 18 7988 45003 Diamond sharpening steel stainless steel core with diamond coating, 37 cm,18 8022 6030 4 Grand Gourmet Santoku knife 32 cm, blade 18 cm, 18 9171 6032 5 Ceramill Nature spice mill set, 2 piece, with the exclusive ceramic grinding mechanism, top section made of quality oak, height 14 cm, 06 5231 4500WMF 5Grand ClassChef's knife 20 cm18 9171 6030Cradle the knife in your hand! The GrandClass handles have been manufacturedseamlessly. The black handles withstainless steel rivets are reminiscent oftraditional handcrafted forging. Andthe blades have been forged along theirentire length with a forging hammerand then ground using Performance Cuttechnology, ensuring they stay very sharpfor a very long time.6 WMFGet out your ingredients. Grab your knife. And start cutting. Each cut has its own distinct sound. Onions crunch, peppers crack, parsley rustles. Carve your roasts into wafer-thin slices and savour the sensation of the blade cutting through meat as if it were butter. Our blades are forged along their entire length using a forging hammer, and thanks to Perfor-mance Cut technology they are extra sharp. The handles of our knives fit into your hand as if they were made to measure. With our knife ranges such as Grand Class, Chef’s Edition, Grand Gourmet, Spitzenklasse Plus and Damasteel, there's the perfect knife for every purpose.Chef’s EditionChef's knife 20 cm18 8200 6032Hold your knife like a pro! Professional chefs hold knives with a wide cutting blade centrally over the bolster, with the blade lying between the thumb and index finger. The knife feels as though it is part of your body and with this knife-sharp extension of your hand you can even cut effortlessly through thick meat and hard vegetables.Grand GourmetChef's knife 20 cm18 8039 6032For a beautiful and sharp cut:the wonderful Grand Gourmet knives are made from high-quality special blade steel. Each knife has been processed with a forging hammer along its entire length at our forge and then ground using Performance Cut technology, ensuring the blade stays very sharp for a very long time. The Cromargan® handle sits in your hand as though it were made to measure.Spitzenklasse PlusChef's knife 20 cm18 9548 6031Extremely sharp: Spitzenklasse Plus is the classic among the WMF knife ranges. The blades are unbelievably sharp and remain so for a very long time. Touch the riveted handle: it has been manufactured seamlessly and sits so comfortably in your hand that it could have been made just for you. The complete series offers you the perfect knife for every challenge.DamasteelChef's knife 20 cm18 8039 9998Take great pleasure in using the most beautiful blades – ones that could have been produced in traditional Damascus steel workshops. They incorporate the latest technology, which combines different types of special steel to create one single steel blade — each individual knife consists of 120 layers! This makes the blades unbelievably hard and robust.WMF 7Steel/bladeSpecial blade steel, etchedformula provides detailsof the composition.BolsterThe bolster provides theright balance and servesas a finger shield.Cutting edgeExtremely sharp thanks toPerformance Cut.Seamless transition fromthe bolster to the handle.HandleErgonomic handle, balancedweight, pleasant to hold. Craftsmanship and innovation.Performance Cut from WMF.Knives with Performance Cut technology are manufactured at our forgein Hayingen. The technique is based on a combination of traditional crafts-manship and innovative technology.First of all, the forger works along the entire length of each red-hot pieceof steel with a hammer in the traditional way. The knives are then placed inthe furnace: this heat treatment in a special furnace changes the structureof the blade steel. The steel becomes harder and can be sharpened to asharper angle than was possible before. During the final sharpening process,our precision technology ensures that each blade is consistently sharpenedto the ideal angle.The result is extremely sharp blades that last an extremely long time. Wealso run regular quality checks at our forge: blades with Performance Cuttechnology achieve double the level that the DIN standard requires forcutting performance.8 WMFDish 9 x 9 x 6 cm06 8725 9440Dish 9 x 9 x 4 cm06 8724 9440Bowl 9 x 9 cm06 8723 9440Bowl ø 26 cm06 8721 9440Hors d'œuvre set, 2 pieceOlive boat 34.5 x 3.5 x 4 cm Baguette dish 40 x 4 x 10 cm06 8738 9440Bowl ø 12 cmavailable in other sizes06 8738 9440VariousSet out your ingredients on the table. Chop, cut, fillet and clean whatever you are going to put in the pot. Sort everything into small dishes. Fresh vegetables, glazed onions, chopped meat: everything is spread out before you in cubes, slices and sticks — a colourful patchwork of promise. The Various system porcelain plates and bowls are suitable for all occasions and purposes: they can be stacked and placed in the oven or used for storing, chilling, heating up, serving and marinating food. The scratch-resistant porcelain stays warm for a long time, looks great on the table and what's more you can simply wash it in the dishwasher when you have finished.Can be combined in a variety of ways,stackable to save space.Hard porcelain.Impact-, cut- and scratch-resistant.Suitable for use in the microwave and oven.Dishwasher safe.Baking/soufflé dish 18 x 18 cm, 18 x 27 cmRectangular bowls, various sizes Flat rectangular plates, various sizes06 8752 9440 06 8733 944012431 Gourmet mortar porcelain, ø 12 cm, 06 4541 6040 2 Top Tools four-sided grater stainless steel, 06 8607 60403 Top Tools nutmeg mill Cromargan®, synthetic material, height 16.5 cm, 06 8603 60304 Spice cutter, empty top section Cromargan®, acrylic glass, height 11 cm, 06 4808 6030Open all the jars and take in the aroma of the spices! Get those mills grinding! Add grated Parmesan to your dish and season with salt and pepper. Spice away:Crack even the toughest of spices with the lightest of touches! Release those spicy essential oils with every twist. Take a sniff, have a taste – then add some more herbs and spices. The ceramic grinding mechanisms are extremely strong, durable and easy to adjust for different size grinds.Ceramill de Luxe06 6771 6040 (without contents) Spice mill with the exclusive ceramic grinding mechanism. The upper part is made from Cromargan®. Mill sold with or without contents: salt, sea salt, black pepper, mixed peppercorns or dried chilli. Height 14 cm.Ceramill Nature06 5230 4500 (without contents)Spice mill with the exclusiveceramic grinding mechanism.Upper part in high-quality oak.Mill sold without contents.Height 14 cm.Also available as a two-piece set.Ceramill Trend06 4790 7630 (white, without contents)Spice mill with the exclusiveceramic grinding mechanism.Upper part in black or whitesynthetic material. Mill sold withor without contents: salt, blackpepper or mixed peppercorns.Height 14 cm.Ceramill Nature06 5232 4500Salt/pepper mill with theexclusive ceramic grindingmechanism. Oak. Mill soldwithout contents.Height 18 cm.Also available as a two-piece set.Electricsalt/pepper mills06 6734 6030With the exclusive ceramicgrinding mechanism. Battery-operated, switches on automati-cally when turned. Cromargan®,acrylic. Height 20 cm.All mills:Ceramic grinding mechanism,harder than steel,non-wearing,corrosion-resistant,10-year guarantee.Top ToolsGrate and slice away! Grind delicately scented nutmeg, slice gherkins into wafer-thin slices and add a decorative green transparent touch to your salad. Create the finest potato salad! Throw in a sprinkle of bright chilli flakes too. Our graters and slicers are easy to clean and sit securely in your hand.Vegetable graterwith 3 inserts06 8610 6040Finger shieldfor safe operation of the vegetable grater06 8615 6630Blades made from special blade steel effortlessly chop even the hardestof vegetables.Interchangeable inserts for coarse and fine strips and slices. Can be adjustedto any thickness.Nutmeg grater06 8616 6040Nutmeg mill06 8603 6030Spice cutter06 4808 6030Flat grater, fine,with waste holder06 8617 6040Grinds whole nuts. The nut is held in place during the grinding process. With storage compartment.Cromargan®: stainless steel 18/10, matt, synthetic material.Knife-sharp teeth cut the spices instead of grinding them. For spices such as chilli, caraway, coriander, fennel, aniseed, mustard seeds, sesame (black), cardamom or dried herbs and ginger. Cromargan®: stainless steel 18/10, matt, acrylic glass.SchneidWerk®: stainless steelblades with small etched teeth.1 Profi Plus dough scraper, 26 cm, 18 7195 60302 Profi Plus pastry wheel, 17 cm, 18 7135 60303 Profi Plus pizza cutter, coated, 21 cm, 18 7219 60304 Profi Plus melon/potato scoop, 15 cm, ø 2.5 cm,18 7126 6030 5 Profi Plus broth colander in ø 8, 12, 16 and 20 cm, 18 7172 6030 (ø 16 cm) 6 Mixing bowl with handle and stand ring ø 20 cm, height 12 cm, 06 4565 6030Stir the ingredients together in your bowls and then thoroughly knead your dough! Use the dough scraper to remove all the cake mixture from your bowls — and if nobody is looking you can lick off any that is left. Roll the pastry wheel over your pasta dough while the boiling water bubbles away expectantly. Fire up the oven and fill your kitchen with the smell of cooking. Pop in a home-made pizza! All the essentials for your dough:613425All whisks:Cromargan®, stable,hard-wearing, waterproof, dishwasher safe, modern design, hanging loop forthe kitchen rail.Give your soup a good stir and beat the cream to your heart's content until you forget everything around you! All our kitchen gadgets are little experts in their field: The flexi whisk makes everything fluffy and lump-free, while our flat whisk ensures that your soufflés will never collapse. Find your own rhythm as you mix away in your mixing bowl!Profi PlusFlexi whisk 32 cm18 7262 6030Profi PlusWhisk, silicone 25 cm18 7265 6030Profi PlusWhisk 30 cm18 7115 6030Black LineFlexi whisk, synthetic material, heat resistant to 270°C, 32 cm18 7605 6040Chef’s Edition:Cromargan®,manufactured seamlessly,functional front parts.Serve up your creations! A ladle is the perfect tool for the job. The Chef’s Edition kitchen gadgets are all made from hard-wearing, easy-care Cromargan® and can be washed in a dishwasher without hesitation.Chef’s EditionFish slice18 9083 6040Chef’s EditionBasting ladle18 9081 6040Chef’s EditionSauce ladle18 9082 6040Chef’s EditionWok slice18 9084 6040Chef’s EditionMeat fork18 9085 6040Chef’s EditionSkimming ladle18 9080 60401 Universal lid ø 29 cm, 06 5072 6040 2 Depot storage jar with lid, contents 1 l, WMF glass, Cromargan®, synthetic material, 06 6161 60403 Depot storage jar with lid, contents 2 l, WMF glass, Cromargan®, synthetic material, 06 6163 60404 Top Serve bowl, high , ø 13 cm, 06 5499 60205 Depot Fresh square bowl, 19 x 19 cm, 06 5994 6630 6 Depot fine, coarse and universal shaker, ø 5.5 cm, 06 6154 6040, 06 6153 6040, 06 6152 60407 Bread bin with chopping board, Cromargan®, bamboo 45 x 28 x 18 cm, 06 3446 6040Prepare your food: Cook, chop, roast and bake what you want. Store your food: in bowls, jars, boxes or bread bins. Cook your favourite foods and take them along to a picnic; they'll stay fresh for longer in the refrigerator. Keep everything fresh:1235746Rectangular bowl13 x 10 cm, 400 ml06 5488 6020High bowlø 13 cm, 500 ml06 5499 6020Flat bowlø 15 cm, 700 ml06 5486 6020Flat bowlø 18 cm, 1,250 ml06 5487 6020Rectangular bowl21 x 13 cm, 1,200 ml06 5489 6020Rectangular bowl26 x 21 cm, 3,000 ml06 5489 6020Top ServeServe all your food in style! And simply close the lid to keep vegetables, fish and meat fresh. The stay-fresh valve creates a slight vacuum, which keeps the aromas locked inside. And if condensation builds up inside the bowl, it simply drains through the drip tray grid.WMF glassServe and store in one container. Dishwasher safe.Silicone sealLocks in the aromas.Cromargan®Dishwasher safe, hard-wearing and keeps it shape.Stay-fresh valveCreates a vacuum in the containers.StackableFor space-saving storage in the refrigerator.Drip tray gridPrevents the food from coming into contact with any condensation thathas built up.Square bowl15 x 15 cm, 800 ml06 5993 6630Rectangular bowl13 x 10 cm, 400 ml06 5990 6630Rectangular bowl21 x 13 cm, 1,200 ml06 5991 6630Rectangular bowl26 x 21 cm, 3,000 ml06 5992 6630Square bowl19 x 19 cm, 1,500 ml06 5994 6630Square bowl22 x 22 cm, 2,800 ml06 5995 6630 Depot FreshStore all your food in these glass bowls with black lids made of syntheticmaterial. Not only does your food stay fresh, it also looks good. And if youhave any leftovers, store them in the same aroma-tight bowls and placein the refrigerator. Thanks to the Easyfresh ventilation valve you can evenregulate how much oxygen flows into the containers.WMF glassServe and storein one container.Dishwasher safe.Silicone sealLocks in aromas.Lid made of syntheticmaterialDishwasher safe.Easyfresh valveRegulates the flowof oxygen.StackableFor space-savingstorage in therefrigerator.Profi Plus Kitchen thermometer Length 23 cm, display -40°C to +200°C, measurement time 4-10 sec 18 7238 6030Weighing spoon Display up to 300 g with clock and timer 06 0835 6030Kitchen scales 20 x 20 cm, measure up to 5 kg 06 0871 6030Digital cooking timer 7.5 x 7.5 cm, synthetic material, batteries included 06 0890 1040WMF Scala Meat thermometer ø 6.3 cm 06 0863 6030WMF Scala Wine thermometer ø 5 cm 06 0866 6030WMF Scala Thermometer with immediate display ø 6.3 cm 06 0868 6030WMF Scala Steak thermometer ø 2.5 cm 06 0867 6030Premium One Cooking timer Measurement range 0-60 min. (ø 5 cm)07 9976 6040Measuring and weighingPlace a bowl on the scales, pour in some sugar and watch as the display indicator slowly rises. Add a couple of pinches of salt to see how much they weigh! And now put everything in the oven and set the timer. As you wait eagerly in anticipation, the aromas fill the kitchen and finally the timer goes off!WMF Scala Oven thermometer ø 6.7 cm06 0864 6030WMF 31WMF Group GmbH Eberhardstraße 35 73312 Geislingen/Steige Germany。
在Word文档中插入AutoCAD图形的工具BetterWMF
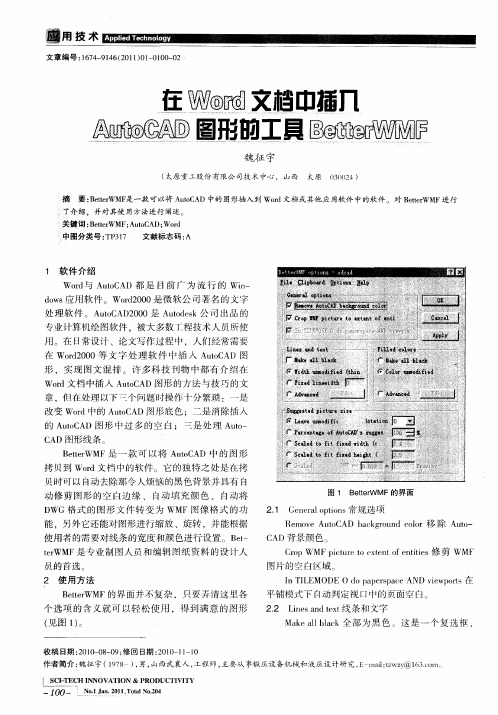
修 改线 条的宽度 和颜 色 。
图 3 插 入 Wo d中 的 A t C D 图 形 r uo A
3 说 明
1 )装 载 Bt r eeWMF后 A tC D新 增 三条命令 : t uo A
b o yl 一 制 到 剪 贴 板 :b m ot 打 开 选 项 对 话 cp c p 复 i w fr 一
为黑色 ,该功 能在 写作科 技文 章时特 别实 用 。
Wit n df d线宽不 变 ,这是 缺省 的设置 。 dhu mo ie i Fx dLn wdh采用 固定 线宽 。 i ie it e A31 . 版本 后新 增 的一
个选 项 。选 中后 进入 图 2对话框 进 行设 置 。从 中可
作者简 介: 魏征 宇 ( 9 8 , 山西武襄人 , 17 一) 男, 工程师 , 主要从事锻 压设备机械和液压设计研 究, - i t y 6 0 1 E ma :wz@13 1 lz C1
i SCI TECH NNOVATI - I ON & PRODUCTI TY VI
一
1 0一 ~ o ,21,o l o0 0 N.J ・01Tt ・ 4 1a aN 2
( 图 1 见 )
平铺 模式 下 自动判 定视 口中 的页面空 白。 22 ln s n x 线 条和 文字 . a e d et a t Ma e lbak全部 为黑 色 。这 是 一个 复选 框 , k l l a c
收 稿 日期 :0 0 0 — 9 修 回 日期 :0 0 l— 0 2 1— 8 0 ; 2 1一 1 1
应 用 技
选 后可 以将插 入 图形 中的全部 线条 和 文字颜 色 处理 钮 ,然后 就 可 以按 照常 规 “ 制 ” “ 复 粘贴 ” 的方 法 将 A tC D 图形 插 入 到 Wod中 .这 时 Wod中 的 uo A r r 图形 已是非 常完美 了 ( 图 3 。 见 )
WMF使用指南范文
WMF使用指南范文
WMF,即Windows Metafile,是一种图形文件格式,用于在
Microsoft Windows操作系统中记录和显示二维矢量图形。
WMF文件通常
包含绘图命令,如线条、曲线、填充和文本,可以在不损失图像质量的情
况下进行缩放和修改。
在本指南中,我将介绍如何使用WMF文件格式和一
些相关操作。
1. 查看WMF文件:要查看WMF文件,你可以使用常见的图像查看器,如Windows图片查看器、Adobe Photoshop等。
双击文件即可在默认查看
器中打开它。
你也可以在文件资源管理器中右键单击WMF文件,选择“打
开方式”然后选择一个查看器进行打开。
4. 插入WMF文件:WMF文件可以被插入到其他文档中,如Microsoft Word、PowerPoint和Excel等。
在这些应用程序中,你可以按照以下步
骤插入WMF文件:
-打开文档并定位到插图的位置。
-选择“插入”选项卡,并点击“图片”按钮(不同应用程序的按钮
名称可能不同)。
-在弹出的对话框中,选择要插入的WMF文件,然后点击“插入”按钮。
插入后,你可以调整图形的大小、位置和其他属性。
你也可以在文档
中复制、粘贴和删除插入的WMF图形。
5. 打印WMF文件:要打印WMF文件,你可以使用任何支持打印的应
用程序。
打开WMF文件后,选择“文件”->“打印”或者使用快捷键
Ctrl+P,然后选择打印机、打印设置和打印范围等选项,最后点击“打印”按钮即可开始打印。
巧用BetterWMF在Word中处理AutoCAD图形
巧用BetterWMF在Word中处理AutoCAD图形
尹亚兰
【期刊名称】《智能计算机与应用》
【年(卷),期】2004(000)001
【摘要】在Word中插入AutoCAD图形出现的图形呈锯齿状及打印图形线宽粗细不适中的问题,借助BetterWMF完美地解决了这两个问题.
【总页数】2页(P51-52)
【作者】尹亚兰
【作者单位】南京市江浦海军工程大学南京分校研究二室,211800
【正文语种】中文
【中图分类】TP3
【相关文献】
1.利用BetterWMF实现在Word文本中插入AutoCAD图形 [J], 巫喜红
2.Word 中 AutoCAD 图形的插入及图形处理 [J], 孙丽萍
3.AutoCAD图形在Word中的处理应用 [J], 贺音
4.在Word文档中插入AutoCAD图形的工具BetterWMF [J], 魏征宇
5.在Word文档中插入AutoCAD图形的工具BetterWMF [J], 魏征宇
因版权原因,仅展示原文概要,查看原文内容请购买。
WMF weigh模块Active Cooling功能的引导说明书
WMF Active Cooling FunctionAPW EngineeringNote2 E n g i ne e r i n g N o t e 1Introduction ............................................................................................ 3 2 Installation & Operation . (4)2.1Star Topology .............................................................................................. 5 2.2 Ring Topology (6)3 Temperature Limits .................................................................................. 7 3.1 Diagnostic LED ............................................................................................ 7 3.2 Communication Protocol............................................................................... 8 4Troubleshooting ...................................................................................... 9 5Conclusion ............................................................................................. 9 6Other Reference Documents (10)3 1 IntroductionWMF weigh modules can be connected to an active cooling concept, which can help to reduce the internal temperature of weigh modules in multiline applications. This function might be necessary when the distance between two weigh modules is less than 10 mm. Once acti-vated, it helps to cool down the weigh module and thus ensures to maintain best performance. The supplied air is circulated inside the bottom plate to cool down the electronics of the weigh module. This means, there is no access of this air pressure to the interior of the weigh module.Activate if d < 10 mm d dd4E n g i n e e r i n g N o t e2 Installation & OperationActive cooling function can be activated by supplying a continuous airflow to the air inlet lo-cated at the bottom plate of the weigh module. A continuose airflow is mandatory for an accurate temperature compensation (Do not switch on/off or regulate the airflow during the process to avoid temperature drift).If the airflow is activated or deactivated during a weighing process, the warm-up time (45 min) must be applied and an adjustment executed after the warm-up time in order to have sta-ble weighing results.Another air connector next to the air inlet is used to transfer this airflow to the outside. Air used for this function should have the following qualities for optimum performance:∙ Compressed air∙ Maximum pressure: 1bar(g)For an optimum performance of the cooling function, please make surethat the compressed air is clean and does not cause accumulation ofdeposits (oil, dirt etc.) in the air channel.This can compromise free flow of the air in the channel and thus thecooling function.In the below drawing, you can find the positions of the air connectors for the cooling function.Air connectors for cooling function5These air connectors can be purchased as an accessory with the following order number: 30307194If the air cooling function is used in combination with a 90° sensor ca-ble, the sensor cable connector will conflict with the air pipes. There-fore, install 90° air connectors available from external suppliers toavoid collision.Order information: (connection thread: M3 x 0.5)These air connectors can be installed in the field. For this purpose, an Allen wrench (no. 1.5) can be used to remove the two hexagon screws, which seal the threaded holes for the air con-nectors. Then, air connectors can be installed at these threaded holes by turning them gently in clockwise direction.2.1 Star TopologyIn the following topology, air is supplied to all weigh modules separately. This method has the advantage of providing a low air pressure to keep enough airflow for all weigh modules in the network. The air inlet should be supplied with 0.6 bar(g) (air flow of 15 ± 2 liter / minute per weigh module) in order to activate the cooling function.The air outlet should be left open to transfer the circulating air to the outside.Typically, an air pressure of 0.6 bar can be applied in order to create an air flow of 15 liter / minute per weigh module. The temperature range of the supplied air should be between 10°C - 30°C.6E n g i n e e r i n g N o t e2.2 Ring TopologyIn this topology, air is transferred from one weigh module to the other, thereby saving air pipe material and facilitating the installation. The air outlet of the last unit should be left open to transfer the circulating air to the outside (see drawing below).The air outlet of the first weigh module can be connected to the air inlet of the second weigh module in a daisy chain fashion. The same connection type can be repeated for all the other weigh modules.Typically, an air pressure of 0.6 bar can be applied in order to create an air flow of 15 liter / minute per weigh module. The temperature range of the supplied air should be between 10°C - 30°C.Air pressure should be increased by approximately 0.1 bar for every new weigh module in this configuration.Please be aware that in this configuration, the temperature of the sup-plied air can increase at every weigh module, which can potentiallycompromise the effectiveness of the cooling function.Therefore, we recommend connecting maximum 4 weigh modules to asingle air supplier in this configuration. If more weigh modules are tobe connected in this configuration, we recommend using an airpressure distributor.3Temperature LimitsWMF weigh modules monitor their internal temperature value with a sensor placed at the elec-tronics.3.1Diagnostic LEDWhen certain threshold values are exceeded, this is displayed by the diagnostic status LED as follows:Diagnostic LED78E n g i n e e r i n g N o t e 3.2 Communication ProtocolMT-SICS (via TCP/IP interface): MT-SICS protocol is transmitted over the TCP/IP serial chan-nel and can be used to communicate with the device using a PC or laptop.Warning / error conditions are transmitted with the following codes in this protocol: Condition Communication Status Normal operation Weighing possible Warning Weighing possible No error code is transmitted ErrorWeighing not possibleError code "104" is transmitted instead of the weight value Temperature value of the weigh module can be requested with the M28 command. For more details, you can refer to MT-SICS reference manual on (see 6, other reference docu-ments).SAI (via PROFINET or EtherNet / IP interface): SAI protocol is transmitted over the Industrial Ethernet interface and can be used as communication protocol between the weighing module and an industrial control system (e.g. a PLC).Warning / error conditions are transmitted with corresponding SAI status bits in the status block.∙ If status block command 0 (default) or status block command 1 is selected, tempera-ture errors are indicated through bit 10 in status group 1 (temperature error).∙ If status block command 21 is sent, the weigh module in case of a temperature alarmsets following alarm monitor bit-set.For more details, you can refer to SAI reference manual on (see 6, other reference doc-uments).4TroubleshootingBelow in the table, you can find the potential solution methods in order to react to warning or error conditions:5ConclusionInternal temperature condition of WMF weigh modules can be continuously monitored by the control system with corresponding warning/error status bits and LED signals.If a warning condition is active, this means that weight results are not reliable due to high tem-perature value. In this case, cooling function should be activated and supplied with enough air pressure to bring the weigh module back to permissible temperature range.If an error condition is active, this means that the internal temperature value is too high which can damage electronic components. In this case, power to the weigh module should be dis-connected immediately to prevent any potential damage. Cooling function can also here be ac-tivated to bring the weigh module back to permissible temperature range.96Other Reference Documents∙WMF user manual, 30297182, WEU∙WMF installation manual, 30275981, en∙MT-SICS reference manual, 11781363, en∙Standard Automation Interface reference manual, 30324925, en All reference documents can be downloaded from:/ind-wmf-documentsMettler-Toledo GroupIndustrial DivisionLocal contact: /contacts Subject to technical changes©07/2020 Mettler-Toledo Document No. 00000001 D For more information。
WMF 重量模块安装说明书
WMF
Table of Contents 1
2 Table of Contents
WMF
1 Installation
1.1 Mechanical Installation
1.1.1 Support Interface (Support Surface)
Observe the following when designing the support interface for the weigh module: • Wherever possible, provide a vibration-free support surface for the weigh module. • Determine the floor properties in the location where the system is to be set up.
3.3 Air connections............................................................................................................ 14
4 Calibration and Adjustment
19
6.1 Accessories................................................................................................................. 19
6.2 Spare Parts ................................................................................................................. 20
智尊宝纺输出详解
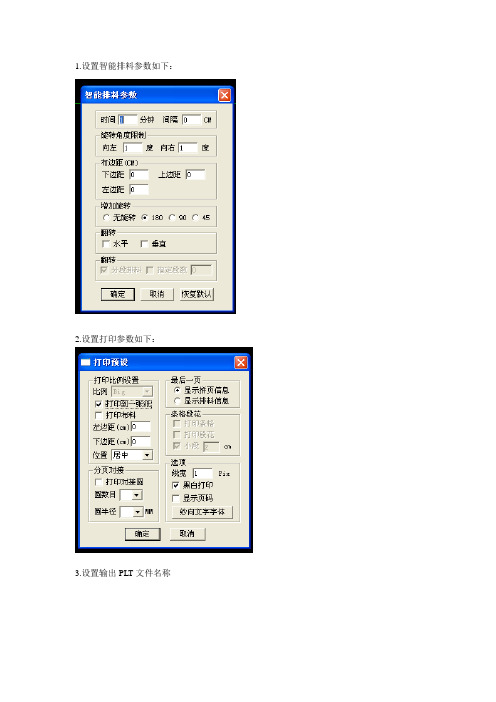
1.设置智能排料参数如下:
2.设置打印参数如下:
3.设置输出PLT文件名称
4.文泰点文件—读入
5.选择文件类型*.plt 打开刚刚保存的文件
6.点击高级功能—简单分割—矩形分割
7.在选取状态下框选不需要的标题
8.选取标题并删除
9.得到要输出的文件
在选取状态下点击高级功能—镜像
10.在选取状态下点击高级功能—缩放
11.得到缩放窗口(修改前)
12. 按排料长度输入在宽度里面(勾选等比变化)
13.在选取状态下点击图形—图形加外框
14.设置参数如下图
15.点击文件—存为其他格式
16.选择*.plt 保存文件
17.。
好越达打菲软件说明书
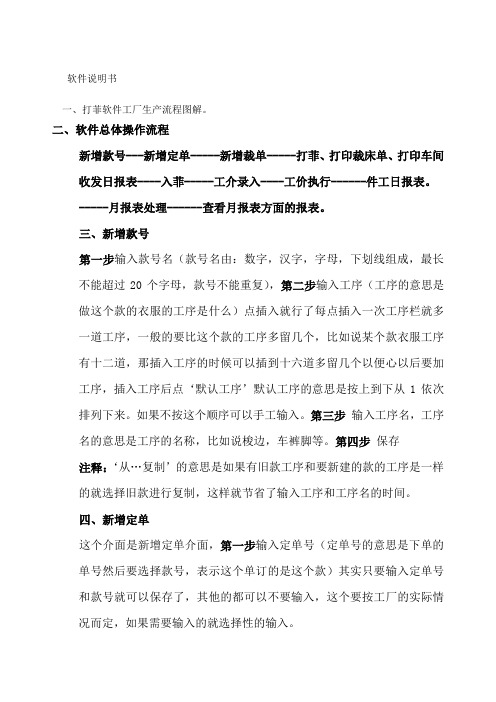
软件说明书一、打菲软件工厂生产流程图解。
二、软件总体操作流程新增款号---新增定单-----新增裁单-----打菲、打印裁床单、打印车间收发日报表----入菲-----工介录入----工价执行------件工日报表。
-----月报表处理------查看月报表方面的报表。
三、新增款号第一步输入款号名(款号名由:数字,汉字,字母,下划线组成,最长不能超过20个字母,款号不能重复),第二步输入工序(工序的意思是做这个款的衣服的工序是什么)点插入就行了每点插入一次工序栏就多一道工序,一般的要比这个款的工序多留几个,比如说某个款衣服工序有十二道,那插入工序的时候可以插到十六道多留几个以便心以后要加工序,插入工序后点‘默认工序’默认工序的意思是按上到下从1依次排列下来。
如果不按这个顺序可以手工输入。
第三步输入工序名,工序名的意思是工序的名称,比如说梭边,车裤脚等。
第四步保存注释:‘从…复制’的意思是如果有旧款工序和要新建的款的工序是一样的就选择旧款进行复制,这样就节省了输入工序和工序名的时间。
四、新增定单这个介面是新增定单介面,第一步输入定单号(定单号的意思是下单的单号然后要选择款号,表示这个单订的是这个款)其实只要输入定单号和款号就可以保存了,其他的都可以不要输入,这个要按工厂的实际情况而定,如果需要输入的就选择性的输入。
定单明细是可以选择要不要输入的(定单明细的意思是:客户订单明细表)。
点系统管理里面的设置就会出现上面这个介面,这里不打勾新增定单就不会出现定单明细。
五、新增裁单点存盘打印后出现:点是:点否:汇总表就出现在下一页。
存盘不打印是保存退出的意思。
存盘打印,是保存然后打印出来。
裁单是裁床要裁衣服的明细表。
六、印菲点打印后,电脑桌面下的任务栏会出现印菲有两种方式,方式是打印某扎。
这种方式就是只打印某一床的指定扎号,比如说打印机在打印整床的时候碰到停电的情况,那么就没有必要已经打印的重打,只要把后面没有打印的打完就行了。
- 1、下载文档前请自行甄别文档内容的完整性,平台不提供额外的编辑、内容补充、找答案等附加服务。
- 2、"仅部分预览"的文档,不可在线预览部分如存在完整性等问题,可反馈申请退款(可完整预览的文档不适用该条件!)。
- 3、如文档侵犯您的权益,请联系客服反馈,我们会尽快为您处理(人工客服工作时间:9:00-18:30)。
如何使用Betterwmf把CAD清晰插入WORD教程
步骤一:安装Betterwmf软件,记住安装路径(建议单独新建文件夹进行安装)。
步骤二:安装完成后,在文件夹中双击右侧图标,
出现如下对话框:
1号红线圈,勾选“全部修改为黑色”后,图片会较为清晰。
2号红线圈,勾选“固定线宽”后PL线将不显现粗细。
3号红线圈,此项较为关键,若不勾选此项,copy到word后cad文件可能会变形,勾选后比例越高,越清晰。
4号红线圈,勾选“全部修改为黑色”后,图片会较为清晰。
注意:在有CAD程序打开时,无法弹出该对话框,因此必须关闭所有CAD程序才能进行以上设置
步骤三:按个人需求设置完Betterwmf各项参数后,关闭对话框,调出任务管理器,在进程中关闭Bclipbrd.exe选项(如果不进行此项操作,在CAD中无法运行Betterwmf进
行复制),然后打开cad文件,输入“arx”命令,之后按“L”,根据自己cad的版
本点击Bwmf.arx文件,如图:
然后按要求框选自己需要COPY到WORD中的区域,CTRL+C。
步骤四:在WORD中插入图片,直接CTRL+V,调整文件格式、大小即可。
