1SMB7.0AT3中文资料(motorola)中文数据手册「EasyDatasheet - 矽搜」
1SMB6.5AT3中文资料(motorola)中文数据手册「EasyDatasheet - 矽搜」

值 (%)
50
半值 - RSM I 2
tP
0.1 0.1
µs
1 µs
10 µs 100µs
0
1毫秒 10毫秒
0
1
2
3
4
总磷,脉冲宽度
T,时间(ms)
160 C ° 140
A 120
图 1.脉冲额定值 Curve
图 2.脉冲波形 典型防护护电路
Zin
100
80
Vin
LOAD
VL
60
峰值脉冲4降0 容% 峰值功20率或电流@ T = 25
性,如图4.
该装置中感应作用是由于实际导通 所需设备时间(时间去从零电流到全
电流)和引线电感.这种诱导效应产生
在两端电压设备过冲或
部件防护护,如图5最小化 这种过冲是在应用非常重要,因为
用于添加瞬变抑制器主要目是夹紧
电压尖峰.在SMB系列有一个很好反响 时间,通常为1纳秒和可以忽略不计电感.然而,
外部感应影响可能产生不能接受过
IPP
峰值脉冲电流 - 见图2
PP
峰值脉冲功率
IR
反向漏
600瓦峰值功率数据表 5-2
芯片中文手册,看全文,戳
一般数据 - 600瓦峰值功率
100 10 PP,峰值1 功率(KW)
非重复 脉冲波形
如图2中所示
tr 100
峰值 - IRSM
脉冲宽度(TP)定义 因为这地步PEAK 电流衰减到50% IRSM.作者:
(Refer to Section 10 for more information on Packaging Specifications.)
0.089 2.261
摩托罗拉 accessories 编程软件说明书

Motorola Accessory Programming SoftwareTable of Contents1.Introduction2.What's New in this Release3.Requirements4.Installation and Removal5.Open Issues Summary6.Legal Notice7.Publicly Available Software Legal Notices1. IntroductionThe Accessory Programming Software provides organizations with the ability to upgrade and manage the accessory devices.The Accessory Programming Software application contains an upgrade tool that can be used to upgrade one or multiple accessory devices at a time and a retrieve log tool to retrieve the device logs.2. What's New in this ReleaseVersion Notes1.0Initial release allows a user to upgrade their Mission critical and Operations critical wirelessaccessory devices.2.0This release allows a user to upgrade their XE RSM accessory devices.2.8This release allows a user to upgrade their GPS RSM as well as wireless devices.APS R2.8must beused for firmware upgrade to Mission Critical Wireless R01.04.00and Operations Critical WirelessR01.03.01or later firmware.3.0This release allows a user to upgrade their WRSM accessory devices4.0This release allows a user to recognize the name for Long Range OCW Wireless RSM as OCWWRSM.4.1This release allows a user to upgrade and manage their XE500Model1and Model1.5accessorydevices4.2This release allows a user to set codeplug to enable channel knob position broadcast duringpower up for their accessory devices.4.3This release allows a user to set Volume Channel codeplug for their XE500accessory devices.4.4This release allows a user to set Kodiak Device Operation Mode for their OCW WRSM accessorydevices.4.5This release allows a user to set Kodiak Device Operation Mode for their OCW WPOD accessorydevices.4.6This release allows a user to set the Radio,Wave and Kodiak Device Operation Mode for theirWRSM accessory devices.4.7This release allows a user to set the Send Channel Control Powerup for XVE500,XVP850andVolume Control Feature codeplug for XVE500,XVE NO KNOB,XVP850/830,XVN500RSMaccessory devices for FDNY support.4.8This release allows a user to upgrade XV RSM(PMMN4123A and PMMN4145A)accessorydevices.4.9This release fixes the XE500Model1volume configuration missing in version4.8and allows auser to disable over temperature reporting status for XVN500RSM accessory devices.4.10This release allows a user to set Volume and Channel codeplug for their XVE DIV1accessorydevices.4.11This release allows a user to set Extra Loud Earpiece Compatible codeplug for their WM800accessory devices.3. RequirementsOperating Systems●Microsoft®Windows®7Home/Professional Edition●Microsoft®Windows®8.1Home/Professional Edition●Microsoft®Windows®10Home/Professional EditionNote●Please see the application help file for information on how to use the Accessory Programming Software4. Installation and RemovalInstallationAdministrative rights on the PC in which the software is to be installed are required.To download the Accessory Programming Software,please visit the Motorola Solutions MOL website.After downloading the software,please refer to the“APS User Guide.pdf”for instructions to install the software.If a previous version of Accessory Programming Software has already been installed,please remove the software first and install the new software.RemovalIn the Control Panel,select the"Programs and Features"option.Select the Accessory ProgrammingSoftware item from the list of programs and click the Uninstall button.5. Open Issues SummaryOn rare occasion,after completion of the firmware upgrade user may get the following WARNING:"The device has been upgraded successfully but fails to reset.Please disconnect and reconnect the USB cable to reset the device."User can IGNORE this warning since the device was upgraded successfully.6. Legal NoticeMotorola Solutions is a registered trademark of Motorola Solutions,IncMicrosoft®and Windows®are registered trademarks of Microsoft Inc.7. Publicly Available Software Legal NoticesThis media,or Motorola Solutions Product,may include Motorola Solutions Software,Commercial Third Party Software,and Publicly Available Software.The Motorola Solutions Software that may be included on this media,or included in the Motorola Solutions Product,is Copyright(c)by Motorola Solutions,Inc.,and its use is subject to the licenses,terms and conditions of the agreement in force between the purchaser of the Motorola Solutions Product and Motorola Solutions,Inc.The Commercial Third Party Software that may be included on this media,or included in the Motorola Solutions Product,is subject to the licenses,terms and conditions of the agreement in force between the purchaser of the Motorola Solutions Product and Motorola Solutions,Inc.,unless a separate Commercial Third Party Software License is included,in which case,your use of the Commercial Third Party Software will then be governed by the separate Commercial Third Party License.The Publicly Available Software that may be included on this media,or in the Motorola Solutions Product,is listed below.The use of the listed Publicly Available Software is subject to the licenses,terms and conditions of the agreement in force between the purchaser of the Motorola Solutions Product and Motorola Solutions,Inc.,as wellas,the terms and conditions of the license of each Publicly Available Software package.Copies of the licenses for the listed Publicly Available Software,as well as,all attributions,acknowledgements,and software information details,are included below.Motorola Solutions is required to reproduce the software licenses,acknowledgments and copyright notices as provided by the Authors and Owners,thus,all such information is provided in its native language form,without modification or translation.For instructions on how to obtain a copy of any source code being made publicly available by Motorola Solutions related to software used in this Motorola Solutions Product you may send your request in writing to:Motorola Solutions,INC.Government&Public Safety BusinessPublicly Available Software Management1301E.Algonquin RoadSchaumburg,IL60196USA.In your request,please include the Motorola Solutions Product Name and Version,along with the Publicly Available Software specifics,such as the Publicly Available Software Name and Version.Note,the source code for the Publicly Available Software may be resident on the Motorola Solutions Product Installation Media,or on supplemental Motorola Solutions Product Media.Please reference and review the entire Motorola Solutions Publicly Available Software Notifications/EULA for the details on location of the source code.Note,dependent on the license terms of the Publicly Available Software,source code may not be provided.Please reference and review the entire Motorola Solutions Publicly Available Software Notifications/EULA for identifying which Publicly Available Software Packages will have source code provided.To view additional information regarding licenses,acknowledgments and required copyright notices for Publicly Available Software used in this Motorola Solutions Product,please select Legal Notices display from the GUI(if applicable),or review the Notifications/EULA File/ReadMe,on the Motorola Solutions Install Media,or resident in the Motorola Solutions Product.Motorola Solutions and the Stylized M logo are registered in the US Patent and Trademark Office.All other trademarks,logos,and service marks("Marks")are the property of the respective third party owners.You are not permitted to use the Marks without the prior written consent of Motorola Solutions or such third party which may own the Marks.===========================================================================PUBLICLY AVAILABLE SOFTWARE LIST===========================================================================Name:Microsoft WPF ToolkitVersion: 3.5.40619.1Description:The WPF Toolkit is a collection of WPF features and components that are being made available outside of the Framework ship cycle.The WPF Toolkit not only allows users to get new functionality more quickly,but allows an efficient means for giving feedback to the product team. Many of the features will be released with full source code as well.SoftwareSite:/wpfSourceNo Source Distribution Obligations.Code:License:Microsoft Public License(Ms-PL)Microsoft Public License(Ms-PL)This license governs use of the accompanying software.If you use the software,you accept this license.If you do not accept the license,do not use the software.1.DefinitionsThe terms"reproduce,""reproduction,""derivative works,"and"distribution"have the same meaning here as under U.S.copyright law.A"contribution"is the original software or any additions or changes to the software.A"contributor"is any person that distributes its contribution under this license."Licensed patents"are a contributor's patent claims that read directly on its contribution.2.Grant of Rights(A)Copyright Grant-Subject to the terms of this license,including the license conditions and limitations in section 3,each contributor grants you a non-exclusive,worldwide,royalty-free copyright license to reproduce its contribution,prepare derivative works of its contribution,and distribute its contribution or any derivative works that you create.(B)Patent Grant-Subject to the terms of this license,including the license conditions and limitations in section3, each contributor grants you a non-exclusive,worldwide,royalty-free license under its licensed patents to make, have made,use,sell,offer for sale,import,and/or otherwise dispose of its contribution in the software or derivative works of the contribution in the software.3.Conditions and Limitations(A)No Trademark License-This license does not grant you rights to use any contributors'name,logo,or trademarks.(B)If you bring a patent claim against any contributor over patents that you claim are infringed by the software, your patent license from such contributor to the software ends automatically.(C)If you distribute any portion of the software,you must retain all copyright,patent,trademark,and attribution notices that are present in the software.(D)If you distribute any portion of the software in source code form,you may do so only under this license by including a complete copy of this license with your distribution.If you distribute any portion of the software in compiled or object code form,you may only do so under a license that complies with this license.(E)The software is licensed"as-is."You bear the risk of using it.The contributors give no express warranties, guarantees or conditions.You may have additional consumer rights under your local laws which this license cannotchange.To the extent permitted under your local laws,the contributors exclude the implied warranties of merchantability,fitness for a particular purpose and non-infringement.。
Matrix 中文手册

重要的安全指导!请阅读这本手册!它提供了很重要的安全、安装和操作指导,使您的设备发挥最高的性能,并且能够延长设备的使用寿命。
请保存这本手册!它包含了安全使用UPS 的重要指导,而且还告诉您,如何在需要时获得厂家提供的服务。
在以后对UPS的维修和存放中,以及遇到问题时,都需要参看这本手册以获得正确的指导。
射频干扰重要的安全指导!警告:我们只对遵守规则的用户负责,千万不要自行更改或拆卸,否则用户将失去使用这个设备的权力。
注意:此设备被检测通过,并且符合FCC第15部分A规则,由于该设备会产生和发出射频干扰,这些限制使得设备在商用环境下运行时产生的有害干扰保持在一定限度内,使其它通讯设备得到有效的保护。
如果没有根据指导安装或使用,可能会对无线电通讯产生有害的干扰。
总而言之,我们并不保证在特殊情况下安装时不会出现干扰。
如果该设备的关闭和打开对无线电设备产生干扰和影响,我们建议用户用以下方法中的一种或几种去尝试消除干扰。
■重置天线的方向。
■加大设备和接收器的距离。
■使设备连接在与接收器不在同一电路的插座上。
■向销售商、经验丰富的无线电调试人员咨询求助。
■该产品必须使用屏蔽通讯电缆接口。
目录1.0简介(1)2.0安全(3)3.0外观(4)隔离模块(4)电子模块(6)电池组(8)4.0安装(10)开箱检查,保护措施,移动UPS,放置(10)输入电压要求(11)安装步骤(12)输入线安装(13)输入电压插头选择(15)输出线安装过程(16)模块连接(18)紧急断电接口(Emergency Power Off Interface)(20)5.0操作(21)显示与控制操作(22)6.0UPS监控(29)计算机接口(29)7.0问题(30)故障查找(31)故障信息(33)重装电子模块(33)重装或增加了电池组(35)获得服务(36)8.0UPS存放(37)9.0指标(38)1.0简介1.1概述Matrix-UPS是一种高性能在线互动式的不间断电源。
ENC-03J中文资料(murata)中文数据手册「EasyDatasheet - 矽搜」
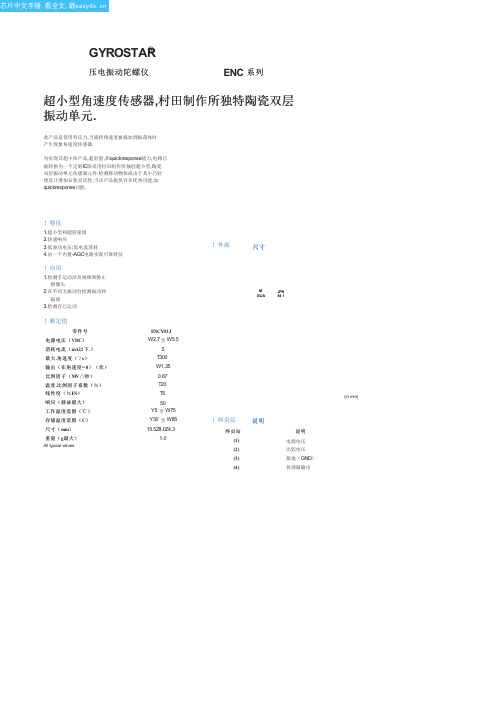
存储温度范围( C) 尺寸( mm) 重量( g最大)
All typical values.
ENCY03J W2.7 至 W5.5
5 T300 W1.35
0.67 T20 T5
50 Y5 至 W75 Y30 至 W85 15.5Z8.0Z4.3
1.0
!外部Biblioteka 尺寸MJPN
芯片中文手册,看全文,戳
GYROSTAR®
压电振动陀螺仪
ENC 系列
超小型角速度传感器,村田制作所独特陶瓷双层 振动单元.
此产品是使用科氏力,当旋转角速度被施加到振荡体时 产生现象角速度传感器.
为实现其超小体产品,超轻量,和quickresponse能力,电路已 被转换为一个定制IC除采用村田制作所独创超小型,陶瓷 双层振动单元传感器元件.检测移动物体或由于其小巧轻 便设计增加安装灵活性,当该产品提供许多优秀功能,如 quickresponse功能.
!特征 1.超小型和超轻量级 2.快速响应 3.低驱动电压;低电流消耗 4.由一个内置-AGC电路实现可靠特征
!应用 1.检测手运动涉及视频和静止
摄像头
2.在不同无振动台检测振动和
隔离
3.检测自己运动
!额定值
零件号
电源电压( VDC) 消耗电流( mA以下 .) 最大 .角速度( ˚/ s) 输出(在角速度 = 0)(伏) 比例因子( MV /˚/秒) 温度 .比例因子系数(%) 线性度(% FS)
03JA 883JPN
Sensor
DC cut
A/D
Processing
AMP
Converter
circuit
待检测每旋转轴1.一个sensot. 2.对于高精度测量,tempreature漂(在静止状态下输出波动,由于变化影响
M7 1 用户手册说明书

USER MANUALM7Table of Contents1.GENERAL INFORMATION (2)1.1W ARNINGS AND RECOMMENDATIONS (2)1.2F UNCTION AND F EATURE (2)1.3F RONT VIEW (2)1.4R EAR VIEW (2)1.5D IMENSIONAL DATA AND INSTALLATION HEIGHTS (3)1.6W ALL-MOUNTED INSTALLATION (4)2.SYSTEM APPLICATION (5)2.1V ILLA OR SINGLE-FAMILY CONTEXT (5)2.2A PARTMENT BLOCK OR MULTI-FAMILY CONTEXT (5)3.OPERATION DESCRIPTION (7)3.1M AIN P AGE (7)3.2S HORTCUT PAGE (7)3.3A DJUSTING PAGE (8)3.4BASIC OPERATIONS (8)3.5SETUP INSTRUCTIONS (11)3.6U PLOAD PICTURE AS WALLPAPER (20)3.7U PLOAD MUSIC AS RINGTONE (20)4.SPECIFICATIONS (20)1. General information1.1 Warnings and recommendationsIt is important to read this manual carefully before proceeding with the installation. The guarantee automatically expires for negligence, misuse, tampering by unauthorizedpersonnel.The Video internal unit must only be installed indoors; it must not be exposed to water drops orsplashes.1.2 Function and Feature⚫ 7” capacitive touch screen monitor ⚫ Based on Android system ⚫ IP over 2-wire non-polarity ⚫ 1024(RGB)x600 pix resolution ⚫ Picture in Picture function⚫ Indicator: Power, mute, message, WIFI ⚫ Picture and video save⚫ Support the secondary door bell and ringer extension ⚫ Support WIFI for cloud intercom⚫Flexible power way: support remote and local power1.3 Front view+-1234567891. 7” touch screen display (16: 9)2. SD card slot3. 24v DC input4. Reset button5. Indicate lights for power, mute, message, WIFI6. Increase the volume7. Volume indicate lights8. Reduce the volume1.4 Rear view123456781. Mic2. Loudspeaker3. Interface for 2nd door bell and extension ring4. Interface for additional power supply, non-polarity5. Interface for 2-wire IP interface, non-polarity6. Configurator J1: remove for additional power supply7. Configurator J2: Master/Slave, remove for Slave8. SD card slot1.5 Dimensional data and installation heightshttps:///1201207-power_icon.html+-HOME232mm133m m15mmGround160 ~ 165m m135 ~ 140m mRecommended height, unless otherwise required by the law1.6 Wall-mounted installation12345671 - Mark the location of the bracket holes2 - Drill3 – Install expandable screw4 - Fix the wall bracket5 - Connect the wires with the interface according to the wiring diagrams.6 – Insert the connector into the monitor, using index finger, middle finger, ring finger and littlefinger is easy to insert7 - Put the monitor on its wall bracket2.System Application2.1Villa or single-family contextMonitor 3 PowerDoor StationSmartPhone APP INTERNETMonitor 2Monitor 1In villa(single-family) systems all of the unit can be connected with the power.2.2Apartment block or multi-family contextHome 1DistributorDoor StationSmartPhoneAPPINTERNETHome 2Home 3PowerIn multi-family systems (apartment blocks), you need the distributor to connect all of the monitor and door station.The distributor can be connected with each other via CAT-5 cable.Distributor1PowerPowerDistributor NPowerDistributor 2CAT-53.Operation Description3.1Main PageThe Main Page is your starting point for using all the applications on your monitor.Touch anywhere of the screen on monitor in standby mode, the Main Page will appear as follows:Icon description:System status icons: from left to right-Connection-Mute-Wi-FiDoor Connection to the outdoor panel to show imageCamera Connection to the IP cameraRecord Pictures and video reviewIntercom Call to other monitors in the house (if any).Setting Enter setting menuScreen off Shut the screen. The screen will automatically switch off after 30” if no activity is done.. Sliding the main page to the left will show shortcut page.. Sliding the main page to the right will show adjusting brightness and volume page 3.2Shortcut pageIcon description:WIFI Deactivate / activate WIFI (master monitor only)Silence Activate / deactivate do not disturb modeLeaving Deactivate / activate leaving mode,when leaving mode is active, the silence and transfer function will be onTransfer Deactivate / activate call transfer functionwhen transfer function is activate, the call from door panel will be transfer to APP.3.3Adjusting pageIcon description:Speaker Volume Adjust the volume from door stationRing Volume Adjust the ring/video volumeBrightness Adjust the screen brightness3.4BASIC OPERATIONSEnter Door ListP ush “Door” button Push door panel you want to see Then the monitor page will be shown as follows:1 23 4 5 6 7 8Icon description:1.The additional IP camera window2.Button for adjusting video quality3.Take picture4.Take video5.Open the first door6.Open the second door7.Start to talk with visitor8.Return home pageNote: The name of door panels can be set by user, Door1, Door2, Door3 and Door4 in default.The instruction to set name can be found from ‘Setting-Door’ in the Setting.Enter Camera ListP ush “Camera” button Push camera you want to seeThen the monitor page will be shown as follows:12 3Icon description:1.Button for adjusting video quality2.Take picture3.Return home pageNote: The name of camera can be set by user, Camera1, Camera2, Camera3 and Camera4 in default.The instruction to set name can be found from ‘Setting-Camera’ in the Setting.Enter Intercom ListP ush “Intercom” button Push the monitor you want to dial Then the dialing page will be shown as follows:12Icon description:1.Adjust volume2.Cancel the callThe called page is as follows:123Icon description:1.Adjusting volume2.Answer the call3.Hung up3.5SETUP INSTRUCTIONSAll settings should enter the setting page by touching the icon ’Setting’ from main page:Setting-Door Panel1From door list page above, choose the door you want to set, it will show the following page:123456Icon description:1.Set door panel name2.Set auto record mode. (None, Photo, Video)3.Set door panel ring tone4.Set door lock open time. (1s,2s,3s,4s,5s,6s,7s,8s,9s)5.Select IP camera for picture in picture function. To activate this function, please add IPcamera first. See “Setting-Camera”6.Turn on/off fish eye lensCloud intercomPress cloud menu, the following page will be shown:1Use App to scan the QR code, and add it to device list.The App link for smartphone:Android APP IOS APPNote: Users should turn on [Leaving] mode or [Transfer] mode to enable cloud intercom function Setting-Memory12345Parameter description:1.The usage of the memorya)Red means the volume of images storedb)Green means the volume of videos storedc)Grey means the available volume2.The number of pictures record3.The number of videos record4.The video time when take video5.Format MemorySetting-WIFI12Parameter description:1.WIFI switcher2.Select a WIFI network to joinSetting-Motion Detection1234Setting description:1.Turn on/off motion detection2.Set the lock to open when motion happen3.Set the time schedule for motion detection function4.Take picture when motion happenSetting-Mute123Setting description:1.Deactivate / activate “manual” for mute functionW hen activate “Manual” for mute function, there will no ring when visitor call from door panel.2.Deactivate / activate “schedule” for mute function3.Set schedule mute periodW hen setting “Schedule” mute function, there will no ring in the setting time. Setting-Time&Date12345Setting description:1.Turn on/off synchronization time automatedly2.Set time zone3.Set Date4.Set Time5.Deactivate / activate 12-hour or 24-hour formatSetting-Language1Setting description:1.Set languageSetting-Wallpaper12Setting description:1.Push to choose a new picture as wall paper2.The existing wallpaperSetting-SetupTo set monitor address, add RFID card, add IP camera, and upgrade system, user needs input password in the following page:1Note: default password: 12345Setting-Room-Address1234Parameter description:1.Set room number, the value can be 01 ~ 322.Set room name3.Set extension room number, the value can be 1-44.Confirm and restart the deviceSetting-RFID Card1234Setting description:1.Add new RFID card2.Delete all RFID card3.The number of existing RFID card4.The lock to open when swiping RFID cardSetting- Add RFID Card1For example: If apartment 01 wants to add RFID card, the procedure:1.P ush “Setting” →“RFID card” →“Add card”,2.Swipe the card on door station one by one, then push the 01 call button to finish it3.Sound prompt: add card - Beep 1 time, add card success: Beep 2 timesNote: When swipe card on the door station, the limited time is 90SThe indoor monitor can talk with door station when adding RFID card.Setting- swipe short time to open lock1, long time to open lock21Description:Time for short time swipe:1sTime for long time swipe: 3sSetting-Camera123Icon description:1.Modify IP camera setting2.Delete IP camera3.Add new IP cameraWhen push icon1 and icon 3, the following page will be shown:12345Parameter description:1.Type: Choose the brand of IP camera2.IP address name: set the name for IP camera.3.IPC address: Set IP address of IP cameraNote: the suggestion IP address for IP camera: from 192.168.137.134 to192.168.137.254ername: Fill in username of IP camera5.Password: Fill in password of IP cameraSetting-System12345678Setting description:1.Show hardware version2.Show software version3.Show model name4.Show Room number5.Show IP address6.Push to upgrade system7.Push to restore setting8.Push to change [setting] passwordAfter pushing upgrade button, the following page will be shown:1Setting description:1.Upgrade via SD carda.Create a new folder named “u pgrade”Note: please use lowercase lettersb.Put the system software in itc.P ush “Setting” →“System” →”System upgrade” →”SD upgrade” to start3.6Upload picture as wallpaperYou can use your own picture as the system wallpaper, the operation procedure:1.Prepare a Micro-SD card2.C reate a new folder named “w allpaper”, and copy your picture in itNote: please use lowercase letters3.P ush “Setting” →“Wallpaper” →”Choose a new wallpaper” to set3.7Upload music as ringtoneYou can use your own music as the ring tone, the operation procedure:1.Prepare a Micro-SD card2.Create a new folder named “ringtones”, and copy your music in itNote: please use lowercase letters3.P ush “Setting” →“Door” →”Ringtone” to set4.SpecificationsCategory SpecificationInput power DC: 24v, 50Hz/60HzPower Consumption Max: 6W, standby: 3WTFT LCD 7-inch digital TFT LCDLCD resolution 1024(RGB) x 600Connection with door station Support four 2-wire door stations (Maximum)Connection with CCTV Support 16 IP camera input (Maximum) Connection with extension monitor Support 3 extension monitorsMemory capacity TF card: 1024 pictures, 128 videos Dimensions (mm) 232mm*133mm*15mmWeight(kg) 0.43kg。
CS8900A中文数据手册 中文部分翻译

Байду номын сангаас 目录
4.10.11 I/O 模式下轮询 CS8900A....................................................................... 15 5.2 基本接收操作........................................................................................................ 17
5.2.1.1 数据包................................................................................................ 17 5.2.1.2 帧........................................................................................................ 17 5.2.1.3 传送.................................................................................................... 18 5.2.2 接收配置...................................................................................................... 18 5.2.2.1 配置物理接口.................................................................................... 19
MOTOROLA MICOM中文使用手册
Q. ‘S’
当扫描按钮按下,开启信道扫描时显示。
5
图 3 液晶显示器
B.基本电台操作
本机容易操作。下列简化的的过程是操作电台的指南。在实际操作之前请完整阅读1.打开电源,设置音量。
1.要扫描信道 101-110,按 SCAN。
2.键入信道号。
2.要停止扫描,再按 SCAN 或按一下麦克风上的发射键。
a. 上下箭头。上移信道或下移信道。(A-B)
7
b 数字键盘 1.用户编程的信道(1-120) a)例如调出 115 号信道。按 1 键,频率显示消失,信道数显示‘1’且方框围绕‘CH RCL’ 闪动。再按 1 键和 5 键。显示 115,需要的信道。按 ENTER 键。方框停止闪动。新频率显 示在显示屏的频率部分。
型的频率传播春季与夏季40008000传播范围英里日落后小时数100100100250506008001000150025002502502504007502000250025003000400050000350075060006000150070005025020010005003510060025015005003500750100100150020005007503500400010250250075040001110010005002500日出后小10000100250250250150150015001500750500500500350035003500750750750400040006000150015001500700070007000时数5001004004002000200010010025025015001500500500100015002501500500250075040001002501500500350075040001500700010111213501001002002502501501501500500500500500500350035003500750750750400060006000150015001500700070007000由于大气状况使用的天线类型地线的质量太阳黑子周期和其他变数影响传播摩托罗拉不能保证本产品能工作到表中所列的范围
samba howto 中文版
Samba HOWTO中文版Samba计划文档(初稿)Samba小组编译:meaculpa (mailto:meaculpa@)中文译稿声明:该文档是Samba软件的一部分,受GNU GPL保护,使用时请注意版权问题;由于译者水平有限,错误之处在所难免,希望各位读者来信指正,由此产生的一切后果,本人概不负责。
----------------------------------------------------------------------------------------------------------------------------------------------------------------概要本文档汇集了Samba文档历年来的HOWTOs。
我试图确保所有内容都是最新的,但有时一个人维护不了这么大的项目。
你可以在http:///的“Documentation”找到这份文档的最新版本,有更新的话寄给jerry@。
干杯,jerry目录表1. 如何安装并测试Samba1.1. Step 0: 阅读手册页1.2. Step 1: 编译二进制1.3. Step 2: 所有关键步骤1.4. Step 3: 建立配置文件1.5. Step 4: 用testparm测试你的配置文件1.6. Step 5: 启动smbd和nmbd进程1.6.1. Step 5a: 从inetd.conf启动1.6.2. Step 5b. 可选法:以后台进程启动1.7. Step 6: 尝试列出服务器可获得之共享项1.8. Step 7: 尝试从UNIX客户端建立连接1.9. Step 8: 尝试从DOS、WfWg、Win9x、WinNT、Win2k、OS/2及其它客户端建立连接1.10. 如不工作咋办?1.10.1. 诊断问题1.10.2. 范围ID1.10.3. 选择协议级别1.10.4. 从UNIX向PC客户端进行打印1.10.5. 锁定1.10.6. 映射用户名1.10.7. 其它字符集2. Samba 2.x中的LanMan和NT口令加密2.1. 介绍2.2. 工作原理2.3. 重要的安全性说明2.3.1. SMB加密的好处2.3.2. 非加密口令的好处2.4. smbpasswd文件2.5. smbpasswd命令2.6. 设定Samba支持LanManager加密3. 在Samba中配置微软分布式文件系统树3.1. 介绍3.1.1. 说明4. Samba 2.2.x中的打印支持4.1. 介绍4.2. 配置4.2.1. 建立[print$]项4.2.2. 为现有打印机设定驱动程序4.2.3. 支持大量打印机4.2.4. 通过Windows NT APW添加新打印机4.2.5. Samba和打印机端口4.3. Imprints工具包4.3.1. 什么是Imprints?4.3.2. 建立打印机驱动程序包4.3.3. Imprints服务器4.3.4. 客户端安装程序4.4. 从Samba 2.0.x向2.2.x迁移5. Samba 2.x中的security = domain选项5.1. 把Samba 2.2添加到NT域5.2. Samba和Windows 2000域5.3. 为什么比security = server选项更好?6. 把Samba 2.2配置成主域控制器6.1. 说明6.2. 配置Samba域控制器6.3. 建立机器信任账号并把客户添加到域中6.4. 常见问题及错误6.5. 系统策略及配置文件6.6. 其它可获得的帮助6.6.1. 链接及类似资源6.6.2. 邮件列表6.7. DOMAIN_CONTROL.txt:Samba & Windows NT域控制7. 用Winbind在Windows NT与UNIX间进行统一登录7.1. 概要7.2. 介绍7.3. Winbind的功能7.3.1. 使用目标7.4. winbind如何工作7.4.1. Microsoft远程过程调用7.4.2. 名字服务切换7.4.3. 可插式验证模块7.4.4. 用户及组ID的分配7.4.5. 缓存结果7.5. 安装及配置7.6. 限制7.7. 结语8. UNIX权限位和Windows NT访问控制表8.1. 用NT安全对话框浏览和修改UNIX权限8.2. 如何浏览Samba共享项上的文件权限8.3. 浏览文件所有权8.4. 浏览文件或目录权限8.4.1. 文件权限8.4.2. 目录权限8.5. 修改文件或目录权限8.6. 使用创建掩码选项8.7. 使用文件属性映射9. OS2客户HOWTO9.1. 常见问答集9.1.1. 如何把OS/2 Warp Connect或OS/2 Warp 4配置成Samba的客户端?9.1.2. 如何把How can I configure OS/2 Warp 3 (非Connect版)、OS/2 1.2、1.3或2.x配置成Samba的客户端?9.1.3. 把OS/2(任何版本)作为客户端还有其它的问题吗?9.1.4. 如何让OS/2客户下载打印机驱动程序呢?10. 中文翻译版致谢--------------------------------------------------------------------------------第1章. 如何安装并测试Samba1.1. Step 0: 阅读手册页Samba发布版中所带的手册页包含了大量有用的信息,如果你不知道怎样阅读它们,可以试试下面的命令:$ nroff -man smbd.8 | more在Samba的网站可以找到其它的资源。
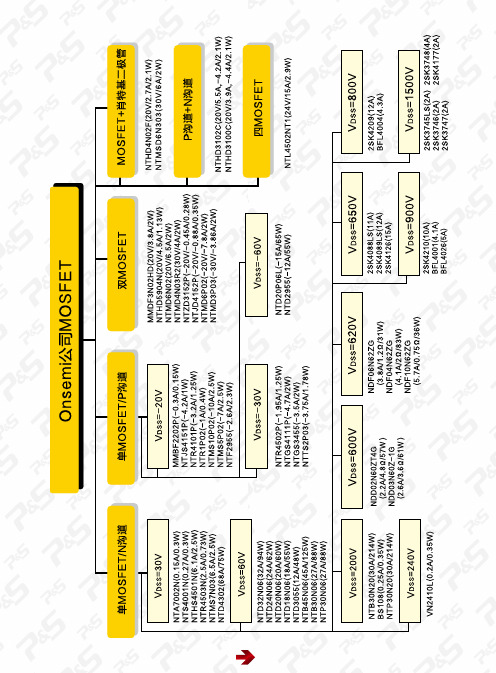
15.分离元器件选型Discrete
index
单片机和 微处理器
系统管 理器件
通信接 口器件
数据 转换器
信号调 理器件
电源管 理器件
数字 电位器
数字逻 辑电路 差分逻辑 与时钟管 理器件
开关器件
存储器
功率器件
传感器
特殊功能 集成电路
分立半导 体器件
被动器件
合理的电路板布局最重要的是要在使用 TVS 二极管保护 ESD 损害的同时避免自感。TVS 器件应与接口尽量接近, 与被保护线路尽量接近,这样才会减少自感耦合到其它邻近线路上的机会。在电路板设计中还应注意以下几点:尽量避 免在保护线路附近走比较关键的信号线,尽量将接口安排在同一个边上;采用高集成度器件,二极管阵列不但可以大大 节约线路板上的空间,而且减少了由于回路复杂可能诱发的寄生性线路自感的影响;避免被保护回路和未实施保护的回 路并联,将接口信号线路和接地线路直接接到保护器件上,然后再进入回路的其它部分,将复位、中断、控制信号远离 输入 / 输出口,远离电路板的边缘;各类信号线及其馈线所形成的回路所环绕面积要尽量小,必要时可考虑改变信号线或 接地线的位置;在可能的地方都加入接地点。
力源常备 3000 余种 Onsemi 公司的高质量分立器件产品,为工程师在电源、功率驱动、线路保护等产品设计方面提 供购买的便利。
* 因版面原因本目录未列出 Onsemi 公司的全部器件型号,如需订购 Onsemi 公司的其他型号请直接与销售人员联系。
ESD 应用与器件选择
ESD 保护就是对静电放电的防护。ESD 器件广泛应用于底部连接器的设计,RJ-45(10/100M 以太网网络 ) 接口设计, 视频线路的保护,USB 保护,音频 / 扬声器数据线路保护,按键 / 开关回路的保护。
SIMPANA70中文介绍

SIMPANA70中文介绍SIMPANA7.0介绍一体化信息管理概述Galaxy?数据保护系统Quick Recovery?快速恢复软件 CDR 连续数据复制用户级 WEB 搜索 CommVault? 高级功能Simpana? Singular Information Management? 一体化信息管理概述SIMPANA 是CommVault 一体化信息管理(Singular Information Management)软件套件的品牌名称,该软件套件提供了数据保护、归档、复制、资源管理和搜索模块,这些模块是利用一套源代码被无缝地结合在一起,并能共享相同的服务功能。
SIMPANA 是业界唯一利用一套源代码把多种功能无缝结合在一起的数据管理软件。
共享的服务功能被称为通用技术引擎(CTE),是业界唯一的、可升级的统一数据管理技术优化集合, CTE 具有节省成本和时间的独特优势,能广泛地用于企业的数据中心、远程办公室和工作组部门。
SIMPANA 一体化信息管理的方法能提供空前的软件效率、性能和可靠性,从而有效地控制数据增长、费用和风险。
利用SIMPANA,将在下面几个方面发挥效益: IT 的基础架构–包括驱动器、介质库、服务器、网络、虚拟带库和磁盘。
一体化信息管理的价值在于,当用户购买一个模块后,花费很少的成本就能很容易把其他模块加进去。
比喻用户购买了备份/ 恢复数据保护模块后,能很方便地把复制、归档、资源管理和搜索模块加进去。
即便用户不需要其他模块,一体化信息管理的单个模块也能为用户提供优秀的数据管理功能。
一个真正的一体化软件要满足:基于一套源程序、共享一个服务集合、一套许可证管理。
这些都是 CommVault 在企业环境中取得骄人业绩的基础。
淘汰只用磁带备份的方式。
人工–培训、排错、维护和可用性改进可靠性、报告功能、应用集成、小颗粒恢复以及单一管理控制台。
能利用较少的资源并能调用现有的功能来进行数据管理。
爱数 备份软件 3.0 说明书
使用手册版权声明爱数软件有限公司©2009 版权所有,保留一切权利。
未经本公司书面许可,任何单位或个人不得以任何形式,复制、传播、摘抄本书内容的 部分或全部。
本手册内容上可能会有增删和修改,爱数软件会定期将修订后的内容纳入新版本中,如 有更改恕不另行通知。
2使用手册关于爱数爱数,直译爱护数据。
作为业界安全备份 的唯一倡导者和中国数据备份整体方案的领先提供商,我们立志于 通过自主创新为用户提供安全可靠的磁盘备份方案,专注于为用户提供全面、统一、安全的 整体网络备份方案和远程容灾服务。
目前,爱数的各项产品和服务在制造业、金融业、医疗业、教育业等大量行业用户中的 成功应用。
了解爱数软件更多信息请访问: 。
爱数软件有限公司地址:上海市闵行区联航路 1188 号浦江智谷 10 号楼 2 层 邮编:201 112 网址: 客户服务电话:021-******** 客户服务邮箱:support@3使用手册目录关于爱数 ................................................................................................................................................ 3爱数备份软件 3.0 简介 ..................................................................................................................... 81. 关于爱数备份软件 3.0..................................................................................................... 82. 爱数备份软件 3.0 的新增功能....................................................................................... 83. 爱数备份软件 3.0 的工作方式........................................................................................ 9 4. 产品组成 ............................................................................................................................ 9 5.基本模块构成与模块功能 ............................................................................................... 95.1 管理控制台 ............................................................................................................. 10 5.2 LDAP 助手.............................................................................................................. 11 5.3 介质服务器 ............................................................................................................. 12 5.4 Windows 客户端 .................................................................................................. 12 5.5 Linux 客户端.......................................................................................................... 13 5.6 系统恢复环境 ......................................................................................................... 13 安装与配置 .......................................................................................................................................... 131. 系统要求 .......................................................................................................................... 13 1.1 32 位管理控制台&介质服务器........................................................................... 13 1.2 64 位管理控制台&介质服务器........................................................................... 14 1.3 32 位 Windows 客户端..................................................................................... 14 1.4 64 位 Windows 客户端..................................................................................... 15 1.5 32 位 Linux 客户端.............................................................................................. 15 1.6 64 位 Linux 客户端.............................................................................................. 16 1.7 LDAP 助手.............................................................................................................. 162. 如何使用 AnySetup....................................................................................................... 16 2.1 检测环境 ................................................................................................................... 17 2.2 安装指导 ................................................................................................................... 18 2.3 查看自述文件 ........................................................................................................... 183. 软件安装管理 .................................................................................................................. 19 3.1 管理控制台安装、配置与卸载 .............................................................................. 19 3.2 介质服务器的安装、配置和卸载.......................................................................... 244使用手册3.3 Windows 客户端安装、配置与卸载.................................................................... 26 3.4 LDAP 助手的安装、配置和卸载 ........................................................................... 32 3.5 Linux 客户端的安装、配置和卸载 ....................................................................... 34 3.6 系统恢复环境的安装 ............................................................................................ 35爱数备份软件管理 ............................................................................................................................. 371. 登录管理控制台 ............................................................................................................ 37 2. 用户管理 ........................................................................................................................ 382.1 创建和管理用户.....................................................................................................38 2. 2 创建和管理用户组.................................................................................................. 38 2.3 用户权限设置 ........................................................................................................... 39 3. 客户端管理 ...................................................................................................................... 41 3.1 客户端(组)操作................................................................................................. 41 3.2 客户端配置 ............................................................................................................. 41 3.3 删除客户端 ............................................................................................................. 42 4. 双机/集群管理 ................................................................................................................ 42 5. 介质服务器 ...................................................................................................................... 43 5.1 介质操作 ................................................................................................................. 43 5.2 介质服务器操作.....................................................................................................44 6. 许可证管理 ...................................................................................................................... 45 6.1 添加和删除授权码................................................................................................... 45 6.2 激活授权码 ............................................................................................................. 45 6.3 许可证授权管理.....................................................................................................45 7. 系统设置........................................................................................................................... 46 8. 更新管理 .......................................................................................................................... 47 8.1 更新管理界面 ......................................................................................................... 47 8.2 更新管理操作 ........................................................................................................... 48基本功能操作...................................................................................................................................... 491. 基本功能操作 .................................................................................................................. 49 1.1 备份操作 ................................................................................................................... 49 1.2 创建任务和设置任务选项 ...................................................................................... 50 1.3 备份文档 ................................................................................................................... 52 1.4 备份操作系统 ........................................................................................................... 53 1.5 备份邮件数据 ........................................................................................................... 542. 恢复操作 .......................................................................................................................... 542.1 浏览恢复 ................................................................................................................... 55 2.2 下载恢复 ................................................................................................................... 55 2.3 搜索恢复 ................................................................................................................... 565使用手册3. 执行操作 .......................................................................................................................... 573.1 常规执行任务 ........................................................................................................... 57 3.2 历史清单 ................................................................................................................. 57 3.3 日志管理 ................................................................................................................... 58 3.4 报表管理 ................................................................................................................... 58 应用功能操作...................................................................................................................................... 591. SQL SERVER 备份与恢复............................................................................................... 591.1 功能介绍 ................................................................................................................. 59 1.2 备份注意事项 ......................................................................................................... 60 1.3 备份指导 ................................................................................................................. 60 1.4 恢复指导 ................................................................................................................. 63 1.5 常见问题总结 ......................................................................................................... 65 2. Oracle 备份与恢复.......................................................................................................... 672.1 功能介绍 ................................................................................................................... 67 2.2 备份注意事项 ........................................................................................................... 67 2.3 备份指导 ................................................................................................................... 68 2.4 恢复指导 ................................................................................................................. 71 2.5 常见问题 ................................................................................................................. 74 3. Exchange Server 备份与恢复....................................................................................... 773.1 功能介绍 ................................................................................................................... 77 3.2 备份指导 ................................................................................................................. 77 3.3 恢复指导 ................................................................................................................... 79 3.4 恢复后注意事项.....................................................................................................80 3.5 常见问题处理 ........................................................................................................... 81 4. Lotus Domino 备份与恢复 ........................................................................................... 844.1 功能介绍 ................................................................................................................... 84 4.2 备份注意事项 ........................................................................................................... 85 4.3 备份指导 ................................................................................................................. 86 4.4 恢复指导 ................................................................................................................. 88 4.5 常见问题 ................................................................................................................. 89 5. Sybase 备份与恢复 ......................................................................................................... 905.1 功能介绍 ................................................................................................................... 90 5.2 备份注意事项 ........................................................................................................... 906使用手册5.3 备份指导 ................................................................................................................... 90 5.4 恢复指导 ................................................................................................................... 93 5.5 常见问题 ................................................................................................................. 95 6. Active Directory 备份与恢复........................................................................................ 96 6.1 功能介绍 ................................................................................................................... 96 6.2 备份注意事项 ........................................................................................................... 96 6.3 备份指导 ................................................................................................................. 97 6.4 恢复指导 ................................................................................................................... 99 6.5 常见问题 ...............................................................................................................100 7. 实时备份 ........................................................................................................................ 101 7.1 功能介绍 ...............................................................................................................101 7.2 备份指导 ...............................................................................................................101 7.4 恢复指导 .................................................................................................................103 恢复系统 ............................................................................................................................................104 1.启动系统恢复环境 .......................................................................................................... 104 1.1 硬盘启动 ...............................................................................................................104 1.2 光盘启动 ...............................................................................................................104 1.3 USB 设备启动 ......................................................................................................104 2. 恢复系统 ........................................................................................................................ 105 2.1 手动恢复系统 .......................................................................................................105 2.2 自动恢复系统 .......................................................................................................106 2.3 裸机恢复 ...............................................................................................................106 技术支持 AnySupport ................................................................................................................108 FAQ.....................................................................................................................................................1087使用手册爱数备份软件 3.0 简介1. 关于爱数备份软件 3.0作为业界安全备份的唯一倡导者和国内数据备份整体方案的领导者,上海爱数软件有限 公司专注于备份软件的技术研究和产品开发,提供的解决方案涵盖企业级备份软件、软硬件 一体化方案、远程数据灾备平台、在线备份服务等,立志通过自主创新为用户提供整体网络 备份方案和远程容灾服务。
Synology DSM 7.1 用户手册说明书

目錄第 1 章:簡介 01第 2 章:快速入門指南 02 2.1 安裝硬碟2.2 開始使用 DSM2.3 註冊 Synology 帳戶2.4 DSM 桌面導覽2.5 檢查區域選項2.6 指定 QuickConnect ID2.7 建立儲存空間2.8 建立共用資料夾來分享檔案2.9 安裝附加套件2.10 建立本地使用者及群組2.11 管理通知設定2.12 強化安全性2.13 定期更新 DSM第 3 章:帳號與權限 26 3.1 帳號與權限3.2 目錄用戶端3.3 Synology Directory Server3.4 LDAP Server3.5 SSO Server3.6 RADIUS Server第 4 章:儲存與虛擬化 30 4.1 儲存空間管理員4.2 儲存擴充4.3 儲存空間分析器4.4 SAN Manager 與 Storage Console4.5 Virtual Machine Manager第 5 章:檔案分享與同步 355.1 共用資料夾5.2 檔案服務5.3 File Station5.4 Synology Drive Server5.5 Cloud Sync5.6 WebDAV第 6 章:資料備份 40 6.1 Active Backup 套件組合6.2 USB Copy第 7 章:NAS 保護 43 7.1 DSM 設定備份7.2 Hyper Backup7.3 Snapshot Replication7.4 Synology High Availability第 8 章:安全性 45 8.1 安全性設定8.2 Secure SignIn8.3 安全諮詢中心8.4 防毒軟體第 9 章:網路 47 9.1 外部存取9.2 網路設定9.3 Proxy Server9.4 DNS Server9.5 DHCP Server9.6 VPN Server第 10 章:管理 57 10.1 硬體及電源設定10.2 登入入口10.3 資源監控10.4 日誌中心10.5 Universal Search10.6 Central Management System10.7 Active Insight10.8 系統重置第 11 章:生產力工具 6311.1 Synology Office11.2 Note Station11.3 Synology Chat11.4 Synology Calendar11.5 Synology Contacts11.6 Synology MailPlus11.7 Web Station第 12 章:多媒體 6712.1 Synology Photos12.2 Video Station12.3 Audio Station12.4 媒體伺服器12.5 索引服務12.6 Advanced Media Extensions第 13 章:監控方案 7013.1 設定網路攝影機13.2 監控中心13.3 錄影與回放13.4 全方位管理功能13.5 集中化管理系統附錄 73法律資訊相關資訊Synology 發佈多種支援文件。
Motorola Mag One 无线通信设备用户手册说明书

P R O D U C T S A F E T Y A N D R F E X P O S U R E C O M P L I A N C EA T T E N T I O N !T h i s r a d i o i s r e s t r i c t e d t o o c c u p a t i o n a l u s e o n l y t o s a t i s f y F C C R F e n e r g y e x p o s u r er e q u i r e m e n t s . B e f o r e u s i n g t h i s p r o d u c t , r e a d t h e R F e n e r g y a w a r e n e s s i n f o r m a t i o n a n d o p e r a t i n gi n s t r u c t i o n s i n t h e P r o d u c t S a f e t y a n d R F E x p o s u r e b o o k l e t e n c l o s e d w i t h y o u r r a d i o (M o t o r o l a P u b l i c a t i o n p a r t n u m b e r 6881095C 98) t o e n s u r e c o m p l i a n c e w i t h R F e n e r g y e x p o s u r e l i m i t s .F o r a l i s t o f M o t o r o l a -a p p r o v e d a n t e n n a s , b a t t e r i e s , a n d o t h e r a c c e s s o r i e s , v i s i t t h e f o l l o w i n g w e bs i t e w h i c h l i s t s a p p r o v e d a c c e s s o r i e s : h t t p ://w w w .m o t o r o l a .c o m /g o v e r n m e n t a n d e n t e r p r i s eM a g O n e ™ b y M o t o r o l a i s r e g i s t e r e d i n t h e U .S . P a t e n t a n d T r a d e m a r k O f f i c e .A l l o t h e r p r o d u c t s a n d s e r v i c e n a m e s a r e t h e p r o p e r t y o f t h e i r o w n r e s p e c t i v e o w n e r s .© M o t o r o l a , I n c . 2005, 2006, 20071301 E . A l g o n q u i n R d .,S c h a u m b u r g , I L 60196-1078, U .S .A .P r i n t e d i n C h i n a . 02/07. A l l R i g h t s R e s e r v e d .*6881098C 61*6881098C 61-DAttaching and Removing the AntennaTo Remove Antenna 2.Rotate the antenna clockwise until tight.1.Turn the antenna in a counter-clockwise direction until it disengages from the radio.To Remove Battery 2.Secure the latch at the bottom of the radio.1.Unlatch the battery clasp at the bottom of the radio.2.Gently lift the hilt of the battery nearest to the battery latch away from the housing.3.Slide battery downwards to remove.Attaching and Removing the Belt ClipTo Remove Belt Clip 1.Align mounting rails of the radio with the grooves of the belt clip.2.Slide the belt clip downwards until it clicks into place.1.Lift the release tab.2.Slide the belt clip upwards.1.Turn off your radio and the A/C power supply to your charger (if they are on).2.Place your radio in the charger pocket.3.Turn on the charger’s A/C power supply.4.While charging your radio, the charger’s LED shows a steady red light. The radio should be charged at least 16 hours initially before decreasing charging time to 12 hours.5.Turn off the charger’s A/C power supply, and remove the radio from the charger pocket.6.For more details, refer to your Tri-Chem Charger User Guide (6871916T01).Audio Alert TonesTone Name Tone Cadence DescriptionIn Chirp Tone Programmable buttons are pressed.Out Chirp Tone Programmable buttons are pressed.Bad Key Chirp Tone Invalid programmable button function (i.e. pressing programmable button while button lock is activated.)Talk Prohibit Tone Continuous tone is heard if PTT is pressed when transmit is not allowed.Low Battery Alert Tone Repeating tone heard if battery level is low.PriorityChannel Alert ToneReceived priority channel in Priority Scan mode.Low ToneHigh ToneLED IndicatorsColour State IndicationRed Illuminated Radio is transmitting.Blinking Battery voltage is low.Green Illuminated Radio is receiving with PL/DPL disabled.Blinking Radio is in active scanning mode.OrangeIlluminated Radio is receiving with PL/DPL enabled.BlinkingAn error has occured.Accessories*Caution: Your radio does not support the VOX feature. Please set the accessory switch to ‘PTT’. If the accessory switch is set to ‘VOX’, your radio transmits constantly and never receives.Types Part No.DescriptionAntenna PMAD4051_R Mag One 150-174MHz Antenna PMAE4020_R Mag One 450-470MHz Antenna Audio AccessoryPMMN4008_Remote Speaker MicrophonePMLN4442_Earbud with in-line mic and PTT/VOX * Switch PMLN4443_Ear Receiver with in-line mic and PTT/VOX * Switch PMLN4445_Ultra Lightweight Headset with In-line PTT/VOX * Switch PMLN4294_Earbud with Microphone & PTT Combined PMLN4605_Clear Acoustic KitPMLN4606_2-Wire Surveillance Kit with Clear Acoustic Tube PMLN4658 _D-shell Earset with Boom Mic with PTT/VOX * Switch BatteryPMNN4071_R Mag One NiMH 1200mAH PMNN4075_R Mag One Li-Ion 1500mAH Carry AccessoryPMLN4743_Mag One Spring Belt Clip PMLN4741_Mag One Soft Leather Carry Case PMLN4742_Mag One Hard Leather Carry Case Charger PMLN5041_R Mag One Tri-Chem SUC BasePMLN5048_R Mag One Tri-Chem SUC with Switching PS US PlugEPNN9288_Switching Power Supply with AC Cord, US plug, 90–264 VACProgrammable Buttons•The following functions can be assigned as short press (press and release) or long press (press and hold for 1 second) in the programmable buttons.† In Chirp Tone* Out Chirp Tone•Your radio’s default functions are described below. If re-programmed, enter the new functions .ButtonFunctionHigh/Low Power Selects desired power level to High † or Low *.Volume Set Allows you to check the audio and alert tone volume level.Monitor Allows you to monitor the current channel for activity; disables squelch.Sticky Monitor *The radio monitors continually until you press this button again.ScanStarts * or Stops † channel scan.Nuisance Channel Delete †Removes unwanted channel(s) temporarily from scan list during scan.Repeater/Talkaround Toggles radio between functioning in Repeater mode † or Talkaround mode *.PL/DPL Enables †/Disables * radio from requiring matching PL/DPL to receive messages.Button Lock Locks * or unlocks † all buttons except PTT, Channel Knob and On/Off/Volume Knob .Battery Save Mode Toggles between functioning with Battery Saver ON * or Battery Saver OFF †.SquelchSelects desired squelch level: Normal † or Tight *.Press TypeProgrammable Button 1Programmable Button 2DefaultRe-programmedDefault Re-programmedShort Press Monitor ScanLong Press Sticky MonitorNuisance Channel Delete。
E1UAA20-16.257M中文资料(ECLIPTEK)中文数据手册「EasyDatasheet - 矽搜」
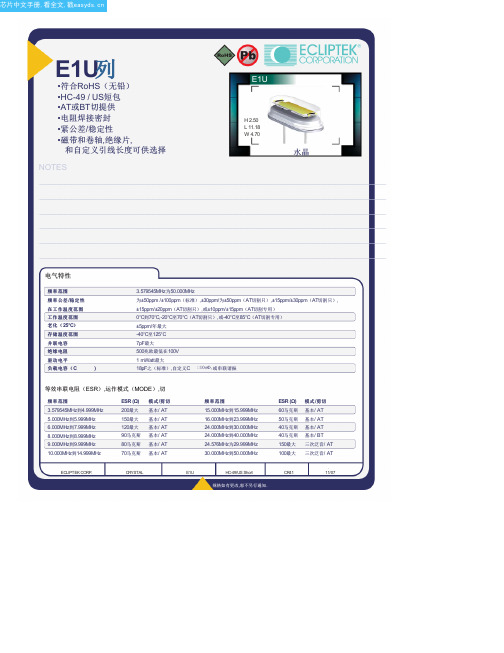
E1U列•符合RoHS(无铅)•HC-49 / US短包•AT或BT切提供•电阻焊接密封•紧公差/稳定性•磁带和卷轴,绝缘片,和自定义引线长度可供选择NOTES H 2.50L 11.18W 4.70水晶_____________________________________________________________________________________________________________________________________________________________________________________________ _____________________________________________________________________________________________________________________________________________________________________________________________ _____________________________________________________________________________________________________________________________________________________________________________________________ _____________________________________________________________________________________________________________________________________________________________________________________________ _____________________________________________________________________________________________________________________________________________________________________________________________ _____________________________________________________________________________________________________________________________________________________________________________________________ _____________________________________________________________________________________________________________________________________________________________________________________________ _____________________________________________________________________________________________________________________________________________________________________________________________ _____________________________________________________________________________________________________________________________________________________________________________________________ _____________________________________________________________________________________________________________________________________________________________________________________________ _____________________________________________________________________________________________________________________________________________________________________________________________ _____________________________________________________________________________________________________________________________________________________________________________________________电气特性频率范围频率公差/稳定性在工作温度范围温度范围工作温度范围老化(25°C)存储温度范围并联电容绝缘电阻驱动电平负载电容(C)3.579545MHz为50.000MHz为±50ppm /±100ppm(标准),±30ppm/为±50ppm(AT切割只),±15ppm/±30ppm(AT切割只),±15ppm/±20ppm(AT切割只),或±10ppm/±15ppm(AT切割专用)0°C到70°C,-20°C至70°C(AT切割只),或-40°C至85°C(AT切割专用)±5ppm/年最大-40°C至125°C7pF最大500兆欧最低在100V1 mWatt最大18pF之(标准),自定义C 10pF,或串联谐振等效串联电阻(ESR),运作模式(MODE),切频率范围3.579545MHz到4.999MHz5.000MHz到5.999MHz6.000MHz到7.999MHz8.000MHz到8.999MHz9.000MHz到9.999MHz10.000MHz到14.999MHz ESR (Ω)200最大150最大120最大90马克斯80马克斯70马克斯模式/剪切基本/ AT基本/ AT基本/ AT基本/ AT基本/ AT基本/ AT频率范围15.000MHz到15.999MHz16.000MHz到23.999MHz24.000MHz到30.000MHz24.000MHz到40.000MHz24.576MHz为29.999MHz30.000MHz到50.000MHzESR (Ω)60马克斯50马克斯40马克斯40马克斯150最大100最大模式/剪切基本/ AT基本/ AT基本/ AT基本/ BT三次泛音/ AT三次泛音/ AT.ECLIPTEK CORP.CRYSTAL E1U HC-49/US Short CR4111/07零件编码指南E1U A A 18 - 20.000M - I2 TR频率公差/稳定性A =±50PPM 25°C时,±0℃至100ppm70℃B =±50PPM,在25°C,±100ppm-20℃至70℃C =±50PPM,在25°C,±100ppm温度范围为-40°C至85°CD =±30ppm25°C时,±0℃50PPM至70℃E =±30ppm25°C时,为±50ppm -20℃至70℃F =±30ppm25°C时,为±50ppm -40°C至85°CG =±15ppm25°C时,±0℃为30ppm至70℃H =±15ppm25°C时,±30ppm-20℃至70℃J =±15ppm25°C时,±30ppm温度范围为-40°C至85°C K =±15ppm25°C时,±0℃为20ppm至70℃L =±15ppm25°C时,±20ppm-20℃至70℃M =±15ppm25°C时,±20ppm温度范围为-40°C至85°C N =±10ppm25°C时,±0℃为15ppm至70℃P =±10ppm25°C时,±15ppm-20℃至70℃包装选择空白=散装,A =盘,TR =卷带式可选项空白=无(标准)CX =自定义引线长度I2 =绝缘子标签频率负载电容S =系列X X = X X pF(自定义)动作模式/水晶切割A =基本/ A TB =三次泛音/ A TD =基本/ BT外形尺寸ALL DIM ENSIONS IN M ILLIM ET ERS 卷带尺寸ALL DIM ENSIONS IN M ILLIM ET ERS环境/机械特性PARAMET ER SPECIFICAT ION 标记规格1000 Pieces per ReelCompliant to EIA-468B精细泄漏测试总泄漏测试铅完整铅端接机械冲击耐焊接热抗溶剂可焊性温度循环振荡M IL-STD-883,方法1014,条件AM IL-STD-883,方法1014,条件CM IL-STD-883 2004方法锡2微米 - 6微米M IL-STD-202,方法213,条件CM IL-STD-202,方法210M IL-STD-202,方法215M IL-STD-883,2002年法M IL-STD-883,法1010M IL-STD-883,方法2007,条件A1号线:电子X X.X X X中号Frequency in MHz(5 Digits Maximum + Decimal).ECLIPTEK CORP.CRYSTAL E1U HC-49/US Short CR4111/07。
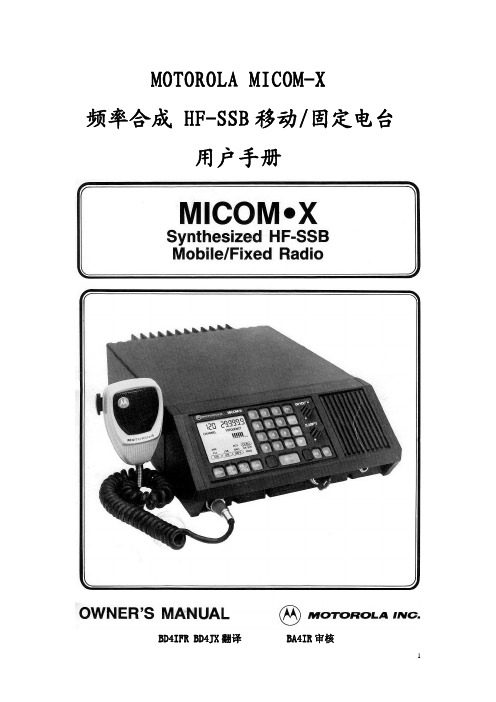
摩托罗拉 RFS7000 产品中文 配置手册
Motorola RFS7000配置手册1配置AC的方式 (3)1.1MGMT口配置 (3)1.2console口配置 (4)2AC配置 (4)2.1国家设置 (4)2.2GE口设置 (5)2.3AC的IP 设置 (6)2.4路由设置 (6)2.5WLAN设置 (7)2.6AP配置 (10)2.7配置DHCP (11)2.8流量设置 (13)2.8.1基于WLAN的流量限制 (13)2.8.2基于单个无线用户的流量限制 (14)2.9负载均衡 (15)2.9.1基于无线用户数量的负载均衡 (15)2.9.2基于设定无线用户数量的负载均衡 (16)2.9.3基于无线用户流量的负载均衡 (17)2.9.4用户按照VLAN进行负载均衡 (17)2.10NAT地址转换设置 (17)2.11非法AP检测设置 (20)2.12网络自愈 (21)2.13加密 (22)2.13.1WPA2 TPIK加密 (22)2.14802.11x EAP认证 (22)2.15冗余 (27)2.15.1主机配置 (27)2.15.2备机配置 (28)2.15.3查看主备机状态 (29)2.16配置数据导入导出 (29)2.17启用某个版本运行 (29)2.18软件升级 (29)2.19TELNET端口打开 (30)2.20其他 (30)2.20.1其他 (30)1配置AC的方式1.1MGMT口配置使用交叉网线连接至AC(RFS7000)的MGMT口(管理地址为10.1.1.100/24)。
1.2 console口配置使用console口进入给以太口配置一个地址进行管理。
1.2.1 用超级终端,波特率为192001.2.2端口配置为VLAN 100(任意),给VLAN 100配置一个IP地址(任意)下文中的AC配置步骤主要以登陆到AC的GUI界面为主,CLI界面为辅。
2AC配置2.1 国家设置第一次登陆到AC的Web界面后,会要求设置国家项。
Motorola BT Push-to-Talk (PTT) User Guide

2. Charging the BT Push-to-Talk (PTT) button1. Package contents Battery Power Indicators of BT PTT buttonBuilt-in bluetooth module(inside the radio)BT PTT buttonVelcro USB charging cable(One out of two)When the indicator on the PTT is blinking red, the battery voltage is low. Connect the USB charging cord into the BT PTT's USB charging port. If the PTT is not fully charged, the indicator will turn solid red. When the indicator turns off, the unit is fully charged. A fully discharged battery will need approximately 1.5 hours to complete a full charge.For best performance, keep charging PTT when not in use.Red blinking lightLow battery voltage Light offFully charged. Over 24 hours’talk time Red solid light Less than a full chargeBluetooth(BT) UserGuide3. Mounting the BT PTTA Velcro is supplied with the BT PTT button which allows you to secure the PTT button to the car steeling wheel or any other location for convenience. 4. Bluetooth MenuThe AnyTone Bluetooth features are accessed from the radio menu. If the Bluetooth option is installed on the radio, the Bluetooth Menu will appear in the radio Main Menu.Controls for the Bluetooth option are listed and described in the table below:5. Getting StartedStep One: Pairing the radio with BT PTT button●Press the BT PTT button, so the blue light is blinking. The BT PTT is now inpairing mode.●Turn on radio and go into bluetooth menu, turns BT On in BT On/Off menu.Scroll down to BT PTT Pair menu, enter into PTT Pair, the radio is now in pairing mode.●Place the BT PTT button near the radio and wait. Within a few seconds, thedevices should pair with each other.●Once paired, the LED on the BT PTT will turn off, and the radio will show ablue "P" icon on the top line of the display.Step Two: Pairing the radio with a Car Audio System or a Bluetooth earpiece●Turn on the car audio system and set it to bluetooth pairing mode (sameoperation for the BT earpiece).●Scroll the radio menu to BT Pairing menu, enter into Seek PTT, the radiowill start seeking a BT device to pair with.(The BT must be on in BT On/Off menu.)●Locate the radio near the car audio system or bluetooth earpiece and wait.Within a few seconds, the radio will show available BT names, select the BT name ELEC…. and start pairing.●Some cars require a 6 digit pin code for BT connection. Enter this code intothe BT pin code menu and wait for pairing.●Once paired, the radio will have the blue BT icon show on the top of display. Notice: The radio can only connect to one BT module at a time, either the Car Audio System or the Bluetooth earpiece.Step Three: Transmit and Receive OperationPush-to-Talk can be activated by any of the following methods:●Pressing and hold the PTT button of the radio itself.●Pressing and hold the PTT button on BT PTT (if the BT PTT has beenpaired with the radio per Step One above).When transmitting, the operator's voice is picked-up by:●The car audio system. (after a car audio system has been paired to theradio).●The microphone in the Bluetooth earpiece. (after a bluetooth earpiece hasWhen receiving, the received audio is handled by following methods: ●Receive audio can be heard over car audio system or bluetooth earpiece, and it can also be heard over the radio's internal speaker when BT + int spk is selected in the radio menu.●The volume can be controlled by car audio system or bluetooth earpiece volume setting. It can also be controlled by the volume knob on the radio.Notice: If the received audio level is not loud enough even if you set the radio volume to maximum, you can adjust the BT Spk Gain in the menu to a higher level to get a louder received volume.Important Notice:●Although Bluetooth version 4.2 is compatible to many newer car entertainment systems, it cannot be guaranteed that it will work with all of these devices .●Anytone will continue to improve the Bluetooth system to allow more car models to be connected to our radios. Updating of the Bluetooth firmware in the radio and in the PTT module may be required to achieve these improvements .been paired to the radio)●The microphone in the radio. (If BT + int mic is turned on in radio menu)Notice: If the recipients volume is not loud enough with the volume set to maximum, you can adjust the BT Mic Gain via the menu to a higher level to achieve a louder transmit volume.A4.200611。
EasyATM 內建式 70 合 1 (IR 版) 产品说明书

步驟 6: EZO 網路 ATM 智慧軟體安裝完成 螢幕上出現此畫面,表示「EZO 網路 ATM 智慧軟體」 安裝完成, 按下「完成」即可。
6
3. IE 瀏覽器設定(IE.6 / IE.7 / IE.8)
步驟 1: 確定 IE 版本 請開啟 IE 瀏覽器(Internet Explorer), 選擇上方功能選項說明 → 關於 Internet Explorer 請務必要完成此設定!
安裝過程4: 驅動程式及 SIM 卡編輯軟體安裝完成 「SIM 卡編輯軟體」及「智慧卡讀卡機驅動程式」安 裝完成 後,請按「確定」鈕以進行下一步。
步驟 5: 安裝 EZO 網路 ATM 智慧軟體 系統將自行啟動安裝「EZO 網路 ATM 智慧軟體」, 安裝過程中請勿取消,以免安裝失敗。 將來您使用 EasyATM 晶片讀卡機時,直接點選 「EZO」圖示捷徑,即可立即為您啟動網路 ATM 服務。
( Windows Me / XP / 2000 / vista / 2008 / 7 ) 進 行安裝畫面。 程式安裝過程將因個人電腦屬性不同, 安裝時間約為 30 秒~2 分鐘不等,煩請耐心等候。
步驟 3: 安裝驅動程式及 SIM 卡編輯軟體 點選「安裝驅動程式」之後,系統將會依序自動為您 安裝「SIM 卡編輯軟體」、「智慧卡讀卡機驅動程式」,
EasyATM 內建式 70 合 1 (IR 版)
產品使用手冊
1
EasyATM 晶片讀卡機 產品使用手冊
感謝您選購 EasyATM 晶片讀卡機,EasyATM 晶片讀卡機系列為 DIGILION 系列產品之一,為您提供最安全、最 方便的網路 ATM 服務。請跟隨下面的步驟指示安裝 EasyATM 晶片讀卡機。請勿下載來路不明的驅動程式,如 有任何問題,歡迎您跟我們客服人員聯絡。 本產品使用手冊執行環境為 Window 作業系統,並適用於下列的讀卡機: 作業系統:Windows ME / 2000 / XP / 2003 / Vista / 2008 / 7 Windows 7 請務必參照第四點完成設定。
- 1、下载文档前请自行甄别文档内容的完整性,平台不提供额外的编辑、内容补充、找答案等附加服务。
- 2、"仅部分预览"的文档,不可在线预览部分如存在完整性等问题,可反馈申请退款(可完整预览的文档不适用该条件!)。
- 3、如文档侵犯您的权益,请联系客服反馈,我们会尽快为您处理(人工客服工作时间:9:00-18:30)。
将是产品极相对于阳极
安装位置:
任何
率:
改进L型提供更多接触面产品焊盘
最大外壳焊接温度目:
晶圆厂位置:
亚利桑那州凤凰城
装配 /测试地点:
马来西亚芙蓉
260℃,10秒
最大额定值
等级
峰值功耗(1) @TL 25°C
正向浪涌电流(2) @ TA = 25°C
热阻结铅(典型值)
工作和存储温度范围 NOTES: 1. Nonrepetitive current pulse per Figure 2 and derated above TA = 25°C per Figure 3. NOTES: 2. 1/2 sine wave (or equivalent square wave), PW = 8.3 ms, duty cycle = 4 pulses per minute maximum.
3.7
5.0
NZ
1SMB110AT3
110
122
1.0
177
3.4
5.0
PE
1SMB120AT3
120
133
1.0
193
3.1
5.0
PG
1SMB130AT3
130
144
1.0
209
2.9
5.0
PK
1SMB150AT3
150
167
1.0
243
2.5
5.0
PM
1SMB160AT3
160
178
1.0
259
1SMB12CAT3
12
13.3
1.0
19.9
30.2
1SMB13CAT3
13
14.4
1.0
21.5
27.9
5.0
KXC
5.0
KZC
5.0
5.0
LGC
1SMB14CAT3
14
15.6
1.0
23.2
25.8
1SMB15CAT3
15
16.7
1.0
24.4
24.0
1SMB16CAT3
16
17.8
1.0
乍一看图6降额曲线似乎是在 误差为10毫秒脉冲具有比更高降额系数 10 µs 脉冲.然而,在给定降额系数 脉冲图6乘以峰值功率值 图1为相同脉冲,结果按照预期趋势.
TVS /稳压装置数据
600瓦峰值功率数据表 5-69
芯片中文手册,看全文,戳
一般数据 - 600瓦峰值功率
V
Vin td
40.0
1.0
58.1
10.3
5.0
MP
1SMB40AT3
40
44.4
1.0
64.5
9.3
5.0
MR
1SMB43AT3
43
47.8
1.0
69.4
8.6
5.0
MT
1SMB45AT3
45
50.0
1.0
72.7
8.3
5.0
MV
1SMB48AT3
48
53.3
1.0
77.4
7.7
5.0
MX
1SMB51AT3
51
电流)和引线电感.这种诱导效应产生
在两端电压设备过冲或
部件防护护,如图5最小化 这种过冲是在应用非常重要,因为
用于添加瞬变抑制器主要目是夹紧
电压尖峰.在SMB系列有一个很好反响 时间,通常为1纳秒和可以忽略不计电感.然而,
外部感应影响可能产生不能接受过
射击.适当电路布局,最小引线长度及配售
抑制器装置尽可能接近该设备或部件被防护护将这种过冲最
1SMB8.0AT3
8.0
8.89
1.0
13.6
44.1
50
KR
1SMB8.5AT3
8.5
9.44
1.0
14.4
41.7
10
KT
1SMB9.0AT3
9.0
10.0
1.0
15.4
39.0
5.0
KV
1SMB10AT3
10
11.1
1.0
17.0
35.3
5.0
KX
1SMB11AT3
11
12.2
1.0
18.2
0
1毫秒 10毫秒
0
1
2
3
4
TP,脉宽
T,时间(ms)
160 C ° 140
A 120
图 1.脉冲额定值 Curve
图 2.脉冲波形 典型防护护电路
Zin
100
80
Vin
负载
VL
60
峰值脉冲4降0 容% 峰值功20率或电流@ T = 25
0
0
25
50
75
100 125 150
TA,环境温度(℃)
图 3.脉冲降额曲线
1.0
113
5.3
5.0
NP
1SMB75AT3
75
83.3
1.0
121
4.9
5.0
NR
1SMB78AT3
78
86.7
1.0
126
4.7
5.0
NT
1SMB85AT3
85
94.4
1.0
137
4.4
5.0
NV
1SMB90AT3
90
100
1.0
146
4.1
5.0
NX
1SMB100AT3
100
111
1.0
162
缩写和符号
VR
V( BR)分
关断电压.施加反向电压,以确防护非导电状态(见 注1). 这是最小击穿电压器件将呈现,并用于确防护传导不 之前在25℃下该电压电平发生.
VC
最大钳位电压.最大峰值电压
年龄出现在整个瞬态抑制器时,
经受峰值PUSLE电流在一毫秒时间间隔.尖峰脉冲电压是 电压上升,由于双方串联电阻和热上升结合.
26.0
23.1
5.0
LP
1SMB17AT3
17
18.9
1.0
27.6
21.7
5.0
LR
1SMB18AT3
18
20.0
1.0
29.2
20.5
5.0
LT
1SMB20AT3
20
22.2
1.0
32.4
18.5
5.0
LV
1SMB22AT3
22
24.4
1.0
35.5
16.9
5.0
LX
1SMB24AT3
24
26.7
33.0
5.0
KZ
1SMB12AT3
12
13.3
1.0
19.9
30.2
5.0
LE
1SMB13AT3
13
14.4
1.0
21.5
27.9
5.0
LG
1SMB14AT3
14
15.6
1.0
23.2
25.8
5.0
LK
1SMB15AT3
15
16.7
1.0
24.4
24.0
5.0
LM
1SMB16AT3
16
17.8
1.0
1.0
38.9
15.4
5.0
LZ
1SMB26AT3
26
28.9
1.0
42.1
14.2
5.0
ME
1SMB28AT3
28
31.1
1.0
45.4
13.2
5.0
MG
1SMB30AT3
30
33.3
1.0
48.4
12.4
5.0
MK
1SMB33AT3
33
36.7
1.0
53.3
11.3
5.0
MM
1SMB36AT3
36
一般 数据
600瓦
峰值功率
塑料表面贴装 齐纳过电压 短暂 抑制器
6.8-200伏 600瓦 峰 值 功 率
CASE 403A
塑料
符号
PPK
IFSM
RqJL TJ, Tstg
值
600
100
25 - 65到+150
单元
Watts
Amps
°C/W °C
转1
600瓦峰值功率数据表 5-68
芯片中文手册,看全文,戳
voltage level. * * VBR measured at pulse test current IT at an ambient temperaure of 25°C. {{ Surge current waveform per Figure 2 and derate per Figure 3 of the General Data — 600 Watt at the beginning of this group. {{ T3 suffix designates tape and reel of 2500 units.
应用手册
响应时间
在大多数应用中,瞬态抑制器装置是 放置在平行于设备或组件得到防护护.在这种情况下,
存在与器件电容和与该装置电感和连接方法电感相关过冲条件
相关联时间延迟.电容效应是在因为它仅产生中时间延迟从
所述工作电压钳位电压过渡平行防护护方案次要重要
