RHEL4 Oracle10g
在RHEL4上安装OracleDatabase10gR2(上)

在RHEL4上安装OracleDatabase10gR2(上)分步骤教你在window虚拟机的Linu某平台上安装Oracle10g,从安装虚拟机开始一直到安装Oracle10g,每部够有截图与说明。
前言Linu某最初的一些版本,主要用途是作為開發平台工作站及桌上型電腦系統,因此缺乏對於大型系統的支援能力,所以比較不適合當作伺服器系統。
但是自從1999年發表2.2的kernel之後不僅支援多重處理器系統,也包括支援更強健的I/O能力;直到2001年的2.4kernel發表之後,更提供了一個穩定、高效能的作業系統,並且也支援了更大量的記憶體。
所以大多數的硬體廠商,也開始都提供了對Linu某伺服器的驅動程式與支援服務。
從今以後Linu某系統不管是效能和穩定度上都急起直追昂貴的UNI某系統。
除了有硬體大廠支援外,Linu某更擁有製造供應商的如虎添翼加持,如Oracle的強力支援最為後盾。
現今,Oracle所有的主力產品已經都可支援在Linu某作業系統上。
Oracle最初是針對UNI某作業系統而設計的,因此它的架構相當適合由UNI某延伸發展而來的Linu某作業系統。
雖然Oracle也能夠在其他的作業系統的架構上執行,不過不管是效能和穩定度的表現上,UNI某-Like作業系統的架構仍然是最適合它。
擁有Oracle10g與Linu某,將代表著擁有當前最先進的關聯式資料庫管理系統,且運作於最先進最低成本的作業系統上。
測試軟體之取得方式要在RedHatEnterprieLinu某4(RHEL4)上安裝OracleDatabae10gR2,分成三個部份:3.安裝OracleDatabae10gR2()以上所有下載的軟體其授權方式為“(程式開發者授權"DeveloperLicene),雖然具備完整版的功能,但是您只能運用於開發測試或是進行評估,千萬不能進行商業用途!分步骤教你在window虚拟机的Linu某平台上安装Oracle10g,从安装虚拟机开始一直到安装Oracle10g,每部够有截图与说明。
RedHat Linux安装Oracle10g安装步骤
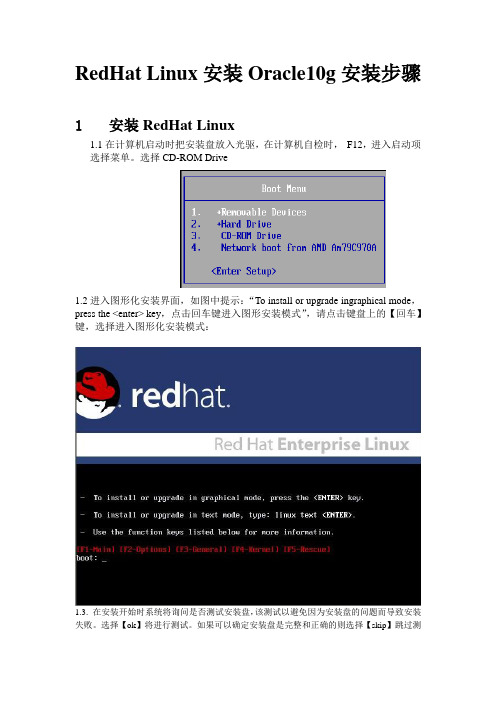
RedHat Linux安装Oracle10g安装步骤1安装RedHat Linux1.1在计算机启动时把安装盘放入光驱,在计算机自检时,F12,进入启动项选择菜单。
选择CD-ROM Drive1.2进入图形化安装界面,如图中提示:“To install or upgrade ingraphical mode,press the <enter> key,点击回车键进入图形安装模式”,请点击键盘上的【回车】键,选择进入图形化安装模式:1.3. 在安装开始时系统将询问是否测试安装盘,该测试以避免因为安装盘的问题而导致安装失败。
选择【ok】将进行测试。
如果可以确定安装盘是完整和正确的则选择【skip】跳过测试。
1.4. 进入Redhat Linux安装界面,该界面中并无需要手动配置的内容,可直接点击【next】继续。
1.5. 在下面这个界面中,用户可以选择安装过程中将使用的语言。
我默认其为英语,然后点击【next】;1.6. 默认键盘语言为U.S.English,如果有错误提示,则选择skip跳过,否则直接next;1.7. 请选择手动分区,Create custom layout,点击【next】1.8. 进入下图分区操作界面,该界面中常用的三个功能及其作用分别是:点击【new】新建分区,点击【edit】对已经建立的分区进行编辑,点击【delete】删除存在的分区。
(这里需要注意,因为linux是文件模式,所以应与windows分区区别开。
特别是在重装linux系统时,如果只想格式化根分区,切记一定要重新挂载其它的分区而不格式化,否则将不能加载分区。
)第一次安装linux系统,并未建立分区,首先请点击【new】建立分区。
分区按如下配置建立(分区顺序并无先后)。
1.8.1. Swap交换分区为内存的两倍,例如:如果物理内存为2G,那么交换分区为4G。
但如果物理内存大于等于16G,那么交换分区大小就是物理内存大小。
ORACLE 10G介绍

AWR采集与性能相关的统计数据,并从那些统计数 据中导出性能量度,以跟踪潜在的问题。与 Statspack 不同,快照由一个称为 MMON 的新的后台 进程及其从进程自动地每小时采集一次。为了节省空 间,采集的数据在 7 天后自动清除。快照频率和保 留时间都可以由用户修改。要查看当前的设置,您可 以使用下面的语句:
不是客户端安装的工具,实际上它是位于数据库服务 器上的一个 HTTP 服务器(称为 DB 控制台,参见下 图)。你可以使用任何浏览器查看 EM 界面。
DB 控制台使用的端口号可在 $ORACLE_HOME/install/portlist.ini 文件中找到。 以下是一个文件的示例(根据主机情况不一样,端口 可能不相同)
AWR 使用几个表来存储采集的统计数据,所有的 表都存储在SYSAUX 表空间中的SYS 模式下,并且以 WRM$_* 和 WRH$_* 的格式命名。前一种类型存储元 数据信息(如检查的数据库和采集的快照),后一种 类型保存实际采集的统计数据。
在这些表上构建了几种带前缀 DBA_HIST_的视图, 这些视图可以用来编写您自己的性能诊断工具。视图 的名称直接与表相关;例如,视图 DBA_HIST_SYSMETRIC_SUMMARY是在 WRH$_SYSMETRIC_SUMMARY表上构建的。 AWR 历史表采集的信息比 Statspack 多许多,这 些信息包括表空间使用率、文件系统使用率、甚至操 作系统统计数据。这些表的完整的列表可以通过以下 命令从数据字典中看到:
ORACLE 10G 简介
亚信联创 曹震
概
述
Oracle 10g于2003年9月9日在旧金山发布,代 号中的G代表GRID,表示ORACLE将提供一个网格计 算体系,是自Oracle 8I提供互联网功能后的一次 重大更名,并在今年发布了可能是Oracle10g的最 后一个补丁集10.2.0.5 。 Oracle 10g可以分为4个版本,分别是: 1、Oracle Database Standard Edition One, 最基本的商业版本,包括基本的数据库功能。
linux安装Oracle 10g过程截图
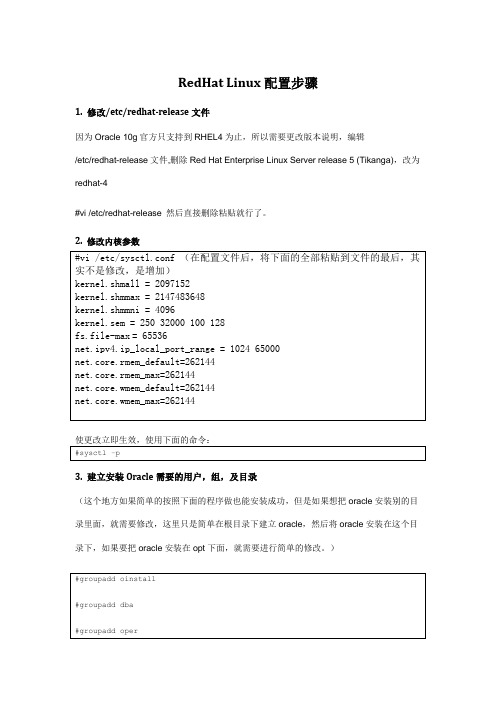
RedHat Linux配置步骤1. 修改/etc/redhat-release文件因为Oracle 10g官方只支持到RHEL4为止,所以需要更改版本说明,编辑/etc/redhat-release文件,删除Red Hat Enterprise Linux Server release 5 (Tikanga),改为redhat-4#vi /etc/redhat-release 然后直接删除粘贴就行了。
2.修改内核参数使更改立即生效,使用下面的命令:3. 建立安装Oracle需要的用户,组,及目录(这个地方如果简单的按照下面的程序做也能安装成功,但是如果想把oracle安装别的目录里面,就需要修改,这里只是简单在根目录下建立oracle,然后将oracle安装在这个目录下,如果要把oracle安装在opt下面,就需要进行简单的修改。
)4.设置oracle用户的shell limit (为了提高在linux系统上运行软件的性能,必须对oracle5.目录授权chmod 777 /database/6.添加登录验证[root@localhost ~]# vi /etc/pam.d/login //添pam认证session required pam_limits.so7.更改Oracle的语言环境更改oracle的语言环境问中文[root@localhost ~]# vi ~oracle/.bash_profile# .bash_profile# Get the aliases and functionsif [ -f ~/.bashrc ]; then. ~/.bashrcfi# User specific environment and startup programsPATH=$PATH:$HOME/binexport PATHumask 022 //文件权限掩码export ORACLE_BASE=/opt/oracle //定义的基本目录export ORACLE_SID=orcl //定义数据库实例名称export DISPLAY=:0.0 //告知默认的显示终端号export LANG=zh_CN.UTF-8 //确定使用的语言环境允许oracle使用图形界面,取消所有限制[root@localhost ~]# xhost + //在图形页面中进行,取消所有权限access control disabled, clients can connect from any host//将Oracle安装文件拷入Linux系统里面,并使ORACLE 安装步骤1.启动安装程序报表由于缺少相关Linux 包导致报表将三个包安装以后启动正常画面如下三个包名分别:libXp-1.0.0-8.i386.rpmlibXp-devel-1.0.0-8.i386.rpmlibXau-devel-1.0.1-3.1.i386.rmp安装完包以后,./runInstaller 启动安装程序如果报错解决方式是由于没有相应权限将database 文件移动至/文件并授权限再次启动启动界面如下在Linux下面执行以上图中的两个脚本待执行完成以后再关闭当前界面[root@localhost ~]# ./root.sh[root@localhost ~]# ./orainstRoot.shLinux 配置ORACLE 环境变量创建数据库[root@localhost ~]#DBCA配置监听[root@localhost ~]# NETCAORACLE数据库启动与关闭问题:SQL操作基本操作限制(Where 子句)练习单行函数练习。
在RHEL 4 上安装Oracle Database 10g R2(下)
在RHEL 4上安裝 Oracle Database 10g R2(下) 作 者:鄭嘉松 Steven Cheng前言在上一期的文章中,我們已經完成了安裝 Oracle 10g R2 的前置準備工作。
本期筆者將延續之前的步驟,說明如何利用 Oracle Universal Install OUI 工具安裝 Oracle10g R2。
整個安裝過程主要分為三部份,首先會先安裝 Oracle 資料庫管理程式(DBMS)部份,然後再利用輔助工具建立資料庫(Database),最後說明如何設定Client 連線工具。
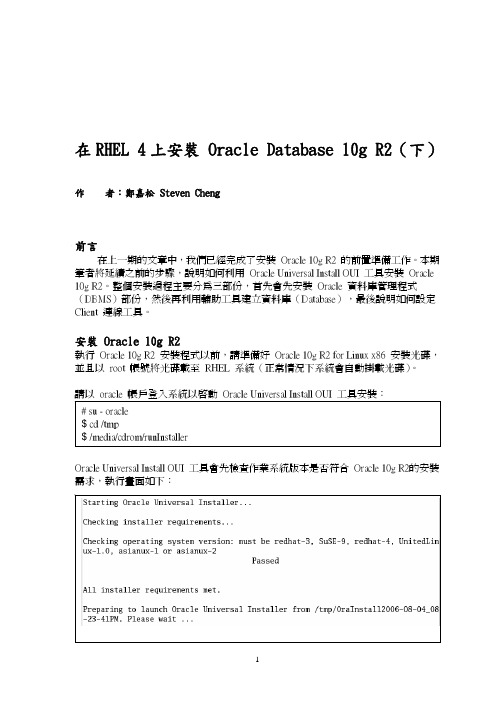
安裝 Oracle 10g R2執行 Oracle 10g R2 安裝程式以前,請準備好 Oracle 10g R2 for Linux x86 安裝光碟,並且以 root 帳號將光碟載至 RHEL 系統(正常情況下系統會自動掛載光碟)。
Oracle Universal Install OUI 工具會先檢查作業系統版本是否符合 Oracle 10g R2的安裝需求,執行畫面如下:【1】 檢查光碟片是否正確(Skip)【2】 安裝歡迎畫面(Next)【3】 選擇安裝時使用的語言介面(English)【4】 選擇鍵盤(Next)【1】 設定 Oracle Inventory 所在目錄。
必須指定足夠權限的使用者群組(oinstall)【2】 選擇 Oracle 10g 安裝的版本【3】 指定 Oracle 安裝目的地【4】 安裝前的檢查(包括系統環境、RHEL核心參數、RHEL套件版本)【5】 選擇只有軟體安裝(Next)【6】 檢查安裝總結【7】 開始安裝軟體【8】 使用終端機開啟另一個視窗,用 root 帳戶執行【9】 完成 Oracle 軟體安裝利用輔助工具建立資料庫在安裝 Oracle 10g R2 時我們可以選擇同時建立資料庫,此時 OUI 工具會自動執行「網路組態輔助程式--- NetCA」以及「資料庫組態輔助程式--- DBCA」。
Oracle10g安装手册(forRedhatAS4)
Oracle10g安装手册(forRedhatAS4)以下操作在redhata4update5上测试通过。
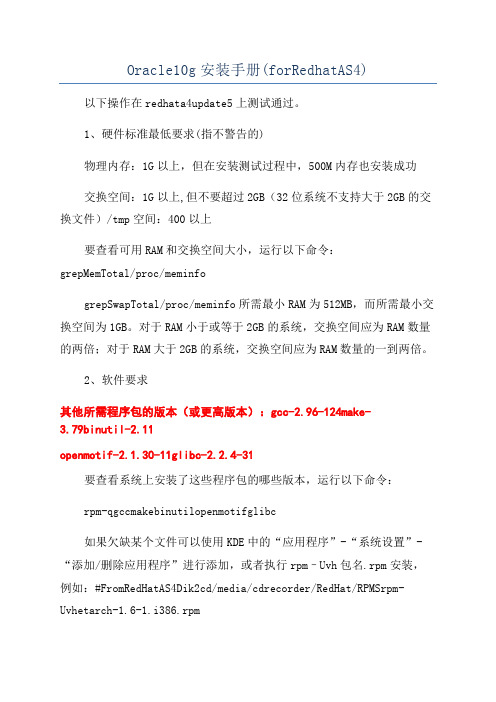
1、硬件标准最低要求(指不警告的)物理内存:1G以上,但在安装测试过程中,500M内存也安装成功交换空间:1G以上,但不要超过2GB(32位系统不支持大于2GB的交换文件)/tmp空间:400以上要查看可用RAM和交换空间大小,运行以下命令:grepMemTotal/proc/meminfogrepSwapTotal/proc/meminfo所需最小RAM为512MB,而所需最小交换空间为1GB。
对于RAM小于或等于2GB的系统,交换空间应为RAM数量的两倍;对于RAM大于2GB的系统,交换空间应为RAM数量的一到两倍。
2、软件要求其他所需程序包的版本(或更高版本):gcc-2.96-124make-3.79binutil-2.11openmotif-2.1.30-11glibc-2.2.4-31要查看系统上安装了这些程序包的哪些版本,运行以下命令:rpm-qgccmakebinutilopenmotifglibc如果欠缺某个文件可以使用KDE中的“应用程序”-“系统设置”-“添加/删除应用程序”进行添加,或者执行rpm–Uvh包名.rpm安装,例如:#FromRedHatAS4Dik2cd/media/cdrecorder/RedHat/RPMSrpm-Uvhetarch-1.6-1.i386.rpm#FromRedHatAS4Dik3cd/media/cdrecorder/RedHat/RPMS#FromRedHatAS4Dik4cd/media/cdrecorder/RedHat/RPMS3、安装oracle1、创建Oracle组和用户帐户接下来,创建用于安装和维护Oracle10g软件的Linu某组和用户帐户。
用户帐户将称为oracle,而组将称为ointall和dba。
以root用户身份执行以下命令:/某某某某某某某某某某某某某某某某某某某某某某某某某某某某某某某某某某某某某某某某某某某某某某某某某建用户、设置密码、修改用户、删除用户:ueraddtetuer创建用户tetuerpawdtetuer给已创建的用户tetuer设置密码说明:新创建的用户会在/home下创建一个用户目录tetueruermod--help修改用户这个命令的相关参数uerdeltetuer删除用户tetuer rm-rftetuer删除用户tetuer所在目录查看有哪些组:more/etc/group/某某某某某某某某某某某某某某某某某某某某某某某某某某某某某某某某某某某某某某某某某某某某某某某某ueraddoraclepawordoracle/ur/bin/groupaddointall/ur/bin/groupadddba/ur/bin/ueradd-m-gointall-Gdbaoracle可以使用idoracle查看一下创建情况可以用uermod改变用户组属性例如:/ur/bin/uermod-gointall-Gdbaoracle使用idoracleuid=512(oracle)gid=512(ointall)group=512(ointall),513(dba)2、创建目录以下假设在根文件系统中创建目录。
在RHEL4上安装OracleDatabase10gR2(上)

在RHEL4上安装OracleDatabase10gR2(上)分步骤教你在windows虚拟机的Linux平台上安装Oracle 10g,从安装虚拟机开始一直到安装Oracle 10g,每部够有截图与说明。
在RHEL 4上安b Oracle Database 10g R2(上)作者:嘉松Steven Cheng前言Linux 最初的一些版本,主要用途是作殚_l平台工作站及桌上型X系y,因此缺乏於大型系y的支援能力,所以比^不m合作伺服器系y。
但是自1999年l表 2.2 的kernel 之後不H支援多重理器系y,也包括支援更健的I/O 能力;直到20XX年的2.4 kernel l表之後,更提供了一定、高效能的作I系y,K且也支援了更大量的w。
所以大多档挠搀wS商,也_始都提供了Linux 伺服器的映淌脚c支援服铡慕褚葬Linux 系y不管是效能和定度上都急起直追昂F的UNIX 系y。
除了有硬w大S支援外,Linux 更碛醒u造供商的如虎添翼加持,如Oracle的力支援最獒岫堋,F今,Oracle 所有的主力a品已都可支援在Linux 作I系y上。
Oracle 最初是UNIX 作I系y而O的,因此它的架相m合由UNIX 延伸l展而淼Linux 作I系y。
m然Oracle 也能蛟谄渌的作I系y的架上绦校不^不管是效能和定度的表F上,UNIX-Like 作I系y的架仍然是最m合它。
碛Oracle 10g c Linux,⒋表著碛挟前最先M的P式Y料旃芾硐到y,且\作於最先M最低成本的作I系y上。
yw之取得方式要在Red Hat Enterprise Linux 4 (RHEL4)上安bOracle Database 10g R2,分成三部份:1.安bVmware Workstation()2.安bRHEL4(https://)3.安bOracle Database 10g R2()以上所有下d的w其授喾绞椤( 程式_l者授啵Developer License),m然具渫暾版的功能,但是您只能\用於_ly或是M行u估,千f不能M行商I用途!分步骤教你在windows虚拟机的Linux平台上安装Oracle 10g,从安装虚拟机开始一直到安装Oracle 10g,每部够有截图与说明。
RHEL4下配置ORACLE 10g RAC
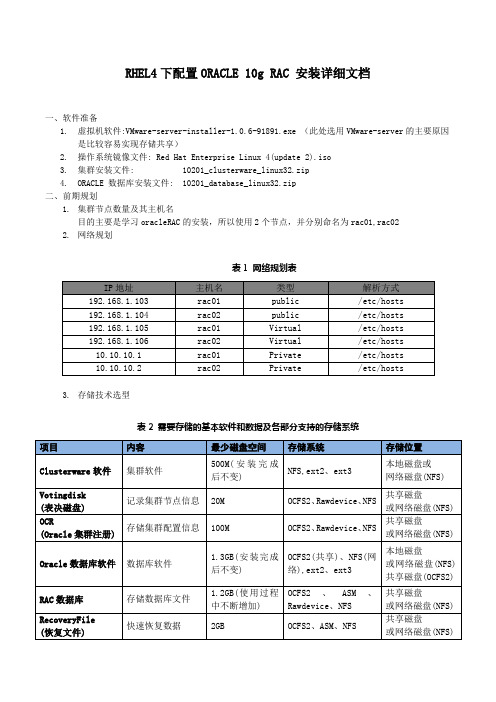
RHEL4下配置ORACLE 10g RAC 安装详细文档一、软件准备1.虚拟机软件:VMware-server-installer-1.0.6-91891.exe (此处选用VMware-server的主要原因是比较容易实现存储共享)2.操作系统镜像文件: Red Hat Enterprise Linux 4(update 2).iso3.集群安装文件:10201_clusterware_linux32.zip4.ORACLE 数据库安装文件: 10201_database_linux32.zip二、前期规划1.集群节点数量及其主机名目的主要是学习oracleRAC的安装,所以使用2个节点,并分别命名为rac01,rac022.网络规划表1 网络规划表3.存储技术选型从存储位置中可以看出,所有的内容均可使用网络磁盘,但是网络磁盘要求有 NAS 设备。
如果不使用 NAS设备,除软件外,其他的数据都必须存储在共享磁盘上。
对于 Oracle数据库软件,如果要存储在共享磁盘上(所有服务器共享一个 Oracle Home) ,需要使用 OCFS2 文件系统。
从上表中可以看出,要想使用单一文件系统,必须使用 OCFS2 或NFS 文件系统。
但是,Oracle10g提供了非常方便的存储管理系统ASM。
我们采用如下策略:将Oracle数据库软件安装在本地磁盘(每个节点上一个拷贝),使用裸设备来存储 Clusterware,使用ASM 来存储数据库和恢复文件。
表4 选定的存储策略4.存储空间规划安装操作系统的用一块虚拟硬盘,大小设置为15G,共享磁盘设置如下表所示三、虚拟环境搭建1.虚拟机创建创建虚拟机命名为 rac01,基本配置如下图所示2.操作系统安装根据提示安装REDHAT AS 4操作系统,安装时,为了以后的配置方便,选择组件的时候选择全部,防火墙选择为禁用,SELinux也选择为禁用。
网卡的地址分别设置成eth0: 192.168.1.103/255.255.255.0 网关:192.168.1.1eth1: 10.10.10.1/255.255.255.0 网关:10.10.10.2543.共享存储实现关闭虚拟机rac01,编辑虚拟机rac01,依次根据规划添加3块虚拟硬盘MODE 都选择:independent,Persistent注:用作共享磁盘的文件一定要放在一个单独的目录保证虚拟机rac01是为关闭状态,找到rac01虚拟机文件所在目录,打开虚拟机Red Hat Enterprise Linux 4.vmx配置文件,在文件最后直接添加如下内容:disk.locking = "FALSE"diskLib.dataCacheMaxSize = "0"scsi1.sharedBus = "virtual"scsi1:1.deviceType = "disk"scsi1:2.deviceType = "disk"scsi1:3.deviceType = "disk"4.节点复制克隆rac01虚拟机前,需要将rac01关闭,然后新建一个目录rac02,将rac01中的虚拟机文件复制到rac02目录中。
Oracle10g安装说明书
Oracle10g安装说明书Oracle 10g for Linux系统安装说明书文件代号:CZ-XTGC-AZ-061024-05整理:郑炎平日期:2006-10-24日期:日期:修订记录名目Linux as 4 上安装oracle 10 g ............................................ - 3 -1、检查内存和交换分区................................................ - 3 -2、检查/tmp空间..................................................... - 3 -3、检查软件包........................................................ - 4 -在RHEL 4 x86_64上安装10g R2 (64-bit)需要的软件包: ............. - 4 -在RHEL 4 x86上安装10g R2 (64-bit)需要的软件包: ................ - 4 -查看处理器内核:................................................. - 4 -能够用以下命令来查询:........................................... - 5 -4、检查内核参数...................................................... - 5 -5、检查磁盘空间...................................................... - 6 -6、创建oracle的用户................................................. - 6 -7、为Oracle用户设定Shell的限制..................................... - 6 -8、创建oracle名目................................................... - 7 -9、设置oracle环境变量............................................... - 7 -10、安装oracle ...................................................... - 8 -1)进入欢迎界面: .................................................. - 9 -2)指定详细名目和认证: ............................................ - 9 -3)弹出对话框要求执行orainstRoot.sh脚本:....................... - 10 -4)检查产品安装的先决条件........................................ - 10 -5)选择数据库配置: ............................................... - 10 -6)指定数据库配置选项: ........................................... - 10 -7)指定数据库储备组选项: ......................................... - 10 -8)指定备份和修复选项: ........................................... - 10 -9)指定数据库密码: ............................................... - 10 -10)点击安装..................................................... - 10 -11)安装完成..................................................... - 11 -11、安装后检查...................................................... - 11 -12、使用Oracle数据库............................................... - 11 -设置 Oracle 环境变量:.......................................... - 11 -启动数据库: ..................................................... - 11 -关闭数据库: ..................................................... - 11 -停止数据库...................................................... - 12 -数据库治理程序:................................................ - 12 -停止网络侦听:.................................................. - 12 -关闭群集服务进程:.............................................. - 12 -启动和停止 Oracle Enterprise Manager 数据库操纵:............... - 12 -启动和停止 iSQL*Plus:.......................................... - 12 -启动和停止监听器:.............................................. - 12 -启动和停止数据库:.............................................. - 13 -列出 Oracle 进程:.............................................. - 13 -13、卸载Oracle:................................................... - 14 -Linux as 4 上安装oracle 10 g 1、检查内存和交换分区检查物理内存grep MemTotal /proc/meminfo检查交换分区grep SwapTotal /proc/meminfo能够创建一个temporary swap文件已增加系统temporary swap 空间su - rootdd if=/dev/zero of=tmpswap bs=1k count=900000chmod 600 tmpswapmkswap tmpswapswapon tmpswap能够用以下命令来撤销temporary swapsu - rootswapoff tmpswaprm tmpswap2、检查/tmp空间依照Oracle的文档,安装oracle的OUI界面需要400MB的/tmp空间$df /tmp假设没有足够的交换tmp空间,能够在其他的文件系统中创建一个tmp名目su - rootmkdir /<AnotherFilesystem>/tmpchown root.root /<AnotherFilesystem>/tmpchmod 1777 /<AnotherFilesystem>/tmpexport TEMP=/<AnotherFilesystem>export TMPDIR=/<AnotherFilesystem>当你安装好oracle后能够删掉增加的tmp空间su - rootrmdir /<AnotherFilesystem>/tmpunset TEMPunset TMPDIR3、检查软件包安装oracle 10g之前需要检查系统的RPM包。
Redhat Linux AS4 安装 Oracle 10g
Redhat Linux AS4 安装Oracle 10g (10.2)1、硬件需求1)内存>1024M内存交换分区>1024M 2倍内存<2048M 1.5倍内存<8192M 1倍内存>8192M 0.75倍内存显示内存命令2)/tmp > 400M3)检测命令内存# grep MemTotal /proc/meminfo交换分区# grep SwapTotal /proc/meminfo/tmp分区# df -k /tmpcpu信息# grep "model name" /proc/cpuinfo2、软件需求1)操作系统Red Hat Enterprise Linux AS/ES 3.0 (Update 4 or later) Red Hat Linux 4.0SUSE Linux Enterprise Server 9.0Asianux 1.0Asianux 2.02)内核Red Hat Enterprise Linux 3.0 and Asianux 1.02.4.21-27.ELRed Hat Enterprise Linux 4.0 and Asianux 2.02.6.9-5.ELSUSE Linux Enterprise Server 9.02.6.5-7.2013)具体组件包Red Hat Enterprise Linux 3.0 and Asianux 1.0make-3.79.1gcc-3.2.3-34glibc-2.3.2-95.20compat-db-4.0.14-5compat-gcc-7.3-2.96.128compat-gcc-c++-7.3-2.96.128compat-libstdc++-7.3-2.96.128compat-libstdc++-devel-7.3-2.96.128openmotif21-2.1.30-8setarch-1.3-1Red Hat Enterprise Linux 4.0 and Asianux 2.0:binutils-2.15.92.0.2-13.EL4compat-db-4.1.25-9compat-libstdc++-296-2.96-132.7.2control-center-2.8.0-12gcc-3.4.3-22.1.EL4gcc-c++-3.4.3-22.1.EL44glibc-2.3.4-2.9glibc-common-2.3.4-2.9gnome-libs-1.4.1.2.90-44.1libstdc++-3.4.3-22.1libstdc++-devel-3.4.3-22.1make-3.80-5pdksh-5.2.14-30sysstat-5.0.5-1xscreensaver-4.18-5.rhel4.2setarch-1.6-1SUSE Linux Enterprise Server 9binutils-2.15.90.0.1.1-32.5gcc-3.3.3-43.24gcc-c++-3.3.3-43.24glibc-2.3.3-98.28gnome-libs-1.4.1.7-671.1libstdc++-3.3.3-43.24libstdc++-devel-3.3.3-43.24make-3.80-184.1pdksh-5.2.14-780.1sysstat-5.0.1-35.1xscreensaver-4.16-2.64)命令操作系统型号# cat /etc/issue内核型号# uname -r查询安装包# rpm -q package_nameRL AS4 下查询脚本rpm -qa binutilsrpm -qa compat-dbrpm -qa compat-libstdc++-33rpm -qa control-centerrpm -qa gccrpm -qa gcc-c++rpm -qa glibcrpm -qa glibc-commonrpm -qa gnome-libsrpm -qa libstdc++rpm -qa libstdc++-develrpm -qa makerpm -qa pdkshrpm -qa sysstatrpm -qa xscreensaverrpm -qa setarch3、安装1)环境内存 2048M,硬盘146G2)分区/ 30G/tmp 2G/var 3G/app 20G/app/oradata 60G/app/oraBP 20G3)安装选择所有的管理工具,开发工具,Gnome环境,Web Server,FTP Server 除sysstat包都成功安装,sysstat包在4号盘上,rpm -i sysstat-5.0.5-1.i386.rpm4、安装Oracle1)添加用户组判断用户和组是否存在grep dba /etc/groupgrep oinstall /etc/groupid oracleid nobody有则不添加groupadd oinstallgroupadd dbauseradd -g oinstall -G dba oracle--oracle 已经存在但不是 oinstall组,也非dba组成员usermod -g oinstall -G dba oracleuseradd nobody2)内核参数Parameter Value Filesemmsl 250 /proc/sys/kernel/semsemmns 32000semopm 100semmni 128shmall 2097152 /proc/sys/kernel/shmallshmmax Half the size of physical memory (in bytes) /proc/sys/kernel/shmmax shmmni 4096 /proc/sys/kernel/shmmnifile-max 65536 /proc/sys/fs/file-maxip_local_port_range Minimum: 1024 /proc/sys/net/ipv4/ip_local_port_rangeMaximum: 65000rmem_default 1048576 /proc/sys/net/core/rmem_defaultrmem_max 1048576 /proc/sys/net/core/rmem_maxwmem_default 262144 /proc/sys/net/core/wmem_defaultwmem_max 262144 /proc/sys/net/core/wmem_max命令semmsl, semmns, semopm, and semmni # /sbin/sysctl -a | grep semshmall, shmmax, and shmmni # /sbin/sysctl -a | grep shmfile-max # /sbin/sysctl -a | grep file-maxip_local_port_range # /sbin/sysctl -a | grep ip_local_port_rangermem_default # /sbin/sysctl -a | grep rmem_defaultrmem_max # /sbin/sysctl -a | grep rmem_maxwmem_default # /sbin/sysctl -a | grep wmem_defaultwmem_max # /sbin/sysctl -a | grep wmem_max修改配置文件/etc/sysctl.conf,增加或修改kernel.shmall = 2097152kernel.shmmax = 2147483648kernel.shmmni = 4096kernel.sem = 250 32000 100 128fs.file-max = 65536net.ipv4.ip_local_port_range = 1024 65000net.core.rmem_default = 1048576net.core.rmem_max = 1048576net.core.wmem_default = 262144net.core.wmem_max = 262144重新启动3)设置oracle用户的shella)增加如下行到/etc/security/limits.conforacle soft nproc 2047oracle hard nproc 16384oracle soft nofile 1024oracle hard nofile 65536b)增加下列行到/etc/pam.d/loginsession required /lib/security/pam_limits.sosession required pam_limits.soc)修改Shell默认启动文件Bourne,Bash,Korm shell下增加下列行到/etc/profileif [ $USER = "oracle" ]; thenif [ $SHELL = "/bin/ksh" ]; thenulimit -p 16384ulimit -n 65536elseulimit -u 16384 -n 65536fifiC shell下,增加下列行到/etc/csh.loginif ( $USER == "oracle" ) thenlimit maxproc 16384limit descriptors 65536endif4)创建需要的目录mkdir /app/oraclechown -R oracle:oinstall /app/oraclechmod -R 775 /app/oraclechown -R oracle:oinstall /app/oradatachmod -R 775 /app/oradatachown -R oracle:oinstall /app/orabpchmod -R 775 /app/orabp这里只有一块硬盘,如果有多块硬盘,你需要将其建立一个挂接点,如u01, 则目录为/u01/app/oracle,这里只有一个硬盘,挂接点就是/5)设置oracle用户环境a)如果在远程系统上安装oracle,在本地的X-Windows里显示,要设置xhost host_nameb)用oracle登陆X-windows系统,或su - oraclec)查看默认Shellecho $SHELLd)bashvi .bash_profile如果设置了ORACLE_SID,ORACLE_HOME,ORACLE_BASE,删除相应行e)umask 022f)保存文件,执行. .bash_profileg)设置显示变量DISPLAY=localhost:0.0 ; export DISPLAY如果在远程显示界面,localhost就改成远程主机h)如果/tmp空间不够,需要设置TMP,TMPDIR变量$ su - root# mkdir /mount_point/tmp# chmod a+wr /mount_point/tmp# exitbash下$ TMP=/mount_point/tmp$ TMPDIR=/mount_point/tmp$ export TMP TMPDIRi)确定ORACLE_HOME,TNS_ADMIN没有设置$ unset ORACLE_HOME$ unset TNS_ADMINj)检验是否设置正确$ umask$ env | more6)安装Oraclea)取得Oracle安装件从Oracle网站上下载,是免费的,只需要一个简单的注册即可,得到的是zip文件unzip 10201_database_linux32.zip如果是安装光盘,mount上介质b)运行runInstallerc)安装过程和Windows非常类似,要注意的是在选择dba组的时候选择oinstall修改一下默认目录,如安装目录,Inventory目录安装。
RedHat Linux安装Oracle10g(图文详解教程)
RedHat Linux安装Oracle10g(图文详解教程)1安装RedHat Enterprise Linux 31.1 准备安装介质安装介质一共4张光盘(CD版),版本号为:2.4.21-27.ELsmp设置BIOS为光盘启动,放入第一张光盘即可。
进入到RedHat Enterprise Linux3(以下均简称为Linux)的启动界面,屏幕上出现[boot]字样,如果采用图形化方式安装,直接按回车继续,如果想采用命令行模式进行,输入“linux text”后回车,如有其他需要,按屏幕提示选择选项进行(比如安装SAT A硬盘或网卡时可能需要先安装其驱动)。
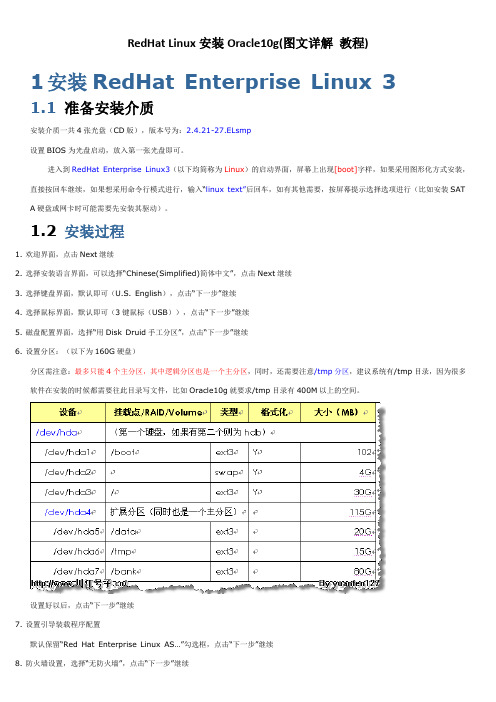
1.2 安装过程1.欢迎界面,点击Next继续2.选择安装语言界面,可以选择“Chinese(Simplified)简体中文”,点击Next继续3.选择键盘界面,默认即可(U.S. English),点击“下一步”继续4.选择鼠标界面,默认即可(3键鼠标(USB)),点击“下一步”继续5.磁盘配置界面,选择“用Disk Druid手工分区”,点击“下一步”继续6.设置分区:(以下为160G硬盘)分区需注意:最多只能4个主分区,其中逻辑分区也是一个主分区,同时,还需要注意/tmp分区,建议系统有/tmp目录,因为很多软件在安装的时候都需要往此目录写文件,比如Oracle10g就要求/tmp目录有400M以上的空间。
设置好以后,点击“下一步”继续7.设置引导装载程序配置默认保留“Red Hat Enterprise Linux AS…”勾选框,点击“下一步”继续8.防火墙设置,选择“无防火墙”,点击“下一步”继续9.系统默认的语言设置,默认(Chinese (P.R. of China)),点击“下一步”继续10. 选择时区,默认,点击“下一步”继续11. 设置root用户密码,点击“下一步”继续12. 软件包组设置,选择“定制要安装的软件包集合”,点击“下一步”继续13. 选择要安装的软件包特别注意:在“遗留网络服务器”中的细节中,勾选“telnet”服务点击“下一步”继续14. 确认界面,点击“下一步”继续15. 等待安装首先会根据第6步的设置进行磁盘分区和格式化然后会根据第13步的设置进行软件安装,安装过程会提示换光盘进行,按提示进行16. 安装完成17. 设置图形化界面(X)配置,默认即可18. 设置显示器配置,默认即可19. 设置图形化配置,默认即可(如有需要,可以把登录类型改成“文本”)20. 配置完成,退出重启就可以了2配置RedHat Enterprise 32.1 安装网卡驱动有些机器的网卡可能在安装操作系统时就能自动安装好,因此安装好Linux系统以后,可以通过ifconfig来查看是否有eth0设备,如果只有lo设备,说明网卡驱动未成功。
RHEL4下ORACLE10G安装手册
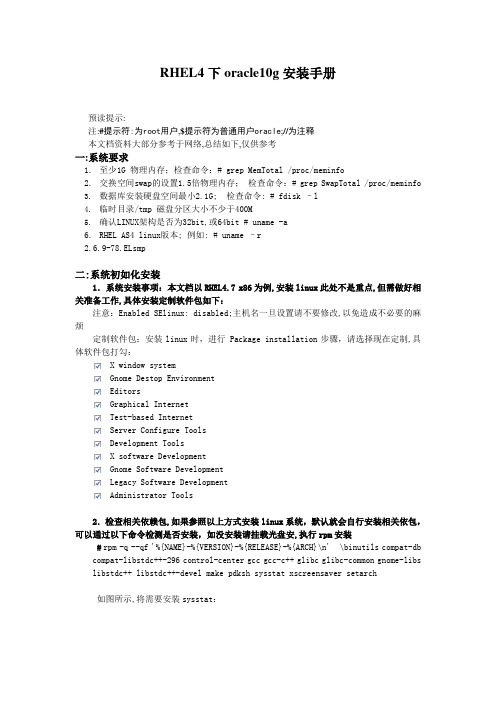
RHEL4下oracle10g安装手册预读提示:注:#提示符:为root用户,$提示符为普通用户oracle;//为注释本文档资料大部分参考于网络,总结如下,仅供参考一:系统要求1.至少1G 物理内存;检查命令:# grep MemTotal /proc/meminfo2.交换空间swap的设置1.5倍物理内存;检查命令:# grep SwapTotal /proc/meminfo3.数据库安装硬盘空间最小2.1G; 检查命令: # fdisk –l4.临时目录/tmp 磁盘分区大小不少于400M5.确认LINUX架构是否为32bit,或64bit # uname -a6.RHEL AS4 linux版本;例如: # uname –r2.6.9-78.ELsmp二:系统初如化安装1.系统安装事项:本文档以RHEL4.7 x86为例,安装linux此处不是重点,但需做好相关准备工作,具体安装定制软件包如下:注意:Enabled SElinux: disabled;主机名一旦设置请不要修改,以免造成不必要的麻烦定制软件包:安装linux时,进行 Package installation步骤,请选择现在定制,具体软件包打勾:X window systemGnome Destop EnvironmentEditorsGraphical InternetTest-based InternetServer Configure ToolsDevelopment ToolsX software DevelopmentGnome Software DevelopmentLegacy Software DevelopmentAdministrator Tools2.检查相关依赖包,如果参照以上方式安装linux系统,默认就会自行安装相关依包,可以通过以下命令检测是否安装,如没安装请挂载光盘安,执行rpm安装#rpm -q --qf '%{NAME}-%{VERSION}-%{RELEASE}-%{ARCH}\n' \binutils compat-db compat-libstdc++-296 control-center gcc gcc-c++ glibc glibc-common gnome-libs libstdc++ libstdc++-devel make pdksh sysstat xscreensaver setarch如图所示,将需要安装sysstat:具体所有相关包如下,直到所有包全都安装才可继续下一步: binutils-2.15.92.0.2-25-i386compat-db-4.1.25-9-i386compat-libstdc++-296-2.96-132.7.2-i386control-center-2.8.0-12.rhel4.5-i386gcc-3.4.6-10-i386gcc-c++-3.4.6-10-i386glibc-2.3.4-2.41-i686glibc-common-2.3.4-2.41-i386gnome-libs-1.4.1.2.90-44.1-i386libstdc++-3.4.6-10-i386libstdc++-devel-3.4.6-10-i386make-3.80-7.EL4-i386pdksh-5.2.14-30.6-i386package sysstatxscreensaver-4.18-5.rhel4.14-i386setarch-1.6-1-i386解决办法:# mkdir /mnt/cdrom# mount –t iso9660 /dev/cdrom /mnt/cdrom# cd /mnt/cdrom/RedHat/RPMS# rpm -ivh sysstat-5.0.5-19.el4.i386.rpm如图成功安装,于是再一次检查:三:系统参数配置及环境安装1.修改相关内核参数,必须修改kernel配置;Oracle 数据库 10g 需要以下所示的内核参数设置,使用编辑器工具将以下文本内容粘贴到系统/etc/sysctl.conf文件中#vi /etc/sysctl.confkernel.shmall = 2097152kernel.shmmax = 536870912kernel.shmmni = 4096kernel.sem = 250 32000 100 128fs.file-max = 65536net.ipv4.ip_local_port_range = 1024 65000net.core.rmem_default = 1048576net.core.rmem_max = 1048576net.core.wmem_default = 262144net.core.wmem_max = 262144一般而言我们只需要修改kernel.shmmax这个值,该参数应该是物理内存的一半(字节)编辑完之后存盘退出,具体参数值可以参考oracle官方相关文档说明2.重新加载并验证内核参数是否修改正确#sysctl –p正确配置后打印信息如下:3.为 oracle 用户设置 Shell 限制Oracle 建议对每个 Linux 帐户可以使用的进程数和打开的文件数设置限制。
Oracle 10g安装 Rhel4
DBA: LinuxInstalling Oracle Database 10g Release 2 on Linux x86(RHEL4 and SLES9 covered)by John SmileyLearn the basics of installing OracleDatabase10gNovell SUSE Enterprise Linux, from the baremetal up (for evaluation purposes only).ContentsOverviewPart I: Installing LinuxRHEL4SLES9Part II: Configuring Linux for OracleVerify System RequirementsCreate DirectoriesCreate the Oracle Groups and User AccountConfigure Linux Kernel ParametersSet Shell Limits for the oracle UserPart III: Installing OracleInstall the SoftwarePart IV: Configuring StorageFilesystemsAutomatic Storage ManagementConclusionAppendixUpdated December 2007Click here for a version covering Oracle Database 11g on OEL5/RHEL5. OverviewOracle Database 10The guide provides a walkthrough of installing an Oracle Database 10g Release 2 database on commodity hardware for the purpose of evaluation. If you are new to Linux and/or Oracle, this guide is for you. It starts with the basics and walks you through an installation of Oracle Database 10g Release 2 from the bare metal up.This guide will take the approach of offering the easiest paths, with the fewest number of steps for accomplishing a task. This approach often means making configuration choices that would be inappropriate for anything other than an evaluation. For that reason, this guide is not appropriate for building production-quality environments, nor does it reflect best practices.The Linux distributions certified for Oracle Database 10g Release 2 are: ∙Oracle Enterprise Linux 5 (OEL5)∙Oracle Enterprise Linux 4 (OEL4)∙Red Hat Enterprise Linux 5 (RHEL5)∙Red Hat Enterprise Linux 4 (RHEL4)∙Red Hat Enterprise Linux 3 (RHEL3)∙Novell SUSE Linux Enterprise Server 10 (SLES10)∙Novell SUSE Linux Enterprise Server 9 (SLES9)∙Asianux 2.0∙Asianux 1.0We will cover the RHEL4 and SLES9 distributions only here.Please note that as an alternative Novell offers the orarun package for installation of SLES9 and Oracle. To use that method instead of the one described here, refer to this Novell-supplied install guide.This guide is divided into four parts: Part I covers the installation of the Linux operating system, Part II covers configuring Linux for Oracle, Part III discusses the essentials of installing the Oracle Database, and Part IV covers creating additional filesystems and Automatic Storage Management(ASM)—a new storage option in Oracle Database 10g that greatly simplifies storage administration and management. The Appendix provides information to help you get started using your new database including how to access the database interactively and how to stop and start the database and related services.Part I: Installing LinuxThis guide assumes a server with the following hardware:∙800MHz Pentium III CPU∙1024MB of RAM∙SCSI host adapter (Ultra SCSI 160)∙Four SCSI disk drives (1 x 9GB + 3 x 36GB)∙One 100Base-T Ethernet adapterYour hardware does not have to match this in order to use this guide. All that is necessary for a basic database install is a single CPU, 1024MB of RAM, and one disk drive (IDE, SCSI, or FireWire) with at least 7GB of free space.Now, let's walk through the process of installing the Linux operating system on a server. The instructions assume a fresh install of Linux (as opposed to an upgrade), that the server will be dedicated to Oracle, and that no other operating systems or data are on the server.RHEL4Oracle Database 10g Release 2 is certified to run the base release of RHEL4 (Advanced Server and Enterprise Server) without updates. If you have update CDs, you can use the boot CD from the update instead of the boot CD from the base release to automatically apply all updates during the installation. All updates from Red Hat are supported by Oracle.The easiest and fastest way to apply the updates for a fresh install of Linux is to perform the install by using the update CDs. If Linux is already installed or you don't have the updates on CDs, they can be applied through RHN. Because this guide is designed for a fresh Linux install, you'll use the update CDs.1.Boot the server using the first CD.o You may need to change your BIOS settings to allow booting from the CD.2.The boot screen appears with the boot: prompt at the bottom of thescreen.o Select Enter to continue with a graphical install on the console. (For other installation methods and options, referto the Red Hat Installation Guide.)o The installer scans your hardware, briefly displays the Red Hat splash screen, and then begins a series of screen prompts.nguage Selectiono Accept the default.4.Keyboard Configurationo Accept the default.5.Welcome Screeno Click on Next.6.Disk Partitioning Setupo A thorough treatment of disk partitioning is beyond the scope of this guide, which assumes that you are familiar with diskpartitioning methods.(WARNING: Improperly partitioning a disk is one of the surestand fastest ways to wipe out everything on your hard disk.If you are unsure how to proceed, stop and get help, or youwill risk losing data!)This guide uses the following partitioning scheme, with ext3for each filesystem:The 9GB disk on the first controller (/dev/sda) will hold allLinux and Oracle software and contains the followingpartitions:- 100MB /boot partition-1,500MB swap partition—Set this to at least twice theamount of RAM in the system but to no more than 2GB.(Thirty-two-bit systems do not support swap files larger than2GB.) If you need more than 2GB of swap space, create multipleswap partitions.-7,150MB root partition—This partition will be used foreverything, including /usr, /tmp, /var, /opt, /home, and more.This approach is purely to simplify installation for thepurposes of this guide. A more robust partitioning schemewould separate these directories onto separate filesystems.7.Boot Loader Configurationo Accept the default.work Configurationo It is usually best to configure database servers with a static IP address. To do so, click on Edit .o A pop-up window appears. Uncheck the Configure using DHCP box, and enter the IP Address and Netmask for the server. Be surethat Activate on boot is checked, and click on OK .o In the Hostname box, select manually and enter the hostname.o In the Miscellaneous Settings box, enter the remaining network settings.9.Firewall Configurationo For the purposes of this walk-through, no firewall is configured. Select No firewallo Select Disabled on the "Enable SELinux" drop down list.o Click on Proceed when the "Warning - No Firewall" window appears.10.Additional Language Supporto Accept the default.11.Time Zone Selectiono Choose the time settings that are appropriate for your area.Setting the system clock to UTC is usually a good practicefor servers. To do so, click on System clock uses UTC. 12.Set Root Passwordo Enter a password for root, and enter it again to confirm.13.Package Installation Defaultso Select Customize software packages to be installed.14.Package Group Selectiono Select only the package sets shown here and leave all others unselected.o Desktop▪X Window System▪Gnomeo Applications▪Graphical Internet (optional)o Servers▪Do not select anything in this group.o Development▪Development Toolso System▪Administration Tools▪System Tools▪Add the package 'sysstat' by clicking on theDetails link and selecting "sysstat - The sar aniostat system monitoring commands." from theOptional Packages list.o Miscellaneous▪Do not select anything in this group.o Click on Next to proceed.15.Installing Packageso Software will be copied to the hard disk and installed. Change disks as prompted.16.Congratulationso Remove the installation media from the system, and click on Reboot .17.The system automatically reboots and presents a new welcome screen.o Click on Next.18.License Agreemento Read the license agreement. If you agree to the terms, select Yes, I agree to the License Agreement and click on Next.19.Date and Timeo Set the Date and Time.o If you want to use an NTP server (recommended), select Enable Network Time Protocol and enter the name of the NTP server.20.Displayo Accept the defaults or change as required.21.Red Hat Logino Enter your Red Hat Network login and password or create a new one.22.System Usero Create an account for yourself.o Do not create an account for oracle at this time. Creating the oracle account is covered later in this section.23.Additional CDso Click on Next.24.Finish Setupo Click on Next.25.A graphical login screen appears.26.Congratulations! Your RHEL4 software is now installed.Verifying Your InstallationRequired kernel version: 2.6.9-5.0.5.EL This kernel, or any of the kernels supplied in updates, works with Oracle Database 10g Release 2 .Check your kernel version by running the following command:uname -rEx:# uname -r2.6.9-22.ELsmpOnce you've completed the steps above, all of the packages required for Oracle Database 10g Release 2 will have been installed. Verify this using the example below.Required package versions (or later):∙binutils-2.15.92.0.2-10.EL4∙compat-db-4.1.25-9∙control-center-2.8.0-12∙gcc-3.4.3-9.EL4∙gcc-c++-3.4.3-9.EL4∙glibc-2.3.4-2∙glibc-common-2.3.4-2∙gnome-libs-1.4.1.2.90-44.1∙libstdc++-3.4.3-9.EL4∙libstdc++-devel-3.4.3-9.EL4∙make-3.80-5∙pdksh-5.2.14-30∙sysstat-5.0.5-1∙xscreensaver-4.18-5.rhel4.2∙libaio-0.3.96∙openmotif21-2.1.30-11.RHEL4.2 (Required only to install Oracle demos. Installation of Oracle demos is not covered by this guide.)To see which versions of these packages are installed on your system, run the following command:rpm -q binutils compat-db control-center gcc gcc-c++ glibc glibc-common \gnome-libs libstdc++ libstdc++-devel make pdksh sysstat xscreensaver libaio openmotif21Ex:# rpm -q binutils compat-db control-center gcc gcc-c++ glibc glibc-common \> gnome-libs libstdc++ libstdc++-devel make pdksh sysstat xscreensaver libaio openmotif21binutils-2.15.92.0.2-15compat-db-4.1.25-9control-center-2.8.0-12.rhel4.2gcc-3.4.4-2gcc-c++-3.4.4-2glibc-2.3.4-2.13glibc-common-2.3.4-2.13gnome-libs-1.4.1.2.90-44.1libstdc++-3.4.4-2libstdc++-devel-3.4.4-2make-3.80-5pdksh-5.2.14-30.3sysstat-5.0.5-1xscreensaver-4.18-5.rhel4.9libaio-0.3.103-3openmotif21-2.1.30-11.RHEL4.4SLES9Oracle Database 10g Release 2 is certified to run on the base release of SLES9. Service Packs and package updates are available from Novell, either on CDs or online via its support portal. In this guide, we will install on the SLES9 base release.1.Boot the server, using the SLES9 CD.o You may need to change your BIOS settings to allow booting from the CD.2.The Novell SLES installation screen appears.o Select Installation.o The installer scans your hardware and presents the YaST interface.nguage Selectiono Accept the license agreement.o Accept the default, English (US).4.Installation Settingso Select New Installation.5.Partitioningo A thorough treatment of disk partitioning is beyond the scope of this guide, which assumes that you are familiar with diskpartitioning methods.(WARNING: Improperly partitioning a disk is one of the surestand fastest ways to wipe out everything on your hard disk.If you are unsure how to proceed, stop and get help, or youwill risk losing data!)This guide uses the following partitioning scheme, with ext3for each filesystem:The 9GB disk on the first controller (/dev/sda) will hold allLinux and Oracle software and contains the followingpartitions:- 100MB /boot partition-1,500MB swap partition—Set this to at least twice theamount of RAM in the system but to no more than 2GB.(Thirty-two-bit systems do not support swap files larger than2GB.) If you need more than 2GB of swap space, create multipleswap partitions.-7,150MB root partition—this partition will be used foreverything, including /usr, /tmp, /var, /opt, /home, and more.This approach is purely to simplify installation for thepurposes of this guide. A more robust partitioning schemewould separate these directories onto separate filesystems.6.Softwareo Click on the link for Software.o The Software Selection screen appears.o Click on Detailed Selection.o The left-hand window displays a list of software selections.Click on the box next to each selection to select/deselectit.o Select the following software (this is the recommended set;all others should be deselected):- Basis Runtime System- YaST- Linux Tools- Help & Support Documentation- Graphical Base System- GNOME System- C/C++ Compiler and Tools- Analyzing Toolso It is recommended that the following items not be installed, as they may conflict with Oracle products providing the sameservice:- Simple Webserver- Authentication Server (NIS, LDAP, Kerberos)7.Time Zoneo Set your time zone.8.Click on Accept.9. A warning box appears. Click on Yes, install when ready to proceed.10.Change CDs as prompted by the installer.11.Confirm Hardware Detectiono Network Cards – Click on OK.12.Password for "root." the system administrator.o Enter the root password and repeat to confirm.13.Configure your network interface(s), and click on Next when readyto proceed.o Static IP addresses are recommended for servers.o There is no need to configure printers, modems, ISDN adapters, or sound in order to build a database.14.Test Internet Connectiono There is no need to connect to the Internet to download release notes or Linux updates. Select No, Skip This Test. 15.Service Configurationo There is no need to configure CA Management or OpenLDAP Server.Select Skip Configuration.er Authentication Methodo Select Local(/etc/passwd).17.Add a New Local Usero Create an account for yourself. Do not create the oracle account at this time; we'll do that later.18.Release Noteso Click on Next19.Hardware Configurationo Confirm Hardware Detection – Graphics Cards – click on Continue.o There is no need to configure sound cards for a database –click on Skip.o If the graphics card and monitor have been successfully detected, click on Next. Otherwise, click on the GraphicsCards link and enter the correct information.20.Installation Completedo Click on Finish.21.Congratulations! Your SLES9 software is now installed.Verifying Your InstallationIf you've completed the steps above, you should have all the packages and updates required for Oracle Database 10g Release 2. However, you can take the steps below to verify your installation.Required kernel version: 2.6.5-7.97 (or later)Check your kernel version by running the following command:uname -rEx:# uname -r2.6.5-7.97-smpOther required package versions (or later):∙binutils-2.15.90.0.1.1-32.5∙gcc-3.3.3-43.24∙gcc-c++-3.3.3-43.24∙glibc-2.3.3-98.28∙gnome-libs-1.4.1.7-671.1∙libstdc++-3.3.3-43.24∙libstdc++-devel-3.3.3-43.24∙make-3.80-184.1∙pdksh-5.2.14-780.1∙sysstat-5.0.1-35.1∙xscreensaver-4.16-2.6libaio-0.3.98To see which versions of these packages are installed on your system, run the following command as root:rpm -q binutils gcc gcc-c++ glibc gnome-libs libstdc++ libstdc++-devel make \pdksh sysstat xscreensaver libaioEx:# rpm -q binutils gcc gcc-c++ glibc gnome-libs libstdc++ libstdc++-devel make \> pdksh sysstat xscreensaver libaiobinutils-2.15.90.0.1.1-32.10gcc-3.3.3-43.34gcc-c++-3.3.3-43.34glibc-2.3.3-98.47gnome-libs-1.4.1.7-671.1libstdc++-3.3.3-43.34libstdc++-devel-3.3.3-43.34make-3.80-184.1pdksh-5.2.14-780.7sysstat-5.0.1-35.4xscreensaver-4.16-2.6libaio-0.3.102-1.2If any of the package versions on your system are missing or the versions are earlier than those specified above, you can download and install the updates from the Novell SUSE Linux Portal.Part II: Configuring Linux for OracleNow that the Linux software is installed, you need to configure it for Oracle. This section walks through the steps required to configure Linux for Oracle Database 10g Release 2.Verifying System RequirementsTo verify that your system meets the minimum requirements for an Oracle Database 10g Release 2 database, log in as root and run the commands below.To check the amount of RAM and swap space available, run this:grep MemTotal /proc/meminfogrep SwapTotal /proc/meminfoEx:# grep MemTotal /proc/meminfoMemTotal: 1034680 kB# grep SwapTotal /proc/meminfoSwapTotal: 1534196 kBThe minimum RAM required is 1024MB, and the minimum required swap space is 1GB. Swap space should be twice the amount of RAM for systems with 2GB of RAM or less and between one and two times the amount of RAM for systems with more than 2GB.You also need 2.5GB of available disk space for the Oracle Database 10g Release 2 software and another 1.2GB for the database. The /tmp directory needs at least 400MB of free space. To check the available disk space on your system, run the following command:df -hEx:# df -hFilesystem Size Used Avail Use% Mounted on/dev/sda3 6.8G 1.3G 5.2G 20% //dev/sda1 99M 17M 77M 18% /bootThe example shows that the /tmp directory does not have its own filesystem. (It's part of the root filesystem for this guide.) With 5.2 GB available, the root filesystem has just enough space for the installation (2.5 + 1.2 + 0.4 = 4.1GB) with a little room left over.Create the Oracle Groups and User AccountNext, create the Linux groups and user account that will be used to install and maintain the Oracle Database 10g Release 2 software. The user account will be called oracle, and the groups will be oinstall and dba. Execute the following commands as root:/usr/sbin/groupadd oinstall/usr/sbin/groupadd dba/usr/sbin/useradd -m -g oinstall -G dba oracleid oracleEx:# /usr/sbin/groupadd oinstall# /usr/sbin/groupadd dba# /usr/sbin/useradd -m -g oinstall -G dba oracle# id oracleuid=501(oracle) gid=502(oinstall) groups=502(oinstall),503(dba)Set the password on the oracle account:passwd oracleEx:# passwd oracleChanging password for user oracle.New password:Retype new password:passwd: all authentication tokens updated successfully.Create DirectoriesNow create directories to store the Oracle Database 10g Release 2 software and the database files. This guide adheres to the Optimal Flexible Architecture (OFA) for the naming conventions used in creating the directory structure. For more information on OFA standards, see Appendix C of the Oracle Database Installation Guide 10g Release 2 (10.2) for Linux x86.The following assumes that the directories are being created in the root filesystem. This is done for the sake of simplicity and is not recommended as a general practice. These directories would normally be created as separate filesystems.Issue the following commands as root:mkdir -p /u01/app/oraclechown -R oracle:oinstall /u01/app/oraclechmod -R 775 /u01/app/oracleEx:# mkdir -p /u01/app/oracle# chown -R oracle:oinstall /u01/app/oracle# chmod -R 775 /u01/app/oracleConfiguring the Linux Kernel ParametersThe Linux kernel is a wonderful thing. Unlike most other *NIX systems, Linux allows modification of most kernel parameters while the system is up and running. There's no need to reboot the system after making kernel parameter changes. Oracle Database 10g Release 2 requires the kernelparameter settings shown below. The values given are minimums, so if your system uses a larger value, don't change it.kernel.shmall = 2097152kernel.shmmax = 536870912kernel.shmmni = 4096kernel.sem = 250 32000 100 128fs.file-max = 65536net.ipv4.ip_local_port_range = 1024 65000net.core.rmem_default=262144net.core.wmem_default=262144net.core.rmem_max=262144net.core.wmem_max=262144If you're following along and have just installed Linux, the kernel parameters will all be at their default values and you can just cut and paste the following commands while logged in as root.cat >> /etc/sysctl.conf <<EOFkernel.shmall = 2097152kernel.shmmax = 536870912kernel.shmmni = 4096kernel.sem = 250 32000 100 128fs.file-max = 65536net.ipv4.ip_local_port_range = 1024 65000net.core.rmem_default=262144net.core.wmem_default=262144net.core.rmem_max=262144net.core.wmem_max=262144EOF/sbin/sysctl -pEx:# cat >> /etc/sysctl.conf <<EOF> kernel.shmall = 2097152> kernel.shmmax = 536870912> kernel.shmmni = 4096> kernel.sem = 250 32000 100 128> fs.file-max = 65536> net.ipv4.ip_local_port_range = 1024 65000> EOF# /sbin/sysctl -pnet.ipv4.ip_forward = 0net.ipv4.conf.default.rp_filter = 1net.ipv4.conf.default.accept_source_route = 0kernel.sysrq = 0kernel.core_uses_pid = 1kernel.shmall = 2097152kernel.shmmax = 536870912kernel.shmmni = 4096kernel.sem = 250 32000 100 128fs.file-max = 65536net.ipv4.ip_local_port_range = 1024 65000net.core.rmem_default = 262144net.core.wmem_default = 262144net.core.rmem_max = 262144net.core.wmem_max = 262144Run the following commands as root to verify your settings:/sbin/sysctl -a | grep shm/sbin/sysctl -a | grep sem/sbin/sysctl -a | grep file-max/sbin/sysctl -a | grep ip_local_port_range/sbin/sysctl -a | grep rmem_default/sbin/sysctl -a | grep rmem_max/sbin/sysctl -a | grep wmem_default/sbin/sysctl -a | grep wmem_maxEx:# /sbin/sysctl -a | grep shmkernel.shmmni = 4096kernel.shmall = 2097152kernel.shmmax = 536870912kernel.shm-use-bigpages = 0# /sbin/sysctl -a | grep semkernel.sem = 250 32000 100 128# /sbin/sysctl -a | grep file-maxfs.file-max = 65536# /sbin/sysctl -a | grep ip_local_port_rangenet.ipv4.ip_local_port_range = 1024 65000# /sbin/sysctl -a | grep rmem_defaultnet.core.rmem_default = 262144# /sbin/sysctl -a | grep rmem_maxnet.core.rmem_max = 262144# /sbin/sysctl -a | grep wmem_defaultnet.core.wmem_default = 262144# /sbin/sysctl -a | grep wmem_maxnet.core.wmem_max = 262144For Novell SUSE Linux releases, use the following to ensure that the system reads the /etc/sysctl.conf file at boot time:/sbin/chkconfig boot.sysctl onSetting Shell Limits for the oracle UserOracle recommends setting limits on the number of processes and open files each Linux account may use. To make these changes, cut and paste the following commands as root:cat >> /etc/security/limits.conf <<EOForacle soft nproc 2047oracle hard nproc 16384oracle soft nofile 1024oracle hard nofile 65536EOFcat >> /etc/pam.d/login <<EOFsession required /lib/security/pam_limits.soEOFFor RHEL4, use the following:cat >> /etc/profile <<EOFif [ \$USER = "oracle" ]; thenif [ \$SHELL = "/bin/ksh" ]; thenulimit -p 16384ulimit -n 65536elseulimit -u 16384 -n 65536fiumask 022fiEOFcat >> /etc/csh.login <<EOFif ( \$USER == "oracle" ) thenlimit maxproc 16384limit descriptors 65536umask 022endifEOFFor SLES 9, use the following:cat >> /etc/profile.local <<EOFif [ \$USER = "oracle" ]; thenif [ \$SHELL = "/bin/ksh" ]; thenulimit -p 16384ulimit -n 65536elseulimit -u 16384 -n 65536fiumask 022fiEOFcat >> /etc/csh.login.local <<EOFif ( \$USER == "oracle" ) thenlimit maxproc 16384limit descriptors 65536umask 022endifEOFPart III: Installing OracleOracle Database 10g Release 2 can be downloaded from OTN. Oracle offers a development and testing license free of charge. However, no support is provided and the license does not permit production use. A full description of the license agreement is available on OTN.The easiest way to make the Oracle Database 10g Release 2 distribution media available on your server is to download them directly to the server. Use the graphical login to log in as oracle.Create a directory to contain the Oracle Database 10g Release 2 distribution:mkdir 10gR2_dbTo download Oracle Database 10g Release 2 from OTN, point your browser (Firefox works well) to/technology/software/products/database/oracle10g /htdocs/10201linuxsoft.html. Fill out the Eligibility Export Restrictions page, and read the OTN License agreement. If you agree with the restrictions and the license agreement, click on I Accept.Click on the 10201_database_linux32.zip link, and save the file in the directory you created for this purpose (10gR2_db)—if you have not already logged in to OTN, you may be prompted to do so at this point.Unzip and extract the file:cd 10gR2_dbunzip 10201_database_linux32.zipInstall the Software and Create a DatabaseLog in using the oracle account.Change directory to the location where you extracted the Oracle Database 10g Release 2 software.Ex:$ cd $HOME/10gR2_dbChange directory to Disk1.Ex:$ cd databaseStart the Oracle Universal Installer.$ ./runInstaller1.Select Installation Methodo Select Basic Installationo Oracle Home Location: /u01/app/oracle/product/10.2.0/db_1o Installation Type: Enterprise Edition (1.3GB)o UNIX DBA Group: oinstallo Make sure Create Starter Database is checkedo Global Database Name: demo1o Enter the Database Password and Confirm Passwordo Click on Next2.Specify Inventory Directory and Credentialso Inventory Directory: /u01/app/oracle/oraInventoryo Operating System group name: oinstallo Click on Next3.Product-specific Prerequisite Checkso If you've been following the steps in this guide, all the checks should pass without difficulty. If one or more checksfail, correct the problem before proceeding.o Click on Next4.Summaryo A summary of the products being installed is presented.o Click on Install.5.Configuration Assistantso The Oracle Net, Oracle Database, and iSQL*Plus configuration assistants will run automatically6.Execute Configuration Scriptso At the end of the installation, a pop up window will appear indicating scripts that need to be run as root. Login as rootand run the indicated scripts.o Click on OK when finished.7.End of Installationo Make note of the URLs presented in the summary, and click on Exit when ready.8.Congratulations! Your new Oracle Database 10g Release 2 databaseis up and ready for use.Part IV: Configuring StorageThe database we created in Part III used a single filesystem for disk storage. However, there are several other ways to configure storage for an Oracle database.Part IV explores other methods of configuring disk storage for a database. In particular, it describes creating additional filesystems and using Automatic Storage Management (ASM). Use of raw devices and Oracle Cluster File System (OCFS) is covered in the next article in this series which walks through installing Oracle RAC Database 10g Release 2 on Linux x86.Partition the DisksIn order to use either file systems or ASM, you must have unused disk partitions available. This section describes how to create the partitions that will be used for new file systems and for ASM.WARNING: Improperly partitioning a disk is one of the surest andfastest ways to wipe out everything on your hard disk. If you are unsure how to proceed, stop and get help, or you will risk losing data.。
RHEL4.7安装ORACLE文档
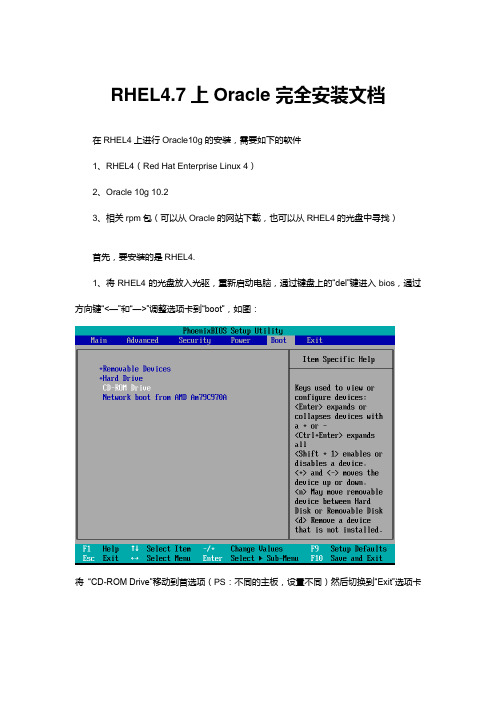
RHEL4.7上Oracle完全安装文档在RHEL4上进行Oracle10g的安装,需要如下的软件1、RHEL4(Red Hat Enterprise Linux 4)2、Oracle 10g 10.23、相关rpm包(可以从Oracle的网站下载,也可以从RHEL4的光盘中寻找)首先,要安装的是RHEL4.1、将RHEL4的光盘放入光驱,重新启动电脑,通过键盘上的―del‖键进入bios,通过方向键―<—‖和―—>‖调整选项卡到―boot‖,如图:将―CD-ROM Drive‖移动到首选项(PS:不同的主板,设置不同)然后切换到―Exit‖选项卡选择―Exit Saving Changes‖确认保存并退出电脑重新启动,进入RHEL4的安装界面回车进入计算机硬件驱动检测的文字界面这儿离我们选择跳过―Skip‖2、进入图形化安装界面点击―Next‖这里选择系统所要使用的语言,默认为―English‖,(如果要更改系统的语言为中文,可以选择―U.S.English‖)点击―Next‖这里选择键盘的模式。
一般情况默认的U.S.English就是我们通常使用的标准键盘。
这里直接―Next‖就好了。
这里是磁盘的分配选择,我们选择第二项,手动分配磁盘,然后点击―Next‖这里在点击了―Next‖后会有一个询问,直接点击―Yes‖就好了。
这里让用户选择要对磁盘的操作。
第一项为:删除所有的linux分区,第二项为:删除全部的分区,第三项为:保持现有分区。
这里我们选择第二项。
然后点击―Next‖点击―Next‖后会有一个警告,这里直接点―Yes‖进入手动磁盘分区界面分好区之后别忘了swap(交换分区),swap设定为内存的2倍就好!点击―Next‖这里是开机启动选项的配置,可以不用管,直接点击―Next‖本例只改了本机的hostname,然后点击―Next‖。
这里设置本机的防火墙,直接选择―no firewall‖,然后点击―Next‖同样会有一个警告出现。
Oracle 10g(10201) For Redhat AS4安装指南

Oracl e 10g(10201)在Redhat AS4上的安装指南EAS产品支持部刘学鹏请注意:本文件只作为产品介绍之用,不属于您与金蝶签署的任何协议。
本文件仅包括金蝶既定策略、产品及功能方面的信息,不能以本文件作为要求金蝶履行商务条款、产品策略以及开发义务的依据。
本文件内容可能随时变更,恕不另行通知。
前言概述这是在Red Hat Linux AS4 上安装Oracle 10g(10.201) 软件的指南,并假设使用Intel x86 硬件。
本文详细介绍了在Red Hat Linux AS4 上安装Oracle 10g(10.201) 和配置的过程。
适用范围EAS系统工程师、EAS实施顾问。
约定符号约定在本文中可能出现下列标志,它们所代表的含义如下。
内容约定本处对文中通用信息作如下约定●$EAS_HOME表示EAS服务器安装的根目录,即安装过程中输入的本地路径。
●$BOS_HOME表示BOS工具的安装根目录,即安装过程中输入的本地路径。
目录概述 (2)适用范围 (2)约定 (2)1 安装前的准备工作 (4)2 安装Oracle (8)3 Oracle基本命令 (13)4 参考文档 (17)1 安装前的准备工作系统安装要求:要验证系统是否满足Oracle 10g 数据库的最低要求,以root 用户身份登录并运行以下命令。
要查看可用RAM 和交换空间大小,运行以下命令:例如:# grep MemTotal /proc/meminfoMemTotal:512236 kB# grep SwapTotal /proc/meminfoSwapTotal:1574360 kB所需最小RAM 为512MB,而所需最小交换空间为1GB。
对于RAM 小于或等于2GB 的系统,交换空间应为RAM 数量的两倍;对于RAM 大于2GB 的系统,交换空间应为RAM数量的一到两倍。
Oracle 10g 软件还需要2.5GB 的可用磁盘空间,而数据库则另需1.2GB 的可用磁盘空间。
Redhat Linux AS4 下安装 Oracle 10g R2
Redhat Linux AS4 下安装Oracle 10g R2RedHat AS4下安装了Oracle 10gR2.总结安装过程如下:第 1 部分:安装LinuxRed Hat Enterprise Linux 4(Update 2)Oracle 10g 经认证可以在不需要更新的情况下运行Red Hat Enterprise Linux 4(Advanced Server 和Enterprise Server)的基本版本。
如果拥有更新CD,则可以使用更新版本中的启动CD 而非基本版本中的启动CD 在安装过程中自动应用所有更新。
Oracle 支持Red Hat 的所有更新。
1. 使用第一张CD 启动服务器。
o 您可能需要更改BIOS 设置,以允许从CD 启动。
2. 启动屏幕上出现时在底部显示boot:。
o 选择Enter,从控制台上执行图形安装。
(对于其他安装方法和选项,请参阅Red Hat 安装指南。
)o 安装程序扫描硬件,短暂显示Red Hat 闪屏,然后开始显示一系列屏幕提示。
3. 选择语言o 接受默认值。
4. 配置键盘o 接受默认值。
5. 欢迎屏幕o 单击Next。
6. 配置鼠标o 接受默认值。
7. 安装类型o 选择Custom。
8. 设置磁盘分区o 本文不介绍磁盘分区的详细方法,而是假设您熟悉磁盘分区方法。
(警告:对磁盘进行错误分区是删除硬盘上所有内容的最可靠、最快捷的方法之一。
如果不确定如何分区,请先停下来,找人帮帮您,否则您将冒丢失数据的危险!)本文使用以下分区方案(文件系统均为ext3):第一个控制器(/dev/sda) 上的9GB 磁盘包含以下分区,用于存放所有Linux 和Oracle 软件:-100MB /boot 分区-2GB 交换分区—将此分区大小至少设置为系统RAM 的两倍,但不要超过2GB-1GB /tmp 临时文件区-10GB / 根分区—该分区将用于所有目录,包括/usr、/tmp、/var、/home 等。
RHEL上清除Oracle10g clusterware的失败安装

在安装Oracle10g clusterware的过程中,经常会遇到错误导致安装失败,这时候需要清除所有已安装的信息,保证重新安装的顺利进行。
这个工作在不同平台上是略有差别,对于RedHat,需要作这样几步:1、以root身份运行$ORA_CRS_HOME/install/rootdelete.sh2、rm -f /etc/init.d/init.cssdrm -f /etc/init.d/init.crsrm -f /etc/init.d/init.crsdrm -f /etc/init.d/init.evmdrm -f /etc/rc2.d/K96init.crsrm -f /etc/rc2.d/S96init.crsrm -f /etc/rc3.d/K96init.crsrm -f /etc/rc3.d/S96init.crsrm -f /etc/rc5.d/K96init.crsrm -f /etc/rc5.d/S96init.crsrm -Rf /etc/oracle/scls_scrrm -f /etc/inittab.crscp /etc/inittab.orig /etc/inittab3、rm -rf /var/tmp/.oracle 或 rm -rf /tmp/.oracle4、删除ocr.loc,这个文件通常位于/etc/oracle中5、rm -Rf <CRS 安装目录>/*6、清空OCR和Votingdisk文件,如果rdsk不存在,则这一步可以略过dd if=/dev/zero of=/dev/rdsk/V1064_vote_01_20m.dbf bs=8192 count=2560 dd if=/dev/zero of=/dev/rdsk/ocrV1064_100m.ora bs=8192 count=12800。
- 1、下载文档前请自行甄别文档内容的完整性,平台不提供额外的编辑、内容补充、找答案等附加服务。
- 2、"仅部分预览"的文档,不可在线预览部分如存在完整性等问题,可反馈申请退款(可完整预览的文档不适用该条件!)。
- 3、如文档侵犯您的权益,请联系客服反馈,我们会尽快为您处理(人工客服工作时间:9:00-18:30)。
目录
一、主机环境检查 (2)
二、Oracle依赖组件的检查 (2)
三、调整oracle使用者环境限制 (4)
四、创建用户和相关目录 (5)
五、编辑用户环境变量配置文件(SID可自己拟定) (5)
六、SSH oracle用户登录,导入oracle安装介质到/home/oracle目录下进行安装 (6)
七、Oracle用户登录x-windows界面,GUI图形安装 (6)
八、dbca创建数据库 (11)
九、检查监听器 (18)
十、sqlplus登陆数据库 (18)
一、主机环境检查
1.内存检查(内存不能小于1G)
2.交换分区的大小(遵循oracle的规范)
3.主机名检查
二、Oracle依赖组件的检查
1.复制以下脚本文件在shell下执行
2.复制输出结果与标准结果(挂载系统ISO包安装相应的组件)
三、调整oracle使用者环境限制
1.添加下面的行到/etc/security/limits.conf以修改你的资源限制
2.在/etc/pam.d/login文件中加入下列行,如果里面没有的话
3.在/etc/profile中增加如下,修改linux系统核心参数
4.编辑/etc/sysctl.conf文件,在后面添加下参数做微调操作系统内核。
5.内核修改配置马上生效
/sbin/sysctl -p (载入档案参数数值,并检查参数值是否正确)
四、创建用户和相关目录
1.--创建dba组
/usr/sbin/groupadd dba
2.创建oinstall组
/usr/sbin/groupadd oinstall
3.创建oracle用户并设置用户所属组
/usr/sbin/useradd -g oinstall -G dba -m oracle
passwd oracle
4.创建相关安装目录
mkdir -p /opt/oracle/product
5.设置目录所有者和权限
chown -R oracle.oinstall /opt/oracle
[root@oracle ~]# ll /opt/oracle/
6.创建oracle的安装目录和存放数据的目录(切换到oracle用户)
mkdir -p /opt/oracle/product/10.2.0/db_1
mkdir -p /opt/oracle/product/10.2.0/oradata
五、编辑用户环境变量配置文件(SID可自己拟定)
六、SSH oracle用户登录,导入oracle安装介质到
/home/oracle目录下进行安装
七、Oracle用户登录x-windows界面,GUI图形安装
1.更改权限
2.开始安装
(有错误是必须解决才能点击next的,警告不处理会影响oracle的性能或者是安装出错、安装完毕侦听器、数据库无法启动等)
(注意切换到root用户,先在shell下执行以上两个文件后再点击OK)
八、dbca创建数据库
九、检查监听器
十、sqlplus登陆数据库。
