Sofia3gr平台_Android5.1_CTS_产品测试环境搭建V1
android cts测试原理
android cts测试原理Android CTS(Compatibility Test Suite)是一套用于测试Android设备和ROM兼容性的测试工具。
它主要包括两部分,一部分是CTS 测试套件,另一部分是CTS Verifier测试套件。
CTS测试套件用于验证Android设备是否符合Android兼容性要求,而CTS Verifier测试套件则用于验证设备是否支持特定功能和硬件。
CTS测试原理基于黑盒测试方法,即只关注输入和输出,而不关注内部实现细节。
在测试过程中,CTS会模拟各种使用场景和用户操作,如调用API、启动应用、发送短信等,然后验证设备的响应是否符合预期。
CTS测试的基本原理如下:1. 定义测试用例:CTS测试套件包含了大量的测试用例,涵盖了Android系统的各个方面,如权限管理、网络连接、媒体播放等。
这些用例是按照Android兼容性要求编写的,旨在验证设备是否满足标准规范。
2. 运行测试用例:CTS测试套件会自动运行所有测试用例,并记录测试结果。
测试过程中,CTS会模拟各种场景和用户操作,如点击按钮、输入文字等,以模拟真实使用情况。
3. 验证测试结果:测试完成后,CTS会对测试结果进行验证。
如果所有测试用例都通过了验证,则设备被认为是兼容的;如果有任何一个测试用例未通过验证,则设备被认为是不兼容的。
CTS测试的目的是确保Android设备和ROM的兼容性,保证用户在不同的设备上都能获得一致的使用体验。
通过CTS测试,厂商可以确保自己的设备符合Android的标准规范,并能够顺利通过Google 的认证。
总结一下,Android CTS测试原理基于黑盒测试方法,通过运行测试用例并验证测试结果,来确保Android设备和ROM的兼容性。
这个测试过程是自动化的,涵盖了Android系统的各个方面,旨在验证设备是否满足Android的标准规范。
通过CTS测试,厂商可以确保自己的设备符合Android标准,并能够通过Google的认证。
CTS环境搭建
CTS环境搭建1./sofia5.1-sdk/packages/apps/Launcher3$ find -name "fill_screens.py*" :fill_screens.py设置图标没掉位置:2.1 将已有apk改成zip格式,提取class.dex放到 C:\User\Administrator\ApkFBY\dex2jar⽬录下2.2 在cmd下进⼊C:\User\Administrator\ApkFBY\dex2jar\执⾏命令配置:6.1 Settings -> Wi-Fi 连接wifi ,确认vpn⽹络环境;6.2 Settings -> Security -> Screen lock 选择None;6.3 连续点击Settings ->About tablet(phone)->Build Number,使被隐藏的Developer Options显⽰出来;6.4 adb install -r android-cts/repository/testcases/CtsDeviceAdmin.apk,在 Security -> Deviceadministrators,打开前三项 6.5 Settings -> Developer options -> Stay awake,勾选该选项;6.6 Settings -> Developer options ->Allow mock locations 勾选;6.7 Settings -> Location 打开定位服务(正常选high accuracy);6.8 Settings -> Display -> Sleep 设置成最长时间,将亮度调节到最暗(测试时间较长节省电量);6.9 拷贝媒体资源⽂件,需使⽤android-cts-media-1.1新版的媒体资源包:source copy_media.sh [720 x 480 | 1280 x 720 | 1920 x 1080 | all] [-s serial]6.10 不勾选:Settings -> Developer options -> Verify apps over USB不勾选:Settings -> Security -> Unknown sources7.Ubuntu jdk环境搭建kkkkk@ubuntu:~$ sudo mkdir /usr/lib/jvm2.解压jdk到/usr/lib/jvm/⽂件夹kkkkk@ubuntu:~/java$ sudo tar -C /usr/lib/jvm -xzf jdk-8u60-linux-i586.tar.gz3.进⼊ usr/lib/jvm/kkkkk@ubuntu:~$ /usr/lib/jvm cd jdk-8u60-linux-i586.tar.gz/4.chakan shifou yiyou jdkkkkkk@ubuntu:~$ sudo update-alternatives --list java5.设置环境变量sudo gedit ~/.bashrcexport JAVA_HOME=/usr/lib/jvm/jdk1.8.0_60export JRE_HOME=${JAVA_HOME}/jreexport CLASSPATH=.:${JAVA_HOME}/lib:${JRE_HOME}/libexport PATH=${JAVA_HOME}/bin:$PATH6.另开终端 java -version百度经验:/article/c33e3f48a3365dea15cbb5c9.html8.CTS相关⽹页:adt:/sdk/index.htmlcts:/airk000/article/details/11113391/zhudaozhuan/article/details/15719879adb:/GoFor100/article/details/38150589adb kill-serveradb shelljdk:/stwstw0123/article/details/47834177/viewtopic.php?t=418518jdk version1.8(cuowu):/GoFor100/article/details/381505899.1.安装jdk和搭建环境变量(参考jdk⽂挡)。
android兼容性测试CTS测试过程(实践测试验证通过)
android兼容性测试CTS测试过程(实践测试验证通过)写这个博客的时候是为了记忆,建议⼤家还是看官⽅的说明,官⽅说的很清楚,不想把官⽅⼤段⼤段的拷贝到这⾥,官⽅的的确说的很清楚:⼀、Android的CTS测试,英⽂为Compatibility Test Suite,意为兼容性测试。
只有通过CTS测试的设备才有可能获得Android的商标和享受Android Market的权限;Android的CTS⽬的与意义:⽤户在android系统中有更好的⽤户体验,并且展⽰android应⽤的优越性,使得android开发者更容易编写⾼质量的andorid程序。
⼆、CTS是兼容性测试,Google为了防⽌⼚商对Android的改动影响其SDKAPI的兼容性,即第三⽅应⽤程序安装到该⼚商的机器上都能正常运⾏;这个差不多是⾃动跑的,会测试硬件(⽐如GPS,WIFI),还有其他⼀系列的东西,跑完之后会出⼀份详细的报告,告诉你哪些地⽅没通过。
三、我们实际使⽤CTS的过程中,很可能需要根据特定的要求,来定制⾃⼰的TestPlan。
这时就需要⾃⼰编译CTS官⽅说明Compatibility Test SuiteWhat is the purpose of the CTS?The Compatibility Test Suite is a tool used by device manufacturers to help ensure their devices are compatible, and to report test results for validations. The CTS is intended to be run frequently by OEMs throughout the engineering process to catch compatibility issues early. What kinds of things does the CTS test?The CTS currently tests that all of the supported Android strong-typed APIs are present and behave correctly. It also tests other non-API system behaviors such as application lifecycle and performance. We plan to add support in future CTS versions to test "soft" APIs such as Intents as well.CTS是⼀个免费的,商⽤级的测试套件,可供下载,CTS运⾏于台式机的直接连接的设备或仿真器,并执⾏测试⽤例。
如何进行Android应用的第三方库和插件测试
如何进行Android应用的第三方库和插件测试Android应用的第三方库和插件测试是一项重要的工作,它可以确保应用的功能、性能和稳定性。
在本文中,我们将介绍如何进行Android应用的第三方库和插件测试,并提供一些实用的技巧和建议。
一、测试环境的搭建要进行Android应用的第三方库和插件测试,首先需要搭建相应的测试环境。
以下是一些常见的测试环境搭建步骤:1. 安装并配置Android开发环境:确保已经正确安装和配置了Android开发环境,包括Java开发工具、Android SDK和相应的构建工具。
2. 创建测试项目:根据需要,创建一个用于测试的Android项目,可以使用Android Studio等开发工具进行创建。
3. 导入第三方库和插件:将需要进行测试的第三方库和插件导入到测试项目中,可以通过Gradle等构建工具进行依赖管理。
4. 配置测试用例:根据需要,配置相应的测试用例,包括单元测试、集成测试、UI测试等。
二、测试方法的选择Android应用的第三方库和插件测试可以采用多种不同的方法和技术。
根据具体的测试需求和项目情况,可以选择以下几种常用的测试方法:1. 单元测试:针对第三方库和插件的核心功能,编写相应的单元测试用例。
可以使用JUnit等测试框架进行单元测试,并结合Mockito等工具进行依赖模拟。
2. 集成测试:在测试环境中,将第三方库和插件与应用的其他组件进行集成测试。
测试重点包括接口调用、数据传递和功能兼容性等。
3. UI测试:通过模拟用户操作,测试第三方库和插件的UI界面功能和交互体验。
可以使用Android Instrumentation等工具进行UI自动化测试。
4. 性能测试:测试第三方库和插件在不同负载条件下的性能表现,包括响应时间、内存占用和电量消耗等指标。
5. 兼容性测试:测试第三方库和插件在不同Android版本和设备上的兼容性。
可以使用模拟器、真机测试和云测试平台等进行测试。
android CTS测试
CTS ( COMPATIBILITY TESTSUITE )USER GUIDEAndroid-ALL-CTS USER GUIDERev. 1.10July 23, 2011DISCLAIMERAll information and data contained in this material are without any commitment, are not to be considered as an offer for conclusion of a contract, nor shall they be construed as to create any liability. Any new issue of this material invalidates previous issues. Product availability and delivery are exclusively subject to our respective order confirmation form; the same applies to orders based on development samples delivered. By this publication, T elechips, Inc. does not assume responsibility for patent infringements or other rights of third parties that may result from its use.Further, Telechips, Inc. reserves the right to revise this publication and to make changes to its content, at any time, without obligation to notify any person or entity of such revisions or changes.No part of this publication may be reproduced, photocopied, stored on a retrieval system, or transmitted without the express written consent of Telechips, Inc.This product is designed for general purpose, and accordingly customer be responsible for all or any of intellectual property licenses required for actual application. Telechips, Inc. does not provide any indemnification for any intellectual properties owned by third party.Telechips, Inc. can not ensure that this application is the proper and sufficient one for any other purposes but the one explicitly expressed herein. Telechips, Inc. is not responsible for any special, indirect, incidental or consequential damage or loss whatsoever resulting from the use of this application for other purposes.COPYRIGHT STATEMENTCopyright in the material provided by Telechips, Inc. is owned by Telechips unless otherwise noted.For reproduction or use of Telechips‟ copyright material, permission should be sought from Telechips. That permissi on, if given, will be subject to conditions that Telechips‟name should be included and interest in the material should be acknowledged when the material is reproduced or quoted, either in whole or in part. You must not copy, adapt, publish, distribute or commercialize any contents contained in the material in any manner without the written permission of Telechips. Trade marks used in Telechips‟ copyright material are the property of Telechips.Important NoticeThis product may include technology owned by Microsoft Corporation and in this case it cannot be used or distributed without a license from Microsoft Licensing, GP.For customers who use licensed Codec ICs and/or licensed codec firmware of mp3:“Supply of this product does not convey a license nor imply any right to distribute content created with this product in revenue-generating broadcast systems (terrestrial. Satellite, cable and/or other distribution channels), streaming applications(via internet, intranets and/or other networks), other content distribution systems(pay-audio or audio-on-demand applications and the like) or on physical media(compact discs, digital versatile discs, semiconductor chips, hard drives, memory cards and the like). An independent license for such use is required. For details, please visit ”.For customers who use other firmware of mp3:“Supply of this product does not convey a license under the relevant intellectual property of Thomson and/or Fraunhofer Gesellschaft nor imply any right to use this product in any finished end user or ready-to-use final product. An independent license for such use is required. For details, please visit ”.For customers who use Digital Wave DRA solution:“Supply of this implementation of DRA technology does not convey a license nor imply any right to this implementation in any finished end-user or ready-to-use terminal product. An independent license for such use is required.”For customers who use DTS technology:“Supply of this implementation of DTS technology does not convey a license, exhaust DTS‟ rights in the implementation, or imply a right under any patent, or any other industrial or intellectual property right of DTS to use, offer for sale, sell, or import such implementation in any finished end-user or ready-to-use final product. Notice is hereby provided that a license from DTS is required prior to such use.”“This product made under license to U.S. Patents 5,451,942; 5,956,674; 5,974,380; 5,978,762; 6,487,535; 6,226,616 and/or foreign counterparts.”"© 1996 –2010 DTS, Inc.”For customers who use Dolby technology:"Supply of this Implementation of Dolby technology does not convey a license nor imply a right under any patent, or any other industrial or intellectual property right of Dolby Laboratories, to use this Implementation in any finished end-user or ready-to-use final product. It is hereby notified that a license for such use is required from Dolby Laboratories."Revision HistoryTABLE OF CONTENTSContents1 Introduction ......................................................................................................................................................................... 1-11.1 How does the CTS work? ......................................................................................................................................... 1-12 Setup environment .............................................................................................................................................................. 2-22.1 Set up Test PC .......................................................................................................................................................... 2-22.1.1 JDK ................................................................................................................................................................. 2-22.1.2 Preparing Android SDK ................................................................................................................................... 2-32.1.3 Setup Path ...................................................................................................................................................... 2-32.1.4 CTS installation............................................................................................................................................... 2-42.1.5 Setup CTS configuration ................................................................................................................................. 2-42.1.6 Setup target device ......................................................................................................................................... 2-52.2 Start CTS .................................................................................................................................................................. 2-62.2.1 Start CTS ........................................................................................................................................................ 2-62.2.2 Execute a Command ...................................................................................................................................... 2-72.3 Customizing CTS .................................................................................................................................................... 2-102.3.1 Add and Use a Plan ...................................................................................................................................... 2-102.3.2 Debugging .................................................................................................................................................... 2-113 Clearing problems ............................................................................................................................................................. 3-133.1 ADB Connection ..................................................................................................................................................... 3-133.2 CTS Connection ..................................................................................................................................................... 3-134 Appendix ........................................................................................................................................................................... 4-144.1 Checking peripherals .............................................................................................................................................. 4-144.2 Checking applications ............................................................................................................................................. 4-144.3 References ............................................................................................................................................................. 4-141 IntroductionCTS (Compatibility Test Suite) is a tool to test the compatibility of android devices. This checks whether APIs required in the Android standard SDK exist and they work properly. This is necessary to guarantee application programs made according to the Standard SDK development guide properly work with CTS certified Android compatibility devices. Therefore, Pass in CTS is the basic condition for accessing to the Android market. In addition, the Google policy requires not only market programs but also various applications called GMS (Google Mobile Service) such as Gmail, Maps, Search, YouTube, etc to pass a Compatibility Test in order to get a license.Since CTS is a software based test, it is not sufficient. Therefore, you can find a guide to the composition of actual devices. If you refer to the document “Compatibility Definition” which can be obtained from Google once you execute a NDA with Google, you will see the document explains well peripherals, input and output configuration of devices, and application operation style required for being certified as an Android compatible device. This device guide seems to update according to the market trend or the Android development status. 1.1 How does the CTS work?The CTS is an automated testing harness that includes two major software components:1. The CTS test harness runs on your desktop machine and manages test execution.2. Individual test cases are executed on attached mobile devices or on an emulator. The test cases arewritten in Java as JUnit tests and packaged as Android .apk files to run on the actual device target.- Copied to /compatibility/cts-intro.html2 Setup environmentrefer to /compatibility/cts-intro.html2.1 Set up Test PCyou will need to use Linux and Ubuntu (10.04 and later)●OS : Linux, Ubuntu 10.042.1.1 JDKYou can download JDK from and set up it at /root/ of Test PC system.●If you wish to test Gingerbread, set up JDK 6Fie Name : jdk-1_5_0_19-linux-i586.bin/javase/downloads/index_jdk5.jsp●If you wish to test Froyo, set up JDK 5File Name : jdk-6u24-linux-i586.binhttps:///is-bin/INTERSHOP.enfinity/WFS/CDS-CDS_Developer-Site/en_US/-/USD/ViewFilteredProducts-SingleVariationTypeFilter2.1.2 Preparing Android SDK1. Download TCC Android platform from GIT server to Android building machine(Linux PC) through “repo sync”.2.Run “make sdk” at “local path : ~/Android_platform_home/” of Android build machine (Linux PC),then Android-SDK_xxxx.xxxx_linux-x86.zip is generatedat “local path : ~/Android_platform_home/out/host/linux-x86/sdk/”3.Copy Android-SDK_xxxx.xxxx_linux-x86.zipfrom “local path : ~/Android_platform_home/out/host/linux-x86/sdk/” of Android building systemto “root_path: /home/(user_ID)/” of CTS test PC(Linux OS),then decompress it.2.1.3 Setup PathAdd the followings in ~/.bashrc or ~/.bash_profile file. (local path)2.1.4 CTS installationrefer to /compatibility/downloads.html1. Download TCC Android platform from GIT server to Android building machineLinux PC) through “repo sync”.If you already downloaded it, you can skip this step.2. Run “make cts” at “local path : ~/Android_platform_home/” of Android build machine (Linux OS),then android-cts.zip is created at “local path : ~/Android_platform_home/out/host/linux-x86/cts/”.3. Copy android-sdk.zipfrom “local path : ~/Android_platform_home/out/host/linux-x86/cdk/” of Android building systemto “root_path: /home/(user_ID)/” of CTS test PC(Linux OS),then decompress it.2.1.5 Setup CTS configurationFor Froyo and older versions, edit the startcts script in android-cts directory.In the script, you will find SDK_ROOT=NOT_CONFIGURED.Change NOT_CONFIGURED to the root path of the android-sdk-linux_86 as below.Note > Gingerbread or beyond doesn‟t this configuration.2.1.6 Setup target deviceAfter your machine(CTS test PC) set up1. Attach at least one device (or emulator) to you machine2. For CTS 2.1 R2 and beyond, setup your device (or emulator) to run the accessibility tests:adb install –r android-cts/repository/testcases/CtsDelegatingAccessibilityService.apkOn the device, enable Settings > Accessibility > Accessibility > Delegating Accessibility Service3. For CTs 2.3 R4 and beyond, setup your device to run the devices administration testsadb install –r android-cts/repository/testcases/CtsDeviceAdmin.apkOn the device, enable all the android.deviceadmin.cts.* device administratorsunder Settings > Location & security > Select devices administrators.4. Launch the CTS. The CTS test harness loads the thst plan onto the attached devices.For each test in the test harness.The test harness pushes a apk file to each device, executes the test through instrumentation,And records test resultsThe test harness removes the apk file from each device.2.2 Start CTSNow, Setup of CTS environment is finished.Please connect PC to target android device through USB interface cable.2.2.1 Start CTSRun “adb device” and “startcts” at path “local_path : ~/android-cts/tool/”. If target device is connected with CTS,”Device (0123456789ABCDEF) connected” is displayed.If not, “Device (0123456789ABCDEF) disconnected” is displayed.2.2.2 Execute a CommandIf you enter help, you will see various options. For example, if you want to test one certain packet, you can do as follows.그림 3 CTS plans list# ls –-planHere, you can see the basically provided plans The plans should be formed in xml file and placed in repository -> plans .# ls –-plan AndroidYou can check the packages in Android Plan.그림 4 fail result for local test of Signature planIf you choose Signature over a couple of plans and execute the CTS test, you will get the result as above. This figure shows the result is …fail‟.The following figure shows the result is …pass‟.그림 5 pass result for local test of Ref App그림 6 generated location path of CTS test result filesIf CTS test is completed, in the local-path “local_path : ~/android-cts/repository/results” directory, CTS test timing becomes the title of the directory and the results are saved to the directory. If you enter into your wanted directory and check testResult.xml, you can easily check data that you want to see.그림7 tResult.xml file viewed with firefox[web browser※If you execute CTS test, it takes a long time (approx. 8 hours) to test around each of 21,000.2.3 Customizing CTS2.3.1 Add and Use a PlanYou can use this when you want to remove unnecessary packages and test only necessary packages.그림8 screen of selecting planscts_host> add –plan MyTest: A new plan called MyTest is created. At this time, you can select a package.cts_host> start –plan MyTest: You can use the created MyTest plan as above.2.3.2 DebuggingIf a result of CTS test is …fail‟, you need debugging to analyze causes for the failure.The log as the following figure will remain.그림9 debugging message for failYou sometimes might have some difficulty with finding a problem from a platform source. If so, directly refer to CTS source in order to easily access to debugging.A path is divided per package in cts/tests/test.a.Enter a log message in the location of a file where an error occurs.b.After Rebuild, install CTS on a test PC. (Refer to 2-(1)-⑤.)c.Reset the environment setting of the CTS (Refer to 2-(2)-①).d.Re-execute the CTS and check the log message. (Refer to 2-(2)-②.)For example, in the above figure CameraTest.java file exist in the following path.3 Clearing problems3.1 ADB ConnectionProblem : If ADB of a device is unstable, time out can be happened frequently.Solution :-Use a shield cable.-Connect a target board directly to a test PC, not use an extension USB port.3.2 CTS ConnectionCTS reboots a device periodically during CTS test.Problem : For some reasons, CTS can not be connected after rebooting the device.Solution :-Physically reboot a device until the message “connected”on the CTS appears.-With adb kill-server, turn off adb and turn on it with adb start-server.4 Appendix4.1 Checking peripheralsTo run CTS successfully, target device has to be equipped with several peripherals.GPS/G-sensor/Compass1. Check Wi-FiEnable Settings > Wi-Fi >Wireless & networks > Wi-FiEnable Settings > Wi-Fi >Wireless & networks > Wi-Fi setting2. Check Location & security settingsEnable Settings > Location & security settings > Use GPS satellites4.2 Checking applicationsBesides peripherals, some applications has to be installed and some feature has to be selected to run CTS successfully, 1. Check Display SettingEnable Settings > Display Setting > Auto-rotate screenCheck Settings > Display Setting > Enable Screen timeout : Max (30 minute)2. Check AccessibilityEnable Settings > Accessibility > Accessibility > Delegating Accessibility Service3. Check ApplicationsEnable Setting > Applications > USB debuggingEnable Setting > Applications > Allow mock locations4. Check Text-to-speech settingsCheck up on TTS engines (ex. Pico TTS).4.3 References1. Android2.1 Compatibility Definition ( Android 2.1 CTS r1 Open Handset Alliance )2. Compatibility Test Suite Framework User Manual ( Android 2.1 CTS r2 Open Handset Alliance )3. Android 2.2 Compatibility Definition4. Android 2.3 Compatibility Definition3. /android/mydroid/development/pdk/docs/instrumentation_framework.html。
cts环境介绍

CTS目录整理1.CTS简介Android兼容性测试套件标准CTS 测试就是用来确保某手机或者模拟器符合该兼容性规范。
CTS 测试基于Android instrumentation 测试,其又基于JUnit 测试。
说白了,CTS 就是一堆单元测试用例。
这也是Java 语言的擅长部分。
目前CTS 主要包括功能方面的测试,有少数的性能方面的测试。
性能测试未来会越来越多。
总的来说,它只包括自动化测试,目的主要是保证API 的兼容性。
由于基于单元测试,CTS 本身不能用于测试多应用交互的情况。
对我们的帮助:1)应用程序的开发者可以开发出自己应用的单元测试,并将其加入CTS 测试集。
2)设备制造商可以通过周期性运行CTS 测试,确保没有对Android 伤筋动骨。
2.CTS目录说明CTS中主要目录有:tests,tools,apps,development,libs 分别说明如下:TESTS 文件目录├─accessibilityservice│├─ApiDemosReferenceTest //API Demo测试用例│├─appsecurity-tests //放置应用程序安全性测试用例│├─assets //用来放置“原料”文件的,在这个目录中可以包含为流媒体和动画准备的音频文件。
├─anim //卡通动画├─color //色彩├─drawable //图片├─layout //布局文件├─menu //菜单├─raw //未加工文件mp3,video├─values //风格,字符串,数组│├─config_demo //存放配置测试用例,包括API检验测试,TestPlan TestResult│├─core // mk, AndroidManifest.xml│├─jni├─ProcessTest //放进程测试用例│├─res //项目资源放置并且编译应用程序的地方。
当创建一个新的Android项目,res 目录包含3个子目录:drawable,layout,values。
详解Android测试全流程及关键环节解析
详解Android测试全流程及关键环节解析在如今移动应用领域的快速发展中,Android平台成为了最受欢迎的操作系统之一。
为了确保Android应用的质量和稳定性,进行全面的测试流程是非常重要的。
本文将详细解析Android测试的全流程以及关键环节。
一、测试策略在进行Android应用测试之前,我们需要制定一个全面的测试策略。
测试策略是指通过分析应用的特点和需求,确定测试的目标、范围、方法和资源等方面的计划。
一个好的测试策略可以提高测试的效率和质量。
1.1 确定测试目标:我们需要明确我们测试的目标是什么,是为了发现潜在的Bug还是为了确保应用的性能和稳定性。
1.2 确定测试范围:根据应用的特点和需求,确定测试的范围。
通常包括功能测试、性能测试、兼容性测试等方面。
1.3 确定测试方法:根据应用的特点选择合适的测试方法,如黑盒测试、白盒测试、灰盒测试等。
1.4 确定测试资源:确定测试所需的硬件和软件资源,如设备、测试工具等。
二、测试计划测试计划是指根据测试策略确定的测试目标和范围,制定一个详细的测试计划。
测试计划包括测试环境的搭建、测试用例的设计、测试工具的选择等。
2.1 搭建测试环境:根据应用的需求和测试策略,搭建适合的测试环境,包括硬件、操作系统、网络环境等。
2.2 设计测试用例:根据应用的功能和用户需求设计合适的测试用例。
测试用例应该包括正常情况下的测试和异常情况下的测试。
2.3 选择测试工具:根据测试的需求选择合适的测试工具,如自动化测试工具、性能测试工具等。
三、测试执行在测试执行阶段,我们需要按照测试计划进行测试,并记录测试结果。
3.1 执行测试用例:按照设计好的测试用例逐步执行测试,并记录测试结果。
在执行测试过程中,我们需要认真记录每一个Bug的具体表现和重现步骤。
3.2 Bug管理:测试过程中发现的Bug需要进行管理。
包括给每个Bug分配一个唯一的ID,对Bug进行分类、优先级排序和状态管理等。
CTS测试执行步骤
CTS测试执行步骤1.准备测试环境2.准备CTS测试套件3.运行CTS测试4.查看测试结果CTS测试运行完成后,会生成测试结果报告。
打开"/android-cts/repository/results"目录,可以查看各个测试模块的详细测试结果。
其中,"test_result.xml"文件保存了整个CTS测试的结果。
可以使用CTS result analyzer工具分析测试结果。
5.修复失败项如果CTS测试结果中存在失败的测试项,需要针对具体的失败项进行修复。
可以根据测试结果报告中的信息,查找失败的原因,并对测试环境或代码进行修复。
6.重新运行CTS测试在修复失败项后,可以重新运行CTS测试。
重新执行步骤3和4,生成新的测试结果报告。
如果新的测试结果中没有失败项,说明已经通过了CTS测试。
7.提交CTS测试结果将新的测试结果报告保存,并提交到Google的CTS代码库中。
通过Google的开发者网站登录,找到CTS项目,将测试结果报告上传到相应的位置。
Google会对提交的测试结果进行审核和验证。
8.更新CTS测试套件9.定期执行CTS测试为了确保Android应用的兼容性和稳定性,建议定期执行CTS测试。
可以根据项目需求,设置每日、每周或每月执行一次CTS测试。
可以使用定时任务工具,如cron,在规定的时间自动执行CTS测试。
总结:CTS测试是Android系统兼容性测试的重要工具,通过自动化执行一系列测试用例,来验证Android设备和应用的兼容性。
CTS测试的执行步骤包括准备测试环境、准备CTS测试套件、运行CTS测试、查看测试结果、修复失败项、重新运行CTS测试、提交CTS测试结果、更新CTS测试套件和定期执行CTS测试。
通过CTS测试,可以提高Android应用的兼容性,提升用户体验。
CTS测试的相关方法
CTS测试的相关方法1.CTS构建和执行:CTS测试可以在开发者机器上进行,也可以在持续集成(CI)服务器上进行。
CTS测试套件包括一系列的测试用例、测试脚本和工具。
开发者可以使用CTS构建工具将测试套件打包成可执行的APK文件,然后将其安装到设备上进行测试。
2. CTS运行环境:CTS测试需要在符合Android兼容性规范的设备上运行。
设备必须安装有兼容版本的Android操作系统,并且满足CTS测试的硬件和软件要求。
例如,设备必须支持指定的硬件功能(如蓝牙、Wi-Fi、摄像头等),并且必须预装了特定版本的Android框架和服务。
3. 测试用例和测试覆盖:CTS测试包含了大量的测试用例,用于测试Android系统和应用程序的基本功能和兼容性。
测试包括各种场景和功能,例如应用程序的安装和卸载、图形和多媒体功能、网络和通信功能、传感器和位置服务等。
测试用例的目标是覆盖Android系统和应用程序的各个方面,以发现潜在的兼容性问题。
4.CTS测试结果和报告:CTS测试会生成详细的测试结果和报告,用于评估设备的兼容性。
测试结果包括测试通过的用例、失败的用例和跳过的用例。
开发者可以根据测试结果来调试和修复潜在的兼容性问题。
同时,CTS测试报告还包括设备的基本信息、测试环境的配置和日志等。
这些信息有助于跟踪和分析测试结果。
5. CTS测试自动化:CTS测试可以进行自动化执行,以提高测试效率和稳定性。
可以使用自动化测试框架,例如Android测试支持库(Android Testing Support Library)和JUnit等,来编写和执行CTS测试用例。
自动化测试能够减少重复工作,提高测试覆盖率,并且可以在持续集成环境下进行。
6.CTS扩展和定制:CTS测试套件可以通过扩展和定制来满足特定的需求。
开发者可以编写自定义的测试用例、测试脚本和工具,以测试设备的特定功能和兼容性。
同时,CTS测试套件也提供了一些扩展点和接口,用于定制和配置测试环境和行为。
Android系统CTS及GTS测试介绍

2. 解压JDK
3. 安装JDK
1) 打开终端,进入Root权限,使用cd <路径> 进入到JDK所在目录。 2) 赋予JDK文件可执行权限:
chmod u+x jdk-6u26-linux-i586.bin 3) 执行安装(注意前面有./s):
最长时间)。 6. 进入Settings->Developer options,分别勾选
Stay awake项(使其在测试过程中充电时屏幕不会进入休眠)。 Allow mock locations项(CTS的android.location包中有22项要
求允许仿真位置)。该功能是仿真测试机台目前所处的位置: 如测试设备目前的实际位置在中国,但测试CTS时要求测试条 件是美国,此时就可使用该功能进行CTS测试仿真位置)。 USB debugging项,并在出现的提示信息点击OK允许USB调试。
2. 解压ADT Bundle
1) 注:测试时需要用到的adb在解压后的ADT Bundle下:adt-bundlelinux-x86-20130917\sdk\platform-tools\。
5
CTS PC端环境配置_ JDK 配置
1. 下载JDK
1) 下载地址: /technetwork/java/javase/downloads/jdk6u26-download-400750.html
2. 解压CTS
3. 配置cts-tradefed文件
1) 用编辑模式打开其tools目录下的cts-tradefed。 2) 添加adb的路径至cts-tradefed脚本的开始行。如
PATH=$PATH:/home/user/adt-bundle-linux-x8620130917\sdk\platform-tools 3) 添加java的路径至cts-tradefed脚本的开始行。如: PATH=$PATH:/home/user/jdk1.6.0_26/bin 4) 在Root权限下用chmod u+x cts-tradefed命令赋予该文件可执行权限。
Android CTS环境搭建
Result:
ls -r/--result: list all result of sessions
ls -r/--result -s/--session session_id: list detail case result of a specified session
一、准备 Android SDK 和 CTS
1、 将 Android 2.1 SDK (Linux)和 CTS 复制到虚拟机上; 具体步骤:
A. 启动虚拟机后,选择“设备”—“分配数据空间…”,添加新的数据空间后,将目 录设定为包含 SDK、CTS 压缩包的目录;
B. $ sudo mount -t vboxsf Sun /home/android/Share/ 将该目录 Mount 到 虚拟机。 注:假定包含 SDK 和 CTS 压缩包的目录名为 Sun,Share 为虚拟机目标目录;
ls -r/--result [pass/fail/notExecuted/timeout] -s/--session session_id: list detail cases of a specified session by the specified result.
History:
history/h: list all commands in command history
三、CTS 测试中常用的命令
Host:
help: show this message
exit: exit cts command line
cts测试原理
cts测试原理CTS(Compatibility Test Suite)测试原理一、引言CTS(Compatibility Test Suite)是Android系统开发者通用软件测试套件,用于验证Android设备和Android诸多核心服务的兼容性。
本文将介绍CTS的测试原理、测试流程以及测试案例。
二、测试原理CTS测试原理主要包括以下几个方面:1. 兼容性验证:CTS对设备的各项功能进行验证,确保设备能够正确地运行Android系统。
2. 接口规范:CTS验证设备是否按照Android接口规范进行开发,确保设备在API调用、资源访问等方面与Android系统保持一致。
3. 一致性测试:CTS测试设备在各种场景下的表现是否与Android 系统一致,包括性能、功能、稳定性等方面的测试。
4. 容错性测试:CTS测试设备在异常情况下的表现是否正确,包括设备的异常处理、错误提示等容错性测试。
三、测试流程CTS测试流程主要包括以下几个阶段:1. 环境搭建:搭建CTS测试环境,包括安装配置相关软件和工具,构建测试设备的镜像等。
2. 测试计划:根据设备的功能和需求编写测试计划,确定测试范围和测试目标。
3. 测试用例开发:根据测试计划编写测试用例,包括功能测试用例、性能测试用例、稳定性测试用例等。
4. 测试执行:按照测试计划和测试用例执行测试,记录测试结果和问题。
5. 缺陷分析:分析测试结果和问题,确定是否符合规范和要求,找出问题的原因和解决方法。
6. 缺陷修复:对发现的问题进行修复,确保设备符合CTS的要求。
7. 重新测试:对修复后的设备进行再次测试,确认问题是否解决。
8. 结果评估:根据测试结果评估设备的兼容性和稳定性,确定是否通过CTS测试。
四、测试案例CTS测试案例可以根据具体的设备和需求进行定制,以下是部分常见的测试案例:1. 应用兼容性测试:测试设备对各种类型的应用程序的兼容性,包括正常启动、正常运行、数据传输等方面的测试。
RK平台_Android7.1_CTS_产品测试环境搭建V1.72
福州瑞芯微电子有限公司密级状态:绝密()秘密()内部(√)公开()RK平台Android7.1_GMS_产品测试环境搭建(系统产品一部)文件状态:[]正在修改[√]正式发布当前版本:V1.0作者:xzj完成日期:2017-05-15审核:完成日期:2017-05-15福州瑞芯微电子有限公司Fuzhou Rockchips Semiconductor Co.,Ltd(版本所有,翻版必究)版本号作者修改日期修改说明备注V1.0xzj2017-03-10初始版本,加入公共补丁以及KR312x补丁V1.7xzj2017-05-15适配对外更新0512,对应CTSR5版本目录1简述 (3)2测试命令 (3)3产品编译 (4)4ANDROID7.1CTS (5)4.1简述 (5)4.2A NDROID7.1CTS环境设置 (5)4.2.1CTS代码集成DRM、GMS包 (5)4.2.2CTS代码配置 (6)4.2.3CTS固件生成(KEY签名) (7)4.2.4CTS固件签名 (7)4.2.5机器序列号 (8)4.2.6机器配置 (9)4.2.7FRP功能 (9)4.3CTS/GTS测试可豁免测试项 (9)4.4CTS、GTS测试不过项补丁 (11)4.4.17.1CTS/GTS测试共性问题 (11)4.4.2CTS312xSDK测试特有问题 (18)4.4.3CTS3288SDK测试特有问题 (20)4.4.43368SDK CTS测试特有问题 (20)4.4.53188SDK CTS测试特有问题 (21)4.5CTS V ERIFIER测试不过项补丁 (21)4.5.1有关CV中Audio相关测试的说明 (23)4.6XTS4.1R2测试不过项补丁 (27)1简述本文档主要是简单介绍下Android7.1R5RK平台上过GMS的一些环境搭建及部分目前测试不过项的补丁,若有存在其他问题,欢迎反馈,我们会尽快进行补充。
Android-CTS测试规范(linux系统)
目录一、Android CTS测试简介 (2)二、Android CTS测试环境搭建 (2)1.下载android-SDK linux版本,下载地址: (2)2.下载android-cts包,下载地址: (2)3.jdk的安装: (2)4.将android-sdk和android-cts解压放置在同一个文件夹 (3)5.在CTS/tools中修改脚本设置环境变量 (3)6.置ubantu系统环境变量 (3)三、Android-CTS测试的几个概念 (3)四、终端测试前准备 (5)1.检测手机是否连接上电脑 (5)2.手机端安装CtsDelegatingAccessibilityService.apk (6)3. 终端设置: (6)五、测试命令的执行 (6)1.进入CTS测试环境 (6)2.CTS测试的方法 (7)3.CTS详细命令 (9)4.Android-CTS用户指南 (10)六、测试结果分析 (10)一、Android CTS测试简介CTS 全称 Compatibility Test Suite 兼容性测试工具。
当电子产品开发出来,并定制了自己的 Android 系统后,必须要通过最新的 CTS 检测,以保证标准的 android application 能运行在该平台下。
通过了CTS 验证,需要将测试报告提交给Google,已取得android market的认证。
CTS 是一款通过命令行操作的工具。
目前 cts 没有提供 windows 版本,只能在 Linux 下测试。
本文将详细介绍在ubantu系统上如何搭建CTS环境,以及运行测试计划和分析测试结果。
二、Android CTS测试环境搭建1.下载android-SDK linux版本,下载地址:/sdk/index.html2.下载android-cts包,下载地址:/compatibility/downloads.html根据手机系统版本下载对应版本的cts包,否则将无法运行测试3.jdk的安装:/source/initializing.html在ubuntu系统中打开终端,输入命令:$ sudo add-apt-repository "deb / lucid partner"$ sudo apt-get update$ sudo apt-get install sun-java6-jdk$ sudo ln -s /usr/lib/i386-linux-gnu/libX11.so.6 /usr/lib/i386-linux-gnu/libX11.so4.将android-sdk和android-cts解压放置在同一个文件夹5.在CTS/tools中修改脚本设置环境变量进入android-cts/tools目录下,修改startcts文件,将脚本中的SDK_ROOT 改成自己的SDK路径,如:SDK_ROOT=/home/jackmiao/workspace/CTS/android-cts/tools6.设置ubantu系统环境变量进入ubantu系统用户目录下按Ctrl+H,打开.bashrc在最后面加PATH=$PATH:$HOME/bin: /home/jackmiao/CTS/android-sdk-linux/tools: /home/jackmia o/CTS /android‐sdk‐linux/platform‐tools: /home/ jackmiao/CTS /android‐cts/tools:其中红色部分为sdk和cts工具的路径请根据自己的实际路径创建三、Android-CTS测试的几个概念在进行 CTS 测试之前,先阐述 CTS 测试中几个概念:Test Plan(Plan):测试计划,Test package 的集合,每个 Plan 中都包含若干个测试包以android –cts 2.2版本为例,总共有8个测试计划CTS:包含2万多个测试用例,这些测试用例是检验兼容性必须的,性能测试不包含在本计划中,随版本的更新,本测试计划也会更新。
CTS测试环境搭建介绍
CTS测试环境搭建介绍CTS 全称Compatibility Test Suite兼容性测试工具。
当电子产品开发出来,并定制了自己的Android系统后,必须要通过最新的CTS检测,以保证标准的android application能运行在该平台下。
通过了CTS验证,需要将测试报告提交给Google,已取得android market的认证。
CTS是一款通过命令行操作的工具。
目前cts没有提供windows版本,只能在Linux下测试。
在我们实际使用CTS的过程中,很可能需要根据特定的要求,来定制自己的Test Plan。
这时就需要自己编译CTS.建立步骤如下:1. 下载CTS包/compatibility/cts-intro.html2. 在手机或者模拟器上安装CtsDelegatingAccessibilityService.apk $sudo ./adb install -r/cts/android-cts/repository/testcases/CtsDelegatingAccessibilityService. apk3. 手机或者模拟器设置Settings->Accessibility->两个选项都选上;Settings > Application > Development 三个选项都选上;Settings > Sound & Display > Scree n Timeout should be set to “Never Timeout”;4. 修改startcts脚本文件进入android/out/host/linux-x86/cts /android-cts/repository/tools目录下,修改startcts脚本文件。
将脚本中的SDK_ROOT该成自己的android SDK路径。
$cd android/out/host/linux-x86/cts/android-cts/tools$vim startcts 修改脚本中出现的第一个SDK_ROOT如”SDK_ROOT=/home/vic/softs/android-sdk-linux_86″。
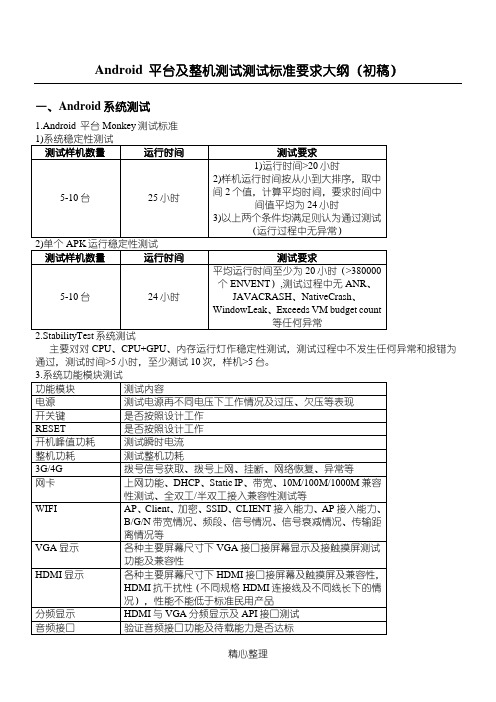
Android 平台及整机测试测试标准要求大纲(初稿)
Android 平台及整机测试测试标准要求大纲(初稿)一、Android系统测试1.Android 平台Monkey测试标准详细看研发保护机制方案二、整机测试GB 191-2000 包装储运图示标志GB 1002-1996 家用和类似用途单相插座形式尺寸GB 2099.1-1996 家用和类似用途插头插座第一部分:通用要求GB/T 2421-1999 电工电子产品环境试验第一部分:总则GB/T 2422—1995 电工电子产品环境试验术语GB/T 2423.1—2001 电工电子产品环境试验规程试验A:低温试验方法GB/T 2423.2—2001 电工电子产品环境试验规程试验B:高温试验方法GB/T 2423.3—1993 电工电子产品环境试验规程试验Ca:恒定湿热试验方法GB/T 2828.1-2003 计数抽样检验程序第1部分:按接收质量限(AQL)检索的逐批检验抽样计划GB/T 4857.2-1992 包装件基本试验温湿度调节处理GB/T 4857.5-1992 包装件基本试验跌落试验方法GB 4943-2001 信息技术设备(包括电气事物设备)的安全GB 5080.7-1986 可靠性试验恒定失效率假设下的失效率与平均无故障时间的验证试验方案。
GB 6882-1986 声学噪声源声功率级的测定消声室和半消声室精密法(neq ISO3745:1977)GB 9254-1998 信息技术设备的无线电干扰极限值和测量方法试验GB/T 9813-2000 微型计算机通用规范GB 17625.1—2003 电磁兼容限值谐波电流发射限值(设备每相输入电流≤16A)2)安全要求,B. 功能和性能检查按产品标准中规定的各项功能、性能、软件配置和文档逐项进行检查,应符合产品标准的要求。
C. 外观和结构试验用目测法和有关检测工具进行外观和结构检查,产品应符合4.3的要求。
D. 安全试验a) 接触电流试验按GB4943中5.1条规定进行。
CTS测试执行步骤

CTS测试执行步骤1. 了解CTS测试:在执行CTS测试之前,首先需要了解CTS测试的目的和测试范围。
CTS测试旨在验证Android设备是否符合Android兼容性标准,包括程序的正确性、稳定性、性能等方面的要求。
2. 搭建测试环境:CTS测试需要在专门的测试环境下进行。
首先需要准备一台或多台Android设备作为被测设备,同时需要一台或多台计算机作为测试主机。
测试设备和测试主机需要通过ADB(Android Debug Bridge)进行连接。
4. 配置CTS测试环境:在开始执行CTS测试之前,需要进行一些配置工作。
首先需要将测试设备刷入最新的Android固件,确保设备的固件版本和CTS测试软件的版本一致。
然后需要配置ADB和测试设备的网络连接,确保测试设备能够正常连接到测试主机。
5.运行CTS测试套件:在配置好CTS测试环境后,就可以运行CTS测试套件了。
CTS测试套件包含了一系列的测试用例,用于测试设备的各项功能和性能。
可以选择运行全部测试用例,也可以选择运行部分测试用例。
运行测试套件后,CTS测试软件会自动执行测试用例,并生成测试报告。
6. 分析测试结果:在CTS测试完成后,可以查看测试报告来分析测试结果。
测试报告会详细记录每个测试用例的执行结果,包括通过的测试用例、失败的测试用例和跳过的测试用例等。
通过分析测试报告,可以了解设备在兼容性方面是否符合Android标准,以及存在的问题和改进的方向。
7.修复问题并重新测试:在分析测试结果时,可能会发现一些测试用例未通过或有问题。
在这种情况下,需要查找问题的原因,并进行修复。
修复问题后,需要重新运行相关的测试用例,确保修复的问题已经解决。
8. 提交测试结果:在完成CTS测试后,可以将测试结果提交给Android官方进行审核。
通过提交测试结果,可以获得Android设备兼容性认证,并在Android官方网站上公布设备的兼容性信息。
总结:CTS测试是一项全面的Android设备兼容性测试工作,需要准备测试环境、配置测试环境、运行测试套件、分析测试结果、修复问题并重新测试,最后提交测试结果。
- 1、下载文档前请自行甄别文档内容的完整性,平台不提供额外的编辑、内容补充、找答案等附加服务。
- 2、"仅部分预览"的文档,不可在线预览部分如存在完整性等问题,可反馈申请退款(可完整预览的文档不适用该条件!)。
- 3、如文档侵犯您的权益,请联系客服反馈,我们会尽快为您处理(人工客服工作时间:9:00-18:30)。
福州瑞芯微电子有限公司密级状态:绝密( ) 秘密( ) 内部( √ ) 公开( )Sofia3GR平台A ndroid5.1_CTS产品测试说明(系统产品二部)文件状态:[ ] 正在修改[√] 正式发布当前版本:V1.1作者:hxw完成日期:2015-09-03审核:完成日期:福州瑞芯微电子有限公司Fuzhou Rockchips Semiconductor Co . , Ltd(版本所有,翻版必究)1简述本文档介绍Sofia3GR平台Android 5.1 的GMS测试,包括Android 5.1工程配置,CTS、GTS、Verifier测试fail项补丁,GMS要求相关细节说明,以及测试环境搭建及机器配置,若有存在其他问题,欢迎反馈,我们会尽快进行补充。
2Android 5.1 GMS 工程配置2.1集成DRM、GMS 包1)确保widvine level3 drm包被编译diff --git a/device.mk b/device.mkindex 7df0cb7..5d794b6 100755--- a/device.mk+++ b/device.mk@@ -16,9 +16,26 @@# Oct 20, 2013: Initial Creation for Sofia3G# May 27 2014: IMC: add IMC test tools for engineering build+$(call inherit-product-if-exists, vendor/widevine/widevine.mk)# Screen size is "normal", density is "mdpi"PRODUCT_AAPT_CONFIG := normal large mdpi tvdpi hdpi2)确保GMS 包编译:GMS 包SDK 默认是不带的,请向认证公司索取最新的GMS 包,解压后放在:vendor/google 目录下在/device/rockchip/sofia3gr/BoardConfig.mk 中将以下两项设为true# google appsBUILD_WITH_GOOGLE_MARKET ?= trueBUILD_WITH_GOOGLE_MARKET_ALL ?= true2.2合并分区、hardware features配置1)合并分区,在/device/rockchip/sofia3gr/BoardConfig.mk 中#if set to true m-user would be disabled and UMS enabled, if set to disable UMS would be disabled and m-user enabled-BUILD_WITH_UMS := true+BUILD_WITH_UMS := false2)Sensor编译配置,根据产品sensor list在/device/rockchip/sofia3gr/BoardConfig.mk 如下代码块中做正确配置:# Enabling sensorsBOARD_SENSOR_MPU := false #if use mpuBOARD_USES_GENERIC_INVENSENSE := false #if use mpuBOARD_SENSOR_ST := trueifeq ($(BOARD_SENSOR_ST),true)BOARD_GRAVITY_SENSOR_SUPPORT := trueBOARD_COMPASS_SENSOR_SUPPORT := falseBOARD_GYROSCOPE_SENSOR_SUPPORT := falseBOARD_PROXIMITY_SENSOR_SUPPORT := trueBOARD_LIGHT_SENSOR_SUPPORT := trueBOARD_PRESSURE_SENSOR_SUPPORT := falseBOARD_TEMPERATURE_SENSOR_SUPPORT := falseBOARD_SENSOR_COMPASS_AK8975 := falseBOARD_SENSOR_COMPASS_AK09911 := falseBOARD_SENSOR_COMPASS_AK8963 := falseBOARD_COMPASS_ARCH_ARM=falseBOARD_COMPASS_ARCH_X86_32=trueBOARD_COMPASS_ARCH_X86_64=falseendif另外需要在framework/native/data/etc目录下的xml文件中,根据产品hardware features 进行配置。
2.3 FRP功能谷歌目前要求5.1 的系统需要实现FRP 功能,具体实现请参考“FRP 补丁”,请按照里面的frp_readme.txt 步骤来实现。
2.4编译选项工程做如上配置之后,若编译user debug固件会有7~8项fail,若要全过,最终需要编译user固件。
3CTS测试fail项补丁3.1 Android 5.1 CTS 测试共性问题●Package: android.osClass:bDebuggingTestMethod: testUsbDebugging该项要求系统ro.adb.secure =1,ro.adb.secure =0 时会出现该项错误。
修改对应方法:请在/device/rockchip/common/system.prop 做如下修改:-ro.adb.secure =0+ro.adb.secure =1●Package: Class: .cts.DnsTestMethod: testDnsWorks修改对应方法:请连接VPN 进行测试,若测试fail请在/system/core 目录打上system_core_testDnsWorks.patch 补丁●Package: android.themeClass: android.theme.cts.DeviceDefaultTestMethod: testGetActionBar_DeviceDefault_DialogWhenLargetestGetActionBar_DeviceDefault_Light_DialogWhenLarge修改对应方法:diff --git a/device.mk b/device.mkindex 20f41f6..468a364 100755--- a/device.mk+++ b/device.mk@@ -21,6 +21,7 @@ $(shell python $(LOCAL_PATH)/auto_generator.py $(TARGET_PRODUCT)preinstall_del)$(call inherit-product, $(SRC_TARGET_DIR)/product/full_base.mk)-PRODUCT_AAPT_CONFIG ?= normal xlarge hdpi xhdpi xxhdpi+PRODUCT_AAPT_CONFIG += normal large xlarge hdpi xhdpi xxhdpi PRODUCT_AAPT_PREF_CONFIG ?= xhdpi●Package: android.viewClass: android.view.cts.DisplayRefreshRateTestMethod: testRefreshRate●Package:android.host.themeMethod:testHoloTheme修改对应方法:并确认kernel中显示dtsi的宽高尺寸、clock等参数配置正确●Package: android.securityClass: android.security.cts.ServicePermissionsTestMethod: testDumpProtected修改对应方法:在framework/base 目录上打上framework_base_testDumpProtected.patch 补丁●Package: .hostsidenetworkClass: .HostsideNetworkTestsMethod: testVpn修改对应方法:在system/netd 目录上打上system_netd_server-forvpncts.patch 这个补丁●Package: android.appClass: android.app.cts.ProgressDialogTestMethod: testShow4修改对应方法:在frameworks/base 目录上打上framework_base_ProgressDialogTest.patch 这个补丁●Package: Class: .cts.ConnectivityManagerTestMethod: testIsNetworkTypeValid修改对应方法:在device/rockchip/common/目录上打上device_rockchip_common_testIsNetworkTypeValid.patch 这个补丁。
● Package: android.adminhostsideClass: com.android.cts.devicepolicy.DeviceOwnerTest修改对应方法:这个类中全测不过,请在frameworks/base 目录上打上framework_base_DeviceOwnerTest.patch及frameworks_base_testLockTask.diff这2个补丁。
●Package: android.contentClass: android.content.cts.ContextWrapperTestMethod: testRegisterReceiver1Method: testRegisterReceiver2Method: testSendOrderedBroadcast1Method: testSendOrderedBroadcast2修改对应方法:该测试类相关的错误也通用该补丁。
在/frameworks/base 目录上打上补丁frameworks_base_fixContentFail.patch。
●Package: android.displayClass: android.display.cts.VirtualDisplayTestMethod: testPrivatePresentationVirtualDisplayMethod: testPrivateVirtualDisplayMethod: testPrivateVirtualDisplayWithDynamicSurface修改对应方法:在/frameworks/base 目录上打上补丁framework_base_VirtualDisplayTest.patch。
