java虚拟机安装操作手册
安装java软件和widows 7下配置环境(
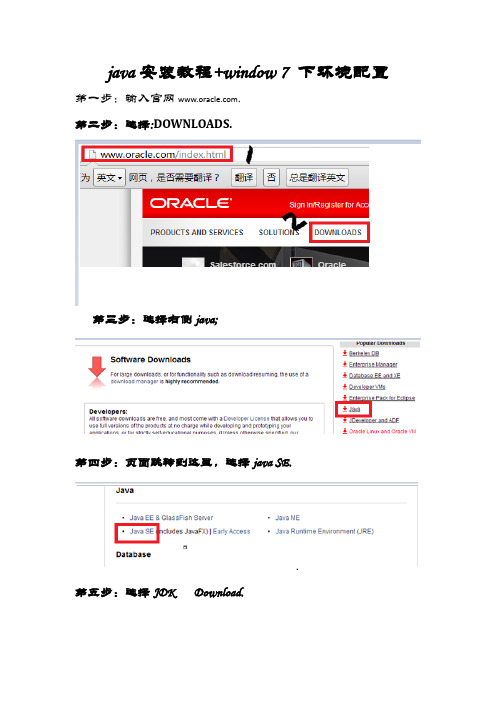
java安装教程+window 7 下环境配置第一步:输入官网.
第二步:选择:DOWNLOADS.
第三步:选择右侧java;
第四步:页面跳转到这里,选择java SE.
第五步:选择JDK Download.
第六步:选择Accept License Agreement.(同意协议)
第七步:在下面选择适当的系统,一般是windows
第八步:选择立即下载、
第九步:下载完成后,打开文件选择下一步。
(或者自己更改安装目录)
第十步:选择下一步;
第十一步:安装完毕;
配置环境第一步:桌面右键我的电脑,选择属性。
第二步:选择高级系统设置。
第三步:选择高级下的环境变量。
第四步:新建系统变量——输入变量名JAVA_HOME和变量值:C:\Program Files\Java\jdk1.7.0_25——确定
第五步:新建系统变量—:变量名为Classpath,变量值
为.;%JAVA_HOME%\bin;(注意:分号和点号)
-按确定。
第六步:新建系统变量——变量值:Path;变量
名:%JAVA_HOME%\bin;%JAVA_HOME%\jre\bin;;%SystemRoot%\sy
stem32;%SystemRoot%;%SystemRoot%\system32\wbem——确定
第七步:开始——输入cmd,按回车
最后,输入java或Java或javac或java -version。
出现提示东西,则表示成功了。
简述java开发环境搭建的具体过程。
简述java开发环境搭建的具体过程。
Java开发环境搭建是Java程序员的必修课程,下面简述了java开发环境搭建的具体过程:
1.下载JDK:在官网上下载适合自己电脑系统的JDK,下载完后进行安装。
2.配置环境变量:将JDK的安装路径添加到环境变量中,使得系统可以找到Java的执行文件。
3.安装开发工具:选择适合自己的开发工具,例如Eclipse、IntelliJ IDEA等,进行安装。
4.配置开发工具:打开安装的开发工具,进行配置,例如设置JDK的路径、导入需要的库等。
5.创建项目:在开发工具中创建一个新的Java项目,可以选择不同的类型,例如普通Java项目、Java web项目等。
6.编写代码:在新建的项目中编写Java代码,可以使用已经导入的库和框架,快速实现自己的功能。
7.编译和运行:在开发工具中选择编译和运行选项,进行代码的编译和运行。
以上就是java开发环境搭建的具体过程,只要按照以上步骤进行操作,就可以搭建出一个完整的Java开发环境。
- 1 -。
java项目部署指南

部署安装手册1.0目录第一章、简单安装部署1、JDK安装和配置2、Tomcat的安装和配置A)5.5版的安装B)6.0版的安装3、快速设置系统环境变量方法4、MySQL安装5、数据库导出和导入A)数据导出B)数据导入6、部署项目程序到TomcatA)另一种部署7、启动服务器测试8、数据库自动备份设置1.JDK安装和配置JDK使用版为1.5,目前有安装版和绿色解压版,这里使用的是绿色解压版。
首先解压下载的JDK1.5.rar,然后统一放入指定目录下方便日后管理(为了避免跟系统盘符分离,可以在D盘下新建一个文件夹命名为:develop,这里使用C盘):然后开始设置环境变量。
右键我的电脑--属性--高级--环境变量。
在这里你可以选在在系统变量中添加,这样这台机器上的所有用户都可以使用这个环境变量。
在系统变量中点击新建按钮添加以下几个变量:JAVA_HOME=c:\develop\jdk1.5classpath=.;%JAVA_HOME%\lib\tools.jar;%JAVA_HOME%\jdk1.5\lib\dt.Jar注意,在最前面有一个“.”,不要忘记了。
这里面的路径要换成你自己的安装路径。
然后配置PATH 在变量值的最前面写上%JA V A_HOME%\bin;%JA V A_HOME%\bin\jre; 记得一定用分号隔开最后点击确定后在运行cmd输入javac出现提示命令符为配置成功!2.Tomcat的安装和配置A)5.5版的安装Tomcat使用的版本为:5.5,这里使用解压版,同样解压到develop目录:如果选择的是安装版,按照安装提示进行安装就可以了。
中途可以选择端口。
默认是8080。
你可以改成80,这样在以后输入地址的时候比较方便。
但是80端口比较容易发生冲突。
所以这里就不用改了。
(安装之后在配置文件中也可以重新设置端口号,请查阅相关资料)。
然后继续配置tomcat系统变量,在环境变量中添加:TOMCAT_HOME=c:\develop\tomcat5.5CATALINA_HOME=%TOMCAT_HOME%TOMCAT_BASE=%TOMCAT_HOME%在CLASSPATH最后面添加:;%TOMCAT_HOME%\common\lib\servlet-api.Jar在所有这一切做完之后,启动tomcat,进入tomcat5.5\bin运行startup.Bat,等待启动完成后,打开你的浏览器,输入 http://localhost:8080 看看是否能看到tomcat菜单页面。
系统部署手册

XXXXXXXXXXXXXXXXX项目XXXXXX系统部署手册作者:xxxxxxxXXXX股份有限公司XXXX年XX月目录一、环境 (3)1.系统环境: (3)2.软件环境: (3)3.硬件环境 (3)二、系统部署 (3)1.Jdk安装 (3)1.1 安装jdk (3)1.2 jdk环境变量配置 (5)2.oracle安装 (6)2.1 oracle安装 (6)3.apache-tomcat安装 (14)4.XXXXXXXXXX系统需要修改的地方 (15)5. 启动、停止Tomcat服务器 (15)一、环境1.系统环境:Windows2003 32位2.软件环境:Java JDK版本:jdk1.6 以上版本oracle版本:Oracle 11g 或oracle 10gtomcat 版本: tomcat 6.33.硬件环境二、系统部署1.Jdk安装1.1 安装jdk运行下载好的jdk-6u10-beta-windows-i586-p.exe,按提示进行操作。
在设置JDK安装路径时,建议放在C:\jdk1.6或D:\jdk1.6这种没有空格字符的目录文件夹下,避免在以后编译、运行时因文件路径而出错。
这里我们将它安装到D:\jdk1.6目录下。
安装好JDK后,会自动安装JRE。
这样JDK的安装即完成。
1.2 jdk环境变量配置新建系统变量Classpath和Path,详细设置如下图所示。
2.oracle安装2.1 oracle安装1. 解压缩文件,将两个压缩包一起选择,鼠标右击 -> 解压文件如图2.两者解压到相同的路径中,如图:3. 到相应的解压路径上面,找到可执行安装文件【 setup.exe 】双击安装。
如图:4. 安装第一步:配置安全更新,这步可将自己的电子邮件地址填写进去(也可以不填写,只是收到一些没什么用的邮件而已)。
取消下面的“我希望通过My Oracle Support接受安全更新(W)”。
VMware虚拟化配置手册
VMware虚拟化配置手册1.服务器安装硬件要求确保主机符合 ESXi 6.0 支持的最低硬件配置。
必须具有以下硬件和系统资源,才能安装和使用 ESXi 6.0:ESXi 6.0 将仅在安装有 64 位 x86 CPU 的服务器上安装和运行。
ESXi 6.0 要求主机至少具有两个内核。
ESXi 6.0 仅支持 LAHF 和 SAHF CPU 指令。
已知的 64 位处理器:所有 AMD Opteron 处理器所有 Intel Xeon 3000/3200、3100/3300、5100/5300、5200/5400、5500/5600、7100/7300、7200/7400和 7500 处理器至少 2 GB 的内存。
一个或多个千兆或 10GB 以太网控制器。
一个或多个以下控制器的任意组合:基本 SCSI 控制器。
Adaptec Ultra-160 或 Ultra-320、LSI Logic Fusion-MPT 或者大部分 NCR/SymbiosSCSI。
RAID 控制器。
Dell PERC(Adaptec RAID 或 LSI MegaRAID)、HP Smart Array RAID 或IBM(Adaptec) ServeRAID 控制器。
SCSI 磁盘或包含未分区空间用于虚拟机的本地(非网络)RAID LUN。
ESXi 为多个 64 位客户机操作系统提供支持。
使用 64 位客户机操作系统运行虚拟机的主机有下列硬件要求:对于基于 AMD Opteron 的系统,处理器必须为 Opteron Rev E 或更高版本。
对于基于 Intel Xeon 的系统,处理器必须包括对 Intel 的 Virtualization Technology (VT) 的支持。
许多CPU 支持 VT 的服务器可能默认禁用 VT,因此必须手动启用 VT。
如果CPU 支持 VT 但在 BIOS 中看不到此选项,请联系供应商以获得可启用 VT 支持的 BIOS 版本。
java虚拟机环境配置
文章分类:Java编程第一步:下载jdk和tomcat:JDK下载Tomcat下载最新的jdk为1.6.10,tomcat为6.0,建议jdk1.4以上,tomcat4.0以上第二步:安装和配置你的jdk和tomcat:执行jdk和tomcat的安装程序,然后设置按照路径进行安装即可。
1.安装jdk以后,需要配置一下环境变量,在我的电脑->属性->高级->环境变量->系统变量中添加以下环境变量(假定你的jdk安装在C:\Program Files\Java):JAVA_HOME=C:\Program Files\Java\jdk1.6.0_10classpath=.;%JAVA_HOME%\lib\dt.jar;%JAVA_HOME%\lib\tools.jar;(.;一定不能少,因为它代表当前路径)path=%JAVA_HOME%\bin接着可以写一个简单的java程序来测试JDK是否已安装成功:Java代码1.public class Test{2.3.public static void main(String args[]){4.5.System.out.println("This is a test program.");6.7.}8.9.}将上面的这段程序保存为文件名为Test.java的文件。
然后打开命令提示符窗口,cd到你的Test.java所在目录,然后键入下面的命令javac Test.javajava Test此时如果看到打印出来This is a test program.的话说明安装成功了,如果没有打印出这句话,你需要仔细检查一下你的配置情况。
2.安装Tomcat后,在我的电脑->属性->高级->环境变量->系统变量中添加以下环境变量(假定你的tomcat安装在c:\tomcat):CATALINA_HOME:C:\Program Files\Apache Software Foundation\Tomcat 6.0CATALINA_BASE:C:\Program Files\Apache Software Foundation\Tomcat 6.0TOMCAT_HOME: C:\Program Files\Apache Software Foundation\Tomcat 6.0然后修改环境变量中的classpath,把tomat安装目录下的common\lib下的servlet.jar 追加到classpath中去,修改后的classpath如下:classpath=.;%JAVA_HOME%\lib\dt.jar;%JAVA_HOME%\lib\tools.jar;%CATALINA_HOME% \common\lib\servlet-api.jar;【注意最新版本的Tomcat中可能没有common这个文件夹了。
CommVaul CommServe 安装手册
CommVault技术手册CommServe/SRM/CommNet服务器简明安装手册二〇一一年三月目录第 1 章COMMSERVE服务器安装 (3)1.1安装环境准备 (3)1.1.1验证安装前提条件 (3)1.1.2操作系统和平台兼容性 (3)1.1.3服务器硬件要求 (5)1.2安装软件 (6)1.3登录数据管理控制台 (14)1.4服务管理器 (15)1.5导入永久许可证 (16)第 2 章SRM服务器安装 (18)2.1安装环境准备 (18)2.1.1验证安装前提条件 (18)2.1.2操作系统和平台兼容性 (18)2.1.3服务器硬件要求 (18)2.2安装软件 (19)2.3SRM服务器管理 (23)第 3 章COMMNET服务器安装 (24)3.1安装环境准备 (24)3.1.1验证安装前提条件 (24)3.1.2系统需求 (24)3.2安装软件 (25)3.3登录C OMM N ET管理控制台 (30)第 1 章CommServe服务器安装1.1安装环境准备1.1.1验证安装前提条件CommServe服务器是CommCell里安装的第一个组件。
安装CommServe服务器前执行本节中的操作过程。
这些要求适用于远程安装和本地安装。
1.1.2操作系统和平台兼容性确认您的操作系统和平台支持COMMV AULT SIMPANA 9.0 CommServe服务器。
验证兼容性:访问COMMVAULT技术文档网页/commvault/release_9_0_0/books_online_1/ english_us/prod_info/cs.htm在左边的列表里选择“System Requirments”,阅读该文档,确认环境中的软件与CommServe服务器兼容。
下面的列表仅供参考:操作系统平台:●Microsoft Windows Server 2003 32位或x64位版本,补丁SP1或之上。
VMware工具中文手册
2008十大免费VMware工具手册2008十大免费VMware工具手册IT预算是IT管理员的一个烦恼。
不过在如今全球经济危机下,相对于减少IT预算和和裁员,更值得考虑使用免费的虚拟化管理工具。
在整个2008年,许多公司发布了关于VMware ESX和VMware Infrastructure套件的新应用,包括几个免费的VMware工具。
这些工具是免费的,但并不意味着它们竞争不过付费产品。
本应用手册将介绍2008十大免费VMware工具。
概述在如今全球经济危机下,相对于减少IT预算和和裁员,更值得考虑使用免费的虚拟化管理工具,它们能做昂贵的商业应用所能做的多数工作。
作为免费工具的爱好者,TechTarget中国的特约虚拟化专家David Davis尝试了几乎所有在去年推出的免费产品。
本文将介绍2008十大免费VMware工具。
新春巨献:2008十大免费VMware工具VIMA在VMware移除VMware ESXi的服务控制台同时,它给管理员提供了类似的功能。
VIMA工具为ESXi提供了命令行集中管理控制台,可以创建脚本以管理和配置多个ESX和ESXi主机。
最好的是这款工具是免费的。
如何使用VMware VIMA弥补ESXi管理上的不足?安装VIMA的两种方法VMware ESXi Server这个清单包括了VMware工具,但是VMware的免费企业级虚拟化hypervisor ESXi也应包括在内。
虽然可能不能使用VMotion或Update Manager,ESXi仍然是最强劲的hypervisor。
安装和配置VMware ESXi如何上传文件到VMware ESX 3i ServerVeeam Monitor Free EditionVeeam Monitor发布于2008年年底,它使用VMware应用程序接口直接访问vCenter,监视ESX主机和子机的性能。
Veeam Monitor能实时监控,并显示ESX事件的性能数据。
xx系统部署手册【范本模板】

XXXXXXXXXXXXXXXXX项目XXXXXX系统部署手册作者:xxxxxxxXXXX股份有限公司XXXX年XX月目录一、环境 (3)1。
系统环境: (3)2.软件环境: (3)3。
硬件环境 (3)二、系统部署 (3)1.Jdk安装 (3)1.1 安装jdk (3)1.2 jdk环境变量配置 (5)2.oracle安装 (6)2。
1 oracle安装 (6)3。
apache-tomcat安装 (14)4.XXXXXXXXXX系统需要修改的地方 (15)5. 启动、停止Tomcat服务器 (15)一、环境1。
系统环境:Windows2003 32位2。
软件环境:Java JDK版本:jdk1.6 以上版本oracle版本:Oracle 11g 或oracle 10gtomcat 版本: tomcat 6.33.硬件环境二、系统部署1.Jdk安装1。
1 安装jdk运行下载好的jdk-6u10—beta-windows—i586-p.exe,按提示进行操作。
在设置JDK安装路径时,建议放在C:\jdk1.6或D:\jdk1.6这种没有空格字符的目录文件夹下,避免在以后编译、运行时因文件路径而出错。
这里我们将它安装到D:\jdk1.6目录下.安装好JDK后,会自动安装JRE。
这样JDK的安装即完成。
1.2 jdk环境变量配置新建系统变量Classpath和Path,详细设置如下图所示。
2.oracle安装2。
1 oracle安装1. 解压缩文件,将两个压缩包一起选择,鼠标右击 -> 解压文件如图2.两者解压到相同的路径中,如图:3. 到相应的解压路径上面,找到可执行安装文件【 setup.exe 】双击安装.如图:4。
安装第一步:配置安全更新,这步可将自己的电子邮件地址填写进去(也可以不填写,只是收到一些没什么用的邮件而已).取消下面的“我希望通过My Oracle Support接受安全更新(W)”。
WAS安装部署手册范本
一、安装步骤1.进入安装包../WAS下,点击,进行安装;出现下图:2,点击下一步;3.如图,接受协议,点击下一步;4.如果显示“已通过”,则可进行“下一步”操作;输入安装路径;5.如图所示,默认点击“下一步”即可;6.输入你想设定的用户名及密码;7.如图,一路默认,点击“下一步”即可;8.安装结果显示“成功”,至此安装完成。
点击“完成”,出现以下界面:9.点击“安装验证”,会出现安装结果;10.登录https://localhost:9043/ibm/console/来验证是否安装成功。
11.点击“继续浏览此网站”12.安装成功二、部署应用1.启动websphere第一种方法,打开“第一步”如图,点击“启动服务”第二种方法,点击“启动服务”第三种方法,打开“开始”---“管理工具”---“服务”,启动“IBM WebSphere Application Server”2.部署应用1)Websphere启动之后,打开https://localhost:9043/ibm/console/页面2)点击“继续浏览此网站”3)输入用户名,密码,点击登录4)打开“应用程序”—“新建应用程序”5)点击“新建企业应用程序”6)选择要部署的应用7)点击下一步,这部分需要的时间较长8)点击下一步9)点击下一步10)选中应用之后,点击应用,11)点击“下一步”12)选择web模块,虚拟主机,这选择默认值,点击“下一步;13)如图,输入“上下文根”,点击“下一步”14)如图,15)点击“完成”,该步时间较长,耐心等待;16)点击“保存”,该步也需要时间;17)进入\IBM\WebSphere\AppServer\profiles\AppSrv01\installedApps\PC-20130327CMF CNode01Cell\shanshan_war.ear经行相关配置的修改;18)修改完成后,打开“应用程序类型”—websphere企业应用程序;19)选择要启动的应用程序,点击启动;进行验证,输入:http://服务器IP:端口号/应用名/,这我的是:http://localhost:9080/shanshan/shan.html3.遇到的问题查看\IBM\WebSphere\AppServer\profiles\AppSrv01\logs\server1中的日志文件1,部分安装成功:日志中: CWUPI0000I: 退出代码=2原因可能是:机器名不对,机器名中不能有下划线;2.部署过程中出现内存溢出时:进行如下操作;,点击sever1,选择“Java 和进程管理”---“进程定义”选择“Java 虚拟机”设置“初始堆大小”与“最大堆大小”之后点击“应用”点击保存;重启服务。
虚拟机软件vmware使用教程图解5.5
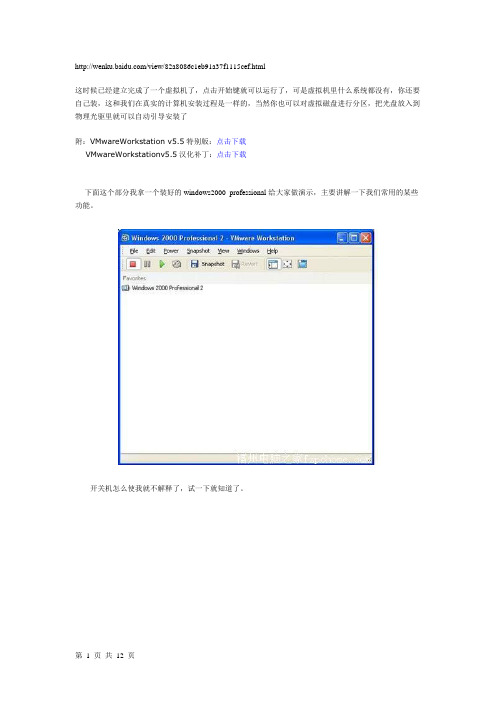
/view/82a8086c1eb91a37f1115cef.html这时候已经建立完成了一个虚拟机了,点击开始键就可以运行了,可是虚拟机里什么系统都没有,你还要自己装,这和我们在真实的计算机安装过程是一样的,当然你也可以对虚拟磁盘进行分区,把光盘放入到物理光驱里就可以自动引导安装了附:VMwareWorkstation v5.5特别版:点击下载VMwareWorkstationv5.5汉化补丁:点击下载下面这个部分我拿一个装好的windows2000 professional给大家做演示,主要讲解一下我们常用的某些功能。
开关机怎么使我就不解释了,试一下就知道了。
装好这个以后去看看虚拟机的硬件状态会发现所有的硬件都工作正常了,其实只要你的真实系统里的硬件驱动都安装好了,VMware就会在虚拟机里也安装好的。
到此为止,安装虚拟机的工作已经完成。
好,下面我们来看vmware最激动人心的部分,网络功能。
配置虚拟机的网络光有虚拟机是不够的,我们需要使用虚拟机和真实主机以及其他的虚拟机进行通讯。
通讯分两个部分,一个是局域网内的,另一个是连接到公网的。
这一部分是重点,三种不同模式的用途就要揭晓。
(1)桥接模式:拓扑:如果你的真实主机在一个以太网中,这种方法是将你的虚拟机接入网络最简单的方法。
虚拟机就像一个新增加的、与真实主机有着同等物理地位的一台电脑,桥接模式可以享受所有可用的服务;包括文件服务、打印服务等等,并且在此模式下你将获得最简易的从真实主机获取资源的方法。
(2)host only模式:拓扑:Host-only模式用来建立隔离的虚拟机环境,这这种模式下,虚拟机与真实主机通过虚拟私有网络进行连接,只有同为Host-only模式下的且在一个虚拟交换机的连接下才可以互相访问,外界无法访问。
ho st only模式只能使用私有IP,IP,gateway,DNS都由VMnet 1来分配。
(3)NAT模式:拓扑:NAT(network address translation)模式其实可以理解成为是方便地使虚拟机连接到公网,代价是桥接模式下的其他功能都不能享用。
架设教程-天堂2JAVA模拟器版最详细全套基础教程!
架设教程-天堂2JAVA模拟器版最详细全套基础教程!新增加安装教程: 【共享】新0822版最完整详细新⼈新⼿专⽤全套安装教程(1台电脑的⽤法) 【共享】新版0604服务端完整详细安装教程简单架设简体4章私服(1台电脑的⽤法) 如此教程还有错误或需要补充的地⽅,请朋友们回帖指出,我⼀定会尽快修正的 天堂2 JAVA单机版-专业的新⼿全套详细教程(新⼈必看) 注意1:L2J的路径上不能有中⽂字,建议路径都改成英⽂字因为如果路径上有中⽂字它有时会读不到HTML档,导致结果是创建⾎盟建不了,有些任务也接不了最好是天堂2客户端和服务端都不要⽤中⽂做⽂件名,那样就更完美了 注意2:电脑上不要插上⼿柄,就算只插上⼿柄转接器(没插⼿柄)也不⾏,不然进⼊游戏后视⾓就会有问题(⼀直向上看) 注意3:X:L2Jcnl2jgameserverdatastatsskills⽬录内的技能4515修改<skill id="4515"levels="99" name="⽯化"> <effect count="1" name="Paralyze" time="120" val="0"/> 把time="120"改成time="0" ⽬的是以后遇到等级⽐⾃⼰低的⾸领级怪物时可以避免被它⽯化 <skill id="4098" levels="12" name="Magic Skill Block">是敌⼈封锁我⽅的技能,使我们在中此招后发不出技能,最好此技能时间也要改的短⼀些 4063 (4064) 4117 4118 4131 4164 4189 4205 (4319)(4620)敌技能是⿇痹 4035 4036 4052 (4148) 4182 4198 (4243) 4259 (4320)(4514)(4582)(4606)(4649)敌技能是毒 4111 4578 敌技能是⽯化 删除召唤的怪物有两个⽅式: 1.先打//admin 然后点怪然后点选gm操作窗⼝内的⽬标删除2.shit + 点怪出现了窗⼝~~点选删除 先输⼊//admin弹出GM管理窗⼝,再选中⾃⼰,按“GM指令”-“⽬标学习技能”输⼊技能ID和技能最⼤等级再按“确定”按钮就可以了 以下是全部的被动技能(⽤来打造⼀个完美的⾃⼰吧) 想增加负重能⼒(使⾃⼰可以带更多的物品⽽不会受到负重惩罚)150(3)X:L2Jcnl2jgameserverdatastatsskills⽬录内的0100-0199⽤记事本打开找到第150号技能的⽼版<table name="#rate"> 166000 249000 332000 </table> 新版<table name="#rate"> 2 3 4</table>这⼀⾏把“33200”或“4”这个数字改成⼤数(33200和4就是⾃⼰的负重限量,可以根据⾃⼰喜好随意更改) 想加快跑步速度(使跑步⽐坐飞龙还要快)=169(2) X:L2Jcnl2jgameserverdatastatsskills⽬录内的0100-0199⽤记事本打开找到第169号技能的<table name="#spd"> 7 11 </table>这⼀⾏把“11”这个数字改成⼤数(11就是跑步速度,可以根据⾃⼰喜好随意更改,建议最⾼不要超过1000) 以下是全部的被动技能(⽤来打造⼀个完美的⾃⼰) 1312=钓鱼 1315=精通钓鱼(27) 1316=C级精通钓鱼 1317=B级精通钓鱼 1318=A级精通钓鱼 1319=S级精通钓鱼 239=D级专家(1)C级专家(2)B级专家(3)A级专家(4)S级专家(5) 1050=回归术(2) 169=移动加速(2) 150=负重惩罚(3) 1373=精通座龙 4009=耐⽕属性(6) 4010=耐⽔属性(6) 4011=耐风属性(6) 4012=耐地属性 4071=耐于⼸箭攻击(6) 4084=耐于物理攻击(6) 4116=耐于魔法攻击(10) 4225=耐于冲击攻击(6) 4273=耐于⼔⾸攻击(6) 4277=耐于毒性攻击(6) 4278=邪恶属性攻击 4284=耐于出⾎攻击(6) 4285=耐于催眠攻击(6) 4286=耐于催眠攻击⾼ 4287=耐于固定攻击(6) 4288=耐于固定攻击⾼ 4333=耐于邪恶属性(6) 4337=耐于神圣属性(6) 4379=耐于予攻击(6) 4376=物理攻击耐性⾼ 4085=致命攻击能量 4086=致命攻击机率 4093=敏捷 4095=还击 4122=安塔瑞斯 4679=巴拉卡斯 4271=聚⽓提升(6) 4312=防御类型(重) 4313=防御类型(轻) 4332=精神保护 4335=神圣攻击 4384=替⾝的恩惠(防) 4385=替⾝的恩惠(攻) 4386=替⾝的恩惠(毒) 4387=替⾝的恩惠(魔) 147=魔法抵抗(51) 191=精神凝聚(6) 169=移动加速(2) 171=活跃⽣命(8) 225=回避移动(3) 173=特技精通(2) 195=调息术(2) 212=快速⽣命恢复(8) 211=⽣命强化(10) 291=最终要塞(11) 316=终极保护 148=⽣命之原(8) 248=结晶制作(5) 168=攻击加速(3) 319=敏捷移动(2) 137=致命机率(3) 193=致命威⼒(6) 196=神圣之刃 197=神圣之⾐(2) 198=回避提升(3) 146=抗魔术(45) 164=快速恢复(3) 213=魔⼒强化(8) 228=快速施法(3) 229=快速魔⼒恢复(7) 285=强效魔⼒回复(27) 1297=⼼灵净化(6) 235=精通长袍(41) 153=精通盾技(4) 217=精通剑钝兵器(45) 205=精通钝器(45) 208=精通⼸术(52) 209=精通⼔⾸(45) 216=精通长戟(45) 144=精通双重武器(45) 210=精通拳技(45) 143=精通晶体召唤(2) 259=精通重装甲(52) 258=精通轻装甲(50) 重要的装备ID号: id=4422=[风龙号⾓]=[呼唤风座龙时⽤的号⾓.] id=4423=[星龙号⾓]=[呼唤星座龙时⽤的号⾓.] id=4425=飞龙=赎罪者⼿铐=呼唤飞龙时⽤的⼿铐. 提升⾎盟等级⽤品ID:1419=⾎之证 3874=结义之证 3870=盼望之证 5575=古代⾦币 2002=体⼒治愈辅助药⽔ 2003=魔⼒治愈辅助药⽔ 等级惩罚:1-19普级 20-39 D级 40-51 C级 52-60 B级 61-66 A级 67以上S级等级20级⼀转等级40级⼆转等级76级三转 重新安装新版本后记得以前⽼版本的这两个设置⽂件夹要备份⼀下 X:l2jcnl2jgameserverdatastatsskills和X:l2jcnl2jgameserverconfig X:L2Jcn-0822FWDl2jgameserverconfig内的options.properties⽤记事本打开把DefaultPunish = 1 设成1 就是在游戏中如果误操作也不会被踢下线 两项重要的设置 X:L2Jcngameserverconfig内的altsettings.properties中的是⽤来⾃动学习技能的,建议设成“True” # 玩家⾃动学习技能 AutoLearnSkills = True X:L2Jcngameserverconfig内的altsettings.properties中的是⽤来在低级时可以拿⾼级武器及防具,⽽不⽤受到各种惩罚,建议设成“False” # 允许等级惩罚 GradePenalty = True 整个L2JBD复制出来 DiskwusrlocalmysqldataL2JDB(要点时间)就是重装电脑后的备份原先数据 X:l2jcnl2jgameserverdatajscriptquests.....是所有任务的⽬录 最新的L2JCN的版本和你刚下载完L2J时你会发现⾥⾯有个l2jdb的⽂件夹,你要把l2jdb移动到diskw⾥的usrlocalmysqldata⾥⾯才能令L2J正常运⾏ ⽆限视野设置:打开system⾥的user.ini找到MaxZoomingDist把后⾯的数字改到2000或者更⼤或systemuser.ini表⾥⾯ RightMouse=CameraRotationModeOn | CameraRotationModeOff ; FixedDefaultCamera OnRelease MaxPressedTime=200.0 (试着将;符号换成|) 点怪左键+SHIFT 你可以看到编辑页⾯案编辑NPC 可以看到很多数值 NPC种类就是设定他是商⼈.怪物.BOSS.还是教师...等等型态注意这边乱改没有依照设定的语法会造成⽆法呼叫NPC的情形 范围就是你点NPC的时候能不能轻易点到⽐⽅说游戏中的圣诞树⼤多⽆法点就是因为范围0 ⾼度这个是NPC显⽰的⾼度钓鱼版很多NPC都埋在⼟⾥⾯就可以修正这个数值来调整 等级这个不需要解释了吧 性别这个也不⽤我说明 最⼤HP 这⾥可以改⾎量 最⼤MP 改MP 经验打死怪得到的经验值 技能值 SP 物攻怪物的攻击⼒ 物防怪的防御 魔攻怪的魔攻 魔防怪的魔防 攻速怪的攻击速度 主被动 0为被动 500为主动 施法SPD 怪的施法速度 右⼿你要给怪物武器的编号 左⼿同上或盾牌 盔甲这个好像都没实装 ⾛度⾛路速度 跑速跑步速度 编辑完成储存删除怪物重叫⼀只就会正常了 点左键+SHIFT 选择显⽰掉落 这⾥可以编辑掉落物品 道具编号就是你要设定的物品编号 最⼩你要掉落的数量最⼩值 0表⽰不⼀定会掉落 1表⽰最少掉1个 最⼤你要掉落数量的最⼤值 回收 0表⽰掉落 true 表⽰回收才能回收到上⾯设定的物品 机率 100000表⽰10% (记住这⾥的设定必须配合你游戏上掉宝率的设定才不会变成太会掉落) 负重问题有2种解决⽅式在这⾥我教⼀种最简单的⽅式到L2JDB CHAR_TEMPLATES 这⾥记载游戏上所有职业包含新⼿.1转.2转.3转职业编号ID在这找到 _LOAD 这个地⽅把所有职业都多+⼀个0或2个0 例如 0战⼠的 _LOAD 81900 这是他的副重数值你多+个0 他就可以多承受 所有的职业都要改这样才能他⼀转植还能保有承受数值这是最简便⽅式 X:l2jcnl2jgameserverdatastatsskills⽬录内的0200-0299 是全部歌曲和舞蹈的技能持续时间,只要⽤记事本打开后 <effect name="Buff" time="1200" count="1" val="0">这⾏代码内的time="1200"就是技能的持续时间,1200=1200秒等于20分钟 X:l2jcnl2jgameserverdatastatsskills⽬录内的⽂件说明:助技能) 9000不明(似乎是基本属性之类的) 7000不明(有两个召唤技能,,不知何⽤) 4000以前的个别说明~2000-2199的⽂件是物品技能(如药⽔等),3000-3099是武器特殊能⼒技能 如果遇到这样的,表⽰技能为空 <skill id="7005" levels="1" name="⽆名称"> <set name="power" val="0.0"/> <set name="target" val="TARGET_SELF"/> <set name="skillType" val="PASSIVE"/> <set name="operateType" val="OP_PASSIVE"/> <set name="castRange" val="-1"/> <for> </for> </skill> 再发个武器的中英⽂对照,,,其实这些都置顶了的,,,翻论坛仔细点噻.... <set val='380' order='0x08' stat='pAtk' /> 物理攻击设定为380 <set val='250' order='0x08' stat='mAtk' />魔法攻击设定为250 <add val='200' order='0x40' stat='cAtk' />致命+200伤害 <add val='67' order='0x40' stat='rCrit' />增加致命攻击率67 <set val='10' order='0x08' stat='rCrit' />致命机率设定值 <set val='325' order='0x08' stat='pAtkSpd' /> 攻击速度设定为325 <mul val='1.35' order='0x40' stat='maxHp' /> 最⼤HP加35% <mul val='1.45' order='0x40' stat='maxMp' /> 最⼤MP加45% <mul val='1.35' order='0x40' stat='maxCp' /> 最⼤CP加35% <mul val='1.05' order='0x40' stat='pDef' /> 防加5% <mul val='1.05' order='0x40' stat='mDef' /> 魔防加5% <mul val='1.10' order='0x40' stat='pAtk' /> 物理攻击加10% <mul val='1.10' order='0x40' stat='mAtk' /> 魔法攻击加10% <mul val='1.15' order='0x40' stat='pAtkSpd' /> 物理攻击速度加15% <mul val='1.15' order='0x40' stat='mAtkSpd' /> 魔法攻击速度加15% <add stat='INT' order='0x10' val='10'> INT加10 (STR,WIN,DEX等都⼀样) <mul val='1.10' order='0x40' stat='sDef' /> 盾挡格加10% <enchant val='0' order='0x0C' stat='pAtk' />pvp <enchant val='0' order='0x0C' stat='mAtk' />pvp <skill onCrit="1" id="3070" lvl="1" chance="18" />致命攻击时附加状态 <skill onCast="1" id="1035" lvl="2" chance="50" />施展魔法时附加状态 id="1035"为你要发动的技能ID,,,chance="50"是⼏率(以百分⽐计算) 技能修改对照: <set name="mpConsume" val="250"/> 消耗250MP <set name="power" val="350.0"/> 威⼒350 <set name="target" val="TARGET_SELF"/> ⽬标⾃我 <set name="target" val="TARGET_ONE"/> ⽬标单个 <set name="target" val="TARGET_AREA"/> ⽬标群体(若为AURA则是以⾃我为中⼼对周围的伤害) <set name="skillRadius" val="605"/> 群攻的半径(群体时⽤) <set name="skillTime" val="7000"/> 技能时间间隔 <set name="skillType" val="MDAM"/> 技能类型:魔法攻击 <set name="skillType" val="PDAM"/> 技能类型:物理攻击(BUFF技能有对应的skillType) <set name="castRange" val="900"/> 发技能所须的距离 <skill id="30" levels="38" name="Backstab"> 技能ID,级数,名 <table name="#mpConsume"> 53 55 57 57</table> 把每级技能消耗的MP定义在#mpConsume <set name="mpConsume" val="#mpConsume"/> 调⽤上⾯定义的 #mpConsume (<set name="power" val="#power"/> 同理,当然你也可以⽤这⽅法定义施法时间逐级减少或其它) <for> <using kind="Dagger" skill="0030"/> (Dagger是⼔⾸,这是需要装备⼔⾸才能发动此技能的意思,剑sword,盾Shield,砘器blunt如此类推) </add> </for> X:l2jcnl2jgameserverdatastatsskills⾥找到风之种⼦(技能编号现在游戏⾥查查),接下来⾥⾯有这么⼀⾏: 将⾥⾯的name="Seed" time="10"改成name="Seed" time="1200"那么种⼦的时间就会变成20分钟的了 <set name="skillTime" val="7000"/> 是完成⼀个技能需要的时间 <set name="reuseDelay" val="1000"/> 这个才是技能恢复的时间 有关各种药⽔的修改法修改药⽔..补量..跟加速 修改地⽅xml的位置在客户端 X:l2jcnl2jgameserverdatastatsskills ⾥⾯找⼀个 2000~2099的xml档案是⽤记事本打开: 红⾊药⽔ skill id 2001 体⼒治愈辅助药⽔ skill id 2002 魔⼒治愈辅助药⽔ skill id 2003 魔⼒治疗药⽔ skill id 2005 奋⽃药⽔ skill id 2010 移动加速药⽔ skill id 2011 攻击加速药⽔ skill id 2012 体⼒治疗药⽔ skill id 2031 强⼒体⼒治疗药⽔ skill id 2302 加速药⽔ skill id 2033 终级治愈药⽔ skill id 2037 瞬间体⼒治愈剂 skill id 2038 强⼒加速移动药⽔.....skill id 2034 强⼒攻击加速药⽔skill id 2035 以下是修改内容说明: - <skill id="2001" levels="1" name="Red potion">物品名 <table name="#hot">2</table> 刚喝下时补的量 <set name="power" val="1.0" /> 时间内每次回补⼀次的量(单位不详) <set name="target" val="TARGET_SELF" /> <set name="skillType" val="HOT" /> <set name="operateType" val="OP_ACTIVE" /> <set name="buffDuration" val="15000" /> <<<<喝到结束的时间(单位毫秒) <set name="castRange" val="-1" /> 喝扣道具⼀个 修改移动速度为<table name="#Tab-runSpd">255</table> <<<加速255... ---------【如何设置攻城的⽅法】--------- 要攻城前,⾸先要确定盟的等级要4级以上(⼀般⼤家都是把盟升到5级)⾸先要找各⼤职业(⼯会)的领导者开盟及升级 升级所需的物品有: ⼀定数量的SP ⼀定数量的钱 ⾎之证(ID=1419) 结义之证(ID=3874) 盼望之证(ID=3870) 之后就⼀⼝⽓把盟升级到5级盟,接着离开游戏,重起服务端还有客户端,进⼊游戏,这时你就会发现你的盟已经升级到5级了盟升好级了就能开始攻城了 ⾸先先到你要攻城的城堡那⾥,开启攻城选单,点选要攻打的城名,然后点选⾃⼰的名字,选增加攻城⽅,然后再开启开始攻城! (L2J-VN Rev82版以上的按照上⾯的⽅法就能开启攻城了,不需要去改系统时间这⽅⾯的问题) 现在就这么多啦以后慢满整理啦累~~~~~~~~攻城去找传令登记,要在攻城前24⼩时登记好,登记好了把你的系统时间改到攻城时间,近⼊GM菜单.攻城选项,选你登记的那座城,按开始攻城,就会被传送到你所要攻的城的城镇,你就可以跑去攻城了我是把⾃⼰设置为3级别盟主以后直接在GM菜单⾥找到攻城然后设置我为攻⽅然后按开始攻城如果你插了旗⼦,攻城时死掉后,会有2个提⽰⼀个⾄附近村庄⼀个⾄攻城据点你选择攻城据点后才会在旗⼦附近复活 ⼀般的版本都有啊好像代码!ID Name [Crystal-Type] 9020 乾坤⽆极⼑ [s] 9019 乾坤⽆极剑 [s] 9025 乾坤⽆极⼔⾸ [s] 9026 乾坤⽆极⼸ [s] 9030 乾坤⽆极拳套 [s] 9021 乾坤⽆极斧 [s] 9022 乾坤⽆极杆 [s] 9024 乾坤⽆极杖 [s] 9027 乾坤⽆极枪 [s] 9023 乾坤⽆极锤 [s] 9040 双天堂分割者 [s] 9042 双⽆极天使杀⼿ [s] 9041 双⽆极天堂分割者 [s] 9035 双⽆极黄昏之剑 [s] 9036 双神之刃 [s] 9034 双黄昏之剑 [s] 8010 圣双奇迹剑 [s] 9000 圣双屠龙之刃 [s] 8006 圣双神之刃 [s] 8008 圣双英雄剑 [s] 8009 圣双英雄巨剑 [s] 8007 圣双⿊暗军刃 [s] 9050 圣⽆极屠龙⼑ [s] 346 堕天使之泪 [s] 6580 塔鲁⼑+⿊暗军刃 [s] 6367 天使杀⼿ [s] 6591 天使杀⼿ [s] 6590 天使杀⼿ [s] 6592 天使杀⼿ [s] 6372 天堂分割者 [s] 6606 天堂分割者 [s] 6605 天堂分割者 [s] 6607 天堂分割者 [s] 307 奥拉齐莉长枪 [s] 8005 封印的双奇迹剑 [s] 8000 封印的双屠龙 [s] 8001 封印的双神之刃 [s] 8003 封印的双英雄剑 [s] 8004 封印的双英雄巨剑 [s] 8002 封印的双⿊暗军刃 [s] 6678 封印的皇家骑⼠团盾 [s] 6369 屠龙斧 [s] 6604 恶魔碎⽚ [s] 6371 恶魔碎⽚ [s] 9002 ⽆极之刃 [s] 9001 ⽆极之剑 [s] 9008 ⽆极之⼸ [s] 9009 ⽆极之枪 [s] 9007 ⽆极⼔⾸ [s] 9039 ⽆极天堂分割者 [s] 9003 ⽆极⼿斧 [s] 9004 ⽆极⼿杆 [s] 9006 ⽆极⼿杖 [s] 9005 ⽆极⼿锤 [s] 9028 ⽆极拳套 [s] 9038 ⽆极神之刃 [s] 9033 ⽆极黄昏之剑 [s] 6621 ⽆级之⽭ [s] 6620 ⽆级之翼 [s] 6611 ⽆级⼑ [s] 6617 ⽆级刺剑 [s] 6612 ⽆级屠⼑ [s] 6619 ⽆级⼸ [s] 6613 ⽆级斧 [s] 6616 ⽆级杖 [s] 6618 ⽆级⽛ [s] 6615 ⽆级碎⽚ [s] 6614 ⽆级竿 [s] 6587 皇室魔杖 [s] 6588 皇室魔杖 [s] 6589 皇室魔杖 [s] 6366 皇室魔杖 [s] 6377 皇家骑⼠团盾 [s] 82 神之刃 [s] 6601 神圣之⽭ [s] 6600 神圣之⽭ [s] 6599 神圣之⽭ [s] 6370 神圣之⽭ [s] 6608 神秘钉锤 [s] 6610 神秘钉锤 [s] 6609 神秘钉锤 [s] 6579 神秘钉锤 [s] 6534 美⼈鱼竿 [s] 9011 英雄之刃 [s] 9010 英雄之剑 [s] 9016 英雄之⼔⾸ [s] 9017 英雄之⼸ [s] 9012 英雄之斧 [s] 9013 英雄之杆 [s] 9015 英雄之杖 [s] 9018 英雄之枪 [s] 9014 英雄之锤 [s] 9029 英雄拳套 [s] 6364 遗忘之剑 [s] 290 闪耀⼸ [s] 6595 闪耀⼸ [s] 6593 闪耀⼸ [s] 6594 闪耀⼸ [s] 6368 闪耀⼸ [s] 214 魔杖 [s] 9032 ⿊暗毁灭之刃 [s] 9031 ⿊暗毁灭之剑 [s] 7578 龙之⼸ [s] 7577 龙之⼸ [s] 7575 龙之⼸ [s] 7576 龙之⼸ [s] 237 龙⼑ [s] 306 龙斧 [s] 634 龙盾 [s] 【共享】参加奥林匹亚竞赛~☆ ⽬前最新版本的贵族任务尚未实装,所以只要副职业达到76级以上,系统就会判定你拥有贵族资格,所以照着以下步骤,就可以享受到参加奥林匹亚的乐趣唷⾸先,先到亚丁城找NPC 转副职业 转了副职业,等级会降到40级(官⽅设定),此时请⽤指令把该副职业等级提升到76级以上,然后再跟NPC对话,再转换回本职(奥林匹亚只能⽤本职参赛) 贵族的条件成⽴后,在奥林匹亚竞赛时(晚上8点到10点50),到奥林匹亚管理者处报名参加 ☆→L2jgameserverconfig的altsettings可以修改奥林匹亚时间 ☆→假如时间修改不顺利,也可以使⽤修改计算机时间,去提早运作奥林匹亚 参加之后,可再确认参加⼈数跟类别『普通』是本职竞赛『默认』是⽆差职竞赛 报名完成后,系统会⾃动帮你配对,配对成功,系统将会提醒即将传送 进来竞赛场之后,⾮常好听的⾳乐,个⼈很喜欢,之后还有点准备时间给你++辅助魔法 ⽐赛开始了,就开始奥林匹亚竞赛,杀呀..... 之后揭晓胜负 英雄积分到⼿,准备被传送回村 accounts--⼈物帐号数据 armor--盔甲装备数据 auction--拍卖数据 auction_bid--投标数据 boxaccess--宝箱数据 boxes--宝箱数据 castle--攻城战城堡数据 castle_door--城堡门数据 castle_doorupgrade--城堡门守卫数据 castle_siege_guards--攻城战守卫数据 characters--⼈物数据 character_friends--⼈物在游戏中朋友数据 character_hennas--⼈物纹⾝数据 character_macroses--⼈物(宏)指令数据 character_quests--⼈物任务数据 character_recipebook--⼈物制作卷书数据 character_shortcuts--⼈物快捷⽅式数据 character_skills--⼈物技能数据 character_skills_save--⼈物副职业技能数据 character_subclasses--⼈物副职业数据 char_templates--⼈物个职业基本属性数据 clanhall--⾎盟⼤厅数据 clan_data--⾎盟数据 clan_wars--⾎盟战数据 class_list--职业对应转职⼩猫htm表 connection_test_table--连接测试表 droplist--掉落物品数据 etcitem--其它道具 games--活动资料储存数据 henna--染料数据 henna_trees--染料对应职业数据 items--游戏⼈物道具 locations--地点 lvlupgain--升级⼈物更新属性数据 mapregion--地图地区 merchants--商店npc对应地区 merchant_areas_list--商店地区内容 merchant_buylists--商店内容 merchant_lease--出租商⼈ merchant_shopids--商店ID minions--boss及所带的怪 npc--游戏中所有npc的数据 npcskills--npc技能 pets--⼈物拥有的宠物 pets_stats--宠物基本数据 random_spawn--⾃动召唤npc random_spawn_loc--⾃动召唤npc地点 record--游戏记录挡 seven_signs--七封印 seven_signs_festival--七封印-⿊暗祭典 siege_clans--攻城战参加的⾎盟 skill_learn--个职业对应学习技能的npc skill_spellbooks--学习技能所对应的法书 skill_trees--⼈物在个职业所能学习的技能 spawnlist--游戏中所有npc刷出地点数据 teleport--传送位置的数据 temporaryobjecttable--⼯作id暂时数据 weapon--武器数据 ⼈类:战⼠ 1转⽃⼠需要的道具是⽃⼠的徽章 2转拥兵需要的道具是挑战者标章,信任标章,优胜标章 2转剑⽃⼠需要的道具是挑战者标章,信任标章,决⽃者标章 2转圣骑⼠需要的道具是使命标章,信任标章,治愈者标章 2转暗骑⼠需要的道具是使命标章,信任标章,⿊魔法标章 1转盗贼需要的道具是贝兹库推荐状 2转宝藏猎⼈需要的道具是巡守者标章,信任的标章,探索者标章 2转鹰眼需要的道具是巡守者标章,信任的标章,⼈马标章 ⼈类:法师 1转巫师需要的道具是四季之⽟ 2转术⼠需要的道具是探求者标章,信任标章,巫师标章 2转死灵法师需要的道具是探求者标章,信任标章,⿊魔法标章 2转法魔需要的道具是探求者标章,信任标章,元素使标章 1转牧师需要的道具是信仰凭证 2转主教需要的道具是求道者标章,信任标章,治愈者标章 2转先知需要的道具是求道者标章,信任标章,变⾰者标章 精灵:战⼠ 1转精灵骑⼠需要的道具是精灵骑⼠的别针 2转圣殿骑⼠需要的道具是使命标章,⽣命标章,治愈者标章 2转剑术诗⼈需要的道具是挑战者标章,⽣命标章,决⽃者标章 1转精灵巡守需要的道具是雷奥利亚推荐状 2转⼤地⾏者需要的道具是巡守者标章,⽣命标章,探索者标章 2转银⽉游侠需要的道具是巡守者标章,⽣命标章,⼈马标章 精灵:法师 1转精灵巫师需要的道具是不朽钻⽯ 2转咒术诗⼈需要的道具是探求者标章,⽣命标章,巫师标章 2转元素使需要的道具是探求者标章,⽣命标章,元素使标章 1转精灵神使需要的道具是神谕之叶 1转沼泽骑⼠需要的道具是深渊凝视 2转席林骑⼠需要的道具是使命标章,命运标章,⿊魔法标章 2转剑刃舞者需要的道具是挑战者标章,命运标章,决⽃者标章 1转暗杀者需要的道具是钢铁之⼼ 2转深渊⾏者需要的道具是巡守者标章,命运标章,探索者标章 2转暗影游侠需要的道具是巡守者标章,⽣命标章,⼈马标章 ⿊暗精灵:法师 1转⿊暗巫师需要的道具是⿊暗宝⽯ 2转狂咒术⼠需要的道具是探求者标章,命运标章,巫师标章 2转暗影召唤⼠需要的道具是探求者标章,命运标章,元素使标章 1转席林神使需要的道具是深渊之珠 2转席林长⽼需要的道具是求道者标章,命运标章,变⾰者标章 兽⼈:战⼠ 1转兽⼈突击者需要的道具是突袭者标章 2转破坏者需要的道具是挑战者标章,荣誉标章,优胜标章 1转兽⼈武者需要的道具是卡巴塔⾥之图腾 2转暴君需要的道具是挑战者标章,荣誉标章,决⽃者标章 兽⼈:法师 1转萨满巫医需要的道具是施咒者⾯具 2转霸主需要的道具是求道者标章,荣誉标章,君主标章 2转战狂需要的道具是求道者标章,荣誉标章,战⽃灵标章 矮⼈:战⼠ 1转收集者需要的道具是掠夺者之戒 2转赏⾦猎⼈需要的道具是公会会员标章,繁荣标章,探索者标章 1转⼯匠需要的道具是最后的合格证 2转战⽃⼯匠需要的道具是公会会员标章,繁荣标章,巨匠标章 1转⼤多在古鲁丁村庄找各⾃公会的⼤师,2转可以在奇岩找各⾃公会的⼤师 PS:1转道具和2转道具都在奇岩传送边上的转职道具商那⾥买 天堂2职业分类法师类为巫师类与治疗师的统称 精灵:精灵骑⼠精灵巡守圣殿骑⼠剑术诗⼈⼤地⾏者银⽉游侠 ⿊暗精灵:沼泽骑⼠暗杀者席林骑⼠剑刃舞者深渊⾏者暗影游侠 半兽⼈:突袭者武者破坏者暴君 矮⼈:收集者⼯匠赏⾦猎⼈战争⼯匠 巫师类: ⼈类:巫师术⼠死灵法师法魔 精灵:精灵巫师咒术诗⼈元素使 ⿊暗精灵:⿊暗巫师狂咒术⼠暗影召唤⼠ 治疗师类: ⼈类:牧师告知主教 精灵:神使长⽼ ⿊暗精灵:席林神使席林长⽼ 半兽⼈:法师巫医霸主战狂 3转职业ID 0.战⼠ fighter 1.⽃⼠ warrior 2.剑⽃⼠ gladiator 3.佣兵 warlord 4.骑⼠ knight 5.圣骑⼠ paladin 6.暗骑⼠ dark_avenger 7.盗贼 rogue 8.宝藏猎⼈ treasure_hunter 9.鹰眼 hawkeye 10.法师 mage 11.巫师 wizard 12.术⼠ sorcerer 13.死灵法师 necromancer 14.法魔 warlock 17.先知 prophet 18.精灵战⼠ elven_fighter 19.精灵骑⼠ elven_knight 20.圣殿骑⼠ temple_knight 21.剑术诗⼈ swordsinger 22.精灵巡守 elven_scout 23.⼤地⾏者 plains_walker 24.银⽉游侠 silver_ranger 25.精灵法师 elven_mage 26.精灵巫师 elven_wizard 27.咒术诗⼈ spellsinger 28.元素使 elemental_summoner 29.神使 oracle 30.长⽼ elder 31.暗精灵战⼠ dark_fighter 32.沼泽骑⼠ palus_knight 33.席琳骑⼠ shillien_knight 34.剑刃舞者 bladedancer 35.暗杀者 assassin 36.深渊⾏者 abyss_walker 37.暗影游侠 phantom_ranger 38.暗精灵法师 dark_mage 39.⿊暗巫师 dark_wizard 40.狂咒术⼠ spellhowler 41.暗影召唤⼠ phantom_summoner 42.席琳神使 shillien_oracle 43.席琳长⽼ shillien_elder 44.兽⼈战⼠ orc_fighter 45.兽⼈突袭者 orc_raider 48.暴君 tyrant 49.兽⼈法师 orc_mage 50.萨满巫医 orc_shaman 51.霸主 overlord 52.战狂 warcryer 53.矮⼈战⼠ dwarven_fighter 54.收集者 scavenger 55.赏⾦猎⼈ bounty_hunter 56.⼯匠 artisan 57.战争⼯匠 warsmith 88 ⾓⽃⼠ Duelist 89 勇⼠ DreadNought 90 神骑⼠ Phoenix Knight 91 死亡骑⼠ Hell Knight 92 神射⼿ Sagittarius 93 冒险家 Adventurer 94 ⼤法师 Archmage 95 灵魂捕获者 Soultaker 96 秘术之王 Arcana Lord 97 红⾐主教 Cardinal 98 ⼤祭司 Hierophant 99 伊娃圣骑⼠ Eva's Templar 100 吟游剑⼠ Sword Muse 101 风骑⼠ Wind Rider 102 ⽉光守护者 Moonlight Sentinel 103 神圣诗⼈ Mystic Muse 104 元素⼤师 Elemental Master 105 伊娃圣徒 Eva Saint 106 席琳圣骑⼠ Shillien Templar 107 幽灵舞者 Spectral Dancer 108 幽灵猎⼈ Ghost Hunter 109 幽灵守护者 Ghost Sentinel 110 暴风狂啸者 Storm Screamer 111 幽灵⼤师 Spectral Master 112 席琳圣徒 Shillien Saint 113 巨⼈ Titan 114 武道家 Grand Kh ava tari 115 统治者 Dominator 116 毁灭使者 Doomcryer 117 探索者 Fortune Seeker 118 巨匠 Maestro 【教程】如何使⽤Navicat连接数据库...【图⽂】 应某位朋友要求...特做此教程给他..也给⼀些还不会⽤ Navicat 连接上数据库的新⼿ 要知道 L2J 的数据都在diskwusrlocalmysqldatal2jdb⽬录下的..要打开他们需要⽤到Navicat 这个软件..找不到下载的去本帖附件下..(已经包含了破解补丁与汉化补丁) 汉化补丁安装⽅法:把default.loc⽂件覆盖掉X:Navicatlocalization⽂件夹下的⽂件即可 破解补丁使⽤⽅法:将patch.exe⽂件放到你Navicat的安装⽬录下运⾏按下apply patch按扭即可 安装准备好之后就开始了.. 1.运⾏模拟器主⽬录的START.BAT⽂件. 2.运⾏Navicat.选择.连接设置 连接名:你⾃⼰喜欢改什么名字了. 主机名/IP地址:localhost 端⼝:3306 帐户与密码都是root 然后测试⼀下连接.如果出现了Connection Successful的对话框..就说已经连接上了 然后选择数据库类型设定.数据库编码拉到最下⽅.选择UTF-8 OK.设置完毕 选择你下⾯已经设置好的连接.图表变绿就证明已经连接上了 选择L2JDB就出现我们模拟器的各个数据表了.下⾯你们就可以进⾏修改拉.. PS:要使Navicat连接上模拟器的数据库必须先运⾏模拟器的START.BAT⽂件 否则是连不上的哦.. QUOTE: accounts表为帐号资料 armor表是装备属性 castle表是城堡情况(设置攻城时间税率等等) char_templates⼈物初始属性 characters ⼈物属性资料 items表按照我的理解应该是⼈物⾝上装备资料 npc表为各个NPC的属性 weapon表为武器资料属性 你们看完了要回哦..... 不然帖⼦沉了...你们是会了后⾯来滴新⼿看不到了.他们⽶学到滴嘛... {补充⼀个: sql⽂件导⼊步骤: 1.双击server⾥的START.bat 2.运⾏NAVICAT,右击L2JDB数据包,出现⼦菜单,然后选择“Execute Batch File” 3.选择要导⼊的⽂件,导⼊正确后,会提⽰“……**⽂件导⼊”;如果报错:若显⽰不成功already......“已存在同名⽂件”,则需删除原数据库中重名数据!!,然后重新导⼊即可! 教你如何简单架设简体4章私服(两台电脑的⽤法)! ⾸先是jdk1.5(想玩天⼆的单机版还是想⾃⼰开个私服就⼀定要下载) l2jvn_ rev.71全套中⽂数据库版(就是俗称的服务端) 4章简体system破解⽂件 以上是想要玩天⼆四章所需要的⽂件 接下来是我装载天⼆的教学,⼤家做个参考! 我是⽤两台电脑来玩天⼆的,⼀台当服务端,⼀台当客户端 服务端的电脑必须要装jdk1.5还有GH系列l2jvn_ rev.71全套中⽂数据库版 jdk1.5的设置很简单,下载之后就⼀路按下⼀步就能⾃动安装了! ⾄于GH系列l2jvn_ rev.71全套中⽂数据库版就需要讲解了 下载后记得解压缩,解压缩后⽬录⾥⾯会出现Start, Stop两个执⾏档,还有diskwy以及L2J 的⽬录 ⾸先在启动Start这个执⾏档前有两项事情要注意: 1.如果你以前有安装过MYSQL的程序记得要把它"彻彻底底"的移除掉 2.要先编辑Start这个执⾏档 echo The server is working on the disk %Disk%: [http/127.0.0.1/a/a] 把后⾯的IP改成你服务端电脑的IP 以上步骤都做到后才执⾏Start这个执⾏档 然后"我的电脑"就会出现⼀个多出来的"W虚拟硬盘"之后到打开L2Jloginconfig⾥的loginserver更改ExternalHostname=填上你的IP⽹址InternalHostname=127.0.0.1(把后⾯的IP删除掉) 保存再到L2Jgameserverconfig⾥的server更改ExternalHostname=填上你的IP⽹址InternalHostname=127.0.0.1(把后⾯的IP删除掉) LoginHost=填上你的IP⽹址保存 之后先到L2Jlogin开启startLoginServer出现最后⼀⾏字是Telnet server is currently disabled.然后到L2Jgameserver开启startGameServer出现最后⼀⾏字也是Telnet server is currently disabled. 注意:StartLoginServer和startGameServer都要开!且都不能关! 然后到你客户端的电脑上,把tjy2005⼤⼤所提供的4章简体system破解⽂件解压缩放在你的天堂2四章的⽬录⾥然后到system的⽬录⾥⾯打开⼀个程序叫"解加密L2.INI⽂件"更改ServerAddr=服务端电脑的IP保存 之后启动L2.exe这个档案就能开始玩你的天堂2四章了(跳不跳NP不重要,先玩再说) 最后是在装载天⼆所要注意的事项(请熟读): 1.如果你之前是⽤MYSQL来装载天堂2的话,记住要完全的移除,⽽不是简单的把档案杀掉⽽已,要到新增移除程序⾥⾯去移除,在移除之后还 要到C:Program Files⾥⾯确定没有MYSQL的相关⽂件 2.服务器所在的电脑不可装载IIS,记住要先完全的移除. 3.在启动START后,要确定服务端是否有正确的启动,到windows防⽕墙⾥⾯的例外的选项,⽽且确定有出现Apache HTTP Server和mysqld-nt这两个选项有被勾选 4.启动START后,要确定计算机⾥有"W"硬盘. 5.如果还是⽆法启动,请确定下载了教学⾥的连结system,server还有JDK1.5,⼤部分都是这⽅⾯的问题 6.如何知道⾃⼰的IP地址,请到,左边便会出现你的IP位置 7.运⾏server⾥的start后出现⽹页,在点前往PHPMySQLAdmin出现 Warning: require_once(./lang/chinese_simplified-gb2312.inc. php) [function.require-once]: failed to open stream: No such file or directory in W:homeadminwwwlibrariesselect_lang.lib.php on line 313 要先按STOP,如果试了很久还是⽤不出来... 我教你⼀招叫"移花接⽊" ⾸先把C:serverdiskwhomeadminwwwlang⾥的chinese_simplified-utf-8.inc.php备份到别的资料夹或桌⾯,然后再把本来的 C:serverdiskwhomeadminwwwlang⾥⾯的chinese_simplified-utf-8.inc.php改成chinese_simplified-gb2312.inc.php,然后再把之前 的备份到别的资料夹或桌⾯的chinese_simplified-utf-8.inc.php放回到C:serverdiskwhomeadminwwwlang,这样档案⾥⾯除了有本来。
vxworks安装设置
1.开发环境及软件cghomer1. 开发工具a) WindML3.0+Tornado2.2+Tilcon IDS5.5其中,Tornado2.2是风河公司出品的嵌入式系统vxworks的集成开发环境,WindML3.0是风河公司出品的媒体库,Tilcon5.5是加拿大Tilcon公司出品的界面开发工具,对Tornado提供最新的支持,非常强大的所见即所得的可视化开发工具。
b) WindML3.0+Windbench2.4+Tilcon IDS5.5其中,Windbench2.4也是风河公司出品,作用和Tornado差不多,好像是基于JA V A的,不太了解c) WindML2.0.3+Tornado2.2+Zinc6.0(for Tornado2.2)其中,Zinc6.0作用同Tilcon IDS,但由于其不稳定性,现已经被风河公司放弃,WindML3.0已经不兼容Zinc6.0了,或者说是会有冲突,但因为价格相对Tilcon的几万美元要便宜得多,且可以在网络上下载到,所以还是有很多人使用。
d) WindML3.0+Tornado2.2即,不用现成的界面开发工具,完全在WindML下,自己编写代码,调用媒体库实现。
2. 开发工具分析上述四种方式中:a) 方式使用最方便,开发工具比较简单易学,容易上手,开发周期较短,且界面比较华丽,做出的效果较好。
他的结构如下:IDS用类似VB的方式构建界面,并生成不含代码的窗口描述文件,窗口中的每一个对象都自己的ID,Value,还有其他属性,如:是否模糊,对象之间是否关联,按钮的抬起或按下,指针指向的数值等等。
这些属性通过EVE引擎,调用API,都可以读取和控制,从而得知窗口的改变或控制窗口的行为,该API与C/C++完全兼容,且平台无关,开发人员只需关注程序的逻辑与实现,而不必考虑其他。
但Tilcon价钱过于昂贵,大概要几万美元,在网上有该公司提供的评估版本,14天试用期,试用期间,感觉功能比较强大,最主要的是简单易学,容易上手,但该版本到期就失效,即使整个系统格式化,重装系统,再重装该软件,给出的提示仍然是超出试用期,更糟糕的是,之前编译生成的可执行文件也失效,提示是运行库授权到期,因此,目前无法打试用版的主意,而且,网上找不到破解版,或者说,除了该公司的网站以外,没有其他网站提供下载。
vSphere5操作手册完整版
VSphere5操作手册北京网智科技2012.4目录VSPHERE ESXI的安装 (3)ESXi 安装需要的信息 (3)部署vsphere 5 (3)部署Vmware vCenter Server (10)VCENTER SERVER 软件要求 (10)安装vCenter Server 数据库 (10)建立vCenter Server数据库 (15)安装vCenter Server (19)ESXI配置过程 (25)配置多网卡的NIC-TEAMING (26)创建VM OTION网络 (30)创建ISCSI网络 (36)启用ISCSI软件适配器 (40)配置ESXI服务器NTP时钟同步 (45)创建数据中心群集 (49)在V C ENTER中添加ESXI主机 (57)为ESXI主机添加共享存储 (62)创建虚拟机 (70)安装VM WARE T OOLS (79)创建虚拟机模版 (85)使用模版部署虚拟机 (87)启动虚拟机和ESXI主机时间同步 (96)V S PHERE许可证密钥添加 (97)P2V物理服务器 (101)P2V准备 (101)V MWARE CONVERTER STANDALONE软件安装 (102)P2V物理服务器至虚拟化架构 (107)热P2V Windows2003物理服务器 (108)热P2V LINUX物理服务器 (118)冷P2V Windows2003物理服务器 (128)冷P2V LINUX物理服务器 (140)Vsphere ESXi的安装ESXi 安装需要的信息1、Vsphere ESXI许可证密钥2、至少有一块网卡处在激活状态3、管理IP地址、子网掩码、网关、DNS4、主机名(如:ESXi01。
)5、ESXI安装光盘部署vsphere 5安装Vsphere5本次Vsphere5采用交互式安装.使用ESXi CD/DVD 安装程序,将ESXi 安装到本地主机磁盘。
java虚拟机安装操作手册
JA V A虚拟机安装操作手册目录一、JA V A虚拟机的安装 (1)二、安装JAVA虚拟机注意事项 (2)三、如何查看JAVA虚拟机是否安装成功? (3)四、如何更新管理加载项 (4)五、常见问题 (6)一、JAVA虚拟机的安装如果您是第一次访问网上办税系统,用户操作时系统将提示您下载安装JA V A虚拟机。
如果您已经使用了其他虚拟机(如微软虚拟机),在访问网上办税系统时出现网页错误、无法提交数据等错误,请卸载后下载安装本系统提供的JA V A虚拟机。
下载地址在:福建省国家税务局首页-办税指南-下载中心-税务软件-网上办税JA V A虚拟机下载-下载JA V A虚拟机安装软件。
下载完成后,双击下载的文件“j2re-1_4_0-win-i.exe”,按默认点击“下一步”安装;请确认勾选“Microsoft Internet Explorer”,安装完成后请重开IE浏览器或重启电脑。
【备注】:二、安装JAVA虚拟机注意事项①请确认操作系统是WIN2000以上,并且IE的版本是6.0;②如有安装JA V A程序,请检查所使用的操作系统的登录帐号是否以中文命名,如是,请将JA V A程序卸载后新建一个以英文命名的帐号再进行安装;③卸载了JA V A虚拟机后重新安装,并且一定要将该程序安装在默认的目录下,安装后需重新打开浏览器再进行操作或重启电脑;④如有安装防火墙或卡巴斯基等杀毒软件请先将其关闭再安装;⑤如果安装JA V A虚拟机之后无法打开办税大厅页面,您有可能安装“上网助手”、“雅虎助手”、“中文上网”等辅助软件,阻止了JA V A虚拟机的运行,请删除类似辅助软件。
三、如何查看JAVA虚拟机是否安装成功?①打开IE浏览器,点击“工具”->“Internet选项(O)...”②选中“高级”,查看是否有下图中红色框选中的信息,表示已安装成功,③没有安装成功则如下图所示,请您卸载后重新安装。
四、如何更新管理加载项(1)任意打开一个网页。
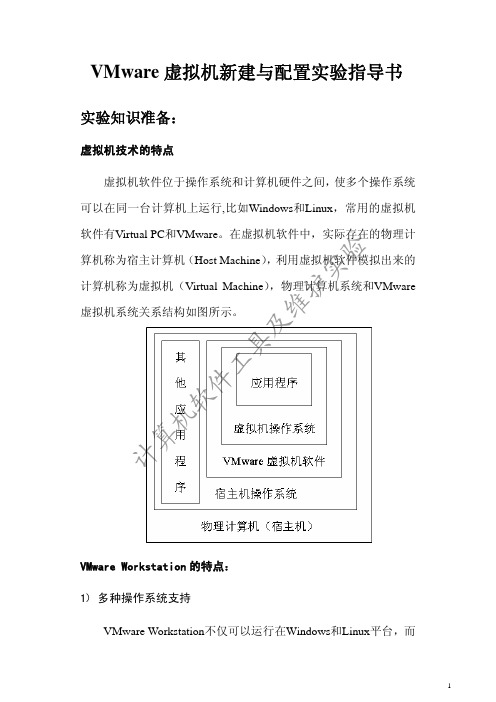
VMware虚拟机新建与配置实验指导书
VMware 所支持
的操作系统有很多,
包括全系列的
Microsoft Windows,
大部分的 Linux 发行
版 本 , 以 及 Novell
Netware 和 Sun
Solaris , VMware
ESX 是 VMware 公司
一个大型商用的虚
拟机软件,是以
Linux 为内核,应用
在小型机及 PC 服务
虚拟机所使用的内存的一部分是用户物理计算机的内存但超过一定大小后使用的是操作系统的虚拟内存根据虚拟机的应用来决定内存的大小如果设定过小会使虚拟系统的性能受到影响设定过大会使物理计算机的性能受到影响一般选择默认大小recommendedmemory当然也可以在安装虚拟系统的时候设定稍大的内存完成安装后改回默认值
指每个虚拟磁盘都以独
立文件的方式存在;
“ Use an existing
virtual disk(使用一个
已经存在的虚拟磁盘)”
方式是指使用现有的虚
拟磁盘;
“Use a physical disk
( for advanced users )
(使用一块物理磁盘)”
方式是指使用一个独立
验 的物理磁盘作为虚拟磁
2) 多个系统共存
一台物理计算机上可同时并存多台虚拟机,装载不同的操作系 统, 每个虚拟机系统都是相对独立的,拥有自己独立的网络地址, 就像运行单机一样,而虚拟机间的切换也仅仅是窗口间的切换[3]。
3) 安装简便,恢复快速
验
护实 虚拟机硬件是固定的型号,与物理计算机无关,故在安装过程中 维 速度快,且不产生设备兼容问题,通过复制虚拟机系统的相关文件就
件 设 备 )” 按 钮 进 行 更
LINUX环境中部署JAVA项目步骤
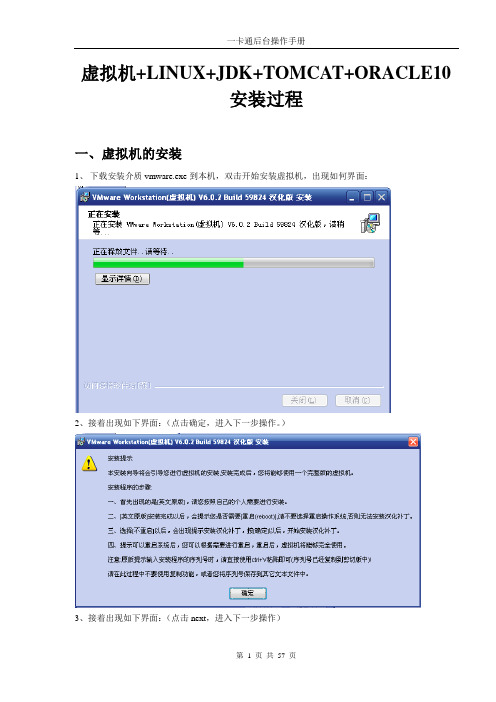
虚拟机+LINUX+JDK+TOMCAT+ORACLE10安装过程一、虚拟机的安装1、下载安装介质vmware.exe到本机,双击开始安装虚拟机,出现如何界面:2、接着出现如下界面:(点击确定,进入下一步操作。
)3、接着出现如下界面:(点击next,进入下一步操作)4、接着出现如下界面:(选择typical,点击next,进行下一步)5、接着出现如下界面:(选择安装路径为D:\Program Files\Vmware\Vmware Workstation,点击change 按钮,修改folder name,把C:\Program Files\Vmware\Vmware Workstation改为D:\Program Files\Vmware\Vmware Workstation,点击OK,安装目录修改完毕。
点击next进行下一步操作)6、接着出现如下界面:(点击next,进入下一步操作)7、接着出现如下界面:(点击install,进行安装)8、接着出现如下界面:9、接着出现如下界面:(点击skip,跳过)10、接着出现如下界面:(点击Finish)11、接着出现如下界面:(点击NO)12、接着出现如下界面:(点击确定,进入下一步)13、接着出现如下界面:(点击确定,进入下一步)14、接着出现如下界面:(点击确定,并手动重启系统)二、linux的安装1、双击虚拟机快捷图标,运行虚拟机。
2、接着出现如下界面:3、选择文件→新建→虚拟机。
出现如下界面,点击下一步,进入下一步操作:4、接着出现如下界面:(选择默认的典型安装,点击下一步)5、接着出现如下界面:(根据你要安装的系统类型,选择是windows还是linux或者其他的,以及版本的选择。
都选好之后,点击下一步,进入下一步的操作)6、接着出现如下界面:(安装目录最好不要存储在C盘,而且文件夹名字最好是你系统的名字。
这样便于管理。
点击下一步,进入下一步操作)7、接着出现如下界面:(我们选择桥接模式,不同模式,功能不同。
Java Card平台虚拟机规范(经典版)v3.2说明书
Java Card™Platform Virtual Machine Specification, Classic EditionVersion 3.2January 2023Java Card Platform Virtual Machine Specification, Classic Edition Version 3.2Copyright © 1998, 2023, Oracle and/or its affiliates. All rights reserved.The Specification provided herein is provided to you only under the Oracle Technology Network Developer License included herein as Annex A - Oracle Technology Network Developer License Terms.License Restrictions Warranty/Consequential Damages DisclaimerThis software and related documentation are provided under a license agreement containing restrictions on use and disclosure and are protected by intellectual property laws. Except as expressly permitted in your license agreement or allowed by law, you may not use, copy, reproduce, translate, broadcast, modify, license, transmit, distribute, exhibit, perform, publish, or display any part, in any form, or by any means. Reverse engineering, disassembly, or decompilation of this software, unless required by law for interoperability, is prohibited.Warranty DisclaimerThe information contained herein is subject to change without notice and is not warranted to be error-free. If you find any errors, please report them to us in writing.Restricted Rights NoticeIf this is software or related documentation that is delivered to the U.S. Government or anyone licensing it on behalf of the U.S. Government, then the following notice is applicable:U.S. GOVERNMENT END USERS: Oracle programs, including any operating system, integrated software, any programs installed on the hardware, and/or documentation, delivered to U.S. Government end users are "commercial computer software" pursuant to the applicable Federal Acquisition Regulation and agency-specific supplemental regulations. As such, use, duplication, disclosure, modification, and adaptation of the programs, including any operating system, integrated software, any programs installed on the hardware, and/or documentation, shall be subject to license terms and license restrictions applicable to the programs. No other rights are granted to the U.S. Government.Hazardous Applications NoticeThis software or hardware is developed for general use in a variety of information management applications. It is not developed or intended for use in any inherently dangerous applications, including applications that may create a risk of personal injury. If you use this software or hardware in dangerous applications, then you shall be responsible to take all appropriate fail-safe, backup, redundancy, and other measures to ensure its safe use. Oracle Corporation and its affiliates disclaim any liability for any damages caused by use of this software or hardware in dangerous applications.Trademark NoticeOracle and Java are registered trademarks of Oracle and/or its affiliates. Other names may be trademarks of their respective owners.Intel and Intel Xeon are trademarks or registered trademarks of Intel Corporation. All SPARC trademarks are used under license and are trademarks or registered trademarks of SPARC International, Inc. AMD, Opteron, the AMD logo, and the AMD Opteron logo are trademarks or registered trademarks of Advanced Micro Devices. UNIX is a registered trademark of The Open Group.Third-Party Content, Products, and Services DisclaimerThis software or hardware and documentation may provide access to or information about content, products, and services from third parties. Oracle Corporation and its affiliates are not responsible for and expressly disclaim all warranties of any kind with respect to third-party content, products, and services unless otherwise set forth in an applicable agreement between you and Oracle. Oracle Corporation and its affiliates will not be responsible for any loss, costs, or damages incurred due to your access to or use of third-party content, products, or services, except as set forth in an applicable agreement between you and Oracle.Documentation AccessibilityFor information about Oracle's commitment to accessibility, visit the Oracle Accessibility Program website at /pls/topic/lookup?ctx=acc&id=docacc.Access to Oracle SupportOracle customers that have purchased support have access to electronic support through My Oracle Support. For information, visit /pls/topic/lookup?ctx=acc&id=info or visit/pls/topic/lookup?ctx=acc&id=trs if you are hearing impaired.ContentsPreface (19)Who Should Use This Specification (19)Before You Read This Specification (19)Shell Prompts (19)Typographic Conventions (20)Related Documentation (20)Third-Party Web Sites (20)Documentation Accessibility (21)Access to Oracle Support (21)Oracle Welcomes Your Comments (21)1Introduction (22)1.1 Motivation (22)1.2 The Java Card Virtual Machine (23)1.3 Java Language Security (25)1.4 Java Card Runtime Environment Security (25)2 A Subset of the Java Virtual Machine (27)2.1 Why a Subset is Needed (27)2.2 Java Card Platform Language Subset (27)2.2.1 Unsupported Items (27)2.2.1.1 Unsupported Features (27)2.2.1.1.1 Dynamic Class Loading (27)2.2.1.1.2 Security Manager (28)2.2.1.1.3 Finalization (28)2.2.1.1.4 Threads (28)2.2.1.1.5 Cloning (28)2.2.1.1.6 Access Control in Java Packages (28)2.2.1.1.7 Typesafe Enums (28)2.2.1.1.8 Enhanced for Loop (29)2.2.1.1.10 Runtime Visible Metadata (Annotations) (29)2.2.1.1.11 Assertions (29)2.2.1.2 Unsupported Keywords (29)2.2.1.3 Unsupported Types (29)2.2.1.4 Unsupported Classes (29)2.2.1.4.1 System (30)2.2.2 Supported Items (30)2.2.2.1 Supported Features (30)2.2.2.1.1 Packages (30)2.2.2.1.2 Dynamic Object Creation (30)2.2.2.1.3 Virtual Methods (30)2.2.2.1.4 Interfaces (30)2.2.2.1.5 Exceptions (30)2.2.2.1.6 Generics (31)2.2.2.1.7 Static Import (31)2.2.2.1.8 Runtime Invisible Metadata (Annotations) (31)2.2.2.2 Supported Keywords (31)2.2.2.3 Supported Types (32)2.2.2.4 Supported Classes (32)2.2.2.4.1 Object (32)2.2.2.4.2 Throwable (32)2.2.3 Optionally Supported Items (32)2.2.3.1 Integer Data Type (33)2.2.3.2 Object Deletion Mechanism (33)2.2.4 Limitations of the Java Card Virtual Machine (33)2.2.4.1 Limitations of Packages (33)2.2.4.1.1 Packages in a Java Card CAP file (33)2.2.4.1.2 Package References (33)2.2.4.1.3 Package Name (33)2.2.4.2 Limitations of Classes (34)2.2.4.2.1 Classes in a Package (34)2.2.4.2.3 Static Fields (34)2.2.4.2.4 Static Methods (34)2.2.4.3 Limitations of Objects (34)2.2.4.3.1 Methods (34)2.2.4.3.2 Class Instances (34)2.2.4.3.3 Arrays (34)2.2.4.4 Limitations of Methods (34)2.2.4.5 Limitations of Switch Statements (35)2.2.4.6 Limitations of Class Initialization (35)2.2.5 Multiselectable Applets Restrictions (35)2.2.6 Java Card Platform Remote Method Invocation (RMI) Restrictions (35)2.2.6.1 Remote Classes and Remote Interfaces (36)2.2.6.2 Access Control of Remote Interfaces (36)2.2.6.3 Parameters and Return Values (36)2.3 Java Card VM Subset (36)2.3.1 Class File Subset (37)2.3.1.1 Not Supported in Class Files (37)2.3.1.1.1 Class Access Flags (37)2.3.1.1.2 Field Descriptors (37)2.3.1.1.3 Constant Pool (37)2.3.1.1.4 Fields (37)2.3.1.1.5 Methods (37)2.3.1.2 Supported in Class Files (37)2.3.1.2.1 ClassFile (37)2.3.1.2.2 Field Descriptors (37)2.3.1.2.3 Method Descriptors (38)2.3.1.2.4 Constant Pool (38)2.3.1.2.5 Fields (38)2.3.1.2.6 Methods (38)2.3.1.2.7 Attributes (38)2.3.2 Bytecode Subset (38)2.3.2.2 Supported Bytecodes (40)2.3.2.3 Static Restrictions on Bytecodes (42)2.3.2.3.1 ldc, ldc_w (42)2.3.2.3.2 lookupswitch (42)2.3.2.3.3 tableswitch (42)2.3.2.3.4 wide (42)2.3.3 Exceptions (43)2.3.3.1 Uncaught and Uncatchable Exceptions (43)2.3.3.2 Checked Exceptions (43)2.3.3.3 Runtime Exceptions (44)2.3.3.4 Errors (44)3Structure of the Java Card Virtual Machine (46)3.1 Data Types and Values (46)3.2 Words (46)3.3 Runtime Data Areas (47)3.4 Contexts (47)3.5 Frames (47)3.6 Representation of Objects (48)3.7 Special Initialization Methods (48)3.8 Exceptions (48)3.9 Binary File Formats (48)3.10 Instruction Set Summary (48)3.10.1 Types and the Java Card Virtual Machine (49)4Binary Representation (51)4.1 Java Card Platform File Formats (51)4.1.1 Export File Format (51)4.1.2 CAP File Format (52)4.1.3 JAR File Container (52)4.2 AID-based Naming (53)4.2.1 The AID Format (53)4.2.2 AID Usage (53)4.2.2.2 Applet AID namespace (53)4.2.2.3 Package AID namespace (54)4.2.2.3 Custom Component AID namespace (54)4.3 Token-based Linking (54)4.3.1 Externally Visible Items (54)4.3.2 Private Tokens (55)4.3.3 The Export File and Conversion (55)4.3.4 References – External and Internal (55)4.3.5 Installation and Linking (56)4.3.6 Token Assignment (56)4.3.7 Token Details (56)4.3.7.1 Package (56)4.3.7.2 Classes and Interfaces (56)4.3.7.3 Static Fields (57)4.3.7.4 Static Methods and Constructors (57)4.3.7.5 Instance Fields (57)4.3.7.6 Virtual Methods (58)4.3.7.7 Interface Methods (58)4.4 Binary Compatibility (59)4.5 CAP and Package Versions (60)4.5.1 Assigning (60)4.5.2 Linking (60)5The Export File Format (62)5.1 Export File Name (62)5.2 Containment in a JAR File (62)5.3 Ownership (62)5.4 Hierarchies Represented (63)5.5 Export File (63)5.6 Constant Pool (65)5.6.1 CONSTANT_Package (65)5.6.2 CONSTANT_Classref (67)5.6.4 CONSTANT_Utf8 (68)5.7 Classes and Interfaces (68)5.8 Fields (71)5.9 Methods (73)5.10 Attributes (75)5.10.1 ConstantValue Attribute (75)6The CAP File Format (77)6.1 CAP File Overview (77)6.2 Component Model (78)6.2.1 Containment in a JAR File (79)6.2.2 Defining New Components (80)6.3 Installation (81)6.4 Header Component (81)6.5 Directory Component (85)6.6 Applet Component (90)6.7 Import Component (92)6.8 Constant Pool Component (93)6.8.1 CONSTANT_Classref (95)6.8.2 CONSTANT_InstanceFieldref, CONSTANT_VirtualMethodref, CONSTANT_SuperMethodref (96)6.8.3 CONSTANT_StaticFieldref and CONSTANT_StaticMethodref (98)6.9 Class Component (100)6.9.1 type_descriptor (102)6.9.2 interface_info, class_info_compact and class_info_extended (104)6.9.2.1 interface_info, class_info_compact and class_info_extended Shared Items (105)6.9.2.2 interface_info Items (106)6.9.2.3 class_info_compact and class_info_extended Items (107)6.9.2.4 method_block_info (111)6.9.2.5 implemented_interface_info (112)6.9.2.6 remote_interface_info (113)6.9.2.7 public_virtual_method_token_mapping (115)6.10 Method Component (116)6.10.1 method_component_block (117)6.10.2 Exception Handler Example (118)6.10.3 exception_handler_info (119)6.10.4 method_info (121)6.11 Static Field Component (123)6.12 Reference Location Component (127)6.12.1 reference_location_component_block (128)6.13 Export Component (130)6.14 Descriptor Component (133)6.14.1 package_descriptor_info (135)6.14.2 class_descriptor_info_compact and class_descriptor_info_extended (135)6.14.3 field_descriptor_info (137)6.14.4 method_descriptor_info_compact and method_descriptor_info_extended (139)6.14.5 type_descriptor_info (142)6.15 Debug Component (143)6.15.1 package_debug_info_compact and package_debug_info_extended Structures (145)6.15.2 The class_debug_info_compact and class_debug_info_extended Structures (145)6.15.2.1 The field_debug_info Structure (148)6.15.2.2 The method_debug_info_compact and method_debug_info_extended Structures (150)6.16 Static Resource Component (154)7Java Card Virtual Machine Instruction Set (157)7.1 Assumptions: The Meaning of “Must” (157)7.2 Reserved Opcodes (157)7.3 Virtual Machine Errors (157)7.4 Security Exceptions (158)7.5 The Java Card Virtual Machine Instruction Set (159)7.5.1 aaload (160)7.5.2 aastore (161)7.5.3 aconst_null (163)7.5.4 aload (163)7.5.5 aload_<n> (164)7.5.6 anewarray (165)7.5.8 arraylength (166)7.5.9 astore (166)7.5.10 astore_<n> (167)7.5.11 athrow (168)7.5.12 baload (169)7.5.13 bastore (169)7.5.14 bipush (170)7.5.15 bspush (171)7.5.16 checkcast (171)7.5.17 dup (173)7.5.18 dup_x (174)7.5.19 dup2 (175)7.5.20 getfield_<t> (175)7.5.21 getfield_<t>_this (176)7.5.22 getfield_<t>_w (178)7.5.23 getstatic_<t> (179)7.5.24 goto (180)7.5.25 goto_w (181)7.5.26 i2b (181)7.5.27 i2s (182)7.5.28 iadd (182)7.5.29 iaload (183)7.5.30 iand (184)7.5.31 iastore (184)7.5.32 icmp (185)7.5.33 iconst_<i> (186)7.5.34 idiv (186)7.5.35 if_acmp<cond> (187)7.5.36 if_acmp<cond>_w (188)7.5.37 if_scmp<cond> (189)7.5.38 if_scmp<cond>_w (189)7.5.40 if<cond>_w (191)7.5.41 ifnonnull (192)7.5.42 ifnonnull_w (193)7.5.43 ifnull (193)7.5.44 ifnull_w (194)7.5.45 iinc (194)7.5.46 iinc_w (195)7.5.47 iipush (195)7.5.48 iload (196)7.5.49 iload_<n> (197)7.5.50 ilookupswitch (197)7.5.51 imul (198)7.5.52 ineg (199)7.5.53 instanceof (200)7.5.54 invokeinterface (202)7.5.54.1 Interface Method Resolution (203)7.5.55 invokespecial (204)7.5.56 invokestatic (205)7.5.56.1 Super Method Resolution (206)7.5.57 invokevirtual (206)7.5.57.1 Virtual Method Resolution (207)7.5.58 ior (208)7.5.59 irem (208)7.5.60 ireturn (209)7.5.61 ishl (210)7.5.62 ishr (210)7.5.63 istore (211)7.5.64 istore_<n> (211)7.5.65 isub (212)7.5.66 itableswitch (213)7.5.67 iushr (214)7.5.69 jsr (215)7.5.70 new (216)7.5.71 newarray (216)7.5.72 nop (217)7.5.73 pop (218)7.5.74 pop2 (218)7.5.75 putfield_<t> (219)7.5.76 putfield_<t>_this (220)7.5.77 putfield_<t>_w (222)7.5.78 putstatic_<t> (223)7.5.79 ret (224)7.5.80 return (225)7.5.81 s2b (225)7.5.82 s2i (226)7.5.83 sadd (226)7.5.84 saload (227)7.5.85 sand (228)7.5.86 sastore (228)7.5.87 sconst_<s> (229)7.5.88 sdiv (229)7.5.89 sinc (230)7.5.90 sinc_w (231)7.5.91 sipush (231)7.5.92 sload (232)7.5.93 sload_<n> (232)7.5.94 slookupswitch (233)7.5.95 smul (234)7.5.96 sneg (234)7.5.97 sor (235)7.5.98 srem (235)7.5.99 sreturn (236)7.5.101 sshr (237)7.5.102 sspush (238)7.5.103 sstore (238)7.5.104 sstore_<n> (239)7.5.105 ssub (239)7.5.106 stableswitch (240)7.5.107 sushr (241)7.5.108 swap_x (241)7.5.109 sxor (242)8Tables of Instructions (244)8.1 Instructions by Opcode Value (244)8.2 Instructions by Opcode Mnemonic (248)Glossary (254)Annex A - Oracle Technology Network Developer License Terms (269)FiguresFigure 1-1: Java Card Application or Library Conversion (23)Figure 1-2: Java Card Application or Library Installation (24)Figure 4-1: Mapping Package Identifiers to AIDs (54)Figure 4-2: Binary Compatibility Example (59)TablesTable 2-1: Unsupported Java Constant Pool Tags (37)Table 2-2: Supported Java Constant Pool Tags (38)Table 2-3: Support of Java Checked Exceptions (43)Table 2-4: Support of Java Runtime Exceptions (44)Table 2-5: Support of Java Errors (44)Table 3-1: Type Support in the Java Card Virtual Machine Instruction Set (49)Table 3-2: Storage Types and Computational Types (50)Table 4-1: AID Format (53)Table 4-2: Token Range, Type and Scope (56)Table 4-3: Tokens For Instance Fields (57)Table 5-1: Export File Constant Pool Tags (65)Table 5-2: Export File Package Flags (66)Table 5-3: Export File Class Access and Modifier Flags (69)Table 5-4: Export File Field Access and Modifier Flags (72)Table 5-5: Export File Method Access and Modifier Flags (74)Table 6-1: CAP File Component Tags (79)Table 6-2: CAP File Component File Names (79)Table 6-3: CAP File Flags (83)Table 6-4: CAP File Constant Pool Tags (94)Table 6-5: Type Descriptor Values (102)Table 6-6: Encoded Reference Type p1.c1 (103)Table 6-7: Encoded Byte Array Type (103)Table 6-8: Encoded Reference Array Type p1.c1 (103)Table 6-9: Encoded Method Signature ()V (104)Table 6-10: Encoded Method Signature (Lp1.ci;)S (104)Table 6-11: CAP File Interface and Class Flags (106)Table 6-12: CAP File Method Flags (122)Table 6-13: Segments of a Static Field Image (124)Table 6-14: Static Field Sizes (124)Table 6-15: Array Types (126)Table 6-16: One-byte Reference Location Example (129)Table 6-17: CAP File Class Descriptor Flags (136)Table 6-18: CAP File Field Descriptor Flags (138)Table 6-19: Primitive Type Descriptor Values (139)Table 6-20: CAP File Method Descriptor Flags (140)Table 6-21: Class Access and Modifier Flags (146)Table 6-22: Field Access and Modifier Flags (149)Table 6-23: Method Modifier Flags (151)Table 7-1: Example Instruction Entry (159)Table 7-2: Array Values (172)Table 7-3: Array Values (200)Table 7-4: Array Values (217)Table 8-1: Instructions by Opcode Value (244)Table 8-2: Instructions by Opcode Mnemonic (248)PrefaceJava Card technology combines a subset of the Java programming language with a runtime environment optimized for secure elements, such as smart cards and other tamper-resistant security chips. Java Card technology offers a secure and interoperable execution platform that can store and update multiple applications on a single resource-constrained device, while retaining the highest certification levels and compatibility with standards. Java Card developers can build, test, and deploy applications and services rapidly and securely. This accelerated process reduces development costs, increases product differentiation, and enhances value to customers.The Classic Edition of the Java Card Platform is defined by three specifications:∙Virtual Machine Specification, Java Card Platform, Version 3.2, Classic Edition,∙Runtime Environment Specification, Java Card Platform, Version 3.2, Classic Edition,∙Application Programming Interface, Java Card Platform, Version 3.2, Classic Edition.This document is a specification of the Classic Edition of the Java Card Platform, Version 3.2, Virtual Machine (Java Card VM).In this book, Java Card Platform refers to version 3.2 to distinguish it from all earlier versions. A vendor of a Java Card technology-enabled device provides an implementation of the Java Card RE. An implementation within the context of this specification refers to a vendor's implementation of the Java Card Virtual Machine (or Java Card VM), the Java Card Application Programming Interface (API), or other component, based on the Java Card technology specifications. A "reference implementation" is an implementation produced by Oracle. Application software written for the Java Card platform is referred to as a Java Card technology-based applet (Java Card applet or card applet).Who Should Use This SpecificationThis specification is intended to assist implementers of the Java Card RE in creating an implementation, developing a specification to extend the Java Card technology specifications, or in creating an extension to the runtime environment for the Java Card platform. This specification is also intended for Java Card applet developers who want a greater understanding of the Java Card technology specifications.Before You Read This SpecificationBefore reading this guide, you should be familiar with the Java programming language, the other Java Card technology specifications, and smart card technology. A good resource for becoming familiar with Java technology and Java Card technology located at:/technetwork/java/javacard/overview/Shell PromptsShell PromptC shell machine-name%C shell superuser machine-name#Bourne shell and Korn shell $Bourne shell and Korn shell superuser #Typographic ConventionsThe settings on your browser might differ from these settings. Typeface Meaning ExamplesAaBbCc123 The names of commands,files, and directories; on-screen computer output Edit your .login file. Use ls -a to list all files. % You have mail.AaBbCc123 What you type, whencontrasted with on-screen computer output %su Password:AaBbCc123 Book titles, new words orterms, words to beemphasized. Replacecommand-line variableswith real names orvalues. Read Chapter 6 in the User's Guide. These are called class options. You must be superuser to do this. To delete a file, type rm filename.Related DocumentationReferences to various documents or products are made in this guide, so you might want to have them available:∙Application Programming Interface, Java Card Platform, Version 3.2, Classic Edition∙Runtime Environment Specification, Java Card Platform, Version 3.2, Classic Edition∙The Java Language Specification (https:///javase/specs/)∙ISO 7816 Specification Parts 1-6. (https://)Third-Party Web SitesOracle is not responsible for the availability of third-party web sites mentioned in this document. Oracle does not endorse and is not responsible or liable for any content, advertising, products, or other materials that are available on or through such sites or resources. Oracle will not be responsible or liable for any actual or alleged damage or loss caused by or in connection with the use of or reliance on any such content, goods, or services that are available on or through such sites or resources.Documentation AccessibilityFor information about Oracle's commitment to accessibility, visit the Oracle Accessibility Program website at:/pls/topic/lookup?ctx=acc&id=docacc.Access to Oracle SupportOracle customers that have purchased support have access to electronic support through My Oracle Support. For information, visit:/pls/topic/lookup?ctx=acc&id=infoOr, if you are hearing impaired, visit:/pls/topic/lookup?ctx=acc&id=trsOracle Welcomes Your CommentsOracle is interested in improving its documentation and welcomes your comments and suggestions.Please include the title of your document with your feedback:Virtual Machine Specification, Java Card Platform, v3.2, Classic Edition1IntroductionThis document specifies the Java Card Virtual Machine features required by the Classic Edition ofJava Card technology.∙It defines the subset of the Java Virtual Machine used for the Java Card Virtual Machine and list the supported and unsupported features.∙It defines the binary representation of the application code, the role and structure of the Export and CAP file formats and their use in the verification and linking process.∙It specifies the Java Card Virtual Machine byte-code set and its detailed behavior.1.1 MotivationJava Card technology enables programs written in the Java programming language to be run on secure elements such as smart cards and other tamper-resistant security chips. Developers can build and test programs using standard software development tools and environments, then convert them into a form that can be installed onto a Java Card technology-enabled device. Application software for the Java Card platform is called an applet, or more specifically, a Java Card applet (to distinguish it from browser applets).While Java Card technology enables programs written in the Java programming language to run on small devices such as smart cards, those are far too under-powered to support the full functionality of the Java platform. Therefore, the Java Card platform supports only a carefully chosen, customized subset of the features of the Java platform. This subset provides features that are well-suited for writing programs for small devices and preserves the object-oriented capabilities of the Java programming language.A simple approach to specifying a Java Card virtual machine would be to describe the subset of the features of the Java virtual machine that must be supported to allow for portability of source code across all Java Card technology enabled devices. Combining that subset specification and the information in Java Virtual Machine Specification, smart card and secure elements manufacturers could construct their own Java Card technology-based implementations (“Java Card implementations”). While that approach is feasible, it has a serious drawback. The resultant platform would be missing the important feature of binary portability of Java Card applets.The standards that define the Java platform allow for binary portability of Java programs across all Java platform implementations. This “write once, run anywhere” quality of Java programs is perhaps the most significant feature of the platform. Part of the motivation for the creation of the Java Cardplatform was to bring just this kind of binary portability to the embedded security and smart card industry. In a world with billions of secure elements with varying processors and configurations, the costs of supporting multiple binary formats for software distribution could be overwhelming.This Virtual Machine Specification, Java Card Platform, v3.2, Classic Edition is the key to providing binary portability. One way of understanding what this specification does is to compare it to its counterpart in the Java platform. The Java virtual machine specification defines a Java virtual machine as an engine that loads Java class files and executes them with a particular set of semantics. The class file is a central piece of the Java architecture, and it is the standard for the binary compatibility of the Java platform. The Virtual Machine Specification, Java Card Platform, v3.2, Classic Edition also defines a file format that is the standard for binary compatibility for the Java Card platform: the CAP file format is the form in which software is deployed to be loaded onto devices which implement a Java Card virtual machine.1.2 The Java Card Virtual MachineThe role of the Java Card virtual machine is best understood in the context of the process for production and deployment of software for the Java Card platform. There are several components that make up a Java Card system, including the Java Card virtual machine, the Converter for the Java Card platform (“Java Card Converter”), a terminal installation tool, and an installation program that runs on the device, as shown in Figure 1-1 and Figure 1-2.Figure 1-1: Java Card Application or Library ConversionFigure 1-2: Java Card Application or Library InstallationDevelopment of a Java Card applet begins as with any other Java program: a developer writes one or more Java classes, and compiles the source code with a Java compiler, producing one or more class files. The applet is run, tested and debugged on a workstation using simulation tools to emulate the device environment. Then, when an applet is ready to be downloaded to a device, the class files comprising the applet are converted to a CAP (converted applet) file using a Java Card Converter.The Java Card Converter takes as input all of the class files in one or more Java packages which make up a Java Card CAP file. A Java package that contains one or more non-abstract subclasses, direct or indirect, of the javacard.framework.Applet class is referred to as an applet package. Otherwise the package is referred to as a library package. A Java Card CAP file may contain only applet packages, only library packages or a combination of applet and library packages. Additionally, both applet and library packages in a Java Card CAP file can be public or private.A private library package in a Java Card CAP file is not listed in the Export Component (6.13 Export Component) of the CAP file and is therefore not visible outside the Java Card CAP file. Similarly, a private applet package in a Java Card CAP file is not listed in the Export Component (6.13 Export Component) of the CAP file, however, non-abstract direct or indirect subclasses of thejavacard.framework.Applet class are listed in the Applet Component (6.6 Applet Component) of the CAP file. For a public applet package in a Java Card CAP file, only public interfaces extending javacard.framework.Shareable are listed in the Export Component (6.13 Export Component) of the CAP file and are therefore visible outside the Java Card CAP file. For further details see The CAP File Format.The Java Card Converter also takes as input one or more export files. An export file contains name and link information for the contents of other packages that are imported by the classes being converted. The converter can also produce export files for the public applet and library packages in a CAP file.After conversion, the CAP file is copied to a terminal, such as a desktop computer with a card reader peripheral. Then an installation tool on the terminal loads the CAP file and transmits it to the Java Card technology-enabled device. An installation program on the device receives the contents of the CAP file。
- 1、下载文档前请自行甄别文档内容的完整性,平台不提供额外的编辑、内容补充、找答案等附加服务。
- 2、"仅部分预览"的文档,不可在线预览部分如存在完整性等问题,可反馈申请退款(可完整预览的文档不适用该条件!)。
- 3、如文档侵犯您的权益,请联系客服反馈,我们会尽快为您处理(人工客服工作时间:9:00-18:30)。
JA V A虚拟机安装操作手册
目录
一、JAVA虚拟机的安装 (2)
二、安装JAVA虚拟机注意事项 (3)
三、如何查看JAVA虚拟机是否安装成功? (4)
四、如何更新管理加载项 (6)
五、常见问题 (8)
一、JAVA虚拟机的安装
如果您是第一次访问网上办税系统,用户操作时系统将提示您下载安装JAVA虚拟机。
如果您已经使用了其他虚拟机(如微软虚拟机),在访问网上办税系统时出现网页错误、无法提交数据等错误,请卸载后下载安装本系统提供的JAVA虚拟机。
下载地址在:福建省国家税务局首页-办税指南-下载中心-税务软件-网上办税JAVA虚拟机下载-下载JAVA虚拟机安装软件。
下载完成后,双击下载的文件“j2re-1_4_0-win-i.exe”,按默认点击“下一步”安装;
请确认勾选“Microsoft Internet Explorer”,安装完成后请重开IE 浏览器或重启电脑。
【备注】:
二、安装JAVA虚拟机注意事项
①请确认操作系统是WIN2000以上,并且IE的版本是6.0;
②如有安装JAVA程序,请检查所使用的操作系统的登录帐号是否
以中文命名,如是,请将JAVA程序卸载后新建一个以英文命名的帐号再进行安装;
③卸载了JAVA虚拟机后重新安装,并且一定要将该程序安装在默认的
目录下,安装后需重新打开浏览器再进行操作或重启电脑;
④如有安装防火墙或卡巴斯基等杀毒软件请先将其关闭再安装;
⑤如果安装JAVA虚拟机之后无法打开办税大厅页面,您有可能安装“上网助手”、“雅虎助手”、“中文上网”等辅助软件,阻止了JAVA 虚拟机的运行,请删除类似辅助软件。
三、如何查看JAVA虚拟机是否安装成功?
①打开IE浏览器,点击“工具”->“Internet选项(O)...”
②选中“高级”,
查看是否有下图中红色框选中的信息,表示已安装成功,
③没有安装成功则如下图所示,请您卸载后重新安装。
四、如何更新管理加载项
(1)任意打开一个网页。
选中“工具”——“管理加载项”
(2)选择“Internet explorer 已经使用的加载项”
(3)选中下图红色框中的加载项,点击“更新ActiveX”
(4)更新完成后,系统需要重新启动才能生效。
重启后就可以正常访问了。
五、常见问题
下载并安装好JAVA虚拟机后,点击办税大厅马上关闭,无法进入?
请用户确认操作系统是WIN2000以上,并且IE的版本是6.0;请您更
新您的加载项。
工具——管理加载项——已经使用的加载项——“选中相应的JAVA虚拟机的控件”——点击“更新ACTIXE控件”。
●已经安装了虚拟机程序,但打开办税大厅的页面后还会提示安
装?
确认安装成功后且IE浏览器是6.0版本,请您更新您的加载项。
工具——管理加载项——已经使用的加载项——“选中相应的JAVA虚拟机的控件”——点击“更新ACTIXE控件”。
●输入税务登记证号码和密码后,密码自动清空?
确认安装成功后且IE浏览器是6.0版本,请您更新您的加载项。
工具——管理加载项——已经使用的加载项——“选中相应的JAVA虚拟机的控件”——点击“更新ACTIXE控件”。
●如何卸载JAVA虚拟机?
电脑左下角的开始-设置-控制面板-选择添加删除程序-选择JAVA虚拟机-删除即可。
