CodeIgniter_架构的说明教程
CodeIgniter框架开发教程(版本3.0.1)说明书

About the T utorialCodeIgniter is a powerful PHP framework with a very small footprint, built for developers who need a simple and elegant toolkit to create full-featured web applications. CodeIgniter was created by EllisLab, and is now a project of the British Columbia Institute of Technology.AudienceThis tutorial has been prepared for developers who would like to learn the art of developing websites using CodeIgniter. It provides a complete understanding of this framework. PrerequisitesBefore you start proceeding with this tutorial, we assume that you are already exposed to HTML, Core PHP, and Advance PHP. We have used CodeIgniter version 3.0.1 in all the examples.Copyright & DisclaimerCopyright 2015 by Tutorials Point (I) Pvt. Ltd.All the content and graphics published in this e-book are the property of Tutorials Point (I) Pvt. Ltd. The user of this e-book is prohibited to reuse, retain, copy, distribute or republish any contents or a part of contents of this e-book in any manner without written consent of the publisher.We strive to update the contents of our website and tutorials as timely and as precisely as possible, however, the contents may contain inaccuracies or errors. Tutorials Point (I) Pvt. Ltd. provides no guarantee regarding the accuracy, timeliness or completeness of our website or its contents including this tutorial. If you discover any errors on our website or inthistutorial,******************************************T able of ContentsAbout the Tutorial (i)Audience (i)Prerequisites (i)Copyright & Disclaimer (i)Table of Contents .................................................................................................................................... i i1.CODEIGNITER – OVERVIEW (1)2.INSTALLING CODEIGNITER (3)3.APPLICATION ARCHITECTURE (4)Directory Structure (5)4.CODEIGNITER – MVC FRAMEWORK (8)5.CODEIGNITER – BASIC CONCEPTS (9)Controllers (9)Views (11)Models (13)Helpers (15)Routing (16)6.CODEIGNITER – CONFIGURATION (19)Configuring Base URL (19)Database Configuration (19)Autoload Configuration (21)7.WORKING WITH DATABASE (23)Connecting to a Database (23)Inserting a Record (23)Updating a Record (24)Deleting a Record (25)Selecting a Record (26)Closing a Connection (26)Example (26)8.CODEIGNITER – LIBRARIES (33)Library Classes (33)Creating Libraries (34)9.ERROR HANDLING (37)10.FILE UPLOADING (39)11.SENDING EMAIL (43)12.FORM VALIDATION (49)13.SESSION MANAGEMENT (55)14.FLASHDATA (58)15.TEMPDATA (61)16.COOKIE MANAGEMENT (65)MON FUNCTIONS (68)18.PAGE CACHING (71)19.PAGE REDIRECTION (73)20.APPLICATION PROFILING (75)21.BENCHMARKING (77)22.ADDING JS AND CSS (80)23.INTERNATIONALIZATION (83)24.CODEIGNITER – SECURITY (88)XSS Prevention (88)SQL Injection Prevention (88)Hiding PHP Errors (89)CSRF Prevention (90)Password Handling (90)CodeIgniter5CodeIgniter is an application development framework, which can be used to develop websites, using PHP. It is an Open Source framework. It has a very rich set of functionality, which will increase the speed of website development work.If you know PHP well, then CodeIgniter will make your task easier. It has a very rich set of libraries and helpers. By using CodeIgniter, you will save a lot of time, if you are developing a website from scratch. Not only that, a website built in CodeIgniter is secure too, as it has the ability to prevent various attacks that take place through websites.CodeIgniter FeaturesSome of the important features of CodeIgniter are listed below:∙ Model-View-Controller Based System ∙ Extremely Light Weight∙ Full Featured database classes with support for several platforms. ∙ Query Builder Database Support ∙ Form and Data Validation ∙ Security and XSS Filtering ∙ Session Management∙ Email Sending Class. Supports Attachments, HTML/Text email, multiple protocols (sendmail, SMTP, and Mail) and more.∙ Image Manipulation Library (cropping, resizing, rotating, etc.). Supports GD, ImageMagick, and NetPBM ∙ File Uploading Class ∙ FTP Class ∙ Localization ∙ Pagination ∙ Data Encryption ∙ Benchmarking ∙ Full Page Caching ∙ Error Logging ∙Application Profiling1. CODEIGNITER – OVERVIEWCodeIgniter∙Calendaring Class∙User Agent Class∙Zip Encoding Class∙Template Engine Class∙Trackback Class∙XML-RPC Library∙Unit Testing Class∙Search-engine Friendly URLs∙Flexible URI Routing∙Support for Hooks and Class Extensions∙Large library of “helper” functions6CodeIgniter7It is very easy to install CodeIgniter. Just follow the steps given below:∙ Step-1: Download the CodeIgniter from the link /download∙ Step-2: Unzip the folder.∙ Step-3: Upload all files and folders to your server.∙Step-4: After uploading all the files to your server, visit the URL of your server, e.g., .On visiting the URL, you will see the following screen:2. INSTALLING CODEIGNITERCodeIgniter8The architecture of CodeIgniter application is shown below.Figure: CodeIgniter Application Flowchart∙ As shown in the figure, whenever a request comes to CodeIgniter, it will first go to index.php page. ∙∙ In the second step, Routing will decide whether to pass this request to step-3 for caching or to pass this request to step-4 for security check. ∙∙ If the requested page is already in Caching , then Routing will pass the request to step-3 and the response will go back to the user. ∙∙ If the requested page does not exist in Caching , then Routing will pass the requested page to step-4 for Security checks. ∙∙Before passing the request to Application Controller , the Security of the submitted data is checked. After the Security check, the Application Controller loads necessary Models, Libraries, Helpers, Plugins and Scripts and pass it on to View . ∙∙The View will render the page with available data and pass it on for Caching . As the requested page was not cached before so this time it will be cached in Caching, to process this page quickly for future requests.3. APPLICATION ARCHITECTURECodeIgniterDirectory StructureThe image given below shows the directory structure of the CodeIgniter.Figure: Directory StructureCodeIgniter directory structure is divided into 3 folders:∙Application∙System∙User_guideApplicationAs the name indicates the Application folder contains all the code of your application that you are building. This is the folder where you will develop your project. The Application folder contains several other folders, which are explained below:∙Cache: This folder contains all the cached pages of your application. These cached pages will increase the overall speed of accessing the pages.∙Config: This folder contains various files to configure the application. With the help of config.php file, user can configure the application. Using database.php file, user can configure the database of the application.∙Controllers: This folder holds the controllers of your application. It is the basic part of your application.9∙Core: This folder will contain base class of your application.∙Helpers: In this folder, you can put helper class of your application.∙Hooks: The files in this folder provide a means to tap into and modify the inner workings of the framework without hacking the core files.∙Language: This folder contains language related files.∙Libraries: This folder contains files of the libraries developed for your application.∙Logs: This folder contains files related to the log of the system.∙Models: The database login will be placed in this folder.∙Third_party: In this folder, you can place any plugins, which will be used for your application.∙Views: Application’s HTML files will be placed in this folder.SystemThis folder contains CodeIgniter core codes, libraries, helpers and other files, which help make the coding easy. These libraries and helpers are loaded and used in web app development. This folder contains all the CodeIgniter code of consequence, organized into various folders:∙Core:This folder contains CodeIgniter’s core class. Do not modify anything here. All of your work will take place in the application folder. Even if your intent is to extend the CodeIgniter core, you have to do it with hooks, and hooks live in the application folder.∙∙Database:The database folder contains core database drivers and other database utilities.∙∙Fonts: The fonts folder contains font related information and utilities.∙∙Helpers:The helpers folder contains standard CodeIgniter helpers (such as date, cookie, and URL helpers).∙∙Language: The language folder contains language files. You can ignore it for now.∙∙Libraries: The libraries folder contains standard CodeIgniter libraries (to help you with e-mail, calendars, file uploads, and more). You can create your own libraries or extend (and even replace) standard ones, but those will be saved in the application/libraries directory to keep them separate from the standard CodeIgniter libraries saved in this particular folder.User_guideThis is your user guide to CodeIgniter. It is basically, the offline version of user guide on CodeIgniter website. Using this, one can learn the functions of various libraries, helpers and classes. It is recommended to go through this user guide before building your first web app in CodeIgniter.Beside these three folders, there is one more important file named “index.php”. In this file, we can set the application environment and error level and we can define system and application folder name. It is recommended, not to edit these settings if you do not have enough knowledge about what you are going to do.4.CODEIGNITER – MVC FRAMEWORKCodeIgniterCodeIgniter is based on the Model-View-Controller (MVC) development pattern. MVC is a software approach that separates application logic from presentation. In practice, it permits your web pages to contain minimal scripting since the presentation is separate from the PHP scripting.Figure: CodeIgniter – MVC Framework∙∙The Model represents your data structures. Typically, your model classes will contain functions that help you retrieve, insert and update information in your database.∙∙The View is information that is being presented to a user. A View will normally be a web page, but in CodeIgniter, a view can also be a page fragment like a header or footer. It can also be an RSS page, or any other type of “page”.∙∙The Controller serves as an intermediary between the Model, the View, and any other resources needed to process the HTTP request and generate a web page.5.CODEIGNITER – BASIC CONCEPTSCodeIgniterControllersA controller is a simple class file. As the name suggests, it controls the whole application by URI.Creating a ControllerFirst, go to application/controllers folder. You will find two files there, index.html and Welcome.php. These files come with the CodeIgniter.Keep these files as they are. Create a new file under the same path named “Test.php”. Write the following code in that file:<?phpclass Test extends CI_Controller {public function index(){echo "Hello World!";}}>The Test class extends an in-built class called CI_Controller. This class must be extended whenever you want to make your own Controller class.Calling a ControllerThe above controller can be called by URI as follows:/index.php/testNotice the word “test” in the above URI after index.php. This indicates the class name of controller. As we have given the name of the con troller “Test”, we are writing “test” after the index.php. The class name must start with uppercase letter but we need to write lowercase letter when we call that controller by URI. The general syntax for calling the controller is as follows:/index.php/controller/method-nameCreating & Calling Constructor MethodLet us modify the above class and create another method named “hello”.<?phpclass Test extends CI_Controller {public function index(){echo "This is default function.";}public function hello(){echo "This is hello function.";}}>We can execute the above controller in the following three ways:1./index.php/test2./index.php/test/index3./index.php/test/helloAfter visiting the first URI in the browser, we get the output as shown in the picture given below. As you can see, we got the output of the method “index”, even though we did not pass the name of the method the URI. We have used only controller name in the URI. In such situations, the CodeIgniter calls the default method “index”.Visiting the second URI in the browser, we get the same output as shown in the above picture. Here, we have passed method’s name after controller’s name in the URI. As the name of the method is “index”, we are getting the same output.Visiting the third URI in the browser, we get the output as shown in picture given below. As you can see, we are getting the output of the method “hello” because we have passed “hello” as the method name, after the name of the controller “test” in the URI.Points to Remember:∙The name of the controller class must start with an uppercase letter.∙The controller must be called with lowercase letter.∙Do not use the same name of the method as your parent class, as it will override parent class’s functionality.ViewsThis can be a simple or complex webpage, which can be called by the controller. The webpage may contain header, footer, sidebar etc. View cannot be called directly. Let us create a simple view. Create a new file under application/views with name “test.php” and copy the below given code in that file.<!DOCTYPE html><html lang="en"><head><meta charset="utf-8"><title>CodeIgniter View Example</title></head><body>CodeIgniter View Example</body></html>Change the code of application/controllers/test.php file as shown in the below.Loading the ViewThe view can be loaded by the following syntax:$this->load->view('name');Where name is the view file, which is being rendered. If you have planned to store the view file in some directory then you can use the following syntax:$this->load->view('directory-name/name');It is not necessary to specify the extension as php, unless something other than .php is used. The index() method is calling the view method and passing the “test” as argument to view() method because we have stored the html coding in “test.php” file under application/views/test.php.<?phpclass Test extends CI_Controller {public function index(){$this->load->view('test');}}>Here is the output of the above code:The following flowchart illustrates of how everything works:Views$this->load->view('test')will render the view file application/views/test.php andgenerates the output.ControllerThe index.php file will call the class application/controllers/Test.php . As the method name hasn't been passed in the URI, the default index()method will be called which willindirectly call the application/views/test.php file ./index.php/testThe above URI will first call the index.php file in your CodeIgniter folder .ModelsModels classes are designed to work with information in the database. As an example, if you are using CodeIgniter to manage users in your application then you must have model class, which contains functions to insert, delete, update and retrieve your users’ data.Creating Model ClassModel classes are stored in application/models directory. Following code shows how to create model class in CodeIgniter.<?phpClass Model_name extends CI_Model{Public function __construct(){parent::__construct();}}>Where Model_name is the name of the model class that you want to give. Each model class must inherit the CodeIgniter’s CI_Model class. The first letter of the model class must be in ca pital letter. Following is the code for users’ model class.<?phpClass zzzextends CI_Model{Public function __construct(){parent::__construct();}}>The above model class must be saved as User_model.php. The class name and file name must be same.Loading ModelModel can be called in controller. Following code can be used to load any model.$this->load->model('model_name');Where model_name is the name of the model to be loaded. After loading the model you can simply call its method as shown below.$this->model_name->method();Auto-loading ModelsThere may be situations where you want some model class throughout your application. In such situations, it is better if we autoload it.As shown in the above figure, pass the name of the model in the array that you want to autoload and it will be autoloaded, while system is in initialization state and is accessible throughout the application.HelpersAs the name suggests, it will help you build your system. It is divided into small functions to serve different functionality. A number of helpers are available in CodeIgniter, which are listed in the table below. We can build our own helpers too.Helpers are typically stored in your system/helpers, or application/helpers directory. Custom helpers are stored in application/helpers directory and systems’ helpers are stored in system/helpers directory. CodeIgniter will look first in your application/helpers directory. If the directory does not exist or the specified helper is not located, CodeIgniter will instead, look in your global system/helpers/directory. Each helper, whether it is custom or system helper, must be loaded before using it.Helper Name DescriptionArray Helper The Array Helper file contains functions that assist in working with arrays.CAPTCHA Helper The CAPTCHA Helper file contains functions that assist in creating CAPTCHA images.Cookie Helper The Cookie Helper file contains functions that assist in working with cookies.Date Helper The Date Helper file contains functions that help you work with dates.Directory Helper The Directory Helper file contains functions that assist in working with directories.Download Helper The Download Helper lets you download data to your desktop.Email Helper The Email Helper provides some assistive functions for working with Email. For a more robust email solution, see CodeIgniter’s Email Class.File Helper The File Helper file contains functions that assist in working with files.Form Helper The Form Helper file contains functions that assist in working with forms.HTML Helper The HTML Helper file contains functions that assist in working with HTML.Inflector Helper The Inflector Helper file contains functions that permits you to change words to plural, singular, camel case, etc.Language Helper The Language Helper file contains functions that assist in working with language files.Number Helper The Number Helper file contains functions that help you work with numeric data.Path Helper The Path Helper file contains functions that permits you to work with file paths on the server.Security Helper The Security Helper file contains security related functions.20End of ebook previewIf you liked what you saw…Buy it from our store @ https://21。
code interpreter原理

code interpreter原理Code Interpreter原理什么是Code Interpreter?Code Interpreter(代码解释器)是一种计算机程序,用于将高级编程语言中的源代码逐行解释执行。
与编译器不同,代码解释器不会事先将源代码转换为机器语言,而是逐行解释执行,从而实现程序的运行。
Code Interpreter的工作原理1.词法分析(Lexical Analysis):代码解释器首先对源代码进行词法分析,将源代码分解为一个个词法单元(Token)。
词法单元是代码的基本组成部分,例如关键字、运算符、变量名等。
2.语法分析(Syntax Analysis):词法分析之后,代码解释器进行语法分析,基于语法规则构建抽象语法树(AST)。
抽象语法树表示了源代码的语法结构,用于后续的解释执行。
3.解释执行(Interpreter):当抽象语法树构建完成后,代码解释器开始逐行解释执行源代码。
解释执行过程中,解释器根据不同的语法结构执行相应的操作,例如赋值、函数调用等。
Code Interpreter与编译器的对比与Code Interpreter不同,编译器将源代码事先转换为机器语言,生成可执行文件,然后由计算机直接执行。
虽然编译器的执行速度更快,但Code Interpreter具有以下优点:•跨平台:代码解释器解释执行源代码,不依赖于特定的硬件平台,因此源代码可以在不同的平台上运行。
•动态性:代码解释器可以在程序运行时动态地修改和执行源代码,灵活性更高。
•易于调试:代码解释器可以逐行解释执行源代码,方便调试和定位错误。
Code Interpreter的应用领域代码解释器在许多领域都有广泛的应用,例如:•脚本语言:许多脚本语言(如Python、Ruby、JavaScript等)都使用代码解释器实现。
脚本语言常用于快速开发、动态网页、自动化任务等。
•学习编程:代码解释器可以将编程语言的源代码逐行解释执行,有助于初学者理解和学习编程。
PHP敏捷开发CodeIgniter框架
第七章涵盖了 CodeIgniter 使用对象的方式,以及你能够以各种不同的方式编写和使用 你自己的对象。
第八章涵盖了 CodeIgniter 中用于测试的类:单元测试、基准测试和“分析器”,通过这 些方法,CodeIgniter 可以帮你在不影响当前数据的情况下测试数据库。
第九章讲述了通过使用 CodeIgniter 的 FTP 类和 Email 类来简化通讯,并使用 XML-RPC 从 Web 2.0 的世界中获取信息。
当我们想请你注意某特定部分的代码块时,相关的行或内容将被加粗:
</head> <body> <h1 class="test"><?php echo $mytitle; ?> </h1> <p class="test"><?php echo $mytext; ?> </p> </body>
新名词和重要文字采用粗体字。例如在屏幕上、菜单或对话框中,以我们的文本样式则显 示为:“单击下一步按钮以转到下一个屏幕”。
我们有三种文本样式。 一个代码块将显示为下列样式:
$active_group = "default"; $db['default']['hostname'] = ""; $db['default']['username'] = ""; $db['default']['password'] = "";
CodeIgniter介绍以及安装配置
CodeIgniter介绍以及安装配置【本讲内容】一、codeigniter(以下简称CI)的介绍;我们一起来了解一下CI是什么?CI能够为我们做什么?以及CI的不足在哪里?二、codeigniter的安装配置。
我们学习一个技术不是仅仅只是想知道它是什么和能为我们做什么,最重要的是我们要掌握和使用它。
其实CI的安装和使用是非常简单的,过一会你们就可以感觉的到~~【具体内容】一、CI的介绍。
1、CI是什么?军哥喜欢用这样一句话来介绍CI是什么,CI是一个免费、轻量级但功能强大且易扩展的PHP框架,使用面向对象的开发结构和MVC模式,提供了一套丰富的类库来满足通常的任务需求。
总之,CI简单易学,高效实用!那怎么样来解读这句话呢?我们接着看:(1)、CI是一个PHP框架;大家都知道PHP框架有很多,CI只是其中之一,框架是为了重用发明的。
同样,CI的目标是实现让你比从零开始编写代码更快速地开发项目。
CI可以将需要完成的任务代码量最小化,这样你就可以把更多的精力放到项目的开发上了。
(2)、CI是免费的;CI是经过开源许可授权的,只要你愿意就可以使用它。
(3)、CI是轻量级的;CI的核心系统只需要一些非常小的库,这与那些需要更多资源的框架完全相反。
额外的库文件只在请求的时候加载,依需求而定,所以核心系统是非常快而且轻的。
(4)、CI使用M-V-C模式;CI使用了模型(Model)- 视图(View)- 控制器(Controllers)的方法,这样可以更好地使表现层和逻辑层分离。
(5)、CI功能强大;CI拥有众多的类库,可以方便并快速的完成开发任务,包括:读取数据库、数据的缓存、发送电子邮件、保存session、文件的上传、图像的操作、数据的确认等。
(6)、CI是易扩展的;CI可以非常简单的通过自定义类库、辅助函数来进行扩展,或者也可以通过扩展类、系统钩子来实现。
(7)、CI不需要模版引擎;虽然CI自带了一个可选的模板解析器程序,但不要求你必须使用模板。
大师的6个codeigniter技巧
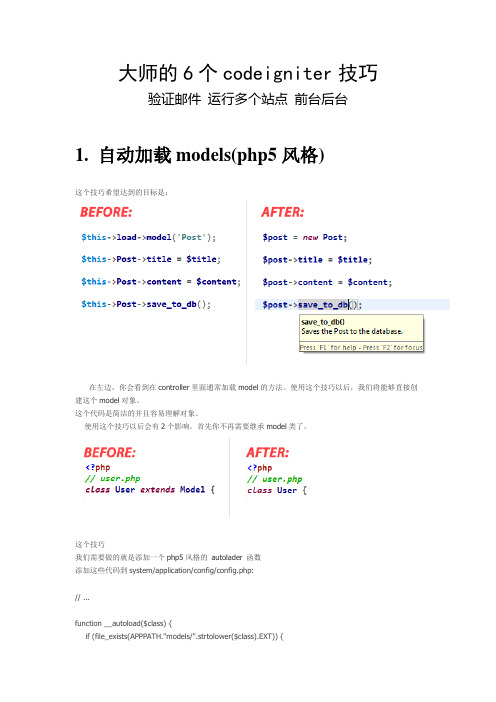
大师的6个codeigniter技巧验证邮件运行多个站点前台后台1. 自动加载models(php5风格)这个技巧希望达到的目标是:在左边,你会看到在controller里面通常加载model的方法。
使用这个技巧以后,我们将能够直接创建这个model对象。
这个代码是简洁的并且容易理解对象。
使用这个技巧以后会有2个影响。
首先你不再需要继承model类了。
这个技巧我们需要做的就是添加一个php5风格的autolader 函数添加这些代码到system/application/config/config.php:// ...function __autoload($class) {if (file_exists(APPPATH."models/".strtolower($class).EXT)) {include_once(APPPATH."models/".strtolower($class).EXT);}}?>如果你也有兴趣运用这个技巧到controller,你只需要添加以下代码来代替上面的代码。
// ...function __autoload($class) {if (file_exists(APPPATH."models/".strtolower($class).EXT)) {include_once(APPPATH."models/".strtolower($class).EXT);} else if (file_exists(APPPATH."controllers/".strtolower($class).EXT)) {include_once(APPPATH."controllers/".strtolower($class).EXT);}}?>任何时候,你试着使用一个没有定义的类时候,这个__autoload函数将会被调用,它将会加载这个类文件。
codeIgniter框架基本结构分析【中级教程】
codeIgniter框架基本结构分析【中级教程】【求精】1、index.php入口文件:1)指定CodeIgniter框架所在目录;2)定义APPPATH常量,指示应用程序文件根目录;3)载入codeigniter/CodeIgniter.php文件,启动框架。
2、codeigniter/CodeIgniter.php文件:主要完成初始化CodeIgniter框架和启动应用程序两项工作。
1)实例化CI_Benchmark,这个类用于标记应用程序执行消耗的时间;2)载入应用程序的配置文件require(APPPATH.'config/config'.EXT);3)实例化CI_Config,这个类用于将数组封装为可以操作的配置服务;4)实例化CI_Router,这个类用于分析URL请求,确定要执行的控制器和动作;5)实例化CI_Output,这个类提供输出内容的缓存和检查服务;6)通过$OUT->_display_cache($CFG,$RTR)尝试输出缓存内容,如果成功,则结束程序运行;7)判断控制器类定义文件是否存在。
如果不存在则通过show_404()显示错误信息;8)实例化CI_Input,这个类提供对$_GET、$_POST的访问手段,并封装了一些过滤方法;9)实例化CI_URI,这个类提供对URL的分析、构造服务;10)实例化CI_Language,这个类提供多语言字符串映射服务;11)载入codeigniter/Base4.php或者codeigniter/Base5.php;12)载入libraries/Controller.php;13)载入控制器类定义文件;14)实例化控制器类;15)如果控制器使用了scaffolding功能,则调用控制器的_ci_scaffolding()方法,否则调用控制器动作方法;16)通过$OUT->_display();输出内容($OUT是CI_Output的实例)。
CodeIgniter 入门

CodeIgniter入门快速简单地创建MVC应用程序级别:中级Thomas Myer,作者、顾问和Web开发人员,Triple Dog Dare Media2008年9月16日创建CodeIgniter应用程序要比您想像中的容易。
我将引导您创建第一个项目:一个带有联系人表单的简单Web页面。
如果您是一位PHP开发人员,在使用PHP编程语言时不难发现:大型项目可能会变得复杂。
这并非PHP的缺点。
是的,这种语言提供了丰富的特性,而且具有足够理想的弹性,可区分程序员之间的工作成果。
在这种意义上,PHP类似于Perl,这是一些人喜欢它(而其他人鄙视它)的原因之一。
任何曾经查看过遗留PHP项目的有经验的PHP开发人员都可以轻松判断出不同开发人员在项目不同阶段的工作—就像您是一位考古学家,正在凝视着深深的墓穴,见证着不同文化在各自时代的发展。
不管涉及了什么样式或使用了什么方法,超过几千行代码的PHP项目很容易在仓促之中变得凌乱不堪。
这主要是因为它们在结构上不一致。
一些程序员创建类来组织其工作,但似乎没有任何两个程序员对于如何编写类具有相同的看法。
其他程序员构建大量充满函数的包含文件。
还有其他人使用巨大、独立的库,比如PEAR。
MVC框架如何提供帮助在几年前,PHP一直缺乏一个良好的、功能完善的模型-视图-控制器(Model-View-Controller,MVC)框架。
MVC框架允许程序员将其代码组织为三个不同的功能区:•模型包含与您的数据库和其他数据结构相关的所有代码。
如果您具有一个名为pages的表,则您具有一个模型,其中具有用于从表中选择、创建、更新和删除记录的函数。
•视图包含所有显示和UI元素—JavaScript代码、Cascading Style Sheets(CSS)、HTML甚至PHP。
•控制器将一切联系在一起。
控制器中的每个函数表示一个目的地或路线。
如果您具有一个名为/about的目的地,则控制器将具有一个名为about()的函数。
CodeIgniter快速入门教程
CodeIgniter快速入门教程作为一款进口的MVC框架,CodeIgniter活跃在PHP开发者群体里,CodeIgniter 也被亲切的称之为CI,有人说它很像国内的一款开发框架(ThinkPHP)。
我倒觉得这两者之间还是有很大差异的,除了开发模式,文件结构有一些类似之后,编码方式,使用方法都还是有区别的。
一、下载和安装对于CI的下载,你只需要在任何搜索引擎上找到它的官网,然后猛戳下载两个字,就可以搞定,CI是一款轻量级的框架,下载下来也不过2点几M。
目前流行的版本包括3.X 和2.X。
作为初学者,建议使用3.x的版本。
你可以将CI下载下来的源码看做是一款绿色软件,也就是说,无需太多的操作,直接解压就可以完成。
二、部署作为开发者,我们有N多种方式部署你的代码,不过我们建议,每一个项目都应该拥有一个虚拟主机,比如我们在本机使用作为我们的虚拟主机。
注意:在部署虚拟主机的时候,一定要将CI的入口文件所在的目录作为网站根目录、初步运行如果我们访问出现如下界面。
那么恭喜你,安装成功!需要注意的是,CI的默认语言是English,如果你不是太熟悉英文,可以在配置文件中,将默认语言设置为中文(zh-cn)。
三、控制器项目的控制器默认在application/controllers中。
控制器文件使用大驼峰命名法,比如:Goods.php。
创建了控制器文件之后,还需要在控制器文件中创建一个和文件名同名的类。
比如:class Goods extends CI_Controller{}你需要在编写控制器的时候,继承CI的基础控制器:CI_Controller四、控制器的方法和调用视图在CI中,要使用哪个控制器和方法,都是通过URI表明的,比如我们的URI是:index.php/Goods/index。
那么我们就应该在Goods控制器中创造一个index方法。
public function index(){}这个方法还必须是被Public修饰的公共方法。
Codeigniter网络应用框架入门教程

Codeigniter网络应用框架入门教程第一章:简介CodeIgniter是一个轻量级的PHP开发框架,被广泛应用于PHP 网络应用的开发中。
本教程将介绍CodeIgniter的基本知识和使用方法,帮助读者快速入门。
第二章:安装和配置在本章中,将介绍如何下载、安装和配置CodeIgniter框架。
包括如何创建一个新的CodeIgniter项目,设置数据库连接等基本配置。
第三章:控制器与视图控制器是CodeIgniter中的核心组件之一,负责处理用户请求,并将处理结果传递给视图进行显示。
本章中将讲解如何创建和使用控制器,并结合视图实现动态页面的展示。
第四章:模型与数据库CodeIgniter提供了强大的数据库操作功能,通过模型与数据库的配合,可以便捷地实现数据的增删改查。
本章将详细介绍CodeIgniter中的模型类以及常用的数据库操作方法。
第五章:表单验证与安全网络应用中的表单验证和安全性是非常重要的一部分。
CodeIgniter为此提供了丰富的验证规则和安全措施。
本章将教你如何使用CodeIgniter的表单验证库和安全类来确保数据的正确性和安全性。
第六章:URL路由与重定向URL路由是一个重要的功能,它可以帮助开发人员实现友好的URL,并提供更好的用户体验。
本章将介绍CodeIgniter中的URL 路由规则,以及如何进行重定向操作。
第七章:错误处理与日志记录网络应用中出现错误是不可避免的,CodeIgniter提供了丰富的错误处理机制和日志记录功能。
本章将详细介绍如何使用CodeIgniter来处理错误,并记录应用的日志。
第八章:缓存与性能优化缓存是提升应用性能的重要手段,CodeIgniter中也提供了缓存功能,并支持多种缓存类型。
本章将讲解如何使用CodeIgniter的缓存类来提升应用的性能。
第九章:文件操作与上传在网络应用中,文件操作和上传功能是常见需求。
CodeIgniter 为此提供了一系列的功能,使文件操作和上传变得简单易用。
codesmith模板生成三层架构的代码使用说明

一.模板使用方式打开CodeSmith Studio ,按以下顺序设置。
二.示例使用的数据库包含的表关系如下:三.生成的StuInfo 表的实体类如下,其它实体结构相同:1.点击此处打开模板所在目录2.加载后的模板目录3.双击打开三层架构模板4.如果打开了多个模板,点击切换到三层架构模板9.在此设置数据库中的视图是否为临时视图,如果是临时视图,生成后可以删除12.配置文件中的数据库连接串6.设置生成代码的命名空间前缀7.设置生成代码的目标目录,一般直接设置为项目所在的目录13.设置生成三层架构使用的数据库14.最后点击生成5.正则表达式过滤字符串,表名或视图名符合正则表达式才生成相应的三层架构代码,为空则不过滤,生成所有表和视图的三层架构8.设置是否使用延迟加载模式,如果使用,开始子对象集合为空,在访问子对象集合时才去数据库中查询数据。
11.设置是否会将实体类序列化成XML ,如果要序列化,在实体类上会添加[Serializable ]特性。
数据表的名字中如果存在“_”或空格,会自动清除,每一字段生成一个对应的属性,同样会去除“_”和空格,表中的外键字段除生成一个对应属性外,还会生成一个外键实体属性,如class_id,除生成ClassId属性外,还生成了一个类型为StudentClass的属性ClassRef,如果表的主键被其它表引用,如表Student_Score中的字段Student_id外键引用了Stu_Info表中的Student_ID主键,则StuInfo实体中包含一个集合StudentScoreList,如果一个表中有多个外键引用同一个表的主键,则该集合名会用数字进行编号。
四.生成的数据访问类公共方法如下:1.连接串设置生成的代码中有一个Connection类,用来实现事务操作,该类中有一个ConnectionString静态属性,该属性用于储存数据连接串,定义如下:get{if (connectionString == null){connectionString =System.Configuration.ConfigurationManager.ConnectionStrings["连接串名"].ConnectionString;}}其中"连接串名"由CodeSmith生成时设置,如果Config文件中已更改连接串名称,此处也要更改。
CodeIgniter视图使用注意事项

CodeIgniter视图使用注意事项
关于CodeIgniter视图使用注意事项
本文讲述了CodeIgniter视图使用注意事项。
分享给大家供大家参考,具体如下:
CI中视图即application/views/下的模版文件,模版中支持直接使用PHP,所以模版的实现没有太多好说的,说几点视图的注意事项:
1、CI的视图可以在控制器中load多个视图,页面最后将这些内容组合起来后输出。
这里load的动作如果交给控制器去做,需要调整模版结构时就需要调整控制器,这不太好。
可以在控制器中进行封装或者直接交给视图去做,保证每个ACTION都只load一个视图文件。
2、让视图做它擅长的事情,不要在PHP代码中直接定义HTML,这样子会让程序和视图都难以维护,如果要加载HTML,可通过load 的方式返回。
3、虽然有万能的`get_instance方法,但在视图中也不要直接去读取数据或者做一些其他模块的事情。
视图的作用就是接收数据并展现出来,以确保人尽其责,物尽其用。
4、关于是否要使用模版的问题,个人趋向于使用模版。
直接使用PHP时,需要自己去处理变量的定义问题、转换为HTML实体的问题,而这些问题模版都可以解决,以及会提供一些更方便的操作。
如果要说效率问题,不在这里,也大多不在PHP。
希望本文所述对大家基于CodeIgniter框架的PHP程序设计有所帮助。
CI(CodeIgniter)框架配置
CI(CodeIgniter)框架配置MVC的组成部分:模型 (Model)代表你的数据结构。
通常来说,你的模型类将包含取出、插⼊、更新你的数据库资料这些功能。
视图 (View)是展⽰给⽤户的信息。
⼀个视图通常是⼀个⽹页。
控制器 (Controller)是模型、视图以及其他任何处理 HTTP 请求所必须的资源之间的中介,并⽣成⽹页。
举例⽐如⼀批统计数据你可以分别⽤柱状图、饼图来表⽰。
C存在的⽬的则是确保M和V的同步,⼀旦M改变,V应该同步更新。
每个控制器都是⼀个类Class, 在每个 Class ⾥⾯的 function 都是⼀个页⾯, 嗯, 这个概念很重要!⼊⼝⽅法:⼊⼝——>控制器——>⽅法——>参数localhost/index.php/welcome/index控制器:1、到底什么是控制器简⽽⾔之,⼀个控制器就是⼀个类⽂件⽤户通过URL访问的就是某个控制器类中的具体成员⽅法并由这个⽅法中的代码去做某些操作2、如何创建控制器a.创建⽂件夹\application\controllersb.类名必须以⼤写字母开头c.继承核⼼的控制器类CI_Controller3、创建⽅法a.就是创建⼀个成员⽅法function()b.默认访问的是index⽅法4、URL如何传递参数给⽅法⽅法段后的按次序传⼊⽅法中的形式参数配置CI:1.在CI官⽹下载最新版的CI框架,⽬前最新版的是2.13版本2.解压之后,有三个⽂件夹:application 开发要⽤到的配置⽂件,Model,VIew,Control 的等⽂件……system CI框架源码user_guide ⽤户⼿册index.php CI的接⼝⽂件3.根⽬录建⽴⼀个⽂件夹ci,把 application ,system和index.php复制到 ci下,这个⽂件夹,⾃⼰可以随便写4.然后访问: localhost/ci 实际访问路径——> localhost/ci/index.php/welcome/index这样就可以⽤了,具体使⽤说明如下:1.上边讲到它访问的⼊⼝⽅法⼊⼝——>控制器——>⽅法——>参数2.主要就是application下的controllers⽂件夹下的welcome.php⽂件访问了views下的welcome_message.php⽂件3.它是怎么访问的呢?在config⽂件夹下有个路由⽂件routes.php配置了路由路径⽂件welcome因此可以看到Welcome to Codelgniter!4.在models ⾥建⽴业务逻辑⽂件,在views⾥建⽴视图⽂件复制代码代码如下:/*注意的是,类名(⾸字母⼤写,也是⽂件名)不能与⽅法名相同,否则会报错,像这样的Index,下边有⼀个index ⽅法,就会出错*/class Index extends CI_Controller{function index(){}}。
CI框架(CodeIgniter)操作redis的方法详解

CI框架(CodeIgniter)操作redis的⽅法详解本⽂实例讲述了CI框架(CodeIgniter)操作redis的⽅法。
分享给⼤家供⼤家参考,具体如下:1. 在autoload.php 中加⼊如下配置⾏$autoload['libraries'] = array('redis');2. 在/application/config 中加⼊⽂件 redis.php⽂件内容如下:<?php// Default connection group$config['redis_default']['host'] = 'localhost'; // IP address or host$config['redis_default']['port'] = '6379'; // Default Redis port is 6379$config['redis_default']['password'] = ''; // Can be left empty when the server does not require AUTH$config['redis_slave']['host'] = '';$config['redis_slave']['port'] = '6379';$config['redis_slave']['password'] = '';>3. 在 /application/libraries 中加⼊⽂件 Redis.php⽂件来源:⽂件内容:<?php defined('BASEPATH') OR exit('No direct script access allowed');/*** CodeIgniter Redis** A CodeIgniter library to interact with Redis** @package CodeIgniter* @category Libraries* @author Joël Cox* @version v0.4* @link https:///joelcox/codeigniter-redis* @link http://joelcox.nl* @license /licenses/mit-license.html*/class CI_Redis {/*** CI** CodeIgniter instance* @var object*/private $_ci;/*** Connection** Socket handle to the Redis server* @var handle*/private $_connection;/*** Debug** Whether we're in debug mode* @var bool*/public $debug = FALSE;/*** CRLF** User to delimiter arguments in the Redis unified request protocol* @var string*/const CRLF = "\r\n";/*** Constructorpublic function __construct($params = array()){log_message('debug', 'Redis Class Initialized');$this->_ci = get_instance();$this->_ci->load->config('redis');// Check for the different styles of configsif (isset($params['connection_group'])){// Specific connection group$config = $this->_ci->config->item('redis_' . $params['connection_group']);}elseif (is_array($this->_ci->config->item('redis_default'))){// Default connection group$config = $this->_ci->config->item('redis_default');}else{// Original config style$config = array('host' => $this->_ci->config->item('redis_host'),'port' => $this->_ci->config->item('redis_port'),'password' => $this->_ci->config->item('redis_password'),);}// Connect to Redis$this->_connection = @fsockopen($config['host'], $config['port'], $errno, $errstr, 3); // Display an error message if connection failedif ( ! $this->_connection){show_error('Could not connect to Redis at ' . $config['host'] . ':' . $config['port']); }// Authenticate when needed$this->_auth($config['password']);}/*** Call** Catches all undefined methods* @param string method that was called* @param mixed arguments that were passed* @return mixed*/public function __call($method, $arguments){$request = $this->_encode_request($method, $arguments);return $this->_write_request($request);}/*** Command** Generic command function, just like redis-cli* @param string full command as a string* @return mixed*/public function command($string){$slices = explode(' ', $string);$request = $this->_encode_request($slices[0], array_slice($slices, 1));return $this->_write_request($request);}/*** Auth** Runs the AUTH command when password is set* @param string password for the Redis server* @return void*/private function _auth($password = NULL){// Authenticate when password is setif ( ! empty($password)){// See if we authenticated successfullyif ($this->command('AUTH ' . $password) !== 'OK')show_error('Could not connect to Redis, invalid password');}}}/*** Clear Socket** Empty the socket buffer of theconnection so data does not bleed over* to the next message.* @return NULL*/public function _clear_socket(){// Read one character at a timefflush($this->_connection);return NULL;}/*** Write request** Write the formatted request to the socket* @param string request to be written* @return mixed*/private function _write_request($request){if ($this->debug === TRUE){log_message('debug', 'Redis unified request: ' . $request);}// How long is the data we are sending?$value_length = strlen($request);// If there isn't any data, just returnif ($value_length <= 0) return NULL;// Handle reply if data is less than or equal to 8192 bytes, just send it over if ($value_length <= 8192){fwrite($this->_connection, $request);}else{while ($value_length > 0){// If we have more than 8192, only take what we can handleif ($value_length > 8192) {$send_size = 8192;}// Send our chunkfwrite($this->_connection, $request, $send_size);// How much is left to send?$value_length = $value_length - $send_size;// Remove data sent from outgoing data$request = substr($request, $send_size, $value_length);}}// Read our request into a variable$return = $this->_read_request();// Clear the socket so no data remains in the buffer$this->_clear_socket();return $return;}/*** Read request** Route each response to the appropriate interpreter* @return mixed*/private function _read_request(){$type = fgetc($this->_connection);// Times we will attempt to trash bad data in search of a// valid type indicator$response_types = array('+', '-', ':', '$', '*');$type_error_limit = 50;$try = 0;while ( ! in_array($type, $response_types) && $try < $type_error_limit) {$type = fgetc($this->_connection);$try++;}if ($this->debug === TRUE){log_message('debug', 'Redis response type: ' . $type);}switch ($type){case '+':return $this->_single_line_reply();break;case '-':return $this->_error_reply();break;case ':':return $this->_integer_reply();break;case '$':return $this->_bulk_reply();break;case '*':return $this->_multi_bulk_reply();break;default:return FALSE;}}/*** Single line reply** Reads the reply before the EOF* @return mixed*/private function _single_line_reply(){$value = rtrim(fgets($this->_connection));$this->_clear_socket();return $value;}/*** Error reply** Write error to log and return false* @return bool*/private function _error_reply(){// Extract the error message$error = substr(rtrim(fgets($this->_connection)), 4);log_message('error', 'Redis server returned an error: ' . $error);$this->_clear_socket();return FALSE;}/*** Integer reply** Returns an integer reply* @return int*/private function _integer_reply(){return (int) rtrim(fgets($this->_connection));}/*** Bulk reply** Reads to amount of bits to be read and returns value within* the pointer and the ending delimiter* @return string*/private function _bulk_reply(){// How long is the data we are reading? Support waiting for data to// fully return from redis and enter into socket.$value_length = (int) fgets($this->_connection);if ($value_length <= 0) return NULL;$response = '';// Handle reply if data is less than or equal to 8192 bytes, just read it if ($value_length <= 8192){$response = fread($this->_connection, $value_length);}else{$data_left = $value_length;// If the data left is greater than 0, keep readingwhile ($data_left > 0 ) {// If we have more than 8192, only take what we can handleif ($data_left > 8192){$read_size = 8192;}else{$read_size = $data_left;}// Read our chunk$chunk = fread($this->_connection, $read_size);// Support reading very long responses that don't come through // in one fread$chunk_length = strlen($chunk);while ($chunk_length < $read_size){$keep_reading = $read_size - $chunk_length;$chunk .= fread($this->_connection, $keep_reading);$chunk_length = strlen($chunk);}$response .= $chunk;// Re-calculate how much data is left to read$data_left = $data_left - $read_size;}}// Clear the socket in case anything remains in there$this->_clear_socket();return isset($response) ? $response : FALSE;}/*** Multi bulk reply** Reads n bulk replies and return them as an array* @return array*/private function _multi_bulk_reply(){// Get the amount of values in the response$response = array();$total_values = (int) fgets($this->_connection);// Loop all values and add them to the response arrayfor ($i = 0; $i < $total_values; $i++){// Remove the new line and carriage return before reading// another bulk replyfgets($this->_connection, 2);// If this is a second or later pass, we also need to get rid// of the $ indicating a new bulk reply and its length.if ($i > 0){fgets($this->_connection);fgets($this->_connection, 2);}$response[] = $this->_bulk_reply();}// Clear the socket$this->_clear_socket();return isset($response) ? $response : FALSE;}/*** Encode request** Encode plain-text request to Redis protocol format* @link http://redis.io/topics/protocol* @param string request in plain-text* @param string additional data (string or array, depending on the request) * @return string encoded according to Redis protocol*/private function _encode_request($method, $arguments = array()){$request = '$' . strlen($method) . self::CRLF . $method . self::CRLF;$_args = 1;// Append all the arguments in the request stringforeach ($arguments as $argument){if (is_array($argument)){foreach ($argument as $key => $value){// Prepend the key if we're dealing with a hashif (!is_int($key)){$request .= '$' . strlen($key) . self::CRLF . $key . self::CRLF;$_args++;}$request .= '$' . strlen($value) . self::CRLF . $value . self::CRLF;$_args++;}}else{$request .= '$' . strlen($argument) . self::CRLF . $argument . self::CRLF; $_args++;}}$request = '*' . $_args . self::CRLF . $request;return $request;}/*** Info** Overrides the default Redis response, so we can return a nice array* of the server info instead of a nasty string.* @return array*/public function info($section = FALSE){if ($section !== FALSE){$response = $this->command('INFO '. $section);}else{$response = $this->command('INFO');}$data = array();$lines = explode(self::CRLF, $response);// Extract the key and valueforeach ($lines as $line){$parts = explode(':', $line);if (isset($parts[1])) $data[$parts[0]] = $parts[1];}return $data;}/*** Debug** Set debug mode* @param bool set the debug mode on or off* @return void*/public function debug($bool){$this->debug = (bool) $bool;}/*** Destructor** Kill the connection* @return void*/function __destruct(){if ($this->_connection) fclose($this->_connection);}}>4. 然后你就可以在⽂件中这样使⽤了<?phpif($this->redis->get('mark_'.$gid) === null){ //如果未设置$this->redis->set('mark_'.$gid, $giftnum); //设置$this->redis->EXPIRE('mark_'.$gid, 30*60); //设置过期时间(30 min)}else{$giftnum = $this->redis->get('mark_'.$gid); //从缓存中直接读取对应的值}>5. 重点是你所需要的东东在这⾥很详细的讲解了所有要⽤的函数只需要更改$redis ==> $this->redis需要注意的是:(1)你的本地需要安装 redis服务()(2)并开启redis 服务(3)不管是windows 还是linux 都需要装 php对应版本的 redis扩展更多关于CodeIgniter相关内容感兴趣的读者可查看本站专题:《》、《》、《》、《》、《》、《》、《》、《》及《》希望本⽂所述对⼤家基于CodeIgniter框架的PHP程序设计有所帮助。
CI框架(CodeIgniter)实现的数据库增删改查操作总结

CI框架(CodeIgniter)实现的数据库增删改查操作总结本⽂实例讲述了CI框架(CodeIgniter)实现的数据库增删改查操作。
分享给⼤家供⼤家参考,具体如下:controllers下的 cquery.php⽂件<?phpclass CQuery extends Controller {//构造函数function CQuery() {parent::Controller();// $this->load->database();}function index() {//调⽤model 其中train为外层⽂件夹 MQuery为model名称 queryList为重命名$this->load->model('train/MQuery','queryList');//获得返回的结果集这⾥确定调⽤model中的哪个⽅法$result = $this->queryList->queryList();//将结果集赋给res$this->smarty->assign('res',$result);//跳转到显⽰页⾯$this->smarty->view('train/vquery.tpl');}//进⼊新增页⾯function addPage() {$this->smarty->view('train/addPage.tpl');}//新增function add() {//获得前台数据//⽤户名$memberName = $this->input->post('memberName');//密码$password = $this->input->post('password');//真实姓名$userRealName = $this->input->post('userRealName');//性别$sex = $this->input->post('sex');//出⽣⽇期$bornDay = $this->input->post('bornDay');//e_mail$eMail = $this->input->post('eMail');//密码问题$question = $this->input->post('question');//密码答案$answer = $this->input->post('answer');//调⽤model$this->load->model('train/MQuery','addRecord');//向model中的addRecord传值$result = $this->addRecord->addRecord($memberName,$password,$userRealName,$sex,$bornDay,$eMail,$question,$answer);//判断返回的结果,如果返回true,则调⽤本页的index⽅法,不要写 $result == false 因为返回的值未必是false 也有可能是""if ($result) {$this->index();} else {echo "add failed.";}}//删除function deletePage() {//获得ID$deleteID = $this->uri->segment(4);//调⽤model$this->load->model('train/MQuery','delRecord');//将值传⼊到model的delRecord⽅法中$result = $this->delRecord->delRecord($deleteID);//判断返回值if ($result) {$this->index();} else {echo "delect failed.";}}//修改先查询function changePage() {$changeID = $this->uri->segment(4);$this->load->model('train/MQuery','changeRecord');$result = $this->changeRecord->changeRecord($changeID);//将结果集赋给res$this->smarty->assign('res',$result);//跳转到显⽰页⾯$this->smarty->view('train/changePage.tpl');}//修改function change() {//获得前台数据//ID$ID = $this->input->post('id');//⽤户名$memberName = $this->input->post('memberName');//密码$password = $this->input->post('password');//真实姓名$userRealName = $this->input->post('userRealName');//性别$sex = $this->input->post('sex');//出⽣⽇期$bornDay = $this->input->post('bornDay');//e_mail$eMail = $this->input->post('eMail');$answer = $this->input->post('answer');//调⽤model$this->load->model('train/MQuery','change');//向model中的change传值$result = $this->change->change($ID,$memberName,$password,$userRealName,$sex,$bornDay,$eMail,$question,$answer);//判断返回的结果,如果返回true,则调⽤本页的index⽅法,不要写 $result == false 因为返回的值未必是false 也有可能是""if ($result) {$this->index();} else {echo "change failed.";}}}models中的 mquery.php ⽂件<?phpclass MQuery extends Model {//构造函数function MQuery() {parent::Model();//连接数据库$this->load->database();}//查询列表function queryList() {//防⽌select出的数据存在乱码问题//mysql_query("SET NAMES GBK");//SQL语句$sql = "SELECT ID,member_name,sex,e_mail FROM user_info_t";//执⾏SQL$rs = $this->db->query($sql);//将查询结果放⼊到结果集中$result = $rs->result();//关闭数据库$this->db->close();//将结果集返回return $result;}//新增function addRecord($memberName,$password,$userRealName,$sex,$bornDay,$eMail,$question,$answer) {//防⽌select出的数据存在乱码问题//mysql_query("SET NAMES GBK");//SQL语句$sql = "INSERT INTO user_info_t (member_name,password,user_real_name,sex,born_day,e_mail,question,answer) " ."VALUES ('$memberName','$password','$userRealName','$sex','$bornDay','$eMail','$question','$answer')";//执⾏SQL$result = $this->db->query($sql);//关闭数据库$this->db->close();//返回值return $result;}//删除function delRecord($deleteID) {//防⽌select出的数据存在乱码问题//mysql_query("SET NAMES GBK");$sql = "DELETE FROM user_info_t WHERE ID = $deleteID";$result = $this->db->query($sql);$this->db->close();return $result;}//修改前查询function changeRecord($changeID) {//防⽌select出的数据存在乱码问题//mysql_query("SET NAMES GBK");$sql = "SELECT ID,member_name,password,user_real_name,sex,born_day,e_mail,question,answer FROM user_info_t WHERE ID = $changeID"; //执⾏SQL$rs = $this->db->query($sql);$result = $rs->row();//$result = $rs[0]//关闭数据库$this->db->close();//将结果集返回return $result;}//修改function change($ID,$memberName,$password,$userRealName,$sex,$bornDay,$eMail,$question,$answer) {//防⽌select出的数据存在乱码问题//mysql_query("SET NAMES GBK");//SQL语句$sql = "update user_info_t set member_name = '$memberName',password = '$password', user_real_name = '$userRealName'," ."sex = '$sex',born_day = '$bornDay',e_mail = '$eMail',question = '$question',answer = '$answer'" ."where ID = $ID";//执⾏SQL$result = $this->db->query($sql);//关闭数据库$this->db->close();//返回值return $result;}}views 下的 addPage.tpl⽂件<html><head></head><body><form action="{{site_url url='train/cquery/add'}}" method="post"><table border='1'><td><input type="text" class="text" name="memberName" id="memberName"/></td></tr><tr><td>密码</td><td><input type="text" class="text" name="password" id="password"/></td></tr><tr><td>真实姓名</td><td><input type="text" class="text" name="userRealName" id="userRealName"/></td></tr><tr><td>性别</td><td><input type="text" class="text" name="sex" id="sex"/></td></tr><tr><td>出⽣⽇期</td><td><input type="text" class="text" name="bornDay" id="bornDay"/></td></tr><tr><td>e_mail</td><td><input type="text" class="text" name="eMail" id="eMail"/></td></tr><tr><td>密码问题</td><td><input type="text" class="text" name="question" id="question"/></td></tr><tr><td>密码答案</td><td><input type="text" class="text" name="answer" id="answer"/></td></tr></table><table><tr><td><input type="submit" class="button" name="OK" value="提交" /></td></tr></table></form></body></html>changePage.tpl ⽂件<html><head></head><body><form action="{{site_url url='train/cquery/change'}}" method="post"><table border='1'><input type="hidden" name="id" value="{{$res->ID}}" /><tr><td>⽤户名</td><td><input type="text" class="text" name="memberName" id="memberName" value="{{$res->member_name}}" /></td> </tr><tr><td>密码</td><td><input type="text" class="text" name="password" id="password" value="{{$res->password}}" /></td></tr><tr><td>真实姓名</td><td><input type="text" class="text" name="userRealName" id="userRealName" value="{{$res->user_real_name}}"/></td> </tr><tr><td>性别</td><td><input type="text" class="text" name="sex" id="sex" value="{{$res->sex}}"/></td></tr><tr><td>出⽣⽇期</td><td><input type="text" class="text" name="bornDay" id="bornDay" value="{{$res->born_day}}"/></td></tr><tr><td>e_mail</td><td><input type="text" class="text" name="eMail" id="eMail" value="{{$res->e_mail}}"/></td></tr><tr><td>密码问题</td><td><input type="text" class="text" name="question" id="question" value="{{$res->question}}"/></td></tr><tr><td>密码答案</td><td><input type="text" class="text" name="answer" id="answer" value="{{$res->answer}}"/></td></tr></table><table><tr><td><input type="submit" class="button" name="OK" value="提交" /></td></tr></table></form></body></html>vquery.tpl ⽂件<html><head><title></title></head><body><table border='1'><tr><td>操作</td></tr>{{foreach from=$res item=row}}<tr><input type="hidden" value={{$row->ID}}><td>{{$row->member_name}}</td><td>{{$row->sex}}</td><td>{{$row->e_mail}}</td><td><a href="{{site_url url='train/cquery/deletePage'}}/{{$row->ID}}" rel="external nofollow" >删除</a><a href="{{site_url url='train/cquery/changePage'}}/{{$row->ID}}" rel="external nofollow" >修改</a></td> </tr>{{/foreach}}</table><a href="{{site_url url='train/cquery/addPage'}}" rel="external nofollow" rel="external nofollow" mce_href="{{site_url url='train/cquery/addPage'}}" rel="external nofollow" rel="external nofollow" >add</a></body></html>更多关于CodeIgniter相关内容感兴趣的读者可查看本站专题:《》、《》、《》、《》、《》、《》、《》、《》及《》希望本⽂所述对⼤家基于CodeIgniter框架的PHP程序设计有所帮助。
Codeigniter项目使用phpDocumentor生成api文档

Codeigniter项⽬使⽤phpDocumentor⽣成api⽂档前⾔运⾏环境:vagrant 2.2.4virtualbox 6.0box bento/ubuntu-16.04 (Apache 2.4.18 + Mysql 5.7.26 + PHP 5.6.40)phpDocumentor 2 是⼀个尽可能的通过你的PHP源码来⽣成⽂档的⼯具。
通过 Codeigniter项⽬applicaiton下控制器和模型 2个⽂件夹的源码来⽣成 api⽂档vagrant@vagrant:~$ phpdoc -VphpDocumentor version v2.9.0我是通过⽅式进⾏安装wget https:///phpDocumentor.phar # 下载phpDocumentor.phar⽂件# php phpDocumentor.phar -Vsudo mv phpDocumentor.phar /usr/local/bin/phpdoc #将⽂件移⼊到/usr/local/bin下,并重命名为phpdoc,在所有⽬录下,都可以运⾏ phpdoc命令了,即全局命令phpdoc -h # 输出帮助信息phpdoc -V # 输出版本信息phpdoc template:list # 列出使⽤的模板使⽤简单的使⽤ phpDocumentor 是使⽤命令⾏参数(-d ⼀个⽬录,-f ⼀个⽂件)来提供⼀个输⼊点和告诉它你喜欢放的⽂件夹(-t)来输出你的⽂档。
例如:$ phpdoc -d ./src -t ./docs/api上⾯的案列会扫描在src 和它⼦⽂件夹下的所有⽂件,执⾏分析和⽣成⼀个包含⽂档的⽹站在docs/api下。
如果你没有指定-t选项,⽂档的输出将会写⼊到⼀个⼦⽂件夹为output⽂件夹中。
命令:codeignniter$: phpdoc -d "application/controllers,application/models" -t ./docs/api在docs/api可以看到⽣成的⽂档通过⽂件进⾏配置phpdoc.dist.xml 配置⽂件内容<?xml version="1.0" encoding="UTF-8" ?><phpdoc><title>Codeigniter</title><parser><target>docs/api</target></parser><files><directory>application/controllers</directory><directory>application/models</directory></files><transformations><template name="responsive-twig" /><target>docs/api</target></transformations></phpdoc>命令:codeigniter$: phpdoc -c phpdoc.dist.xml我安裝apigen網站的教程,通過 composer的⽅式安裝 apigen 庫,然後⽣成基於Codeigniter 3.1.10項⽬的Api ⽂檔composer require apigen/apigen --devcomposer.json 中require-dev顯⽰的 "apigen/apigen": "^4.1"單個源⽂件夾src,輸出⽬錄docsvendor/bin/apigen generate -s application/controllers --destination docs2將應⽤的vendor/bin/apigen generate -s application/controllers,application/models,application/core,application/helpers --destination apigendocapigen generate helpvagrant@vagrant:/var/www/html/codeigniter310$ vendor/bin/apigen generate --helpUsage:generate [options]Options:-s, --source=SOURCE Dirs or files documentation is generated for. (multiple values allowed)-d, --destination=DESTINATION Target dir for documentation.--access-levels=ACCESS-LEVELS Access levels of included method and properties. [default: ["public","protected"]] (multiple values allowed)--annotation-groups=ANNOTATION-GROUPS Generate page with elements with specific annotation.--base-url=BASE-URL Base url used for sitemap (useful for public doc).--config=CONFIG Custom path to apigen.neon config file. [default: "/var/www/html/mainpowers3/apigen.neon"]--google-cse-id=GOOGLE-CSE-ID Custom google search engine id (for search box).--google-analytics=GOOGLE-ANALYTICS Google Analytics tracking code.--debug Turn on debug mode.--deprecated Generate documentation for elements marked as @deprecated--download Add link to ZIP archive of documentation.--extensions=EXTENSIONS Scanned file extensions. [default: ["php"]] (multiple values allowed)--exclude=EXCLUDE Directories and files matching this mask will not be parsed (e.g. */tests/*). (multiple values allowed)--groups=GROUPS The way elements are grouped in menu. [default: "auto"]--charset=CHARSET Charset of scanned files. (multiple values allowed)--main=MAIN Elements with this name prefix will be first in tree.--internal Include elements marked as @internal.--php Generate documentation for PHP internal classes.--skip-doc-path=SKIP-DOC-PATH Files matching this mask will be included in class tree, but will not create a link to their documentation. (multiple values allowed) --no-source-code Do not generate highlighted source code for elements.--template-theme=TEMPLATE-THEME ApiGen template theme name. [default: "default"]--template-config=TEMPLATE-CONFIG Your own template config, has higher priority templateTheme.--title=TITLE Title of generated documentation.--todo Generate documentation for elements marked as @todo.--tree Generate tree view of classes, interfaces, traits and exceptions.-h, --help Display this help message.-q, --quiet Do not output any message.-V, --version Display this application version. Help:Generate API documentationReferences。
- 1、下载文档前请自行甄别文档内容的完整性,平台不提供额外的编辑、内容补充、找答案等附加服务。
- 2、"仅部分预览"的文档,不可在线预览部分如存在完整性等问题,可反馈申请退款(可完整预览的文档不适用该条件!)。
- 3、如文档侵犯您的权益,请联系客服反馈,我们会尽快为您处理(人工客服工作时间:9:00-18:30)。
yum.sg 项目接手文档 第一部分 第 1 页 共 5 页 CodeIgniter 架构的使用说明教程 陈德贵 2008-3-7 邮件:degui.chen@ 目录 系统执行的流程图................................................................................................................................................................................................1 CodeIgniter 默认启动了重定向:...........................................................................................................................................................................1 CodeIgniter 中的 MVC 架构: ................................................................................................................................................................................1 添加新功能的实例:...............................................................................................................................................................................................2 主要应用的类使用说明: .......................................................................................................................................................................................2 架构中的类的职责说明:.....................................................................................................................................................................................3 架构的静态结构图:...............................................................................................................................................................................................4 系统执行的流程图1. Index.php 服务器前端控制器,初始化运行 CodeIgniter 必须的基本资源 2. 路由器检查 HTTP 请求,为了决定那部分需要执行。
3. 如果缓存文件存在,它直接发送到浏览器,返回正常系统完成。
4. 安全,应用程序控制器被载入之前,HTTP 请求和任何用户提交数据被安全过滤。
5. 控制器加载模型、核心库、辅助文件和其他指定请求资源。
CodeIgniter 默认启动了重定向: Apche 的配置大约和下面这个差不多. 只是些图片和 JavaScript 目录不重写向 <VirtualHost *:80> RewriteEngine on RewriteCond $1 !^(\/css|\/images|\/js|\/header) RewriteRule ^(.*)$ /index.php/$1 [L] ServerAdmin degui.chen@ DocumentRoot /opt/wwwdata/yum.sg/ ServerName yum.sg ErrorLog yum.sg-error_log CustomLog yum.sg-access_log common </VirtualHost> 重定向中的 URL 各部分说明 如: /class/function/ID 第一个片段代表需要调用的控制器 class。
第二个片段代表需要调用的类中的 function。
第三个片段或更多片段代表传递给控制器的参数,可以是 ID 或任意变量。
CodeIgniter 中的 MVC 架构: Controller 担当一个在 Model 与 View 之间的中间层, 文件所有位置的目录是: system\application\controllers Model 扮演你的数据结构。
文件所有位置的目录是: system\application\models View 视图是一个 PHP 的 WEB 页面。
文件所有位置的目录是:system\application\views 内部工作流: 1.URL 的控制器初始化 系统初始化后, 直接把控制权交给 Controller ,在 Controller 的初始化时,会把需要的实例化常用的内部类(参考类说明 部分),聚合到 Controller 对象中, 作为 Controler 的成员变量。
2. URL 的函数/方法 在 Controler 初始化后, 即执行 URL 中第二个片段指定的函数, 一般在这里载入 Model 获取所需要的数据。
当然在 Controller 初始化时, 也可以载入 Model. 在般在 Controller 中载入的是通用的 Model .而在 函数中则载入专用的 Modelyum.sg 项目接手文档 第一部分 第 2 页 共 5 页 3.视图显示处理 View 视图是由控制器载入,因为 View 视图是一个 PHP 文件。
它的载入函数是在 Controller 函数(即 URL 的函数/方法)内载 入。
载入时,系统会把 controller 的所有聚合的成员变量,聚合到 View 中。
即:为什么可以在 Controller 中使用的聚合对象,即:View 只是这个函数的内容。
这就是可以在 View 中使用的原因:它的实现过程代码大约如下: 在 Controller 的 函数内: $CI =& get Controller (); foreach (get_object_vars($CI) as $key => $var) { if ( ! isset($this->$key)) { $this->$key =& $CI->$key; } } 添加新功能的实例: 添加一个功能的过程: 在控制器目录(system\application\controllers)建立一个控制器文件 (文件名是 URL 的第一个片段的名称, 类名是文件名的首字母大写, 其实类的函数是 URL 的第二个片段的名称) welcome.php class Welcome extends Controller { function Welcome() { parent::Controller(); } function index() { // 这里进行其他处理,如载入类库,进行其他处理。
$this->load->model(' welcome'); $this->info = $this-> welcome-> getInfo() $this->load->view('welcome_message'); } } 在模型目录(system\application\models)建立一个模型文件 (文件名是控制器载入的参数名, 类名是文件名的首字母大写) welcome.php class Welcome extends Model { public function Welcome () { parent::Model(); } Public function getInfo() { return array(‘degui.chen’); } } 在视图目录(system\application\views)建立一个视图文件 (文件名也是控制器函数中载入视图时的参数名称) welcome_message.php print_r($this->->info); 一个控制器可以对应多个模型,和多个视图. 主要应用的类使用说明: 载入器 获取当前的控制器 $CI =& get_instance(); 用户载入和实例化类库, 它为用户的应用程序控制器而设计 $CI->load->library('email'); $CI->email->emailFunction(); 载入 Model $CI->load->model('UserModel'); $user_info = $CI->UserModel->GetUserInfo($userid); 载入视图文件: 文件的目录在 system/application/views/ 直接输出yum.sg 项目接手文档 第一部分 第 3 页 共 5 页 $CI->load->view('viewsTests', array('parameter' => 'value'), false); 直接返回结果 $CI->load->view('viewsTests', array('parameter' => 'value'), true); 载入助手文件(助手文件一般定义的都是些函数) $CI->load->helper('array'); arrayHlperFuncton(); 载入语言文件: $CI->load->language($file_prefix = 'email', $idiom = 'english'); echo $CI->lang->line('email_must_be_array'); 获取数据库对象 function getDatabaseObject() { $CI =& get_instance(); return $CI->db; } 插入数据到数据库 $table = 'test'; $data = array('username' => 'username', 'password' => 'password'); $sql = $database_object->insert_string($table, $data); $result = $database_object->simple_query($sql); 更新数据库的数据 $where = array('id' => $insert_id); $table = 'test'; $data = array('username' => 'username update' . time(), 'password' => 'password' . time()); $sql = $database_object->update_string($table, $data, $where); $result = $database_object->simple_query($sql); 读取数据库的结果 $sql = 'SELECT * FROM `test` LIMIT 0 , 30'; $query_result = $database_object->query($sql); 一行结果 $result = $query_result->result_object(); $result = $query_result->result_array(); 多行结果 $result = $query_result->result('object'); $result = $query_result->result('array'); 读取请求的 URL 参数: POST 和 FILES 的数据直接读取 $_POST 和 $_FILES GET 的参数: $this->load->library('URI'); //如 URL = http://www.yum.sg/welcome/index/name/value/name1/value1/ $welcome= trim($this->URI->slash_segment(1), '/'); $index = trim($this->URI->slash_segment(2), '/'); $name = trim($this->URI->slash_segment(3), '/'); $value = trim($this->URI->slash_segment(4), '/'); $name1 = trim($this->URI->slash_segment(5), '/'); $value1 = trim($this->URI->slash_segment(6), '/'); 架构中的类的职责说明: Auto_typography 自动印刷类;格式化字符串,格式化新行。
