ERDA2013安装教程
ERDAS基本操作

方法2、快捷键:
(注:在这里我们打开数据lanier.img.)
ERDAS基本操作
选中图像(lanier.img)
ERDAS基本操作
点击Raster Option,设置图像显示的参数:
在同一个窗口中打开多个文件时取消
ERDAS基本操作
按照如上页所示的参数设置所显示的图像:
ERDAS基本操作
Raster|Band Combinations
ERDAS基本操作
图像剖面工具:
Raster|Pro
纵轴代表象元反射值
ERDAS基本操作
光谱剖面曲线
ERDAS基本操作
空间剖面曲线
ERDAS基本操作
三维空间剖面
ERDAS基本操作
Zoom
In--放大 1、
Out--缩小
2、放大两倍: 缩小两倍:
viewers|Geographical 3、按照提示在另一个窗口的图像上单击鼠标左键 4、在一个窗口中漫游,放大、缩小、拖曳,可以看到
link的效果
ERDAS基本操作
用两个viewer分别打开Lanier.img , Insoils.img,并在 Lanier.img 窗口中点击view|link/unlink viewers|Geographical
启电脑后,解密。
2、打开原始安装文件夹下的crack文件夹, 将eraster.dll和erdas.exe两个文件,拷贝 到$home/imagine8.5/bin/NTx86下,把原 有文件替换;将license.dat拷贝到 $home/imagine8.5/etc/下,把原有文件
替换。
3、安装完成。
光标查询功能:查询指定像元的相关信息(纵
Erdas 2013下载及破解

Erdas Imagine2013破解亲测可用,win7和win8均兼容(有图)作者: lelegan(站内联系TA)发布: 2013-03-23Erdas Imagine2013破解亲测可用,含破解文件!!!win7和win8均兼容(两环境均测试过),附件文件最详尽!有图大家自己看,自己对比哈!!!!!尤其注意:由于资源时效性,且安装文件过大,ERDAS Foundation 2013和ERDAS IMAGINE 2013可以直接从网络上下载其他资源。
但是ERDAS2013Crack.rar一定要用本文附件提供的!!!安装步骤:(1)先安装ERDAS Foundation 2013,再安装ERDAS IMAGINE 2013。
复制bin_crack 目录所有文件到安装目录:\Intergraph\ERDAS IMAGINE 2013\bin\Win32Release覆盖原版文件;(2)复制licensing_crack目录所有文件到安装目录:\Program Files (x86)\Intergraph\Lice nsing\11.10.1\Program覆盖原版文件,以管理员身份(下划线处很重要,不然可能出错)运行flexlm.ecc.generic.patcher.exe,点击patch,并选择INGRTS_libFNP.dll文件并破解,修改license.dat中计算机名为你的计算机名;(3)运行lmtools.exe,点击config services,新建service name:Intergraph License S erver,首先在第一栏选择安装目录:\Program Files (x86)\Intergraph\Licensing\11.10.1\Pr ogram下的lmgrd文件;第二栏选择刚改名的许可证文件license.dat;第三栏可以将压缩包中的Erdas.log文件拷到任意目录下,然后选择其所放置路径即可。
Autodesk DirectConnect 2013 安装指南说明书
Portions relating to Threading Building Blocks Copyright (C) 2005-2008 Intel Corporation. All Rights Reserved.
PCRE LICENSE
PCRE is a library of functions to support regular expressions whose syntax and semantics are as close as possible to those of the Perl 5 language.
erdas安装指南
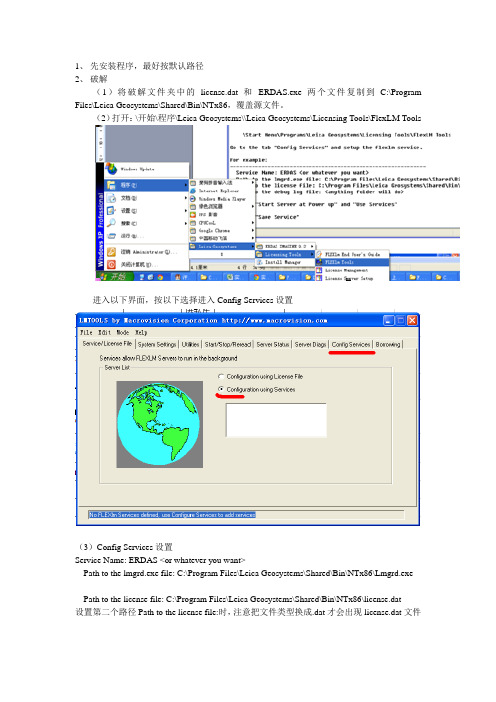
1、先安装程序,最好按默认路径2、破解(1)将破解文件夹中的license.dat 和ERDAS.exe两个文件复制到C:\Program Files\Leica Geosystems\Shared\Bin\NTx86,覆盖源文件。
(2)打开:\开始\程序\Leica Geosystems\\Leica Geosystems\Licensing Tools\FlexLM Tools进入以下界面,按以下选择进入Config Services设置(3)Config Services设置Service Name: ERDAS <or whatever you want>Path to the lmgrd.exe file: C:\Program Files\Leica Geosystems\Shared\Bin\NTx86\Lmgrd.exePath to the license file: C:\Program Files\Leica Geosystems\Shared\Bin\NTx86\license.dat设置第二个路径Path to the license file:时,注意把文件类型换成.dat才会出现license.dat文件Path to the debug log file: <anything folder will do>,这个点按钮后任意输一个名称两个可选项都打钩(4)停止/启动服务Go to the tab "Start/Stop/Reread",先点,再如看见,则破解成功请将examples.rar文件解压后内容全部拷贝到C:\Program Files\Leica Geosystems\Geospatial Imaging 9.2\examples。
如果是安装好了从一个电脑往其他多台电脑电脑对拷的话,下一步就不进行了,因为每台电脑的计算机名不一样。
ERDAS2013安装

1. 第一次运行时,会出现没有授权的提示,点击确定后,输入计算机名 就可以了。
整体流程为
一.安装ERDAS Foundation 2013
二.安装RDAS IMAGINE 2013 三.破解
一. 首先安装ERDAS Foundation 2013 (下张PPT有图示)
1. 打开“foundation-v13.0-win”文件夹
2. 如果没有安装.net framework 4.0,安装文件夹下的 “dotNetFx40_Full_x86_x64”
6. 接上页
7. 目标文件夹下运行“lmtools.exe”,点击config services,新建service name:Intergraph License Server。选择C:\Program Files\Intergraph\Licensing\11.10.1\Program下的lmgrd,修改好的license.dat, 自行制定log文件名。勾选use service和start server at power up,点击save service(见下图左)。点击start/stop/reread,点击start service即可使用软 件(见下图右)。
3. 双击Setup.exe
4. 展开列表,选中ERDAS Foundation 2013 5. 点击“安装”……等待 6. 接受许可,选择安装路径等 7. 安装 8. 完毕
二. 安装ERDAS IMAGINE 2013 (includes LPS) (下张PPT有图示)
1. 关闭防火墙和杀毒软件,最好断网
3. 在目标文件夹下找到并运行“flexlm.ecc.generic.patcher.exe”,点击 “Patch”,选择INGRTS_libFNP.dll并破解。 4. 在目标文件夹下,修改license.dat中计算机名为你的计算机名,如有需 要可在第一行最后添加一个空格,一个端口号,避免与arcgis冲突 5. 接下页
正确的erdas安装

将第二行 daemon erdas path_to_\erdas.exe 改为daemon erdas 绝对路径\erdas.exe,例如daemon erdas "D:\Program Files\ERDAS License Tools\erdas.exe"
7、运行flexlm tools ——开始->程序->erdas license tools->flexlm tools 打开liecense管理器。
需要说明的是在ERDAS License Tools和IMAGINE 8.6\Bin\NTx86\目
录下都有erdas.exe,在license中需要注明是ERDAS License Tools的erdas的绝对路径,并且上面的引号是不能少的!!并将之copy到ERDAS License Tools\目录下
将第二行 DAEMON ERDAS path_to_\ERDAS.exe 改为DAEMON ERDAS 绝对路径\ERDAS.exe,例如DAEMON ERDAS "D:\Program Files\ERDAS License Tools\ERDAS.exe",在运行过程中发现,不能改成 DAEMON ERDAS d:\Program Files\IMAGINE 8.6\Bin\NTx86\ERDAS.exe
Adams2013安装教程(含有注意事项-绝对成功)

之前好多吧友给我留言了,我也没有办法解决。
再次,对方法重新总结,大家参照这个方法。
Adams这个软件确实娇贵,经常出现license的问题。
不过又经过我的学习研究,还有参考大神的方法,总结出最终的安装方法,和之前的安装方法大有不同。
解决了“重启证书问题”、“27500证书问题”等。
希望大家多多支持我。
我的教程分4部分:1安装前的准备工作;2,Adams2013安装教程;3注意事项4,汉化过程。
注意:一定要严格按照我的步骤。
一、准备工作:1、下载Adams2013安装包(是iso镜像文件格式的):自己百度吧(不要再私聊索要资源了),verycd里就可以下载,下载好后解压就可以得到iso文件2、下载一个虚拟光驱软件,楼主用的是 DAEMON Tools ,请自行度娘。
二、Adams2013安装教程:(一)安装证书1、用虚拟光驱DAEMON Tools加载iso文件(用DAEMON Tools软件打开iso镜像文件,双击此镜像目录即可)2、打开iso目录,复制MAGNiTUDE文件夹到桌面。
3、管理员运行MSC_Calc_xxxx.exe文件,注意输入n(再次注意!!!!输入n),再输入主机名称,主机ip地址。
(查询主机名称和主机ip地址方法:在电脑-‘运行’-输入cmd-输入 ipconfig/all)4、即可得到license.dat文件,这个是你的证书文件。
5、管理员运行msc_licensing_11.9_windows3264.exe文件,只需要NEXT就ok。
注意:不要操作别的,只需要一直next即可,最后会提示安装成功:如图6、复制第4步生成的license.dat文件到第5步的安装目录下(默认的地址是c:\MSC.Software\MSC.Licensing\11.9),替换原来的证书文件。
7、单击\MSC.Software\MSC.Licensing\11.9下的lmtools.exe文件,进行一下操作:(1)“config services”,分别单击下面的三个browse,选择相应的文件。
Intel Parallel Studio XE 2013 for Windows 安装指南和发行
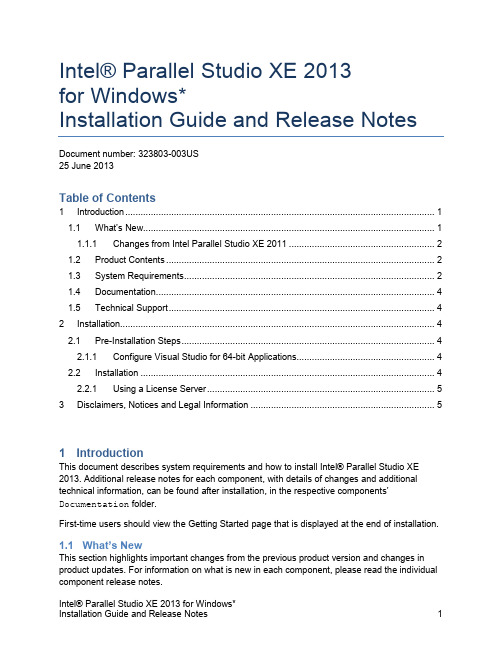
Intel® Parallel Studio XE 2013for Windows*Installation Guide and Release Notes Document number: 323803-003US25 June 2013Table of Contents1 Introduction (1)1.1 What’s New (1)1.1.1 Changes from Intel Parallel Studio XE 2011 (2)1.2 Product Contents (2)1.3 System Requirements (2)1.4 Documentation (4)1.5 Technical Support (4)2 Installation (4)2.1 Pre-Installation Steps (4)2.1.1 Configure Visual Studio for 64-bit Applications (4)2.2 Installation (4)2.2.1 Using a License Server (5)3 Disclaimers, Notices and Legal Information (5)1 IntroductionThis document describes system requirements and how to install Intel® Parallel Studio XE 2013. Additional release notes for each component, with details of changes and additional technical information, can be found after installation, in the respective components’ Documentation folder.First-time users should view the Getting Started page that is displayed at the end of installation.1.1 What’s NewThis section highlights important changes from the previous product version and changes in product updates. For information on what is new in each component, please read the individual component release notes.Update 4 – June 2013∙Component products updated to current versionsUpdate 3 – March 2013∙Component products updated to current versionsUpdate 2 – February 2013∙Component products updated to current versionsUpdate 1 – October 2012∙Component products updated to current versions1.1.1 Changes from Intel Parallel Studio XE 2011∙Intel® Advisor XE is a new component included in this product.∙Other components updated to current versions∙Support added for Microsoft Windows 8* and Microsoft Windows Server 2012*∙Microsoft Visual Studio 2012* is now supported∙Microsoft Visual Studio 2005* is no longer supported∙Microsoft Windows Vista* and Microsoft Windows Server 2003* are no longer supported ∙Microsoft Windows XP* is deprecated – support will be removed in a future release1.2 Product ContentsIntel® Parallel Studio XE 2013 includes the following components:∙Intel® C++ Composer XE 2013 Update 5 - includes Intel® Integrated Performance Primitives (Intel® IPP), Intel® Threading Building Blocks (Intel® TBB) and Intel® MathKernel Library (Intel® MKL)∙Intel® Visual Fortran Composer XE 2013 Update 5 - includes Intel® Math Kernel Library (Intel® MKL)∙Intel® Advisor XE 2013 Update 3∙Intel® Inspector XE 2013 Update 6∙Intel® VTune™ Amplifier XE 2013 Update 9∙Sample programs∙On-disk documentation1.3 System RequirementsFor an explanation of architecture names, see http://intel.ly/mXIljK∙ A PC based on an IA-32 or Intel® 64 architecture processor supporting the Intel® Streaming SIMD Extensions 2 (Intel® SSE2) instructions (Intel® Pentium® 4 processor or later, or compatible non-Intel processor)o Incompatible or proprietary instructions in non-Intel processors may cause the analysis capabilities of this product to function incorrectly. Any attempt to analyzecode not supported by Intel® processors may lead to failures in this product.o For the best experience, a multi-core or multi-processor system is recommended ∙2GB RAM∙8GB free disk space for all product features and architectures∙Microsoft Windows XP*, Microsoft Windows 7*, Microsoft Windows 8*, Microsoft Windows Server 2012* or Microsoft Windows Server 2008*; 32-bit or “x64” editions -embedded editions not supportedo Support of Microsoft Windows XP is deprecated – a future major release of Intel® Parallel Studio XE will not support Windows XP∙One or more of:o Microsoft Visual Studio 2012* Professional Edition (or higher edition) with C++ component installedo Microsoft Visual Studio 2010* Professional Edition (or higher edition) with C++ and “x64 Compiler and Tools” components installed [1]o Microsoft Visual Studio 2008* Standard Edition (or higher edition) SP1 with C++ and “x64 Compiler and Tools” components installed [1]o For Intel® Visual Fortran, Intel® Advisor XE, Intel® Inspector XE and Intel® VTune™ Amplifier XE use only, Microsoft Visual Studio 2010* Shell and Librariesfrom the Intel® Visual Fortran Composer XE installationo For Intel® Visual Fortran, Intel® Advisor XE, Intel® Inspector XE and Intel® VTune™ Amplifier XE use only, Microsoft Visual Studio 2008* Shell and Librariesfrom an earlier version of Intel® Visual Fortran Composer XE or Intel® VisualFortran Compiler Professional EditionNotes:1. Microsoft Visual Studio 2008 Standard Edition installs the “x64 Compiler and Tools”component by default –the Professional and higher editions require a “Custom” install to select this. Microsoft Visual Studio 2010 and Visual Studio 2012 include this component by default.2. The default for the Intel® compilers is to build IA-32 architecture applications that requirea processor supporting the Intel® SSE2 instructions - for example, the Intel® Pentium®4 processor. A compiler option is available to generate code that will run on any IA-32architecture processor. However, if your application uses Intel® Math Kernel Library,Intel® Integrated Performance Primitives or Intel® Threading Building Blocks, executing the application will require a processor supporting the Intel® SSE2 instructions.3. Applications built with Intel® Compilers can be run on the same Windows versions asspecified above for development. Applications may also run on non-embedded 32-bitversions of Microsoft Windows earlier than Windows XP, though Intel does not test these for compatibility. Your application may depend on a Win32 API routine not present inolder versions of Windows. You are responsible for testing application compatibility. You may need to copy certain run-time DLLs onto the target system to run your application.1.4 DocumentationProduct documentation can be accessed through the Help menu in Microsoft Visual Studio. It can also be found, along with “Getting Started” information, in the Windows “Start” menu und er Intel Parallel Studio XE 2013. Please note that if you view the documentation in Microsoft Internet Explorer*, the browser may display a security warning when you click on links to open a documentation set. If you see this warning, you should click the option to proceed.1.5 Technical SupportIf you did not register your compiler during installation, please do so at the Intel® Software Development Products Registration Center. Registration entitles you to free technical support, product updates and upgrades for the duration of the support term.For information about how to find Technical Support, Product Updates, User Forums, FAQs, tips and tricks, and other support information, please visit/software/products/supportNote: If your distributor provides technical support for this product, please contact them for support rather than Intel.2 Installation2.1 Pre-Installation Steps2.1.1 Configure Visual Studio for 64-bit ApplicationsIf you will be developing 64-bit applications you may need to change the configuration of Visual Studio to add 64-bit support.If you are using Visual Studio 2008 Standard Edition, Visual Studio 2012 or Visual Studio 2010, no configuration is needed to build 64-bit applications. For other editions:1. From Control Panel > Add or Remove Programs, sele ct “Microsoft Visual Studio 2008 >Change/Remove. The Visual Studio Maintenance Mode window will appear. Click Next.2. Click Add or Remove Features3. Under “Select features to install”, expand Language Tools > Visual C++4. If the box “X64 Compiler and Tools” is not checked, check it, then click Update. If thebox is already checked, click Cancel.2.2 InstallationThe installation of the product requires a valid license file or serial number. If you are evaluating the product, you can also choose the “Evaluate this product (no serial number required)” option during installation.If you received your product on DVD, insert the first product DVD in your computer’s DVD drive; the installation should start automatically. If it does not, open the top-level folder of the DVD drive in Windows Explorer and double-click on setup.exe.If you received your product as a downloadable file, double-click on the executable file (.EXE) to begin installation. Note that there are several different downloadable files available, each providing different combinations of components. Please read the download web page carefully to determine which file is appropriate for you.You do not need to uninstall previous versions or updates before installing a newer version –the new version will coexist with the older versions. If you want to remove older versions, you may do so before or after installing the newer one.2.2.1 Using a License ServerIf you have purchased a “floating” license, see http://intel.ly/oPEdEe for information on how to install using a license file or license server. This article also provides a source for the Intel® License Manager for FLEXlm* product that can be installed on any of a wide variety of systems.3 Disclaimers, Notices and Legal InformationINFORMATION IN THIS DOCUMENT IS PROVIDED IN CONNECTION WITH INTEL(R) PRODUCTS. NO LICENSE, EXPRESS OR IMPLIED, BY ESTOPPEL OR OTHERWISE, TO ANY INTELLECTUAL PROPERTY RIGHTS IS GRANTED BY THIS DOCUMENT. EXCEPT AS PROVIDED IN INTEL'S TERMS AND CONDITIONS OF SALE FOR SUCH PRODUCTS, INTEL ASSUMES NO LIABILITY WHATSOEVER, AND INTEL DISCLAIMS ANY EXPRESS OR IMPLIED WARRANTY, RELATING TO SALE AND/OR USE OF INTEL PRODUCTS INCLUDING LIABILITY OR WARRANTIES RELATING TO FITNESS FOR A PARTICULAR PURPOSE, MERCHANTABILITY, OR INFRINGEMENT OF ANY PATENT, COPYRIGHT OR OTHER INTELLECTUAL PROPERTY RIGHT.Intel may make changes to specifications and product descriptions at any time, without notice. Designers must not rely on the absence or characteristics of any features or instructions marked "reserved" or "undefined." Intel reserves these for future definition and shall have no responsibility whatsoever for conflicts or incompatibilities arising from future changes to them.The information here is subject to change without notice. Do not finalize a design with this information.The products described in this document may contain design defects or errors known as errata which may cause the product to deviate from published specifications. Current characterized errata are available on request.Contact your local Intel sales office or your distributor to obtain the latest specifications and before placing your product order.Copies of documents which have an order number and are referenced in this document, or other Intel literature, may be obtained by calling 1-800-548-4725, or go to:/design/literature.htmCeleron, Centrino, Cilk, Intel, Intel logo, Intel386, Intel486, Intel Atom, Intel Core, Itanium, MMX, Pentium, VTune, and Xeon are trademarks of Intel Corporation in the U.S. and other countries. * Other names and brands may be claimed as the property of others.Copyright © 2013 Intel Corporation. All Rights Reserved.。
ADAMS2013安装及汉化图文教程

ADAMS2013安装及汉化图文教程一、 ADAMS 2013许可证安装安装虚拟机后,直接打开ADAMS安装文件,进行加载到虚拟光驱 1.生成许可证(1)将MAGNiTUDE文件夹复制到桌面或电脑磁盘的任意位置(2)生成许可文件license退出后将在MAGNiTUDE文件夹中生成 license文件2.安装许可证管理器(2)直接单击“Next”(3)直接单击“Next”(4)选择安装路径。
点击“Browser…”弹出右图所示对话框进行修改安装路径,直接将C改为D即可(5)点击“Browser…”,弹出对话框,找到之前生成的license文件(在MAGNiTUDE文件夹)(6)直接单击“Next”,进行安装,中途弹出提示框提示框,直接点“确定”二、 安装ADAMS 2013软件1.用虚拟光驱加载镜像文件,单击setup.exe开始安装,2.弹出对话框直接点next。
3.出来这个界面User name 和 company name 都不用改,反正在这个界面啥也不需要改。
直接next。
4.在这个界面中,选择安装路径。
单击“Browse…”(如左图) d盘、e盘、f盘都可以。
可直接将C改为D即可,如右图。
更改完安装路径之后,果断直接next。
注意:不要选择带有空格的文件目录,否则安装完成后无法打开软件5.弹出对话框,直接点“ Next”进行安装。
6.在此处输入27500@hostname,这个hostname必须替换成你自己的计算机名称(可以在自己的计算机右键属性中查看)附:计算机名查看方法,我的电脑点击鼠标右键,选择“属性”,弹出对话框7.直接点“Next”8.选择桌面快捷方式创建项目,可直接点“Next”9.弹出对话框,直接单击“Next”,自动进行必要运行环境组件安装10.再点next点击确定 ,再点 finish。
三、 汉化对着“我的电脑”单击鼠标右键,选择“属性”,弹出如图对话框在弹出的对话框中选择“环境变量”,弹出右侧对话框,点击“新建”输入变量(变量名:ADAMS_GUI_LOCALE 变量值:Chinese)。
20130910ERDAS-9.2软件安装概述
•
• 2013-10-11
遥感应用研究
•第一部分 ERDAS IMAGINE 9.2软件简介 •第二部分 ERDAS IMAGINE 9.2软件安装 •第三部分 ERDAS IMAGINE 9.2功能介绍
第一部分ERDAS IMAGINE 9.2软件介绍
ERDAS IMAGINE 是美国 ERDAS 公司开发的遥感图像处理系统。它以其 先进的图像处理技术,友好、灵活的用户界面和操作方式,面向广阔应用领 域的产品模块,服务于不同层次用户的模型开发工具以及高度的 RS/GIS/GPS (遥感图像处理、地理信息系统、全球定位系统)集成功能,为遥感及相关 应用领域的用户提供了内容丰富而功能强大的图像处理工具,代表了遥感图 像处理系统未来的发展趋势。
一、主程序安装
• 在安装过程中一般都选择默认安装,单击Next下一步。 • 选择接受I accept the terms in the license agreement。--单击next下
一步。
一、主程序安装
• 选择默认安装路径,单击Next下一步。
一、主程序安装
• 选择默认安装,单击Next下一步。
软件视窗简介—ห้องสมุดไป่ตู้菜单介绍
软件视窗简介—主菜单介绍
软件视窗简介—主菜单介绍
软件视窗简介—主菜单介绍
软件视窗简介—主菜单介绍
软件视窗简介—主模块介绍
软件视窗简介—主模块介绍
软件视窗简介—实用工具介绍
软件视窗简介—实用工具介绍
软件视窗简介—实用工具介绍
软件视窗简介—实用工具介绍
软件视窗简介—实用工具介绍
三、许可配置方法
2、选择配置文件
按照下面路径进行配置文件:
(整理)erda安装教程(1).

ERDAS2013安装教程先安装ERDAS Foundation 2013 再安装ERDAS IMAGINE 2013 (includes LPS) 记得安装的时候关闭防火墙杀毒软件最好断网安装1、安装foundation和erdas imagine原版:安装完毕关闭软件,推荐默认路径,破解方便些!!如果提示没安装.net 4.0,点击文件夹下的dotNetFx40_Full_x86_x64.exe安装2、复制bin_crack目录所有文件到C:\Intergraph\ERDAS IMAGINE 2013\bin\Win32Release 覆盖原版文件(如有必要请备份原始文件)。
3复制licensing_crack目录所有文件到C:\Program Files (x86)\Intergraph\Licensing\11.10.1\Program覆盖原版文件(如有必要请备份原始文件),这个路径针对32系统应该是(自行注意)C:\Program Files\Intergraph\Licensing\11.10.1\Program右键管理员身份运行flexlm.ecc.generic.patcher.exe,选择INGRTS_libFNP.dll并破解,修改license.dat(右键,记事本打开)中计算机名为你的计算机名,如有需要可在第一行最后添加一个空格,一个端口号,避免与arcgis冲突。
4、运行lmtools.exe,点击config services,首先把原来的删除,点Remove Service新建service name:Intergraph License Server,选择C:\Program Files (x86)\Intergraph\Licensing\11.10.1\Program下的lmgrd.exe,修改好的license.dat,自行制定log文件名。
勾选use service和start server at power up,点击save service,点击start/stop/reread,点击start service即可使用软件。
Linux下MatlabR2013a命令行(silent mode)安装

Linux下MatlabR2013a命令行(silent mode)安装实验室服务器是RedHat Linux Enterprise5.0系统,远程登录没有图形界面,只能通过命令行安装。
(1)拷贝文件:将matlabforlinux.iso文件拷贝到服务器上去。
(2)远程登录:ssh hostname@IPaddr(3)准备工作:sudo mkdir /media/cdrom0sudo mkdir /usr/local/matlab(4)挂载iso文件:mount ~/matlab.iso /media/cdrom0/ -t iso9660 -o loop //~为matlab.iso 所在路径(5)配置自动安装文件:cd /media/cdrom0 //切换到挂载目录下可以看到下图所示文件安装过程中主要用到的文件有install、installer_input.txt、activate.txt和license.lic(在serial 文件夹下,installationKey在此文件夹下的readme.txt中)sudo cp serial/license.lic /usr/local/etc //拷贝licensesudo cp activate.ini /usr/local/etc //拷贝激活文件模版供后续编辑sudo cp installer_input.txt /usr/local/etc //拷贝自动安装文件模版供后续编辑sudo vim /usr/local/etc/installer_input.txt //编辑installer_input文件,键入星号内内容并保存**************************************destinationFolder= /usr/local/matlab //安装目录fileInstallationKey=xxxxx-xxxxx-xxxxx-xxxxx-xxxxx //你的序列号agreeToLicense=yes //同意协议outputFile=/tmp/mathwork_install.log //安装日志mode=silent //开启无人值守安装licensePath=/usr/local/etc/license.lic //你的license文件activationPropertiesFile=/usr/local/etc/activate.ini //激活文件*******************************************sudo vim /usr/local/etc/activate.ini //编辑activate文件,键入星号内内容并保存***********************************************isSilent=true //开启silent模式activateCommand=activateOffline //设置激活方式,离线激活licenseFile=/usr/local/etc/license.lic //license文件位置*****************************************************以上为全部准备工作,执行安装命令(6)sudo ./install -inputFile /usr/local/etc/installer_input.txt 等待安装完毕即可(7)启动matlabcd /usr/local/matlab/bin./matlab如下图,可以看到matlab的“>>”了(8)可以添加matlab路径到环境变量,方便启动matlabcd ~ //调到主目录vim .bashrc //添加环境变量在.bashrc最后加上两行:PATH=/usr/local/matlab2012/bin:$PATHexport PATH保存退出source .bashrc //使其立即生效以后要启动matlab直接键入命令matlab即可。
ERDAS安装说明

ERDAS安装说明⽅法⼀:如果你在安装erdas之前没有安装Arcgis的话,按照电骡⾥的英⽂提⽰进⾏安装。
⽅法⼆、我因为先安装了Arcgis,因此,⽤下⾯的⽅法进⾏安装:1、安装完程序后.2、拷贝license.dat 和 ERDAS.exe到安装⽬录下:你的安装盘\Program Files\Leica Geosystems\Shared\Bin\NTx86、并且把license.dat中的this_host改成你的计算机名(此计算机名还必须进⾏"⽹络ID"标识,⽅法是我的电脑>属性>⽹络ID.3、因为已经安装了ARCGIS,再安装ERDAS时,找不到ERDAS LICENSE MANAGER,需对注册表进⾏如下修改:运⾏注册表regedit在注册表中打开HKEY_LOCAL_MACHINE,找到SOFTWARE,选择:HKEY_LOCAL_MACHINE\SOFTWARE\FLEXlm License Manager,在FLEXlm License Manager下再新建⼀个注册信息⽂件ERDAS License Manager。
3、对ERDAS License Manager进⾏配置。
点击“开始”->“所有程序”->“Leica Geosystems”->“Licensing Tools”->“FlexLM Tools”运⾏许可管理器。
在Service/License File页⾯中,选择Configuration using Services。
如果机器上曾经装过 ArcGIS、ERDAS 或 AutoCAD 等相同许可⽅式的软件,则在下⾯的列表中可能会有ERDAS License Server 和 ESRI License Manager 等选项(如有 ERDAS License Server 则选中它,没有则不要选中任何⼀个)。
ADAMS2013安装教程(图文)
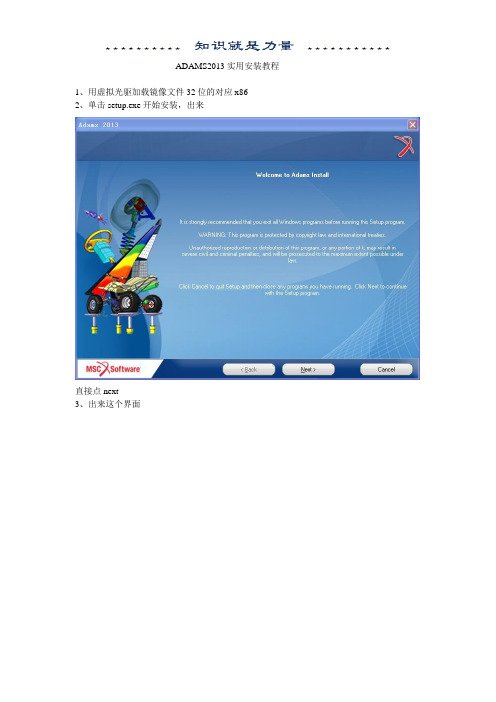
ADAMS2013实用安装教程1、用虚拟光驱加载镜像文件32位的对应x862、单击setup.exe开始安装,出来直接点next3、出来这个界面User name 和 company name 都不用改,反正在这个界面啥也不需要改。
直接next4、在这个界面中,选择安装路径可以不要选择安装在系统盘,d盘、e盘、f盘都可以。
更改完安装路径之后,果断直接next。
不用理会,依然next。
接下来进入安装阶段,慢慢的等吧。
终于等了大约15分钟,5、接下来出现这个界面我们得先制作一个许可证文件licence.txt在镜像文件夹下面找到文件夹MAGNiTUDE把这个文件夹复制到你所安装adams的根目录下面!(比如你安装在了d盘,那么就把这个文件夹复制到d盘)双击文件夹MAGNiTUDE,里面再双击MSC_Calc_20130115.exe(注意:管理员打开)弹出DOS界面输入Y,回车这样许可证就做好了。
然后在安装步骤5中的第一个图片中我们看到有License一栏,但是这里不是安装许可证的!而是要我们输入27500@hostname,这个hostname必须替换成你自己的计算机名称(我们可以在自己的计算机右键属性中查看)输入之后,就直接点next,出来这个界面单击是(Y).出来这个继续点next,出来这个界面由于前几个软件功能都用不到,我们只选最后一个即可。
然后点next出来下面这个继续next继续等。
直接点Finish。
6、接下来进行服务器安装在复制到d盘目录的文件夹下面找到双击(管理员方式打开)点next 再点next 再点next 选择安装路径确定之后出来浏览(Browse)找到制做好license文件Next 再点next点击确定,再点finish。
最后打开Love is not a maybe thing. You know when you love someone.。
AutoCAD Electrical 2013安装说明
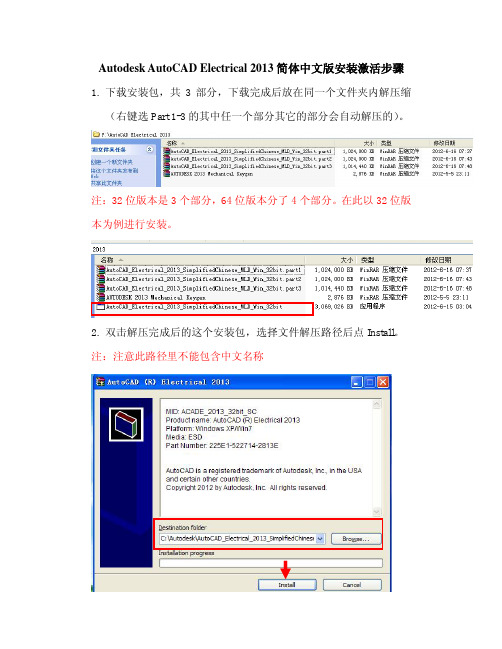
Autodesk AutoCAD Electrical 2013简体中文版安装激活步骤1.下载安装包,共3部分,下载完成后放在同一个文件夹内解压缩(右键选Part 1-3的其中任一个部分其它的部分会自动解压的)。
注:32位版本是3个部分,64位版本分了4个部分。
在此以32位版本为例进行安装。
2.双击解压完成后的这个安装包,选择文件解压路径后点Install。
注:注意此路径里不能包含中文名称3.单击安装在此计算机上,进行主程序安装。
注:以下提示是安装.NET Framework 4.0,如果你的电脑已安装就不会出现这个提示。
跳过此步骤安装即可。
注:.NET Framework 4.0安装完成后需要重新点Setup进行安装。
4.选择我接受,接着是下一步。
5.输入安装序列号:666-69696969,或667-98989898, 或400-45454545,输入对应密匙:225E1,点下一步。
6.更改自已想要安装的路径,点击安装,直到完成后点击确认退出。
注:当然跟前面保持一致,安装路径一定不能出现中文路径。
7.启动软件,选择“试用”运行软件。
在此点关闭改善提示。
在此选关于AutoCAD Electrical.注意:软件激活时需要断网情况下进行,如果出现序列号无效界面一般都是因为没有断开网络造成的,点关闭后,会重新出现激活界面。
8.打开注册机,杀毒软件一般都是会阻止注册机运行,请关闭后再进行,不然会出现提示错误无法注册成功的。
注:vista/win7用户需要选择注册机右键以管理员身份运行。
9.将申请号复制(用Ctrl+c键)到注册机的第一行,并点击注册机左下方的patch按钮,提示“Successfully Patched!”点确认。
接着再点击Generate按钮,会在注册机第二行出现激活码,将第二行的注册码复制(用Ctrl+c键),再粘贴(用Ctrl+V键)到我具有注码的界面,确认后点下一步进行激活。
ADAMS 2013 安装教程

ADAMS2013实用安装教程1、用虚拟光驱加载镜像文件,点setup.exe开始安装 (1)2、输入License (3)3、把从镜像文件中解压或复制出MAGNiTUDE文件夹 (6)4、制作许可证文件license.dat (6)5、安装服务器MSC.Licensing (7)6、打开Adams出现msc_license_file=27500@(计算机全名)错误提示 (8)1、用虚拟光驱加载镜像文件,点setup.exe开始安装2、输入License名(在计算机右键属性中查看)由于前几个软件功能都用不到,只选最后三个即可。
3、把从镜像文件中解压或复制出MAGNiTUDE文件夹4、制作许可证文件license.dat打开文件夹MAGNiTUDE,运行MSC_Calc_20130115.exe弹出DOS界面,输入Y,回车5、安装服务器MSC.Licensing打开文件夹MAGNiTUDE,运行msc_licensing_11.9_windows3264.exe浏览(Browse)找到制做好license文件6、打开Adams出现msc_license_file=27500@(计算机全名)错误提示进入MSC.Licensing的安装目录,打开lmtools.exe。
打开Config Services选项卡配置好Path to the lmgrd.exe file和Path to the license file (选.dat)等,同时勾选Use Services 和Start Server at Power Up。
点击Save Service保存。
打开第一个Service/License File选项卡,勾选LMTOOLS ignore license file pathevvironment variables。
ADAMS2013安装教程

ADAMS2013实用安装教程1、用虚拟光驱加载镜像文件32位的对应x862、单击setup.exe开始安装,出来直接点next3、出来这个界面User name 和 company name 都不用改,反正在这个界面啥也不需要改。
直接next4、在这个界面中,选择安装路径可以不要选择安装在系统盘,d盘、e盘、f盘都可以。
更改完安装路径之后,果断直接next。
不用理会,依然next。
接下来进入安装阶段,慢慢的等吧。
终于等了大约15分钟,5、接下来出现这个界面在镜像文件夹下面找到文件夹MAGNiTUDE把这个文件夹复制到你所安装adams的根目录下面!(比如你安装在了d盘,那么就把这个文件夹复制到d盘)双击文件夹MAGNiTUDE,里面再双击MSC_Calc_20130115.exe弹出DOS界面输入Y,回车这样许可证就做好了。
然后在安装步骤5中的第一个图片中我们看到有License一栏,但是这里不是安装许可证的!而是要我们输入27500@hostname,这个hostname必须替换成你自己的计算机名称(我们可以在自己的计算机右键属性中查看)输入之后,就直接点next,出来这个界面单击是(Y).出来这个继续点next,出来这个界面由于前几个软件功能都用不到,我们只选最后一个即可。
然后点next出来下面这个继续next继续等。
直接点Finish。
6、接下来进行服务器安装在复制到d盘目录的文件夹下面找到双击点next 再点next 再点next 选择安装路径确定之后出来浏览(Browse)找到制做好license文件Next 再点next点击确定,再点finish。
ERDAS 2013安装破解

ERDAS Desktop 2013 安装、破解教程1.打开ERDAS 2013安装文件夹,其中包含如下文件2.首先安装“foundation” 打开解压好的文件夹点击Setup,出现如下对话框点击“安装”3.继续安装ERDAS主体文件“imagine” 打开解压好的文件夹点击Setup出现如上图一样的对话框点击“安装”4.安装过程中会出现选择安装扩展工具对话框,按需求选择安装即可如下图所示:5.破解软件1)打开“Crack”文件里面包含bin_crack和licensing_crack2)复制bin crack 目录所有文件到C:\Intergraph\ERDAS IMAGINE 2013\bin\ Win32Release覆盖原始文件3)复制licensing crack目录所有文件到C:\Program Files(x86)\Intergraph\ Licensing\11.10.1\Program覆盖原始文件4)运行flexlm.ecc.generic.patcher.exe,选择INGRTS_libFNP.dll5)修改licensing crack文件中license.dat的计算机名为你的计算机名6)运行Imtools.exe文件a)打开Config Services选项卡,新建一个service name(ERDAS 2013 名称可自己定义)b)在”2”选项框中添加lmgrd.exe和license.dat文件,上面的Browse选择C:\Program Files (x86)\Intergraph\Licensing\11.10.1\Program下的lmgrd,下面的Browse选择C:\Program Files (x86)\Intergraph\Licensing\11.10.1\Program下修改好计算机名称的licesen.dat文件c)在“3”选项框中勾选use service和start server at power upd)点击”4”选项框中的save servicee)完成上述操作后点击“1”选项卡,点击“2”中的“Start Server”f)打开“1”选项卡,记录下“2”中的IP地址7)在开始菜单中找到ERDAS IMAGINE 2013中的Intergraph License Administrator打开在打开的对话框中点击Client---Add Concurrent License Source在computer name中输入刚才记录下的IP地址,在Port中输入“1700”点击“OK”注:当erdas不能正常使用是可能由于你电脑IP变化,打开lmtools文件查询新的IP6.破解完成,祝各位好运!安装包连接如下所示破,如有问题可以联系viccyang@ERDAS Foundation 2013/software/2013/ERDASFoundation_2013/foundation-v13.0-win.zipERDAS IMAGINE 2013 (includes LPS)/software/2013/IMAGINE_2013/imagine-v13.0-win-x86.zip。
ERDA2013安装教程
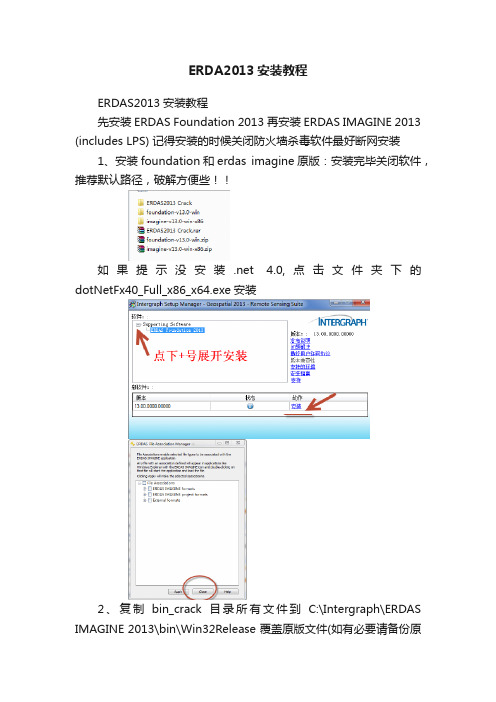
ERDA2013安装教程ERDAS2013安装教程先安装ERDAS Foundation 2013 再安装ERDAS IMAGINE 2013 (includes LPS) 记得安装的时候关闭防火墙杀毒软件最好断网安装1、安装foundation和erdas imagine原版:安装完毕关闭软件,推荐默认路径,破解方便些!!如果提示没安装.net 4.0,点击文件夹下的dotNetFx40_Full_x86_x64.exe安装2、复制bin_crack目录所有文件到C:\Intergraph\ERDAS IMAGINE 2013\bin\Win32Release 覆盖原版文件(如有必要请备份原始文件)。
3复制licensing_crack目录所有文件到C:\Program Files (x86)\Intergraph\Licensing\11.10.1\Program覆盖原版文件(如有必要请备份原始文件),这个路径针对32系统应该是(自行注意)C:\Program Files\Intergraph\Licensing\11.10.1\Program右键管理员身份运行flexlm.ecc.generic.patcher.exe,选择INGRTS_libFNP.dll并破解,修改license.dat(右键,记事本打开)中计算机名为你的计算机名,如有需要可在第一行最后添加一个空格,一个端口号,避免与arcgis 冲突。
4、运行lmtools.exe,点击config services,首先把原来的删除,点Remove Service新建service name:Intergraph License Server,选择C:\Program Files (x86)\Intergraph\Licensing\11.10.1\Program下的lmgrd.exe,修改好的license.dat,自行制定log文件名。
- 1、下载文档前请自行甄别文档内容的完整性,平台不提供额外的编辑、内容补充、找答案等附加服务。
- 2、"仅部分预览"的文档,不可在线预览部分如存在完整性等问题,可反馈申请退款(可完整预览的文档不适用该条件!)。
- 3、如文档侵犯您的权益,请联系客服反馈,我们会尽快为您处理(人工客服工作时间:9:00-18:30)。
ERDAS2013安装教程
先安装ERDAS Foundation 2013 再安装ERDAS IMAGINE 2013 (includes LPS) 记得安装的时候关闭防火墙杀毒软件最好断网安装
1、安装foundation和erdas imagine原版:安装完毕关闭软件,推荐默认路径,破解方便些!!
如果提示没安装.net 4.0,点击文件夹下的dotNetFx40_Full_x86_x64.exe安装
2、复制bin_crack目录所有文件到C:\Intergraph\ERDAS IMAGINE 2013\bin\Win32Release 覆盖原版文件(如有必要请备份原始文件)。
3复制licensing_crack目录所有文件到
C:\Program Files (x86)\Intergraph\Licensing\11.10.1\Program覆盖原版文件(如有必要请备份原始文件),这个路径针对32系统应该是(自行注意)
C:\Program Files\Intergraph\Licensing\11.10.1\Program
右键管理员身份运行flexlm.ecc.generic.patcher.exe,选择INGRTS_libFNP.dll并破解
,修改license.dat(右键,记事本打开)中计算机名为你的计算机名,如有需要可在第一行最后添加一个空格,一个端口号,避免与arcgis冲突。
4、运行lmtools.exe,点击config services,首先把原来的删除,点Remove Service
新建service name:Intergraph License Server,
选择C:\Program Files (x86)\Intergraph\Licensing\11.10.1\Program下的lmgrd.exe,修改好的license.dat,自行制定log文件名。
勾选use service和start server at power up,点击save service,点击start/stop/reread,点击start service即可使用软件。
5、以上步骤完成之后,首次运行erdas 会弹出一个对话框选择第一个选项然后再后面的空白处填上自己的电脑名,然后 continue
•新的处理点云数据的工具和技术
ERDAS IMAGINE 2013允许可视化、分析和管理点云数据。
新的查看技术可以同时在2D、3D窗口中查看点云,或者用户指定的剖面进行展示。
还有一些进行分类、裁切、过滤、RGB编码点云数据的工具。
•新一代空间建模
新一代的空间建模具有全新的界面,提供实时的结果预览功能。
除了ERDAS IMAGINE 栅格算子之外,新的空间建模结合了GeoMedia矢量和格网算子,大大扩展了解决问题的能力。
Python脚本可以让用户扩展模型的应用,甚至可以合并其他软件的算子。
•GeoMedia和ERDAS IMAGINE进行整合
•支持ECW V3文件格式
•IMAGINE雷达包中的新工具
IMAGINE Radar Mapping Suite提供的新的工具,更易于应用雷达数据源。
目前Ribbon 界面可以更快、更容易的访问许多雷达工具。
其他的新特征包含利用AIS跟踪实时的航行轨迹、在线的地理校正、快速检测洪水或者溢出。
•面向对象的特征提取得到更好的结果
ERDAS IMAGINE Objective应用一个新的分割算法FLS,提供给用户基于形状、大小和光谱值进行分割得到较好结果的功能。
•增加了指数、改进了指数操作的界面
ERDAS IMAGINE2013包含超过35种常用的指数,改进了指数操作的界面,指数操作支持ERDAS IMAGINE支持的所有传感器模型。
指数工具和空间建模可以进行连接,更易于编辑。
LPS 2013新功能
•界面Ribbon化
LPS所有工具目前都整合到ERDAS IMAGINE的Ribbon界面上,可以更快、更易应用LPS 的所有工具,对于应用不同类型数据,进行进一步处理,比如变化监测或者影像分类的摄影测量用户,简化了工作流。
老界面仍然可以从Tool标签进行访问,使用户使用新界面有个过渡期。
•支持新的传感器
o VisionMap A3 Super Large Format (SLF)模型
o Pleiades RPC模型
o DEIMOS RPC模型
•支持Z/I鼠标
在立体点量测工具和地形编辑工具中,支持Z/I鼠标作为数据化设备。
其他增强的小工具
•动态的指北针和比例尺
•基于windows的文件选择
•目录图例和样式
•量测工具
•批处理
•非监督分类
•镶嵌
•LPS地形处理
(本资料素材和资料部分来自网络,仅供参考。
请预览后才下载,期待您的好评与关注!)。
