linux下ntp时间服务器安装配置
Linux下的NTP服务搭建
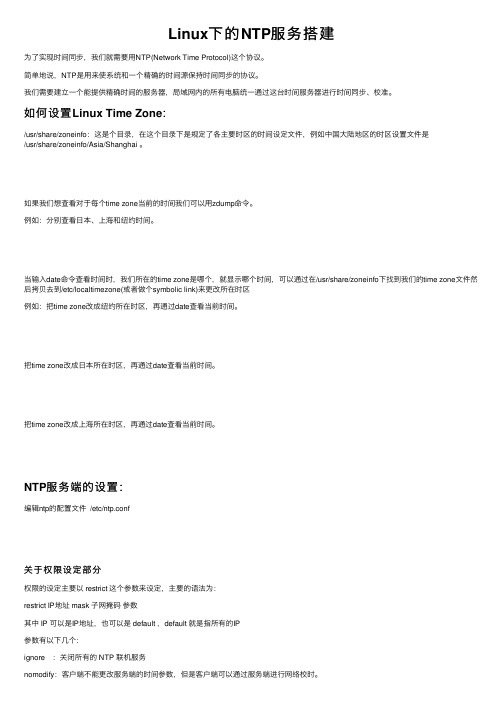
Linux下的NTP服务搭建为了实现时间同步,我们就需要⽤NTP(Network Time Protocol)这个协议。
简单地说,NTP是⽤来使系统和⼀个精确的时间源保持时间同步的协议。
我们需要建⽴⼀个能提供精确时间的服务器,局域⽹内的所有电脑统⼀通过这台时间服务器进⾏时间同步、校准。
如何设置Linux Time Zone:/usr/share/zoneinfo:这是个⽬录,在这个⽬录下是规定了各主要时区的时间设定⽂件,例如中国⼤陆地区的时区设置⽂件是/usr/share/zoneinfo/Asia/Shanghai 。
如果我们想查看对于每个time zone当前的时间我们可以⽤zdump命令。
例如:分别查看⽇本、上海和纽约时间。
当输⼊date命令查看时间时,我们所在的time zone是哪个,就显⽰哪个时间,可以通过在/usr/share/zoneinfo下找到我们的time zone⽂件然后拷贝去到/etc/localtimezone(或者做个symbolic link)来更改所在时区例如:把time zone改成纽约所在时区,再通过date查看当前时间。
把time zone改成⽇本所在时区,再通过date查看当前时间。
把time zone改成上海所在时区,再通过date查看当前时间。
NTP服务端的设置:编辑ntp的配置⽂件 /etc/ntp.conf关于权限设定部分权限的设定主要以 restrict 这个参数来设定,主要的语法为:restrict IP地址 mask ⼦⽹掩码参数其中 IP 可以是IP地址,也可以是 default ,default 就是指所有的IP参数有以下⼏个:ignore :关闭所有的 NTP 联机服务nomodify:客户端不能更改服务端的时间参数,但是客户端可以通过服务端进⾏⽹络校时。
notrust :客户端除⾮通过认证,否则该客户端来源将被视为不信任⼦⽹noquery :不提供客户端的时间查询notrap:不提供trap远程登录功能,trap服务是⼀种远程时间⽇志服务nopeer:提供时间服务,但不作为对等体kod:向不安全的访问者发送Kiss-Of-Death报⽂注意:如果参数没有设定,那就表⽰该 IP (或⼦⽹)没有任何限制!上级时间服务器的设定:由于我们配置的NTP 服务器需要⽹络上⾯时间⽐较准确的NTP服务器来更新⾃⼰的时间,所以在我们的 NTP 服务器上⾯要配置⼀部上级时间服务器来进⾏校准⽤server这个参数设定上级时间服务器,语法为:server + IP地址或域名 [prefer]IP地址或域名就是我们指定的上级时间服务器,如果 Server 参数最后加上 prefer,表⽰我们的 NTP 服务器主要以该部主机时间进⾏校准。
linux配置ntp服务器的方法
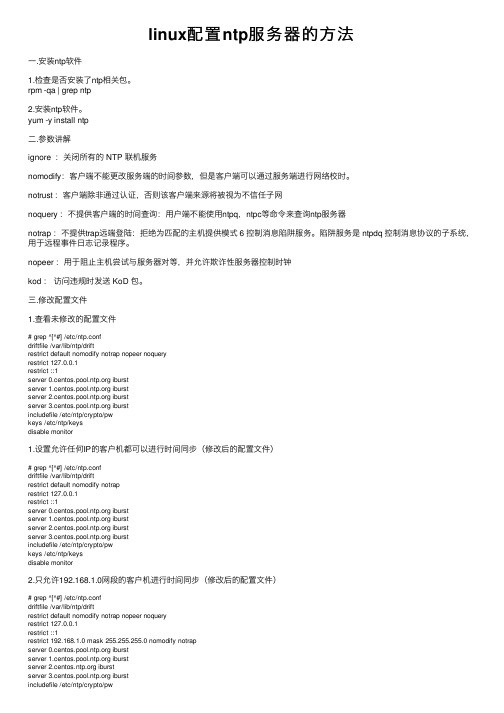
linux配置ntp服务器的⽅法⼀.安装ntp软件1.检查是否安装了ntp相关包。
rpm -qa | grep ntp2.安装ntp软件。
yum -y install ntp⼆.参数讲解ignore :关闭所有的 NTP 联机服务nomodify:客户端不能更改服务端的时间参数,但是客户端可以通过服务端进⾏⽹络校时。
notrust :客户端除⾮通过认证,否则该客户端来源将被视为不信任⼦⽹noquery :不提供客户端的时间查询:⽤户端不能使⽤ntpq,ntpc等命令来查询ntp服务器notrap :不提供trap远端登陆:拒绝为匹配的主机提供模式 6 控制消息陷阱服务。
陷阱服务是 ntpdq 控制消息协议的⼦系统,⽤于远程事件⽇志记录程序。
nopeer :⽤于阻⽌主机尝试与服务器对等,并允许欺诈性服务器控制时钟kod :访问违规时发送 KoD 包。
三.修改配置⽂件1.查看未修改的配置⽂件# grep ^[^#] /etc/ntp.confdriftfile /var/lib/ntp/driftrestrict default nomodify notrap nopeer noqueryrestrict 127.0.0.1restrict ::1server iburstserver iburstserver iburstserver iburstincludefile /etc/ntp/crypto/pwkeys /etc/ntp/keysdisable monitor1.设置允许任何IP的客户机都可以进⾏时间同步(修改后的配置⽂件)# grep ^[^#] /etc/ntp.confdriftfile /var/lib/ntp/driftrestrict default nomodify notraprestrict 127.0.0.1restrict ::1server iburstserver iburstserver iburstserver iburstincludefile /etc/ntp/crypto/pwkeys /etc/ntp/keysdisable monitor2.只允许192.168.1.0⽹段的客户机进⾏时间同步(修改后的配置⽂件)# grep ^[^#] /etc/ntp.confdriftfile /var/lib/ntp/driftrestrict default nomodify notrap nopeer noqueryrestrict 127.0.0.1restrict ::1restrict 192.168.1.0 mask 255.255.255.0 nomodify notrapserver iburstserver iburstserver iburstserver iburstincludefile /etc/ntp/crypto/pwkeys /etc/ntp/keysdisable monitor四.启动NTP服务和防⽕墙systemctl start ntpdsystemctl enable ntpdiptables -A INPUT -p UDP -i eno16777736 -s 192.168.1.0/24 --dport 123 -j ACCEPT setsebool -P ntp_disable_trans 1#SELinux设置vi /etc/sysconfig/ntpd#允许BIOS与系统时间同步,添加下⾯⼀⾏。
linux(Red Hat)NTP时间同步的配置方法

局域网内linux(Red Hat)NTP时间同步的配置方法2009.12.31目录1.NTP跟踪层级安排2.NTP配置数据对单点故障应对能力的评估3.NTP服务器- redhat服务器的配置数据及说明4.NTP客户机-redhat服务器的配置数据及说明一.NTP跟踪层级安排注1:如有其他与192.168.80.4同级的时钟源可用,则NTP的可靠性更佳。
网内所有NTP客户机由自已的NTP算法根据当时NTP服务器及网络状态自行选择NTP服务器:不是192.168.80.31就是192.168.80.34。
一旦网内NTP客户机失去了与网内NTP服务器的连接,将会按照自已的时钟频率将系统时间继续走下去,除了可能会造成日志时间和告警时间与标准时间有非常小的偏差外,不会对服务器应用或自身造成任何影响。
二.NTP配置数据对单点故障应对能力的评估下面就局域网内系统中相关设备发生单点故障时,各设备的NTP时钟跟踪情况做一分析:1.上级NTP服务器单机失效但vrrp有效:2.上级NTP服务器vrrp失效):3.局域网内的NTP server_1 (31)失效:4.局域网内的NTP server_2 (34)失效:三.NTP服务器-redhat服务器(31, 34)的配置数据及说明(注:对NTP服务器的唯一要求是机器上不要跑双机系统。
)1.NTP的配置文件(/etc/ntp.conf)的内容:===============================#ntp restrict partrestrict default kod nomodify notrap nopeer noqueryrestrict 127.0.0.1restrict 192.168.80.0 mask 255.255.255.0 nomodify notraprestrict 192.168.81.0 mask 255.255.255.0 nomodify notrap#ntp server partserver 192.168.80.4 version 3server 127.127.1.0#fudge 127.127.1.0 stratum 10#ntp other partdriftfile /var/lib/ntp/drift==============================2.硬件时间每日有条件地被系统时间更新的配置(1)创建硬件时间更新脚本:/root/day_update_hwclock.sh的内容:===========================/usr/sbin/ntpq -p > /root/tmp_ntpq.txt 2>&1if grep "*192.168.80.4" /root/tmp_ntpq.txtthen/bin/date >> /root/tmp_ntpq.txt 2>&1/usr/sbin/hwclock --show >> /root/tmp_ntpq.txt 2>&1/usr/sbin/hwclock -w >> /root/tmp_ntpq.txt 2>&1[ $? -eq 0 ] && echo "hwclock -w success" >> /root/tmp_ntpq.txt 2>&1/bin/date >> /root/tmp_ntpq.txt 2>&1/usr/sbin/hwclock --show >> /root/tmp_ntpq.txt 2>&1elselogger -p alert "[HC]:NTP server lost or NTP service stop"fi正常输出结果:# cat tmp_ntpq.txtremote refid st t when poll reach delay offset jitter=========================================================== *192.168.80.4 127.0.0.1 4 u 763 1024 377 7.651 0.373 2.499 LOCAL(0) .LOCL. 5 l 21 64 377 0.000 0.000 0.001 [root@PC2 sbin]#cat tmp_ntpq.txtMon Jan 4 14:19:18 CST 2010Mon 04 Jan 2010 02:19:18 PM CST -0.015936 secondshwclock -w successMon Jan 4 14:19:20 CST 2010Mon 04 Jan 2010 02:19:20 PM CST -0.015907 seconds[root@ftpnode2 ~]#=============================该脚本用于将系统时间去同步硬件时间,以消除硬件时间的累积误差。
linux ntp时间同步
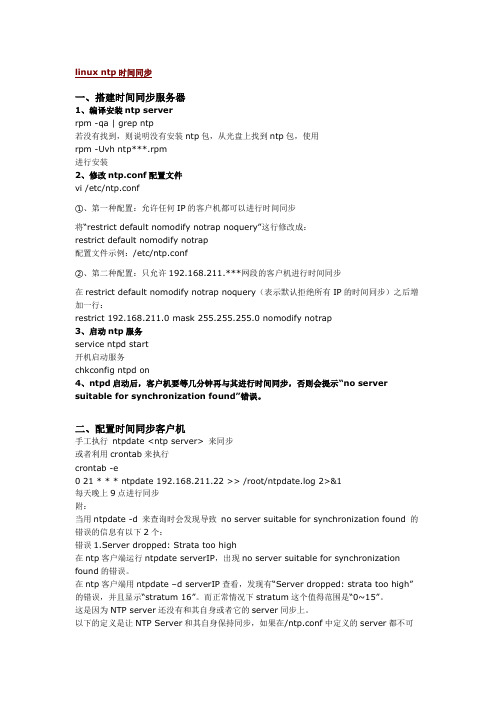
linux ntp时间同步一、搭建时间同步服务器1、编译安装ntp serverrpm -qa | grep ntp若没有找到,则说明没有安装ntp包,从光盘上找到ntp包,使用rpm -Uvhntp***.rpm进行安装2、修改ntp.conf配置文件vi /etc/ntp.conf①、第一种配置:允许任何IP的客户机都可以进行时间同步将“restrict default nomodifynotrapnoquery”这行修改成:restrict default nomodifynotrap配置文件示例:/etc/ntp.conf②、第二种配置:只允许192.168.211.***网段的客户机进行时间同步在restrict default nomodifynotrapnoquery(表示默认拒绝所有IP的时间同步)之后增加一行:restrict 192.168.211.0 mask 255.255.255.0 nomodifynotrap3、启动ntp服务service ntpd start开机启动服务chkconfigntpd on4、ntpd启动后,客户机要等几分钟再与其进行时间同步,否则会提示“no server suitable for synchronization found”错误。
二、配置时间同步客户机手工执行ntpdate<ntp server>来同步或者利用crontab来执行crontab -e0 21 * * * ntpdate 192.168.211.22 >> /root/ntpdate.log 2>&1每天晚上9点进行同步附:当用ntpdate -d 来查询时会发现导致no server suitable for synchronization found 的错误的信息有以下2个:错误1.Server dropped: Strata too high在ntp客户端运行ntpdateserverIP,出现no server suitable for synchronization found 的错误。
NTPD配置指南
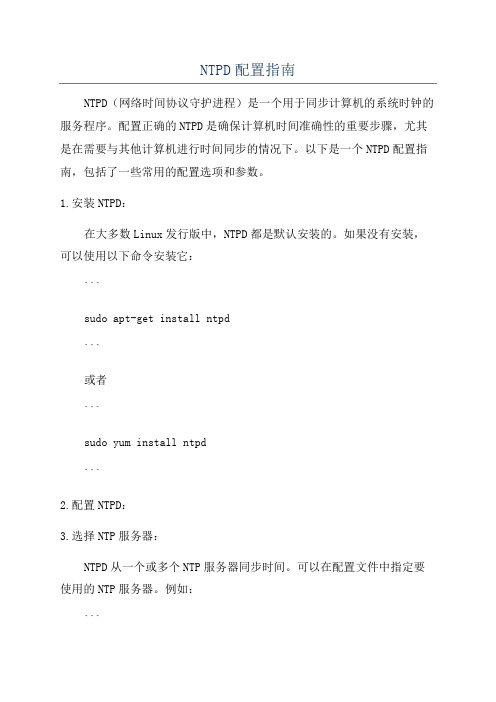
NTPD配置指南NTPD(网络时间协议守护进程)是一个用于同步计算机的系统时钟的服务程序。
配置正确的NTPD是确保计算机时间准确性的重要步骤,尤其是在需要与其他计算机进行时间同步的情况下。
以下是一个NTPD配置指南,包括了一些常用的配置选项和参数。
1.安装NTPD:在大多数Linux发行版中,NTPD都是默认安装的。
如果没有安装,可以使用以下命令安装它:```sudo apt-get install ntpd```或者```sudo yum install ntpd```2.配置NTPD:3.选择NTP服务器:NTPD从一个或多个NTP服务器同步时间。
可以在配置文件中指定要使用的NTP服务器。
例如:``````可以使用多个server行指定多个NTP服务器,以提供冗余和更好的时间源。
4.本地时钟源:除了外部NTP服务器,NTPD还可以使用本地时钟源进行时间同步。
要启用本地时钟源,可以在配置文件中添加以下行:```server 127.127.1.0fudge 127.127.1.0 stratum 10```这将使用NTPD的本地时钟进行时间同步,并将其宣布为stratum 10。
5.配置日志:NTPD可以生成日志以记录时间同步的活动和错误信息。
可以配置NTPD以指定日志文件的位置和详细级别。
例如:```logfile /var/log/ntp.logdriftfile /var/lib/ntp/ntp.drift```这将将日志记录写入/var/log/ntp.log,并将时钟漂移数据保存在/var/lib/ntp/ntp.drift中。
6.启用认证:为了确保时间的准确性和安全性,可以启用NTPD的认证功能来验证传入的时间数据。
可以在配置文件中添加以下行来启用认证:```keys /etc/ntp/keystrustedkey 1```这将启用NTPD的认证功能,并使用/etc/ntp/keys文件存储密钥。
Linux系统搭建NTP服务器教程
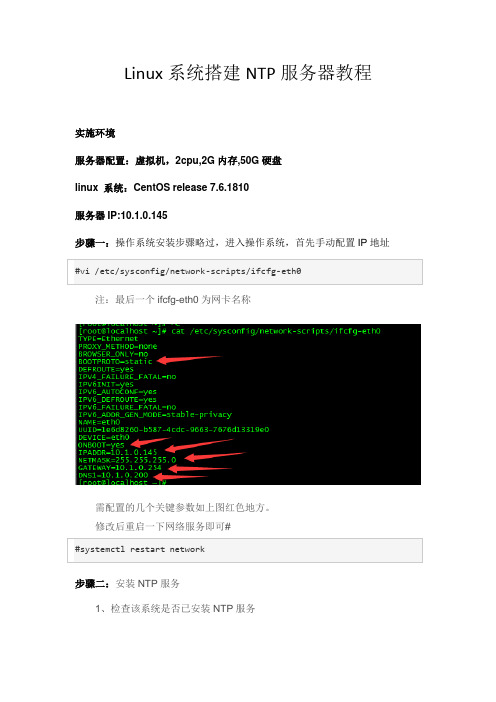
Linux系统搭建NTP服务器教程实施环境服务器配置:虚拟机,2cpu,2G内存,50G硬盘linux 系统:CentOS release 7.6.1810服务器IP:10.1.0.145步骤一:操作系统安装步骤略过,进入操作系统,首先手动配置IP地址步骤二:安装NTP服务1、检查该系统是否已安装NTP服务安装完可用1的命令再检查是否安装成功。
步骤三:修改ntp配置文件,红色字体是修改项。
注:修改后记得保存配置文件。
restrict 控制相关权限。
语法为:restrict IP地址mask 子网掩码参数其中IP地址也可以是default ,default 就是指所有的IP。
参数有以下几个:ignore :关闭所有的NTP 联机服务nomodify:客户端不能更改服务端的时间参数,但是客户端可以通过服务端进行网络校时。
notrust :客户端除非通过认证,否则该客户端来源将被视为不信任子网noquery :不提供客户端的时间查询:用户端不能使用ntpq,ntpc等命令来查询ntp服务器notrap :不提供trap远端登陆:拒绝为匹配的主机提供模式6 控制消息陷阱服务。
陷阱服务是ntpdq 控制消息协议的子系统,用于远程事件日志记录程序。
nopeer :用于阻止主机尝试与服务器对等,并允许欺诈性服务器控制时钟kod :访问违规时发送KoD 包。
restrict -6 表示IPV6地址的权限设置。
步骤四:设置NTP服务开机启动步骤五:启用ntp服务NTP服务器配置完成。
测试:NTP客户端:windows 7系统如上图所示,勾选与internet时间服务器同步,服务器输入框里填NTP服务器IP地址,点立即更新按钮。
等待一会下面出面同步成功的提示,说明NTP服务正常。
如下出现如下提示,说明NTP服务端有问题,需要排查故障。
排查故障大概的思路:1、确定NTP客户端与服务端的网络是否可达。
2、确定NTP服务端的服务是否启动。
Linux配置ntp时间服务器(全)
Linux配置ntp时间服务器(全)时间服务器作⽤:⼤数据产⽣与处理系统是各种计算设备集群的,计算设备将统⼀、同步的标准时间⽤于记录各种事件发⽣时序,如E-MAIL信息、⽂件创建和访问时间、数据库处理时间等。
⼤数据系统内不同计算设备之间控制、计算、处理、应⽤等数据或操作都具有时序性,若计算机时间不同步,这些应⽤或操作或将⽆法正常进⾏。
⼤数据系统是对时间敏感的计算处理系统,时间同步是⼤数据能够得到正确处理的基础保障,是⼤数据得以发挥作⽤的技术⽀撑。
⼤数据时代,整个处理计算系统内的⼤数据通信都是通过⽹络进⾏。
时间同步也是如此,利⽤⼤数据的互联⽹络传送标准时间信息,实现⼤数据系统内时间同步。
⽹络时间同步协议(NTP)是时间同步的技术基础。
注意:在CentOS8.0中默认不再⽀持ntp软件包,时间同步将由chrony来实现。
(⼀)确认ntp的安装1)确认是否已安装ntp【命令】rpm –qa | grep ntp若只有ntpdate⽽未见ntp,则需删除原有ntpdate。
如:ntpdate-4.2.6p5-22.el7_0.x86_64fontpackages-filesystem-1.44-8.el7.noarchpython-ntplib-0.3.2-1.el7.noarch2)删除已安装ntp【命令】yum –y remove ntpdate-4.2.6p5-22.el7.x86_643)重新安装ntp【命令】yum –y install ntp(⼆)配置ntp服务1)修改所有节点的/etc/ntp.conf【命令】vi /etc/ntp.conf【内容】restrict 192.168.6.3 nomodify notrap nopeer noquery //当前节点IP地址restrict 192.168.6.2 mask 255.255.255.0 nomodify notrap //集群所在⽹段的⽹关(Gateway),⼦⽹掩码(Genmask)2)选择⼀个主节点,修改其/etc/ntp.conf【命令】vi /etc/ntp.conf【内容】在server部分添加⼀下部分,并注释掉server 0 ~ n server 127.127.1.0Fudge 127.127.1.0 stratum 103)主节点以外,继续修改/etc/ntp.conf【命令】vi /etc/ntp.conf【内容】在server部分添加如下语句,将server指向主节点。
Linux配置时间服务器
设置B服务器同步A服务器的时间。
一、A服务器操作:
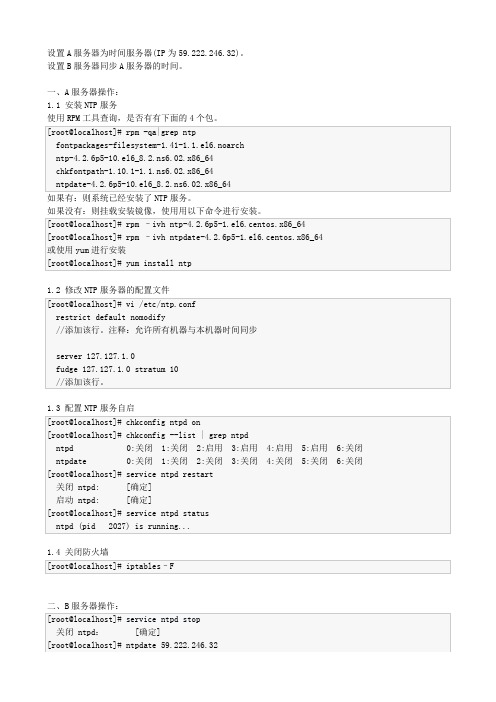
1.1安装NTP服务
使用RPM工具查询,是否有有下面的4个包。
[root@localhost]# rpm -qa|grep ntp
fontpackages-filesystem-1.41-1.1.el6.noarch
1.3配置NTP服务自启
[root@localhost]# chkconfig ntpd on
[root@localhost]# chkconfig --list grep ntpd
ntpd0:关闭1:关闭2:启用3:启用4:启用5:启用6:关闭
ntpdate0:关闭1:关闭2:关闭3:关闭4:关闭5:关闭6:关闭
ntp-4.2.6p5-10.el6_8.2.ns6.02.x86_64
chkfontpath-1.10.1-1.1.ns6.02.x86_64
ntpdate-4.2.6p5-10.el6_8.2.ns6.02.x86_64
如果有:则系统已经安装了NTP服务。
如果没有:则挂载安装镜像,使用用以下命令进行安装。
二、B服务器操作:
[root@localhost]#service ntpd stop
关闭 ntpd:[确定]
[root@localhost]#ntpdate 59.222.246.32
16 May 15:08:52 ntpdate[87180]: adjust time server 59.222.246.32 offset -0.003437 sec
1.2修改NTP服务器的配置文件
[root@localhost]#vi/etc/ntp.conf
NTP网络时间服务器(时间同步装置)使用手册
NTP网络时间服务器(时间同步装置)使用手册NTP网络时间服务器(时间同步装置)使用手册1. 概述NTP网络时间服务器是一种用于同步网络中各个设备时间的重要工具。
本手册将详细介绍NTP网络时间服务器的使用方法,帮助用户准确设置和配置时间同步装置,保证网络中设备的时间始终保持一致。
2. 安装与配置2.1 硬件连接首先,将NTP网络时间服务器与网络中心交换机或路由器相连。
确保连接正常,然后将时间同步装置接通电源。
2.2 系统配置进入NTP网络时间服务器的管理界面(通常通过浏览器输入设备的IP地址进入),按照系统要求进行基本配置和初始化设置。
包括设定服务器的IP地址、子网掩码、网关等参数。
3. 时间同步设置3.1 外部时间源选择在时间同步设置中,用户可以选择适合自身需求的外部时间源。
NTP网络时间服务器支持使用GPS、卫星时间信号、国家授时中心等多种外部时间源,用户可以根据实际网络环境选择合适的时间源。
3.2 同步频率设定用户可以在时间同步设置中设定时间同步的频率。
一般建议将同步频率设置为每天一次,这样可以保证网络中设备的时间与外部时间源的同步。
4. 客户端配置为了让网络中所有客户端设备都能接收到经过时间同步的准确时间,需要对客户端设备进行配置。
4.1 Windows系统配置在Windows操作系统中,打开控制面板,选择“日期和时间”选项,然后在“Internet时间”标签下将NTP服务器地址设置为NTP网络时间服务器的IP地址。
4.2 Linux系统配置在Linux操作系统中,找到NTP配置文件(通常位于/etc/ntp.conf)并进行编辑,在文件中指定NTP服务器的IP地址。
4.3 其他系统配置其他系统根据具体操作系统版本进行相应的配置,设置NTP服务器的IP地址作为时间同步源。
5. 故障排除在使用过程中,如果发现时间同步装置存在故障,用户可以按照以下步骤进行排查和解决。
5.1 检查硬件连接首先,检查NTP网络时间服务器与网络设备的连接是否正常,确保网线连接正常,电源供应稳定。
ntp时间服务器

可以用来追踪某台时间服务器的时间对应关系。
四、NTP 服务端的配置
1.修改 /etc/ntp.conf
"注释"以下配置:
restrict default kod nomodify notrap nopeer noquery
restrict -6 default kod nomodify notrap nopeer noquery
# /etc/init.d/ntpd stop
# /etc/init.d/ntpd restart
5.切记每次修改了配置文档后都需要重新启动服务来使配置生效。
6.能够使用下面的命令来检查NTP服务是否启动,将得到一个进程ID号:
# pgrep ntpd
7.使用下面的命令检查时间服务器同步的状态:
7 May 20:13:29 ntpdate[8072]: no server suitable for synchronization found
耐心等待几分钟即可
当用ntpdate -d 来查询时会发现导致 no server suitable for synchronization found 的错误的信息有以下2个:
notrap – 不提供trap远端登陆
配置文件说明如下:
第一行restrict、default定义默认访问规则,nomodify禁止远程主机修改本地服务器配置,notrap拒绝特殊的ntpdq捕获消息,noquery拒绝btodq/ntpdc查询(这里的查询是服务器本身状态查询)。
restrict 192.168.1.0 mask 255.255.255.0 nomodify notrap
ntp时间服务器设置

#指定Internet上的时间服务器
restrict 207.46.232.182 mask 255.255.255.255 nomodify notrap noquery
server 207.46.232.182
server 127.127.1.0
fudge 127.127.1.0 stratum 10
chkconfig ntpd --level 35 off
2.3 配置信息
配置ntp,将Internet上的时间服务器作为内部标准时间来源,过程如下
1)修改/etc/ntp.conf文件
restrict default kod nomodify notrap nopeer noquery
后记:本文仅介绍NTP服务的标准安装及配置方法,有需要对时间服务器访问进行密码验证的朋友,可通过-akey命令启用身份验证功能并指定要勇于身份验证的密钥标识符(缺省设置是金庸身份验证功能)。
chkconfig ntpd on
#在运行级别2、3、4、5上设置为不自动运行
chkconfig ntpd off
#在运行级别3、5上设置为自动运行
chkconfig ntpd --level 35 on
#在运行级别3、5上设置为不自动运行
inux下配置NTP服务器
一、前言:
默认NTP服务端口:
UDP/123
本文配置的NTP工作模式:
使用client/server方式,该方式适用于一台时间服务器接收上层时间服务器的时间信息,并提供时间信息给下层用户。
二、配置方法:
1、ntp服务安装
NTP服务在RHEL5.x中式默认安装的软件包,可用rpm -qa |grep ntp检查是否安装,如果未安装可使用如下命令安装与删除NTP服务器软件包
(完整word版)NTP服务器及客户端配置手册
NTP时间同步配置说明目录1。
1 Linux NTP Server配置 (1)1。
2 AIX系统时间配置 (3)1。
3 Linux系统时间同步配置 (5)1。
4 Windows 2003系统时间同步配置 (7)1。
5 Windows 7 & Windows 2008系统时间同步配置 (11)1.6 ESXi系统时间同步配置 (16)1.7 Suse Linux 系统时间同步配置 (18)1。
8 HP-UX NTP配置 (20)1.1 Linux NTP Server配置1.检查NTP安装包#rpm —qa | grep ntpntp—4.2.6p5—10。
el6.x86_64ntpdate—4。
2。
6p5-10。
el6.x86_642.NTP配置文件/etc/ntp。
conf#vim /etc/ntp。
confdriftfile /var/lib/ntp/drift例:restrict 11。
1。
71。
0 mask 255。
255.255.0 nomodify noquery notrap #设置向11。
1.71.1-11。
1。
71.254段的主机提供NTP同步服务server 210.72。
145。
44 #中国国家授时中心IPserver [local IP address] prefer #prefer 表示优先使用此地址进行时间同步Server 127。
127.1.0 # local clock #外界同步源不可用时将用本地时间提供时间同步服务fudge 127.127。
1。
0 stratum 2 #stratum是定义时间服务器层级,0表示为最顶级;如果需要从别的NTP服务器更新时间,请修改为非0SYNC_HWCLOCK=yes #允许BIOS与系统时间同步,也可以通过hwclock -w命令权限管理使用 restrict 公式如下:restrict IP mask [参数]/ restrict 192。
Linux系统使用NTP服务器的方法
Linux系统使用NTP服务器的方法Linux系统使用NTP服务器的方法Linux系统下的NTP服务器指的是网络时间同步协议,其作用就是同步网络时间和Linux系统中的时间,使得Linux时间更加精确。
下面就来介绍一下Linux系统下如何使用NTP服务器。
一、ntp配置文件1. /etc/ntp.confNTP服务的主要配置文件,不同的Linux版本文件所在的目录可能会不同。
2. /usr/share/zoneinfo规定了各主要时区的时间设定文件。
/usr/share/zoneinfo/Asia/Shanghai 为中国大陆地区的时区设定文件。
3. /etc/sysconfig/clock时区设置文件4. /etc/localtime本地系统的时间设定文件[root@linuxidc1 ~]# grep -v “^#” /etc/ntp.confrestrict default kod nomodify notrap nopeer noquery//对于默认的client拒绝所有的操作restrict -6 default kod nomodify notrap nopeer noquery //针对ipv6的设置restrict 127.0.0.1 //允许本机地址一切的操作restrict -6 ::1server //设置上层服务器做同步ip地址server server server 127.127.1.0 //local地址fudge 127.127.1.0 stratum 10 //这行是时间服务器的层次。
设为0则为顶级,如果要向别的NTP服务器更新时间,请不要把它设为0driftfile /var/lib/ntp/drift //记录上次的NTP server与上层NTP server联接所花费的时间keys /etc/ntp/keys参数:ignore :关闭所有的 NTP 联机服务nomodify:客户端不能更改服务端的`时间参数,但是客户端可以通过服务端进行网络校时。
NTP服务器及NTP客户端配置原理及实例
NTP服务器及NTP客户端配置原理及实例NTP (Network Time Protocol) 是一种用于在计算机网络中同步各个设备系统时间的协议。
它由一个服务器和多个客户端组成。
服务器负责提供准确的时间信息,而客户端则使用这些信息来同步其本地时间。
下面将详细介绍NTP服务器和NTP客户端的配置原理和实例。
1.配置原理:-基于GPS或其他高精度时钟源获取准确的时间信息;-将获取到的时间信息通过NTP协议广播到网络中的客户端设备;-对客户端的请求进行响应,根据客户端的时间偏差调整其本地时间。
2.配置实例:配置一个基于Linux系统的NTP服务器,实现时间同步的步骤如下:- 安装NTP软件:使用包管理工具安装ntp软件包;- 启动NTP服务:启动ntp服务,使其开始提供时间同步服务;- 验证NTP服务器:使用ntpdate命令或其他NTP客户端工具验证时间同步是否正常。
1.配置原理:NTP客户端负责与NTP服务器进行通信,并将服务器提供的时间信息用于同步本地时间。
其主要通过以下几个步骤来实现:-与NTP服务器建立连接,发送时间同步请求;-接收NTP服务器的响应,获取服务器时间信息;-根据服务器提供的时间信息,调整本地时间。
2.配置实例:配置一个基于Windows系统的NTP客户端,实现时间同步的步骤如下:-打开"日期和时间"设置:在控制面板中找到"日期和时间"设置;- 配置时间服务器:在"Internet时间"选项卡中,选择"更改设置",输入NTP服务器的地址;-同步时间:点击"手动同步"按钮,客户端将向服务器发送时间同步请求;-验证时间同步:等待同步完成后,验证本地时间是否与服务器时间一致。
总结:。
如何配置NTP服务器
如何配置NTP服务器NTP(Network Time Protocol)是一种用于同步计算机时钟的协议,它能够确保网络上的设备拥有一致准确的时间。
配置 NTP 服务器可以使得其他计算机通过网络同步其时钟,确保整个网络系统的时间一致性。
以下是一种基本的 NTP 服务器配置方法,共分为四个步骤:第一步:安装NTP服务器软件首先,需要在服务器上安装 NTP 软件。
常见的 NTP 软件有 ntpd、chronyd等。
这里我们以 ntpd 为例进行配置。
在 Linux 系统上,安装ntpd 通常使用以下命令:```bashsudo apt-get install ntp```安装完成后,NTP服务器将会自动启动。
第二步:选择合适的时间源NTP协议需要从一个可靠的时间源同步时间。
可以选择使用官方提供的公共NTP服务器或者使用自己的时钟源。
对于大多数情况,使用官方的公共NTP服务器是最简单且可靠的。
可以在NTP官方网站上查找可用的NTP服务器列表,并选择距离自己服务器最近的服务器。
如果你有自己的时钟源,可以使用GPS接收器、原子钟或者其他时间源作为NTP服务器的上游源。
```restrict default kod nomodify notrap nopeer noqueryrestrict -6 default kod nomodify notrap nopeer noqueryrestrict 127.0.0.1restrict ::1server <NTP服务器IP地址> iburst```在配置文件中,restrict 选项表示限制 NTP 服务器允许连接的客户端的权限。
这里我们限制了只有本地的机器可以连接。
server 选项用于指定上游 NTP 服务器的 IP 地址。
添加完配置后,保存并关闭文件。
配置完成后,需要重新启动NTP服务器以使配置生效。
在终端中运行以下命令:```bashsudo service ntp restart```这会重新启动NTP服务器并应用新的配置。
NTP服务器配置方法

配置NTP架设本地时间服务器
NTP是用来使系统和一个精确的时间源保持时间同步的协议.在Linux下,我们可以通过自带的NTP(Network Time Protocol)协议通过网络使自己的系统保持精确的时间.
安装:
# yum install ntp
将同步好的时间写到CMOS里
vi /etc/sysconfig/ntpd
SYNC_HWCLOCK=yes
切记每次修改了配置文件后都需要重新启动服务来使配置生效。可以使用下面的命令来检查NTP服务是否启动,你应该可以得到一个进程ID号:
# pgrep ntpd
使用下面的命令检查时间服务器同步的状态:
HKEY_LOCAL_MACHINE\SYSTEM\CurrentControlSet\Services\W32Time\TimeProviders\NtpClient\SpecialPollTimeRemaining=192.168.1.1,0 (192.168.1.1替换为实际的NTP服务器IP)
# ntpq -p
用ntpstat 也可以查看一些同步状态,用netstat -ntlup查看端口使用情况!
安装完毕客户端需过5-10分钟才能从服务器端更新时间!
客户端设置:
# crontab -e
加入一行:
*/15 * * * * ntpdate 服务器端IP。
【客户端设置】
方法1) <-该方法未测试成功
修改注册表以下键值:
HKEY_LOCAL_MACHINE\SYSTEM\CurrentControlSet\Services\W32Time\TimeProviders\NtpClient\SpecialPollInterval=43200 (十进制)
LinuxNTP服务器搭建部署与NTP时间同步配置
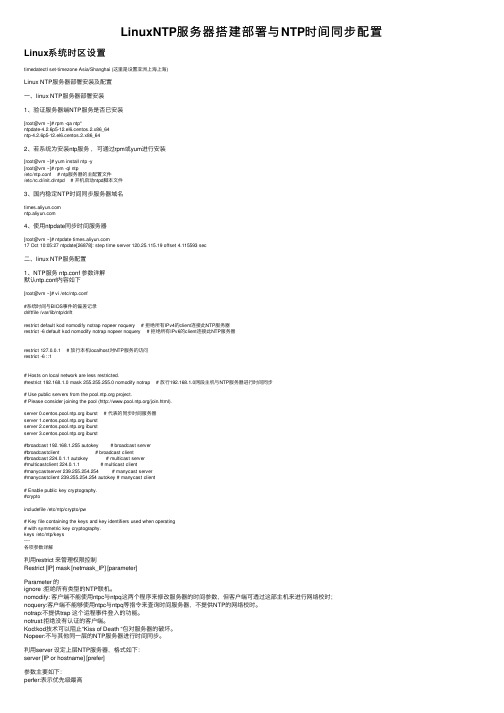
LinuxNTP服务器搭建部署与NTP时间同步配置Linux系统时区设置timedatectl set-timezone Asia/Shanghai (这⾥是设置亚洲上海上海)Linux NTP服务器部署安装及配置⼀、linux NTP服务器部署安装1、验证服务器端NTP服务是否已安装[root@vm ~]# rpm -qa ntp*ntpdate-4.2.6p5-12.el6.centos.2.x86_64ntp-4.2.6p5-12.el6.centos.2.x86_642、若系统为安装ntp服务,可通过rpm或yum进⾏安装[root@vm ~]# yum install ntp -y[root@vm ~]# rpm -ql ntp/etc/ntp.conf # ntp服务器的主配置⽂件/etc/rc.d/init.d/ntpd # 开机启动ntpd脚本⽂件3、国内稳定NTP时间同步服务器域名4、使⽤ntpdate同步时间服务器[root@vm ~]# ntpdate 17 Oct 10:05:27 ntpdate[26878]: step time server 120.25.115.19 offset 4.115593 sec⼆、linux NTP服务配置1、NTP服务 ntp.conf 参数详解默认ntp.conf内容如下[root@vm ~]# vi /etc/ntp.conf#系统时间与BIOS事件的偏差记录driftfile /var/lib/ntp/driftrestrict default kod nomodify notrap nopeer noquery # 拒绝所有IPv4的client连接此NTP服务器restrict -6 default kod nomodify notrap nopeer noquery # 拒绝所有IPv6的client连接此NTP服务器restrict 127.0.0.1 # 放⾏本机localhost对NTP服务的访问restrict -6 ::1# Hosts on local network are less restricted.#restrict 192.168.1.0 mask 255.255.255.0 nomodify notrap # 放⾏192.168.1.0⽹段主机与NTP服务器进⾏时间同步# Use public servers from the project.# Please consider joining the pool (/join.html).server iburst # 代表的同步时间服务器server iburstserver iburstserver iburst#broadcast 192.168.1.255 autokey # broadcast server#broadcastclient # broadcast client#broadcast 224.0.1.1 autokey # multicast server#multicastclient 224.0.1.1 # multicast client#manycastserver 239.255.254.254 # manycast server#manycastclient 239.255.254.254 autokey # manycast client# Enable public key cryptography.#cryptoincludefile /etc/ntp/crypto/pw# Key file containing the keys and key identifiers used when operating# with symmetric key cryptography.keys /etc/ntp/keys----各项参数详解利⽤restrict 来管理权限控制Restrict [IP] mask [netmask_IP] [parameter]Parameter 的ignore :拒绝所有类型的NTP联机。
NTP时间服务器安装文档
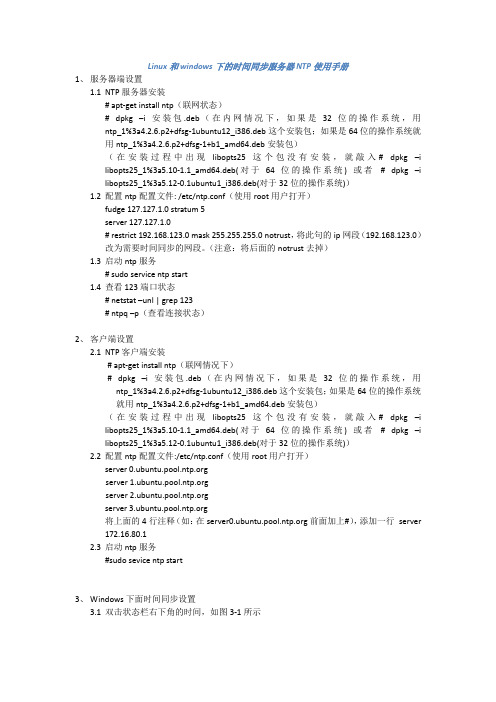
Linux和windows下的时间同步服务器NTP使用手册1、服务器端设置1.1NTP服务器安装# apt-get install ntp(联网状态)# dpkg –i 安装包.deb(在内网情况下,如果是32位的操作系统,用ntp_1%3a4.2.6.p2+dfsg-1ubuntu12_i386.deb这个安装包;如果是64位的操作系统就用ntp_1%3a4.2.6.p2+dfsg-1+b1_amd64.deb安装包)(在安装过程中出现libopts25这个包没有安装,就敲入# dpkg –i libopts25_1%3a5.10-1.1_amd64.deb(对于64位的操作系统) 或者# dpkg –i libopts25_1%3a5.12-0.1ubuntu1_i386.deb(对于32位的操作系统))1.2配置ntp配置文件: /etc/ntp.conf(使用root用户打开)fudge 127.127.1.0 stratum 5server 127.127.1.0# restrict 192.168.123.0 mask 255.255.255.0 notrust,将此句的ip网段(192.168.123.0)改为需要时间同步的网段。
(注意:将后面的notrust去掉)1.3启动ntp服务# sudo service ntp start1.4查看123端口状态# netstat –unl | grep 123# ntpq –p(查看连接状态)2、客户端设置2.1NTP客户端安装# apt-get install ntp(联网情况下)# dpkg –i 安装包.deb(在内网情况下,如果是32位的操作系统,用ntp_1%3a4.2.6.p2+dfsg-1ubuntu12_i386.deb这个安装包;如果是64位的操作系统就用ntp_1%3a4.2.6.p2+dfsg-1+b1_amd64.deb安装包)(在安装过程中出现libopts25这个包没有安装,就敲入# dpkg –i libopts25_1%3a5.10-1.1_amd64.deb(对于64位的操作系统) 或者# dpkg –i libopts25_1%3a5.12-0.1ubuntu1_i386.deb(对于32位的操作系统))2.2配置ntp配置文件:/etc/ntp.conf(使用root用户打开)server server server server 将上面的4行注释(如:在前面加上#),添加一行server 172.16.80.12.3启动ntp服务#sudo sevice ntp start3、Windows下面时间同步设置3.1双击状态栏右下角的时间,如图3-1所示图3-13.2鼠标左键单击Internet时间选项卡,如图3-2所示图3-2修改服务器ip地址,将地址改为时间同步服务器的ip地址,改过之后,单击确定按钮完成操作。
NTP(时间同步服务器)配置
NTP(时间同步服务器)配置NTP(网络时间协议)是一种用于网络中计算机时间同步的协议。
它通过一组服务器,称为时间同步服务器,将准确的时间信息传递给其他计算机,以确保整个网络中的时间一致性。
配置NTP服务器是很重要的,本文将介绍如何进行NTP服务器的配置。
首先,安装并配置NTP服务器软件。
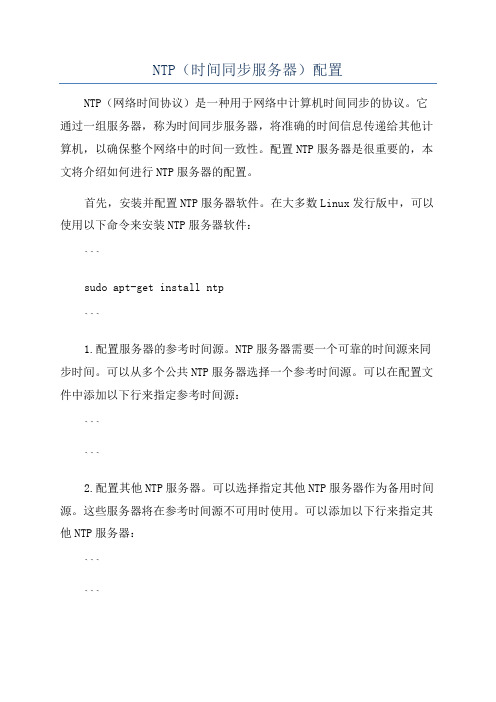
在大多数Linux发行版中,可以使用以下命令来安装NTP服务器软件:```sudo apt-get install ntp```1.配置服务器的参考时间源。
NTP服务器需要一个可靠的时间源来同步时间。
可以从多个公共NTP服务器选择一个参考时间源。
可以在配置文件中添加以下行来指定参考时间源:``````2.配置其他NTP服务器。
可以选择指定其他NTP服务器作为备用时间源。
这些服务器将在参考时间源不可用时使用。
可以添加以下行来指定其他NTP服务器:``````3. 配置允许访问NTP服务器的客户端。
可以通过使用`restrict`命令来限制可以访问NTP服务器的客户端。
可以添加以下行来指定允许访问的客户端:```restrict 192.168.0.0 mask 255.255.255.0 nomodify notrap```其中,`192.168.0.0`应替换为允许访问的客户端的IP地址范围。
4.配置NTP服务器的日志记录。
可以通过添加以下行来配置NTP服务器的日志记录:```logfile /var/log/ntp.log```这将指定日志文件的路径和文件名。
5.配置时间同步频率。
可以通过添加以下行来配置时间同步的频率:```minpoll 4maxpoll 6```其中,`minpoll`表示最小的间隔时间单位,`maxpoll`表示最大的间隔时间单位。
较小的值表示更频繁的时间同步。
6.配置NTP服务器的启动选项。
可以通过添加以下行来配置NTP服务器的启动选项:```#启用NTP服务器server 127.127.1.0fudge 127.127.1.0 stratum 10```这将启用本地计算机作为NTP服务器以提供时间同步服务。
ntp的安装与配置

NTP的安装与配置NTP的作用:NTP用于同步系统时钟,保持时间的正确性,如果是独立的 linux 系统并且设定了正确的时间,只要CMOS电池不失效,影响是不大的,但是如果是在集群中,时间不一致往往导致数据混乱,这时候NTP就很重要了,往往都是自己搭一台NTP服务器来保持整个集群的时间一致性。
像有些场合,比如股票处理、航天领域,任何时间的微小误差都会导致大的错误,这时候NTP就很有必要,而一些与时间无关的场合就没必要。
关闭 NTP主要是因为这个服务启动太耗时间。
第一步,NTP的安装Ntp安装包在我们的安装包中有,就是安装linux的压缩包中,操作步骤linux虚拟机右键、设置、硬件、cd/dvd、使用ios镜像文件、选择你的linux压缩包、点击上边的连接。
回到虚拟机,打开终端输出mount /dev/cdrom /mnt 这次命令意思为吧光盘挂载到/mnt 下如出现:mount: block device /dev/cdrom is write-protected, mounting read-only 的时候表示挂载成功,然后我们输出cd /mnt/Server 因为安装包的rpm包默认在Server 中查找需要的安装包ls | grep ntp 命令解释为 ls 查看目录 grep 找出与ntp相关的包上图中ntp-4.2.2p1-9.el5_4.1.x86_64.rpm是我们需要安装包,输入rpm –ivh ntp-4.2.2p1-9.el5_4.1.x86_64.rpm安装 ntp。
第二步配置文件我们要做的是客户端/服务器模式,要配置的文件为vi /etc/ntp.conf这个配置文件,打开后的内容restrict、default,默认定义的规则,nomodify禁止远程主机修改本地配置,拒绝特殊的ntpdq获取信息。
图中最后一行是我添加的,意思为内网从192.168.150.1到192.168.150.254的服务器都可以跟我这台服务器同步时间。
- 1、下载文档前请自行甄别文档内容的完整性,平台不提供额外的编辑、内容补充、找答案等附加服务。
- 2、"仅部分预览"的文档,不可在线预览部分如存在完整性等问题,可反馈申请退款(可完整预览的文档不适用该条件!)。
- 3、如文档侵犯您的权益,请联系客服反馈,我们会尽快为您处理(人工客服工作时间:9:00-18:30)。
时区设置文件
4. /etc/localtime
本地系统的时间设定文件
[root@linuxidc1 ~]# grep -v "^#" /etc/ntp.conf
restrict default kod nomodify notrap nopeer noquery//对于默认的client拒绝所有的操作
driftfile /var/lib/ntp/drift
restrict 192.168.56.12
restrict 127.0.0.1
restrict -6 ::1
server 192.168.56.200
fudge 192.168.56.200 stratum 8
includefile /etc/ntp/crypto/pw
keys /etc/ntp/keys
注释:
restrict 192.168.56.12 <---------客户端需要同步的ip,有多少个客户端,添加多
restrict 127.0.0.1 <---------允许本地同步,便于本地监控、配置
service ip6tables stop
service iptables stop
查看是否关闭成功:
[root@mysql ~]# chkconfig --list | grep ip
ip6tables 0:off1:off2:off3:off4:off5:off6:off
restrict -6 default kod nomodify notrap nopeer noquery //针对ipv6的设置
restrict 127.0.0.1 //允许本机地址一切的操作
restrict -6 ::1
server //设置上层服务器做同步ip地址
server
server
server 127.127.1.0 //local地址
fudge 127.127.1.0 stratum 10 //这行是时间服务器的层次。设为0则为顶级,如果要向别的NTP服务器更新时间,请不要把它设为0
ntpd 2862 ntp 19u IPv6 22535 0t0 UDP [fe80::a00:27ff:fe8a:b4f0]:ntp
ntpd 2862 ntp 20u IPv6 22536 0t0 UDP [fe80::a00:27ff:feb9:c941]:ntp
fontpackages-filesystem-1.41-1.1.el6.noarch
ntp-4.2.4p8-3.el6.x86_64
ntpdate-4.2.4p8-3.el6.x86_64
如果没有后面两个,需要安装,注意是客户端和服务器端都要查看
2:在需要做ntp服务器的主机 编辑 /etc/ntp.conf
[root@mysql ~]# ntpdate -d 192.168.56.11 查看原因
22 Jul 02:55:01 ntpdate[2096]: ntpdate 4.2.4p8@1.1612-o Thu Jan 10 15:17:41 UTC 2013 (1)
22 Jul 02:55:02 ntpdate[2096]: no server suitable for synchronization found
==============================================================================
192.168.56.200 .INIT. 16 u 41 64 0 0.000 0.000 0.000
[root@mysql ~]# crontab -e 编辑定时任务,每分钟执行一次
*/1 * * * * /root/ntpupdate.sh
[root@mysql ~]# crontab -l
*/1 * * * * /root/ntpupdate.sh 编辑后查看
[root@mysql ~]# vi /root/ntpupdate.sh 编辑定时脚本
/usr/sbin/ntpdate 192.168.56.11
[root@mysql ~]# cat /root/ntpupdate.sh 编辑完之后查看
/usr/sbin/ntpdate 192.168.56.11
4:防火墙设置
iptables -I INPUT -p udp -m udp --sport 123 -j ACCEPT 对外开放123端口
最好的办法是将所有linux系统的防火墙都关闭:
chkconfig --level 2345 ip6tables off
chkconfig --level 2345 iptables off
driftfile /var/lib/ntp/drift //记录上次的NTP server与上层NTP server联接所花费的时间
keys /etc/ntp/keys
参数:
ignore :关闭所有的 NTP 联机服务
nomodify:客户端不能更改服务端的时间参数,但是客户端可以通过服务端进行网络校时。
driftfile /var/lib/ntp/drift
restrict default nomodify notrap <----- 允许所有ip,省去设置麻烦
restrict 127.0.0.1
restrict -6 ::1
server 192.168.56.200
ntpd 2862 ntp 21u IPv4 22537 0t0 UDP localhost.localdomain:ntp
ntpd 2862 ntp 22u IPv4 22538 0t0 UDP 11g:ntp
ntpd 2862 ntp 23u IPv4 22539 0t0 UDP 192.168.110.12:ntp <-----可以看出,设置成功
ntp服务器设置
浏览:144 |更新:2014-07-22 16:00
192.168.56.11 ntp服务器
192.168.56.200 ntp服务器上层同步ip
192.168.56.12 客户端
1:查看客户端和服务器端ntp rpm包是否安装
[root@11g ~]# rpm -qa | grep ntp
方法二
1. /etc/ntp.conf
NTP服务的主要配置文件,不同的Linux版本文件所在的目录可能会不同。
2. /usr/share/zoneinfo
规定了各主要时区的时间设定文件。/usr/share/zoneinfo/Asia/Shanghai 为中国大陆地区的时区设定文件。
[root@11g ~]# chkconfig ntpd on 设置开机自启动ntpd服务
[root@11g ~]# lsof -i:123 查看123端口
COMMAND PID USER FD TYPE DEVICE SIZE/OFF NODE NAME
如果stratum 设置没有问题的话,第一次执行
[root@mysql ~]# ntpdate 192.168.56.11
22 Jul 06:53:14 ntpdate[5611]: no server suitable for synchronization found
需要再等上3-5分钟再次执行
restrict -6 ::1
server 192.168.56.200 <---------需要同步的上层服务器
fudge 192.168.56.200 stratum 8 <-------同步上层服务器的stratum 大小不能超过或等于16
还有一种方案是:
[root@11g ~]# vi /etc/ntp.conf
[root@11g ~]# ntpq -p 如果出现这样的情况,ntp服务器最后设置才算成功
remote refid st t when poll reach delay offset jitter
==============================================================================
*192.168.56.200 LOCAL(0) 11 u 9 64 377 1.362 2.822 0.449
以下是失败的设置:
[root@11g ~]# ntpq -p
remote refid st t when poll reach delay offset jitter
[root@mysql ~]# ntpdate 192.168.56.11
22 Jul 06:54:45 ntpdate[5627]: adjust time server 192.168.56.11 offset -0.119003 sec <-----同步成功
4:客户端设置定时同步时间
[root@11g ~]# cp /etc/ntp.conf /etc/ntp.conf.bak 先拷贝一份做备份
[root@11g ~]# rm -rf /etc/ntp.conf 显出原始ntp配置文件
[root@11g ~]# vi /etc/ntp.conf 重新编辑一份ntp配置文件
ntpd 2862 ntp 16u IPv4 22529 0t0 UDP *:ntp
ntpd 2862 ntp 17u IPv6 22530 0t0 UDP *:ntp
