移动黑莓bis使用教程
黑莓机器最全教程

小帅黑莓智能手机西北专卖黑莓手机基本常用操作指南安装SIM卡:用指头向下按住后盖下方的弹簧卡子,用力向上将后盖推开,将SIM卡和TF扩展卡按照卡槽侧边的方向提示插入槽内,安装电池等待手机自动开机。
(安装电池直至2分钟自动开机)按键解释:8310 8100 8800系列机器为例:键盘中间的滚珠为导航键,用来控制上下左右,向下按为确认键。
滚珠右边的(反折箭头键)为返回键。
滚珠左边的黑莓(很多点点键)为菜单键,绿色键为接听键,红色键为挂机键或长按则为关机键。
在键盘上,按数字1234567890为拨号按键,其他字母键为编写文档或者短信时,拼音或英文书写。
8700:手机右侧的滚轮为导航键,滚轮滚动控制上下左右,滚轮往里按为确定键或者菜单键。
滚轮下方的按键为返回键。
删除键:键盘右下方,标有DEL键,那个就是,可以删除文字和拨号数字。
------------------------------------------------------------------------------调试电话及短信:(必须步骤)1,开机后,在主页屏幕找到(管理连接)或(开关无线电),点击确定,选择打开无线电即手机信号。
2,进入主页屏幕上的(选项)——(短信或SMS)——数据编码——将(7位)改为(UCS2)。
将发送报告---选择开。
3,进入(通话记录),使用菜单键选择(选项)——智能拨号——国家地区代码——改为(未知)即可。
4,至此,您的电话功能和短信收发没有任何障碍了,在初次使用时,可以进入每个功能选项和软件,研究和认识下每个软件或选项的具体功能。
5,如果您的SIM卡有电话本,请进入通讯录,按菜单键—SIM卡电话本,加载完成后,选择菜单键全部复制到手机上。
如果您的SIN卡无电话本,可以将卡放回原手机,进行复制,再放入黑莓手机后复制。
拨打电话:直接在键盘左边部分的数字键输入号码,按绿色拨号键和红色挂机键即可。
电话本中的人,可以直接进入通讯录,选择要呼叫的联系人,回车键或者拨号键即可!通话时,上下调节侧边的音量键可调节通话音量,按菜单键,其中有激活免提,即为使用免提通话。
BlackBerry上的网络连接_CU
BlackBerry上的网络连接王恒进@RIM ChinaContents1. BlackBerry上连接HTTP或Socket的五种方式 (2)1.1. BlackBerry Enterprise Server(BES)方式 (2)1.2. BlackBerry Internet Servie(BIS)方式 (2)1.3. Direct TCP方式 (2)1.4. Wi-Fi (3)1.5. WAP (3)2. BlackBerry上中国联通的WAP网关连接技巧 (6)BlackBerry 5.0新提供的Network API:自动选择网关的终极解决方案 (9)3. 网络设置解决方案举例 (12)4. HTTP连接代码实例 (14)1.BlackBerry上连接HTTP或Socket的五种方式BlackBerry JDE的API提供了五种方式来进行HTTP或者socket连接,包括:1.1. BlackBerry Enterprise Server(BES)方式这种方式通过使用BES的BlackBerry MDS Services来进行网络连接,BlackBerryMDS Services负责处理所有的浏览器请求或者连接请求、并负责数据加密,这是黑莓手机的默认连接方式,如下:例1: (HttpConnection) Connector.open("");以上代码会自动将BlackBerry MDS Services作为它的默认连接路径。
实际开发中,如果要确保应用程序使用uses BlackBerry MDS Services作为它的连接路径,需要在URL最后加上参数“deviceside=false”,这也是我们推荐的方式,如下:例2:(HttpConnection)Connector.open(“;deviceside=false”);1.2.BlackBerry Internet Servie(BIS)方式这种方式是为第三方提供的连接接口,它对数据不进行加密,用户可以通过使用HTTPS和SSL来进行安全的连接。
BlackBerry BIS业务客服手册(黑莓)

中国移动黑莓个人邮箱服务(BIS)客服手册中国移动Blackberry支持中心2010年11月本文制定了中国移动黑莓个人邮箱服务(BIS)全国通用客服方案,介绍了主要业务功能、各方的职责分工、业务客服处理流程、常见问题处理等内容,适用于中国移动各省、自治区、直辖市公司一线客服及管理人员,用于业务培训和处理客服问题时使用。
中国移动通信有限公司市场经营部负责手册的编制、解释并根据业务发展情况每年组织相关人员对手册进行修订。
目录1业务概述 (1)1.1业务定位 (1)1.2业务介绍 (1)1.3 实施时间 (1)1.4 业务特点 (1)1.5 使用对象和范围 (2)1.6 业务资费 (2)1.7 业务功能 (2)2业务受理流程 (3)2.1中国移动黑莓个人邮箱服务(BIS)的开通流程 (3)2.2中国移动黑莓个人邮箱服务(BIS)的套餐变更流程 (3)2.3中国移动黑莓个人邮箱服务(BIS)的取消流程 (4)3 一二线中国移动黑莓个人邮箱服务(BIS)客服职责和分工 (4)3.1 一线客服工作职责 (4)3.2 二线客服工作职责 (5)4 客户服务流程 (6)4.1 流程说明 (6)4.2 二线客服联系电话及邮箱 (7)5 投诉操作指引介绍 (7)5.1帐户类相关问题 (7)5.2邮件服务类问题 (10)5.3功能使用类问题 (13)6 常见问题FAQ (15)6.1 业务咨询类问题 (15)6.2 手机终端咨询类问题 (17)6.3 其他技术类问题 (18)6.4 终端使用类问题 (21)6.5 业务故障类问题 (22)1业务概述1.1业务定位中国移动黑莓个人邮箱服务(BIS)是中国移动和加拿大RIM公司联合推出的合作业务。
1.2业务介绍1.2.1中国移动黑莓个人邮箱服务(BIS)是由中国移动面向个人用户推出的无线电子邮件解决方案。
中国移动黑莓个人邮箱服务(BIS)可以使用户随时随地的通过BlackBerry终端无线处理多个电子邮件账户的邮件以及其它基于BlackBerry的相关增值应用,具有实时、安全、稳定、主动推送的特点。
BlackBerry手册 黑莓手机使用

DM:BlackBerry Desktop Manager,桌面管理器BM:BlackBerry ManagerOTA:Over The AirIPPP:Inter Process第一部分BESBES服务器上通过系统开始菜单——程序——BlackBerry Enterprise Server——BlackBerry Manager,打开BM:用户右键菜单右键单击用户列表中的用户,弹出右键菜单。
这个菜单几乎包含了所有常用的操作。
根据用户状态,菜单中的某些选项可能会略有不同:打开用户列表,右键单击空白处添加用户,或在下方选择Add Users:成后可以通过右键菜单中的【Choose Folders for Redirection】看到用户邮箱中的文件夹,类似下图:企业激活设置有线激活将BlackBerry终端用USB数据线连接到BES服务器,右键单击需要使用此设备的用户,右键菜单中选择【Assign Device】,弹出窗口中选择设备:点击【OK】即可。
如果BB终端的无线功能已经关掉,再执行一次上述的操作,会通过USB数据线开始同步,BB终端的屏幕会出现下图的界面,请等待激活完成。
相对于无线同步,有线同步会较快。
无线激活无线激活的条件:1.用户可以收发公网邮件2.用户的新邮件投递位置位于邮件服务器3.激活时用户邮箱会收到一封发件人为etp@etp****(****为4位数字),邮件含有名为ETP.DAT的附件。
BES会监控用户的收件箱,该邮件到达后,BES会取走并删除该用户邮箱中的该邮件。
请确认邮件网关不会拦截该邮件,并保证邮件被投递到用户的收件箱文件夹中。
设置激活密码对指定用户使用右键菜单中的【Set Activation Password】,设置激活密码:注意该密码只能用于激活对应用户邮件地址的BB终端,仅能使用一次,且有时效限制,默认为48小时。
超时未激活需要重新设置。
管理员随后可将激活密码告知用户,用户使用该密码激活BB终端,激活操作方法请参见终端企业激活。
黑莓(BlackBerry)手机快速启动指南说明书
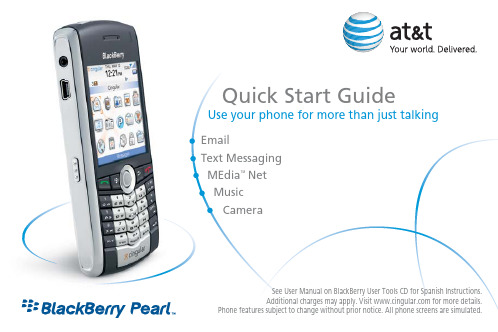
EmailText Messaging MEdia ™ Net Music CameraSee User Manual on BlackBerry User Tools CD for Spanish Instructions.Additional charges may apply. Visit for more details.Phone features subject to change without prior notice. All phone screens are simulated.Use your phone for more than just talkingQuick Start GuideMute keyHeadset jackUSB portMenu keyOpen the menu inan applicationSend keyOpen the phone. Call a highlighted phone number TrackballRoll to move around a screen Click (press) to select an itemAlt keyType the alternate characteron a keySymbol keyOpen the symbol listShift keyEnter key Backspace/Delete key Speaker keyConvenience keyOpen the push-to-talk application Speak to a push-to-talk contactTurn on/off speakerphone during a call End/Power key End a callTurn off the device Escape keyMove back a screen Close a menu Volume keysAdjust the volume during a call Right convenience key Open the camera Take a pictureBla c kBerry ®Pearl ™key fun c tionsall to st name or phone numTaking photos is easy with your BlackBerry Pearl’s built-in Camera.1.On the Home Sc reen, c li c k Camera.2.Take a pi c ture b y c li c kin g the trackball or3.Perform one of the followin g a c tions:a.To take another pi c ture, c li c k theb.To d elete the pi c ture, c li c k thec.To set the pi c ture as a c aller ID pi c ture or Home Sc reenb ac k g roun d, c li c k the Crop i c on.d.To sen d the pi c ture via email, c li c kthe Envelope i c on.e.To rename the pi c ture, c li c k the FileFolder i c on.With MEdia™Net, you can get the information that is important to you at a glance. Check your local weather, your team scores or movie listings with just a few clicks.1.On the Home Sc reen, s c roll d own to an d sele c t MEdia™Net.2.Hi g hli g ht the c ate g ory of interest, an d c li c k on the trackball.For qui c k a cc ess to your favorite c ate g ories personalize your MEdia™ Net Home Sc reen.1.From the MEdia™ Net Home Pa g e sele c t Customize MEdia™ Net.2.C li c k Edit Categories.3.S ele c t the C ate g ories you woul d like to appear on your Home Pa g e.4.Sc roll to the b ottom of the pa g e an d C li c k Save.How to a dd a b ookmark1.To b ookmark a we b pa g e, press the Menu key c li c k at Add Bookmark.2.C li c k Add.The BlackBerry Pearl allows you to take your Address Book and Calendar with you and stay on top of your day. Stay organized and on schedule with time savingS et the alarm1.From the Home Sc reen c li c k on Settings.2.C li c k on the Alarm i c on.3.S et up the Alarm b y sele c tin g On for the Daily Alarm anthe Time, Snooze.A dd a c onta c t1.On the Home Sc reen c li c k on Address Book.2.C li c k on the Menu key, c li c k on New Address.3.Type in the c onta c t information.4.C li c k on the trackball an d c li c k Save when c omplete.S et-up a task1.From the Home Sc reen c li c k on Applications.2.C li c k on Tasks. C li c k on Menu, c li c k on New an d enter your task (an erran d).You can synchronize local information on your home/work computer such as Microsoft Office Outlook mobile content, media files or contacts by using BlackBerry Desktop software that comes standard with the enclosed CD in the box.Use Once an d Text Message@, hold thekey while typing OP(for, or /, use thekey .BlackBerry Internet Service email provides automatic delivery and access to your personal and even work emails including MSN™, Yahoo™, Hotmail™, GMail™, Earthlink™and many other popular ISP and personal email providers.How to set up your email from the phone1.From the Home Sc reen, c li c k the BlackBerry Setup i c on.2.On the Bla c kBerry S etup s c reen, c li c k the Personal Email Setup i c on.3.Roll the tra c k b all, s c roll d own an d c li c k Create New Account.4.Rea d the le g al terms an d c on d itions c arefully s c roll to an d c li c k Yes to a cc ept.5.Type the followin g information in the A cc ount S etup s c reen: User ID & Password.6.You now have the option to a dd up to 10 Internet email a cc ounts an d/or c reate anoptional Bla c kBerry email a dd ress.How to c ompose email1.From the Home Sc reen, c li c k on the Messages i c on.2.Press the Menu key, s c roll to an d c li c k Compose Email.3.Type an email a dd ress or c onta c t in the To: fiel d.4.Type the Subject. Then when finishe d typin g messa g e, c li c k the trackball an d sele c t Send. For more information on Corporate email solutions please visit /blackberryYou can listen to your favorite music on the BlackBerry Pearl. The built-in Media Player provides the ultimate in control and flexibility to organize your music and listen to it the way you want to.How to loa d MP3 files1.Ensure that you have inserte d a Mi c ro S D c ar d into the b a c k of yourBla c kBerry Pearl to optimize memory availa b le for musi c.2.C onne c t your Bla c kBerry d evi c e to your c omputer usin g the U S B c a b le provi d e d.3.On your P C, d ou b le c li c k with your mouse on thesoftware provi d e d (is installe d from the Bla c kBerry User Tools C D).in g your mouse, d ou b le c li c k on the Media Manager i c on.5.Two c olumns will appear, one on the left showin g your P C files,one on the ri g ht showin g your Bla c kBerry Me d ia files.6.In the Bla c kBerry c olumn on the ri g ht, d ou b le c li c k on Media Card,then d ou b le c li c k on BlackBerry, then d ou b le c li c k on Music.7.In the P C c olumn on the left, usin g your mouse, sele c t the fileyou woul d like to import to your Me d ia C ar d.in g your mouse, c li c k on the arrow that points to the ri gthe file to the Musi c fol d er on your Me d ia C ar d. Repeat as ne cListen to your favorite music on the BlackBerry Pearl while on the road, relaxing at home or at the gym.How to play MP3 files1.From the Home Sc reen, c li c k the Media i c on.2.On the Me d ia s c reen, you will fin d (4) d ire c tories. C li c k the tra c k b all on the alrea d yhi g hli g hte d Music d ire c tory.3.Sc roll the trackball to an d c li c k Me d ia C ar d. To play all son g s you see store d on theme d ia c ar d, press the Menu key an d roll an d press the tra c k b all to sele c t Play All.Note: All audio files must be transferred to the BlackBerry Pearl before playing. Use the Media Manager icon of the Desktop Software found on the CD in the box to transfer files.© 2007 AT&T Knowle dge Ventures. All ri g hts reserve d.S u b si d iaries an d affiliates of AT&T In c. provi d e pro d u c ts an d servi c es un d er the AT&T b ran d. All other b ran d s, pro d u c t names, c ompany names, tra d emarks an d servi c e marks are the properties of their respe c tive owners.A C A d apter S kinsMi c ro S D™ C ar d Leather C ases & TotesG P S Re c eiverS tereo Hea d setBUS MS T 02 07 2060 E BlackBerry Pearl QSG。
黑莓业务激活方法及步骤
黑莓业务激活方法及步骤
1.BES激活步骤
1.企业IT管理员登陆企业BES管理页面,为用户创建BES账户,为要激活的账号配置激活码。
2.用户手机端激活,操作步骤:主屏幕---设置---电子邮件设置---企业账户
输入企业邮箱,和管理员所设置的激活密码
2.BIS激活步骤
2.1通过手机终端激活
主屏幕---设置---电子邮件设置---Internet邮件帐户
绑定新邮箱----其他(POP3邮箱,如新浪、163、QQ邮箱)
输入邮箱地址和邮箱密码,选择继续。
添加成功
添加成功后,会有一些个性化设置,如显示姓名、签名档等。
2.2通过PC端激活
• 用电脑访问
创建新用户,输入手机的PIN和IMEI号码
选择用户名和密码
• 绑定邮箱。
Blackberry_basic_setting(黑莓上手基本设置)

Blackberry basic setting基于我的个人使用黑莓手机的习惯,做的一些最基本设置,供参考黑莓作为一个手机,肯定基本的功能就是电话和短信,以下就是电话和短信的基本设置。
A.电话A1.黑莓的比较内在的东西就是原生就支持快捷键,所以电话拨号就不能设置从主屏幕拨号设置为否设置步骤:按,进入界面按黑莓键(菜单键),会弹出下图显示的菜单滑动触板选择选项,点击进下图选择常规选项点击触板进下图滑动触板到从主屏幕拨号选项,设置为否按菜单键弹出菜单,点击保存。
现在可以在主屏幕时使用快捷键了。
按键盘上的m键,进入短信界面。
按键盘上的p键,进入电话界面。
按键盘上的b键,进入浏览器界面。
按键盘上的o键,进入选项界面。
按键盘上的a键,进入地址簿界面。
按键盘上的l键,进入日历界面。
按键盘上的t键,进入任务界面。
按键盘上的d键,进入记事本界面。
A2.如果有短信拨不出去,或者不想在电话号码前显示+86,可以按照下面步骤进行设置。
按照A1中步骤到电话选项界面,选择智能拨号点击进下图智能拨号界面,滑动滑板到国家(地区)代码选项,点击,出现下图选项这里可以设置为未知(如果你不知道你现在所在国家(地区)的代码)或者中国(+86)。
建议设置为未知这里不设置正确,不能发送短信。
B.短信B1.将短信,彩信集成到消息界面中去,这样就可以直接按m键进入消息界面时,能看到短信和彩信。
如下图,下面短信和彩信和消息(M)是分开的,而消息是有快捷键M,所以为了快速的看到短信,需要设置在消息中显示短信,和彩信。
设置步骤点击消息图标进入消息界面,按下图,从左向右,从上向下操作。
B2。
设置短信保留时间,建议设置为永远,这样不担心短信丢失。
B3。
设置短信发送报告,知晓短信是否已经发到对方手机。
在主屏幕按o键,进入选项设置界面进行设置C.网络使用设置,以移动网络设置为例。
C1.设置接入账号,按下图设置后,就可以通过移动edge上网了,这里cmnet和cmwap都可以,建议cmnet,速度要快点,而且现在两种方式上网一样的收费。
中国移动WLAN自动认证功能Blackberry配置操作手册

中国移动WLAN自动认证功能Blackberry配置操作手册
中国移动通信集团公司
2011年11月
1.首次使用设置【后续使用请“跳过”】:
黑莓手机使用WLAN自动认证操作步骤如下:步骤1.打开手机功能表,进入“选项”功能。
步骤2.选择“网络和连接”。
步骤3.选择“WLAN网络”。
步骤4.在搜索到的SSID列表中选择“CMCC-AUTO”。
未开通手机wlan功能客户请发送短信“手机WLAN”至10086根据短信提示开通业务。
步骤6.点击“连接”,手机终端与网络侧进行认证。
步骤7.待手机显示“成功!”,点击“完成”返回主页面。
2.下线说明
打开手机功能表,进入“管理连接”选项关闭WiFi即完成WLAN自动认证下线。
中国联通黑莓BIS服务主要功能

邮件推送功能
(1)支持多种类型附件阅读,提高商务人士的办公效率。
(2)支持无线邮件同步。邮件在手机上删除后,不需持创建邮件过滤器。用户可以根据自己的实际使用情况设置各类邮件过滤器,防止垃圾邮件的骚扰。
(4)支持设置自动签名、自动回复。用户可以在自己休假、出差时,设置邮件的自动回复。
提供第三方应用push通道
提供给第三方应用PUSH通道是指第三方应用开发可以利用Blackberry提供的PUSH通过进行消息的主动推送。
黑莓终端用户未开通BIS服务时,可以通过3GNET访问移动互联网,但无法享受黑莓的特殊服务。只有开通BIS服务后,才可以通过APN为接入移动互联网,在网页浏览时可以对流量进行压缩,特定的应用程序可以通过push通道进行主动推送等。
黑莓即时通信功能BBM
BBM是RIM公司推出的即时通信工具,可以随时创建群组进行聊天,发送文件,通过电子邮件、PIN或者二维码添加好友。BBM采用压缩技术,占用的无线资源少。不订购黑莓服务的用户无法使用BBM。
(5)支持BMC接入。BMC是基于web的管理平台,可以实现基本的对终端的控制,实现重置密码,邮件删除等功能。BIS用户通过接受邮件邀请的方式加入BMC。(此平台暂时未开放)
黑莓智能浏览器
黑莓智能浏览器采用高效压缩推送技术,通过RIM公司的专用通道,让用户享受更高速,更省流量的上网体验。
APN为的移动互联网通道
应用商店APP World
APP World是基于Blackberry OS系统开发的应用软件商店,用户可以通过APP World随时下载主题、应用等内容。订购了BIS服务的用户可以直接使用AppWorld,不需要在终端侧做特殊的设置。
WIFI收发邮件
黑莓Passport智能手机用户指南说明书
BlackBerry Passport Smartphone版本: 10.3.3使用指南已發佈: 2016-06-29 SWD-20160629121631232內容設定與基本資訊 (6)裝置簡介 (6)BlackBerry 10 OS 有什麼不同? (7)通知圖示 (13)功能表圖示 (14)設定您的裝置 (14)使用觸控手勢 (16)進階互動 (23)裝置個人化 (25)裝置切換 (25)關於 BlackBerry ID (35)電話與語音 (38)電話 (38)通知與鈴聲 (47)語音信箱 (53)BlackBerry Hub 和電子郵件 (56)BlackBerry Hub 和電子郵件 (56)joyn 裝置的 BlackBerry 10 (84)媒體 (87)變更媒體音量 (87)支援的音訊與視訊檔案副檔名、格式及轉碼器 (87)疑難排解:媒體 (88)相機 (88)圖片 (97)音樂 (104)影片 (109)BlackBerry Story Maker (113)媒體分享 (116)FM 收音機 (118)設定 (120)自訂您的裝置設定 (120)更新您的裝置軟體。
(124)電池與電源 (125)連線 (132)BlackBerry 鍵盤與鍵入 (157)語言 (166)鍵盤輸入法 (167)畫面顯示 (176)輔助工具 (178)媒體卡與儲存裝置 (194)使用您裝置的 BlackBerry Link (198)應用程式與功能 (208)整理應用程式 (208)關於 BlackBerry Assistant (210)行事曆 (214)連絡人 (225)時鐘 (232)Android 應用程式 (236)地圖與 GPS (238)瀏覽器 (245)智慧標籤 (253)檔案管理員 (257)計算機 (260)生產力與工作 (262)關於 BlackBerry Balance 及公司空間 (262)提醒 (267)安全性與備份 (274)密碼與鎖定 (274)若您的裝置遺失或遭竊時該怎麼辦 (280)BlackBerry Protect (281)清除您的裝置以刪除裝置資料 (282)安全性設定 (283)密碼管理員 (286)法律注意事項 (290)設定與基本資訊裝置簡介1.耳機插孔2.鎖定畫面 (按);電源開關 (長按);重設 (長按 10 秒)3.通知 LED4.前置相機5.提高音量6.靜音 (按下);BlackBerry Assistant (長按)7.降低音量8.多功能埠 (支援 USB 和視訊)6BlackBerry 10 OS 有什麼不同?若您是 BlackBerry 10 裝置的新使用者,那您可能會迫切想要知道它與其他 BlackBerry 裝置有何不同。
黑莓使用说明书
Learn more一、感谢使用黑莓风暴二智能手机。
设置你的手机,安装SIM卡安装电池完成设置wizard。
使用手机和手机附件前,请查看Safety and Product Information(使用安全和产品信息),最新版本请查看/go/docs关于安装SIM卡SIM卡储存重要的无线网络信息,SIM卡可能已经实现安装在您的设备里。
在以下几种情况下安装SIM卡1、无线网络服务商提供给您的SIM卡,或者在您手机的盒子里的SIM卡2、可以将以前使用的SIM卡安装在您新的手机中,根据不同的无线运营商,您可能需要一个PIN码。
更多信息请联系您的无线网络运营商3、您从无线网络运营商购买一个可选择的SIM卡,连接全球漫游网络,以便于能够在旅行时将您的手机连接到GSM或者UMTS二、手机基本部件不要在使用耳机时将您的手机放在耳朵附近,以免发生听觉损坏。
更多信息,请查看光盘上的Safety and Product Information1、打电话1)在Home界面,按下绿色键2)输入电话号码3)按下绿色键要终止谈话,按下红色键2、更改铃声1)在Home界面,按下绿色键2)按下菜单键3)点击设置铃声4)可执行以下操作(1)使用出厂时预先下载好的铃声,在手机铃声处,选择点击一首铃声(2)使用自己下载的手机铃声,在手机铃声处,点击列表顶部的选择音乐,找到已经下载好的音乐,选择手机铃声5)按下菜单键6)点击保存3、添加联系1)Home界面,点击Contacts(联系人)2)点击新联系人3)输入新联系人信息4)按下菜单键5)点击Save(保存)4、手机小窍门1)接电话,按下绿色键2)接听电话时调节声音,按下手机右侧的Volume(声音)键3)接听电话时打开(关闭)声音,按下手机顶部的静音键5、配对蓝牙设备连接蓝牙设备前,必须与其配对1)Home界面,点击Manage Connections(连接管理)2)点击Set Up Bluetooth(建立蓝牙)3)点击搜索4)点击搜索到的设备中的一个设备5)如果连接的设备没有键盘,例如耳机,在你的手机上,输入配对密码,此时配对密码往往是一个数字或者第一个数字如果连接的蓝牙设备有键盘例如笔记本,在两边都输入配对密码6、蓝牙指示在Home界面顶部有关于蓝牙的指示7、关于紧急呼叫如果您不在服务区内,而SOS无线指示显示,你可以拨打急救号码(即使手机被锁住,或者没有SIM卡);如果当您开始一次紧急呼叫时无线网络断掉,手机会自动重新连接无线网络您只可以拨打官方紧急呼叫电话(例如911、112)您不能信赖任何必要的交流的无线服务,包括医疗服务。
黑莓教程 黑莓上网(包括系统浏览器)、彩信、数据推送、邮件、QQ应用等全解决
黑莓上网(包括系统浏览器)、彩信、数据推送、邮件、QQ应用等全解决(请大家下载收藏,以后就不必再上网辛苦找了,网上的东西信息太浩瀚了,你也不知哪个是有用的。
我打字打得累死了,大家下载支持一下)要解决这些问题,首先要了解一个东西,就是Service Book,也就是我们说的SB。
Service Book这个词听着很熟悉但应用起来却很陌生,熟悉的原因是很多人都在谈论SB,陌生的原因是根本不清楚黑莓手机中的Service Book到底是个什么,它究竟是做什么用的。
Service Book中文称为“服务预定”,简单得说就是黑莓各项链接网络的服务手册。
只有有了SB,你的黑莓才可以上网,收发邮件,接发彩信,接收W AP Push消息等等。
其中上网需要有GPRS和W AP的配置条例,Wi-FI需要有Wi-FI的配置条例,E-Mail需要有E-Mail的配置条例,这些都是调用SB来完成的,并且不同的SB可以修改你自带浏览器的属性,让他以W AP或NET方式打开网页,自定义主页等等。
以我现在的手机为例(8707 os4.2),SB条目显示为:MMS config(wap)Wap push config(wappushconfig)Cmcc wap(wap)Cmcc wap(browser config)Email(cmime)以下为解释:MMS config(wap)就是收发彩信用的,config配置的意思,这里配置为wap.Wap push config(wappushconfig)数据推送,上传、下载用的数据服务,还是wapCmcc wap(wap)网络服务(也就是你的浏览器啊、QQ啊、飞信啊等等需要用到网络服务的第三方应用程序),都是用wap的,由此我们看到,一些只支持net配置的应用就用不了,但好像也有例外,据说是有些地区的网络,可以将net格式的东西转化成wap,这个就不讨论了,毕竟每个地方的运营商(移动、联通)的运行方式不一样。
黑莓 Wi-Fi 移动设置手册说明书

1. Authentication Certificate Install in that PC①②Preparation for BlackBerry Wireless Set-Up (Authentication Certificate Download in the Homepage)How to connect the wireless internet.1. Download the certification to the device from homepage.2. Synchronize the device with downloaded certification using BlackBerry Desktop Program.3. Enjoy the wireless internet.③④⑤⑥Preparation for BlackBerry Wireless Set-Up (Authentication Certificate Download in the Homepage)First, Authentication Certificate Install in that PC⑦⑧⑨ Preparation for BlackBerry Wireless Set-Up (Authentication Certificate Download in the Homepage)First, Authentication Certificate Install in that PC①②Preparation for BlackBerry Wireless Set-Up (Authentication Certificate Download in the Homepage)First, Authentication Certificate Install in that PC③④⑤⑥Preparation for BlackBerry Wireless Set-Up (BlackBerry Desktop Program Download in the Homepage) Second, BlackBerry Desktop Program Install in that PC (BlackBerry Desktop Software 5.0.1)⑦⑧⑨⑩Preparation for BlackBerry Wireless Set-Up (BlackBerry Desktop Program Download in the Homepage) Second, BlackBerry Desktop Program Install in that PC (BlackBerry Desktop Software 5.0.1)⑪⑫Preparation for BlackBerry Wireless Set-Up (BlackBerry Desktop Program Download in the Homepage)Second, BlackBerry Desktop Program Install in that PC (BlackBerry Desktop Software 5.0.1)⑬⑭Preparation for BlackBerry Wireless Set-Up (BlackBerry Desktop Program Download in the Homepage)Second, BlackBerry Desktop Program Install in that PC (BlackBerry Desktop Software 5.0.1)Preparation①Choose the Menu for Authentication Certificate Synchronization.①Preparation for BlackBerry Wireless Set-Up (BlackBerry Desktop Program Implementation in that PC)Preparation for BlackBerry Wireless Set-Up (BlackBerry Desktop Program Implementation in that PC)②At the Top Menu-> Choose the Root Authentication Certificate Tap③Choose the Authentication Certificate lable AnyClick Certificate-> Choose the Bottom Synchronization②③1. BlackBerry Start-Up Screen-> Choose the Menu2.BlackBerry Option Choose3.Choose the Preserved Wi-Fi Profile4. Choose the New addition5. Network Addition in a Hand-Operated6. SSID Input of AP to ConnectKoreaUniv AP7. Choose the Security Pattern8. Certification Method-> Choose the PEAP9. Input of Authorized ID/PWD (Potal ID/Password )Input PORTAL IDInput PORTAL Password11. Authentication Certificate -> Choose the AnyClick 10. Choose the Authentication Certificate13. Choose the EAP-MS-CHAP v212. Choose the Internal Link Security14. Choose the Connection15. ConnectingKoreaUniv AP17. Input Profile and Next 16. Profile Name18. Choose the Finish19. Finish Wi-Fi Set-UpKoreaUniv AP20. BlackBerry Web SurfingQ1. To use a School Wi-Fi Lan to BlackBerry Phone, have to install in BlackBerry Phone a Anyclick Cetification BlackBerry, Where can I download a Certification?A1. Download in Portal System(KUPID)and FTP(ftp://ftp.korea.ac.kr) Server a Anyclick CertificationQ2. Have to install a Anyclick Certification?A2. Surely, Need a Anyclick Certification.Q3. Where can install into SMART Phone a Anyclick Certification?A3. not install into SMART Phone,1. Download in PC and install in PC. (Reference of Manual)2. Synchronization a SMART Phone with Certification to use a BlackBerry Desktop Program. (Reference of Manual)Q4. Where can I download a BlackBerry Desktop Program and, have to install what version?A4. Can download in BlackBerry Homepage, Version is unrelatednessManual is made to stand on the basis a BlackBerry Desktop Program 5.0.1 Version.(※ Caution: When choose a install type, Choose a User Define, Choose and Install a Cetification Synchronization Manu)Q5. Can’t find a Certification and Synchronization Manu in BlackBerry Manager program A5. Below like Picture, have to install in User Define.⑦⑧⑨⑩KoreaUniv APQ6. When set up of Wi-Fi Connection, Below like picture, have to Network add and set up in manual?A6. Choose the Network Browse Manu, choose the KoreaUniv AP.(※ Caution: Aftr choose the KoreaUniv AP, have to add a Security Type, choose the Certification, ID/PWD)Q7. After add a Network Name(SSID) , Below like a Picture , When browse a CA Certification, There is no AnyClickCertificate Publisher ArticleA7. After install in PC a Certification ,have to Synchronization a BlackBerry Phone with Certification. (Reference ofManual)Q8. After set up a Wi-Fi Connection, can choose a anything profile name? A8. Yes. You can choose a anything to KoreaUniv AP in Manual。
黑莓个人邮箱(BIS)业务介绍
建立 黑莓个人业务(BIS) 帐户
1. 使用任意一台可上网的电脑登录: 网站 2. 点击创建新帐户
-27-
建立 黑莓个人业务(BIS) 帐户
1. 勾选我已阅读并理解“法律条款和条件”; 2. 点击我同意;
-28-
建立 黑莓个人业务(BIS) 帐户
-34-
设置邮箱
1. 建立好账户后,系统会提示用户绑定邮箱; 2. 在征得用户许可的情况下,营业厅为用户开通免费版139邮箱
-35-
设置邮箱
1. 输入用户139邮箱的邮件地址和邮箱密码; 2. 点击下一步;
-36-
设置邮箱
1. 系统正在处理信息;
-37-
1. 需要输入PIN和IMEI号
-29-
建立 黑莓个人业务(BIS) 帐户 在手机上查看自己的PIN号码和IMEI号码
选项(Options)—状态(Status) 在这里能看到PIN码(PIN)和IMEI号码(IMEI)。
-30-
建立 黑莓个人业务(BIS) 帐户
1. 输入PIN和IMEI号; 2. 点击继续;
-31-
建立 黑莓个人业务(BIS) 帐户
1. 需要设置自己登录的用户名和密码; 2. 请牢记该用户名和密码,以便以后登录BIS站点,管理邮箱;
-32-
建立 黑莓个人业务(BIS) 帐户
1. 为自己设置用户名和密码; 2. 点击下一步;
-33-
建立 黑莓个人业务(BIS) 帐户
1. 开通BIS帐号后,手机会收到信息
-15-
黑莓个人业务(BIS) 支持的手机类型 所有型号的BlackBerry手机:
中国移动定制机:8310,8910 客户现有的其他渠道BlackBerry手机 支持BIS的BlackBerry Connect手机*
黑莓手机常用设置介绍--blackberry

对“语言”和输入法进行设置;
选择“中文拼音输入法”后,编辑“编辑输入法选项”,这里出现的“声音”选项是选择在输入拼音时是否输入声调,从“编辑输入法选项”中还可以看出BB的拼音输入法还支持模糊音和短语输入,其实BB的输入法还是蛮强大的,输入时带有预测能力,会根据上个字,找到与这个字搭配成词的下一个字,几乎不用在汉字之间选择,我个人还是比较喜欢的。
对于简体拼音,是我们大家都常用的,不仅支持按词组预测下一个字,还支持用首字母缩写输入词组和模糊音输入。使用时,只要输入完整的音节,拼音下方就会出现横向的汉字前带数字的汉字列表。如果选第一个字,可以按回车或不选直接打下个字的拼音,默认输入第一个字;要选其他的字,可以滚动滚轮或按Space到那个字按回车或滚轮,也可以按Alt后按对应的数字键选字,要向后翻页按Alt+P,像前翻页按Alt+O,按Space可将光标移到下一个字,按Alt+Space则将光标移到上一个字。当打出的字还有下划线时,可以将光标移到这个字上,按Space就可以重新选字了。
你可以建立一个约会并设置提醒,还可以邀请联系人中的人参加会议;
在“启用快速输入”模式下,在日视图中按住Shift并滚动滚轮选择约会的时间,按回车或滚轮,输入日程主题,按回车;再按一次回车添加其他信息。
(4)说说BB的各种输入法
除了7100系列没有中文输入法以外(官方没有提供,但是网友们利用autotext工作原理自己做了五笔和拼音输入法),BB给我们提供五种中文输入法,有:拼音、五笔划、简体仓颉、粤语拼音(繁体)、还有繁体仓颉。
(1)闹钟
按需设置即可,相对简单,不详细介绍。
(2)计算器
从主页屏幕进入到计算器的界面,我们看到上方有个数字显示栏,下面是与键盘相对应的按键功能指示,按下一个键在屏幕上就会有显示,你可以把结果复制到剪贴板里,还可以对结果进行度量衡的单位转换。
中国移动黑莓新业务 BIS 开通设置介绍

中国移动黑莓BIS业务开通指导说明书什么是BIS?黑莓个人邮箱服务(BIS)是中国移动和加拿大RIM公司联合推出的合作业务。
黑莓BIS即是黑莓网络服务即BlackBerry Internet Service的简称,黑莓网络服务(BIS)是RIM(黑莓)公司的邮件推入服务(Push-Mail)。
黑莓个人邮箱服务(BIS)是由中国移动面向个人用户推出的无线电子邮件解决方案。
BIS服务的推出,可以解决没有BES服务的黑莓用户及个人用户也可以实现blackberry Push-Mail功能,实现黑莓手机终端接收、阅读、回复、转发和撰写电子邮件等功能。
北京移动用户可以编辑短信KTBIS98或KTBIS108发送到10086,可以开通98元/月或108元/月的BIS业务套餐。
在收到Blackberry的注册信息之后才可以进行以下操作。
请注意这一点。
注意:五月六月移动黑莓BIS套餐免费使用。
如果想取消相关业务,请编辑短信QXBIS发送到10086,可以取消相关业务。
1.1帐户类相关问题1.1.1中国移动黑莓个人邮箱服务(BIS)业务网站登录如何登录中国移动BlackBerry Internet Service 业务网站?请完成以下步骤:连接至中国移动的BlackBerry Internet Service 网站。
网址为:/1)访问中国移动BlackBerry Internet Service 网站。
2)单击创建新帐户。
此时将出现“帐户设置”网页。
3)阅读并接受法律条款。
4)键入设备的个人信息号码 (PIN)和IMEI码,但后单机继续。
5)键入您的用户名和密码。
6)单击下一步。
现在,您便已完成帐户注册设置。
以下步骤可以继续设置您的邮箱。
1.2邮件服务类问题1.2.1其他电子邮件帐户与 BlackBerry 帐户绑定1.2.1.1.登陆/网站,输入用户名和密码,登陆之后,点击添加邮箱1.2.1.2,输入电子邮件地址和电子邮件密码单击“下一步”,完成邮件的添加。
Digium Switchvox Mobile for BlackBerry 用户手册说明书

Switchvox Mobile for BlackBerrySwitchvox Mobile brings your Switchvox PBX to your smartphone!Get StartedClick more...and then Settings to enter the information for your Switchvox.Activate Call RulesClick call rules to activate,deactivate,or disable Call Rules.Manage GreetingsClick more...and then Greetings to activate a greeting.Check VoicemailClick voicemail to view your voicemail messages,listen to a message,and call the person back.Make CallsClick directory to use your Switchvox Directory.Click more...and then Place a Call to call anyone.Click call logs to view your calls and call back any of those entries.Also,in the Voicemail area,you can return calls right from a voicemail message.Get StartedYou can use Switchvox Mobile with your Switchvox PBX,or in Demo Mode.If you use Demo Mode,you can't make any changes or make any calls via Switchvox.But Demo Mode has sample data,which lets you see the features of Switchvox Mobile even if you do not yet have a Switchvox PBX.To set up Switchvox Mobile to use your Switchvox,clickmore...and then Settings,then enter the informationabout your Switchvox(Domain,Extension,andPassword),and your Call Back Number(the number forthis phone).Be sure that Demo Mode is not checked.ClickSave Settings.The Domain is the IP address or domain that can be reachedby the phone.Ask your Switchvox Administrator for this infor-mation.The Extension and Password are your extensionnumber and your password that you use to access yourSwitchvox Voicemail and log into Switchvox's Web ToolSuite.The Call Back Number is used when you make a call viaSwitchvox.First,Switchvox dials this phone number,thenwhen you answer,Switchvox dials the call.Once you set up your Switchvox information,you may see a message that the server's certificate is not trusted.If you see that message,then you need to open the browser on your device,and go to https://domain(where domain the same Switchvox Domain that you entered in the Settings).Follow the prompts to trust the certificate,until you reach the login screen on your Switch-vox.(If you have trouble reaching Switchvox,make sure that you entered the URL correctly,with http s.)Return to Switchvox Mobile,and you should be connected.You should be using Switchvox SMB version4.5.2or later.If you are unsure about this,ask your Switchvox Administrator.Auto syncOnce Switchvox Mobile is open on your smartphone,it can periodically check for new voicemail messages and calls on your Switchvox extension.The voicemail and call logs icons will indicate when you have unread messages,or missed calls.To set Auto sync,scroll to it an click to open the selections.Click the option you want.You can turn this off,or set it to checkevery10minutes,30minutes,1hour,or2hours.Close Switchvox MobileSwitchvox Mobile remains open on your smartphone until you close it.To close Switchvox Mobile,go back to the main page,click menu,and click again to close.Switchvox Mobile and Your NetworkMost likely,your Switchvox is on a private network(a VPN).If that's the case,you will need to connect your smartphone to that network before you can use Switchvox Mobile.For more information about this,please see this Knowledge base article.Manage GreetingsYou can manage your Switchvox Greetings from Switchvox Mobile.Greetings are played when a Switchvox call is sent to your voicemail.Greetings include custom recordings,and your recorded name.If you have not recorded a custom greeting or your name,Switchvox reads your extension to the caller.To activate a greeting,click more...and then Greetings,then scroll to the Name of the greeting.Click,and then select Set asactive greeting.To listen to a greeting,scroll to the name of the greeting,click on it,then select Listen to Greeting.The Busy greeting plays when you are on the phone and the call is sent to your voicemail.The Unavailable greeting plays when you are not on the phone,but the call goes to voicemail.Check VoicemailYou can check your Switchvox Voicemail from Switchvox Mobile,and easily call someone back.To play a voicemail message,click voicemail,click the message then select Listen to Voicemail.To delete a message,click the message then select Delete.To mark a message as read or unread,click then message then select Mark Read/Unread.To call back the phone number on the message,click the message then select Call Back.To see the voicemail messages in a different folder,click and select Switch Folder,click again on the folder name,then selectthe folder that you want to see.Voicemail messages are listed50per page.To show the next50messages(or the previous50),click,and make your selection.Activate Call RulesYou can activate,deactivate,or disable your Switchvox Unanswered Call Rule Sets from Switchvox Mobile.If you want to change or delete a Rule Set,or re-order your Rule Sets,you must log into your Switchvox Web Tool Suite.When you receive a call,your Rule Sets are evaluated and followed from top to bottom.However,an Active Rule Set is always evaluated first,and a Disabled Rule Set is always ignored.To activate or deactivate a Rule Set,scroll to it and click.If you want the rule set to be Active,select Activate Ruleset,then select the date and time that the activation should end,and then select Save Settings.If you want an Active Rule Set to no longer be Active,select Deactivate Ruleset.To disable an Active Rule Set,select Disable Ruleset.Make CallsYou can make calls from Switchvox Mobile in several different ways:VoicemailCall back the person who left you a message:click on a message then select Call Back.If the caller is an internal Switchvox extension,you must place the call via Switchvox.Otherwise,you can choose to use Switchvox or your smartphone.Call LogsPlace a call to any number in your log:click on an entry then select Call Back.If the caller is an internal Switchvox extension, you must place the call via Switchvox.Otherwise,you can choose to use Switchvox or your smartphone.Call Logs are collected for the past20days.DirectoryCall an extension in the Switchvox Directory:click on an entry then select Call Back.You can send an email,if you have setup an email account for this mobile phone,and the extension contains an email address.Placing a call from the Directory requires that you call via Switchvox.Place a Call(more...)Call any number:click more...,then Place a Call,then enter a phone number and select Place Call.If the caller is an internal Switchvox extension,you must place the call via Switchvox.Otherwise,you can choose to use Switchvox or your smartphone.Note:When you make a call via Switchvox,you are making the call using your own extension.Switchvox first places a call from your extension to your mobile phone,then if you Accept the call,Switchvox dials the requested phone number.If you do not Accept the first call,the second call won't be placed.Call LogsYour Call Log on Switchvox Mobile contains all of the calls for your Switchvox extension,not just calls that have been made from Switchvox Mobile.Calls are indicated as incoming,outgoing,or missed.Incoming callOutgoing callMissed callReceive CallsSwitchvox Mobile does not receive calls coming into your Switchvox extension.To send your incoming Switchvox calls to your smartphone number,go to your Switchvox Web Suite's Settings>Call Rules.。
- 1、下载文档前请自行甄别文档内容的完整性,平台不提供额外的编辑、内容补充、找答案等附加服务。
- 2、"仅部分预览"的文档,不可在线预览部分如存在完整性等问题,可反馈申请退款(可完整预览的文档不适用该条件!)。
- 3、如文档侵犯您的权益,请联系客服反馈,我们会尽快为您处理(人工客服工作时间:9:00-18:30)。
BIS业务用户设置指南
*用户在移动营业厅开通BIS业务后,需要将SIM卡放入BlackBerry 终端,终端网络信号将显示大写的EDGE或GPRS。
*确认以上步骤后参照以下操作,用户进行首次设置有两种方式,即通过WWW网站进行配置和通过手机终端进行配置,两者任选其一,以下分别介绍该两种方式:
一、通过中国移动BIS业务网站创建帐户,并绑定139邮箱
1.登录中国移动BIS业务网站:
/
2.点击“创建新帐户”按钮,进入用户协议页面
钮,进入设备信息页面
4.输入设备的PIN码与IMEI号码(该号码可在终端的“选项——
状态”中查看)。
或直接在键盘上同时按下三个键:ALT+CTRL+H
5.
6.点击“继续”按钮,进入用户名和密码设置页面(操作该步骤时,
确保用户已开通BIS业务,并且SIM卡已放入终端)
7.输入用户名与密码,点击“下一步”按钮,进入邮件设置页面
Exchange)”,输入用户139邮箱的邮件地址与密码,点击“下一
步”按钮,进入完成页面
9.点击“完成”按钮,进入邮件管理页面
10.点击“注销”,完成帐户创建与139邮箱绑定
1.在BlackBerry手机上选择“设置”
2.选择“电子邮件设置”
3.进入用户服务协议界面
4.选择“我接受”
5.进入电子邮件设置界面
6.点击BlackBerry手机的菜单键,在弹出的菜单中选择“创建用户
名”(该步骤为必选项,否则用户以后无法通过Web页面设置BIS
业务)
7.进入创建登录信息界面
8.选择“下一步”
9.输入用户名与密码(用户名与密码由用户自定义),选择“下一步”
10.手机显示已成功创建BIS用户名,选择“确定”
11.选择“添加”,添加139邮箱
12.选择“其它”
13.输入电子邮件地址与密码,选择“下一步”
14.手机显示已成功添加139邮箱,选择“确定”
15.选择“关闭”
16.在BlackBerry手机上选择139邮箱
17.确认139邮箱中收到电子邮件帐户信息的邮件
18.打开电子邮件帐户信息的邮件,确认已成功设置139邮箱。
