SYBASE ASE12.5.3 For Linux安装配置
ASE 12.5 for RedHat Linux 简易安装管理

您正在看的sybase教程是:ASE 12.5 for RedHat Linux 简易安装管理。
ASE 12.5 for RedHat Linux 简易安装这个简易的安装手册是基于RedHat Advance Server2.1!有些OS的参数可能是非Server的版本没有的,请注意!1.unload sybase to os使用root)rpm --hiv sybase****.rpm (解包sybase到/opt/sybase)rpm包的解包顺序大概是common,ase,esql,openclient,openserver!或者使用rpm --hiv sybase****.rpm --prefix /path/sybase(解包sybase到--prefix指定的路径,建议Sybase使用单独的分区以免同OS争夺空间)2.创建Sybase用户和环境变量(使用root)执行/path/sybase/install/sybinstall.sh将会建立Sybase用户,更改sybase用户口令(password sybase) 3.修改核心参数(使用root)shmmax,aio-max-size直接修改/etc/sysctl.conf添加kernel.shmmax = *****byte,fs.aio-max-size= *****byte.关于shmmax是最大共享内存段,如果服务器上没有别的应用并且使用raw device可以将此参数调整到物理内存的100%,如果使用file system device的话相应调小,因为file system buffer需要开销内存!aio-max-size是一次异步IO所能够完成的大小default为128K调整到640K甚至更大(128K->640K在创建1G data,500M log的数据,时间差别是32m38s->1m2s使用page size=2k,ide hd)。
SYBASE ASE 12.5 的安装步骤
SYBASE ASE 12.5 的安装步骤SYBASE ASE 12.5的安装步骤为:1. Unload –使用install (在MS Windows NT/2000 中为setup.exe)应用程序从安装介质卸载ASE产品到机器上2. 安装ASE的补丁3. Install –使用srvbuild (在MS Windows NT/2000 中为SYCONFIG.exe)应用程序来安装配置ASE产品和创建ASE数据库服务器4. 更新ASE数据库服务器中的系统信息Unload准备工作1.如果要在一台远程机器上运行sybsetup, 就需要给其显示权限:xhost + remote_machine2.在远程机器上运行sybsetup, 确认DISPLAY 环境变量已设置正确:DISPLAY= host_name:0.0; export DISPLAY3.创建“sybase” 组和用户.4.用“sybase” 用户登录.5.确定并创建Sybase 产品安装目录, 需要具有read, write, execute权限.在X-Windows 环境下进行Unload1. 把ASE CD放进CD-ROM 并以”root”用户来mount CD:¨SUN Solaris PlatformCD-ROM会自动mount.¨IBM AIX Platform/usr/sbin/mount –v ‘cdrfs’ –r ‘device_name’/cdrom¨HP UX Platform/etc/mount –F cdfs –o ro device_name /cdrom¨Digital Unix Platform/sbin/mount –r –t cdfs –o noversion –o rrip device_name /cdrom2. 确认以“sybase” 用户登录.3. 使用Studio Installer (执行install)执行卸载工作:cd /cdrom/cdrom0 or cd /cdrom./install4. 指定ASE在磁盘上的安装位置Studio Installer 提示ASE 安装(即卸载到磁盘)目标路径(/usr/sybase),根据用户的要求进行调整.5. 选择安装类型,以指定欲安装的ASE组件¨Standard Install(标准安装)– installs the default components a user needs(Backup Server, Monitor Server, and XP Server are unloaded, by default, with Adaptive Server)¨Full Install(完全安装)– installs every component on the CD¨Customized Install(自定义安装)– allows you to select which components to install用户所选组件运行时所要求的组件将被自动安装.提示:如果选择了自定义安装,则下一个窗口是组件选择窗口。
Sybase_12.5.3for_linux安装(图文)
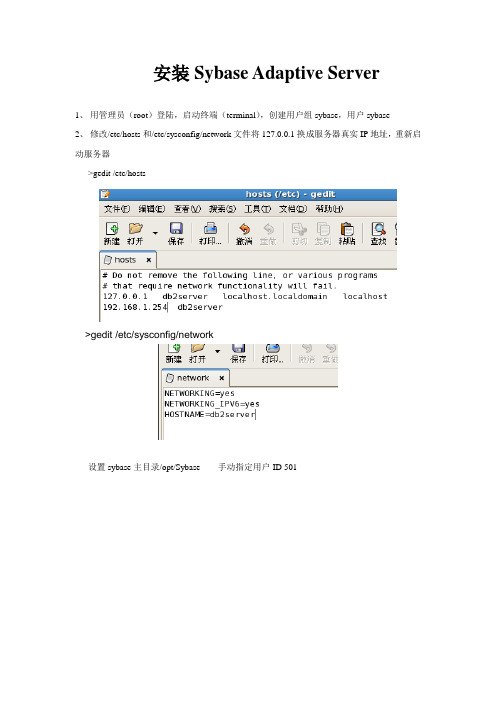
安装Sybase Adaptive Server1、用管理员(root)登陆,启动终端(terminal),创建用户组sybase,用户sybase2、修改/etc/hosts和/etc/sysconfig/network文件将127.0.0.1换成服务器真实IP地址,重新启动服务器>gedit /etc/hosts>gedit /etc/sysconfig/network设置sybase主目录/opt/Sybase 手动指定用户ID 5013、对sybase用户目录授权,能使sybase用户完全操作。
> chown –R Sybase:Sybase /opt> chmod -R 777 /opt/sybase4、设置系统共享内存,系统共享内存必需大于或等于64M,默认值是32M,建议使用512M 以上。
10737418241)查看系统共享内存> /sbin/sysctl kernel.shmmax2)设置系统共享内存(64×1024×1024)> /sbin/sysctl -w kernel.shmmax=5368709123)使共享内存生效> /sbin/sysctl –p若要保证每次启动系统时都应用所设置的值,应将/sbin/sysctl -w kernel.shmmax=536870912命令行添加到/etc/rc.d/rc.local 文件中。
>vi /etc/rc.d/rc.local5、注销管理员用户(root),启用sybase用户登陆。
6、运行sybase安装文件./setup 如果是rmp包解压到/opt 下的sybase目录>cd /opt/sybase12.5>./setup7、将显示欢迎屏幕。
单击“下一步”(Next)8、当出现许可证选择窗口时,从下拉列表中选择最适当的地点(People's Republic of China),然后单击“我同意”(I agree) 以继续。
在Linux操作系统上安装Sybase的注意事项-电脑资料
在Linux操作系统上安装Sybase的注意事项-电脑资料1.如果是双机系统,代码装在本地磁盘,数据库设备装在阵列上缺省情况下,Sybase代码安装在/opt/sybase-12.5下在/opt目录下,创建sybase-12.5目录#mkdir sybase-12.5把磁盘阵列的moint point设为/sybdata以后建的数据库设备都建在/sybdata上.2.创建sybase用户通过图形界面,用管理工具建立sybase用户,注意,Sybase用户的home目录设为/opt/sybase-12.5,shell设置为bsh.3.修改/opt/sybase-12.5和/sybdata的宿主为sybase#chown sybase /opt/sybase-12.5#chown sybase /sybdata4.更改" target="_blank">linux系统的共享内存值,单位是m例如,系统有2G内存,分配给sybase 1.5G执行#echo '1500*1024*1024' bc>/proc/sys/kernel/shmmax检查是否生效,可执行#ipcs Clm grep ‘max seg size’要共享内存设置永久生效,在/etc/rc.d/rc.local文件里面,添加一行如下:echo '1500*1024*1024' bc>/proc/sys/kernel/shmmax5.如果是双机系统,建议先产生逻辑IP,安装数据库时绑定在逻辑IP上例如,本机网卡是eth0,ip地址是10.100.60.201,主机名是dataserver1,逻辑IP是10.100.60.200,主机名是dataserver 可以通过图形界面#redhat-config-network给eth0添加多一个IP,地址是10.100.60.200,并激活这个网卡.命令行方式应该也可以#ifconfig eth0:1 10.100.60.200 netmask 255.255.255.0 dataserver最后,执行ifconfig 检查新的ip地址是否生效,,电脑资料《在Linux操作系统上安装Sybase的注意事项》(https://www.)。
linux下SYBASE数据库安装后的配置
linux下SYBASE数据库安装后的配置sybase的安装很简单,是rpm格式的,运行rpm -ivh **.rpm.bin的,直接执行./***.bin就安装成功sybase用户和syabse组,安装完成后你要用syabse登陆,他就会自动初始化,sybase数据库和配置,你也可以行初始化程序。
以sybase用户登录:cd install→sybinit就可以,下面祥解:Sybase数据库系统初始化sybase用户登录:cd install→sybinitSYBINIT1、Release Directory: /u/sybase 释放目录2、Edit/View Interfaces File 编辑查看接口文件3、Config a Server Product 配置服务器产品4、Config a Open Client/Server Product 配置客户/服务器产品3,出现如下信息:1、SQL SERVER SQL服务器2、Backup Server 备份服务器1,配置主服务器,出现提示菜单:1、Configrue a new SQL Server 配置一个新的SQL服务器2、Configure an existing SQL Server 配置已存在的SQL服务器3、Upgrade an existing SQL Server 升级已存在的SQL服务器1,确定SQL Server name:SYBASE。
提示主菜单:ctrl+a1、Configure Server’s interfaces file entry2、Master device configure3、Sybsystem procs devices configure4、………9、…Server name:SYBASE ctrl+a确定。
出现提示信息:1、Retry count:32、Retry polay:33、Add a newlistener service3,进行TCP网络信息的配置,出现如下信息:EDIT TCP SERVICE1、Host name/address→cwserver2、Port→50003、Name Alias4、…….ctrl+actrl+a2项,配置主设备:1、Master device: /u/sybase/master,dat2、Size(Meg): 21→30ctrl+a3项,配置SYBASE系统过程库:1、Syb systemprocs database size(Meg):16→302、……5、Size of the new device(Meg)16→304项~~~~第9项,按ctrl+a直接确认即可。
sybase12.5.3安装说明

Sybase12.5.3安装指南2006-2-23一需要的文件清单安装平台:linux adserver2.1或3.0aseent1252linux321.tgz (自刻光盘)EBF13204.tgz (自刻光盘)srvbuild.tar.gz (自刻光盘)other.tar (自刻光盘)sp2tar.z (自刻光盘)alltar.z (自刻光盘)database_12.5.sql二卸载sybase12.5.0.3说明:若是系统一经安装了sybase12.5.0.3的话,请先行卸载sybase12.5.0.3。
卸载步骤如下:1、用sp_helpdevice exchange 查看原来sybase的设备情况,并对设备及数据库的大小进行记录,重建时原设备相同较好。
2、运行exchange目录下的trade_shut和server_shut关掉相应的交易进程和数据库,并logout相应的sybase用户的登陆3、用sybase用户登陆,执行命令rpm –qa |grep sybase查询sybase的安装包,显示为:sybase-common-12.5.0.3-6sybase-openclient-12.5.0.3-6sybase-ase-12.5.0.3-64、用root登陆,然后执行命令rpm –e 上面查询显示的安装包把sybase12.5.0.3进行卸载,顺序为:rpm -e sybase-openclient-12.5.0.3-6rpm -e sybase-ase-12.5.0.3-6rpm –e sybase-common-12.5.0.3-65、然后删除相应的sybase目录和sybase-12.5目录,执行命令rm –rf sybaserm –rf sybase-12.5三安装sybase以及相关环境安装sybase12.5.3的文件清单如下:aseent1252linux321.tgzEBF13204.tgzasesetup.txtebfsetup.txtsrvbuild.tar.gz(注意asesetup.txt和ebfsetup.txt中指定的安装目录为/opt/Sybase-12.5, 请根据实际情况修改配置文件中第38行,-P installLocation="/opt/Sybase-12.5",并且保证用sybase用户登陆时,可对该目录有相应的操作权限)1.将安装文件ftp到/tmp目录下2.用root登陆,在opt下建相应的sybase-12.5目录,为干净起见,把相应的sybase 用户删除后重建,指定相应的默认路径,命令如下:3.cd /optmkdir sybase-12.5chown sybase.sybase /opt/sybase-12.5ln –s sybase-12.5 sybasechown sybase.sybase sybase若userdel 时报sybase用户在用,则用ps ax看一下,用kill –9杀掉相应连接的进程.4.退掉root登陆,切换到sybase用户进行登陆,cd /tmp mkdir sybase_setup cd sybase_setup,再把aseent1252linux321.tgz和asesetup.txt拷贝到sybase_setup下,5.执行tar xvfz aseent1252linux321.tgz,解压后,在当前目录下有个setup的执行程序,此时确保asesetup.txt文件也在当前目录时,则执行以下命令,进行sybase12.5.2的安装:./setup -is:log log.txt -options asesetup.txt -silent -W SybaseLicense.agreeToLicense=truelog.txt为安装过程中自动产生的日志文件,用于监控安装过程产生的错误信(看日志时,可以看最后几行,正常的话:其中ErrOut:后没有信息,若有报错的话,在ErrOut:后有相应的提示)6.安装完成后,进行补丁的安装,用tar xvfz EBF13204.tgz进行解压,会在当前目录下生成ebf13204目录,把ebfsetup.txt 复制到该目录下并且cd 进入该目录,执行以下语句进行补丁的安装:./setup -is:log log.txt -options ebfsetup.txt -silent -W SybaseLicense.agreeToLicense=true -G overwriteJVM=yes replaceNewerResponse=yesToAlllog.txt为安装过程中自动产生的日志文件,用于监控安装过程产生的错误信(看日志方法同上)安装成功后,执行以下指令,设置环境变量:cd /opt/sybase-12.5cp SYBASE.sh .bash_profile修改.bash_profile文件,设置PATCH:PATH=$PATH:./7.重新用sybase进行登陆,验证SYBASE环境变量设置正确。
Sybase for linux安装步骤
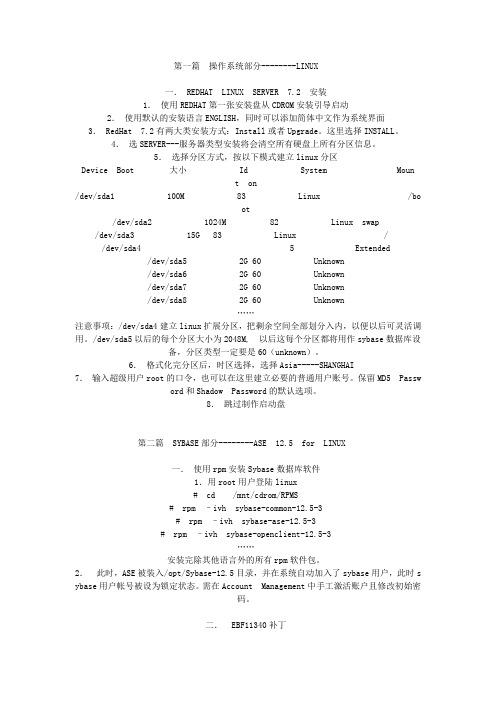
第一篇操作系统部分--------LINUX一. REDHAT LINUX SERVER 7.2 安装1.使用REDHAT第一张安装盘从CDROM安装引导启动2.使用默认的安装语言ENGLISH,同时可以添加简体中文作为系统界面3. RedHat 7.2有两大类安装方式:Install或者Upgrade。
这里选择INSTALL。
4.选SERVER---服务器类型安装将会清空所有硬盘上所有分区信息。
5.选择分区方式,按以下模式建立linux分区Device Boot 大小Id System Mount on/dev/sda1 100M 83 Linux /boot/dev/sda2 1024M 82 Linux swap /dev/sda3 15G 83 Linux //dev/sda4 5 Extended/dev/sda5 2G 60 Unknown/dev/sda6 2G 60 Unknown/dev/sda7 2G 60 Unknown/dev/sda8 2G 60 Unknown……注意事项:/dev/sda4建立linux扩展分区,把剩余空间全部划分入内,以便以后可灵活调用。
/dev/sda5以后的每个分区大小为2048M, 以后这每个分区都将用作sybase数据库设备,分区类型一定要是60(unknown)。
6.格式化完分区后,时区选择,选择Asia-----SHANGHAI7.输入超级用户root的口令,也可以在这里建立必要的普通用户账号。
保留MD5 Password和Shadow Password的默认选项。
8.跳过制作启动盘第二篇SYBASE部分--------ASE 12.5 for LINUX一.使用rpm安装Sybase数据库软件1.用root用户登陆linux# cd /mnt/cdrom/RPMS# rpm –ivh sybase-common-12.5-3# rpm –ivh sybase-ase-12.5-3# rpm –ivh sybase-openclient-12.5-3……安装完除其他语言外的所有rpm软件包。
Sybase ASE安装说明
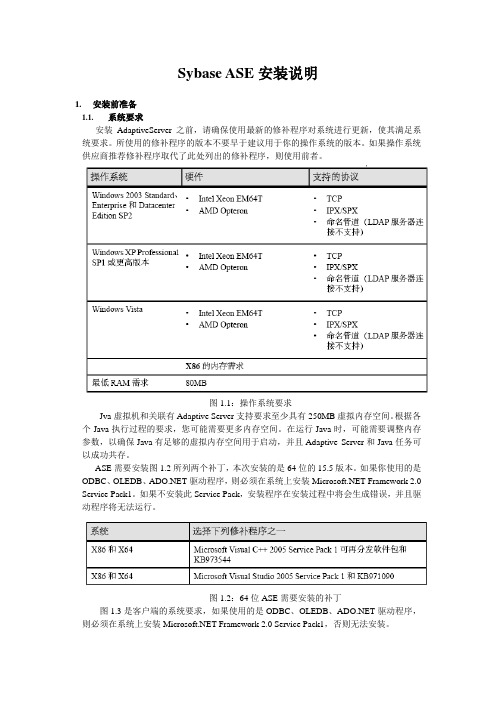
Sybase ASE安装说明1.安装前准备1.1.系统要求安装AdaptiveServer之前,请确保使用最新的修补程序对系统进行更新,使其满足系统要求。
所使用的修补程序的版本不要早于建议用于你的操作系统的版本。
如果操作系统供应商推荐修补程序取代了此处列出的修补程序,则使用前者。
图1.1:操作系统要求Jva虚拟机和关联有Adaptive Server支持要求至少具有250MB虚拟内存空间。
根据各个Java执行过程的要求,您可能需要更多内存空间。
在运行Java时,可能需要调整内存参数,以确保Java有足够的虚拟内存空间用于启动,并且Adaptive Server和Java任务可以成功共存。
ASE需要安装图1.2所列两个补丁,本次安装的是64位的15.5版本。
如果你使用的是ODBC、OLEDB、驱动程序,则必须在系统上安装 Framework 2.0 Service Pack1。
如果不安装此Service Pack,安装程序在安装过程中将会生成错误,并且驱动程序将无法运行。
图1.2:64位ASE需要安装的补丁图1.3是客户端的系统要求,如果使用的是ODBC、OLEDB、驱动程序,则必须在系统上安装 Framework 2.0 Service Pack1,否则无法安装。
图1.3:客户端系统要求1.2.预安装任务1)检验操作系统是否符合平台的版本级别、RAM和网络协议要求;2)如有必要,安装操作系统修补程序;3)确保用于启动服务器的账户对要在其中安装服务器的目录具有读取和写入权限;4)使用administrator账号执行所有安装任务。
5)如果安装的是64位的ASE,把安装文件的兼容性选为Windows XP (Service Pack 2)。
图1.4:64位版本兼容性勾选2.安装adaptive server1)如果是64位系统,要把兼容性设置为Windows XP (Service Pack 2),如图1.4所示。
Sybase ASE 12.5安装和操作(图解)
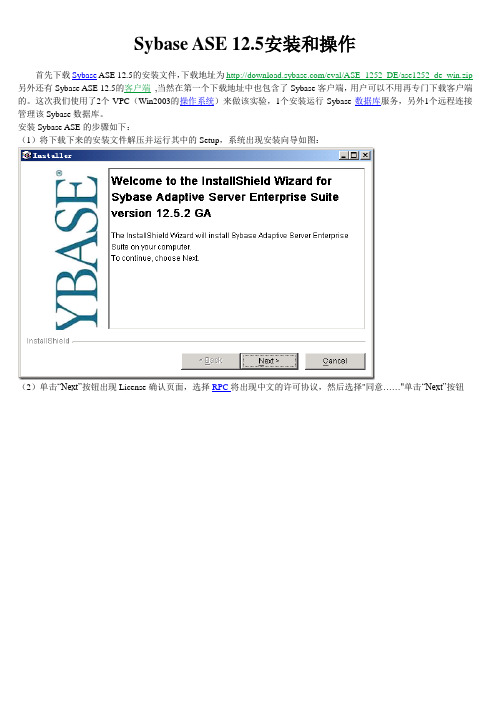
Sybase ASE 12.5安装和操作首先下载Sybase ASE 12.5的安装文件,下载地址为/eval/ASE_1252_DE/ase1252_de_win.zip 另外还有Sybase ASE 12.5的客户端,当然在第一个下载地址中也包含了Sybase客户端,用户可以不用再专门下载客户端的。
这次我们使用了2个VPC(Win2003的操作系统)来做该实验,1个安装运行Sybase数据库服务,另外1个远程连接管理该Sybase数据库。
安装Sybase ASE的步骤如下:(1)将下载下来的安装文件解压并运行其中的Setup,系统出现安装向导如图:(2)单击“Next”按钮出现License确认页面,选择RPC将出现中文的许可协议,然后选择"同意……"单击“Next”按钮(3)选择安装目录,默认是“C:\sybase”,修改安装目录后单击“Next”按钮(4)选择安装类型,是默认安装,完整安装还是自定义安装,这里我们选择自定义安装,单击“Next”按钮(5)在出现的安装选项中除了默认勾选上的以外,还需要把ASE Data Providers和中文给勾选上,如下图所示:(6)单击“Next”按钮,系统将列出需要安装的组件以及计算安装所需要的空间,再单击“Next”按钮便开始安装Sybase。
(7)最后安装完成后单击“Finish”按钮,所有配置都使用默认配置既可,完成后需要重启计算机完成安装。
安装完成Sybase后可以在服务中找到“Sybase SQL Server _***”的服务,默认情况下是手动启动的,这里可以改成自动,启动该服务。
在另外一台虚拟机上,运行客户端安装程序,按照上面雷同的方式安装Sybase客户端,在选择安装组件的时候也要选上ASE Data Providers!安装完成后Windows开始菜单的下将增加:Sybase Central是Sybase数据库的客户端,相当于SQL Server 2005中的Management Studio,启动Central后如图:单击“工具”菜单中的“连接”选项或者直接使用快捷键F11,系统弹出如下对话框:其中HostName就是刚才安装了Sybase数据库服务的虚拟机的IP,PortNumber使用的是默认端口5000,用户名使用sa,默认情况下没有设置密码,单击“OK”按钮,Sybase Central将连接到Sybase数据库,连接后的Central如下图:要创建数据库首先需要创建Database Devices,这个就相当于Oracle中的表空间,用于存放数据库的。
Sybase ASE 12.5.2安装参考手册
Sybase ASE 12.5.4 for Linux安装参考手册1. 引言本手册旨在以图文方式,step by step 地描述在Linux 上安装Sybase ASE 数据库。
手册中所使用的Linux 为RedHat Enterprise Linux 5.4(以下简称RH5),Sybase 数据库版本为ASE 12.5.2(以下简称ASE)。
其他Linux 发行版可参考进行。
由于本手册所使用的硬件限制,文中并未描述裸设备、阵列等的安装与配置。
另外需要注意的是:本手册重在描述安装过程,具体的配置,如目录、大小等,应根据您的硬件和应用来确定。
本手册同样也适合在RH3.0/4.0 上安装ASE 15 for Linux。
1.1. 本手册适用的读者本手册主要是为Sybase 数据库安装人员、技术人员以及管理人员而写的,主要对象是入门级和初级用户。
本手册不介绍基本概念。
我们假定读者已具备一些Linux 的基本知识和基本操作,如建目录、改变目录权限等。
同时,我们也假设读者具备一些ASE 数据库的基本知识和基本操作,如设备、库等。
1.2. 导读本手册的第二章描述的是Linux 的安装。
尽管写本手册所使用的Linux 发行版为RH3,但其它发行版,如SUSE、RH4、RedFlag,可以参照进行。
RH4 及一些采用2.6 内核的发行版在安装时的注意事项,我们也会以醒目的方式予以简要说明。
如果您已熟悉或精通Linux,具备相当程度的Linux 知识和能力,您可以跳过此章,直接阅读第三章。
您也可以只参考此章的注意。
第三章描述的是在Linux 下安装ASE。
此章分为三节,分别说明ASE 软件的安装、基本配置以及用户数据库的建立。
此章所使用的参数值,仅仅是征对本手册所涉及的硬件环境。
请在参照此手册操作时,调整为适合您的硬件和应用的数值。
鉴于本手册的定位,文中没有描述如何通过远程或控制台方式来安装ASE,但在文中我们会给予简单的参考。
SYBASE12.5安装指导

windows操作系统的版本号:
windows NT4.0 NT4.0
windwos 2000 NT5.0
windows XP NT5.1
版本号为x.x,就改为NTx.x
�
sybase 18674 18673 0 8?? 03 pts/2 0:01 /export/home/sybase/ASE-12_5/bin/backupserver -Sipnet_back -e/export/home/sybas
33) isql -Usa -P 登陆进入确认数据库已经启动
一般内容如下:
SERVER E250 ANY 29722
VENDOR SYBASE /export/home/sybase/SYSAM-1_0/bin/SYBASE
USE_SERVER
INCREMENT ASE_SERVER SYBASE 12.0 PERMANENT 1 B58C308DDA64 SN=1054290-142 OVERDRAFT=10000 ck=0
INCREMENT ASE_JAVA SYBASE 12.0 PERMANENT 1 49BF4D12CE41 SN=1054290-291 OVERDRAFT=10000 ck=0
INCREMENT ASE_EJB SYBASE 12.5 PERMANENT 1 DA607A375623 SN=1054290-321 OVERDRAFT=10000 ck=0
安装完成之后,基于中文的管理工具依然会出现乱码,按上面的方法更改%sybase%\shared-1_0\jre1.2.2\lib中的font.properties.zh.NT4.0文件名为font.properties.zh.NT5.1,另外还必须按上面的方法改font.properties.zh_TW的名称改成font.properties.zh_CN ,使显示为简体中文。
Sybase ASE12.5.3 For Linux简易安装手册
Sybase ASE12.5.3 For Linux简易安装手册制作:张学勇2005-11-19一、安装软件包的准备我试图在Linux 9上安装ASE15.0没有安装上。
SYBASE ASE12.5.3也有光盘Setup的,我从网上找的是RPM的安装包。
安装文件有以下几个:sybase-common-12.5-3.i386.rpmsybase-ase-12.5-3.i386.rpmsybase-openclient-12.5-3.i386.rpmsybase-esql-12.5-3.i386.rpmsybase-efts-12.5-3.i386.rpm下面的是语言包sybase-chinese-12.5-3.i386.rpmsybase-french-12.5-3.i386.rpmsybase-german-12.5-3.i386.rpmsybase-japanese-12.5-3.i386.rpmsybase-korean-12.5-3.i386.rpmsybase-polish-12.5-3.i386.rpmsybase-portuguese-12.5-3.i386.rpmsybase-spanish-12.5-3.i386.rpmsybase-sqlremote-7.0.2-1.i386.rpmsybase-thai-12.5-3.i386.rpm在我这里有ISO格式的rpm包。
二、安装前的准备2.1 修改环境变量使用root用户登录,在root的启动配置文件.bash_profile中加入以下设置:SYBASE=/opt/sybase-12.5SYBASE_ASE=ASESYBASE_FTS=FTSSYBASE_OCS=OCSSYBASE_SYSAM=SYSAMUSER=sybasePATH=$PATH:/sbin:$SYBASE/$SYBASE_ASE/bin:$SYBASE/$SYBASE_OCS /bin:.export SYBASE SYBASE_ASEexport SYBASE_FTS SYBASE_OCSexport SYBASE_SYSAM DISPLAYexport USER PATH2.2 检查/opt目录的存在检验计算机上存在目录/opt ,且存在足够的空间容纳该软件。
Sybase安装、配置、使用

Sybase安装、配置、使用
———————————————————————————————— 作者:
———————————————————————————————— 日期:
第一章数据库安装
系统环境:操作系统:win7。数据库 Sybase 12.5.3。
1.解压ase1252_de_win.zip
2.进入目录ase1252_de_win,点击setup.exe
点击language下的add/remove,把chinese加入右边列表,如果在左边没有看到chinese,那就是在安装的时候没有选择chinese module。
点击ok,回到配置界面。
2.2设置字符集
点击charadd all,添加所有字符集-》ok。
1.Dsedit Utility
这个工具是设置Sybase的服务名称、绑定的IP地址和端口号等,如下图:
2.Server Config
这个工具在前面我们已经使用过了,这里简单的介绍下。
Create AdaptiveServer…:创建一个新的服务(类似于这里REYPC)
Config AdaptiveServer…:配置一个服务(如配置这里的REYPC)
点击character下面的Set Default,设置默认字符集为UTF-8,点击OK返回配置界面。如下图:
2.3设置默认排序
然后选择sort下面的Set Default,选择“Case insensitive ordering,foruser with any utf8-based 8-bit environment”,如下图:
4.设置MyDB数据库
在刚创建好的MyDB数据库上右键->属性,勾选上选项后点击确定,如下图:
SYBASE ASE for linux
sybase-ase for linux安装步骤一.调整共享内存段(以下三种情况选择一种)shmmax=nnn (其中nnn为系统的实际内存例如:2G=2048000000 1G=1048576000)修改/etc/sysctl.conf文件,加入:kernel.shmmax=nnn二.安装Linux 伪网络接口如果Linux 系统中没有安装网络通信硬件,或如果系统使用动态主机配置协议(DHCP) 进行网络IP 地址配置,则可以使用这些过程安装Adaptive Server 组件。
. 安装伪网络接口1.向$PATH 环境设置中添加/sbin:# PATH=$PATH:/sbin2.向/etc/hosts 表中添加IP 地址和主机名。
Sybase 建议使用可用Internet 地址范围内的地址。
例如,Internet 地址10.0.0.1 将得到:echo 10.0.0.1 $HOSTNAME >> /etc/hosts注意Sybase 建议不要使用“localhost”。
3.在计算机上预装载伪网络驱动程序。
# modprobe dummy如果此命令成功执行,则不会收到来自服务器的任何消息。
4.将虚拟建立的网络接口绑定至已配置IP 地址的$HOSTNAME。
# ifconfig dummy0 $HOSTNAME5.对于DHCP 环境,应向建立的虚拟网络设置添加一个路由(而不使用“缺省”)。
# route add $HOSTNAME dummy06.检查网络绑定:# ifconfig dummy0此命令给出下列输出:dummy0 Link encap:Ethernet HWaddr 00:00:00:00:00:00inet addr:10.0.0.1 Bcast:10.255.255.255 Mask:255.0.0.0UP BROADCAST RUNNING NOARP MTU:1500 Metric:1RX packets:0 errors:0 dropped:0 overruns:0 frame:0TX packets:0 errors:0 dropped:0 overruns:0 carrier:0 collisions:0 txqueuelen:0三.配置显示如果正在远程计算机上执行安装过程,应设置本地X11 服务器的DISPLAY 变量。
sybase12.5安装说明

附录1:Sybase 12.5的安装及配置一、安装步骤第一步如果服务器的CPU是P4CUP 需要打一个Java 公司的P4补丁,执行光盘中的P4JREPatch\jre-1_2_2_009-win\jre-1_2_2_009-win\disk1\setup.exe。
第二步安装中文版SYBASE 12.5,执行光盘中的SYB12.5NT\setup.exe ,需要重启计算机第三步安装光盘中的PC_Client12.5\setup.exe第四步将光盘中的sqladv-12_5下的所有文件拷贝到c:\sybase目录中,目的是支持sybase 中的sqladvantage 功能。
将其中的Sqladv.exe 文件在桌面建立快捷方式。
二、安装后的配置第一步进入开始-程序-sybase-找到server config 选项,选择Create Adaptive server 按钮,单击Continue 按钮,确定server page 值为2k 单击Continue 按钮;确定Sybase 中master.dat的路径path 为c:\Sybase\data\master.dat (注意sybase的所在盘符),单击Continue按钮;确定Sybase中Sybprocs.dat的路径path 为c:\Sybase\data\Sybprocs.dat (注意sybase的所在盘符),单击Continue 按钮;确定sybase中的Error log path 为c:\Sybase\install\errorlog(注意sybase的所在盘符),单击Netwoek Addresses 按钮,单击Add 输入sfserver,5000 (注意sfserver为服务器名,如是双网卡则把服务器名改为IP地址,重复两次),单击OK ,然后单击configure xp default server 按钮,单击Netwoek Addresses按钮,单击Add 输入sferver,5004 (注意sfserver 为服务器名,如是双网卡则把服务器名改为IP地址,重复两次,),单击OK 。
Sybase12.5 数据库的安装、卸载、备份、还原全集资料
一、Sybase 数据库服务器端的安装由于以前一直用sql server数据库,早已熟悉了sql 环境,最近突然接触sybase数据库,不免有些陌生,各种不习惯呀。
个人感觉sql比sybase好用多了,也许是我习惯sql了吧,但是有一点是可以肯定的,sql的视觉效果比sybase强的不是一点半点。
不过吧,sql比sybase强(这是对于用户或是小型企业而言,对于大型企业来说,咱也不晓地,没准sybase比较适合大型企业)也是理所应当的,毕竟sql是在sybase的基础上发展起来的,怎么说也算是站在巨人的肩膀上吧。
好了,不多说了,开始具体介绍sybase 安装。
sybase数据库的安装分为服务器端和客户端,本文先介绍一下服务器端的安装。
1、和其他程序一样,双击setup.exe.2、出现欢迎界面,直接点击next即可。
3、下面选择相应国家的协议,咱是中国人,当然选择“中华人民共和国”啦,并选择下面单选钮“我同意”,next。
4、选择Sybase数据库的主目录,我选择的E盘,因为这个盘是NTFS格式的,数据库文件都比较大(单个文件),如果单个文件超过4G,FAT32格式的磁盘就会出错。
大家可根据磁盘空间分配进行改动,但目录名Sybase,最好不要改动,方便日后维护,若改动注意不要用中文,请使用英文字母名。
5、点击【Next】后,若路径名不存在,会提示创建,选[是]即可。
6、接下来选择自定义(custom)安装7、选择你要安装的文件,服务器端嘛,最好全选。
8、接下来,next即可。
9、接下来你将看到安装进度条,这个过程比较漫长,大家耐心等待……10、接下来复选框全选。
11、选中[自定义配置新的Adaptive Server]选项和自定义配置新的Backup Server选项,对Adaptive Server、Backup Server服务进行手工设置,点击【Next】下一步,屏幕显示窗口12、Adaptive Server配置如下,Backup server端口号为5001。
SybaseASE安装配置(完整版)

SybaseASE安装配置(完整版)1 安装OS补丁执⾏Vcredisk_x64、Vcredisk_x64(1)2 安装ASE 15.0.32.1进⼊安装⽬录进⼊⽬录2.2执⾏安装程序执⾏setup下⼀步,指定安装⽬录(⽬录空间1G以上,数据⽂件也需要空间)下⼀步,选择安装类型ASE安装⽬录设置为D:\sybase选择完全安装,下⼀步查看记录主机MAC地址和ip地址,以便以后去Sybase⽹站申请license这⾥选择第⼀个(第⼆个开发版第三个评估版),下⼀步选择国家,同意,下⼀步这⾥选择第三个(暂时没有license key),下⼀步产品版本选择企业版,许可证类型选择SR:Server License,下⼀步暂⽆license 选择“否”选择“是”,继续安装选择“否”,不配置电⼦邮件报警,下⼀步等待安装。
安装完成,下⼀步选择“是”,记住⼝令(有风险),下⼀步取消“配置新的Adaptive Server”和“配置统⼀代理”ASE 15.0.3安装完成。
3 安装ASE最新EBF(补丁)3.1进⼊安装⽬录进⼊⽬录3.2执⾏安装程序执⾏setup下⼀步,开始安装ASE补丁安装⽬录设置为D:\sybase⽬标路径和ase 安装路径⼀致。
下⼀步选择“是”,继续安装选择“完全”安装,下⼀步安装步骤与“安装ase15.0.3”⼀致。
下⼀步,开始安装选择“全部是”以下安装步骤与“安装ase15.0.3”⼀致。
补丁安装完成。
4 安装RS15.5(复制服务器) 4.1进⼊安装⽬录实际环境中复制服务器安装在备点主机中进⼊“RS15.5—winx64 \ rs1550winx64”⽬录4.2执⾏安装程序执⾏setup下⼀步。
Sybase12.5安装、配置、使用
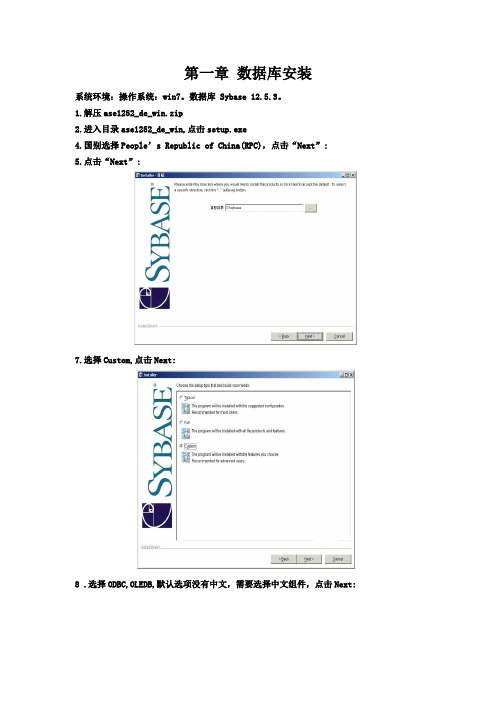
第一章数据库安装系统环境:操作系统:win7。
数据库 Sybase 12.5.3。
1.解压ase1252_de_win.zip2.进入目录ase1252_de_win,点击setup.exe4.国别选择People’s Republic of China(RPC),点击“Next”:5.点击“Next”:7.选择Custom,点击Next:8 .选择ODBC,OLEDB,默认选项没有中文,需要选择中文组件,点击Next:10.安装程序开始安装。
11安装完毕后,点击Next:11.点击Next:13.点击Next:14.点击Next15.点击Finish重启完成安装。
第二章Create Adaptive Server1.开始-》程序-》Sybase-》Server Config点击Create Adaptive Server…-》输入Server名称,如“REYPC”,点击Coninue。
2.设置服务器页大小为16K为了适应应用,这里的页带下必须设置为16K,点击Continue,如下:3.设置Master设备大小设置Master设备大小和存放路径,点击Continue,进入下一步,如下:4.设置系统存储过程设置大小5.设置Phase Commit6.设置Adaptive Server选项[1]设置绑定的IP和端口点击“Command Line Parameters…”进行设置,如下图:点击OK,返回设置界面[2]配置默认的XP Server点击“Configure Default XP Server…”进行设置,如下图:点击OK,返回设置界面[3]设置网络地址点击“Network Addresses…”进行设置,如下图:点击OK,返回设置界面第三章Sybase adaptive server配置1.开始-》程序-》Sybase-》Server Config点击Config Adaptive Server…-》continted登陆sybase,sa初始密码为空2.选择language进行语言、字符集和排序设置2.1设置语言点击language下的add/remove,把chinese加入右边列表,如果在左边没有看到chinese,那就是在安装的时候没有选择chinese module。
sybase安装说明
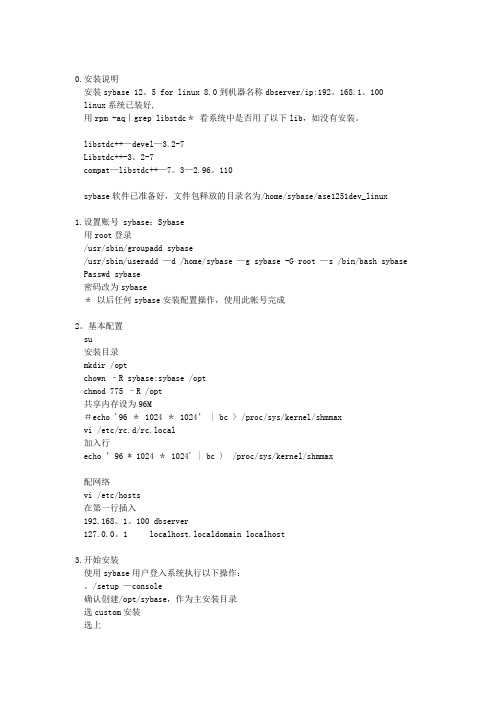
0.安装说明安装sybase 12。
5 for linux 8.0到机器名称dbserver/ip:192。
168.1。
100linux系统已装好,用rpm -aq|grep libstdc*看系统中是否用了以下lib,如没有安装。
libstdc++—devel—3.2-7Libstdc++-3。
2-7compat—libstdc++—7。
3—2.96。
110sybase软件已准备好,文件包释放的目录名为/home/sybase/ase1251dev_linux1.设置账号 sybase:Sybase用root登录/usr/sbin/groupadd sybase/usr/sbin/useradd —d /home/sybase —g sybase -G root —s /bin/bash sybase Passwd sybase密码改为sybase*以后任何sybase安装配置操作,使用此帐号完成2。
基本配置su安装目录mkdir /optchown –R sybase:sybase /optchmod 775 –R /opt共享内存设为96M#echo '96 * 1024 *1024’ | bc > /proc/sys/kernel/shmmaxvi /etc/rc.d/rc.local加入行echo ’96 * 1024 * 1024' | bc 〉 /proc/sys/kernel/shmmax配网络vi /etc/hosts在第一行插入192.168。
1。
100 dbserver127.0.0。
1 localhost.localdomain localhost3.开始安装使用sybase用户登入系统执行以下操作:。
/setup —console确认创建/opt/sybase,作为主安装目录选custom安装选上3。
+[x] Language Modules下面的1。
- 1、下载文档前请自行甄别文档内容的完整性,平台不提供额外的编辑、内容补充、找答案等附加服务。
- 2、"仅部分预览"的文档,不可在线预览部分如存在完整性等问题,可反馈申请退款(可完整预览的文档不适用该条件!)。
- 3、如文档侵犯您的权益,请联系客服反馈,我们会尽快为您处理(人工客服工作时间:9:00-18:30)。
۩f在Suse Linux Enterprise 3.0上安装Sybase ASE12.5.3一.安装准备1.1系统软件包信息操作系统:Suse Linux Enterprise AS Release 3JA V A包:java1.4数据库:Sybase ASE 12.5.31.2创建cdrom文件系统(如果没有cdrom文件系统)该步骤可以不做!1.3创建SYBASE文件系统 (Linux :)例如:/home/sybase 空间要求: 5G disk( local disk)该步骤可以不做!1.4创建SYBASE组和用户(Linux : useradd)增加sybase组和sybase用户,将sybase用户加入sybase组。
修改sybase文件系统的属主:chown –R sybase:sybase /home/sybase1.5确认基本安装信息:(安装后的情况)Master device /dev/rsybmasterSybsystemprocs device: /dev/rsybprocServer name: SYBASEErrorlog location /home/sybase/ASE-12_5/install/errorlogBackerup Server name SYBASE_backupLanguage u s_englishCharacter set utf8Sort order nocasePageSize 8k (12.5以上可以是2k-16k) 1.6创建SYBASE逻辑设备例:(卷组及逻辑卷的创建应由操作系统的工程师划分)修改设备权限:#chown sybase:sybase /dev/ rsyb* /dev/ syb*#chmod 660 /dev/ rsyb* /dev/ syb*二.SYBASE产品安装2.1SYBASE数据库的安装2.1.1安装数据包以sybase用户登录到主机,在Linux命令行下执行如下命令:#mount –r /dev/cd0 /mnt/cdrom$ cd /mnt/cdrom$./setup –console(字符安装模式) 或$./setup(图形方式)Initializing InstallShield Wizard........Launching InstallShield Wizard........-------------------------------------------------------------------------------Welcome to the InstallShield Wizard for Sybase Adaptive Server Enterprise Suite version 12.5.2 GAThe InstallShield Wizard will install Sybase Adaptive Server Enterprise Suiteon your computer.To continue, choose Next.Press 1 for Next, 3 to Cancel or 4 to Redisplay [1] 1-------------------------------------------------------------------------------1) Argentina 2) Australia3) Belgium(English) 4) Belgium(French)5) Brazil 6) Canada7) Denmark 8) Europe,Middle East, and Africa - General 9) France(English) 10) France(French)11) Germany(English) 12) Germany(German)13) Hong Kong 14) India15) Italy(English) 16) Italy(Italy)17) Japan 18) Korea19) Malaysia 20) Mexico21) Netherlands 22) New Zealand23) Norway 24) People's Republic of China(PRC)25) Philippines 26) Singapore27) Spain(English) 28) Spain(Spanish)29) Sweden 30) Switzerland(English)31) Switzerland(German) 32) Taiwan33) Thailand 34) United Kingdom35) United States of America 36) Any Other LocationsPlease enter the number of the location you are installing. (1-37) [1] 35?LICENSE AGREEMENTUnited States and CanadaIMPORTANT NOTICE: Read this License Agreement ("Agreement") carefully beforeusing the enclosed Program. You may Use the Program acquired in the United States and Canada only, in accordance with the following terms and conditions.IF YOU DO NOT AGREE TO BE BOUND BY THESE TERMS, YOU MAY NOT USE THE PROGRAM. Byinstalling or using the Program in any way, You acknowledge that You have read,understand and agree to the terms of this Agreement. If You do not agree with these terms, promptly return the Program and package (and all other product contents, including Documentation) with Your receipt or other proof of purchase to the entity from which You obtained this product within 30 days and request a refund. THIS IS A LICENSE AND NOT A SALE.click the "I agree" button if you wish to install the program.If You, Your company, or Your public agency have signed a written software license agreement with Sybase, Inc., or Sybase Canada Limited ("Sybase") or a Press ENTER to read the text [Type q to quit] qIf you cannot read the agreement for the related location, you may not have the fonts installed on your system to view the agreement properly. If you cannot read this agreement, go to /softwarelicenses and read it there before agreeing.I agree to the terms of the Sybase license for the install locationspecified.(Y/N) [N]YPress 1 for Next, 2 for Previous, 3 to Cancel or 4 to Redisplay [1] 1Please wait...-------------------------------------------------------------------------------Please enter the directory where you would like to install the products orpress ENTER to accept the default.Destination Directory [/home/sybase]Press 1 for Next, 2 for Previous, 3 to Cancel or 4 to Redisplay [1] 11. Yes2. NoYou have chosen to install into an existing directory. Any older versions of the products you choose to install that are detected in this directory willbereplaced. Do you want to continue with installation into this directory? [2]1 -------------------------------------------------------------------------------Choose the setup type that best suits your needs.[X] 1 - TypicalThe program will be installed with the suggested configuration.Recommended for most users.[ ] 2 - FullThe program will be installed with all the products and features. [ ] 3 - CustomThe program will be installed with the features you choose.Recommended for advanced users.To select an item enter its number, or 0 when you are finished: [0]Press 1 for Next, 2 for Previous, 3 to Cancel or 4 to Redisplay [1] 1 Performing install checks. Please wait...Please wait...------------------------------------------------------------------------------- Sybase Adaptive Server Enterprise Suite will be installed in the following location: /home/sybasewith the following features:Sybase ServersAdaptive Server EnterpriseASE Diagnostic ServerReplicatorConnectivityOpen ClientCommon ctlib filesCommon dblib filesLanguage ModulesjConnect 5.5 for JDBCjConnect 6.0 for JDBCSharedASE Adminstration ToolsPress ENTER to read the text [Type q to quit]Sybase CentralAdaptive Server PluginJob Scheduler Templates and UtilitiesSybase Software Asset Managementfor a total size:762.6 MBPress 1 for Next, 2 for Previous, 3 to Cancel or 4 to Redisplay [1] 1 Installing Sybase Adaptive Server Enterprise Suite. Please wait... |-----------|-----------|-----------|------------|0% 25% 50% 75% 100% ||||||||||||||||||||||||||||||||||||||||||||||||||||||||||||||||||||||||||||||2.1.2设置环境变量编辑/home/sybase/.profile文件,如下:在PATH中加入路径/home/sybase/ASE-12_5/installSYBASE=/home/sybaseDSQUERY=SYBASESYBASE_ASE=ASE-12_5SYBASE_OCS=OCS-12_5LD_LIBRARY_PATH=$SYBASE/$SYBASE_ASE/libexport SYBASE DSQUERY PATH SYBASE_ASE SYBASE_OCS LD_LIBRARY_PATHPATH=$PATH: $SYBASE/$SYBASE_ASE/bin:export PATH../SYBASE.sh编辑/home/sybase/.bash_profile文件,如下SYBASE=/home/sybaseDSQUERY=SYBASESYBASE_ASE=ASE-12_5SYBASE_OCS=OCS-12_5LD_LIBRARY_PATH=$SYBASE/$SYBASE_OCS/libexport SYBASE DSQUERY PATH SYBASE_ASE SYBASE_OCS LD_LIBRARY_PATHPATH=$PATH:$SYBASE/$SYBASE_ASE/bin:$SYBASE/$SYBASE_OCS/bin: export PATHSYBPLATFORM=linuxexport SYBPLATFORMLANG=CP936export LANG2.2SYBASE数据库的配置2.2.1配置ASE服务器1.在Sybase系统文件安装完成后,利用init文件夹中已建立配置文件的样例来创建SYBASE数据库服务器(/home/sybase/ASE-12_5/init/sample_resource_files/srvbuild.adaptive_s erver.rs)1) 在/home/sybase下建立rs文件夹(mkdir rs);将样例文件拷贝到/home/sybase/rs文件夹下,并改名为sql.rs,在/home/sybase/ASE-12_5/init/sample_resource_filesl路径下执行下述命令:$ cp srvbuild.adaptive_server.rs /home/sybase/rs/sql.rs2) 用vi 命令修改配置参数$ vi sql.rs2.具体配置参数如下:sybinit.release_directory: /home/sybasesybinit.product: sqlsrvsqlsrv.server_name: SYBASEsqlsrv.new_config: yessqlsrv.do_add_server: yeswork_protocol_list: tcpHOSTNAME(对应IP:本机IP,应已记录在/etc/hosts中,下同)work_port_list: 7788sqlsrv.server_page_size: 8K (逻辑页大小)sqlsrv.force_buildmaster: nosqlsrv.master_device_physical_name: /dev/rsybmastersqlsrv.master_device_size: 160sqlsrv.master_database_size: 110sqlsrv.errorlog: /home/sybase/ASE-12_5/install/errorlogsqlsrv.do_upgrade: nosqlsrv.sybsystemprocs_device_physical_name:/dev/rsybprocsqlsrv.sybsystemprocs_device_size: 130sqlsrv.sybsystemprocs_database_size: 120sqlsrv.sybsystemdb_device_physical_name:USE_DEFAULTsqlsrv.sybsystemdb_device_size: USE_DEFAULTsqlsrv.sybsystemdb_database_size: USE_DEFAULTsqlsrv.default_backup_server: SYBASE_backup注意:sqlsrv.sybsystemprocs_device_size、sqlsrv.sybsystemdb_device_size 两个参数数值要略小于实际sybsystemprocs及sybsystemdb所建逻辑卷的大小(10M-25M左右);2.2.2初始化sybase adaptive server进入/home/sybase/ASE-12_5/bin路径中,在命令行下执行srvbuildres命令:$ srvbuildres–r /home/sybase/rs/sql.rs./srvbuildres: Building Adaptive Server 'SYBASE':./srvbuildres: Building master device..../srvbuildres: Master device complete../srvbuildres: Writing entry into directory services..../srvbuildres: Directory services entry complete../srvbuildres: Writing RUN_SYBASE file..../srvbuildres: RUN_SYBASE file complete../srvbuildres: Starting server..../srvbuildres: Server started../srvbuildres: Building sysprocs device and sybsystemprocs database..../srvbuildres: sybprocs device and sybsystemprocs database created../srvbuildres: Running installmaster script to install system stored procedures..../srvbuildres: /home/sybase/ASE-12_5/scripts/installmaster: 10% complete../srvbuildres: /home/sybase/ASE-12_5/scripts/installmaster: 20% complete../srvbuildres: /home/sybase/ASE-12_5/scripts/installmaster: 30% complete../srvbuildres: /home/sybase/ASE-12_5/scripts/installmaster: 40% complete../srvbuildres: /home/sybase/ASE-12_5/scripts/installmaster: 50%complete../srvbuildres: /home/sybase/ASE-12_5/scripts/installmaster: 60% complete../srvbuildres: /home/sybase/ASE-12_5/scripts/installmaster: 70% complete../srvbuildres: /home/sybase/ASE-12_5/scripts/installmaster: 80% complete../srvbuildres: /home/sybase/ASE-12_5/scripts/installmaster: 90% complete../srvbuildres: /home/sybase/ASE-12_5/scripts/installmaster: 100% complete../srvbuildres: installmaster script complete../srvbuildres: Installing common character sets (Code Page 437, Code Page 850,ISO Latin-1, Macintosh and HP Roman-8)..../srvbuildres: Character sets installed../srvbuildres: Setting server name in Adaptive Server..../srvbuildres: Server name added. The name will be visible from SQL afterrestarting the server../srvbuildres: Server 'SYBASE' was successfully created.完成服务器安装;2.2.3设置客户端字符集在/home/Sybase/locaels目录下,打开locales.dat文件,找到有[linux]的位置,将[linux]部分locale = default改为在.profile文件中添加如下内容LANG=defaultSYBLANG=cp936export LANG SYBLANG2.2.4服务器的启动与停止1. 手工启动数据库:$ cd /home/sybase/ASE-12_5/install$ startserver -f RUN_SYBASE2. 关闭数据库:isql –Usa –P -SSYBASE1>shutdown SYB_BACKUP <关闭备份数据库>2>go1>checkpoint2>go1>shutdown2>go2.3创建用户数据库例子3.4.1建立一个4000M的名为portal的数据设备为例$ isql –Usa –P –SSYBASE1> disk init name=“portaldb”, --数据库逻辑设备名2> physname=“/dev/rportaldb”,--逻辑卷名称3> vdevno=7, --设备号4> size=2048000 --数据设备大小5> go3.4.2建立一个1000M的名为logdb的日志设备为例$ isql –Usa –P –SSYBASE1> disk init name=“logdb”, --数据库逻辑设备名2> physname=“/dev/rlogdb”,--逻辑卷名称3> vdevno=8, --设备号4> size=512000 --日志设备大小5> go3.4.3创建用户数据库portal1> create database portal on portaldb=4000 log on logdb=10002> go一般数据库的日志设备大小是数据设备大小的20-30%。
