Solaris系统安全加固列表
solaris系统加固

Permission of master.passwd and spwd.db file Ports opened
根据需要设置 于2007年及以后年度中,如可用端口发 生变化,需执行系统变更流程以得到适 当审批。 必须
禁用不必要的用户和用户组
取消并反安装所有不用的服务
必须 于2007年及以后年度中,如可用服务发 生变化,需执行系统变更流程以得到适 当审批。
由超级用户root将相关用户的登录shell取消即可,命令如下: #passwd -e 用户名 而后根据提示把用户的登录shell改变为/bin/false。 这些用户有:bin、daemon、adm、lp等等; 另外,也可以由超级用户root从系统的口令文件/etc/passwd和 /etc/shadow中,把一些系统中确实不需要的用户帐号和用户组记录去掉。 首先,在/etc/inetd.conf中注释掉经确认不需要的服务,比如 name、shell、login、exec、comsat、talk、finger、uucp等。 其次,通过更改/etc/rc2.d和/etc/rc3.d目录下一些控制服务自动启动的 脚本的文件名,来关闭相应的服务。这些服务包括sendmail、NFS等。 具体操作举例如下: # /etc/rc2.d/S88sendmail stop # mv /etc/rc2.d/S88sendmail /etc/rc2.d/s88sendmail
YES
用户连续5次登录失败的信息会详细记录在如下文件中, /var/adm/loginlog中。但之前需要超级用户执行如下的配置: # touch /var/adm/loginlog # chown root:sys /var/adm/loginlog # chmod 600 /var/adm/loginlog # ls -l /var/adm/loginlog -rw------- 1 root sys 0 Jun 26 10:39 /var/adm/loginlog
Solaris10系统安全加固标准

Solaris系统安全文档(for solaris 10)1.禁用不需要的用户备份:备份/etc/passwdcp /etc/passwd /etc/passwd.080903cp /etc/shadow /etc/shadow.080903修改:编辑/etc/shadow,将需要禁止帐户的**用NP代替Example: noaccess:NP:60002:60002:No Access User:/:/sbin/noshell恢复:编辑/etc/shadow,将需要恢复帐户的NP用**代替Example: noaccess:**:60002:60002:No Access User:/:/sbin/noshell或使用备份还原cp /etc/passwd.080903 /etc/passwdcp /etc/shadow.080903 /etc/shadow恢复:用原始备份还原cp /etc/group.bak.2008 /etc/group2.设置用户密码安全策略(根据具体要求修改)修改全局密码策略备份:备份/etc/default/passwdcp /etc/default/passwd /etc/default/passwd.080903#MINDIFF=3 #最小的差异数,新密码和旧密码的差异数。
#MINALPHA=2 #最少字母要多少#MINNONALPHA=1 #最少的非字母,包括了数字和特殊字符。
#MINUPPER=0 #最少大写#MINLOWER=0 #最少小写#MAXREPEATS=0 #最大的重复数目#MINSPECIAL=0 #最小的特殊字符#MINDIGIT=0 #最少的数字#WHITESPACE=YES #能使用空格吗?修改:(以下只针对除root用户外的其他用户)编辑/etc/default/passwd,设置:MINWEEKS= 最短改变时间MAXWEEKS=8 密码最长有效时间WARNWEEKS=5 密码失效前几天通知用户PASSLENGTH=8 最短密码长度MINDIFF=3MINALPHA=2MINLOWER=1MINDIGIT=1恢复:用备份的原始/etc/default/passwd文件替换现有的/etc/default/passwd如需针对个别用户设置修改/etc/shadow 文件,备份:cp /etc/shadow /etc/shadow.080903shadow 文件格式如下:loginID:password:lastchg:min:max:warn:inactive:expire:例如:默认root 用户的格式为:root:lySCmJ.1txm4M:6445::::::loginID 指登陆用户名password 密码选项,例如13位加密字符,或者*LK*锁定用户,或NP,无法登陆用户lastchg 指最后密码修改日期,从1970年1月1号开始计算min 指两次密码修改间隔的最少天数max 指密码最大有效天数warn 指密码过期前开始发出提醒的天数inactive 指如果用户未登陆超过多少天将把用户锁定expire 用户过期时间,即到达此日期后用户过期,将无法登陆以上选项如为设置,留空,即代表无密码策略如需使用/etc/shadow 设置密码策略,则/etc/default/passwd 文件中MINWEEKS MAXWKEEKS WARNWEEKS PASSLENGTH 等选项不应设置参数。
Solaris系统安全
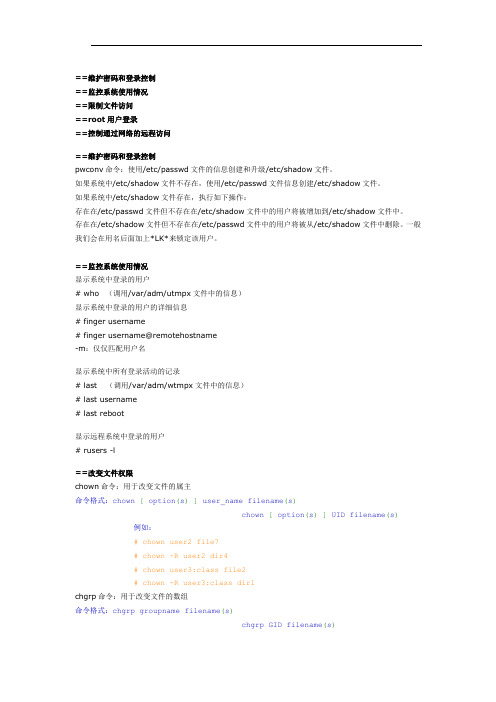
# last reboot
显示远程系统中登录的用户
# rusers -l
==改变文件权限
chown命令:用于改变文件的属主
命令格式:chown[option(s) ]user_name filename(s)
chown[option(s) ]UID filename(s)
==维护密码和登录控制
==监控系统使用情况
==限制文件访问
==root用户登录
==控制通过网络的远程访问
==维护密码和登录控制
pwconv命令:使用/etc/passwd文件的信息创建和升级/etc/shadow文件。
如果系统中/etc/shadow文件不存在,使用/etc/passwd文件信息创建/etc/shadow文件。
==监控系统使用情况
显示系统中登录的用户
# who(调用/var/adm/utmpx文件中的信息)
显示系统中登录的用户的详细信息
# finger username
# finger username@remotehostname
-m:仅仅匹配用户名
显示系统中所有登录活动的记录
# last(调用/var/adm/wtmpx文件中的信息)
#
#ULIMIT=0
# If CONSOLE is set, root can only login on that device.
# Comment this line out to allow remote login by root.
#
CONSOLE=/dev/console
限制root访问
CONSOLE=/dev/console
#
solaris主机操作系统加固规范

Solaris主机操作系统加固规范2010年9月目录1账号管理、认证授权 (1)1.1账号 (1)1.1.1SHG-Solaris-01-01-01 (1)1.1.2SHG-Solaris-01-01-02 (2)1.1.3SHG-Solaris-01-01-03 (3)1.1.4SHG-Solaris-01-01-04 (4)1.1.5SHG-Solaris-01-01-05 (5)1.2口令 (6)1.2.1SHG-Solaris-01-02-01 (6)1.2.2SHG-Solaris-01-02-02 (7)1.2.3SHG-Solaris-01-02-03 (8)1.2.4SHG-Solaris-01-02-04 (9)1.2.5SHG-Solaris-01-02-05 (10)1.3授权 (12)1.3.1SHG-Solaris-01-03-01 (12)1.3.2SHG-Solaris-01-03-02 (13)1.3.3SHG-Solaris-01-03-03 (15)1.3.4SHG-Solaris-01-03-04 (17)1.3.5SHG-Solaris-01-03-05 (18)1.3.6SHG-Solaris-01-03-06 (18)1.3.7SHG-Solaris-01-03-07 (19)2日志配置 (20)2.1.1SHG-Solaris-02-01-01 (20)2.1.2SHG-Solaris-02-01-02 (21)2.1.3SHG-Solaris-02-01-03 (22)2.1.4SHG-Solaris-02-01-04 (23)2.1.5SHG-Solaris-02-01-05 (24)2.1.6SHG-Solaris-02-01-06 (25)2.1.7SHG-Solaris-02-01-07 (26)3通信协议 (27)3.1IP协议安全 (27)3.1.1SHG-Solaris-03-01-01 (27)3.1.2SHG-Solaris-03-01-02 (28)3.1.3SHG-Solaris-03-01-03 (29)3.1.4SHG-Solaris-03-01-04 (30)3.2路由协议安全 (31)3.2.1SHG-Solaris-03-02-01 (31)3.2.2SHG-Solaris-03-02-02 (32)4设备其他安全要求 (34)4.1补丁管理 (34)4.1.1SHG-Solaris-04-01-01 (34)4.1.2SHG-Solaris-04-01-02 (35)4.2服务进程和启动 (37)4.2.1SHG-Solaris-04-02-01 (37)4.2.2SHG-Solaris-04-02-02 (39)4.2.3SHG-Solaris-04-02-03 (40)4.2.4SHG-Solaris-04-02-04 (41)4.2.5SHG-Solaris-04-02-05 (42)4.2.6SHG-Solaris-04-02-06 (43)4.2.7SHG-Solaris-04-02-07 (43)4.3B ANNER与屏幕保护 (44)4.3.1SHG-Solaris-04-03-01 (44)4.3.2SHG-Solaris-04-03-02 (45)4.4内核调整 (46)4.4.1SHG-Solaris-04-04-01 (46)4.4.2SHG-Solaris-04-04-02 (47)5附录:SOLARIS可被利用的漏洞(截止2009-3-8) (48)本文档是Solaris 操作系统的对于Solaris操作系统设备账号认证、日志、协议、补丁升级、文件系统管理等方面的43项安全配置要求,对系统的安全配置审计、加固操作起到指导性作用。
IIS系统安全加固规范

IIS系统安全基线规范2022年4月目录1账号管理、认证授权 (1)1.1.1ELK-IIS-01-01-01 (1)1.1.2ELK-IIS-01-01-02 (2)1.1.3ELK-IIS-01-01-03 (2)1.1.4ELK-IIS-01-01-04 (4)2日志配置 (5)2.1.1ELK-IIS-02-01-01 (5)2.1.2ELK-IIS-02-01-02 (6)2.1.3ELK-IIS-02-01-03 (7)3通信协议 (8)3.1.1ELK-IIS-03-01-01 (8)4设备其他安全要求 (10)4.1.1ELK-IIS-04-01-01 (10)4.1.2ELK-IIS-04-01-02 (13)4.1.3ELK-IIS-04-01-03 (14)4.1.4ELK-IIS-04-01-04 (14)4.1.5ELK-IIS-04-01-05 (15)本文档是Windows 操作系统的对于IIS服务IIS应用服务在安全等方面的安全配置要求,对系统的安全配置审计、加固操作起到指导性作用。
1账号管理、认证授权1.1.1E L K-I I S-01-01-011.1.2E L K-I I S-01-01-021.1.3E L K-I I S-01-01-03实施目的阻止非法IP访问问题影响Web服务器带来安全性问题。
系统当前状态查看Internet 信息服务(IIS)管理器配置是否与原来相同实施步骤1、参考配置操作开始->管理工具->Internet 信息服务(IIS)管理器选择相应的站点,然后右键点击“属性”回退方案取消IP访问控制判断依据1、判定条件需要限制访问源的话进行ip范围限制。
2、检测操作开始->管理工具->Internet 信息服务(IIS)管理器选择相应的站点,然后右键点击“属性”。
检查是否进行了ip的限制。
实施风险低1.1.4E L K-I I S-01-01-042日志配置2.1.1E L K-I I S-02-01-01回退方案恢复IIS日志路径到C:\WINDOWS\system32\LogFiles目录。
Solaris 10角色系统安全维护和管理命令大全

Solaris 10用户管理入门:用户配置文件与命令(2)一、了解Solaris 10 用户配置文件1、了解标准用户表-1 列出了系统在安装过程中创建的标准用户(其中所列内容与/etc/passwd文件的描述是一致的)。
表中的组id号是用户所在的首要组的代号。
这是solaris安装过程中自动设置的。
表-1 Solaris 系统标准用户3了解solaris 10 用户、用户组配置文件● /etc/passwd与用户相关的系统配置文件主要有/etc/passwd 和/etc/shadow,其中/etc/shadow是用户资讯的加密文件,比如用户的密码口令的加密保存等;/etc/passwd 和/etc/shadow 文件是互补的。
/etc/passwd 的内容简介:在/etc/passwd 中,每一行都表示的是一个用户的信息;一行有7个段位;每个段位用:号分割,图-1是我的系统中的/etc/passwd 的行;图-1 /etc/passwd文件第一字段:用户名(也被称为登录名);在上面的例子中,我们看到用户名是 cjh;第二字段:口令;在例子中我们看到的是一个x,其实密码已被映射到/etc/shadow 文件中;第三字段:UID ,用户ID,101;第四字段:GID,组ID,1;第五字段:用户名全称,这是可选的;第六字段:用户的家目录所在位置;cjh这个用户是/home/cjh ;第七字段:用户所用SHELL 的类型,cjh是 bash ;所以设置为/bin/sh ;● /etc/shadow/etc/shadow文件是/etc/passwd 的影子文件,这个文件并不由/etc/passwd 而产生的,这两个文件是应该是对应互补的;shadow内容包括用户及被加密的密码以及其它/etc/passwd 不能包括的信息,比如用户的有效期限等;这个文件只有root权限可以读取和操作,权限如下:# ls -l /etc/shadow-r-------- 1 root root 1256 08-08 05:01 /etc/shadow/etc/shadow 的权限不能随便改为其它用户可读,这样做是危险的。
Solaris安全设置手册

禁止基于rhosts的用户认证10
检查信任关系10
启动服务脚本的屏蔽掩码10
六,网络接口的调整和安全11
缩短ARP缓存的存在周期11
缩短条目在arp-table里刷新的时间11
禁止回应广播的的请求来防止一些特别的具有危害性的ping包11
启动时禁止源路由11
user:lRs.8R9EfQXx.:11137:0:10000::::
加密段有无被修改的迹象
去掉所有path环境变量里的“.”
安全层面:本地
解决方法:
从用户及root的初始化脚本中的path变量里去除“.”,比如如下脚本:
/.login /etc/.login /etc/default/login /.cshrc /etc/skel/local.cshrc
修改syslog.conf文件22
安装tripwire22
IDS22
日志文件观察者(swatch)22
禁止telnet远程管理,用ssh23
十二,其他23
设置启动标示23
一 solaris系统安装
系统patch
解决方案:
# grep sugroup /etc/group
sugroup::600:root,httpadm,wsphere
只有是sugroup组里的用户才能使用su命令
四 inetd终极进程
注释掉所有确实不必的服务
打开cron程式的记账20
检查utmp,utmpx的权限20
寻找没有用户关联的文件21
寻找没有组关联的文件21
检查/var/cron的权限21
十一,登录和记账21
教你如何配置安全的SOLARIS系统

教你如何配置安全的SOLARIS系统一、帐号和口令安全策略1.1更改口令文件、影像文件、组文件的权限/etc/passwd 必须所有用户都可读,root用户可写–rw-r—r—/etc/shadow 只有root可读–r--------/etc/group 必须所有用户都可读,root用户可写–rw-r—r—1.2修改不必要的系统帐号移去或者锁定那些系统帐号,比如sys、uucp、nuucp、listen、lp、adm等等,简单的办法是在/etc/shadow的password域中放上NP字符。
还可以考虑将/etc/passwd文件中的shell域设置成/bin/false1.3修改口令策略修改/etc/default/passwd文件MAXWEEKS=4 口令至少每隔4星期更改一次MINWEEKS=1 口令至多每隔1星期更改一次WARNWEEKS=3 修改口令后第三个星期会收到快要修改口令的信息 PASSLENGTH=6 用户口令长度不少于6个字符二、用户授权安全策略2.1移去组及其它用户对/etc的写权限。
执行命令#chmod -R go-w /etc2.2禁止root远程登录在/etc/default/login中设置CONSOLE=/dev/concle2.3setuid和setgid特殊权限。
Setuid是指设置程序的有效执行用户身份(uid)为该文件的属主,而不是调用该程序进程的用户身份。
Setgid与之类似。
Setuid和setgid 用1s -1显示出来为s权限,存在于主人和属组的执行权限的位置上。
系统设置特殊权限,使用户执行某些命令时,具有root的执行权限, 命令执行完成, root身份也随之消失。
因此特殊权限关系系统的安全,可执行命令#find / -perm -4000 -print 寻找系统中具有setuid权限的文件,存为列表文件,定时检查有没有这之外的文件被设置了setuid 权限。
Solaris 系统安全加固列表

Solaris 系统安全加固列表一、安全理念1、安全的隐患更多来自于企业内部2、对于管理员的要求:不要信任任何人3、分层保护策略:假设某些安全保护层完全失效4、服务最小化5、为最坏的情况做打算二、物理安全1、记录进出机房的人员名单,考虑安装摄像机2、审查PROM是否被更换,可以通过记录hostid进行比较3、每个系统的OpenBoot口令应该不一样,口令方案不可预测4、系统安装完毕移除CD-ROM5、将版本介质放入不在本场地的介质储藏室中三、账号与口令策略1、超级用户的PA TH(在/.profile中定义的)设置为:PATH = /usr/bin:/sbin:/usr/sbin任何用户的PATH或者LD_LIBRARY_PATH中都不应该包含―.‖2、口令文件、影像文件、组文件/etc/passwd 必须所有用户都可读,root用户可写–rw-r—r—/etc/shadow 只有root可读–r--------/etc/group 必须所有用户都可读,root用户可写–rw-r—r--3、口令安全solaris强制口令最少6位,但是超级用户修改口令的时候不受这个限制强迫test账号每隔30天修改一次口令#passwd –n 30 test强迫test账号在下次登录的时候修改口令#passwd –f test禁止test账号修改口令#passwd –n 2 –x 1 test封锁test账号,禁止登录#passwd –l test4、组口令用newgrp 命令临时改变gid由于sysadmin组可执行admintool,必须要保护好,增加组口令的过程:删除不需要的成员(如果成员属于sysadmin,改变组时不需要口令)#passwd (通常封锁的账号)提取/etc/shadow中user的口令字符串插入到/etc/group中sysadmin的口令字段封锁user账号5、修改口令策略/etc/default/passwd文件MAXWEEKS=4 口令至少每隔4星期更改一次MINWEEKS=1 口令至多每隔1星期更改一次WARNWEEKS=3 修改口令后第三个星期会收到快要修改口令的信息PASSLENGTH=6 用户口令长度不少于6个字符6、限制使用su的组(只允许sysadmin组执行su命令)#chgrp sysadmin /bin/su#chmod o-rwx /bin/su7、su的纪录/etc/default/su文件SULOG=/var/adm/sulogSYSLOG=YESCONSOLE=/dev/consolePATH=/usr/bin:SUPA TH=/usr/sbin:/usr/bin 8、禁止root远程登录/etc/default/login中设置CONSOLE=/dev/null在/etc/ftpusers里加上root。
Solaris安全操作指南
Solaris安全操作指南第一章 Solaris系统安全安装1.1 安装步骤下面将以安装Solaris 8 为例,描述系统安装的过程及相关的安全注意事项。
请系统管理员在安装系统前,认真阅读Sun公司提供的系统安装指南和参考手册,了解系统安装的基本操作步骤。
断开网络连接请确定网络是断开,即网线没有接入网络中。
如果用户希望自动配置NIS服务,则需要网络处于连通状态,但是这样做会带来一些安全隐患,因为在安装期间,RPC服务处于启动状态,存在潜在的安全威胁。
建议在系统处于安全保护状态下,才将系统联入网络。
Openboot口令和安全请首先插入CD。
为了防止无关人员执行EEPROM上的命令,请在OK提示符下,使用命令"setenv"设置EEPROM的安全模式为”command”,并设置相应的口令,要求口令至少为8位,必须有字母、数字和标点,不能使用名字、完整的英文单词或生日作为口令。
下面是一个示例:ok setenv security-mode commandsecurity-mode = command请再次确定已经设置了EEPROM的安全模式和口令,并且口令满足一定的复杂读要求。
· OK boot cdrom在OK状态下,设置系统启动设备为CD-ROM。
开始Solaris 安装程序进入系统安装初期,请系统管理员按照SUN公司提供安装手册所描述的步骤进行。
在系统安装min-root,并进入StartWeb安装环境后,系统管理员注意下列安全事项:1. 设置root口令设置一个强壮的root的口令,使其符合复杂性要求,即口令长度必须为8位,包含数字、字母和标点,不能为完整的英文单词或句子。
2. 选择系统安装的类型选择系统安装的类型是系统安装中关键一步,系统管理员需要根据系统安装的策略和最小化原则选择相应的系统软件包。
强烈建议:系统安装选择自定义核心组(core group)软件包,并且不安装附带软件和附加产品。
Solaris安全加固和Bind安装配置

Solaris安全加固和Bind安装配置一.安全配置1 禁用系统帐号并修改相关文件的访问权限修改/etc/passwd 文件让系统帐号没有shellchmod 644 /etc/passwd600 /etc/shadow644 /etc/group644 /etc/systemchmod –R g-w /etc2 修改配置文件/etc/default/passwdPASSLENGTH=6/etc/default/loginLCONSOLE=/dev/consoleLSYSLOG= YESLTIMEOUT=120LPASSREQ=YES #确定登陆需要密码验证UMASK=027/etc/default/cronCRONLOG=YES3 配置并且限制su/etc/default/suSYSLOG=YESSULOG=/var/adm/sulogchmod 550 /bin/suchmod +s /bin/sugroupadd sugroupchown root.sugroup /bin/su4 修改/etc/inetd.conf 文件,关闭超级进程使用#注释不用的服务,只留下:ftp stream tcp nowait root /usr/sbin/in.ftpd in.ftpd //telnet stream tcp nowait root /usr/sbin/in.telnetd in.telnetd //如启动ssh则注释掉time stream tcp nowait root internaltime dgram udp wait root internalecho stream tcp nowait root internalecho dgram udp wait root internaldiscard stream tcp nowait root internaldiscard dgram udp wait root internaldaytime stream tcp nowait root internaldaytime dgram udp wait root internalrstatd/2-4 tli rpc/datagram_v wait root /usr/lib/netsvc/rstat/rpc.rstatd rpc.rstatd//性能监测也可去掉fs stream tcp wait nobody /usr/openwin/lib/fs.auto fs100083/1 tli rpc/tcp wait root /usr/dt/bin/rpc.ttdbserverd rpc.ttdbserverd在只需要不多图形操作的服务器或是要保证相当的安全,你也许应该关掉字体服务fs,也可以关掉系统性能监视器rstatd和tooltalk服务器ttdbserverd。
windows、AIX、solaris、linux、oracle安全检查及整改建议
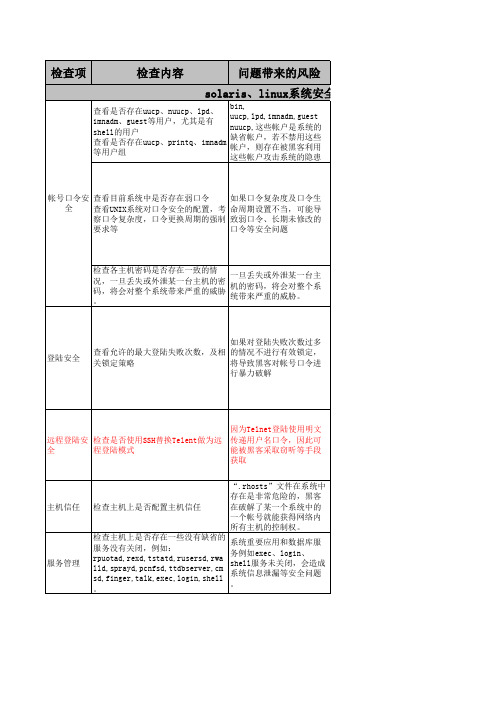
没有及时更新系统补丁, 这样一旦发现系统漏洞, 则存在被黑客攻击的安全
是否对系统日志进行了定期查看
通过日志可以发现安全问 题
由于定期进行漏洞扫描是
日常维护 是否对主机进行了定期漏洞扫描
发现系统和应用漏洞最有 效和最便捷的方法,通过
分析扫描结果可以及时对
系统进行相应的加固。
数据库安全检查项
检查数据库只采用密码认证方式,容 明文在网络传输过程中容
的密码。
全
删除或锁定与设备运行、维护等与工 多余帐号会带来被黑客攻
作无关的账号。
击利用
当用户连续认证失败次数超过6次 (不含6次),锁定该用户使用的账 会给暴力破解带来机会。 号。 设备应配置日志功能,对用户登录进 行记录,记录内容包括用户登录使用 对各种用户的访问进行审 的账号,登录是否成功,登录时间, 计,为发现恶意攻击和事 以及远程登录时,用户使用的IP地址 后发现提供帮助。 。
一旦出现安全事故或者发
现入侵行为,查看系统审
核日志是找出操作源的最
系统未打开syslog日志
简便方法。如果恶意人员 篡改一些文件或者系统重
要信息,而系统没有设该
审核策略,将无法对恶意
事件进行详细的定位。
补丁情况
系统的ML(Maintenance Level)未更 新至最新。
系统未打补丁,可能存在 已知的系统漏洞,遭受黑 客攻击
管理
账号及口令 管理
应用服务器上存在已经不使用的数据 库连接配置文件,该配置文件中的帐
户口令信息以明文方式保存,并且此 帐户也已经不再使用,但数据库未锁 定此帐户,若这些数据库连接信息被 恶意访问者获取,就能获取数据库的
应用服务器被攻击成功, 直接造成数据库服务器面 临危险。
Solaris安全加固实施
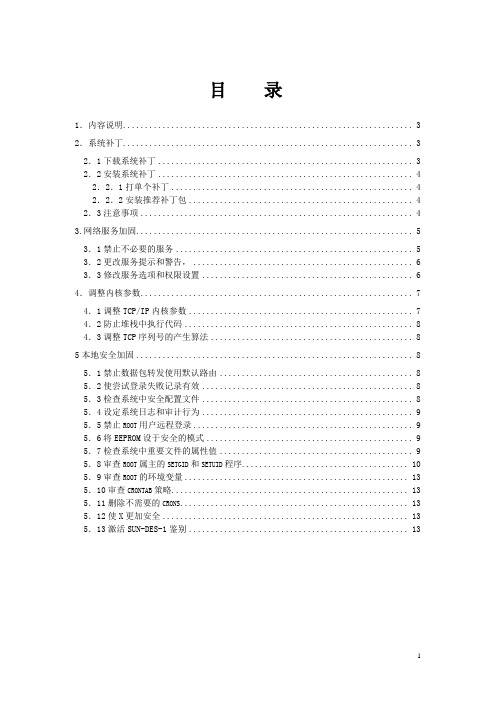
目录1.内容说明 (3)2.系统补丁 (3)2.1下载系统补丁 (3)2.2安装系统补丁 (4)2.2.1打单个补丁 (4)2.2.2安装推荐补丁包 (4)2.3注意事项 (4)3.网络服务加固 (5)3.1禁止不必要的服务 (5)3.2更改服务提示和警告, (6)3.3修改服务选项和权限设置 (6)4.调整内核参数 (7)4.1调整TCP/IP内核参数 (7)4.2防止堆栈中执行代码 (8)4.3调整TCP序列号的产生算法 (8)5本地安全加固 (8)5.1禁止数据包转发使用默认路由 (8)5.2使尝试登录失败记录有效 (8)5.3检查系统中安全配置文件 (8)5.4设定系统日志和审计行为 (9)5.5禁止ROOT用户远程登录 (9)5.6将EEPROM设于安全的模式 (9)5.7检查系统中重要文件的属性值 (9)5.8审查ROOT属主的SETGID和SETUID程序 (10)5.9审查ROOT的环境变量 (13)5.10审查CRONTAB策略 (13)5.11删除不需要的CRONS (13)5.12使X更加安全 (13)5.13激活SUN-DES-1鉴别 (13)安全加固实施反馈表Solaris安全加固实施方案1.内容说明在本文档中,将Solaris系统的安全加固分为四大步骤进行实施,包括系统补丁、网络服务加固、内核参数调整和本地安全加固。
系统补丁将描述如何得到系统的最新补丁、如何为系统打单个补丁等方法,网络服务加固主要描述如何加固存在安全漏洞的网络服务、封闭不必要的网络服务等,内核参数调整描述如何用Solaris系统灵活的内核参数调整方法加固系统安全,最后,本地安全加固描述如何在本地设定系统自身的安全配置,以达到加固系统安全性能的目的。
对于开展具体应用业务中涉及安全安的其它问题,本文没有给予描述,应视具体情况灵活应用。
2.系统补丁2.1下载系统补丁访问sun公司的站点,可以得到最新的系统补丁。
Solaris系统加固方案
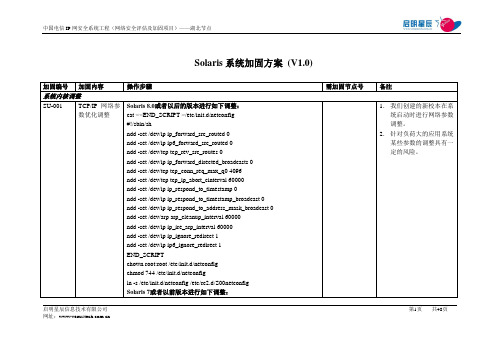
Solaris系统加固方案(V1.0)启明星辰信息技术有限公司第1页共48页网址:启明星辰信息技术有限公司第2页共48页网址:启明星辰信息技术有限公司第3页共48页网址:启明星辰信息技术有限公司第4页共48页网址:启明星辰信息技术有限公司第5页共48页网址:启明星辰信息技术有限公司第6页共48页网址:启明星辰信息技术有限公司第7页共48页网址:启明星辰信息技术有限公司第8页共48页网址:启明星辰信息技术有限公司第9页共48页网址:启明星辰信息技术有限公司第10页共48页网址:启明星辰信息技术有限公司第11页共48页网址:启明星辰信息技术有限公司第12页共48页网址:启明星辰信息技术有限公司第13页共48页网址:启明星辰信息技术有限公司第14页共48页网址:启明星辰信息技术有限公司第15页共48页网址:启明星辰信息技术有限公司第16页共48页网址:启明星辰信息技术有限公司第17页共48页网址:启明星辰信息技术有限公司第18页共48页网址:启明星辰信息技术有限公司第19页共48页网址:启明星辰信息技术有限公司第20页共48页网址:启明星辰信息技术有限公司第21页共48页网址:启明星辰信息技术有限公司第22页共48页网址:启明星辰信息技术有限公司第23页共48页网址:启明星辰信息技术有限公司第24页共48页网址:附录A:TCP/IP网络参数优化调整脚本#!/sbin/sh## Copyright (c) 1999-2002 by Sun Microsystems, Inc.# All rights reserved.##ident "@(#)nddconfig 2.13 03/05/14 SMI"## INTRODUCTION## This script sets network driver parameters to prevent some network# attacks. Install this script to make changes at system boot. For# further information on the parameters set in this script, see# the Sun Blueprints(tm) OnLine article entitled "Solaris Operating# Environment Network Settings for Security - updated for 8".## /blueprints/0602/network-updt2.pdf## The latest version of this script is available from the Blueprints# Online tools area at:## /blueprints/tools/## This script is written for the Solaris 2.5.1, 2.6, 7, 8, and 9# Operating Environment releases.#启明星辰信息技术有限公司第25页共48页网址:# WARNING## This script makes changes to the system default network driver# parameters. The settings included in this script are considered safe# in terms of security. However, some settings may not work in your# environment. The comments provided for each parameter explain the# effect the setting has.## INSTALLATION## # cp <script> /etc/init.d/nddconfig# # chmod 744 /etc/init.d/nddconfig# # chown root:sys /etc/init.d/nddconfig# # ln /etc/init.d/nddconfig /etc/rc2.d/S70nddconfig## WARNING MESSAGES## When adding specific privileged ports ({tcp|udp}_extra_priv_ports_add),# if a specific port number has already been applied, the following# warning message is displayed:## operation failed, File exists## This is a very poor ndd warning message. It can be safely ignored.#启明星辰信息技术有限公司第26页共48页网址:PATH=/usr/bin:/usr/sbin## A note about parameter values:# '0' == false/off/disable# '1' == true/on/enable### verbose## This option enables verbose output generated by this script.#verbose=1## arp_cleanup_interval## This option determines the period of time the Address Resolution# Protocol (ARP) cache maintains entries. ARP attacks may be effective# with the default interval. Shortening the timeout interval should# reduce the effectiveness of such an attack.# The default value is 300000 milliseconds (5 minutes).#arp_cleanup_interval=60000启明星辰信息技术有限公司第27页共48页网址:## ip_forward_directed_broadcasts## This option determines whether to forward broadcast packets directed# to a specific net or subnet, if that net or subnet is directly# connected to the machine. If the system is acting as a router, this# option can be exploited to generate a great deal of broadcast network# traffic. Turning this option off will help prevent broadcast traffic# attacks.# The default value is 1 (true).#ip_forward_directed_broadcasts=0## ip_forward_src_routed# ip6_forward_src_routed (Solaris 8 and 9)## This option determines whether to forward packets that are source# routed. These packets define the path the packet should take instead# of allowing network routers to define the path.# The default value is 1 (true).#ip_forward_src_routed=0ip6_forward_src_routed=0#启明星辰信息技术有限公司第28页共48页网址:# ip_ignore_redirect# ip6_ignore_redirect (Solaris 8 and 9)## This option determines whether to ignore Internet Control Message# Protocol (ICMP) packets that define new routes. If the system is# acting as a router, an attacker may send redirect messages to alter# routing tables as part of sophisticated attack (man in the middle# attack) or a simple denial of service.# The default value is 0 (false).#ip_ignore_redirect=1ip6_ignore_redirect=1## ip_ire_flush_interval (Solaris 2.5.1, 2.6, and 7)# ip_ire_arp_interval (Solaris 8 and 9)## This option determines the period of time at which a specific route# will be kept, even if currently in use. ARP attacks may be effective# with the default interval. Shortening the time interval may reduce# the effectiveness of attacks.# The default interval is 1200000 milliseconds (20 minutes).#ip_ire_flush_interval=60000ip_ire_arp_interval=60000启明星辰信息技术有限公司第29页共48页网址:## ip_respond_to_address_mask_broadcast## This options determines whether to respond to ICMP netmask requests# which are typically sent by diskless clients when booting. An# attacker may use the netmask information for determining network# topology or the broadcast address for the subnet.# The default value is 0 (false).#ip_respond_to_address_mask_broadcast=0## ip_respond_to_echo_broadcast# ip6_respond_to_echo_multicast (Solaris 8 and 9)## This option determines whether to respond to ICMP broadcast echo# requests (ping). An attacker may try to create a denial of service# attack on subnets by sending many broadcast echo requests to which all# systems will respond. This also provides information on systems that# are available on the network.# The default value is 1 (true).#ip_respond_to_echo_broadcast=0ip6_respond_to_echo_multicast=0#启明星辰信息技术有限公司第30页共48页网址:# ip_respond_to_timestamp## This option determines whether to respond to ICMP timestamp requests# which some systems use to discover the time on a remote system. An# attacker may use the time information to schedule an attack at a# period of time when the system may run a cron job (or other time-# based event) or otherwise be busy. It may also be possible predict# ID or sequence numbers that are based on the time of day for spoofing# services.# The default value is 1 (true).#ip_respond_to_timestamp=0## ip_respond_to_timestamp_broadcast## This option determines whether to respond to ICMP broadcast timestamp# requests which are used to discover the time on all systems in the# broadcast range. This option is dangerous for the same reasons as# responding to a single timestamp request. Additionally, an attacker# may try to create a denial of service attack by generating many# broadcast timestamp requests.# The default value is 1 (true).#ip_respond_to_timestamp_broadcast=0启明星辰信息技术有限公司第31页共48页网址:## ip_send_redirects# ip6_send_redirects (Solaris 8 and 9)## This option determines whether to send ICMP redirect messages which# can introduce changes into remote system's routing table. It should# only be used on systems that act as routers.# The default value is 1 (true).#ip_send_redirects=0ip6_send_redirects=0## ip_strict_dst_multihoming# ip6_strict_dst_multihoming (Solaris 8 and 9)## This option determines whether to enable strict destination# multihoming. If this is set to 1 and ip_forwarding is set to 0, then# a packet sent to an interface from which it did not arrive will be# dropped. This setting prevents an attacker from passing packets across# a machine with multiple interfaces that is not acting a router.# The default value is 0 (false).## NOTE: Strict destination multihoming may prevent SunCluster 2.x# systems from operating as intended. This script will NOT enable# strict destination multihoming if SunCluster 2.x software is installed.启明星辰信息技术有限公司第32页共48页网址:#ip_strict_dst_multihoming=1ip6_strict_dst_multihoming=1## ip_def_ttl## This option sets the default time to live (TTL) value for IP packets.# Normally, this should not be altered from the default value.# Changing it to a different value may fool some OS "fingerprinting"# tools such as queso or nmap.# The default value is 255.#ip_def_ttl=255## tcp_conn_req_max_q0## This option sets the size of the queue containing unestablished# connections. This queue is part of a protection mechanism against# SYN flood attacks. The queue size default is adequate for most# systems but should be increased for busy servers.# The default value is 1024.#tcp_conn_req_max_q0=4096启明星辰信息技术有限公司第33页共48页网址:## tcp_conn_req_max_q## This option sets the maximum number fully established connections.# Increasing the size of this queue provides some limited protection# against resource consumption attacks. The queue size default is# adequate for most systems but should be increased for busy servers.# The default value is 128.#tcp_conn_req_max_q=1024## tcp_rev_src_routes (Solaris 8 and 9)## This option determines whether the specified route in a source# routed packet will be used in returned packets. TCP source routed# packets may be used in spoofing attacks, so the reverse route should# not be used.# The default value is 0 (false).#tcp_rev_src_routes=0## Adding specific privileged ports (Solaris 2.6, 7, 8, and 9)## These options define additional TCP and UDP privileged ports outside启明星辰信息技术有限公司第34页共48页网址:# of the 1-1023 range. Any program that attempts to bind the ports# listed here must run as root. This prevents normal users from# starting server processes on specific ports. Multiple ports can be# specifed by quoting and separating them with spaces.## Defaults values:# tcp_extra_priv_ports: 2049 (nfsd) 4045 (lockd)# udp_extra_priv_ports: 2049 (nfsd) 4045 (lockd)#tcp_extra_priv_ports_add="6112"udp_extra_priv_ports_add=""## Ephemeral port range adjustment## These options define the upper and lower bounds on ephemeral ports.# Ephemeral (means short-lived) ports are used when establishing# outbound network connections.## Defaults values:# tcp_smallest_anon_port=32768# tcp_largest_anon_port=65535# udp_smallest_anon_port=32768# udp_largest_anon_port=65535#tcp_smallest_anon_port=32768启明星辰信息技术有限公司第35页共48页网址:tcp_largest_anon_port=65535udp_smallest_anon_port=32768udp_largest_anon_port=65535## Nonprivileged port range adjustment## These options define the start of nonprivileged TCP and UDP ports.# The nonprivileged port range normally starts at 1024. Any program# that attempts to bind a nonprivileged port does not have to run as# root.## Defaults values:# tcp_smallest_nonpriv_port=1024# udp_smallest_nonpriv_port=1024#tcp_smallest_nonpriv_port=1024udp_smallest_nonpriv_port=1024# +-----------------------------------------+# | No modification needed below this line. |# +-----------------------------------------+#启明星辰信息技术有限公司第36页共48页网址:# base parameters (the same across the 2.5.1, 2.6, 7, 8, and 9 releases)#base_parameters="arp_cleanup_interval \ip_forward_directed_broadcasts \ip_forward_src_routed \ip_ignore_redirect \ip_respond_to_address_mask_broadcast \ip_respond_to_echo_broadcast \ip_respond_to_timestamp \ip_respond_to_timestamp_broadcast \ip_send_redirects \ip_strict_dst_multihoming \ip_def_ttl \tcp_conn_req_max_q0 \tcp_conn_req_max_q \tcp_smallest_anon_port \tcp_largest_anon_port \udp_smallest_anon_port \udp_largest_anon_port \tcp_smallest_nonpriv_port \udp_smallest_nonpriv_port"## OS_revision specific parameters#启明星辰信息技术有限公司第37页共48页网址:# Solaris 2.5.1 specific parametersSunOS5_5_1="ip_ire_flush_interval"# Solaris 2.6 specific parametersSunOS5_6="ip_ire_flush_interval \tcp_extra_priv_ports_add \udp_extra_priv_ports_add"# Solaris 7 specific parametersSunOS5_7="ip_ire_flush_interval \tcp_extra_priv_ports_add \udp_extra_priv_ports_add"# Solaris 8 specific parametersSunOS5_8="ip_ire_arp_interval \tcp_extra_priv_ports_add \udp_extra_priv_ports_add \tcp_rev_src_routes"# Solaris 9 specific parametersSunOS5_9="ip_ire_arp_interval \tcp_extra_priv_ports_add \udp_extra_priv_ports_add \tcp_rev_src_routes"# Solaris 10 specific parameters启明星辰信息技术有限公司第38页共48页网址:SunOS5_10="ip_ire_arp_interval \tcp_extra_priv_ports_add \udp_extra_priv_ports_add \tcp_rev_src_routes"## IPv6 parameters (apply to Solaris 8, 9, and 10 (alpha))#ip6_parameters="ip6_forward_src_routed \ip6_respond_to_echo_multicast \ip6_send_redirects \ip6_ignore_redirect \ip6_strict_dst_multihoming"## system privilege ports defaults#extra_priv_ports_defaults="2049 4045 "## check for the presence of SunCluster 2.x software# (disables strict destination multihoming if SunCluster 2.x is installed)#if [ -f /opt/SUNWcluster/bin/scconf ]; then[ "$verbose" = "1" ] && \echo "SunCluster 2.2 detected; disabling IP strict destination multihoming."启明星辰信息技术有限公司第39页共48页网址:ip_strict_dst_multihoming=0ip6_strict_dst_multihoming=0fi# check for the presence of SunCluster 3.1u1 software# (disables strict destination multihoming if SC 3.1u1 is installed# This check is for SC31u1 for 32-bit and 64-bit modeif [ -f /kernel/drv/clprivnet -o -f /kernel/drv/sparcv9/clprivnet ]; then[ "$verbose" = "1" ] && \echo "SunCluster 3.1u1 detected; disabling IP strict destination multihoming."ip_strict_dst_multihoming=0ip6_strict_dst_multihoming=0fi## get OS name and revision information#os=`uname -s`revision=`uname -r`OSRev=$os`echo $revision | sed -e 's/\./_/g'`## check if IPv6 is enabled## ip6_interfaces="`echo /etc/hostname6.*[0-9] 2> /dev/null`"启明星辰信息技术有限公司第40页共48页网址:# [ "$ip6_interfaces" != "/etc/hostname6.*[0-9]" ] && ip6_enabled=true## Force IPv6 checks to always be applied. There do not generate an error if# there are no IPv6 interfaces defined, and the settings will persist if one# is created at a later point in time.#if [ "$revision" = "5.5.1" -o "$revision" = "5.6" -o "$revision" = "5.7" ]; thenip6_enabled=falseelseip6_enabled=truefi## do_in_order -- This function executes the specified functions with# the appropriate parameters for the local OS, revision, and# configuration. Currently it acts on a specific base set of# parameters, OS and revision specific parameters, and IPv6# parameters.#do_in_order() { # function_namefunction_name=$1# handle the base parametersfor param in $base_parameters; do启明星辰信息技术有限公司第41页共48页网址:$function_name $paramdone# handle the OS/revision specific parameterseval OSRev_params=\$$OSRevfor param in $OSRev_params; do$function_name $paramdone# handle IPv6 parametersif [ "$ip6_enabled" = "true" ]; thenfor param in $ip6_parameters; do$function_name $paramdonefi}## set_parameter -- This function uses ndd to set a parameter.# The supplied parameter name has a shell variable with the same# name which contains the value for the parameter.#set_parameter() { # parameter# definition for local variable启明星辰信息技术有限公司第42页共48页网址:param=$1# determine the driver from the first substring in the parameter namedriver=/dev/`echo $param | sed -e 's/_.*//'`eval values=\$$param# First check that a value for the parameter exists. If not, skip it.if [ -n "$values" ]; then# Some parameters may have multiple values specified in one# assignment further up in the script. ndd only accepts one# parameter at a time. Loop through and set each value.for value in $values; do[ "$verbose" = "1" ] && \echo "Setting $driver $param to $value"ndd -set $driver $param $valuedonefi}## display_parameter -- This function uses ndd to extract the value of# a parameter and display it.#display_parameter() { # parameter启明星辰信息技术有限公司第43页共48页网址:# definition for local variableparam=$1# hack for the "write only" extra privileged ports parametersparam=`echo $param | sed -e 's/_add$//'`# determine the driver from the first substring in the parameter namedriver=/dev/`echo $param | sed -e 's/_.*//'`# execute the ndd command to retrieve settings and remove newlinesvalue=`ndd $driver $param | tr -d '\n'`# print parameter valueecho " $driver $param = '$value'"}## compare_parameter -- This function uses ndd to extract the value of# a parameter. It compares the current parameter value to the one# defined in this script.#compare_parameter() { # parameter# definition for local variableoriginalParam=$1启明星辰信息技术有限公司第44页共48页网址:# hack for the "write only" extra privileged ports parametersmodifiedParam=`echo $originalParam | sed -e 's/_add$//'`# determine the driver from the first substring in the parameter namedriver=/dev/`echo $modifiedParam | sed -e 's/_.*//'`# execute the ndd command to retrieve settings and remove newlinescurrentValue=`ndd $driver $modifiedParam | tr -d '\n'`eval intendedValue="\$$originalParam"# if the modified parameter name is different from the original# parameter, then we are dealing with the privileged port parametersif [ "$modifiedParam" != "$originalParam" ]; then# the privileged port parameters have system defaults that must# be accounted for in the comparisonif [ -n "$intendedValue" ]; thenintendedValue="$extra_priv_ports_defaults$intendedValue "elseintendedValue="$extra_priv_ports_defaults"fifi# print parameter value and note all deviations启明星辰信息技术有限公司第45页共48页网址:echo " $driver $modifiedParam = '$currentValue'\c"if [ "$intendedV alue" != "$currentValue" ]; thenecho " (should be '$intendedValue')"elseecho " (ok)"fi}# Process the command argumentcase "$1" in'start')# set the parameters in the defined orderdo_in_order set_parameter;;'show')echo "Current ndd parameter settings:"do_in_order display_parameter;;'compare')echo "Comparison of ndd parameter settings:"启明星辰信息技术有限公司第46页共48页网址:do_in_order compare_parameter;;'stop')# ignored[ "$verbose" = "1" ] && \echo "$0: 'stop' ignored. No network changes applied.";;*)echo "Usage: $0 { start | stop | show | compare }"exit 1;;esacexit 0附录B:日志文档化脚本#!/bin/ksh# rotate -- A script to roll over log files# Usage: rotate /path/to/log/file [mode [#revs] ]FILE=$1MODE=${2:-644}DEPTH=${3:-4}DIR=`dirname $FILE`LOG=`basename $FILE`启明星辰信息技术有限公司第47页共48页网址:DEPTH=$(($DEPTH - 1))if [ ! -d $DIR ]; thenecho "$DIR: Path does not exist"exit 255ficd $DIRwhile [ $DEPTH -gt 0 ]doOLD=$(($DEPTH - 1))if [ -f $LOG.$OLD ]; thenmv $LOG.$OLD $LOG.$DEPTHfiDEPTH=$OLDdoneif [ $DEPTH -eq 0 -a -f $LOG ]; thenmv $LOG $LOG.0ficp /dev/null $LOGchmod $MODE $LOG/etc/init.d/syslog stop/etc/init.d/syslog start启明星辰信息技术有限公司第48页共48页网址:。
solaris安全加固实施方案

安全加固实施方案目录1加固目的 (4)2加固范围 (4)3加固前准备工作 (4)3.1加固前检查 (4)3.2加固前备份 (5)3.3影响分析 (6)3.4加固操作流程 (7)4加固实施 (7)4.1账号管理、认证授权 (7)4.1.1账号 (7)4.1.2口令 (11)4.1.3授权 (13)4.2日志审计 (17)4.2.1登录日志(必选) (17)4.2.2操作审计 (18)4.2.3本地记录系统日志 (18)4.2.4远程记录日志 (19)4.2.5SU操作日志 (20)4.2.6应用日志 (20)4.3IP协议安全 (21)4.3.1使用SSH协议登录 (21)4.3.2关闭不需要的IP服务端口 (22)4.3.3鉴权远程登录的主机IP (23)4.3.4禁止ICMP重定向 (24)4.4屏幕保护 (25)4.4.1超时退出登录界面 (25)4.4.2定时锁屏 (26)4.5文件系统及访问权限 (27)4.5.1重要文件权限加固 (27)4.5.2限制FTP等应用的访问目录 (27)4.6补丁管理 (28)4.6.1软件包裁减 (28)4.6.2补丁包 (29)4.7服务 (29)4.7.1关闭不需要的服务 (29)Email Server (31)4.7.2NTP服务的安全配置 (31)4.7.3NFS服务的安全配置 (32)4.8内核调整 (33)4.8.1防止堆栈缓冲溢出 (33)4.9启动项 (34)4.9.1启动项的安全配置 (34)5加固后检查验证 (35)5.1操作系统健康检查 (35)5.2业务检查 (36)6失败处理 (36)6.1失败定义 (36)6.2回退操作 (36)1加固目的随着电信业务不断发展,系统信息安全方面的投入的不断增多,在信息系统各个层面都采取一些安全防护策略。
而由于网络系统本身的复杂性,各种应用系统繁多,设备采用通用操作系统、数据库和IP协议,设备自身存在的安全问题日益突出。
系统安全强化标准程序 Solaris

系統安全強化標準程序(S OLARIS 8/9版)敦陽科技股份有限公司2005/10目錄壹、前言 (3)一、文件介紹 (3)二、系統安全強化的目的 (3)三、文件限制 (3)貳、系統安全強化基礎 (5)(一)、調整系統服務 (5)(二)、系統設定修正 (12)(三)、重開系統 (13)參、註解 (14)壹、前言一、文件介紹本文件將協助需要針對 Solaris 作業環境進行系統安全強化的技術人員(主要是針對負責系統初始安裝之人員),可以以簡單快速的方式完成安全強化工作,並達成基本的安全防護要求。
雖然目前有許多類似文件可以參考,但我們也發現這些文件之間即使大部分相似,仍是有許多建議之設定是有相當的歧異,或是要求過於嚴格可能影響到實際環境的安裝工作。
所以我們著手製作本文件,目的是希望可以根據經驗來選擇最適合實際環境的設定流程。
二、系統安全強化的目的“Defense-in-depth”,不論是否有建置昂貴的防火牆,為達成深度防禦的目的,每部系統都應該在系統初始安裝起,便開始進行系統安全強化工作,用另一種方式來說,系統安裝時便應該開始重視系統安全,因為系統強化的目的不在於替系統提升至最嚴格的系統安全強度,而是讓初次安裝的系統可以避免一般性的入侵事件,因為就原始安裝光碟所提供的預設設定與軟體組態而言,都是極為容易被入侵的目標。
三、文件限制本文件所說明之現況與建議,有以下幾項限制:1、適用版本說明本文件主要針對之作業系統版本是Sun Microsystems 之Solaris Operating Environment version 9 for Sparc 。
基本上本文件所提及之相關設定,也適用於version 8。
2、適用狀況說明本文件建議針對新安裝上線之系統在未安裝應用程式之前進行針對新安裝上線之系統在未安裝應用程式之前進行強化工作強化工作。
對於已經上線或是已經安裝各種應用程式的系統,若需要進行安全強化,應該在與上線系統相同測試環境上,經過仔細的測試與安排強化步驟,檢驗是否會影響到現有的應用程式與服務,再對正式系統進行安全強化修正工作。
- 1、下载文档前请自行甄别文档内容的完整性,平台不提供额外的编辑、内容补充、找答案等附加服务。
- 2、"仅部分预览"的文档,不可在线预览部分如存在完整性等问题,可反馈申请退款(可完整预览的文档不适用该条件!)。
- 3、如文档侵犯您的权益,请联系客服反馈,我们会尽快为您处理(人工客服工作时间:9:00-18:30)。
Solaris系统安全加固列表ps:由于现在不少Solaris安全加固列表都比较老了,在下根据资料和自己的实践总结的Solaris 系统加固列表,难免会有不合适(影响服务)和错误以及不足之处,望各位不惜赐教(本来是word文档,发上来以后格式都乱了)多谢lgx和ghoststone对此文的帮助Solaris系统安全加固列表一、安全理念1、安全的隐患更多来自于企业内部2、对于管理员的要求:不要信任任何人3、分层保护策略:假设某些安全保护层完全失效4、服务最小化5、为最坏的情况做打算二、物理安全1、记录进出机房的人员名单,考虑安装摄像机2、审查PROM是否被更换,可以通过记录hostid进行比较3、每个系统的OpenBoot口令应该不一样,口令方案不可预测4、系统安装完毕移除CD-ROM5、将版本介质放入不在本场地的介质储藏室中三、账号与口令策略1、超级用户的PATH(在/.profile中定义的)设置为:PATH = /usr/bin:/sbin:/usr/sbin 任何用户的PATH或者LD_LIBRARY_PATH中都不应该包含“.”2、口令文件、影像文件、组文件/etc/passwd 必须所有用户都可读,root用户可写–rw-r—r—/etc/shadow 只有root可读–r--------/etc/group 必须所有用户都可读,root用户可写–rw-r—r--3、口令安全Solaris强制口令最少6位,但是超级用户修改口令的时候不受这个限制强迫test账号每隔30天修改一次口令#passwd –n 30 test强迫test账号在下次登录的时候修改口令#passwd –f test禁止test账号修改口令#passwd –n 2 –x 1 test封锁test账号,禁止登录#passwd –l test4、组口令用newgrp <group>命令临时改变gid由于sysadmin组可执行admintool,必须要保护好,增加组口令的过程:删除不需要的成员(如果成员属于sysadmin,改变组时不需要口令)#passwd <user>(通常封锁的账号)copyright 领测软件测试网提取/etc/shadow中user的口令字符串插入到/etc/group中sysadmin的口令字段封锁user账号5、修改口令策略/etc/default/passwd文件MAXWEEKS=4 口令至少每隔4星期更改一次MINWEEKS=1 口令至多每隔1星期更改一次WARNWEEKS=3 修改口令后第三个星期会收到快要修改口令的信息PASSLENGTH=6 用户口令长度不少于6个字符6、限制使用su的组(只允许sysadmin组执行su命令)#chgrp sysadmin /bin/su#chmod o-rwx /bin/su7、su的纪录/etc/default/su文件SULOG=/var/adm/sulogSYSLOG=YESCONSOLE=/dev/consolePATH=/usr/bin:SUPATH=/usr/sbin:/usr/bin8、禁止root远程登录/etc/default/login中设置CONSOLE=/dev/null在/etc/ftpusers里加上root。
在SSH 配置文件加:permitRootLogin = no(Solaris 9自带SSH,缺省就禁止root登陆,对Solaris 9,/etc/ftpusers 不再使用,FTP配置文件都在/etc/ftpd/ 下面。
如果ftpd 启动时存在/etc/ftpusers,它会被移动到/etc/ftpd/下)四、系统加固1、为OpenBoot设置密码在Solaris中设置密码# eeprom security-password在OpenBoot中设置密码ok password在Solaris中设置安全级别(command)# eeprom security-mode=command在OpenBoot中设置安全级别(command)ok setenv security-mode command在OpenBoot中设置安全级别(full)ok setenv security-mode full2、取消不必须账号移去或者锁定那些不是必须的帐号,比如sys\uucp\nuucp\listen等等,简单的办法是在/etc/shadow的password域中放上NP字符。
(简单办法是passwd -l username)3、文件系统/etc目录中应该没有文件是组或者其他用户可写的find /etc/ -type f –perm –g+w –print (查找组可写文件)find /etc/ -type f –perm –o+w –print (查找其他用户可写文件)chmod –R go-w /etc (改变任何错误的组/其他用户的写权限)/var/adm/utmp和/var/adm/utmpx文件的权限应该是6444、X-Windows手工锁定(当管理员离开电脑的时候)CDE中面板上的加锁图标OpenWindows中-鼠标右键-Utilities-Lock Screen5、/etc的存取权限用chmod -R g-w /etc命令来移去组用户对/etc的写权限。
6、打开数据包转发#ndd –set /dev/ip ip_forwarding 1 (在系统作为路由器的情况中执行)关闭数据包转发#ndd –set /dev/ip ip_forwarding 0 (建议把这条命令加入/etc/init.d/inetinit中)忽略重定向数据包(否则有遭到DOS的隐患)#ndd –set /dev/ip ip_ignore_redirects 1 (加入/etc/init.d/inetinit)不发送重定向数据包#ndd –set /dev/ip ip_send_redirects 0 (加入/etc/init.d/inetinit)禁止转发定向广播(如果网桥连结则不禁止)内容来自#ndd –set /dev/ip ip_forward_directed_broadcasts 0 (加入/etc/init.d/inetinit)禁止转发在数据源设置了路由的数据包#ndd –set /dev/ip ip_forward_src_routed 0 (加入/etc/init.d/inetinit)7、利用/etc/notrouter关闭IP转发创建/etc/notrouter文件,重启计算机(入侵者如果可以访问根目录,可以使用ndd命令重新开启IP转发)/etc/inet/hosts中的配置127.0.0.1 Localhost (所有系统都有这一项)192.168.0.13 Loghost (syslog使用的)192.168.0.109 wy_solaris (主机IP和主机名)/etc/defaultrouter包含了默认路由器的名称或者IP如果使用了默认路由器,在/etc/inet/hosts文件中必须包含路由器的名称,因为如果设置了路由表,系统将不会运行任何目录服务(DNS、NIS或者NIS+)8、cron(任务在/var/spool/cron/crontabs/ 一般行为在/etc/default/cron)格式:minute hour day-of-month month day-of-week command (每项间用空格,同一项两个数字间用逗号,每项为数字或者星号)配置:查看命令crontab –l(1)进入只有本用户可读的目录(2)crontab –l > mycronfile(3)编辑mycronfile(4)crontab < mycronfile不要使用crontab –e命令,因为它会在/tmp下建立所有用户都可读的crontab副本访问cron系统/etc/cron.d/cron.allow (允许)/etc/cron.d/cron.deny (不允许)存在cron.allow,其中没有某用户,则不允许此用户访问cron系统存在cron.deny,其中没有某用户,则允许此用户访问cron系统在/etc/default/cron里设置了"CRONLOG=yes" 来记录corn的动作PATH中不应包含“/tmp”“~”“.”字样at(任务在/var/spool/cron/atjobs)/etc/cron.d/at.allow和/etc/cron.d/at.deny和cron文件完全一样9、增加静态路由格式:route add net net-address subnet-mask router hops 领测软件测试网例如:route add net 10.15.0.0 255.255.0.0 10.14.48.2 1(要到达10.15.x.x的网络,需要将数据包送往路由器10.14.48.2,距离10.15.x.x有一个跃点。
这个命令将增加到启动文件/etc/rc2.d/S72inetsvc)增加动态路由(会带来安全隐患)在/etc/rc2.d/S72inetsvc中增加和是的命令行运行in.routed或者in.rdisc诊断工具snoop可以sniff,只有root可以使用,可以把snoop从不需要的UNIX机器上删除10、root的umask设置错误修改/etc/profile文件,将umask设为077或者02711、堆栈缓冲溢出攻击防护设置在/etc/system里加上如下语句,禁止缓冲溢出:echo "set noexec_user_stack=1" >> /etc/systemecho "set noexec_user_stack_log=1" >> /etc/system 领测软件测试网(对Solaris 9,可以对单个程序设定堆栈不可执行属性,前提是有该程序的源码,例如:# cc -M /usr/lib/ld/map.noexstk myprogram.c)12、使IP forwarding和sourec routing(源路)由无效在Inetinit中使IP forwarding和sourec routing(源路)由无效(假如有超过一个网络接口的话)。
在/etc/init.d/inetinit中增加下面所示设置:ndd -set /dev/ip ip_forward_directed_broadcasts 0ndd -set /dev/ip ip_forward_src_routed 0ndd -set /dev/ip ip_forwarding 013、防止TCP序列号预测攻击(ip欺骗)建议在/etc/default/inetinit中增加如下的生成初始化序列号设置来防止TCP序列号预测攻击(ip欺骗):TCP_STRONG_ISS=214、(如果有ftp服务)不要使用匿名ftp/etc/inet/inetd.conf中的ftpd为(记录)ftp stream tcp nowait root /usr/sbin/in.ftpd in.ftpd –dl决不能用root身份使用ftp(口令不加密)/etc/ftpusers中的增加超级用户(这里的账号禁止用ftp连接系统)FTP 服务暴露系统敏感信息编辑/etc/default/ftpd文件,假如文件不存在就新建一个,在文件中的加进以下一项:BANNER=XXXX(XXXX可以任意改变为任何一个版本信息),将该系统版本信息屏蔽.15、关闭NFS服务16、用SSH替代Telnet服务17、限制.rhosts、.netrc和/etc/hosts.equiv文件的使用限制.rhosts、.netrc和/etc/hosts.equiv文件的使用。
