apache+设置主机头,同一端口绑定多个域名和网站
Apache绑定多IP多域名

Apache绑定多IP多域名1.为Apache绑定多IP多域名(备用)当然还想尝试多域名的功能–网上也有很多.相比上一篇IIS上绑定多IP多域名,在Apache服务器上绑定方法要简单些,主要因为Apache是个开源独立的服务器软件,而且支持跨平台安装和配置,支持丰富的API扩展,所以很多人对Apache 的好感要甚于IIS,Apache的优点就不用多说了,还是来看看如何为Apache配置多 IP和多域名,天缘在上篇文章中说过,多IP和多域名绑定问题有很多种方法,所以本文仍然只介绍常规的绑定方法,即通过修改httpd.conf文件来绑定IP地址和域名。
HTTPD配置文件说明:Apache服务器httpd.conf配置文件说明注意:•无论Windows主机还是Linux主机,在Apache接收处理前,首要要确保这些IP地址已经映射到APACHE服务上,也就是说,对要首先保证操作系统本身接受这些IP地址访问,Windows绑定多IP参考前一篇文章(如何为Windows绑定多个IP和多个域名),Linux 绑定多IP地址先自行搜索解决,以后再补充。
•测试之前,确保域名已经解析到本服务器上且已生效。
•本文默认按照80端口配置,还可以通过同IP但不同端口来区分不同网站,该情况一般是用在主机管理上。
举个例子:可以使用http://192.168.1.100作为正常网址,而http://192.168.1.100:2020则可以用来做后台配置管理等。
•绑定方法有很多种,比如虚拟绑定、单IP多域名绑定、多IP单域名绑定、多IP多域名绑定、端口识别绑定等等,而且每种绑定可能还有不同的实现方法,根据自己习惯和场合选择使用。
1.Apache绑定单IP多域名1、示例绑定:•IP地址192.168.1.100•对应两个域名和http://bbs.(二级域名)2、绑定过程a、打开http.conf,该文件位置在apache/conf下面,直接用文本编辑器即可打开。
apache下配置详解
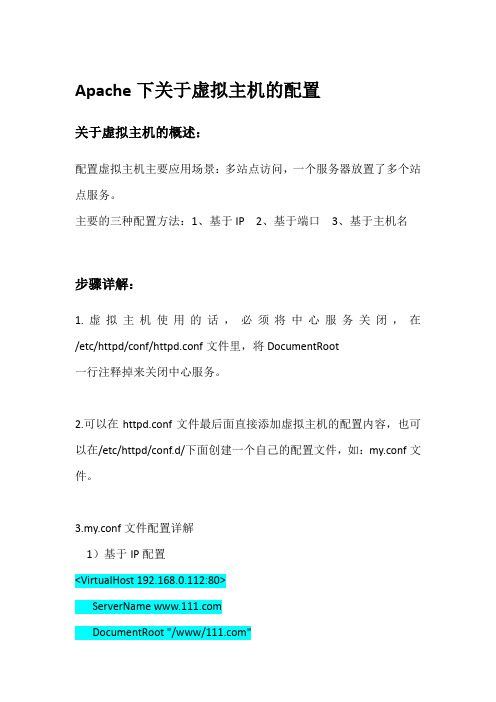
Apache下关于虚拟主机的配置关于虚拟主机的概述:配置虚拟主机主要应用场景:多站点访问,一个服务器放置了多个站点服务。
主要的三种配置方法:1、基于IP 2、基于端口3、基于主机名步骤详解:1.虚拟主机使用的话,必须将中心服务关闭,在/etc/httpd/conf/httpd.conf文件里,将DocumentRoot一行注释掉来关闭中心服务。
2.可以在httpd.conf文件最后面直接添加虚拟主机的配置内容,也可以在/etc/httpd/conf.d/下面创建一个自己的配置文件,如:my.conf文件。
3.my.conf文件配置详解1)基于IP配置<VirtualHost 192.168.0.112:80>ServerName DocumentRoot "/www/"</VirtualHost><VirtualHost 192.168.0.113:80>ServerName DocumentRoot "/www/"</VirtualHost>以上2个虚拟主机配置的IP分别为192.168.0.113和192.168.0.112,端口同为80端口。
这样在浏览器分别输入不同的ip或域名时就会访问到不同的站点。
Tips:如果只有一块网卡可以同过ipaddr add 192.168.0.112 dev eth0来添加辅助ip。
如果是域名方式访问,还需要在windows和linux下的hosts文件里面自行添加域名解析。
关于辅助ip的设置:ipaddr add 192.168.0.112/24 dev eth0这是为网卡设置一个辅助ip。
假如一个网卡的ip地址为192.168.0.22,执行上面的命令,在用ifconfig 查看,会发现有两个ip地址,而192.168.0.22称为主地址(Primary IP address),而192.168.0.112称为辅助地址(secondary IP address),一块网卡是允许有多个IP地址的,所以就算再多添加几个secondary IP 也是合法行的。
apache_配置多个ip网站站点
附录:进一步的提示
一个简单示例
<VirtualHost www.abc.dom>
ServerAdmin webgirl@abc.dom
DocumentRoot /www/abc
</VirtualHost> webgirl@abc.dom
DocumentRoot /www/abc
本文档的涵义一言以蔽之就是:不要让Apache在解析配置文件的时候用到DNS。 如果Apache在解析配置文件时用到了DNS,您的服务器就会发生可靠性的问题(也可能根本无法启动), 或者遭致拒绝(偷窃)服务攻击(包括用户可以从其他用户那里偷窃点击)。
一个简单示例
拒绝服务
"main server"地址
基于域名的虚拟主机相对比较简单,因为我们只需要配置DNS服务器将每个主机名映射(CNAMES)到正确的IP地址,然后配置Apache HTTP服务器,令其辨识不同的主机名就可以了。基于域名的服务器也可以缓解IP地址(IPV4)不足的问题。这种方式下,各个虚拟主机共享同一份Apache,因此有CGI程序运行时,安全性也不高。
</VirtualHost> webmaster@
DocumentRoot /www/docs/
ServerName
ErrorLog logs/-error_log
TransferLog logs/-access_log
用Apache设置虚拟主机服务通常可以采用两种方案:基于IP地址的虚拟主机和基于主机名字的虚拟主机,下面我们分别介绍一下它们的实现方法以及优缺点。以便大家在具体的应用中能够选择最合适的实现方法。
Apache配置多个站点(非虚拟目录)
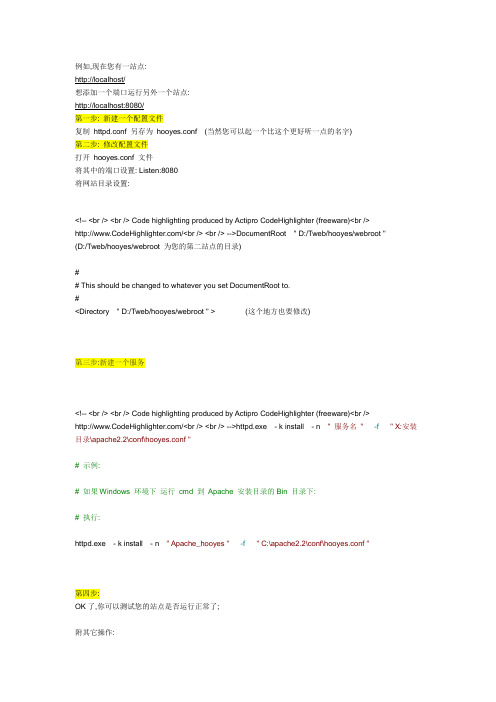
例如,现在您有一站点:http://localhost/想添加一个端口运行另外一个站点:http://localhost:8080/第一步: 新建一个配置文件复制httpd.conf 另存为hooyes.conf (当然您可以起一个比这个更好听一点的名字)第二步: 修改配置文件打开hooyes.conf 文件将其中的端口设置: Listen:8080将网站目录设置:<!-- <br /> <br /> Code highlighting produced by Actipro CodeHighlighter (freeware)<br />/<br /> <br /> -->DocumentRoot " D:/Tweb/hooyes/webroot "(D:/Tweb/hooyes/webroot 为您的第二站点的目录)## This should be changed to whatever you set DocumentRoot to.#<Directory " D:/Tweb/hooyes/webroot " > (这个地方也要修改)第三步:新建一个服务<!-- <br /> <br /> Code highlighting produced by Actipro CodeHighlighter (freeware)<br />/<br /> <br /> -->httpd.exe - k install - n "服务名"-f"X:安装目录\apache2.2\conf\hooyes.conf"#示例:#如果Windows 环境下运行cmd 到Apache 安装目录的Bin 目录下:#执行:httpd.exe - k install - n "Apache_hooyes"-f"C:\apache2.2\conf\hooyes.conf"第四步:OK了,你可以测试您的站点是否运行正常了;附其它操作:<!-- <br /> <br /> Code highlighting produced by Actipro CodeHighlighter (freeware)<br />/<br /> <br /> -->#其他的命令:#将Apache安装为服务:httpd - k install#指定服务的名称,当你在同一机器上安装多个Apache服务时,你必须为它们指定不同的名字。
iis部署部署中一个端口部署多个网站的介绍
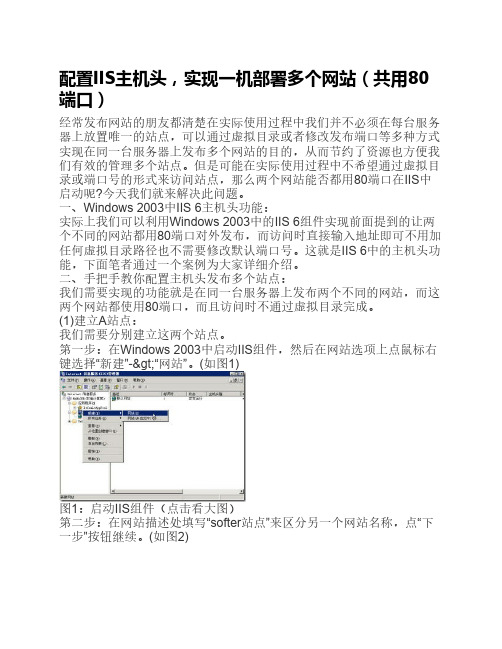
配置IIS主机头,实现一机部署多个网站(共用80端口)经常发布网站的朋友都清楚在实际使用过程中我们并不必须在每台服务器上放置唯一的站点,可以通过虚拟目录或者修改发布端口等多种方式实现在同一台服务器上发布多个网站的目的,从而节约了资源也方便我们有效的管理多个站点。
但是可能在实际使用过程中不希望通过虚拟目录或端口号的形式来访问站点,那么两个网站能否都用80端口在IIS中启动呢?今天我们就来解决此问题。
一、Windows 2003中IIS 6主机头功能:实际上我们可以利用Windows 2003中的IIS 6组件实现前面提到的让两个不同的网站都用80端口对外发布,而访问时直接输入地址即可不用加任何虚拟目录路径也不需要修改默认端口号。
这就是IIS 6中的主机头功能,下面笔者通过一个案例为大家详细介绍。
二、手把手教你配置主机头发布多个站点:我们需要实现的功能就是在同一台服务器上发布两个不同的网站,而这两个网站都使用80端口,而且访问时不通过虚拟目录完成。
(1)建立A站点:我们需要分别建立这两个站点。
第一步:在Windows 2003中启动IIS组件,然后在网站选项上点鼠标右键选择“新建”->“网站”。
(如图1)图1:启动IIS组件(点击看大图)第二步:在网站描述处填写“softer站点”来区分另一个网站名称,点“下一步”按钮继续。
(如图2)图2:填写网站名称(点击看大图)第三步:接下来就是主机头设置的关键了,网站IP地址处信息保持默认的“全部未分配”即可,端口是默认的80,最下面的“此网站的主机头”输入一个域名,当然如果真的要对internet发布自己的网站,这个域名是要输入真实的已经注册的。
笔者填写作为该网站的主机头。
(如图3)图3:填写域名(点击看大图)第四步:选择网站发布的主目录,通过“浏览”按钮定位站点文件夹。
(如图4)图4:选择网站发布主目录(点击看大图)第五步:设置网站访问权限,这个就要根据自己站点的特征决定了。
Apache虚拟主机VirtualHost配置
Apache 虚拟主机 VirtualHost 配置虚拟主机 (Virtual Host)是在同一台机器搭建属于不同域名或者基于不同 IP 的多个网站服务的技术. 可以为运行在同一物理机器上的各个网站指配不同的IP 和端口, 也可让多个网站拥有不同的域名.Apache 是世界上使用最广的 Web 服务器, 从版开始支持虚拟主机. 本文将讲解在不同服务器 (Redhat Enterprise Linux, Ubuntu Linux, Windows) 上使用 Apache 搭建虚拟主机来搭建多个网站.主旨本文旨在让读者知道如何在同一台机器上搭建多个网站, 并附带一些使用技巧. 以操作为主, 不会过多谈及原理.目标本文是写给拥有一定的服务器配置和管理技能, 工作中需要同时维护多个网站的网站主, 网站开发者和网络管理员. 如果你是互联网公司的配管工程师, 对计算机服务器原理和操作十分熟悉, 请忽视本文, 你不会在上面找到太多有价值的东西.Redhat Enterprise LinuxRedhat Enterprise Linux (包括 CentOS Linux), 是使用最广的 Linux 服务器, 大量的网站应用都部署在其上.1. 打开文件 /etc/httpd/conf/, 搜索 VirtualHost example, 找到代码如下:## VirtualHost example:# Almost any Apache directive may go into a VirtualHost container.# The first VirtualHost section is used for requests without a known# server name.##<VirtualHost *:80># ServerAdmin# DocumentRoot /www/docs/ ServerName ErrorLog logs/ CustomLog logs/ common#</VirtualHost>2. 仿照例子, 添加一段代码来指定某一域名的网站.## DocumentRoot 是网站文件存放的根目录# ServerName 是网站域名, 需要跟 DNS 指向的域名一致#<VirtualHost *:80>ServerAdminDocumentRoot /var/www/httpdocs/demo_aliluna_comServerName ErrorLog logs/ CustomLog logs/ common</VirtualHost>3. 重启 httpd 服务, 执行以下语句.service httpd restartUbuntu LinuxUbuntu 在 Linux 各发行版中, 个人用户数量最多的. 很多人在本机和虚拟机中使用. 但 Ubuntu 和 Redhat 的 VirtualHost 设置方法不相同.1. 打开目录 /etc/apache2/sites-available/, 发现 default 和default-ssl 两个文件, 其中 default 是 http 虚拟主机服务的配置文件, default-ssl 是配置 https 服务使用的. 可以复制一份 default 文件. 并修改配置文件名, 文件名必须与域名一致 (如:2. 打开新建的配置文件, 修改 DocumentRoot, ServerName 和对应的配置目录. 例子如下:## DocumentRoot 是网站文件存放的根目录# ServerName 是网站域名, 需要跟 DNS 指向的域名一致#<VirtualHost *:80>ServerAdminDocumentRoot /var/www/httpdocs/demo_aliluna_comServerName ErrorLog ${APACHE_LOG_DIR}/ CustomLog ${APACHE_LOG_DIR}/ combined</VirtualHost>3. 通过 a2ensite 激活虚拟主机配置sudo a2ensite 打开目录 /etc/apache2/sites-enabled/, 你会发现所有激活的虚拟主机, 可以通过 a2dissite 进行注销sudo a2dissite 重启 Apache 服务, 激活虚拟主机sudo/etc/apache2 restartWindowsWindows 是市场占有率最高的 PC 操作系统, 也是很多人的开发环境. 其VirtualHost 配置方法与 Linux 上有些差异, 以下方式适合原生 Apache, XAMPP 和 WAMP 套件.1. 打开目录 {Apache2 安装目录}\conf\extra\, 找到文件.2. 仿照例子, 添加一段代码来指定某一域名的网站.## DocumentRoot 是网站文件存放的根目录# ServerName 是网站域名, 需要跟 DNS 指向的域名一致#<VirtualHost *:80>ServerAdminDocumentRoot "D:/workspace/php/demo_aliluna_com"ServerName ErrorLog "logs/"CustomLog "logs/" common</VirtualHost>3. 打开文件, 添加如下语句.# Virtual hostsInclude conf/extra/4. 重启 Apache 服务.总结最近我在不同的几台服务器上搭建了一些网站服务, 这篇文章也算是我的个人笔记, 望日后可自用, 也希望对读者有用. 文中介绍了几个主流开发和部署环境上配置虚拟主机的方法, 其他 OS 大同小异.。
PHP5.4 Apache Mysql 搭配与多站点配置详解
现在开源的建站系统中,php语言的程序占主导。
因此在使用开源程序前,学会搭建环境是必须的。
当然现在又很多现成的集成环境,但今天我要写的是手动搭建apache、PHP、mysql 的环境,及服务器上多站点的配置,还有mysql在安装过程中如何选择我们必要的选项。
注:很多时候我们学东西只是要实现某种功能,简单使用就可以了。
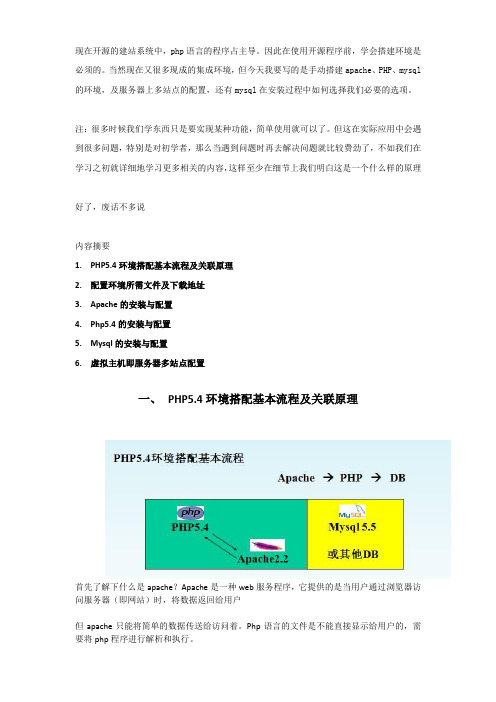
但这在实际应用中会遇到很多问题,特别是对初学者,那么当遇到问题时再去解决问题就比较费劲了,不如我们在学习之初就详细地学习更多相关的内容,这样至少在细节上我们明白这是一个什么样的原理好了,废话不多说内容摘要1. PHP5.4环境搭配基本流程及关联原理2. 配置环境所需文件及下载地址3. Apache的安装与配置4. Php5.4的安装与配置5. Mysql的安装与配置6. 虚拟主机即服务器多站点配置一、PHP5.4环境搭配基本流程及关联原理首先了解下什么是apache?Apache是一种web服务程序,它提供的是当用户通过浏览器访问服务器(即网站)时,将数据返回给用户但apache只能将简单的数据传送给访问着。
Php语言的文件是不能直接显示给用户的,需要将php程序进行解析和执行。
所以apache和php的使用流程是,先讲apache安装好,然后将PHP程序加入到apache 组件当中,当用户访问其他文本文件的时候,apache 直接将数据展示给用户,当用户访问PHP 文件的时候,将apache来调用PHP组件,然后将相关文件解析成可执行的内容之后再展示给用户。
也就是所谓的将php执行。
然后在看mysql,mysql就是一种数据库,当然也可以用其他的数据库,只是习惯性的觉得这三者是“铁三角”。
Mysql与其关联是用户访问apache,apache在调用PHP组建的时候,PHP组建里面写的程序文件来开启mysql的应用,再连接数据库。
再实际应用中apache与PHP的关系更紧密一些,那么这两者之间需要实现哪几个逻辑?首先将php的组件加入到apache的程序中,让apache在执行中可以调用PHP用到一下三局代码:LoadModule php5_module "c:/www/php54/php5apache2_2.dll"(载入php模块)AddType application/x-httpd-php .php(只有文件名后缀为.PHP时才载入上面的模块)PHPIniDir "C:/www/PHP54"(php程序路径)二、配置环境所需文件1.httpd-2.2.21-win32-x862.mysql-5.5.18-win323.php-5.4.0RC4-Win32-VC9-x86下载地址:/s/1skRXcCX三、apache的安装与配置1.apache的安装和普通软件的安装没有多大区别,进行到下图这一步时如图进行相应添加即可。
Apache配置多个站点的方法
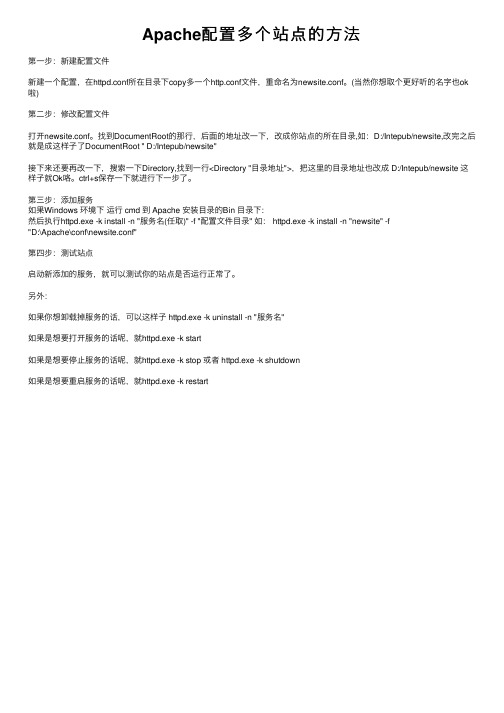
Apache配置多个站点的⽅法第⼀步:新建配置⽂件新建⼀个配置,在httpd.conf所在⽬录下copy多⼀个http.conf⽂件,重命名为newsite.conf。
(当然你想取个更好听的名字也ok 啦)第⼆步:修改配置⽂件打开newsite.conf。
找到DocumentRoot的那⾏,后⾯的地址改⼀下,改成你站点的所在⽬录,如:D:/Intepub/newsite,改完之后就是成这样⼦了DocumentRoot " D:/Intepub/newsite"接下来还要再改⼀下,搜索⼀下Directory,找到⼀⾏<Directory "⽬录地址">,把这⾥的⽬录地址也改成 D:/Intepub/newsite 这样⼦就Ok咯。
ctrl+s保存⼀下就进⾏下⼀步了。
第三步:添加服务如果Windows 环境下运⾏ cmd 到 Apache 安装⽬录的Bin ⽬录下:然后执⾏httpd.exe -k install -n "服务名(任取)" -f "配置⽂件⽬录" 如: httpd.exe -k install -n "newsite" -f"D:\Apache\conf\newsite.conf"第四步:测试站点启动新添加的服务,就可以测试你的站点是否运⾏正常了。
另外:如果你想卸载掉服务的话,可以这样⼦ httpd.exe -k uninstall -n "服务名"如果是想要打开服务的话呢,就httpd.exe -k start如果是想要停⽌服务的话呢,就httpd.exe -k stop 或者 httpd.exe -k shutdown如果是想要重启服务的话呢,就httpd.exe -k restart。
Apache本机不同端口多站点配置:httpd-vhosts.conf

环境:Ap ache2.2.9,Resin-3.1.6,Win Serv er 20031.解压Re sin至任意目录,我的是D:;2.安装Apa che,具体操作下一步、下一步即可,其中要配置的地方是需要你填写网站名等信息,这里可以不用管它,全部填写loc alhos t,默认端口 80;3.进入Resi n目录运行setup.exe,勾选Web Serv ers中的Apach e复选框,并在后面的输入框中填写你的Ap ache安装目录,我的是D:\Apach e2.2;4.打开 Apa che的配置文件(D:\Apa che2.2\con f\htt pd.co nf,我的),找到这行:Loa dModu le ca ucho_modul e "D:/resi n-3.1.6/wi n32/a pache-2.0/mod_c aucho.dll",就是你的Resin安装目录中与Apac he整合的插件模块,不过它默认的是ap ache-2.0目录下的,使用这个模块,在启动Ap ache服务器时会出错,必须使apach e-2.2目录下的mod_c aucho.dll,修改后为:LoadM odule cauc ho_mo dule"D:/r esin-3.1.6/win32/apa che-2.2/mo d_cau cho.d ll";5.找到这行:#S erver Namelocal host:80,将前面的#号去掉(不知道为什么它默认把它注释了); 6.找到这行:<Di recto ry "D:/Apa che2.2/htd ocs">,改为<D irect ory />,如果不改Apac he将不会去找虚拟主机配置文件中对应的目录(如果你用loca lhost访问);7.将O ption s Ind exesFollo wSymL inks,目录列表,安全设置为将Inde xes去掉,不显示目录列表;8.将#i ncl ude c onf/e xtra/httpd-vhos ts.co nf前面的#号去掉,打开虚拟主机配置;至此ht tpd.c onf配置结束. 下面对h ttpd-vhost s.con f进行配置.ht tpd-v hosts.conf在"D:\Apach e2.2\conf\extra" 目录下,将"Na meVir tualH ost *:80"改为"Nam eVirt ualHo st lo calho st:80",确定为你本机(测试时),如果正式启用Inter net服务,就把它换成你的服务器的IP地址吧,下面的是虚拟主机基本配置:X ml代码<Vir tualH ost l ocalh ost:80> S erver Namelocal host Doc ument RootE:/wo rkspa ce/ss hDemo/WebR oot Alia s /te st E:/work space/test/WebR oot Resi nConf igSer ver 127.0.0.1 6800 </V irtua lHost><Virt ualHo st lo calho st:80>Se rverN ame l ocalh ost Do cumen tRoot E:/w orksp ace/s shDem o/Web RootAlia s /te st E:/work space/test/WebR ootResin Confi gServ er 127.0.0.1 6800</Virtu alHos t>各个元素说明:<Virtu alHos t loc alhos t:80>:loca lhost为网站域名,80端口可以不写,如果改成别的端口则需要写上,同时还要修改httpd.conf中的监听端口号:L isten 80 Serve rName:网站域名,同上;Docu mentR oot:网站程序主目录;A lias:网站中其他的WEB应用的名称及目录位置;Re sinCo nfigS erver:Resi n服务器监听端口,我这里是本地为:127.0.0.1,如果有多台机器作为服务器,修改成对应IP地址即可; 以上就将虚拟主机的配置完成了,一个网站对应一个<Virtu alHos txxx.xxx.com></Virt ualHo st>标记;Re sin配置:Re sin 配置文件:D:\Res in-3.1.6\c onf\r esin.conf,打开并搜索"8080"对应的就是HTTP端口,将H TTP端口注释,因为我们已经不需要Re sin提供WEB服务了,只要让它监听本的端口就行,本地监听端口位置大概在149,这样一行"<serv erid="" a ddres s="127.0.0.1" p ort="6800"/>",同样如果Ap ache装在别的机器上,这里就改成这台机器的IP地址了,否则Apach e会找不到Resin的端口的;如果想使用多J VM来实现多机器的功能实现:一个JV M一个配置文件; 每个配置文件的监听端口不能相同,要改<serve r id="" ad dress="127.0.0.1"po rt="6800"/>中的po rt值,6801,6802,...以此类推,Apa che与之保持一致;将Re sin注册成为 Wi ndows服务: 命令行切换至Resi n主目录,运行htt pd -i nstal l 完成默认resi n服务安装,http d -re move完成默认re sin服务卸载,使用多JVM时就不能这样安装,如下:ht tpd -insta ll-as服务名-conf对应re sin配置文件; httpd -rem ove-a s 服务名然后启动Apac he与Re sin,这时会发现R esin服务只能启动一个,为什么呢,因为Resi n 在注册为Windo ws服务的时候都有一个自己监控的功能,它会占用一个端口:6600,在r esin.conf中大概121行的位置可以看到:"<wat chdog-port>6600</wat chdog-port>",所当该端口被占用,re sin服务便失败了,修改之,为方便可以这样来修改:本地监听端口6800,自己监听:6600,6801:6601,方便,记忆快. 这样就完成了Apa che与R esin实现多网站的应用了;分类: Apac he2011-09-08--------------------------------------------------------------------------------c1009。
apache实现部署多个网站(一个ip部署多域名)的方法详解

apache实现部署多个⽹站(⼀个ip部署多域名)的⽅法详解前⾔在⽇常的⽹站发布中很多情况下都⽆法做到⼀个IP对应⼀个站点,在IP4的情况下IP的资源是相对有限的。
然⽽作为最流⾏的Apache⾃然也考虑到这种情况,下⾯来⼀起看看详细的介绍吧。
配置⽅法⾸先apache的版本是2.4.7,然后系统是Ubuntu 14.04.1 LTS。
(因为好像配置⽂件和⽬录有差异)⾸先进到apache2⽬录下,我们要探讨的主要是sites-available和sites-enabled根据字⾯意思,前⼀个是⽹站可⽤的,后⼀个是⽹站可⽤的,然后我们还知道了,sites-enabled⾥⾯的⽂件是sites-available⾥⾯⽂件的软链接,所以我们主要改site-available的⽂件,打开site-available有两个⽂件,但我们只需要000-default.conf⽂件,打开cat⽂件代码如下:<VirtualHost *:80># The ServerName directive sets the request scheme, hostname and port that# the server uses to identify itself. This is used when creating# redirection URLs. In the context of virtual hosts, the ServerName# specifies what hostname must appear in the request's Host: header to# match this virtual host. For the default virtual host (this file) this# value is not decisive as it is used as a last resort host regardless.# However, you must seothert it for any further virtual host explicitly.#ServerName ServerAdmin webmaster@localhostDocumentRoot /var/www/# Available loglevels: trace8, ..., trace1, debug, info, notice, warn,# error, crit, alert, emerg.# It is also possible to configure the loglevel for particular# modules, e.g.#LogLevel info ssl:warnErrorLog ${APACHE_LOG_DIR}/error.logCustomLog ${APACHE_LOG_DIR}/access.log combined# For most configuration files from conf-available/, which are# enabled or disabled at a global level, it is possible to# include a line for only one particular virtual host. For example the# following line enables the CGI configuration for this host only# after it has been globally disabled with "a2disconf".#Include conf-available/serve-cgi-bin.conf</VirtualHost>这就是⽹址配置⽂件了,⽽我们要修改的只有被注释掉的ServerName 域名,DocumentRoot 路径这两个部分,去掉注释剩下。
PHP服务器上配置apache绑定多域名
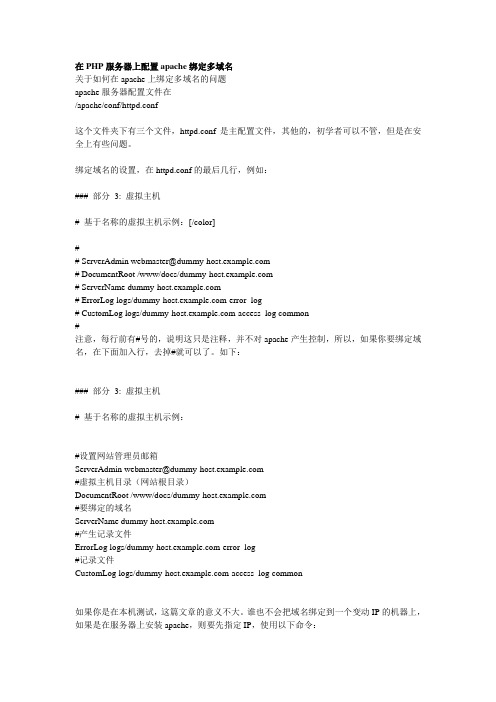
在PHP服务器上配置apache绑定多域名关于如何在apache上绑定多域名的问题apache服务器配置文件在/apache/conf/httpd.conf这个文件夹下有三个文件,httpd.conf是主配置文件,其他的,初学者可以不管,但是在安全上有些问题。
绑定域名的设置,在httpd.conf的最后几行,例如:### 部分3: 虚拟主机# 基于名称的虚拟主机示例:[/color]## ServerAdmin webmaster@# DocumentRoot /www/docs/# ServerName # ErrorLog logs/-error_log# CustomLog logs/-access_log common#注意,每行前有#号的,说明这只是注释,并不对apache产生控制,所以,如果你要绑定域名,在下面加入行,去掉#就可以了。
如下:### 部分3: 虚拟主机# 基于名称的虚拟主机示例:#设置网站管理员邮箱ServerAdmin webmaster@#虚拟主机目录(网站根目录)DocumentRoot /www/docs/#要绑定的域名ServerName #产生记录文件ErrorLog logs/-error_log#记录文件CustomLog logs/-access_log common如果你是在本机测试,这篇文章的意义不大。
谁也不会把域名绑定到一个变动IP的机器上,如果是在服务器上安装apache,则要先指定IP,使用以下命令:#指定主机IP地址NameVirtualHost 12.34.56.78这样的话,就把域名绑定到指定IP上了。
————————————————————[color=crimson]关于如何安装win2000adv+php5.0+iis+apache2+mysql+perl如果你用windows,下载最新的apache(2.0.54),php(5.0.4),mysql(5.x的是测试版,推荐用4.1.1x),zend optimizer 2.5.7和kehui cms。
CentOS服务器apache绑定多个域名的方法

CentOS服务器apache绑定多个域名的⽅法Apache是最流⾏的HTTP服务器软件之⼀,其以快速、可靠(稳定)⽽著称,并且可通过简单的API扩展,Perl/Python解释器可被编译到服务器中,完全免费,并且源代码全部开放。
如果有⾃⼰的服务器或者VPS,并且不想为了⽅便⽽购买昂贵的控制⾯板的话,那⾃⼰动⼿配置Apache就成了⼀门必修课了。
下⾯简单的介绍了如何通过设置Apache的http.conf⽂件,进⾏多个域名以及其相关的⼆级域名的绑定(假设我们要绑定的域名是和,⼆级域名是,独⽴IP为72.167.11.30).apache怎么绑定多个域名打开http.conf1、ServerName 127.0.0.1 修改成ServerName 72.167.11.302、#NameVirtualHost * 修改成"NameVirtualHost 72.167.11.30"3、在⽂件最后⾯有虚拟主机格式:#<VirtualHost *># ServerAdmin [email]admin@[/email]# DocumentRoot /www/httpd/html/# ServerName # ErrorLog logs/-error_log# CustomLog logs/-access_log common#</VirtualHost>//简单的添加:<VirtualHost 72.167.11.30>DocumentRoot usr/local/www/ServerName 72.167.11.30</VirtualHost><VirtualHost 72.167.11.30>DocumentRoot usr/local/www//ServerName </VirtualHost><VirtualHost 72.167.11.30>DocumentRoot usr/local/www//ServerName </VirtualHost>⽇志⽂件的话也可以按照⾃⼰的路径添加。
Apache配置多个https协议(ssl加密)站点

Apache配置多个https协议(ssl加密)站点Apache 配置多个https协议(ssl加密)站点工作中经常会遇到多个站点实现https访问,并指向同一个网页,本文将详解如何在Centos 环境下配置Apache多站点实现HTTPS访问。
准备工作OS:CentOS release 6.8 (Final)Web:Apache安装Apache1、安装Apache[root@node1 ~]# yum install httpd -y2、启动服务[root@node1 ~]# service httpd startStarting httpd: [ OK ][root@node1 ~]#3、修改测试页面[root@node1 ~]# cat /var/www/html/index.html<h1>Apache Test Page~</h1>4、测试访问Apache 配置多个HTTPS站点实现HTTPS访问1、安装SSL模块[root@node1 ~]# yum install mod_ssl -y #mod_ssl模块,是apache的https传输安全ssl支持模块,必须安装2、检测[root@node1 ~]# cd /etc/httpd/modules/[root@node1 modules]# ll | grep ssl-rwxr-xr-x 1 root root 181872 Oct 20 2017 mod_ssl.so3、上传证书文件这里我们可以到各大厂商去申请免费证书,可满足个人网站的需求,如企业网站,建议购买企业收费证书;[root@node1 ~]# cd /etc/httpd/ #证书文件通常也可放到linux的/etc/pki/tls/certs目录下[root@node1 httpd]# mkdir ssl/default[root@node1 httpd]# cd ssl/default[root@node1 default]# rz[root@node1 default]# lltotal 12-rw-r--r-- 1 root root 1683 Apr 13 22:26 1_root_bundle.crt-rw-r--r-- 1 root root 2008 Apr 13 22:26 2_.crt -rw-r--r-- 1 root root 1678 Apr 13 22:26 3_.key [root@node1 default]#4、修改配置[root@node1 ~]# cd /etc/httpd/conf.d/[****************]#lsREADME ssl.conf welcome.conf[****************]#vim ssl.conf #安装mod_ssl模块后,该ssl.conf会自动生成,里面有配置443虚拟主机的案例文件参见附件给出了mod_ssl的原始文件LoadModule ssl_module modules/mod_ssl.soListen 443<VirtualHost *:443>DocumentRoot "/var/www/html"ServerName SSLEngine onSSLCertificateFile/etc/httpd/ssl/default/2_.crtSSLCertificateKeyFile/etc/httpd/ssl/default/3_.keySSLCertificateChainFile/etc/httpd/ssl/default/1_root_bundle.crt</VirtualHost>配置文件参数说明LoadModule 加载SSL模块Listen 监听443端口DocumentRoot 网页目录ServerName 站点域名SSLEngine on 启用SSL功能SSLCertificateFile 证书文件SSLCertificateKeyFile 私钥文件SSLCertificateChainFile 证书链文件5、重启服务[root@node1 ~]# httpd -tSyntax OK可以先试用httpd -t 检测一下配置文件是否正确,然后再重启服务;[root@node1 ~]# service httpd restartStopping httpd: [ OK ]Starting httpd: [ OK ]6、检测端口是否监听[****************]#ss-ntlState Recv-Q Send-Q Local Address:Port Peer Address:PortLISTEN 0 128 *:80 *:*LISTEN 0 128 *:22 *:*LISTEN 0 100 127.0.0.1:25 *:*LISTEN 0 128 *:443 *:*[****************]#7、测试访问建议使用google浏览器进行测试访问,f12查看,会显示“This page is secure (valid HTTPS).”,说明证书配置正确;Apache 配置多个HTTPS站点配置多个HTTPS站点1、上传证书文件[root@node1 ~]# cd /etc/httpd/ssl/[root@node1 ssl]# mkdir web[root@node1 ssl]# cd web/[root@node1 web]# rz2、修改配置文件修改的是ssl.confLoadModule ssl_module modules/mod_ssl.soListen 443NameVirtualHost *:443 #配置多个https站点,该行一定要加入# 第一个虚拟主机<VirtualHost *:443>DocumentRoot "/var/www/html"ServerName SSLEngine onSSLCertificateFile /etc/httpd/ssl/default/2_.crt SSLCertificateKeyFile/etc/httpd/ssl/default/3_.keySSLCertificateChainFile/etc/httpd/ssl/default/1_root_bundle.crt</VirtualHost>#第二个虚拟主机<VirtualHost *:443>DocumentRoot "/var/www/html"ServerName SSLEngine onSSLCertificateFile/etc/httpd/ssl/web/2_.crtSSLCertificateKeyFile/etc/httpd/ssl/web/3_.keySSLCertificateChainFile/etc/httpd/ssl/web/1_root_bundle.crt</VirtualHost>3、重启服务[****************]#servicehttpdrestartStopping httpd: [ OK ]Starting httpd: [ OK ][****************]#4、测试访问Apache 配置多个HTTPS站点Apache 配置多个HTTPS站点到这里,Apache多站点https就实现了~附件1:yum安装mod_ssl模块后生成的配置完成2个https网站的ssl文件/etc/httpd/conf.d/ssl.conf文件:## This is the Apache server configuration file providing SSL support.# It contains the configuration directives to instruct the server how to# serve pages over an https connection. For detailing information about these# directives see <URL:>## Do NOT simply read the instructions in here withoutunderstanding# what they do. They're here only as hints or reminders. If you are unsure# consult the online docs. You have been warned.#LoadModule ssl_module modules/mod_ssl.so## When we also provide SSL we have to listen to the# the HTTPS port in addition.#Listen 443NameVirtualHost *:443#### SSL Global Context#### All SSL configuration in this context applies both to## the main server and all SSL-enabled virtual hosts.### Pass Phrase Dialog:# Configure the pass phrase gathering process.# The filtering dialog program (`builtin' is a internal# terminal dialog) has to provide the pass phrase on stdout.SSLPassPhraseDialog builtin# Inter-Process Session Cache:# Configure the SSL Session Cache: First the mechanism# to use and second the expiring timeout (in seconds).SSLSessionCache shmcb:/var/cache/mod_ssl/scache(51 2000)SSLSessionCacheTimeout 300# Semaphovre:# Configure the path to the mutual exclusion semaphore the# SSL engine uses internally for inter-process synchronization.SSLMutex default# Pseudo Random Number Generator (PRNG):# Configure one or more sources to seed the PRNG of the # SSL library. The seed data should be of good random quality.# WARNING! On some platforms /dev/random blocks if not enough entropy# is available. This means you then cannot use the /dev/random device# because it would lead to very long connection times (as long as# it requires to make more entropy available). But usually those# platforms additionally provide a /dev/urandom device which doesn't# block. So, if available, use this one instead. Read the mod_ssl User# Manual for more details.SSLRandomSeed startup file:/dev/urandom 256SSLRandomSeed connect builtin#SSLRandomSeed startup file:/dev/random 512#SSLRandomSeed connect file:/dev/random 512#SSLRandomSeed connect file:/dev/urandom 512## Use "SSLCryptoDevice" to enable any supported hardware # accelerators. Use "openssl engine -v" to list supported# engine names. NOTE: If you enable an accelerator and the # server does not start, consult the error logs and ensure# your accelerator is functioning properly.#SSLCryptoDevice builtin#SSLCryptoDevice ubsec#### SSL Virtual Host Context##<VirtualHost *:443># General setup for the virtual host, inherited from global configurationDocumentRoot"/var/www/html/qiangshangkeji/web/web/weixinpronew.qiangs "ServerName :443# 添加 SSL 协议支持协议,去掉不安全的协议SSLProtocol all -SSLv2 -SSLv3# 修改加密套件如下SSLCipherSuiteHIGH:!RC4:!MD5:!aNULL:!eNULL:!NULL:!DH:!EDH:!EXP:+MEDIU MSSLHonorCipherOrder on# 证书公钥配置SSLCertificateFile /etc/pki/tls/certs/public.pem# 证书私钥配置SSLCertificateKeyFile/etc/pki/tls/certs/215024286030114.key# 证书链配置,如果该属性开头有 '#'字符,请删除掉SSLCertificateChainFile /etc/pki/tls/certs/chain.pem</VirtualHost><VirtualHost *:443># General setup for the virtual host, inherited from global configurationDocumentRoot"/var/www/html/qiangshangkeji/web/web/weixin.qiangshangke "ServerName :443# 添加 SSL 协议支持协议,去掉不安全的协议SSLProtocol all -SSLv2 -SSLv3# 修改加密套件如下SSLCipherSuiteHIGH:!RC4:!MD5:!aNULL:!eNULL:!NULL:!DH:!EDH:!EXP:+MEDIU MSSLHonorCipherOrder on# 证书公钥配置SSLCertificateFile/etc/pki/tls/certs//public.pem # 证书私钥配置SSLCertificateKeyFile/etc/pki/tls/certs//215024163410114. key# 证书链配置,如果该属性开头有 '#'字符,请删除掉SSLCertificateChainFile/etc/pki/tls/certs//chain.pem </VirtualHost>附件2:yum安装mod_ssl模块后生成的配置完成ssl文件/etc/httpd/conf.d/ssl.conf文件原始文件:## This is the Apache server configuration file providingSSL support.# It contains the configuration directives to instruct the server how to# serve pages over an https connection. For detailing information about these# directives see <URL:>## Do NOT simply read the instructions in here without understanding# what they do. They're here only as hints or reminders. If you are unsure# consult the online docs. You have been warned.#LoadModule ssl_module modules/mod_ssl.so## When we also provide SSL we have to listen to the# the HTTPS port in addition.#Listen 443NameVirtualHost *:443#### SSL Global Context#### All SSL configuration in this context applies both to## the main server and all SSL-enabled virtual hosts.### Pass Phrase Dialog:# Configure the pass phrase gathering process.# The filtering dialog program (`builtin' is a internal# terminal dialog) has to provide the pass phrase on stdout.SSLPassPhraseDialog builtin# Inter-Process Session Cache:# Configure the SSL Session Cache: First the mechanism# to use and second the expiring timeout (in seconds).SSLSessionCache shmcb:/var/cache/mod_ssl/scache(51 2000)SSLSessionCacheTimeout 300# Semaphovre:# Configure the path to the mutual exclusion semaphore the# SSL engine uses internally for inter-process synchronization.SSLMutex default# Pseudo Random Number Generator (PRNG):# Configure one or more sources to seed the PRNG of the # SSL library. The seed data should be of good random quality.# WARNING! On some platforms /dev/random blocks if not enough entropy# is available. This means you then cannot use the /dev/random device# because it would lead to very long connection times (as long as# it requires to make more entropy available). But usually those# platforms additionally provide a /dev/urandom device which doesn't# block. So, if available, use this one instead. Read the mod_ssl User# Manual for more details.SSLRandomSeed startup file:/dev/urandom 256SSLRandomSeed connect builtin#SSLRandomSeed startup file:/dev/random 512#SSLRandomSeed connect file:/dev/random 512#SSLRandomSeed connect file:/dev/urandom 512## Use "SSLCryptoDevice" to enable any supported hardware # accelerators. Use "openssl engine -v" to list supported# engine names. NOTE: If you enable an accelerator and the # server does not start, consult the error logs and ensure# your accelerator is functioning properly.#SSLCryptoDevice builtin#SSLCryptoDevice ubsec#### SSL Virtual Host Context##<VirtualHost *:443># General setup for the virtual host, inherited from global configurationDocumentRoot"/var/www/html/qiangshangkeji/web/web/weixin.qiangshangke "ServerName :443# Use separate log files for the SSL virtual host; note that LogLevel# is not inherited from httpd.conf.ErrorLog logs/ssl_error_logTransferLog logs/ssl_access_logLogLevel warn# SSL Engine Switch:# Enable/Disable SSL for this virtual host.SSLEngine on# SSL Protocol support:# List the enable protocol levels with which clients will be able to# connect. Disable SSLv2 access by default:SSLProtocol all -SSLv2# SSL Cipher Suite:# List the ciphers that the client is permitted to negotiate.# See the mod_ssl documentation for a complete list.SSLCipherSuiteDEFAULT:!EXP:!SSLv2:!DES:!IDEA:!SEED:+3DES# Server Certificate:# Point SSLCertificateFile at a PEM encoded certificate. If# the certificate is encrypted, then you will be prompted for a# pass phrase. Note that a kill -HUP will prompt again. A new# certificate can be generated using the genkey(1) command.#SSLCertificateFile /etc/pki/tls/certs/localhost.crtSSLCertificateFile /etc/pki/tls/certs/server.crt# Server Private Key:# If the key is not combined with the certificate, use this# directive to point at the key file. Keep in mind that if# you've both a RSA and a DSA private key you can configure# both in parallel (to also allow the use of DSA ciphers, etc.) #SSLCertificateKeyFile /etc/pki/tls/private/localhost.keySSLCertificateKeyFile /etc/pki/tls/private/server.key# Server Certificate Chain:# Point SSLCertificateChainFile at a file containing the# concatenation of PEM encoded CA certificates which form the# certificate chain for the server certificate. Alternatively# the referenced file can be the same as SSLCertificateFile # when the CA certificates are directly appended to the server# certificate for convinience.#SSLCertificateChainFile /etc/pki/tls/certs/server-chain.crtSSLCertificateChainFile /etc/pki/tls/certs/server.crt# Certificate Authority (CA):# Set the CA certificate verification path where to find CA # certificates for client authentication or alternatively one # huge file containing all of them (file must be PEM encoded)#SSLCACertificateFile /etc/pki/tls/certs/ca-bundle.crt# Client Authentication (Type):# Client certificate verification type and depth. Types are # none, optional, require and optional_no_ca. Depth is a # number which specifies how deeply to verify the certificate# issuer chain before deciding the certificate is not valid.#SSLVerifyClient require#SSLVerifyDepth 10# Access Control:# With SSLRequire you can do per-directory access control based# on arbitrary complex boolean expressions containing server# variable checks and other lookup directives. The syntax is a# mixture between C and Perl. See the mod_ssl documentation# for more details.#<Location />#SSLRequire ( %{SSL_CIPHER} !~ m/^(EXP|NULL)/ \# and %{SSL_CLIENT_S_DN_O} eq "Snake Oil, Ltd." \ # and %{SSL_CLIENT_S_DN_OU} in {"Staff", "CA", "Dev"} \# and %{TIME_WDAY} >= 1 and %{TIME_WDAY} <= 5 \# and %{TIME_HOUR} >= 8 and %{TIME_HOUR} <= 20 ) \# or %{REMOTE_ADDR} =~ m/^192\.76\.162\.[0-9]+$/ #</Location># SSL Engine Options:# Set various options for the SSL engine.# o FakeBasicAuth:# Translate the client X.509 into a Basic Authorisation. This means that# the standard Auth/DBMAuth methods can be used for access control. The# user name is the `one line' version of the client's X.509 certificate.# Note that no password is obtained from the user. Every entry in the user# file needs this password: `xxj31ZMTZzkVA'.# o ExportCertData:# This exports two additional environment variables:SSL_CLIENT_CERT and# SSL_SERVER_CERT. These contain the PEM-encoded certificates of the# server (always existing) and the client (only existing when client# authentication is used). This can be used to import the certificates# into CGI scripts.# o StdEnvVars:# This exports the standard SSL/TLS related `SSL_*' environment variables.# Per default this exportation is switched off for performance reasons,# because the extraction step is an expensive operation and is usually# useless for serving static content. So one usually enables the# exportation for CGI and SSI requests only.# o StrictRequire:# This denies access when "SSLRequireSSL" or "SSLRequire" applied even# under a "Satisfy any" situation, i.e. when it applies access is denied# and no other module can change it.# o OptRenegotiate:# This enables optimized SSL connection renegotiation handling when SSL# directives are used in per-directory context.#SSLOptions +FakeBasicAuth +ExportCertData +StrictRequire<Files ~ "\.(cgi|shtml|phtml|php3?)$">SSLOptions +StdEnvVars</Files><Directory "/var/www/cgi-bin">SSLOptions +StdEnvVars</Directory># SSL Protocol Adjustments:# The safe and default but still SSL/TLS standard compliant shutdown# approach is that mod_ssl sends the close notify alert but doesn't wait for# the close notify alert from client. When you need a different shutdown# approach you can use one of the following variables:# o ssl-unclean-shutdown:# This forces an unclean shutdown when the connection is closed, i.e. no# SSL close notify alert is send or allowed to received. This violates# the SSL/TLS standard but is needed for some brain-dead browsers. Use# this when you receive I/O errors because of the standard approach where# mod_ssl sends the close notify alert.# o ssl-accurate-shutdown:# This forces an accurate shutdown when the connection is closed, i.e. a# SSL close notify alert is send and mod_ssl waits for the close notify# alert of the client. This is 100% SSL/TLS standardcompliant, but in# practice often causes hanging connections with brain-dead browsers. Use# this only for browsers where you know that their SSL implementation# works correctly.# Notice: Most problems of broken clients are also related to the HTTP# keep-alive facility, so you usually additionally want to disable# keep-alive for those clients, too. Use variable "nokeepalive" for this.# Similarly, one has to force some clients to use HTTP/1.0 to workaround# their broken HTTP/1.1 implementation. Use variables "downgrade-1.0" and# "force-response-1.0" for this.SetEnvIf User-Agent ".*MSIE.*" \nokeepalive ssl-unclean-shutdown \downgrade-1.0 force-response-1.0# Per-Server Logging:# The home of a custom SSL log file. Use this when you want a# compact non-error SSL logfile on a virtual host basis.CustomLog logs/ssl_request_log \"%t %h %{SSL_PROTOCOL}x %{SSL_CIPHER}x \"%r\" %b"</VirtualHost>案例:#用于建筑行业招聘求职小程序,customlog配置访问日志的目录,也就是https的来自443端口的访问目录,经过实际测试即使来自https的访问,记录的协议类型也是HTTP/1.1,与http一样,因此可以配置与80端口不同的访问日志目录来区分来自https的访问。
什么是主机头,一台机器架多个网站
什么是主机头,一台机器架多个网站什么是主机头所谓的主机头的叫法起自IIS中对域名绑定的功能,一般的web 服务器一个ip地址的80端口只能正确对应一个网站,处理一个域名的访问请求。
而web服务器在不使用多个ip地址和端口的情况下,如果需要支持多个相对独立的网站就需要一种机制来分辨同一个ip地址上的不同网站的请求,这就出现了主机头绑定的方法。
简单的说就是,将不同的网站空间对应不同的域名,以连接请求中的域名字段来分发和应答正确的对应空间的文件执行结果。
举个例子来说,一台服务器ip地址为192.168.1.10,有两个域名和对应的空间在这台服务器上,使用的都是192.168.1.10的80端口来提供服务。
如果只是简单的将两个域名A和B的域名记录解析到这个ip地址,那么web服务器在收到任何请求时反馈的都会是同一个网站的信息,这显然达不到要求。
接下来我们使用主机头绑定域名A和B到他们对应的空间文件夹C和D。
当含有域名A的web请求信息到达192.168.1.10时,web服务器将执行它对应的空间C中的首页文件,并返回给客户端,含有域名B的web请求信息同理,只不过解释的是空间D的文件。
所以在使用主机头绑定功能后就不能使用ip地址访问其上的任何网站了,因为请求信息中不存在域名信息,所以会出错。
在不更改TCP端口和IP地址的情况下,同样可以实现“一机多站”,这里我们需要使用“主机头名”来区分不同的站点。
所谓“主机头名”,实际上就是指之类的友好网址,因此要使用“主机头法”实现“一机多站”,就必须先进行DNS设置。
在DNS 中设置和两个网址,将它们都指向惟一的IP地址192.168.0.1。
按照以上两例中的做法首先设置默认站点“教师之家”,由于是默认站点,因此基本无需进行特别设置。
然后参考以上两例进行添加“学生天地”站点的操作,IP地址选择192.168.0.1,TCP端口保持默认的80不变,“此站点的主机头”一项一定要填上,然后选定主目录,设置好访问权限,“学生天地”站点的设置完成。
- 1、下载文档前请自行甄别文档内容的完整性,平台不提供额外的编辑、内容补充、找答案等附加服务。
- 2、"仅部分预览"的文档,不可在线预览部分如存在完整性等问题,可反馈申请退款(可完整预览的文档不适用该条件!)。
- 3、如文档侵犯您的权益,请联系客服反馈,我们会尽快为您处理(人工客服工作时间:9:00-18:30)。
DocumentRoot “D:/root/abc” #指向本地位置
ServerName #主机名称(注意这个很重要,就是你的域名,准确输入才能成功)
一台服务器安装了APACHE,如何绑定多个域名和网站内容呢?最简单的方法当然就是不同的站用不同的端口。但这样就需在域名后加入端口号才能访问,不能直接以域名访问。另一个方法就是使用主机头名虚所主机了。打开APACHE配置文件httpd.conf 在最后一行输入以下代码
NameVirtualHost *:80 #使用虚拟主机,80端口
</VirtualHost>
如此类推,只要你的机性能好,带宽够,多挂几个都可以
Aapche 如果需要绑定多个域名到一个IP上,是支持的。需要注意以下2点:
1 必须要开启 NameVirtualHost开关选项,
如:NameVirtualHost 220.231.220.231:80
2 NameVirtualHost 需要指定具体的端口
例如":80",跟<VirtualHost 220.231.32.*:80>对应,否则会报错:
mixing * ports and non-* ports with a NameVirtualHost address is not supported, proceeding with undefined results。
</VirtualHost> #结束第一个主机配置
<VirtualHost *:80> #第二个主机,80端口
DocumentRoot “D:/root/def” #指向本地位置
ServerName #主机名称
CustomLog logs/-access_log common
</VirtualHost>
<VirtualHost 219.133.61.226:80>
ServerAdmin hot@
DocumentRoot /usr/local/apache2/htdocs2
ServerName
ErrorLog logs/-error_log
CustomLog logs/-access_log common
</VirtualHost>
翻译过来就是: NameVirtualHost 地址,指定端口和不指定端口混合使用是不支持的,将会产生未逾期的后果。
未逾期的后果就是: 第2个不起作用,仅当一个站点设置起作用。
完整的例子:
#
# VirtualHost example:
# Almost any Apache directive may go into a VirtualHost container.
</VirtualHost>
<VirtualHost *:80> #第三个主机,80端口
DocumentRoot “D:/root/ghi” #指向本地位置
ServerName #主机名称
# The first VirtualHost section is used for requests without a known
# server name.
#
NameVirtualHost 219.133.61.226:80
<VirtualHost 219.133.61.226:80>
ServerAdmin hot@
DocumentRoot /usr/local/apache2/htdocs1
ServerName
ErrorLog logs/-error_log