TRACE32SimulatorforARM
Trace32 simulator For arm
Simulator for ARM and XSCALETRACE32 Online HelpTRACE32 DirectoryTRACE32 IndexTRACE32 Documents ......................................................................................................................!ICD In-Circuit Debugger ................................................................................................................!Software Simulator Target Guides ...........................................................................................!Simulator for ARM and XSCALE (1)Quick Start of the Simulator (5)Operation (7)Peripheral Simulation (7)Troubleshooting (8)FAQ8 Memory Classes9 Virtual Terminal9 Semihosting10 Coprocessors11ARM Specific SYStem Commands (12)SYStem.Mode Establish the communication with the simulator12 SYStem.CPU Select the used CPU13 SYStem.CpuAccess Run-time memory access (intrusive)13 SYStem.MemAccess Run-time memory access14 SYStem.Option Alignment Enable alignment exceptions15 SYStem.Option BigEndian Define byte order (endianess)15 SYStem.Option DisMode Define disassembler mode16 SYStem.Option MMU Debugging of multi-spaced applications16 SYStem.RESetOut CPU reset command for ARM simulator16Support (18)Available Tools18 ARM718 ARM925 ARM1028 ARM1128 Compilers28 Realtime Operation System30 Debuggers30Products (32)Product Information32 Order Information32Simulator for ARM and XSCALEVersion June, 22 2005For general informations about the In-Circuit Debugger refer to the ‘Software Simulator User’s Guide’. All general commands are described in ‘IDE Reference Guide’ and ’General Reference Guide’.Quick Start of the SimulatorStarting up the simulator is done as follows:1.Select the device prompt for the ICD Debugger and reset the system.The device prompt B:: is normally already selected in the command line. If this is not the case enter B:: to set the correct device prompt. The RESet command is only necessary if you do not start directly after booting the TRACE32 development tool.2. Specify the CPU specific settings. The default values of all other option are set in such a way that it should be possible to work without modification. Please consider that this is probably not the best configuration for your target.3. Enter debug mode.This command resets the CPU and enters debug mode. After this command is executed it is possible to access memory and registers.4. Load the program.The format of the Data.LOAD command depends on the file format generated by the compiler. Refer to Supported Compilers to find the command, that is necessary for your compiler.A detailed description of the Data.LOAD command and all available options is given in the reference guide.5. Startup ExampleA typical start sequence is shown below. This sequence can be written to an ASCII file (script file)and executed with the command DO <filename>. b::RESetSYStem.CPU <cputype >SYStem.UpData.LOAD.format <filename >load program and symbolsb::Select the ICD device prompt WinClearClear all windows SYStem.CPU <cpuname>Select CPU typeSYStem.Up Reset the target and enter debug mode Data.LOAD.format <filename>Load the applicationRegister.Set pc main Set the PC to function mainData.List *)Open source code windowRegister *)Open register windowVariable.Local *)Open window with local variables *) These commands open windows on the screen. The window position can be specified with the WINPOS command.OperationFor more information see ‘Software Simulator User’s Guide’Peripheral SimulationFor more information see ‘API for Software Simulators’TroubleshootingFAQ•No information available•Memory ClassesThe following ARM specific memory classes are available.Memory Class DescriptionP Program MemoryD Data MemorySP Supervisor Program Memory (privileged access)UP User Program Memory (non-privileged access)SR Supervisor ARM Memory (privileged access)ST Supervisor Thumb Memory (privileged access)UR User ARM Memory (non-privileged access)UT User Thumb Memory (non-privileged access)U User Memory (non-privileged access)S Supervisor Memory (privileged access)R ARM MemoryT Thumb MemoryICE ICE Breaker Register (debug register; ARM7, ARM9)C14Coprocessor 14 Register (debug register; ARM10, ARM11)C15Coprocessor 15 Register (if implemented)ETM Embedded T race Macrocell Registers (if implemented)VM Virtual Memory (memory on the debug system)USR Access to Special Memory via User Defined Access RoutinesE Run-time memory access(see SYStem.CpuAccess and SYStem.MemAccess)T o access a memory class write the class in front of the address.Example: Data.dump ICE:0--3Normally there is no need to use the following memory classes: P, D, SP, UP, SR, ST, UR, UT, U, S, R, or T.The memory class is set automatically depending on the setting of SYStem.Option DisMode.Virtual TerminalThe command TERM opens a terminal window which allows to communicate with the ARM core over the ICEbreaker Debug Communications Channel (DCC). All data received from the comms channel aredisplayed and all data inputs to this window are sent to the comms channel. Communication occurs byte wide or up to four bytes per transfer. The four bytes ASCII mode (DCC4A) does not allow to transfer the byte00. Each non-zero byte of the 32bit word is a character in this mode. The four byte binary mode (DCC4B)can be used to transfer non-ascii 32bit data (e.g. to or from a file). The three bytes mode (DCC3) allows binary transfers of up to 3 bytes per DCC transfer. The upper byte defines how many bytes are transfered (0=one byte, 1= two bytes, 2=three bytes). This is the preferred mode of operation, as it combines arbitrary length messages with high bandwidth. The TERM.METHOD command selects which mode is used (DCC, DCC3, DCC4A or DCC4B).The communication mechanism is described e.g. in the ARM7TDMI data sheet in chapter 9.11. Only three move to/from coprocessor 14 instructions are necessary.The TRACE32 demo/arm/etc/terminal directory contains the file TERM.CMM which demonstrates how the communication works.SemihostingThe command TERM.GATE opens a terminal window which allows to support ARM compatiblesemihosting. The communication can either be done by stopping the target at the SWI or by using the DCC interface channel - which provides non-stop operation of the target.The SWI emulation mode requires to stop the target at the SWI exception vector. On ARM7 this can be done only with an onchip or software breakpoint at location 8. On other ARM cores it can be done by enabling the ICEbreaker breakpoint at the SWI vector (TrOnchip.Set SWI ON). The terminal must be set to the ARMSWI method (TERM.METHOD ARMSWI). The handling of the SWI is only active when the TERM.GATE window is existing. An example can be found in demo/etc/arm/semihost/swisoft.cmm.The DCC communication mode requires an target agent for the SWI. The communication is done in the DCC3 method of the TERM command. An example and the source of the SWI agent can be found in demo/ etc/arm/semihost/swidcc.cmm.CoprocessorsIt is not possible to access coprocessors which are not included in an ARM macrocell from debug mode.This means all coprocessors which are added to ARM cores by customers can not be accessed from debug mode.The following coprocessors can be accessed if available in the processor:Coprocessor 14. Please refer to the chapter Virtual Terminal and to your ARM documentation for details.Coprocessor 15, which allows the control of basic CPU functions. This coprocessor can be accessed with the access class C15. For the detailed definition of the CP15 registers please refer to the ARM data sheet.The CP15 registers can also be controlled in the PER window.The TRACE32 address is composed of the CRn, CRm, op1, op2 fields of the corresponding coprocessor register command<MCR|MRC> p15, <op1>, Rd, CRn, CRm, <op2>BIT0-3:CRn, BIT4-7:CRm, BIT8-10:<op2>, BIT12-14:<op1>is the corresponding TRACE32 address (one nipple for each field)ARM Specific SYStem CommandsSYStem.Mode Establish the communication with the simulator Format:SYStem.Mode <mode><mode>:DownNoDebugGoUpDefault: Down. Selects the target operating mode.Down The CPU is in reset. Debug mode is not active. Default state and state after fatalerrors.NoDebug The CPU is running. Debug mode is not active. Debug port is tristate. In thismode the target should behave as if the debugger is not connected.Go The CPU is running. Debug mode is active. After this command the CPU can bestopped with the break command or if any break condition occurs.Up The CPU is not in reset but halted. Debug mode is active. In this mode the CPUcan be started and stopped. This is the most typical way to activate debugging.If the mode “Go” is selected, this mode will be entered, but the control button in the SYStem window jumps to the mode “UP”.SYStem.CPU Select the used CPU Format:SYStem.CPU <cpu><cpu>:ARM7TDMI | ARM740TD | ... (JTAG Debugger ARM7)ARM9TDMI | ARM920T | ARM940T | ... (JTAG Debugger ARM9)ARM1020E | ARM1022E | ARM1026EJ | ... (JTAG Debugger ARM10)ARM1136J | ARM1136JF | ... (JTAG Debugger ARM11)JANUS2 (JTAG Debugger Janus)Selects the processor type. If your ASIC is not listed, select the type of the integrated ARM core. SYStem.CpuAccess Run-time memory access (intrusive) Format:SYStem.CpuAccess Enable |DeniedDefault: Denied. For the ARM7 and the ARM9 onchip breakpoints can always be set while programexecution is running.SYStem.MemAccess Run-time memory access Format:SYStem.MemAccess <mode><mode>:CPUDeniedDefault: Denied.If SYStem.MemAccess is not Denied, it is possible to to read from memory, to write to memory and to set software breakpoints while the CPU is executing the program. This requires one of the following monitors.CPU A run-time memory access is made without CPU intervention whilethe program is running. This is only possible on the instruction setsimulator.Denied No memory access is possible while the CPU is executing theprogram.If specific windows, that display memory or variables should be updated while the program is running select the memory class E: or the format option %E.Data.dump E:0x100Var.View %E firstSYStem.Option Alignment Enable alignment exceptions Format:SYStem.Option AlignmentCauses the processor to go into a DAbort exeception for any unaligned access. Otherwise the data will be handled according to the ARM core specification.SYStem.Option BigEndian Define byte order (endianess) Format:SYStem.Option BigEndian [ON | OFF]Default: OFF. This option selects the byte ordering mechanism. For correct operation the following three settings must correspond:•this option•the compiler setting (-li or -bi compiler option)SYStem.Option DisMode Define disassembler mode Format:SYStem.Option DisMode <option><option>:AUTOACCESSARMTHUMBThis command specifies the selected disassembler. Default: AUTO.AUTO The information provided by the compiler output file is used for thedisassembler selection. If no information is available it has the samebehavior as the option ACCESS.ACCESS The selected disassembler depends on the T bit in the CPSR or onthe selected access class. (e.g. Data.List SR:0 for ARM mode orData.List ST:0 for THUMB mode).ARM Only the ARM disassembler is used (highest priority).THUMB Only the THUMB disassembler is used (highest priority). SYStem.Option MMU Debugging of multi-spaced applications Format:SYStem.Option MMU [ON | OFF]Default: OFF. Debugging of multi-spaced applications. Extends the address scheme of the debugger to include memory spaces (16:32 address format). The option is not required when the MMU is doing a static address translation.SYStem.RESetOut CPU reset command for ARM simulator Format:SYStem.RESetOutSpecial reset command for ARM simulator.SupportAvailable ToolsARM7C P UI C EF I R EI C D D E B U GI C D M O N I T O R I C D T R A C EP O W E R I N T E G R A T O RI N S T R U C T I O N S I M U L A T O R AD20MSP430YES YES YES AD6522YES YES YES AD6526YES YES YES AD6528YES YES YES AD6529YES YES YES AD6532YES YES YES ADUC7020YES YES YES ADUC7021YES YES YES ADUC7022YES YES YES ADUC7024YES YES YES ADUC7025YES YES YES ADUC7026YES YES YES ADUC7027YES YES YES ARM710TYES YES YES YES ARM710T -AMBA YES YES YES YES YES ARM720TYES YES YES YES ARM720T -AMBA YES YES YES YES YES ARM740TYES YES YES YES ARM740T -AMBA YES YES YES YES YES ARM7TDMIYES YES YES YES YES YES ARM7TDMI-AMBA YES YESYES YES YES YES ARM7TDMI-S YES YES YESYES AT75C220YES YES YES AT75C310YES YES YES AT75C320YES YES YES AT76C501YES YES YES AT76C502YES YES YES AT76C502A YES YES YES AT76C503YES YES YES AT76C503A YES YES YES AT76C510YESYESYESAT76C551YES YES YES AT76C901YES YES YES AT78C1501YES YES YES AT91F40416YES YES YES AT91F40816YES YES YES AT91FR40162YES YES YES AT91FR4042YES YES YES AT91FR4081YES YES YES AT91M40100YES YES YES AT91M40400YES YES YES AT91M40403YES YES YES AT91M40800YES YES YES AT91M40807YES YES YES AT91M42800A YES YES YES AT91M43300YES YES YES AT91M55800A YES YES YES AT91M63200YES YES YES AT91R40008YES YES YES AT91R40807YES YES YES AT91SC321RC YES YES YES BC6911YES YES YES BERYLLIUM YES YES YES BU7611AKU YES YES YES CBC32XXA YES YESYES CDC3207G YES YES YES YES CDC3272G YES YES YES YES CDC32XXG YES YES YES CDL-82YES YES YES CDMAX YES YES YES CEA32XXA YES YES YES CL-PS7110YES YES YES CL-PS7111YES YES YES CL-PS7500FE YES YES YES CL-SH8665YES YES YES CL-SH8668YES YES YES CLARITY YES YES YES CS22210YES YES YES CS22220YES YES YES CS22230YES YES YES CS22250YES YES YES CS22270YES YES YES C I C F I I C D I C M I C T R P I N I N S ICS89712YES YES YES CSM5000YES YES YES CSM5200YES YES YES CX81210YES YES YES CX81400YES YES YES D5205YES YES YES D5313YES YES YES D5314YES YES YES EP7209YES YES YES EP7211YES YES YES EP7212YES YES YES EP7309YES YES YES EP7311YES YES YES EP7312YES YES YES EP7339YES YES YES EP7407YES YESYES GEMINIYES YES YES YES GMS30C7201YES YES YES GP4020YES YES YES HELIUM 100YES YES YES HELIUM 200YES YES YES HELIUM 210YES YES YES HMS30C7202YES YES YES HMS31C2816YES YES YES HMS39C70512YES YES YES HMS39C7092YES YES YES IXP220YES YES YES IXP225YES YES YES KS17C40025YES YES YES KS17F80013YES YES YES KS32C61100YES YES YES KS32P6632YES YES YES L64324YES YES YES L7200YES YES YES L7205YES YES YES L7210YES YES YES LH75400YES YES YES LH75401YES YES YES LH75410YES YES YES LH75411YES YES YES LH77790YES YES YES C I C F I I C D I C M I C T R P I N I N S ILH79520YES YES YES LITHIUMYES YES YES LOGIC CBP3.0YES YES YES LOGIC CBP4.0YES YES YES LOGIC L64324YES YES YES LPC2104YES YES YES YES LPC2105YES YES YES YES LPC2106YES YES YES YES LPC2109YES YES YES YES LPC2112YES YES YES YES LPC2114YES YES YES YES LPC2119YES YES YES YES LPC2124YES YES YES YES LPC2129YES YES YES YES LPC2131YES YES YES YES LPC2132YES YES YES YES LPC2138YES YES YES YES LPC2194YES YES YES YES LPC2210YES YES YES YES LPC2212YES YES YES YES LPC2214YES YES YES YES LPC2290YES YES YES YES LPC2292YES YES YES YES LPC2294YES YES YES YES M4641YES YES YES MAC7101YES YES YES YES MAC7111YES YES YES YES MAC7116YES YES YES MAC7121YES YES YES YES MAC7131YES YES YES YES MAC7141YES YES YESYES MKY -82A YES YES YES MKY -85YES YES YES ML670100YES YES YES ML671000YES YES YES ML674000YES YES YES ML674001YES YES YES ML674080YES YES YES ML675001YES YES YES ML675200YES YES YES ML675300YES YESYES C I C F I I C D I C M I C T R P I N I N S IML67Q2300YES YES YES ML67Q2301YES YES YES ML67Q4002YES YES YES ML67Q4003YES YES YES ML67Q4100YES YES YES ML67Q5002YES YES YES ML67Q5003YES YES YES ML67Q5200YES YES YES ML67Q5300YES YES YES ML70511LA YES YES YES ML7051LA YES YES YES MN1A7T0200YES YES YES MODEM YES YES YES MSM3000YES YES YES MSM3100YES YES YES MSM3300YES YES YES MSM5000YES YES YES MSM5100YES YES YES MSM5105YES YES YES MSM5200YES YES YES MSM5500YES YES YES MSM6000YES YES YES MSM6050YES YES YES MSM6200YES YES YES MSM6600YES YES YES MSP1000YES YES YES MT1020A YES YES YES MT92101YES YES YES MTC-20276YES YES YES MTC-20277YES YES YES MTC-30585YES YES YES MTK-20141YES YES YES MTK-20280YES YES YES MTK-20285YES YES YES NET+15YES YES YES NET+20YES YES YES NET+40YES YES YES NET+50YES YES YES NITROGEN YES YES YES NS7520YES YES YES OMAP710YES YES YES C I C F I I C D I C M I C T R P I N I N S IOMAP730YES YES YES OMAP732YES YES YES PBM 990 90YES YES YES PCC-ISES YES YES YES PCD80703YES YES YES YES PCD80705YES YES YES YES PCD80708YES YES YES YES PCD80715YES YES YES YES PCD80716YES YES YES YES PCD80718YES YES YES YES PCD80720YES YES YES YES PCD80721YES YES YES YES PCD80725YES YES YES YES PCD80727YES YES YES YES PCD80728YES YES YESYES PCF26002YES YES YES PCF26003YES YES YES PCF87750YES YES YES PCI2010YES YES YES PCI3610YES YES YES PCI3620YES YES YES PCI3700YES YES YES PCI3800YES YES YES PCI5110YES YES YES PCI9501YES YES YES PH21101YES YES YES PMB7754YES YES YES PS7500FE YES YES YES PUC3030A YES YES YES PUC303XA YES YES YES S3C3400A YES YES YES S3C3400X YES YES YES S3C3410X YES YES YES S3C44A0A YES YES YES S3C44B0X YES YES YES S3C4510B YES YES YES S3C4520A YES YES YES S3C4530A YES YES YES S3C4610D YES YES YES S3C4620D YES YES YES S3C4640XYES YESYES C I C F I I C D I C M I C T R P I N I N S IS3C4650D YES YES YES S3C46C0YES YES YES S3C46M0X YES YES YES S3C4909A YES YES YES S3C49F9X YES YES YES S3F441FX YES YES YES S3F460H YES YES YES S5N8946YES YES YES S5N8947YES YESYES SE470R1VB8AD YES YES YES YES SIRFSTARII YES YES YES SJA2020YES YES SOCLITE+YES YES YES ST30F7XXA YES YES YES YES ST30F7XXC YES YES YES YES ST30F7XXZ YES YES YESYES STR710YES YES YES STR711YES YES YES STR712YES YES YES STR720YES YES YESYES STW2400YES YES YES TA7S05YES YES YES TA7S12YES YES YES TA7S20YES YES YES TA7S32YES YES YES TMS320VC5470YES YES YESYES TMS320VC5471YES YES YES TMS470R1VC336A YES YES YES TMS470R1VC338YES YES YES TMS470R1VC346A YES YES YES TMS470R1VC348YES YES YES TMS470R1VC688YES YES YES TMS470R1VF288YES YES YES TMS470R1VF336YES YES YES TMS470R1VF336A YES YES YES TMS470R1VF338YES YES YES TMS470R1VF346A YES YES YES TMS470R1VF348YES YES YES TMS470R1VF356A YES YES YES TMS470R1VF37A YES YES YES TMS470R1VF448YESYESYES C I C F I I C D I C M I C T R P I N I N S IARM9TMS470R1VF45A YES YES YES TMS470R1VF45AA YES YES YES TMS470R1VF45B YES YES YES TMS470R1VF45BA YES YES YES TMS470R1VF478YES YES YES TMS470R1VF48B YES YES YES TMS470R1VF48C YES YES YES TMS470R1VF55B YES YES YES TMS470R1VF55BA YES YES YES TMS470R1VF67A YES YES YES TMS470R1VF688YES YES YES TMS470R1VF689YES YES YES TMS470R1VF76B YES YES YES TMS470R1VF7AC YES YES YES UPD65977YES YES YES UPLAT CORE YES YES YES VCS94250YES YES YES VMS747YES YES YES VWS22100YES YES YES VWS22110YES YES YES VWS23112YES YES YES VWS23201YES YES YES VWS23202YES YES YES VWS26001YES YES YESC P UI C EF I R EI C D D E B U GI C D M O N I T O RI C D T R A C EP O W E R I N T E G R A T O RI N S T R U C T I O N S I M U L A T O R 88E6208YES YES YES 88E6218YES YES YES AAEC-2000YES YESYES ARM7EJ-S YES YES YES YES ARM910T YES YES YES YES ARM920TYES YES YESYES C I C F I I C D I C M I C T R P I N I N S IARM922T YES YES YES YES ARM926EJ-S YES YES YES YES ARM940T YES YES YES YES ARM946E-S YES YES YES YES ARM966E-S YES YES YES YES ARM968E-S YES YES YES YES ARM9E-S YES YES YES YES ARM9TDMI YES YES YES YES AT91RM9200YES YES YESYES CN9414YES YES YES CX22490YES YES YES CX22491YES YES YES CX22492YES YES YES CX22496YES YES YES CX82100YES YES YES DIGICOLOR-OA980YES YES YES DRAGONBALL MX1YES YES YESYES EP9301YES YES YES EP9312YES YES YES EPXA1YES YES YES YES EPXA10YES YES YES YES EPXA4YES YES YESYES FA526YES YES YES HELIUM 500YES YES YES INFOSTREAM YES YES YES LH7A400YES YES YES LH7A404YES YES YES LH7A405YES YES YES LPC3000YES YES YES YES MC9328MX1YES YES YESYES MC9328MX21YES YES YES ML67Q2003YES YES YES MSM6100 3G YES YES YES YES MSM6250YES YES YES YES MSM6300YES YES YES YES MSM6500YES YES YES YES MSM7XXX YES YES YES NEXPERIA YES YES YES YES NOMADIC YES YES YESYES NS9360YES YES YES NS9750YES YESYES C I C F I I C D I C M I C T R P I N I N S IARM10NS9775YES YES YES OMAP1510YES YES YES YES OMAP1610YES YES YES YES OMAP1611YES YES YES YES OMAP1612YES YES YES YES OMAP1710YES YES YES YES OMAP310YES YES YES YES OMAP5910YES YES YES YES OMAP5912YES YES YESYES OMAP710YES YES YES OMAP730YES YES YES OMAP732YES YESYES PMB8870 S-GOLD YES YES YES PMB8875 S-GOLDL YES YES YES PMB8876 S-GOLD2YES YES YES S3C2400X YES YES YES S3C2410YES YES YES S3C2410X YES YES YES S3C2440YES YES YES S3C2500A YES YES YES S3C2510YES YES YES S3C2800X YES YES YES SCORPIOYES YES YES T6TC1XB-0001YES YES YES T8300YES YES YES T8302YESYESYESC P UI C EF I R EI C D D E B U GI C D M O N I T O RI C D T R A C EP O W E R I N T E G R A T O RI N S T R U C T I O N S I M U L A T O R ARM1020E YES YES YES YES ARM1022E YES YES YES YES ARM1026EJ-S YES YES YESYES C I C F I I C D I C M I C T R P I N I N S IARM11CompilersC P UI C EF I R EI C D D E B U GI C D M O N I T O R I C DT R A C EP O W E R I N T E G R A T O RI N S T R U C T I O N S I M U L A T O R ARM1136J-S YES YES YES YES ARM1136JF-S YES YES YES YES MSM7XXX YES YES YES OMAP2410YES YES YES YES OMAP2420YESYESYESYES Language CompilerCompanyOptionCommentC ARMCC ARM AIFC ARMCC ARM ELF/DWARF C GCCARM FSF COFF/STABS C GCCARMFSFELF/DWARF2C GREENHILLS C Greenhills ELF/DWARF2C ICCARM IARELF/DWARF2C ICCV7-ARM Imagecraft ELF/DWARF ARM7C HIGH-C MetawareELF/DWARF C TI-C Texas Instruments COFF C GNU-CWind River Systems COFFC++ARM SDT 2.50ARM ELF/DWARF2C++GCCARM FSF COFF/STABS C++GNUFSF EXE/STABS C++GCCARMFSFELF/DWARF2C++GREENHILLS C++Greenhills ELF/DWARF2C++HIGH-C++Metaware ELF/DWARF C++MSVCMicrosoftEXE/CV5WindowsCERealtime Operation SystemDebuggersNameCompanyComment OSEK -via ORTI ProOSEK 3Softvia ORTI AMXKADAK Products ChorusOS Sun Microsystems micro & basic ECOS eCosCentric Limited 1.3.1 and 2.0embOS Segger Linux -Kernel Version 2.4 and 2.6LinuxMontaVistaVersion 3.0 and 3.1Nucleus PLUS Accelerated Tech.OSE Basic Enea OSE Systems (OSARM)OSE Epsilon Enea OSE Systems (OSARM), 3.x Precise/MQX Precise Software 2.40 and 2.50pSOS+Integrated Systems 2.1 to 2.5, 3.0QNXQNX Software Systems 6.0 to 6.3RealTime Craft GSI tecsi(XECARM)RTXC 3.2Quadros Systems Inc.RTXC Quadros Quadros Systems Inc.Sciopta ScioptaSMXMicro Digital Symbian OS Symbian6.x,7.0s,8.0a+b, 8.1a+b,9.1ThreadX Express Logic uC/OS-II Micrium Inc. 2.0 to 2.7uCLinux freewareKernel Version 2.4VxWorks Wind River Systems 5.x, with TRACE32 BSP Windows CEMicrosoft4.0 to 4.2CPU DebuggerCompany Host ALL EASYCASE BKR GmbHWindows ALL X-TOOLS / X32blue river software Windows ALL RHAPSODY IN MICROC I-Logix Windows ALL A TTOL TOOLS MicroMax Windows ALL VISUAL BASIC INTERFACE MicrosoftWindows ALL CODEWRIGHT Premia Corporation Windows ALLDA-CRistanCASEWindows31 ProductsProduct InformationOrder InformationOrderNo CodeText LA-8809SIM-ARM Instruction Set Simulator for ARM Instruction Set Simulatorfor ARM, XSCALE, Janus2Order No.Code Text LA-8809SIM-ARM Instruction Set Simulator for ARM。
TRACE32系列仿真器介绍

EPROM Simulator Module
深圳旋极
ICD配置方案
例 4: BDM/JTAG调试器,带ROM仿真器(USB口)
BDM/JTAG Debugger with USB Interface
EPROM Simulator Module
网址:
深圳旋极
TRACE32为何与众不同
一、All in One,模块化。丰与俭,巧规划。
模块化结构。可按用户要求裁剪,配置 多种仪器的综合体:
– 通用仿真器 – 逻辑/状态/时序分析仪 – 通用计数器/定时器 – 模式/脉冲信号源 – 模拟调试器 – 软件测试 – FLASH编程
深圳旋极
Trace32的使用
Support for a wide range of on-chip debug interfaces Easy high-level and assembler debugging Interface to all compilers Fast download RTOS awareness Interface to all hosts Display of internal and external peripherals at a logical level Flash programming Hardware breakpoints and trigger (if supported by the on-chip
Emulation Control
Fire Pod
Podbus
PC Workstation
Target
深圳旋极
Android_trace32_Kernel_Debug

如何用trace32调试native和kernel异常---------- for Android System Debug众所周知gdb功能强大,但相对于gdb的指令式调试,trace32的图形界面要更方便易上手,而且不用查记那些繁复的指令,虽然效率上不及gdb,但对于新手而言,使用trace32要比gdb 快捷。
下面就介绍如何使用trace32加载symbol文件。
1.启动trace32默认安装好trace32后,在开始菜单中选择“Trace32 Simulator for ARM”,如图1图12.启动模拟器在CPU菜单中选择“System Settings…”,如图2,图2在弹出窗口中的CPU框选择对应的CPU,如图3,对于MT6589平台选择CortexA9MPCore,图3然后点击UP即可启动模拟器,右下角会显示“system ready”,如图4。
图43.加载symbol文件加载的指令为“data.load.elf <symbol路径> <加载地址> /gnu /noclear /nocode”,symbol 文件可以是boot、lk等的elf文件,kernel的vmlinux,native so的symbol库;加载地址是可选项,可从PROCESS_MAP获取,也可从问题log获取。
加载完成后点击工具条上的蓝色感叹号就会显示出该symbol文件所对应的symbol,如图5,双击symbol符号可进入该symbol的具体内容。
图54.设置资源路径symbol文件加载完了,但对应的内容是十分难读的汇编语言,如图6,图6不过不用担心trace32支持symbol与code映射,可以将symbol与代码对应起来,在图6界面滑动鼠标滚轮,在命令框下方会提示该段symbol所对应的文件,如图7,图7将与symbol文件对应的同一版本的代码放到提示的路径下,在View菜单选择“Symbols”-> “Source Search Paths”,如图8,图8在弹出的对话框中点击“Add Dir…”按钮将路径设置到代码路径,然后点击“Reload”按钮,如图9,图9回到刚才symbol 界面,汇编语言就变成对应的代码了,如图10,图10点击 “Mode ” 按钮可切换到纯代码模式,如图11。
T32

Qualcomm Trace32 crash forMTP and A60KAuthor: Field Trial DepartmentRevision HistoryContents目的 (4)前置作業 (4)安裝TRACE32 FOR QDSP6 (4)LOAD MODEM RAM DUMP LOGS INTO TRACE32 SIMULATOR (10)EXTRACT F3 MESSAGE LOGS FROM RAM DUMP LOGS (12)FIRMWARE DEBUGGING (13)SUBMIT QUALCOMM CASE (15)備注一: INSTALL PERL (16)●目的我們在crash分類時,看到”fws_task.c, line240”時,需要再細分,才可報上Qualcomm case,此份SOP為當碰到”fws_task.c, line240”時,如何使用trace32做進一步的分類。
●前置作業請至FTP下載Trace32以及所需的檔案,路徑如下:Venderftp://QT5/FT/A60K/Trace32-tool/Note: 由於後面開啟f3 log需要,所以建議先安裝perl(已於folder中),安裝方法請參考備註一●安裝Trace32 for QDSP61.解壓縮後,將Trace32 資料夾打開2.點擊setup.bat並把預設路徑改為C:\T32_QDSP63.選擇”New Installation”4.選software only5.Setup Type選Trace32 Instruction Set Simulator6.CPU selection選SIM ARM,然後選擇”Next”7.Press確定8.接下來都選擇default setting,Press “Next”9.看到”Finish”即代表安裝完成10. 接著將QDSP6201012資料夾內檔案全選並複製到C:\T32_QDSP6目錄,遇到重複的直接蓋掉。
TRACE32系列仿真器介绍
Trace32-ICE的结构
Host Connection
To Target
深圳旋极
TRACE32-ICE
深圳旋极
TRACE32-ICE的基本模块
仿真头Emulation Probe 仿真基本模块Emulation Base 逻辑分析仪State Analyzer
扩展存储模块 Emulation RAM up to16M
深圳旋极
TRACE32为何与众不同
八、基本功,样样精。搞开发,轻轻松。
Memory 测试 硬件断点功能,TRACE32可以在FLASH或EPROM
中直接调试 支持多CPU调试 丰富的断点类型 支持MMU、 FPU调试 上下文追踪系统CTS(Context Tracing System) 条件执行功能(STEP、GO) ...
深圳旋极
TRACE32 -ICD
TRACE32-ICD是基于集成在片内的调试和跟踪逻辑 (BDM、JTAG、ETM、OCDS、NEXUS)的在线调试 器(In-Circuit Debugger)
深圳旋极
常见的调试接口
BDM:背景调试模式 – Background Debug Mode –主要由Motorola使用,用于调试 –有6Pin和10Pin两种形式
ROM Monitor
深圳旋极
ICD配置方案
例 2: ROM仿真器(网口,32位)
Ethernet Interface EPROM Simulator Module and ROM Monitor EPROM Simulator Module
深圳旋极
ICD配置方案
例 3: BDM/JTAG调试器,带ROM仿真器(网口)
关于TRACE32使用说明
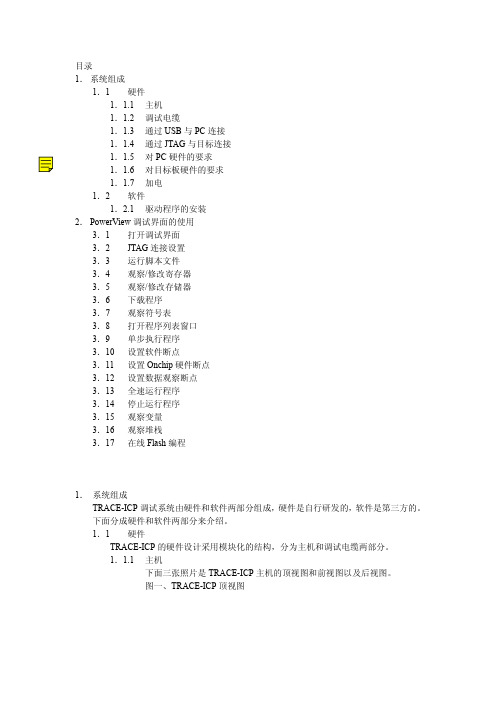
目录1.系统组成1.1硬件1.1.1主机1.1.2调试电缆1.1.3通过USB与PC连接1.1.4通过JTAG与目标连接1.1.5对PC硬件的要求1.1.6对目标板硬件的要求1.1.7加电1.2软件1.2.1驱动程序的安装2.PowerView调试界面的使用3.1 打开调试界面3.2 JTAG连接设置3.3 运行脚本文件3.4 观察/修改寄存器3.5 观察/修改存储器3.6 下载程序3.7 观察符号表3.8 打开程序列表窗口3.9 单步执行程序3.10 设置软件断点3.11 设置Onchip硬件断点3.12 设置数据观察断点3.13 全速运行程序3.14 停止运行程序3.15 观察变量3.16 观察堆栈3.17 在线Flash编程1.系统组成TRACE-ICP调试系统由硬件和软件两部分组成,硬件是自行研发的,软件是第三方的。
下面分成硬件和软件两部分来介绍。
1.1硬件TRACE-ICP的硬件设计采用模块化的结构,分为主机和调试电缆两部分。
1.1.1主机下面三张照片是TRACE-ICP主机的顶视图和前视图以及后视图。
图一、TRACE-ICP顶视图图二、TRACE-ICP前视图图三、TRACE-ICP后视图在图二中的连接器是标准DB25/M连接器,用于连接调试电缆。
在图三中,有两个连接器和一个LED指示灯。
左边的连接器是USB接口,用于通过USB电缆和PC连接。
右边的连接器是TRACE-ICP的外接5VDC电源接口。
TRACE-ICP可以通过USB供电,在USB供电不足的情况下,使用外接电源。
LED指示灯是TRACE-ICP的电源指示灯。
1.1.2调试电缆下图是TRACE-ICP的调试电缆的照片。
图四、TRACE-ICP的调试电缆TRACE-ICP的调试电缆有两个连接端,一个是标准的DB25/F连接器,用于和TRACE-ICP主机相连,另一个是针距为2.54毫米的标准IDC20连接器,用于和目标板连接。
TRACE32系列仿真器介绍
TRACE32系列仿真器介绍TRACE32系列仿真器是由German Lauterbach公司开发的一套用于嵌入式系统开发和调试的工具,旨在帮助开发人员进行快速、高效的开发和调试工作。
TRACE32系列仿真器包含多种型号,适用于不同的平台和处理器架构,如ARM,PowerPC,MIPS等。
1.统一的调试界面:TRACE32提供了一个统一的调试界面,可以同时支持多种不同的处理器架构。
这使得开发人员能够使用一套工具进行不同架构的调试工作,而不需要切换到不同的开发环境。
2.高级调试功能:TRACE32提供了丰富的高级调试功能,如断点调试、单步执行、观察变量、内存查看等。
开发人员可以利用这些功能快速定位和解决问题,提高调试效率。
3.多核调试支持:TRACE32支持多核处理器调试,可以同时跟踪和调试多个核心。
开发人员可以实时查看和分析不同核心的状态和交互情况。
4.实时追踪:TRACE32提供了实时追踪功能,可以记录系统运行时的任务切换、中断、函数调用等信息。
这有助于开发人员了解系统的运行状态,定位问题和调优性能。
5.嵌入式硬件调试:TRACE32支持对嵌入式硬件进行调试,如片上系统(SoC)和外围设备。
开发人员可以通过TRACE32对硬件进行控制和监控,以便更好地了解和优化系统设计。
6.脚本自动化:TRACE32可以通过脚本进行自动化测试和调试。
开发人员可以编写脚本来执行一系列调试操作,从而提高测试效率和减少人工操作的错误。
7.高性能仿真:TRACE32具有高性能的仿真能力,可以快速加载和运行大型程序。
这使得开发人员能够更快地进行代码调试和性能分析,提高开发效率。
总之,TRACE32系列仿真器是一套功能强大的工具,可帮助开发人员进行嵌入式系统的开发和调试工作。
无论是单核还是多核,无论是硬件还是软件,TRACE32都提供了丰富的调试功能和便于使用的界面,让开发人员能够更轻松地进行调试工作,提高效率。
TRACE32 调试器使用指南 TRACE32 Trace Tutorial说明书
T race T utorial Release 02.2023TRACE32 Online HelpTRACE32 DirectoryTRACE32 IndexTRACE32 Debugger Getting Started ..............................................................................................Trace Tutorial (1)History (3)About the Tutorial (3)What is Trace? (3)Trace Use Cases4Trace Methods (5)Simulator Demo (6)Trace Configuration (7)Trace Recording (8)Displaying the Trace Results (10)Trace List10 Displaying Function Run-Times13 Graphical Charts13 Numerical Statistics and Function Tree14 Duration Analysis15 Distance Analysis16 Variable Display17 Track Option18Searching Trace Results (19)Trace Save and Load (20)Version 10-Feb-2023 History18-Jun-21New manual.About the TutorialThis tutorial is an introduction to the trace functionality in TRACE32. It shows how to perform a tracerecording and how to display the recorded trace information.For simplicity, we use in this tutorial a TRACE32 Instruction Set Simulator, which offers a full tracesimulation. The steps and features described in this document are however valid for all TRACE32 products with trace support.The tutorial assumes that the TRACE32 software is already installed. Please refer to “TRACE32Installation Guide” (installation.pdf) for information about the installation process.Please refer to “ICD Tutorial” (icd_tutorial.pdf) for an introduction to debugging in TRACE32 PowerView. What is Trace?T race is the continuous recording of runtime information for later analysis. In this tutorial, we use the term trace synonymously with core trace. A core trace generates information about program execution on a core,i.e. program flow and data trace. The TRACE32 Instruction Set Simulator used in this tutorial supports a fulltrace simulation including the full program flow as well as all read and write data accesses to the memory. A real core may not support all types of trace information. Please refer to your Processor Architecture Manual for more information.Trace Use CasesT race is mainly used in the following cases:1.Understand the program execution in detail in order to find complex runtime errors more quickly.2.Analysis of the code performance of the target code3.Verification of real-time requirements4.Code-coverage measurementsTrace MethodsTRACE32 supports various trace methods. The trace method can be selected in the Trace configuration window, which can be opened from the menu Trace > Configuration…If a trace method is not supported by the current hardware/software setup, it is greyed out in the trace configuration window. NONE means that no trace method is selected.We use in this tutorial the trace method Analyzer. Please refer to the description of the commandTrace.METHOD for more information about the different trace methods.Simulator DemoWe use in this tutorial a TRACE32 Simulator for Arm. The described steps are however valid for the TRACE32 Simulator for other core architectures.T o load a demo on the simulator, follow these steps:1.Start the script search dialog from the menu File > Search for scripts…2.Enter in the search field “compiler demo”3.Select a demo from the list with a double click, a PSTEP window will appear. Press the“Continue” button.We will use here the demo “GNU C Example for SRAM”.Trace ConfigurationIn order to set up the trace, follow these steps:1.Open the menu Trace > Configuration… The trace method Analyzer [A] should be selected perdefault. If this is not the case, select this trace method2.Clear the contents of the trace buffer by pressing the Init button [B].3.Select the trace operation mode [C].In mode Fifo , new trace records will overwrite older records. The trace buffer includes thus always the last trace cycles before stopping the recording.In Mode Stack , the recording is stopped if the trace buffer is full. The trace buffer always includes in this case the first cycles after starting the recording.Mode Leash is similar to mode Stack , the program execution is however stopped when the trace buffer is nearly full.TRACE32 supports other trace modes. Some of these modes depend on the core architecture. Please refer to the documentation of the command Trace.Mode for more information. We will keep here the default trace mode selection, which is Fifo .4.The SIZE field [D] indicates the size of the trace buffer. As we are using a TRACE32 Simulator, the trace buffer is reserved by the TRACE32 PowerView application on the host. It is thuspossible to increase the size of this buffer. If a TRACE32 trace hardware is used with a real chip, the size of the trace buffer is limited by the size of the memory available on the trace tool.In order to have a longer trace recording, we will set the trace buffer size to 10000000.BACDThe same configuration steps can be performed using the following PRACTICE script:Trace RecordingPress the Go button to start the program execution.The trace recording is automatically started with the program execution. The state in the Trace window changes from OFF to Arm [A]. The used field displays the fill state of the trace buffer [B].In order to stop the trace recording, stop the program execution with the Break button. The state in the trace window changes to OFF .Trace.METHOD Analyzer Trace.InitTrace.Mode FifoTrace.SIZE 10000000.BACThe trace recording is automatically started and stopped when starting and stopping the program execution because of the AutoArm[C] setting in the Trace window, which is per default enabled. The trace recording can also be started/stopped manually while the program execution is running using the radio buttons Armand OFF of the Trace window [A].Displaying the Trace ResultsTRACE32 offers different view for displaying the trace results. This document shows some examples.Please note that the trace results can only be displayed if the trace state in the Trace window is OFF. It is not possible to display the trace results while recording.The caption of a TRACE32 window includes the TRACE32 command that can be executed in the TRACE32 command line or in a PRACTICE script to open this window, e.g. here Trace.ListTrace ListA list view of the trace results can be opened from the menu T race > List > Default. The same window canbe opened from the Trace configuration window by pressing the List button.The Trace.List window displays the recorded trace packets together with the corresponding assembler and source code.In our case, trace packets are program fetches (cycle fetch) or data accesses (e.g. wr-long and rd-long for 32bit write and read accesses). Each trace packet has a record number displayed in the record column. The record number is a negative index for Fifo mode.As we are using a Simulator, each assembly instruction has an own trace packet. This is not the case with a real hardware trace.The displayed information can be reduced using the Less button. By pressing Less three times, only the high-level source code is displayed. This can be reverted using the More button.A double click on a line with an assembly instruction or high-level source code opens a List window showing the corresponding line in the code.Using the TRACE32 menu Trace > List > Tracing with Source , you get a Trace.List and a List /Track window. When doing a simple click on a line in the Trace.List window, the List window will automaticallydisplay the corresponding code line.The timing information (see ti.back column) is generated in this case by the TRACE32 Instruction Set Simulator. With a real core trace, timestamps are either generated by the TRACE32 trace hardware or by the onchip trace module.Double clickSimpleclickDisplaying Function Run-TimesTRACE32 supports nested and flat function run-time analysis based on the trace results. Please refer to the video “Flat vs. Nesting Function Runtime Analysis” for an introduction to function run-time analysis inTRACE32:/tut_profiling.htmlGraphical ChartsBy selecting the menu Trace > Chart > Symbols, you can get a graphical chart that shows the distribution of program execution time at different symbols. The displayed results are based on a flat analysis:The corresponding nesting analysis can be displayed using the menu Perf > Function Runtime > Show as Timing.The In and Out buttons can be used to zoom in/out. Alternatively, you can select a position in the window and then use the mouse wheel to zoom in/out.Numerical Statistics and Function TreeThe menu entry Perf > Function Runtime >Show Numerical displays numerical statistics for each function with various information as total run-time, minimum, maximum and average run-times, ratio, and number of function calls.ABParents [A] displays for example a caller tree for the selected function. By doing a right mouse click on func1 and selecting Parents, we see the run-times of the functions func2 and func9, which have called func1 in thetrace recording.Children [B] displays the run-times of the functions called by the selected function, for example here the function subst called by the function encode.A function call tree view of all function recorded in the trace can be displayed using the menu entries Perf >Function Runtime > Show as Tree or Perf > Function Runtime > Show Detailed Tree.Duration AnalysisBy doing a right mouse click on a function in the numerical statistics window (Trace.STATistic.Func) then selecting Duration Analysis, you get an analysis of the function run-times between function entry and exit including the time spent in called subroutines, e.g. here for the function subst (P:0x114C corresponds to the start address of the subst function):The time interval can be changed using the Zoom buttons.Distance AnalysisBy doing a right mouse click on a function in the numerical statistics window (Trace.STATistic.Func) then selecting Distance Analysis, you can get run-times between two consecutive calls of the selected function,e.g. here for the function subst (P:0x114C corresponds to the start address of the subst function):Variable DisplayThe Trace.ListVar command allows to list recorded variables in the trace. If the command is used without parameters all recorded variables are displayed:Y ou can optionally add one or multiple variables as parameters.Example: display all accesses to the variables plot1 and plot2The Draw button can then be used to plot the displayed variables graphically against time. This corresponds to the following TRACE32 command:Please refer for more information about the Trace.DRAW command to “Application Note forTrace.DRAW” (app_trace_draw.pdf).Trace.ListVar Trace.ListVar %DEFault plot1 plot2Trace.DRAW.Var %DEFault plot1 plot2Track OptionThe /Track options allows to track windows that display the trace results. Y ou just need to add the /Track option after the command that opens a trace window, e.g.Trace.List /TrackThe cursor will then follow the movement in other trace windows, e.g. Trace.Chart.Func. Default is time tracking. If no time information is available, tracking to record number is performed.TRACE32 windows that displays the trace results graphically, e.g. Trace.Chart.Func, additionally accept the /ZoomTrack option. If the tracking is performed with another graphical window, the same zoom factor is used in this case.Trace.Chart.Func /ZoomTrackSearching Trace ResultsThe Find button allows to search for specific information in the trace results.Example 1: find the first call of function func21.Enter “func2” under address / expression2.Select Program under cycle3.Press the Find First button. The next entries to func2 in the trace can then be found using theNext buttonExample 2: Find all write accesses to the variable mstatic1 with the value 0x01.Enter “mstatic1” under address / expression2.Select Write under cycle3.Enter 0x0 under Data4.Press the Find All buttonPlease refer to “Application Note for Trace.Find” (app_trace_find.pdf) for more information about Trace.Find.Trace Save and LoadThe recorded trace can be stored in a file using the command Trace.SAVE , e.g.The saved file can then be loaded in TRACE32 PowerView using the command Trace.LOADThe TRACE32 trace display windows will show in this case a LOAD message in the low left cornerPlease note that TRACE32 additionally allows to export/import the trace results in different formats. Refer to the documentation of the command groups Trace.EXPORT and Trace.IMPORT for more information. Trace.SAVE file.adTrace.LOAD file.ad。
TRACE32 pdebug Target Server for ARM 用户手册说明书

TRACE32 pdebug T arget Server for ARMRelease 09.2023TRACE32 Online HelpTRACE32 DirectoryTRACE32 IndexTRACE32 Documents ...................................................................................................................... OS Awareness Manuals ................................................................................................................ OS Awareness and Run Mode Debugging for QNX ................................................................ TRACE32 pdebug Target Server for ARM .. (1)Operation Theory (3)Quick Start of the TRACE32 pdebug Front-end4Pdebug Front-end Specific Commands (6)SYStem.Mode Establish communication to debug agent6 SYStem.PORT Set communication settings6Version 09-Oct-2023Operation TheoryThe TRACE32 pdebug front-end is a software debugger solution for QNX. It provides single processdebugging.pdebug is a QNX application that provides access to process-level debugging from a remote host.Single process debugging works as follows:•pdebug is started together with the communication parameters and the process name on the target via the terminal window.•TRACE32 links to pdebug via Ethernet or RS232 and thus becomes the front-end for debugging.Quick Start of the TRACE32 pdebug Front-endThe TRACE32 pdebug front-end is set up for single process debugging as follows:1.Start pdebug on the target.2.Start TRACE32 as pdebug front-end. To do so, edit your configuration file (default: config.t32) and insert the statementrm the debugger about the CPU type on your target using the SYStem.CPU command e.g.4.Define the communication parameters with the SYStem.PORT command eg:5.Establish the communication to the pdebug agent with SYStem.Mode Attach :6.Load the symbols of the process to get symbol information (apply /NoCODE option to load symbols only).7.Go till mainA simple start sequence is shown below:PBI=QNXSYStem.CPU *SYStem.PORT 10.0.0.1:8000SYStem.Mode AttachData.LOAD.Elf myprocess /NoCODEGo main ListSYStem.Down WinCLEARSYStem.CPU *SYStem.PORT 10.0.0.1:8000SYStem.Mode AttachData.LOAD.ELF myprocess /NoCODE Go main List.Mix ENDDO; switch the debugger to down state ; clear all windows; select your target CPU; define communication parameters ; connect to pdebug; load the process symbols ; enter the process; open source code windowThe list of running tasks can be displayed using the command TASK.List.tasks.•To attach to a running process, use TASK.select.•To start a new process for debugging, use TASK.RUN.•To detach form a process, use TASK.DETach.•To kill a process, use TASK.KILL.Pdebug Front-end Specific CommandsSYStem.Mode Establish communication to debug agent Format:SYStem.Mode <mode><mode>:DownAttachDefault: DownDown TRACE32 has no connection to pdebug.Attach TRACE32 establishes the connection to pdebug.If you switch from Up to Down:•The process is killed.•The connection is closed.SYStem.PORT Set communication settings Format:SYStem.PORT <settings><mode>:COM1 BAUD=9600HOST:PORTSets the communication parameters. Y ou can use a serial or a TCP communication.SYStem.PORT COM1 baud=9600SYStem.PORT 10.1.2.99:8000。
ARM XSCALE RTOS-EMBOS RTOS Awareness on TRACE32 说明
R TO S -E M B O ST e c h n i c a l I n f o r m a t i o n13.03.19RTOS-EMBOSRTOS Debugger for embOS■Real Time, Non-Intrusive Display of embOS System Resources■embOS specific Display of Trace Listing ■Statistic Evaluation and Graphic Display of Task Run Times■Task related Evaluation of Function Run Times ■Statistic Evaluation and Graphic Display of Task States■Task Stack Coverage ■Task Context Display■PRACTICE Functions for OS Data ■embOS related Pull-DownMenuThe TRACE32 System includes a configurable multitask debugger to provide symbolic debugging in real time oper-ating systems. Our software package contains a ready-to-run configuration for the embOS Real Time Kernel fromSegger Microcontroller Systeme GmbH.In close cooperation with Segger, we built a special multi-task support for embOS on ARM processors. This leafletwill guide you through the additional implemented fea-tures in TRACE32, to do an effective debugging on embOS systems.ARM XSCALERTOS Awareness on TRACE32 with embOSReal Time, Non-Intrusive Display of embOS System ResourcesThe TRACE32 RTOS debugger for embOS provides display functions to show the system resources of embOS. All objects, such as tasks, timers, mail-boxes and both types of semaphores can be displayed and inspected. In addition, by using the processors capa-bility of reading the target memorywhile the application is running, or by using the emulators dual-port memory (if available), the display of all these regions can be viewed non-intrusively in real time. The tables are updated permanently (“On The Fly”), without affecting the application at all.Task Related BreakpointsAny breakpoint set in the TRACE32 debugger can be set dependent to a specific task. This means, that thebreakpoint will then only halt, if hit by the specified task. This allows taskrelated debugging even in shared code.T ask list window and detailed view of one taskMailbox display windowTask Stack CoverageIn real time systems it is quite impor-tant to know, how much stack space each task consumes. For this purposea special window shows the current and the maximum usage of each seperate task.Task Context DisplayThe TRACE32 RTOS Debugger pro-vides an easy way to switch the current displayed context to another task. Usu-ally all register related windows (e.g. listing at current PC, local variables orfunction call stack) are displayed to the actual context (i.e. current executed task). Y ou can switch to the context of another task, to see all this information at the time this task was scheduled.Dynamic Task Performance MeasurementWhile embOS is running, TRACE32 is capable of recurrently evaluating the current running task and collecting the results. The percentage, each task consumes of the system, is then dis-played graphically and updated perma-nently. The longer time you let the measurement run, the more exact are the results. This feature is available even without any hardware trace.PRACTICE Functions for OS Data.The support includes extended PRAC-TICE functions for embOS specific data, to be used in setup and test scripts. E.g. the function “task.con-fig(magic)” returns the address of the so called magic value, which corre-sponds to the id of the current execut-ing task.Task stack coverage windowPerformance measurement listembOS specific Display of Trace ListingThe data recorded in the real time trace buffer (if available) can be displayed and interpreted specific to the operat-ing system.The task switches are dis-played symbolically, either exclusively or in addition to other information.Statistic evaluation and graphic display of task run timesOut of the real time trace buffer (if avail-able), the analyzer can calculate statis-tic tables of task run times and task switches. A graphical diagram showswhich task was active at a specific time, giving a clear view of the behav-iour of the system.Task related evaluation of function run timesThe statistic and graphic evaluation of function calls and function run times (if available) can be done dependant to the actual running task. This is neces-sary, if different tasks call one single function at the same time, or if a taskswitch occurs in between the function.Analyzer listing, displaying recorded source, task switches and time spanStatistics and flow of tasksStatistic evaluation and graphic display of task statesIf covered by the real time trace, these tabular and graphical analyses of the status of tasks show the various states (i.e. running, ready, waiting, suspendedand undefined) and times each task spent in each state. A graphical view of the data can help to highlight prioritisa-tion problems, critical paths etc.embOS related pull-down menuBecause the menu bar of theTRACE32 user interface can be fully costomized, you can create a new pull down menu, including operating sys-tem specific commands. We deliver embOS support with an example for such specific menues, which providesfast access to the embOS features.Statistics and flow of task statesTRACE32 with embOS menuContactInternational RepresentativeArgentinaAnacom Eletronica Ltda.Mr. Rafael SoriceRua Nazareth, 807, BarcelonaBR-09551-200 São Caetano do Sul, SP Phone: +55 11 3422 4200FAX: +55 11 3422 4242EMAIL:******************.br AustraliaEmbedded Logic Solutions P/LMr. Ramzi KattanSuite 2, Level 3144 Marsden StreetParramatta NSW 2150Phone: +61 2 9687 1880FAX: +61 2 9687 1881EMAIL:*****************.au AustriaLauterbach GmbHAltlaufstr. 40D-85635 Höhenkirchen-Siegertsbrunn Phone: +49 8102 9876 190FAX: +49 8102 9876 187EMAIL:******************** BelgiumTritec Benelux B.V.Mr. Robbert de VoogtStationspark 550NL-3364 DA SliedrechtPhone: +31 184 41 41 31FAX: +31 184 42 36 11EMAIL:******************BrazilAnacom Eletronica Ltda.Mr. Rafael SoriceRua Nazareth, 807, BarcelonaBR-09551-200 São Caetano do Sul, SP Phone: +55 11 3422 4200FAX: +55 11 3422 4242EMAIL:******************.br CanadaLauterbach Inc.Mr. Udo Zoettler4 Mount Royal Ave.USA-Marlborough, MA 01752 Phone: +1 508 303 6812FAX: +1 508 303 6813EMAIL:********************** China BeijingLauterbach Technologies Co., LtdMr. Linglin HeBeijing OfficeA3,South Lishi Road, XiCheng District Beijing 100037, P.R. ChinaPhone: +86 10 68023502FAX: +86 10 68023523EMAIL:************************* China ShenzhenLauterbach Technologies Co., Ltd1406/E Xihaimingzhu BuildingNo.1 Taoyuan Road, Nanshan District Shenzhen 518052, P.R. China Phone: +86 755 8621 0671FAX: +86 755 8621 0675EMAIL:**************************China SuzhouLauterbach Technologies Co., Ltd Mr. Linglin HeHengyu Square, Rm 709No. 188, Xing Hai StreetSuzhou, 215021 P.R. of China Phone: +86 512 6265 8030FAX: +86 512 6265 8032EMAIL:********************** Czech. RepublicLauterbach GmbHAltlaufstr. 40D-85635 Höhenkirchen-Siegertsbrunn Phone: +49 8102 9876 130FAX: +49 8102 9876 187EMAIL:******************** DenmarkNohau Danmark A/SMr. Flemming JensenHørkær 26, Plan 4DK-2730 HerlevPhone: +45 44 52 16 50FAX: +45 44 52 26 55EMAIL:*************EgyptLauterbach GmbHAltlaufstr. 40D-85635 Höhenkirchen-Siegertsbrunn Phone: +49 8102 9876 130FAX: +49 8102 9876 187EMAIL:******************** FinlandNohau Solutions FinlandMr. Martti ViljainenTekniikantie 14FI-02150 EspooPhone: +358 40 546 0142FAX: +358 9 2517 8101EMAIL:**************FranceLauterbach S.A.R.L.Mr. Jean-Pierre ParadisoEuroparc - Le Hameau B135 Chemin Des BassinsF-94035 Créteil CedexPhone: +33 1 49 56 20 30FAX: +33 1 49 56 20 39EMAIL:********************** GermanyLauterbach GmbHSales Team GermanyAltlaufstr. 40D-85635 Höhenkirchen-Siegertsbrunn Phone: +49 8102 9876 190FAX: +49 8102 9876 187EMAIL:******************** GreeceLauterbach GmbHAltlaufstr. 40D-85635 Höhenkirchen-Siegertsbrunn Phone: +49 8102 9876 190FAX: +49 8102 9876 187EMAIL:******************** HungaryLauterbach GmbHAltlaufstr. 40D-85635 Höhenkirchen-Siegertsbrunn Phone: +49 8102 9876 190FAX: +49 8102 9876 187EMAIL:********************India-BangaloreElectro Systems Associates Pvt. Ltd. Mr. G. V. GurunathamS-606, World Trade CenterMalleswaram West, No.26/1, Dr. Rajkumar RoadIndia - Bangalore 560055Phone: +91 80 67648888FAX: +91 80 23475615EMAIL:************************* India-ChennaiElectro Systems Associates Pvt. Ltd. Mr. D. KannanNo.109 /59A , Ground FloorIV Avenue, Ashok NagarIndia - Chennai - 600 083 Tamilnadu Phone: +91 044-24715750FAX: ++91 44 24715750EMAIL:********************India-DelhiElectro Systems Associates Pvt. Ltd. Mr. R.K. BhandariNo. 705, 7th Floor, Laxmi Deep ShivajinagarIndia - Delhi - 110 092Phone: +91 11-22549351FAX:EMAIL:******************India-HyderabadElectro Systems Associates Pvt. Ltd. Mr. C.V.M. Sri Ram MurthyShop No. 14, "Global Enclave" Bhagyanagar Colony, Kukat pallyIndia - Hyderabad 500 072Phone: +91 40-23063346FAX: +91 40-23063346EMAIL:**********************India-KolkataElectro Systems Associates Pvt. Ltd. Mr. Arun RoyIndia - KolkataPhone: +91 98305 78843FAX:EMAIL:********************India-PuneElectro Systems Associates Pvt. Ltd. Mr. R K BhandariShriram Complex,1126/1, Model Colony ShivajinagarIndia - Pune - 411 016Phone: +91 20 - 30462035 / 25663FAX: +91 20-25677202EMAIL:*****************IrelandLauterbach Ltd.Mr. Richard Copeman11 Basepoint Enterprise Centre Stroudley RoadBasingstoke, Hants RG24 8UPPhone: 0044-118 328 3334FAX:EMAIL:**********************IsraelItec Ltd.Mr. Mauri GottliebP.O.Box 10002IL-Tel Aviv 61100Phone: +972 3 6491202FAX: +972 3 6497661EMAIL:***************.ilItalyLauterbach SrlMr. Maurizio MenegottoVia Enzo Ferrieri 12I-20153 MilanoPhone: +39 02 45490282FAX: +39 02 45490428EMAIL:**********************JapanLauterbach Japan, Ltd.Mr. Kenji Furukawa3-8-8 ShinyokohamaKouhoku-ku, Nisso 16th BuildingY okohama-shi, Japan 222-0033 Phone: +81 45 477 4511FAX: +81 45 477 4519EMAIL:******************.jp LuxembourgTritec Benelux B.V.Mr. Robbert de VoogtStationspark 550NL-3364 DA SliedrechtPhone: +31 184 41 41 31FAX: +31 184 42 36 11EMAIL:****************** MalaysiaFlash TechnologyMr. Teo Kian HockNo 61, # 04-15 Kaki Bukit Av 1Shun Li Industrial ParkSGP-Singapore 417943Phone: +65 6749 6168FAX: +65 6749 6138EMAIL:*******************.sg MexicoLauterbach Inc.Mr. Udo Zoettler4 Mount Royal Ave.USA-Marlborough, MA 01752 Phone: +1 508 303 6812FAX: +1 508 303 6813EMAIL:********************** NetherlandsTritec Benelux B.V.Mr. Robbert de VoogtStationspark 550NL-3364 DA SliedrechtPhone: +31 184 41 41 31FAX: +31 184 42 36 11EMAIL:******************New ZealandEmbedded Logic Solutions P/LMr. Ramzi KattanSuite 2, Level 3144 Marsden StreetParramatta NSW 2150Phone: +61 2 9687 1880FAX: +61 2 9687 1881EMAIL:*****************.au NorwayNohau Solutions ABMr. Jörgen NilssonDerbyvägen 6DSE-21235 MalmoePhone: +46 40 592 206FAX: +46-40 592 229EMAIL:*********************** PolandQUANTUM Sp. z o.o.Mr. Aleksander Bilul. Jeleniogorska 654-056 WroclawPhone: +48 71 362 6356FAX: +48 71 362 6357EMAIL:****************.pl PortugalCaptura Electronica,SCCLMr. Juan Martinezc/Duero, 40E-08031 BarcelonaPhone: +34 93 429 5730FAX: +34 93 407 0778EMAIL:******************* RomaniaLauterbach GmbHAltlaufstr. 40D-85635 Höhenkirchen-Siegertsbrunn Phone: +49 8102 9876 130FAX: +49 8102 9876 187EMAIL:********************RussiaRTSoftMr. Alexey IsaevNikitinskaya 3RUS-105037 MoscowPhone: +7 495 742 6828FAX: +7 495 742 6829EMAIL:****************.ruSingaporeFlash TechnologyMr. Teo Kian HockNo 61, # 04-15 Kaki Bukit Av 1Shun Li Industrial ParkSGP-Singapore 417943Phone: +65 6749 6168FAX: +65 6749 6138EMAIL:*******************.sgSouth Korea, PangyoHancom MDS Inc.Mr. Dongwook Jun3FL. Hancom Tower49, Daewangpangyo-ro 644, Bundang-gu Seongnam-si, Gyeonggi-do, 463-400, ROK Phone: +82-31-627-3000FAX: +82-31-627-3100EMAIL:*********************SpainCaptura Electronica,SCCLMr. Juan Martinezc/Duero, 40E-08031 BarcelonaPhone: +34 93 429 5730FAX: +34 93 407 0778EMAIL:*******************SwedenNohau Solutions ABMr. Jörgen NilssonDerbyvägen 6DSE-21235 MalmoePhone: +46 40 592 206FAX: +46 40 592 229EMAIL:*********************** SwitzerlandJDT Jberg DatenTechnikMr. Andreas JbergZimmereistrasse 2CH-5734 Reinach AGPhone: +41 62 7710 886FAX:EMAIL:********************TaiwanSuperlink Technology Corp.Mr. Sulin Huang3F-8,No.77,Sec.1,Xintaiwu Rd.,Xizhi District, New Taipei City 22101, Taiwan, R.O.C. Phone: +886 2 26983456FAX: +886 2 26983535EMAIL:**********************.tw TunisiaLauterbach Consulting S.A.R.L.Mr. Khaled JmalRoute El Ain Km 3.5TN-3062 SfaxPhone: +216-31361061FAX: +216-74611723EMAIL:********************** Turkey-1Tektronik Muh. ve Tic. A.S.Mr. Hakan Y avuzCyberPlaza B-Blok, 702BBilkent06800 AnkaraPhone: +90 312 437 3000FAX: +90 312 437 1616EMAIL:******************.tr Turkey-2G3TEK Embedded Technologies Ltd. Mr. Celal AygunIlkyerlesim Mah. 445.Sok. No: 4806370 Batikent/AnkaraPhone: +90 312 3324769FAX: +90 312 3324769EMAIL:**************UKLauterbach GmbHMr. Richard CopemanAltlaufstr. 40D-85635 Höhenkirchen-Siegertsbrunn Phone: +49 8102 9876 190FAX: +49 8102 9876 187EMAIL:******************** USA EastLauterbach Inc.Mr. Udo Zoettler4 Mount Royal Ave.USA-Marlborough, MA 01752 Phone: +1 508 303 6812FAX: +1 508 303 6813EMAIL:********************** USA WestLauterbach Inc.Mr. Bob Kupyn1111 Main Street, Suite 620USA-Vancouver, WA. 98660 Phone: +1 503 524 2222FAX: +1 503 524 2223EMAIL:************************Additional InformationLauterbach GmbHAltlaufstr. 40D-85635 Höhenkirchen-SiegertsbrunnTel. ++49 8102 9876-0 FAX -999*******************uterbach.deLauterbach Inc.4 Mount Royal Ave.Marlboro MA 01752Phone (508) 303 6812 FAX (508) 303 6813 ********************** Lauterbach Ltd.11 Basepoint Enterprise Ctre Stroudley Road Basingstoke, Hants RG24 8UPPhone ++44-1256-333-690 FAX -661**********************http:/Lauterbach S.A.R.L.135 Chemin Des BassinsF-94035 Créteil CedexPhone ++33-149-562-030FAX ++33-149-562-039**********************http:/uterbach.fr Lauterbach Japan, Ltd.3-9-5 Shinyokohama Kouhoku-kuY okohama-shi Japan 222-0033Phone ++81-45-477-4511 FAX -4519*********************uterbach.co.jp Lauterbach s.r.l.Lauterbach s.r.l.Via Enzo Ferrieri 12I-20153 MilanoPhone ++39 02 45490282FAX ++39 02 45490428*********************uterbach.itSuzhou Lauterbach Consulting Co.,Ltd.Room 1605, Xing Hai International Square No.200, Xing Hai StreetSuzhou, 215021 PR of ChinaPhone: 0086-512 6265 8030FAX: 0086-512 6265 8032*********************DisclaimerThe information presented is intended to give overview information only.Changes and technical enhancements or modifications can be made with-out notice.。
TRACE32梯度32在线帮助应用程序说明书
Application Note for t32cast Release 09.2023TRACE32 Online HelpTRACE32 DirectoryTRACE32 IndexTRACE32 Documents ......................................................................................................................Source Level Debugging ..............................................................................................................Application Note for t32cast (1)History (3)Introduction (4)Intended Audience4 Prerequisites5 Related Documents5 Restrictions5Installation (6)System Requirements6 License Requirements6 Installing t32cast6Command Line Parameters of t32cast (7)t32cast Usage (9)Version 09-Oct-2023 History18-Apr-23Added commands for source code instrumentation.11-Jun-18Initial version.IntroductionThere are TRACE32 features which require additional source code details that are not included in the debug infromation generated by the compiler. For example, several coverage metrics such as MC/DC or decision coverage need information about the locations of decisions and function calls in the source code.The task of the command line tool t32cast is to generate all the additional information. It analyzes the C/C++ source code and generates an Extended Code Analysis data file (.eca) per source file.The .eca files have to be loaded into TRACE32 if needed. The source code file and the .eca file must be located in the same directory. In this way, the assignment is simple and unambiguous.t32cast can be started via a PRACTICE script or a batch job. But to ensure that the .eca files always match the source code files, it is recommended to integrate their generation into the build process.Intended Audience•Developers who want to use one of the TRACE32 code coverage metrics that require additional details about the source code.•Persons in charge of the build system who want to integrate t32cast into their build process.PrerequisitesWindows users will need to ensure that the Microsoft Visual C++ Redistributable package is installed on their system. The latest one is always available as a free-of-charge download from the Microsoft download center.Linux users will need at least libncurses-5 or libncurses-compat. Depending upon the distribution used, other dependencies may be needed. Generally, running the t32cast tool will highlight any missingcomponents.Related Documents•“Application Note for Trace-Based Code Coverage” (app_code_coverage.pdf).•The description of the sYmbol.ECA command group in “General Commands Reference Guide S” (general_ref_s.pdf).RestrictionsCurrently, t32cast does not parse decisions within macros within macros correctly. The source file must be pre-processed by the compiler to expand these before running it against t32cast.InstallationSystem Requirements•64-bit Windows or Linux host computer.•The sYmbol.ECA command group was supported for the first time with TRACE32 build of 95748 (March 2018). The version of TRACE32 can be verified with the VERSION.SOFTWAREcommand.License RequirementsThe use of t32cast requires no additional licenses.Installing t32castThe command line tool t32cast is located under ~~/bin/<host_os>. An installation is not necessary.If you receive an error message about a missing *.dll, then install the Microsoft Visual C++ Redistributable package. See “Prerequisites”, page 5.Command Line Parameters of t32castThe command line tool t32cast is designed to be included as part of the build process.The examples below show how you can quickly display the help message (--help) and the version information (--version). They are independent of the t32cast integration into the build process.t32cast [subcommand] [options] <input>Available subcommands:eca Generate data for extended code analysis in TRACE32.This command generates additional information about theC/C++ code which is usually not included in the debugsymbols. The data includes the position of decisions,function calls and comments.instrument Instrument source file for MC/DC or Decision coveragemeasurement with TRACE32. Depending on the target andcompiler the source file may be partially or fullyinstrumented. Refer to “Application Note for Trace-BasedCode Coverage” (app_code_coverage.pdf) for moreinformation.vectors Generate MC/DC test vectors.This command will output all decisions together with testvectors to achieve full MC/DC coverage. The results may beused for developing test cases. They are not for use withTRACE32.Available options:--help Display the help message and exit.--version Display version information and exit.-o <output>Write output to file <output>.--comments List comments in output.-I <dir>Add directory to include search path.-D <macro[=value]>Define a macro.-imacros <file>Define macros from file before parsing.-m32Preprocess source code for 32-bit target.-m64Preprocess source code for 64-bit target.<input>Read input from file.-x <language>Set the language as which the file as parsed. The optionsare C and C++.--show-warnings Show additional warnings when parsing the C or C++ code --stop-on-error Stop on Clang parser errors--strict-mode Abort the parsing process on any warning--parse-const-expr Exports decisions where the expression can already beevaluated during compile-time--mode <value>Specify instrumentation mode.Allowed values:•MCDC--filter <file>Specify filter file for partial instrumentation--extra-arg=<string>Additional argument to append to the t32cast parseroptions. All options available to the Clang compiler areavailable.--extra-arg-before=<string>Additional argument to prepend to the t32cast parseroptions. All options available to the Clang compiler areavailable.The t32cast utility requires the output from the compiler’s pre-processing step. Most compilers generate these intermediary files but automatically remove them as part of the normal build process. These files contain the full source code, any included files and all compiler macros have been replaced or expanded. Please refer to your toolchain documentation to configure your compiler to generate and keep these files.The t32cast tool will generate an Extended Code Analysis (ECA) data file. These should be loaded into TRACE32 to be able to calculate coverage data for several coverage metrics.Examples for Arm and PowerArchitecture can be found under ~~/demo/t32cast/eca/ppc or~~/demo/t32cast/eca/arm. These contain a complete build environment showing how to adapt a Makefile for GNU make and GCC.t32cast UsageExamplesExample 1: This PRACTICE script (*.cmm) shows how to start t32cast from within TRACE32 and display the help message.OS.screen cmd /C c:/t32/demo/t32cast/bin/win-x64/t32cast.exe --help && pauseExample 2: This batch script (*.bat) displays the version number of t32cast in a shell window.@echo offC:cd c:\t32\demo\t32cast\bin\win-x64\t32cast.exe --version && pause。
TRACE32系列仿真器介绍
TRACE32系列仿真器介绍
TRACE32系列仿真器是德国公司Lauterbach开发的一套高性能调试和仿真解决方案。
TRACE32系列仿真器可以用于各种处理器架构,包括ARM、PowerPC、MIPS、X86等。
它提供了一套完整的调试工具链,包括硬件仿真器、调试软件和调试接口,为开发人员提供了全面的调试和仿真功能。
1.高性能:TRACE32系列仿真器具有高速仿真速度和低延迟,能够实时监视和检查目标设备的状态和寄存器值。
它支持多核处理器的并行调试和多台仿真器的联机仿真,提供卓越的性能。
2. 多功能:TRACE32系列仿真器支持多种调试功能,包括源代码级调试、汇编级调试、硬件断点、软件断点、数据观察、函数跟踪等。
它还提供了多种调试接口,包括JTAG、BDM、Nexus、In-Circuit Emulation 等,适应不同的调试需求。
3. 灵活性:TRACE32系列仿真器兼容多种开发环境和操作系统,包括Windows、Linux、UNIX等。
它支持多种集成开发环境(IDE),如Eclipse、Visual Studio等,提供了丰富的插件和扩展功能。
4.易于使用:TRACE32系列仿真器具有用户友好的图形界面和直观的操作方式,使开发人员可以快速上手。
它提供了丰富的调试命令和脚本语言,支持批量调试和自动化测试,提高了开发效率。
总的来说,TRACE32系列仿真器是一套高性能调试和仿真解决方案,提供了丰富的调试功能和灵活的开发环境,广泛应用于嵌入式系统的开发和调试中。
它的高性能、多功能和易用性使得开发人员能够更高效地进行软件开发和调试工作。
TRACE32使用
• 6.4)查看CPU寄存器:
Thank You!
由于th100使用的那根小线fpc很容易受到干扰如果出现连接不成功的情况建议使用防干扰的fpc线或更换testboard试试不用怀疑跳线问题
TRACE32 使用
刘小春 2009-05-26
1,TRACE32作用:
在线实时仿真 • 设置实时地址和数据断点、单步执行、对 ARM内核完全存取和控制。 • 跟踪调试程序异常原因。
2,硬件连接
• • TH100连接Trace32及开发板跳线方法: 1.1)下图为TH100,TRACE32和开发板 连接方法:
TRACE32,手机,开发板连接图:
• 1.2)下图适用于TH100接开发板跳线方法。 • J14和J13两个跳线帽放到左边 ,J7在右边
• •
•
1.3)TH100连接Trace32注意事项: 图中的开发板的版本是 “TG100_TESTBOARD_V2.10_PCB(07 0619)”,请尽量使用此版本的Test Board。 由于TH100使用的那根小线(FPC)很容易 受到干扰,如果出现连接不成功的情况, 建议使用防干扰的FPC线或更换Test Board试试,不用怀疑跳线问题。
TRACE32运行截图:
7,TRACE32调试
• • • • • • 6.1)断点 最多可设置两个硬件断点。 可设置条件断点。 6.2)单步跟踪,跳转 6.3)查看堆栈,变量和内存 当TRACE停在断点上,或者处于break状态下执 行view—stackframe查看堆栈中函数调用关系。 • 查看变量和读取制定内存接好TRACE32,手 机和开发板。 • 5.2)运行TRACE32程序,选择脚本 “file—open batch file…— js_it_debug.cmm”。 • 5.3)长按手机开机键,执行 js_it_debug.cmm脚本开机,如下图所示:
Lauterbach TRACE32工具简化MIPS和ARM CPU结合设计的调试
M icrochip Technology Inc.(美 国 微 芯 科 技 公 司 )发 布 SCH322X系 列 1/o控 制 器 新 品 ,该 系 列 产 品 基 于 工 业 及 嵌 入 式 计 算设 计 人 员 的需 求 而定 制 ,功 能 丰 富且 灵 活 。新 一 代 I/O 控 制 器 系 列 ,封 装 尺 寸 更 小 ,产 品 生 命 周 期 更 长 , 可 实 现 更 具 成 本 效 益 的 工业 及嵌 入 式 应 用 。
每 一 物 联 网平 台开 发 套 件 包 含 了 安 森 美 半 导 体 的无 需 电池 无 线 传 感 器 标 签 ,标 签 采 用 RFMicron的 Magnus s2传 感 器 Ic,可 执 行 温 度 、湿 度 、压 力 或 距 离 感 测 功 能 。 该 平 台还 具 有 UHF RFID 阅 读 器 模 块 ,具 32分 贝 毫 瓦 (dBm)的 额 定 功 率 和 860~ 960 MHz的 频 率 范 围 。本 地 化 数 据 处 理 由 基 于 ARM Cortex-A8的 AM335x系统 级 芯 片 (SoC)执 行 。该 平 台 能 无 线 (通 过 w I AN、Zigbee、Z— W ave、UHF Gen 2等 )或 使 用 有 线 基 础 设 施 (通 过 KNX、 CAN、SPI、以太 网等 )传 输 捕 获 到 的数 据 。
OpenSSI 是 一 套 通 用 的加 密 库 ,可 支 持 安 全 套 接 层 (SSI )和 传 输 层 安 全 (TLS)协 议 的 开 源 实 现 。wolfSSI 是 一 套 加 密 库 ,可 提 供 以速 度 和 规 模 为 主 ,轻 质 、便 携 的安 全 解 决 方 案 。 Atmel的 新 型 ATECC508A )penSSI 和 ATECC508A—wolfSSI 可 以 直 接 在 各 自 的 软 件 资 源 点 下 载 ,同时 允 许 在 保 留开 发 者 原 有 工 作 流 程 的 前 提 下 ,无 缝 适 配 更 多安 全 元 件 。
TRACE32测试软件及操作说明书
T raining Simulator and Demo SoftwareRelease 09.2023TRACE32 Online HelpTRACE32 DirectoryTRACE32 IndexTRACE32 Training ............................................................................................................................Training Simulator and Demo Software (1)About the Demo (3)Starting the TRACE32 Simulator (3)User Interface - TRACE32 PowerView (4)TRACE32 Command Line and Softkeys6 Window Captions - What Makes Them Special in TRACE327Debugging the Program (8)Basic Debug Commands8 Debug Modes9 Displaying the Stack Frame11Breakpoints (12)Setting Breakpoints12 Listing all Breakpoints13 Setting Read/Write Breakpoints14Variables (15)Displaying Variables15 Displaying Variables of the Current Program Context16 Using the Symbol Browser16 Formatting Variables17 Modifying Variables18Memory (19)Displaying Memory19 Modifying Memory20Version 10-Oct-2023About the DemoWhat is this? This is a guided tour through TRACE32 - a tutorial. We use a simple program example in C to illustrate the most important debug features, and give lots of helpful tips & tricks for everyday use.How long does this tutorial take? 0.5 to 1 hrs.How can I learn most from this tutorial? Work completely through all chapters in sequence and then do the quiz at the end.Where can I download the TRACE32 Simulator for the hands-on debug session? From:https:///download.html . You do not need any hardware for this tutorial.Starting the TRACE32 Simulator1.Unzip the downloaded file. Y ou do not need to install the TRACE32 Simulator.2.Double-click the t32m <architecture>.exe file (e.g. t32m arm .exe ) to start the demo debug session. When the TRACE32 Instruction Set Simulator starts, a start-up PRACTICE script that sets up a debug session is automatically executed.Y ou can manually execute the same start-up PRACTICE script by choosing File menu > Run Script .PRACTICE, the Lauterbach script language, is used for automating tests, configuring the TRACE32 PowerView GUI and your debug environment.For our demo debug session, the PRACTICE start-up script armc.cmm loads the application program armle.axf and generates a TRACE32 internal symbol database out of the loaded information.By default, TRACE32 executes the autostart.cmm script on start-up.User Interface - TRACE32 PowerViewThe graphical user interface (GUI) of TRACE32 is called TRACE32 PowerView.The following screen shot presents the main components of the user interface.We’ll briefly explain the GUI using the List command and List window as an example.A video tutorial about the TRACE32 PowerView GUI is available here:/kb/articles/introduction-to-trace32-gui Do one of the following to open the List window:•Choose View menu > List Source•or, at the TRACE32 command line, type: List (or L )Main Menu Bar Main Tool BarC o n t e x t M e n uLocal ButtonsMessage Line SoftkeyLine State LineWindow AreaCommand LineThe List window displays the code in assembler mnemonic and HLL (HLL stands for High-Level Language and means the programming language of your source code).In the List window, the gray bar indicates the position of the program counter (PC). Right now, it is located on the symbolic address of the label main .A video tutorial about the source code display in TRACE32 is available here:/kb/articles/displaying-the-source-codeT o summarize it, you can execute commands in TRACE32 PowerView via the usual suspects:1.Menus on the menu bar2.Buttons on the main toolbar and the buttons on the toolbars of TRACE32 windows3.Context menus in TRACE32 windowsAdditionally in TRACE32, you can execute commands via the TRACE32 command line.Opens the List windowProgram counter (PC)TRACE32 Command Line and SoftkeysTRACE32 commands are not case sensitive: register.view is the same as Register.view UPPER CASE letters indicate the short forms of commands and must not be omitted. All lower case letters can be omitted. This makes short forms an efficient time saver when you are entering frequently-used commands in the command line. Examples:•Instead of the long form Register.view type just the short form r or R •Instead of the long form List type just the short form l or LThe softkeys are below the command line. The camel casing (i.e. upper and lower case letters) on any softkey tells you the long form of a command. The softkeys guide you through the command input, displaying all possible commands and parameters.Example - To assemble the Data.dump command using the softkeys:1.Click Data .2.Click dump .3.Type the <range> or <address> you want to dump. For example, 0x1000--0x20004.Click [ok] to execute the command. The Data.dumpwindow opens.SoftkeysCommand lineWindow Captions - What Makes Them Special in TRACE32The command with which you open a window will be shown as the window caption. The parameters and options are also included in the window caption.You can re-insert a command from a window caption (a) into the command line (b) in order to modify the command. Let’s do this with the Register window.1.Choose View menu > Register . 2.Right-click the window caption (a).3.Modify the command, e.g. by adding the /SpotLight option: It will highlight changed registers.4.Click [ok] to execute the modified command.5.Click Single Step on the TRACE32 toolbar. Changed registers are highlighted immediately.(a)(b)Debugging the ProgramBasic Debug CommandsThe basic debug commands are available via the Run menu, the toolbar of the List window, the main toolbar, and via the TRACE32 command line.Single steppingis one of the basic debug commands.TRACE32 provides also more complex debug control commands. Y ou can step until an expression changes or becomes true.Example: Var.Step.Till i>11. single-steps the program until the variable i becomes greater than 11. Please note that TRACE32 uses a dot to denote decimal numbers.Step over function calls or subroutinesGo to the next code line written in the program listing Go Return / Go to the last instruction of the current functionUseful e.g. to leave loopsSingle StepStop the program executionGo / Start program executionGo Up / return to the caller functionStep till next unreached lineDebug ModesT ake a look at the state line at the bottom of the TRACE32 main window:6.On the toolbar of the Listwindow, clickMode to toggle the debug mode to HLL .The state line tells you:A The (symbolic) address of the current cursor position.The program counter (PC) is highlighted in gray.B The state of the debugger: stopped means program execution is stopped. Y ou can now, for example, inspect or change memory.C The state line displays the currently selected debug mode: The code display will beHLL (High Level Language) or ASM (assembler) or a MIX ed mode with HLL and its corre-sponding assembler mnemonic.AB CDebug mode HLLDebug mode MIXStep.7.ClickThe step you are taking is debug mode HLL goes to the next source code line.8.ClickMode again to toggle the debug mode to MIX.Step.9.ClickThis time, the step executes one assembler line.10.Right-click a code line, and then select Go Till.The program execution starts. It stops when the program reaches the selected code line.Displaying the Stack FrameFor the following example, let’s assume we have the following call hierarchy: main() calls func2() and func2() calls func1():Choose Show Stack in the Var menu. The Frame.view window displays the call hierarchy.•The /Locals option shows the local variables of each function.•The /Caller option shows a few source code lines to indicate where the function was called.This screenshot corresponds to the calling hierarchy shown above.BreakpointsVideo tutorials about breakpoints in TRACE32 are available here:/kb/articles/using-breakpoints-in-trace32Setting BreakpointsLet’s set a breakpoint to the instruction prime = i + i + 3 and the instruction k += prime1.Double-click a code line to set a program breakpoint.2.Make sure to click the white space in the code line, and not the code literal.All code lines with a program breakpoint are marked with a red vertical bar.T o set a breakpoint to an instruction that is not in the focus of the current source listing1.Choose Var menu > Show Function.The sYmbol.Browse.Function window opens.2.Select the function you are interested in e.g. sieve.The List window opens, displaying this function. This window is now fixed to the start address ofthe function sieve and does not move with the program counter cursor.Listing all Breakpoints1.Choose Break menu > List to list all breakpoints.The Break.List window opens, providing an overview of the set breakpoints.2.On the toolbar, clickGoto start the program execution. 3.When the program execution stops at a breakpoint, it is highlighted in the Break.List window.A Address of the breakpoint.B Breakpoint type.C Breakpoint method: SOFTware, ONCHIP or DISABLED.D Symbolic address of the breakpoint. Example:•sieve\11 means source code line 11 in function sieve .AB C DSetting Read/Write BreakpointsY ou can set a breakpoint that stops the program execution at a read or write access to a memory location(e.g. global variable). T o set a breakpoint on the array flags for instance, do a right mouse click on thearray name in the List window then select Breakpoints > Write.VariablesVideo tutorials about variable display in TRACE32 are available here:/kb/articles/variable-logging-and-monitoring-in-trace32Displaying VariablesLet’s display the variables flags, def, and ast.1.Choose Var menu > Watch...The Var.AddWatch window opens, displaying the variables known to the symbol database.2.Double-click the variable flags.The Var.Watch window opens, displaying the selected variable.steps:3. Alternative-In the Var.Watch window, click Watch, and then double-click the variables def and ast to add them to the Var.Watch window.-From a List window, drag and drop any variable you want into the Var.Watch window.-In a List window, right-click any variable, and then select Add to Watch window from the context menu.-If you want to display a more complex structure or an array in a separate window, choose Var menu >View.Displaying Variables of the Current Program Context1.Set the program counter (PC) to sieve() by typing at the TRACE32 command line:2.Choose Var menu > Show Current Vars .The Var.REF window opens, displaying all variables accessed by the current program context.3.Click Step on the TRACE32 toolbar to execute a few single steps. TheVar.REFwindow is updated automatically.Using the Symbol BrowserThe symbol browser provides an overview of the variables, functions, and modules currently stored in the symbol database.1.ChooseVar menu > Watch...The Var.AddWatch window lets you browse through the contents of the symbol database. Global variables are displayed in black and functions in gray. By double-clicking a function, its local variables are displayed.2.In the Var.AddWatch window, double-click func2.Register.Set PC sieve ;The command short form is: r.s pc sieveTo format the display of variables - global settings:1.Choose Var menu > Format.2.In the SETUP.Var window, make your settings. Decimal and Hex are useful global settings.TRACE32 applies your settings to all Var.view windows that you open afterwards.To format the display of an individual variable:1.At the command line, type: Var.view ast (The variable ast is included in this demo.)2.In the Var.view window, right-click ast, and then click Format.The Change Variable Format dialog opens.3.Select the Type check box to display the variable ast with the complete type information.4.Click Apply. The format of ast in the Var.view window is updated immediately.5.For more complex variable select TREE in the Change Variable Format dialog box.Click + and - to expandand collapse the tree.1.Double-click the variable value to modify the value. The Var.set command will be displayed in thecommand line. The short form of the command is V or v2.Enter the new value directly after the equal sign and confirm with [ok].MemoryDisplaying Memory1.To display a memory dump in a Data.dump window, do one of the following:-Choose View menu > Dump,-or click Memory Dump on the toolbar,-or, at the TRACE32 command line, type: Data.dumpY ou can also specify an address or symbol directly, e.g.: Data.dump flags2.In the Data.dump dialog, enter the data item, e.g. flags-Alternatively click to browse through the symbol database.3.In the Browse Symbols window, double-click the symbol flags to select it, and then click OK.Double-click flags.In the following screenshot, theData.dump window is called via the TRACE32 command line.There are different ways to define an address range:•<start_address>--<end_address> (SD is an access class)•<start_address>++<offset>Modifying Memory1.In a Data.dumpwindow, double-click the value you want to modify.A Data.Set command for the selected address is displayed in the command line. The short form of the command isD.S or d.s2.Enter the new value directly after %LE , and then confirm with [ok].(%LE stands for Little Endian).Data.dump SD:0x5530--SD:0x554FData.dump cstr1++0x1f /Byte ;start at cstr1 plus the next 0x1f bytesAccess Class + AddressHEX ASCIITraining Simulator and Demo Software | 21©1989-2023 L auterbach。
TRACE32系列仿真器介绍教程文件
RTXC
pSOS
– ...
深圳旋极
TRACE32为何与众不同
五、FLASH,可擦写。全序列,任选择。
TRACE32支持FLASH在线编程,FLASH(厂家) 主要有:
AMD ATMEL MICRON
MOTOROLA
FUJISTU INTEL MITSUBISHI
MACRONIX
SHARP SST ST
TI
TOSHIBA…
既支持片外FLASH,也支持片内FLASH 支持8bit、16bit、32bit总线宽度
深圳旋极
TRACE32为何与众不同
六、测软件,辨好坏。查性能,算覆盖。
TRACE32具有独特的嵌入式软件测试功能: – 程序追踪(Trace)
程序流程 选择追踪... – 函数性能测试(Performance)
仿真控制模块Emulation Controller 系统控制模块System Controller
深圳旋极
TRACE32-ICE配置方案举例
例1:简洁型,针对8位单片机
ICExxx ECC8 SCU32
深圳旋极
TRACE32-ICE配置方案举例
例2:简洁型,针对32位单片机
ICExxx ECC32 SCU32
Zilog
Infineon ...
通用性,更换仿真模块就可调试不同的芯片
深圳旋极
TRACE32为何与众不同
三、编译器,款款宜。各平台,没问题。
TRACE32支持60种以上的编译器,主要有:
ARM Borland Tasking CAD-UL Diab-SDS
Greenhills
Hitech Hiware HP
运行时间 函数嵌套... – 代码覆盖分析(Coverage)
ARM trace32 内存调试命令调试方法教程

ARM trace32 内存调试命令调试方法教程1 IEEE Standard 1149.1 - Test Access Port and Boundary-Scan Architecture既然是介绍JTAG调试,还是让我们从IEEE的JTAG调试标准开始吧。
JTAG是JOINT TEST ACTION GROUP的简称。
IEEE 1149.1标准就是由JTAG这个组织最初提出的,最终由IEEE批准并且标准化的。
所以,这个IEEE 1149.1这个标准一般也俗称JTAG调试标准。
接下来的这一部分,主要简单的介绍了TAP (TEST ACCESS PORT) 和BOUNDARY-SCAN ARCHITECTURE的基本构架。
虽然不是很全面,但对了解JTAG的基本原理来说,应该是差不离了。
如果希望更全面深入的了解JTAG的工作原理,可以参考IEEE 1149.1标准。
这篇文章主要介绍ARM JTAG调试的基本原理。
基本的内容包括了TAP (TEST ACCESS PORT) 和BOUNDARY-SCAN ARCHITECTURE的介绍,在此基础上,结合ARM7TDMI详细介绍了的JTAG调试原理。
这篇文章主要是总结了前段时间的一些心得体会,希望对想了解ARM JTAG调试的网友们有所帮助。
我个人对ARM JTAG的理解还不是很透彻,在文章中,难免会有偏失和不准确的地方,希望精通JTAG调试原理的大侠们不要拍砖,有什么问题提出来,我一定尽力纠正。
同时也欢迎对ARM JTAG调试感兴趣的朋友们一起交流学习2-1 边界扫描在JTAG调试当中,边界扫描(Boundary-Scan)是一个很重要的概念。
边界扫描技术的基本思想是在靠近芯片的输入输出管脚上增加一个移位寄存器单元。
因为这些移位寄存器单元都分布在芯片的边界上(周围),所以被称为边界扫描寄存器(Boundary-Scan Register Cell)。
trace32仿真器使用教程+
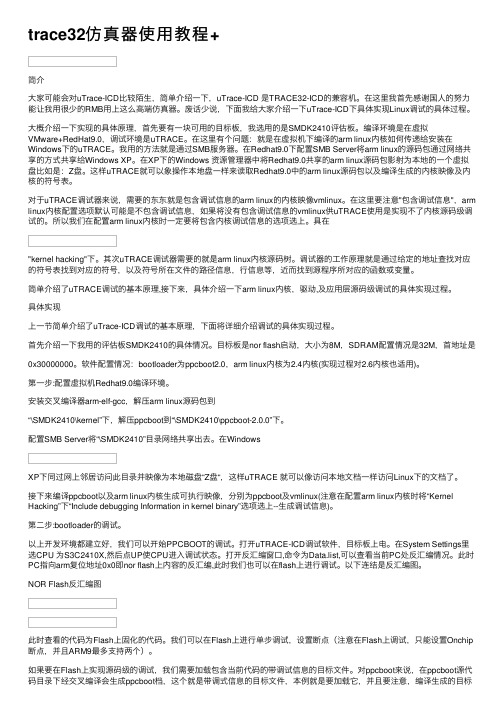
trace32仿真器使⽤教程+简介⼤家可能会对uTrace-ICD⽐较陌⽣,简单介绍⼀下,uTrace-ICD 是TRACE32-ICD的兼容机。
在这⾥我⾸先感谢国⼈的努⼒能让我⽤很少的RMB⽤上这么⾼端仿真器。
废话少说,下⾯我给⼤家介绍⼀下uTrace-ICD下具体实现Linux调试的具体过程。
⼤概介绍⼀下实现的具体原理,⾸先要有⼀块可⽤的⽬标板,我选⽤的是SMDK2410评估板。
编译环境是在虚拟VMware+RedHat9.0,调试环境是uTRACE。
在这⾥有个问题:就是在虚拟机下编译的arm linux内核如何传递给安装在Windows下的uTRACE。
我⽤的⽅法就是通过SMB服务器。
在Redhat9.0下配置SMB Server将arm linux的源码包通过⽹络共享的⽅式共享给Windows XP。
在XP下的Windows 资源管理器中将Redhat9.0共享的arm linux源码包影射为本地的⼀个虚拟盘⽐如是:Z盘。
这样uTRACE就可以象操作本地盘⼀样来读取Redhat9.0中的arm linux源码包以及编译⽣成的内核映像及内核的符号表。
对于uTRACE调试器来说,需要的东东就是包含调试信息的arm linux的内核映像vmlinux。
在这⾥要注意"包含调试信息",arm linux内核配置选项默认可能是不包含调试信息,如果将没有包含调试信息的vmlinux供uTRACE使⽤是实现不了内核源码级调试的。
所以我们在配置arm linux内核时⼀定要将包含内核调试信息的选项选上。
具在"kernel hacking"下。
其次uTRACE调试器需要的就是arm linux内核源码树。
调试器的⼯作原理就是通过给定的地址查找对应的符号表找到对应的符号,以及符号所在⽂件的路径信息,⾏信息等,近⽽找到源程序所对应的函数或变量。
简单介绍了uTRACE调试的基本原理,接下来,具体介绍⼀下arm linux内核,驱动,及应⽤层源码级调试的具体实现过程。
Trace32SimulatorforARM
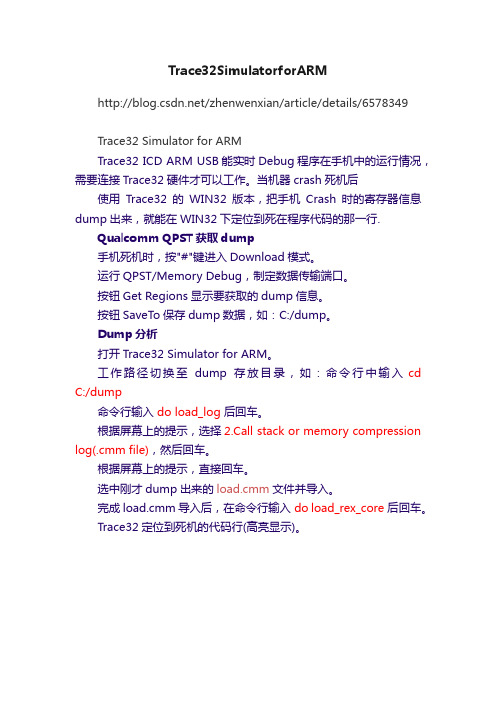
Trace32SimulatorforARM
/zhenwenxian/article/details/6578349
Trace32 Simulator for ARM
Trace32 ICD ARM USB能实时Debug程序在手机中的运行情况,需要连接Trace32硬件才可以工作。
当机器crash死机后
使用Trace32的WIN32版本,把手机Crash时的寄存器信息dump出来,就能在WIN32下定位到死在程序代码的那一行.
Qualcomm QPST获取dump
手机死机时,按"#"键进入Download模式。
运行QPST/Memory Debug,制定数据传输端口。
按钮Get Regions显示要获取的dump信息。
按钮SaveTo保存dump数据,如:C:/dump。
Dump分析
打开Trace32 Simulator for ARM。
工作路径切换至dump存放目录,如:命令行中输入cd C:/dump
命令行输入 do load_log 后回车。
根据屏幕上的提示,选择2.Call stack or memory compression log(.cmm file),然后回车。
根据屏幕上的提示,直接回车。
选中刚才dump出来的load.cmm文件并导入。
完成load.cmm导入后,在命令行输入do load_rex_core 后回车。
Trace32定位到死机的代码行(高亮显示)。
- 1、下载文档前请自行甄别文档内容的完整性,平台不提供额外的编辑、内容补充、找答案等附加服务。
- 2、"仅部分预览"的文档,不可在线预览部分如存在完整性等问题,可反馈申请退款(可完整预览的文档不适用该条件!)。
- 3、如文档侵犯您的权益,请联系客服反馈,我们会尽快为您处理(人工客服工作时间:9:00-18:30)。
1 前言
Trace32 ICD ARM USB能实时DEBUG代码在手机中的运行情况,功能强大,但需要连接TRACE32硬件才能工作。
更重要的是,对于概率性死机的BUG,用Trace32 ICD ARM USB应该是很难找到问题,因为你不能确定手机什么时候crash。
其实TRACE32还有一个WIN32版本,用户只需要把手机crash时候的寄存器信息dump出来,就能在WIN32下定位到死在代码的那一行,非常类似于EMP 平台的CHKARM工具。
这就是本文将要描述的Trace32 Simulator for ARM工具。
2 安装
WIN32版的TRACE32需要重新安装,安装文件和硬件版TRACE32是一样的,只是安装时候的选项不同,而且WIN32版的需要安装在不同的目录下(比如trace32-win32)。
z运行安装文件\trace32\bin\setup\setup.exe。
首先设置安装路径,注意不要和硬件版TRACE32安装在同一个目录下,请新建一个文件夹(比如
trace32-win32)
z选择【New Installation】,然后Next
z选择【Simulator】,这个是WIN32版TRACE32的选项(硬件版TRACE32是选择第2项,注意不要搞错了)
z选择默认值,然后Next
z选择【SIM ARM7 ARM9 ARM10 ARM11】,和硬件版TRACE32一样
z安装中,安装完毕后就可以使用了。
3 使用
首先请确保你有保存当前手机软件的原始ARM文件。
手机死机时,按“#”键进入downloading模式。
z运行【QPST】→【Memory Debug】,制指定数据线端口
z点击【Get Regions】显示将要dump的信息
z点击【SaveTo】保存dump数据
z创建保存dump数据的文件夹,建议放到Arm/ms/dump目录下
z保存dump数据,这个过程花的时间比较长
z保存完毕dump数据后,运行软件【Trace32 Simulator for ARM】首先把工作路径切换到\source\Arm\ms下
z在命令行中输入do load_log,然后按回车
z根据屏幕上的提示,选择【2. Call stack or memory compression log (.cmm file)】,然后按回车
z根据屏幕上的提示,直接按回车
z选中刚才dump出来的load.cmm文件并导入
z导入load.cmm中……
z完成load.cmm导入后,在命令行输入do load_rex_cor e 命令,并按回车
z TRACE32定位到死机的代码行(高亮显示部分),和硬件版的TRACE32一样,可以查看当前变量值等有用的信息……
分析,代码如下图所示。
4 后记
本文旨在给出一个WIN32版TRACE32的快速使用指南,预知更多细节,
请查阅TRACE32帮助文档或请教有使用经验的同事。
TRACE32提供的功能是非常强大的,使用的细节和技巧需要我们在实际工作中不断去摸索总结。
希望大家把使用心得分享出来,让TRACE32在我们的工作中发挥更大的作
用。