Liferay Portal 4 - Portlet development guide
几种开源Portal的简单介绍分析

主要包括:Pluto,Liferay,eXo,Jetspeed四种开源Portal的介绍和分析,有助于对具体项目选择合适的开发平台。
(1)Pluto2003 年10月JSR168规范1.0正式公布后,Jakarta Apache就开始实施Pluto计划(冥王星计划),最终开发出该规范的一个参考实现(Reference Implementation),即Pluto。
Pluto的1.0.1-rc2版与2004年12月发布。
Pluto实现基于 JSR168的一个 Portlet Container,相当于为开发者提供了一个运行portlets的工作平台。
Pluto本身也提供了一个简单的Portal模块,该模块仅仅是为了满足Portlet容器和JSR 168的需要而写的,因而显得非常简单,提供的实用的Portlet 也非常少。
从某种意义上说Pluto更像是一个Portlet Container,作为一个实用的Portal开发框架尚需要更强大的支持。
但新版本的Pluto仍没有推出。
对于Pluto的应用开发,Apache 更推荐使用Jetspeed项目框架。
尽管Pluto作为一个完整的Portal应用还非常欠缺。
但不少有影响力的Portal项目使用Pluto作为Portlet Container。
这些项目包括:Jetspeed 、Cocoon uPortal 、Jahia等。
由此可见Pluto的重要性。
从开发者和学习者的角度看,Pluto的意义还在于为开发者和学习者提供了一个深入了解Portlet Container的简洁的参考实例。
(2)LiferayLiferay(支持JSR168)代表了完整的J2EE应用,最高版本是2005年1月推出的Professional 3.2.0。
它的主要优点有:(1)使用第三放的开源项目,如Hibernate等。
特别是前台界面部分使用了Struts技术;(2)支持包括中文在内的多种语言;(3)支持较多的先进技术,如Web Services、EJB, JMS, SOAP, XML等;Liferay的缺点是它缺乏一个简单清晰可拓展的架构设计,整个架构比较复杂且庞大;Struts1.1本身并不支持JSR168,所以Liferay 在实现诸如上下文共享等问题上显得十分笨重且没有从根本上解决这些问题;portlet设计也显得比较凌乱。
plugins开发指南4 (续)
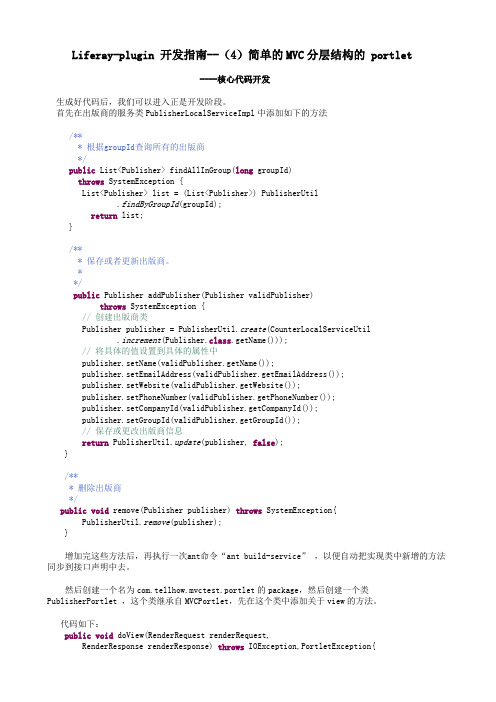
Liferay-plugin 开发指南--(4)简单的MVC分层结构的 portlet----核心代码开发生成好代码后,我们可以进入正是开发阶段。
首先在出版商的服务类PublisherLocalServiceImpl中添加如下的方法/*** 根据groupId查询所有的出版商*/public List<Publisher> findAllInGroup(long groupId)throws SystemException {List<Publisher> list = (List<Publisher>) PublisherUtil.findByGroupId(groupId);return list;}/*** 保存或者更新出版商。
**/public Publisher addPublisher(Publisher validPublisher)throws SystemException {// 创建出版商类Publisher publisher = PublisherUtil.create(CounterLocalServiceUtil.increment(Publisher.class.getName()));// 将具体的值设置到具体的属性中publisher.setName(validPublisher.getName());publisher.setEmailAddress(validPublisher.getEmailAddress());publisher.setWebsite(validPublisher.getWebsite());publisher.setPhoneNumber(validPublisher.getPhoneNumber());publisher.setCompanyId(validPublisher.getCompanyId());publisher.setGroupId(validPublisher.getGroupId());// 保存或更改出版商信息return PublisherUtil.update(publisher, false);}/*** 删除出版商*/public void remove(Publisher publisher) throws SystemException{PublisherUtil.remove(publisher);}增加完这些方法后,再执行一次ant命令“ant build-service” ,以便自动把实现类中新增的方法同步到接口声明中去。
LifeRay Portal 6学习笔记6使用Struts2开发Portlet

准备Liferay版本:6.0.4开发模式:普通插件模式(非Ext)Struts版本:2.1.8.1环境使用到的Struts2相关jar包如下:antlr-2.7.2.jarcommons-fileupload-1.2.1.jar freemarker-2.3.15.jarognl-2.7.3.jarstruts2-core-2.1.8.1.jarstruts2-portlet-plugin-2.1.8.1.jar xwork-core-2.1.6.jar工程目录如下:参考内容参考Struts2自带的portlet示例struts2-portlet-2.1.8.1.war,在Struts 解压包下面的apps目录里面,这个示例是基于Pluto(/pluto/)Apache的Portal实现,但开发的都是portlet,所以可以参考这个。
开发示例代码portlet.xmlXml代码1.<portlet>2.<portlet-name>StrutsPortlet</portlet-name>3.<display-name>Struts Test Portlet</display-name>4.5.<portlet-class>org.apache.struts2.portlet.dispatcher.Jsr168Dispatcher</portlet-class>6.7. <!--这里的name名字不能修改,value对应于Struts.xml文件里面的配置-->8.<init-param>9.<name>viewNamespace</name>10. <value>/strutsDemoView</value>11. </init-param>12.13. <!-- 对应Struts.xml中设置的默认action -->14. <init-param>15. <name>defaultViewAction</name>16. <value>index</value>17. </init-param>18.19. <init-param>20. <name>editNamespace</name>21. <value>/strutsDemoEdit</value>22. </init-param>23.24. <init-param>25. <name>defaultEditAction</name>26. <value>index</value>27. </init-param>28.29. <expiration-cache>0</expiration-cache>30.31. <!-- 支持view、edit,和前面的portlet一样 -->32. <supports>33. <mime-type>text/html</mime-type>34. <portlet-mode>view</portlet-mode>35. <portlet-mode>edit</portlet-mode>36. </supports>37.38. <portlet-info>39. <title>My StrutsPortlet portlet</title>40. <short-title>SP</short-title>41. <keywords>struts,portlet</keywords>42. </portlet-info>43. </portlet>liferay-portlet.xmlXml代码1.<portlet>2.<portlet-name>StrutsPortlet</portlet-name>3.<instanceable>true</instanceable>4.</portlet>liferay-display.xmlXml代码1.<portlet id="StrutsPortlet"></portlet>Struts.xmlXml代码1.<?xml version="1.0"encoding="UTF-8"?>2.<!DOCTYPE struts PUBLIC3. "-//Apache Software Foundation//DTD Struts Configuration 2.0//EN"4. "/dtds/struts-2.0.dtd">5.6.<struts>7.<package name="strutsDemoView"namespace="/strutsDemoView"extends="struts-portlet-default">8.<action name="index"method="view"class="org.huqiwen.study.StrutsDemo">9.<result name="success">/strutsDemoView/view.jsp</result>10. </action>11. <action name="portletView"method="portletView"class="org.huqiwen.study.StrutsDemo">12. <result name="view">/strutsDemoView/viewMode.jsp</result>13. </action>14. </package>15.16.17. <package name="strutsDemoEdit"namespace="/strutsDemoEdit"extends="struts-portlet-default">18. <action name="index"method="edit"class="org.huqiwen.study.StrutsDemo">19. <result name="success">/strutsDemoEdit/edit.jsp</result>20. </action>21. <action name="portleEdit"method="portletEdit"class="org.huqiwen.study.StrutsDemo">22. <result name="edit">/strutsDemoEdit/editMode.jsp</result>23. </action>24. </package>25.</struts>java文件Java代码1.import com.opensymphony.xwork2.ActionSupport;2.3.public class StrutsDemo extends ActionSupport {4.5. private static final long serialVersionUID = 1L;6.7. private String message;8.9. public String getMessage(){10. return message;11. }12. public void setMessage(String message){13. this.message=message;14. }15. public String view() throws Exception {16. message = "hello Struts2 View Portlet!";17. return SUCCESS;18. }19. public String portletView(){20. return "view";21. }22. public String edit() throws Exception {23. message = "hello Struts2 Edit Portlet!";24. return SUCCESS;25. }26. public String portletEdit(){27. return "edit";28. }29.}strutsDemoView/view.jspHtml代码1.<%@ page contentType="text/html;charset=utf-8"%>2.<%@ taglib prefix="s"uri="/struts-tags"%>3.<h2><s:property value="message"/></h2>4.<s:form action="portletView!portletView.action"method="post"namespace="view">5.<s:textfield label="名字"key="message"></s:textfield>6.<s:submit value="提交"></s:submit>7.</s:form>其他的JSP不写了,和普通的Strtus2开发一样。
liferay portal

Liferay研究(一):初步在新Tomcat下部署从现在开始,会把我最近在研究的开源Portal Liferay一些心得贴出来。
研究Liferay版本:Liferay Professional 4.0.0柯自聪兄弟写过一系列的Liferay Portal开发文章,参考/ea moi/。
所以基础性内容,本文不再细说,可参考柯自聪的文章或Blog。
(一)部署Liferay PortletLiferay简单部署一个portlet并不是很复杂,通过WEB-INF目录下的portlet.xm l、liferay-portlet.xml、liferay-display.xml描述即可。
描述portlet.xml portlet.xml用来定义Portlet的诸如部署名称、初始化参数、支持模式、re source bundle等普通的初始化信息,包括:portlet-name、display-name、portlet-class、init-param、expiration-cathe、supports、portlet-info、security-role-ref 等等。
其正式的规范请参考:/xml/ns/Portlet/Portlet-app_1_0. xsdliferay-portlet.xml 定义Portlet默认可用的用户组、默认模板、是否支持多个实例等,规范由/dtd/liferay-Portlet-app_3_5_0.dtdliferay-display.xml 定义Portlet默认的所属类别。
Liferay Portal对Portlet实行按类别管理和划分用户权限。
Liferay是基于Struts Template页面模版技术来实现页面的,所以Liferay默认提供了com.liferay.portlet.StrutsPortlet这个Portlet Class来完成Portlet处理的;当然为了简单对普通jsp页面的处理,Liferay也提供了com.liferay.portlet.JSPPortlet等其他Portlet Class。
liferay portal
Community(社区)1、Liferay Portal的Community(社区)概述用户手册里面是这么说的:一个社区是由有相同爱好或技术兴趣的用户组成的,一个用户可以属于任意多个的社区。
赋给某个社区的权限也会自动地赋给这个社区里的用户。
说到这里就顺便说说Liferay Portal的另外一个概念User Group, User Group的概念跟上述Community的概念完全类似,也是由一些用户组成的,并且能够继承分配给这个组的权限. 他们的不同点在于一个Community必须至少包含一个页面, 但是User Group不能有自己的页面.系统中默认有CMS, Support, Guest三个Community,另外每个Power User或者Administrator角色的用户第一次登录后, Liferay会自动地创建一个只属于这个用户的Commnunity.社区还有开放(Open)和关闭(Close)之分,开放社区就是来去自由,某个用户想来就来,想走就走.关闭社区想增加新成员,必须要通过管理员来增加.Open communities allow a user to join or leave them at any time without any type of approval from Administrators. Closed communities can only receive new users who are explicitly assigned by Administrators. These concepts will also be discussed in a later section.如果一个用户属于多个Community,选择上述的弹出功能图标中的一个【My Place】图标,会出现一个所有社区的下拉框, 选择你要的那个就可以了.上面说过,一个Community必须有自己的页面(数量不限),每个页面可以有多个Portlet. 真是说起来容易,我想自定义一下社区的页面,结果花了大半天时间.Without pages, a community is just an empty shell. All portlets in the portal are displayed on pages. They can be thought of as desktops on which you put your portlet applications. The desktops can be shared with other users or they can be restricted for your own personal use. By default, if a user is given the Power User role, that user is given a personal community that only he/she can access, and he/she has permissions to do anything in that community. Under the My Places menu, that community will appear as the user's name.社区的页面还分Public和Private, Pubilc页面可以让Guest访问(通过设置FrendlyUrl); Private页面必须登录后才能访问到A public page is a page in your community that can be accessed by guests. As long as the guest has the appropriate URL (Friendly URLs will be discussed in the next section), the guest haspermission to access any public page.A private page is a page in your community that can only be accessed by logged in users who are part of your community. If a user is not logged in (i.e., the user is a guest) or if a user does not belong to your community, then the user cannot access your private page.下面以添加一个名为My Community的社区,并自定义这个社区页面为例,说明这个问题. 具体的操作是:1、以管理员身份登录2、用Add Content功能把"Communities" Portalet添加到管理员默认的社区页面里面来.3、点击"Communities" Portalet里的"Current"链接,出现目前所有的Community(就是默认的那三个).4、点击上面的Add按钮,添加一个叫MyCommunity的社区,并把Open选项勾上.5、点击save按钮,回到社区列表页面,点击MyCommunity后面的Pages图标,出现页面编辑窗口6、因为这个社区还没有页面,所以左边只有一个光秃秃的电脑图标.在右边的Name文本框填如新的页面名称(如page1),点击"Add page"按钮.7、现在可以看到电脑图标下多了一个page1.其他的子页面也可以用类似的方法添加.8、用弹出的功能图标"路标"图标,转到MyCommunity(Public)页面,再用Add Content功能添加你想要的Portalet.这样就完成了.2、存储社区的表在Liferay Portal的数据库中的表Group_代表社区,在Liferay以前的老版本中,社区被称为组;如果Group_表中字段classNameId和字段classPk为0,则代表社区。
Liferay 使用手册

Liferay 使用手册
刘建军
os9@
1.快速入门
1.1. 安装
去liferay官方网站上下载liferay-portal-tomcat-4.2.2.zip,直接解压就可以,然后执行liferay-portal-tomcat-4.2.2\bin\startup.bat命令,显示liferay已经启动
1.2. 测试
在浏览器上输入:http://localhost:8080/
1.3. 登录
用户名:test@ 密码:
test
登录后界面如下:
1.4. 添加portlet
然后在左边出现如下画面,就可以选择自己想要的portlet 了。
从这里进入 添加portlet
2.高级使用
2.1. 增加新用户
从这里进入
保存就完成添加
用户建立后,在这里改密码在这里可以将用户添加到组织或区域中
喜欢中文?
这里改改就行
2.2. 给用户增加角色
第一步:进入角色标签页
先选中角色,
再点击分配第二步:找到要添加到adminstrator角色的用户
2.3. 增加组织
与添加用户类似2.4. 增加地域
与添加用户类似先点击可用的再更新关联关系
2.5. 变更主题
从这里进入
选你所爱。
Liferay 6开发指南

Liferay 6.0开发指南1. 介绍1、已有的应用集成方法:将应用重写为一个Portlet创建一个简单的Portlet整合应用(一般使用Web Service),可以使用iframe或http 代理(可以使用Liferay's WebProxy portlet)。
已有的应用要像部署门户插件一样,把WAR文件部署到应用服务器里,可以使用控制面板或直接复制的方式完成。
Liferay可以自动创建一个Portlet通过iframe集成已有应用。
2、自定义主题风格(Themes)3、自定义布局模板(Layout Templates)4、自定义或扩展门户功能:Hook plugins)Hook plugins可以用来扩展Liferay的核心功能。
5、高级扩展方式:Ext plugins扩展插件可以允许开发人员修改Liferay的核心部分,可以修改任何一个类。
扩展插件部署之后需要重新启动应用服务器。
Liferay 6.0之后用Ext plugins的开发方式替换了原来的Ext Environment开发方式,这样可以简化部署。
之前的扩展环境可以转换为一个独立的插件。
2. 插件开发工具包(THE PLUGINS SDK)2.1 安装Liferay1、下载Liferay Portal bundled with Tomcat;/downloads2、下载Plugins SDK;3、删除liferay-portal-[version]/tomcat-[tomcatversion]/webapps 除ROOT和tunnel-web目录的其他所有文件夹。
4、打开liferayportal-[version]/tomcat-[tomcat-version]/bin目录,运行startup.bat,启动Liferay。
5、http://localhost:8080,默认帐号/密码:test@/test。
6、设置环境变量ANT_HOME,将$ANT_HOME/bin加入到PATH环境变量中。
Jaspersoft 商务智能系统
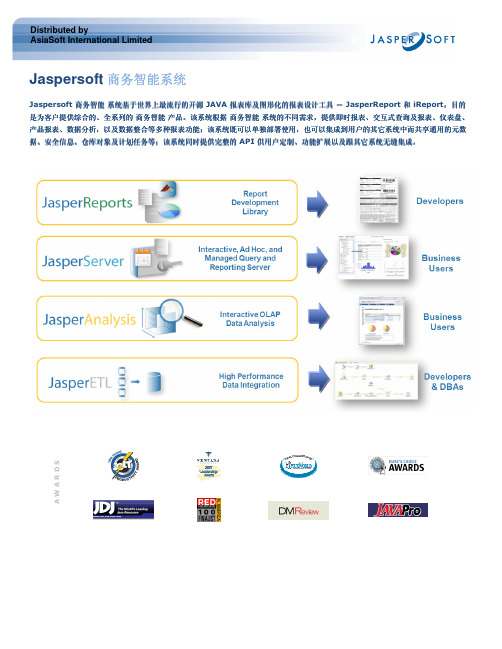
Distributed by AsiaSoft International LimitedJaspersoft 商务智能系统 商务智能系统Jaspersoft 商务智能 系统基于世界上最流行的开源 JAVA 报表库及图形化的报表设计工具 - JasperReport 和 iReport,目的 系统基于 基于世界上最流行的开源 , 是为客户提供综合的、 产品。
系统根据 系统的不同需求 提供即时报表 交互式查询及报表、仪表盘、 的不同需求, 即时报表、 查询及报表 是为客户提供综合的、全系列的 商务智能 产品。
该系统根据 商务智能 系统的不同需求,提供即时报表、交互式查询及报表、仪表盘、 产品报表、数据分析,以及数据整合等多种报表功能; 系统既可以单独部署使用, 产品报表、数据分析,以及数据整合等多种报表功能;该系统既可以单独部署使用,也可以集成到用户的其它系统中而共享通用的元数 既可以单独部署使用 供用户定制、功能扩展以及跟其它系统无缝集成 扩展以及跟其它系统无缝集成。
据、安全信息、仓库对象及计划任务等;该系统同时提供完整的 API 供用户定制、功能扩展以及跟其它系统无缝集成。
安全信息、仓库对象及计划任务等; 系统同时提供完整的 信息 对象及计划任务等AWARDSDistributed by AsiaSoft International Limited基于 Web 2.0 的 商务智能 系统系统的设计初衷是适合不懂技术的商业人员使用,并为其提供看第一 眼就能够使用的系统,包括广泛使用 AJAX、DHTML 等 Web 2.0 的技术 MDX、EJBs 以及 Hibernate;•部署即运行 – 作为系统便利,Tomcat、MySQL 及 Liferay Portal 都已经捆绑到安装包中。
无缝集成、 无缝集成、内嵌以及系统扩展性•基于 Web 2.0 的用户界面 – 完全基于浏览器的采用 AJAX、 DHTML 技术的交互式用户界面,提供用户拖拽功能,同时可 以方便的嵌入/集成到用户的其它基于 Web 的系统; Ad Hoc 报表设计器 – 基于 Web 2.0 技术的报表工具,使得 用户可以很方便的创建各种数据表及报表,包括:交叉表、图 表,可以很方便的在现有报表中增加计算域,改变现有排序以 及报表样式等; Ad Hoc 仪表盘设计器 – 使用 Web 2.0 技术创建“闪亮的” 或自动刷新的关键工作情况指示器,用户仅需瞄一眼即可了解 实时的工作情况汇报,同时支持关联外部数据创建混合仪表 盘; 数据源无关的直观商业视图(或称为“域”) – 提供元数据及 查询的数据源抽象引擎,使用户通过直观的商业视图,仅需点 击鼠标即可完成查询,而毋须了解复杂的数据库技术或术语; 基于 URL 定位的内容 – 所有报表、仪表盘以及分析视图都可 以 通过参数化的 URL 地址访问,以被其它系统引用; iReport –强大的图形化的高级报表设计工具。
portal.properties说明

#Session控制
session.timeout=30
session.timeout.warning=1
session.timeout.auto.extend=false
#隐藏没权限的Portlet
layout.show.portlet.access.denied=false
#设置认证登陆的页面
auth.login.url=/web/12702/1
#设置登出后的页面路径
default.logout.page.path=/web/12702
#设置默认的用户角色
s=Power User\nUser
yout.column-1=
yout.column-2=
yout.column-3=
yout.column-4=
#设置默认的用户模板
layout.default.template.id=2_columns_ii
layout.guest.show.min.icon=false
#权限设置的读取路径
resource.actions.configs=resource-actions/default.xml
#设置默认的用户头像
er.female.portrait=com/liferay/portal/dependencies/user_female_portrait.gif
open.id.auth.e的协议页面
e.required=true
#默认用户布局
#可以自己设置上面要放的Portlet。
=Home
yout.template.id=3_columns
#隐藏不活动的Portlet
开源平台Portal liferay介绍

开源平台Portal liferay介绍:一、平台已经提供的功能:1.个性化平台2.基本的portlet组件(用户管理、组织机构管理、角色管理、portlet管理、日历、论坛、博客、文档库、图片库、CMS)3.与其他开源项目的集成单点登陆:CAS工作流:JBPM即时通讯:jabber邮件:4.移动门户5.功能扩展二、平台相关分析1.技术构成:2.权限结构01.用户管理02.组织机构管理03.权限划分:用户-用户组-角色-portlet 3.portal应用的目录结构4.对外服务:已提供服务接口三、二次开发1.jsr168标准01.与servlet的异同Portlet 和 Servlet 的相似之处Portlet 也是 Java 技术的 web 组件Portlet 也是有特定的 container 在管理Portlet 可以动态产生各种内容Portlet 的生命周期由 container 所管理Portlet 和客户端的互动是通过 request/response 的机制Portlet 和 Servlet 的一些不同Portlet 只产生 markup 信息片段,不是完整的网页文件。
而 Portal 会将所有的Portlet markup 信息片段放到一个完整的 Portal 网页。
Portlet 不会和 URL 有直接的关系客户端必须通过 portal 系统才能和 Portlet 互动Portlet 有一些定义好的 request 处理,action request 以及 render request。
Portlet 默认定义 Portlet modes 及窗口状态可以指出在网页中该 Portlet 的哪个功能正在执行及现在的状态。
Portlet 可以在同一个 portal 网页之中存在多个。
Portlet 有一些附加的功能是 Servlet 所没有的Portlet 能够存取及储存永久配置文件及定制资料。
liferay配置
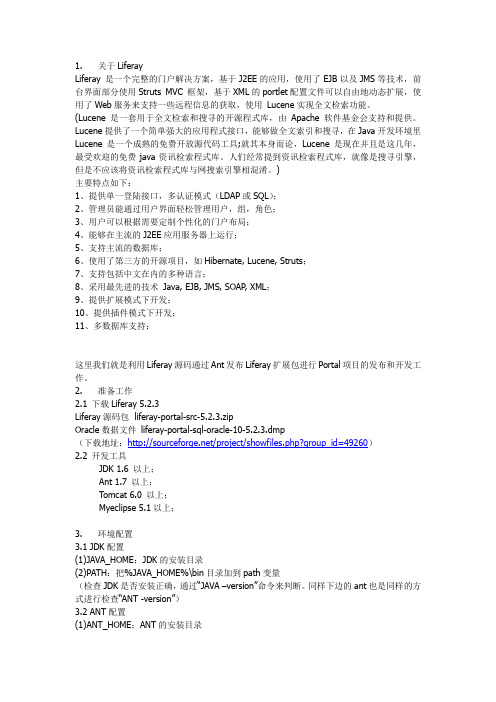
1. 关于LiferayLiferay 是一个完整的门户解决方案,基于J2EE的应用,使用了EJB以及JMS等技术,前台界面部分使用Struts MVC 框架,基于XML的portlet配置文件可以自由地动态扩展,使用了Web服务来支持一些远程信息的获取,使用Lucene实现全文检索功能。
(Lucene是一套用于全文检索和搜寻的开源程式库,由Apache软件基金会支持和提供。
Lucene提供了一个简单强大的应用程式接口,能够做全文索引和搜寻,在Java开发环境里Lucene是一个成熟的免费开放源代码工具;就其本身而论,Lucene是现在并且是这几年,最受欢迎的免费java资讯检索程式库。
人们经常提到资讯检索程式库,就像是搜寻引擎,但是不应该将资讯检索程式库与网搜索引擎相混淆。
)主要特点如下:1、提供单一登陆接口,多认证模式(LDAP或SQL);2、管理员能通过用户界面轻松管理用户,组,角色;3、用户可以根据需要定制个性化的门户布局;4、能够在主流的J2EE应用服务器上运行;5、支持主流的数据库;6、使用了第三方的开源项目,如Hibernate, Lucene, Struts;7、支持包括中文在内的多种语言;8、采用最先进的技术Java, EJB, JMS, SOAP, XML;9、提供扩展模式下开发;10、提供插件模式下开发;11、多数据库支持;这里我们就是利用Liferay源码通过Ant发布Liferay扩展包进行Portal项目的发布和开发工作。
2. 准备工作2.1 下载Liferay 5.2.3Liferay源码包 liferay-portal-src-5.2.3.zipOracle数据文件liferay-portal-sql-oracle-10-5.2.3.dmp(下载地址:/project/showfiles.php?group_id=49260)2.2 开发工具JDK 1.6 以上;Ant 1.7 以上;Tomcat 6.0 以上;Myeclipse 5.1以上;3. 环境配置3.1 JDK配置(1)JAVA_HOME:JDK的安装目录(2)PATH:把%JAVA_HOME%\bin目录加到path变量(检查JDK是否安装正确,通过“JAVA –version”命令来判断。
Liferay-Portal架构

Liferay Portal系统架构点滴原文地址: /web/guest/documentation/architecture目录Liferay Portal系统架构点滴 (1)目录 (1)I、综述 (1)II、Portlet 应用接口(JSP168) (2)III、Struts 和 Tiles (2)IV、Session EJBs、Spring和Hibernate (3)V、SAOP、RMI和Tunneling (5)VI 应用服务器 (6)I、综述用户可以通过传统的或者无线网络的方式访问portal。
开发者可以通过SOAP、RMI和自己定义的通道类访问暴露的API来操作portal。
II、Portlet 应用接口(JSP168)Liferay设计成为部署符合(JSP168)Portlet 应用接口的Portlet。
很多有用的Portlet(比如邮件、Liferay文档、日立、公告版和其他)已经跟portal绑定,而且可以作为添加自定义的Portlet的范例。
III、Struts 和 Tiles所有的HTTP和WAP请求都通过MainServlet响应,MailServlet扩展了Struts基类ActionServlet。
MainServlet处理所有的请求,使得每个请求都路由到合适的PortletAction。
想要更好的理解portal的web框架请参考Struts。
Portal的布局信息通过定制的模板管理。
想要更好的理解Tiles如何管理布局的,请参考Tile的相关文章。
IV、Session EJBs、Spring和HibernateLiferay不再依赖EBJ,可以部署在标准的servlet容器中。
所有的业务逻辑都集中在可以被Spring查找和实例化的POJO实现中。
这些实现都可以通过Spring的AOP和IOC修改或者强化。
Portal 企业版使用Session EJB包装POJO实现,以为大型网站提供所需的重量级扩展和事务支持。
Liferay6实例教程

Liferay6Development DocumentationTABLE OF CONTENTS1.PREFACE ............................................................................................ 错误!未定义书签。
W HAT'S COVERED.................................................................................... 错误!未定义书签。
P REREQUISITE SOFTWARE ......................................................................... 错误!未定义书签。
A SSUMPTION........................................................................................... 错误!未定义书签。
2.LIFERAY INSTALLATION AND CONFIGURATION ......................... 错误!未定义书签。
D OWNLOAD ............................................................................................ 错误!未定义书签。
JDK I NSTALLATION................................................................................ 错误!未定义书签。
M Y SQL I NSTALLATION............................................................................. 错误!未定义书签。
CAS登录验证(密码MD5、SHA加密后,再进行Base64加密实现代码),与Liferay的用户身份验证对应
定制CAS登录验证,用Liferay的用户身份进行验证摘要本文以Liferay与CAS整合为例,将CAS登录验证从输入相同的用户名/密码定制为以Liferay的用户身份进行验证。
环境∙MySQL5.0.5∙JRE 1.6.0.7∙Ubuntu 8.04∙Liferay 5.1.1 Bundled with Tomcat 6.0∙CAS Server 3.3.1∙Yale CAS Client 2.0.11∙NetBeans IDE 6.1在进行本文示例前,请参考这里。
新建工程打开NetBeans IDE,新建Java Class Library工程:PortalAuthHandler。
添加依赖包从CAS中的lib下找到如下jar:∙cas-server-core-3.3.jar∙inspektr-core-0.7.0.jar下载spring-core.jar(2.5.5),点这里。
将这三个jar包添加到工程PortalAuthHandler下。
编写测试用例在Test Packages下建立测试用例,代码如下:package com.jinfonet.developer.portal;import junit.framework.TestCase;import org.jasig.cas.authentication.handler.PasswordEncoder;/**** @author 88250 <DL88250@>*/public final class Base64PasswordEncoderTests extends TestCase {private final PasswordEncoder passwordEncoder = new Base64PasswordEncoder("SHA1");public void testHashBase64Encoded() {assertEquals("qUqP5cyxm6YcTAhz05Hph5gvu9M=", this.passwordEncoder.encode("test")); }public void testNullPassword() {assertEquals(null, this.passwordEncoder.encode(null));}public void testInvalidEncodingType() {final PasswordEncoder pe = new Base64PasswordEncoder("invalid encoding");try {pe.encode("test");fail("exception expected.");} catch (final Exception e) {return;}}}这个测试用例有三个测试方法,其中HashBase64Encoded最为重要。
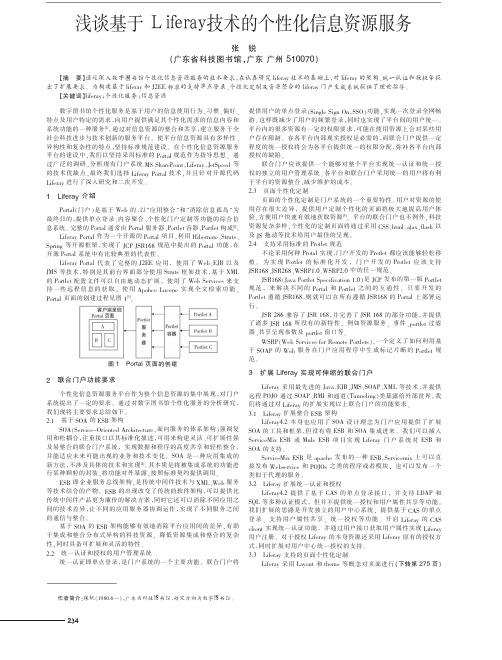
基于Liferay技术的个性化信息资源服务
数字图书馆个性化服务是基于用户的信息使用行为、习惯、偏好、特点及用户特定的需求,向用户提供满足其个性化需求的信息内容和系统功能的一种服务[1]。
通过对信息资源的整合和共享,建立服务于全社会科技进步与技术创新的服务平台。
使平台信息资源具有多样性、异构性和复杂性的特点,坚持标准规范建设。
在个性化信息资源服务平台的建设中,我们以坚持采用标准的Portal 规范作为指导思想。
通过广泛的调研,分析现有门户系统MS SharePoint ,Liferay ,JetSpeed 等的技术优缺点,最终我们选择Liferay Portal 技术,并且针对开源代码Liferay 进行了深入研究和二次开发。
1Liferay 介绍Portal (门户)是基于Web 的,以“应用整合”和“消除信息孤岛”为最终目的,提供单点登录、内容聚合、个性化门户定制等功能的综合信息系统。
完整的Portal 通常由Portal 服务器、Portlet 容器、Portlet 构成[2]。
Liferay Portal 作为一个开源的Portal 项目,利用Hibernate 、Struts 、Spring 等开源框架,实现了JCP JSR168规范中提出的Portal 功能,在开源Portal 系统中有比较典型的代表性。
Liferay Portal 代表了完整的J2EE 应用,使用了Web 、EJB 以及JMS 等技术,特别是其前台界面部分使用Struts 框架技术,基于XML 的Portlet 配置文件可以自由地动态扩展,使用了Web Services 来支持一些远程信息的获取,使用Apahce Lucene 实现全文检索功能。
Portal 页面的创建过程见图1[3]。
图1Portal 页面的创建2联合门户功能要求个性化信息资源服务平台作为整个信息资源的集中展现,对门户系统提出了一定的要求。
通过对数字图书馆个性化服务的分析研究,我们现将主要要求总结如下。
Liferay_You_do_not_have_permission_to_view_this_page
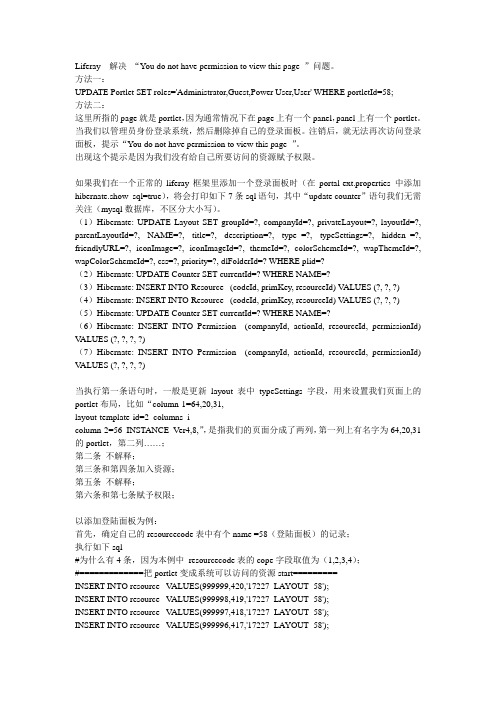
Liferay 解决“You do not have permission to view this page ”问题。
方法一:UPDATE Portlet SET roles='Administrator,Guest,Power User,User' WHERE portletId=58;方法二:这里所指的page就是portlet,因为通常情况下在page上有一个panel,panel上有一个portlet。
当我们以管理员身份登录系统,然后删除掉自己的登录面板。
注销后,就无法再次访问登录面板,提示“You do not have permission to view this page ”。
出现这个提示是因为我们没有给自己所要访问的资源赋予权限。
如果我们在一个正常的liferay框架里添加一个登录面板时(在portal-ext.properties 中添加hibernate.show_sql=true),将会打印如下7条sql语句,其中“update counter”语句我们无需关注(mysql数据库,不区分大小写)。
(1)Hibernate: UPDATE Layout SET groupId=?, companyId=?, privateLayout=?, layoutId=?, parentLayoutId=?, NAME=?, title=?, description=?, type_=?, typeSettings=?, hidden_=?, friendlyURL=?, iconImage=?, iconImageId=?, themeId=?, colorSchemeId=?, wapThemeId=?, wapColorSchemeId=?, css=?, priority=?, dlFolderId=? WHERE plid=?(2)Hibernate: UPDATE Counter SET currentId=? WHERE NAME=?(3)Hibernate: INSERT INTO Resource_ (codeId, primKey, resourceId) VALUES (?, ?, ?) (4)Hibernate: INSERT INTO Resource_ (codeId, primKey, resourceId) VALUES (?, ?, ?) (5)Hibernate: UPDATE Counter SET currentId=? WHERE NAME=?(6)Hibernate: INSERT INTO Permission_ (companyId, actionId, resourceId, permissionId) V ALUES (?, ?, ?, ?)(7)Hibernate: INSERT INTO Permission_ (companyId, actionId, resourceId, permissionId) V ALUES (?, ?, ?, ?)当执行第一条语句时,一般是更新layout表中typeSettings字段,用来设置我们页面上的portlet布局,比如“column-1=64,20,31,layout-template-id=2_columns_icolumn-2=56_INSTANCE_Ver4,8,”,是指我们的页面分成了两列,第一列上有名字为64,20,31的portlet,第二列……;第二条不解释;第三条和第四条加入资源;第五条不解释;第六条和第七条赋予权限;以添加登陆面板为例:首先,确定自己的resourcecode表中有个name =58(登陆面板)的记录;执行如下sql#为什么有4条,因为本例中resourcecode表的cope字段取值为(1,2,3,4);#=============把portlet变成系统可以访问的资源start=========INSERT INTO resource_ V ALUES(999999,420,'17227_LAYOUT_58');INSERT INTO resource_ V ALUES(999998,419,'17227_LAYOUT_58');INSERT INTO resource_ V ALUES(999997,418,'17227_LAYOUT_58');INSERT INTO resource_ V ALUES(999996,417,'17227_LAYOUT_58');#=============把portlet变成系统可以访问的资源end=========#=============把为资源设定权限编号start=========INSERT INTO permission_ V ALUES(999999,3901,'CONFIGURATION',999999);INSERT INTO permission_ V ALUES(999998,3901,'VIEW',999999);INSERT INTO permission_ V ALUES(999997,3901,'CONFIGURATION',999998);INSERT INTO permission_ V ALUES(999996,3901,'VIEW',999998);INSERT INTO permission_ V ALUES(999995,3901,'CONFIGURATION',999997);INSERT INTO permission_ V ALUES(999994,3901,'VIEW',999997);INSERT INTO permission_ V ALUES(999993,3901,'CONFIGURATION',999996);INSERT INTO permission_ V ALUES(999992,3901,'VIEW',999996);#=============把为资源设定权限编号end=========#=============把权限分配给guest用户组,此处guest的groupId=28140 start========= INSERT INTO roles_permissions V ALUES(28140,999999);INSERT INTO roles_permissions V ALUES(28140,999998);INSERT INTO roles_permissions V ALUES(28140,999997);INSERT INTO roles_permissions V ALUES(28140,999996);INSERT INTO roles_permissions V ALUES(28140,999995);INSERT INTO roles_permissions V ALUES(28140,999994);INSERT INTO roles_permissions V ALUES(28140,999993);INSERT INTO roles_permissions V ALUES(28140,999992);#=============把权限分配给guest用户组,此处guest的groupId=28140 end=========有些时候还会牵扯到groups_permissions 或者其他表,这样问题就更复杂了。
liferayportal评估报告-二七老泉

Liferay Portal评估报告- 二七老泉Liferay Portal评估报告Portal这里所说的Portal是指JCP-JSR168规范所描述的:Portal是一个基于Web的应用,通常它提供个性化、单点登录、内容集成和显示等功能。
Portal技术包括三个方面:1)Portal服务器(Portal Server);2)Portlet容器;(Portlet Container)3)Portlet。
1) Portal Server 的定义是一个Portal(门户网站)就是指一个Web-based 的系统,通常都会提供个人化设置、单一登陆、以及由各种不同来源或不同网站取得各式各样的信息,并且将这些信息放在网页之中组合而成的呈现平台,门户网站会有精巧的个人化设置去提供定制的网页,当不同等级的使用者来浏览该页面将获得不同的信息内容。
负责接收HTTP请求,调用portlet,并将portlet产生的内容聚集到portal page返回给客户。
2) Portlet Container 的定义是portlet container 是提供portlets 执行的环境,包含了许多portlets 并且管理他们的生命周期,他也会永远保存着portlets 的喜好设置,一个portlet container 接收到来自portal 的请求后,接着将这个请求传递给存在container 的portlet 执行。
portlet container 没有义务去组合portlets 产生的信息內容,这个工作必须由portal 来处理。
portal 和portlet container 可以放在一起视为同一个系统的组件,或者分开成为两个独立的组件。
负责提供portlet的运行时环境,管理portlet的生命周期,还负责提供portlet持久化能力。
3) Portlet 的定义是一个Portlet 是以Java 技术为技术的Web 组件,由Portlet Container 所管理,专门处理客户的request 以及产生各种动态的信息内容。
liferay技巧
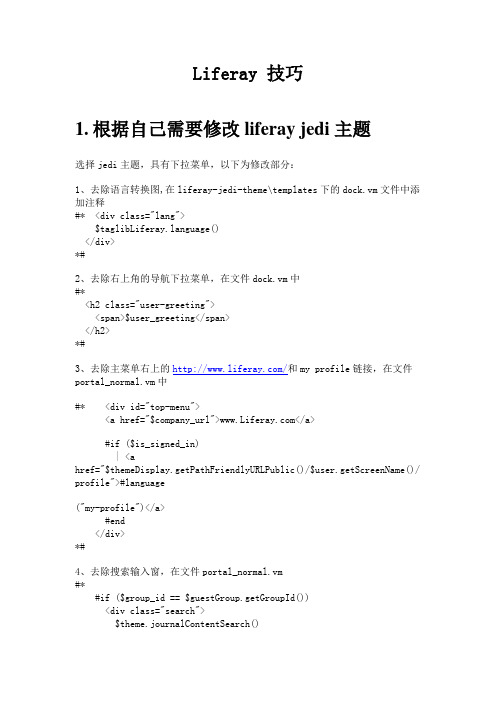
Liferay 技巧1.根据自己需要修改liferay jedi主题选择jedi主题,具有下拉菜单,以下为修改部分:1、去除语言转换图,在liferay-jedi-theme\templates下的dock.vm文件中添加注释#* <div class="lang">$nguage()</div>*#2、去除右上角的导航下拉菜单,在文件dock.vm中#*<h2 class="user-greeting"><span>$user_greeting</span></h2>*#3、去除主菜单右上的/和my profile链接,在文件portal_normal.vm中#* <div id="top-menu"><a href="$company_url"></a>#if ($is_signed_in)| <ahref="$themeDisplay.getPathFriendlyURLPublic()/$user.getScreenName()/ profile">#language("my-profile")</a>#end</div>*#4、去除搜索输入窗,在文件portal_normal.vm#*#if ($group_id == $guestGroup.getGroupId())<div class="search">$theme.journalContentSearch()</div>#end#if ($update_available_url)<div class="popup-alert-notice"><a class="update-available" href="$update_available_url">#language ("updates-are-available-for-liferay")</a></div>#end*#5、左上角logo图标文件为custom/logo.png6、右上角下拉菜单我的帐户去除等#*#if ($show_my_account)<li class="my-account"><a href="$my_account_url">$my_account_text</a></li>#end*#7、去除公司logo链接,在文件portal_normal.vm<h1 class="logo">#* <a class="png" href="$company_url">$company_name</a>*#<a class="png">$company_name</a></h1>8、主菜单默认颜色为images\custom\下的bg.png9、ie上的ico图标在images\liferay.ico2.Liferay中如何让无权访问的Portlet隐藏?layout.show.portlet.access.denied=false未验证3.提高liferay性能转载自:/web/wanpeng/blog/-/blogs/777189提高liferay性能By Gavin Wan, On 5/7/08 6:28 AM似乎总能听到liferay性能的抱怨,在一个开源软件中这其实不难理解,就想一台公用的电脑,有人用oracle就在上面装个oracle,有人用DB2就又装了一个DB2…… 这些服务都启动自然就会慢。
ortl产品分析报告
PORTAL分析报告徐亚斌Portal是web应用发展的一个重要趋势,目前几乎所有大的软件厂商都有自己的Portal产品。
并且Portal技术已经形成规范。
本文对Portal技术和产品进行了分析,目的是为公司产品的规划提供参考。
本文包括4个部分:Portal简介、Portal厂商及Portlet 规范、Portal技术分析、相关技术-JSF。
Portal简介介绍了Potal的概念,Portal的发展等基本情况。
Portal厂商及Portlet规范介绍了国内外主要的Portal厂商、Portal开放源代码项目,以及刚刚通过的Portlet规范-JSR (Java Specification Request) 168。
Portal技术分析介绍了Portal技术的核心概念以及实现思路。
由于组件化web页面开发对Portal技术及公司产品都有很大的影响,因此在本文的第四个部分专门介绍了组件化web页面开发的技术JSF。
1Portal简介1.1Portal的概念根据(JSR (Java Specification Request) 168)的定义,Portal是基于web的应用,它主要作为信息系统的展现层,提供个性化、统一登录和内容整合的功能。
整合就是将不同来源的信息集中展现在一张网页上。
一个Portal可以具有很多个性化参数,用来调整为用户定制的内容。
对于不同用户,一个Portal网页可能由多组不同的页面构件-portlet (定义参看 3.1节)组成,portlet为不同用户生成不同的定制内容。
Portal网页的内容如图1所示。
Portal网页中的Portlet窗口存在常规、最大化和最小化三种状态,窗口的状态可以由用户调整。
从上面的定义可以看出,Portal的核心思想是网页个性化,它有两个含义,一是为不同的网页访问者匹配不同的内容(信息),二是为不同的网页访问者提供不同的portlet应用服务,并在所能提供服务的基础上根据访问者的不同相应改变处理流程。
- 1、下载文档前请自行甄别文档内容的完整性,平台不提供额外的编辑、内容补充、找答案等附加服务。
- 2、"仅部分预览"的文档,不可在线预览部分如存在完整性等问题,可反馈申请退款(可完整预览的文档不适用该条件!)。
- 3、如文档侵犯您的权益,请联系客服反馈,我们会尽快为您处理(人工客服工作时间:9:00-18:30)。
Liferay Portal4-Portlet developmentguideJoseph ShumAlexander ChowJorge FerrerLiferay Portal4-Portlet development guide Joseph ShumAlexander ChowJorge Ferrer1.0Copyright©2000,2007Liferay Inc.Table of ContentsPreface (v)1.Introduction (1)1.Portlet Development vs Servlet Development (1)2.Java Portlet Specification(JSR-168) (1)3.Recommended Tools (2)3.1.JDK1.5.0or JDK1.4.2 (2)3.2.Jikes1.22or Jikes1.21 (2)3.3.Ant1.6.5 (2)3.4.Subversion or a Similar Version Control System (2)4.Portlet development environments (3)2.Liferay Specific Descriptors (4)1.Extended Portlet Definition (4)anizing Portlets in Categories (9)3.Liferay Portlet Frameworks (10)1.Writing a Simple JSPPortlet (10)2.StrutsPortlet Tutorial (12)2.1.Writting a Very Simple Struts Portlet (12)2.2.Adding an action (23)2.3.Conclusion (32)4.Portlet deployment (33)1.Liferay Hot Deploy (33)yout Templates,Portlets and Themes (33)2.Manual Deployment (33)5.Liferay Services (35)1.Security and Permissions Service (35)1.1.Introduction (35)1.2.Overview (35)1.3.Implementing Permissions (35)1.4.Summary (44)rmation (44)er service (46)6.Conclusions (48)PrefaceIntended audience.This document is intended for developers that want to develop portlets that will bedeployed in Liferay Portal.As Liferay supports the portlet specification(JSR-168),any portletdeveloped according to that standard will work.Liferay version.This guide has been written for Liferay4.Some details might be different for previousversions.Do not expect it to be accurate for even older versions.Related documents.If this is not what you are looking for consider the following related documents•Liferay Portal4-Customization Guide•Liferay Portal4-Portal Users Guide•Liferay Portal4-Development in the Extension EnvironmentMore information and support.If you are looking for help for a specific issue we invite you to use ourcommunity forums:/web/guest/devzone/forums[]toask your questions.We also offer professional support services(support@[mailto:support@])where your company will be assigned a Liferay developer ensuring yourquestions are answered promptly so that your project is never compromised.Purchased support alwaysgets first priority.This business model allows us to build a company that can contribute a great portal tothe open source community.If your company uses Liferay,please consider purchasing support.Liferayhas an extremely liberal license model(MIT,very similar to Apache and BSD),which means you canrebundle Liferay,rename it,and sell it under your name.We believe free means you can do whateveryou want with it.Our only source of revenue is from professional support and consulting.Chapter1.IntroductionThis guide covers the Liferay specific deployment description and explains the tools,additional featuresand services that Liferay Portal offers to developers of portlets.A portlet is a web application thatfollows a set of conventions that allow portals to manage its lifecycle and integrate them with otherportlets.The following sections provide an introduction to the development of portlets and the environmentrecommended for this task.1.Portlet Development vs Servlet DevelopmentDeveloping a Java Portlet is similar to the process of developing a Servlet based web applications.Themain differences are:•The portlet only produces a fragment of the final HTML and not the full markup.The portal will jointhe fragments of several portlets and will create the full page returned to the user.•The class receiving the requests has to inherit from javax.portlet.Portlet instead ofjavax.servlet.http.HttpServlet.•A portlet request may involve a two phase process:1.On each request at most one portlet will be able to perform an state-changing operation.This isreferred to as the Action phase and is implemented through a method called processAction.Not always an action phase is needed.Requests that involved an action phase are invoked to anURL known as an ActionURL,while those that only have a render phase are invoked through aRenderURL.2.Next is the render phase where all other portlets related to the page that is going to be returned maybe called in any order to produce the HTML fragment to draw themselves.Portlet implement thisfunctionality through a method called render.•Existing web application development frameworks such as Struts,JSF,Webworks,etc can be usedthrough the use of Bridges.Other existing frameworks have been adapted to be usable directlywithout the need of a bridge.An example is the Spring Portlet MVC framework.A portlet container is a server side software component that is capable of running portlets.A portal is aweb application that includes a portlet container and may offer additional services to the user.LiferayPortal includes its own portlet container and offers lots of functionalities such as user and organizationadministration,creation of virtual communities,having pages based on portlet layouts,graphicalselection of portlets and drag&drop to place them,grouping pages into websites,several bundledready-to-use portlets,and much more.2.Java Portlet Specification(JSR-168)The Java platform provides an standard referred to as JSR-168that standarizes how portlets interact withportlet containers and ensures compatibility across different portal products as long as portlet adheres tothe standard.Liferay Portal provides a100%compatible portlet container that guarantees that anyportlet that adheres to the standard specification will be able to run within Liferay.In JSR-168a portlet application may aggregate several different portlets and is packed in a WAR filejust as a standard Java web application.The portlets of the application are defined in a file calledportlet.xml that is placed in the WEB-INF directory inside the WAR file.This file can be seen asan extension to the web.xml defined in the Java Servlet Specification.The Java Portlet specificationallows portlet containersFor more information related to JSR-168it is recommended to read the specification itself.Also severalarticles introducing development of JSR-168portlets and explaining how to use several portletframeworks are available online.3.Recommended ToolsThe following instructions will help you get your development environment ready for working with thesource code.These instructions are specific to setting up for deployment to Orion server and Tomcat5.5developing with Java JDK1.5.Liferay Portal is compatible with Java1.4also and a wide array ofapplication servers and containers.You will need to adjust your development environment according toyour platform.Before we can get started,the following components must be installed on your machine.3.1.JDK1.5.0or JDK1.4.21.Download and install JDK1.5.0[/j2se/1.5.0/download.jsp].JDK1.4is alsosupported.2.Set an environment variable called JAVA_HOME to point to your JDK directory.3.2.Jikes1.22or Jikes1.21Jikes is a Java compiler by IBM that is much faster than the original one provided by the JDK.1.Download and unzip Jikes1.22[/developerworks/oss/jikes].If using JDK1.4you have to use Jikes1.21instead.2.Set an environment variable called JIKES_HOME to point to your Jikes directory.3.Add JIKES_HOME\bin to your PATH environment variable.3.3.Ant1.6.51.Download and unzip the latest version of Ant[/].2.Set an environment variable called ANT_HOME to point to your Ant directory.3.Add ANT_HOME\bin to your PATH environment variable.3.4.Subversion or a Similar Version Control SystemWe recommend that you put all your code and configuration files into a version control system.Subversion is free and open source and can be used through a set of commands,by installing asubversion client such as SmartSVN[/],TortoiseSVN[/]or through the integration mechanisms provided by most IDEs.4.Portlet development environmentsPortlets for Liferay can be developed using general tools or Liferay specific tools.Here is a list of themost common options:Using an IDE that supports portlet development Increasingly IDEs are providing tools for developing portlets. This is usually a good option for rapid application development, mainly if you already have the knowledge set of that tool.In this case the IDE must allow adding Liferay specific descriptors as explained in chapter3.The result provided by the IDE must be a WAR file that can be deployed to Liferay using the method described in Chapter4.Creating an custom environment Using tools such as ant or maven it's not difficult to create anenvironment to create portlet applications that are packaged asWAR and deployed by copying that file to the autodeploydirectory in a Liferay installation.Using Liferay's development environment This environment provides a ready to use ant based system for developing portlets and customizing Liferay Portal in general.It is the option that gives most flexibility and access to all Liferay specific e this environment if you want to use the portlet frameworks provided by Liferay such as JSPPortlet and StrutsPortlet described in chapter3.For detailed information about this environment read Liferay Portal4-Development in the Extension Environment.Chapter2.Liferay Specific Descriptors Liferay Portal has two specific deployment descriptors that extend the functionality provided by theportlet.xml file.One of them provides the ability to use Liferay specific features and the secondone permits the configuration of the UI that will allow users to select the portlets.The next sectionsdescribe both of them.1.Extended Portlet DefinitionThe file liferay-portlet.xml may be placed in the WEB-INF directory of any portlet applicationto configure Liferay Portal specific features.Following is an example of what this file may look like:<?xml version="1.0"?><!DOCTYPE liferay-portlet-app PUBLIC"-//Liferay//DTD PortletApplication 4.2.0//EN""/dtd/liferay-portlet-app_4_2_0.dtd"><liferay-portlet-app><portlet><portlet-name>1</portlet-name><struts-path>mail</struts-path><preferences-unique-per-layout>false</preferences-unique-per-layout><preferences-owned-by-group>false</preferences-owned-by-group><use-default-template>false</use-default-template><restore-current-view>false</restore-current-view><maximize-edit>true</maximize-edit><private-request-attributes>false</private-request-attributes><render-weight>0</render-weight></portlet>...</liferay-portlet-app>The portlet-name element must be equal to the portlet name specified in the portlet.xml file.Here is a complete list of all the available options.struts-path This option is only useful when using the Liferay StrutsPortletframework.Suppose the struts-path value is"mail".This tells theportal that all requests with the path mail/*are considered part ofthis portlet's ers who request paths that match mail/*will only be granted access if they also have access to this portlet.This is true for both portlet requests and regular servlet requests.configuration-path The configuration-path value is a Struts path that allows users toconfigure the portlet at runtime.The Struts path must reference aclass that extends com.liferay.portal.struts.PortletAction.indexer-class The indexer-class value must be a class that implementscom.liferay.util.lucene.Indexer and is called tocreate or update a search index for the portlet.scheduler-class The scheduler-class value must be a class that implementscom.liferay.portal.job.Scheduler and is called toschedule Quartz jobs for this portlet.portlet-url-class The portlet-url-class value must be a class that extendscom.liferay.portlet.PortletURLImplWrapper.SetLiferay Specific Descriptorsthis class to override the default portlet URL implementation.portlet-url-class The portlet-url-class value must be a class that implementscom.liferay.portal.servlet.FriendlyURLPortletPlugin.Use this if content inside a portlet needs to have a friendly URL.See the Message Boards portlet source code for an example of itsuses.portlet-data-handler-class The portlet-data-handler-class value must be a class thatimplementsr.PortletDataHandlerand is called when archiving tasks are run.smtp-message-listener-class The smtp-message-listener-class value must be a class thatimplementscom.liferay.portal.kernel.smtp.MessageListenerand is called when processing emails.preferences-company-wide Set the preferences-company-wide value to true if the preferencesfor the portlet are across the entire company.Setting this value totrue means the value for preferences-unique-per-layout andpreferences-owned-by-group are not used.The default value isfalse.For example,an administrator could set the preferences to anAnnouncements portlet that would save a message in the portlet'spreferences.This message would then be used across all pages forthat company.The portlet must not be instanceable becauseinstanceable portlets have uniquely generated portlet ids.The default behavior of the bundled Announcements portlet setsthe instanceable value to true so that normal users cannot createcompany wide messages.A future release would includepermissions for the edit mode versus the view mode which wouldallow an administrator to set the message while users would justview the message.preferences-unique-per-layout Set the preferences-unique-per-layout value to true if thepreferences for the portlet are unique for each page.If set to false,the preferences for the portlet are shared across all pages.Thedefault value is true.The preferences-unique-per-layout element is used incombination with the preferences-owned-by-group element.Seethe comments for the preferences-owned-by-group element formore information.preferences-owned-by-group Set the preferences-owned-by-group value to true if thepreferences for the portlet are owned by the group when theportlet is shown in a group page.If set to false,the preferences areowned by the user at all times.The default value is true.Suppose the Stocks portlet has preferences-unique-per-layout setto true and preferences-owned-by-group set to ers can seta different list of stocks for every personal ers can set adifferent list of stocks for every community page.Suppose the Stocks portlet has preferences-unique-per-layout setto false and preferences-owned-by-group set to ers canset one list of stocks to be shared across all personal erscan set one list of stocks to be shared across a community's set ofpages.Suppose the Stocks portlet has preferences-unique-per-layout setto true and preferences-owned-by-group set to ers can seta different list of stocks for every personal page.Administratorsset the portlet preferences for users in a community page.Administrators can set a different list of stocks for everycommunity page that are then shared by all users within acommunity.Suppose the Stocks portlet has preferences-unique-per-layout setto false and preferences-owned-by-group set to ers can setone list of stocks to be shared across all personal pages.Administrators set the portlet preferences for users in acommunity page.Administrators can set one list of stocks to beshared by all users across a community's set of pages.use-default-template Set the use-default-template value to true if the portlet uses thedefault template to decorate and wrap content.Setting this to falseallows the developer to own and maintain the portlet's entireoutputted content.The default value is true.The most common use of this is if you want the portlet to lookdifferent from the other portlets or if you want the portlet to nothave borders around the outputted content.show-portlet-access-denied Set the show-portlet-access-denied value to true if users areshown the portlet with an access denied message if they do nothave access to the portlet.If set to false,users are never shown theportlet if they do not have access to the portlet.The default valueis set in portal.properties.show-portlet-inactive Set the show-portlet-inactive value to true if users are shown theportlet with an inactive message if the portlet is inactive.If set tofalse,users are never shown the portlet if the portlet is inactive.The default value is set in portal.properties.action-url-redirect Set the action-url-redirect value to true if an action URL for thisportlet should cause an auto redirect.This helps prevent doublesubmits.The default value is false.restore-current-view Set the restore-current-view value to true if the portlet restores tothe current view when toggling between maximized and normalstates.If set to false,the portlet will reset the current view whentoggling between maximized and normal states.The default valueis true.maximize-edit Set the maximize-edit value to true if the portlet goes into themaximized state when the user goes into the edit mode.This onlyaffects the default portal icons and not what may beprogrammatically set by the portlet developer.The default valueis false.maximize-help Set the maximize-help value to true if the portlet goes into themaximized state when the user goes into the edit mode.This onlyaffects the default portal icons and not what may beprogrammatically set by the portlet developer.The default valueis false.maximize-print Set the maximize-print value to true if the portlet goes into themaximized state when the user goes into the edit mode.This onlyaffects the default portal icons and not what may beprogrammatically set by the portlet developer.The default valueis false.layout-cacheable Set the layout-cacheable flag to true if the data contained in thisportlet will never change unless the layout or portlet entry ischanged.instanceable Set the instanceable value to true if the portlet can appear multipletimes on a page.If set to false,the portlet can only appear once ona page.The default value is false.private-request-attributes Set the private-request-attributes value to true if the portlet doesnot share request attributes with any other portlet.The defaultvalue is true.render-weight The default value of render-weight is1.If set to a value less than1,the portlet is rendered in parallel.If set to a value of1orgreater,then the portlet is rendered serially.Portlets with a greaterrender weight have greater priority and will be rendered beforeportlets with a lower render weight.If the ajaxable value is set to false,then render-weight is alwaysset to1if it is set to a value less than1.This means ajaxable canoverride render-weight if ajaxable is set to false.ajaxable The default value of ajaxable is true.If set to false,then thisportlet can never be displayed via Ajax.add-default-resource If the add-default-resource value is set to false,and the portletdoes not belong to the page but has been dynamically added,thenthe user will see that he does not have permissions to view theportlet.If the add-default-resource value is set to true,the defaultportlet resources and permissions are added to the page.The usercan then view the portlet.Most portlets are harmless and canbenefit from this flexibility.However,to prevent security loopholes,the default value is false.system Set the system value to true if the portlet is a system portlet that auser cannot manually add to their page.The default value is false. active Set the active value to true if the portlet is active and available tousers.If set to false,the portlet will not be active or available tousers.The default value is true.This value can be changed at runtime via the Admin portlet. include Set the include value to true to if the portlet is available to theportal.If set to false,the portlet is not available to the portal.Thedefault value is true.Portlets that are not included as part of theportal are never available to the user to be made active or inactive.As far the user knows,the portlets do not even exist in the system.This allows the Liferay developers to bundle a lot of portlets inone core package,and yet allow custom deployments to turn on oroff individual portlets or sets of portlets.This follows the Siebeland Microsoft model of bundling everything in one core package,but using XML configuration or registry settings to turn on andoff features or sets of features.We do not recommend that customdeployers modify the core source by removing specific portletsbecause this prevents an easy upgrade process in the future.Thebest way to turn on and off portlets is to set the include element.The advantage of this way of doing things is that it becomes veryeasy to deploy Liferay.All features are available in one package.The disadvantage is that by not utilizing all of the portlets,you arewasting disk space and may even take a small but static memoryfootprint.However,we feel that the extra disk space and memoryusage is a cheap price to pay in order to provide an easyinstallation and upgrade path.In addition to specifying the above parameters specific to each portlet,the liferay-portlet.xmlfile can also be used to specify role mappings and custom user attributes global to the whole portlet application.Here is an example:<?xml version="1.0"?><!DOCTYPE liferay-portlet-app PUBLIC"-//Liferay//DTD PortletApplication 4.2.0//EN""/dtd/liferay-portlet-app_4_2_0.dtd"><liferay-portlet-app>...<role-mapper><role-name>user</role-name><role-link>User</role-link></role-mapper><custom-user-attribute><name>.random</name><custom-class>com.liferay.portlet.CustomUserAttributes</custom-class> </custom-user-attribute></liferay-portlet-app>Here is a more detailed description of these elements:role-mapper The role-mapper contains two names specified by role-name androle-link.The role-name value must be a role specified in portlet.xml.The role-link value must be the name of a Liferay role that exists inthe database.The role-mapper element pairs up these two values tomap roles from portlet.xml to roles in the Liferay database.This isneeded because Liferay roles may contain spaces whereas roles inportlet.xml cannot contain spaces.This also adds extra flexibilitywhere the portlet vendor does not need to have any knowledge aboutLiferay's roles.custom-user-attribute The custom-user-attribute contains a list of names that are retrievedusing a custom class that extendscom.liferay.portlet.CustomUserAttributes.For a usage example,download the sample hot deployable portletWAR named test.war.Look for the classcom.liferay.portlet.teststruts.TestStrutsUserAttributesto see how it associates the custom user attribute".test"withthe value"Test Name".This class could be modified to read customuser attributes from another datasource that may be a database,aLDAP server,or a web service.anizing Portlets in CategoriesThe interface provided to a user to select a portlet to be added to a page shows the portlets organized incategories to make it easier to find them.The file liferay-display.xml is available to portlet developers tospecify how they want their portlets to be categorized.Following is an example of what this file maylook like:<display><category name="category.admin"><portlet id="9"/><portlet id="40"/><portlet id="79"/><portlet id="80"/></category><category name="category.cms"><category name="category.alfresco"><portlet id="91"/></category></category>...<display>The name of the category must be a key defined in the resource bundle of the portlet.The value of the idattribute must be the portlet-name as defined in the portlet.xml file.Categories can be nested anddefault portal categories can be used to add the portlet along with the bundled portlets.Chapter3.Liferay Portlet Frameworks In the next sections,you will learn how to develop a JSR168portlet leveraging two frameworks offeredby Liferay to make deployment easier.First you will also learn how to create a simple JSPPortlet beforemoving on to the more complicated StrutsPortlet.Both of these frameworks are available through the extension environment,so the rest of this sectionwill assume that you already have it installed in a directory called ext.If you need more informationabout the extension environment,please read the Liferay Portal4-Development in the ExtensionEnvironment guide.Note that by using these portlet frameworks your portlets will only work in Liferay Portal but not inother JSR-168compliant e them also if you need to speed your development and do not planto deploy your portlets in other portal in the near term.1.Writing a Simple JSPPortletAlthough a JSPPortlet does little more than display content,there is still some work that needs to bedone.Let’s start by creating a new directory called myjspportlet withinext\ext-web\docroot\html\portlet\ext Next,open portlet-ext.xml withinext\ext-web\docroot\WEB-INF\.NoteIf you are using Eclipse,you may need to associate.xml files to Eclipse if your.xml files are being opened in a separate editor.You can do this by selecting Window from the menu bar and then Preferences.Expand the Workbench navigation,and click on File Associations.From there you can add*.xml as anew File type and associate it to open in Eclipse.Notice how the portlets are uniquely identified by their portlet-name(also referred within Liferay Portalas the portlet id).As such,you will want to create a new portlet that is an increment of the portlet name,such as EXT_2.Since we are creating a JSPPortlet,you will want the portlet-class to reference the fullclass name:com.liferay.portlet.JSPPortlet.For this tutorial,add the following to your portlet-ext.xml(you may find it easier to copy and paste EXT_1and just make the necessary changes):<portlet><portlet-name>EXT_2</portlet-name><display-name>My JSPPortlet</display-name><portlet-class>com.liferay.portlet.JSPPortlet</portlet-class><init-param><name>view-jsp</name><value>/portlet/ext/myjspportlet/view.jsp</value></init-param><expiration-cache>300</expiration-cache><supports><mime-type>text/html</mime-type></supports><portlet-info><title>My JSP Portlet</title></portlet-info><security-role-ref><role-name>Power User</role-name></security-role-ref><security-role-ref><role-name>User</role-name></security-role-ref></portlet>。