Oracle92数据库安装参考文档
oracle数据库安装文档

oracle 数据库安装文档概述内蒙古中行数据库安装:平台red hat 6.6 ,数据库版本1120.4,升级psu,、环境准备1、安装前准备1.1 编辑/etc/security/limits.co nf 文件vi /etc/security/limits.c onf oracle soft n proc 2047 oracle hard n proc 16384 oracle soft n ofile 1024 oracle hard n ofile 65536vi /etc/sysctl.c onf#kernel.shmmax = 68719476736 #kernel.shmall = 4294967296 fs.aio-max-nr = 1048576 fs.file-max = 6815744kernel.shmall = 2097152 kernel.shmmax = 4294967295 kern el.shm mni = 4096kernel.sem = 250 32000 100 128 net.ipv4.ip_local_port_ra nge = 9000 65500 n et.core.rmem_default = 262144 n et.core.rmem_max = 4194304n et.core.wmem_default = 262144 n et.core.wmem_max = 10485861•创建组和用户:groupadd -g 600 oin stallgroupadd -g 601 dbagroupadd -g 602 oper2•修改用户口令:1.5创建目录mkdir -p /u01/appchow n -R oracle: oin stall /u01/app/ chmod -R 775 /u01/app/ mkdir -p /u01/app/ora Inven torychow n -R oracle: oin stall /u01/app/ora Inven tory/ chmod -R 775 /u01/app/ora Inven tory/ mkdir -p/u01/app/oraclechow n -R oracle: oin stall /u01/app/oracle/ chmod -R 775 /u01/app/oracle/vi .bash_profileumask 022export ORACLE_BASE=/u01/app/oracleexport ORACLE_HOME=$ORACLE_BASE/product/11.2.0/dbhome_1export ORACLE_SID=orclexport TERM=xtermexport ORA_NLS33=/oracle/db/product/11.2.0/db_1/dataexportLD_LIBRARY_PATH=$ORACLE_HOME/lib:$ORACLE_HOME/rdbms/lib:/lib:/usr/l ib exportPATH=$ORACLE_HOME/bi n:/usr/bi n:/etc/:/usr/sbi n:/usr/ucb:/sb in:$ORACLE_HOME/OPatch:/bi n:/usr/ccs/bi n: $PATHexportCLASSPATH=$ORACLE_HOME/JRE:$ORACLE_HOME/jlib:$ORACLE_HOME/rdbms/jli b ;#PATH=$PATH:$HOME/bin[oraclesclny -] 5 vl .baafL profileif [ -f -/^baahre ]; then■ -/. ba.shrcCRrL__E_3j-LZ± 二 /uu 1 /app/oracle CRACLE^HCt!E= /produce;/ ・・ /dbhome_l ORACLE_弓 llL^jhbdkf TERM=xtermORA_1TLS 3 3-/oracle/db/product/ ・丄 /db_l/data LD 』IBRAJlY_PATIMCMCLEb ri J FJ7 lib: $ORA£XE M B<»£/iriksns/ lib :/lib :/usr/lib ElTH*i /bin: /LUI r/bins /etc/ : / use/sbin:/usr/ueb: / abin: /DPatchi /bin: / uvr/ccs/bCU^SEATH«^aRA£I£ H<HE/JU : «GRA£XE 且CME/j 1U>£ «SIA£XE KMB/rmM/lilLbj#export PATHe F -e e e e e i e1、Oracle 软件安装进入安装目录/stage/database,运行runlnstaller启动图形界面|[oracle@olny 吐丘匚abaae] $ ./ninl 且日匸aller StartingOracle Database llg Release 2 Installer - Installing database - Step 1 of 11Installer ・ *七 Oracle UniversalTemp apace: mus€ swap space : urast moniMr; musn beCheckingChecking Checking Preparing to launch Oracle Universal -[uncle Solny database ]$ |be greater be greaterccnJigured Acwal 33270 MB Actual 399& MB to display az least 25fi colors. Insualler from /tep/OraInsta112016-03-10_07-5G-25PH , Please wait …than 120 MB. than 150 HEUPassedPassed Actual 1677721A PassedCon figure Security UpdatesORACUCOM 也e 倉 secur nv upasesProvide your email a.ddre^s to be informed a1 securhy issues, install the product ^nd initiatecanfigura^ion manager. Viewdstails.Email!Apply SdfhMTt Updaf ts Installation Oplion Eis ier for you if you use your My 0 racle Supp Drt email 比日 dre ss/us emam c.Grid InsUllatiDn Op? ionsTypical InrtaJllalionSummary in si an Pro duelFinishI wish to 『ecerve security updates via My Oracle Supp 口rt将电子邮件和口令字段留空。
oracle数据库安装文档
数据库安装文档oracle概述内蒙古中行数据库安装:平台red hat 6.6,数据库版本11.2.0.4,升级psu。
1 1一、环境准备1、安装前准备 /etc/security/limits.conf文件编辑1.1vi /etc/security/limits.conforacle soft nproc 2047oracle hard nproc 16384oracle soft nofile 1024oracle hard nofile 65536Configure Kernel Parameters)配置内核参数(1.2vi/etc/sysctl.conf#kernel.shmmax = 68719476736#kernel.shmall = 4294967296fs.aio-max-nr = 1048576fs.file-max = 6815744kernel.shmall = 2097152kernel.shmmax = 4294967295kernel.shmmni = 4096kernel.sem = 250 32000 100 128net.ipv4.ip_local_port_range = 9000 65500net.core.rmem_default = 262144net.core.rmem_max = 419430422net.core.wmem_default = 262144net.core.wmem_max = 1048586关闭防火墙并重启系统1.3vi /etc/selinux/config1.4创建用户组1.创建组和用户:groupadd -g 600 oinstallgroupadd -g 601 dbagroupadd -g 602 operuseradd -m -u 601 -g oinstall -G dba,oper oracle2.修改用户口令:3 3创建目录1.5mkdir -p /u01/appchown -R oracle:oinstall /u01/app/chmod -R 775 /u01/app/mkdir -p /u01/app/oraInventorychown -R oracle:oinstall /u01/app/oraInventory/chmod -R 775 /u01/app/oraInventory/mkdir -p /u01/app/oraclechown -R oracle:oinstall /u01/app/oracle/chmod -R 775 /u01/app/oracle/1.6配置用户环境变量vi .bash_profileumask 022export ORACLE_BASE=/u01/app/oracleexport ORACLE_HOME=$ORACLE_BASE/product/11.2.0/dbhome_1export ORACLE_SID=orclexport TERM=xtermexport ORA_NLS33=/oracle/db/product/11.2.0/db_1/dataexportLD_LIBRARY_PATH=$ORACLE_HOME/lib:$ORACLE_HOME/rdbms/lib:/lib:/usr/lib exportPATH=$ORACLE_HOME/bin:/usr/bin:/etc/:/usr/sbin:/usr/ucb:/sbin:$ORACLE _HOME/OPatch:/bin:/usr/ccs/bin:$PATH44exportCLASSPATH=$ORACLE_HOME/JRE:$ORACLE_HOME/jlib:$ORACLE_HOME/rdbms/jli b; #PATH=$PATH:$HOME/bin#export PATH5 5软件安装Oracle二、进入安装目录/stage/database, 运行runInstaller 启动图形界面将电子邮件和口令字段留空。
Oracle安装文档
Vmware在linux下安装oracle10g2010-5-20安装oracle:1、内存及交换分区检查[root@oracle10g ~]# cat /proc/meminfo | grep MemTotalMemTotal: 1034604 kB[root@oracle10g ~]# cat /proc/meminfo | grep SwapTotalSwapTotal: 1574360 kB建议内存最少1G,交换分区为内存1.5~2倍。
如果空间充足建议2倍。
Oracle 安装之前会检测,但我在交换分区为内存一半的情况下,也安装成功过。
当时内存为4G。
2、修改主机名及hosts文件[root@oracle10g ~]# hostname oracle10g[root@oracle10g ~]# vi /etc/hosts# Do not remove the following line, or various programs# that require network functionality will fail.127.0.0.1 localhost.localdomain localhost172.16.60.196 oracle10g建议修改,避免以后网络访问出现异常。
退出重联看是否生效。
3、检查所需操作系统的RPM包是否完整Red Hat Enterprise Linux 4.0:binutils-2.15.92.0.2-13.EL4compat-db-4.1.25-9compat-libstdc++-296-2.96-132.7.2control-center-2.8.0-12gcc-3.4.3-22.1.EL4gcc-c++-3.4.3-22.1.EL44glibc-2.3.4-2.9glibc-common-2.3.4-2.9gnome-libs-1.4.1.2.90-44.1libstdc++-3.4.3-22.1libstdc++-devel-3.4.3-22.1make-3.80-5pdksh-5.2.14-30sysstat-5.0.5-1xscreensaver-4.18-5.rhel4.2setarch-1.6-1以上是oracle10g在RHEL4环境下,需要装的包。
Oracle 9i 数据库安装步骤(使用模板)
CSMS Oracle数据库安装步骤1安装前提条件1.1操作系统:WINDOWS SERVER 2003 ENT1.2SP2补丁:最新补丁打至200904231.3域控制器:服务器改名后进行配置1.4群集组件:安装并配置好各个分区1.5Oracle:ORACLE 9201 已经只安装软件2主机S1 先安装CSMS2.1安装数据库2.1.1将群集资源切换到主机2.1.2运行ORACLE_INSTALL/COPY.BAT2.1.3开始→运行→DBCA2.1.4选“创建数据库”2.1.5选择CSMS_INSTALL2.1.6全部下一步至安装完成。
注意:用户名密码:sys/sys oracle/oracle2.2配置监听程序2.2.1开始」菜单\程序\Oracle - OraHome92\Configuration and MigrationTools\ Net Configuration Assistant2.2.2选择“监听程序配置”2.2.3全部下一步至安装完成。
2.3配置ORACLE服务2.3.1修改OracleServiceCSMS,OracleOraHome92TNSListener登录用户为:cluster输入密码(以上的安装过程是在administrator用户下进行的,所以Oracle服务的登录用户为administrator,Oracle切换需要用cluster用户登陆)。
2.3.2修改方法:在操作系统服务中选中OracleServiceCSMS,双击(或右键/属性)出现属性页面,选登陆签,登陆身份中选此用户,在浏览中选cluster用户,输入用户名/密码。
2.3.3OracleOraHome92TNSListener同样处理2.3.4将服务OracleServiceCSMS , OracleOraHome92TNSListener 设置为手动并停止服务。
2.4备份已安装数据文件2.4.1将E:\ORACLE 重命名为ORACLE_OLD3从机安装CSMS3.1安装数据库(与主机安装步骤相同)3.1.1将群集资源切换到从机3.1.2从2.1.2开始3.2配置监听程序3.2.1开始」菜单\程序\Oracle - OraHome92\Configuration and MigrationTools\ Net Configuration Assistant3.2.2选择“监听程序配置”3.2.3全部下一步至安装完成。
Oracle 官方安装文档

rpm -q grep binutils-2.* \elfutils-libelf-0.* \glibc-2.* \glibc-common-2.* \libaio-0.* \libgcc-4.* \libstdc++-4.* \make-3.* \compat-libstdc++-33 \elfutils-libelf-devel-0.* \glibc-devel-2.* \gcc-4.* \gcc-c++-4.* \libaio-devel-0.* \libstdc++-devel-4.* \unixODBC-2.* \unixODBC-devel-2.* \sysstat-7.*2.如缺少相应的补丁包,可以到系统安装盘安装相关的补丁包cd /media/Enterprise\ Linux\ dvd\ 20090127/Server/ rpm -Uvh grep binutils-2.*rpm -Uvh elfutils-libelf-0.*rpm -Uvh glibc-2.*rpm -Uvh glibc-common-2.*rpm -Uvh libaio-0.*rpm -Uvh libgcc-4.*rpm -Uvh libstdc++-4.*rpm -Uvh make-3.*rpm -Uvh compat-libstdc++-33rpm -Uvh elfutils-libelf-devel-0.*rpm -Uvh glibc-devel-2.*rpm -Uvh gcc-4.*rpm -Uvh gcc-c++-4.*rpm -Uvh libaio-devel-0.*rpm -Uvh libstdc++-devel-4.*rpm -Uvh unixODBC-2.*rpm -Uvh unixODBC-devel-2.*rpm -Uvh sysstat-7.*用户创建完了,这一步骤可以省略)# groupadd oinstall -g 501# groupadd dba -g 502# groupadd oper -g 503# useradd oracle -u 500 -g oinstall -G dba,oper# passwd oracle输入密码:oracle4.修改参数文件 sysctl.conf# cat >> /etc/sysctl.conf << EOFkernel.sem=1055 32000 100 128kernel.shmmax=2147483648kernel.shmall = 2097152net.ipv4.tcp_sack = 0net.ipv4.tcp_timestamps = 0net.ipv4.conf.default.rp_filter = 0net.core.optmem_max = 65535net.core.rmem_default = 4194304net.core.wmem_default = 262144net.core.rmem_max = 4194304net.core.wmem_max = 262144fs.file-max = 6553600net.ipv4.ip_local_port_range = 1024 65000EOF5.以下命令加载sysctl.conf文件中的内容,检查参数值是否正确设定。
oracle数据库安装及配置文档

Oracle 9i安装及使用说明一、oracle安装 (2)一、安装的硬件环境需求 (2)二、安装的软件环境需求 (2)三、安装步骤 (2)二、Oracle服务名的配置 (9)三、Oracle用户管理(企业管理器) (16)四、pl/sql应用 (23)一、导入数据: (23)二、备份数据 (24)一、oracle安装一、安装的硬件环境需求1、对CPU的要求:CPU最低配置为Pentium1662、对内存要求:内存容量最低为64兆,最好在256兆以到到就可以3、对硬盘的要求:建议配置信8GB容量以上硬盘4、对光驱的要求:建议选用快速光驱,16倍速以上5、对网卡的要求:一般可以选用10/100兆自适应网卡二、安装的软件环境需求1、对操作系统的要求A、建议在全新安装Windows 2000 Server或更高服务器版本的操作系统上安装数据库服务器,在window 98或更高版本操作系统上安装管Oracle理客户机程序。
2、对虚拟内存的要求A、建议可以将虚拟内存适当进行调整以加快安装速度。
三、安装步骤出现如图1.1所示的【安装】界面。
单击【开始安装】按钮图1.1出现如图1.2所示的【欢迎】界面,单击按钮。
图1.2出现如图1.3所示的【文件定位】界面,用来指定要安装的程序的目录和Oracle 主目录名及其安装后的目标全路径,单击按钮。
图1.3出现如1.4所示的【可用产品】界面,选择安装类型,为Oracle 9i Database 9.0.1.1.1,单击<下一步图片>按钮。
出现如图1.5所示的【安装类型】界面,选择“企业版”,单击按钮。
出现如图1.6所示的【数据库配置】界面,选择“通用”,单击按钮。
图1.6出现如1.7所示的【数据库标识】界面。
在【全局数据库名】文本框里输入名称“net ”后,在【SID 】文本框里自动生成“orcl”,单击按钮。
图1.7出现如图1.8所示的【数据库文件位置】界面。
oracle数据库安装文档

数据库安装注:Oracle安装文件必须放在/tmp文件夹下边,在安装过程中,tmp至少400MB空间,系统至少4G空间,且系统要配置静态IP,内存至少512MB,swap大小为内存的2倍左右图形界面版安装1)vi /etc/hosts 加入: 本机IP 本机名称(本机名称可通过hostname命令获取)将127.0.1.1换为本机IP2)vi /etc/pam.d/login 添加# add by oraclesession required pam_limits.so3)vi /etc/selinux/config 设置SELINUX=disabled4)如果RedHat版本是5,则修改为4,安装完后再修改回来(若是centos系统也是这样改)vi /etc/redhat-release 修改成45)检查并修改核心参数输入以下命令,/sbin/sysctl -a | grep sem/sbin/sysctl -a | grep shm/sbin/sysctl -a | grep file-max/sbin/sysctl -a | grep ip_local_port_range注意查看结果,有些参数没有达到最小值则修改我的机子上有以下没有达到最小值:kernel.shmall = 2097152kernel.shmmax = 536870912(根据实际情况有时候要求2147483648)kernel.shmmni = 4096kernel.sem = 250 32000 100 128fs.file-max = 65536net.ipv4.ip_local_port_range = 1024 650002012.1.29 补充:shmmax表示最大共享内存。
如果SGA的设置大于共享内存的大小也没关系。
只是系统会分配多个共享内存段给SGA。
而我们一般将SGA分配在一个共享内存段里。
所以一般共享内存大小略大于SGA。
Oracle9iR2安装全攻略

Oracle9iR2(9.2)+Windows数据库服务器安装全攻略1.将网线拔掉,安装windows2000/2003 Server。
建议C盘8-10G左右。
注意预备安装Oracle 的硬盘格式化时分配单位大小应与Oracle数据库的Block块大小(Oracle默认为8k)一致,否则将引起磁盘读写性能瓶颈。
windows2000应安装sp4。
配置IP地址。
2.(这个步骤是可选的)在我的电脑->属性->高级->性能选项中设置虚拟内存,建议600M-1G以上。
3.(这个步骤是可选的)启动时删除系统级共享。
在C:\Documents and Settings\All Users\Start Menu\Programs\Startup目录下新增一个批处理文件,将下面的命令添加到文件中net share c$ /deletenet share d$ /deletenet share admin$ /delete4.安装杀毒软件及病毒库,插上网线,运行在线升级病毒库,在线升级操作系统,拔掉网线。
5.安装Oracle数据库,安装路径建议为默认的D:\oracle\ora92,选择Oracle9i Database9.2->自定义安装,在组建选择页面中取消Oracle Enterprise Manager Products->Oracle ManagementServer选择Oracle Windows Interfaces和iSQL*Plus询问是否创建数据库时默认选择创建即可6.创建数据库时有如下选项数据库标识->全局数据库名->orcl初始化参数->内存->选择典型数据库存储->存储->表空间->system大小为1G,temp大小为512M,UNDOTBS1大小为2G 或更大7.(这个步骤是可选的)修改D:\oracle\ora92\network\admin\sqlnet.ora文件,添加SQLNET.EXPIRE_TIME = 1数据库将每隔1分钟自动断开已经死亡的进程,比如kill过多的连接,该参数重新启动OracleOraHomeTNSListener监听服务或重启计算机后方8.以system的用户名登录sql/plus,执行以下sql文REM ***** 数据表空间2G+2G=4G *****create tablespace LIB_DATA datafile 'D:\Oracle\lib_data1.ora' size 1024Mextent management local autoallocate;alter tablespace LIB_DA TA add datafile 'D:\Oracle\ lib_data2.ora' size 2048M;create tablespace LIB_IDX datafile 'D:\Oracle\ lib_idx1.ora' size 2048Mextent management local autoallocate;alter tablespace LIB_IDX add datafile 'D:\Oracle\ lib_idx2.ora' size 2048M;REM ** 注意:如果有数据量的需要可以依样再新增几个表空间文件并注意文件路径**REM ***** 临时表空间512M *****create temporary tablespace LIB_TEMP tempfile 'D:\Oracle\ lib_temp.ora' size 2048Mextent management local uniform;REM ***** 创建libsys用户*****REM ***** 口令libsys,默认表空间lib_data,临时表空间lib_temp *****CREATE USER LIBSYS IDENTIFIED BY LIBSYSDEFAULT TABLESPACE LIB_DATATEMPORARY TABLESPACE LIB_TEMP;GRANT CONNECT,RESOURCE,DBA TO LIBSYS;删除上列表空间:drop tablespace LIB_DA TA INCLUDING CONTENTS;drop tablespace LIB_DA TA INCLUDING CONTENTS;drop tablespace LIB_DA TA INCLUDING CONTENTS;9.(这个步骤是可选的)在网络属性中,删除TCP/IP以外的其他协议。
Oracle数据库安装手册

Oracle10g安装手册一、安装过程1.软件准备2.运行安装程序Setup.exe,系统将启动Oracle Universal Installer,然后进行先决条件检查。
会出现如下图示3.之后,系统将打开如下界面:选择安装方法。
ORACLE提供了两种安装方法:基本安装(I)和高级安装(A)。
从上面的图中我们可以看到两种安装方法的不同之处。
Oracle默认是选择基本安装。
4.基本安装,当填好对应的各项之后,“下一步”按钮将由灰色恢复正常,如下图所示,这时点击下一步即可进行安装。
5.高级安装,选择“高级安装”,“下一步”按钮会恢复正常,点击下一步,将出现如下的画面“选择安装类型”。
安装类型共有4种,分别是企业版(E)、标准版(S)、个人版(P)和定制(C)。
每种安装的不同之处,我们也可以从图片上看到。
为了完整安装Oracle 10g,我们选择了定制,然后选择下一步。
6.出现“指定主目录详细信息”设置。
这里我们可以输入或选择所安装产品的名称以及安装产品的完整路径。
如下图所示,这里我们没有进行修改,直接下一步。
7.加载产品之后,将出现选择产品组件的画面,如下图所示,选择需要的组件之后,点击下一步。
这里我们选择了几乎所有的组件。
8.出来的画面为“产品的先决条件检查”步骤。
当我们在第4步选择基本安装后,直接就可以跳到这个画面。
9.点击“下一步”,一会将出现“创建数据库”的画面,如下图,这里有三个选项,分别为创建数据库(C)、配置自动存储管理(ASM)(A)和仅安装数据库软件(S)。
这里我们选择了创建数据库(C)。
点击下一步。
10.Oracle MTS Recovery Service配置界面,如下图,下一步11.最后检查安装清单,然后点击安装。
12.安装中的画面,系统将复制文件并进行配置。
13.配置助手,安装完成后系统会自动运行下面所示的配置程序。
14.紧接着系统出现如下的界面Oracle Net Configuration Assistant,选择“执行典型配置“后,系统将返回13步中所示的画面继续运行下面的配置程序。
Oracle数据库安装说明及配置

9.测试成功后,指定网络服 务名,如“server_orcl”
10.选择“否”,取消配置 另一网络服务名,“完成”
Page 19
Web服务器IIS安装及配置指南
IIS安装 安装过程: 打开“打开或关闭Windows功能”,勾选“Internet信 息服务”下“Web管理工具”和“万维网服务”两项,完成 安装IIS。
(1)Cd D:\Program Files\Membase\Server\bin
(2)service_stop
(3)service_unregister (4)service_register.bat ns_1@PHYSICAL IP (5)service_start
Page 16
127.0.0.1
Page
20
Web服务器IIS安装及配置指南
IIS上发布应用程序 1.准备好要发布的程序包,打开IIS管理器。 2.设置应用程序池 V4.0参数:固定时间间隔(分钟) 改为0;虚拟/专用内存限制(KB)改为 0;闲置超时(分钟)改 为0。 3.添加应用程序
Page
21
Web服务器IIS安装及配置指南
3.选择“测试”
4.选择要测试的网络服务 名“ORCL”
5.连接数据库(若不能成 功,更改登陆用户名和密 码再次连接)
Page 11
6.测试成功 (表示数据库 已成功安装)
Oracle数据库安装及配置指南
创建表空间
1.点击“Database Control - orcl” 2.点击“继续浏览此网站”
密码管理
完成
Page
9
Oracle数据库安装及配置指南
Oracle数据库安装
安装准备
配置安全更新
oracle92安装步骤及配置

安装ORACLE9I客户端
执行oracle_clt文件里的\setup.exe
按【下一步】
注意目录一般安装在d:\oracle\ora92
按【下一步】选择如下图选项(oracle9i client ….)
按【下一步】选择安装类型为“运行时”
按【安装】开始安装
配置net服务名,选择如下图选项
点下一步,选择TCP协议为访问数据库的协议。
下面的是厦门的主机名,宁德的主机名更改为10.142.65.26
Net服务名为:xm,是否配置另一个Net服务器:否
按【退出】结束安装
安装完建模2.0系统后,接下来的工作是要在本机上配置一个Oralce 实例,才能让程序连上数据库正常使用。
具体的步骤如下: 第一步:首先点击开始菜单,在程序菜单下找到Oracle 的目录,打开一个叫做“Net Manager ”配置工具,如图1;打开Net Manager 后的界面如图2。
选中“服务命名”,如图3所示,点击左边的加号可以查看下一级目录。
第三步:点击工具界面左边的绿色加号按钮,弹出“Net 服务名向导”对话框,填写如下:
第四步:点击下一步,在主机名处填写主机名地址。
第五步:填写Net服务名,
第六步:完成后,点击“测试”,如下所示测试成功即安装成功。
oracle数据库的安装及使用说明书
3.3开发环境的配置我所做的毕业设计是基于Web的师生互动交流平台,需要用到一系列开发工具。
目前开发平台的搭建需要MyEclipse+JDK+Tomcat,数据库使用Oracle数据库。
3.3.1JDK+Tomcat+MyEclipse开发环境的搭建我下载的是JDK是JDK1.6.0_24,Tomcat是Tomcat6.0,MyEclipse是MyEclipse8.5。
在安装过程中出现过很多问题。
最后,我是按着先安装JDK,然后安装Tomcat,最后安装MyEclipse的顺序进行。
安装JDK的过程比较简单,就是下载下来直接的.exe文件,然后开始安装。
在整个安装过程中都使用默认的路径。
这样比较不容易出错。
然后JDK安装到C:\Program Files\Java\JDK1.6.0_24这个路径下。
安装完JDK之后,我们需要在我的电脑—>属性—>高级选项卡里设置环境变量。
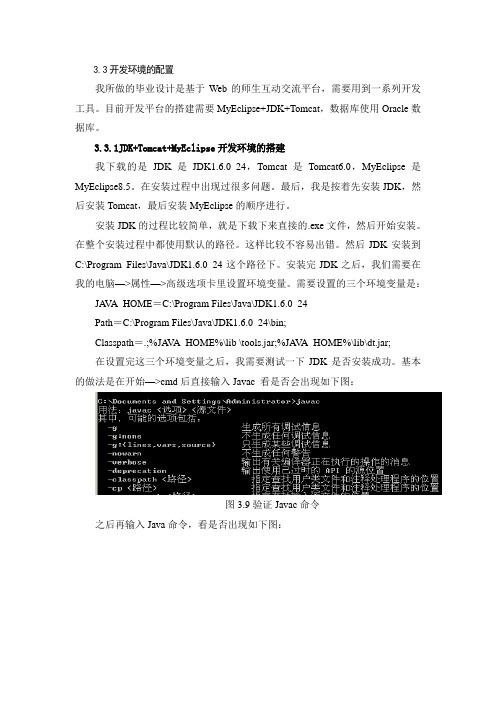
需要设置的三个环境变量是:JA V A_HOME=C:\Program Files\Java\JDK1.6.0_24Path=C:\Program Files\Java\JDK1.6.0_24\bin;Classpath=.;%JA V A_HOME%\lib \tools.jar;%JA V A_HOME%\lib\dt.jar;在设置完这三个环境变量之后,我需要测试一下JDK是否安装成功。
基本的做法是在开始—>cmd后直接输入Javac 看是否会出现如下图:图3.9验证Javac命令之后再输入Java命令,看是否出现如下图:图3.10验证Java命令最后我们还可以输入Java –version查看JDK的版本,如下图3:图3.11 验证Java –version命令如果顺利出先以上三张图,说明JDK配置成功了。
接下来安装Tomcat。
我这里下载的也是.exe文件。
直接开始安装,我使用的都是默认路径。
我把Tomcat安装在C:\Program Files\Apache Software Foundation\Tomcat 6.0。
ORACLE安装(官方文档)
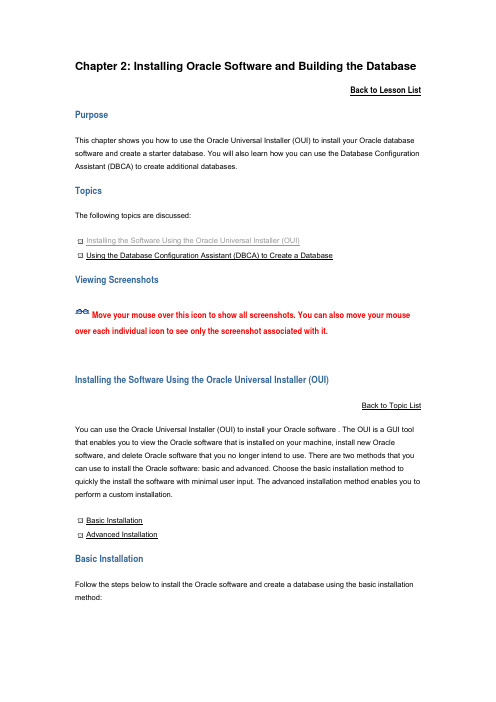
Chapter 2: Installing Oracle Software and Building the DatabaseBack to Lesson ListPurposeThis chapter shows you how to use the Oracle Universal Installer (OUI) to install your Oracle database software and create a starter database. You will also learn how you can use the Database Configuration Assistant (DBCA) to create additional databases.TopicsThe following topics are discussed:Installing the Software Using the Oracle Universal Installer (OUI)Using the Database Configuration Assistant (DBCA) to Create a DatabaseViewing ScreenshotsMove your mouse over this icon to show all screenshots. You can also move your mouse over each individual icon to see only the screenshot associated with it.Installing the Software Using the Oracle Universal Installer (OUI)Back to Topic ListYou can use the Oracle Universal Installer (OUI) to install your Oracle software . The OUI is a GUI tool that enables you to view the Oracle software that is installed on your machine, install new Oracle software, and delete Oracle software that you no longer intend to use. There are two methods that you can use to install the Oracle software: basic and advanced. Choose the basic installation method to quickly the install the software with minimal user input. The advanced installation method enables you to perform a custom installation.Basic InstallationAdvanced InstallationBasic InstallationFollow the steps below to install the Oracle software and create a database using the basic installation method:1.Log onto you computer as a member of the administrative group that is authorized to install Oracle software and create and run the database.2.Insert the distribution CD for the database into your CD drive. The Autorun window will appear automatically. Select Install/Deinstall Products.Note: If you a re downloading from Oracle’s download site, follow the instructions given on the Web site.3.The Select Installation Method window appears. Select Basic Installation. Specify the Oracle Home location, Installation Type, and Unix DBA Group appropriate for your environment. Select Create Starter Database and accept the default Global Database Name of orcl or supply another database name appropriate for your environment. Supply the database password of oracle or a password of your choice. Click Next to begin the installation of your software.4.On UNIX and Linux installations, the Specify Inventory directory and credentials window appears. Enter the full path of the directory in which to install the Oracle software or accept the default. Enter the name of an operatingsystem group that has write permission to the directory. Click Next.The Product-Specific Prerequisites Checks window appears. After all checks are completed, click Next.5.6.The Summary window appears containing a list of the products to be installed. Click Install to begin the installation.7.The Install progress window is displayed.8.The Configuration Assistants window appears. Allow the assistants to execute. They configure your network, start an Oracle Net Services listener process for connecting to the database, create the database and configure management tools.9.The Database Configuration Assistant window showing a progress bar for database creation appears.10.When the database creation is finished, a window containing information about your database appears. Review this list. You may click Password Management if you want to unlock or change passwords for database accounts. Otherwise click OK.The Configuration Assistants window appears again. The Execute Configuration scripts dialog box appears.11.Open a new terminal window, log in as root, and execute the orainstRoot.sh and root.sh scripts asdescribed in the dialog page. When the scripts finish, return to the Oracle Universal Installer page and click OK.12.The End of Installation page appears with important information about Web application port numbers. Click Exit to exit.Click Yes. You have now completed the installation of Oracle software and database creation.Advanced InstallationBack to Topic ListFollow the steps below to install the Oracle software and create a database using the advanced installation method.Note: If you performed the Basic Installation steps, you do not need to complete this section.1.Log onto you computer as a member of the administrative group that is authorized to install Oracle software and create and run the database.2.Insert the distribution CD for the database into your CD drive. The Autorun window will appear automatically. Select Install/Deinstall Products.Note: If you are downloading from Oracle’s download site, follow the instructions given on the Web site.3.The Select Installation Method window appears. Select Advanced Installation and click Next to begin the installation of your software.4.On UNIX and Linux installations, the Specify Inventory directory and credentials window appears. Enter the full path of the directory in which to install the Oracle software or accept the default. Enter the name of an operating system group that has write permission to the directory. Click Next.5.The Select Installation Type window appears. Select Enterprise Edition or Standard Edition as appropriate for your environment. Click Next.6.The Specify Home Details window appears. Enter the Oracle home name and directory path in which to install the Oracle software or accept the default. Click Next.7.The Oracle Universal Installer will now verify that your system meets all the minimum requirements for installing and configuring the chosen products. Correct any reported issues before continuing. Click Next.8.The Select Configuration Option window appears. Select Create a Database and click Next .9.The Select Database Configuration window appears. Select the starter database type of General Purpose,Transaction Processing, or Data Warehouse. Click Next.10.The Specify Database Configuration Options window appears. Enter the Global Database Name and SID in the Database Naming section. Select the character set in the Database Character Set section. Select Create database with sample schemas to install the Sample schemas. Click Next.11.The Select Database Management Option window appears. Select Use Database Control for Database Management. Click Next.12.The Specify Database Storage Option window appears. Select File System, Automatic Storage Management, or Raw Devices as appropriate to your environment. Click Next.13.The Specify Backup and Recovery Options window appears. Select Do not enable Automated backups to configure your own backup schedule. Click Next.14.The Specify Database Schema Passwords window appears. Select Use different passwords for these accounts and enter passwords for the administrative users or select Use the same password for all the accounts and enter the password. Click Next.15.The Summary window appears containing a list of the products to be installed. Click Install to begin the installation.16.The Install progress window is displayed.17.The Configuration Assistants window appears. Allow the assistants to execute. They configure your network, start an Oracle Net Services listener process for connecting to the database, create the database and configure management tools.18.The Database Configuration Assistant window showing a progress bar for database creation appears.19.When the database creation is finished, a window containing information about your database appears. Review this list. You may click Password Management if you want to unlock or change passwords for database accounts. Otherwise click OK.The Configure Assistants window reappears and then the Execute Configuration scripts dialog box appears.20.Open a new terminal window, log in as root, and run the orainstRoot.sh and root.sh scripts asdescribed in the dialog page. When the scripts finish, return to the Oracle Universal Installer window and click OK.21.The End of Installation window appears with important information about Web application port numbers. Click Exit to exit.22.The Exit dialog box appears. Click Yes to exit.You have now completed the installation of Oracle software and database creation.Using the Database Configuration Assistant (DBCA) to Create a DatabaseBack to Topic ListIf you choose to install software only and later create a database, or if you want to create additional databases using the software that you just installed, you can do so by using the Database Configuration Assistant (DBCA).Note: If you created a database as part of the Basic Installation or Advanced Installation, you do not need to complete this section.Follow the steps below to create a new database or a second database if you created a database as part of the software installation:1.Log onto your computer as a member of the administrative group that is authorized to install Oracle software and create and manage the database.2.Launch the DBCA on a Windows operating system as follows:Start > Programs > Oracle - home_name > Configuration and Migration Tools > Database Configuration AssistantLaunch the DBCA on a Linux or UNIX operating system by entering the following at a command prompt:dbca3.The Welcome window appears. Click Next.4.Select Create a Database in the Operations window to begin an interview that enables you to configure and create a database. Click Next.5.On the Database Templates window, select the type of database template to be used in creating the database. You can click Show Details to see the configuration for each type of database. Choose the template suited to the type of workload your database will support. If you are not sure, select the default General Purpose template. Click Next.On the Database Identification window, enter the Global Database Name and SID. Click Next.6.Note: If you created a database as part of your installation of the Oracle software and you are creating a seconddatabase with DBCA, you must choose a different global database name and SID for your second database.7.The Management Options window appears. To use Enterprise Manager, select Configure the Database with Enterprise Manager. Select Use Database Control for Database Managemen t to manage your database locally or select Use Grid Control for Database Management as appropriate to your configuration. Click Next.8.Enter passwords for the administrative users. Click Next .9.Select File System, Automatic Storage Management, or Raw Devices as appropriate to your environment. Click Next.10.Specify the location for the creation of the datafiles. Choose one of the following:Use Database File Locations from Template, Use Common Location for All Database Files, or Use Oracle-Managed Files. Click Next.11.Select Flash Recovery Area and specify a directory location and size. Select Enable Archiving to place your database in ARCHIVELOG mode. Click Next.12.Click the Sample Schemas tab. Select Sample Schemas if you want to include the Sample Schemas (EXAMPLE) tablespace in your database. Click Next.13.The Memory window appears. Select Typical and enter a percentage value. Click the Sizing tab.14.The Sizing window appears. Specify the smallest block size and the maximum number of operating system user processes that can simultaneously connect to the database.Note: You cannot specify the block size if you are using a template.Click the Character Sets tab.15.The Character Sets window appears. Select the character set for your database. Click the Connection Mode tab.16.The Connection Mode window appears. Select Dedicated Server or Shared Server as appropriate for your environment. Click Next.17.The Database Storage window appears. Accept the configuration or make changes as needed. Click Next .18.Select Create Database to create your database. You can also select Save as a Database Template to save your configuration. Click Finish.19.At the Confirmation window, confirm the options that will be installed and click OK .20.Your database is now being created.21.After the database is created, you can change or unlock your passwords or click Exit .。
oracle服务器安装文档

1、Oracle11G数据库1、安装服务端:下列是:安装界面,点击下一步:选择仅安装数据库软件,点击下一步:选择安装单实例数据安装,点击下一步:选择简体中午,点击下一步:选择企业版,点击下一步:建议安装到D盘下,点击下一步:点击开始菜单、所有程序、找到Database Configuration assistant 点击:建库界面:下一步选择创建数据库,单价下一步:选择一般用途或事物处理:选择下一步:创建全局数据库名:yaaoEnterprise manager 前面对钩去掉,自动维护界面对钩去掉,然后点击下一步:所有账户使用同一管理口令:fb2000指定快速回复区对钩去掉,然后单击下一步:内存大小百分比调整到80%,然后单击下一步:(下图百分比是错误的)点击完成:正在建库界面:点击口令管理:SYS与SYStem口令输入:fb2000点击“确定”,数据库安装完成。
将已预先准备好的LISTENER.ORA.、SQLNET.ORA、TNSNAMES.ORA三个文件拷贝到安装数据库目录ORACLE 11G下,D:\app\Administrator\product\11.2.0\dbhome_1\NETWORK\ADMIN安装完毕后会自动创建“OracleServiceYAAO”服务,但不会自动创建TNSListener服务。
创建TNSListener服务需手工创建,在CMD命令窗口,运行如下命令:lsnrctl start,如下图:再启动这两个服务,创建完数据库后,接着就要对数据库进行配置。
运行开始/设置/控制面板/管理工具/服务器:选择OrackeOraDb10g_home1TNSListener,右键属性:将“启动类型”改为自动,再重启:将所以Oracle程序都设置为“自动”启动类型。
1.1建立用户与表空间1.运行cmd2.输入sqlplus /nolog3.输入conn sys/fb2000 as sysdba4.其中“D:\app\Administrator\oradata\yaao”要修改成现在数据所安装的路径。
oracle数据库安装 使用说明书

使用说明书以后按此格式逐步完善。
1数据库安装、数据恢复及备份1.1 Oracle数据库安装从安装盘中找到第一张盘,在文件夹中找到,选中后双击鼠标左键,出现如下对话框:单击“下一步”,出现如下对话框:选择将Oracle安装到计算机的那个磁盘和目录下。
默认名称:OraHome92路径:D:\oracle\ora92一般使用默认位置安装。
如果需要更改路径,则单击“浏览”,选择相应的安装路径。
然后再单击“下一步”继续单击“下一步”,出现如下对话框:数据库服务器:选择Oracle9i Database 9.2.0.1.0 数据库客户端:选择:Oracle9i Client 9.2.0.1.0 然后继续单击“下一步”,出现如下对话框:使用默认选择“企业版”,继续单击“下一步”,出现如下对话框:使用默认选择“通用”,继续单击“下一步”,出现如下对话框:使用默认端口号:2030,继续单击“下一步”,出现如下对话框:全局数据库:pbgl,SID:pbgl。
然后继续单击“下一步”,出现如下对话框:使用默认选择,继续单击“下一步”,出现如下对话框:使用模式设置,继续单击“下一步”,出现如下对话框:单击“安装”,出现如下对话框:程序开始安装,请等待一会,该过程大约需要分钟,具体视计算机的性能而定。
安装的过程中会有一些DOS模式的对话框自动弹出来,又自动消失,此时不要操作,不要强行关闭这些对话框。
当弹出如下对话框时,设置对应的密码:注意:保存好该密码,以便在Oracle维护时使用。
一般SYS的口令就设置为sys,SYSTEM 的口令设置为system,方便记忆。
设置好密码后单击“确定”,然后继续等待,直到出现如下对话框:数据库安装结束,此时单击“退出”按钮,弹出如下对话框:单击“是(Y)”,关闭安装程序。
安装完毕后,屏幕上启动了一个Oracle的关于HTTP的Server,如下图,因系统不需要启动该服务,因此直接关闭即可。
Oracle 数据库安装手册
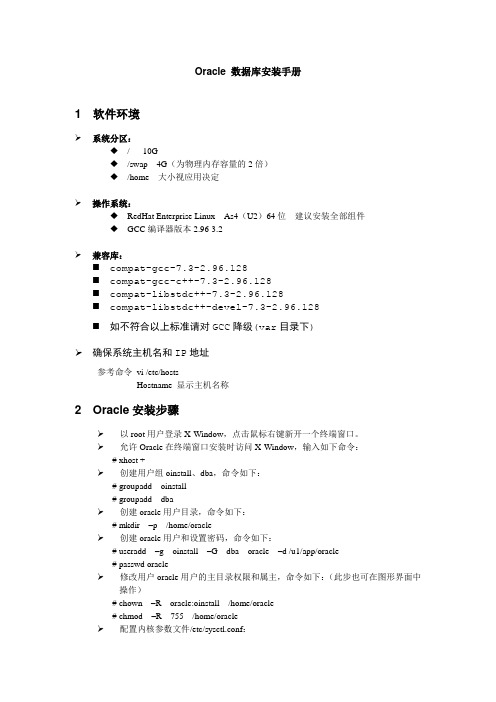
Oracle 数据库安装手册1 软件环境系统分区:◆/ 10G◆/swap 4G(为物理内存容量的2倍)◆/home 大小视应用决定操作系统:◆RedHat Enterprise Linux As4(U2)64位建议安装全部组件◆GCC编译器版本2.96-3.2兼容库:⏹compat-gcc-7.3-2.96.128⏹compat-gcc-c++-7.3-2.96.128⏹compat-libstdc++-7.3-2.96.128⏹compat-libstdc++-devel-7.3-2.96.128⏹如不符合以上标准请对GCC降级(var目录下)确保系统主机名和IP地址参考命令vi /etc/hostsHostname 显示主机名称2 Oracle安装步骤以root用户登录X-Window,点击鼠标右键新开一个终端窗口。
允许Oracle在终端窗口安装时访问X-Window,输入如下命令:# xhost +创建用户组oinstall、dba,命令如下:# groupadd oinstall# groupadd dba创建oracle用户目录,命令如下:# mkdir –p /home/oracle创建oracle用户和设置密码,命令如下:# useradd –g oinstall –G dba oracle –d /u1/app/oracle# passwd oracle修改用户oracle用户的主目录权限和属主,命令如下:(此步也可在图形界面中操作)# chown –R oracle:oinstall /home/oracle# chmod –R 755 /home/oracle配置内核参数文件/etc/sysctl.conf:修改文件/etc/sysctl.conf,增加以下内容:kernel.shmall = 2097152kernel.shmmax = 2147483648kernel.shmmni = 4096kernel.sem = 250 32000 100 128fs.file-max = 65536net.ipv4.ip_local_port_range = 1024 65000net.core.rmem_default = 262144net.core.rmem_max = 262144net.core.wmem_default = 262144net.core.wmem_max = 262144增加保存后,使设置生效,输入如下命令:# sysctl-p配置SHELL参数文件/etc/security/limits.conf:修改文件/etc/security/limits.conf,增加以下内容:oracle soft nproc 2047oracle hard nproc 16384oracle soft nofile 1024oracle hard nofile 65536配置文件/etc/profile,增加以下内容:if [ $USER = "oracle" ]; thenif [ $SHELL = "/bin/ksh" ]; thenulimit -p 16384ulimit -n 65536elseulimit -u 16384 -n 65536fifi切换到oracle用户,命令如下:#su - oracle编辑文件.bash_profile,设置文件权限掩码,在最后追加如下内容:umask 022运行如下命令,使配置生效:$ source .bash_profile运行如下命令,开始安装oracle:$安装文件路径/runInstaller按提示进行安装,具体情况视需要设置。
ORACLE9.2.0 for Solaris SPARC安装手册

set semsys:seminfo_semmns=630
set semsys:seminfo_semopm=315
set semsys:seminfo_semvmx=32767
set shmsys:shminfo_shmmax=4294967295
6、设置/var/opt/oracle/oratab文件的链接
$ln -s /var/opt/oracle/oratab /etc/oratab
7、创建net连接参数与数据库实例,此处不需特别的设置,按提示完成即可,漫长的等待。
这个时候有些安装光盘会出错,或者其他原因可能导致数据库创建失败,忽略它。等安装完成后手动用dbca命令创建数据库,在用dbca创建之前,也还有可能需要把%ORACLE_HOME%/bin/dbca文件中最终执行命令jre改成java。我有两次未成功创建数据库都是用这种方法解决的。
export ORACLE_BASE
ORACLE_SID=nec01
export ORACLE_SID
#工作需要我用的是日语版系统,中文系统下请修改这个属性
NLS_LANG=JAPANESE_JAPAN.JA16SJIS
export NLS_LANG
JAVA_HOME=/export/home/oracle/oracle/product/9.2.0/JRE
完成以上工作后对机器reboot,使设置生效。
二、开始安装
选择英文图形界面后以oracle用户身份登录。据说以中文安装有可能出现问题,所以最好选择英文方式。
1、解压oracle安装光盘
1). 使用gunzip 解压生成三个.cpio文件
(Oracle管理)Centos48-Oracle92安装说明
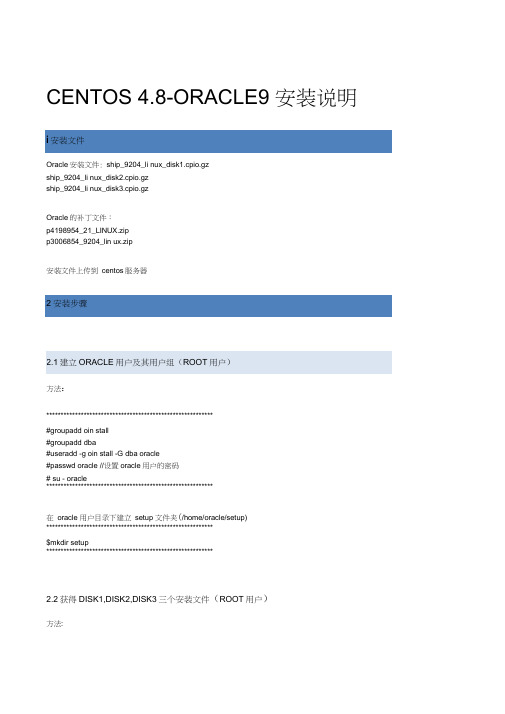
CENTOS 4.8-ORACLE9 安装说明Oracle安装文件: ship_9204_li nux_disk1.cpio.gzship_9204_li nux_disk2.cpio.gzship_9204_li nux_disk3.cpio.gzOracle的补丁文件:p4198954_21_LINUX.zipp3006854_9204_lin ux.zip安装文件上传到centos服务器方法:**********************************************************#groupadd oin stall#groupadd dba#useradd -g oin stall -G dba oracle#passwd oracle //设置oracle用户的密码# su - oracle**********************************************************在oracle 用户目录下建立setup 文件夹(/home/oracle/setup)**********************************************************$mkdir setup**********************************************************2.2获得DISK1,DISK2,DISK3三个安装文件(ROOT用户)方法:⑴**********************************************************#gu nzip ship_9204_li nux_disk1.cpio.gz#gu nzip ship_9204_li nux_disk2.cpio.gz#gu nzip ship_9204_li nux_disk3.cpio.gz**********************************************************⑵**********************************************************#cpio -idm < ship_9204_lin ux_disk1.cpio #(should report 1288238 blocks)#cpio -idm < ship_9204_lin ux_disk2.cpio #(should report 1263504 blocks)#cpio -idm < ship_9204_lin ux_disk3.cpio #(should report 585396 blocks)**********************************************************ps)以上两步可合成分别一步**********************************************************#zcat ship_9204_li nux_disk1.cpio.gz | cpio -idmv#zcat ship_9204_li nux_disk2.cpio.gz | cpio -idmv#zcat ship_9204_li nux_disk3.cpio.gz | cpio -idmv**********************************************************⑶把Disk1,Disk2,Disk3 三个安装文件mv 到/home/oracle/setup 中去⑷给上面的文件权限并把它赋予oracle用户**********************************************************#chmod -R 755 /home/oracle/setup/*#chow n -R oracle. oin stall /home/oracle/setup/***********************************************************为节约空间可把三个.gz文件和.cpio文件删除.2.3打补丁(ROOT用户)方法:(1) 把p4198954_21_LINUX.zip, p3006854_9204_linux.zip 补丁文件mv 至U /home/oracle/setup中去(2) 在/home/oracle/setup 目录执行**********************************************************#unzip p4198954_21_LINUX.zip#rpm -ivh compat-libcwait-2.1-1.i386.rpm#rpm -ivh compat-oracle-rhel4-1.0-5.i386.rpm#un zip p3006854_9204_li nux.zip#cd 3006854#sh rhel3_pre_ in stall.sh********************************************************************************************************************#mkdir -p /opt/oracle9i/product/9.2.0#mkdir /var/opt/oracle9i#chow n -R oracle. oin stall /opt/oracle9i#chow n -R oracle.dba /var/opt/oracle9i#chmod 755 /var/opt/oracle9i**********************************************************方法:(1)打开/etc/sysctl.conf文件,在文件末尾添加以下参数**********************************************************kernel.core_uses_pid = 1kernel.shmmax = 536870912kern el.shm mni = 4096kernel.shmall = 2097152kernel.sem = 250 32000 100 128fs.file-max = 65536net.ipv4.ip_local_port_ra nge = 1024 65000**********************************************************(2)打开/etc/security/limits.conf 文件,在文件末尾添加以下参数**********************************************************oracle soft nofile 65536oracle hard nofile 65536oracle soft nproc 16384oracle hard nproc 16384**********************************************************⑶打开/etc/profile,文件末尾添加以下参数**********************************************************export LD_ASSUME_KERNEL=2.4.1export ORACLE_BASE=/opt/oracle9iexport ORACLE_OWNER=oracleexport ORACLE_HOME=/opt/oracle9i/product/9.2.0export ORACLE_SID=ORCLexport ORACLE_TERM=xtermexport TNS_ADMIN=$ORACLE_HOME/network/admi nexport ORA_NLS33=$ORACLE_HOME/ocommo n/n ls/admi n/dataexport NLS_LANG=AMERICAN_AMERICA.ZHS16GBKexport LD_LIBRARY_PATH=$LD_LIBRARY_PATH:$ORACLE_HOME/lib:/lib:/usr/lib:/usr/local/libexport PATH=$PATH:$ORACLE_HOME/b inCLASSPATH=$CLASSPATH:$ORACLE_HOME/JRE:$ORACLE_HOME/jlib:$ORACLE_HOME/rdbms/jlib:$ORACLE_HOME/ne twork/jlibexport CLASSPATH**********************************************************(4) 让配置生效,不需要重新启动,执行**********************************************************#/sb in /sysctl -p#source /etc/profile**********************************************************(5) 在oracle用户下查看环境变量**********************************************************#su - oracle#env |grep ORA**********************************************************只选择安装软件(software only)不创建数据库方法:(1)用root用户执行**********************************************************#xhost +localhost(查看是否access)**********************************************************⑵切换到oracle用户并安装**********************************************************#su - oracle#export LANG=en_US(不然乱码)#/home/oracle/setup/Disk1/ru nln stall**********************************************************安装,注意:中间按照它的提示执行相应的操作,安装只选择安装软件不按照默认数据库,待软件装完后再建库。
- 1、下载文档前请自行甄别文档内容的完整性,平台不提供额外的编辑、内容补充、找答案等附加服务。
- 2、"仅部分预览"的文档,不可在线预览部分如存在完整性等问题,可反馈申请退款(可完整预览的文档不适用该条件!)。
- 3、如文档侵犯您的权益,请联系客服反馈,我们会尽快为您处理(人工客服工作时间:9:00-18:30)。
1.1.1 ORACLE92数据库完整版安装
比如安装目录在E:\ORACLE9i2
1.1.1.1 进入E:\ORACLE9i2\A(安装目录一般为英文目录),双击SETUP
1.1.1.2 点击“下一步”。
1.1.1.3 点击“下一步”。
1.1.1.4 点击“下一步”(第一个选择为完全安装,可以建立数据库;第二个为只装相关管理工具和服务,可以修改数据库;第三个为客户端,可以连接服务器)。
1.1.1.5 点击“下一步”。
1.1.1.6 点击“下一步”。
1.1.1.7 点击“下一步”。
1.1.1.8 点击“下一步”(全局数据库命录入为orcl,一个网段内不能有两个相同的数据库)。
1.1.1.9 点击“下一步”。
1.1.1.10 点击“下一步”。
1.1.1.11 点击“安装”,开始安装
1.1.1.12 更改安装路径,(Oracle92一共三张盘)点击“浏览”。
1.1.1.13 在浏览中选择B, 选择“确定”。
1.1.1.14 选择“确定”。
1.1.1.15 更改安装路径,点击“浏览”。
1.1.1.17 选择“确定”。
1.1.18 在弹出的对话框中输入口令,点击“确定”。
(SYS口令为SYS;SYSTEM 口令为SYSTEM 主要是为里方便进入)一个是:System 默认密码是:manager
一个是:sys 默认秘密是:change_on_install
首先。
Oracle92默认的系统超级用户有两个,一个是:System 默认密码是:manager
一个是:sys 默认秘密是:change_on_install System和Sys是系统用户,是oracle系统权限最大的两个用户,如果要作为应用,一般是通过登陆System或者sys用户后,建立一般用户(oracle是已用户为基本单位的),在用户下包括表,视图,触发器,过程等元素,下面做为建立用户到操作流程
1.通过程序-> Oracle - OraHome92-> Enterprise Manager Console 打开此画面
A .首先通过system用户登陆oracle ,此处的密码为: system(我更改后的,默认为manager
连接身份为Normal
B.通过sys 用户登陆oracle ,此处的密码也为: sys(我更改后的,默认为change_on_install 连接身份必须选择SYSDBA
通过两种用户身份登陆后都出现如下界面:
点击左侧的“安全性“-》用户
在用户上点击右键——》点击“创建“出现
如下画面:
在名称框里输入要建立的用户名称,
例如名称:CCGL_JNYY(仓储管理-济南药业) 输入口令:xxxx
确认口令:xxxx
口令自己随便输入,记住
在角色页里选择新增角色:DBA , RESOURCE 到已授予角色里,并且把管理选项
打为后点击创建,则ccgl_jnyy 用户创建成功
导入数据库步骤:
导入数据库主要是在有数据备份的基础上进行的一项操作
导入到用户下后,该用户就包含了各种数据库元素(表,视图等)
1.1.3.12 导入数据库:依次进入“开始”—“运行”,输入“imp”,弹出对话框。
1.1.3.13 输入“用户名”,“ccgl_jnyy/xxxx@orcl”,回车。
在出现的“导入文件:EXPDAT.DMP〉”中输入(比如)“e:\xxxx.dmp”,连续回车,直到出现“用户名”,输入“ccgl_jkxt”,回车两次,完成导入。
删除数据库:比如删除CCGL_JNYY数据库
1.1.3.15 删除数据库:在“安全性”—“用户”中选择“CCGL_JNYY”,按右键,选择“移去”。
1.1.3.15 在弹出的对话框中选择“是”。
ORACLE9i数据库完整版卸载
要想重新安装 ORACLE9i,则必须完成以下工作:
1.1.4.1 停止所有ORACLE进程的运行:
1.1.4.1.1 点击:开始—设置—控制面板—服务;
1.1.4.1.2 停止所有 ORACLE 的服务项;
1.1.4.1.3 置所有“自动”ORACLE的服务项为“手工”;
1.1.4.1.4 重新起动计算机。
1.1.4.2 用资源管理器删除 ORACLE 目录及所有文件;
1.1.4.3 用regedit 清除注册表中的所有ORACLE项;
1.1.4.3.1 点击:开始—运行—输入regedit;
1.1.4.3.2 点击“HEY_LOCAL_MACHINE”左边的“+”以展开目录;
1.1.4.3.3 点击“SOFTWARE”左边的“+”以展开目录;
1.1.4.3.4 删除“ORACLE”项;
1.1.4.3.5 点击“SYSTEM”左边的“+”以展开目录;
1.1.4.3.6 点击“CurrentControlSet”左边的“+”以展开目录;
1.1.4.3.7 点击“Services”左边的“+”以展开目录;
1.1.4.3.8 用上下滚动条查看ORACLE的各项,并删除各项(光标在当前项,按Del键再按确定);
1.1.4.3.9 完成以上操作后,重新起动计算机;
1.1.4.3.10 开始进行基于操作系统的ORACLE9I的安装。
ORACLE9i客户端连接服务器步骤
1、依次进入“开始”—“Oracle-Orahome92”—“Configuration and Migration Tools”—“Net
Configuration Assistant”。
2、选择本地Net服务名配置,点击“下一步”。
3、点击“下一步”。
4、点击“下一步”。
5、选择公司的服务器,输入ORA(具体的根据现场实际配置为主,此处举例),点击“下一步”。
6、点击“下一步”。
7、7、输入主机名例如:172.18.14.230(以实际安装数据库服务器的ip地址为主,此处举例),点击“下一步”。
8、选择“是”,进行测试,点击“下一步”。
9、测试未成功,点击“更改登录”。
10、输入口令:更改后的system密码,点击“确定”。
11、显示测试成功,点击“下一步”。
12、点击“下一步”。
13、点击“下一步”。
14、点击“下一步”。
15、点击“完成”。
至此;客户端就配置好了与服务器数据库的通讯
1.1.5 ORACLE9i数据库第三方工具安装
1.1.5.1 进入三方工具备份目录
E:\gaokeruanjianbeifen\plsqldev714.1390。
1.1.5.2 点击plsqldev714.1390进行英文版安装。
1.1.5.3 选择“确定”。
1.1.5.4 选择“I Agree”。
1.1.5.5 选择“Next”。
1.1.5.6 选择“Next”。
1.1.5.7 点击“”Finish”。
1.1.5.8 选择“Close”。
1.1.5.9 依次进入E:\gaokeruanjianbeifen\plsqldev714.1390。
1.1.5.10 点击“Chinese”进行汉化安装。
1.1.5.11 点击“确定”。
1.1.5.12 输入路径:C:\Program Files\PLSQL Developer,点击“下一步”。
1.1.5.13 点击“下一步”。
1.1.5.14 点击“确定”。
1.1.5.15 完成后显示,点击“确定”。
1.1.5.16进入“E:\gaokeruanjianbeifen\plsqldev714.1390\注册文件”,拷
贝“aalf”文件到“C:\Program Files\PLSQL Developer”目录里粘
贴。
通过oracle第三方工具 PL/SQL Developer操作 CCGL_JNYY用户数据库
下面以用户:ccgl_jnyy 为例演示 ,桌面上点击PL/SQL Developer图标
点击“确定“进入后,出现此画面
ODBC连接ORACLE92数据库方式
1.首先打开——》控制面板——》管理工具—》数据源(ODBC) 出现如下图所示(我本机所示)
1.在“系统DSN“页上,点击”添加“后
拖动纵向滚动条找到“Oracle in OraHome92”数据源
点击完成后出现如下图示
输入正确信息后
点击:Test Connection 出现如下
输入正确的password 后点击:OK
如果出现Connection successful 则说明通过ODBC连接oracle数据库成功!!!!!
如果出现如下情况,则说明配置出错(错误包括:用户名,密码,或者服务名,需要仔细检查)。
