新版 GP 以太网接口打印机使用手册
GP条码打印机驱动安装及使用教程
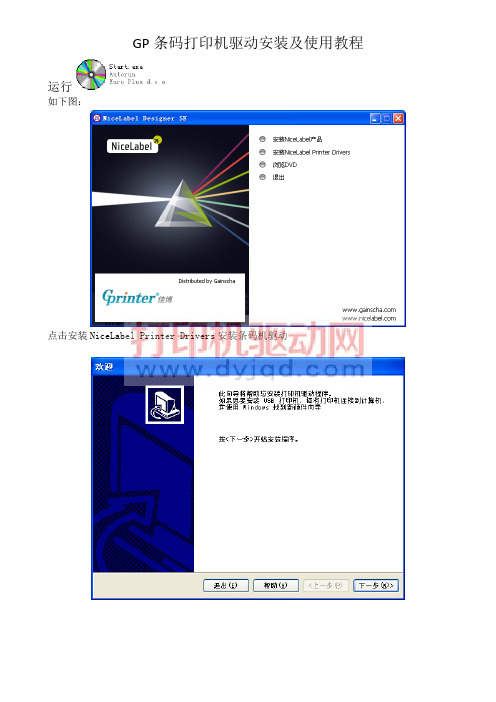
GP条码打印机驱动安装及使用教程运行如下图:点击安装NiceLabel Printer Drivers安装条码机驱动点击下一步,查看许可协议。
选择对应型号的打印机驱动,以GP-9035T为例。
选择通讯端口,根据数据连接线不同选择不同的端口。
并口线连接请选择LPT,根据机器有否扩展选择端口。
串口线连接请选择COM,根据机器有否扩展选择端口。
USB线连接请选择USB,请注意因为USB接口为系统虚拟打印端口,实际操作过程中需要确保打印机USB线连接上并打开打印机电源。
如果一台电脑在安装多台连接USB线的打印机时,有可能出现多个USB端口,如USB001,USB002……USB005……等,如果在完成驱动安装后不能打印需要进行端口调整。
若使用网络端口请选择添加TCP/IP端口,如下步骤:输入打印机的“IP 地址”,如下图所示。
然后选择“自定义”‐‐‐‐‐‐‐‐“设置”,如下图所示,确认以下图示信息并选择“确定”。
然后选择“下一步”,如下图所示。
最后选择“完成”即成功添加了以太网通迅端口。
并可供选择,如下图:如选择串口(COM 口),需要在已安装完成的驱动属性页里选择端口选项卡,然后“配置端口”。
选择串口通讯“每秒位数”、“数据位”、“奇偶校验”、“停止位”、“数据流控制”等。
出厂默认参数如下图所示,可通过打印机开机自检页上查看到串口通讯参数信息,如“SERIAL 9600,N,8,1”。
如果使用USB连接时驱动端口内存在多个USB虚拟端口时,如下图:请遵循以下步骤尝试连接打印机:首先,在打印机属性的“常规”选项卡中点击“打印测试页”然后,查看打印任务状态,如果正常测试页会在短时间内消失并且打印机会有打印动作,如果端口不正确,则状态一定会出现“错误-正在打印”的字样。
如下图:回到打印机属性的“端口”选项卡中,勾选另外一个USB虚拟端口,点击右下角“应用”,等待一下,测试页任务会重新启动,如果端口对应上,则任务会消失并且打印机会有打印动作,如果仍然是错误则重复上述勾选操作直到打印任务完成。
GP无线WIFI打印机安装使用设置手册V最新版
GP无线WIFI打印机安装使用手册GP无线WIFI打印机参数功能介绍:可用Web 浏览器进行参数设定。
支持点对点(TCP、UDP) 和broadcast (仅UDP)。
支持WLAN 基础网(Infra)、自组网(Ad-Hoc)。
支持WLAN 安全(WEP64、WEP128、WPA-Personal、WPA2-Personal、TKIP、AES)。
内置AP、Ad-Hoc 搜索功能(site survey 功能)。
支持2.4G 无线网络(1-13信道可选)IEEE802.11b(11Mbps),IEEE802.11g(54Mbps),IEEE802.11n(72Mbps)。
接收信号强度大于-35db(72Mbps)。
支持AP(Access Point)路由和STA(Station)两种模式,用户可以通过网页选择不同模式。
AP模式:笔记本,手机,平板等无线终端可以直接搜索并连接到打印机。
STA模式:此模式打印机可以直接连接到路由器(可实现无线打印机共享打印功能)GP无线WIFI打印机使用设置步骤:一.AP(Access Point)模式设置方法1.请将纸卷放置打印机内部并开启打印机电源,使用可以接收无线WIFI的笔记本电脑设置电脑IP为自动获取状态。
2.搜索当前无线网络,查找到“Printer”打印机设备,点击“连接”连接到打印机。
3.我的电脑-》控制面板-》打印机和传真,找到已经安装好GP-80160II打印机驱动程序,右击选择“属性”。
4.选择“端口”,然后点击“添加端口”。
5. 选择“Standard TCP/IP Port”,并点击“新端口”。
6. 输入打印机默认IP地址,并点击下一步。
7.点击“常规”,然后点击“打印测试页”完成打印机安装,如果打印机能打印出测试页,表示已经可以正常使用。
二.STA(Station)模式设置方法1. 在AP模式下使用笔记本连接到打印机,如下图:2. 在IE浏览器输入:http://192.168.0.1,进入后输入用户名:admin,用户密码:admin 登陆到设置页面。
GP-H80250系列USB接口打印机安装及使用说明
GP-H80250系列USB接口打印机安装及使用说明打印机USB使用介绍:打印机USB接口总体来说可分为真正的USB接口、并口转USB接口、串口转USB接口和USB虚拟串口等5种。
真正的USB接口和并口转USB接口:数据传输速度和打印速度都有保障,但应用软件接入联接打印不能直接兼容传统上的并口或串口;串口转USB接口:虽然说应用软件接入联接打印可以直接兼容传统上的串口,但数据传输速度和打印速度都是传统的串口速度,数据传输速度和打印速度都很慢,无法体现出打印机高速高效的特性;USB虚拟串口:既能够直接兼容传统上的串口,又能实现真正的USB接口的高速的数据传输和高速打印。
USB虚拟串口可以说是USB接口设计的最佳应用方案,盛源票据打印机公司出品的GP-H80250系列打印机正是采用了这种先进的技术,既采用USB接口与计算机相联接,又可以对应用软件的良好的兼容传统的串口,使应用软件只要支持串口打印,应用软件不须要做任何修改,就可以使用GP-H80250系列打印机的USB端口通讯轻松实现票据打印。
GP-H80250系列打印机USB驱动安装及使用说明:当计算机通过USB接口连接GP-H80250时,计算机即提示找到新硬件,如下图所示。
然后选择“从列表或指定位置安装(高级)(S)”,如下图所示。
然后选择“下一步(N)”,出现如下窗口所示,选择GP-H80250打印机USB端口驱动所在路经。
然后选择“下一步(N)”继续安装USB端口驱动。
当弹出如下所示窗口。
选择“仍然继续(C)”,即提示驱动安装“完成”,然后选择“完成”确认,如下图所示。
然后在“控制面版”——>“系统”——>“硬件”——>“设备管理器”——>“端口(COM和LPT)”——>“Gprinter Micro USB serial port (COM3)”,通过这里可以查看到打印机打USB虚拟的端口号,如COM3,这样打印机时,应用软件或是驱动里的通迅端口就要选择这个端口号,如COM3。
《GP用户手册》word版
Pro-face GP承蒙使用日本Digital公司Pro-face GP系列触摸屏工业图形显示器产品,万分感谢。
在开始使用GP之前,请认真阅读本手册的有关说明。
本手册对GP产品的硬件特性、连接及初始化设定等内容作介绍。
警告:为了安全、正确地使用该装置,请遵守下列准则。
* 因为存在触电的危险,因此在连接电源线到GP上时,确保电源线没有接通电源。
* 由于GP内部装有高电压部件,当拆解该装置时,可能会引起触电,不要拆解GP。
* 不要使用超过电压范围的电源。
使用超过指定电压范围的电源,可能会损坏GP。
* 在有可燃性气体的环境中不要使用GP,否则可能引起爆炸。
* GP使用一个锂电池用来支持内部时钟数据。
如果错误的更换电池,可能引起爆炸。
为了避免危险,请不要自己更换电池。
当需要更换电池时,请与天任联系。
* 在涉及生命或有重大灾难的情况下,不要使用触摸屏键。
应使用单独的开关。
* 当GP与它的主控制器之间的通信出现错误时,请设计你的系统以便机器动作不会出现错误。
如果不这样,人有受到伤害的危险并且有可能损坏设备。
预防措施:* 不要用硬的或重物碰撞触摸屏,或用太大的力量按触摸屏,因为可能会导致无法修补的损伤。
* 如果放置GP的环境温度超出了规定的温度范围,GP将可能被损坏。
* 在GP的内部,不允许有水、液体或金属物质,否则会使GP损坏或触电。
* 避免减少GP的通风空间,或在易升温的环境中存放、使用GP。
* 避免在阳光直射、灰尘多、肮脏的环境中存放使用GP。
* GP是精密仪器。
注意不要对GP有大的冲击或振动,否则仪器容易损坏。
* 不要使用油漆,有机溶剂或强酸复合物擦拭显示器。
* 因为可能会有无法预料的事情发生,请对您的画面数据做备份。
GP系列触摸屏工业图形显示器用户手册目录第一章技术条件1.1一般规格 ---------------------------------------------------- 4 1.2功能特点 ---------------------------------------------------- 5 1.3GP各部分名称 ----------------------------------------------- 10 1.4外形尺寸 ---------------------------------------------------- 10 第二章安装与接线------------------------------------------------ 12第三章OFF-LINE(离线)方式3.1 进入OFF-LINE方式 ------------------------------------------- 15 3.2 主菜单 ---------------------------------------------------- 16 3.3 初始化—标准操作 -------------------------------------------- 16 3.4 自诊断—标准操作 -------------------------------------------- 16 3.5 画面数据传送 ---------------------------------------------- 17 第四章初始化4.1 初始化屏幕 ------------------------------------------------ 18 4.2 初始化项目 ------------------------------------------------ 18 4.3 系统环境设置 ---------------------------------------------- 19 4.4 I/O设置 -------------------------------------------------- 22 4.5 PLC设置 -------------------------------------------------- 26 4.6 初始化存储器 ---------------------------------------------- 29 4.7 时间设置 -------------------------------------------------- 30 4.8 屏幕设置 -------------------------------------------------- 30 第五章G P运行方式和出错信息5.1 进入运行(RUN)方式 ---------------------------------------- 31 5.2 问题解决 -------------------------------------------------- 31 5.3 自诊断 ---------------------------------------------------- 34 5.4 出错信息 -------------------------------------------------- 37第一章技术条件日本DIGITAL公司的Pro-face GP系列产品,目前有GP70和GP77两大系列。
打印机连接和电源操作说明书
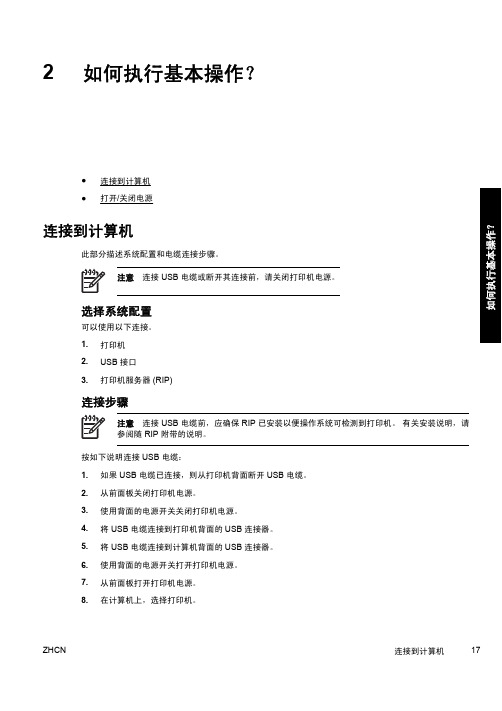
2如何执行基本操作?●连接到计算机●打开/关闭电源连接到计算机此部分描述系统配置和电缆连接步骤。
注意连接 USB 电缆或断开其连接前,请关闭打印机电源。
选择系统配置可以使用以下连接。
1.打印机B 接口3.打印机服务器 (RIP)连接步骤注意连接 USB 电缆前,应确保 RIP 已安装以便操作系统可检测到打印机。
有关安装说明,请参阅随 RIP 附带的说明。
按如下说明连接 USB 电缆:1.如果 USB 电缆已连接,则从打印机背面断开 USB 电缆。
2.从前面板关闭打印机电源。
3.使用背面的电源开关关闭打印机电源。
4.将 USB 电缆连接到打印机背面的 USB 连接器。
5.将 USB 电缆连接到计算机背面的 USB 连接器。
6.使用背面的电源开关打开打印机电源。
7.从前面板打开打印机电源。
8.在计算机上,选择打印机。
ZHCN 连接到计算机17如何执行打开/关闭电源警告!使用铭牌上指定的电源电压。
确保打印机已良好接地。
打印机未接地可能导致触电、失火,并易受电磁干扰。
小心连接电源插座和从中断开时,始终通过插头固定电源线。
切勿拉电源线,否则可能损坏电源线并引起失火和触电。
打开打印机电源1.将打印机背面左侧的打印机开关置于关闭 (0) 位置,然后将提供的电源电缆一端插入打印机的插孔中。
将电缆的另一电源插头插入电源插座。
警告!避免因将多个设备插入打印机电源插座而导致过载。
只使用随打印机提供的 HP电线。
不要损坏、剪切或维修电源线。
损坏的电源线可能导致失火和触电。
使用 HP 认可的电源线替换损坏的电源线。
1. 打印机开关2. 电源插孔18第 2 章如何执行基本操作?ZHCN2.将打印机背面左侧的打印机开关置于打开 (1)位置。
1. 打印机开关2. 电源插孔ZHCN 打开/关闭电源19如何执行基本操作3.按前面板上的 POWER ON/OFF(电源开/关)键。
1. POWER ON/OFF(电源开/关)键打开电源后,打印机将执行开机自检,并且前面板上会显示以下消息。
GP以太网(Ethernet)打印机状态检测指令说明
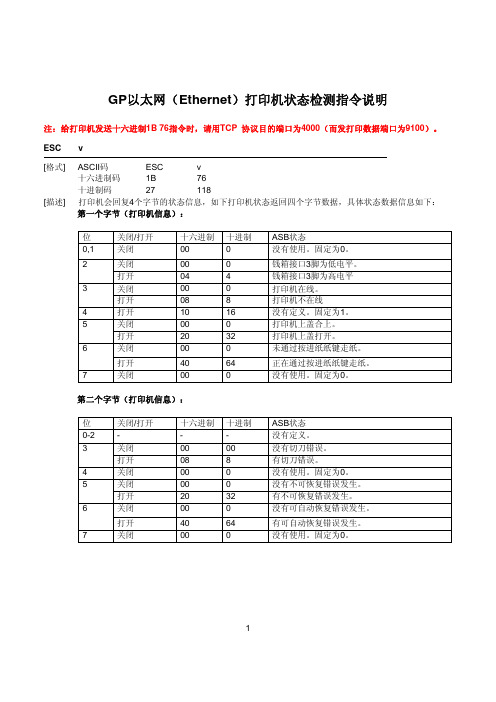
GP以太网(Ethernet)打印机状态检测指令说明注:给打印机发送十六进制1B 76指令时,请用TCP 协议目的端口为4000(而发打印数据端口为9100)。
ESC v[格式] ASCII码ESC v十六进制码1B 76十进制码 27 118[描述] 打印机会回复4个字节的状态信息,如下打印机状态返回四个字节数据,具体状态数据信息如下:第一个字节(打印机信息):位关闭/打开十六进制十进制 ASB状态0,1 关闭00 0 没有使用。
固定为0。
2 关闭00 0 钱箱接口3脚为低电平。
4 钱箱接口3脚为高电平打开 043 关闭00 0 打印机在线。
打开08 8 打印机不在线4 打开10 16 没有定义。
固定为1。
5 关闭00 0 打印机上盖合上。
打开20 32 打印机上盖打开。
6 关闭00 0 未通过按进纸纸键走纸。
打开40 64 正在通过按进纸纸键走纸。
7 关闭00 0 没有使用。
固定为0。
第二个字节(打印机信息):位关闭/打开十六进制十进制 ASB状态0-2 - - - 没有定义。
3 关闭00 00 没有切刀错误。
打开08 8 有切刀错误。
4 关闭00 0 没有使用。
固定为0。
5 关闭00 0 没有不可恢复错误发生。
打开20 32 有不可恢复错误发生。
6 关闭00 0 没有可自动恢复错误发生。
打开40 64 有可自动恢复错误发生。
7 关闭00 0 没有使用。
固定为0。
12第三个字节(纸传感器信息):位 关闭/打开 十六进制 十进制 ASB 状态0,1 关闭00 0 没有探测到打印机纸将尽。
打开03 3 打印机纸将尽。
2,3 关闭00 0 打印机有纸 打开0C 12 打印机缺纸。
4 关闭00 0 没有使用。
固定为0。
5,6 - - - 没有定义。
7 关闭00 0 没有使用。
固定为0。
第四个字节(纸传感器信息):位 关闭/打开 十六进制 十进制 ASB 状态0-3 - - - 没有定义。
4 关闭00 0 没有使用。
GP-5890XII安装手册

GP-5890XII安装手册一打印机安装1 插入安装光盘,选择安装光盘。
2 进入光盘文件,选择文件夹(文件夹名称为打印纸宽)3 选择驱动文件夹4 选择安装文件(CN为中文模式,EN为英文模式)5 左键双击安装文件或右键打开出现下图提示6 点击下一步出现以下提示,选择“我同意此协议”,点击下一步7 浏览以下信息,单击下一步8 选择电脑操作系统,点击下一步9 选择驱动名称(打印机型号),根据不同情况勾选或者取消“设为默认打印机”,点击结束完成打印机安装GP 以太网接口打印机具有非常卓越的性能:1、防水、防油烟结构设计(特别是GP-58120III、GP-80250 系列)。
2、打印机错误报警提示功能。
3、可选支持EPSON ESC/POS 指令模式或Star 指令模式(特别是GP-80250 系列)。
4、可选支持简体中文、繁体中文、日文、韩文语言,以及多达68 种国际字型支持。
5、打印机来单打印自动提醒功能(需软件配合使用或使用GP 驱动程序使用)。
6、打印机可选高速驱动打印模式和高速硬字库打印模式,最高可达250mm/s 的硬字库打印速度和220mm/s 的驱动打印速度。
7、串口可选115200bps 高速串口通讯速度,串口校验位支持无校验、奇校验、偶校验、空格、标记等多种校验方式。
8、打印机小票自动重新打印功能:即当打印机由于纸尽导致最后一张小票打印不完整时,此时重新装纸,打印机会自动将此张小票完整的重新打印出来。
9、可实现软件与打印机绑定支持,保护软件商的切实利益。
一旦激活此功能,用户使用此软件只能使用此型号的打印机才能正常工作。
10、打印机可实现同时存的 2 个连接任务,即当以太网接口打印正在打印一个连接的打印任务,另外可以存在一个连接任处于等待打印机状态。
11、打印机打印过程全监控功能:即通过上层软件指令控制和打印机的状态自动返传功能运回的信息交互实现打印机打印票据全过程监控。
实现票据打印前打印机状态查询、打印过程中状态查询、打印结束后状态再查询的两层三次查询机制,有效保证打印票据的完整性及打印与查询状态的一致性。
GP条码打印机软件安装及使用说明

GP条码打印机软件安装及使用说明运行如下图:点击“安装NiceLabel产品”安装条码机软件选择安装软件使用语言点击下一步点击下一步,查看许可协议。
接受协议并继续下一步自行调整安装路径和附加图标,并点击安装,等待安装过程完成点击完成运行软件,至此安装过程全部完成。
软件运行后点击介绍界面的继续进入欢迎向导软件提供了三个不同大小和内容的标签样式供参考,用户可以参照示例来进行编辑,下面介绍新建标签的步骤,选择“创建新标签”,然后点击完成标签设置向导中第一步定义标签的尺寸,如40 mm X 30 mm就在“标签宽度”里输入4,“标签高度”里输入3,可以根据需要调整度量单位,尺寸输入时自行转换,点击下一步打印机选择中软件会扫描驱动列表并筛选出GP系列驱动供使用,其余驱动会自动屏蔽,可以选择打印方向为纵向或横向,点击完成,进入软件编辑界面左侧工具栏中可以选择使用所有可编辑对象,如“文本”,“条码”,“图片”,“矩形”,“直线”,“椭圆”,“反白”点击“文本”,鼠标出现大写“A”字母后点击标签编辑界面中想放置的位置,出现文本向导,选择固定文本则可以在下方输入框内输入需要的文字内容,字体可以点击“选择”来改动,如下图:确认改动后点击完成则字体会出现在刚才点击的位置菜单栏中的文本一栏可以继续调整字体样式和大小若文本选择“变量文字”时,确认好字体样式后点击下一步这里有两个方式选择,“键盘输入”是在向打印机下发打印任务时软件会给客户一个相应提示,在此文本内打印什么字符由用户通过键盘输入,而不是固定文本。
“计数器”则可以使用软件的累加功能达到让数字累加的效果键盘输入向导需要填写提示文本,比如要提示输入“产品名”则在文本内写入“产品名”,可以设置“最大字符数”和“格式”“字首”“字尾”可以根据需要填写,也可不填,完成后在标签编辑界面会出现“?????”的字样,在点击“打印”后会新增可以输入的文本框,并可以勾选“清除变量”,如下图:计数器方式的设置,点击下一步在这里可以设置“起始值”,如果勾选了“打印前提示数值”则可以像键盘输入文本一样在打印时输入初始值,“设置最大位数”表示数字最多的位数,可以选择“递增”或者“递减”方式,“预览”一栏可以看到数值变化的效果,点击下一步“每隔”填入每次递增或者递减的数量,“每几张标签更改一次值”填入每一个数值需要重复的标签数量,“到达极限值时重新计数”一栏可以勾选后输入一个极限值,每次到达极限值就会循环重新计数,更改好参数后可以从“预览”中看到数字是如何变化的,下一步中的字首字尾跟键盘输入的一致,完成后在标签界面同样会出现“?????”的字样,点击打印并打印多张就可以看到实际的效果了点击左侧“条码”,鼠标会变成带有条码标示的形状,点击标签编辑界面中需要放置的位置,出现条码向导。
GPN601用户手册
以太网接口的配置与局端板卡的以太网配置自动一致。并且当输入光纤光功率低于接收灵敏度时,LINK指示灯将熄灭,以太网接口指示灯同时将熄灭,以太网接口自动停止工作,等待对端来光正常后,再次启动。
GPN601系列光纤收发器以太网电口支持MDI/MDI-X,即直连线、交叉线自适应功能。RJ-45头各个脚与CAT3/5双绞线的连线关系如下表所示。
收发器电口不能LINK
检查如下事项:
1.检查电口以太网设置是否正确,
2.当使用FT-FE盘时检查交叉,直连线是否正确
检查板卡LPT是否使能,若使能,则检查对接设备的电口、光口是否连接正常,对接设备运行状态是否正常;对接设备配置是否正常;
Ping 有丢包
检查电口以太网设置是否正确
本机为精密光电设备,运输和搬运时必须轻放并注意防潮、防撞。
RJ45 DB9
图6-2RJ45-DB9 RS232口连接示意图
表6-2串口(CONSOLE)RJ45接头的线序定义
1
2
3
4
5
6
7
8
TXD
GND
GND
RXD
表6-3计算机DB9接头的线序定义
1
2
3
4
5
6
7
8
9
-
RXD
TXD
GND
-
RS232串口作为Console口使用时,通过命令行的方式对设备的各项参数进行设置。用户使用时可以通过超级终端等软件对设备的参数进行配置。
□用户可任意选择使用交流220V、直流-48V的供电方式,便于在不同供电情况的场所使用;
3
3.1
□工作温度:0~50℃
□相对湿度:95%(无凝结),不防水
GP-Pro EX 数据穿越功能指南说明书

数据穿越功能指南1简介 (2)2安装 (6)3设置 (15)4错误消息 (19)5附录 (20)1简介1.1什么是数据穿越功能?当使用梯形图软件等Windows应用程序通过串行接口与外接控制器进行通讯时,需要将梯形图软件和外接控制器进行串行连接。
示例)1. 装有梯形图软件的PC2. 准备与之通讯的外接控制器3.串行接口在GP-Pro EX上,使用数据穿越功能可允许通过一台显示设备来实现梯形图软件和外接控制器之间的通讯。
示例)1. 装有梯形图软件的PC2. 准备设置的外接控制器3. 连接串口的显示设备4. USB传输电缆或以太网(UDP)连接5. 外接控制器连接电缆使用数据穿越功能,无需连接电缆即可用梯形图软件更改外接控制器的设置。
使用WinGP 时,在一台PC 上安装WinGP 和梯形图软件,可按以下配置使用数据穿越功能。
示例)1. 装有WinGP 和梯形图软件的PC 。
2. 准备设置的外接控制器3. 外接控制器连接电缆)"3.1.2 使用数据穿越功能设置工具进行设置" (第17页)1.2数据穿越功能的原理数据穿越功能是实现PC上的虚拟端口与外接控制器上的串口进行通讯的一种机制。
下文中将PC上的虚拟端口称为“虚拟串口”。
示例)通过在梯形图软件的通讯设置中设置虚拟串口“端口1'”,可使系统在运行时就好像连接了外接控制器的“端口1”一样。
要完成这一操作,需要用到数据穿越功能设置工具、虚拟串口总线驱动程序和虚拟串口驱动程序。
1. 外接控制器上的串口:端口1。
2. 下文中将PC上的虚拟端口称为“虚拟串口”。
数据穿越功能设置工具和虚拟串口总线驱动程序、虚拟串口驱动程序提供以下功能。
•在PC上建立端口1':虚拟串口驱动程序•关联端口1'与端口1:数据穿越功能设置工具•在端口1'与端口1之间交换数据:虚拟串口总线驱动程序数据穿越功能可允许您使用已建立的虚拟串口与外接控制器进行通讯。
打印机使用说明手册说明书

新版GP 以太网(Ethernet)端口打印机使用及配置说明

新版GP 以太网(Ethernet)端口打印机使用及配置说明注:本说明只适用于WinNT、Win2k、WinXP和Win2003操作系统。
1、安装并运行以太网接口打印机测试及配置程序GPEthernet .exe,如下图所示。
2、通过打印机开机自检测条查看打印机网络IP address及Ethernet ID。
3、修改PC主机IP地址使PC主机IP地址与打印机网络IP地址在同一网关,如打印机IP地址为192.168.123.100,则可修必PC主机IP地址为192.168.123.200。
4、在打印机测试及配置程序“Printer current IP address”后的文本框中输入打印旧的IP address,如打印机开机自检测条上“IP address”为“192.168.123.100”则输入“192.168.123.100”,通过打印机测试及配置程序GPEthernet.exe执行“Connect Test”,如通讯成功,则显示如下图所示窗口。
5、在打印机测试及配置程序“Printer set new IP address”后的文本框中输入打印机的新IPaddress,如要将打印机的“IP address”修改为“192.168.123.200”则输入“192.168.123.200”。
然后执行“Set New IP Address”,这样打印机的IP地址被修改,通过打印机开机自检测条可查看打印机的IP address。
注意:网络中PC主机及网络接口打印机IP 地址不能重复。
6、在打印机测试及配置程序“Set New Ethernet ID”的文本框中输入打印机的新Ethernet ID,如要将打印机的“Ethernet ID”修改为“0-201-202-203-204-205”则输入“0-201-202-203-204-205”。
然后执行“Set New Ethernet ID”,这样打印机的Ethernet ID被修改,通过打印机开机自检测条可查看打印机的Ethernet ID。
欧姆龙 GP-Pro EX GP-4402WW 和 GP-4502WW 说明书

前言本文档介绍GP-4402WW和GP-4502WW(以下统称GP-4*02WW)的相关信息(包括规格和限制)。
这些信息在GP-Pro EX参考手册或控制器/PLC连接手册中均没有描述。
•GP-Pro EX从V4.04开始支持GP-4*02 WW。
•本文档中未描述的规格和限制与GP-4000系列相同。
关于这些信息的详情,请参阅GP-Pro EX参考手册和控制器/PLC连接手册。
目录前言 (1)目录 (1)参考手册 (2)支持的型号列表 (2)支持的功能 (2)支持的颜色 (5)特殊功能和限制 (5)控制器/PLC连接手册 (9)GP-4402WW/GP-4502WW连接控制器/PLC (9)电缆接线图 (9)支持的驱动程序 (10)本节描述有关GP-Pro EX操作方面的规格和限制。
支持的型号列表支持的功能支持的颜色特殊功能和限制支持的型号列表支持的功能*1 取决于外接控制器/PLC的类型。
*2 指挥中心部件列在支持网站上(/otasuke/)支持的颜色•显示颜色65,536色,无闪烁•绘图时的颜色256色特殊功能和限制GP-4*02WW的特殊功能和限制如下:特殊功能不支持的功能限制特殊功能SRAM•GP-4*02WW未配备备份存储器(SRAM),因此内部存储器的一部分会被用作备份区。
GP-Pro EX参考手册中将这一区域称为“虚拟备份存储器”。
和备份存储器(SRAM)一样,虚拟存储器中的数据在人机界面关机后仍能得到保存。
通过下述方法可查看虚拟存储器的容量:从[工程(F)]菜单中选择[信息(I)],再选择[工程信息(I)],然后选择[SRAM信息]。
•虚拟备份存储器保存以下数据:•历史报警数据•配方数据(配方)时钟•重置或关闭GP-4*02WW会初始化时钟。
需要对时钟进行更新。
本产品支持从控制器/PLC获取时钟信息。
详情请参阅GP-Pro EX中的“通用设置- 时钟更新设置”。
2点触摸•GP-4*02WW不支持2点触摸。
GPUSB端口打印机安装及使用说明
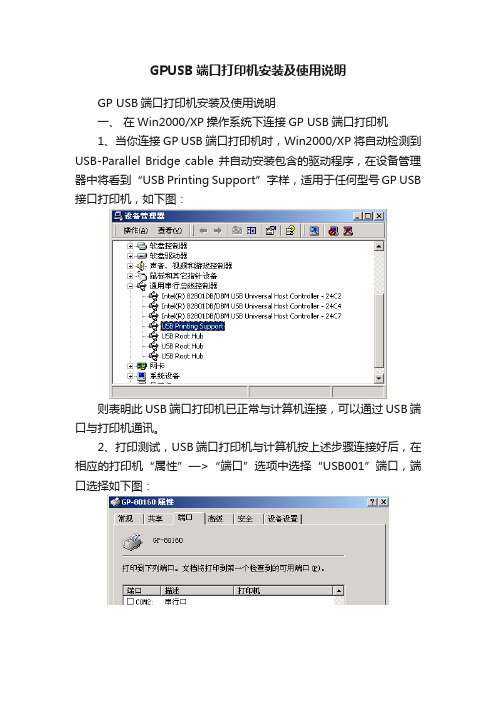
GPUSB端口打印机安装及使用说明GP USB端口打印机安装及使用说明一、在Win2000/XP操作系统下连接GP USB端口打印机1、当你连接GP USB端口打印机时,Win2000/XP将自动检测到USB-Parallel Bridge cable 并自动安装包含的驱动程序,在设备管理器中将看到“USB Printing Support”字样,适用于任何型号GP USB 接口打印机,如下图:则表明此USB端口打印机已正常与计算机连接,可以通过USB端口与打印机通讯。
2、打印测试,USB端口打印机与计算机按上述步骤连接好后,在相应的打印机“属性”—>“端口”选项中选择“USB001”端口,端口选择如下图:3、执行打印测试页,查看打印是否正常。
正常则表明打印机已与计算机正确连接且通讯正常。
二、在Win9x/ Win ME操作系统下连接GP USB端口打印机A:请按照下面的步骤安装USB端口驱动程序:◆ USB虚拟成LPT端口使用: (只适用于GP热敏系列USB端口打印机)1. 打开将要连接USB端口打印机的计算机的电源,并确定将要连接的USB口已经启动并正常工作。
2. 连接USB端口打印机至计算机USB接口,Windows将检测到IEEE-1284设备,并运行添加新硬件向导帮助你设置新设备,单击下一步继续。
3. 选择驱动程序包(文件名:PL2305_USB to Parallel ),并单击下一步继续。
选择为硬件搜索最新的驱动程序,然后单击下一步,选择从软盘安装然后单击OK。
4. Windows将检测到安装信息(Parupl.inf或parppl.inf)并显示IEEE-1284 Controller设备, 单击下一步继续安装。
5. 单击下一步继续,让Windows拷贝必要的文件到你的硬盘。
6. 当Windows显示安装了新设备USB-Parallel Bridge所必需的软件,单击完成。
01.欢迎使用GP-Pro EX
• 您可以在操作过程中编辑逻辑程序
• 在列表中查看控制器 /PLC 数据 您可以使用寄存器监控,列出和更改外接设备及 PLC 的当前值。
• 增强安全性 现在您可以检索操作日志。通过设置用户 ID 和密码,您可以确认人机界面操作 员,以帮助您决定问题的原因。此外还提供了全局互锁支持,在所有画面上禁用 触摸操作。
GP-Pro EX 参考手册
1-5
支持的功能
1.3.1 GP-3200 系列
O: 支持 o : 限于特定型号 X: 不支持
GP-3200 系列 用 256 色绘制*1 暗色闪烁 与多个控制器 /PLC 同时进行通讯 LAN 连接 调制解调器传输 串口传输 (COM 连接 ) 传输工具的 CF 卡连接功能 CF 卡 Memory Loader 工具 USB Memory Loader 工具功能 备份 SRAM 的 CF 保存 报警历史 ( 以 CSV 格式保存 ) 采样数据 ( 以 CSV 格式保存 ) 配方传输 ( 传输 CSV 数据 ) 在 CSV 显示器中编辑数据 记录数据保存 文件管理器功能 显示 CF 卡上的 JPEG 文件 画面捕捉 AUX 的 音频报警 录制 / 播放视频 视频模块连接 逻辑编程 变量 保持变量功能 I/O 驱动程序 远程 PC 访问 寄存器监控*5 梯形图监控 *5 反转显示 背光灯颜色切换设置 背光灯烧毁检测 十字光标显示 纵向 用户画面区 8MB GP-Viewer EX 的 Web 服务器 GP 远程打印服务器 动画 以太网多重连接
计算机和人机界面的连接方法usb电缆连接proface的usb传输电缆ca3usbcb01单独销售支持的功能gpproex参考手册16131gp3200系列不支持gp3200系列用256色绘制与多个控制器plc同时进行通讯lan连接传输工具的cf卡连接功能cf卡memoryloader工具usbmemoryloader工具功能备份sram的cf保存报警历史以csv格式保存采样数据以csv格式保存配方传输传输csv数据在csv显示器中编辑数据显示cf卡上的jpeg文件录制播放视频远程pc访问gpviewerexweb服务器gp远程打印服务器p3415以太网多重连接p727支持的功能gpproex参考手册17有关显示颜色的信息请参阅硬件手册或参阅851设置颜色p835可使用usb存储设备
GPrinter 打印机安装手册说明书
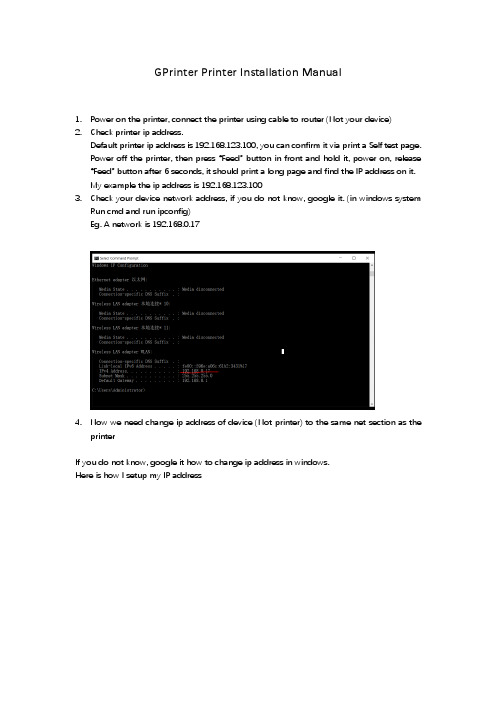
GPrinter Printer Installation Manual1.Power on the printer, connect the printer using cable to router (Not your device)2.Check printer ip address.Default printer ip address is 192.168.123.100, you can confirm it via print a Self test page.Power off the printer, then press “Feed” button in front and hold it, power on, release “Feed” button after 6 seconds, it should print a long page and find the IP address on it.My example the ip address is 192.168.123.1003.Check your device network address, if you do not know, google it. (in windows systemRun cmd and run ipconfig)Eg. A network is 192.168.0.174.Now we need change ip address of device (Not printer) to the same net section as theprinterIf you do not know, google it how to change ip address in windows.Here is how I setup my IP addressOK, now the device IP is 192.168.0.99, now they can communicate now,Go back the to IP tool fold, click “GPETHERNET.exe”,It display the printer IP address is 192.168.123.100, click “Connect Test” it should pop “Connect successfully”, click “Print” or “Cut Paper” it also should work.Now we need change printer’s IP to 192.168.0.28, click “Set New IP Address”You should be able to hear a beep from printer.Change the device IP to its original state,Now if you restart GPETHERNET.exe and change “Printer Current IP address” to 192.168.0.28, click “Connect Test”, if it succeeds, then now the printer and dev ice are now in right network and connected.Next step is to connect the printer with windowGo tohttps:///wp-content/uploads/2021/12/Driver-Tool-Network-Configuration-Tool.zip and download it.Unzip it and run “JIABO - Thermal Printer Driver V19.3.exe”, click next to this step,Click “Install Printer Driver” , choose right moduleYou can find the model from the back of the printer, for C881, you can use GL80180 SeriesClick Next and then click “Create Port”Choose Standard TCP/IP Port, use the printer’s IP,Choose it,Then click “Install” til it’s completed.Now go to windows -> Printer and scanner, you should be able to see it and print test page without problem.It’s down, good luck.。
网络打印机快速入门指南说明书
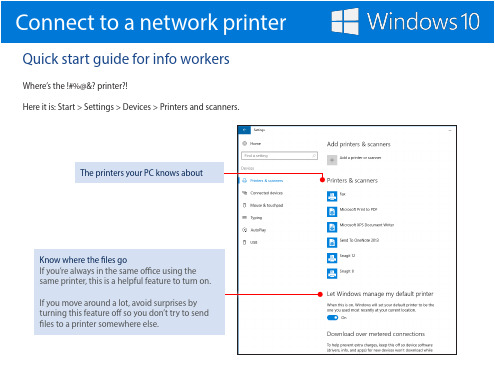
Know where the files go If you’re always in the same office using the same printer, this is a helpful feature to turn on. If you move around a lot, avoid surprises by turning this feature off so you don’t try to send files to a printer somewhere else.
In a small business, the name might be the name of a PC that’s in a room with the printer. As it goes with a large business, if you don’t know, you’re going to have to ask.
Type the name Take a careful look at the examples given because the direction of the slashes matters.
Select Next.
Connect to a network printer
If you’re in a medium or large business and nothing has worked so far, it’s likely that you’re going to have to contact your IT department and ask for help. If their response is to give you only the printer’s IP address (or hostname) to go on, that’s OK—they’re actually being really helpful—because you’ll just need to paste it into a box and you’re done.
WIFI打印机使用手册
Gain Electronic TechnologyCo.,LtdWIFI打印机使用手册一、产品概述新一代GP-58XX系列USB+WIFI接口打印机是直接热敏式票据打印机在技术和质量全面提升后的新版本,是目前58系列打印机中,质量最稳定,工艺最先进的打印机,该打印机采用最新WIFI技术,三种WIFI工作模式,支持QRCODE +一维码功能,采用GB18030大字库,用途最广泛的直接热敏式打印机;可在Windows系统(提供打印机驱动),Android 系统(提供相应的Android下的APP软件)灵活的应用。
本机器的使用将得到供应商一年非人为损坏的免费保修和终身技术服务。
安全须知在操作使用本打印机之前,请仔细阅读下面的各项内容并严格遵守使用。
1.安全警告警告:不要触摸打印机撕纸刀。
警告:热敏打印头为发热部件,打印过程中或打印刚结束时,不要触摸热敏打印头以及周边部件。
警告:不要触摸热敏打印头以及连接插件,避免因静电损坏打印头。
2.注意事项(1)打印机应安装在稳固的地方,避免将打印机放在有振动和冲击的地方。
(2)不要在高温,湿度大以及污染严重的地方使用和储存打印机。
(3)将打印机的电源适配器连接到一个适当的接地插座上。
避免与大型电机或其它能够导致电源电压波动的设备使用同一插座。
(4)避免水或导电的物质(例如:金属)进入打印机内部,一旦发生,应立即关闭电源。
(5)打印机不得在无纸的状态下打印,否则将严重损害打印胶辊和热敏打印头。
(6)如果较长时间不使用打印机,请断开打印机电源适配器的电源。
(7)用户不得擅自拆卸打印机进行检修或改造。
(8)电源适配器只使用随机专配的电源适配器。
(9)为了保证打印质量和延长产品的使用寿命,建议使用推荐的或同等质量的热敏打印纸。
(10)当拔插连接线时,请确认打印机电源处于关闭状态。
(11)请妥善保管本手册,以备使用参考。
技术参数◆打印方式:行式热敏◆接口类型:USB+WIFI◆电源输入:DC12V/3A◆钱箱输出:DC12V/1A◆打印密度:384点/行◆打印纸宽:58mm(打印最大宽度:48mm)◆字库类型:GB18030大字库◆条码:一维码、QRCODE 码◆外观尺寸:140×222×120mm,(W×D×H)◆重量:0.92KG打印机连接以及按键,指示灯说明 1.按键以及指示灯的说明12345678910111:FEED 按钮(走纸按键)2:PAPER 灯(红色,缺纸提示)3:ERROR 灯(红色,错误提示)4:POWER 灯(蓝色,电源提示)5:OPEN 按钮(开盖)6:电源插座7:钱箱插座8:USB 插座9:功能提示灯(蓝色)10:功能按键11:开关按钮2.打印机连接3.装纸a将电源适配器电缆连接到打印机电源插座内。
i95Dev GP Connect用户手册说明书
i95Dev GP Connect User ManualTable of ContentsIntroduction4 About this guide4 Terminologies4 Configuration and Setup4 Enabling the Connector5 Setting up the Connector6 Setting up Connector notifications6 General Contact Info7 Credentials7 i95Dev Message Queue Settings7 i95Dev Connect Log Settings7 Implementing Locale7 Data synced between Magento and GP8 Magento admin dashboard8 Customer8 Email Address8 Primary Address9 Customer grid and information screen9 Order10 Order grid and information screen10 Invoice11 Invoice grid and information screen11 Shipment12 Shipment grid and information screen12 Product12 Inventory & Tier Prices12 Product grid and information screen12 Inbound Message Queue in Magento13 Sync status13 Manual data sync13 Clean up synced data13 Viewing sync report and manually syncing data14 Outbound Message Queue in Magento16 Sync status16Clean up synced data16 Viewing sync report16 Summary Reports in Magento17 Inbound Summary17 Outbound Summary181.Introductioni95Dev GP Connect is a secure, scalable and an efficient way of integrating your Magento e- commerce and Microsoft GP system without impacting the client’s existing workflows. i95Dev GP Connect is more than just information sync and helps you increase sales, reduce costs, improve operational efficiency, and provide superior customer experience thus enabling you to take your business to the next level.The bidirectional information sync results in consistent data across the systems, which helps reduce the manual administrative work, improves efficiency, streamlines order fulfillment, inventory and more.1.1.About this guideThe objective of the document is to help users understand i95Dev GP Connect features and itsfunctionality. The document works on the premise that the reader is familiar with Magento andGP ERP systems.The manual is divided into the following parts:1Introduction A note about the guide, and terminologies used.2Configuration and setup Instructions to enable and configure i95Dev GP Connect3Information exchanged betweenMagento and GPList of data synchronized between Magento and GP.4Magento admin dashboard Changes made in Magento admin screens to view GP Information (like GP IDs, order status, etc.) associated with a record in Magento.5i95Dev message queue reports inMagentoAbout report functionality in Magento to view sync status, and more.1.2.Terminologies●Customer - Customer details●Address - Order details●Product - Product detail●Order - Order details●Invoice - Invoice details●Shipment - Shipment details●Connector – i95Dev GP Connect●Magento admin - Magento’s admin panel or web store’s backend2.Configuration and SetupOnce i95Dev GP Connect is installed on your Magento system a main menu I95DEV and a tab, i95Dev Connector Settings is added to the store configurations screen. Here you can configure settings related to i95Dev GP Connect.Note - This document is only for your reference. When GP Connect is installed, the i95Dev team takes care of installation and configuration of the connector.i95Dev Connector Settings tab is where you can manage all settings related to the connector and has the following seven sections.●i95Dev Extension●i95Dev Connector Settings●i95Dev Connect Notifications●General Contact Info●Credentials●i95Dev Message Queue Settings●i95Dev Connect Log Settings2.1.Enabling the ConnectorThe connector, when installed, is by default in enabled mode. For the connector to start synchronizing data between Magento and GP, it must first be enabled from the store configurations screen.Follow the following steps to enable the Connector from Magento admin.1.Sign in to your Magento admin dashboard.2.Click Store in the left admin bar, then click Configurations in the Settings group.3.Scroll down and expand i95Dev Connect tab in the left GPigation pane as shown in Figure 1.4.Click i95Dev Connector Settings and expand the i95Dev Extension tab.Figure 1: i95Dev Connector SettingsFigure 2: i95Dev Extension tab5.Select Yes in the Enable drop-down list.6.Set Package Size from drop-down list. By default the value is 50.2.2.Setting up the Connector1.Select GP in the Component drop-down list.2.In the Capture Invoice drop-down list, select Yes if you would like to capture the amount online,else select No.a.Note: Only and PayPal payment methods are supported bydefault for capturing the amount online.3.In the Default Customer Group drop-down list, select a Customer Group that is to be assigned to aCustomer If no customer group provided from GP in customer sync from GP to Magento.4.In the Product Attribute Set drop-down list, select a Product Attribute Set that is to be assigned toProduct that is synced from GP to Magento5.In the Attribute Group drop-down list, select an Attribute Group that is to be assigned to ProductAttribute that is created in Product Sync from GP to Magento2.3.Setting up Connector notifications1.In the EMail Confirmations combo-box select the records (use ctrl key to select more thanone option) for which you wish to enable notification.a.Invoice When selected, a confirmation email is sent to the customer afteran invoice is synced from GP to Magento.b.Shipment When selected, a confirmation email is sent to the customer aftera shipment is created from GP to Magento.2.In the Order Total Mismatch Notification drop-down list, select Yes to enable adminnotifications when there is a mismatch between Magento and GP order2.4.General Contact Info1.Provide Admin Email to which want to receive data sync failed email notifications, AdminUsername which will be displayed in data sync failed email notifications2.5.Credentials1.Provide API Integration Token (Token can be generated from Magento admin by followingthis link), which will be used for communication between Magento and GP.2.Provide Encryption Pass Key as “jZjneNba78tqCuB8l8eQrXoAigmbjIwwngYfjEdnnLg=”,which will be used to encrypt and decrypt the data that is transferred between Magentoand GP2.6.i95Dev Message Queue Settings1.Provide Retry Limit count, if this value is provided if any record failed to sync to Magentofrom GP then that record will try to sync again and again until this configuration value isreached.2.Provide MQ Data Clean Days: The data which is created before the configured days will bedeleted from Message Queue.2.7.i95Dev Connect Log Settings1.Select Yes from the drop-down list of Enable Logs configuration to generate connectorrelated logs.2.Provide Log Clean Days: The connector logs which are generated before configured dayswill be deleted.3.Provide Log Archive Days: The connector logs which are generated before configured dayswill be archived.4.Provide MGP Log Size in kb, if the generated log reaches the configured size a new log willbe generated with the same name by appending a suffix 1, 2, 3….2.8.Implementing Localei95Dev GP Connect by default is implemented in the English language which is configured using a CSV file. Follow the following steps to view custom fields and labels in your preferred language:1.To display custom fields in your preferred language, download the English template, addpreferred language, and upload the same to Magento FTP as shown below.Figure 3: Locale Implementation3.Data synced between Magento and GPConnector by default synchronizes the following information between Magento and GPElement Magento to GP GP to MagentoCustomer Y YAddress Y YProduct Y YInventory N YOrder Y YShipment N YInvoice N YOrder Status N YTier Price/ Price Group N Y4.Magento admin dashboard4.1.Customer4.1.1.Email AddressCustomer email address is a mandatory field in Magento, hence customer records created in GP must have an email address. In cases where an email address is not available, the Connector automatically generates and assigns a dummy email address. This email address generatedfollows the following format:****************************In the above email address the GPcustomerid is the Customer ID given at the time of Customer creation in GP and companyname is the name of the GP Company. This email id can be updated later.4.1.2.Primary AddressAs with email, primary address is mandatory in Magento. Hence a customer record created in GP must have a primary address associated with the customer record for successful synchronization to Magento.4.1.3.Customer grid and information screenOnce a Customer record is synced between Magento and GP, you can view the GP Customer IDin Magento admin’s Customer information screen.We added two additional columns to Magento admin’s Customer grid, Origin - to identify the originator (the source system where the record was created), and GP Customer ID – to display the primary identifier of the record in GP to help correlate the records in Magento and GP.Figure 4: Customer grid in Magento adminSimilarly, the Connector adds an additional GP Information section in the account Information tab. This section displays the customer's GP Customer ID and Price Group assigned (if any) to the Customer.1.Go to the Customer View tab in the Customer Information screen.2.Scroll down to the GP Information section to view Customer’s GP Customer ID and PriceGroup.Figure 5: Customer’s GP Information in Magento admin4.2.Order4.2.1.Order grid and information screenAs with Customer grid, the same two columns are also added to the Order grid – Origin and GP Order ID.Figure 5: Order grid in Magento adminSimilar to the Customer information page, an additional section, GP Information, is also added to the Order information page. This section displays GP Order ID, Order Status and GP Invoice ID.1.Go to the Information tab in the Order View screen.2.Scroll down to the GP Information section to view Order’s GP Order ID, GP Order Status and GP Invoice ID.Figure 6: GP Information of Order in Magento adminNote: For invoice and shipment, the Connector by default assumes the GP system as the master. Hence, both the invoice and shipment information is synchronized only from GP to Magento.4.3.Invoice4.3.1.Invoice grid and information screenOnce an Invoice record is synced to Magento from GP, you can view the GP Invoice ID in Magento admin’s Invoice information screen.Figure 7: Invoice grid in Magento adminWe added an additional column to Magento admin’s Invoice grid, GP Invoice ID – to display the primary identifier of the record in GP to help correlate the records in Magento and GP.Figure 8: GP Information of Invoice in Magento admin4.4.Shipment4.4.1.Shipment grid and information screenOnce a Shipment record is synced to Magento from GP, you can view the GP Shipment ID in Magento admin’s Shipment information screen.Figure 9: Shipment grid in Magento adminWe added an additional column to Magento admin’s Shipment grid, GP Shipment ID – to display the primary identifier of the record in GP to help correlate the records in Magento and GP.Figure 10: GP Information of Shipment in Magento admin4.5.Product4.5.1.Inventory & Tier PricesFor inventory and tier prices, the Connector by default assumes the GP system as the master. Hence, both the inventory and tier pricing information is synchronized only from GP to Magento.4.5.2.Product grid and information screenIn the Product grid we add one column – GP Product Status. Products successfully synced between Magento and GP have status as “synced”.Figure 11: Product sync status, from Magento to GP5.Inbound Message Queue in MagentoThe Inbound Message Queue Report gives an overview of the status of data sync transactions happening from GP to Magento. The sync status can be viewed for the following entities:Customer Product OrderAddress Tier Price InvoiceInventory PriceGroupShipmentThis is a dynamic report; once the record has synced successfully there would be no records in the report section.5.1.Sync statusThe Connector assigns the following status to each record during various stages of the syncprocessPending Status used for incoming data – once the Connector starts receiving a message (data of an entity) from GP. At this stage, the data is received byMagento but yet to be synced.Processing Status used for records, which have picked up from Inbound Message Queue to MagentoSuccess Status used for records, which have successfully synced to Magento.Error Status used when the Connector encounters an error during the sync process.Complete Status used when a record is successfully synced to Magento and the success acknowledgement is sent back to the GP system.5.2.Manual data syncFor every record that fails to sync to Magento (records with sync status “Error”), the connector attempts to re-sync the record a couple of times which is pre-configured. In the process, if the record successfully syncs then the status is changed to “Success” and then to “Complete” as discussed above. However, if the record fails to sync even after a pre-configured number of attempts, the automated retry process is stopped and will be removed from the message queue periodically (pre- configured).Magento administrators can manually sync (after resolving the issue that is causing the automated sync to fail.5.3.Clean up synced dataTo avoid the message queue from getting overwhelming (to understand and in size), the Connector periodically (pre-defined) removes the data, with sync status “Complete” and “Error”, from the message queue.5.4.Viewing sync report and manually syncing dataPlease follow the following steps to view sync reports and to manually sync records with sync status Error.1.Login as administrator in the Magento admin panel.2.Click I95DEV in the Admin sidebar click Inbound Message Queue in Reports group.The system displays the Inbound Message Queue Report screen.Figure 12: Navigation to Inbound Message Queue3.Select the entity type in the Entity drop-down list for which you wish to see the syncreport.Figure 13: Entity in Inbound Message Queue4.To view records with sync status Error, select Error from the Status drop down list and clickSearchFigure 14: Entity Status in Inbound Message Queue5.Select all records (check box) you wish to sync manually and select Sync from the ActionsDrop-down list.6.Click Submit.6.Outbound Message Queue in MagentoThe Outbound Message Queue Report gives an overview of the status of data sync transactions happening from Magento to GP. The sync status can be viewed for the following entities, this is a dynamic reportCustomer OrderProduct-6.1.Sync statusThe Connector assigns the following status to each record during various stages of the sync processPending Status used for outgoing data – once the Connector starts receiving a message (data of an entity) from Magento. At this stage, the data is received by Connector Outbound Message Queue but yet to be synced.RequestTransferredStatus used for records, which sent from Outbound Message Queue to GPProcessing Status used for records, which have picked up from Outbound Message Queue to GPError Status used when the Connector encounters an error during the sync process.Complete Status used when a record is successfully synced to GP and the successAcknowledgement is sent back to Magento.6.2.Clean up synced dataTo avoid the message queue from getting overwhelming (to understand and in size), the Connector periodically (pre-defined) removes the data, with sync status “Complete” and “Error”, from the message queue.6.3.Viewing sync reportPlease follow the following steps to view sync report of Outbound Message Queue1.Login as administrator in the Magento admin panel.2.Click I95DEV in the Admin sidebar click Outbound Message Queue in Reports group. Thesystem displays the Outbound Message Queue Report screen.Figure 15: Navigation to Outbound Message QueueFigure 16: Outbound Message Queue in Magento7.Summary Reports in Magento7.1.Inbound SummaryThe Inbound Summary Report gives status wise count of the records for different entities like Customer, Order and Product etc., that are syncing from GP to Magento.Please follow the following steps to view sync summary report of Inbound Message Queue1.Login as administrator in the Magento admin panel.2.Click I95DEV in the Admin sidebar click Inbound Summary in Reports group. The systemdisplays the Inbound Message Queue Summary Report screen.Figure 17: Inbound Message Queue Summary Report in Magento7.2.Outbound SummaryThe Outbound Summary Report gives status wise count of the records for different entities like Customer, Order and Product etc., that are syncing from Magento to GP.Please follow the following steps to view sync summary report of Outbound Message Queue1.Login as administrator in the Magento admin panel.2.Click I95DEV in the Admin sidebar click Outbound Summary in Reports group. The systemdisplays the Outbound Message Queue Summary Report screen.Figure 18: Outbound Message Queue Summary Report in Magento。
- 1、下载文档前请自行甄别文档内容的完整性,平台不提供额外的编辑、内容补充、找答案等附加服务。
- 2、"仅部分预览"的文档,不可在线预览部分如存在完整性等问题,可反馈申请退款(可完整预览的文档不适用该条件!)。
- 3、如文档侵犯您的权益,请联系客服反馈,我们会尽快为您处理(人工客服工作时间:9:00-18:30)。
新版GP 以太网接口打印机使用手册一、前言GP 以太网(Ethernet)接口打印机自2006 年上市以来,凭借着其稳定可靠的质量、极强的兼容性、高速高效的显著特性,被广泛应用于餐饮行业厨房打印点菜单,赢得了广大用户的一致好评。
GP 以太网(Ethernet)接口打印机为用户实现的网络远程打印服务,摈弃了传统网络远程打印需要并口打印机+打印服务器的方法,在实现高效的打印速度的同时,避免了由于打印服务器数据转换造成丢单的情况,并降低了应用成本、提高的系统的稳定性和可靠性。
GP 支持以太网(Ethernet)接口的打印机有以下型号:58mm 热敏打印机:GP-5890XE、GP-5890XIIE、GP-5890XIIIE、GP-5890IIE、GP-58120E、GP-58120IIE、GP-58120IIIE;80mm 热敏打印机:GP-80220IIE、GP-80220IIIE、GP-80250E、GP-80250IIE、GP-80250IIIE、GP-H80250E、GP-H80250IIE;76mm 针式打印机:GP-7635IIIE 、GP-7645E 、GP-7645IIE 、GP-7645IIIE 、GP-7645IIICE 、GP-7645IIIDE;GP 以太网接口打印机具有非常卓越的性能:1、防水、防油烟结构设计(特别是GP-58120III、GP-80250 系列)。
2、打印机错误报警提示功能。
3、可选支持EPSON ESC/POS 指令模式或Star 指令模式(特别是GP-80250 系列)。
4、可选支持简体中文、繁体中文、日文、韩文语言,以及多达68 种国际字型支持。
5、打印机来单打印自动提醒功能(需软件配合使用或使用GP 驱动程序使用)。
6、打印机可选高速驱动打印模式和高速硬字库打印模式,最高可达250mm/s 的硬字库打印速度和220mm/s 的驱动打印速度。
7、串口可选115200bps 高速串口通讯速度,串口校验位支持无校验、奇校验、偶校验、空格、标记等多种校验方式。
8、打印机小票自动重新打印功能:即当打印机由于纸尽导致最后一张小票打印不完整时,此时重新装纸,打印机会自动将此张小票完整的重新打印出来。
9、可实现软件与打印机绑定支持,保护软件商的切实利益。
一旦激活此功能,用户使用此软件只能使用此型号的打印机才能正常工作。
10、打印机可实现同时存的2 个连接任务,即当以太网接口打印正在打印一个连接的打印任务,另外可以存在一个连接任处于等待打印机状态。
11、打印机打印过程全监控功能:即通过上层软件指令控制和打印机的状态自动返传功能运回的信息交互实现打印机打印票据全过程监控。
实现票据打印前打印机状态查询、打印过程中状态查询、打印结束后状态再查询的两层三次查询机制,有效保证打印票据的完整性及打印与查询状态的一致性。
12、可选支持黑标检测定位打印功能。
用户可根据实际需要,使用随时机光盘或或我公司网站上()下载的“GP80 黑标功能设置及测试工具”GP80BM.exe 启用/关闭黑标检测定位功能。
找黑标命令是GS FF(十六进制编码:0C),1D可使用此命令找黑标定位打印。
打印完成后可使用切纸命令(十六进制编码:1D 56 42 00)走黑标纸至切纸位置进行切纸。
可通过工具设置检测黑标后的起始打印位置或自动切纸位置的偏移量。
黑标纸票长范围为50~500毫米;黑标宽度范围为3~30 毫米。
(注:黑标检测定位功能需上位机软件编程配合GP80 打印机使用。
)GP80 黑标功能设置及测试程序软件界面如下图所示:下面将向大家介绍一下GP 以太网(Ethernet)接口打印机安装及使用过程中一些操作方法及注意事项。
二、如何查看打印机的IP 地址和ID 地址通过打印机开机自检测试页可查看到打印机的IP 地址和ID 地址。
如下图是以GP-80220IIE 为例以太网接口打印机开机自检测试页清单样。
打印机出厂默认的IP 地址都是192.168.123.100。
打印机出厂默认的ID 地址是随机生成的,一般不相同,但有可能出现相同的情况。
安装打印机过程中一定要注意通过打印开机自检测试页检查打印机的ID 地址是否有相同的情况,若发现有相同的情况,就必须使用“以太网测试及设置工具”GPETHERNET.exe 更改成ID 地址都是唯一的。
否则,可能出现打印机连不通或时断时通的现象。
打印开机自检测试页的操作方法:在打印机连接好电源以后,按住进纸(FEED)按键同时打印打印机电源,首先打印机复位检测,待复位完毕后小于5 秒钟松开进纸(FEED)按键,这时打印机将进行自检测并打印出自检测试页清单样。
三、打印机安装过程中特别注意的事项及操作方法介绍1、打印机IP 地址(IP address)的唯一性:网络中的所有打印机的IP 地址都必须是唯一的,即网络中的所有打印机和计算机的IP 地址都不能出现有相同的情况。
如果出现打印机IP 地址或与计算机的IP 地址相同的情况,就有可能会出现打印机连不通或时断时通的现象。
根据实际需要,用户可使用随机光盘上(在\\tools\GP 以太网(Ethernet)打印机测试及设置工具目录下)或我公司网站上()下载的“以太网测试及设置工具”GPETHERNET.exe 对打印机的IP 址进行修改。
下面的内容将介绍GPETHERNET.exe 的操作使用。
2、打印机ID 地址(Ethernet ID)的唯一性:网络中的所有打印机的ID 地址都必须是唯一的,RECEIPT PRINTER3即网络中的所有打印机和计算机的ID 地址都不能出现有相同的情况。
如果出现打印机ID 地址或与计算机的ID 地址相同的情况,就有可能会出现打印机连不通或时断时通的现象。
根据实际需要,用户可使用随机光盘上(在\\tools\GP 以太网(Ethernet)打印机测试及设置工具目录下)或我公司网站上()下载的“以太网测试及设置工具”GPETHERNET.exe 对打印机的IP 址进行修改。
下面的内容将介绍GPETHERNET.exe 的操作使用。
3、打印机的出厂默认IP 地址是192.168.123.100,为了使计算机能正常与打印机通讯,必须更改计算机的IP 地址为与打印机的IP 地址192.168.123.100 在同一个网段内的指定IP 地址(192.168.123.x),如192.168.123.120。
如下图所示。
更改了计算机IP 为与打印机的IP 在同一个网段后,通过ping 指令测试打印机与计算机连接的网络状态。
如打印机当前自检测试页的IP 地址是192.168.123.100,就在点击windows 开始菜单的“运行”,出现如下图所示的窗口。
输入“cmd“,如下图所示的窗口。
然后“确定”。
出现如下图所示的窗口。
输入“ping”指令测试网络连接状态,即ping 192.168.123.100 –t 测试连接状态。
如下图所示。
然后“回车”,如果计算机与打印机通讯成功,则出现如下图所示窗口。
否则,则出现“Request timed out”(请求超时)的错误提示。
如下图所示的窗口。
四、如何使用GP 以太网接口打印机测试及配置程序注:本说明只适用于WinNT、Win2k、WinXP、Win2003、WinVista 和Win7 操作系统。
1、用户可以在随机光盘上(在\\tools\GP 以太网(Ethernet)打印机测试及设置工具目录下)或我公司网站上()下载的“以太网测试及设置工具”GPETHERNET.exe。
2、安装并运行以太网接口打印机测试及配置程序GPEthernet .exe,如下图所示。
3、通过打印机开机自检测条查看打印机的IP 地址(IP address)及ID 地址(Ethernet ID)。
4、首先选择工具软件与打印机的通迅端口。
如打印机采用网口与计算机通讯,请修改计算机的IP 地址使计算机的IP 地址与打印机的IP 地址在同一网段,如打印机IP 地址为192.168.123.100,则可修改计算机的IP 地址为192.168.123.120。
5、在打印机测试及配置程序中“打印机旧的IP 地址”“Printer current IP address”()后的文本框中输入打印旧的IP address,如打印机开机自检测条上“IP 地址”“IP address”()为“192.168.123.100”则输入“192.168.123.100”通过打印机测试及配置程序GPEthernet.exe。
,如果通讯不成功,请检查下列项目是否正确:A、计算机的IP 地址是否与打印机的IP 地址在同一个网段?注:要计算机与打印机通讯成功,必须将计算机的IP 地址设置为与打印的IP 地址在同一个网段。
B、计算机与打印机联接的电缆是否符合网络通讯规范?注:计算机直接与打印机连接通讯,需采用交叉线连接;计算机通过集线器(HUB)或路由器(ROUTER)与打印机连接通讯,打印机需采用直通线与集线器(HUB)或路由器(ROUTER)连接。
使用网络测线仪检测网线是否能正常连通。
C、通过ping 指令检测计算机与打印机是否能正常通讯?6、在打印机测试及配置程序“打印机新的IP 地址”“Printer new IP address”()后的文本框中输入“打印机新的IP 地址”(“Printer new IP address”,如要将打印机的“IP 地址”“IP)(address”)修改为“192.168.1.200”则输入“192.168.1.200”。
然后执行“设置新的IP 地址”(“Set New IP Address”,这样打印机的IP 地址被修改,通过打印机开机自检测页可查看到打)印机的IP address。
注意:网络中PC 主机及网络接口打印机IP 地址不能重复。
7、如果安装过程中检查发现打印机的ID 地址有相同冲突的情况,就必须使用打印机测试及配置程序更改打印机的ID 地址。
下面将介绍修改打印机的ID 地址的操作方法。
首先按照前面介绍的方法将两台ID 地址相同的的打印机中的一台(注意:只能将其中的一台与计算机连接,另外一台打印要断开网络连接或关机)打印机与计算机连接通讯。
然后在“打印机新的ID 地址”“Printer new Ethernet ID”()后的文本框中输入打印机新的ID 地址(要确保此ID 地址与网络中其它的打印机或计算机的ID 地址不相同),然后点击“设置新的ID 地址”“Set New Ethernet ID”()将文本框中输入打印机的新Ethernet ID 保存到打印机中。
例如:要将打印机的“Ethernet ID”修改为“0-164-165-167-168-169”则输入“0-164-165-167-168-169”。
