Scepter2.0手持式细胞计数器
Millipore手持式自动细胞计数器
ScepterHandheld Automated Cell Counter 手持式自动细胞计数器手持式自动细胞计数器Handheld Pipette Form•像移液器一样方便使用•屏幕式使用指导•USB数据下载•72组图形数据的内存传感器前后•2 种类型的传感器•灵敏的电极•精确的进样室•高精度的电子感应检测孔•精确到亚微米的细胞直径•精确到来皮升的细胞体积传感器特点40 µm Sensor60 µm Sensor检测样品浓度范围50,000-1,500,000particles/mL10,000-500,000particles/mL检验颗粒直径范围3-17 um6-36 um建议的检测细胞平均直径4-13 microns8-25 microns目录号50-pack: PHCC40050250-pack: PHCC40250500-pack: PHCC4050050-pack: PHCC60050250-pack: PHCC60250500-pack: PHCC60500Sensor Selection GuideMeasured size (µm)40 µm60 µm NIH 3T315454 beadsAlgae (various)7-9 CHO14-17 Cos-715 Epithelia 14-15 HEK29311-15 HeLa12-14 HepG212 HT-2911 HUH7-Hepatoma lineB Cells6-11 Human ES Cells9-12 HUVEC14-15 Jurkat13K56222 Luminex beads5-6 MCF715-17 MDCK13-15Measuredsize (µm)40 µm60 µm Mouse Embryomic Stem Cell5-13Mesenchymal Stem Cell15-16PBMCs7-12PC129-13Primary Astrocytes7Primary Neuronal CellRat Whole Blood 4.6Rat Dorsal Root Ganglion Cells7Red Blood Cells5-7Rat Neural Stem Cell11-13SF913SH-SY5Y12Splenocytes7-9U26612U87-Human Glioblastoma cell line12-14Yeast-Pichia Pastoris5Yeast-S.cerevisiae6Merck Millipore ValidatedCustomer ValidatedRecommended based on size仪器软件Software Pro•强大的细胞分析平台•直方图叠加比较多组数据和多参数设置表格•构建和保存门的设置Software Pro Analysis PackageAn intuitive, intelligent platform to perform high level cell analysisData:data files from your Scepter device Current Plot:working plot and data file Multifunctional Plot: multiple data sets/ histogram overlaysAnalysis Templates: saved gating parameters Group Stats:customizable stats from your data files selected Export, print selectedgraphs/files, cut and paste订购信息PHCC00000Scepter Handheld Cell Counter-42525 PHCC20040Scepter 2.0 Handheld Cell Counter, with 50pk of 40uM Sensors42525PHCC20060Scepter 2.0 Handheld Cell Counter, with 50pk of 60uM Sensors42525 PHCC60050Scepter Sensors, 60uM, 50PK1186 PHCC60250Scepter Sensors, 60uM, 250 PK (5-50PKs)5747 PHCC60500Scepter Sensors, 60uM, 500PK (10-50PKS)10919 PHCC40050Scepter Sensors, 40um, 50PK2120 PHCC40250Scepter Sensors, 40uM, 250 PK (5-50PKs)10275 PHCC40500Scepter Sensors, 40uM, 500 PK (10-50PKs)19522 PHCC00KIT Scepter 2.0 Startup Kit, 1 Scepter 2.0 pls 12 PKs of Sensors, 60uM51576 PHCC01KIT 2 Scepter 2.0 Handheld Automated Cell Counters80798 PHCC02KIT Scepter 2.0 Start Up Kit, 1 Scepter 2.0 pls 5 packs of 60uM Sensors47307PHCC03KIT Scepter 2.0 Startup Kit, 1 Scepter 2.0 pls 12 PKs of Sensors, 40uM58708PHCC04KIT Scepter 2.0 Start up kit, 1 Scepter 2.0 pls 5 pks of 40uM Sensors51744PHCC05KIT Scepter 2.0 Startup Kit, 1 Scepter 2.0 pls 17 PKs of Sensors, 60uM54737计数器原理-精确记数的保证VoltageV=I RCurrent Resistance•Scepter感应器吸入精确的样本体积•细胞穿过感应器小孔时,电阻值增加。
XHPM2000E-V2.0新先河颗粒物监测仪(PM2.5、PM10)

工作条件:
切割器: (-30~60)℃,0~100% RH, 无凝结,(80~106)kPa; 主机: (5~35)℃,≤85% RH, (80~106)kPa; 电源电压:AC220V 电源频率:50Hz
3. XHPM 2000E系统组成及结构
主 体 外 观
3.1 TSP采样头和切割器
用户可根据自己的需要,通过更换不同的切割部件来监测大气中不同粒 径的颗粒物浓度。
3.2.1 键盘及显示系统
XHPM2000E仪器的前面板部件由按键及显示系统 构成,其中包括:I液晶显示屏;Ⅱ键盘板;Ⅲ前面 板;Ⅳ主控板保护罩;Ⅴ数据传输线缆。
3.2.2 纸带传送系统
XHPM2000E的仪器的纸带传送系统由安装基板上的收带轮驱动电 机组件、收带轮组件、供带轮组件、摩擦从动轮组件构成。 • 纸带传送系统:将使用过的滤带收集起来,并为尘样采集系统提供 新的滤带。 • 收带轮驱动电机组件:为纸带传送系统提供动力,使其每次测量完 成后采样滤带走过25mm的长度, • 摩擦从动轮:依靠摩擦机构提供的摩擦力,保证系统的同步运行。
• TSP采样头:用于检测大气中总悬浮颗粒物浓度值; • PM10切割器:冲击式切割原理,用于监测大气中≤10µm颗粒物浓度值; • PM2.5切割器:旋风式切割原理,需要与PM10切割器配套使用,用于
监测大气中≤2.5µm颗粒物的浓度值。
TSP
PM10切割器
PM2.5切割器
3.2 主机构造
XHPM2000E的仪器主机主要由以下部分构成: 1.键盘及显示系统;2.纸带传送系统;3.尘样采集系统;4. 尘样检测系统;5.恒流系统;6.相关辅助控制系统。整机 布局图如下图所示。
上气道座
压臂组件
AdtempTM 421数字耳朵温度仪产品说明书
NOTARE CHE:QUESTO STRUMENTO MEDICO DEVE ESSEREUTILIZZATO SECONDO LE ISTRUZIONI PERGARANTIRE LE LETTURE ACCURATE.Domande?Chiama il numero verde ADC al numero1-800-232-2670421 Termometro auricolare digitaleManuale di istruzioniAdtemp TM421 Termometro Auricolare Digitale1. I vantaggi di questo termometro auricolare . . . . . . .3-42. Importanti istruzioni per la sicurezza . . . . . . . . . . .4-53. Come questo termometro auricolaremisura la temperatura . . . . . . . . . . . . . . . . . . . . . . .54. Display e simboli di controllo . . . . . . . . . . . . . . . .5-65. Istruzioni per l'uso . . . . . . . . . . . . . . . . . . . . . . . .6-76. Fahrenheit a Celsius commutabile . . . . . . . . . . . . . .77. Come richiamare 12 letture in modalità memoria . .7-88. Messaggi di errore . . . . . . . . . . . . . . . . . . . . . . . . .89. Pulizia e disinfezione . . . . . . . . . . . . . . . . . . . . . . .810. Sostituzione della batteria . . . . . . . . . . . . . . . . . . . .911. Garanzia . . . . . . . . . . . . . . . . . . . . . . . . . . . . . . . .912. Specifiche tecniche . . . . . . . . . . . . . . . . . . . . . .9-1013. Sito web . . . . . . . . . . . . . . . . . . . . . . . . . . . . . . .1014. Informazioni di contatto . . . . . . . . . . . . . . . . . . . . .311. I vantaggi di questo termometro auricolareUso multiplo (misurazione ad ampio raggio)Questo termometro offre un'ampia gamma di misure da 32,0 ° F a 212,0 ° F (da 0 °C a 100,0 ° C); il che significa che l'unità può essere utilizzata come termometro au-ricolare per misurare la temperatura corporea, ma può anche essere utilizzata per misurare la temperatura superficiale degli oggetti:Temperatura superficiale del latte nella bottiglia del bambinoTemperatura superficiale del bagno del bambinoTemperatura ambienteCopertura della sonda gratuitaQuesto termometro è più user-friendly e più economico, dal momento che non èrichiesta una copertura per sonda.Misura in 1 secondoL'innovativa tecnologia a infrarossi consente di misurare la temperatura del-l'orecchio in solo 1 secondo.Accurato e affidabileL'esclusiva struttura del gruppo sonda, che incorpora un sensore a infrarossi avanzato, assicura che ogni misura sia accurata e affidabile.Delicato e facile da usareIl design ergonomico consente un utilizzo semplice e facile del ter-mometro.Questo termometro può essere utilizzato anche su un bambino chedorme, senza causare alcuna interruzione.Questo termometro è veloce e piacevole da usare per i bambini.Memoria display automaticoL'ultima lettura viene visualizzata automaticamente per 2 secondi quando l'unitàè accesa.Richiami a più lettureGli utenti saranno in grado di richiamare le ultime 12 letture quando entrano in modalità memoria, consentendo un monitoraggio efficiente delle variazioni di tem-peratura.Sicuro e igienicoNessun rischio di rottura del vetro o ingestione di mercurio.Completamente sicuro per l'uso sui bambini.La pulizia della sonda può essere eseguita con un tessuto di cotone imbevuto di alcol, rendendo questo termometro completamente igienico per l'uso da parte di tutta la famiglia.Allarme febbre10 brevi segnali acustici avvisano il paziente che potrebbe avere la febbre.2. Importanti istruzioni di sicurezzaQuesto strumento può essere usato solo per lo scopo descritto in questo opus-colo. Il produttore non può essere ritenuto responsabile per danni causati da un'applicazione errata.Non immergere mai questo strumento in acqua o altri liquidi (non impermeabili). Per le istruzioni di manutenzione, fare riferimento alla sezione "Pulizia e disinfezione".Non utilizzare lo strumento se si ritiene che sia danneggiato o si noti qualcosa di insolito.Non aprire mai lo strumento.Il cerume nel condotto uditivo può causare una lettura della temperatura piùbassa. Pertanto è importante assicurarsi che il canale uditivo del soggetto sia pulito.Questo strumento comprende componenti sensibili e deve essere trattato con cautela. Osservare le condizioni di conservazione e di funzionamento descritte nella sezione "Specifiche tecniche"Proteggilo da:temperature estremeimpatto e cadutacontaminazione e polvereluce direttacaldo e freddoAVVERTIMENTO:L'uso di questo strumento non è inteso come un sostituto per la consultazione con il proprio medicoQuesto strumento NON è impermeabile! MAI immergere nei liquidiQuesto prodotto può contenere una sostanza chimica nota allo stato della California per provocare cancro, difetti alla nascita o altri danni riproduttivi.3. Come questo termometro auricolare misura la temperaturaQuesto termometro misura l'energia infrarossa irradiata dal timpano e dal tessuto circostante. Questa energia viene raccolta attraverso l'obiettivo e convertita in un val-ore di temperatura. La lettura misurata ottenuta direttamente dal timpano (membrana timpanica) può garantire la temperatura dell'orecchio più precisa.Le misurazioni prelevate dal tessuto circostante del condotto uditivo generano letture più basse e possono provocare diagnosi errate di febbre.Per evitare una misurazione imprecisa:Questo termometro è stato testato clinicamente e dimostrato di essere sicuro e accurato quando utilizzato in conformità con il suo manuale di istruzioni operative.Accendere il termometro premendo il pulsante ON / OFF.Dopo aver sentito un segnale acustico (e l'icona della scala della temperaturalampeggia), raddrizzare il condotto uditivo tirando delicatamente la parte cen-trale dell'orecchio verso l'alto e verso l'alto.Posizionare saldamente la sonda nel condotto uditivo, premere il pulsante START e mantenere la sonda nell'orecchio finché il termometro emette un seg-nale acustico per identificare il completamento della misurazione.1. 2.3.Se lo strumento non verrà utilizzato per un periodo prolungato, le batterie dovrebbero essere rimosseAssicurarsi che i bambini non usino lo strumento senza sorveglianza; alcuneparti sono abbastanza piccole da essere ingoiate4. Display e simboli di controlloTutti i segmenti visualizzati: Premere il pulsante ON / OFF per accendere l'unità, tutti i segmenti verranno visualizzati per 2 secondi.Memoria: l'ultima lettura verrà visualizzata automaticamente sul display per 2secondi.Pronto per la misurazione:l'unità è pronta per la misurazione, l'icona ° F o ° C continuerà a lampeggiare.Misurazione completata:la lettura verrà visualizzata sul display con l'icona ° F o ° C lampeggiante, l'unità è di nuovo pronta per la misurazione successiva.Indicazione della temperatura fuori dall'orecchio:Un'icona con le orec-chie incrociate visualizzata sul display se la lettura non rientra nell'intervallo 89,6 ~ 108,0 ° F (32,0 ~ 42,2 ° C).Indicazione di batteria scarica: quando l'unità è accesa, l'icona della batte-ria continuerà a lampeggiare per ricordare all'utente di sostituire la batteria.5. Istruzioni per l'usoPremere il pulsante ON / OFF. Il display è attivato per mostrare tutti i segmentiper 2 secondi.L'ultima lettura della misurazione verrà visualizzata automaticamente sul displayper 2 secondi con l'icona M.Quando l'icona ° F o ° C lampeggia, viene emesso un segnale acustico e il ter-mometro è pronto per la misurazione.Raddrizzare il condotto uditivo tirando l'orecchio verso l'alto e indietro per dareuna visione chiara del timpano.• Per i bambini di età inferiore a 1 anno:tirare indietro l'orecchio.• Bambini di età compresa tra 1 anno e adulto:tirare l'orecchio in alto e indietro.Vedi anche le brevi istruzioni a pagina 5.Mentre si tira delicatamente l'orecchio, inserire la sonda nel canale uditivo e pre-mere il pulsante START. Rilascia il pulsante e attendi il segnale acustico. Questa èl'indicazione che conferma la fine della misurazione.Rimuovere il termometro dal condotto uditivo. Il display mostra la temperatura misurata.1.2.3.4.5.6.NOTA: al fine di garantire letture accurate, attendere almeno 30 sec-ondi dopo 3-5 misurazioni continue. L'accumulo di cerume sulla sonda può causare letture della temperatura meno accurate o in-fezioni incrociate tra gli utenti. Pertanto, è essenziale utilizzare una sonda pulita prima di ogni misurazione. Per la pulizia, seguire le istruzioni nella sezione Pulizia e disinfezione. Dopo aver pulito la sonda con alcool, è necessario attendere 5 minuti prima di eseguirela misurazione successiva, in modo da consentire al termometro di raggiungere la temperatura di riferimento operativa.10 toni brevi suonano quando la temperatura è superiore a 99,5 ° F (37,5 ° C)per avvertire il paziente che potrebbe avere la febbre.Per un bambino, è meglio che il bambino penda piatto con la testa di lato inmodo che l'orecchio sia rivolto verso l'alto. Per un bambino più grande o unadulto, è meglio stare dietro e leggermente al lato del paziente.Prendi sempre la temperatura nello stesso orecchio, poiché le letture della tem-peratura potrebbero essere diverse dall'orecchio destro e dall'orecchio sinistro.Attendere alcuni minuti per prendere la temperatura dell'orecchio dopo aver dor-mito.Nelle seguenti situazioni si consiglia di prendere tre temperature nello stesso orecchio e quella più alta presa come la lettura:1. 2.3.Neonati nei primi 100 giorni.Bambini sotto i tre anni con un sistema immunitario compromesso e per i quali la presenza o l'assenza di febbre è critica.Quando l'utente sta imparando come utilizzare il termometro per la prima volta fino a quando non ha familiarizzato con lo strumento e ottiene letture coerenti.6. Fahrenheit a Celsius commutabileQuesto termometro può visualizzare le misurazioni della temperatura in gradi Fahrenheit o Celsius. Per cambiare la visualizzazione tra ° F e ° C, è sufficiente spegnere l'unità, tenere premuto il pulsante START per 5 secondi. Quando si smette di premere il pulsante START dopo 5 secondi, la scala di misurazione corrente (icona ° F o ° C) lampeggerà sul display. Passa dalla scala di misurazione tra ° F e ° C premendo di nuovo il pulsante START.Una volta selezionata la scala di mis-urazione, attendere 5 secondi e l'unità entrerà automaticamente in modalità di mis-urazione pronta per la misurazione.7. Come richiamare 12 letture in modo memoriaQuesto termometro può richiamare le ultime 12 letture.Modalità memoria:premere il pulsante START per accedere alla modalità di memoria quando l'alimentazione è spenta. L'icona della memoria M lampeggia.Lettura 1 - l'ultima lettura: premere e rilasciare il pulsante START per richia-mare l'ultima lettura. Visualizza 1along con l'icona della memoria.Lettura 12 - lettura in successione: Premere e rilasciare il pulsante START consecutivamente per richiamare le letture in successione, fino alle ultime 12 let-ture. Premendo e rilasciando il pulsante START dopo che le ultime 12 letturesono state richiamate, si riprenderà la sequenza sopra riportata dalla lettura 1.8. Messaggi di erroreTemperatura misurata troppo alta: Visualizza H quando la temperaturamisurata è superiore a 212,0 ° F o 100,0 ° C.Temperatura misurata troppo bassa:visualizza L quando la temperatura misurata è inferiore a 32,0 ° F o 0 ° C.Temperatura ambiente troppo alta: visualizza H in combinazione con s quando la temperatura ambiente è superiore a 104,0 ° F (40,0 ° C).Temperatura ambiente troppo bassa: visualizza L in combinazione con t quando la temperatura ambiente è inferiore a 10 ° C (50 ° F).Visualizzazione della funzione di errore:quando il sistema ha un malfun-zionamento.Display vuoto:verificare se la batteria è stata caricata correttamente. Control-lare anche la polarità (+ e -) delle batterie.Indicazione della batteria scarica: se l'icona della batteria fissa è l'unico simbolo visualizzato sul display, è necessario sostituire immediatamente le bat-terie.9. Pulizia e disinfezioneUtilizzare un tampone imbevuto di alcool o un tessuto di cotone inumidito con alcol (70% Isopropyl) per pulire l'involucro del termometro e la sonda di misurazione. As-sicurarsi che nessun liquido penetri all'interno del termometro. Non utilizzare mai detergenti abrasivi, diluenti o benzene per la pulizia e non immergere mai lo stru-mento in acqua o altri liquidi detergenti. Fare attenzione a non graffiare la superficie dell'obiettivo della sonda e il display.10. Sostituzione della batteriaQuesto strumento è fornito con una batteria al litio, tipo CR2032. Sostituire con una nuova batteria CR2032 quando il simbolo della batteria lampeggiante appare sul display. Rimuovere il coperchio della batteria facendolo scorrere verso il basso.Rimuovere la batteria e sostituirla con una nuova..11. GaranziaQuesto strumento è coperto da una garanzia di 2 anni dalla data di acquisto.La garanzia copre lo strumento e le batterie. La confezione non è inclusa.L'apertura o la modifica dello strumento invalida la garanzia.La garanzia non copre i danni causati da uso improprio, batterie scariche, inci-denti o mancata osservanza delle istruzioni operative. Contattare il servizio di assistenza clienti ADC® per ulteriori informazioni.12. Specifiche tecnicheTermometro auricolare 421Da 32,0 ° F a 212,0 ° F - da 0 ° C a 100,0 ° C 0,1 ° F / ° C ± 0,4 ° F, 89,6 ~ 108,0 ° F (± 0,2 ° C: 32,0 ~ 42,2 ° C)± 2 ° F: 32,0 ~ 89,5 ° F, 108,1 ~ 212,0 ° F (± 1 ° C: 0 ~ 31,9, 42,3 ~ 100,0 ° C)Display a cristalli liquidi, 4 cifre più icone speciali • L'unità è accesa e pronta per la misurazione:1 segnale acustico breve • Completare la misurazione: 1 bip lungo• Errore o malfunzionamento del sistema: 3 bip brevi• Allarme febbre: 10 bip breviGenere:MisurazioneGamma:Risoluzione:Misura:Laboratorio:Precisione:Display:Acustico:• Auto: visualizza l'ultima temperatura misurata• 12 richiami di letture nel modo memoriaDa 50 ° F a 104 ° F (da 10 ° C a 40 ° C)Da -13 ° F a 131 ° F (da -25 ° C a 55 ° C)Circa. 1 minuto dopo l'ultima misurazione è stata presa BATTERIA CR2032 (X1) - almeno 1000 misurazioni 6 "(L) x 1,2" (L) x 1,6 "(H)153mm (L) x 31mm (W) x 40mm (H)1,87 once (53 g con batteria), 1,76 once (50 g senza batteria)Conforme ai requisiti ASTM E-196513. Sito WebInformazioni dettagliate sugli utenti dei nostri termometri e misuratori della pressione sanguigna, nonché altri prodotti e servizi sono disponibili su .Memoria:OperativoTemperatura:ConservazioneTemperatura:AutomaticoSpegnere:Batteria:Dimensioni:Peso:Standard:In base alla legge sull'utente del prodotto medico, è consigliabile un'is-pezione tecnica biennale per gli utenti professionali. Si prega di osservare le norme di smaltimento applicabili.rmazioni di contattoPer registrare il tuo prodotto e ottenere un ulteriore utente dettagliato informazioni sui nostri prodotti e servizi visitaci a:e segui i collegamenti.Per domande, commenti o suggerimentichiamaci al numero:1-800-232-2670Dist. da: ADC®55 Commerce Drive,Hauppauge, NY 11788Ispezionato negli Stati UnitiFatto in Cinatel: 631-273-9600numero verde: 1-800-232-2670fax: 631-273-9659email:***************** Onbo Electronic (Shenzhen) Co., Ltd.No. 497, Ta Laneg Nan RoadTa Laneg StreetBaoan District, Shenzhen, ChinaMicrolife AG, Espenstrasse139, 9443 Widnau, SwitzerlandAmerican Diagnostic Corporation55 Commerce Drive, Hauppauge, New York 11788Telephone: 631-273-9600 • Fax: 631-273-9659Email:*****************Stampato in Cina。
Scepter细胞计数全面介绍

18
Scepter | 28/12/2011
* 来源: Scepter Application Note (Lit. No. AN3775酿酒过程中,精确的酵母计数对于酵母接 种和酵母取样是很重要的,这样,才能保证 整个生产的一致性。
芬兰Sinebrychoff Brewery的发言人在评价 Scepter时说道:
Air bubble in tip Filter is wet Wrong diluent O-ring is damaged or misaligned
Keep tip fully immersed while screen displays Submerge the tip. If Aperture block error appears repeatedly, remove filter cover and dry filter. Refer to maintenance section. Refer to list of acceptable diluents in General Guidelines section. Change or reposition o-ring. Refer to maintenance section. Make sure sample volume is ≥ 100 µL. Keep tip fully immersed while screen displays Submerge the tip.
3 Scepter | 28/12/2011
你认识我么? ?
不同直径的细胞 数量分布 细胞数量
细胞浓度
细胞体积
4 Presentation title in footer | 00 Month 0000
THD2FE非接触前额温度计说明书
THD2FE Non-contact Forehead Thermometer⇔The device setting with buzzer is on, you can set buzzer on/off under Mute mode.beep sounds. You can also use the same process to turn off the Mute function.Use of the thermometerNote: If there is any temperature difference between the places where the device is stored and where you are going to measure, subject and the device should stay in the same room for at least 15 minutes before measurement.1. Always make sure the probe lens is clean without any damage and the forehead is clean. Warning: Choking from swallowing small parts and batteries by children or pets is possible, please keep small parts and batteries at places wherechildren and pets can’t reach.2. Power on:Press the “ON/MEM ” button (see figure 1).3. Measuring body temperature on the forehead:Indications for use: The Non-contact Clinical Thermometer, Model THD2FE is an infrared thermometer intended for the intermittent measurement of human body temperature in people of all ages.Ref No.:032020Press the “ON/MEM” button to power on the device. Forehead mode is the default mode. You can see the icon on the screenand hear two beep sounds (see figure 1). In this mode, you can hold the thermometer within 1.5 inch from the central forehead (Fig. 2) andpressthe "START" button to get the forehead measurement. The time consuming for measurement might be 1 second. After each foreheadmeasurement, wait icon stop flashing to be ready for next measurement.Figure 2 Points for attention:a. Forehead temperature is displayed in oral mode. This mode converts the forehead temperature to display its “oral-equivalent” value.b. Before the measurement, the subject should stay in a stable environment for 5 minutes and avoid exercise, bath for 30mins.c. Remember to keep the forehead area clean and away from sweat, cosmetics and scar while taking temperature.d. The “Clinical Bias” is -2.5 ~ -3.1°F (-1.4 ~ -1.7°C).e. The “Limits of Agreement” is 0.98.f. The "Repeatability" is 0.36°F (0.20°C)4. Measuring surface temperature:4.1 After power on, press and hold the “ON/MEM” button, and press the “START” button one time for “Infrared thermometer” mode to see icon on your LCDdisplay. In this mode, you can get the target surface temperature.4.2 When you press the “START” button, you will get the real time temperature immediately. If you press and hold the “START” button, the reading of measurement willbe continuously updated.4.3 Applications include temperature measurements for water, milk, cloth, skin or other objects.* Note: This mode shows the actual and unadjusted surface temperature which is different from the body temperature.5. Power off:5.1 Device will automatically shut off if left idle for more than 1 minute to extend battery life.ProblemWarranty:Warranty: 12 monthsManufacture Date: as the serial number (please open the battery cover, it is shown on the inside of the device.)Ex.SN:E512A000001, the first “E” is External, the second number “5” is the last number of manufacture year, the third and the fourth number “12” is the manufacture Note: The thermometer is calibrated at the time of manufacture. If you question calibration mode, the accuracy of temperature measurements or unexpected events at any time, please contact the dealers or nearest service address.Warning: No modification of this equipment is allowed.Please read the instructions for use BF type applied partMetris instrument east, IIcAdd: 25 Long Meadow PlaceSouth Setauket, NY USA 11720Figure 1 Figure 2 Figure 3IP220,120,23 FM c)±5 kHz deviation1 kHz sine。
Scepter 2.0 单细胞计数仪说明书

Scepter™ 2.0 Cell Counter Precise, handheld cell countingThe life science business of Merck KGaA,Darmstadt, Germany operates as/scepterupgrade Precise, handheld cell countingScepter™ 2.0 cell counters mark the next generation in Scepter™ technology, highlighted by:Compatibility with More Cell TypesIncreased Cell Concentration RangePowerful Software for Complex, Effortless Cell AnalysisScepter™ 2.0 Cell Counter• Recommended based on size • Customer Validated• MilliporeSigma Validated“At last, an alternative to lining up for the Coulter Counter ®, and far easier than sweating over fragile hemocytometers.”Amy A. Caudy is a Lewis-Sigler Fellow at Princeton University’s Lewis-Sigler Institute for Integrative GenomicsThe Scientist , Dec. 2010. Top Ten Innovations of 2010.The power of precisionTrust Scepter™ devices with your most valuable samples to get reproducible and reliable counts. The reliability of Scepter™ cell counters is particularly apparent with smallercell types. Because the Scepter™ cell counter measures volume using the Coulter Principle, it can quantify cells based on size and will discriminate larger cells from smaller debris, unlike vision-based techniques, which rely on object recognition software and cannot reliably detect small cells.Scepter™ sensor technologyCompatible with 60 μm and 40 μm sensors, theScepter™ 2.0 cell counter can meet even more of your cell- and particle-counting needs. Use the 60 μm sensor for particles between 6 and 36 μm. Use the 40 μm sensor for particles between 3 and 17 μm.• Precise volumes are drawn into the Scepter™ sensor.• As cells flow through the aperture in the sensor, resistance increases. This increase in resistance causes a subsequent increase in voltage.• Voltage changes are recorded as spikes with each passing cell.• Spikes of the same size are bucketed into a histogram and counted. This histogram gives you quantitative data on cell morphology that can be used to examine the quality and health of your cell culture.Particles are detected by Ohm’s Law V=IR (V=voltage, I=current, and R=resistance).Table 1.Cell types validated with the Scepter™ cell counter and the recommended Scepter™ sensor.Cell Type Measuredsize (μm)40 μm sensor 60 μm sensorMeg-0116-17•MG-6315-17•Mouse ES Cell5-13••Mesenchymal Stem Cell 15-16•MRC-5•NCI-H14610-13•NIH 3T315•NTERA2, clone D113••OK 17-18•PBMCs 7-12•PC129-13•Primary Astrocytes 7•Primary Neuronal Cell •Raji 12-15••Ramos11-12••Rat Dorsal Root Ganglion Cells 7•Rat Whole Blood 4.6•Red Blood Cells 5-7•Rat Neural Stem Cell 11-13•RAW 264.712-15•RBL 11-13••RIN-mF513-14•SF913•SH-SY5Y 12•Sk-Br-315-20•SK-MEL-2817-19•SK-N-MC 14-15•SK-N-SH 14-15•Splenocytes 7-9•SW-48015•SW-62013-14••T8414-18•T98G 17•TF-113-14••U25116-20•U2OS 16-19•U26612•U87-HumanGlioblastoma cell line 12-14•U93711-13••WI-3812-15•Y7913-14•Yeast- Pichia Pastoris 5•Yeast- S.cerevisiae 6•Cell Type Measuredsize (μm)40 μm sensor 60 μm sensor2102 Ep 15-19•454 beads •A17215•A25314-18•A37516•A43115-17•A549•Algae (various)7-9•B3513-16••B Cells6-11•C2C1212••C30512-14••C612-13•CA4610-12••Caco-217•CHO 14-17•COS-112••Cos-715•D28312•Daudi 10-12••DU-14515-17•Epithelia 14-15•HCT-11610••HEK29311-15•HeLa 12-14•HepG212•HFF 18-20•Hs2714••HT-108014-16•HT-2911•HUH7- Hepatoma line •Human ES Cells 9-12•HUVEC 14-15•IMR-3212-14••IMR-9015••Jurkat 13•K56222•KB 14•KG-110-13••L614-16•LNCaP15-16•Luminex ® beads 5-6•MCF715-17•MDCK13-15•Scepter™ cell counterHemocytometer= Average % CV= Coulter counter % CVVision-based counter1234567Figure 2.The average percent coefficient of variation (CV) for each counting method shown was calculated using cell concentration measurementsat 50,000 cells/mL samples of 19 different cell lines. The Scepter™ cell counter is more precise than vision-based counting and hemocytometry, and approaches the precision of the Coulter Counter ® standard (yellow bars). Error bars represent standard deviation.of cell diameter or cell volume FormatCounting methods Samplevolume needed Samplevolume counted Cells counted in a 100,000 cell/mL sample Average % CV Hemocytometer Slide and microscope Manual, vision-based 10 μL 0.1 μL /square 10/square 41.8Brand L Benchtop Automated vision-based system10 μL 0.4 μL 4032.1Scepter™ Cell Counter HandheldImpedance-based cell detection100 μL50 μL50009.1Intuitive analysis softwareFrom simple counts to complex volume measurements used to assess cell health parameters, Scepter™ Software Pro provides an intuitive, intelligent platform to perform high-level cell analysis based on the size measurements captured with the Scepter™ cell counter.Using the Scepter™ Software Pro on your computer, you can:• Compare several samples and data sets side by side using histogram overlay and multiparametric tables • Create and save gates to be used from one experiment to the next • Create attractive graphical presentations and reports with your dataA View of Scepter™ Software ProData:Data files from your Scepter™ cell counter Current Plot:Working plot and data file Group Stats:Customizable statistics from your selected data filesMultifunctional Plot:Multiple data sets/histogram overlays Reports:Export, print selected graphs/files, cut and pasteAnalysis Templates:Saved gating parametersPrepare the sample:Start with a single-cell suspension, diluted to a total volume of 100 μL (recommended) in phosphate buffered saline (such as EmbryoMax ® 1x DPBS) to 10,000-500,000 cells/mL (operating range for 60 μm sensor) in a 1.5 mL microcentrifuge tube.Perform cell count:• Turn on the Scepter™ cytometer by pressing the toggle on the back of the instrument and wait for on-screen instructions to appear.• When prompted, attach a sensor to the end of the Scepter™ unit with the electrode sensing panel facing toward the front of the instrument, and you’ll see detailed instructions for each step of the counting process.• Pipette once to draw sample into the sensor. 50 μL of your cell suspension is drawn into the microfabricated, precision-engineered channel embedded in the sensor. The cell sensing zone detects each cell drawn into the sensor and thus cell concentration is calculated.• The sensing zone also measures cell sizes and cell volumes with sub-micron and sub-picoliter resolution, enabling the Scepter™ cytometer to display a As easy as pipetting100MDMA231 cellsFlow cytometryScepter™Trypan blue + hemocytometerNIH 3T3 cells% V i a b i l i t y1009080706050403020100Flow cytometryScepter™Trypan blue + hemocytometer% V i a b i l i t yA.B.ApplicationsMilliporeSigma continues to expand the capabilities of Scepter™ technology, and the latest generation Scepter™ 2.0 device features enhanced analytical powers, enabling you to count even more cell types and sizes.Figure 3.Rapid cell analysis using the Scepter™ 2.0 device provides reliable assessments of cell viability compared to flow cytometry (ViaCount ® assay) and hemocytometry (using Trypan blue staining). MDMA231 cells (A) and NIH 3T3 cells (B) were treated with camptothecin 24 hours prior to analysis.“Cell counting is normally a very tedious process and usually only provides minimal information on the cell population. This instrument, which is only slightly larger than an automatic pipette, allows you to count cells in your tissue-culture hood, simplifies the procedure, and provides much useful data, such as the fraction of intact cells.”H. Steven Wiley is a lead biologist at the Environmental Molecular Sciences Laboratory at the Pacific Northwest National LaboratoryThe Scientist , Dec. 2010. Top Ten Innovations of 2010.Scepter™ 2.0 cell counter for counting heterogeneous cell populationsCount blood cells and other cells with small diameters with the highest precision. Biological samples such as primary isolates or cultured cells are often heterogeneous mixtures of cells that differ by type and/or function. Such differences in cellularattributes are most commonly determined by multicolor fluorescent antibody detection of cell type specific surface marker(s) using flow cytometry. Notably,in addition to variations in protein expression, many cell types and physiological states are also uniquely distinguishable on the basis of size alone. The ability to identify population subsets on the basis ofphenotypic differences and further determine their relative frequencies (and concentrations) is critical to many aspects of research.Scepter™ 2.0 cell counter for cell healthInstantly gauge the health of your cell cultures without even leaving the culturehood. Because the Scepter™ cell counter displays high-resolution histograms of entire cell populations, you can differentiate live cells from dead cells and debris by simply gating on the histogram peak corresponding to larger-diameter cells. No staining is required! The resulting calculation for % viable cells agrees with viability calculations obtained using flow cytometry (ViaCount ® reagent) and Trypan blue staining/hemocytometry (shown here with MDMA231 and NIH 3T3 cells).% C o e ffic i e n t o f V a r i a t i o n (%C V )(40 µm sensor)Vision-based Counter Counting MethodPBMCsAverage % CV Z2 Coulter Counter C o u n tC o u n tForward ScatterFlow CytometryPlot PO3, ungatedScepter™ (40 µm)Current AcquisitionDiameter (µm)100200300400500600700800900100001000200030004000500060005.6 µm Polystyrene MILLIPLEX ® Antibody-Conjugated MicrospheresC o u n tDiameter (µm)1,500,000500,000250,000125,00050,000750,0000.0E+00M e a s u r e d C e l l C o n c e n t r a t i o n (c e l l s /m L )Theoretical Cell Concentration (cells/mL)4.0E+058.0E+051.2E+061.6E+06Theoretical Cell ConcentrationZ2 Coulter Counter Scepter™ - 40 µm SensorsScepter™ 2.0 │ Precise, handheld cell countingScepter™ 2.0 cell counter for countingheterogeneous cell populations (continued)Distinguishing lymphocytes from monocytes in freshly isolated PBMCs . The assessment of immune profiles of the various immune cell subsets can help identify molecular signatures that may facilitate research. The Scepter™ cell counter, when used in combination withScepter™ Software Pro, provides a tool for rapid determination of lymphocyte and monocyte concentrations as well as the relative frequency of these cell types in PBMC isolates.Figure 4.The Scepter™ 2.0 cell counter counts PBMCs with greater precision than other counting methods, as reflected by low coefficients of variation. % CVs were calculated using average cell counts of four replicate samples.Figure 6.Scepter™ Software Pro displays imported size distribution histograms as either a single sample histogram or as overlaid histograms for multiple samples. Shown is an overlaid histogram for serially diluted 5.6 μm MILLIPLEX ® map microspheres.Figure 7.The Scepter™ cell counter counts yeast cells with good accuracy and linearity. Measured yeast cell concentrations were compared totheoretical concentrations. The solid blue line represents the theoretical values. Dotted lines represent best linear fit to data. Both the Scepter™ and Coulter Counter ® platforms show a loss of linearity and accuracy upon an increase in cell concentration.Figure 5.Representative comparison of histogram plots for human PBMCsamples acquired on the Scepter™ cell counter (diameter histogram on right) and guava ® easyCyte™ flow cytometry (forward scatterhistogram on left) platforms. Analysis plots derived from both platforms demonstrate three distinct peaks corresponding to 1) dead cell/debris, 2) lymphocyte and 3) monocyte fractions. The difference in counts displayed (Y-axis) is due to differences in sample dilution between the guava ® easyCyte™ flow cytometer and the Scepter™ cell counter.Cell Fraction Scepter™ 1Forward Scatter 2Staining 31Lymphocyte 586563Monocyte 4235372Lymphocyte 687271Monocyte 3228293Lymphocyte 666971Monocyte343129Precise and accurate bead counting with the Scepter™ 2.0 cell counterMicron-sized beads are used in a variety of biological applications, ranging from daily validation of flowcytometer performance to purification of fusion protein constructs from cell lysates. Accurate determination of bead counts at the onset of each assay allows for standardization of bead concentrations acrossmultiple samples and minimizes errors and variation in downstream results. The Scepter™ cell counter is well suited for precise counting for beads of numerous types and can improve reproducibility of bead-based assays, such as immunoprecipitation and multiplexed detection.Scepter™ devices can facilitate yeastcell counting for brewing and wine industriesIntroduction of a consistent yeast cell concentration is required for successful beer and wine fermentation as well as to maintain batch-to-batch reproducibility and ensures consistent fermentation over many cycles. Scepter™ cell counter can be used to monitor yeast size and concentration by yielding interpretable histograms that could be gated to provide this depth of information.Ordering InformationDownloadable Scepter™ Software 1O-Rings2Scepter™ Test Beads 1PHCCBEADS Scepter™ USB Cable 1PHCCCABLE Scepter™ Sensors, 60 μm50PHCC60050500PHCC60500Scepter™ Sensors, 40 μm 50PHCC40050500PHCC40500Universal Power Adapter1PHCCP0WER Scepter™ O-Ring Kit (includes 2 O-rings and 1 filter cover)1PHCC0CLIP Table 2.Lymphocyte and monocyte subset frequencies from three individual PBMC samples. Aliquots from each sample were analyzed using the guava ® easyCyte™ flow cytometry and Scepter™ platforms. 1 Values were derived from the diameter histogram plot. 2 Values were derived from the forward scatter histogram plot based on total events measured on guava ® easyCyte™ flow cytometry platform. 3 Staining frequencies derived as follows: % Lymphocytes = (% CD3+ T cells) + (%CD16/56+ NK cells) + (%CD19+ B cells); % Monocytes = % CD14+ cells.vMilliporeSigma400 Summit Drive Burlington, MA 01803。
Countstar 细胞计数仪介绍

Countstar细胞计数仪 与人工计数对比
Countstar细胞计数仪与血球计数板计数细胞活率结果一致,两种方法 计数结果差异无统计学意义(Y=1.0072x;R2=0.9937)
手持式白度计使用说明书
敬告:在操作本仪器之前请阅读下述内容仪器应放置在温度稳定、干燥、无振动的地方。
请避免高温、高湿和大量灰尘,否则会引起仪器损坏。
触摸屏为玻璃易碎品,使用时不要对触摸屏施加大力冲击。
取放仪器时轻拿轻放,避免与其他物体相碰撞而损伤触摸屏。
清洁触摸屏表面时,请用柔软性布料(鹿皮)擦拭。
不可使用带腐蚀性的有机溶剂擦拭触摸屏表面。
水滴或饮料落在仪器上,及时用干布把仪器擦拭干净。
勿将其它物品堆叠放置在触摸屏上。
不要用带腐蚀性的胶粘贴在触摸屏的表面。
不要打开仪器,本机属于精密仪器,机内没有用户自已能够维修的部件。
仪器发生故障时,必须请有资格的技术人员检修。
如因用户自行打开仪器而发生故障,恕本公司不予保修。
由于软件版本更新而造成界面和功能变更,恕不另行通知。
产品颜色请以实物为准。
仪器的安装1.打开仪器包装箱,先取出仪器主机、附件盒,然后小心地取出仪器测头。
2. 去掉包装塑料袋,然后把测头放倒在桌面上,如下图所示。
用螺丝刀旋出顶杆,完成后重新摆正放稳仪器测头。
3.确认仪器的电源开关处于关闭状态,将电源适配器的输出插头插入仪器主机的电源接口,再把电源适配器的电源线插入市电插座。
把测头的电缆插头插入主机背后的测头接口;若有打印机需用打印电缆联接好。
(详看打印机使用说明书。
)若要与计算机通讯则需接好USB通讯电缆。
确认无误后打开电源开关。
2目 录一 前言 (3)二 仪器概述 (4)三 技术指标 (5)四 系统框图 (6)五 使用方法 (7)1. 测量准备 (7)2. 校正 (9)3. 测量 (9)4. 设置 (9)4.1 仪器设置 (10)4.1.1标准白板 (10)4.1.2输出设置 (10)4.1.3背光调节 (11)4.1.4设置时间 (11)4.2 选择文件 (12)4.3 工厂设置 (12)5. 管理 (13)5.1 选择文件 (13)5.2 查看文件 (13)5.3 输出文件 (14)5.4 删除文件 (14)6. 关于 (14)六 触摸屏校准 (14)七 压样器使用 (15)八 装箱单 (16)3一前言白度计是一种积分型测色仪器,可测物体的反射色。
般特ORPscan10 20 笔式ORP计 用户手册说明书
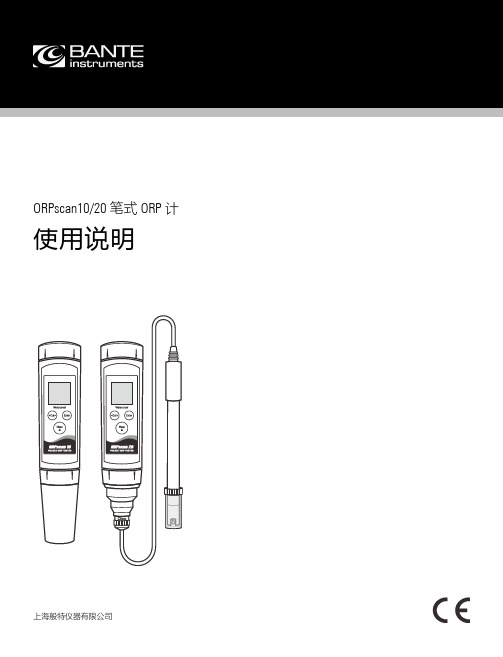
ORPscan10/20笔式ORP 计使用说明上海般特仪器有限公司1 I综述感谢您选择般特仪器的ORPscan 系列笔式ORP 计。
这本用户手册循序渐进地描述了测量仪的各项功能与特征。
使用前,请仔细阅读。
安装电池 1. 拧下测量仪前端的电极固定圈,取下电极(或BNC 连接器)。
2. 将2节AAA 电池插入电池仓,注意极性。
3. 对准插槽,将电极(或BNC 连接器)缓慢推入主机,顺时 针拧入电极固定圈直至锁紧。
按键 按键 功能 • 开关测量仪 • 锁定或解锁测量 • 退出校准、设置并且返回测量 • 开始校准 • 按住键进入设置菜单• 选择一个选项• 确认校准、设置或显示的选项 显示 图标 描述MEAS 表示正在测量CAL 表示正在校准SETUP 表示正在设置选项或数值使用前ORPscan10取下电极保护帽(与半透明盖),如果一些盐晶体沉积在电极壁,用自来水冲洗以清除沉积物。
如果铂金传感器已干燥,将电极浸入电极浸泡液约30分钟。
ORPscan20取出携带箱内的ORP 电极,将BNC 连接器插入测量仪的连接器座,顺时针旋转并锁紧。
开关测量仪• 按住Meas 键约5秒开机。
• 按住Meas 键关机。
如果8分钟内无按键操作,测量仪将自动关机以节省电能。
电极浸泡液I 2设置菜单ORPscan 系列笔式ORP 计内含一个简洁的设置菜单用于自定义功能选项以满足使用偏好,下表描述了各菜单项的功能。
菜单项 选项与描述 自动锁定 设置是否自动判别并锁定测量终点。
启用禁用(默认) 自动关机 设置8分钟内无按键操作是否自动关机。
启用(默认) 禁用重置测量仪 设置是否删除校准数据并且恢复测量仪至工厂默认设置。
注意,一旦启用,测量仪必须重新校准。
启用禁用(默认) 设置默认选项 1. 在测量模式,按住Cal 键进入设置菜单。
2. 如有需要,再次按Cal 键选择一个选项。
3. 按Enter 键保存当前选项,屏幕显示下一个菜单项。
德克萨斯仪器 DPI 620 高精度多功能计ibrator 安全参考指南说明书
[EN] English - K0454 Issue 1 Quick Reference 1Quick ReferenceWARNING: Before you use this instrument, read and understand the “Safety” section. It is dangerous to ignore the specified warnings.Start operations (S1 to S4)S1:Install the battery. Refer to Section 5.S2:Power on/off sequenceS3:Example change of function (Voltage to Current)ON➀First display Normal outputOFF➀Press and hold PressTAPChannel Settings1324Task Settings68Task Settings5Select FunctionChannel Settings7S4:Touch-screen operations (maximise, minimise, set voltage) Menu sequenceTask*SettingsCH1CH2ChannelSettingsFunctionUnitsUtilityCaptionSelect“Function”NoneCurrentVoltage* A channel can only have one function at a time.TAPSet voltageMaximise12134Minimise*** Alternative options for step ➀TAP2 Quick Reference K0454 Issue 1 - [EN] English[EN] English - K0454 Issue 1 31OverviewThe advanced modular calibrator (AMC) is part of a set ofhand-held modules that you can quickly put together to include a wide range of calibrator functions.Advanced modular calibrator, DPI 620: This is abattery-powered instrument for electrical measure and source operations and HART® communications; see table A1(front cover). It also supplies the power and user interface functions for all the add-on modules. You can use the touch-screen to display up to six different parameters.Pressure module carrier, MC 620: Optional item. This attaches to the DPI 620 calibrator to make a fully integrated pressure indicator instrument. To measure and display pneumatic or hydraulic pressures, you can have up to two interchangeable pressure transducers at a time.Pressure modules, PM 620: Optional item. These modules attach to the pressure module carrier (MC 620) or to a pressure station (PV 62x) to give the DPI 620 calibrator the necessary pressure measurement functionality. They are fullyinterchangeable “plug and play” modules with no initial set-up or user calibration.Pressure stations, PV 62x: Optional item. To make a fully integrated pressure calibrator, you can attach the DPI 620 calibrator to one of the three pressure stations. Refer to user manual - K0457.2Standard equipmentThese items are part of the standard equipment with the DPI 620 calibrator:•DC power supply/battery charger unit •Li-Polymer battery•Set of six electrical test leads •Safety and quick reference guide •CD with the user manualDPI 620MC 620PM 620PV 62xOverview/Standard equipment3Safety Before you use the instrument, make sure that you read andunderstand all the related data. This includes: the applicablelocal safety procedures, the user manual (K0449), and theinstructions for the accessories/options/equipment you areusing it with.General warningsWARNING•It is dangerous to ignore the specified limits for the instrument or to use the instrument when it is not in its normal condition. Use the applicable protection andobey all safety precautions.•Do not use the instrument in locations with explosive gas, vapour or dust. There is a risk of an explosion.Electrical warnings •To prevent electrical shocks or damage to the instrument, do not connect more than 30V between the terminals, or between the terminals and the ground(earth).•To prevent electrical shocks, use only the GE specified AC probe (Part: IO620-AC) to measure AC voltages(maximum: 300 Vac).•This instrument uses a Lithium-Polymer (Li-Polymer) battery pack. To prevent an explosion or fire, do notshort circuit, do not disassemble, keep it safe fromdamage. For operating conditions, see Table 1.•To prevent an explosion or fire, use only the GE specified battery, power supply and battery charger. •To prevent battery leakage or heat generation, only use the battery charger and power supply in thetemperature range 0 to 40°C (32 to 104°F). Foroperating conditions, see Table 1.Pressure warnings •Some liquid and gas mixtures are dangerous. This includes mixtures that occur because ofcontamination. Make sure that the equipment is safe to use with the necessary media.•To prevent a dangerous release of pressure, isolate and bleed the system before you disconnect a pressureconnection.Continued4 Safety K0454 Issue 1 - [EN] English[EN] English - K0454 Issue 1Parts 5•To prevent a dangerous release of pressure, make sure that all the related pipes, hoses and equipment have the correct pressure rating, are safe to use and are correctly attached.CautionsTo prevent damage to the display, do not use sharp objects on the touch-screen.To prevent damage to the PM 620 module, only use it within the specified pressure limit on the label.Before you start an operation or procedure in this publication, make sure that you have the necessary skills (if necessary, with qualifications from an approved training establishment). Follow good engineering practice at all times.Marks andsymbols on the instrument4PartsRefer to the figures on the front cover (A2, B1).4.1Key to figure A2 (DPI 620 calibrator)Complies with EuropeanUnion directives Warning - refer to the manualRead the manual USB ports: Type A; Mini-type B connector Ground (Earth)ON/OFFDo not dispose of this product as household waste. Refer to “Maintenance” (Section 5.5).More marks and symbols are specified in the user manual (K0449 - Druck DPI 620Advanced modular calibrator)1.On or off button. Refer to “Quick Reference”.2. CH1Channel 1 connectors for: voltage (V); frequency (Hz);resistance (Ω); resistance temperature detectors (RTD): 3W, 4W = 3-wire, 4-wire RTD input; switch operation; current (mA+, mA-): COM = Common connectorYou can also use the GE specified AC probe (Part: IO620-AC) to measure AC voltages (maximum: 300 Vac).3.TCChannel 1 connectors for thermocouples.4.CH2Isolated channel 2 connectors for: voltage (V); current (mA+,mA-); 24V loop power supply (24Vo); switch operation6 PartsK0454 Issue 1 - [EN] English4.2Key to figure B1 (MC 620 module carrier/PM 620 module) - Optional item5.USB type A connector for connections to external peripherals (USB flash memory or optional external modules)B mini-type B connector for communication with a computer.7.+5V DC power input socket. This supply also charges the battery.8.Sealed speaker unit.9.Liquid crystal display (LCD): Colour display with touch-screen. To make a selection, lightly tap on the applicable display area.a.Battery indicatorb.Date and time10.CH1: Window for the channel 1 settings and values. c.Measure or source indicationd.Functione.Full scale (FS) rangef.Function units11.Other windows: The number of windows you see on the display is set by the number of task selections and external modules you are working with (maximum: 6).12.Tap this button to set up the Task , set up the instrument (Configure ) and to access Help (?). Refer to “Quick Reference”.Tap this button to maximise each of the available windows in sequence. Refer to “Quick Reference”.Pause (II ) or Play (X ): Tap (II ) to hold (freeze) all the data on the display. To release the display and continue, tap (X ).1.Pressure connection (G1/8 or 1/8NPT) to attach external pressure equipment.2.Pressure and electrical connections for a pressure module (PM 620). These are self-seal pressure connections.3.Two screws to attach the calibrator (DPI 620).4.Electrical connections for the calibrator (DPI 620).5.Pressure module (PM 620) with a pressure connection, reference port (a) and a label. The label includes:Pressure range . Example: 20 bar g (g: gauge; a: absolute); serial number (S/N); manufacturer : name, address, website[EN] English - K0454 Issue 1Installation 75InstallationBefore you start:•Read and understand the “Safety” section.•Do not use damaged equipment.Note: Use only original parts supplied by the manufacturer.5.1AMC batterySee figure A3 (front cover).5.2IndicatorassemblyOptional item (MC 620/PM 620). See figure B2 (front cover).5.3Electricalconnections See figure C1 to C5, and D1 (front cover).5.4External pressureconnectionsSee figure B1/E1 (front cover). Use an applicable method to seal the external pressure connections, and then tighten to the applicable torque. Maximum torque:1/8 NPT: 35 Nm (26 lbf.ft)G1/8: 25 Nm (18.4 lbf.ft)1.When the power is off, loosen the five screws (a) and remove the cover (b).If necessary, turn the instrument over and let the discharged battery drop into your hand.2.Install the new battery correctly until it is flat in the compartment.3.Re-attach the cover.1.Align the two slots (a) on the calibrator with the two posts (b) on the module carrier.2.When the posts are fully engaged in the slots, tighten the two screws until they are hand tight.3.Attach one or two PM 620 modules with the correct range and type.4.Tighten each one until it is hand tight only.5.5Maintenance Clean the case with a moist, lint-free cloth and a weakdetergent. Do not use solvents or abrasive materials.Return the instrument to the manufacturer or an approvedservice agent for all repairs. Refer to the user manual.Do not dispose of this product as household waste. Use anapproved organisation that collects and/or recycles wasteelectrical and electronic equipment. For more information,contact one of these:•our customer service department:(Contact us at )•your local government office.6SpecificationTable 1: General specificationLCD: Colour display with touch-screen-10 to 50°C (14 to 122°F)-20 to 70°C (-4 to 158°F)IP65 (DPI 620 calibrator only)0 to 90% relative humidity (RH) non-condensingDef Stan 66-31, 8.4 cat IIIElectromagnetic compatibility: BS EN 61326-1:2006Electrical - BS EN 61010:2001Pressure Equipment Directive - Class: Sound EngineeringPractice (SEP)CE MarkedLithium-Polymer battery (GE Part number: 191-356)Capacity: 5040 mAh (minimum), 5280 mAh (typical);Nominal voltage: 3.7 V.Charge temperature: 0 to 40°C (32 to 104°F)Note: When the instrument senses the temperature is outsidethis range, it stops charging.Discharge temperature: -10 to 50°C (14 to 122°F).Charge/discharge cycles: > 500 > 70% capacity8K0454 Issue 1 - [EN] EnglishMaintenance/SpecificationCustomer serviceVisit our web site: 。
山珍II型数据采集仪说明书(双面版)
参数,默认 192.168.0.100
GPRS\CDMA:后三组 IP ;目前 只有第 一 组可以使 用,默认
B-Po
192.168.0.100 同相应 IP 地址对应的端口号,默认 6000,端口号小于 32767
Turbo 高级设置: T-val
1.2 山珍 II 型数据采集仪的特点
全智能。无人职守自动工作。实现对下端仪器的反控。 多信道通讯。GPRS /CDMA、以太网等,所有通讯方式可以同时
使用,具有极高的通讯可靠性。 出厂标配为 LAN 通讯方式。 备用电源系统。当 AC220 掉电时,将自动切换到备用电池供电。 可持续工作大于 12 个小时。 具有报警功能。按照设置的报警上、下限触发报警功能,并可以 及时上报到中心机,且报警出现时自动按设定间隔时间记录监测 数据。并具有报警使能开关设置。 显示下端仪器的工作状态。数据采集仪自带 8 个按键、8 位数码管 以及 8 个状态指示灯。可在现场设置工作参数、指示设备的运行 状态和显示采集到现场数据,并且设置参数时需要密码识别。
具有通讯使能设置,有效减少 GPRS/CDMA/LAN 不必要的数
据流量开支ຫໍສະໝຸດ 2.2 工作环境指标本产品是通过了兵器工业第一环境模拟与可靠性试验中心的综 合试验和电磁兼容性检测。该中心通过了中国实验室国家认可委员会 (CNAL)实验室认可(证书号:NO.L1490)和拥有计量认证资格(MA)。
工作环境:温度 -20℃ ~+60℃, 湿度 ≤ 95%。 供电电源:220VAC±15% ,50HZ。 设备功率 < 30W。 防水等级为 IP63。
常用因子编码表详情请参见污染源在线自动监控监测系统数据传输标准中常用部分污染物相关参数编码表因子代码因子名称名称类型单位s02烟气流速废气s03烟气温度废气s04烟气动压废气s05烟气湿度废气s06制冷温度废气s07烟道截面积废气s08烟气压力废气b02废气流量废气01烟尘废气02二氧化硫so2废气mgm303氮氧化物nox废气mgm304一氧化碳co废气mgm305硫化氢废气06氟化物fluride废气mgm307氰化物含氰化氢废气08氯化氢废气10废气11氯气废气12二硫化碳废气16废气17甲苯tol废气mgl18二甲苯xyl废气mgl19甲醛废气20abena废气gm325碳氢化合物含非甲烷废气26乙醛废气27废气28甲醇废气30二氧化碳废气37废气39颗粒物其他废气98臭气浓度无量纲废气99其他气污染物废气b01污水流量污水001phrph污水002色度color污水003悬浮物wsus污水mgl010生化需氧量bod5bod5污水mgl011化学需氧量codcrcodcr污水mgl015总有机碳toc污水mgl020hg污水mgl022cd污水mgl023污水024cr6污水mgl025污水026污水027pb污水mgl028污水029cu污水mgl030zn污水mgl031mn污水mgl032污水033污水034污水035污水060nh4n污水mgl063亚硝酸盐以nno2n污水mgl064硝酸盐以nno3n污水mgl070氰化物总氰化合物cn污水mgl071硫化物s2污水mgl080石油类石油醚萃取oils污水mgl081动植物油avoils污水mgl082污水090氯化物以cl计cl污水mgl101污水mgl102磷酸盐以p污水110挥发酚vphen污水mgl570放射性污水571放射性污水720气温atemp空气质量721气压apres空气质量kpa722相对湿度humir空气质量723风速wspeed空气质量724主导风向wdirec空气质量701dust空气质量tmonthkm2702总悬浮颗粒物tsp空气质量mgm3704可吸入颗粒物pm10空气质量mgm3705臭氧o3空气质量mgm3710硫酸根rso42地表水mgl711硝酸根rno3地表水mgl712氟离子rf地表水mgl713氯离子rcl地表水mgl714铵离子rnh4地表水mgl715钙离子rca2地表水mgl716镁离子rmg
涂层导尿管的体外细胞毒性试验研究

涂层导尿管的体外细胞毒性试验研究周小婷;徐玉茵;田林奇;周静;韩颖【摘要】目的分析国内市场上常用的新型涂层导尿管的细胞毒性,给临床导尿管的选择提供指导.方法参考GB/T 16886.5-2017/ISO10993.5:2009的试验方法,将涂层导尿管浸提液与小鼠成纤维细胞L929培养接触,采用MTT细胞毒性试验计算细胞毒性,计算细胞存活率.结果不同材质和不同涂层的导尿管对L929细胞显示出不同的细胞毒性.结论聚氯乙烯(PVC)基材的涂层导管的体外细胞毒性小,生物相容性高;乳胶基材的涂层导尿管,细胞毒性结果有差异.【期刊名称】《中国医疗设备》【年(卷),期】2019(034)003【总页数】3页(P45-47)【关键词】涂层导尿管;细胞毒性;乳胶;聚氯乙烯【作者】周小婷;徐玉茵;田林奇;周静;韩颖【作者单位】河南省医疗器械检验所河南省医疗器械检验检测工程技术研究中心生物检测室,河南郑州 450000;河南省医疗器械检验所河南省医疗器械检验检测工程技术研究中心生物检测室,河南郑州 450000;河南省医疗器械检验所河南省医疗器械检验检测工程技术研究中心生物检测室,河南郑州 450000;河南省医疗器械检验所河南省医疗器械检验检测工程技术研究中心生物检测室,河南郑州 450000;河南省医疗器械检验所河南省医疗器械检验检测工程技术研究中心生物检测室,河南郑州 450000【正文语种】中文【中图分类】R608引言导尿管是指通过尿路插入膀胱腔以排尿和冲洗膀胱为目的的管状器械。
按《医疗器械分类目录》,根据涂层不同,其管理类别也不同。
润滑涂层导尿管管理类别为Ⅱ类,银盐和抗菌成分等涂层导尿管管理类别为Ⅲ类。
随着临床上导尿管的应用日益广泛,由导尿管引起的导尿管相关尿路感染及损伤日益得到重视,如细菌定植、抗生素耐药性、慢性感染、肾脏和膀胱损伤、肾结石、膀胱假息肉、败血症、尿道损伤等[1]。
由于导尿管的原材料天然乳胶中含有对人体致敏性蛋白、生产工艺控制不严、添加剂或助剂使用比例不正确易导致生物相容性尤其是细胞毒性试验不符合要求。
BIO TC10 自动细胞计数仪
Product Description TC10 Automated cell counter with counting kit TC10 Automated cell counter with thermal printer & counting kit TC10 Counting kit, 30 slides, 1.5ml Trypan blue (60 samples) TC10 Counting slides, double-chamber 150 slides (300 samples) TC10 Counting slides, double-chamber 300 slides (600 samples) TC10 Counting slides, double-chamber 600 slides (1200 samples) TC10 Counting slides, double-chamber 900 slides (1800 samples) TC10 Counting slides, double-chamber 1200 slides (2400 samples) TC10 Counting slides, double-chamber 2400 slides (4800 samples) TC10 Trypan blue dye, 5 x 1.5ml (750 samples) TC10 Trypan blue dye, 10 x 1.5ml (1500 samples) TC10 Verification Slide TC10 Thermal printer Thermal labels (1 roll of 185 labels)
Performance Data-活细胞计数
7.0E+05 6.0E+05 5.0E+05 4.0E+05 3.0E+05 2.0E+05 1.0E+05 0.0E+00 Live Dead Total
MESSKO BeTech 指针温度计 操作说明书
BA3527161/02 ZH MESSKO® BeTech 指针温度计操作说明书请妥善保存本手册以备将来参考!目录1安全 . . . . . . . . . . . . . . . . . . .41 .1 安全说明书 . . . . . . . . . . . . . . . .41 .2 使用目的 . . . . . . . . . . . . . . . . .41 .3 关于运行设备运转的重要提示 . . . . . . . .42产品规格 . . . . . . . . . . . . . . . . .42 .1 BeTech 油温指示器 . . . . . . . . . . . .42 .2 BeTech 绕组温度指示器 . . . . . . . . . .42 .3 TT 版(选项) . . . . . . . . . . . . . .52 .4 Pt 100 版(选项) . . . . . . . . . . . .53安装 . . . . . . . . . . . . . . . . . . .53 .1 安装装置 . . . . . . . . . . . . . . . . .53 .2 毛细管 . . . . . . . . . . . . . . . . . .53 .3 袋 . . . . . . . . . . . . . . . . . . . .53 .4 防踢保护 . . . . . . . . . . . . . . . . .54电气连接 . . . . . . . . . . . . . . . . .64 .1 连接微动开关 . . . . . . . . . . . . . . .64 .2 模拟输出端 4 - 20 mA 电流环路信号 . . . .64 .3 模拟输出端 4 - 20 mA 电流环路信号和 0 -5 V直流电压输出 . . . . . . . . . . . . . . .74 .4 模拟输出端 0 - 5 V 直流电压输出 . . . . .84 .5 模拟输出端 Pt 100 Ohm 电阻信号 . . . . . . 94 .6 开关设置 . . . . . . . . . . . . . . . .104 .7 开关设置检查 . . . . . . . . . . . . . .105恒温校准 . . . . . . . . . . . . . . . .105 .1 恒温校准检查 . . . . . . . . . . . . . .106梯度校准 . . . . . . . . . . . . . . .116 .1 通过加热电流进行校准 . . . . . . . . . .116 .2 通过内置匹配电阻 MRB110-1 或 MRB110-2 进行校准 . . . . . . . . . . . . . . . . . .127 技术数据 . . . . . . . . . . . . . . . .138附录 . . . . . . . . . . . . . . . . . .148 .1 尺寸 . . . . . . . . . . . . . . . . . .148 .2 模拟输出端 / 4 - 20 mA 电流环路信号 . .158 .3 模拟输出端 / 4 - 20 mA 电流环路信号和 0 - 5V 直流电压输出 . . . . . . . . . . . . .168 .4 模拟输出端 / 0 - 5 V 直流电压输出 . . .178 .5 模拟输出端 / Pt100 Ohm 电阻信号 . . . . 188 .6 布线图 / OTI 5 开关、WTI 5 开关和 WTI 4 开关 + MRB110 . . . . . . . . . . . . . .198 .7 接线端子 . . . . . . . . . . . . . . . .208 .8 编号 1 感温包尺寸 . . . . . . . . . . .218 .9 编号 2 感温包尺寸 . . . . . . . . . . .218 .10 编号 2F 感温包尺寸 . . . . . . . . . . .218 .11 编号 5 感温包尺寸 . . . . . . . . . . .218 .12 编号 6 感温包尺寸 . . . . . . . . . . .228 .13 编号 8 感温包尺寸 . . . . . . . . . . .228 .14 编号 9 感温包尺寸 . . . . . . . . . . .238 .15 编号 10 感温包尺寸 . . . . . . . . . . .238 .16 编号 27 感温包尺寸 . . . . . . . . . . .231 安全1.1 安全说明书参与本运行设备的安装、调试、运行或维修的所有人员都必须:- 具备相应的专业资格,并 - 严格遵守本操作说明书。
CedexXS细胞计数仪操作手册
Cedex XS 细胞计数仪操作手册一、启动Cedex XS 系统1. 打开计数仪:按下计数仪上的ON/OFF按钮,按钮亮起蓝色光表示仪器已打开;2. 打开Cedex XS 控制软件:①打开配套电脑,进入Windows操作系统;②双击桌面上的Cedex XS 图标,进入Cedex XS 控制中心;3. 调节白平衡:首次安装Cedex XS系统或移动系统后必须调节白平衡。
①把样品板支架拉出;②点击Cedex XS 控制中心中的HWM键,打开硬件管理对话框;③点击WHITE BALANCE键进行调节,结果将自动保存;④调节完毕后关闭对话框。
二、细胞计数与活性测定1. 样品制备①用培养基或PBS将样品稀释至细胞数不高于5×10⁶/ml;②使用0.2%台盼蓝染色(一般为10μl、1:1):台盼蓝对血清蛋白亲和力更强,若大量血清蛋白导致图像背景过暗,可以将样品离心,用无蛋白培养基或生理盐水悬浮细胞进行计数;③将细胞悬液充分混匀;④用移液枪取细胞悬液加入样品板,每槽10μl;可以一次测定八槽,也可测定单槽。
2. 进样:样品板有八个槽,一次可测定四个样品槽。
①拉出样品板支架;②加有样品方向朝里,将样品板放上支架;③将支架推入计数仪,有少许卡扣感表示已就位:样品槽位置指示灯表示样品测定进程。
三、软件设置:1. 打开测定界面:在Cedex XS 控制中心点击MEASURE键,进入测定界面;2. 设置样品参数:①在样品参数栏输入样品名(Reactor ID),可在下拉栏选择或手动输入,最多可输入21个字符;②输入样品编号(Sample ID),最多21个字符;若样品名已存在,软件将自动延续样品编号,也可手动重新输入编号;③软件将自动记录日期和时间,表明样品测定的实际时间;④点击MI×键,出现进样体积对话框;⑤输入参数:样品量(Sample V olume)、台盼蓝用量(Dye V olume)、稀释剂用量(Diluent V olume);⑥系统将自动计算稀释比例等,可以手动输入注释(Comments)。
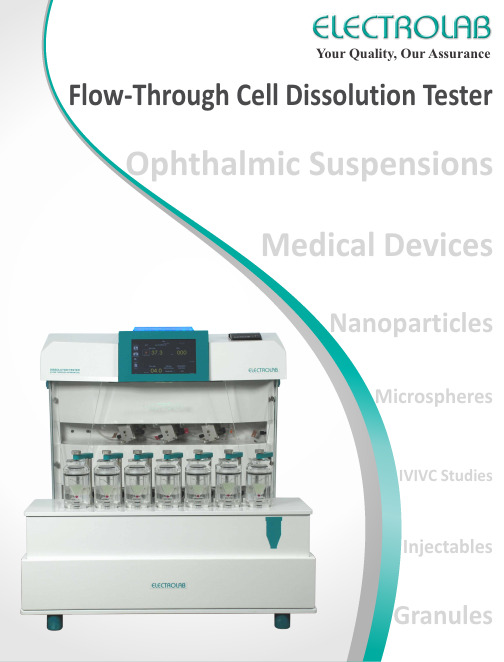
USP Apparatus 4 流通细胞溶解试验仪说明书
Your Quality, Our Assurance Flow-Through Cell Dissolution Tester Ophthalmic SuspensionsMedical DevicesNanoparticlesIVIVC StudiesInjectablesGranules2Flow-Through Cell Dissolution Tester (USP Apparatus 4)Flow-Through cell dissolution tester is widely recommended for poorly soluble, modified release and extended release dosage forms. With the evolution of new drug delivery platforms, USP apparatus 4 is best recommended for studying the dissolution profile of solid, liquid, oral, non-oral dosage forms and other medical devices such as stents, implants etc. As this apparatus offers highly flexible configurations, ability to work in variety of solubility conditions, different types of cells and positioning of the dosage form, hydrodynamics, sink conditions and flow rates, USP apparatus 4 will continue to evolve to meet the changing needs of today’s dissolution and drug release testing.The USP apparatus 4 comprises of a media reservoir to hold the dissolution media, a pump that forces the media upwards through a vertically positioned flow-through cell that holds the dosage form and a water bath to maintain the cell temperature.The test sample is placed in a vertically positioned flow-through cell through which the media is pumped at a desired flow rate and temperature. The eluate is filtered at top of the cell and is then collected either manually or by a sample collector. The samples are further analyzed using suitable analytical techniques to calculate the percent drug release.The pump unit is responsible for ensuring the most critical parameter of USP apparatus 4 i.e 1. 2. The flow rate must be constant throughout the test, even in cases of back pressure created by the filters. . The USP recommends the optimum 0media temperature should be 37C.Flow rate of the media Temperature ± 0.5 as per USPThe USP regulation recommends that the flow profile should be sinusoidal with pulsation of 120 ± 10 pulses/min ŸUSP apparatus 4 is the ideal choice for poorly soluble drugsŸUSP apparatus 4 is the best method of choice for large media volume dissolution, in order to achieve infinite sink condition ŸFor IVIVC studies, automated media changeovers can be easily achieved for solid as well liquid dosage forms ŸFlow rates can be easily changed to allow ‘accelerated’ test studies ŸMany challenges such as tablet floating, sticking etc. are eliminatedMethodologySystem Specifications as per USP RecommendationSystem ComponentsWhy choose USP Apparatus 4?Heat ExchangerCoilPiston PumpSampleCollectorMedia SelectorMediaReserviorsWaste1234Flow Through Cell Open LoopoCDifferentialtdmC(t) =edtQ((Although USP apparatus 1, 2 and 3 can be used for studying the dissolution profile of poorly soluble drugs, but they fail to offer the optimal sink conditions required. Whereas, USP apparatus 4h as a lways b een l inked t o "optimal s ink c onditions" a s i t o ffers t he f lexibility i n t erms of media volume required. In an "open loop" configuration, there is a continuous flow of fresh media across the dosage form and hence, the total media volume used can be infinite. This means, that the influence of poor sink conditions on the test can be avoided by using larger volumes of media without the need for solubilizing agents. Samples can be collected as a fraction over a timed interval and analyzed using suitable analytical technique. The total amount of media passing through the dosage form is determined by the flow rate. In an open loop configuration, results are calculated as a differential curve or rate of drug release over the time.In an open loop configuration, EFD-07 can be integrated with a sample collector with splitter that enables sample collection for 14 sampling intervals (21 optional) with 75 mL of sample collection volume. Sample collector with splitter, automatically splits the sample volume into collection and waste depending upon the sample volume required.Media Selector Automated media changeover :Unlike the USP apparatus 1 and 2 involving media changeovers, where physical removal of the dosage and change to a new media is cumbersome and tedious, USP apparatus 4-open loop configuration facilitates easy media changeover at predefined time intervals. The flow-through method is the only method that allows for a media changeovers of suspensions and powders. This feature is useful while performing IVIVC studies, where the dosage form naturally passes through different pH of the digestive tract within sink conditions. It is also useful for enteric coated products, modified and extended release drug products. Using EFD-07 media selector, 4 different media can be automatically drawn from different sources at predetermined intervals.Sample Collector with SplitterTMD’light technologyfor audio and visual indication of instrumentstatus from anywhere in the laboratoryMovement of arm to :Sample positionWaste tray / home positionPower onNeedle diving up / downCommunication with dissolution testerError due to :Absence of waste trayAbsence of sample collector traySample collector hood ajarCompletely covered to prevent contamination and air drafts which causeexcess evaporation of the collected samplesOpen Loop Configuration34oC Cumulativedm C (t) =e V htThe closed loop configuration of USP apparatus 4 is similar to USP apparatus 1 and 2 where a fixed volume of media is recirculated through the dosage form. Samples can be withdrawn from the media reservoir at predetermined time intervals either manually or by a syringe system. The samples can be analyzed using suitable analytical technique. In case of closed loop, result of percent drug release dissolved is expressed as a cumulative curve. Closed loop configuration is ideal for dosage forms where solubility and sink conditions are optimal in a limited media volume range from 40 mL to 4 L. For low dose formulations such as drug eluting stents, implants, coated medical devices, injectable and microspheres; closed loop configuration has been utilized to fulfill lower media volume testing. The problems such as tablet sticking, floating, coning or dead zones seen in USP 1 and 2 as well as sampling issues and sample introduction effects are eliminated using the USP apparatus 4.Off-line sample collection for the closed loop configuration is available with EFD-07 connected to a sample collector . Syringes pull the desired volume from the media reservoir and dispense them either into glass tubes (20 mL or 10 mL) or capped HPLC vials. The system can be programmed to collect the sample volumes at predefined time points. The syringe system also offers the facility for auto-replacement and dilution with fresh media. The sample collector enables sample collection for 24 sampling intervals. Automatic sample collector adapts to 5 different types of trays.Sample Collector and Syringe PumpClosed LoopEFD-07 can also be integrated with a media manager to maintain the desired media temperature and provide continuous stirring of media in the media reservoir throughout the test.Closed Loop ConfigurationHeat Exchanger CoilPiston PumpMedia ReservoirAutomated SamplingManual SamplingFlow Through CellSyringe PumpCombination tray (with dilution option)HPLC vialsGlass tubesHPLC and Glass tubes (2 Types)ŸHPLC vials 1.5 mL (8 x 7) + Glass tubes 20 mL (8 x 7)*Customized trays availableSample Collector Tray (ESC-08Dx)* Ÿ1.5 mL (24 x 7)Ÿ20 mL (16 x 7)5ComplianceTouch ScreenX7°CIndividual Cell Temp. MonitorProgrammable Protocols999Print Report LAN Audio OutputT e s t Rep o r tAutomated Offline SamplingQuality by DesignQbD ApplicationsUSP apparatus 4 facilitates dissolution testing of:ŸTablets ŸCapsulesŸPowder / granules / API's / bead formulation ŸInjectable suspensionsŸSuppositories / soft gelatin capsules ŸMicrospheres / liposomes / nanoparticles ŸInhaler drugsŸDrug eluting stents / implants ŸOintments / creams / gels ŸOphthalmic lensesŸCompliance with USP , Ph. Eur. JP and BP Ÿ7 cell dissolution tester ŸValveless ceramic pump headsŸAutomatic flow rate adjustment for individual cellsŸIndividual cell temperature monitoringŸMedia selector for easy media change (optional) for open loopŸProgram support for gravimetric flow validation and calibration of individual pumpsŸIsolated water circulating pump for precise temperature control of the water bath and to reduce vibrationsŸUser friendly intuitive 7” touch screen interfaceŸFlow rates can be adjusted from 2 mL/min to 32 mL/minŸ999 programmable protocolsŸSaves upto 100 calibration and validationreportsŸfor system and sample collector status. For eg. Connected Run ErrorTest protocol can also be printed using in-bult thermal printer for better longetivity of data (optional)TMD’lighttechnology Ÿn n n E F D -07Features of EFD-07USP, Ph.Eur.,JP6As USP apparatus 4 has wide range of applications, several flow-through cells have been developed and optimized according to the different dosage form like tablets, suspensions, stents, suppository etc. EFD-07 is capable of employing the method to accommodate most dosage forms.1.12 mm cell : This cell is described as a small cell for tablets and capsules in theUSP , Ph. Eur. and JP . As per the specifications, a detachable tablet holder is also available. This cell can also be used for suspensions, injectables, small medical devices and stents.2.22.6 mm cell : This is the most widely used cell of all flow-through cells. It isdescribed as a large cell for tablets and capsules in the USP , Ph. Eur. and JP . As per the specifications, a detachable tablet holder is also available. It can also be used for larger doses of suspensions and microspheres. There are a variety of holders developed for holding different dosage forms in this cell.3.Cell for powders and granules : This cell is described in the Ph. Eur. and isbased on the 12 mm cell. It is used to determine the dissolution rate of pure solid substances (API characterization), active substances in preparations used as powders, granules and bead formulations.4.Dialysis adapter in 22.6 mm cell : This cell is based on the 22.6 mm cell and isused to study the dissolution profile of nanoparticles, microspheres, micro-suspensions and injectables etc. A dialysis adapter along with dialysis membrane inside the cell allows testing on these dosage forms. Adapter to accommodate 1 mL Float-A-Lyzer is also available.5.Cell for suppositories and soft gelatin capsules : This cell is described in thePh. Eur. and has a special two chambered design which blocks the lipidic excipients from the suppository/soft gelatin capsules and allows only the dissolution media to pass up to the filter.6.Aerosol/Inhaler cell : This cell is manufactured in stainless steel and isspecially designed to study the elution rate of inhaler drugs.1 : 12 mm cell2 : 22.6 mm cell3 : Cell for powders and granules4 : Dialysis adapter in 22.6 mm cell5 : Cell for suppositories and soft gelatin capsules6 : Aerosol/Inhaler cell7.Cell for drug eluting stents: This cell is manufactured in PTF and is used for medical devices like drug elutingstents. The inner diameter can be customized to fit the medical device accordingly. 8. Cell for large medical devices : This cell has a maximum length of 80 mm and is designed to hold longer medical devices.9.Cell for implants: This cell has a small chamber to house the dosage and is used for smaller implants.Flow-Through cells for different dosage forms710. Customized flow-through cells :Using the above cells as the main models, specific holders have also been designed to hold other dosage forms. Customization can be based on the dosage form, media, inner diameters, cell length and holding devices etc. • Holder for creams and gels : An inserted cup facilitates testing on ointments, gels and creams using apermeation membrane. This modification is based on 22.6 mm cell.• Holder for ophthalmic lens : This modification is based on 22.6 mm cell and has an inverted holder thatallows testing on ophthalmic lenses coated with drugs.For intended use of hydroalcoholic media, specially designed PEEK cells are also available•Types of flow :s :There are 2 types of hydrodynamic flow within a flow-through cell viz. a laminar flow and turbulent flow. Laminar flow is achieved by filling the flow-through cell with a 5 mm ruby bead bottom of the cell followed by a layer of 1 mm glass beads as described in the USP . The laminar flow is more controlled as it crosses the dosage form in unidirectional flow. The turbulent type of flow is obtained by placing only the ruby bead in the flow-through cell. The turbulent flow is more beneficial for dosage forms that require a higher agitation rate to release its actives.Experimental ConditionsTurbulent FlowŸSample filtration :Filtration occurs at the top of the flow-through cell with a filter insert of standard filter size of 25 mm. Different types of filters with variety of pore sizes can be used depending on the dosage form. In some cases, multiple filters can be used from larger to smaller pore size. The use of glass wool in the filter section is recommended for dosage forms with highly insoluble or oily particulates .ŸDosage positioning :Solid dosage form: Tablet can be simply placed in the cell on the layer of glass beads or positioned uniformly on atablet clip holder or directly on the ruby bead (turbulent flow). This factor can eliminate problems such as tablet sticking, swelling and floating as seen in other conventional dissolution methods.Suspension :Liquid samples can be placed directly on layer of glass beads or sandwiched uniformly between single or multiple layers of glass beads. This ensures repeatability, reproducibility and reliability of results.Powder :Using the powder granule cell, the powder is simply filled into the cell without any compression or compaction. The filter insert is placed on either side of the cell.Laminar Flowaccepts no liability for any errors and reserves the right to alter specifications without noticeDecember, 2015ELECTROLABSales &Service WorldwideEFD-07M.S. : 1410100110 Volts 230 Volts M.S. : 1420100ModelProduct code Utilize ELECTROLAB ’s dedicated Dissolution Application Lab for confidential MethodDevelopment and Transposition to optimize parameters for NDDS。
Auto 2000细胞计数和活力分析仪操作说明
14、用Auto 2000分析下一个样品。将另一个样品插入样品室后,点击屏幕底部 右侧的“Next Sample”按钮,根据提示,设置Sample ID,然后点击“Count”
编辑:达科为生物技术有限公司 网址:
4、 检查背景影像,可以点击 Cell Line , Total Cell Conc. Assay 和 Preview Image 按 钮。所显示的应该是白色的屏幕。如果出现暗区或者一些变化,联系技术支 持
三、 设置自动保存
1、 插入一个 U 盘或者通过 USB 数据线将仪器和一个网络驱动器连接起来 2、 点击“Settings”按钮,然后点击“Saving Options”按钮
1、 Auto 2000 可以分析的细胞浓度范围为 1.0 x 10⁵ 到 1.0 x 10⁷ cells/mL,最佳细 胞浓度是 1.0 x 10⁶ cells/mL
2、 将样品管上下颠倒十次,吹打细胞样品十次以混匀细胞样品、减少细胞团。 不要震动或旋转样品,以免产生气泡
3、 进行细胞存活率测量时,用 50 μl,0.2%的台盼蓝溶液(最终浓度为 0.1%的台 盼蓝)混合 50 μl 的样品将细胞染色。上下吹吸十次,轻轻混匀
下表显示使用该系统软件的各种不同样品的推荐稀释浓度和最终浓度值。将
样品加到样品室前要轻轻上下吹吸样品十次。
样品类型 原液稀释 样品体积 AO / PI 体 最终稀释
(用 PBS)
积
倍数
全外周血 1:10
20 μl
20 μl
20
或脐带血
已分离的 不需要 20 μl
20 μl
2
PBMCs
CD34+ 干 不需要 20 μl
Cellometer Auto 2000 细胞计数和活力分析仪 操作介绍
细胞计数仪说明书
Countess™自动细胞计数仪
货号:C10227 修订日期:2009 年 9 月 15 日 MP10227
用户手册
ii
目录
产品内容.............................................................................................................................................................iv 安全信息................................................................................................................................................v 产品规格...............................................................................................................................................vii Countess™ 自动细胞计数仪的描述.....................................................................................................viii