tensorflow和opencv安装教程
OPENCV初级教程及范例
OPENCV初级教程及范例一、安装OPENCV要使用OPENCV,首先需要在计算机上安装它。
安装步骤如下:3.打开命令行工具,并进入解压后的文件夹。
4.运行以下命令来编译和安装OPENCV:cmake .makesudo make install二、OPENCV基本概念1.图像数据结构在OPENCV中,图像被表示为一个多维数组,每个数组元素对应着图像中的一个像素。
例如,对于一个RGB彩色图像,每个像素由三个颜色通道(红、绿、蓝)组成,可以使用3维数组来表示。
2.图像读取和显示import cv2#读取图像image = cv2.imread("image.jpg")#显示图像cv2.imshow("Image", image)cv2.waitKey(0)cv2.destroyAllWindows3.图像处理import cv2import numpy as np#读取图像image = cv2.imread("image.jpg")#图像模糊处理kernel = np.ones((5,5), np.float32) / 25blurred = cv2.filter2D(image, -1, kernel) #显示处理后的图像cv2.imshow("Blurred Image", blurred)cv2.waitKey(0)cv2.destroyAllWindows三、OPENCV实例以下是一些使用OPENCV的实际范例:1.边缘检测import cv2#读取图像image = cv2.imread("image.jpg", 0)#边缘检测edges = cv2.Canny(image, 100, 200)#显示边缘图像cv2.imshow("Edges", edges)cv2.waitKey(0)cv2.destroyAllWindows2.目标识别import cv2#读取图像image = cv2.imread("image.jpg")#创建目标识别器cascade = cv2.CascadeClassifier("cascade.xml")#对图像进行目标识别objects = cascade.detectMultiScale(image, scaleFactor=1.1, minNeighbors=5, minSize=(30, 30))#绘制识别结果for (x, y, w, h) in objects:cv2.rectangle(image, (x, y), (x+w, y+h), (0, 255, 0), 2)#显示识别结果cv2.imshow("Objects", image)cv2.waitKey(0)cv2.destroyAllWindows这些范例只是OPENCV功能的冰山一角,OPENCV还提供了很多强大的功能和工具。
Python3.7+Pycharm+cuda10.0+tensorflowGPU版本安装
Python3.7+Pycharm+cuda10.0+tensorflowGPU版本安装
处理器:I5-7500 显卡 :GTX1050Ti 系统 :Win10
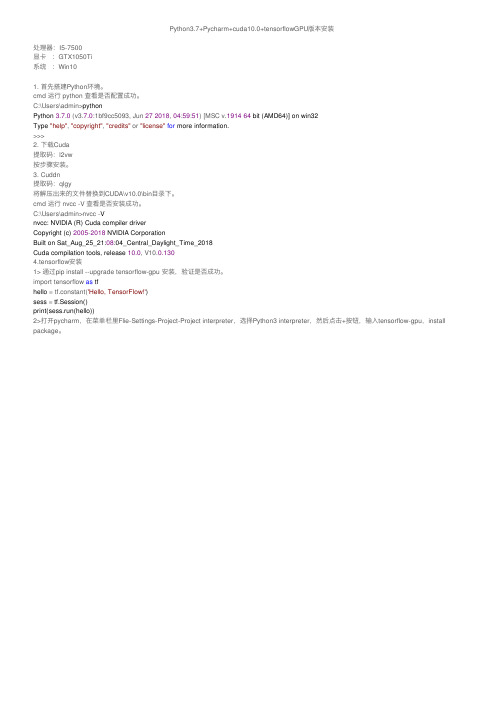
1. 首先搭建Python环境。 cmd 运行 python 查看是否配置成功。 C:\Users\admin>python Python 3.7.0 (v3.7.0:1bf9cc5093, Jun 27 2018, 04:59:51) [MSC v.1914 64 bit (AMD64)] on win32 Type "help", "copyright", "credits" or "license" for more information. >>> 2. 下载Cuda 提取码:l2vw 按步骤安装。 3. Cuddn 提取码:qlgy 将解压出来的文件替换到CUDA\v10.0\bin目录下。 cmd 运行 nvcc -V 查看是否安装成功。 C:\Users\admin>nvcc -V nvcc: NVIDIA (R) Cuda compiler driver Copyright (c) 2005-2018 NVIDIA Corporation Built on Sat_Aug_25_21:08:04_Central_Daylight_Time_2018 Cuda compilation tools, release 10.0, V10.0.130 4.tensorflow安装 1> 通过pip install --upgrade tensorflow-gpu 安装,验证是否成功。 import tensorflow as tf he
(一)如何在Python3.8上安装TensorFlow(Mac版本)
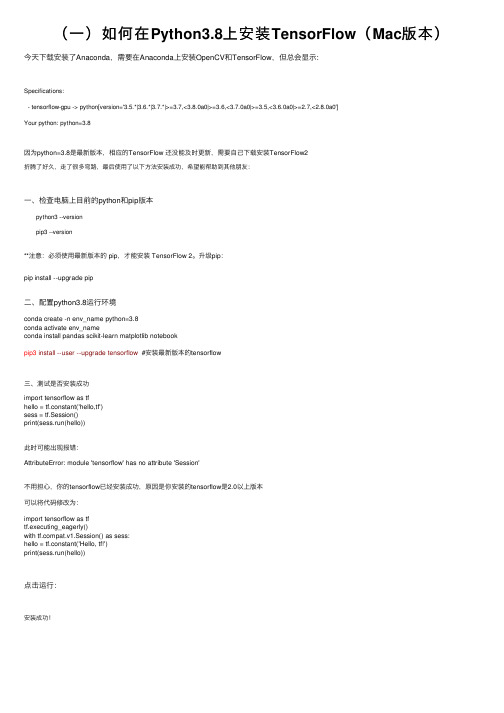
(⼀)如何在Python3.8上安装TensorFlow(Mac版本)今天下载安装了Anaconda,需要在Anaconda上安装OpenCV和TensorFlow,但总会显⽰:Specifications:- tensorflow-gpu -> python[version='3.5.*|3.6.*|3.7.*|>=3.7,<3.8.0a0|>=3.6,<3.7.0a0|>=3.5,<3.6.0a0|>=2.7,<2.8.0a0']Your python: python=3.8因为python=3.8是最新版本,相应的TensorFlow 还没能及时更新,需要⾃⼰下载安装TensorFlow2折腾了好久,⾛了很多弯路,最后使⽤了以下⽅法安装成功,希望能帮助到其他朋友:⼀、检查电脑上⽬前的python和pip版本 python3 --version pip3 --version**注意:必须使⽤最新版本的 pip,才能安装 TensorFlow 2。
升级pip:pip install --upgrade pip⼆、配置python3.8运⾏环境conda create -n env_name python=3.8conda activate env_nameconda install pandas scikit-learn matplotlib notebookpip3 install --user --upgrade tensorflow #安装最新版本的tensorflow三、测试是否安装成功import tensorflow as tfhello = tf.constant('hello,tf')sess = tf.Session()print(sess.run(hello))此时可能出现报错:AttributeError: module 'tensorflow' has no attribute 'Session'不⽤担⼼,你的tensorflow已经安装成功,原因是你安装的tensorflow是2.0以上版本可以将代码修改为:import tensorflow as tftf.executing_eagerly()with pat.v1.Session() as sess:hello = tf.constant('Hello, tf!')print(sess.run(hello))点击运⾏:安装成功!。
Opencv新手教程
Opencv新手教程OpenCV是一个开源的计算机视觉库,用于处理图像和视频的各种任务。
它是一个强大的工具,可以应用于从简单的图像处理到复杂的计算机视觉任务。
在本教程中,我们将介绍一些基本的OpenCV功能和使用方法,以帮助你入门。
1. 安装OpenCV2. 导入OpenCV库在你的代码中,你需要导入OpenCV库。
你可以使用以下命令导入OpenCV库:import cv23.加载图像在OpenCV中,你可以使用imread(函数加载图像。
这个函数接受图像的文件路径作为参数,并返回一个代表图像的多维数组。
以下是一个加载图像的例子:image = cv2.imread('image.jpg')4.显示图像你可以使用imshow(函数显示图像。
这个函数接受两个参数,第一个参数是窗口的名称,第二个参数是要显示的图像。
以下是一个显示图像的例子:cv2.imshow('Image', image)cv2.waitKey(0)cv2.destroyAllWindows这个例子中,图像将在一个名为"Image"的窗口中显示。
你可以使用waitKey(函数等待用户的按键操作,然后使用destroyAllWindows(函数关闭窗口。
5.图像预处理OpenCV提供了许多图像预处理功能,如图像的调整、裁剪、旋转、缩放等。
你可以使用这些功能来改变图像的外观和大小。
以下是一些常用的图像预处理函数的例子:gray_image = cv2.cvtColor(image, cv2.COLOR_BGR2GRAY) # 将图像转换为灰度图像resized_image = cv2.resize(image, (width, height)) # 调整图像大小cropped_image = image[y:y+h, x:x+w] # 裁剪图像rotated_image = cv2.rotate(image, cv2.ROTATE_90_CLOCKWISE) # 旋转图像这个例子中,我们将图像转换为灰度图像、调整大小、裁剪和旋转图像。
【opencv】1.opencv安装之使用pip或conda安装opencv
【opencv】1.opencv安装之使⽤pip或conda安装opencv⽂章⽬录基于conda安装⽅法1. 创建需要的python版本虚拟环境2. 激活该虚拟环境并安装opencv3. 验证opencv是否正确安装4. 不想使⽤,可卸载opencv3,退出并删除虚拟环境基于pip安装总结本⽂将介绍如何在linux系统中安装opencv,从源码中安装的⽅式参见我的博客从源码安装很耗时,也很复杂,不推荐,源码安装的博客有⼀些安装OpenCV之前的依赖,如读写本地图⽚视频的软件包;并且也可以通过python⾃有的包管理⼯具pip来安装或常⽤科学计算包Anaconda的包管理⼯具conda来安装 .先要说明的是,The PyPi/PiWheels包含的opencv版本并不包括⼀些“non-free" 算法,⽐如SIFT,SURF或其它专利算法。
如果不介意这些,并且想快速搭⼀个opencv的环境,就是本⽂以下要讨论的。
还有就是通过pip或conda安装的包并不是opencv官⽅的包,⽽是由第三⽅维护的,但这并不影响我们的使⽤。
我们有两种⽅案安装基于conda和pip基于conda安装⽅法Anconda(或者Minianaconda)安装完成后,python版本固定(2019年8⽉27⽇,安装好anaconda后python默认版本是3.7),但我们可以⾃⼰指定所需要的python版本:conda将把包安装在$YOURENV/vm/lib/python3.6/site-packages1. 创建需要的python版本虚拟环境conda create -n vm python=3.6 #创建⼀个名叫vm,python3.6版本的虚拟环境1conda search opencv -c conda-forge3. 验证opencv是否正确安装pythonimport cv2print(cv2.__version__)此处遇到问题:环境为centosImportError: libGL.so.1: cannot open shared object file: No such file or directory解决办法yum install mesa-libGL.x86_64,测试可⽤4. 不想使⽤,可卸载opencv3,退出并删除虚拟环境conda unstall opencv3 #卸载opencv3conda deactivate #退出虚拟环境conda remove -n vm --all #删除虚拟环境基于pip安装基于pip安装,有两种选项:安装到系统的site-packages安装到虚拟环境的site-packages.也就是说可以通过pip在系统进⾏安装或在anaconda 或virtualenv的虚拟环境来安装。
银河麒麟服务器操作系统 V4 TensorFlow 软件适配手册说明书
银河麒麟服务器操作系统V4 TensorFlow软件适配手册天津麒麟信息技术有限公司2019年5月目录1概述 (2)1.1系统概述 (2)1.2环境概述 (2)1.3TENSORFLOW软件概述 (2)1.4TENSORFLOW特点 (2)1.5TENSORFLOW原理介绍 (4)2TENSORFLOW软件适配 (4)2.1安装编译需要的依赖包 (4)2.2下载指定分支源码 (5)2.3编译选项和以及平台相关修改 (5)2.4编译及安装 (5)3TENSORFLOW软件功能验证 (6)3.1验证TENSORFLOW安装 (6)3.2尝试CONVOLUTIONAL MODEL (6)1概述1.1系统概述银河麒麟服务器操作系统主要面向军队综合电子信息系统、金融系统以及电力系统等国家关键行业的服务器应用领域,突出高安全性、高可用性、高效数据处理、虚拟化等关键技术优势,针对关键业务构建的丰富高效、安全可靠的功能特性,兼容适配联想、浪潮、华为、曙光等国内主流厂商的服务器整机产品,以及达梦、金仓、神通等主要国产数据库和中创、金蝶、东方通等国产中间件,满足虚拟化、云计算和大数据时代,服务器业务对操作系统在性能、安全性及可扩展性等方面的需求,是一款具有高安全、高可用、高可靠、高性能的自主可控服务器操作系统。
1.2环境概述服务器型号长城信安擎天DF720服务器CPU类型飞腾2000+处理器操作系统版本Kylin-4.0.2-server-sp2-2000-19050910.Z1内核版本 4.4.131TensorFlow版本 1.101.3TensorFlow软件概述TensorFlow是谷歌基于DistBelief进行研发的第二代人工智能学习系统,其命名来源于本身的运行原理。
TensorFlow最初由Google大脑小组(隶属于Google 机器智能研究机构)的研究员和工程师们开发出来,用于机器学习和深度神经网络方面的研究,但这个系统的通用性使其也可广泛用于其他计算领域。
人工智能程序的比较:OpenCV vs TensorFlow
人工智能程序的比较:OpenCV vsTensorFlow人工智能的使用正在逐渐普及,许多人都在使用不同的程序来实现人工智能的应用。
其中,OpenCV和TensorFlow是两个非常受欢迎的程序。
OpenCV是一种计算机视觉库,最初是由英特尔公司开发的。
它是一个广泛使用的开源库。
它用于图像处理、计算机视觉和机器学习等方面。
然而,与OpenCV不同,TensorFlow是人工智能领域中的另一种程序,是由Google开发的开源库。
它用于机器学习和深度学习方面。
在这篇文章中,我们将比较这两种程序的特点和应用。
一、特点1. OpenCVOpenCV是一种早期的程序,它最早是用于计算机视觉方面的,现在的版本不仅覆盖了计算机视觉,同时也涉及到机器学习等方面。
下面是OpenCV的主要特点:- OpenCV是一个开源库,因此它可以在不同的平台上运行。
-它是用C++编写的,但也存在Python等其他语言的接口。
-它支持多线程处理和GPU加速,能够有效地处理大规模数据。
-它提供了大量的图像操作函数,可用于图像处理和计算机视觉。
-它能够利用机器学习算法进行线性代数、图形分割、目标检测等的功能。
2. TensorFlowTensorFlow是Google公司开发的深度学习框架,由于其出色的性能和丰富的功能特点,被广泛应用于人工智能领域。
下面是TensorFlow的主要特点:- TensorFlow是一个开源库,因此它可以在不同的平台上运行。
-它支持Python、C++等多种编程语言,并提供了良好的API接口。
-它提供了内置的机器学习算法,以及可以用于各种层级的预训练模型。
-它支持GPU加速,并提供了分布式计算功能,能够解决大规模数据的处理问题。
二、应用1. OpenCVOpenCV由于其良好的图像处理和计算机视觉功能,在许多不同的应用场景中都得到了广泛的应用,下面是一些在不同领域中使用OpenCV的例子:-军事和安全:像目标跟踪、人脸识别和自动车辆识别等任务都可以用OpenCV实现。
VSCode调试TensorFlow应用程序方法
VSCode调试TensorFlow应用程序方法TensorFlow是一个流行的开源机器学习框架,而VSCode则是一个强大的集成开发环境(IDE)。
结合二者,我们可以方便地调试TensorFlow应用程序,提高开发效率和代码质量。
本文将介绍如何在VSCode中进行TensorFlow应用程序的调试。
## 准备工作在开始之前,我们需要确保已经完成以下准备工作:1. 安装并配置好VSCode:前往VSCode官网下载并安装最新版本的VSCode,确保安装成功并能正常运行。
2. 安装Python和TensorFlow:在本地环境中安装好Python和TensorFlow,并确认TensorFlow能够正常运行。
## 步骤一:创建项目文件在VSCode中,打开一个新的文件夹,并创建一个新的Python项目文件夹。
将TensorFlow应用程序的代码文件复制到该文件夹中。
## 步骤二:创建调试配置文件在VSCode的侧边栏中,点击调试按钮(红色的正方形图标),然后点击左上角的齿轮图标,选择"create a launch.json file"。
在弹出的选项中,选择"Python"。
在生成的launch.json文件中,找到"configurations"字段,将其修改为以下内容:```json{"name": "Python: TensorFlow","type": "python","request": "launch","program": "${file}","cwd": "${workspaceFolder}","env": {"PYTHONPATH": "${workspaceFolder}"}}```保存并关闭launch.json文件。
Win10环境安装Anaconda(3-2021.05)+Tensorflow(2.6)
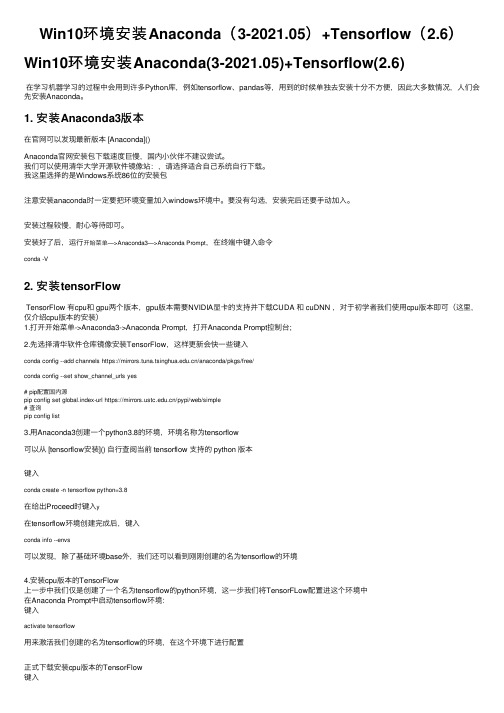
Win10环境安装Anaconda(3-2021.05)+Tensorflow(2.6)Win10环境安装Anaconda(3-2021.05)+Tensorflow(2.6)在学习机器学习的过程中会⽤到许多Python库,例如tensorflow、pandas等,⽤到的时候单独去安装⼗分不⽅便,因此⼤多数情况,⼈们会先安装Anaconda。
1. 安装Anaconda3版本在官⽹可以发现最新版本 [Anaconda]()Anaconda官⽹安装包下载速度巨慢,国内⼩伙伴不建议尝试。
我们可以使⽤清华⼤学开源软件镜像站:,请选择适合⾃⼰系统⾃⾏下载。
我这⾥选择的是Windows系统86位的安装包注意安装anaconda时⼀定要把环境变量加⼊windows环境中。
要没有勾选,安装完后还要⼿动加⼊。
安装过程较慢,耐⼼等待即可。
安装好了后,运⾏开始菜单—>Anaconda3—>Anaconda Prompt,在终端中键⼊命令conda -V2. 安装tensorFlowTensorFlow 有cpu和 gpu两个版本,gpu版本需要NVIDIA显卡的⽀持并下载CUDA 和 cuDNN ,对于初学者我们使⽤cpu版本即可(这⾥,仅介绍cpu版本的安装)1.打开开始菜单->Anaconda3->Anaconda Prompt,打开Anaconda Prompt控制台;2.先选择清华软件仓库镜像安装TensorFlow,这样更新会快⼀些键⼊conda config --add channels https:///anaconda/pkgs/free/conda config --set show_channel_urls yes# pip配置国内源pip config set global.index-url https:///pypi/web/simple# 查询pip config list3.⽤Anaconda3创建⼀个python3.8的环境,环境名称为tensorflow可以从 [tensorflow安装]() ⾃⾏查阅当前 tensorflow ⽀持的 python 版本键⼊conda create -n tensorflow python=3.8在给出Proceed时键⼊y在tensorflow环境创建完成后,键⼊conda info --envs可以发现,除了基础环境base外,我们还可以看到刚刚创建的名为tensorflow的环境4.安装cpu版本的TensorFlow上⼀步中我们仅是创建了⼀个名为tensorflow的python环境,这⼀步我们将TensorFLow配置进这个环境中在Anaconda Prompt中启动tensorflow环境:键⼊activate tensorflow⽤来激活我们创建的名为tensorflow的环境,在这个环境下进⾏配置正式下载安装cpu版本的TensorFlow键⼊#不指定版本及⾃动下载最新版本pip install tensorflow-cpu#指定版本(建议安装所需版本)pip install tensorflow-cpu==2.5后期更换版本# 卸载pip uninstall tensorflow-cpupip uninstall keraspip install tensorflow-cpu==2.5pip install keras==2.4.3耐⼼等待下载安装。
教你如何在pycharm中安装opencv,tensorflow,keras
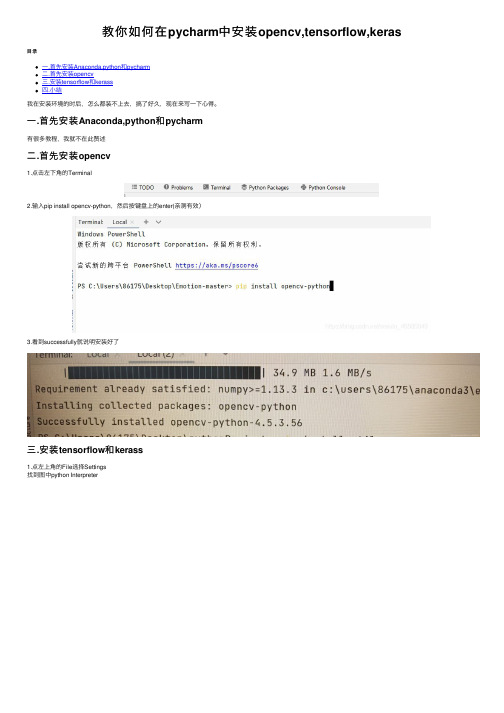
教你如何在pycharm中安装opencv,tensorflow,keras ⽬录⼀.⾸先安装Anaconda,python和pycharm⼆.⾸先安装opencv三.安装tensorflow和kerass四.⼩结我在安装环境的时后,怎么都装不上去,搞了好久,现在来写⼀下⼼得。
⼀.⾸先安装Anaconda,python和pycharm有很多教程,我就不在此赘述⼆.⾸先安装opencv1.点击左下⾓的Terminal2.输⼊pip install opencv-python,然后按键盘上的enter(亲测有效)3.看到successfully就说明安装好了三.安装tensorflow和kerass1.点左上⾓的File选择Settings找到图中python Interpreter2.找到你配好的环境3.点击加号4.在上⾯的框框上搜索你要安装的框架5.将Specify version前⾯的框框中打勾,选中⼀个合适的版本(注意版本不要太⾼)6.点击Install Package7.这样⼀般就可以了,keras也是这样滴四.⼩结如果你看来很多教程下了很多次软件还是没有成功,你可以参考以下建议(我⾃⼰没有试过,看看就好)⾸先要找到你安装的anaconda3所在的⽂件,在找到envs,把别⼈已经配置好⽂件复制在此⽂件夹下。
(例如BY,pytorch_envs都是配置的环境)重点就是要选中已经配置好的环境(就是别⼈刚刚配好的那个)剩下就是像我上⾯写的那样找到你要安装的库下载下来,就⼤公告成啦。
因为每个⼈的电脑不⼀样,所以我的⽅法不⼀定适合所有⼈,如果你没有成功,请见谅。
到此这篇关于教你如何在pycharm中安装opencv,tensorflow,keras的⽂章就介绍到这了,更多相关pycharm安装opencv,tensorflow,keras内容请搜索以前的⽂章或继续浏览下⾯的相关⽂章希望⼤家以后多多⽀持!。
Ubuntu20.04环境安装tensorflow2的方法步骤
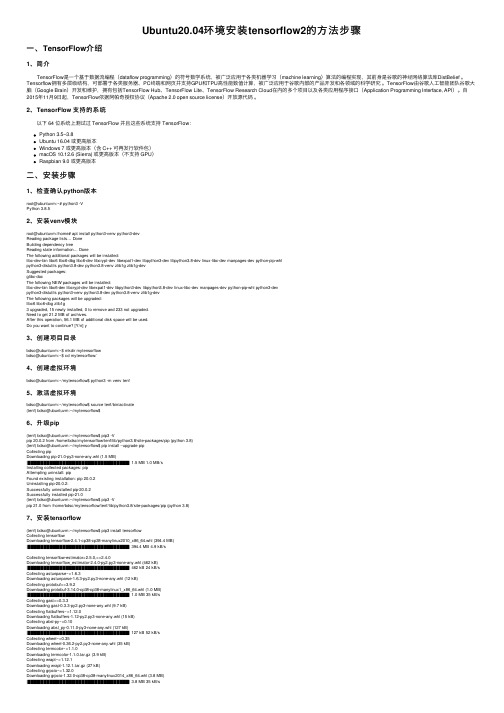
Ubuntu20.04环境安装tensorflow2的⽅法步骤⼀、TensorFlow介绍1、简介 TensorFlow是⼀个基于数据流编程(dataflow programming)的符号数学系统,被⼴泛应⽤于各类机器学习(machine learning)算法的编程实现,其前⾝是⾕歌的神经⽹络算法库DistBelief 。
Tensorflow拥有多层级结构,可部署于各类服务器、PC终端和⽹页并⽀持GPU和TPU⾼性能数值计算,被⼴泛应⽤于⾕歌内部的产品开发和各领域的科学研究。
TensorFlow由⾕歌⼈⼯智能团队⾕歌⼤脑(Google Brain)开发和维护,拥有包括TensorFlow Hub、TensorFlow Lite、TensorFlow Research Cloud在内的多个项⽬以及各类应⽤程序接⼝(Application Programming Interface, API)。
⾃2015年11⽉9⽇起,TensorFlow依据阿帕奇授权协议(Apache 2.0 open source license)开放源代码。
2、TensorFlow ⽀持的系统 以下 64 位系统上测试过 TensorFlow 并且这些系统⽀持 TensorFlow:Python 3.5–3.8Ubuntu 16.04 或更⾼版本Windows 7 或更⾼版本(含 C++ 可再发⾏软件包)macOS 10.12.6 (Sierra) 或更⾼版本(不⽀持 GPU)Raspbian 9.0 或更⾼版本⼆、安装步骤1、检查确认python版本root@ubuntuvm:~# python3 -VPython 3.8.52、安装venv模块root@ubuntuvm:/home# apt install python3-venv python3-devReading package lists… DoneBuilding dependency treeReading state information… DoneThe following additional packages will be installed:libc-dev-bin libc6 libc6-dbg libc6-dev libcrypt-dev libexpat1-dev libpython3-dev libpython3.8-dev linux-libc-dev manpages-dev python-pip-whlpython3-distutils python3.8-dev python3.8-venv zlib1g zlib1g-devSuggested packages:glibc-docThe following NEW packages will be installed:libc-dev-bin libc6-dev libcrypt-dev libexpat1-dev libpython3-dev libpython3.8-dev linux-libc-dev manpages-dev python-pip-whl python3-devpython3-distutils python3-venv python3.8-dev python3.8-venv zlib1g-devThe following packages will be upgraded:libc6 libc6-dbg zlib1g3 upgraded, 15 newly installed, 0 to remove and 233 not upgraded.Need to get 21.2 MB of archives.After this operation, 56.1 MB of additional disk space will be used.Do you want to continue? [Y/n] y3、创建项⽬⽬录bdsc@ubuntuvm:~$ mkdir mytensorflowbdsc@ubuntuvm:~$ cd mytensorflow/4、创建虚拟环境bdsc@ubuntuvm:~/mytensorflow$ python3 -m venv tenf5、激活虚拟环境bdsc@ubuntuvm:~/mytensorflow$ source tenf/bin/activate(tenf) bdsc@ubuntuvm:~/mytensorflow$6、升级pip(tenf) bdsc@ubuntuvm:~/mytensorflow$ pip3 -Vpip 20.0.2 from /home/bdsc/mytensorflow/tenf/lib/python3.8/site-packages/pip (python 3.8)(tenf) bdsc@ubuntuvm:~/mytensorflow$ pip install --upgrade pipCollecting pipDownloading pip-21.0-py3-none-any.whl (1.5 MB)|████████████████████████████████| 1.5 MB 1.0 MB/sInstalling collected packages: pipAttempting uninstall: pipFound existing installation: pip 20.0.2Uninstalling pip-20.0.2:Successfully uninstalled pip-20.0.2Successfully installed pip-21.0(tenf) bdsc@ubuntuvm:~/mytensorflow$ pip3 -Vpip 21.0 from /home/bdsc/mytensorflow/tenf/lib/python3.8/site-packages/pip (python 3.8)7、安装tensorflow(tenf) bdsc@ubuntuvm:~/mytensorflow$ pip3 install tensorflowCollecting tensorflowDownloading tensorflow-2.4.1-cp38-cp38-manylinux2010_x86_64.whl (394.4 MB)|████████████████████████████████| 394.4 MB 4.9 kB/sCollecting tensorflow-estimator<2.5.0,>=2.4.0Downloading tensorflow_estimator-2.4.0-py2.py3-none-any.whl (462 kB)|████████████████████████████████| 462 kB 24 kB/sCollecting astunparse~=1.6.3Downloading astunparse-1.6.3-py2.py3-none-any.whl (12 kB)Collecting protobuf>=3.9.2Downloading protobuf-3.14.0-cp38-cp38-manylinux1_x86_64.whl (1.0 MB)|████████████████████████████████| 1.0 MB 35 kB/sCollecting gast==0.3.3Downloading gast-0.3.3-py2.py3-none-any.whl (9.7 kB)Collecting flatbuffers~=1.12.0Downloading flatbuffers-1.12-py2.py3-none-any.whl (15 kB)Collecting absl-py~=0.10Downloading absl_py-0.11.0-py3-none-any.whl (127 kB)|████████████████████████████████| 127 kB 52 kB/sCollecting wheel~=0.35Downloading wheel-0.36.2-py2.py3-none-any.whl (35 kB)Collecting termcolor~=1.1.0Downloading termcolor-1.1.0.tar.gz (3.9 kB)Collecting wrapt~=1.12.1Downloading wrapt-1.12.1.tar.gz (27 kB)Collecting grpcio~=1.32.0Downloading grpcio-1.32.0-cp38-cp38-manylinux2014_x86_64.whl (3.8 MB)|████████████████████████████████| 3.8 MB 35 kB/sCollecting six~=1.15.0Downloading six-1.15.0-py2.py3-none-any.whl (10 kB)Collecting typing-extensions~=3.7.4Downloading typing_extensions-3.7.4.3-py3-none-any.whl (22 kB)Collecting tensorboard~=2.4Downloading tensorboard-2.4.1-py3-none-any.whl (10.6 MB)|████████████████████████████████| 10.6 MB 46 kB/sCollecting keras-preprocessing~=1.1.2Downloading Keras_Preprocessing-1.1.2-py2.py3-none-any.whl (42 kB)|████████████████████████████████| 42 kB 43 kB/sCollecting h5py~=2.10.0Downloading h5py-2.10.0-cp38-cp38-manylinux1_x86_64.whl (2.9 MB)|████████████████████████████████| 2.9 MB 46 kB/sCollecting opt-einsum~=3.3.0Downloading opt_einsum-3.3.0-py3-none-any.whl (65 kB)|████████████████████████████████| 65 kB 45 kB/sCollecting google-pasta~=0.2Downloading google_pasta-0.2.0-py3-none-any.whl (57 kB)|████████████████████████████████| 57 kB 26 kB/sCollecting numpy~=1.19.2Downloading numpy-1.19.5-cp38-cp38-manylinux2010_x86_64.whl (14.9 MB)|████████████████████████████████| 14.9 MB 65 kB/sCollecting markdown>=2.6.8Downloading Markdown-3.3.3-py3-none-any.whl (96 kB)|████████████████████████████████| 96 kB 66 kB/sCollecting google-auth-oauthlib<0.5,>=0.4.1Downloading google_auth_oauthlib-0.4.2-py2.py3-none-any.whl (18 kB)Collecting werkzeug>=0.11.15Downloading Werkzeug-1.0.1-py2.py3-none-any.whl (298 kB)|████████████████████████████████| 298 kB 44 kB/sRequirement already satisfied: setuptools>=41.0.0 in ./tenf/lib/python3.8/site-packages (from tensorboard~=2.4->tensorflow) (44.0.0)Collecting tensorboard-plugin-wit>=1.6.0Downloading tensorboard_plugin_wit-1.8.0-py3-none-any.whl (781 kB)|████████████████████████████████| 781 kB 43 kB/sCollecting requests<3,>=2.21.0Downloading requests-2.25.1-py2.py3-none-any.whl (61 kB)|████████████████████████████████| 61 kB 57 kB/sCollecting google-auth<2,>=1.6.3Downloading google_auth-1.24.0-py2.py3-none-any.whl (114 kB)|████████████████████████████████| 114 kB 37 kB/sCollecting rsa<5,>=3.1.4Downloading rsa-4.7-py3-none-any.whl (34 kB)Collecting pyasn1-modules>=0.2.1Downloading pyasn1_modules-0.2.8-py2.py3-none-any.whl (155 kB)|████████████████████████████████| 155 kB 34 kB/sCollecting cachetools<5.0,>=2.0.0Downloading cachetools-4.2.1-py3-none-any.whl (12 kB)Collecting requests-oauthlib>=0.7.0Downloading requests_oauthlib-1.3.0-py2.py3-none-any.whl (23 kB)Collecting pyasn1<0.5.0,>=0.4.6Downloading pyasn1-0.4.8-py2.py3-none-any.whl (77 kB)|████████████████████████████████| 77 kB 42 kB/sCollecting chardet<5,>=3.0.2Downloading chardet-4.0.0-py2.py3-none-any.whl (178 kB)|████████████████████████████████| 178 kB 47 kB/sCollecting idna<3,>=2.5Downloading idna-2.10-py2.py3-none-any.whl (58 kB)|████████████████████████████████| 58 kB 31 kB/sCollecting urllib3<1.27,>=1.21.1Downloading urllib3-1.26.2-py2.py3-none-any.whl (136 kB)|████████████████████████████████| 136 kB 33 kB/sCollecting certifi>=2017.4.17Downloading certifi-2020.12.5-py2.py3-none-any.whl (147 kB)|████████████████████████████████| 147 kB 26 kB/sCollecting oauthlib>=3.0.0Downloading oauthlib-3.1.0-py2.py3-none-any.whl (147 kB)|████████████████████████████████| 147 kB 36 kB/sUsing legacy ‘setup.py install' for termcolor, since package ‘wheel' is not installed.Using legacy ‘setup.py install' for wrapt, since package ‘wheel' is not installed.Installing collected packages: urllib3, pyasn1, idna, chardet, certifi, six, rsa, requests, pyasn1-modules, oauthlib, cachetools, requests-oauthlib, google-auth, wheel, werkzeug, tensorboard-plugin-wit, protobuf, numpy, markdown, grpcio, google-auth-oauthlib, abs Running setup.py install for wrapt … doneRunning setup.py install for termcolor … doneSuccessfully installed absl-py-0.11.0 astunparse-1.6.3 cachetools-4.2.1 certifi-2020.12.5 chardet-4.0.0 flatbuffers-1.12 gast-0.3.3 google-auth-1.24.0 google-auth-oauthlib-0.4.2 google-pasta-0.2.0 grpcio-1.32.0 h5py-2.10.0 idna-2.10 keras-preprocessing-1.1.2 ma 8、验证tensoflow2是否安装成功1、查看安装模块及版本(tenf) bdsc@ubuntuvm:~/mytensorflow$ pip3 show tensorflowName: tensorflowVersion: 2.4.1Summary: TensorFlow is an open source machine learning framework for everyone.Home-page: https:///Author: Google Inc.Author-email: packages@License: Apache 2.0Location: /home/bdsc/mytensorflow/tenf/lib/python3.8/site-packagesRequires: typing-extensions, google-pasta, protobuf, wrapt, gast, tensorboard, opt-einsum, flatbuffers, numpy, wheel, astunparse, keras-preprocessing, six, termcolor, tensorflow-estimator, grpcio, absl-py, h5pyRequired-by:2、查看import tensorflow是否报错3、使⽤TensorFlow打印hello,Tensorflow(tenf) bdsc@ubuntuvm:~/mytensorflow$ python3Python 3.8.5 (default, Jul 28 2020, 12:59:40)[GCC 9.3.0] on linuxType “help”, “copyright”, “credits” or “license” for more information.>>> import os>>> os.environ[‘TF_CPP_MIN_LOG_LEVEL'] = ‘2'>>> import tensorflow as tf>>> pat.v1.disable_eager_execution()>>> hello = tf.constant(‘Hello, Tensorflow!')>>> sess = pat.v1.Session()>>> print(sess.run(hello))b'Hello, Tensorflow!'三、FAQ1、import tensorflow时报错⽆法加载动态库libcudart.so.11.0解决⽅法:在import tensorflow as tf语句前加上如下语句import osos.environ[‘TF_CPP_MIN_LOG_LEVEL'] = ‘2'import tensorflow as tf2、报错session属性找不到原因:报错AttributeError: module ‘tensorflow' has no attribute ‘Session'。
VisualStudio2019下配置CUDA10.1+TensorFlow-GPU1.14.0
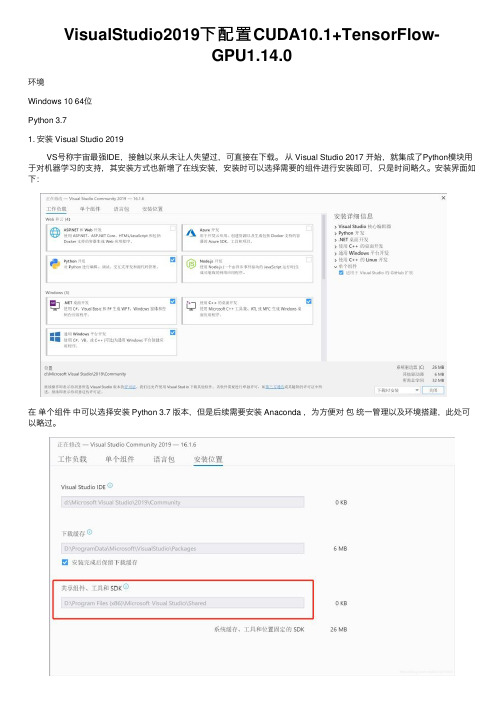
VisualStudio2019下配置CUDA10.1+TensorFlow-GPU1.14.0环境Windows 10 64位Python 3.71. 安装 Visual Studio 2019 VS号称宇宙最强IDE,接触以来从未让⼈失望过,可直接在下载。
从 Visual Studio 2017 开始,就集成了Python模块⽤于对机器学习的⽀持,其安装⽅式也新增了在线安装,安装时可以选择需要的组件进⾏安装即可,只是时间略久。
安装界⾯如下:在单个组件中可以选择安装 Python 3.7 版本,但是后续需要安装 Anaconda ,为⽅便对包统⼀管理以及环境搭建,此处可以略过。
注:选择安装位置时,记住共享组件、⼯具和SDK 的位置,后⾯安装 Anaconda 时会⽤到。
2. 安装 CUDA(1) CUDA™是⼀种由NVIDIA推出的通⽤并⾏计算架构,该架构使GPU能够解决复杂的计算问题。
⾸先需要查看⾃⼰电脑的N 卡⽀持的 CUDA 版本,打开 NVIDIA 控制⾯板——帮助——系统信息——组件: 博主的 NVCUDA 版本为 10.1.120,因此下载的版本。
安装类型包括在线安装和本地安装,在⽹速允许的情况下可以选择在线安装。
(2) 在安装之前,要先关闭安全软件,否则很可能提⽰组件安装失败。
安装空间⼤概⼀个多G,要是C盘空间⾜够,最好选择默认的安装位置,避免不必要的环境配置问题,默认安装位置为 C:\Program Files\NVIDIA GPU ComputingToolkit\CUDA\v10.1。
(3) 接下来需要添加⼀波环境变量$ CUDA_PATH: C:\Program Files\NVIDIA GPU Computing Toolkit\CUDA\v10.1$ CUDA_PATH_V10_1: C:\Program Files\NVIDIA GPU Computing Toolkit\CUDA\v10.1$ CUDA_BIN_PATH: %CUDA_PATH%\bin$ CUDA_LIB_PATH: %CUDA_PATH%\lib 64$ CUDA_SDK_PATH: C:\ProgramData\NVIDIA Corporation\CUDA Samples\v10.1$ CUDA_SDK_BIN_PATH: %CUDA_SDK_PATH%\bin\win64$ CUDA_SDK_LIB_PATH: %CUDA_SDK_PATH%\common\lib 64然后在系统变量的 Path —— 新建,添加四条信息$ %CUDA_BIN_PATH%$ %CUDA_LIB_PATH%$ %CUDA_SDK_BIN_PATH%$ %CUDA_SDK_LIB_PATH%(4) 配置完成后,使⽤ CUDA 的内置⼯具验证配置是否成功。
个人整理的opencv最基本入门资料
个人整理的opencv最基本入门资料OpenCV最基本入门资料OpenCV(Open Source Computer Vision Library)是一个功能强大的开源计算机视觉库,用于处理图像和视频。
它提供了丰富的图像处理和计算机视觉算法,使开发者能够快速构建各种视觉应用程序。
本文将为您提供一份个人整理的OpenCV最基本入门资料,帮助您快速入门并了解OpenCV的基本概念和使用方法。
一、OpenCV简介OpenCV是跨平台的计算机视觉库,最初由英特尔公司于1999年开发并发布。
它包含了超过2500个优化的算法,涵盖了图像处理、特征提取、目标检测、机器学习等领域。
OpenCV支持多种编程语言,包括C++、Python、Java等,且具有良好的兼容性和扩展性。
二、安装OpenCV在开始学习OpenCV之前,首先需要安装OpenCV库。
下面是安装OpenCV的基本步骤:1.下载OpenCV:在OpenCV官方网站(不提供链接,请自行搜索)上下载适合您操作系统的OpenCV版本,并解压缩到本地目录。
2.配置环境变量:将OpenCV所在目录添加到系统的环境变量中,以便系统能够正确找到OpenCV库文件。
3.配置IDE:如果使用集成开发环境(IDE)进行开发,还需要配置IDE以正确链接和使用OpenCV库。
三、OpenCV基本概念在使用OpenCV之前,需要了解一些基本的概念:1.图像表示:OpenCV中的图像使用多维数组来表示,可以是二维的灰度图像,也可以是三维的彩色图像。
了解图像的表示方式有助于理解后续的图像处理操作。
2.像素操作:像素是图像的最基本单元,每个像素都包含了图像上某个位置的颜色信息。
OpenCV提供了各种像素操作函数,可以获取、设置、修改像素的值。
3.图像处理:OpenCV提供了丰富的图像处理函数,包括滤波、边缘检测、直方图均衡化等。
通过这些函数,可以对图像进行各种操作,实现图像的增强、降噪、特征提取等功能。
Windows10下Tensorflow2.0安装及环境配置教程(图文)
Windows10下Tensorflow2.0安装及环境配置教程(图⽂)下载安装Anaconda下载地址,根据所需版本下载安装过程暂略(下次在安装时添加)下载安装Pycharm下载安装,下载对应使⽤版本即可如果你是在校学⽣,有学校的edu邮箱,可以免费注册Pycharm专业版,注册地址如下,本⽂不详细说明下载CUDA10.0下载地址如下下载之后默认安装即可下载CUDNN通过此处选择版本对应的,对于本次配置就选择Windows 10对应的版本下载CUDNN需要注册⼀个NVIDIA的账号,点击注册,登录即可下载好CUDNN之后将其解压在CUDA的安装⽬录下,Win10默认的安装⽬录如下:C:\Program Files\NVIDIA GPU Computing Toolkit\CUDA\v10.0之后,通过右键点击此电脑——>属性——>⾼级系统设置——>环境变量然后配置环境变量,添加如下环境变量重新安装NVIDIA最新驱动因为安装CUDA时,因为版本原因,会安装版本较低的NVIDIA驱动,所以我们从官⽹下载最新的驱动重新覆盖安装⼀遍即可创建Conda环境,并安装tensorflow2.0通过Anaconda的conda create创建新的环境,便于我们程序及其环境的配置及其管理⾸先按Win+R键,输⼊cmd,回车然后在cmd界⾯输⼊,conda create --name tensorflow2.0 python=3.7,其中tensorflow2.0可以换成你想要的名字回车后输⼊y之后稍作等待可以看到安装成功使⽤conda info --env看看环境之后使⽤conda activate tensorflow2.0来激活刚才创建的环境依据需求pip安装tensorflow,sklearn,matplotlib等软件。
此处以tensorflow2.0为例,激活环境后输⼊pip install tensorflow-gpu,之后进⾏下载安装。
Tensorrt环境安装及yolov5模型转换以及量化部署INT8
Tensorrt环境安装及yolov5模型转换以及量化部署INT8Tensorrt的运⾏需要环境中有Opencv的编译环境,所以⾸先要opencv的编译⼀.opencv 编译1. 安装依赖项sudo apt-get install cmakesudo apt-get install build-essential libgtk2.0-dev libavcodec-dev libavformat-dev libjpeg-dev libswscale-dev libtiff5-devsudo apt-get install libgtk2.0-dev2. 下载⾃⼰需要的版本解压后放在⾃⼰想放的⽬录下,在opencv-4.5.0⽬录下建⽴build ⽂件夹,进⼊ build ⽂件夹下,打开终端unzip opencv-4.5.0.zipcd opencv-4.5.0/mkdir buildcd build/3.编译cmake3.1.安装cmake以及依赖库sudo apt-get install cmake$ sudo apt-get install build-essential libgtk2.0-dev libavcodec-dev libavformat-dev libjpeg.dev libtiff4.dev libswscale-dev libjasper1 libjasper-dev错误:E: ⽆法定位软件包 libjasper-devsudo add-apt-repository "deb /ubuntu xenial-security main"sudo apt updatesudo apt install libjasper1 libjasper-dev成功的解决了问题,其中libjasper1是libjasper-dev的依赖包3.2.安装cmake$ cmake .. || cmake -D CMAKE_BUILD_TYPE=Release -D CMAKE_INSTALL_PREFIX=/usr/local ..使⽤⽹友的后⾯加⼀堆配置就会遇到各种报错,这种编译⼀直⽤的很顺⼿,没有报错然后就等待安装完成,最后输出如下,没有报错就说成功了⼀半3.3 编译$ sudo make 或者 sudo make -j4这⾥需要耐⼼的等待编译3.4 安装$ sudo make install对应卸载就是:$ sudo make uninstall测试 opencv 版本的。
TensorFlow 为 Jetson 平台安装指南说明书
Installing TensorFlow For Jetson PlatformInstallation GuideTable of Contents Chapter 1. Overview (1)1.1. Benefits of TensorFlow on Jetson Platform (1)Chapter 2. Prerequisites and Dependencies (3)Chapter 3. Installing TensorFlow (4)3.1. Installing Multiple TensorFlow Versions (5)3.2. Upgrading TensorFlow (5)Chapter 4. Verifying The Installation (7)Chapter 5. Best Practices (8)Chapter 6. Uninstalling (9)Chapter 7. Troubleshooting (10)Chapter 8. Support (11)Chapter 1.OverviewTensorFlow on Jetson PlatformTensorFlow™ is an open-source software library for numerical computation using data flow graphs. Nodes in the graph represent mathematical operations, while the graph edges represent the multidimensional data arrays (tensors) that flow between them. This flexible architecture lets you deploy computation to one or more CPUs or GPUs in a desktop, server, or mobile device without rewriting code.Jetson AGX OrinBring your next-gen products to life with the world's most powerful AI computer for energy-efficient autonomous machines. With up to 275 TOPS for running the NVIDIAAI software stack, this developer kit lets you create advanced robotics and edge AI applications for manufacturing, logistics, retail, service, agriculture, smart city, healthcare, and life sciences.Jetson Orin NXThe NVIDIA Jetson Orin NX brings supercomputer performance to the edge in a small form factor system-on-module. Up to 21 TOPS of accelerated computing delivers the horsepower to run modern neural networks in parallel and process data from multiple high-resolution sensors — a requirement for full AI systems.Jetson AGX XavierThe NVIDIA Jetson AGX Xavier developer kit for Jetson platform is the world's first AI computer for autonomous machines. The Jetson AGX Xavier delivers the performance ofa GPU workstation in an embedded module under 30W.1.1. Benefits of TensorFlow on JetsonPlatformOverview Installing TensorFlow for Jetson Platform provides you with the access to the latest version of the framework on a lightweight, mobile platform without being restricted to TensorFlow Lite.Chapter 2.Prerequisites andDependenciesBefore you install TensorFlow for Jetson, ensure you:1.Install JetPack on your Jetson device.2.Install system packages required by TensorFlow:$ sudo apt-get update$ sudo apt-get install libhdf5-serial-dev hdf5-tools libhdf5-dev zlib1g-dev zip libjpeg8-dev liblapack-dev libblas-dev gfortran3.Install and upgrade pip3.$ sudo apt-get install python3-pip$ sudo pip3 install -U pip testresources setuptools==65.5.04.Install the Python package dependencies.$ sudo pip3 install -U numpy==1.21.1 future==0.18.2 mock==3.0.5keras_preprocessing==1.1.2 keras_applications==1.0.8 gast==0.4.0 protobuf pybind11cython pkgconfig packaging h5py==3.6.0Chapter 3.Installing TensorFlow Note: As of the 20.02 TensorFlow release, the package name has changed fromtensorflow-gpu to tensorflow. See the section on Upgrading TensorFlow for moreinformation.Install TensorFlow using pip3. This command will install the latest version of TensorFlow compatible with JetPack 5.1.$ sudo pip3 install --extra-index-url https:///compute/ redist/jp/v51 tensorflow==2.11.0+nv23.01Note: If you would prefer to use a TensorFlow 1.x package, it can be installed by specifyingthe TensorFlow version to be 1.15.5, as in the following command:$ sudo pip3 install --extra-index-url https:///compute/ redist/jp/v51 'tensorflow==1.15.5+nv23.01'If you want to install an older version of TensorFlow, issue the following command:$ sudo pip3 install --extra-index-url https:///compute/ redist/jp/v$JP_VERSION tensorflow==$TF_VERSION+nv$NV_VERSIONWhere:JP_VERSIONThe major and minor version of JetPack you are using, such as 42 for JetPack 4.2.2 or 33 for JetPack 3.3.1.Note:For JetPack versions 5.0.2 and 4.6.1, JP_VERSION includes the patch version, and wouldtherefore be 502 and 461, instead of 50 and 46, respectively.TF_VERSIONThe released version of TensorFlow, for example, 2.11.0 or 1.15.5.NV_VERSIONThe monthly NVIDIA container version of TensorFlow, for example, 23.01.Note: The version of TensorFlow you are trying to install must be supported by theversion of JetPack you are using. Also, the package name may be different for olderreleases. See the TensorFlow For Jetson Platform Release Notes for a list of somerecent TensorFlow releases with their corresponding package names, as well as NVIDIAcontainer and JetPack compatibility.For example, to install TensorFlow 2.9.1 as of the 22.09 release, use the following command:$ sudo pip3 install --extra-index-url https:///compute/ redist/jp/v502 tensorflow-gpu==2.9.1+nv22.093.1. Installing Multiple TensorFlowVersionsIf you want to have multiple versions of TensorFlow available at the same time, this can be accomplished using virtual environments. See below.Set up the Virtual EnvironmentFirst, install the virtualenv package and create a new Python 3 virtual environment: $ sudo apt-get install virtualenv$ python3 -m virtualenv -p python3 <chosen_venv_name>Activate the Virtual EnvironmentNext, activate the virtual environment:$ source <chosen_venv_name>/bin/activateInstall the desired version of TensorFlow and its dependencies:$ pip3 install -U numpy grpcio absl-py py-cpuinfo psutil portpicker six mock requests gast h5py astor termcolor protobuf keras-applications keras-preprocessing wrapt google-pastasetuptools testresources$ pip3 install --extra-index-url https:///compute/redist/jp/v51 tensorflow==$TF_VERSION+nv$NV_VERSIONDeactivate the Virtual EnvironmentFinally, deactivate the virtual environment:$ deactivateRun a Specific Version of TensorFlowAfter the virtual environment has been set up, simply activate it to have access to the specific version of TensorFlow. Make sure to deactivate the environment after use:$ source <chosen_venv_name>/bin/activate$ <Run the desired TensorFlow scripts>$ deactivate3.2. Upgrading TensorFlowTo upgrade to a more recent release of TensorFlow, if one is available, run the install command with the ‘upgrade’ flag:$ sudo pip3 install --upgrade --extra-index-url https:///compute/redist/jp/v51 tensorflow==2.11.0+nv23.01Chapter 4.Verifying The InstallationAbout this taskTo verify that TensorFlow has been successfully installed on your device, you’ll need to launch a Python prompt and import TensorFlow.Procedure1.From the terminal, run:$ python32.Import TensorFlow:>>> import tensorflowIf TensorFlow was installed correctly, this command should execute without error.Chapter 5.Best PracticesPerformance modelIt is recommended to choose the right performance mode to get the best possible performance given energy usage limitations. There is a command line tool (nvpmodel) that can be used to change the performance mode. In order to check the current performance mode, issue:$ sudo nvpmodel -q --verboseTo change the mode to MAX-N, issue:$ sudo nvpmodel -m 0For more information, see:‣How do you switch between max-q and max-p?‣Jetson/Performance‣Two cores disabledSwap space on Jetson XavierOn Jetson Xavier, certain applications could run out of memory (16GB shared between CPU and GPU). This problem can be resolved by creating a swap partition on the external memory. Typically 4GB of swap space is enough.Chapter 6.UninstallingTensorFlow can easily be uninstalled using the pip3 uninstall command, as below: $ sudo pip3 uninstall -y tensorflowNote: If you are If you are using a version of TensorFlow older than the 20.02 release, thepackage name is tensorflow-gpu, and you will need to run the following command to uninstall TensorFlow instead. See the TensorFlow For Jetson Platform Release Notes for more information.$ sudo pip3 uninstall -y tensorflow-gpuChapter 7.TroubleshootingJoin the NVIDIA Jetson and Embedded Systems community to discuss Jetson Platform-specific issues.Chapter 8.SupportTensorFlowFor more information about TensorFlow, see:‣TensorFlow tutorials‣TensorFlow API‣Install TensorFlow on Ubuntu‣NVIDIA TensorFlow documentationJetson PlatformFor more information about Jetson Platforms, see:‣NVIDIA Jetson AGX Orin Developer Kit‣NVIDIA Jetson AGX Xavier Developer Kit‣NVIDIA Jetson Xavier NX Developer Kit‣Jetson software documentationNVIDIA SDK Manager‣See NVIDIA SDK Manager for more information.NoticeThis document is provided for information purposes only and shall not be regarded as a warranty of a certain functionality, condition, or quality of a product. NVIDIA Corporation (“NVIDIA”) makes no representations or warranties, expressed or implied, as to the accuracy or completeness of the information contained in this document and assumes no responsibility for any errors contained herein. NVIDIA shall have no liability for the consequences or use of such information or for any infringement of patents or other rights of third parties that may result from its use. This document is not a commitment to develop, release, or deliver any Material (defined below), code, or functionality.NVIDIA reserves the right to make corrections, modifications, enhancements, improvements, and any other changes to this document, at any time without notice.Customer should obtain the latest relevant information before placing orders and should verify that such information is current and complete.NVIDIA products are sold subject to the NVIDIA standard terms and conditions of sale supplied at the time of order acknowledgement, unless otherwise agreed in an individual sales agreement signed by authorized representatives of NVIDIA and customer (“Terms of Sale”). NVIDIA hereby expressly objects to applying any customer general terms and conditions with regards to the purchase of the NVIDIA product referenced in this document. No contractual obligations are formed either directly or indirectly by this document.NVIDIA products are not designed, authorized, or warranted to be suitable for use in medical, military, aircraft, space, or life support equipment, nor in applications where failure or malfunction of the NVIDIA product can reasonably be expected to result in personal injury, death, or property or environmental damage. NVIDIA accepts no liability for inclusion and/or use of NVIDIA products in such equipment or applications and therefore such inclusion and/or use is at customer’s own risk.NVIDIA makes no representation or warranty that products based on this document will be suitable for any specified use. Testing of all parameters of each product is not necessarily performed by NVIDIA. It is customer’s sole responsibility to evaluate and determine the applicability of any information contained in this document, ensure the product is suitable and fit for the application planned by customer, and perform the necessary testing for the application in order to avoid a default of the application or the product. Weaknesses in customer’s product designs may affect the quality and reliability of the NVIDIA product and may result in additional or different conditions and/or requirements beyond those contained in this document. NVIDIA accepts no liability related to any default, damage, costs, or problem which may be based on or attributable to: (i) the use of the NVIDIA product in any manner that is contrary to this document or (ii) customer product designs.No license, either expressed or implied, is granted under any NVIDIA patent right, copyright, or other NVIDIA intellectual property right under this document. Information published by NVIDIA regarding third-party products or services does not constitute a license from NVIDIA to use such products or services or a warranty or endorsement thereof. Use of such information may require a license from a third party under the patents or other intellectual property rights of the third party, or a license from NVIDIA under the patents or other intellectual property rights of NVIDIA.Reproduction of information in this document is permissible only if approved in advance by NVIDIA in writing, reproduced without alteration and in full compliance with all applicable export laws and regulations, and accompanied by all associated conditions, limitations, and notices.THIS DOCUMENT AND ALL NVIDIA DESIGN SPECIFICATIONS, REFERENCE BOARDS, FILES, DRAWINGS, DIAGNOSTICS, LISTS, AND OTHER DOCUMENTS (TOGETHER AND SEPARATELY, “MATERIALS”) ARE BEING PROVIDED “AS IS.” NVIDIA MAKES NO WARRANTIES, EXPRESSED, IMPLIED, STATUTORY, OR OTHERWISE WITH RESPECT TO THE MATERIALS, AND EXPRESSLY DISCLAIMS ALL IMPLIED WARRANTIES OF NONINFRINGEMENT, MERCHANTABILITY, AND FITNESS FOR A PARTICULAR PURPOSE. TO THE EXTENT NOT PROHIBITED BY LAW, IN NO EVENT WILL NVIDIA BE LIABLE FOR ANY DAMAGES, INCLUDING WITHOUT LIMITATION ANY DIRECT, INDIRECT, SPECIAL, INCIDENTAL, PUNITIVE, OR CONSEQUENTIAL DAMAGES, HOWEVER CAUSED AND REGARDLESS OF THE THEORY OF LIABILITY, ARISING OUT OF ANY USE OF THIS DOCUMENT, EVEN IF NVIDIA HAS BEEN ADVISED OF THE POSSIBILITY OF SUCH DAMAGES. Notwithstanding any damages that customer might incur for any reason whatsoever, NVIDIA’s aggregate and cumulative liability towards customer for the products described herein shall be limited in accordance with the Terms of Sale for the product.HDMIHDMI, the HDMI logo, and High-Definition Multimedia Interface are trademarks or registered trademarks of HDMI Licensing LLC.OpenCLOpenCL is a trademark of Apple Inc. used under license to the Khronos Group Inc.TrademarksNVIDIA, the NVIDIA logo, and cuBLAS, CUDA, cuDNN, DALI, DIGITS, DGX, DGX-1, DGX-2, DGX Station, DLProf, Jetson, Kepler, Maxwell, NCCL, Nsight Compute, Nsight Systems, NvCaffe, NVIDIA Ampere GPU Architecture, PerfWorks, Pascal, SDK Manager, Tegra, TensorRT, Triton Inference Server, Tesla, TF-TRT, and Volta are trademarks and/or registered trademarks of NVIDIA Corporation in the U.S. and other countries. Other company and product names may be trademarks of the respective companies with which they are associated.Copyright© 2018-2023 NVIDIA Corporation & Affiliates. All rights reserved.。
VS2019+python3.7+opencv4.1+tensorflow1.13配置详解
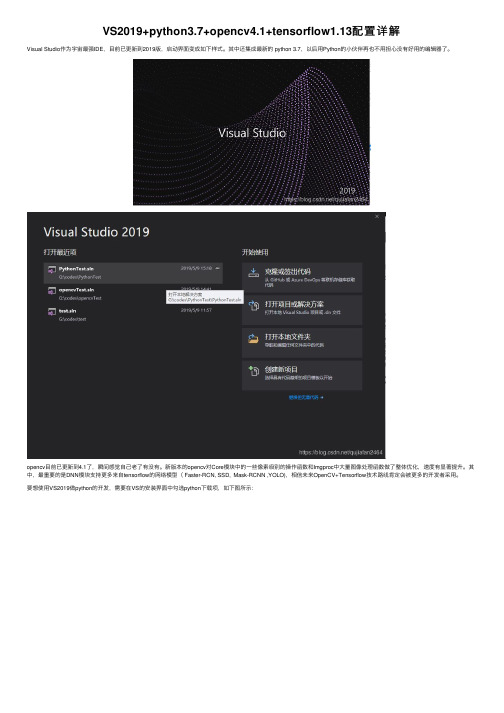
VS2019+python3.7+opencv4.1+tensorflow1.13配置详解
Visual Studio作为宇宙最强IDE,⽬前已更新到2019版,启动界⾯变成如下样式。
其中还集成最新的 python 3.7,以后⽤Python的⼩伙伴再也不⽤担⼼没有好⽤的编辑器了。
opencv⽬前已更新到4.1了,瞬间感觉⾃⼰⽼了有没有。
新版本的opencv对Core模块中的⼀些像素级别的操作函数和Imgproc中⼤量图像处理函数做了整体优化,速度有显著提升。
其中,最重要的是DNN模块⽀持更多来⾃tensorflow的⽹络模型( Faster-RCN, SSD, Mask-RCNN ,YOLO),相信未来OpenCV+Tensorflow技术路线肯定会被更多的开发者采⽤。
要想使⽤VS2019做python的开发,需要在VS的安装界⾯中勾选python下载项,如下图所⽰:
当VS安装好后,新建python的⼯程,在右侧配置界⾯按如下⽅式输⼊opencv-python,然后点击运⾏命令“pip install opencv-python”即可完成python3.7与opencv4.1的配置。
同理tensorflow、numpy 、matplotlib都可以通过这种⽅式安装。
下⾯附上测试代码和运⾏结果的截图:
以上就是VS2019+python3.7+opencv4.1+tensorflow1.13配置详解的详细内容,更多关于VS2019 python opencv tensorflow的资料请关注其它相关⽂章!。
【完整】Win10安装tensorflow-1.4.0-cpu-python3.5版本
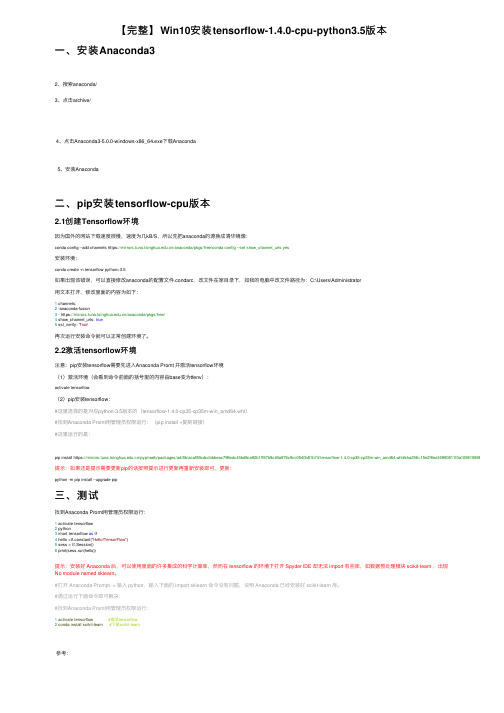
【完整】Win10安装tensorflow-1.4.0-cpu-python3.5版本⼀、安装Anaconda32、搜索anaconda/3、点击archive/4、点击Anaconda3-5.0.0-windows-x86_64.exe下载Anaconda5、安装Anaconda⼆、pip安装tensorflow-cpu版本2.1创建Tensorflow环境因为国外的⽹站下载速度很慢,速度为⼏kB/S,所以先把anaconda的源换成清华镜像:conda config --add channels https:///anaconda/pkgs/free/conda config --set show_channel_urls yes安装环境:conda create -n tensorflow python=3.5如果出现该错误,可以直接修改anaconda的配置⽂件.condarc,改⽂件在家⽬录下,如我的电脑中改⽂件路径为:C:\Users\Administrator⽤⽂本打开,修改⾥⾯的内容为如下:1 channels:2 -anaconda-fusion3 - https:///anaconda/pkgs/free/4 show_channel_urls: true5 ssl_verify: 'True'再次运⾏安装命令就可以正常创建环境了。
2.2激活tensorflow环境注意:pip安装tensorflow需要先进⼊Anaconda Promt 并激活tensorflow环境(1)激活环境(会看到命令前⾯的括号⾥的内容由base变为tfenv):activate tensorflow(2)pip安装tensorflow:#这⾥选择的是对应python-3.5版本的(tensorflow-1.4.0-cp35-cp35m-win_amd64.whl)#找到Anaconda Promt⽤管理员权限运⾏:(pip install +复制链接)#这⾥运⾏的是:pip install https:///pypi/web/packages/ad/8b/acaf89cdccbbbeac798edc45bd8ca92b1ff97b9c49a976c9cc0540b81b74/tensorflow-1.4.0-cp35-cp35m-win_amd64.whl#sha256=15e2f6ea16990811f0a109615898a19359b4af1提⽰:如果还是提⽰需要更新pip的话按照提⽰进⾏更新再重新安装即可,更新:python -m pip install --upgrade pip三、测试找到Anaconda Promt⽤管理员权限运⾏:1 activate tensorflow2 python3 imort tensorflow as tf4 hello =tf.constant("Hello!TensorFlow")5 sess = tf.Session()6 print(sess.run(hello))提⽰:安装好 Anaconda 后,可以使⽤⾥⾯的许多集成的科学计算库,然⽽在 tensorflow 的环境下打开 Spyder IDE 却⽆法 import 有些库,如数据预处理模块 scikit-learn ,出现No module named sklearn。
window10+python3.7安装tensorflow--gputensorflow安装
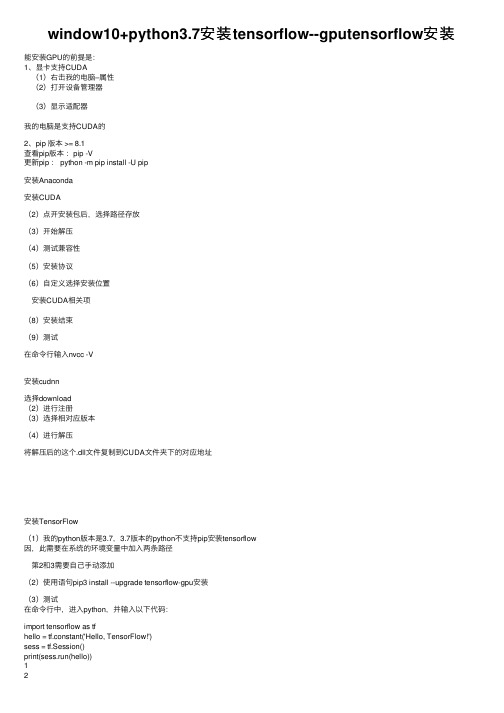
window10+python3.7安装tensorflow--gputensorflow安装能安装GPU的前提是:1、显卡⽀持CUDA (1)右击我的电脑–属性 (2)打开设备管理器 (3)显⽰适配器我的电脑是⽀持CUDA的2、pip 版本 >= 8.1查看pip版本:pip -V更新pip : python -m pip install -U pip安装Anaconda安装CUDA(2)点开安装包后,选择路径存放(3)开始解压(4)测试兼容性(5)安装协议(6)⾃定义选择安装位置 安装CUDA相关项(8)安装结束(9)测试在命令⾏输⼊nvcc -V安装cudnn选择download(2)进⾏注册(3)选择相对应版本(4)进⾏解压将解压后的这个.dll⽂件复制到CUDA⽂件夹下的对应地址安装TensorFlow(1)我的python版本是3.7,3.7版本的python不⽀持pip安装tensorflow因,此需要在系统的环境变量中加⼊两条路径 第2和3需要⾃⼰⼿动添加(2)使⽤语句pip3 install --upgrade tensorflow-gpu安装(3)测试在命令⾏中,进⼊python,并输⼊以下代码:import tensorflow as tfhello = tf.constant('Hello, TensorFlow!')sess = tf.Session()print(sess.run(hello))1234查看tensorflow版本遇到的问题1、importerror: Something is wrong with the numpy installation. While importing we detected an older version of numpy in[‘C:\Users\WeiLinLin\Anaconda3\envs\tensorflow\Lib\site-packages\numpy’]. One method of fixing this is to repeatedly uninstall numpy until none is found, then reinstall this version.出现这个报错说明在安装新的软件,或者更新numpy时,旧的numpy没有卸载掉,两版numpy导致出现冲突。
- 1、下载文档前请自行甄别文档内容的完整性,平台不提供额外的编辑、内容补充、找答案等附加服务。
- 2、"仅部分预览"的文档,不可在线预览部分如存在完整性等问题,可反馈申请退款(可完整预览的文档不适用该条件!)。
- 3、如文档侵犯您的权益,请联系客服反馈,我们会尽快为您处理(人工客服工作时间:9:00-18:30)。
1.安装tensorflow的环境,首先打开Anaconda Prompt,输入清华仓库镜像
输入:
conda config --add channels https:///anaconda/pkgs/free/这是两条命令,
conda config --set show_channel_urls yes
2. 同样在Anaconda Prompt中利用Anaconda创建一个python
3.6的环境,环境名称为tensorflow ,输入下面命令:
conda create -n tensorflow python=3.6
3.执行下边的操作
开始菜单->Anaconda3—>Anaconda Navigator,点击左侧的Environments,可以看到tensorflow的环境已经创建好了。
4.启动和关闭
当使用tensorflow时需要开启tensorflow环境
命令:activate tensorflow
当不使用tensorflow时,关闭tensorflow环境,命令:deactivate
5. 安装cpu版本的TensorFlow
命令:pip install --upgrade --ignore-installed tensorflow
直到最后出现如下的结果:
这样tensorflow cpu版本就安装好了。
注意:但是在Anaconda自带的ipython 和Spyder中import tensorflow的时候一直失败,提示No module named ‘tensorflow’,那是因为我们没有在tensorflow的环境下打开它们。
为了能在ipython 和Spyder中使用tensorflow,我们需要在tensorflow的环境中安装这两个的插件。
打开Anaconda Navigator,选择Not installed,找到ipython和Spyder 并安装,安装好后就可以使用了。
Tensorflow环境中的Spyder不能用,也可能是由于TensorFlow根本没有激活,所以才会出现runfile not found 的情况。
激活anaconda使用或者是重新配置TensorFlow的命令是:
#if tensorflow virtual env has been created, remove it first
#conda remove --name tensorflow --all
#conda create -n tensorflow python=3.6 anaconda
#activate tensorflow
#conda install spyder
#conda install ipython
#pipinstall--ignore-installed—upgrade
https:///tensorflow/windows/cpu/tensorflow-1.0.1-cp35-cp35m-win _amd64.whl
spyder
6.安装opencv
在网页:/~gohlke/pythonlibs/
上找到需要的opencv版本
然后放到anaconda安装的目录下,进入anaconda的终端进行安装
pip install opencvXXXXXXXXXXXXXX
然后可以找到opencv自带的人脸识别特征文件,调用进行可以完成各种人脸和人的身体的不同部位的识别。
这个人脸识别的特征文件就类似是神经网络中的训练好的一整套人脸识别的模型的一个精简的版本,只需要调用这个东西吧就可以完成识别,而不必自己去构建模型来识别,所以OpenCV有可能不能进行深层次的一些识别工作,最后还要自己构建模型,进行识别不同的物体。
所以学习的重心应该是神经网络模型的构建以及参数的调整和确定。
