Teamcenter10.1安装图文教程 (1)
Teamcenter 10安装手册-两层和四层
Teamcenter 10 安装操作手册一.系统环境 (2)1.硬件环境 (2)2.安装操作系统 (2)3.安装JAVA环境 (2)4.设置用户环境变量和系统环境变量 (4)二.安装ORACLE 11G (6)1.安装Oracle 数据库 (6)2.安装数据库实例 (11)三.安装LICENSE (27)1.复制修改License文件 (27)2.运行安装程序 (27)3.检查License服务 (30)四.安装TEAMCENTER (两层) (32)五.安装TEAMCENTER(四层) (45)1.安装Pool_manager (45)2.安装Webtier (51)3.安装Weblogic (64)4.安装Apache (80)5.下载客户端 (85)6.启动服务 (88)7.登录客户端 (88)一.系统环境1.硬件环境2.安装操作系统设置好计算机名和固定的IP地址,关闭防火墙;3.安装JAVA环境1)运行JDK安装程序jdk-7u45-windows-x64.exe,根据安装的操作系统类型选择相应的安装程序,如安装的系统为64位的,则安装64位的JDK;2)安装步骤4.设置用户环境变量和系统环境变量检测JAVA环境是否安装正确:如图所示,JAVA环境安装OK!二.安装Oracle 11g1.安装Oracle 数据库打开oracle安装包,运行setup.exe:选择【仅安装数据库软件】,选择【下一步】默认,选择【下一步】默认,选择【下一步】选择【企业版】,选择【下一步】根据需要选择路径,选择【下一步】检查安装的产品信息,选择【完成】安装完成!2.安装数据库实例1)配置监听打开【开始】→【所有程序】→【Oracle - OraDb11g_home1】→【配置和移植工具】→【Net Configuration Assistant】点选【监听程序配置】,选择【下一步】默认,选择【下一步】默认,选择【下一步】默认,选择【下一步】默认,选择【下一步】默认,选择【下一步】默认,选择【下一步】配置完成!2)复制配置文件将TC 10安装包下的文件:D:\tc\db_scripts\oracle\*,全部复制:到C:\app\Administrator\product\11.2.0\dbhome_1\assistants\dbca\t emplates\*下面:3)安装实例打开【开始】→【所有程序】→【Oracle - OraDb11g_home1】→【配置和移植工具】→【Database Configuration Assistant】点选【创建数据库】,选择【下一步】选择【Teamcenter Oracle11g】,如果前面没有复制系统配置文件则没有此选项给出数据库实例名,如:tc10给出用户密码,一般用:infodba作为系统所有用户密码此页面,在【调整大小】的进程根据需要,给出适合的值,如,300在【字符集】中选择【从字符集列表中选择】:ZHS16GBK-GBK 16位简体中文打开左侧【表空间】,选择需要的表空间,并且给出适合的文件大小,如图所示:选择TEMP,文件大小为100MB;检查配置资料,如过没有问题,点击【确定】开始创建实例创建完成,点击【退出】。
Teamcenter10.1系统基础操作资料
Teamcenter10.1系统基础操作资料1系统基础概念及我的Teamcenter1.1系统常用术语介绍1.零组件(Item):管理Teamcenter信息的基本对象,代表产品、部件或零件的结构化表达,也包含其他数据对象,表示真实世界中的一个产品、部件或零件对象,也表示一个种类的集合等;2.零组件版本(Item Revision):管理Teamcenter信息的基本对象,每个产品对象(Item)都有至少一个版本(Item Revision)。
在本来记录产品对象的历史演变(更改情况)发生;管理其他软件应用程序创建的数据文件的数据对象,例如:RAR文件;6.文件夹(Folder):用来组织产品信息的数据对象,类似Windows里的文件夹;7.伪文件夹:系统内对象与对象之间关系的虚拟表现形式(不是文件夹,实际上是一种关系的文件夹表达方式);8.时间表(Schedule):时间表,用来管理项目计划;9.更改(ECN等):用来管理产品变更记录;10.删除:系统中没有回收站,对象删除掉后,不能恢复;11.剪切:剪切的对象还在系统中,但不显示在当前的界面,可用查询工具找到;Item 零组件Item Revision零组BOMDataset数据集ItemRevisionMaster1.2Teamcenter用户界面1.2.1启动Teamcenter在桌面左键双击或者右键打开以下图标,进入登录界面,输入用户ID、密码,点击登录,进入到TC工作界面1.2.2应用程序管理器登录之后,在TC窗口的左下为应用程序快捷显示栏,通过点击下图红色方框,来编辑显示的应用程序快捷方式;(针对操作用户对“我的Teamcenter、结构管理器PSE、工作流查看器、更改管理器”比较常用)1.2.3启动应用程序的两种方式备注:针对VIEW、ECN对象,双击即可进入具体的应用程序中。
1.2.4“我的Teamcenter”概述元素描述菜单栏菜单栏包含窗口的工作区域中正在运行的应用程序的下拉菜单。
TC10.1 部署手册——Teamcenter10安装说明
目录.................................................................................................... 错误!未定义书签。
1 系统安装说明 (4)1.1Oracle服务器: (4)1.1.1Oracle安装步骤 (5)1.1.2建立Teamcenter使用的数据库 (10)1.1.3配置监听器和本地net服务名 (18)1.1.4添加数据库到监听器 (29)1.1.5测试数据库连接 (31)1.2应用服务器 (32)1.2.1企业服务器安装步骤 (32)1.2.1.1建立Windows系统账号 (32)1.2.1.2安装UGSLicensing (40)1.2.1.3安装企业服务器 (43)1.2.1.4安装J2EE服务器管理器 (57)1.2.2web应用部署 (68)1.2.2.1安装服务应用管理器(web application manager)681.2.2.2Web应用服务器 (70)1.2.2.3部署Web层应用到WebLogic Web应用服务器:.791.2.3分布式服务器、实例的创建及部署 (100)1.2.3.1创建分布式服务器: (100)1.2.3.2创建分布式服务器实例: (106)11.2.3.3部署分布式服务器实例到阿帕奇服务器: (112)1.2.3.4TC8.1 四层客户端可视化工具的安装:错误!未定义书签。
1.2.3.5TC8.1Office深度集成的安装: ....... 错误!未定义书签。
1.2.4四层客户端下载安装 (119)1.2.5业务建模器安装步骤 (119)1.3备份与还原 (126)1.3.1备份 (126)1.3.1.1数据库备份 (126)1.3.1.2备份Teamcenter Data (128)1.3.1.3备份Teamcenter Volumes (128)1.3.1.4备份BMIDE数据 (128)1.3.1.5备份工作流模板 (128)1.3.1.6备份查询构建 (129)1.3.1.7备份访问规则树 (131)1.3.2还原 (132)1.3.2.1数据库还原(注:除非数据库损坏或系统大版本升级才会使用)1321.3.2.2Teamcenter Data还原 (133)1.3.2.3Teamcenter Volumes还原 (133)1.3.2.4BMIDE数据还原 (133)1.3.2.5工作流模板还原 (133)21.3.2.6查询构建还原 (134)1.3.2.7访问规则树还原 (137)1.4系统日常维护 (138)1.4.1清理系统死进程 (138)1.4.2去除Item rev发布状态 (139)1.4.3流程状态校验 (140)31 系统安装说明1.1先决条件1)安装7版本向上的JRE环境,配置环境变量JRE64_HOME,路径指向安装位置(如果安装32位版本,则配置环境变量JRE_HOME)2)安装7版本向上的JDK环境,配置环境变量JAVA_HOME,路径指向安装路径3)在环境变量Path中增加%JAVA_HOME%\bin路径41.2Oracle服务器:1.2.1Oracle版本要求4)Teamcenter10.1系统要求的Oracle版本为11g R2版本向上1.2.2Oracle安装步骤1)登陆Windows系统,执行Oracle安装程序setup.exe。
Teamcenter10.1安装图文教程 (1)

Teamcenter 10 Windows 平台安装详细教程1安装开始此文档简单的描述了如何在windows server 平台上安装Teamcenter 10.1,包括使用teamcenter的安装环境TEM(Teamcenter Environment Manager)安装服务器端特征和使用TAM Teamcenter Application Manager 安装web 层。
注意事项:1)确保C:\Temp文件夹存在且对所有用户都有权限;2)关闭UAC→通过控制面板,关闭UAC设置;3)关闭TCP scaling→通过cmd 命令,输入:netsh interface tcp set globalautotuninglevel=disabled;4)如果使用其他语言,请确保语言包正确安装;数据库安装Teamcenter使用RDBMS 关系数据库存储数据,因此在安装之前,请确保安装了正确的数据库(IBM DB2,oracle 或者SQL)。
(本教程使用oracle数据库,sql数据库请参考论坛教程:/forum.php )Web层配置1)Windows 平台上使用浏览器IE 或者FireFox2)使用Java 网络层需要安装J2EE3)使用.Net网络层需要安装IIS和.Net 框架具体的安装版本请参考这里:/certifi cation/teamcenter .shtml安装工具:Teamcenter使用TEM (Teamcenter Environment manager)和WAM(Web Application Mnager)进行安装。
TEM用来安装2-tier 或者4-tier的胖客户端。
使用tem.bat文件启动安装界面WAM用来安装web层,使用insweb启动安装界面。
注意:.net web层依然使用TEM进行安装。
基本的安装过程1)安装DataBase2)安装Teamcenter服务器3)安装Teamcenter Web层4)安装Teamcenter客户端层安装之前请确保java软件的正确安装,下载最新的java安装包,版本高于1.7.0_17,如果是64位,请指定jre64_home环境变量!2Oracle 数据库的安装1)Oracle数据库安装下载支持版本的oracle数据库,这里使用最新版本11g以下为安装步骤截图:a)双击Setup.exe 文件,如果不想收到邮件的话,可以去掉这个选择。
Teamcenter 10.1 基于JBOSS 四层部署
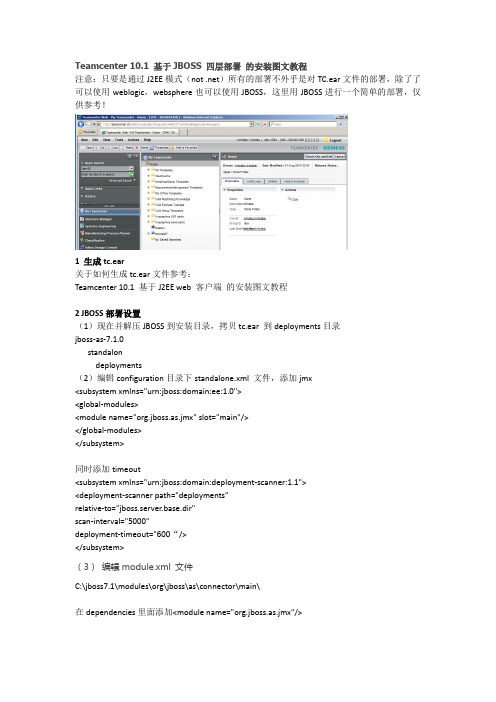
Teamcenter 10.1 基于JBOSS 四层部署的安装图文教程注意:只要是通过J2EE模式(not .net)所有的部署不外乎是对TC.ear文件的部署,除了了可以使用weblogic,websphere也可以使用JBOSS,这里用JBOSS进行一个简单的部署,仅供参考!1 生成tc.ear关于如何生成tc.ear文件参考:Teamcenter 10.1 基于J2EE web 客户端的安装图文教程2 JBOSS部署设置(1)现在并解压JBOSS到安装目录,拷贝tc.ear 到deployments目录jboss-as-7.1.0standalondeployments(2)编辑configuration目录下standalone.xml 文件,添加jmx<subsystem xmlns="urn:jboss:domain:ee:1.0"><global-modules><module name="org.jboss.as.jmx" slot="main"/></global-modules></subsystem>同时添加timeout<subsystem xmlns="urn:jboss:domain:deployment-scanner:1.1"><deployment-scanner path="deployments"relative-to="jboss.server.base.dir"scan-interval="5000"deployment-timeout="600“/></subsystem>(3)编辑module.xml 文件C:\jboss7.1\modules\org\jboss\as\connector\main\在dependencies里面添加<module name="org.jboss.as.jmx"/>3 启动JBOSS服务配置好后,确保java_home OK,启动cmd窗口,cd到jboss 的bin 目录下,启动jboss standalone.bat -b 服务器名启动POOL Manager 服务,teamcenter10的pool manager已经是一个服务了,可以直接在services 里面启动。
teamcenter10系统集群安装手册
TC系统集群安装手册一、主服务器tcqasapp1安装Teamcenter1、关闭防火墙与selinux2、修改hosts文件# vi /etc/hosts10.8.9.92 tcqasapp110.8.9.93 tcqasapp210.8.9.94 tcqasapp310.8.9.87 tctestdb3、修改tcadmin环境变量文件$ cd /home/tcadmin$ vi .bash_profile增加以下:JAVA_HOME=/usr/java/jdk1.7.0_45FMS_HOME=/tcapp/Siemens/Teamcenter10/tccsFSC_HOME=/tcapp/Siemens/Teamcenter10/fscexport JAVA_HOMEexport FMS_HOMEexport FSC_HOME4、使tcadmin用户有root执行权限1)添加sudo文件的写权限,命令是:# chmod u+w /etc/sudoers2)编辑sudoers文件# vi /etc/sudoers找到这行root ALL=(ALL) ALL,在他下面添加tcadmin ALL=(ALL) ALL3)撤销sudoers文件写权限,命令:# chmod u-w /etc/sudoers5、安装jdk1.7# rpm -ivh jdk-7u45-linux-x64.rpm6、安装TCVNC远程到服务器# xhost +# su - tcadmin$ cd /soft/Tc10.1.0_lnx64$ ./tem.sh -jre /usr/java/jdk1.7.0_45/jre修改安装路径/tcapp/Siemens/Teamcenter10输入操作系统用户tcadmin的密码增加license服务器7、Web_Tier安装# su - tcadmin$ cd /tcapp$ mkdir webroot$ cd webroot$cat /soft/Tc10.1.0_lnx64/Web_tier/INSTALL_TCWEB.TZ | gzip -d | tar xvf –(将/soft/Tc10.1.0_lnx64/Web_tier/INSTALL_TCWEB.TZ解压并拷贝到当前目录)$ ./inswebTreeCache Peers:tcqasapp1[17800],tcqasapp2[17800],tcqasapp3[17800] Tclocal:zh_CN8、 Weblogic 安装与配置# su – tcadmin$ cd /soft/Tc10.1.0_lnx64$ /usr/java/jdk1.7.0_45/bin/java -jar wls1036_generic.jarWeblogic用户密码:root_admin启动weblogic$ cd /tcapp/weblogic/user_projects/domains/base_domain/bin $ ./startWebLogic.sh$ cd /tcapp/weblogic/user_projects/domains/base_domain/bin $ ./stopWebLogic.sh$ ./startWebLogic.sh & (增加&符号后台运行)在浏览器打开http://10.8.9.88:7001/console/login/LoginForm.jsp输入路径/tcapp/webroot/WebTier/deployment/tc.ear9、启动pool_manager$ cd /tcapp/Siemens/Teamcenter10/pool_manager/confs/config1 $ ./mgrstart & (加&符号表示后台运行)$ ./mgrstop$ ./mgrstart & (加&符号表示后台运行)10、四层瘦客户端验证在客户端电脑(win7 64位)打开IE浏览器,输入以下地址http://10.8.9.92:7001/tc/webclient/11、 分发服务配置$ cp /soft/Tc10.1.0_otw/icd/* /tcapp/webroot/icd/ $ cd /tcapp/webroot/ $ ./insweb\\10.8.4.32\software\tcvis\Teamcenter_Visualization_10_1_win64.12、Weblogic部署分发服务创建一个目录WEB-INF,并在里面创建两个文件web.xml,weblogic.xml$ cd /tcapp/webroot/DisServerIstance/webapp_root/otwweb$ mkdir WEB-INF$ cd WEB-INF$ vi web.xml<!DOCTYPE web-app PUBLIC "-//Sun Microsystems,Inc. //DTD Web Application 2.3//EN""/dtd/web-app_2_3.dtd"><web-app></web-app>$ vi weblogic.xml<!DOCTYPE weblogic-web-app PUBLIC "-//BEA Systems, Inc. //DTD Web Application8.1//EN" "/server/wls810/dtd/weblogic810-web-jar.dtd"><weblogic-web-app><context-root>/</context-root><container-descriptor><prefer-web-inf-classes>true</prefer-web-inf-classes></container-descriptor></weblogic-web-app>登录weblogic界面http://10.8.9.92:7001/console路径:/tcapp/webroot/DisServerIstance/webapp_root/otwweb测试路径:http://10.8.9.90:7001/otw.html13、Apache配置(如果使用radware负载均衡,则不用安装) # cd /etc/httpd/conf# vi httpd.confServerRoot "/etc/httpd"ServerName tcqasapp1:80DocumentRoot "/tcapp/webroot/DisServerInstance/webapp_root/otwweb" 重新启动apache14、启动TC服务1、启动apache# Service httpd restart2、启动weblogic$ cd /tcapp/weblogic/user_projects/domains/base_domain/$ ./startWebLogic.sh$ cd /tcapp/weblogic/user_projects/domains/base_domain/bin$ ./stopWebLogic.sh$ ./startWebLogic.sh & (增加&符号后台运行)3、启动Pool_manager$ cd /tcapp/Siemens/Teamcenter10/pool_manager/confs/config1$ ./mgrstart & (加&符号表示后台运行)$ ./mgrstop$ ./mgrstart & (加&符号表示后台运行)4、启动DisServer$ cd /tcapp/webroot/DisServer/webapp_root$ ./start_rmi$ ./start_server &二、从服务器tcqasapp2安装Teamcenter1.关闭防火墙与selinux2.修改hosts文件# vi /etc/hosts10.8.9.92 tcqasapp110.8.9.93 tcqasapp210.8.9.94 tcqasapp310.8.9.87 tctestdb3.修改tcadmin环境变量文件$ cd /home/tcadmin$ vi .bash_profile增加以下:JAVA_HOME=/usr/java/jdk1.7.0_45FMS_HOME=/tcapp/Siemens/Teamcenter10/tccsFSC_HOME=/tcapp/Siemens/Teamcenter10/fscexport JAVA_HOMEexport FMS_HOMEexport FSC_HOME4.使tcadmin用户有root执行权限4)添加sudo文件的写权限,命令是:# chmod u+w /etc/sudoers5)编辑sudoers文件# vi /etc/sudoers找到这行root ALL=(ALL) ALL,在他下面添加tcadmin ALL=(ALL) ALL6)撤销sudoers文件写权限,命令:# chmod u-w /etc/sudoers5.安装jdk1.7# rpm -ivh jdk-7u45-linux-x64.rpm6.安装TC# xhost +# su - tcadmin$ cd /soft/Tc10.1.0_lnx64$ ./tem.sh -jre /usr/java/jdk1.7.0_45/jre。
TC10.1部署手册——Teamcenter10安装说明
TC10.1部署手册——Teamcenter10安装说明目录 (2)1 系统安装说明 (4)1.1Oracle服务器: (4)1.1.1Oracle安装步骤 (4)1.1.2建立Teamcenter使用的数据库 (6)1.1.3配置监听器和本地net服务名 (14)1.1.4添加数据库到监听器 (25)1.1.5测试数据库连接 (27)1.2应用服务器 (28)1.2.1企业服务器安装步骤 (28)1.2.1.1建立Windows系统账号 (28)1.2.1.2安装UGSLicensing (35)1.2.1.3安装企业服务器 (37)1.2.1.4安装J2EE服务器管理器 (49)1.2.2web应用部署 (57)1.2.2.1安装服务应用管理器(web application manager)581.2.2.2Web应用服务器 (60)1.2.2.3部署Web层应用到WebLogic Web应用服务器:.65 1.2.3分布式服务器、实例的创建及部署 (86)1.2.3.1创建分布式服务器: (86)1.2.3.2创建分布式服务器实例: (91)11.2.3.3部署分布式服务器实例到阿帕奇服务器: (99)1.2.3.4TC8.1 四层客户端可视化工具的安装: (104)1.2.3.5TC8.1Office深度集成的安装: (109)1.2.4四层客户端下载安装 (112)1.2.5业务建模器安装步骤 (112)1.3备份与还原 (119)1.3.1备份 (119)1.3.1.1数据库备份 (119)1.3.1.2备份Teamcenter Data (120)1.3.1.3备份Teamcenter Volumes (120)1.3.1.4备份BMIDE数据 (121)1.3.1.5备份工作流模板 (121)1.3.1.6备份查询构建 (122)1.3.1.7备份访问规则树 (124)1.3.2还原 (125)1.3.2.1数据库还原(注:除非数据库损坏或系统大版本升级才会使用)1251.3.2.2Teamcenter Data还原 (125)1.3.2.3Teamcenter Volumes还原 (125)1.3.2.4BMIDE数据还原 (125)1.3.2.5工作流模板还原 (125)1.3.2.6查询构建还原 (126)11.3.2.7访问规则树还原 (129)1.4系统日常维护 (130)1.4.1清理系统死进程 (130)1.4.2去除Item rev发布状态 (131)1.4.3流程状态校验 (131)11 系统安装说明1.1先决条件1)安装7版本向上的JRE环境,配置环境变量JRE64_HOME,路径指向安装位置(如果安装32位版本,则配置环境变量JRE_HOME)2)安装7版本向上的JDK环境,配置环境变量JAVA_HOME,路径指向安装路径3)在环境变量Path中增加%JAVA_HOME%\bin路径11.2Oracle服务器:1.2.1Oracle版本要求4)Teamcenter10.1系统要求的Oracle版本为11g R2版本向上1.2.2Oracle安装步骤1)登陆Windows系统,执行Oracle安装程序setup.exe。
Teamcenter10.1系统基础操作资料
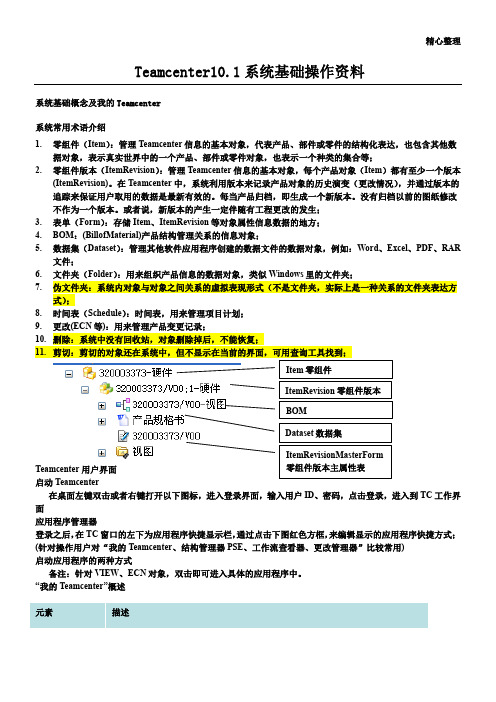
精心整理Teamcenter10.1系统基础操作资料系统基础概念及我的Teamcenter系统常用术语介绍1.零组件(Item):管理Teamcenter信息的基本对象,代表产品、部件或零件的结构化表达,也包含其他数据对象,表示真实世界中的一个产品、部件或零件对象,也表示一个种类的集合等;2.零组件版本(ItemRevision):管理Teamcenter信息的基本对象,每个产品对象(Item)都有至少一个版本(ItemRevision)。
在Teamcenter中,系统利用版本来记录产品对象的历史演变(更改情况),并通过版本的应用程序管理器登录之后,在TC窗口的左下为应用程序快捷显示栏,通过点击下图红色方框,来编辑显示的应用程序快捷方式;(针对操作用户对“我的Teamcenter、结构管理器PSE、工作流查看器、更改管理器”比较常用)启动应用程序的两种方式备注:针对VIEW、ECN对象,双击即可进入具体的应用程序中。
“我的Teamcenter”概述条标签显示窗口标签更改属性列左侧控制面板可以自己定制个性化界面。
用户设置改变组和角色的设置:菜单:找到常规文件夹,在右侧进行编辑,进行个人基本设置,设置完成之后点击确定;菜单栏介绍“文件”菜单“编辑”菜单“视图”菜单其他介绍1、切换当前显示模块可快速进入已经打开的功能模块,例如用户打开了多个模块(我的Teamcenter、结构管理器(PSE)、分类、流程查看器),可用该按钮快速切换2、自定义工具条、模块显示自定义工具栏在工具栏空白处点击右键弹出选择定制工具条弹出如下窗口,对工具栏进行自己定义3、更改应用程序显示按图示操作,进入导航面板窗口侧的“信封1.2.3.1.2.1.2.1.2.PS:复制附加在复制处于不同位置的多个对象时可以提高工作效率:比如先复制A,再找到B,选择复制附加;然后选择要粘贴的位置,点击粘贴,就可以将A、B一起粘贴过去更改所有权1.更改数据的所有用户和所有用户组属性,一般只有“所有者”才有权限修改。
teamcenter安装指导书

17.直接点击“完成”
18.点击“确定”
19.创建数据库
20.数据库安装成功后显示页面:
21.测试连接
“开始”菜单->“Oracle - OraDb10g_home1”->“Net Manager”
22.选择“命令”下的“测试服务”
23.连接测试
24.点击“更改登录”,输入用户名/口令:infodba/infodba
6、选择Teamcenter Oracle 10g
7、输入全局数据库名:tc
8、点击“下一步”
9.选择“所有帐户使用同一口令”,输入口令:tc,确认口令:tc
10.直接点击“下一步”
1下一步”
14.直接点击“下一步”
15.直接点击“下一步”
24、J2EE服务器管理器性能调整,接受默认设置,直接点“下一步”。
25、IIOP服务器设置。接受默认设置,直接点“下一步”。
26、FCC设置,接受默认设置,直接点“下一步”。
27、FCC父项,接受默认设置,直接点“下一步”。
28、胖客户端设置。接受默认设置,直接点“下一步”。
29、联机帮助。接受默认设置,直接点“下一步”。
安装过程中的更详细记录可在TC安装目录下的logs文件夹中找到相关日志文件。如本次安装的日志文件在C:\Teamcenter\Tc2007\logs文件夹中。
37、安装过程中如弹出如下对话框,一律点击“解除阻止”!
38、安装“功能部件成功”,点击“关闭”
20、FSC服务:其他组站点,接受默认设置,直接点“下一步”。
21、FSC部署模型,接受默认设置,直接点“下一步”。
22、TcServer字符编码设置,接受默认设置,直接点“下一步”。
Teamcenter图文教程
© TRW Automotive Holdings Corp. 2009
1
How to start
Start => All Programs => UGS Teamcenter 2007.2 => Teamcenter 2007.2 => Instance tcjohor=> Teamcenter Rich Client (englisch) NX5
Change and/or Manage Search List
Advanced Search
From ‘Quick Search’ to ‘Advanced Search’ click the ▼ icon and go to Advanced.
© TRW Automotive Holdings Corp. 2009
© TRW Automotive Holdings Corp. 2009
4
Teamcenter Window
Menu bar
Icon bar Login person – Group - Role
Navigation Pane
Secondary Application
System status
© TRW Automotive Holdings Corp. 2009
28
Where-referenced and where-used searches
© TRW Automotive Holdings Corp. 2009
29
Make Revision
Using TC: Click on the Item Revision Go to File => Revise
teamcenter安装指导书

37、安装过程中如弹出如下对话框,一律点击“解除阻止”!
38、安装“功能部件成功”,点击“关闭”
3、指定安装目录,然后点击“安装”
4、
5、在选择配置选项中选择“仅安装数据库软件”
6、点击“下一步”
7、安装结束后点击“退出”
8、创建监听
“开始”菜单->“Oracle - OraDb10g_home1”->“Net Manager”进行创建。
9、点击“编辑”->“创建”->“监听程序”
10、输入监听程序名称:LISTENER
oracle100数据库软件安装联系作者pdm原理与应用课程联系作者pdm原理与应用课程联系作者pdm原理与应用课程联系作者pdm原理与应用课程开始菜单oracleoradb10ghome1netmanager进行创建
1Oracle 10.0数据库软件安装
1、进入安装界面,点击“高级安装”
2、选择安装类型为“企业版”
20.数据库安装成功后显示页面:
21.测试连接
“开始”菜单->“Oracle - OraDb10g_home1”->“Net Manager”
22.选择“命令”下的“测试服务”
23.连接测试
24.点击“更改登录”,输入用户名/口令:infodba/infodba
成功后会显示连接成功!
3安装Teamcenter系统
安装Teamcenter 2007
1.双击TC安装包下的\Tc2007.1.3_win\tem.bat文件,将启动TC安装程序,如下图所示:
Teamcenter-10安装手册-两层和四层

Teamcenter 10 安装操作手册一.系统环境 (2)1.硬件环境 (2)2.安装操作系统 (2)3.安装JAVA环境 (2)4.设置用户环境变量和系统环境变量 (4)二.安装ORACLE 11G (6)1.安装Oracle 数据库 (6)2.安装数据库实例 (11)三.安装LICENSE (27)1.复制修改License文件 (27)2.运行安装程序 (27)3.检查License服务 (30)四.安装TEAMCENTER (两层) (32)五.安装TEAMCENTER(四层) (45)1.安装Pool_manager (45)2.安装Webtier (51)3.安装Weblogic (64)4.安装Apache (80)5.下载客户端 (85)6.启动服务 (88)7.登录客户端 (88)一.系统环境1.硬件环境2.安装操作系统设置好计算机名和固定的IP地址,关闭防火墙;3.安装JAVA环境1)运行JDK安装程序jdk-7u45-windows-x64.exe,根据安装的操作系统类型选择相应的安装程序,如安装的系统为64位的,则安装64位的JDK;2)安装步骤4.设置用户环境变量和系统环境变量检测JAVA环境是否安装正确:如图所示,JAVA环境安装OK!二.安装Oracle 11g1.安装Oracle 数据库打开oracle安装包,运行setup.exe:选择【仅安装数据库软件】,选择【下一步】默认,选择【下一步】默认,选择【下一步】选择【企业版】,选择【下一步】根据需要选择路径,选择【下一步】检查安装的产品信息,选择【完成】安装完成!2.安装数据库实例1)配置监听打开【开始】→【所有程序】→【Oracle - OraDb11g_home1】→【配置和移植工具】→【Net Configuration Assistant】点选【监听程序配置】,选择【下一步】默认,选择【下一步】默认,选择【下一步】默认,选择【下一步】默认,选择【下一步】默认,选择【下一步】默认,选择【下一步】配置完成!2)复制配置文件将TC 10安装包下的文件:D:\tc\db_scripts\oracle\*,全部复制:到C:\app\Administrator\product\11.2.0\dbhome_1\assistants\dbca\t emplates\*下面:3)安装实例打开【开始】→【所有程序】→【Oracle - OraDb11g_home1】→【配置和移植工具】→【Database Configuration Assistant】点选【创建数据库】,选择【下一步】选择【Teamcenter Oracle11g】,如果前面没有复制系统配置文件则没有此选项给出数据库实例名,如:tc10给出用户密码,一般用:infodba作为系统所有用户密码此页面,在【调整大小】的进程根据需要,给出适合的值,如,300在【字符集】中选择【从字符集列表中选择】:ZHS16GBK-GBK 16位简体中文打开左侧【表空间】,选择需要的表空间,并且给出适合的文件大小,如图所示:选择TEMP,文件大小为100MB;检查配置资料,如过没有问题,点击【确定】开始创建实例创建完成,点击【退出】。
Teamcenter10.1安装手册
Teamcenter10.1安装手册Teamcenter10.1安装手册Teamcenter 10.1InstallationWindows Publication Number__2 Jon Clients GuideTeamcenter10.1安装手册Proprietary and restricted rights noticeThis software and related documentation are proprietary to Siemens Product Lifecycle Management Software Inc.2022年Siemens Product Lifecycle Management Software Inc. All Rights Reserved. Siemens and the Siemens logo are registered trademarks of Siemens AG. Teamcenter is a trademark or registered trademark of Siemens Product Lifecycle Management Software Inc. or its subsidiaries in the United States and in other countries. All other trademarks, registered trademarks, or service marks belong to their respective holders.Teamcenter10.1安装手册ContentsProprietary and restricted rightsnotice ............................................................. 2 Getting started with Teamcenter client installation ....................................... 1-1 Introduction to Teamcenter client installationSystem requirements ................................................................. 1-1 Preparing to installTeamcenter ............................................................................................................. Configuring Teamcenterinstallation ............................................................................................... 11-1-6 Starting Teamcenter installation .................................................................................. 1-7 Teamcenter Environment Managerinterface ......................................................................................... 1-7 Basic concepts about Teamcenterinstallation ................................................................... ........................................................ .......... 11-7-8 Installing the richclient ............................................................................. 2-1 Before you startInstall a four-tier richclient ....................................................................................................................... Install a two-tier rich clientAlternate rich clientconfigurations . ................................................................................................... .............. ................................................................................... 22-12-1 -6 Configure rich clientfeatures ............................................................................................ .................................... .............................................. 2-102-11 Creating a customdistribution ......................................................................... 3-1 Overview of custom distributionsCreate a silentdistribution ........................................................................................ 3Create a compactdistribution ................................................................................................... ...................... ........................................................................ 3-13-2 -5 Installing Microsoft Office interfaces .............................................................. 4-1 Installing Microsoft Office interfacesInstalling Teamcenter Client for MicrosoftOffice .................................................................................. 4-1 Installing Teamcenter Extensions for Microsoft Office ............................................................ Install Teamcenter Plug-in for Microsoft ProjectPatching Client forOffice ........................................................... ................................................ 4-124-2 Patching Extensions for Office.................................................................................................... 4-16 ........................................................................................... 4-16 4-18 Installing TCCS ....................................................................................................... 5-1 What is TCCS?Preparing to installTCCS ......................................................................................................................... 5-1 Enable TCCS usingTEM ..................................................................................................... 5-2 Install TCCS using the stand-alone installation wizard....................................................................................................... ................................................. 55-3-6Troubleshooting . . . . . . . . . . . . . . . . . . . . . . . . . . . . . . . . . . . . . . . . . . . A-1 Enabling multiple client sessions . . . . . . . . . . . . . . . . . . . . . . . . . . . . . . B-1 Overview of multiple client sessions . . . . . . . . . . . . . . . . . . . . . . . . . . . . . . . Installing support services for multiple client sessions . . . . . . . . . . . . . . . . . . B-1 Uninstalling multiple client supportservices . . . . . . . . . . . . . . . . . . . . . . . . . B-2B-1Teamcenter10.1安装手册ContentsUninstalling Teamcenter . . . . . . . . . . . . . . . . . . . . . . . . . . . . . . . . . . . . . C-1 Uninstall the rich client . . . . . . . . . . . . . . . . . . . . . . . . . . . . . . . . . . . . . . . C-1 Uninstall Microsoft Office interfaces . . . . . . . . . . . . . . . . . . . . . . . . . . . . . . . C-2 Uninstall TCCS . . . . . . . . . . . . . . . . . . . . . . . . . . . . . . . . . . . . . . . . . . . . . C-4 Uninstall Engineering Process Management rich client . . . . . . . . . . . . . . . . . C-4 Glossary . . . . . . . . . . . . . . . . . . . . . . . . . . . . . . . . . . . . . . . . . . . . . . . . . . D-1 Index . . . . . . . . . . . . . . . . . . . . . . . . . . . . . . . . . . . . . . . . . . . . . . . . . Index-1FiguresTeamcenter EnvironmentManager ........................................................................ 1-7 Two-tier architecture .................................................................................................. 1-9 Four-tier architecture .............................................................................................. 1-11 Sample silent installation configuration file .........................................................3-5Platform support for Teamcenter servers andclients .......................................... 1-2 Required hard disk space for Teamcenter configurations .................................. 1-4Teamcenter10.1安装手册Chapter1Getting started with client installationTeamcenter Introduction to Teamcenter clientinstallation ................................................................. 1-1 System requirementsWhere to find systemrequirements ............................................................................................................. 1-1 PlatformsSystemhardware ........................................................................................................................... .. ........................................................................... 11-1 Web browserJava Runtime Environment ...................................................................................................................... . ............................................................................................................ 1-11-3 -4 Softwareintegrations ...................................................................................................... .................. ........................................................................ 11-4-5 Preparing to install Teamcenter .............................................................................................. 1-6 Configuring Teamcenterinstallation .................................................................................. 1-7 Starting Teamcenter installation ........................................................................................ 1-7 Teamcenter Environment Managerinterface ................................................................... 1-7 Basic concepts about Teamcenter installationTeamcenterclients .................................................................. 1-8Richclient ................................................................................................................... .................. ......................................................................................... 1-8Teamcenter network architecturesThinclient .................................................................................................................. 11-8-8 Two-tierarchitecture ............................................................................................... ......................... ...................................................... 11-8File Management System (FMS)Four-tierarchitecture ............................................................................................... 1-8-9 Selecting and configuringfeatures ............................................................................... Basic tasks in Teamcenter installation............................................................................ 1-121-12 Installing Teamcenter clientsInstalling clientfeatures ...................................................................................... .......................................... .................................... .................................................................... 1-13 1-13 1-13Teamcenter10.1安装手册Teamcenter10.1安装手册Introduction to Teamcenter client installationThis guide describes how to install Teamcenter 10.1 on Microsoft Windows clients. This includes installation of Teamcenter two-tier rich clients using Teamcenter Environment Manager and four-tier rich clients using the Over-the-Web Installer. This guide assumes you have a thorough working knowledge of your operating system and general knowledge of Teamcenter use.System requirementsWhere to find system requirementsFor information about versions of operating systems, third-party software, Teamcenter software, and system hardware certified for your platform, see the Siemens PLM Software Certification Database: / certification/teamcenter.shtmlNoteSome software requirements differ for non-English locales. When viewing the certification database, make sure you note any exceptions for your locale.PlatformsDetermine from the following table which Teamcenter 10.1 servers and clients are supported on your operating system. Bullet characters ( )denote supported servers and clients.Teamcenter10.1安装手册Chapter 1Getting started with Teamcenter client installationPlatform support for Teamcenter servers and clientsOperating System Microsoft Windows (desktop platforms)2 Microsoft Windows (server platforms)3 Sun SolarisHewlett-Packard HP-UX4 IBM AIX SUSE Linux Red Hat Linux5Apple Macintosh Mac OSCorporate Web server tierBusinessModelerRich Thin IDETCCS1 client client clientNotes about platform supportGeneral notesFor information about versions of operating systems certified for Teamcenter10.1, see the Siemens PLM Software Certification Database. For information about installing Teamcenter on Windows servers, see the Installation on Windows Servers Guide. For information about installing Teamcenter on Linux clients, see theInstallation on Linux Clients Guide. For information about installing Teamcenter on Macintosh clients, see theInstallation on Macintosh Clients Guide. If your Teamcenter database server is IBM DB2, all Teamcenter servers andtwo-tier rich clients in your network must run operating systems supported for Teamcenter with IBM DB2. IBM DB2 databases are supported only with Teamcenter servers running on Microsoft Windows, IBM AIX, or SUSE Linux platforms. Microsoft WindowsMake sure the C:\Temp directory exists, and grant full access permissionsto this directory for all users.1. Teamcenter client communication system (TCCS) is installed with the rich client. This column refers to the stand-alone TCCS application.2. Microsoft Windows desktop platforms include Windows XP and Windows 7.3. Microsoft Windows server platforms include Windows Server 2022年.4. Itanium platforms only. PA-RISC hardware is not supported.5. Only 64-bit Red Hat Linux is supported.Teamcenter10.1安装手册Getting started with Teamcenter client installationOn Windows Server and Windows 7, disable Windows User Account Control(UAC) before you install Teamcenter. This option is available in theControl Panel→User Accounts dialog box.Windows UAC can interfere with Teamcenter installation programs. Siemens PLM Software recommends turning off UAC for administrative users only.For more information, see Microsoft Windows documentation.Disable the Windows TCP scaling feature. Open a command prompt andenter the following command:netsh interface tcp set global autotuninglevel=disabledSiemens PLM Software recommends setting this parameter before installing Teamcenter because most client network infrastructures use one or more switches or routers. By default, Windows enables TCP window scaling, but some routers do not support this feature. This can cause installation failures that are difficult to diagnose and correct.For more information, see Microsoft Windows documentation.Teamcenter applications are provided in 32-bit and 64-bit versions. Use theappropriate Teamcenter software distribution image for your platform. If you use a nonnative language operating system version of Windows, youmust install and enable the Multilingual User Interface (MUI) pack to ensure the language font is displayed properly.1. Download and install the MUI pack for Windows from Microsoft.2. Open the Regional and Language Options dialog box in the WindowsControl Panel. 3. In the Languages tab, set the required language for the menus anddialogs. 4. In the Advanced tab and the Regional Options tab, set the requiredlanguage.System hardwareMake sure your Teamcenter host has the required amount of disk space available. Required hard disk space for Teamcenter configurations shows the required disk space for the following common Teamcenter configurations: Corporate serverThe corporate server contains the features included in the Corporate Server solution in Teamcenter Environment Manager (TEM). Additional features may require additional disk space.For more information, see the appropriate server installation guide (for Windows or UNIX/Linux). Two-tier rich clientTeamcenter10.1安装手册Chapter 1 Getting started with Teamcenter client installationThe two-tier rich client contains the features included in the Rich Client 2-tier solution in Teamcenter Environment Manager (TEM).Additional features may require additional disk space.For more information, see Install a two-tier rich client.Web tierThe Web tier includes the Web Application Manager, a distribution server, and a distribution server instance that contains the Over-the-Web installer and Rich Client 4-tier solutions. Additional solutions may require additional disk space. For more information, see the appropriate server installation guide (for Windows or UNIX/Linux).Required hard disk space for Teamcenter configurationsPlatformHewlett-Packard HP-UX6 IBM AIX SUSE Linux Red Hat Linux Sun Solaris Microsoft WindowsCorporate server 3.0 GB 2.0 GB 2.0 GB 2.0 GB 2.5 GB 1.5 GBTwo-tier rich client Not supported Not supported 300 MB 300 MB Not supported 450 MBWeb tier 3 GB 3 GB 3 GB 3 GB 3 GB 4.5 GBWeb browserThe Teamcenter thin client and Over-the-Web Installer7 require a Web browser. Teamcenter 10.1 supports the following Web browsers: Windows systems: Microsoft Internet Explorer and Mozilla Firefox Linux systems: Mozilla Firefox Macintosh systems: Apple Safari For information about versions supported, see the Siemens PLMSoftware Certification Database.Java Runtime EnvironmentTeamcenter Environment Manager (TEM) requires a supported Java Runtime Environment (JRE). You must download and install the required JRE before you install Teamcenter.For information about required versions of the JRE for Teamcenter, see the Siemens PLM Software certification database:6. Itanium platforms only. PA-RISC hardware is not supported.7. The Over-the-Web Installer installs the four-tier Teamcenter rich client and Teamcenter Microsoft Office interfaces.Teamcenter10.1安装手册Getting started with Teamcenter client installation/ certification/teamcenter.shtmlTEM verifies the required version of Java is available on the host. If the required version is not present, TEM does not launch.Before you launch TEM to install Teamcenter, specify the location of the JRE by one of the following methods:Set the appropriate environment variable on your host:o32-bit JavaSet the JRE_HOME environment variable to the location of the 32-bit Java JRE. o64-bit JavaSet the JRE64_HOME environment variable to the location of the 64-bit Java JRE.NoteYou must use the appropriate Teamcenter software distribution image (32-bit or 64-bit) for the JRE you use.Use the -jre argument to specify the JRE location when you launch TEM from acommand prompt:tem ―jre JRE-pathFor example:tem Cjre c:\apps\jre1.7TEM stores the JRE location during Teamcenter installation. After installation is complete, TEM no longer requires the JRE_HOME orJRE64_HOME environment variable or the -jre argument.Software integrationsIf you use Teamcenter 10.1 integrations to other Siemens PLM Software products or third-party software, install those products before you install Teamcenter 10.1. Some Siemens PLM Software products require separate licenses from your Siemens PLM Software representative. Siemens PLM Software products are licensed using the Siemens PLM Software Common Licensing Server.For more information about the Common Licensing Server, see the appropriate server installation guide (for Windows or UNIX/Linux).If you use any of the following integrations with the rich client, make sure you install these applications in locations specified by the Teamcenter administrator. Teamcenter Integration for NX or NX Integration Obtain the NX software distribution image and install a supported version of NX on your workstation. You must install the optional Teamcenter Integration for NX executables.For installation information, see the installation guide distributed with NX. Lifecycle VisualizationTeamcenter10.1安装手册Chapter 1 Getting started with Teamcenter client installationObtain the Lifecycle Visualization software distribution image and install a supported version of Lifecycle Visualization on your workstation.For installation information, see the installation guide distributed with Lifecycle Visualization.SCM Integration C ClearCaseObtain the IBM Rational ClearCase client distribution image and install a supported version on your workstation.NoteTeamcenter Microsoft Office interfaces require additional software. For more information, see Installing Microsoft Office interfaces.Preparing to install TeamcenterTo enable Teamcenter Environment Manager (TEM), make sure you complete the following:Locate the Teamcenter software and documentation distribution images andmake sure they are accessible to your host. Specify the path to the required Java Runtime Environment (JRE) by settingthe appropriate environment variable on your host:o32-bit JavaSet the JRE_HOME environment variable to the location of the 32-bit Java JRE.o 64-bit JavaSet the JRE64_HOME environment variable to the location of the 64-bit Java JRE.NoteYou must use the appropriate Teamcenter software distribution image (32-bit or 64-bit) for the JRE you use.Alternatively, you can specify the JRE path from the command line using the -jre argument when you launch TEM:tem ―jre JRE-pathFor example:tem Cjre c:\apps\jre1.7For information about required versions of the JRE for Teamcenter, see the Siemens PLM Software certification database:/ certification/teamcenter.shtmlTeamcenter10.1安装手册Getting started with Teamcenter client installationConfiguring Teamcenter installationIf your Teamcenter administrator configured the rich client to include Teamcenter lifecycle visualization, ensure you have administrator privileges on your workstation.Starting Teamcenter installationTo begin installing Teamcenter installation, launch the appropriate Teamcenter installation tool:Teamcenter Environment ManagerTo install a Teamcenter rich client, launch Teamcenter Environment Manager using the tem.bat command from the Teamcenter software distribution image. Over-the-Web InstallerTo install a Teamcenter four-tier rich client, open the URL to theOver-the-Web Installer provided by your Teamcenter administrator.Teamcenter Environment Manager interfaceTeamcenter Environment Manager is a tool that installs Teamcenter two-tier and four-tier rich clients.Teamcenter Environment ManagerTeamcenter10.1安装手册Chapter 1 Getting started with Teamcenter client installationTeamcenter Environment Manager also performs maintenance operations, such as upgrading servers, applying maintenance packs, and installing patches. You launch Teamcenter Environment Manager using the tem.bat command.Basic concepts about Teamcenter installationTeamcenter clientsTeamcenter provides clients suited to various uses and network configurations. These clients include the rich client, the thin client, and specialized clients such as Teamcenter Client for Microsoft Office and Teamcenter Extensions for Microsoft Office. Rich clientThe rich client is a platform-independent client implementation (Java application) for users who interact with Teamcenter frequently. It is extendable and able to run both Teamcenter and customer-written applications. Customers can also extend the standard user interface.The rich client application is deployed on each user workstation using Teamcenter Environment Manager or the Over-the-Web Installer, depending on which Teamcenter network architecture you use. The rich client is supported in both architectural models described in Two-tier architecture and Four-tier architecture. Thin clientThe thin client provides access to Teamcenter through a standard commercial Web browser, such as Microsoft Internet Explorer or Mozilla Firefox. The user interface provides a streamlined browser-based view of product information stored in a Teamcenter database.The thin client is supported only in the four-tier architectural model described in Four-tier architecture.Teamcenter network architecturesTeamcenter provides two architecture models for deployment: two-tier and four-tier. Two-tier architectureThe two-tier architectural model comprises the following tiers: Client tierThe client tier comprises the Teamcenter rich clients.In a deployment of the two-tier architecture, the Teamcenter server runs on the client workstation.Teamcenter10.1安装手册Getting started with Teamcenter client installationNoteThe two-tier rich client is installed only through TEM. Over-the-Web installation is supported only for the four-tier rich client.Some Teamcenter client features, such as Teamcenter Integration for NX, Lifecycle Visualization, and Teamcenter Client for Microsoft Office, require the Web tier, a component of the four-tier architecture. To enablethese features for a two-tier rich client, you can connect the two-tier rich client to a deployment of the Web tier. For information about functionality you can add to a rich client and which add-ons require the Web tier, see the appropriate server installation guide (for Windows or UNIX/Linux).Resource tierThe resource tier comprises a database server, database, volumes, and file servers.Two-tier architectureIn the two-tier model, you deploy the Teamcenter rich client, which includes the local server, and the optional applications that integrate with the rich client on the client workstation. Typically, the database server, volumes, and file servers are installed on one or more separate hosts.Teamcenter File Management System (FMS) manages the rich client access to volumes:The FMS server cache (FSC) process run on the server hosting the volume.The FMS client cache (FCC) process runs on the rich client host.For more information about FMS and two-tier rich client architecture, see the appropriate Teamcenter server installation guide (for Windows or UNIX/Linux). Four-tier architectureThe four-tier architecture model comprises the following tiers:Teamcenter10.1安装手册Chapter 1 Getting started with Teamcenter client installationClient tierThe client tier comprises the Teamcenter rich client, thin client, and other clients such as Teamcenter Client for Microsoft Office.NoteThe rich client can be deployed with additional functionality, such as Lifecycle Visualization, Teamcenter Client for Microsoft Office, and Teamcenter Integration for NX or NX Integration 4.0.1. (Teamcenter Integration for NX/NX Integration 3 is not supported.)J2EE Web tierThe J2EE Web tier is a Java application that runs in a Java 2 Enterprise Edition (J2EE) application server, such as Oracle WebLogic, and is responsible forcommunication between the client tier and enterprise tier. For information about supported application servers, see the Siemens PLM Software Certification Database:/ certification/teamcenter.shtmlEnterprise tierThe enterprise tier comprises a configurable pool of Teamcenter C++ server processes and a server manager. The enterprise tier retrieves data from and stores data in the database.A server manager manages a pool of Teamcenter server processes.You must install a server manager whenever you deploy the Web tier.NoteTeamcenter provides server managers based on the J2EE and the Microsoft .NET platforms. Install the appropriate server manager for the Web tier you use.Resource tierThe resource tier comprises a database server, database, volumes, and file servers.Teamcenter10.1安装手册Getting started with Teamcenter client installationFour-tier architectureYou can design deployments that host the Web tier, resource tier, and enterprisetiers on the same computer or on separate computers: Smaller sites can run the pool of servers and the server manager on the samehost as the Web tier.Larger sites can distribute the pool of server processes across multiple hostsand optionally include an HTTP server to serve static files or multiple HTTPservers to support load balancing.For a multihost configuration, the server pool consists of multiple subpools, oneor more for each host. Each subpool is managed by one server manager process. The Web tier balances the load across the serverpools.Teamcenter10.1安装手册Chapter 1 Getting started with Teamcenter client installationThe Teamcenter J2EE based server manager and Web tier application both employ the JBoss cache, a tree-structured cache, to provide replication and transaction context. You must configure the JBoss cache (called TreeCache in Teamcenter) in both the J2EE based server manager and the Web tier application.8To ensure communication between the Web tier and the server manager, you must coordinate the values you specify for each component. For some values, you must provide the identical value when configuring the Web tier application.For more information about four-tier rich client architecture, see the appropriate Teamcenter server installation manual (for Windows orUNIX/Linux). A minimum of one server manager for each Web tier deployment.A separate TreeCache cluster for each environment.To configure a separate TreeCache cluster, Siemens PLM Software recommends configuring a different port (multicast) or set of ports (TCP) for each cluster.File Management System (FMS)File Management System (FMS) is a file storage, caching, distribution,。
Teamcenter10.1系统基础操作资料
Teamcenter10.1系统基础操作资料1系统基础概念及我的Teamcenter1.1系统常用术语介绍1.零组件(Item):管理Teamcenter信息的基本对象,代表产品、部件或零件的结构化表达,也包含其他数据对象,表示真实世界中的一个产品、部件或零件对象,也表示一个种类的集合等;2.零组件版本(Item Revision):管理Teamcenter信息的基本对象,每个产品对象(Item)都有至少一个版本(Item Revision)。
在Teamcenter中,系统利用版本来记录产品对象的历史演变(更改情况),并通过版本的追踪来保证用户取用的数据是最新有效的。
每当产品归档,即生成一个新版本。
没有归档以前的图纸修改不作为一个版本。
或者说,新版本的产生一定伴随有工程更改的发生;3.表单(Form):存储Item、Item Revision等对象属性信息数据的地方;4.BOM:(Bill of Material)产品结构管理关系的信息对象;5.数据集(Dataset):管理其他软件应用程序创建的数据文件的数据对象,例如:Word、Excel、PDF、RAR文件;6.文件夹(Folder):用来组织产品信息的数据对象,类似Windows里的文件夹;7.伪文件夹:系统内对象与对象之间关系的虚拟表现形式(不是文件夹,实际上是一种关系的文件夹表达方式);8.时间表(Schedule):时间表,用来管理项目计划;9.更改(ECN等):用来管理产品变更记录;Item Revision零组件版本BOM1.2Teamcenter用户界面1.2.1启动Teamcenter在桌面左键双击或者右键打开以下图标,进入登录界面,输入用户ID、密码,点击登录,进入到TC工作界面1.2.2应用程序管理器登录之后,在TC窗口的左下为应用程序快捷显示栏,通过点击下图红色方框,来编辑显示的应用程序快捷方式;(针对操作用户对“我的Teamcenter、结构管理器PSE、工作流查看器、更改管理器”比较常用)1.2.3启动应用程序的两种方式备注:针对VIEW、ECN对象,双击即可进入具体的应用程序中。
Teamcenter10.1系统基础操作资料教学资料
T e a m c e n t e r10.1系统基础操作资料Teamcenter10.1系统基础操作资料1系统基础概念及我的Teamcenter1.1系统常用术语介绍1.零组件(Item):管理Teamcenter信息的基本对象,代表产品、部件或零件的结构化表达,也包含其他数据对象,表示真实世界中的一个产品、部件或零件对象,也表示一个种类的集合等;2.零组件版本(Item Revision):管理Teamcenter信息的基本对象,每个产品对象(Item)都有至少一个版本(Item Revision)。
在Teamcenter中,系统利用版本来记录产品对象的历史演变(更改情况),并通过版本的追踪来保证用户取用的数据是最新有效的。
每当产品归档,即生成一个新版本。
没有归档以前的图纸修改不作为一个版本。
或者说,新版本的产生一定伴随有工程更改的发生;3.表单(Form):存储Item、Item Revision等对象属性信息数据的地方;4.BOM:(Bill of Material)产品结构管理关系的信息对象;5.数据集(Dataset):管理其他软件应用程序创建的数据文件的数据对象,例如:Word、Excel、PDF、RAR文件;6.文件夹(Folder):用来组织产品信息的数据对象,类似Windows里的文件夹;7.伪文件夹:系统内对象与对象之间关系的虚拟表现形式(不是文件夹,实际上是一种关系的文件夹表达方式);8.时间表(Schedule):时间表,用来管理项目计划;9.更改(ECN等):用来管理产品变更记录;10.删除:系统中没有回收站,对象删除掉后,不能恢复;11.剪切:剪切的对象还在系统中,但不显示在当前的界面,可用查询工具找到;Item 零组件Item Revision零组件版BOMDataset数据集ItemRevisionMasterForm1.2Teamcenter用户界面1.2.1启动Teamcenter在桌面左键双击或者右键打开以下图标,进入登录界面,输入用户ID、密码,点击登录,进入到TC工作界面1.2.2应用程序管理器登录之后,在TC窗口的左下为应用程序快捷显示栏,通过点击下图红色方框,来编辑显示的应用程序快捷方式;(针对操作用户对“我的Teamcenter、结构管理器PSE、工作流查看器、更改管理器”比较常用)1.2.3启动应用程序的两种方式备注:针对VIEW、ECN对象,双击即可进入具体的应用程序中。
EDA2.0应用程序与Teamcenter10 集成安装文档——【Team Center 精品培训资料】
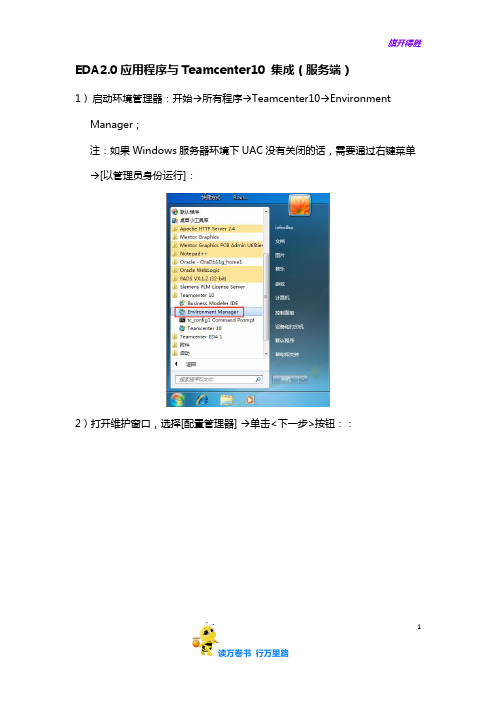
EDA2.0应用程序与Teamcenter10 集成(服务端)
1)启动环境管理器:开始→所有程序→Teamcenter10→Environment Manager;
注:如果Windows服务器环境下UAC没有关闭的话,需要通过右键菜单→[以管理员身份运行]:
2)打开维护窗口,选择[配置管理器] →单击<下一步>按钮::
1
3)选择[维护现有配置] 单击<下一步>按钮:
1
4)选择要执行功能部件维护的现有配置→单击<下一步>按钮:
5)选择[添加/移除功能部件]→单击<下一步>按钮:
1
6)“扩展”→“机械电子过程管理”→勾选[EDA Server Support]和[EMPS - Foundation] →单击<下一步>按钮:
1
会跳出一个“功能部件”窗口,单击<OK>按钮即可:
1。
TECNOMATIX10安装过程
Tecnomatix10.1安装(未集成)1安装环境Windows2008(administrator\默认值为空),64位,oracle 11g(system\manager),64位,teamcenter 8.3.3(infodba\infodba),记住密码和账户,安装和使用过程中要用到。
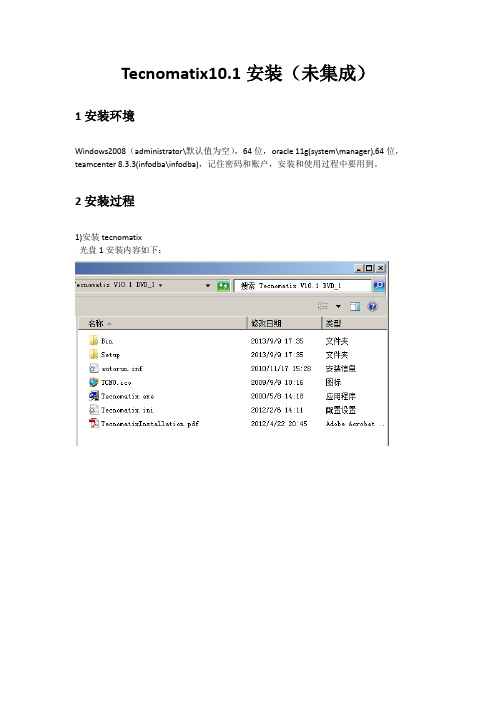
2安装过程1)安装tecnomatix光盘1安装内容如下:光盘2安装(本次测试只安装CAD转化,安装后重启才能运用其转化功能)2)建立实例。
从https:///下载四个文件,放入任意文件夹【如下图】,打开文件runinstall_10.2.0.3_example.txt,根据其路径结构结合本机编辑。
本次测试安装目录为:<ORACLE_BASE> - d:\plmapp\oracle<ORACLE_HOME > - d:\plmapp\oracle\product\11.2.0\dbhome_1<ORACLE_SID> -tecno<PORT> - 默认为1521<*.pl_PATH>- D:\10.2.0.3\如下:在ORACLE目录搜索perl.exe,在该目录的dos环境运行perl脚本,如下:perl -l D:\10.2.0.3\build_files.pl d:\plmapp\oracle d:\plmapp\oracle\product\11.2.0\dbhome_1 tecno vmplmroom 1521生成日志文件build_files.logperl -l D:\10.2.0.3\build_db.pl d:\plmapp\oracle d:\plmapp\oracle\product\11.2.0\dbhome_1 tecno此过程较长,需等待约20分钟perl -l D:\10.2.0.3\build_db.pl d:\plmapp\oracle d:\plmapp\oracle\product\11.2.0\dbhome_1 tecno生成实例TECNO,测试tecno服务,更改为system\manager登陆,再进行测试测试OK安装过程中如有重启电脑,需再次测试服务监听初始化数据库tecno,并赋予角色和权限。
Teamcenter Vis可视化安装及集成——【Team Center 精品培训资料】
1
Teamcenter Vis可视化安装
1、找到路径如Z:\E\Teamcenter.10.1\Tc10.1.0_Vis_ALL\TcVis_101_20130521_win64下的 Teamcenter Vis安装文件,双击执行
2
Teamcenter Vis可视化安装
10
Teamcenter Vis集成
3、默认,单机下一步,添加/移除功能部件,单机下一步
11
Teamcenter Vis集成
4、在扩展选项中找到Lifecycle Visualization,并展开,将两个子选项勾上,单击下一步
12
Teamcenter Vis集成
5、选择默认,单击下一步
13
Teamcenter Vis集成
6、许可证级别选择Mockup,单击下一步
14
Teamcenter Vis集成
7、确认路径,单击下一步
15
Teamcenter Vis集成
8、单击开始,开始安装
16
Teamcenter Vis集成
9、集成安装结束,单击关闭
17
10、登录TC
Teamcenter Vis集成
18
6、开始安装,等待直至完成
7
Teamcenter Vis可视化安装
7、运行Teamcenter Vis Mockup,打开程序
8
Teamcenter Vis集成
1、在开始菜单栏中打开Environment Manager
9
Teamcenter Vis集成
2、配置管理器,单击下一步,维护现有配置,单机下一步
2、点击下一步
3
Teamcenter Vis可视化安装
- 1、下载文档前请自行甄别文档内容的完整性,平台不提供额外的编辑、内容补充、找答案等附加服务。
- 2、"仅部分预览"的文档,不可在线预览部分如存在完整性等问题,可反馈申请退款(可完整预览的文档不适用该条件!)。
- 3、如文档侵犯您的权益,请联系客服反馈,我们会尽快为您处理(人工客服工作时间:9:00-18:30)。
Teamcenter 10 Windows 平台安装详细教程
1安装开始
此文档简单的描述了如何在windows server 平台上安装Teamcenter 10.1,包括使用teamcenter的安装环境TEM(Teamcenter Environment Manager)安装服务器端特征和使用TAM Teamcenter Application Manager 安装web 层。
注意事项:
1)确保C:\Temp文件夹存在且对所有用户都有权限;
2)关闭UAC→通过控制面板,关闭UAC设置;
3)关闭TCP scaling→通过cmd 命令,输入:netsh interface tcp set global
autotuninglevel=disabled;
4)如果使用其他语言,请确保语言包正确安装;
数据库安装
Teamcenter使用RDBMS 关系数据库存储数据,因此在安装之前,请确保安装了正确的数据库(IBM DB2,oracle 或者SQL)。
(本教程使用oracle数据库,sql数据库请参考论坛教程:/forum.php )
Web层配置
1)Windows 平台上使用浏览器IE 或者FireFox
2)使用Java 网络层需要安装J2EE
3)使用.Net网络层需要安装IIS和.Net 框架
具体的安装版本请参考这里:
/certifi cation/teamcenter .shtml
安装工具:
Teamcenter使用TEM (Teamcenter Environment manager)和WAM(Web Application Mnager)进行安装。
TEM用来安装2-tier 或者4-tier的胖客户端。
使用tem.bat文件启动安装界面
WAM用来安装web层,使用insweb启动安装界面。
注意:.net web层依然使用TEM进行安装。
基本的安装过程
1)安装DataBase
2)安装Teamcenter服务器
3)安装Teamcenter Web层
4)安装Teamcenter客户端层
安装之前请确保java软件的正确安装,下载最新的java安装包,版本高于1.7.0_17,如果是64位,请指定jre64_home环境变量!
2Oracle 数据库的安装
1)Oracle数据库安装
下载支持版本的oracle数据库,这里使用最新版本11g
以下为安装步骤截图:
a)双击Setup.exe 文件,如果不想收到邮件的话,可以去掉这个选择。
b)选择只安装数据库事例 选择单一的数据库事例
c)选择语言
d)选择版本,Teamcenter支持企业版本和标准版本,此处选择企业版本
e)选择安装的路径,默认即可
f)点击完成,等待安装结束
2)配置Oracle服务
a)从开始程序,找到Net Manager,创建一个监听文件
b)在Listeners下面选择新建
c)点击添加地址,并指定端口号1521
d)选择profile,name选择General
e)在Advance下设置TNS time out value的大小,Siemens建议此处设置一个大于0的数
值,这里设置为10分钟。
f)通过文件,保存即可完成配置,
g)完成配置后,会在C:\app\Administrator\product\11.2.0\dbhome_1\NETWORK\ADMIN文
件下面生成listener.ora和sqlnet.ora文件.
通过命令启动监听
cd C:\app\Administrator\product\11.2.0\dbhome_1\BIN
lsnrctl start LISTENER
3)配置Teamcenter的oracle事例
Copy teamcenter安装目录C:\sw\Tc10.1\tc\db_scripts\oracle
下oracle模版文件到oracle的模版目录下
C:\app\Administrator\product\11.2.0\dbhome_1\assistants\dbca\templates
点击Database Configuration Assistance 来创建数据库事例,或者直接在cmd窗口中输入DBCA。
选择对应的oracle版本
此处可更改
默认下一步,选择所有的帐号统一密码
默认下一步三次
如果是中文的话可以在这里设置字体
点击完成,漫长的等待,oracle会通过teamcenter提供的模版语句进行teamcenter的表和
数据创建。
如果没有任何错误,oracle数据库安装ok!!
3Teamcenter server 安装
1)安装License Server
打开license文件,更改yourhostname到计算机名。
打开
Uglicense安装文件,安装license server。
C:\sw\Tc10.1\additional_applicationsSPLMLicenseServer_v5.5.1_win64_setup.exe
确保license server 启动ok!
2)安装NX
西门子推荐先安装NX软件,再安装teamcenter,NX9的具体安装方法可以参考兄弟空间站
视频教程:
解压安装包文件,点击Launch.exe
不需要安装license server,直接安装NX 软件。
安装完后,可以通过升级补丁进行升级。
注意:
不要路径有空格或者特殊字符。
3)Teamcenter server 安装
以管理员的方式打开tem.bat 文件,选择安装语言。
选择安装模块,此处至少选择coporate server。
其他的可以后续添加,没有关系的。
此处填写数据库的帐号和密码。
注意tcdata的路径实际为oracle安装SID路径
下面全点击下一步,在NX集成的地方选择NX 安装的路径。
安装完成!!
登录测试。
关于web tier的安装请关注后续教程。
或者关注PLMHome的安装教程
/forum-TeamcenterInstall-1.html。
