根文件系统制作
根文件系统制作记录

根文件系统制作记录一、所用工具Busybox-1.16.1arm-linux-gcc-4.3.2二、制作过程1.编译/安装Busybox1.1下载Busybox及其补丁从/ 下载busybox-1.16.1.tar.bz2及该版本的所有补丁。
补丁文件复制到/work/create_rootfs/busybox-1.16.1-patch目录下。
使用如下命令将busybox-1.16.1.tar.bz2解压到busybox-1.16.1目录$ tar xjf busybox-1.16.1.tar.bz21.2给Busybox打上补丁可以手工逐一给Busybox打补丁,也可以编写脚本自动帮我们完成打补丁的工作,这里采用后面一种方法。
$ gedit /work/create_rootfs/patch.sh$ cd /work/create_rootfs$ sudo chmod +x ./patch.sh$ ./patch.sh若最后输出“Patching all file is finish!”则表示所有补丁都正确的打上了。
1.3配置Busybox若忘记设定交叉编译器和目标板体系结构,则可能在内核启动末期出现下面的错误:在Busybox目录下执行如下命令进入配置界面:$ make menuconfig请使用以下的配置(红色部分表示与Busybox默认配置不同而需要修改的,其他的则需确认):(1)Busybox Settings--->General Configuration--->[*] Show verbose applet usage messages[*] Store applet usage messages in compressed form[*] Support –install [-s] to install applet links at runtime[*] Enable locale support(system needs locale for this to work)[*] Support for –long-options[*] Use the devpts filesystem for unix98 PTYs[*] Support writing pidfiles[*] Runtime SUID/SGID configuration via /etc/busybox.config[*] Suppress warning message if /etc/busybox.conf is not readableBuild Options--->[*] Build BusyBox as a static binary(no shared libs)[*] Build with Large File Support(for accessing files>2GB)Installation Options->[]Don’t use /usrApplets links (as soft-links) --->(./_install) BusyBox installation prefixBusybox Library Tuning --->(6)Minimum password legth(2)MD5:Trade Bytes for Speed[*]Fsater /proc scanning code(+100bytes)[*]Command line editing(1024)Maximum length of input[*] vi-style line editing commands(15) History size[*] History saving[*] Tab completion[*]Fancy shell prompts(4) Copy buffer size ,in kilobytes[*]Use ioctl names rather than hex values in error messages[*]Support infiniband HW(2)Linux Module Utilities--->(/lib/modules)Default directory containing modules(modules.dep)Default name of modules.dep增加对mdev的支持:(3)Linux System Utilities --->[*]Support /etc/mdev.conf[*]Support command execution at device addition/removal1.4安装Busybox将Busybox安装到/work/create_rootfs/rootfs目录下,Busybox将在该目录下创建如下几个文件和目录:2.构建根文件系统2.1创建根文件系统下必要的目录为了创建根文件系统下的其他目录与文件,我们可以采用手工敲命令创建的方式,也可以编写脚本自动完成,这里采用后一种方式。
linux各种根文件系统制作
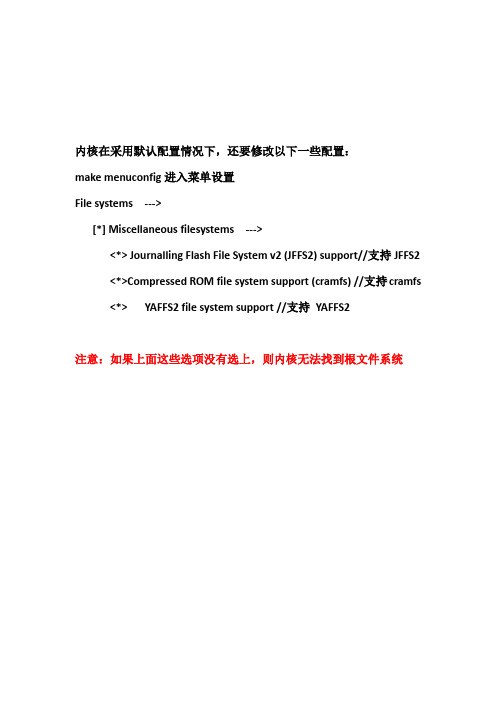
内核在采用默认配置情况下,还要修改以下一些配置:make menuconfig进入菜单设置File systems --->[*] Miscellaneous filesystems ---><*> Journalling Flash File System v2 (JFFS2) support//支持JFFS2<*>Compressed ROM file system support (cramfs) //支持cramfs<*> YAFFS2 file system support //支持YAFFS2注意:如果上面这些选项没有选上,则内核无法找到根文件系统1、制作cramfs映像:压缩rootfs根文件系统生成cramfs./mkcramfs rootfs rootfs.cramfsrootfs.cramfs就是我们要烧写到目标板的映像文件2、在uboot下如下操作,将镜像rootfs.cramfs写入nandflash tftp 30008000 rootfs.cramfsnand erase 560000 40000000nand write 30008000 560000 31d000setenv bootargs 'noinitrd root=/dev/mtdblock3 console=ttySAC0,115200 init=/linuxrc mem=64M'saveenv3、进入文件系统后的运行界面创建一个文件:vi txt输入任意内容:asdasdasd保存:wq你会发现cramfs文件系统是只读的,无法保存提示:"txt" Read-only file system目录也无法创建的:[root@mini2440]#mkdir qqmkdir: cannot create directory 'qq': Read-only file system压缩rootfs根文件系统生成jffs2./mkfs.jffs2 -r rootfs -o rootfsmini.jffs2 -e 0x20000 --pad=0x800000 -nrootfsmini.jffs2就是我们要烧写到目标板的映像文件注意:(1)-r :指定要做成image的目录名。
根文件系统制作
根文件系统实验一、实验目标用busybox定制一个很小的文件系统,并且运行用户编译的hello(动态链接)。
二、软件包busybox:/downloads/busybox-1.10.3.tar.bz2bash:ftp:///gnu/bash/bash-3.2.tar.gz三、实验步骤3.1、建立工作目录设定工作目录为/root/build_rootfs/,该目录主要用来编译busybox,bash等制造根文件系统的软件,下载busybox,bash到该目录;mkdir/root/build_rootfs3.2、建立根目录该目录就是我们要移植到目标板上的目录,对于嵌入式的文件系统,根目录下必要的目录包括bin,dev,etc,usr,lib,sbin,proc,sys,tmp;这里设定根目录是/root/rootfs;busybox、bash编译之后,安装到该目录下;mkdir/root/rootfsmkdir/root/rootfs/{bin,dev,etc,usr,lib,sbin,proc,sys,tmp}mkdir/root/rootfs/usr/{bin,sbin,lib}创建节点以root用户执行,创建节点mknod dev/console c51mknod dev/null c133.3、拷贝动态链接库交叉应用程序的开发需要用到交叉编译的链接库,交叉编译的链接库是在交叉工具链的lib目录下;我们在移植应用程序到我们的目标板的时候,需要把交叉编译的链接库也一起移植到目标板上,这里我们用到的交叉工具链的路径是/usr/local/arm/3.4.4/,所以链接库的目录是/usr/local/arm/3.4.4/sysroot/lib。
#进入链接库目录cd/usr/local/arm/3.4.4/sysroot/lib#编写一个shell文件,用于copy实际的共享链接库;主修订版本的符合链接;动态连接器及其符号链接到目标板根目录下的lib(/root/rootfs/lib)。
根文件系统制作,NFS挂接
2.根文件系统结构:
bin : 存放普通命令,所有用户共享的命令
sbin: 存放系统相关命令,只管管理员用户才能使用的命令
lib : 动态、静态库文件(一般是命令要使用到的库)
proc: proc文件系统的挂接点
tmp : tmp文件系统的挂接点,以及临时文件存放
dev : 设备文件(不是普通文件)
│ Define your directory to install BusyBox files/subdirs in. │
│ │
│ Defined at Config.in:338 │
│ Depends on: !FEATURE_PREFER_APPLETS && !PIE && !STATIC │
│ Prompt: Fancy shell prompts │
│ Defined at libbb/Config.in:97 │
│ Defined at Config.in:595 │
│ Location: │
│ │
│ insmod is used to load specified modules in the running kernel. │
│ │
│ Symbol: FEATURE_USERNAME_COMPLETION [=y] │
│ -> Busybox Settings │
│ -> Busybox Library Tuning │
│ -> Command line editing (FEATURE_EDITING [=y])
模块相关命令:
CONFIG_INSMOD: │
制作根文件系统

– Linux和UNIX的文件系统是一个以“/ “为根的阶层式的树状文件结构,/ 因此 被称为根目录。
– 在早期的UNIX系统中,各个厂家各自定义了自己的UNIX系统的文件系统构成, 比较混乱。为了避免在Linux也产生同样的问题,在Linux面世不久,就开始了 对Linux文件系统进行标准化的活动。 – FHS标准定义了如下的内容。 1. 文件系统中每个区域的用途 2. 所需要的最小构成的文件和目录
根文件系统
• 配置基本的linux命令(嵌入式linux通过busybox制作)
– cat, chmod, chown, cp, chroot, copi, date, dd, df, dmesg, dos2unix, du, echo, env, expr, find, grep, gunzip, gzip, halt, id, ifconfig, init, insmod等等
crw-------- 1 root root 13, 32 Feb 23 2004 /dev/input/mouse0
crw-rw-rw 1 root root 1,
•
典型设备
keyboards, mice, parallel port, IrDA, Bluetooth port, consoles, terminals, sound, video...
•
– 提高软件的可移植性
•
根文件系统 /bin
/dev /etc /lib /mnt /opt /proc /sbin /tmp
目录
内容
可执行程序 块、字符设备节点文件 主要配置文件和初始化执行文件 基本的库文件, 茹:C 库,和内核模块(modules) 挂载点,临时挂载文件系统用 附加的软件包 虚拟文件系统,用于内核和进程通讯 基本的系统管理程序 临时文件目录
根文件系统的制作
busybox-1.7.3制作根文件系统arm-linux-gcc3.4.1 参考文章1. linux-2.6.24.4内核移植到s3c2440----使用busybox-1.9.2制作根文件系统/yang_dk/archive/2008/05/09/2422898.aspx2. 用Busybox创建文件系统/u2/74383/showart_1135014.html1.[root@localhost busybox]#ttar -xjvf busybox-1.7.3.tar.bz22.[root@localhost busybox]#cd busybox-1.7.3修改Makefile中的174行的arch和编译工具链头。
ARCH ?= armCROSS_COMPILE ?= /usr/local/arm/3.4.1/bin/arm-linux-3.[root@localhost busybox-1.7.3]#make menuconfigBusybox Setting----->build option-->[ ] Build BusyBox as a static binary (no shared libs)[*] Build shared libbusybox[*] Produce a binary for each applet, linked against libbusybox [*] Produce additional busybox binary linked against libbusybox [ ] Build with Large File Support (for accessing files > 2 GB)installation option-->[*] Don't use /usrApplets links (as soft-links) --->(./_install) BusyBox installation prefixBusybox Library Tuning --->MD5: Trade Bytes for Speed[*] Faster /proc scanning code (+100 bytes)[*] Support for /etc/networks[*] Support for /etc/networks[*] Additional editing keys[*] vi-style line editing commands[*] History saving[*] Tab completion[*] Username completion[*] Fancy shell promptsLinux Module Utilities --->[*] insmod[*] Enable load map (-m) option[*] Symbols in load map[*] rmmod[*] lsmod[*] lsmod pretty output for 2.6.x Linux kernels[*] modprobe[ ] Multiple options parsing[ ] Fancy alias parsing--- Options common to multiple modutils[ ] Support tainted module checking with new kernels [ ] Support version 2.2.x to 2.4.x Linux kernels[*] Support version 2.6.x Linux kernels其他的用默认值若出现错误1.libbb/time.c:20: error: "CLOCK_MONOTONIC" undeclared (first use in this function)[root@localhost busybox-1.7.3]#make menuconfig去掉Busybox Settings---->Busybox Library Tuning--->[]Use clock_gettie(CLOCK_MONOTONIC) syscall2.miscutils/taskset.c:17: error: parse error before '*' tokenmiscutils/taskset.c:18: warning: function declaration isn't a prototypemiscutils/taskset.c: In function `__from_cpuset':miscutils/taskset.c:22: error: `CPU_SETSIZE' undeclared (first use in this function) miscutils/taskset.c:22: error: (Each undeclared identifier is reported only oncemiscutils/taskset.c:22: error: for each function it appears in.)miscutils/taskset.c:26: warning: implicit declaration of function `CPU_ISSET'miscutils/taskset.c:26: error: `mask' undeclared (first use in this function)miscutils/taskset.c: In function `taskset_main':miscutils/taskset.c:47: error: `cpu_set_t' undeclared (first use in this function)miscutils/taskset.c:47: error: parse error before "mask"miscutils/taskset.c:68: warning: implicit declaration of function `CPU_ZERO'miscutils/taskset.c:68: error: `new_mask' undeclared (first use in this function)miscutils/taskset.c:69: error: `CPU_SETSIZE' undeclared (first use in this function)miscutils/taskset.c:71: warning: implicit declaration of function `CPU_SET'miscutils/taskset.c:78: error: `mask' undeclared (first use in this function)make[1]: *** [miscutils/taskset.o] Error 1make: *** [miscutils] Error 2[root@localhost busybox-1.7.3]#make menuconfig去掉Miscellaneous Utilities--->[ ]task set******************************************************************************* ******************如果是静态3.[root@localhost busybox-1.7.3]#make menuconfigBusybox Setting----->build option-->[*] Build BusyBox as a static binary (no shared libs)[ ] Build shared libbusybox[ ] Produce a binary for each applet, linked against libbusybox [ ] Produce additional busybox binary linked against libbusybox [ ] Build with Large File Support (for accessing files > 2 GB)installation option-->[*] Don't use /usrApplets links (as soft-links) --->(./_install) BusyBox installation prefixLinux Module Utilities --->[*] insmod[*] Enable load map (-m) option[*] Symbols in load map[*] rmmod[*] lsmod[*] lsmod pretty output for 2.6.x Linux kernels[*] modprobe[ ] Multiple options parsing[ ] Fancy alias parsing--- Options common to multiple modutils[ ] Support tainted module checking with new kernels[ ] Support version 2.2.x to 2.4.x Linux kernels[*] Support version 2.6.x Linux kernels其他的用默认值若出现错误#if ENABLE_STATIC && defined(__GLIBC__) && !defined(__UCLIBC__) #warning Static linking against glibc produces buggy executables#warning (glibc does not cope well with ld --gc-sections).#warning See /bugzilla/show_bug.cgi?id=3400#warning Note that glibc is unsuitable for static linking anyway.#warning If you still want to do it, remove -Wl,--gc-sections#warning from top-level Makefile and remove this warning.#error Aborting compilation.#endif将applets/applets.c文件的开头的条件编译去掉******************************************************************************* ***************4.[root@localhost busybox-1.7.3]#make install[root@localhost busybox-1.7.3]#chmod 4755 ./_install/bin/busybox-rwsr-xr-x 1 root root 729120 05-12 20:48 busybox5.[root@localhost busybox-1.7.3]cd /root[root@localhost ~]mkdir rootfs6.[root@localhost ~]cd rootfs[root@localhost rootfs]mkdir bin dev etc lib proc sbin sys usr mnt tmp var[root@localhost rootfs]mkdir usr/bin usr/lib usr/sbin lib/modules[root@localhost rootfs]mknod -m 666 dev/console c 5 1[root@localhost rootfs]mknod -m 666 dev/ttyS0 c 4 64 [root@localhost rootfs]mknod -m 666 dev/ttyS1 c 4 65 [root@localhost rootfs]mknod -m 666 dev/null c 1 37.[root@localhost rootfs]cd etc[root@localhost etc]# vim profile#!/bin/sh#/etc/profile:system-wide .profile file for the Bourne shellsechoecho -n "Processing /etc/profile......"# Set search library pathexport LD_LIBRARY_PATH=/lib:/usr/lib# set user pathexport PATH=/bin:/sbin:/usr/bin:/usr/sbin#Set PS1USER = "`id -un`"LOGNAME=$USERPS1='[\u@\h\W]\$'PATH=$PATHecho "Done!"[root@localhost etc]#mkdir init.d[root@localhost etc]#cd init.d[root@localhost init.d]# more init.d/rcS#!/bin/sh# set hostname, needed host file in /etc directory #./etc/hosthostname `cat /etc/host`# mount all filesystem defined in "fstab"echo "#mount all......."/bin/mount -a#/bin/chmod 0666 /dev/nullecho "# starting mdev...."/bin/echo /sbin/mdev > /proc/sys/kernel/hotplugmdev -s/usr/etc/initecho "******************************************" echo " qhmzdxwdxy_jiangwei "echo " kernel linux-2.6.24.4 "echo " 2010-12-15 "echo " "echo "******************************************"[root@localhost etc]# vim fstabproc /proc proc defaults 0 0none /tmp ramfs defaults 0 0none /var ramfs defaults 0 0mdev /dev ramfs defaults 0 0sysfs /sys sysfs defaults 0 0[root@localhost etc]# vim fstab::sysinit:/etc/init.d/rcS::respawn:-/bin/shtty2::askfirst:-/bin/sh::ctrlaltdel:/bin/umount -a -r::shutdown:/bin umount -a -r::shutdown:/sbin/swapoff -a[root@ocalhost etc]# vim mdev.conf内容空8.复制主机/etc/下面的文件passwd, group, shadow文件到/etc9.在rootfs下,将刚才生成的_install下所有文件复制到rootfs/下[root@ocalhost rootfs]#cp -Rfv _install/* ./10.复制lib 文件到rootfs/lib目录下:[root@ocalhost lib]cp /usr/local/arm/3.4.1/arm-linux/lib/ld* .[root@ocalhost lib]cp /usr/local/arm/3.4.1/arm-linux/lib/libc-2.3.2.so . [root@ocalhost lib]cp /usr/local/arm/3.4.1/arm-linux/lib/libc.so.6 . [root@ocalhost lib]cp /usr/local/arm/3.4.1/arm-linux/lib/libm * . [root@ocalhost lib]cp /usr/local/arm/3.4.1/arm-linux/lib/libcrypt*。
linux制作根文件系统的原理
linux制作根文件系统的原理
制作根文件系统是Linux系统中的一个重要过程,它涉及到文
件系统的组织和安装。
根文件系统是Linux系统中的根目录,包含
了操作系统运行所需的所有文件和目录。
制作根文件系统的原理涉
及到以下几个方面:
1. 文件系统类型,Linux支持多种文件系统类型,如ext4、XFS、Btrfs等。
制作根文件系统时,需要选择合适的文件系统类型,根据实际需求和性能要求进行选择。
2. 文件系统组织,根文件系统的组织结构包括了目录结构、配
置文件、库文件、可执行文件等。
在制作根文件系统时,需要将这
些文件按照一定的目录结构组织起来,确保系统能够正常运行。
3. 安装过程,制作根文件系统通常是在一个干净的环境中进行,可以通过chroot命令将当前系统切换到一个新的根目录下,然后在
这个新的根目录下进行文件的安装和配置,以确保新的根文件系统
能够正常运行。
4. 内核模块和驱动程序,根文件系统中还需要包含操作系统所
需的内核模块和驱动程序,以支持硬件设备的正常工作。
在制作根
文件系统时,需要将这些模块和驱动程序一并包含进去。
5. 引导加载程序,根文件系统的制作还需要考虑引导加载程序,以确保系统能够正确引导并加载根文件系统。
这涉及到引导加载程
序的配置和安装。
总的来说,制作根文件系统的原理涉及到文件系统类型的选择、文件系统的组织、安装过程、内核模块和驱动程序的包含以及引导
加载程序的配置等多个方面。
这些都是确保根文件系统能够正常运
行的重要因素。
第6课 根文件系统的制作及完善-20150713
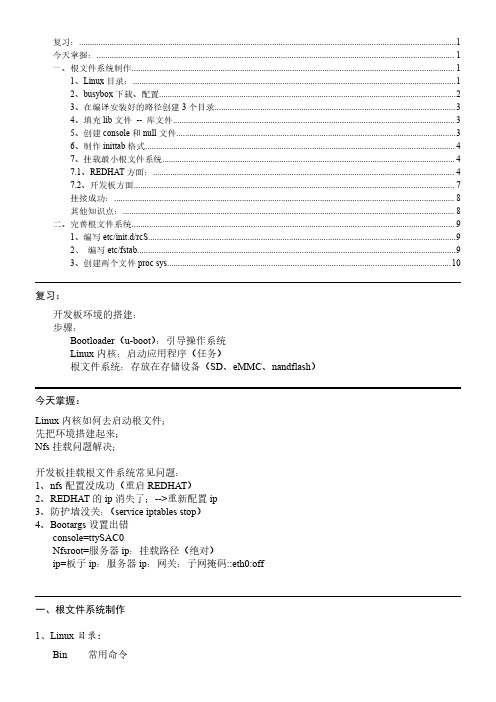
复习: (1)今天掌握: (1)一、根文件系统制作 (1)1、Linux目录: (1)2、busybox下载、配置 (2)3、在编译安装好的路径创建3个目录 (3)4、填充lib文件--库文件 (3)5、创建console和null文件 (3)6、制作inittab格式 (4)7、挂载最小根文件系统 (4)7.1、REDHAT方面: (4)7.2、开发板方面 (7)挂接成功: (8)其他知识点: (8)二、完善根文件系统 (9)1、编写etc/init.d/rcS (9)2、编写etc/fstab (9)3、创建两个文件proc sys (10)复习:开发板环境的搭建:步骤:Bootloader(u-boot):引导操作系统Linux内核:启动应用程序(任务)根文件系统:存放在存储设备(SD、eMMC、nandflash)今天掌握:Linux内核如何去启动根文件;先把环境搭建起来;Nfs挂载问题解决;开发板挂载根文件系统常见问题:1、nfs配置没成功(重启REDHAT)2、REDHAT的ip消失了;-->重新配置ip3、防护墙没关:(service iptables stop)4、Bootargs设置出错console=ttySAC0Nfsroot=服务器ip:挂载路径(绝对)ip=板子ip:服务器ip:网关:子网掩码::eth0:off一、根文件系统制作1、Linux目录:Bin常用命令Sbin 系统命令Etc 配置文件Lib 库文件Dev 设备文件2、busybox 下载、配置1)Busybox :主要帮我们生成linux 的各种命令2)指定交叉编译器(在开发板上运行)3)busybox 的配置(1)拷贝busybox-1.21.1.tar.bz2到/works 目录下;(2)解压tar -xjvf busybox-1.21.1.tar.bz2(3)配置:[root@localhost works]#cd busybox-1.21.1[root@localhost busybox-1.21.1]#make menuconfigBusybox Settings --->Build Options --->[]Build BusyBox as a static binary (no shared libs)(NEW)/*使用交叉编译器*/(arm-linux-)Cross Compiler prefix (NEW)Installation Options ("make install"behavior)--->基本的目录把/wors/system/fs_mini 目录创建好(/work/system/fs_mini )BusyBox installation prefix Busybox Library Tuning --->/*tab 功能*/[*]Tab completion (NEW)(4)编译:[root@localhost busybox-1.21.1]#make install3、在编译安装好的路径创建3个目录进入编译好的路径:/works/system/fs_mini创建3个目录:[root@localhost fs_mini]#mkdir dev lib etc4、填充lib 文件--库文件拷贝交叉编译中的lib 文件:cp /opt/FriendlyARM/toolschain/4.5.1/arm-none-linux-gnueabi/lib/*./lib/-d -rf注:拷贝库一般加上-d ;因为要拷贝链接文件(动态)。
6-制作根文件系统
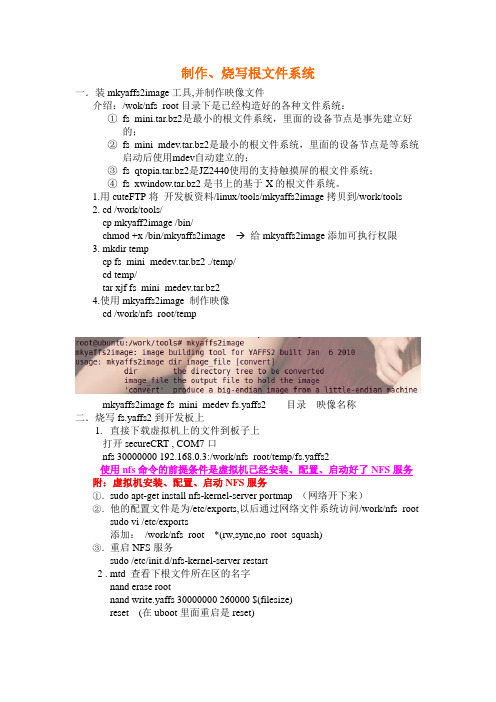
制作、烧写根文件系统一.装mkyaffs2image工具,并制作映像文件介绍:/wok/nfs_root目录下是已经构造好的各种文件系统:①fs_mini.tar.bz2是最小的根文件系统,里面的设备节点是事先建立好的;②fs_mini_mdev.tar.bz2是最小的根文件系统,里面的设备节点是等系统启动后使用mdev自动建立的;③fs_qtopia.tar.bz2是JZ2440使用的支持触摸屏的根文件系统;④fs_xwindow.tar.bz2是书上的基于X的根文件系统。
1.用cuteFTP将开发板资料/linux/tools/mkyaffs2image拷贝到/work/tools2. cd /work/tools/cp mkyaff2image /bin/chmod +x /bin/mkyaffs2image 给mkyaffs2image添加可执行权限3. mkdir tempcp fs_mini_medev.tar.bz2 ./temp/cd temp/tar xjf fs_mini_medev.tar.bz24.使用mkyaffs2image 制作映像cd /work/nfs_root/tempmkyaffs2image fs_mini_medev fs.yaffs2 目录映像名称二.烧写fs.yaffs2到开发板上1.直接下载虚拟机上的文件到板子上打开secureCRT , COM7口nfs 30000000 192.168.0.3:/work/nfs_root/temp/fs.yaffs2使用nfs命令的前提条件是虚拟机已经安装、配置、启动好了NFS服务附:虚拟机安装、配置、启动NFS服务①.sudo apt-get install nfs-kernel-server portmap (网络开下来)②.他的配置文件是为/etc/exports,以后通过网络文件系统访问/work/nfs_rootsudo vi /etc/exports添加:/work/nfs_root *(rw,sync,no_root_squash)③.重启NFS服务sudo /etc/init.d/nfs-kernel-server restart2 . mtd 查看下根文件所在区的名字nand erase rootnand write.yaffs 30000000 260000 $(filesize)reset (在uboot里面重启是reset)使用NFS1.仅用flash上的根文件系统启动后,手动mount NFSmount -t nfs -o nolock,vers=2 192.168.0.3:/work/nfs_root /mnt2.让开发板通过NFS服务器(即虚拟机)启动,并根据uboot对bootargs的规定printset bootargs noinitrd root=/dev/nfsnfsroot=192.168.1.10:/work/nfs_root/temp/fs_mini_mdev,proto=tcp,nolock,rsize=1024,wsize=1024ip=192.168.1.17:192.168.1.10:192.168.1.1:255.255.255.0::eth0:off init=/linuxrc console=ttySAC0,115200save配置附录:F:\2440\system\linux-2.6.22.6_jz2440\linux-2.6.22.6\Documentation\nfsroot 格式1:nfsroot=[<server-ip>:]<root-dir>[,<nfs-options>]格式2:ip=<client-ip>:<server-ip>:<gw-ip>:<netmask>:<hostname>:<device>:<autoconf> 返回开发板原文件系统,修改bootargs:set bootargs noinitrd root=/dev/mtdblock3 init=/linuxrc console=ttySAC0。
Linux根文件系统的详细制作过程

Linux根文件系统的详细制作过程利用busybox制作跟文件系统准备一个busybox包我这里用的是busybox-1.21.1.tar.bz2这个包可以在官方网站上下载,这里我就用百度网盘链接https:///s/10Fnc-UbcNWPLaiAnaXKTug 解压安装包 tar xf busybox-1.21.1.tar.bz2 .根文件系统的制作1、什么是文件系统文件的索引信息文件的具体数据操作索引信息的具体代码kernel/fs/ 操作索引信息的代码ext4fatjffs2: norflashyaffs2: nandflashnfs...为什么会有很多中类型的文件?1)对应硬件特性不同2)软件的处理策略不同断电保护的策略...linux启动时加载使用的第一个文件系统称作根文件系统根文件系统中存储的文件是有特定需求的2、准备根文件系统所需要具备的目录(文件)2.1 生成arm处理器能够使用命令工具使用开源软件busybox去生成需要的命令cd /home/tarena/portingcp /home/tarena/workdir/rootfs/busybox-1.23.2.tar.bz2 ./cd busybox-1.23.2/make menuconfigBusybox Settings --->Build Options --->[*] Build shared libbusybox //共享库Installation Options ("make install" behavior) --->What kind of applet links to install (as soft-links) ---> //软链接(./_install) BusyBox installation prefix (NEW) //安装路径vi Makefile164 CROSS_COMPILE ?= arm-cortex_a9-linux-gnueabi-190 ARCH ?= armmakemake installcd _install2.2 准备busybox可执行程序需要的库文件mkdir libcp /opt/arm-cortex_a9-eabi-4.7-eglibc-2.18/arm-cortex_a9-linux-gnueabi/sysroot/lib/libm.so.6 lib/ -a cp /opt/arm-cortex_a9-eabi-4.7-eglibc-2.18/arm-cortex_a9-linux-gnueabi/sysroot/lib/libm-2.18-2013.10.solib/ -acp /opt/arm-cortex_a9-eabi-4.7-eglibc-2.18/arm-cortex_a9-linux-gnueabi/sysroot/lib/libc.so.6 lib/ -a cp /opt/arm-cortex_a9-eabi-4.7-eglibc-2.18/arm-cortex_a9-linux-gnueabi/sysroot/lib/libc-2.18-2013.10.so lib/ -acp /opt/arm-cortex_a9-eabi-4.7-eglibc-2.18/arm-cortex_a9-linux-gnueabi/sysroot/lib/ld*.so* lib/ -a2.3 配置文件的准备mkdir etc2.3.1 vi etc/inittab::sysinit:/etc/init.d/rcS::respawn:-/bin/sh::ctrlaltdel:/sbin/reboot::shutdown:/bin/umount -a -rmkdir etc/init.d2.3.2 vi etc/init.d/rcS //系统开机自启动的程序可以放入该文件#!/bin/sh#自动挂载/etc/fstab文件中指定的分区mount -a#热插拔事件发生时执行的命令echo /sbin/mdev >/proc/sys/kernel/hotplugmdev -s手工执行:chmod +x etc/init.d/rcS2.3.3 vi etc/fstab格式要求:设备挂载点文件系统类型挂载参数是否备份格式检查device mount_point type options dump fsckproc /proc proc defaults 0 0tmpfs /tmp tmpfs defaults 0 0sysfs /sys sysfs defaults 0 0tmpfs /dev tmpfs defaults 0 02.4 创建必要的目录mkdir proc tmp sys dev var opt mnt2.5 创建必要的设备文件linux内核在启动时需要使用两个设备文件/dev/console : 控制台/dev/null:黑洞文件sudo mknod dev/console c 5 1sudo mknod dev/null c 1 3sudo chown tarena:tarena dev/consolesudo chown tarena:tarena dev/null3、通过nfs方式验证以上根文件数据的有效性服务器端:sudo vi /etc/exports/home/tarena/porting/busybox-1.23.2/_install*(rw,sync,no_root_squash)sudo /etc/init.d/nfs-kernel-server restart客户端:setenv bootargs root=/dev/nfs nfsroot=192.168.1.8:/home/tarena/porting/busybox-1.23.2/_install init=/linuxrc ip=192.168.1.6:192.168.1.8:192.168.1.1:255.255.255.0lcd=vs070cxn tp=gslx680-linux console=ttySAC0,115200 maxcpus=1saveenv------------------------------------------------------------1、使用软链接的好处所有的命令都是指向busybox可执行的软链接_install/bin 远小于 ubuntu 系统 /bin,原因在于:1)使用了软链接的方式2) _install/bin命令是对应PC版本命令的简化版2、bin/busybox可执行程序的分析arm-cortex_a9-linux-gnueabi-readelf -d bin/busybox libm.so.6libc.so.6加载器ldarm版本的库在交叉编译工具包有which arm-cortex_a9-linux-gnueabi-gcc令开一个窗口cd /opt/arm-cortex_a9-eabi-4.7-eglibc-2.18find ./ -name "libm.so.6"cp -a-a: 等价于-dR-d: 保持软链接属性3、linux自举完成后会去运行1号进程1号进程如果指定为linxurclinuxrc对应的实现代码busybox/init/init.cinit_main(...){打开,解析/etc/inittab...}inittab文件的格式<id>:<runlevel>:<action>:<process>前两项在嵌入式经常忽略-/bin/sh:-, 一个会话shell4、设备节点文件的创建mknod dev/xxx c major minorc: 字符设备文件major: 主设备号minor: 次设备号ls /dev/console -l。
制作根文件系统
上海交大志盟科技有限公司制作根文件系统目录实验内容 (2)实验目的 (2)实验材料 (2)实验工具 (2)实验步骤 (3)1、编译/安装B USYBOX(BUSYBOX-1.16.0.TAR.BZ2), (3)1.添加动态库与加载器, (5)3.构建ETC目录, (6)3.1创建etc/inittab文件 (6)3.2创建etc/fstab文件 (7)3.3 创建etc/init.d/rcS文件 (7)1.构建DEV目录, (8)2.构建其他目录, (9)3.制作YAFFS文件系统映像文件 (9)7.移植 (10)能在linux2.6.32与ARM平台运行的根文件系统的制作实验目的掌握简单linux根系统的制作过程,搭建开发平台实验材料交叉编译器:arm-linux-gcc-4.3.2Busybox:busybox-1.16.0.tar.bz2实验工具Linux操作系统:Ubuntu9.04ARM交叉编译套件1、编译/安装Busybox(busybox-1.16.0.tar.bz2),具体步骤:创建制作根文件系统的路径(假定为/root/myroot/rootfs)#> mkdir /root /myroot#> mkdir /root /myroot/rootfs将busybox压缩包解压到/root /myroot目录下#>tar jxvf busybox-1.16.0.tar.bz2 -C /root/myroot/进入解压后软件所在目录#> cd busybox-1.16.0修改Makefile文件#> vi Makefile修改前:190 ARCH ?= $(SUBARCH)164 CROSS_COMPILE ?=修改后:164 CROSS_COMPILE ?= arm-linux-190 ARCH ?= arm添加临时环境变量#> export PA TH=/usr/local/arm/4.3.2/bin:$PATH配置Busybox#> make menuconfig在Busybox Settings --------->Installation Options --------->(./_install)BusyBox installation prefix 输入/root/myroot/rootfs,其他默认原设置,保存退出编译busybox#> make安装busybox#> make install安装结束后,在目录/root/myroot/rootfs/下将生成4个文件:bin、sbin、usr 、linuxrc1. 添加动态库与加载器,具体步骤:动态库与加载器的位置是:/usr/local/arm/4.3.2/arm-none-linux-gnueabi/libc/armv4t/lib/注:若是4.4.3则,位置是:/usr/local/arm/4.4.3/arm-none-linux-gnueabi/lib创建库目录#> mkdir –p /root/myroot/rootfs/lib进入lib目录#> cd /root/myroot/rootfs/lib/添加库函数#> cp/usr/local/arm/4.3.2/arm-none-linux-gnueabi/libc/armv4t/ lib/* .3. 构建etc目录,具体步骤:3.1创建etc/inittab文件进入根文件系统目录(/root/myroot/rootfs)#> cd /root/myroot/rootfs/创建etc目录#> mkdir etc进入etc目录#> cd /root/myroot/rootfs/etc创建inittab文件#> vi inittab内容如下:# /etc/inittab::sysinit:/etc/init.d/rcS::askfirst:-/bin/sh::ctrlaltdel:/sbin/reboot::shutdown:/bin/umount -a -r3.2创建etc/fstab文件进入根文件系统etc目录(/root/myroot/rootfs/etc)#> cd /root/myroot/rootfs/etc/创建fstab文件#> vi fstab内容如下:# device mount-point type options dum fsck order proc /proc proc defaults 0 0 tmpfs /tmp tmpfs defaults 0 0 sysfs /sys sysfs defaults 0 03.3 创建etc/init.d/rcS文件创建/root/myroot/rootfs/etc/init.d目录#> mkdir -p /root/myroot/rootfs/etc/init.d进入/root/myroot/rootfs/etc/init.d目录#> cd /root/myroot/rootfs/etc/init.d创建etc/init.d/rcS文件#> vi rcS内容如下:#!/bin/shmount -aecho /sbin/mdev > /proc/sys/kernel/hotplug mdev -s修改文件属性,使之能执行#>chmod +x /root/myroot/rootfs/etc/init.d/rcS1. 构建dev目录,具体步骤:创建/root/myroot/rootfs/dev目录#> mkdir /root/myroot/rootfs/dev进入/root/myroot/rootfs/dev目录#> cd /root/myroot/rootfs/dev静态创建设备文件#> mknod console c 5 1#> mknod null c 1 32. 构建其他目录,具体步骤:进入/root/myroot/rootfs/#> cd /root/myroot/rootfs/创建其他目录#> mkdir proc mnt tmp sys root3. 制作yaffs文件系统映像文件具体步骤:进入/root/myroot/#> cd /root/myroot/复制制作yaffs文件工具#> cp /usr/sbin/mkyaffs2image-128M . 制作yaffs2映像文件#> ./ mkyaffs2image-128M rootfs root.image 最后在目录/root/myroot/下,生成yaffs2映像文件——root.image7. 移植将root.image移植到开发板上,重启即可。
如何制作根文件系统
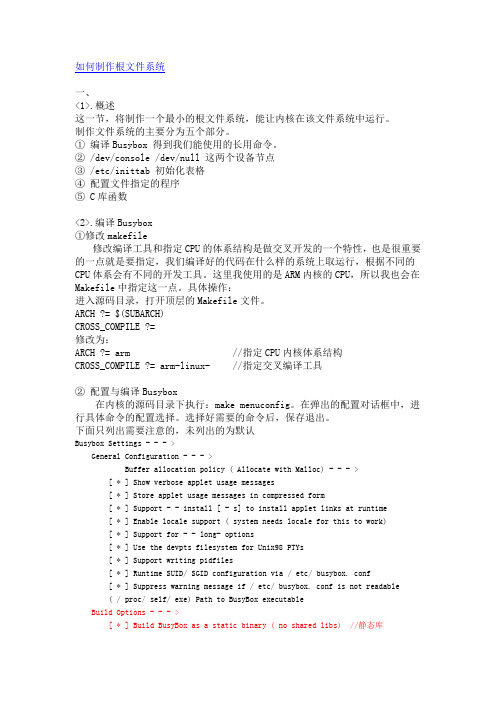
如何制作根文件系统一、<1>.概述这一节,将制作一个最小的根文件系统,能让内核在该文件系统中运行。
制作文件系统的主要分为五个部分。
① 编译Busybox 得到我们能使用的长用命令。
② /dev/console /dev/null 这两个设备节点③ /etc/inittab 初始化表格④ 配置文件指定的程序⑤ C库函数<2>.编译Busybox①修改makefile修改编译工具和指定CPU的体系结构是做交叉开发的一个特性,也是很重要的一点就是要指定,我们编译好的代码在什么样的系统上取运行,根据不同的CPU体系会有不同的开发工具。
这里我使用的是ARM内核的CPU,所以我也会在Makefile中指定这一点。
具体操作:进入源码目录,打开顶层的Makefile文件。
ARCH ?= $(SUBARCH)CROSS_COMPILE ?=修改为:ARCH ?= arm //指定CPU内核体系结构CROSS_COMPILE ?= arm-linux- //指定交叉编译工具② 配置与编译Busybox在内核的源码目录下执行:make menuconfig。
在弹出的配置对话框中,进行具体命令的配置选择。
选择好需要的命令后,保存退出。
下面只列出需要注意的,未列出的为默认Busybox Settings - - - >General Configuration - - - >Buffer allocation policy ( Allocate with Malloc) - - - >[ * ] Show verbose applet usage messages[ * ] Store applet usage messages in compressed form[ * ] Support - - install [ - s] to install applet links at runtime[ * ] Enable locale support ( system needs locale for this to work)[ * ] Support for - - long- options[ * ] Use the devpts filesystem for Unix98 PTYs[ * ] Support writing pidfiles[ * ] Runtime SUID/ SGID configuration via / etc/ busybox. conf[ * ] Suppress warning message if / etc/ busybox. conf is not readable( / proc/ self/ exe) Path to BusyBox executableBuild Options - - - >[ * ] Build BusyBox as a static binary ( no shared libs) //静态库[ * ] Build with Large File Support ( for accessing files > 2 GB)在内核的源码目录下执行:make 。
实验04 制作根文件系统

ata0-slave:type=disk,path=hdc.img, cylinders=520,heads=16,spt=63 fdisk /dev/hdb (SLS Linux系统) 记住分区数据块大小:65015 mkfs /dev/hdb1 64000
利用fdisk命令在hdc.img文件中建立1个分区
进入系统
5、加载硬盘上文件系统
#mount /dev/hd1 /mnt #cd /mnt [/mnt]#for i in bin dev etc usr tmp >do >cp +recursive +verbose /$i $i >done [/mnt]#cd / [/]#umount /dev/hd1 [/]logout
6、关于根文件系统
Linux0.12内核所支持的文件系统是 MINIX1.0文件系统。 启动盘上引导扇区509、510字节处一个字 (ROOT_DEV)中根文件系统设备号从指定的设 备中加载根文件系统。
0表示从引导盘所在当前驱动器中加载根文件系统 1表示从不同设备中加载根文件系统
8、作业
报告:根文件系统制作与使用,提交的文件名如: 2101472_周乐钦.doc 报告内容:
编辑bochsrc-hd.bxrc文件 编辑bootimage-0.12-hd文件,使得根文件系统在 硬盘中 创建磁盘映像文件hdc.img ,存放根文件系统 使用硬盘Image上的根文件系统并启动
7、使用硬盘Image上根文件系统
复制bootimage-0.12和bochsrc.bxrc文件,产生 bootimage-0.12-hd和bochsrc-hd.bxrc 编辑bochsrc-hd.bxrc中floppya为bootimage0.12-hd 用Ultraedit编辑bootimage-0.12-hd二进制文件, 修改第509、510字节(即0x1fc/0x1fd,其值为 00/00)为01/03,表示根文件系统在硬盘的第1个分 区上。 运行bochsrc-hd.bxrc,即可进入Linux 0.12系统中。 此时的0.12系统中的根文件系统来自于硬盘Image
在硬盘上制作根文件系统.doc
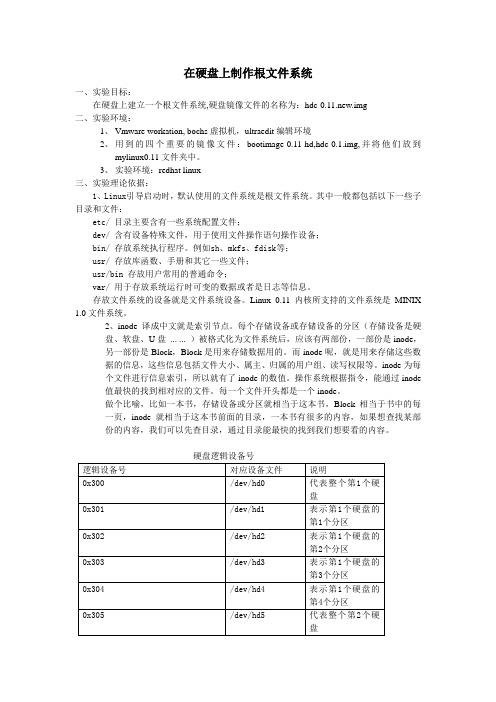
在硬盘上制作根文件系统一、实验目标:在硬盘上建立一个根文件系统,硬盘镜像文件的名称为:hdc-0.11.new.img二、实验环境:1、Vmware workation, bochs虚拟机,ultraedit编辑环境2、用到的四个重要的镜像文件:bootimage-0.11-hd,hdc-0.1.img,并将他们放到mylinux0.11文件夹中。
3、实验环境:redhat linux三、实验理论依据:1、Linux引导启动时,默认使用的文件系统是根文件系统。
其中一般都包括以下一些子目录和文件:etc/ 目录主要含有一些系统配置文件;dev/ 含有设备特殊文件,用于使用文件操作语句操作设备;bin/ 存放系统执行程序。
例如sh、mkfs、fdisk等;usr/ 存放库函数、手册和其它一些文件;usr/bin 存放用户常用的普通命令;var/ 用于存放系统运行时可变的数据或者是日志等信息。
存放文件系统的设备就是文件系统设备。
Linux 0.11内核所支持的文件系统是MINIX1.0文件系统。
2、inode 译成中文就是索引节点。
每个存储设备或存储设备的分区(存储设备是硬盘、软盘、U盘... ... )被格式化为文件系统后,应该有两部份,一部份是inode,另一部份是Block,Block是用来存储数据用的。
而inode呢,就是用来存储这些数据的信息,这些信息包括文件大小、属主、归属的用户组、读写权限等。
inode为每个文件进行信息索引,所以就有了inode的数值。
操作系统根据指令,能通过inode 值最快的找到相对应的文件。
每一个文件开头都是一个inode。
做个比喻,比如一本书,存储设备或分区就相当于这本书,Block相当于书中的每一页,inode 就相当于这本书前面的目录,一本书有很多的内容,如果想查找某部份的内容,我们可以先查目录,通过目录能最快的找到我们想要看的内容。
四、实验过程:说明:为了深刻理解每一步操作的含义文中有【】的,里面的内容均是解释性的。
根文件系统的制作

根文件系统的制作文件系统的制作其实并没有想像中那么难。
一个基本的文件系统应该包括:busybox (提供 shell 命令集)、配置文件(用来初始化和布局你的文件系统)、设备文件(如果是用 devfs 的话这个就免了)、必要的库文件系统(如果 busybox 是静态编译的话,那根本不用为 busybox 用到的库文件而烦。
在我制作的文件系统里,只是为了用户程序和 qt 的运行才放置了一些库文件)。
正文一、首先说一下 busybox 的配置和编译问题其实搞好 busybox 后,可以说你的文件系统已经完成了一半了。
Busybox 之所以比较难编译,主要是 busybox 和交叉编译工具的版本搭配问题。
在文坛上不乏因为 busybox 某些命令不能编译通过而烦的人,在这里我推荐一个搭配:busybox-1.1.3+arm-linux-gcc-3.3.2 (在文坛上看到过有人说busybox-1.0.1+arm-linux-gcc-3.4.1 也可以正常编译通过,你自己看着办吧)。
Busybox 的配置很简单,详细过程可以参考《基于 S3C2410 的 Linux 全线移植文档》的文件系统部分,我刚开始的时候就是按照这个来做出一个很简单的文件系统的。
不过有一点要特别注意的 (shell 的配置问题 ) :1、要这样配置:│ │ Shells --->│ Choose your default shell (ash) --->2、如果是这样配置的话,虽然可以生成ash,但不能生成sh:│ │ Choose your default shell(none) ---> │ ││ │ [*] ash另外,按照他的这种方法做出来的文件系统,运行的时候 shell 并不好有,没有历史记录、自动补全、删除字符的功能,下面介绍如何为它添加这些功能:Shells --->--- Bourne Shell Options │ │[ ] Hide message on interactive shell startup │ │[ ] Standaloneshell │ │[*] command lineediting │ │[*] vi-style line editingcommands │ │(15) historysize │ │[*] historysaving │ │[*] tabcompletion │ │[*] usernamecompletion │ │[ ] Fancy shell prompts这是我自己试验出来的,网上没有看到过这方面的介绍,在此奉献给大家。
根文件系统定制
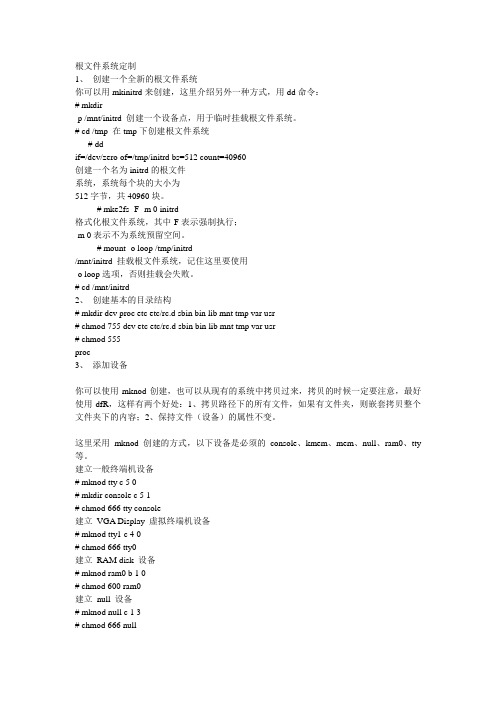
根文件系统定制1、创建一个全新的根文件系统你可以用mkinitrd来创建,这里介绍另外一种方式,用dd命令:# mkdir-p /mnt/initrd 创建一个设备点,用于临时挂载根文件系统。
# cd /tmp 在tmp下创建根文件系统# ddif=/dev/zero of=/tmp/initrd bs=512 count=40960创建一个名为initrd的根文件系统,系统每个块的大小为512字节,共40960块。
# mke2fs -F -m 0 initrd格式化根文件系统,其中-F表示强制执行;-m 0表示不为系统预留空间。
# mount -o loop /tmp/initrd/mnt/initrd 挂载根文件系统,记住这里要使用-o loop选项,否则挂载会失败。
# cd /mnt/initrd2、创建基本的目录结构# mkdir dev proc etc etc/rc.d sbin bin lib mnt tmp var usr# chmod 755 dev etc etc/rc.d sbin bin lib mnt tmp var usr# chmod 555proc3、添加设备你可以使用mknod创建,也可以从现有的系统中拷贝过来,拷贝的时候一定要注意,最好使用-dfR,这样有两个好处:1、拷贝路径下的所有文件,如果有文件夹,则嵌套拷贝整个文件夹下的内容;2、保持文件(设备)的属性不变。
这里采用mknod创建的方式,以下设备是必须的console、kmem、mem、null、ram0、tty 等。
建立一般终端机设备# mknod tty c 5 0# mkdir console c 5 1# chmod 666 tty console建立VGA Display 虚拟终端机设备# mknod tty1 c 4 0# chmod 666 tty0建立RAM disk 设备# mknod ram0 b 1 0# chmod 600 ram0建立null 设备# mknod null c 1 3# chmod 666 null4、创建配置文件到这里我们就有了一个初步的小型根文件系统,但是还需要配置一些有关的shellscript来完善它。
- 1、下载文档前请自行甄别文档内容的完整性,平台不提供额外的编辑、内容补充、找答案等附加服务。
- 2、"仅部分预览"的文档,不可在线预览部分如存在完整性等问题,可反馈申请退款(可完整预览的文档不适用该条件!)。
- 3、如文档侵犯您的权益,请联系客服反馈,我们会尽快为您处理(人工客服工作时间:9:00-18:30)。
Linux根文件系统的制作1. 根文件系统文件系统是包括在一个磁盘(包括光盘、软盘、闪盘及其它存储设备)或分区的目录结构;一个可应用的磁盘设备可以包含一个或多个文件系统;如果您想进入一个文件系统,首先您要做的是挂载(mount)文件系统;为了挂载(mount)文件系统,您必须指定一个挂载点。
注:对于我们应用开发来说,购买开发板的时候,厂家会提供好现成的根文件系统和BootLoader等,如果需要,我们可以改变其中的命令而无需从头开始制作一个新的根文件系统。
不过这儿的制作过程可以让我们更深一点理解Linux的文件系统。
2.主要的根文件系统* Linux 中,rootfs 是必不可少的。
PC 上主要实现有 ramdisk 和直接挂载 HD(Harddisk,硬盘)上的根文件系统;嵌入式中一般不从 HD 启动,而是从 Flash 启动,最简单的方法是将 rootfs load 到 RAM 的 RAMDisk,稍复杂的就是直接从Flash 读取的 Cramfs,更复杂的是在 Flash 上分区,并构建 JFFS2 等文件系统。
* RAMDisk 将制作好的 rootfs 压缩后写入 Flash,启动的时候由 Bootloader load 到RAM,解压缩,然后挂载到 /。
这种方法操作简单,但是在 RAM 中的文件系统不是压缩的,因此需要占用许多嵌入式系统中稀有资源 RAM。
ramdisk 就是用内存空间来模拟出硬盘分区,ramdisk通常使用磁盘文件系统的压缩存放在flash中,在系统初始化时,解压缩到SDRAM并挂载根文件系统, 在linux系统中,ramdisk有二种,一种就是可以格式化并加载,在linux内核2.0/2.2就已经支持,其不足之处是大小固定;另一种是 2.4的内核才支持,通过,ramfs来实现,他不能被格式化,但用起来方便,其大小随所需要的空间增加或减少,是目前linux常用的ramdisk技术.* initrd 是 RAMDisk 的格式,kernel 2.4 之前都是 image-initrd,Kernel 2.5 引入了 cpio-initrd,大大简化了 Linux 的启动过程,附合 Linux 的基本哲学:Keep it simple, stupid(KISS). 不过cpio-initrd 作为新的格式,还没有经过广泛测试,嵌入式 Linux 中主要采用的还是 image-initrd。
* Cramfs 是 Linus 写的很简单的文件系统,有很好的压缩绿,也可以直接从 Flash 上运行,不须 load 到 RAM 中,因此节约了 RAM。
但是 Cramfs 是只读的,对于需要运行时修改的目录(如: /etc, /var, /tmp)多有不便,因此,一般将这些目录做成ramfs 等可写的 fs。
* SquashFS 是对 Cramfs 的增强。
突破了 Cramfs 的一些限制,在 Flash 和 RAM 的使用量方面也具有优势。
不过,据开发者介绍,在性能上可能不如 Cramfs。
这也是一种新方法,在嵌入式系统采用之前,需要经过更多的测试。
3.Ramdisk制作RAMDisk的制作方法如下:(1) 在PC机的Linux操作系统环境下,生成可以虚拟成块设备的文件,假设文件名为init.img。
$ dd if=/dev/zero of=init.img bs=4096 count=1024其中bs*count为块设备大小(单位:字节),生成init.img文件以后,还必须对该文件进行格式化。
$ mke2fs –m0 –F init.img(2) 新建一个文件夹ram,并将init.img挂接到ram目录。
$ mkdir ram$ mount init.img ram/ -o loop这时,读写ram目录,等效于读写init.img文件。
用户可以将根文系统所需的文件写入到ram目录中。
往ram目录写完文件以后,还需要使用umount ram命令卸载init.img,才能将已写入的文件保存到init.img中。
(3)添加完毕,需要umount ram4. Cramfs制作CramFS(Compressed Rom File System)是Linux Torvalds在Transmeta任职时,所参与开发的文件系统。
它是针对Linux内核2.4之后的版本所设计的一种新型只读文件系统,采用了 zlib 压缩,压缩比一般可以达到1:2,但仍可以作到高效的随机读取,Linux系统中,通常把不需要经常修改的目录压缩存放,并在系统引导的时候再将压缩文件解开。
因为Cramfs不会影响系统的读取文件的速度,而且是一个高度压缩的文件系统。
因此非常广泛应用于嵌入式系统中。
在嵌入式的环境之下,内存和外存资源都需要节约使用。
如果使用RAMDISK方式来使用文件系统,那么在系统运行之后,首先要把Flash上的映像文件解压缩到内存中,构造起RAMDISK 环境,才可以开始运行程序。
但是它也有很致命的弱点。
在正常情况下,同样的代码不仅在Flash 中占据了空间(以压缩后的形式存在),而且还在内存中占用了更大的空间(以解压缩之后的形式存在),这违背了嵌入式环境下尽量节省资源的要求。
使用CramFS文件系统就是一种解决这个问题的方式。
CramFS是一个压缩格式的文件系统,它并不需要一次性地将文件系统中的所有内容都解压缩到内存之中,而只是在系统需要访问某个位置的数据的时候,马上计算出该数据在CramFS中的位置,将它实时地解压缩到内存之中,然后通过对内存的访问来获取文件系统中需要读取的数据。
CramFS中的解压缩以及解压缩之后的内存中数据存放位置都是由CramFS文件系统本身进行维护的,用户并不需要了解具体的实现过程,因此这种方式增强了透明度,对开发人员来说,既方便,又节省了存储空间。
但是Cramfs也有其缺点:延迟、小于16MB、不支持写,只支持PAGE_CREATE_SIZE=4096的内核。
制作的命令:(root文件夹中存放着文件系统)#mkcramfs root cramfs.img5. 其他根文件系统的制作制作yaffs文件系统: mkyaffsimage myroots myroots.img制作squashfs: mksquashfs $(FS_DIR) $(FS_NAME) -noappend -be -lzma -no-fragments –noI6. BusyBox编译以及移植(根文件系统内命令的制作移植)建立目标板空根目录文件夹及根目录下的文件夹:[root@190 friendly-arm]# mkdir myroots[root@190 friendly-arm]#pwd/friendly-arm/myroots[root@190 friendly-arm]#cd myroots[root@190 myroots]# mkdir bin sbin usr lib dev mnt opt root etc home proc tmp var[root@190 myroots]# mkdir etc/init.d进入etc/init.d目录下,建立一个脚本文件,并命名为rcS,用gedit打开,添加如下内容:#! /bin/shPATH=/sbin:/bin:/usr/sbin:/usr/bin:/usr/local/bin:runlevel=Sprevlevel=Numask 022export PATH runlevel prevlevel## Trap CTRL-C &c only in this shell so we can interrupt subprocesses. #trap ":" INT QUIT TSTP创建 dev 中的节点如果使用“linux 2.6.xx”的内核,应该事先创建节点“console”、“null”。
否则在系统启动时内容会提示以下错误:Warning: unable to open an initial console.Kernel panic - not syncing: Attempted to kill init!创建节点的命令如下:# mknod dev/console c 5 1# mknod dev/null c 1 3移植Busybox:进入到压缩文件存放的目录下,并解压。
然后进入解压后的busybox目录文件夹,随后配置busybox 。
[root@190 busybox-1.2.0]# make menuconfig执行之后,将出现如下图所示的配置界面:由于每个版本的配置选项组织有所不同。
不管怎样,我们注意以下选项就行了:1) Support for devfs2) Build BusyBox as a static binary ( no shared libs ) //将busybox编译成静态链接3) Do you want to build busybox with a Cross Compile?(/usr/local/arm/3.3.2/bin/arm-linux-) Cross Compile prefix //指定交叉编译器4) init5) Support reading an inittab file //支持init读取/etc/inittab 配置文件6) (X) ash选中ash //建立的rcS脚本才能执行7)ash8)cp cat ls mkdir mv //可执行命令工具的选择,自己看着办吧,需要用到的就选上9) mount10) umount11) Support loopback mounts12) Support for the old /etc/mtab file13) insmod14) Support version 2.2.x to 2.4.x Linux kernels15) Support version 2.6.x Linux kernels16) vi17)don’t use user以上内容必须选上,其他可按默认值;如果要支持其他功能,如网络支持等,可按需选择,英语不是很烂的话,这些都没有问题。
配置好之后,保存退出。
然后对其编译和安装到刚才建立的根文件系统目录下:[root@190 busybox-1.2.0] make TARGET_ARCH=arm CROSS=arm-linux- \ PREFIX=/friendly-arm/myroots/ all install安装好之后,将相应的二进制文件拷贝到根文件系统相应的目录下:∙拷贝一些管理员控制程序到/sbin目录下,最重要的就是要包含一个init命令;∙拷贝应用程序运行时所需要的库到/lib,库文件可以从PC机上的交叉编译工具安装目录下拷贝,如libc-2.2.2.so、 libcryt-2.2.2.so、libm-2.2.2.so、libutil-2.2.2.so等,为部分相应库建立快捷方式,提供一些应用程序按快捷方式名称调用。