吸尘器说明书n
手持吸尘器说明书

手持吸尘器说明书一、产品介绍本手持吸尘器是一款便携式家居清洁工具,能够高效清理家中的灰尘和杂物。
其小巧轻便的设计使得用户可以轻松持握并进行清洁操作。
本说明书将为您提供正确的使用方法、注意事项以及维护保养建议。
请您在使用前仔细阅读说明书,并按照要求正确操作。
二、使用方法1. 准备工作a. 确保电源线连接到可靠的电源插座上,电压要符合标志上的要求。
b. 在使用之前,检查滤网是否清洁,是否装好无损。
c. 确保配件齐全,可使用的吸头已正确安装在吸尘器上。
2. 启动吸尘器a. 按下开关按钮,确认电源已连接,吸尘器将开始工作。
请注意不要让开关键过度按压。
b. 根据清洁要求,选择合适的清洁吸头,在吸尘器吸力下快速移动吸头,以清理目标区域。
3. 调节吸力a. 部分手持吸尘器配备了吸力调节功能。
您可以根据不同清洁需求来调整吸力大小,比如在清理地毯时可以增大吸力,而在清理脆弱家具表面时则需降低吸力。
4. 结束使用a. 使用完毕后,断开电源连接,将吸尘器放置在干燥通风的地方。
b. 清洁滤网并确保其干燥后,将其安装回吸尘器中。
三、注意事项1. 请勿将手持吸尘器用于除尘以外的其他用途,比如吸湿物品、金属碎片等。
2. 避免过度使用手持吸尘器,以免影响其寿命。
3. 使用过程中,如果出现异常噪音、异味等情况,请立即停止使用,并检查是否有故障或异物堵塞。
4. 为保证安全,请勿在使用过程中将手指或其他物体靠近吸嘴或旋转部分。
5. 长时间不使用手持吸尘器时,请断开电源并进行存储,避免电源线的损害。
6. 儿童禁止单独操作手持吸尘器,使用时请在成人的监护下进行。
四、维护保养1. 定期清洁滤网,以保持吸尘器的良好吸力。
清洁方法:将滤网取出,用清水冲洗后自然晾干。
2. 定期清理吸尘器内部储存容器,并从储存容器中倒出杂物和灰尘。
3. 非专业人员请勿私自拆卸吸尘器,以免造成损坏或电器故障。
如需维修,请联系售后服务中心。
五、故障排除如果在使用手持吸尘器时遇到以下问题,您可以按照以下方法进行排除:1. 吸力减弱或无吸力:确认滤网是否清洁,滤网是否装好无损,吸嘴是否堵塞。
吸尘器说明书了解吸尘器的使用方法和维护技巧
吸尘器说明书了解吸尘器的使用方法和维护技巧尊敬的用户:感谢您选购我们的吸尘器!为了让您能更好地使用和保养吸尘器,我们编写了以下说明书,希望能帮助您了解吸尘器的使用方法和维护技巧。
第一部分:使用方法1. 准备工作在使用吸尘器之前,请确保已经插好电源并连接好吸尘管、吸尘头等配件。
2. 启动与关闭插好电源后,将电源开关拨到“ON”位置即可启动吸尘器。
当您使用完毕后,请将电源开关拨到“OFF”位置,然后拔掉电源插头。
3. 吸尘器操作根据需要选择合适的吸尘头,并将吸尘头连接到吸尘管上。
通过控制手柄上的按钮或开关,您可以调整吸力强弱和转向。
4. 吸尘范围请确保吸尘器的电源线长度足够覆盖您需要清理的区域,以免频繁更换插座。
5. 吸尘时间每次使用吸尘器的时间不要过长,根据具体清理情况,合理安排吸尘时间,避免过度使用而导致吸尘器过热。
第二部分:维护技巧1. 清洁滤网吸尘器的滤网是保证吸力的重要组成部分。
定期清洁滤网可以减少堵塞,并且延长吸尘器的使用寿命。
使用前请检查滤网是否安装牢固,清洁时请按照说明书的指引进行。
2. 气路堵塞如果您的吸尘器吸力变弱或吸尘效果不佳,很可能是气路堵塞所致。
此时,请关闭吸尘器,检查吸尘管、吸尘头、吸尘管连接口等部位是否有异物堵塞,并及时清理。
3. 注意电源线使用吸尘器时,请避免将电源线的重物压在上面,以免损坏电源线。
同时,在使用过程中应避免脚踩到电源线,防止触电事故的发生。
4. 定期保养定期检查吸尘器的各个部位,包括电源线、插头、吸尘管、吸尘头等,如果发现损坏或磨损,及时更换或修理。
5. 储存方法当您不使用吸尘器时,请将其存放在干燥通风的地方,并远离高温、潮湿和易燃物品,以防止吸尘器老化或引发事故。
希望以上的使用方法和维护技巧对您有所帮助。
如果您还有其他问题或疑问,请随时联系我们的客服中心,我们将尽快为您解答。
感谢您的支持与配合!祝您使用愉快!此为1500字文章的部分内容,如需完整文章,请在留言中说明。
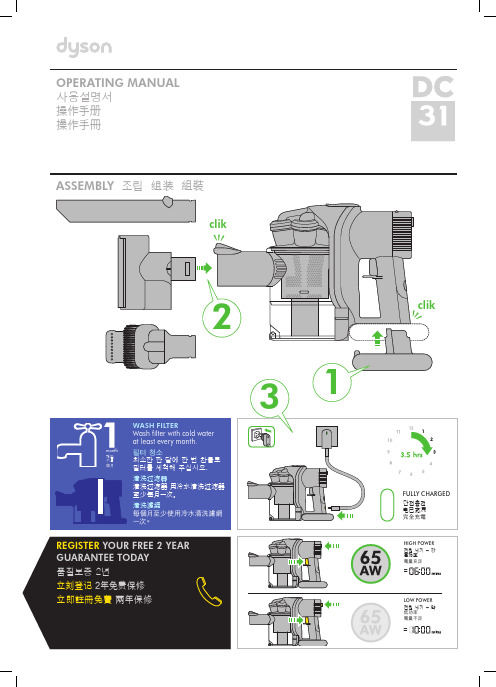
戴森吸尘器说明书
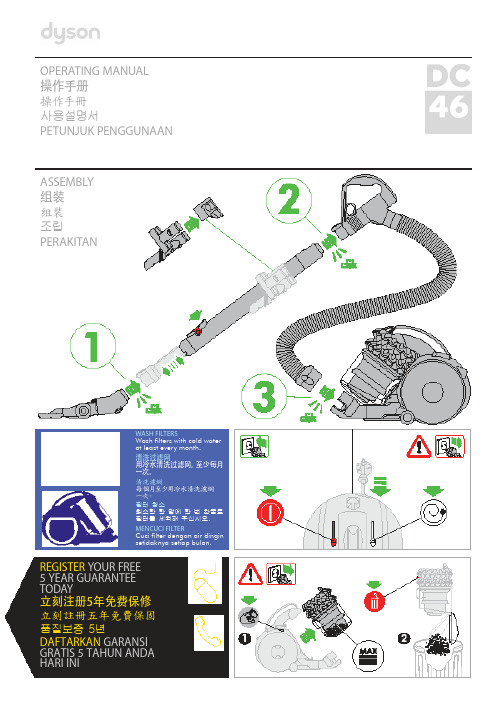
OPERATING MANUAL操作手册操作手冊사용설명서PETUNJUK PENGGUNAANASSEMBLY组装組裝조립PERAKITANWASH FILTERS清洗过滤网清洗濾網필터 청소MENCUCI FILTERREGISTER YOUR FREE5 YEAR GUARANTEE TODAY立刻注册5年免费保修立刻註冊五年免費保固품질보증 5년DAFTARKAN GARANSI GRATIS 5 TAHUN ANDA HARI INIDYSON CUSTOMER CARETHANK YOU FOR CHOOSING TO BUY A DYSON APPLIANCEAfter registering your free 5 year guarantee, your Dyson appliance will be covered for parts and labour for5 years from the date of purchase, subject to the terms of the guarantee.If you have any questions about your Dyson appliance, call the Dyson Helpline with your serial number and details of where/when you bought the appliance.Most questions can be solved over the phone by one of our trained Dyson Helpline staff.Alternatively visit for online help, general tips and useful information about Dyson.戴森客户服务感谢您选择购买戴森产品登记获取 5 年免费保修后,您的戴森产品自购买之日起,将享受 5 年的零件和人工保修服务,但须符合保修条款的规定。
海尔 HZ-G581G 手持锂电吸尘器 使用说明书
电动地刷
电动除螨刷 3
操作说明
吸尘器的装配
注意
●安装、更换附件前需要关闭吸尘器电源。 ●本产品在没有固定倚靠的情况下无法保持自身直立。存放时请将机器和附件 分开置于挂架上!
1.主机安装 (1).如图1将延长管对准电动地刷接头插入,卡扣到位; (2).如图2将主机吸口端向下卡入延长管连接端,卡扣到位。
在废弃器具前,必须将电池从器具中取出。 在取出电池时,器具必须要断电 废弃电池包应安全的回收处理,请勿随意丢弃。 如果电源适配器的线损坏,为了避免危险,必须去制造商当地维修部或类似部 门的专业人员更换。
1
产品说明
产品零件与设备
1
2
10
3 4
5 11
13 14 15
16 17 12
18
6
7
1. 充电插孔 2. 出风口 3. 电机罩 4. 释放按钮 5. 延长管 6. 释放按钮
VI
长扁吸
二合一刷 电源适配器
本表格依据SJ/T 11364的规定编制。 O:表示该有害物质在该部件所有均质材料中的含量均在GB/ T26572规定的限
量要求以下。 X:表示该有害物质至少在该部件的某一均质材料中的含量超出GB/ T26572规
定的限量要求。
12
技术规格
主要技术参数
产品类别
真空吸尘器
保护装置启动
堵塞的去除”处理
充电时间不足
参照说明书“电池 充电”正确充电
电池老化
购买原厂电池包后更换
11
限用物质申明
限用物质申明
本表格是根据SJ/T11364《电子电气产品有害物质限制使用标识 要求》和GB/T26572《电子电气产品中限用物质的限量要求》, 对本产品零部件中所含限制使用的有害物质含量所做的申明。
LG 吸尘器 VK5320GHTNY 英文使用说明书

VK5320GHTNYVK5320GHTNY 220V~ 50Hz 1800W 2000W 5.2Kg1.5L282mm×435mm ×258mm2358-1011121413467GB17625.1-20122456⏙⋕2691073783491234101211121314Dust Capacity: 1.5L282mm×435mm ×258mmVK5320GHTNY220V~ 50Hz5.2KgProduct specifications Attention before using the appliance Assembling and adjusting the Cleaner Parts description and assembly AccessoriesHow to separate, clean and assemble exhaust filter Disassembling Cleansing AssemblingIf you have a problem Packing List 1516-17182425~2627Using and cleaning method of all the accessory nozzles How to use crevice tool, upholstery nozzle and dust brush How to use and clean corner nozzle19-20How to use sani punch nozzle How to use Hard floor nozzle How to clean sani punch nozzleHow to separate, clean and assembly the dust tank and the motor protection filter How to separate, clean the dust tank How to assemble the dust tankHow to separate, clean the motor protection filter How to assemble the motor protection filter21~231800W 2000WGB17625.1-20121518Corner nozzle makes you more convenient to clean corner and small space.Corner nozzle can be used to clean common floor, also can be used to clean corner whenUsing Upholstery Nozzle & Dust Brush & Crevice ToolUsing methodCleaningUse crevice tool to cleanUse calico dishclothto cleanUsing and cleaning method of all the accessory nozzlesAssemblingUsingAssemblingUsingUsing and cleaning the corner nozzleUsing the Floor/Carpet NozzleUpholstery nozzle can be used to clean upholstery, mattresses, etc.furniture brim, book and other irregular surface.Crevice tool can be used to clean the gap of sofa cushion of the place with cobweb and other place hard to reach.19Efficient cleaning of hard floors1269107348Turn the button 2~3 timeswhen the dust is filled in the dustbin whilecleaning.(the dust can be 20How to separate, clean and assemble the dust tank and the motor protection filterWashing dust tank with cold water after emptying the dust. dry it fully in shade so that moistureis removed entirely.How to separate, clean the dust tankAssemble the dust tank and the body of Cleaner till the bottom locker clicks.3Push the front end of top cover till the locker clicks.4How to separate, clean the motor protection filterTake out the motor protection filter from the appliance along the arrow direction. Please clean it at least once month or based on the using frequency. Suggest cleaning the motor protection filter anddry it fully in shade so that moisture is removed entirely.Warning: Please check the assembling of theprotection filter before using the cleaner again22Fix the assembled filter.3Assemble the dust tank.423The exhaust filter should be cleaned at least once half a year.Allow exhaust filter to dry in a shaded location for a dry.Cleansing 1DisassemblingShake off the exhaust filter.2Insert the exhaust filter and join it properly242526Crevice toolHard Floor NozzleSani Punch27/cnMFL67854603。
戴森 吸尘器 用户手册说明书

User manualIn the boxGetting startedCharging your machine Caring for your floors Emptying your bin Cleaning your bin Washing your filterWashing your brush barS V 12 J N .00000 P N .000000-00-00 00.00.00 V E R S I O N N O .01Cleaning your tools Clearing blockagesLooking after your machineThe Dyson cordless vacuum cleaner in an upright position with the wand and cleaner head attached.Dyson micro one point five kilogramsIn the boxWand clipClips to your vacuum's wand to hold tools.A plastic clip that attaches to the wandGetting startedCharging your machineFor the best experience, we recommend fully charging your machine, and any additional batteries, as soon as you open the box and after every clean.The LED light on the end of the handle will flash when the power is running low and you need to put your battery on to charge.Connect the charger directly to the charging point on the base of the handle of your machine. You can also connect to your dock as shown in the installation instructions supplied with your dock.The LED light on the end of the handle will pulse with a blue LED light when charging, and the light will go out when fully charged.It can take up to four hours to fully charge your battery. Your battery has been designed to be left on charge.Your machine won’t operate or charge if the ambient temperature is below 5°C (41°F). This is designed to protect both the motor and battery.You can help prolong the battery life by leaving your machine to cool downbefore recharging.Caring for your floorsCheck that the underside of the cleaner head or tool is clean and free from any objects that may cause damage.Before vacuuming your flooring, rugs, and carpets, check the manufacturer’s recommended cleaning instructions.This machine is designed for use on hard floors. The brush bar on your machine can damage certain flooring. Some rug materials may fuzz if a rotating brush bar is used when vacuuming. If this happens, we recommend vacuuming without the motorised floor tool and consulting with your flooring manufacturer.Washing your filterWash your filter at least once a month to maintain the best performance. Make sure the filter is completely dry before refitting.Twist off your filterDon’t put any part of your machine in a dishwasher or use detergents, polishes or air fresheners.Turn your filter anti-clockwise and pull it away from your machine.Before washing your filter, tap it gently over a bin to remove any loose dust and debris.Wash your filterWash the outside of the filter, rubbing with your fingers to remove the dirt. Carefully rinse the inside filter, without allowing water to fill the filter. Repeat these steps until the water runs clear.Shake and dryEmpty the filter and shake firmly to remove excess water.Keep shaking until there’s no water coming from the filter.Place your filter end up, as shown.Leave your filter to dry for at least 24 hours in a well-ventilated, warm place. Don’t dry your filter in a tumble dryer, microwave or near a naked flame. Important: your filter must be completely dry before you put it back into the machine. Your machine could be damaged if used with a damp filter.Refit your filterTo refit your filter, slide it onto the handle and turn it clockwise until it clicks into place.Your filter may need more frequent washing if you vacuum fine dust,use Max mode frequently or use with the bin full.A hand holding the filter with thenarrow end pointing downwards withdroplets of water being shaken from thefilter and again, with the end pointingdownwards shaking water out.The filter is left to drywith the pleated filterend facing upwards.Filter with hand overthe open end witharrows showing ashaking motion.Filter held in uprightposition, with the widerend in the palm of ahand. Water runningfrom a tap into thenarrower end.The filter is located at therear of your machine.Holding the filterby the hard, plasticend, tap the otherend over the bin.Washing your brush barRemove brush barDon’t put any part of your machine in a dishwasher or use detergents, polishes or air fresheners.Press the cleaner head release button to remove it from the wand.Pull the brush bar off the end cap and put the end cap to one side, don’t wash it.Wash and dry brush baror dirt. Keep washing until the water runs clear.Stand the brush bar upright and leave for at least 24 hours to dry.Replace your brush barsMake sure your brush bar is completely dry before refitting.Rotate the end cap until it clips securely back into position.The cleaner head housing is not washable and should only be wiped over with a damp lint-free cloth.Cleaning your toolspolishes or air fresheners.Light pipe crevice tool Mini motorised toolClearing blockagesIf your machine detects a blockage, the motor will pulse six times. You won’t be able to use your machine until the blockage has been cleared.If you try to use your machine when the motor is pulsing, it will automatically cut out.Leave your machine to cool down before looking for blockages and, for yoursafety, take care not to touch the power button.Disconnect your machine from the charger before looking for blockages. Be careful not to touch the trigger and be aware of sharp objects.Leave your machine to cool down before looking for blockages.Don't use your machine when looking for blockages as this could cause injury.With the wand removed from the machine, check for blockages at both ends of the wand.With the bin removed, check for blockages, paying particular attention to the air inlet, located at on the right–hand side of the machine just below the point where the bin joins the main body of the machine.Turn the cleaner head over to check for obstructions on the brush bar and air inlet.runner.Remove any obstructions from the brush bar.Looking after your machineTo always get the best performance from your machine, it’s important to clean it regularly and check for blockages.Look after your machineIf your machine is dusty, wipe with a damp lint-free cloth.Check for blockages in the cleaner head, tools and main body of your machine. Wash your filter regularly and leave to dry completely.Don’t use detergents or polishes to clean your machine.Look after your batteryTo get the best performance and life from your battery, use Eco mode.Your machine won’t operate or charge if the ambient temperature is below 5°C(41°F). This is designed to protect both the motor and battery.Your serial numbersYou can register your machine using the serial number found on the bottomof your machine.You can find your serial numbers on your machine, battery and charger.Use your serial number to register.。
飞利浦吸尘器说明书
-- 在将适配器连接电源前,务必检查当地的电压 是否与电源适配器所标电压一致。
-- 清洁或维护产品之前,必须先从插座拔掉插头。 -- 如果适配器或吸尘器本身受损或吸尘器不完整,
切勿使用吸尘器。 -- 如果适配器损坏,为了避免危险,必须由飞利
浦或其授权的服务中心,或类似的专职人员来 更换。 -- 仅使用原装型号更换充电电池。 -- 切勿尝试自行修理吸尘器。 -- 本吸尘器仅限于室内使用。将所有通向室外的 门保持关闭。 -- 切勿在危险区域(例如在火炉、淋浴或泳池附 近)使用吸尘器。 -- 本吸尘器仅限于清洁硬地板。它在软地板上的 性能可能受到限制。 -- 肢体不健全、精神有障碍及缺乏相关经验和知 识的人(包括儿童)必须在监护人的监督及指 导下使用。 -- 本吸尘器不是玩具!应照看好儿童,确保他们 不玩耍吸尘器。 -- 将产品及其线缆放在儿童接触不到的地方。 -- 确保宠物远离吸尘器。切勿让宠物坐在或站在 吸尘器上。 -- 确保宽大的衣服、毛发和身体部位远离吸尘器 的毛刷。 -- 清除地板上的所有易碎和轻物体,并确保吸尘 器不会缠绕百叶窗或窗帘的拉线。 -- 切勿让吸尘器在其它产品的电源线或其它线缆 上移动,否则可能导致危险发生。 -- 如果发生危险情况,或吸尘器行为异常或发出 异味,请关闭吸尘器。 -- 为防止损坏,如果滤网在集尘桶中不存在或没 有正确放置在集尘桶中,切勿使用吸尘器。 -- 当吸尘器正在清洁时,切勿覆盖吸尘器或堵塞 通风口,否则可能导致吸尘器过热。 -- 切勿将吸尘器存放在 60°C 以上或 -10°C 以下的环境中。 -- 切勿在 45°C 以上的房间中使用吸尘器。 -- 切勿焚烧、拆卸充电电池或将其置于 60°C 度 以上的环境中。如果过热,充电电池可能爆炸。 -- 开始清洁前,请务必确保带滤网的集尘桶已经 放置在吸尘器的集尘桶仓内。
吸尘器使用说明
吸尘器使用说明一、前言吸尘器作为家庭清洁工具的一种,广泛应用于家庭和办公场所。
为了更好地利用吸尘器,延长其使用寿命,避免不必要的损坏和事故发生,特编写本使用说明,希望用户能够认真阅读并按照指导实施操作。
二、准备工作1. 根据吸尘器类型,选择合适的吸尘器袋或吸尘容器。
2. 确保电源插座可以提供稳定且可靠的电力供应。
三、使用方法1. 开机前a. 检查电源线是否损坏,如果有损坏应及时更换。
2. 接通电源a. 将吸尘器电源线插入电源插座,确保插头和插座接触良好。
b. 打开吸尘器电源开关,吸尘器即可正常工作。
c. 如需停止使用吸尘器,应首先关闭电源开关,待机器完全停止运转后,再拔出电源插头。
3. 吸尘器操作a. 操作过程中,保持吸嘴与地面平行,并保持一定的距离,确保吸力与清洁效果。
b. 小心移动吸尘器,以免碰撞家具或其他物品,引发损坏或事故。
c. 若需要吸尘器转向,应先切断电源,以免出现危险。
4. 吸尘效果a. 细尘清洁:使用细尘吸头,可清除地毯、地板等表面的细小灰尘颗粒。
b. 宠物毛发清洁:使用特殊宠物毛发吸头,吸尘时要控制好吸力,确保彻底清除毛发。
c. 较大杂物清洁:使用大口径吸头,如需要清理碎纸、渣土等较大的垃圾。
四、保养维护1. 每次使用后,应断电并拔掉电源插头,待吸尘器冷却后再进行收纳。
2. 定期清洗滤芯和滤网,避免堵塞影响吸力。
3. 如吸尘器带有旋转刷头,应定期清理刷头上的纠缠杂物,确保刷头顺畅运转。
4. 检查电源线是否有损伤,如有问题应立即维修或更换。
5. 长时间不使用吸尘器时,应将其放置在干燥通风的地方,避免潮湿引起的故障。
五、注意事项1. 在清洁带有导电液体或有可能发生爆炸的地面时,切勿使用吸尘器。
2. 当吸尘器使用过程中出现燃烧、异味或其他异常情况,应立即停机并断电,确认故障原因后再使用。
3. 儿童或无经验的人禁止操作吸尘器,以免发生不必要的事故。
4. 吸尘器不能用于吸烟蒂、火柴头等易燃材料,以及长丝、电路板等易引发故障的材料。
微型吸尘器操作、保养、配件手册说明书
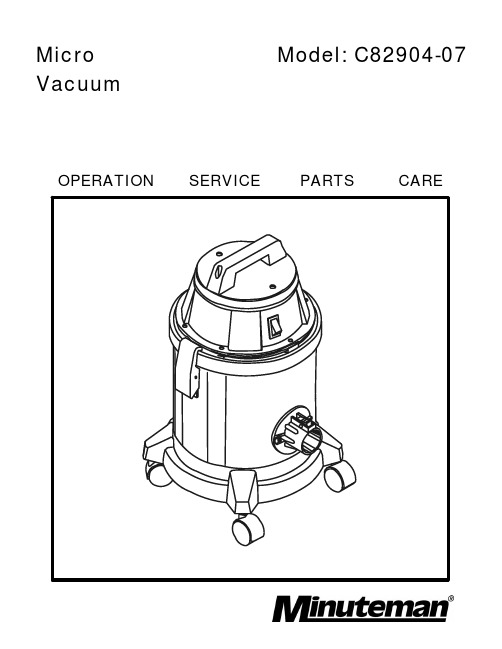
Micro Model: C82904-07 VacuumFOR COMMERCIAL USE ONLYIMPORTANT SAFETY INSTRUCTIONSWhen using an electrical appliance, basic precautions should always be followed, including the following:READ ALL INSTRUCTIONS BEFORE USINGWARNING - To reduce the risk of fire, electric shock, or injury:•Do not leave appliance when plugged in. Unplug from outlet when not in use and before servicing.•To avoid electrical shock, do not expose to rain, store indoors. WARNING:To reduce the risk of electrical shock - Do not use on wet surfaces. Do not expose torain. Store indoors.•Do not allow to be used as a toy. Close attection is necessary when used by or near children.•Use only as described in this manual. Use only manufacturer’s recommended attachments.•Do not use with damaged cord or plug. If appliance is not working as it should, has been dropped, damaged, left outdoors, or dropped into water, return it to a servicecenter.•Do not pull or carry by cord, use cord as a handle, close a door on cord, or pull cord around sharp edges or corners. Do not run appliance over cord. Keep cord awayfrom heated surfaces.•Do not unplug by pulling on cord. To unplug, grasp the plug, not the cord.•Do not handle plug or appliance with wet hands.•Do not put any object into openings. Do not use with any opening blocked; keep free of dust, lint, hair, and anything that may reduce air flow.•Keep hair, loose clothing, fingers, and all parts of body away from openings and moving parts.•Do not pick up anything that is burning or smoking, such as cigarettes, matches, or hot ashes.•Do not use without dustbag and/or filters in place.•Turn off all controls before unplugging.•Use extra care when cleaning on stairs.•Do not use to pick up flammable or combustible liquids such as gasoline or use in areas where they may be present.•Connect to a properly grounded outlet only. See grounding instructions.SAVE THESE INSTRUCTIONSINSPECTIONCarefully unpack and inspect your machine for shipping damage. Each unit is tested and thoroughly inspected before shipment, and any damage is the responsibility of the delivery carrier who should be notified immediately.ELECTRICAL - 115 VoltThis machine is designed to operate on a standard 15 amp. 115 volt, 60 hz, AC circuit. Voltages below 105 volts AC or above 125 volts AC could cause serious damage to the motor. GROUNDING INSTRUCTIONSThis appliance must be grounded. If it should malfunction or breakdown, grounding provides a path of least resistance for electric current to reduce the risk of electric shock. This appliance is equipped with a cord having an equipment-grounding conductor and grounding plug. The plug must be plugged into an appropriate outlet that is properly installed and grounded in accordance with all local codes and ordinances.DANGERImproper connection of the equipment-grounding conductor can result in a risk of electric shock. Check with a qualified electrician or service person if you are in doubt as to whether the outlet is properly grounded. Do not modify the plug provided with the appliance — if it will not fit the outlet, have a proper outlet installed by a qualified electrician.This machine is for use on a nominal 120 volt circuit and has a grounding plug that looks like the plug illustrated in Sketch A. Make sure that the machine is connected to an outlet having the same configuration as the plug. No adapter should be used with this appliance.WARNINGThis vacuum may contain potentially hazardous dust depending on its application. Special handling of contaminated disposal bags and filters is recommended. Disposal must be in compliance with local EPA regulationsUSER MAINTENANCE INSTRUCTIONSAll service and repair should be performed by qualified vacuum service representative or electri-cian. No user serviceable components are employed in the electrical vacuum lid head assembly. No lubrication of the motor is required.CLOTH BAG & HOSE ASSEMBLYCloth bag and hose assembly are user maintenance items and can be replaced when worn out. For optimum performance, empty and clean filter bag regularly. A clogged and dirty bag restricts the flow of air and results in reduced vacuum. The hose assembly can be maintained by wiping off with a dampened cloth of mild liquid soap and water, then allowed to dry.CORD STORAGEWhile not in use storage can be accomplished by winding cord around motor lid assembly. Cord should be completely unwound from lid assembly during operation.•Do not use with damaged cord or plug. If appliance is not working as it should, has been dropped, damaged, left outdoors, or dropped into water, return to service center.•Do not pull or carry by cord, use cord as handle, close a door on cord, or pull cord around sharp edges or corners. Do not run appliance over cord. Keep cord away from heated surfaces.•Do not unplug by pulling cord. To unplug, grasp the plug, not the cord.•Do not handle plug or appliance with wet hands.•Always unplug the machine when removing the motor head off the tank. This equipment should be stored indoors and not exposed to rain.Always unplug the machine when removing the motor head off the tank. This equipment should be stored indoors and not exposed to rain.OPERATION AND FILTER CARE INSTRUCTIONSThe Minuteman Critical Filter Vacuum has been specifically designed to clean up fibrous asbestos, mold, and lead dust of all types. Special filters reduce the incidence of airborne dust that would be created by any other method of cleaning.·During the removal of hazardous dust, do not sweep, scoop, shovel, or in any manner handle other than by vacuuming.·Do not at any time attempt to bypass, remove, substitute, or by any other means change the filters used in this vacuum. Use only approved Minuteman vacuum filters and filter bags.·Before attempting to use and before cleaning, be certain that you fully understand·the instructions given for the setting up or cleaning/changing of filters of this vacuum.·Since each facility has its own individual and unique cleaning problems, it is suggested that you use the following guidelines in determining the length of time between filter changes.·In light cleaning situations change filters once a day unless you have determined by checking that a shorter or longer period of time would be necessary to meet 10 pounds of material.TANK/FILTER SET-UP PROCEDURE1.Take the paper bag that has the cardboard collar attached and open it by gently pullingthe folds apart.2.You will notice two creases on the top side of the collar; carefully bend the ends down (toward) thebag.3.Insert this bag into the tank and push it to the bottom.4.Locate the cardboard collar around the intake tube and gently work it up past the raised ring thatruns around the tube.5.Place the optional cloth filter bag onto and into the tank.6.Position the lid on the tank as shown on the next page.7.Snap the lid latches into place.For proper cleaning of tank and removal/changing of filters, see “Procedure for Removing Contaminated Filters and for Cleaning of Contaminated Tank”.Raised tab LatchPROCEDURE FOR REMOVING CONTAMINATED FILTERSAND FOR CLEANING OF CONTAMINATED TANKFor the benefit of your health, you should always wear personal protective clothing and respiratory protection any time you are using or cleaning this vacuum.1.Unplug machine from power source.2.Carefully and slowly remove lid only (be sure you have not accidentally lifted the cloth filter bagat the same time). Set the lid/filter assembly aside.3.Gently tap the inside of the cloth bag to loosen any particles that may be on the oppositesurface. Do this all around the inside surface of the bag.4.Gently remove the cloth bag and set aside.ing a cloth, dampened with water (not soaking wet), wipe down all of the exposed surfacesinside of the tank; put the cloth aside, do not discard.6.Carefully and “very” slowly, push the paper bag down and off of the intake tube, using theattached cardboard collar. After the collar is removed from the intake tube, take the damp cloth and wipe off any surfaces that were not previously cleaned; at this time, re-wipe the entire inside of the tank and dispose of cloth in the plastic bag.7.CAUTION: Hazardous materials must be disposed of properly. Never throw contaminateddebris in your usual trash receptacle. Place debris in a plastic bag or can marked “HAZARDOUS MATERIALS” and take to a hazardous waste handler.8.For proper assembly of new filters, see “Tank/Filter Set-Up Procedure”.CHANGING THE BLACK FOAM PREFILTERThe black filter should be changed, using all of the precautions previously mentioned. The filter should be changed when any of the following takes place:1.Anytime there is an indication of a filter tear during normal operation of the unit. This tearcould be in any of the filters used.a.paper dust containment bagb.cloth filter bagThese tears would show up during the tank clean-out procedure, or....2.Every other tank clean-out period.To change the prefilter, do the following before you do Step #3 of the normal clean-outprocedure:a.Wipe down all of the exposed surfaces on the underside of the removed lid, using thedampened wiping cloth (see Step #6).3.To install prefilter Item 1 simply slide black foam sleeve over HEPA canister.PARTS LISTNO. REQ'D DESCRIPTIONITEM PARTHEPA-MICROVAC1 110025 1 FILTER,2 110027 1 PREFILTER SLEEVE, ALLERVAC - SINGLE3 290017 2 MOLDED VAC MOTOR GASKET4 290031 1 LID GASKET 294/6 DIECUT5 290032 1 DOME SEAL 2966 380001-4 1 MOTOR-VAC BYPASS 120V (ECM) W/ WIRES7 740088 1 SWITCH-VAC LIGHT SENSORFOAM8 380064 1 RING,9 381020 1 CORD-16GA-3 50FT MED GREYDRY10 829091 1 COVER-MOTOR4G11 460001 1 HANDLE BASIC 460 BLACK12 460101 1 MOTORBLACKCAP-13 460104MCH 1 MOTOR HOLDOWN 829SERIES14 460120 1 MOTOR PAN ASY 829SERIES15 700287 1 GROMMET16 829099 1 TUBE SS .125 X 1.517 800071 1 CLEAR TUBBING 12" LONG18 711125 3 SCR-ST-B 10 X .50 NI19 711160 9 SCR-HI/LO #10 X 5/8 ZINC20 711161 8 SCR-HI/LO #10 X 3/4 ZINC21 711162 2 SCR-HI/LO #10 X 1 1/2 ZINC22 715029 1 DECAL-NAME PLATE SERIALFILTER23 715446 1 DECAL-HEPA24 715009 1 DECAL-WARNING TO AVOID25 809754 1 SWITCH-ROCKERKTR64BX26 828893 1 RIVET-BAP27 831801-2 1 RECEPTACLE ASY, FEMALE W/PIGGYBACKS(ECM)REPLACEMENT28 380005 1 CARBONBRUSHPARTS LISTNO. REQ'D DESCRIPTIONITEM PARTVNNDIECUT1 390087 1 GASKET2 390110 1 INTAKE ASSEMBLY ALUMINUM3 460111 1 TANK 4GAL LOW INTAKETNKPOLY4 460114 2 LATCH5 460115 1 DOLLY, PLAST VAC TNK BLK6 460118 4 CASTER7 711160 4 SCR-HI/LO #10 X 5/8 ZINC8 712320 2 WSR .20 X .45 X .048 NYL9 712638 2 NUT HEX 10-24 SS NYLOC10 712824 2 SCR-MC 10-24 X .75 TRUSS HD ST11 750118 1 INTAKE ASSY TUBE 4/6 GALKTR64BX12 828893 4 RIVET-BAPParts ListNO. REQ'D DESCRIPTIONITEM PART1 711909 4 RIVET-POP .19 X .44 AL2 712764 4 WSR #10 SS3 760244MCH 1 PLASTIC BAG FRAME W/HOLE4 805043 1 BAG ONLY 4G5 829093 1 BAG FRAME 4G6 390005 1 GASKET 4/6 GAL 1TO1*** 829094 1 BAG ASY COMP987620Created 11/06A Member of the Hako Group of CompaniesWorld HeadquartersMinuteman Canada, Inc.Minuteman International, Inc.2210 Drew Road 111 South Rohlwing RoadMississauga, Ontario Addison, Illinois 60101L5S 1B1Phone 630-627-6900Phone 905-673-3222Fax 630-627-1130Fax 905-673-5161Minuteman International Made Simple Commercial Limited WarrantyMinuteman International, Inc. warrants to the original purchaser/user that the product is free from defects in workmanship and materials under normal use. Minuteman will, at its option, repair or replace without charge, parts that fail under normal use and service when operated and maintained in accordance with the applicable operation and instruction manuals. All warranty claims must be submitted through and approved by factory authorized repair stations.This warranty does not apply to normal wear, or to items whose life is dependent on their use and care, such as belts, cords,switches, hoses, rubber parts, electrical motor components or adjustments. Parts not manufactured by Minuteman are covered by and subject to the warranties and/or guarantees of their manufacturers. Please contact Minuteman for procedures in warranty claims against these manufacturers.Special warning to purchaser — Use of replacement filters and/or prefilters not manufactured by Minuteman or its designated licensees, will void all warranties expressed or implied. A potential health hazard exits without original equipment replacement.All warranted items become the sole property of Minuteman or its original manufacturer, whichever the case may be.Minuteman disclaims any implied warranty, including the warranty of merchantability and the warranty of fitness for a particular purpose. Minuteman assumes no responsibility for any special, incidental or consequential damages.This limited warranty is applicable only in the U.S.A. and Canada, and is extended only to the original user/purchaser of this product. Customers outside the U.S.A. and Canada should contact their local distributor for export warranty policies. Minuteman is not responsible for costs or repairs performed by persons other than those specifically authorized by Minuteman. This warranty does not apply to damage from transportation, alterations by unauthorized persons, misuse or abuse of the equipment,use of non-compatible chemicals, or damage to property, or loss of income due to malfunctions of the product.If a difficulty develops with this machine, you should contact the dealer from whom it was purchased.This warranty gives you specific legal rights, and you may have other rights which vary from state to state. Some states do not allow the exclusion or limitation of special, incidental or consequential damages, or limitations on how long an implied warranty lasts, so the above exclusions and limitations may not apply to you.Cord Electric Group ................Three years parts, two years labor, ninety days travel (Not to exceed two hours)Exceptions Port-A-Scrub, one year parts, six months laborMPV 13, one year partsMPV 14 and 18, two years parts, one year laborRapidAir blower, one year parts, one year laborExplosion-Proof Vacuum, one year parts, one year laborPneumatic Vacuums, three years parts, one year laborBattery Operated Group.....................................Three years parts, two years labor, ninety days travel(Not to exceed two hours)Exceptions Sweepers, one year parts, one year labor, ninety days travel(Not to exceed two hours)Internal Combustion Group................................One year parts, one year labor, ninety day travel(Not to exceed two hours)Replacement Parts ............................................Ninety daysBatteries .............................................................0-3 months replacement, 4-12 months pro-ratePolypropylene Plastic Tanks .............................Ten years, no additional labor。
吸尘器使用说明书
吸尘器使用说明书本使用说明书旨在帮助用户正确、安全地使用吸尘器,并有效地清洁居室环境。
请在使用前仔细阅读说明书,并按照操作指南进行操作。
一、产品概述1. 本吸尘器采用先进的吸力技术,适用于各类地板、地毯、家具及其他家庭表面的清洁工作。
2. 产品外形美观大方,携带方便,是您日常清洁的好助手。
二、安全须知1. 使用前请确保电源插座与产品的电源线插头相匹配,注意电压稳定,以免发生电器故障。
2. 操作过程中请勿将吸尘器靠近明火或者高温物体,以免引起火灾或其他意外。
3. 注意保持插头及电源线干燥,避免受潮,以防电气短路。
三、准备工作1. 在开始吸尘前,请将家中的杂物整理干净,尽量清空各个清洁区域,以便提高吸力效果。
2. 检查吸尘器的滤芯是否装好,确保吸尘器吸力有效。
3. 根据需要选择合适的吸头和吸管,以便于清洁不同表面。
四、操作步骤1. 打开电源开关,启动吸尘器。
2. 将吸嘴贴近需要清洁的区域,保持吸嘴与地面平行,缓慢移动吸嘴,让吸尘器充分吸附尘垢。
3. 每次使用无需过度施力,凭借吸力即可轻松吸尘,如遇难清洁的区域,可适量增加吸力以提高效果。
4. 清洁结束后,及时关闭电源开关,停止吸尘器的运行。
五、清洁与维护1. 使用完毕后,请拔掉电源插头。
2. 清理吸尘器的滤芯和垃圾盒,并使用清水彻底清洗干净,但不可浸泡在水中。
3. 吸尘器的外壳可使用湿布擦拭,但请避免使用任何化学清洁剂。
4. 定期更换滤芯和清理吸嘴,以确保吸尘器的正常使用和清洁效果。
5. 请将吸尘器存放在干燥通风的地方,避免受潮或暴露在阳光下。
六、故障排除在使用吸尘器过程中,如果遇到以下故障,请先检查是否按照操作指南进行操作,并根据需要采取以下解决方案:1. 吸力不足:检查滤芯是否清洁,吸嘴是否堵塞,清理或更换相应部件。
2. 电源故障:检查电源线是否连接松动,电源插座是否正常,确保电源供应充足。
3. 异常噪音:检查吸嘴和吸管是否安装牢固,是否有异物卡住。
追觅 X8 无线吸尘器 说明书

欢迎使用追觅无线吸尘器目录吸尘器的安装4使用吸尘器8清洁与更换部件10吸尘器的存放和收纳1314整产品中有害物质名称及含量15故障排除16保修说明17售后服务3重要的安全说明警告请阅读并妥善保管这些说明为了避免使用不当所造成的触电、起火等意外伤害,请在使用前仔细阅读使用说明书本产品不可由身体、感官或智力残障人士以及无相关经验与知识之人士(包括儿童)使用,除非有监护人的看管或指导,以确保其能够安全使用本产品。
禁止儿童操作产品或者当作玩具使用,当在儿童附近使用产品时,需要密切关注;禁止儿童在无监护人的情况下清理或者维护产品。
禁止在户外或潮湿的表面使用,仅限室内干燥表面使用,请勿以湿手触摸插头或产品的任何部分。
为了防止起火、爆炸或受伤,请在使用前检查锂电池以及充电器是否有损坏,禁止在锂电池或充电器损坏时使用吸尘器。
吸尘器软绒滚刷、电池、金属连接杆以及吸尘器主机均为带电部件,请勿浸入水中或者其它液体中清洗,日常清洁后,请确保所有过滤器彻底干燥。
当清理软绒滚刷时,请先关闭主机,防止旋转的滚刷损伤用户,禁止在没有安装任何配件的情况下使用产品。
仅限使用原装充电器,请勿使用非官方适配器,否则可能导致锂电池起火。
请勿使用产品吸水、汽油等可燃或可爆炸液体,禁止吸入有毒溶液,例如氯漂白剂、氨、下水道清理剂或者其它液体。
禁止用吸尘器清洁石膏板灰、壁炉灰以及灰烬,禁止吸入冒烟物或燃烧物,例如火炭、烟蒂或者火柴。
禁止用吸尘器清洁尖锐物品,例如玻璃、钉子、螺丝、硬币,否则将导致吸尘器的损坏。
请将产品气流通道和活动部分远离毛发、宽松服装、手指及身体其他部分,请勿将金属连接杆或其他配件对着眼睛、耳朵或将其放入口中。
禁止在吸口处放置任何物体。
禁止在任何吸口堵塞时使用吸尘器,灰尘、棉絮、毛发或者其他物品可能造成气流减弱,请及时清理。
请勿将吸尘器靠置于椅子、餐桌等不稳定表面,以防跌落后损坏吸尘器或者伤害到用户,当吸尘器因为摔倒、损坏或者其它异常时,请联系官方授权维修,请勿自行拆解。
吸尘器说明书n

高距离吸尘器设计者:李浪,孙雁涛,刘胜魁,李旭辉,邱艳,指导教师:孙明,张克猛(西安交通大学城市学院机械工程系,西安,710018)作品内容简介本作品的主题是民用清洁类机械。
针对高空墙面及天花板的除尘,在普通地面吸尘器的基础上,设计了可以自由升降、旋转、移动的顶棚吸尘器支架,改进了传统吸尘器的洗尘刷结构,研制出了顶棚吸尘器。
本作品由丝杠螺母传动机构带动剪叉式的升降平行四边形机构,实现升降平台的自由升降;通过电机带动,实现吸尘管在空间的自由转动;整个升降平台置于小车之上,从而使吸尘刷具有上、下,前、后,左、右多个自由度,并通过单片机控制,洗尘刷可在高空完成上下、左右移动的除尘作业,进一步还可利用电机驱动小车,使吸尘刷前后运动也实现自动控制,从而实现本作品的完全机电一体化。
作为清洁机械,本作品形成产品后,可供家庭及学校、机关、医院、会馆、教堂等部门使用。
联系人:孙明联系电话:866544228Email:msun@1 作品研制背景及意义1.1 吸尘器发展历史1901年,英国土木工程师布斯到伦敦莱斯特广场的帝国音乐厅参观美国一种车厢除尘器示范表演。
这种除尘器使用压缩空气把尘埃吹入容器内,布斯认为此法并不高明,因为许多尘埃未能吹入容器。
后来,它反其道而行之,用吸尘法,布斯做了个很简单的试验:将一块手帕蒙在椅子扶手上,用口对这手帕吸气,结果使手帕附上了一层灰尘,于是,他制成了吸尘器,用强力电泵把空气吸入软管,通过布袋将灰尘过滤。
1902年布斯的服务公司奉召到西敏斯大教堂,把爱德华七世加冕典礼所用的地毯清理干净。
此后生意日益兴隆。
1906年布斯制成了家庭小型吸尘器,虽名为“小型”,但吸尘器却重达88磅(1磅=0.4536千克),因太重而无法普及。
1907年,美国俄亥俄州的发明家斯班格拉制成轻巧的吸尘器,他当时在一家商店里做管理员,为了减轻清扫地毯的负担,制成了一种吸尘器,用电扇造成真空将灰尘吸入机器,然后吹入口袋。
吸尘器产品说明书掌握吸尘器的使用技巧和清洁过滤器方法
吸尘器产品说明书掌握吸尘器的使用技巧和清洁过滤器方法吸尘器产品说明书一、产品概述吸尘器是一种家用电器,主要用于清理地面、家具和其他家居物品上的灰尘和杂物。
本产品说明书将详细介绍吸尘器的使用技巧和清洁过滤器的方法,以帮助用户更好地使用和维护吸尘器。
二、使用技巧1. 使用前准备在使用吸尘器之前,请确保插头和电源线完好无损,且电源稳定。
检查吸尘器的滤芯是否干净并正确安装。
2. 吸尘器的操作(1)打开电源开关,启动吸尘器。
根据需要选择合适的吸力档位。
(2)沿着地面的方向移动吸尘器,确保吸头严密贴合地面,并缓慢地来回移动,以有效吸附地面上的灰尘和杂物。
(3)当吸尘器袋或容器中的灰尘达到一定程度时,及时清理或更换吸尘器袋或清空吸尘器容器。
3. 注意事项(1)避免长时间使用吸尘器,以免电机过热损坏。
(2)使用时,避免将吸尘器靠近易燃物体或尖锐物品。
(3)长期不使用时,请拔掉电源插头并妥善保管吸尘器。
三、清洁过滤器方法1. 准备工作在清洁过滤器之前,请确保吸尘器已经断开电源并处于关闭状态。
检查过滤器是否存在损坏或破损情况。
2. 清洁过滤器(1)对于可水洗的过滤器,取下过滤器并用清水冲洗。
注意水温不要过高,以免损坏过滤器。
(2)对于不可水洗的过滤器,可以使用软毛刷或吸尘器附件中的小刷子轻轻刷去上面的灰尘和杂物。
(3)清洁过滤器时要避免使用刷子刮擦过滤器表面,以免损坏滤材。
3. 安装过滤器确保过滤器已经干透后,将过滤器安装回吸尘器中。
确保过滤器安装牢固,没有松动或错位。
四、维护保养提示1. 定期清理吸尘器每次使用后,请清理吸尘器的各个部分,尤其是吸头和滤芯区域。
确保吸尘器的畅通性和过滤效果。
2. 定期更换吸尘器袋根据使用频率和吸尘器袋容量,定期更换吸尘器袋。
长时间使用导致吸尘器袋内积聚的灰尘会影响吸力和过滤效果。
3. 注意电线使用在使用吸尘器时,请注意电线的拉扯和保护,避免过度拉伸或受到损坏,以免影响吸尘器的正常使用。
吸尘器使用说明书

吸尘器使用说明书吸尘器使用说明书1. 引言本使用说明书为使用吸尘器的用户提供了使用方法和注意事项。
在使用吸尘器前,请仔细阅读本说明书,并按照说明书中的指示正确使用吸尘器,以确保安全和高效地完成清洁工作。
2. 准备工作在开始使用吸尘器之前,请确保您已经准备好以下物品:- 吸尘器本体- 吸尘器滤网- 吸尘器滤袋(如适用)- 吸尘器吸头和附件(如适用)3. 吸尘器组装1. 将吸尘器本体放置在平稳的地面上,并打开吸尘器包装箱。
2. 检查吸尘器本体是否完整,并根据需要连接吸尘器滤袋或滤网。
3. 根据需要,将吸尘器吸头和附件连接到吸尘器本体上。
4. 吸尘器使用1. 将插头插入电源插座,并确保电源供应稳定。
2. 通过吸尘器本体上的开关或遥控器启动吸尘器。
3. 在使用吸尘器之前,请确保清理工作区域,确保没有大块杂物,以免损坏吸尘器。
4. 将吸尘器吸头放置在地面上,并根据需要调整吸力大小。
5. 开始使用吸尘器清理地面上的灰尘、碎屑等杂物。
6. 在清理过程中,保持吸尘器吸头平稳地移动,以免错过任何区域。
7. 清理完毕后,关闭吸尘器,并将插头拔出电源插座。
5. 吸尘器的维护和清洁1. 在每次使用后,请仔细清理吸尘器吸头和附件,以确保其畅通无阻。
2. 根据需要更换吸尘器滤袋或清洗滤网。
请参考吸尘器说明书中的具体方法。
3. 定期检查吸尘器的电源线,如发现任何损坏或过度磨损的情况,请立即更换。
4. 定期清洁吸尘器本体,以保持其外观整洁,并延长使用寿命。
5. 存放吸尘器时,请将其放置在干燥通风的地方,避免阳光直射或潮湿环境。
6. 注意事项- 在使用吸尘器之前,请仔细阅读和理解本使用说明书,并按照说明进行操作。
- 在使用吸尘器时,请避免将吸尘器吸头接触到水或其他液体。
- 在更换吸尘器滤袋或清洗滤网时,请确保吸尘器已断电并拔出插头。
- 在吸尘器工作时,请注意安全,避免将手指或其他物体接近吸尘器吸头。
- 在清理完毕后,请确保将吸尘器关闭并拔出插头,以防止意外发生。
Miele 无线吸尘器操作说明书

zh操作說明無線吸塵機en Operating instructions Cordless stick vacuum cleanerHS19M.-Nr. 11 484 570内容警告和安全說明 (4)電器指南 (10)環保 (12)安裝及連接 (13)組裝吸塵機 (13)單獨使用主機 (13)連接 Comfort 手柄 (13)連接主機到吸管 (14)放入電池 (14)連接電動吸頭 (15)一般電池資料 (15)電池充電(無壁掛式安裝) (16)電池充電(無壁掛式安裝) (16)壁掛式安裝 (17)固定安裝板 (17)連接壁掛支架 (18)電池充電狀態指示器(充電時) (19)電池充電狀態指示器(使用中) (19)使用附帶的配件 (20)電動吸頭 Multi Floor XXL(SEB 430 或 SEB 435) (20)手提式迷你電動吸頭 (SEB 23) (20)額外 AP01 電池及 LS03 充電器底座 (21)使用 (21)開啟和關閉 (21)調整吸力 (21)照亮操作區域 (22)暫停吸塵時的自立功能 (22)保養 (22)清空集塵器 (22)清潔細微粉塵濾網 (23)清潔預過濾網 (24)清潔集塵箱 (25)清潔電動吸頭/手提式吸頭塵刷 (25)更換充電池 (26)問題解決指南 (27)錯誤訊息 (29)清潔與護理 (30)2内容服務 (30)故障時的聯絡方式 (30)保養 (30)可選配件 (30)購買配件 (30)3警告和安全說明正確用法本吸塵機適用於清潔家庭地板及類似的工作和居住環境。
本吸塵機不適用於建築工地。
本吸塵機不適合在戶外使用。
本吸塵機可用於為地毯、毛毯和堅固硬地板進行常規清潔。
本吸塵機適合在海平面高度在 4000 米以上的地方使用。
本吸塵機只可用於為乾燥地板表面吸塵。
不得對人或動物吸塵。
不得用於任何其他用途、改造或改裝。
本吸塵機不適合身體、感官或心智不健全者,或缺乏經驗與知識的人(包括兒童)使用,除非他們在使用時有人監督,或已知曉如何以安全方式使用,且理解並認識到不正確操作所導致的後果。
强力吸尘的家用吸尘器使用说明书
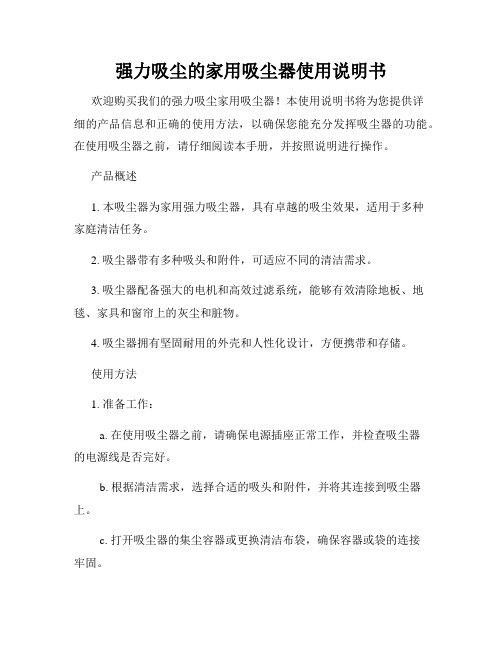
强力吸尘的家用吸尘器使用说明书欢迎购买我们的强力吸尘家用吸尘器!本使用说明书将为您提供详细的产品信息和正确的使用方法,以确保您能充分发挥吸尘器的功能。
在使用吸尘器之前,请仔细阅读本手册,并按照说明进行操作。
产品概述1. 本吸尘器为家用强力吸尘器,具有卓越的吸尘效果,适用于多种家庭清洁任务。
2. 吸尘器带有多种吸头和附件,可适应不同的清洁需求。
3. 吸尘器配备强大的电机和高效过滤系统,能够有效清除地板、地毯、家具和窗帘上的灰尘和脏物。
4. 吸尘器拥有坚固耐用的外壳和人性化设计,方便携带和存储。
使用方法1. 准备工作:a. 在使用吸尘器之前,请确保电源插座正常工作,并检查吸尘器的电源线是否完好。
b. 根据清洁需求,选择合适的吸头和附件,并将其连接到吸尘器上。
c. 打开吸尘器的集尘容器或更换清洁布袋,确保容器或袋的连接牢固。
2. 启动吸尘器:a. 将电源线插入可靠的插座,并确保电源开关处于“关闭”状态。
b. 打开吸尘器的电源开关,吸尘器将开始工作。
c. 针对需要清洁的地方,将吸头靠近目标区域,使其与地面或物体充分接触。
3. 操作技巧:a. 在移动吸尘器时,请将电源线保持在远离行进路线的一侧,以避免绊倒和缠绕。
b. 针对不同类型的地面和物体,可以根据需要调整吸尘器的吸力大小。
c. 如果吸尘器出现堵塞,请立即关闭电源开关,并拆除堵塞物,以避免损坏吸尘器。
d. 每次使用完毕后,请关闭吸尘器的电源开关,并将电源线拔出插座。
注意事项1. 请勿将吸尘器用于吸水、湿润的表面或溶剂清洗。
2. 在使用吸尘器之前,请确保清洁区域没有易燃或有害气体。
3. 使用吸尘器时,请勿将其他物体或巧克力等小颗粒物吸入吸头,以免堵塞并影响吸尘效果。
4. 当吸尘器长时间连续工作时,为了保护电机,请适当休息并清理吸尘器的滤网。
5. 若吸尘器发生故障或需要维修,请联系售后服务中心或授权维修点。
保养与清洁1. 每次使用完成后,请清理吸尘器的集尘容器或清洁布袋,并将其清洗干净并晾干。
戴森手持式吸尘器说明书
TO REDUCE THE RISK OF FIRE, ELECTRIC SHOCK, OR INJURY: 1. Do not charge the Dyson handheld vacuum outdoors, in a bathroom or within 10 feet of a pool. 2. Do not use outdoors or on wet surfaces. 3. Do not allow to be used as a toy. Close attention is necessary when used by or near children. 4. Use only as described in this manual. Use only Dyson recommended accessories and replacement parts. 5. Do not use with damaged cable or charger. If the Dyson handheld vacuum is not working as it should, has been
OPERATING MANUAL 사용설명서 操作手册 操作手冊
ASSEMBLY 조립 组装 組裝
clik
2
WASH FILTER Wash filter with cold water at least every month.
month
개월 个月
필터 청소 최소한 한 달에 한 번 찬물로
個月
필터를 세척해 주십시오.
SAVE THESE INSTRUCTIONS
THIS HБайду номын сангаасNDHELD VACUUM IS INTENDED FOR DOMESTIC HOUSEHOLD AND CAR USE ONLY.
戴森V8 Fluffy无绳吸尘器使用说明书
1
-危险、尖锐、灼热或燃烧的物质。
-潮湿物质或液体。
-易燃、易爆物质和气体。
-来自于炉灶和集中供暖系统的燃烧灰烬或烟煤 -打印机和复印机的墨粉。
如果将真空吸尘器转给第三方,请务必同时转交本-如果意外的吸入液体或者液体进入电器内部;-如果电器掉落并损坏。
要求。
如果由第三方处理(例如空运或货运),2
3请翻开图示页。
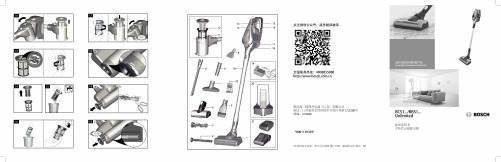
感谢您购买博世 BCS1/BBS1“Unlimited”系列手本说明书手册描述了 BCS1/BBS1“Unlimited”系
11 滤网/绒毛过滤器
1
电池有三种充电方式--使用充电器充电(图 )),23234
4
9■ 将电池存储在-20°C至50°C的温度环境内。
15
6
7
可沿着箭头按下真空吸尘器把手上的开始/停止开关,8
的推移而降低。
这是自然老化过程,不是材料/生产710
超温/低温保护
2012/19/EU(waste electrical and electronic GB4706.1-2005; GB4706.7-2014; GB4343.1-2009;GB17625.1-2012
6。
吸尘器使用说明书
吸尘器使用说明书首部内容:尊敬的用户,感谢您选择使用我们的吸尘器。
为了保证您能正确、安全地使用吸尘器,我们特地为您撰写了以下使用说明书。
请您仔细阅读本手册,并按照要求正确操作。
如有任何问题或疑问,请随时联系我们的客服人员,我们将竭诚为您解答。
一、产品简介:1. 产品名称:某某牌吸尘器2. 产品型号:XXXX3. 主要功能:吸尘、除螨、除菌4. 适用范围:家庭、办公场所、宾馆等5. 外观特点:紧凑、轻便、时尚设计二、产品结构及配件:1. 吸尘器主机:包含电机、吸尘桶、控制面板等核心部件;2. 吸头:根据使用需求,配备不同类型吸头,如地毯吸头、床品吸头、缝隙吸头等;3. 延长管:用于延长吸尘器长度,方便清理高处或较远距离;4. 吸尘刷:适用于清理家具表面、书架等。
5. 其他配件:根据产品型号不同,可能还会配备不同的附件。
三、使用须知:1. 电源要求:请将吸尘器插入稳定的电源插座,并确保电源稳定;2. 适用环境:本吸尘器适用于各种室内干净场所,如家庭、办公室等;3. 注意事项:a) 使用前请检查吸尘器是否正常,如有异常请勿使用;b) 儿童、老人等需要特别关注安全的人群禁止接触吸尘器;c) 使用过程中请勿让其他物体或人员靠近吸尘器;d) 使用时请保持吸尘器周围通风良好,避免堵塞;e) 长时间使用时,请适时休息以免机器过热;f) 使用结束后,请关闭电源开关并拔出电源插头。
四、使用方法:1. 组装:根据说明书,将吸尘器主机、延长管、吸头等组装在一起;2. 插电:将电源插头插入电源插座;3. 开关:手握吸尘器手柄,按下“开关”按钮启动吸尘器;4. 操作:根据需要,选用不同的吸头进行清理,注意调节吸力大小以适应不同地面;5. 结束:使用结束后,关闭电源开关,拔出电源插头,并将吸尘桶清空并清洗。
五、维护保养:1. 定期清理吸尘器主机和吸头,清除积尘和杂物;2. 定期更换吸尘器滤芯,以保证吸尘效果;3. 若吸尘器出现故障,请勿私自拆卸,应联系专业维修人员进行维修;4. 长时间不使用吸尘器时,请妥善保管,避免灰尘积聚。
- 1、下载文档前请自行甄别文档内容的完整性,平台不提供额外的编辑、内容补充、找答案等附加服务。
- 2、"仅部分预览"的文档,不可在线预览部分如存在完整性等问题,可反馈申请退款(可完整预览的文档不适用该条件!)。
- 3、如文档侵犯您的权益,请联系客服反馈,我们会尽快为您处理(人工客服工作时间:9:00-18:30)。
高距离吸尘器设计者:李浪,孙雁涛,刘胜魁,李旭辉,邱艳,指导教师:孙明,张克猛(西安交通大学城市学院机械工程系,西安,710018)作品内容简介本作品的主题是民用清洁类机械。
针对高空墙面及天花板的除尘,在普通地面吸尘器的基础上,设计了可以自由升降、旋转、移动的顶棚吸尘器支架,改进了传统吸尘器的洗尘刷结构,研制出了顶棚吸尘器。
本作品由丝杠螺母传动机构带动剪叉式的升降平行四边形机构,实现升降平台的自由升降;通过电机带动,实现吸尘管在空间的自由转动;整个升降平台置于小车之上,从而使吸尘刷具有上、下,前、后,左、右多个自由度,并通过单片机控制,洗尘刷可在高空完成上下、左右移动的除尘作业,进一步还可利用电机驱动小车,使吸尘刷前后运动也实现自动控制,从而实现本作品的完全机电一体化。
作为清洁机械,本作品形成产品后,可供家庭及学校、机关、医院、会馆、教堂等部门使用。
联系人:孙明联系电话:866544228Email:msun@1 作品研制背景及意义1.1 吸尘器发展历史1901年,英国土木工程师布斯到伦敦莱斯特广场的帝国音乐厅参观美国一种车厢除尘器示范表演。
这种除尘器使用压缩空气把尘埃吹入容器内,布斯认为此法并不高明,因为许多尘埃未能吹入容器。
后来,它反其道而行之,用吸尘法,布斯做了个很简单的试验:将一块手帕蒙在椅子扶手上,用口对这手帕吸气,结果使手帕附上了一层灰尘,于是,他制成了吸尘器,用强力电泵把空气吸入软管,通过布袋将灰尘过滤。
1902年布斯的服务公司奉召到西敏斯大教堂,把爱德华七世加冕典礼所用的地毯清理干净。
此后生意日益兴隆。
1906年布斯制成了家庭小型吸尘器,虽名为“小型”,但吸尘器却重达88磅(1磅=0.4536千克),因太重而无法普及。
1907年,美国俄亥俄州的发明家斯班格拉制成轻巧的吸尘器,他当时在一家商店里做管理员,为了减轻清扫地毯的负担,制成了一种吸尘器,用电扇造成真空将灰尘吸入机器,然后吹入口袋。
由于他本人无能力生产销售,1908年把专利转让给皮毛制造商胡佛。
当年胡佛便开始制造一种带轮的“O”型真空吸尘器,销路相当好,这种最早的家用吸尘器设计比较合理,发展至今也无太大原理上的改动。
最早设计的吸尘器是直立式的。
1913年瑞典斯德哥尔摩的温勒·戈林发明了横罐形真空吸尘器,2002年,iRobot开发出智能吸尘器人。
1.2 吸尘器的分类1 卧式在亚欧市场较为常见的吸尘器类型,占整体市场的80%以上。
其特点是外形小巧,存放方便,卧式吸尘器也分为“尘盒式吸尘器”和“尘袋式吸尘器”。
卧式吸尘器2. 立式美洲市场较为常见,适用于大面积的地毯清洁。
立式吸尘器3. 手持式体型小巧,携带及使用非常方便,主要用于车内的清洁,对键盘,电器等也有良好效果。
缺点是:功率较小,吸力不够强劲。
4. 桶式商用吸尘器,多为保洁公司,酒店,写字楼所使用,特点是容量大,能吸水。
5. 杆式近几年逐步增多,多为充电式,特点是体型小巧,使用方便。
6. 机器人吸尘器iRobot机器人吸尘器英文名称为“Roomba”,中文为“伦巴”,是由美国iRobot公司生产的。
美国麻省理工学院(MIT)罗德尼·布鲁克斯教授,主持世界最大的大学实验室——电脑科学暨人工智能实验室(Computer Science and Artificial intelligence Laboratory,简称CSAIL),于1990年带着得意门生——科林·安格尔(Colin Angle)和海伦·格雷纳(Helen Greiner),以CSAIL所提供的创业基金为基础,创办了iRobot公司。
iRobot最初专注于军用机器人的研究,创造了PackBot等机器人,公司于2002年开始涉足于家用机器人市场,并在2002年推出了具有历史意义的机器人吸尘器Roomba,揭开了机器人吸尘器新篇章。
自动清扫地板上的灰尘,自动清扫地板上的灰尘,自动清理毛发和碎物,清扫任务完成后,自动返回充电,智能吸尘器的核心技术是芯片和里面的软件,iRobot智能吸尘器机器人Roomba使用先进的iAdapt 技术,这是一个由软件和感应器组成的专利系统。
iAdapt让Roomba可以主动对清扫环境进行监控,每秒钟思考次数超过60次,并且能够以40种不同的动作进行反应,以便彻底清扫房间。
高端吸尘器,可自动打扫和充电,优点是:噪音小,体积小,能够轻松进入传统吸尘器不能到达的地方。
智能吸尘器机器人7. 便携式吸尘器它一般有四种形式:肩式吸尘器:体积较小,使用时背在肩上,小功率输出。
杆式吸尘器:形状似杆,上端为把手,下端为吸嘴,小功率输出。
手提式吸尘器:体积更小,可直接握在手中使用,小功率输出。
微型式吸尘器:多用电池供电,体积更小,多用于清洁衣物、仪器等,微功率。
吸尘器是指利用电动机驱动风机而产生负压进行除尘的清洁器。
又称为真空吸尘器。
按吸尘器的装配和类型可分为:立式,电动机主轴垂直于地面;卧式,电动机主轴平行于地面;便携式,可分为手持式、肩式、杆式。
按吸尘器的使用功能可分为:干式、水过滤可吸灰尘式、干湿两用式。
改革开放以来中国清洁行业正在慢慢起步,据不完全统计,目前国内约有4000家左右的清洁用品制造商、分销商和代理商,仅是商业和工业用途清洁产品的最终用户就达到了500万家上,这还不包括数以亿计的普通市民所使用的清洁产品。
工商业清洁用品的产值据估算约有200亿人民币,而国际厂商在中国的投资额目前约有30亿元人民币。
我国是世界吸尘器的主要生产地,世界上销售的吸尘器有80%以上都是产自中国。
欧美及日本为代表的发达国家对吸尘器的需求量非常大,也是我国吸尘器出口的主要地区,这些国家的吸尘器市场已经成熟。
我国经济持续快速的发展,消费者收入水平的提高,居住环境的改善等因素都是小家电企业看好国内吸尘器市场的主要原因。
另外,城市中每年有大量的人口搬进新居,对吸尘器的潜在要求很大。
从20世纪90年代中后期开始,中国吸尘器的销量每年以38%的速度上升。
如今吸尘器不但功能越来越多,外观日趋美化,其价格也越来越便宜,受到了不少市民的喜爱。
中国吸尘器市场主流品牌主要有飞利浦、美的、松下、海尔、三洋等。
2006年1-12月,全国吸尘器累计产量为52,285,519.00台。
与2005年同期增长了6.69%;2007年,中国吸尘器累计产量为16,969,815.00台,与2006年同期相比增长了21。
63%。
虽然在全球金融危机和经济增速放缓的背景下,国内家电却独树一帜。
0100020003000400050006000700020042005200620072008200920102011我国吸尘器产量增长趋势 我国吸尘器产量增长趋势随着当今社会的发展,人们的生活节奏越来越快。
作为便捷的清洁用具,吸尘器也已经进入了我国的城乡,遍及千家万户。
但面对高空的墙角、天花板、柜顶等卫生死角,先进的地面吸尘器却派上用场,往往还需要人工登梯进行高空作业,难免存在安全隐患,特别对腿脚不利的老年家庭,更应引起重视。
为此,在地面吸尘器的基础上,我们研制出了顶棚吸尘器,为吸尘器拓展一个新的应用空间,将吸尘器的概念和工作原理提升到了一个新的层面。
2 设计方案 2.1 升降机构 顶棚吸尘器的核心功能是能够对不同高度的空间面、壁进行除尘,因此吸尘器必须有一个灵活、平稳、自由的升降机构,以满足清洁过程中的各种需求。
方案一: 置于小推车上的升降台采用丝杠螺母机构,通过转动螺母,实现自由升降,摇臂可在铅垂面内上下摆动120 ,同时又随套管一道在水平面内实现自由转动,从而根据吸尘需要,完成吸尘刷上下、左右、前后的吸尘动作:当手柄在滑道最上方时,吸尘吸气管处于水平状态,此时通过转动螺母,将平台调整到人的身高达不到的高度,并沿横向推动小车,吸尘刷即在该高度的立面除尘;如此通过不断调整手柄的角度和平台的高度,即可完成壁面不同高度的吸尘;当手柄下滑到一定的位置,洗尘刷与天花板接触,即可通过套筒的摆动和小车的慢慢纵向移动,完成天花板的吸尘;当手柄沿滑道划过90°,并协调调整平台到合适的高度,此时吸气管位于竖直状态,可通过推动小车小范围内的移动,以围绕天花板上的障碍物进行天花板小范围的除尘。
单位:万台该方案完全人工操作,简单易行,造价低。
但较为笨重,且不宜实现机电一体化。
其工作简图如图1示。
图1 方案一示意图 图2撑杆照片 图3撑杆机构简图方案二:将方案一的升降机构改为可以电动控制的推力杆,实物照片如图2所示。
该推力杆采用丝杠螺母传动,并通过电动丝杠转动,带动与螺母固定的套筒升降,实现升降台的自动上下运动,机构简图如图3所示。
该方案的工作原理与方案一相同。
其优点实现了可控的自由升降。
由于套筒、手柄部分没有改进,且受撑杆系列限制,选型很难配套,致使机构显得头重脚轻,稳定性不够。
方案三:升降部分引入了剪叉式升降机构,采用电动撑杆的驱动,既可实现升降的智能化,又有效地加强了整体的稳定性;采用电机带动吸尘管在空间的自由转动,利用撑杆在一定范围内自由控制吸尘管在空间的方位;下一步还可利用电机驱动小车,以实现吸尘器的全部智能化自动控制。
方案三的照片见图4。
剪叉式升降机构如图5所示,它广泛用于高空作业专用设备,具有较高的稳定性。
本作品利用这一特点,有效的克服了方案二的头重脚轻的问题。
该机构的简图如图6所示。
其中A 、B 为固定架,与小车固定连接,A 、C 、E 、F 、G 、H 均为铰链连接,5和AB 杆构成移动副,8和CD 杆构成移动副。
在推力杆2的带动下实现机构上下运动。
作为机构的驱动装置,推杆的最佳安装位置如图(a )所示,由于市场现货选型受限,本作品实际安装位置如图(b )所示。
图4吸尘器照片该机构具有如下特点:(1)平台上升和下降过程均匀、平稳。
(2)结构紧凑,外观简洁,维护使用灵活、方便。
(3)承载力强,工作效率高。
(4)可选配件范围广泛,全方位满足客户需求。
(5)清洁无污染,利用环境维护。
该机构一般采用液压传动。
考虑到家庭用机械的特点,液压式传动技术难度较大,成本高、维护不太方便,且本作品的实际载荷也不大,综合考虑,我们改用了物美廉价的机械式撑杆传动(螺母、螺杆等),由电动机驱动。
图5 剪叉式升降机构实物图3 工作原理及性能3.1 升降平台升降机构由底座、臂架和工作台三部分组成。
底座用于支撑整个机构,并为装于机构底部的滑块提供导向,采用钢板焊接而成;臂架为双层剪叉式平行四边形机构,采用高强度无缝矩形钢管制作;工作台用于安装吸尘器管架及其传动系统,需要承受一定的重量,故宜采用高强度的轻质材料制作,例如钢板或PVC 材料。
本作品仅提供比例缩小的样机,故采用了有机玻璃制作。