WinForm数据绑定
winform中的ListBox和ComboBox绑定数据用法实例
本例实现将集合数据绑定到ListBox和ComboBox控件,界面上显示某个属性的内容,代码如下:
复制代码 代码如下:
//... //自定义了Person类(有Name,Age,Heigth等属性)
List<Person> persons=new List<Person>(); persons.Add(new Person("WuMiao",18,175)); persons.Add(new Person("YeXinYv",20,170)); persons.Add(new Person("WuDong",18,175));
arraylist是接口list的实现类所以在使用过程中比较推荐使用list接口来实现arraylist在程序开发过程中应用非常广泛接下来脚本之家的小编给大家总结了arraylist的使用有需要的朋友可以参考下
winform中的 ListBox和 ComboBox绑定数据用法实例
本文实例讲述了winform中的ListBox和ComboBox绑定数据用法。分享给大家供大家参考。具体实现方法如下:
//ListBox控件实现 lb_PersonsList.DataSource=persons; //指定数据源 lb_PersonList.DisplayMember="Name"; //界面显示的是人的名字
//ComboBox控件实现 (与Le=persons; cmb_PersonList.DisplayMember="Name";
winform中的TreeView的数据绑定

winform中的TreeView的数据绑定#region绑定TreeView///<summary>///绑定TreeView(利⽤TreeNode)///</summary>///<param name="p_Node">TreeNode(TreeView的⼀个节点)</param>///<param name="pid_val">⽗id的值</param>///<param name="id">数据库 id 字段名</param>///<param name="pid">数据库⽗id 字段名</param>///<param name="text">数据库⽂本字段值</param>protected void Bind_Tv(DataTable dt, TreeNode p_Node, string pid_val, string id, string pid, string text){DataView dv = new DataView(dt);//将DataTable存到DataView中,以便于筛选数据TreeNode tn;//建⽴TreeView的节点(TreeNode),以便将取出的数据添加到节点中//以下为三元运算符,如果⽗id为空,则为构建“⽗id字段 is null”的查询条件,否则构建“⽗id字段=⽗id字段值”的查询条件string filter = string.IsNullOrEmpty(pid_val) ? pid + " is null" : string.Format(pid + "='{0}'", pid_val);dv.RowFilter = filter;//利⽤DataView将数据进⾏筛选,选出相同⽗id值的数据foreach (DataRowView row in dv){tn = new TreeNode();//建⽴⼀个新节点(学名叫:⼀个实例)if (p_Node == null)//如果为根节点{ = row[id].ToString();//节点的Value值,⼀般为数据库的id值tn.Text = row[text].ToString();//节点的Text,节点的⽂本显⽰TreeView1.Nodes.Add(tn);//将该节点加⼊到TreeView中Bind_Tv(dt, tn, , id, pid, text);//递归(反复调⽤这个⽅法,直到把数据取完为⽌)}else//如果不是根节点{ = row[id].ToString();//节点Value值tn.Text = row[text].ToString();//节点Text值p_Node.Nodes.Add(tn);//该节点加⼊到上级节点中Bind_Tv(dt, tn, , id, pid, text);//递归}}}///<summary>///绑定TreeView(利⽤TreeNodeCollection)///</summary>///<param name="tnc">TreeNodeCollection(TreeView的节点集合)</param>///<param name="pid_val">⽗id的值</param>///<param name="id">数据库 id 字段名</param>///<param name="pid">数据库⽗id 字段名</param>///<param name="text">数据库⽂本字段值</param>private void Bind_Tv(DataTable dt, TreeNodeCollection tnc, string pid_val, string id, string pid, string text){DataView dv = new DataView(dt);//将DataTable存到DataView中,以便于筛选数据TreeNode tn;//建⽴TreeView的节点(TreeNode),以便将取出的数据添加到节点中//以下为三元运算符,如果⽗id为空,则为构建“⽗id字段 is null”的查询条件,否则构建“⽗id字段=⽗id字段值”的查询条件string filter = string.IsNullOrEmpty(pid_val) ? pid + " is null" : string.Format(pid + "='{0}'", pid_val);dv.RowFilter = filter;//利⽤DataView将数据进⾏筛选,选出相同⽗id值的数据foreach (DataRowView drv in dv){tn = new TreeNode();//建⽴⼀个新节点(学名叫:⼀个实例) = drv[id].ToString();//节点的Value值,⼀般为数据库的id值tn.Text = drv[text].ToString();//节点的Text,节点的⽂本显⽰tnc.Add(tn);//将该节点加⼊到TreeNodeCollection(节点集合)中Bind_Tv(dt, tn.Nodes, , id, pid, text);//递归(反复调⽤这个⽅法,直到把数据取完为⽌)}}#endregion绑定代码:Bind_Tv(datatable,TreeView1.Nodes, null, "id字段", "⽗id字段", "名称字段");。
Winfrom中ListBox绑定List数据源更新问题

Winfrom中 ListBox绑定 List数据源更新问题
Winfrom中ListBox绑定List数据源,第一次可以成功,但后面List更新以后,ListBox并没有更新。
如果 ListBox的数据源 是 DataTable 是可以自动更新的,但若是 List<T> 时对数据的修改界面不会更新,使用 BindingSource 绑定就可以 了。 private void InitSample() { ListBox listControl = new ListBox(); List<Employee> listSource = new List<Employee>(); BindingSource bs = new BindingSource(); bs.DataSource = listSource;
this.Controls.Adห้องสมุดไป่ตู้(listControl); }
补充:使用BindingList亦可解决此问题!
listControl.DataSource = bs; listControl.DisplayMember = “Name”; listControl.ValueMember = “Id”;
// 事先绑定了,这时修改数据源会自动刷新界面显示 listSource.Add(new Employee(1, “Sam”)); listSource.Add(new Employee(2, “John”));
C#winformDataGridView绑定数据的的几种方法
C#winformDataGridView绑定数据的的⼏种⽅法1.⽤DataSet和DataTable为DataGridView提供数据源String strConn = "Data Source=.;Initial Catalog=His;User ID=sa;Password=*****";SqlConnection conn = new SqlConnection(strConn);String sql= "select * from EMPLOYEE ";conn.Open();SqlCommand cmd = new SqlCommand(sqlId, conn);SqlDataAdapter da = new SqlDataAdapter(cmd);DataSet ds = new DataSet();da.Fill(ds, "EMPLOYEE");dataGridView1.DataSource = ds;this.dataGridView1.AutoGenerateColumns = false;//是否⾃动⽣成列dataGridView1.DataMember = "EMPLOYEE";conn.Close();2.创建DataGridViewRow 对象Add添加⾏String sql_conn= "Data Source=.;Initial Catalog=His;User ID=sa;Password=*****";System.Data.DataTable table =return_table(sql_conn);foreach (System.Data.DataRow date in table.Rows){DataGridViewRow newRow = new DataGridViewRow();newRow.CreateCells(this.dataGridView1);newRow.Cells[0].Value = date[0].ToString();newRow.Cells[1].Value = date[1].ToString();newRow.Cells[2].Value = date[2].ToString();newRow.Cells[3].Value = date[3].ToString();newRow.Cells[4].Value = date[4].ToString();dataGridView1.Rows.Add(newRow);}public System.Data.DataTable return_table(string sql_conn){SqlConnection conn = new SqlConnection(sql_conn);SqlDataReader reader = null;conn.Open();SqlCommand command = new SqlCommand("selectRegID,Name,Area,RoomNO,BedNO from EMPLOYEE", conn);reader = command.ExecuteReader();return ConvertToDataTable(reader);}public DataTable ConvertToDataTable(SqlDataReader dataReader)//SqlDataReader转换为DataTable{DataTable dt = new DataTable();DataTable schemaTable = dataReader.GetSchemaTable();try{//动态构建表,添加列foreach (DataRow dr in schemaTable.Rows){DataColumn dc = new DataColumn();//设置列的数据类型dc.DataType = dr[0].GetType();//设置列的名称dc.ColumnName = dr[0].ToString();//将该列添加进构造的表中dt.Columns.Add(dc);}//读取数据添加进表中while (dataReader.Read()){DataRow row = dt.NewRow();//填充⼀⾏数据for (int i = 0; i < schemaTable.Rows.Count; i++){row[i] = dataReader[i].ToString();}dt.Rows.Add(row);row = null;}dataReader.Close();schemaTable = null;return dt;}catch (Exception ex){//抛出异常throw new Exception(ex.Message); }}。
ItemsControl数据绑定的两种方式

ItemsControl数据绑定的两种⽅式最近在学习ItemsControl这个控件的时候,查看了MSDN上⾯的⼀个例⼦,并且⾃⼰做了⼀些修改,这⾥主要使⽤了两种⽅式来进⾏相应的数据绑定,⼀种是使⽤DataContext,另外⼀种是直接将⼀个类绑定到前台,其实这两种⽅式原理差不多都是将数据模型的对象添加到⼀个ObservableCollection集合中,然后再绑定到前台,下⾯分别介绍两种绑定⽅式:第⼀种是将数据存储在⼀个ObservableCollection集合中,然后作为ItemsControl的DataContext对象,下⾯分别贴出相关的代码:<Window x:Class="TestGrid.MainWindow"xmlns="/winfx/2006/xaml/presentation"xmlns:x="/winfx/2006/xaml"xmlns:local="clr-namespace:TestGrid"Title="MainWindow" Height="350" Width="525"><Grid><ItemsControl Margin="10" x:Name="myItemsControl" ItemsSource="{Binding}"><ItemsControl.Template><ControlTemplate TargetType="ItemsControl"><Border BorderBrush="Aqua" BorderThickness="1" CornerRadius="15"><ItemsPresenter/></Border></ControlTemplate></ItemsControl.Template><ItemsControl.ItemsPanel><ItemsPanelTemplate><WrapPanel/></ItemsPanelTemplate></ItemsControl.ItemsPanel><ItemsControl.ItemTemplate><DataTemplate DataType="{ x:Type local:DataSource}"><DataTemplate.Resources><Style TargetType="TextBlock"><Setter Property="FontSize" Value="18"/><Setter Property="HorizontalAlignment" Value="Center"/></Style></DataTemplate.Resources><Grid><Rectangle Fill="Green"/><Ellipse Fill="Red"/><StackPanel><TextBlock Margin="3,3,3,0" Text="{Binding Path=Priority,Mode=TwoWay}"/><TextBlock Margin="3,0,3,7" Text="{Binding Path=TaskName,Mode=TwoWay}"/></StackPanel></Grid></DataTemplate></ItemsControl.ItemTemplate><ItemsControl.ItemContainerStyle><Style><Setter Property="Control.Width" Value="100"/><Setter Property="Control.Margin" Value="5"/><Style.Triggers><Trigger Property="Control.IsMouseOver" Value="True"><Setter Property="Control.ToolTip" Value="{Binding RelativeSource={x:Static RelativeSource.Self}, Path=Content.Description}"/></Trigger></Style.Triggers></Style></ItemsControl.ItemContainerStyle></ItemsControl></Grid></Window>这⾥需要注意的地⽅是 ItemsSource="{Binding}"这句必须添加,否则后台的数据是⽆法添加到前台的,这个需要注意,这⾥贴出后台的代码using System.Windows.Documents;using System.Windows.Input;using System.Windows.Media;using System.Windows.Media.Imaging;using System.Windows.Navigation;using System.Windows.Shapes;namespace TestGrid{/// <summary>/// MainWindow.xaml 的交互逻辑/// </summary>public partial class MainWindow : Window{private ObservableCollection<DataSource> item = null; public MainWindow(){InitializeComponent();item = new ObservableCollection<DataSource>();item.Add(new DataSource(){Priority = "1",TaskName = "hello"});item.Add(new DataSource(){Priority = "2",TaskName = "whats"});item.Add(new DataSource(){Priority = "3",TaskName = "your"});item.Add(new DataSource(){Priority = "4",TaskName = "name"});item.Add(new DataSource(){Priority = "5",TaskName = "can"});item.Add(new DataSource(){Priority = "6",TaskName = "you"});this.myItemsControl.DataContext = item;}}}using System.Windows.Documents;using System.Windows.Input;using System.Windows.Media;using System.Windows.Media.Imaging;using System.Windows.Navigation;using System.Windows.Shapes;namespace TestGrid{/// <summary>/// MainWindow.xaml 的交互逻辑/// </summary>public partial class MainWindow : Window{private ObservableCollection<DataSource> item = null; public MainWindow(){InitializeComponent();item = new ObservableCollection<DataSource>();item.Add(new DataSource(){Priority = "1",TaskName = "hello"});item.Add(new DataSource(){Priority = "2",TaskName = "whats"});item.Add(new DataSource(){Priority = "3",TaskName = "your"});item.Add(new DataSource(){Priority = "4",TaskName = "name"});item.Add(new DataSource(){Priority = "5",TaskName = "can"});item.Add(new DataSource(){Priority = "6",TaskName = "you"});this.myItemsControl.DataContext = item;}}}这⾥最重要的⼀句就是 this.myItemsControl.DataContext = item;这个是将刚才的集合绑定到ItemsControl控件上,这⾥需要我们的注意。
DevexpressWinFormTreeList的三种数据绑定方式(DataSource。。。

DevexpressWinFormTreeList的三种数据绑定⽅式(DataSource。
第⼀种:DataSource绑定,这种绑定⽅式需要设置TreeList的ParentFieldName和KeyFieldName两个属性,这⾥需要注意的是KeyFieldName 的值必须是唯⼀的。
代码如下:private void Form1_Load(object sender, EventArgs e){try{//构建⼀个DataTable数据源DataTable table = new DataTable();table.Columns.Add("parentId");table.Columns.Add("Id");table.Columns.Add("parentName");table.Columns.Add("Name");DataRow row = table.NewRow();row["parentId"] = "";row["Id"] = "*";row["Name"] = "所有颜⾊";table.Rows.Add(row);row = table.NewRow();row["parentId"] = "*";row["Id"] = "1";row["Name"] = "红⾊";table.Rows.Add(row);row = table.NewRow();row["parentId"] = "*";row["Id"] = "2";row["Name"] = "黄⾊";table.Rows.Add(row);row = table.NewRow();row["parentId"] = "*";row["Id"] = "3";row["Name"] = "绿⾊";table.Rows.Add(row);row = table.NewRow();row["parentId"] = "1";row["Id"] = "01";row["Name"] = "粉红⾊";table.Rows.Add(row);row = table.NewRow();row["parentId"] = "2";row["Id"] = "02";row["Name"] = "鹅黄⾊";table.Rows.Add(row);treeList1.ParentFieldName = "parentId";treeList1.KeyFieldName = "Id";treeList1.DataSource = table;treeList1.ExpandAll();}catch (Exception ex){MessageBox.Show(ex.Message);}}private void treeList1_BeforeCheckNode(object sender, DevExpress.XtraTreeList.CheckNodeEventArgs e){e.State = (e.PrevState == CheckState.Checked ? CheckState.Unchecked : CheckState.Checked);}private void treeList1_AfterCheckNode(object sender, DevExpress.XtraTreeList.NodeEventArgs e){try{SetCheckedChildNodes(e.Node, e.Node.CheckState);SetCheckedParentNodes(e.Node, e.Node.CheckState);}catch (Exception ex){MessageBox.Show(ex.Message);}}///<summary>///设置⼦节点的状态///</summary>///<param name="node"></param>///<param name="check"></param>private void SetCheckedChildNodes(TreeListNode node, CheckState check){for (int i = 0; i < node.Nodes.Count; i++){node.Nodes[i].CheckState = check;SetCheckedChildNodes(node.Nodes[i], check);}}///<summary>///设置⽗节点的状态///</summary>///<param name="node"></param>///<param name="check"></param>private void SetCheckedParentNodes(TreeListNode node, CheckState check){if (node.ParentNode != null){bool b = false;CheckState state;for (int i = 0; i < node.ParentNode.Nodes.Count; i++){state = (CheckState)node.ParentNode.Nodes[i].CheckState;if (!check.Equals(state)){b = !b;break;}}node.ParentNode.CheckState = b ? CheckState.Checked : check;SetCheckedParentNodes(node.ParentNode, check);}}运⾏效果图:第⼆种:AppendNode添加节点代码如下:private void LoadTree(){//清空节点treeList1.BeginUnboundLoad();treeList1.ClearNodes();arrayList = new List<TreeListNode>();//绑定部位树树的第⼀层TreeListNode Node = treeList1.Nodes.Add(new object[] { "所有颜⾊", "*"});Node.Tag = "*";arrayList.Add(Node);//绑定第⼆层DataSet ds = SqlHelper.Query(@"select ctc.colorId as ParentNodeID,ctc.childcolorId as NodeID, s as NodeNamefrom C_colorTocolor ctc(nolock)inner join C_color cc(nolock) on ctc.childcolorId=cc.id");if (ds != null && ds.Tables.Count > 0){table = ds.Tables[0];DataRow[] rows = table.Select("ParentNodeID='*'");foreach (DataRow row in rows){TreeListNode tn = treeList1.AppendNode(new object[] { row["NodeName"].ToString(), row["NodeID"].ToString() }, Node.Id); tn.Tag = row["NodeID"].ToString();arrayList.Add(tn);BindNode(row["NodeID"].ToString(), tn);}}treeList1.EndUnboundLoad();treeList1.ExpandAll();}private void BindNode(string nodeId, TreeListNode tn){DataRow[] rows = table.Select("ParentNodeID='" + nodeId + "'");foreach (DataRow row in rows){TreeListNode tns = treeList1.AppendNode(new object[] { row["NodeName"].ToString(), row["NodeID"].ToString()}, tn.Id);tns.Tag = row["NodeID"].ToString();arrayList.Add(tns);BindNode(row["NodeID"].ToString(), tns);}}private void Form2_Load(object sender, EventArgs e){//绑定树LoadTree();}运⾏效果图:第三种:VirtualTreeGetChildNodes虚拟树加载。
WinForm中comboBox控件之数据绑定
WinForm中comboBox控件之数据绑定下⾯介绍三种对comboBox绑定的⽅式,分别是泛型中IList和Dictionary,还有数据集DataTable⼀、IList现在我们直接创建⼀个List集合,然后绑定View CodeIList<string> list = new List<string>();list.Add("111111");list.Add("222222");list.Add("333333");list.Add("444444");comboBox1.DataSource = list;执⾏后,我们会发现绑定成功,但是我们知道⼀般对于下拉框的绑定都会有⼀个值,⼀个显⽰的内容,这个时候我们可以创建⼀个类,把value和text都封装到这个类,作为list的类型public class Info{public string Id { get; set; }public string Name { get; set; }}private void bindCbox(){IList<Info> infoList = new List<Info>();Info info1 = new Info() { Id="1",Name="张三"};Info info2 = new Info() { Id="2",Name="李四"};Info info3 = new Info() { Id = "3",Name = "王五" };infoList.Add(info1);infoList.Add(info2);infoList.Add(info3);comboBox1.DataSource = infoList;comboBox1.ValueMember = "Id";comboBox1.DisplayMember = "Name";}这个时候我们就可以直接获得值和显⽰的内容了⼆、Dictionary这个有点特殊,不能直接绑定,需要借助类BindingSource才可以完成绑定View CodeDictionary<int, string> kvDictonary = new Dictionary<int, string>();kvDictonary.Add(1, "11111");kvDictonary.Add(2, "22222");kvDictonary.Add(3, "333333");BindingSource bs = new BindingSource();bs.DataSource = kvDictonary;comboBox1.DataSource = bs;comboBox1.ValueMember = "Key";comboBox1.DisplayMember = "Value";三、数据集这个⽐较常见,很简单View Code//数据集绑定private void BindCombox(){DataTable dt = new DataTable();DataColumn dc1 = new DataColumn("id");DataColumn dc2 = new DataColumn("name");dt.Columns.Add(dc1);dt.Columns.Add(dc2);DataRow dr1 = dt.NewRow();dr1["id"] = "1";dr1["name"] = "aaaaaa";DataRow dr2 = dt.NewRow();dr2["id"] = "2";dr2["name"] = "bbbbbb";dt.Rows.Add(dr1);dt.Rows.Add(dr2);comboBox1.DataSource = dt;comboBox1.ValueMember = "id";comboBox1.DisplayMember = "name";}注意:当我们触发combox的SelectedIndexChanged的事件后,我们在加载窗体的时候就会执⾏,这点我刚开始也和魅惑,导致容易出错,这点我们可以采取⼀些⽅法避免执⾏,⽐如可以定义⼀个变量fig=falseprivate void comboBox1_SelectedIndexChanged(object sender, EventArgs e){if(this.fig){string selectValue = this.cmbAddMember.SelectedValue.ToString();rtbaddMember.SelectedText = selectValue;}} 那么肯定想在加载窗体后,执⾏了,所以在加载窗体后我们还要把fig的值设为trueprivate void SetAutoMessage_Load(object sender, EventArgs e){loadCombox();loadMessageTemplet();fig= true;}。
C#WinForm_ComboBox数据绑定的问题
Visual Studio C#中的数据绑定五.复杂型组件的数据绑定:在上面的介绍中,了解到对复杂型组件的数据绑定是通过设定组件的某些属性来完成数据绑定的。
首先来介绍一下ComboBox组件的数据绑定.(1).ComboBox组件的数据绑定:在得到数据集后,只有设定好ComboBox组件的的三个属性就可以完成数据绑定了,这三个属性是:、"DisplayMember"、"ValueMember"。
其中"DataSource"是要显示的数据集,"DisplayMember"是ComboBox 组件显示的字段,"ValueMember"是实际使用值。
具体如下:ComboBox1.DataSource = myDataSet ;ComboBox1.DisplayMember = "person.xm" ;ComboBox1.ValueMember = "person.xm" ;注释:此时绑定是Access 2000数据库中"person"表的"xm"字段。
由此可以得到ComboBox组件数据绑定的源程序代码(Combo01.cs),本代码操作数据库是Access 2000:public class Form1 : Form{private ComboBox ComboBox1 ;private Button button1 ;private System.Data.DataSet myDataSet ;private ponentModel.Container components = null ;public Form1 ( ){file://打开数据链接,得到数据集GetConnect ( ) ;InitializeComponent ( ) ;}file://清除程序中使用过的资源protected override void Dispose ( bool disposing ){if ( disposing ){if ( components != null ){components.Dispose ( ) ;}}base.Dispose ( disposing ) ;}private void GetConnect ( ){file://创建一个OleDbConnectionstring strCon = " Provider = Microsoft.Jet.OLEDB.4.0 ; Data Source = db.mdb" ;OleDbConnection myConn = new OleDbConnection ( strCon ) ;string strCom = " SELECT * FROM person " ;file://创建一个DataSetmyDataSet = new DataSet ( ) ;myConn.Open ( ) ;file://用OleDbDataAdapter 得到一个数据集OleDbDataAdapter myCommand = new OleDbDataAdapter ( strCom , myConn ) ;file://把Dataset绑定person数据表myCommand.Fill ( myDataSet , "person" ) ;file://关闭此OleDbConnectionmyConn.Close ( ) ;}private void button1_Click ( object sender , System.EventArgs e ){ComboBox1.DataSource = myDataSet ;ComboBox1.DisplayMember = "person.xm" ;ComboBox1.ValueMember = "person.xm" ;}static void Main ( ){Application.Run ( new Form1 ( ) ) ;}}图03:对ComboBox组件数据绑定的程序界面得到了ComboBox组件对本地数据库的数据绑定程序,也就十分方便的得到ComboBox组件绑定Sql Server 2000源程序代码(Combox02.cs)具体如下:public class Form1 : Form{private ComboBox ComboBox1 ;private Button button1 ;private System.Data.DataSet myDataSet ;private ponentModel.Container components = null ;public Form1 ( ){file://打开数据链接,得到数据集GetConnect ( ) ;InitializeComponent ( ) ;}file://清除程序中使用过的资源protected override void Dispose ( bool disposing ){if ( disposing ){if ( components != null ){components.Dispose ( ) ;}}base.Dispose ( disposing ) ;}private void GetConnect ( ){// 设定数据连接字符串,此字符串的意思是打开Sql server数据库,服务器名称为server1,数据库为data1 string strCon = "Provider = SQLOLEDB.1 ; Persist Security Info = False ; User ID = sa ; Initial Catalog = data1 ; Data Source = server1 " ;OleDbConnection myConn = new OleDbConnection ( strCon ) ;myConn.Open ( ) ;string strCom = " SELECT * FROM person " ;file://创建一个DataSetmyDataSet = new DataSet ( ) ;file://用OleDbDataAdapter 得到一个数据集OleDbDataAdapter myCommand = new OleDbDataAdapter ( strCom , myConn ) ;file://把Dataset绑定person数据表myCommand.Fill ( myDataSet , " person " ) ;file://关闭此OleDbConnectionmyConn.Close ( ) ;}private void button1_Click ( object sender , System.EventArgs e ){ComboBox1.DataSource = myDataSet ;ComboBox1.DisplayMember = "person.xm" ;ComboBox1.ValueMember = "person.xm" ;}static void Main ( ){Application.Run ( new Form1 ( ) ) ;}}C# WinForm 中ComboBox数据绑定的问题2009-12-29 09:24怎样让WinForm中的ComboBox显示表中的一个字段,同时又绑定另一个字段?在Web中的ComboBox这样写可以绑定两个值:boBox1.DataTextField="B000602";//显示中文,方便用户选择boBox1.DataValueField="B000601";//绑定与选择对应的另一个值boBox1.DataBind();但是在WinForm程序中该怎么写啊?0******************************************************************DataSet ds = new DataSet();//这个DataSet是你从数据库里取出来的值string[] arr = new string[ds.Tables[0].Rows.Count];for (int i = 0; i < arr.Length; i++){arr[i] = ds.Tables[0].Rows[i][2].ToString();}textBox1.AutoCompleteCustomSource.AddRange(arr);textBox1.AutoCompleteSource =AutoCompleteSource.CustomSource;textBox1.AutoCompleteMode =AutoCompleteMode.SuggestAppend;1.******************************************************************* 假设combobox绑定的列表为DataSet2的ListTable表(含有ListID, ListName字段),需要绑定的记录字段为DataSet1的Table1表的ListID字段combobox.DataSource = dataset2.Tables["ListTable"]; combobox.DisplayMember = "ListName";combobox.ValueMember = "ListID";combobox.DataBindings.Add("SelectedValue", dataset1, "Table1.List ID");2.***************************************************************** //dt为数据表,ID,Name为dt的两个字段:comboBox1.DataSource = dt ;comboBox1.ValueMember ="ID";comboBox1.DisplayMember ="Name";3.******************************************************************SqlConnection con = new SqlConnection("server=192.168.2.198;uid=sa;pwd=sa;database=northwind"); SqlCommand cmd = con.CreateCommand();mandText = "Select * from Customers where countr y='USA'";SqlDataAdapter adp = new SqlDataAdapter();adp.SelectCommand = cmd;DataSet ds = new DataSet();adp.Fill(ds, "Customers");comboBox1.DataSource = ds.Tables["Customers"];comboBox1.DisplayMember = "CompanyName";comboBox1.ValueMember = "CompanyName";++++++++++++++++或者++++++++++++++++++++++SqlConnection con = new SqlConnection("server=192.168.2.198;uid=sa;pwd=sa;database=northwind"); SqlCommand cmd = con.CreateCommand();mandText = "Select * from Customers where countr y='USA'";SqlDataAdapter adp = new SqlDataAdapter();adp.SelectCommand = cmd;DataSet ds = new DataSet();adp.Fill(ds, "Customers");comboBox1.DataSource = ds;comboBox1.DisplayMember = "panyName";comboBox1.ValueMember = "panyName";++++++++++++往DataGrid里添加下拉列表++++++++++++ DataGridTableStyle dgt = new DataGridTableStyle();dgt.MappingName = "test";DataGridTextBoxColumn dgtbc = new DataGridTextBoxColumn(); dgtbc.MappingName = "name";dgtbc.HeaderText= "name";ComboBox cmbFunctionArea = new ComboBox(); cmbFunctionArea.DataSource = DtGeneral;cmbFunctionArea.DisplayMember = "name"; cmbFunctionArea.ValueMember = "value";cmbFunctionArea.Cursor = Cursors.Arrow;cmbFunctionArea.DropDownStyle= ComboBoxStyle.DropDownList;cmbFunctionArea.Dock = DockStyle.Fill;dgtbc.TextBox.Controls.Add(cmbFunctionArea);dgt.GridColumnStyles.Add(dgtbc);cmbFunctionArea.SelectionChangeCommitted +=new EventHandler(cmbFunctionArea_SelectionChangeCommitted);+++++++++++++修改++++++++++++++++private void cmbFunctionArea_SelectionChangeCommitted(object se nder, EventArgs e){((DataTable)dataGrid1.DataSource).Rows[dataGrid1.CurrentRowIndex][0] = ((ComboBox)sender).Text.ToString();dataGrid1.SetDataBinding(DtGeneral,null);}4.******************************************************************* *****DataBindings是一般控件所具有的,是绑定数据源的某一个字段combobox.DataBindings.Add("要绑定控件的属性如下拉框的SelectedValue\Text", 数据源如dataset1, "导航路径如Table1.ListID");但是,DataBindings只能绑定一个字段,而绑定多个字段时典型的如列表控件Combobox、ListBox控件,需要键值对,这时就需要指定DataSource(实现IList接口就行),然后指定ValueMember、DisplayMember 。
C#DataGridView绑定数据源的几种常见方式
C#DataGridView绑定数据源的⼏种常见⽅式 开始以前,先认识⼀下WinForm控件数据绑定的两种形式,简单数据绑定和复杂数据绑定。
1. 简单的数据绑定例1using (SqlConnection conn = new SqlConnection(ConfigurationManager.ConnectionStrings["connStr"].ToString())){ SqlDataAdapter sda = new SqlDataAdapter("Select * From T_Class Where F_Type='Product' order by F_RootID,F_Orders", conn); DataSet Ds = new DataSet(); sda.Fill(Ds, "T_Class"); //使⽤DataSet绑定时,必须同时指明DateMember this.dataGridView1.DataSource = Ds; this.dataGridView1.DataMember = "T_Class"; //也可以直接⽤DataTable来绑定 this.dataGridView1.DataSource = Ds.Tables["T_Class"];} 简单的数据绑定是将⽤户控件的某⼀个属性绑定⾄某⼀个类型实例上的某⼀属性。
采⽤如下形式进⾏绑定:引⽤控件.DataBindings.Add("控件属性", 实例对象, "属性名", true);例2 从数据库中把数据读出来放到⼀个数据集中,⽐如List<>、DataTable,DataSet,我⼀般⽤List<>, 然后绑定数据源:IList<student> sList=StudentDB.GetAllList();DataGridView.DataSource=sList; 如果你没有设置DataGridView的列,它会⾃动⽣成所有列。
WinForm之中BindingNavigator控件的使用

WinForm之中BindingNavigator控件的使⽤WinForm之中BindingNavigator控件的使⽤在微软WinForm中,BindingNavigator控件主要⽤来绑定数据。
可以将⼀个数据集合与该控件绑定,以进⾏数据联动的显⽰效果。
如图下图所⽰:那么,下⾯我们就来⽤BindingNavigator控件做⼀下上图所⽰的效果。
分析:该案例以BindingNavigator控件为主线,我们定义⼀个实体类,将实体类以集合的形式显⽰在DataGridView中,同时,将BindingNavigator与DataGridView绑定,将BindingNavigator与⽂本框显⽰数据绑定,将BindingNavigator与Button控件绑定,来演⽰⼀个数据联动的效果,已达到学习BindingNavigator控件的⽬的。
步骤:⾸先,在Visual Studio中创建⼀个WinForm应⽤程序,在Form1中添加BindingNavigator控件,DataGridView控件,两个⽂本框,四个按钮(分别表⽰:First,Previuos,Next,Last);其次,在项⽬中添加⼀个⽤户类User.cs,该类中有两个属性Name和Age;⽰例代码:using System;using System.Collections.Generic;using System.Text;namespace BindingDemo{public class User{public User(){}public User(string name,int age){ = name;this.Age = age;}private string name;public string Name{get { return name; }set { name = value; }}private int age;public int Age{get { return age; }set { age = value; }}}}再次,在Form1的代码之中,创建User对象,并将对象保存到List<>泛型集合之中,并显⽰到DataGridView中;关键代码://创建⼀个泛型集合List<User> users = new List<User>();/// <summary>/// 窗体加载事件/// </summary>/// <param name="sender"></param>/// <param name="e"></param>private void MainForm_Load(object sender, EventArgs e){//创建⽤户User zh = new User("张三", 12);User li = new User("李四",18);User ww = new User("王五",20);User ll = new User("刘六",30);User X = new User("x-man",30);User spaider = new User("spaiderman",25);User ironman = new User("ironman",30);//将⽤户添加到List<>泛型集合的对象中users.Add(zh);users.Add(li);users.Add(ww);users.Add(ll);users.Add(X);users.Add(spaider);users.Add(ironman);}再次,创建BindingSource对象,并在窗体加载事件中将BindingNavigator控件,与DataGridView,⽂本框,按钮控件进⾏数据绑定,进⾏数据联动显⽰效果;⽰例代码: Form1.csusing System;using System.Collections.Generic;using ponentModel;using System.Data;using System.Drawing;using System.Text;using System.Windows.Forms;namespace BindingDemo{public partial class MainForm : Form{//创建⼀个泛型集合List<User> users = new List<User>();//BindingSource bs = new BindingSource();public MainForm(){InitializeComponent();}/// <summary>/// 窗体加载事件/// </summary>/// <param name="sender"></param>/// <param name="e"></param>private void MainForm_Load(object sender, EventArgs e){//创建⽤户User zh = new User("张三", 12);User li = new User("李四",18);User ww = new User("王五",20);User ll = new User("刘六",30);User X = new User("x-man",30);User spaider = new User("spaiderman",25);User ironman = new User("ironman",30);//将⽤户添加到List<>泛型集合的对象中users.Add(zh);users.Add(li);users.Add(ww);users.Add(ll);users.Add(X);users.Add(spaider);users.Add(ironman);//将泛型集合对象中的值赋给Bindingsource对象的DataSourcebs.DataSource = users;//将数据显⽰到DataGridView中去this.dgvMain.DataSource = bs;//绑定导航this.bindingNavigator1.BindingSource = bs;//与⽂本框进⾏数据绑定this.txtName.DataBindings.Add("Text",bs,"Name");this.txtAge.DataBindings.Add("Text",bs,"Age");}//移动到第⼀⾏ private void btnFirst_Click(object sender, EventArgs e) {this.bs.MoveFirst();}//移动到前⼀⾏private void btnPrevious_Click(object sender, EventArgs e){this.bs.MovePrevious();}//移动到下⼀⾏private void btnNext_Click(object sender, EventArgs e){this.bs.MoveNext();}//移动到最后⼀⾏private void btnLast_Click(object sender, EventArgs e){this.bs.MoveLast();}}}。
winform面试题

winform面试题1. 什么是Winform?Winform是指基于Windows操作系统的图形用户界面(GUI)开发技术。
它是微软公司提供的一种创建Windows桌面应用程序的开发工具,通过使用Winform,开发人员可以快速创建各种功能丰富的Windows应用程序。
2. Winform的优点(1)易于学习和使用:Winform提供了一套丰富的控件和容器,开发人员可以通过拖拽和属性设置轻松创建界面。
同时,它使用的是C#语言作为开发工具,语法简洁易懂,学习门槛较低。
(2)快速开发:Winform具有丰富的开发工具和组件库,可以大大加速应用程序的开发速度。
开发人员可以通过简单的配置和自定义,快速构建功能强大的应用程序。
(3)可靠稳定:Winform是基于Windows操作系统的开发技术,可以保证应用程序的稳定性和可靠性。
同时,Winform应用程序与Windows操作系统紧密结合,具有良好的兼容性。
3. Winform的控件和容器Winform提供了丰富的控件和容器,开发人员可以根据实际需求选择和组合这些控件和容器。
常用的控件包括按钮、标签、文本框、列表框、下拉框等,常用的容器包括面板、窗体、选项卡等。
开发人员可以通过组合和嵌套这些控件和容器,构建出复杂的界面和交互功能。
4. Winform的事件驱动模型Winform采用了事件驱动的编程模型,通过响应用户界面上的各种事件,来实现应用程序的交互功能。
开发人员可以通过为控件添加事件处理函数的方式,来定义各种事件的响应行为。
例如,通过为按钮控件的Click事件添加处理函数,可以在用户点击按钮时执行相应的代码。
5. Winform的数据绑定Winform提供了数据绑定的功能,可以将数据与界面元素进行关联,使得数据的变化能够实时反映在界面上。
开发人员可以通过数据绑定,简化数据处理和更新的过程,提高应用程序的开发效率和用户体验。
6. Winform的布局管理Winform提供了多种布局管理器,可以帮助开发人员灵活地控制界面元素的布局和排列方式。
winform datagridview控件用法

winform datagridview控件用法Winform DataGridView 控件用法详解一、简介Winform DataGridView 控件是 .NET Framework 中提供的一个强大的数据显示和编辑控件。
它可以显示和编辑多种类型的数据(如文本、数字、日期、图像等),并且提供了丰富的功能和灵活的样式设置,可以方便地实现数据的展示、排序、筛选、编辑、分页等操作。
二、绑定数据源1. 绑定数据集可以通过设置DataGridView 的DataSource 属性来绑定一个数据集(DataSet)或数据表(DataTable)。
在Visual Studio 的设计器中,通过选择数据源和数据成员来实现绑定,也可以通过代码实现。
例如:dataGridView1.DataSource = dataSet.Tables["TableName"];2. 绑定数据集合除了绑定数据集,还可以绑定数据集合(如List<T>、BindingList<T> 等)。
在数据集合发生变化时,DataGridView 会自动更新显示的数据。
例如:List<User> userList = new List<User>();dataGridView1.DataSource = userList;3. 动态绑定数据绑定数据源后,可以通过设置DataGridView 的AutoGenerateColumns 属性为true,自动根据数据源的结构创建列。
也可以通过手动添加列来控制显示的列数和顺序。
例如:dataGridView1.AutoGenerateColumns = true;三、设置列样式1. 自动调整列宽可以通过设置DataGridView 的AutoSizeColumnsMode 属性来调整列宽。
通常选择AllCells 或Fill,前者会根据列中的内容调整列宽,后者会填充整个控件。
35. 如何在C#中实现数据绑定?

35. 如何在C#中实现数据绑定?35、如何在 C中实现数据绑定?在 C编程中,数据绑定是一种非常有用的技术,它能够建立数据与用户界面元素之间的自动同步关系,从而大大提高开发效率和代码的可读性。
接下来,让我们深入探讨如何在 C中实现数据绑定。
首先,我们需要了解数据绑定的基本概念。
简单来说,数据绑定就是将数据源(例如一个对象、数组或数据库中的数据)与用户界面控件(如文本框、列表框、数据网格等)关联起来,使得当数据源中的数据发生变化时,用户界面能够自动更新显示;反之,当用户在用户界面中修改数据时,数据源也能相应地更新。
在 C中,实现数据绑定通常有多种方式,下面我们将介绍几种常见的方法。
一种常见的方式是使用 Windows 窗体应用程序中的数据绑定。
在Windows 窗体中,可以通过设置控件的 DataBindings 属性来实现数据绑定。
例如,如果有一个文本框 TextBox1 和一个数据源对象dataSource(假设该对象有一个名为 Property1 的属性),可以这样进行绑定:```csharpTextBox1DataBindingsAdd("Text", dataSource, "Property1");```这样,当 dataSource 的 Property1 属性值发生变化时,文本框TextBox1 中的显示内容也会自动更新。
另一种常见的方式是在 WPF(Windows Presentation Foundation)应用程序中实现数据绑定。
WPF 提供了一种更强大和灵活的数据绑定机制。
在 WPF 中,可以使用 XAML 标记或在代码背后进行数据绑定。
在 XAML 中,数据绑定的语法类似于以下示例:```xml<TextBox Text="{Binding Path=Property1}"/>```这里,"Property1" 是数据源对象中的属性名称。
Winform(DataGridView)控件及通过此控件中实现增删改查

Winform(DataGridView)控件及通过此控件中实现增删改查:显⽰数据表,通过此控件中可以实现连接数据库,实现数据的增删改查⼀、后台数据绑定:List<xxx> list = new List<xxx>();dataGridView1.DataSource = list;//设置不⾃动⽣成列,此属性在属性⾯板中没有dataGridView1.AutoGenerateColumns = false;//取消加载默认选中第⼀⾏dataGridView1.ClearSelection();⼆、前台:⼩三⾓箭头,取消可编辑,添加,删除功能;Columns集合属性中,添加列HeaderText中设置显⽰的⽂本DataPropertyName设置绑定的字段名或数据库列名SelectionMode --设置选择⽅式,FullRowSelect只能选中⾏MultiSelect --是否可以选中多⾏内容三、取值:取出选中的单元格的值:dataGridView1.SelectedCells中放着全部选中的单元格if(dataGridView1.SelectedCells.Count > 0){MessageBox.Show(dataGridView1.SelectedCells[0].Value.ToString());}取出选中的⾏内容:if(dataGridView1.SelectedRows.Count > 0){MessageBox.Show(dataGridView1.SelectedRows[0].Cells[0].ToString());}获取⽤于填充⾏绑定的对象://⾏对象使⽤属性:DataBoundItemstudent sss = dataGridView1.SelectedRows[0].DataBoundItem as student;四、删除加确认MessageBoxButtons btn = MessageBoxButtons.YesNoCancel;if (MessageBox.Show("确定要删除么?", "删除数据", btn) == DialogResult.Yes){}五、多条件查询如果⽤户什么都不输⼊,或者⽂本框是空,这时候是查询所有//做两个恒成⽴的条件string tj1 = " 1=1 ";string tj2 = " 1=1 ";//根据⽤户输⼊来改变条件//如果⽤户输⼊了姓名if (name != ""){tj1 = " Name like @name ";}//如果⽤户输⼊了民族if (nation != ""){tj2 = " Nation = @nation ";}//拼接成完整条件string ztj = " where "+tj1+" and "+tj2;。
C#Winform关于ListView控件绑定DataTable

C#Winform关于ListView控件绑定DataTable今天⽤到ListView控件,这⾥总结⼀下ListView控件绑定DataTable的⽅法下⾯需要特别注意的是,绑定的过程中实现绑定控件的column的属性,再进⾏item的绑定。
与DataGridView不同的是,不能直接使⽤DataSourse绑定,再者,绑定第⼀个Items的时候⼀定要实例化⼀个Item进⾏单独绑定,因为第⼀个Item与后⾯的不⽤即Item与SubItem的区别,下⾯的代码中也给出了相应的注释[csharp]1. private void LoadData()2. {3. string sql = @"select * from room";4. DataTable dt = DBUtil.getDataTable(sql);5.6. this.listView1.Columns.Clear(); //好习惯,先清除再添加保证数据的⼀致性7. this.listView1.Columns.Add("roomid");8. this.listView1.Columns.Add("typeids");9. this.listView1.Columns.Add("price");10.11. this.listView1.Items.Clear();12.13. int length = dt.Rows.Count;14.15. for (int i = 0; i < length; i++)16. {17. ListViewItem lvi = new ListViewItem(dt.Rows[i]["roomid"].ToString()); //ListView的第⼀个Item作为主项需要单独添加18.19. string typeid = dt.Rows[i]["typeids"].ToString();20.21. switch (typeid)22. {23. case "1":24. lvi.ImageIndex = 0; //设置每个Item类型绑定的图⽚类型25. break;26. case "2":27. lvi.ImageIndex = 1;28. break;29. case "3":30. lvi.ImageIndex = 2;31. break;32.33. default:34. break;35. }36.37. lvi.SubItems.Add(dt.Rows[i]["typeids"].ToString()); //后⾯添加的Item都为SubItems ,即为⼦项38. lvi.SubItems.Add(dt.Rows[i]["price"].ToString());39. this.listView1.Items.Add(lvi);//最后进⾏添加40. }41. }。
WinForm之CheckListBox:绑定、取值与单选
this.dr = dr;
}
public override string ToString()//一定要注意重载
{
return dr["UserName"].ToString();
如何取得单项CheckBox的单选呢,这里需要用程序去实现,如下:
/// <summary>
/// 单选
/// </summary>
/// <param name="sender"></param>
/// <param name="e"></param>
}
}
}
}
WinForm之CheckListBox:绑定、取值与单选
2008-12-13 00:11
虽然同在.NET框架这个屋檐下,但WinForm与WebForm有些控件的成员和方法还是有不同的。习惯了WebForm的使用,在WinForm中还是有些不习惯。
比如说CheckListBox的数据绑定问题,找了很久,终于综合各路方法,得到以下结论:
{
return Decimal.Parse(dr["UserID"].ToString());
}
}
…………
在需要绑定数据的时候,做如下处理:
foreach (DataRow dr in dt.Rows)//dt为数据源:DataTable类型
/// 内部用户类,用于加载checkedListBox控件,以及返回对象
/// </summary>
ห้องสมุดไป่ตู้ class InnerUser
利用数据绑定(DataBinding)简化多线程数据展示

利⽤数据绑定(DataBinding)简化多线程数据展⽰ 经常做WinForm开发的⼈可能会遇到这样⼀种情况,WinForm程序后台有许多线程在执⾏任务,前台界⾯需要适时或定时显⽰后台任务执⾏的情况。
此类任务界⾯通常如下: 这⾥存在⼀个问题是如何在界⾯上显⽰后台线程上的状态数据,也就是多线程如何访问控件。
.NET中的控件并不是线程安全的,因此我们通常是⽤如下⽅法在界⾯上显⽰后台线程的数据:private void Test(string val) {if (txtSuccess.InvokeRequired) {txtSuccess.Invoke((ShowVal)Test,val);}else {txtSuccess.Text = val;}}此类⽅法存在⼀些问题: 1,更新代码⽐较多,且⽐较晦涩难懂,不易维护; 2,如果后台状态经常发⽣变动,则涉及到需要更改的代码可能⽐较多,如赋值代码,相关委托; 3,后台线程中除了维护状态外还需显世更新前台界⾯,造成后台线程代码冗余; 那么有没有⼀种⽐较好的解决⽅法呢?答案就是数据绑定。
通过数据绑定,后台线程只需要维护任务状态⽽不需要关⼼这些数据如何显⽰,⽽前台界⾯仅需要不断更新显⽰数据,⽽不必关⼼数据更新来⾃何⽅。
下⾯以⼀个简单的例⼦说明如何利⽤数据绑定(DataBinding)简化多线程数据展⽰,假设后台有2个线程在不断处理任务,同时记录了任务执⾏成功,失败的情况,前台则需要动态显⽰这些任务的执⾏状况。
任务类简单定义为:public class TaskEntity {private int _TaskId = 0;private int _TaskSuccess = 0;private int _TaskFail = 0;public int TaskId { get { return _TaskId; } set { _TaskId = value; } }public int TaskSuccess { get { return _TaskSuccess; } set { _TaskSuccess = value; } }public int TaskFail { get { return _TaskFail; } set { _TaskFail = value; } }public int TaskAll { get { return _TaskSuccess + _TaskFail; } }} 然后定义⼀个全局的数据源⽤于存放这些任务的引⽤,同时将该数据源邦定到前台界⾯上public List<TaskEntity> dataSource;private TaskEntity task1;private TaskEntity task2;private void InitializeDataSource() {dataSource = new List<TaskEntity>();task1 = new TaskEntity();task1.TaskId = 0;dataSource.Add(task1);task2 = new TaskEntity();task2.TaskId = 1;dataSource.Add(task2);}private void InitializeBinding() {dataGridView1.DataSource = dataSource;txtAll.DataBindings.Add(new Binding("Text",task1,"TaskAll"));txtFail.DataBindings.Add(new Binding("Text", task1, "TaskFail"));txtSuccess.DataBindings.Add(new Binding("Text", task1, "TaskSuccess"));} 然后启动2个后台线程private Thread thread1;private Thread thread2;void btnBS_Click(object sender, EventArgs e) {workStatus = !workStatus;if (workStatus) {thread1 = new Thread(Dowork1);thread1.Start();thread2 = new Thread(Dowork2);thread2.Start();}} 最后定义数据更新⽅法private void UpdateControlValue() {dataGridView1.Invalidate();txtAll.DataBindings[0].ReadValue();txtFail.DataBindings[0].ReadValue();txtSuccess.DataBindings[0].ReadValue();} 做完这些后就可以点击验证,执⾏结果如下: 最后通过⽐对2种⽅法的实现,执⾏结果,可以得出,在.NET中利⽤数据绑定(DataBinding)可以简化多线程数据展⽰,使得代码的可维护性更⾼,对于新⼈也更容易⼊⼿。
WinForm(C#)CheckedlistBox绑定数据
WinForm(C#)CheckedlistBox绑定数据,并获得选中的值(ValueMember)和显示文本(DisplayMember2010-07-10 11:18本文中我将和大家讨论关于在WinForm开发中给CheckedlistBox空间绑定数据源,并获取控件中选中的所有元素的显示文本(DisplayMember)和对应的实际值(ValueMember)的问题,后者将是讨论的重点。
为了更方便地说明,首先我要预设一些条件。
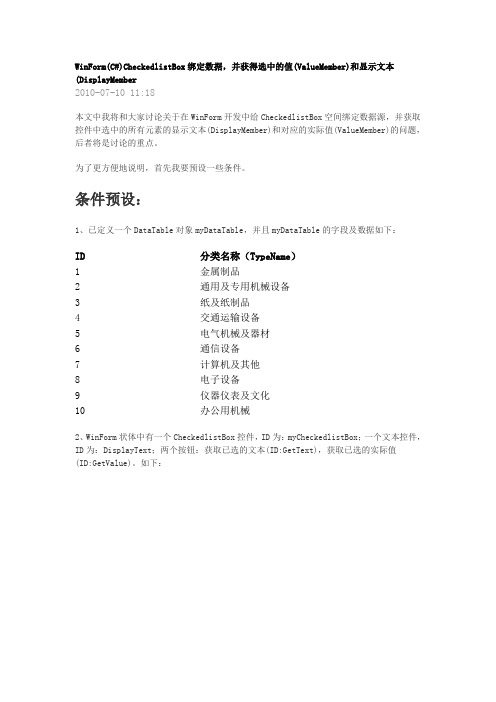
条件预设:1、已定义一个DataTable对象myDataTable,并且myDataTable的字段及数据如下:ID分类名称(TypeName)1 金属制品2 通用及专用机械设备3 纸及纸制品4 交通运输设备5 电气机械及器材6 通信设备7 计算机及其他8 电子设备9 仪器仪表及文化10 办公用机械2、WinForm状体中有一个CheckedlistBox控件,ID为:myCheckedlistBox;一个文本控件,ID为:DisplayText;两个按钮:获取已选的文本(ID:GetText),获取已选的实际值(ID:GetValue)。
如下:具体实现:1、给CheckedlistBox控件myCheckedlistBox绑定数据源,这个方法很简单,固定程式,网上一搜一大把,就直接上代码了1.this.myCheckedlistBox.DataSource = myDataTable;2.this.myCheckedlistBox.ValueMember = "ID";3.this.myCheckedlistBox.DisplayMember = "TypeName";2、获取CheckedlistBox控件myCheckedlistBox中已选中的所有元素的显示文本(DisplayMember)。
1./// <summary>2./// 按钮(GetText)单击事件:获取获取已选的文本3./// </summary>4./// <param name="sender"></param>5./// <param name="e"></param>6.private void GetText_Click(object sender, EventArgs e)7.{8. string checkedText = string.Empty;9. for (int i = 0; i < this.myCheckedlistBox.CheckedItems.Count;i++)10. {11. checkedText += (String.IsNullOrEmpty(checkedText) ? "" :",") +this.myCheckedlistBox.GetItemText(this.myCheckedlistBox.Items[i]);12. }13. this.DisplayText.Text = checkedText;14.}3、获取CheckedlistBox控件myCheckedlistBox中已选中的所有元素对应的实际值(ValueMember)。
- 1、下载文档前请自行甄别文档内容的完整性,平台不提供额外的编辑、内容补充、找答案等附加服务。
- 2、"仅部分预览"的文档,不可在线预览部分如存在完整性等问题,可反馈申请退款(可完整预览的文档不适用该条件!)。
- 3、如文档侵犯您的权益,请联系客服反馈,我们会尽快为您处理(人工客服工作时间:9:00-18:30)。
WinForm数据绑定-简单绑定1数据绑定的意义在前面的文章中已经做了描述。
现在我们来具体了解一下数据绑定。
数据绑定被分为两个部分,(至少我是这样来分的)简单绑定和复杂绑定。
以一种简单的方式来理解的话,简单绑定是只控件和某个单一对象之间的绑定,而复杂绑定是指和集合(ArrayList, Array, DataTable, DataSet)之间的绑定,而复杂绑定中隐含着简单绑定。
所以我们必须先搞清楚简单绑定的想法(也是数据绑定实现的最基本的想法)。
前面描述过了数据绑定机制的想法是将数据和控件关联在一起的机制。
那对于一个单一对象而言什么是数据呢?对象本身其实就可能包含一定的数据。
比如我们知道的成员变量,它就在帮对象维持数据。
而对于数据绑定机制而言,它关心的是属性。
如果我们能将某个对象的属性和控件的某个属性关联在一起,那数据就可以自如的显示到控件中了。
所以对我的认识而言,我认为简单绑定做的事情就是将对象中的属性和控件的属性关联。
考虑一下的代码。
假设我定义了一个Person类,在这个类中我定义了三个属性FirstName, LastName, Age,我想将这三个属性分别显示在三个TextBox中。
如果不使用数据绑定我们需要的代码如下。
Person person = new Person("Cai", "Peng", 32);textbox1.Text = person.FirstName;textbox2.Text = stName;textBox3.Text = person.Age;这样做有什么问题吗?看来是没有什么问题,你的数据可以正常的显示在界面中。
问题就在与如果用户修改了textBox1中的数据,你的person对象中的FirstName的值也会更改吗?如果你想确保person.FirstName中的值和你的textBox1.Text的值一致的话你要怎么做?你必须编写相应的代码来完成。
比如你可以在textBox1的TextChanged事件中编写如下的代码:person.FirstName = textbox1.text这是不使用数据绑定时我们必须要做的事情。
在这样的情况下我们为了保证textBox1中的值和对象中相应的数据是一致,我们必须这样做。
如果使用数据绑定会怎么样呢?为了说明以上的这种转变,建立一个winform来说明一下:在这个项目中我建立了一个Person类和两个界面Form1, Form2.其中Form1不是用数据绑定。
person类:1using System;2using System.Collections.Generic; 3using System.Text;45namespace SimplyDataBinding6{7class Person8 {9private string _firstname;1011public string Firstname12 {13get { return _firstname; } 14set { _firstname = value; } 15 }16private string _lastname;1718public string Lastname19 {20get { return _lastname; }21set { _lastname = value; }22 }23private int _age;2425public int Age26 {27get { return _age; }28set { _age = value; }29 }30public Person() { }31public Person(string firstname, string lastname, int age) 32 {33this.Firstname = firstname;stname = lastname;35this.Age = age;36 }37 }38}39Form1.cs的界面:你可以尝试在第一行的第一个TextBox中键入一些内容,你会发现第二行的对应的TextBox中的值发生了改变。
但如果你去操作其他的TextBox就不会发现数据会发生相应的更改。
Form1的代码:1using System;2using System.Collections.Generic;34/*5 * 这个例子的想法是建立一个Person类的实例,然后将person的各个属性显示在相应的控件中。
6 * 界面中一共又6个TextBox,其中每三个Textbox用来显示person相应的三个属性。
7 * 你会发现如果在不使用数据绑定的情况下,显示数据是没有任何问题的。
8 * 但当你更改任意个Textbox中的数据的时候,你会发现相对应的另一个T extbox中的数据不会更新。
9 * 如果你想要是的两个显示相同person类同一属性的Textbox的数据保持一致,就需要编写相应的代码10 * 去处理。
我建立了第一个Textbox中的TextChanged事件,为了保证数据的一致。
1112 */13using ponentModel;14using System.Data;15using System.Drawing;16using System.Text;17using System.Windows.Forms;1819namespace SimplyDataBinding20{21public partial class Form1 : Form22 {23private Person person;24public Form1()25 {26 InitializeComponent();2728 person = new Person("Cai", "Peng", 32); 29this.txtFirstname1.Text = person.Firstname; 30this.txtLastname1.Text = stname; 31this.txtAge1.Text = person.Age.ToString(); 32this.txtFirstname2.Text = person.Firstname; 33this.txtLastname2.Text = stname; 34this.txtAge2.Text = person.Age.ToString();35 }3637private void button1_Click(object sender, EventArgs e)38 {3940 }4142private void txtFirstname1_TextChanged(object sender, EventArgs e) 43 {44//为了同步person.Firstname 和显示的数据。
我们必须写下如下的代码。
45 //你可以观察到其他的没有建立相应的TextChanged事件的Textbox 没又办法自动的46 //保证数据的一致。
47this.person.Firstname = this.txtFirstname1.Text;48this.txtFirstname2.Text = person.Firstname;49 }50 }51}代码中我建立了第一个控件的TextChanged事件,以便可以使得对应的两个Textbox的数据和person对象中的Firstname可以同步进行修改。
如果不使用数据绑定我们需要自己去编写代码处理上述的情况以及其他的更多的关于数据同步的情况。
下面我演示一下使用数据绑定的情况会如何Form2的界面和Form1的界面一致,你可以重复你在Form1中所做的事情,看看会怎么样。
注意一点,当你修改了控件中的数据后请将鼠标移动到其他的控件上去,以便数据绑定机制可以帮你做数据同步的事情。
Form2的代码:1using System;2using System.Collections.Generic;3using ponentModel;4using System.Data;5using System.Drawing;6using System.Text;7using System.Windows.Forms;89namespace SimplyDataBinding10{11public partial class Form2 : Form12 {13 Person person;14public Form2()15 {16 InitializeComponent();17 person = new Person("Cai", "Peng", 32);18this.txtFirstname1.DataBindings.Add("Text", person, "Firstname"); 19this.txtLastname1.DataBindings.Add("Text", person, "Lastname"); 20this.txtAge1.DataBindings.Add("Text", person, "Age");21this.txtFirstname2.DataBindings.Add("Text", person, "Firstname"); 22this.txtLastname2.DataBindings.Add("Text", person, "Lastname"); 23this.txtAge2.DataBindings.Add("Text", person, "Age");2425 }26 }27}你们应该可以发现这段代码和Form1中的代码的区别了吧。
以上的代码是以数据绑定的方式完成的。
后面我将详细解释这些代码。
你一定发现了,如果你做上述相同的操作的时候两个相应的TextBox始终会保持一致的数据。
而这一切的发生完全是自动的,这要得意于数据绑定了。
该解释一下了。
this.txtFirstname1.DataBindings.Add("Text", person, "Firstname");仔细看看,你能发现,"Text" 是不是就是TextBox的Text属性。
