佳能650D使用说明书超详细
佳能650D官方使用教程
佳能650D官方使用教程第一部分:入门指南欢迎使用佳能650D相机!这款相机以其先进的技术和功能而备受赞誉。
想要最大限度地利用您的佳能650D的潜力,您可以按照以下步骤进行操作:1.首先,让我们了解相机的基本部件。
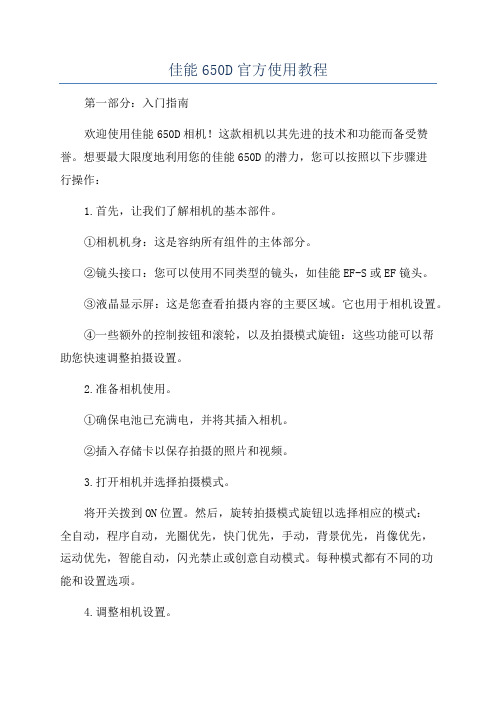
①相机机身:这是容纳所有组件的主体部分。
②镜头接口:您可以使用不同类型的镜头,如佳能EF-S或EF镜头。
③液晶显示屏:这是您查看拍摄内容的主要区域。
它也用于相机设置。
④一些额外的控制按钮和滚轮,以及拍摄模式旋钮:这些功能可以帮助您快速调整拍摄设置。
2.准备相机使用。
①确保电池已充满电,并将其插入相机。
②插入存储卡以保存拍摄的照片和视频。
3.打开相机并选择拍摄模式。
将开关拨到ON位置。
然后,旋转拍摄模式旋钮以选择相应的模式:全自动,程序自动,光圈优先,快门优先,手动,背景优先,肖像优先,运动优先,智能自动,闪光禁止或创意自动模式。
每种模式都有不同的功能和设置选项。
4.调整相机设置。
使用液晶显示屏上的各种按钮和滚轮来调整设置,如感光度,白平衡,对焦模式和曝光补偿等。
相机附带了一本用户手册,其中详细介绍了这些设置。
第二部分:基本拍摄技巧1.确保稳定相机。
为了避免照片模糊,使您的相机保持稳定。
您可以使用三脚架或稳定器。
您还可以使用自动稳定功能,该功能会在拍摄时减少抖动。
2.确保正确对焦。
使用自动对焦功能将图像锁定在您要拍摄的区域。
您可以使用中央对焦点,然后将相机的聚焦点对准您要对焦的主题。
3.选择合适的快门速度。
快门速度控制图像的暴露时间。
对于静态场景,您可以使用较慢的快门速度,例如1/60秒。
对于运动场景,您需要使用较快的快门速度来避免运动模糊。
4.调整光圈大小。
光圈控制图像的深度和明亮度。
较大的光圈值(小光圈数)会给予图像更多的焦点范围,而较小的光圈值(大光圈数)会产生浅景深效果。
5.拍摄照片。
按下快门按钮进行拍摄。
您可以通过使用自动拍摄或连拍模式来拍摄多张照片。
第三部分:高级技巧和功能1.使用曝光补偿。
佳能EOSD使用说明完整版

佳能EOSD使用说明完整版1.外观和功能介绍佳能EOSD采用经典的单反相机外观设计,机身坚固耐用。
相机正面有一个大型取景器,方便观察拍摄画面。
机身背部配有一个触摸屏,可以进行各种设置和操作。
相机上方有一个闪光灯口,可连接外接闪光灯提供更强的光源。
2.相机设置在使用佳能EOSD之前,您需要先进行一些初始设置。
首先,插入电池和存储卡,并打开相机的电源。
然后,按下菜单按钮,选择相机设置选项。
您可以设置语言、日期和时间、闪光灯等。
在设置完成后,您就可以开始拍摄了。
3.自动拍摄模式佳能EOSD提供了多种不同的拍摄模式,以满足不同用户的需求。
其中,自动拍摄模式是最简单的模式之一、在自动拍摄模式下,相机会根据场景自动选择合适的设置,无需用户干预。
只需将相机对准目标,按下快门按钮,相机就会自动对焦并拍摄。
4.手动拍摄模式除了自动拍摄模式外,佳能EOSD还提供了手动拍摄模式,供用户进行更精细的设置和控制。
在手动拍摄模式下,用户可以自行调整快门速度、光圈大小、ISO感光度等参数,以获得更具个性化的拍摄效果。
5.视频拍摄除了拍摄照片外,佳能EOSD还支持高清视频拍摄。
用户只需按下录像按钮,相机即可开始录制视频。
相机支持多种不同的视频分辨率和帧率,用户可以根据需要进行设置。
视频拍摄功能也可以与手动模式相结合,用户可以自定义各种参数以获得满意的视频效果。
6.拍摄特效佳能EOSD还提供了多种不同的拍摄特效,以增加照片的艺术感。
其中,黑白模式可以将照片转换为黑白风格,营造出复古的氛围。
人像模式可以让照片中的人物更加突出,背景虚化。
风景模式可以增加照片的饱和度和对比度,使得颜色更加丰富鲜艳。
7.镜头选择和更换佳能EOSD采用佳能EF/EF-S镜头接口,用户可以根据需要选择不同的镜头进行拍摄。
不同的镜头可以带来不同的拍摄效果,例如广角镜头适合拍摄大景观,长焦镜头适合拍摄远景。
更换镜头时,用户只需按下镜头解锁按钮,顺时针旋转镜头即可取下或安装。
佳能EOS 650D

佳能EOS 650D作者:暂无来源:《摄影之友·影像视觉》 2012年第9期翻译:曹沛然编辑:乔枫伟美编:王晓勇佳能新出的1800万有效像素的数码单反相机,还拥有视频全时自动对焦,它的最大卖点就是触摸屏,650D不仅可以通过屏幕选择焦点,还能浏览菜单,操作的精准度如同智能手机。
除此之外,它还拥有新添加的滤镜效果等选新功能,它的表现如何?我们为你盘点这款相机的表现。
今年六月,佳能发布了EOS 650D,它的适用人群是需要简单操作、对画质有比较高的要求的初学者。
650D并不是代替正在销售的600D的,它倒像是550D的终结版。
这款相机和其他单反的最大区别就是搭载了触摸屏。
让我们从最基本的地方说起,先来谈谈这款相机的感光元件。
650D拥有1800万有效像素的感光元件与其他佳能的CMOS不同,它使用了全新的混合型CMOS传感器,在实时取景与拍摄视频时,能获得更快的对焦速度。
它的处理器也换成了DIGIC 5 14位处理器,所以它的连拍速度也达到了5张/秒,超过了一直称霸入门级相机的尼康D5100(约4张/秒),相比与600D的3.7张/秒也有所提升。
它的感光度范围也经过了拓展,达到了100到12800,最高可以扩展到25600。
单反相机“摸”得到650D是第一款带有触屏功能的数码单反相机,使用者可以通过触摸屏幕的形式选择对焦点、触发快门,并设置一些关键的参数,比如白平衡和感光度。
相机使用的是手机一样的屏幕,所以轻轻触碰就可以完成操作。
不仅如此,用户可以像使用触屏手机那样浏览菜单,或者是用滑动的方式浏览照片。
而且你可以使用双指开合的动作来缩放照片,这种“手机操作体验”非常顺畅,这一点让我们印象深刻。
和600D一样,在使用取景器进行对焦时,650D采用了9点相位检测自动对焦系统,但是现在对焦点都升级为十字对焦点,这让它的对焦精准度更高。
在评测中,它可以轻易锁定突然闯入镜头的物体,无论我们选择哪个对焦点,其合焦速度都令人满意。
佳能数码相机使用说明书
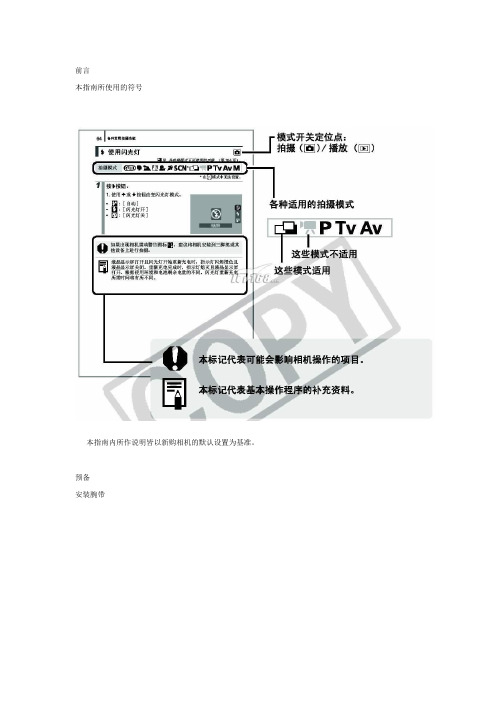
前言本指南所使用的符号本指南内所作说明皆以新购相机的默认设置为基准。
预备安装腕带为防止相机在使用过程中掉落,建议使用腕带。
安装电池1. 将电池仓盖锁扣推向箭头(1) 的方向,定住锁扣不放,此时将电池仓盖推向箭头(2) 方向,然后以箭头(3) 方向将电池仓盖向上打开。
2. 装入两颗电池。
3. 关闭电池仓盖(1),然后将电池仓盖向下按着推向(2),直到咔一声到位为止。
插入存储卡1. 将电池仓盖锁扣推向箭头(1) 的方向,定住锁扣不放,此时将电池仓盖推向箭头(2) 方向,然后以箭头(3) 方向将电池仓盖向上打开。
2. 装入存储卡直到咔一声到位为止。
3. 关闭电池仓盖(1),然后将电池仓盖向下按着推向(2),直到咔一声到位为止。
存储卡插入相机前,请先确定其方向正确。
若存储卡以反方向插入,相机则无法识别该卡或导致故障。
要取出存储卡用手指推存储卡直至听到咔哒声,然后松开存储卡。
设置日期和时间首次开启相机电源时,即会出现日期/ 时间设置菜单。
请依照下面说明的第3 及4 步骤设置日期及时间。
1. 按电源按钮。
2. 选择[ 日期/ 时间]。
3. 选择年、月、日和时间及显示的排列方式。
您可在图像上加印所设置的日期及时间。
设置显示的语言您可变更显示在液晶显示屏菜单及信息所使用的语言。
拍摄静止图像1. 按电源按钮。
(1) 将播放起动声音,液晶显示屏上将显示起动图像。
(2) 再次按电源按钮关闭电源。
2. 选择拍摄模式。
3. 将相机对准拍摄主体。
4. 轻按( 半按) 快门按钮进行对焦。
(1) 相机对焦时,相机鸣响两次,指示灯亮为绿色(使用闪光灯时亮为橙色)。
(2)在液晶显示屏的对焦点上会出现绿色自动对焦框。
5. 不作其他任何变动,将按钮按到底( 全按) 拍摄。
(1) 将播放一次快门声音并记录图像。
(2) 图像被录入存储卡时,指示灯将呈绿色闪烁。
静音设置拍摄后立即查看图像( 拍摄预览)拍摄所录制的图像随即在液晶显示屏上出现约2 秒。
佳能EOSD使用说明

EOS600D使用要点一、创意自动可以调节使背景虚化/清晰的程度二、拍摄人像1.主体距背景离越远越好2.使用远摄镜头三、拍摄风光1.使用广角端2.此模式闪光灯禁用,因此可以用于拍摄夜景四、拍摄微距1.使用简单背景2.尽可能靠近主体3.使用远摄端五、拍摄运动主体1.使用远摄镜头2.使用中央自动对焦点六、拍摄夜景人像1.使用广角镜头以增强夜景的广度2.保持人与相机的距离在5米范围内3.同时使用场景智能自动模式以获得最佳图像七、按选择的氛围效果拍摄1.显示实时图像2.按下速控按钮3.按上下键选择标准设置4.按左右键选择氛围5.液晶显示器会显示所选气氛下的图像效果八、程序自动曝光此模式下会自动设置快门速度和光圈值,闪光灯不会自动闪光;程序偏移:半按快门按钮后,转动拨盘可以更改快门速度和光圈值设定组合,拍摄照片后程序偏移自动取消;九、自动对焦模式1.单次自动对焦模式适合拍摄静止主体2.人工智能伺服自动对焦模式适合拍摄运动主体只要保持半按快门,将会对主体进行持续对焦3.可自动切换自动对焦模式的人工智能自动对焦如果静止物体开始移动,人工智能自动对焦将自动把自动对焦模式从单次自动对焦切换到人工智能伺服自动对焦十、快门优先自动曝光1.捕捉运动主体使用1/4000~1/500秒的高速快门速度2.模糊奔跑的小孩或动物给人以快速运动的感觉,使用1/250~1/30秒的中等快门速度3.模糊流动的河流或喷泉,使用1/30秒或更低的低速快门速度4.如果快门的设置超过了可调整的光圈值范围,光圈值显示将会闪烁以表明无法获得标准曝光;如果曝光过暗,最大光圈最小值将闪烁,此种情况应降低快门速度或增大ISO感光度;如果曝光过亮,最小光圈最大值将闪烁,此种情况应增加快门速度或减少ISO感光度;十一、光圈优先自动曝光光圈的设置如果超过可调整的快门速度范围,快门速度显示将会闪烁以表明无法获得标准曝光;如果照片太暗,“30’’”快门速度显示将会闪烁,此种情况下应增大光圈降低光圈值或提高ISO感光度;如果照片太亮,“4000”快门速度显示将会闪烁,此种情况下,应降低光圈增加光圈值或降低ISO感光度;十二、景深预览光圈开口光阑孔径只在拍摄照片的瞬间变化,其他时候,光圈保持全开状态;因此,当您通过取景器或液晶显示器注视场景时,景深会显得较浅;当您按景深预视按钮时,可以在拍摄之前观看实际的景深;在注视实时显示图像和按住景深预视按钮的同时,可以改变光圈并观看景深如何变化;十三、手动曝光1.要设置快门速度,请转动拨盘2.要设置光圈值,请按住<Av+/->按钮并转动拨盘3.半按快门,对焦拍摄主体,将在取景器中显示当前曝光量与标准曝光量的差距十四、A-DEP自动景深自动曝光前景和背景中的主体将会自动合焦,所有自动对焦点都将会检测拍摄主体,并且获得必要景深所需的光圈会自动设置十五、测光模式设定测光模式时,半按快门按钮不会锁定曝光设置,只有曝光时才会设定曝光设置十六、设置曝光补偿按住<Av+/->按钮并转动拨盘即可设置拍摄照片后,通过将曝光补偿设回0将其取消十七、自动包围曝光十八、锁定曝光当对焦区域不同于曝光测光区域或想要以相同的曝光设置拍摄多张照片时,可以锁定曝光;1.对焦拍摄主体,半按快门,将显示曝光设置2.按下<>按钮,取景器中的<>图标亮起,表示曝光设置已被锁定自动曝光锁3.每次按下<>按钮,将锁定当前自动曝光设置4.重新构图并拍摄照片5.如果希望保持自动曝光锁进行更多拍摄,请保持按住<>按钮并按下快门按钮继续拍摄十九、锁定闪光曝光如果在主体位于取景框侧面时使用闪光灯,取决于背景等,主体可能会显得太亮或太暗,这时应该使用闪光曝光锁;为主体设置正确的闪光曝光后,可以重新构图让主体位于侧面位置并拍摄;1.按下<闪光>按钮,内置闪光灯会升起,半按快门按钮并注视取景器,确保<闪光>图标亮起2.对焦拍摄主体3.让点测光圆覆盖主体,然后按下<>按钮,闪光灯进行预闪,相机将计算必须的闪光输出数据并将其保存在内存中4.在取景器中显示“FEL”一段时间,而且<闪光>会亮起每次按下<>按钮都进行预闪,相机会计算必须的闪光输出数据并将其保存在内存中5.构图并完全按下快门按钮进行拍摄二十、自动对焦模式实时显示图像情况下按下<速控>按钮即可设置1.实时模式:自动对焦操作将比快速模式需要更长时间,此外,可能比快速模式更难以合焦;按下<方向键>可以将自动对焦点移动到您想要对焦的位置边缘除外;要让自动对焦点返回中央,按下<set>或<删除键>;2.面部优先实时模式:按照与实时模式相同的自动对焦方法,检测面部并对焦;3.快速模式:使用专用自动对焦感应器在单次自动对焦模式下对焦时,自动对焦方法与取景器拍摄时相同;尽管可以对目标区域快速对焦,但在自动对焦操作期间,实时显示图像将被暂时中断;操作方法:a按下<实时显示图像>按钮实时显示图像b按<速控>按钮显示速控屏幕,左侧将显示可设定的功能c按下<上下键>使自动对焦点可选择d转动拨盘选择自动对焦点e半按快门进行对焦,实时显示图像会关闭,反光镜会落回原位,当合焦时,合焦的自动对焦点将变为绿色并会重新出现实时显示图像,如果没有合焦,自动对焦点将会变为橙色并闪烁二十一、手动对焦1.将镜头对焦模式开关置于<MF>2.按下<方向键>将放大框移动到想要合焦的位置若要让放大框返回中央,按下<set>键或<删除键>3.按下<放大键>放大区域4.注视放大图像的同时,转动镜头对焦环进行对焦,合焦后按下<放大键>返回通常显示5.拍摄照片二十二、拍摄短片1.开始拍摄短片前,请进行自动对焦或手动对焦2.半按快门,相机会以当前的自动对焦模式对焦3.按下<实时显示图像>按钮开始拍摄短片,再次按下停止拍摄二十三、快速搜索图像1.按下<播放>按钮,液晶显示器会显示最后拍摄的图像2.按下<索引缩小>按钮,出现4张图像索引显示,再次按下则出现9张图像3.按下<放大>按钮将在9张图像、4张图像和1张图像之间切换显示4.按下<方向键>移动蓝框选择图像5.转动拨盘会显示下一屏或上一个图像6.按下<set>键,所选图像将作为单张图像显示二十四、创意滤镜1.按菜单键在设置1下,选择创意滤镜,然后按下<set>键,将显示图像2.选择想要应用滤镜的图像,可以按<索引>按钮搜索3.按下<set>键会显示创意滤镜4.按<左右键>调节滤镜效果,然后按下<set>键,对于微缩景观效果,还可以按<上下键>选择想要清晰显示的区域,然后按下<set>键;5.单击确定保存图像6.要退出或返回菜单,按下<MENU>键。
Canon EOS 650D数码单反超级手册

两款常见的定焦镜头
Canon EF 50mm f/1.8 II Canon EF 100mm f/2.8L IS USM微距
快门线
三脚架
摄影包
1
滤镜
2
存储卡
3
防潮箱
4
遮光罩
5
黑卡、灰卡和 白卡
滤镜
滤镜是什么 UV滤镜的使用方法 偏振镜的使用方法 渐变滤镜的使用方法 滤镜的选择方法
镜头与透视 学会构图
《Canon EOS 650D数码单反超级手册》适合Canon EOS 650D用户以及摄影爱好者学习参考。
目录分析
Canon EOS 650D的8大改进
之处
Canon EOS 650D机身功能 介绍
Canon EOS 650D的8大改进之处
轻巧流畅的机身设计 可旋转式触控液晶监视器 约1800万有效像素的新型CMOS图像感应器 高性能的DIGIC 5数字影像处理器 最高约5张/秒的高速连拍 高达25600的感光度和高效的降噪功能 中央八向双十字全9点十字型自动对焦 专业级的短片拍摄
作者介绍
同名作者介绍
这是《Canon EOS 650D数码单反超级手册》的读书笔记模板,暂无该书作者的介绍。
读书笔记
读书笔记
这是《Canon EOS 650D数码单反超级手册》的读书笔记模板,可以替换为自己的心得。
精彩摘录
精彩摘录
这是《Canon EOS 650D数码单反超级手册》的读书笔记模板,可以替换为自己的精彩内容摘录。
根据不同的题材选择合适的情景模式
Canon EOS 650D模式轮盘简介 1.场景智能自动模式 2.闪光灯关闭模式 3.创意自动模式 4.人像模式 5.风光模式 6.微距模式 7.运动模式 8.夜景人像模式
Canon EOS 650
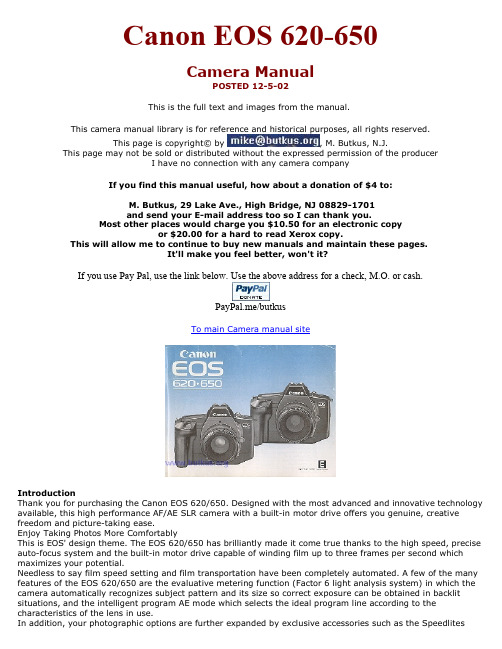
Canon EOS 620-650Camera ManualPOSTED 12-5-02This is the full text and images from the manual.This camera manual library is for reference and historical purposes, all rights reserved.This page is copyright© by , M. Butkus, N.J.This page may not be sold or distributed without the expressed permission of the producerI have no connection with any camera companyIf you find this manual useful, how about a donation of $4 to:M. Butkus, 29 Lake Ave., High Bridge, NJ 08829-1701and send your E-mail address too so I can thank you.Most other places would charge you $10.50 for an electronic copyor $20.00 for a hard to read Xerox copy.This will allow me to continue to buy new manuals and maintain these pages.It'll make you feel better, won't it?If you use Pay Pal, use the link below. Use the above address for a check, M.O. or cash.PayPal.me/butkusTo main Camera manual siteIntroductionThank you for purchasing the Canon EOS 620/650. Designed with the most advanced and innovative technology available, this high performance AF/AE SLR camera with a built-in motor drive offers you genuine, creative freedom and picture-taking ease.Enjoy Taking Photos More ComfortablyThis is EOS' design theme. The EOS 620/650 has brilliantly made it come true thanks to the high speed, precise auto-focus system and the built-in motor drive capable of winding film up to three frames per second which maximizes your potential.Needless to say film speed setting and film transportation have been completely automated. A few of the many features of the EOS 620/650 are the evaluative metering function (Factor 6 light analysis system) in which the camera automatically recognizes subject pattern and its size so correct exposure can be obtained in backlit situations, and the intelligent program AE mode which selects the ideal program line according to the characteristics of the lens in use.In addition, your photographic options are further expanded by exclusive accessories such as the Speedlites420EZ and 300EZ that respond to a wide range of illuminations from dark surroundings to fill-in flash, the Quartz Date Back E that imprints data, and the Technical Back E that memorizes exposure control data.For a full understanding of the EOS 620/650, please read this instruction booklet carefully before using the camera.While reading these instructions unfold the front and back flaps of this booklet for easy reference to the camera’s parts.EOS" is derived from "Electro-Optical System" originating from the completely electronic data communication between the camera and lens. Further, "EOS,' is the Goddess of Dawn in Greek mythology--heralding the new, genuine AF system generation.``EF" lens stands for “Electro-Focus" and adopts the lens-integral auto focus system which uses special motors to make precise and high-speed auto focusing possible whatever the lens focal length.Table of ContentsPreliminary Preparations1. Attaching the Lens 62. Loading the Battery 83. Checking the Battery 94. Loading the Film 10[Automatic Film Speed Setting] 12Basic Steps1. Setting the Main Switch to the "Full Auto" Position 142. Holding the Camera 153. AF Focusing 164. Exposure 17[Display Panel Illumination] 185. Automatic Film Rewind 19[Rewinding Mid-Roll] 20Making the Most of Your EOS 620/6501. Main Switch Functions 222. Setting the AF Mode 243. Setting the Film Winding Mode 264. Setting the Shooting Mode 27(1) Program AE 28(2) Program Shift Function 30(3) Shutter-Priority AE 32(4) Aperture-Priority AE 34[Depth of Field] 36(5) Depth of Field AE 38(6) Manual 425 Partial Metering 446. Exposure Compensation 467. Auto Exposure Bracketing 488. Multiple Exposures 529. Difficult Subjects for Auto-focus 5410. Manual Focusing 56Other Shooting1. Self-timer Photography 582. Dedicated Flash Photography 603. Bulb [Long Exposure] 634. Shooting with Infrared Film 64Accessories 65Caring for Your Camera 72Other Notes 73Appendix 74Specifications 82Carrying the Camera 871. Attaching the Lens1) Turn the rear lens cap in the direction of the arrow until it stops and remove it from the lens.· To attach the rear lens cap, align its ''O'' mark with the red dot on the lens. Then lightly push it in and turn it clockwise until it stops.2) Turn the body cap counterclockwise and remove it.· To attach the body cap, align its "o" mark with the camera's red dot, then turn the cap clockwise.3) To mount the lens, align the lens mount positioning point with the camera's red dot.4) Then turn the lens clockwise until it stops and the lens is locked with a click.· To remove the lens, turn it counterclockwise while pressing the lens release button.5) Remove the front lens cap.CAUTION2. Loading the battery1) Remove the grip with a coin or similar object.2) As shown in the photo, load the battery so that its terminals face in the direction of the camera. Make sure the battery is pushed in all the way until it is locked by the orange lever3) Replace the grip securely.· When replacing the battery, first push the orange lever upward to remove the dead battery.· When using a tripod, dismount t the camera before replacing the battery.3. Checking the Battery1 ) Set the main switch to the green "Go", "A" or "(-)"mark. Thedisplay will come on at this time. If the display does not appear,confirm that the battery is loaded correctly.2) Open the switch cover on the back of the camera and press the battery checkbutton(). Battery power shows in the display panel.4. Loading the Film1) To open the back cover, push the back cover latch down while pressing the back cover lock button2) Insert the upper-flat end of the film cartridge into the film chamber first. The film-load check mark (OIL) appears in the display panel.3) Pull the film leader across the shutter curtain until its tip is aligned with the orange index.CAUTION* Before loading the first roll of film, remove the plastic insert.* NEVER touch the shutter curtain. Its high-precision design makes it sensitive topressure. Also, when loading the film be careful that the film leader does not touchthe shutter curtain.4) Make sure that the film has no slack and that its perforations are properly engaged with the sprocket teeth.5) Close the back cover. The camera advances the film automatically and stops when "1" appears in the frame counter in the display panel.6) During film advance, the film transport bars will appear at the bottom of the display panel moving in sequence from left to right. However, if the film does not advance correctly, the bars blink after the camera has stopped and the shutter will. not release. Reload the film.If the film leader extends past the orange index, take out the film cartridge and manually rewind the excess film back into the cartridge.Film becomes soft and tears easily in high humidity. Keep it stored in its canister until loading.Automatic Film Speed SettingThe camera automatically sets film speed by sensing the DX code marked on the film cartridge. (ISO 25 - 5000 according to DX code standard)1. The automatically-set film speed will appear in the display panel while the film advances to the first usable frame.2.. When using film without a DX code, set the speed manually by following these steps: (ISO6-6400).1 ) Set the main switch to either "A" or " ((*)) ".2) Open the switch cover, and press both the blue and yellow buttons at the same time to display the ISO film speed number.3) Turn the electronic input dial until your film speed displays.· Once the buttons are depressed, you can remove your fingers because the ISO display is held on for approximately eight seconds. To clear this status within eight seconds, press the shooting mode selector.· The previously set film speed appears and blinks in the display panel to warn you if the film speed has not been set. Always be sure to set the correct film speed, because the warning stops after film speed setting.Basic Steps1. Setting the Main Switch to the "Full Auto" Position1) Slide the lens focus switch to "AF"2) Set the camera's main switch to the "Full Auto" position (the green " 0 " mark).The following displays will appear:ONE SHOT: One of the AF modes.P (Program): One of the AE modes.S (Single): One of the film winding modes.For further details on the above displays, please refer to pp. 24, 26 and 27.2. Holding the CameraYour pictures will not be sharp if the camera movesas the shutter is pressed. This movement is called"camera-shake." To avoid this, try the followingcamera-holding technique:1) Hold the camera firmly, with your left handsupporting the camera and lens.2) Press your left elbow close to your body.3) Lightly hold the camera against your cheek or forehead and look into the viewfinder.4) Spread your feet slightly apart, one foot ahead of the other, and relax.There is no one correct way to hold the camera, so experiment to find the most comfortable way. If possible, lean against a steady support such as a tree, wall, or table to help you keen the camera still.3. AF Focusing1) Center the AF from ('[ ]" mark) over the main subject.Do not touch the lens' moving parts during AF focusing.2) Press the shutter button halfway and automatic focus (AF) starts. When correct focus is obtained, the green AF in-focus indicator lights up in the viewfinder and the AF focus signal (short electronic beeper tone) sounds.· Original focus remains locked, even if the subject or focusing distance changes as long as the shutter button is held halfway.· When AF is impossible, the green AF in-focus indicator will start blinking and the shutter will not release. (see pp. 54 to 56.)4. Exposure· If correct exposure is not possible, both the shutter speed and the aperture blink to warn you. Underexposure warning -- Switch to flash photography.· In underexposure warning, the maximum aperture of the lens in use blinks. (The blinking shutter speed is always 30".)Overexposure warning--Use an ND (neutral density) filter.· In overexposure warning, the minimum aperture of the lens in use blinks. (The blinking shutter speed is always 2000 with the EOS 650 and 4000 with the EOS 620.)Display Panel Illumination (EOS 620Only)2) Compose the picture and while continuing to holddown the shutter button gently press the shutterbutton completely to take the picture.· The camera automatically advances the film to thenext frame.· Set the main switch to "L" to turn off thePress the display panel illumination button to illuminatethe display panel for approximately eight seconds.· To turn off the illumination within eight seconds pressthe display panel illumination button again.This camera is equipped with advanced "evaluative metering" so it automatically recognizes lighting conditions, subject pattern, and even subject size in the picture area. Even when there is a difference in brightness between the main subject and the background (e.g. backlit photography), correct exposure can be obtained without exposure compensation.5. Automatic Film RewindThe film automatically rewinds at the end of theroll.1) During rewind the film transport bars move insequence from right to left to indicate the function inprogress while the frame counter counts in descendingorder.2) Film rewind stops automatically when the film hasbeen completely rewound. Open the back cover whenthe film-load check mark(~) blinks.3) Remove the film cartridge.Press the film rewind button (~) to rewind before the roll ends. The function begins immediately.Making the Most of Your EOS 620/650Detailed explanation of other modes to make picture-taking fun.1. Main Switch FunctionsThe main switch has four positions.L (OFF): Turns off the camera. Be sure to set at this position to prevent accidental shutter release when not in use.A (ON): Activates the camera. (The electronic beeper tone does not sound at this position.)(( )) (ON): In addition to being the same ON position as "A", the electronic beeper tone sounds in the following cases;1) When correct focus is obtained. - AF focus signal (short beeper tone)2) When the automatically-set shutter speed is too slow to hand-hold.--Camera-shake warning (long beeper tone)[ ] (ON): Full auto position. The setting will be as follows automatically regardless of the mode. 1) AF mode - ONE SHOT 2) AE mode - P (Program) 3) Film winding mode - S (Single) 4) Electronic beeper tone -short; AF focus signal-long; camera-shake warningVarious AE and AF modes described in "Making the Most of Your EOS 620/650" cannot be set when the main switch is at the " [ ] " position. Make sure the main switch is set to "A" or" ((*)) " position.2. Setting the AF modeThis camera has two AF modes and the manual focus mode.ONE SHOT: Normal set position. The lens stops moving once focus has been obtained. As long as the shutter button is kept pressed halfway, the original focus and exposure remain locked. This mode is useful when you want your subject to be off-center.· The shutter releases only after AF completion.SERVO: The lens continues to rotate, refocusing every time the focusing distance changes. Use this mode to freeze subject motion at a certain moment while following a moving subject. Exposure is determined at the moment of shutter release.· The shutter releases whether or not AF has been completed.MANUAL: Refer to p. 56.To set the AF mode, followthese steps:1) Set the lens focus modeswitch to "AF."2) Open the switch cover andpress the yellow AF modeselector.· The display will be held on for approximately eight seconds so you can remove your finger. To clear this status within eight seconds, press the shooting mode selector.3) Turn the electronic input dial to select either "ONE SHOT" or "SERVO"3. Setting the Film Winding ModeThis camera has two automatic film winding modes.S: Single exposure. The film automatically advances to the next frame upon shutter release.C: Continuous exposure. Keep pressing the shutter button and the film winds continuously at the maximum speed of approximately three frames per second.Self-timer position. (see p. 58)To set the film winding mode, follow these steps:1) Open the switch cover and press the blue film winding mode selector.· The display will be held on for approximately eight seconds so you can remove your finger. To clear this status within eight seconds, press the shooting mode selector.2) Turn the electronic input dial to set either "S" or "C" in the display panel.4. Setting the Shooting ModeTo set the shooting mode, press the shooting modeselector while turning the electronic input dial until thedesired mode appears. (The display moves in thefollowing cycle.)· Once the shutter button is pressed halfway, thedisplay will be held on for approximately eight seconds.To clear this status within eight seconds, press theshooting mode selector.AF can be done with the Canon Circular Polarizing FilterPL-C. When using a linear polarizing filter, use manualfocusing. (see p.56)(1 ) Program AE[Purpose]The camera automatically sets shutter speed/ aperture combinations according to subject brightness. This mode particularly suits first-time SLR users or those who prefer to concentrate on picture composition or candid snapshots.[SETTING]While pressing the shooting mode selector, turn the electronic input dial until "P" appears in the display panel.When the automatically-set shutter speed is too slow to hand-hold,the camera will sound a long beeper tone to warn you. Werecommend using a tripod or flash.The camera selects the ideal program line according to thecharacteristics of the lens in use, i.e., the maximum or minimumaperture and lens focal length. This is referred to as "IntelligentProgram AK." For further information on the program line, pleasesee pp. 79 and 80.This program AE mode has the same characteristics as the oneselected when the main switch is set to the green " [ ] " mark (seep.14). However, the "ONE SHOT" AF and "S" film winding modes areautomatically set so use the setting described on this page whenyou want to use the "SERVO" AF mode or "C" film winding mode.(2) Program Shift Functions (EOS 620 Only)[PURPOSE]With the EOS 620, you can change the automatically-set shutter speed/aperture combinations of the program AE mode. This function is particularly useful when you need a specific shutter speed or aperture while shooting in the program AE mode.Be sure to set the main switch to the "A" or "(' ')" position. (At the green " [ ] " position, the program shift function cannot be used.[SETTING]Simply turn the electronic input dial until the desired shutter speed or aperture value appears after pressing the shutter button halfway to meter the subject. For example, when you need a fast shutter speed suddenly to freeze a fast-moving subject while shooting in the program AE mode, turn the electronic input dial to set a fast shutter speed such as 1/500 second.· Once the shutter button is pressed halfway, you can remove your finger because the display will be held on for approximately eight seconds.· After shutter release, the program shift functionautomatically clears.· The program shift function cannot be used in flashphotography.· For further information on the program shiftcharacteristics, please see p.81[PURPOSE]In this mode the shutter speed is manually set and the camera automatically chooses the correct aperture for the lightingconditions. This mode is best for taking pictures of movingsubjects by con trolling the shutter speed. Faster shutter speeds freeze subject motion while slower shutter speeds can produce artistic blur effects.[SETTING]1) While pressing the shooting mode selector, turn the electronicinput dial until "TV" appears in the display panel.2) Remove your finger from the shooting mode selector. At thispoint, the initial shutter speed setting is always 125 (1/125 see).3) Turn the electronic input dial until the desired shutter speedappears.Shutter speed display4000 3000 2000 1 500 1000 750 500 350 250 180 125 90 60 4530 20 15 10 8 6 4 3 2 0"7 1" 1"5 2" 3" 4" 6" 8" 10" 15" 20 30"Note4000 and 3000 .... EOS 620 onlyThe "camera-shake" warning does not sound in shutter-priority AE.[Purpose]In this mode, the aperture is set manually and the camera chooses correct shutter speed for the b lighting conditions (the opposite of shutter-priority AE). Use this mode for portraits, landscapes and still-life photography where depth of field is an important factor. (see p. 36)[SETTING]1) While pressing the shooting mode selector, turn the electronic input dial until "Av" appears in the display panel.2) Remove your finger from the shooting mode selector. At this point, the initial aperture setting is always 5.6 (f/5.6).3) Turn the electronic input dial until the desired aperture value appears.When the automatically-set shutter speed is too slow to hand-hold,the camera-shake warning sounds. We recommend using a tripod.Depth of FieldWhen your subject is in focus, there is a certain area in front of it and behind it which will also be in focus. This range of sharpness is called "depth of field".Depth of field has the following characteristics:1) The smaller the aperture, the wider the depth of field and vice versa.2) The shorter the lens focal length is, the greater the depth of field, provided that aperture and shooting distance are the same.3) The farther the shooting distance, the greater the depth of field..4) Depth of field is generally greater in the background than the foreground by a ratio of two to one.To check the depth of field(1)Push the depth-of-field check button and the camera will stop-down the aperture to either the automatically-calculated value (e.g. shutter-priority AK), or the one set manually (e.g. aperture priority AK). As you look through the viewfinder with the button pushed in, you can see the range of sharpness, i.e. the depth of field. It is impossible to check depth of field when the main Twitch is set at the green " " [ ] " " mark To check the depth of field (2)Press the shutter button halfway and note the aperture value. Find the two aperture values on the depth-of-field scale on the lens which correspond to that value. Then draw imaginary lines from those two values to the distance scale. The effective depth of field lies between those two distances. For example, using a standard50mm lens focused at 5m with the aperture set at f/11, depth of field extends from approx. 2.7m to 10m (approx. 8.8ft to 32.8ft) away. Any subject from 2.7m to 10m away will be in reasonably sharp focus.There are some lenses which have no depth-of-field scale so follow (1).(5) Depth of Field AE (EOS 650 Only)[PURPOSE]This mode makes everything from a certain point in the foreground tothe background in focus, using both the AF function and the depth offield. The camera automatically sets the correct aperture value andcorresponding shutter speed for the lighting conditions. Use this modefor landscapes and large-group commemorative shots.[SETTING]1) While pressing the shooting mode selector, turn the electronicinput dial until "DEPTH" appears in the display panel.2) Compose the picture first.3) Focus the subject in either the ONE SHOT or SERVOmode.4) Center the AF frame ("[ ]") over the first point in theforeground (see illus. A).5) Press the shutter button halfway to focus the "A"point and remove your finger from the shutter buttonwhen the AF in-focus indicator lights up.The display after the first "A'' point is focused.6) Focus the second "B" point of the background (seeillus. B as you would for step 4)The display after the second "B" point is focused.7) Press the shutter button halfway once again. At thistime, the correct aperture value and correspondingshutter speed are displayed.8) Gently press the shutter button completely to take the picture.[VIEW FINDER INFORMATION]Correct exposure- Exposure will be correct if continuously lit values display.Underexposure - Both the shutter speed of 30" and the lens maximum aperture start blinking.Overexposure - Both the shutter speed of "2000" and the lens minimum aperture start blinking; use an ND filter.If it is impossible to get the distance range in focus, the lens minimum aperture value will start blinking.Exposure, however, will still be correct and you will get the best results under the existing shooting conditions. (see helpful hints on p. 41)[Helpful Hints]1. Move back from the subject and follow steps 2 through 7 again. If the minimum aperture stops blinking, the distance range will be in sharp focus and the exposure will be correct.2. Use a wide-angle lens (or wide-angle side when using a zoom lens) and follow steps 2 through 7 again. If the minimum aperture stopsblinking, the distance range will be in sharp focus and the exposure will be correct.· When you try to focus extremely near and far points the automatically-set shutter speed will be comparatively slower and the long beeper tone will sound to warn you of camera-shake. Hold the camera steady or use a tripod.· When using a zoom lens, do not change the lens focal length after focusing the first point Always be sure to compose the picture first.· It is advisable to use a wide-angle lens to obtain maximum depth-of-field effect. (A lens focal length of more than 200mm is not recommended when you want maximum depth of field.)· Depth of field will be shallow if two points are focused at the same shooting distance. When you want to take a portrait, a telephoto lens is recommended to strengthen the shallow effect.· In depth of field AE, exposure is determined at the moment of shutter release even if the AF mode is set at ONE SHOT. (see p:24)· Depth of field AE cannot be used in flash photography.· Press the shooting mode selector to clear the depth of field AE while operating.(5) Manual Override[PURPOSE]This creative mode allows you to control exposure by setting boththe shutter speed and aperture.[SETTING]1) While pressing the shooting mode selector, turn the electronicinput dial until "M" appears in the display panel. Array2) Remove your finger from the shooting mode selector.· At this point, the initial setting is always 1/125 sec. at f/5.6.3) Turn the electronic input dial to set the desired shutter speed.4) Press the manual aperture set button.· At this point, " OP ", " 00 ", or " CL " lights up instead of the shutter speed. (The aperture value remains unchanged.) The meaning of each display follows:5) While pressing the manual aperture set button, turn theelectronic input dial until "00 " displays. The corresponding aperturevalue displays.6) Remove your finger from the manual aperture set button.7) Determine the exposure referring to the shutter speed/aperturecombination. You must rely on your own experience for setting theexposure.· Set a slower shutter speed if "OP" remains lit when the electronic input dial is turned to the lens maximum aperture.· Set a faster shutter speed if "CL" remains lit when the electronic input dial is turned to the lens minimum aperture.· The camera-shake warning does not sound in the manual mode.5. Partial MeetingThis camera has an evaluative metering function which allows you to obtain the correct exposure without exposure compensation in normal backlit photography (see p. 18). Use the partial metering mode, however, for stage photography where there is a big difference in brightness between the main subject and the background, and when you want to control the exposure.· The partial metering mode can be used regardless of the camera's mode, except when the main switch is set to the full auto position ( 0 ).· The partial metering area is approximately 6.5% of the picture area.· The AE lock mechanism automatically works in the partial metering mode.AE lock:The original exposure value remains locked as long as theshutter button is pressed halfway, so even if you recomposethe picture, correct exposure on the main subject will not beaffected by changes in fighting conditions.1) Put the main subject in the center and cover with the partialmetering mark.2) Press the shutter button halfway.3) While pressing the shutter button halfway, press the partialmetering button. (In the manual override, however, press thepartial metering button while pressing the manual aperture setbutton.)· A green asterisk ("*") indicating that the partial meteringmode and the AE lock are on appears in the viewfinder.· You can remove your finger from the partial metering buttonif you keep pressing the shutter button halfway.4) Compose the picture while continuing to hold down theshutter button, then press the shutter button completely totake the picture.。
强劲入门单反佳能650D功能全面解析全文

强劲入门单反佳能650D 功能全面解析(全文)佳能(中国)有限公司正式发布了全新的EOS 系列3 位编号机型EOS 650D。
EOS 650D 是广受好评的EOS 600D (参数图片文章)后继机型,大幅提升对焦及连拍性能,搭载触控技术的大型可旋转液晶监视器以及众多创意功能,为普及型数码单反相机定义新高度。
新型CMOS 图像感应器有效像素约1800 万,与能高效处理图像并控制相机功能的DIGIC 5 数字影像处理器组合,实现了高画质、高感光度低噪点。
自动对焦系统搭载了中央八向双十字全9 点十字型自动对焦感应器。
最高约5 张/秒的高速连拍可准确捕捉被摄体,不错过精彩瞬间。
(1/17)转发到微博佳能新一代入门级数码单反650D 官方产品图此外,佳能EOS 650D 还搭载了实时显示拍摄和短片拍摄时提高自动对焦性能的Hybrid CMOS AF 系统,位于图像感应器中央区域的部分像素用于相差检测自动对焦,快速检测合焦位置后,再进行反差检测自动对焦完成精确合焦。
沿袭自EOS 600D的3.0〃可旋转液晶监视器在EOS系列中首次采用触控面板,带来了直观的操作与便捷的拍摄。
短片拍摄模式中搭载了“短片伺服自动对焦” ,可以在短片拍摄期间对被摄体进行自动对焦追踪,还能用内置立体声麦克风录音,进行充满临场感、更出色的短片拍摄。
另外,支持作品创作的新功能“手持夜景”模式和“ HDR 逆光控制”模式拓展了表现范围。
EOS 650D 预计于2012 年6 月下旬发售。
佳能EOS 650D 单反佳能650D 有哪些功能超越了同类入门单反?中央八向双十字全9 点十字型自动对焦系统•最高约5张/秒高速连拍•新研发CMOS图像感应器搭载Hybrid CMOS AF实现短片及实时显示拍摄高速对焦•支持短片拍摄中持续追踪被摄体的短片伺服自动对焦•搭载触控技术的大型可旋转液晶监视器以及众多创意功能EOS 650D 是EOS 数码单反相机系列中首款搭载了全十字型自动对焦感应器的3 位编号机型。
佳能数码相机使用说明书

前言本指南所使用的符号本指南内所作说明皆以新购相机的默认设置为基准。
预备安装腕带为防止相机在使用过程中掉落,建议使用腕带。
安装电池1. 将电池仓盖锁扣推向箭头(1) 的方向,定住锁扣不放,此时将电池仓盖推向箭头(2) 方向,然后以箭头(3) 方向将电池仓盖向上打开。
2. 装入两颗电池。
3. 关闭电池仓盖(1),然后将电池仓盖向下按着推向(2),直到咔一声到位为止。
插入存储卡1. 将电池仓盖锁扣推向箭头(1) 的方向,定住锁扣不放,此时将电池仓盖推向箭头(2) 方向,然后以箭头(3) 方向将电池仓盖向上打开。
2. 装入存储卡直到咔一声到位为止。
3. 关闭电池仓盖(1),然后将电池仓盖向下按着推向(2),直到咔一声到位为止。
存储卡插入相机前,请先确定其方向正确。
若存储卡以反方向插入,相机则无法识别该卡或导致故障。
要取出存储卡用手指推存储卡直至听到咔哒声,然后松开存储卡。
设置日期和时间首次开启相机电源时,即会出现日期/ 时间设置菜单。
请依照下面说明的第3 及4 步骤设置日期及时间。
1. 按电源按钮。
2. 选择[ 日期/ 时间]。
3. 选择年、月、日和时间及显示的排列方式。
您可在图像上加印所设置的日期及时间。
设置显示的语言您可变更显示在液晶显示屏菜单及信息所使用的语言。
拍摄静止图像1. 按电源按钮。
(1) 将播放起动声音,液晶显示屏上将显示起动图像。
(2) 再次按电源按钮关闭电源。
2. 选择拍摄模式。
3. 将相机对准拍摄主体。
4. 轻按( 半按) 快门按钮进行对焦。
(1) 相机对焦时,相机鸣响两次,指示灯亮为绿色(使用闪光灯时亮为橙色)。
(2)在液晶显示屏的对焦点上会出现绿色自动对焦框。
5. 不作其他任何变动,将按钮按到底( 全按) 拍摄。
(1) 将播放一次快门声音并记录图像。
(2) 图像被录入存储卡时,指示灯将呈绿色闪烁。
静音设置拍摄后立即查看图像( 拍摄预览)拍摄所录制的图像随即在液晶显示屏上出现约2 秒。
佳能D日常使用技巧及方法

佳能600D使用技巧简单来说,你的相机基本上就是一个身体上带洞并且内部装有一个感光器的盒子;如果能有合适的光线通过洞投射到感光器上面的话,你就得到了一张正确曝光的照片;如果光线过多或者过少了,那么你就得到了一张垃圾;在程序模式中,你已经知道了你可以通过调整感光度ISO来控制感光器的敏感程度,但在手动程序里,你还可以通过调整光线的总量来控制它,这就用到了快门和光圈;——快门:快门决定了你相机上的洞开启时间的长短;打开的时间长,则进入的光线多;打开的时间短,则进入的光线少,就是这么简单;好吧,并不单单如此;高速快门意味着你可以捕捉到快速的运动,譬如运动员的动作,四处飞溅的水滴等等;缺点就在于太少的光线进入相机,以至于你的照片会变得很暗;反过来说,你可以用慢速快门来补偿暗光条件;那个洞开启的时间越长,进入的光线就越多,对么但是这里一样有个缺点,那就是使用慢速快门时,如果你或者你的被摄主题有任何移动的话,你的照片中就会出现动态的模糊; 在自动模式和程序模式当中,相机自己会决定快门速度;有时候结果刚好就是你想要的,但有时候则不是;譬如说相机不会知道你想要捕捉一个快速移动的目标;他只知道是不是有足够的光线进入相机来完成曝光;而当相机处于手动模式的时候,由你来控制快门速度从而得到你想要的照片;你只需要转动指示盘,同时注意LCD上显示的数字,就可以调整你的快门速度了;——光圈:当快门速度等于相机上的洞开启时间的长短时,光圈就代表了这个洞开启的大小;光圈越大,光线越多;光圈越小,光线越少;光圈的大小用“f”来代表;比较混乱的是,大的f数值代表了一个小洞的开启,而小的f指则代表了大洞;所以f/4是一个大光圈但是f/11则是一个小光圈.当相机处于手动模式的时候,按住光圈按钮来调整光圈大小,旋转指令盘并且同时观察显示在LCD上的数值;在暗光条件之下你可能想要使用一个大光圈,譬如说f/,但是这会产生一个负作用:景深DOF;一个大洞的开启小f值会带给你浅度景深,而一个小的开启大f值则会给你一个深度景深;——景深:那么景深到底是指什么简单来说就是成像画面的清晰可视范围;如果画面的成像清晰范围大,这就是我们说的大景深;如果清晰范围小,譬如一张半身人物像,人物主体很清晰,而背景被刻意拍摄得很模糊背景虚化,这就是采取的浅景深;一幅精彩的肖像画经常运用浅景深来突出主题,但当你拍摄风景的时候,你还是希望一切都在镜头当中的,所以就常采取大景深;那么不同的景深效果如何获得这主要是通过光圈、焦距、拍摄距离之间的关系来获得不同景深:光圈越大,景深越小;光圈越小,景深越大;注意:相机上的光圈数值越小的,才是大光圈,如比就大焦距短,景深越大;焦距越长,景深小;拍摄距离越远,景深越大;拍摄距离越近,景深越小;掌握这些关系了,据可依通过灵活改变光圈、焦距、拍摄距离来获得想要的景深;——综合运用快门光圈现在你已经了解了这两个参数——快门速度和光圈大小,他们从本质上来说有同一个功能:控制进入相机的光线总量;你使用大光圈以及慢速快门所得到的光和你使用小光圈以及高速快门得到的光是一样多的;明白了么一个短暂开启的大洞事实上和一个长时间开启的小洞基本无异;结果就是几乎一样多的光进入相机,或者是相同的曝光;所以区别在哪呢其实都在那些我提到的副作用当中;有时候你需要高速快门来定格一个运动,有时候你需要大光圈来得到浅景深,等等;你需要一定量的光线进入你的相机,但是在手动模式之下,你得从你想要的其他效果出发来决定这个量的多少;在自动模式和程序模式之下,相机一般会选择一个不大不小的光圈和快门来进行适当的曝光,但这样既不会有任何极端参数,也就更失去了创造的机会;——感光度要记住,感光度ISO同样是因素之一;如果你想要拍摄一张室内的运动照片,就像这位勇猛的空中斗士,你知道你需要使用高速快门;但你同样知道,你要冒着得不到足够光线来进行曝光的风险使用这个速度;该怎么做呢调高你的ISO在缺乏光线的室内环境中,如果使用高感光度如ISO800进行拍摄,那么你的相机将不再需要太多的光线;你同时也该将光圈值设定为最大:,如果镜头允许,甚至是;如果你按照以上这么做了,你可以在高速快门定格画面的同时得到一张准确曝光的照片;你的照片可能会有一些燥点,而且浅景深会导致运动员背后的事物变得模糊,但这又如何总比什么都没拍摄来的要好,摄影无非是一个取舍的过程;另一个例子;假设你想要在白天拍摄一张户外人像的照片;这时候浅景深正是我们所需要的;模糊背景中的一切来突出被摄主体,所以使用大光圈,至少要f/4;在这么大的开启状态之下,你也有可能将太多的光放进了相机里,以至于照片过曝,甚至几乎变白;这时候你该怎么办首先,确定你使用了最低的ISO来拍摄;其次,使用高速快门——尝试一下1/1000每秒;这些参数可以让你在使用大光圈以及明亮的日光之下进行正确曝光;不必担心出错试着拍摄一张,然后在相机背后的LCD上适当调整一下;有经验的摄影师们可以在特定环境下估计出基本准确的参数来进行拍摄,但即使是他们,也会靠查看照片来确认;——捷径:优先模式太多参数需要记住,尤其对于初学者来说,相反的f值,快门速度,以及ISO值,在准备拍摄一张照片的时候这些参数实在太过复杂;没准你甚至想要放弃所有的这些,单单使用程序模式拍摄,并且再也不钻研你的相机了;千万别放弃这里有两条捷径可以在减少你需要考虑的参数的同时,仍然让你得到一张自己想要的照片;你大概想因为我没有早向你介绍他们而打我一顿了;这两条捷径分别是光圈优先模式"A"或者"Av"以及快门优先模式"S"或者"Tv" — "Time" value;比如说你现在又开始拍摄篮球运动员了;你最关心什么快门速度;那是能帮你将他定格在空中的参数;你为了其他两项参数操心的唯一原因就是对高速快门进行补偿;使用快门优先模式,你可以让你的相机来帮你做这些事;将指令盘拨到"S"来告诉你的相机:我设定快门速度,而你来调整光圈;当然你仍然需要合适的ISO值,但你的相机会计算它——以室内的光线和你选择的快门速度来决定,在一个多大的光圈能进行正确曝光;易如反掌调整快门的方法和在手动模式时一样:转动指令盘并且查看LCD上的数字变化;光圈优先模式基本相同;当你在明媚阳光之下拍摄人像时,你关心的又是什么光圈;这是能使你得到浅景深效果的参数;你调整快门速度的唯一原因是为了进行准确的曝光;同样的,你的相机可以帮你进行一些工作;将指令盘拨到"A"来告诉你的相机:我选择了f/4光圈,那么你,相机先生,将要计算出我所需要的快门速度;就是如此的简单;你仍需要选择一个适合的ISO,但是正确的快门速度相机已经帮你算好了;就光圈优先模式来说,光圈是最主要的参数,所以你并不需要再按光圈按钮,直接转动指令盘并且在LCD上查看数值变化即可;——总结现在你知道了这些东西,可以开始试试了;找一些体育运动:玩滑板的孩子们、追飞盘的人,什么都可以;将你的相机设置为快门优先并且把快门速度定为1/800每秒或者更高,在室内的话选择一个高ISO值,室外日光之下的话则选择一个低一些的;拍摄一些照片吧;你捕捉到运动画面了么如果那个飞盘出现了动态模糊,试着将你的快门速度再调高一些;如果你的照片显得有点暗,提高ISO试试;接下来和朋友到公园里去拍些人像;将相机设置在光圈优先模式并且定为最大光圈,譬如,然后稳稳地拍摄一张照片;你是否得到了一张背景柔软、模糊,而你的朋友突出其中的照片呢额外试验:让你的朋友站在阴影里然后打开闪光灯试试如果你觉得自己足够大胆,那就试试使用手动模式让自己同时控制快门和光圈;我只推荐你在并不着急的时候尝试这个,譬如独自散步的时候拍摄一棵树或者公园的长椅;这些被摄主体不会在你尝试四五次来确定参数的时候变得不耐烦;同时控制快门和光圈并不简单,但却绝对值得;了解他们的工作原理不仅能让你的相机得到适当的光线,还能让你进行你想要的艺术创造,得到的作品是任何相机都无法为你设定的;记得使用那些捷径模式,光圈优式以及快门优先,他们绝对帮得上忙;恭喜你你从此不再是一个只会按按钮的人;你已经走上了一条成为真正摄影师的道路,你只需要不断地练习;所以行动起来吧,享受拍摄的过程配件篇:我很不理解很多人花大价钱买了牛机牛头,却在配件上象葛浪台老头那样一毛不拔;单反是一个"系统",相机和镜头只是系统的一部分,有时候几十块钱的配件就让你的照片改善立竿见影;机身和镜头是牛的话,那附件就是牛绳,没有牛绳你怎么好使唤牛啊,半w上w的钱都出了,别在乎那几十、几百的;1 脚架,脚架是摄影第三只手,让你的拍摄更轻松,拍所有的题材都适合用;人多的地方把三脚架合起来也勉强可当独脚架用;另带防抖的镜头放上脚架请将防抖关闭;2 拍夜景的附件:①快门线;②手电筒,用于照亮对焦点辅助对焦,黑暗中找东西更换镜头等等;③可装在热靴上的LED摄像灯,拍夜景人象时特别好用,还可以连拍;④创可贴,用于实时取景时遮住取景器不要让杂光进入;3.拍人像的附件:①竖拍电池盒+手柄,600D可考虑美科牌的,我买了个价格260;这东西有三个作用,拍摄象横拍那样不容易累,加两个电池拍的更多,最重要是加了手柄,机身立马变得同专业机那样大个有型,模特mm喜欢貌似她们都喜欢大的相机和镜头,我想问她们,你的空够大吗;②反光板,这个东西几十元就有卖了,拍人像时逆光拍摄补光用;麻烦的是自己一个怎样打板,最好有个人专门负责打板;③外置闪光灯,跳闪,600D可以用内闪无线引闪外闪, 这个得专业人士才会用;我也在找一款支持ettl和无线引闪的别宜的国产灯来研究一下,可惜目前只见日清,美兹有;④装在内置闪光灯前面的柔光罩,竖拍时令阴影更柔和,这个简单易行;4.拍风景的附件:CPL圆偏振镜消除被摄体反光,强化蓝天,使蓝天更蓝,白云更白;还可以去除表面反射,表现被摄体本来色彩;还可以消除玻璃的镜面反射拍眼镜mm有福了;CPL不仅仅可以加深天空的蓝色,增加云彩的立体感,在其它许多场合也大有用途,如在野外拍摄人像尤其是水边时,能更为细腻地再现模特的肤色或消除水面的炫光;这个偏振镜的效果是在后期处理中无法实现的;一款好的CPL让你的狗头变牛头,牛头更牛头;仅需选购一枚高档大口径如77mm滤镜就可满足不同口径镜头的需要;便宜的转接环可让其它小口径的镜头共享这块宝贝的镜片;这样不仅经济,而且外出携带方便;机器拿上手还需设置一番才能更好用;我的600D基本设置:一、菜单中的基本设置:括号是VV的设置1、画质:RAW+jpeg大/优;raw这种格式细节更丰富,后期可随意调整白平衡、清晰度、色彩饱和度、亮度、对比度等,对片质的影响很小;后期调整软件可以选择随机附带的DPP软件,关于此软件如何使用,请参见说明书如果拍的好,就直出,拍的不好,还可以用RAW格式医一医;2、提示音:启用;声音的提醒挺好的;3、未装储存卡释放快门:禁用;4、图像确认:2秒;新手可以设置5秒,高手可以关闭;5、周边光量校正:关闭,这个要根据自己的镜头来设置,设置为关闭;包括以下很多项设置为关闭,主要是要求速度快,因为开启的调整项目越多,相机的图片处理速度越慢,不利于抓拍;使用支持此功能的原厂镜头时,我的为开启6、减轻红眼:开;目的是怕拍夜景人像的时候忘记打开;我的是关闭,350d用到现在没有试过红眼,红眼应该是小DC才会有,这个作用其实适得其反7、闪光灯闪光:启用;快门同步:前帘同步,拍夜景时我用后帘同步;闪光曝光补偿:暂设正负零,根据拍摄的具体情况适时调整;E-TTL II测光:评价测光;8、曝光补偿:我感觉60D的测光稍有偏差,正常时我设置为,拍摄时根据情况适时调整;拍风景时黄色物体时-,拍人像+9、自动亮度优化:禁用;目的也是为了提高速度;用Jpeg拍人像时直出时开,其它时候关10、测光模式:多用评价测光,特写的拍摄采用局部测光,更精细的拍摄、逆光等特殊拍摄使用点测光、光比比较大的场景拍摄使用中央重点平均测光;测光模式需要根据拍摄的具体场景适时选择最佳的方式;11、自定义白平衡:遇到可能出好片的场景时可以自己设置,一般的片子就别费那个劲了,留给后期调整吧;12、白平衡偏移/包围:操作过,拍片时没有正式用过,很重要的片子用了也不错,设置偏移和包围以后,再将驱动模式设置为连拍,按下快门,就会出来几张不同白平衡的片子;不过拍完了一定要记得将此次白平衡偏移/包围的设置清除,不然你下一次的连拍会变得五花八门了;13、色彩空间:sRGB;关于色彩空间不是一两句话能说明白的,忠告新手及中手就设置sRGB 吧,设置为Adode RGB也是没有意义的,用于商业印刷的高手自然就知道怎么设置了;需要注意的是,在色彩管理上,要保持相机、电脑、图像浏览和处理软件均应保持同一色彩空间,否则就会很惨;14、照片风格:中性;我经历了“风光”、“自定义”等过程,最后还是选择了0,0,0,0的中性;其目的也是为了减少相机软件处理速度,清晰度采用批量调整,色彩等不满意的个别调整;下载了论坛102个风格,选了人像的几个到自定义里面去15、除尘数据:取消;16、ISO自动:最高1600;这个设置是为基本拍摄区准备的,我几乎不用基本拍摄区;创意拍摄区的ISO可以根据现场实际随时拨盘设置;17、保护图像、旋转、删除图像、打印指令、幻灯片播放:自动旋转:启用仅在电脑上,文件编号:连续编号;18、显示柱状图:亮度;亮度最重要,直观、简洁;19、实时显示功能:启用;测光定时器:30秒;自动对焦模式:快速模式;显示网格线:网格线1;曝光模拟:启用;20、自定义功能:按你喜欢来就是了;VV的是这样:1、曝光等级增量:1/3一级;2、 ISO扩展:启用;3、光圈优先模式下的闪光同步速度:自动;4、长时间曝光降噪功能:自动;5、高ISO降噪功能:弱;6、高光色调优先:启用;提升了高光一级的宽容度;用JPEG拍人像时看状况要用到自动亮度优化只得禁用;7、自动对焦辅助光闪光:禁用;手电筒或者LED摄像灯代替;8、反光镜预升:手持时禁用;上脚架上时启用,同时把防抖镜头的防抖功能关闭;9、快门键/自动曝光锁定按钮:拍摄静止的主体时:1自动曝光锁/自动对焦在需要分别进行对焦和测光时非常方便,对焦和测光分离,连很多老鸟都不知道这个功能如何好用,可以另外写一篇文章介绍;按下按钮进行自动对焦,然后半按下快门按钮应用自动曝光锁,配合人工伺服智能自动对焦,按住按钮锁焦重新构图;抓拍运动物体如打鸟时:3自动曝光/自动对焦,无自动曝光锁,对不断反复运动和停止的主体有效,在人工智能伺服自动对焦模式中,可以按下按钮启动或停止人工智能伺服自动对焦操作;曝光参数在拍摄瞬间设置;这样总能在关键时刻准备好最佳的对焦和曝光;10、分配SET按钮:2闪光曝光补偿11、开启电源时屏幕显示状态:0启用液晶监视器显示;二、其他设置以下是原文1、拍摄模式:①AV档光圈优先;是光圈由拍摄者确定,快门由相机根据测光结果自动确定的一种拍摄模式;这是我最常用的模式;也建议初学者首先学习这种模式;最大的优点是便于自己由控制光圈和焦段的大小来达到合适的景深;②TV档快门优先;由拍摄者确定快门,由相机根据测光结果自动确定光圈的一种拍摄模式;由自己控制快门,以便至少达到安全快门,拍摄运动物体比较好,还常用于使用闪光灯时的拍摄,在1/200秒前帘同步的时候比使用其他挡要好得多;③P档程序模式;光圈和快门都由相机根据测光结果而自动决定,多用于新手在没把握的情况下采用的,会保证片子的清晰,但会缺少拍摄者的创意;使用这一模式的时候需要注意的是测光方式的选择,不同的测光方式对片子的结果影响很大,一般来说多采用评价测光;④M档手动模式;这是最具创意的模式,也是全手动相机的魅力所在;拍摄者可以自由设置光圈、快门、禁用闪光灯等项目,拍摄出高调、暗调等特殊的片子;M档也是夜景拍摄的最佳模式;初学者学习时,可由AV模式逐渐向M模式过渡;但也不要以为手拿单反不用M模式拍摄就没面子,很多大师也不是只用M档,优秀的片子也不都是用全手动模式拍出来的,拍摄模式只是一种手段,最终的片子效果才是硬道理;⑤A-DEP档自动景深自动曝光;九个对焦点同时通过对焦来检测并决定景深和经过测光来自动决定曝光量的一种拍摄模式;感觉没什么意思,景深还是由拍摄者自己决定为好;2、驱动模式:①单拍:不用说了,采用的最多了;②连拍:配合自动对焦模式中的AIFOCUS人工智能自动对焦和AISERVO人工智能伺服自动对焦对运动物体拍摄相当有效;③自拍/遥控:按动快门以后大概延时10秒后拍摄/使用遥控器来拍摄;④自动延时拍摄:我设置为2秒延时,常用于上架拍摄夜景;⑤自动定时器.连拍:按动快门以后大概延时10秒后开始连拍,张数也可设置;3、自动对焦模式:①单次自动对焦:配合自动对焦点单点对焦、九点对焦使用;我最常用的是这种单次自动对焦和中央单点对焦;②人工智能自动对焦:适合拍摄先定后动的物体,比如拍摄鸽子,鸽子没动的时候开始对焦,鸽子动了以后,对焦模式立即由单次自动对焦模式自动切换至人工智能伺服自动对焦模式,自动追踪对焦,配合了连拍,你将捕捉到鸽子起飞的精彩瞬间;③人工智能伺服自动对焦:适合拍摄快速移动的物体;如果你将对焦点设置为中央单点对焦,在使用单点对焦合焦后,主体运动过程中一旦脱离了中央对焦点,不管到达其他任何八个对焦点上,都会被继续捕捉并保持对焦,实际上就是九个对焦点联动持续对焦,这对运动物体的拍摄真是太好了;VV任何时候都喜欢用人工智能伺服自动对焦,配合自定义设置9 ,适合所有主体,加上连拍,这样就不会担心所谓的跑焦了;风动,心动,手动,静是很难的~4、照片风格:中性;就是0,0,0,0,目的是保持原片,调整交给后期;这个设置可根据风景、人物等不同的拍摄自行设置;如果直接出片,后期不作调整了,就应该进行自定义设置,这样出片效果会好一些;5、白平衡:自动;因为我是RAW格式出图,所以白平衡可以后期随意调整,放在自动就可以了;如果后期不作调整了或者JPG格式出图,那还是应该根据当时拍摄的情况挑选合适的白平衡来适时设置,对重要的片子还要自定义白平衡,这样片子不会偏色;6、ISO感光度:原则是能低则低,实在不行了,再提高;在1600以内还是没什么问题的;7、曝光补偿:我总是感觉60D的测光偏亮,因此在正常日光的情况下我经常是用,这样的好处是片子不会过曝;这一点很重要,一旦过曝,后期无可救药,而增加曝光量对后期来说只是举手之劳;特别对于远道拍片来说就不会有遗憾了;另外,60D的曝光补偿达到了正负5档,可谓非常宽泛,这项功能非常实用,对于逆光、晚霞以及暗调片的拍摄再方便不过了;很多新手都不太注意这项功能的使用,很可惜;M档中还可以通过设置包围曝光并配合连拍来实现一次快门连出三张不同曝光度的片子,用于HDR和成片使用,使片子的宽容度有非常大的改善;测光方式的选择,如下:关于如何选择测光模式:一、先来弄明白几种测光模式的差别:1评价测光是EOS相机的标准测光模式,适合大部分拍摄主体;在检测被摄主体在取景器中的位置、亮度、背景、前后照明条件和其它综合照明元素后,相机为主要被摄主体设定正确的曝光;2局部测光对由于逆光等原因使背景比主体更亮的情况非常有效;测光偏重于取景器中央,覆盖了取景器中央一部分面积;3点测光用于对拍摄主体或场景的某个特定部分进行测光;测光偏重于取景器中央,覆盖了取景器中央较小的面积;4中央重点平均测光偏重于取景器中央,然后平均到整个场景;二、再来看看如何选择:1.评价测光:大部分情况下,评价测光都可以得出基本准确的曝光值;因此它适合画面明暗比较均匀的大多数场景的拍摄;2.局部测光:一般常用于逆光片的拍摄;3、点测光:如果你确定不用管周围部分,则局部测光、点测光可以获得更准确的曝光值;这样会保持主体获得正确的曝光,背景等会过亮或者过暗,一般常用于微距、特写等拍摄;4.中央重点平均测光:如果你确定周围部分只要稍加考虑,可以选择中央重点平均测光;这样主体不是特别理想,但周围及背景也不会过分的会过亮或者过暗,有些兼顾;适合晨光、夕阳、。
【最新推荐】佳能650d有哪些拍照技巧-精选word文档 (3页)

本文部分内容来自网络整理,本司不为其真实性负责,如有异议或侵权请及时联系,本司将立即删除!== 本文为word格式,下载后可方便编辑和修改! ==佳能650d有哪些拍照技巧EOS 650D追求小型轻量、易操作,搭载媲美中级机型的先进功能。
有效像素约1800万新型CMOS图像感应器与新DIGIC 5数字影像处理器实现了高画质、高感光度低噪点。
以下是小编整理的佳能650d的照技巧,欢迎阅读。
一、确认镜头的最佳光圈首先我们应该更了解自己手里的镜头,它的最佳光圈是多少。
对于大部分普通镜头来说光圈在F5.6-F11时为最佳,不过简单地遵循这一规律有些太傻了。
只要手上有三脚架,可以将相机固定其上,然后测试各档光圈下的图像质量,直到获得镜头最清晰的可用光圈。
这是因为一些镜头采用了大光圈优化的设计,在较大光圈时依然会有较好的成像。
二、不要使用极端的焦距对于普通变焦镜头来说,与定焦头不同,无法保证所有焦段的成像质量一致。
这里保守的做法是不要使用镜头的极限焦距。
像是一个焦距为75-300mm的镜头,其280mm端所拍摄的照片清晰度一定高于300mm端;而一个70-200mm焦距的镜头,100mm端的成像会比70mm更好。
虽然这条规律并不能用在所有的镜头上,不过对于大部分普通镜头来说是相当实用的。
三、了解你的镜头虽然买了镜头以后,实际使用更为重要,不过还是应该先做好功课,对自己的镜头进行了解。
比如一些带有防抖的镜头在使用三脚架时建议关闭,而有一些在使用三脚架时则建议打开。
四、镜头素质不高通常我们不会遇到不可救药的镜头,一般缩小光圈后都可以获得较理想的清晰度。
不过也有一些镜头本身就存在缺陷(像是索尼E16 F2.8),边缘成像质量不佳,这时即使缩小至最佳光圈取得的图像也可能不尽人意。
对于这些镜头应该避免购买,如果买入的朋友应该仔细选择拍摄的对象,保证主要拍摄对象不在画面边缘区域。
造成照片不够清晰的原因有多种因素,正确地操作相机进行拍摄是其中一个重要的部分。
佳能650D简介及操作案例共69页

谢谢你的阅读
❖ 知识就是财富 ❖ 丰富你的人生
71、既然我已经踏上这条道路,那么,任何东西都不应妨碍我沿着这条路走下去。——康德 72、家庭成为快乐的种子在外也不致成为障碍ቤተ መጻሕፍቲ ባይዱ但在旅行之际却是夜间的伴侣。——西塞罗 73、坚持意志伟大的事业需要始终不渝的精神。——伏尔泰 74、路漫漫其修道远,吾将上下而求索。——屈原 75、内外相应,言行相称。——韩非
佳能650D简介及操作案例
1、纪律是管理关系的形式。——阿法 纳西耶 夫 2、改革如果不讲纪律,就难以成功。
3、道德行为训练,不是通过语言影响 ,而是 让儿童 练习良 好道德 行为, 克服懒 惰、轻 率、不 守纪律 、颓废 等不良 行为。 4、学校没有纪律便如磨房里没有水。 ——夸 美纽斯
5、教导儿童服从真理、服从集体,养 成儿童 自觉的 纪律性 ,这是 儿童道 德教育 最重要 的部分 。—— 陈鹤琴
佳能数码单反相机操作指南
佳能数码单反相机操作指南佳能是全球著名的相机品牌之一,其数码单反相机以其高品质的图像质量和出色的性能而受到广大摄影爱好者和专业摄影师的青睐。
然而,对于初学者来说,使用一台新的数码单反相机可能有些困难。
因此,本文将为您提供一份佳能数码单反相机的操作指南,帮助您更好地使用您的相机。
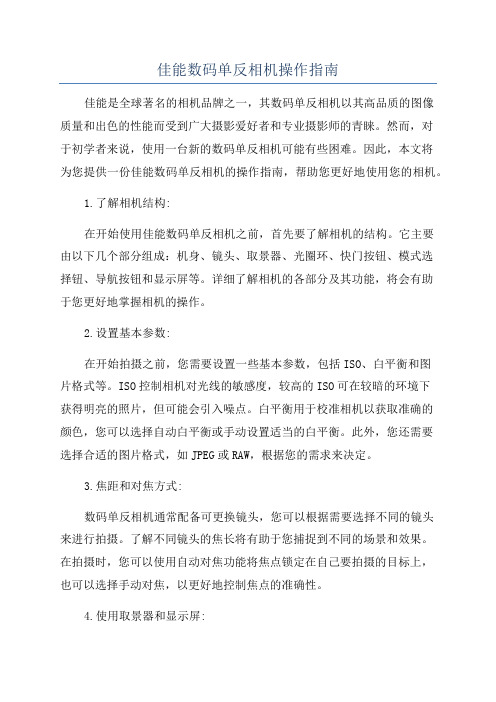
1.了解相机结构:在开始使用佳能数码单反相机之前,首先要了解相机的结构。
它主要由以下几个部分组成:机身、镜头、取景器、光圈环、快门按钮、模式选择钮、导航按钮和显示屏等。
详细了解相机的各部分及其功能,将会有助于您更好地掌握相机的操作。
2.设置基本参数:在开始拍摄之前,您需要设置一些基本参数,包括ISO、白平衡和图片格式等。
ISO控制相机对光线的敏感度,较高的ISO可在较暗的环境下获得明亮的照片,但可能会引入噪点。
白平衡用于校准相机以获取准确的颜色,您可以选择自动白平衡或手动设置适当的白平衡。
此外,您还需要选择合适的图片格式,如JPEG或RAW,根据您的需求来决定。
3.焦距和对焦方式:数码单反相机通常配备可更换镜头,您可以根据需要选择不同的镜头来进行拍摄。
了解不同镜头的焦长将有助于您捕捉到不同的场景和效果。
在拍摄时,您可以使用自动对焦功能将焦点锁定在自己要拍摄的目标上,也可以选择手动对焦,以更好地控制焦点的准确性。
4.使用取景器和显示屏:佳能数码单反相机通常配备取景器和显示屏,您可以选择使用哪种方式来观察和拍摄画面。
取景器适用于在明亮的环境下拍摄,因为它可以阻挡周围的光线,使您更容易看到画面。
然而,在一些情况下,使用显示屏可以提供更好的拍摄体验。
根据您的需求和拍摄环境,选择适当的观察方式。
5.模式选择和拍摄技巧:佳能数码单反相机通常具有不同的拍摄模式,如全自动、手动、光圈优先、快门优先等。
了解不同模式的功能和适用场景,您可以根据拍摄需求选择合适的模式。
此外,在拍摄时,您可以使用不同的技巧来提高照片的质量,如使用三脚架、调整曝光补偿和使用内置闪光灯等。
(佳能650D英文版说明书)EU2.10W_E_00

1234IntroductionContents at a GlanceDownloading ImagesCamera SettingsRemote ShootingReferencePreferencesIndexCommunication Software for the CameraEOS UtilityVer. 2.10Instruction Manual1D Mk IV1Ds Mk III1D Mk III 5D Mk II 7D 60D 50D 40D REBELT3i 600D REBELT2i550DREBELT1i500DREBELXSi450DREBELT31100DREBELXS1000DO Content of this Instruction ManualO EU is used for EOS Utility.O Camera model is displayed as an icon.EOS-1D Mark IV O displays the relevant camera model.O are from Windows Vista.O The selection sequence of menus is displayed inprocedures.(Example: Select the [Window] menu [Main Window].)O Square brackets are used to indicate items such as menu names, button names and window names that appear on the computer screen.O Text inside < > indicates a camera switch name or icon, or a keyboard key name.O ** indicates a reference page. O Marks information that should be read before use.OMarks additional information you may find helpful.1D Mk IVO Switching Between PagesOnext pageprevious pagereturn to a page you had previously displayed O Click on the chapter headings on the right side of the screen to switch to the contents page of that chapter. Also, click the item you want to read about on the table of contents to move to the relevant page.1234IntroductionContents at a GlanceDownloading ImagesCamera SettingsRemote ShootingReferencePreferencesIndexCANON SOFTWARE LICENSE AGREEMENTIMPORTANT - READ THIS AGREEMENT BEFORE USING THE SOFTWARE ON THE CD-ROM IN THIS BOX. BY USING THE SOFTWARE, YOU AGREE TO BE BOUND BY THE TERMS OF THIS AGREEMENT.This is a license agreement (the [Agreement]) between you and Canon Inc. ([Canon]).IF YOU DO NOT AGREE TO THE TERMS AND CONDITIONS OF THIS AGREEMENT, DO NOT USE THE SOFTWARE PROGRAM ON THE CD-ROM AND THE USER MANUAL IN THIS BOX (COLLECTIVELY , THE [SOFTWARE]) AND RETURN THE SOFTWARE WITHIN 30 DAYS FROM THE DATE OF PURCHASE TO YOUR POINT OF PURCHASE FOR A REFUND.In consideration of the right to use the SOFTWARE, you agree to abide by the terms and conditions of this Agreement.1.LICENSE: Canon grants you the non-exclusive right to use the SOFTWARE only on a single computer. You may physically transfer the SOFTWARE from one computer to another provided that the SOFTWARE is used on only one computer at a time. You shall not install or use the SOFTWARE on a network, multiple CPU, multiple site arrangement, or any other hardware configuration where the SOFTWARE is accessible to more than one CPU or to more than one user.YOU SHALL NOT ASSIGN, SUBLICENSE, RENT, LEASE, LOAN, CONVEY OR OTHERWISE USE, TRANSFER, COPY , TRANSLATE, CONVERT TO ANOTHER PROGRAMMING LANGUAGE, ALTER, MODIFY , DECOMPILE OR DISASSEMBLE THE SOFTWARE, IN WHOLE OR IN PART, EXCEPT AS EXPRESSLY PROVIDED IN THIS AGREEMENT.2.BACK-UP COPY: You may make one copy of the SOFTWARE solely for back-up purposes, or copy the SOFTWARE onto the permanent storage device (e.g. a hard disk) of your computer and retain the original for back-up purposes. Any other copying of the SOFTWARE is a violation of this Agreement. You must reproduce and include the copyright notice on the back-up copy.3.SUPPORT AND UPDATES: Canon is not responsible for providing maintenance or support for use of the SOFTWARE. No updates, fixes or support will be made available for the SOFTWARE.4.LIMITED WARRANTY AND LIMITATION OF LIABILITY: It is your responsibility to choose, maintain and match the hardware and software components of your computer system. Thus Canon does not guarantee uninterrupted service or correction of errors or that the functions or performance of the SOFTWARE will meet your requirements. THE SOFTWARE IS LICENSED ON AN [AS IS] BASIS AND WITHOUT WARRANTY OF ANY KIND. The CD-ROM storing the SOFTWARE is warranted only against defective material under normal use for a period of ninety (90) days after purchase from an authorized Canon dealer as evidenced by your sales receipt. Your sole remedy for a defective CD-ROM shall be replacement of the same without charge when returned by you at your expense to your point of purchase and proven to be defective upon inspection. The replacement CD-ROM will be warranted for the remainder of the original ninety (90) day warranty period of the defective CD-ROM. The limited warranty does not apply if the failure of the CD-ROM resulted from accident, abuse or misapplication of the SOFTWARE and shall not extend to anyone other than the original user of the SOFTWARE.EXCEPT AS SPECIFICALLY SET FORTH IN THIS PARAGRAPH 4, CANON, CANON’SSUBSIDIARIES, DISTRIBUTORS AND DEALERS DISCLAIM ALL WARRANTIES, EXPRESS OR IMPLIED, INCLUDING ANY WARRANTY OF MERCHANTABILITY OR FITNESS FOR A PARTICULAR PURPOSE, WITH RESPECT TO THE SOFTWARE.NEITHER CANON NOR ANY OF CANON’S SUBSIDIARIES, DISTRIBUTORS OR DEALERS IS LIABLE FOR ANY DAMAGES HOWSOEVER CAUSED, INCLUDING WITHOUT LIMITATION, DIRECT, CONSEQUENTIAL OR INCIDENTAL LOSS OR DAMAGE INCLUDING LOSS OFPROFITS, EXPENSE OR INCONVENIENCE HOWSOEVER CAUSED OR ARISING OUT OF THE SOFTWARE OR THE USE THEREOF.NEITHER CANON, NOR ANY OF CANON’S SUBSIDIARIES, DISTRIBUTORS OR DEALERS SHALL HAVE ANY OBLIGATION TO INDEMNIFY YOU AGAINST ANY CLAIM OR SUITBROUGHT BY A THIRD PARTY ALLEGING THAT THE SOFTWARE OR THE USE THEREOF INFRINGES ANY INTELLECTUAL PROPERTY OF SUCH THIRD PARTY .5.TERM: This Agreement is effective upon your using the SOFTWARE and remains in effect until expiration of all copyright interests in the SOFTWARE unless earlier terminated. You may terminate this Agreement by destroying the SOFTWARE. This Agreement will also terminate without notice to you if you fail to comply with any of the terms of this Agreement and you must then promptly return the SOFTWARE. In addition, Canon may enforce its other legal rights.6.U.S. GOVERNMENT RESTRICTED RIGHTS NOTICE: The SOFTWARE is provided with restricted rights. Use, duplication or disclosure is subject to restrictions as set forth in either subparagraph (c) (1) (ii) of the Rights in Technical Data and Computer software clause at DFARs 252.227-7013 or subparagraph (c) (1) and (2) of the Commercial Computer Software Restricted Rights Clause at FAR 52.227-19, as applicable.7.SEVERABILITY: In the event that any provision of this Agreement is declared or found to be illegal by any court or tribunal of competent jurisdiction, such provision shall be null and void with respect to the jurisdiction of that court or tribunal and all the remaining provisions of this Agreement shall remain in full force and effect.8.CONTROLLING LAW: The terms of this Agreement as it relates to purchases of the Software in the United States of America shall be governed and construed in all respects in accordance with the laws and regulations of the State of New York, without reference to choice of law principles. The terms of this Agreement as it relates to purchases of the Software in Canada shall be governed by the laws of the province of Ontario.9.OWNERSHIP: All rights, including but not limited to copyrights and trade secret rights, to the SOFTWARE belong to Canon, its affiliated corporations and third party licensors. Your use of the SOFTWARE is subject to the United States, Canada and other applicable copyright and trademark laws and nothing in this Agreement constitutes a waiver of the rights of Canon, its affiliated corporations and third party licensors under such laws.Nothing contained in Paragraph 1 shall be construed to give Canon any ownership rights in any images, graphics or textual material that you save in connection with the Software.10.ACKNOWLEDGEMENT: BY USING THE SOFTWARE, YOU ACKNOWLEDGE THAT YOU HAVE READ THIS AGREEMENT, UNDERSTOOD IT, AND AGREE TO BE BOUND BY ITS TERMS AND CONDITIONS. YOU ALSO AGREE THAT THIS AGREEMENT IS THECOMPLETE AND EXCLUSIVE STATEMENT OF AGREEMENT BETWEEN YOU AND CANON CONCERNING THE SUBJECT MATTER HEREOF AND SUPERSEDES ALL PROPOSALS OR PRIOR AGREEMENTS, VERBAL OR WRITTEN, AND ANY OTHER COMMUNICATIONS BETWEEN THE PARTIES RELATING TO THE SUBJECT MATTER HEREOF. NOAMENDMENT TO THIS AGREEMENT SHALL BE EFFECTIVE UNLESS SIGNED BY A DULY AUTHORIZED OFFICER OF CANON.READ CAREFULLY BEFORE USING!1234IntroductionContents at a GlanceDownloading ImagesCamera SettingsRemote ShootingReferencePreferencesIndexIntroductionEOS Utility (hereinafter EU) is software for communication with your EOS DIGITAL camera. By connecting the camera and computer with the cable provided with the camera, you can download to your computer images saved in the camera’s memory card as well as set various camera settings or shoot remotely from EU on your computer.Main Features of EUFrom EU, you can control the camera remotely and perform the following main features.O Batch download to your computer images saved in the camera’s memory card.O You can also download to your computer only images you have selected.O Set various camera settings from your computer.O Shoot remotely by controlling the camera from your computer.O Remote Live View shooting – Shoot while checking your subject in real time on your computer.O You can also shoot remotely by operating the camera’s shutter button.O Preset a time allowing the camera to shoot automatically with timer shooting.O When downloading images or shooting remotely, view/check images with the linked Digital Photo Professional.System Requirements*1Compatible with 32-bit/64-bit systems for all versions except Starter Edition *2Compatible with 32-bit/64-bit systems for all versions except Starter Edition *3Compatible with Service Pack 3* Framework is Microsoft software. It is installed together with EU.*5For Windows 7 64-bit systems, minimum 2GBSupported CameraCan be used for RAW images, JPEG images or MOV movies shot with the cameras below.OSWindows 7*1Windows Vista *2Windows XP Professional/Home Edition *3Computer PC with one of the above OS preinstalled and a USB port as a standard feature (Upgraded machines not supported)* .NET Framework 2.0 or later is required.*4CPU 1.3GHz Pentium or higher RAM Minimum 1GB *5Interface Hi-Speed USBDisplayScreen resolution: 1024 × 768 pixels or more Color quality: Medium (16 bit) or moreEOS-1D Mark IV EOS-1Ds Mark III EOS-1D Mark III EOS 5D Mark II EOS 7D EOS 60D EOS 50DEOS 40DEOS REBEL T3i/600D EOS REBEL T2i/550DEOS REBEL T1i/500D EOS DIGITAL REBEL XSi/450D EOS REBEL T3/1100DEOS DIGITAL REBEL XS/1000D1234IntroductionContents at a GlanceDownloading ImagesCamera SettingsRemote ShootingReferencePreferencesIndexContents at a GlanceDownloading images from your camera to a computerO To batch download all the images to a computer ¿ p.7O To download to a computer selected images only ¿ p.8O To download images using a third-party card reader¿ p.10Camera settings from a computerO To set the camera owner’s name, copyright notice and date/time ¿ p.12O To set a Picture Style and apply to the camera ¿ p.16O To apply a Picture Style file to the camera ¿ p.18O To register a personal white balance in the camera ¿ p.20O To set a JPEG quality and apply to the camera ¿ p.21O To adjust a white balance setting and apply to the camera¿ p.22O To register lens aberration correction/peripheralillumination correction data for the lens in the camera ¿ p.22O To set My Menu and apply to the camera¿ p.24Remote shootingO To shoot by controlling the camera from a computer (Remote Live View shooting)¿ p.27O To shoot with accurate horizontal/vertical alignment ¿ p.39O To change the aspect ratio and shoot¿ p.39O To shoot with another image displayed as overlay to align several images at the same angle¿ p.40O To shoot by operating the camera ¿ p.42O To shoot movies ¿ p.42O To shoot with timer ¿ p.53O To shoot with flash¿ p.55Functions for use with other accessories sold separatelyO To shoot with the Wireless File Transmitter WFT-E2/A, E2II A/B/C/D, E3/A, E4/A, E4 II A/B/C/D, or E5A/B/C/D and check the images in real time ¿ p.68O To start up the WFT-E2/A, E2 II A/B/C/D, E3/A, E4/A,E4 II/A/B/C/D, or E5A/B/C/D software from EU¿ p.69OtherO To register background music to the camera’s memory card¿ p.5811234IntroductionContents at a GlanceDownloading ImagesCamera SettingsRemote ShootingReferencePreferencesIndexDownloading Images to your ComputerBasic operation such as preparing for downloading images to your computer (connecting your camera and computer), starting up EU,downloading images from your camera to your computer and exiting EU are explained here.Connecting the Camera and Computer..................... 5Starting up EU........................................................... 6Batch Downloading Images to Your Computer ......... 7Downloading Selected Images to Your Computer........ 8Downloading Images with a Card Reader.................. 10Downloading Images Using Digital Photo Professional... 10Downloading Images Using ZoomBrowser EX..... 10Downloading Images without Using Canon Software... 10Exiting EU. (10)1234IntroductionContents at a GlanceDownloading ImagesCamera SettingsRemote ShootingReferencePreferencesIndexConnecting the Camera and ComputerTo download to your computer images shot with your camera, you will need to connect your camera and computer using the interface cable provided with your camera.computer User’s Manual.2Connect the small plug of the cable into the terminal on your camera.O Once the plug is connected to the camera according to the steps for your camera model, preparation for downloading images is complete. Continue with “Starting up EU”.O With the <> mark on the plug facing the back of the camera, connect it to the camera’s <A/V OUT / DIGITAL> terminal.1D Mk IVO With the <> mark on the plug facing the front of the camera, connect it to the camera’s <> terminal or <A/V OUT / 1Ds Mk III1D Mk III1234IntroductionContents at a GlanceDownloading ImagesCamera SettingsRemoteShootingReferencePreferencesIndexStarting up EUO If the window in step 2 is not displayed even when you set the camera’s power switch to < ON >, double-click the [EOS Utility] icon on your desktop to start up EU.Ocannot communicate with EU if the camera’smode dial is set to <>. Set the mode dial to a mode other than <>.REBELT1i500D 2Click [Downloads images from EOS camera].O In Windows XP , select [Canon EOS Utility] and then click the [OK] button to start up EU.O When [Always do this for this device] ([Always use this program for this action] in Windows XP) is checkmarked, from the next time you connect your camera and computer, EU will start when you set your camera’s power switch to < ON >.O The camera’s LCD monitor turns on when EU starts up.O For cameras other than , you can operate the camera and download images saved on the memory cardEU Main window¿EU starts up, the main window appears, and your camera and computer can now communicate. Continue with “BatchDownloading Images to Your Computer”.1D Mk IV7D 60D REBELT3i 600D REBELT2i 550D REBELT31100D1234IntroductionContents at a GlanceDownloading ImagesCamera SettingsRemote ShootingReferencePreferencesIndexBatch Downloading Images to Your ComputerYou can batch download to your computer all the images saved on the memory card inserted in the camera that you have not already downloaded.The downloaded images are sorted by date into folders and are then displayed in the main window of Digital Photo Professional (RAW image processing, viewing and editing software) (hereinafter DPP), which is linked to start up automatically, where you can check them immediately.1Click [Starts to download images].¿The [Save File] dialog box appears and image downloading to your computer begins.¿The downloaded images are saved in the [My Pictures] folder.O When all images have been downloaded, DPP starts up automatically and the downloaded images are displayed in2Check the downloaded images.O Check the downloaded images in DPP .For details on using DPP , refer to the “Digital Photo Professional Instruction Manual” (PDF electronic manual).O Continue with “Exiting EU” (p.10).DPP Main window1234IntroductionContents at a GlanceDownloading ImagesCamera SettingsRemote ShootingReferencePreferencesIndexFrom the images saved in your camera’s memory card, you can select the ones you want and download them to your computer.1Click [Lets you select and download images].¿A viewer window appears and the images in the memory card are displayed.Downloading Selected Images to Your Computer2View the images and checkmark images todownload.Viewer windowAdd check markYou can click the [] button and extract images by a variety of criteria to select images to download.1234IntroductionContents at a GlanceDownloading ImagesCamera SettingsRemote ShootingReferencePreferencesIndex3Click the [Download] button.¿The [Download image] dialog box appears.4Specify the save destination and then click the [OK] button.¿The [Save File] dialog box appears and image downloading toyour computer begins.Download image dialog boxSpecify the save destinationDisplays the save destination on the computer¿The images downloaded to your computer are displayed in the [Quick Preview] window.O The [Quick Preview] window allows you to quickly review thedownloaded images. You can also resize the [Quick Preview] window.O When all images have been downloaded, DPP starts up automatically and the downloaded images are displayed.O To switch to the main window, click the [Main Window] button in the viewer window.After clicking the first image you want to download, hold the < Shift > key and click the last image, and [] will be displayed. By clicking the [] button, the selected images will be checkmarked in a batch.1234IntroductionContents at a GlanceDownloading ImagesCamera SettingsRemote ShootingReferencePreferencesIndexFor users with a third-party card reader, you can also download to your computer images stored in a memory card using the card reader.However, EU does not support image downloading using a card reader. For this reason, when downloading images using a card reader, use one of the following 3 procedures.Downloading Images Using Digital Photo ProfessionalYou can use DPP to download to your computer shot images from a memory card inserted in a third-party card reader connected to your computer.For detailed instructions, refer to “Downloading Images Using Your Card Reader” in the “Digital Photo Professional Instruction Manual” (PDF electronic manual).Downloading Images Using ZoomBrowser EXYou can use ZoomBrowser EX to download to your computer shot images from a memory card inserted in a third-party card reader connected to your computer.For detailed instructions, refer to “Downloading Images Using Your Card Reader” in the “ZoomBrowser EX Instruction Manual” (PDF electronic manual).Downloading Images without Using Canon SoftwareTo download images with a card reader without using Canon software such as DPP or ZoomBrowser EX, copy to your computer the [DCIM] folder in the memory card.For more details about folder structures and files in the memory card, refer to p.70.Downloading Images with a Card ReaderExiting EU1Click the [Quit] button.¿The window closes and EU exits.2Turn the camera’s power switch to < OFF >.3Disconnect the cable from the camera and computer.ODo not pull on the cable; hold the plug and pull out.21234IntroductionContents at a GlanceDownloading ImagesCamera SettingsRemote ShootingReferencePreferencesIndexSetting the Camera from Your ComputerThis section explains how to set the camera’s functions from EU.Setting the Camera Owner’s Name, Copyright Notice and Date/Time............................................................ 12Available Settings by Camera Model.......................... 13Setting up Camera Functions.................................. 14Available Settings by Camera Model.......................... 15Setting Picture Styles and Applying to the Camera. (16)Selecting a Picture Style and Applying to theCamera................................................................... 16Changing Picture Style Settings and Applying to the Camera................................................................... 17Applying Picture Style Files to the Camera............ 18Saving White Balance to your Computer.................... 19Registering Personal White Balance in the Camera... 20Setting JPEG Quality and Applying to the Camera.... 21Adjusting White Balance and Applying to the Camera... 22Registering Lens Aberration Correction/Peripheral Illumination Correction Data for the Lens in theCamera (22)Setting My Menu and Registering to the Camera (24)1234IntroductionContents at a GlanceDownloading ImagesCamera SettingsRemote ShootingReferencePreferencesIndexSetting the Camera Owner’s Name, Copyright Notice and Date/TimeYou can set and apply to the camera, the camera owner’s name,copyright notice and date/time recorded as shooting information in shotimages.1Connect your camera and computer, and then start up EU (p.5).2Click [Camera settings/Remote shooting].¿The capture window appears.3Click the [] button.¿The [Set-up menu] appears.Capture window1234IntroductionContents at a GlanceDownloading ImagesCamera SettingsRemote ShootingReferencePreferencesIndex4Click the required setting and specify each one.O Available settings are displayed for the camera that is connected. For more details, refer to “Available Settings by Camera Model” (Description on the below).SettingOwner’s name {{{Author *1–{–Copyright holder (copyright notice)*1–{–Date/Time{{{Live View/Movie func. set.*2{{{Firmware{{{Set-up menuAvailable Settings by Camera Model1Ds Mk III 1D Mk III1D Mk IV 5D Mk II 7D 60D 50D REBELT3i 600D REBELT2i 550D REBELT1i 500D REBELT31100D40D REBELXSi 450D REBELXS 1000DOwner’s nameO You can enter and set up to 31 characters as the camera owner’s name.Author *1O You can enter and set up to 63 characters or symbols, including a prefix, as the author’s name.Copyright holder (copyright notice)*1O You can enter and set up to 63 characters or symbols, including a prefix, as the photo creation’s copyright holder (copyright notice).Date/TimeO You can set the camera’s date and time.Live View/Movie func. set.*2O You can set whether the Live View function settings or Movie function settings (p.27, p.42) are available or not.FirmwareO You can display the version of the camera’s firmware. O You can update the firmware by clicking on this item.O For more details on updating firmware, refer to the Canon’s website.*1When the author or copyright holder (copyright notice) set is not displayed in full, moving the cursor to the displayed setting item will display all the entered information as a pop-up.*2Movie function settings are for only.1D Mk IV5D Mk II7D60DREBELT3i600DREBELT2i550DREBELT1i500DREBELT31100D1234IntroductionContents at a GlanceDownloading ImagesCamera SettingsRemote ShootingReferencePreferencesIndexSetting up Camera FunctionsYou can set and apply to the camera Picture Styles, personal white balance, JPEG quality and white balance adjustment.1Connect your camera and computer, and then start up EU (p.5).2Click [Camera settings/Remote shooting].¿The capture window appears.3Click the [] button.¿The [Shooting menu] appears.1234IntroductionContents at a GlanceDownloading Images Camera SettingsRemote ShootingReferencePreferencesIndex4Click the required setting and specify each one.O Available settings are displayed for the camera that is connected. For more details, refer to “Available Settings by Camera Model”.Shooting menu*Setting is possible for , but not for .Picture StyleO You can set a Picture Style and apply it to the camera, in the same way as operating from the camera (p.16).Personal white balanceO You can register to the camera a personal white balance file (p.20).JPEG qualityO You can set the JPEG image quality and apply it to the camera, in the same way as operating from the camera (p.21).White balance adjustmentO You can adjust the white balance, in the same way as operating from the camera (p.22).Registering lens aberration correction/peripheral illumination correction dataO You can register lens aberration correction/peripheral illumination correction data for the lens to the camera or delete registered data from the camera (p.22).Setting Picture Style{{{Personal white balance *––JPEG quality{––White balance adjustment {{{Registering lens aberration correction/peripheralillumination correction data*{–Available Settings by Camera Model1D Mk IV1Ds Mk III 1D Mk III5D Mk II7D 60D 50D REBELT3i 600D REBELT2i 550D REBELT1i 500D REBELT31100D40D REBELXSi 450D REBELXS 1000D1D Mk IV 1Ds Mk III1D Mk III1234IntroductionContents at a GlanceDownloading ImagesCamera SettingsRemote ShootingReferencePreferencesIndexYou can set and apply Picture Styles to the camera, in the same way as operating from the camera. You can change the values for [Sharpness], [Contrast], [Saturation] and [Color tone] of each Picture Style and register up to three of your own Picture Styles in the camera as user-defined settings.You can also register Picture Style files in the camera as user-defined settings you have downloaded from the Canon’s website or created with Picture Style Editor (Picture Style file creating software) (hereinafter PSE) and saved to your computer.For , registering Picture Styles may take some time.Selecting a Picture Style and Applying to the Camera1Click [Picture Style].¿The [Picture Style] window appears.Setting Picture Styles and Applying to the Camera1D Mk IV7D60DREBELT3i600DREBELT2i550DREBELT31100D 2Click the Picture Style to be set in the camera.¿The setting is applied to the camera and the display returns to the [Shooting menu].Picture Style window1234IntroductionContents at a GlanceDownloading ImagesCamera SettingsRemote ShootingReferencePreferencesIndexChanging Picture Style Settings and Applying to the CameraYou can set your own Picture Style [Sharpness], [Contrast], [Saturation] and [Color tone] and apply them to the camera, in the same way as operating from the camera.1Click [Detail set.].¿The [Detail set.] dialog box appears.2Set by clicking the pointer on the slider for each item.¿If you select [Monochrome] for the Picture Style (p.16), the [Filtereffect] and [Toning effect] list boxes appear.Cursor position Default settingSetting3Click the [Return] button.¿The settings are applied to the camera, and the display returns tothe [Shooting menu].。
佳能650D官方使用教程
调整用于拍摄的图像亮度/设置曝光补偿(EOS 650D)解决方法如果相机的模式转盘设置为〈M〉以外的模式,相机会自动设置适合的曝光值。
如果要调整相机设置的曝光值,可以使用曝光补偿设置。
曝光补偿可以增加(更亮)或降低(更暗)相机设置的标准曝光。
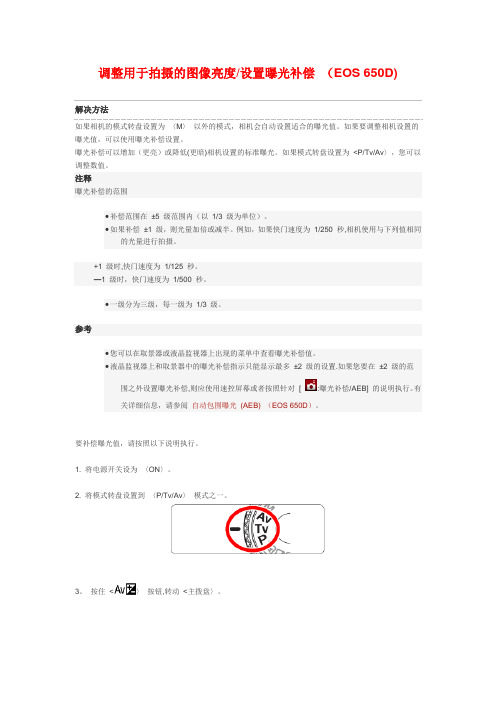
如果模式转盘设置为<P/Tv/Av〉,您可以调整数值。
注释曝光补偿的范围•补偿范围在±5 级范围内(以1/3 级为单位)。
•如果补偿±1 级,则光量加倍或减半。
例如,如果快门速度为1/250 秒,相机使用与下列值相同的光量进行拍摄。
+1 级时,快门速度为1/125 秒。
—1 级时,快门速度为1/500 秒。
•一级分为三级,每一级为1/3 级。
参考•您可以在取景器或液晶监视器上出现的菜单中查看曝光补偿值。
•液晶监视器上和取景器中的曝光补偿指示只能显示最多±2 级的设置.如果您要在±2 级的范围之外设置曝光补偿,则应使用速控屏幕或者按照针对[ :曝光补偿/AEB] 的说明执行。
有关详细信息,请参阅自动包围曝光(AEB) (EOS 650D)。
要补偿曝光值,请按照以下说明执行。
1. 将电源开关设为〈ON〉。
2. 将模式转盘设置到〈P/Tv/Av〉模式之一。
3。
按住<〉按钮,转动<主拨盘〉。
向左转动拨盘可使闪光曝光更暗,向右转动拨盘可使闪光曝光更亮。
4. 按下快门按钮拍摄照片。
•要取消曝光补偿,请将曝光补偿量恢复为〈>.在图像上显示日期本相机不能在所拍图像上直接记录拍摄日期。
要同时显示图像和日期(拍摄日期),有以下方法。
•播放图像时显示拍摄信息。
•打印图像时插入日期。
关于播放图像时如何显示拍摄信息,请参阅相机附带的使用说明书。
将日期插入到打印的图像中要将日期插入到打印的图像中,请使用相应的DPOF 设置。
DPOF 格式是一种数码相机记录格式,用于将图像尺寸、剪裁设置、所用相机和日期/时间设置信息保存为图像数据。
- 1、下载文档前请自行甄别文档内容的完整性,平台不提供额外的编辑、内容补充、找答案等附加服务。
- 2、"仅部分预览"的文档,不可在线预览部分如存在完整性等问题,可反馈申请退款(可完整预览的文档不适用该条件!)。
- 3、如文档侵犯您的权益,请联系客服反馈,我们会尽快为您处理(人工客服工作时间:9:00-18:30)。
佳能650D使用说明(超详细)机身外观从外观上看,本次佳能EOS 650D的造型依旧延续了三位数机型的小巧袖珍式设计,标志性的右肩模式转盘设计依旧沿用,除此以外,从EOS 600D开始采用的翻转屏设计被保留了下来。
佳能EOS 650D机身外观650D的机身蒙皮与600D一样,同样是两侧贴有防滑胶皮,这一设计也是给整台相机的质感和手感都提升了一个档次,握持相机的时候也会提供不错的手感支持。
佳能EOS 650D机身外观佳能EOS 650D机身外观佳能EOS 650D机身外观顶部650D的机身顶部设计和600D机身几乎相同,只是在机身开关拨杆设计上较之前代略有不同。
笔者认为,这样的虽然刚开始用的时候会稍显不太习惯,但是用过一段时间后,这种整合式的设计操作起来更为直接。
佳能EOS 650D机身外观后背经过外观大致的观察,我们发现佳能650D的机身虽然较之前代没有太大的变化,不过一些细节上的改进,却是大大提升了这台相机的整体操控易用性。
接下来,就让我们看一下全新650D在细节设计上都有了哪些变化。
佳能EOS 650D机身外观细节顶部650D的顶部进行了小改进,顶部设计了立体声麦克风,这将更有利于这台机身的独立收声性能。
佳能EOS 650D机身外观细节右肩上的模式转盘机触控按钮650D的顶部更大的改进来自于对右肩部分的全新设计,视频模式从模式转盘中独立出来,通过开关拨杆用户可以直接开启视频模式,这对于传统单反用户来说会稍显麻烦。
不过考虑到如今用单反佳能EOS 650D机身外观细节卡口佳能EOS 650D机身外观细节卡口佳能EOS 650D机身外观细节机身后背按键佳能EOS 650D机身外观机身后背按键细节佳能EOS 650D机身外观细节取景器机周边按键佳能EOS 650D机身外观细节机身接口佳能650D机身接口全面,除具有常规的数据、HDMI接口外,该机还具备遥控器接口,以及外置3.5寸麦克风接口。
对于视频拍摄玩家来说,独立的收声接口将有助于其更轻松的声音采集。
外观性能第2段佳能EOS650D 18-55II套机内含650D单机、EOS数码解决方案光盘、软件使用说明书光盘、电池充电器 LC-E8C(含电源线)、锂电池 LP-E8、USB接口连接线、立体声视频连接线 AVC-DC400ST、相机背带 EW-100DB IV、EF-S 18-55mm f/3.5-5.6 IS II佳能EOS 650D数码单反相机左侧机身位于机身左侧配有快门线接口、麦克风接口、HDMI高清输出口、USB视频接口佳能650D非常罕见地在机身左侧使用了与手柄位置相同材质的贴皮,如此大面积的覆皮一般只会在中端以上机型才会使用,这种破例应用可见佳能对于650D这款产品的重视。
另外在侧面有四个接口,分别是快门线接口和麦克风接口,在后面还有AV OUT /USB 和HDMI高清接口,可外接扩展的余地已经非常大了,足够满足当下主流的应用配件。
佳能EOS 650D数码单反相机顶部初次接触单反相机的摄影爱好者们,可能相对繁琐的拍摄就会让你渐渐地对单反失去拍摄兴趣,佳能全新模式拨盘下的A+模式的“A”具有进化、统和含义、“+”组合而成的新标识。
EOS650D搭载EOS场景自动识别功能,DIGIC 5数字影像处理器以从各感应器获取的信息为基础,综合分析被摄体。
场景智能自动根据EOS场景分析系统分析所得信息,控制自动对焦、自动曝光、自动白平衡、自动亮度优化、照片风格自动这5种自动功能和智能联动,按下快门按钮就能以适合的设置完成轻松拍摄。
佳能EOS 650D数码单反相机闪光灯开启闪光灯不仅在夜间下可以进行补光,佳能650D内置闪光灯还具备辅助对焦功能,内置闪光灯可以无线控制佳能原厂外接闪光灯。
还可通过相机菜单进行对应新无线电传输方式闪光灯的设置。
内置闪光灯的闪光指数约13(ISO 100,以米为单位)。
闪光光线能够覆盖EF-S镜头约17mm镜头焦距(换算为35mm规格约为28mm)的宽广视角。
1次闪光的充电时间约3秒。
对应E-TTL II自动闪光,闪光曝光补偿可在±2级的范围内进行调节。
进行“自定义无线闪光拍摄”设置时,还可进行手动闪光,此时的闪光量可在全功率至1/128功率范围内以1/3级为单位进行调节。
佳能650D的图像感应器尺寸约22.3mmx14.9mm、佳能EF系列镜头包括EF-S系列镜头,35毫米换算焦距约为镜头焦距的1.6倍。
EOS 650D采用SD存储卡作为记录媒体,同时还可使用大容量的SDXC存储卡。
这样,对于使用SD存储卡的小型数码相机用户来说,在升级时便无需重新购入记录媒体了。
目前EOS 650D可支持SD存储卡、SDHC存储卡、SDXC存储卡、兼容UHS-I以上四种类型存储卡。
佳能EOS 650D数码单反相机套装镜头EF-S 18-55mm f/3.5-5.6 IS II佳能EOS 650D数码单反相机套装镜头EF-S 18-55mm f/3.5-5.6 IS II对于一个入门级玩家如果拥有一个EF-S 18-55mm f/3.5-5.6 IS II的镜头还是相当不错的,该镜头不仅具备防抖还有支持手动对焦和自动对焦。
外观性能第3段佳能EOS650D在外观上与EOS600D没有明显的变化,尺寸也相仿,可以说是一个模子里刻出来的。
在650D机身上仅有小部分做了修改,因此在手感上与600D也没有太大差别。
佳能EOS650D数码单反相机正面佳能EOS650D数码单反相机背面面佳能650D机身依然采用了高强度的塑料材质,这也延续了佳能三位数入门机身的传统。
650D机身依然是磨砂表面,但是塑料感依然强烈。
机身手柄位置的蒙皮手感还是不错,增加了手持的稳定性。
佳能EOS650D机身侧面在机身细节方面,佳能EOS650D的外观有许多地方进行了改进。
首先改变的便是佳能650D的取景框器上方添加的眼感应器,这样在拍摄时无需再通过按INFO键或者旋转屏幕来关闭液晶屏。
佳能650D的操控方面变化不大,但是电源拨杆新增了视频拍摄档,而原本在模式转盘的视频拍摄档则换成了HDR拍摄模式。
如今将视频拍摄档与电源拨杆相结合,启动650D 视频拍摄模式变得更简单,也改善了以往视频拍摄操作麻烦的情况。
为了更好为视频拍摄进行录音,在佳能EOS650D取景框上方多了两个麦克风,通过这两个麦克风可以在视频拍摄时实现立体声收音。
佳能650D的实时取景按键设计在了拇指的位置,可以很方便的随时进行实时取景切换。
在650D快门旁,单独设置了ISO按键,配合方向键可以快速完成ISO的设置。
在使用佳能EOS650D时,由于开关拨杆添加了视频拍摄档,因此在开机时,不注意会直接将开关拨杆拨到视频模式,所以这一点改进虽然加强了视频拍摄,但是也增加了误操作的可能,有可能因为开机时,拨杆位置不对而进入视频拍摄模式错过拍摄时机,所以这一点在使用时需要特别注意。
菜单操控第1段第一列MENU菜单按键共11列菜单,通过不同颜色和图案来区分不同类别。
各项参数清晰明了,通过机身顶部的滚轮,可以快速在每一列菜单中切换,虽然机背没有速控转盘,但是你依然可以非常快速地找到需要调节的参数,这样的结构非常适合入门级玩家。
第一列的设置菜单GIF图EOS 650D新搭载了“色差校正”功能,能够有效抑制镜头光学特性带来的色像差。
可补偿广角镜头易产生的倍率色像差、远摄镜头的轴向色像差等。
通过补偿不同镜头的色像差,大幅减少颜色错位和色晕的产生,获得清晰锐利的画质。
色差校正的基本功能与EOS-1D X、EOS 5D Mark III相同,出厂时已预置约25款镜头的校正数据,使用EOS Utility 最多可注册40款镜头的数据。
第二列MENU菜单按键佳能650D可以进行高达正负5的曝光补偿调整,这个功能以前也只有在中高端机型上才会出现,对于阳光较为强烈的天气情况下可以进行减少曝光或室内昏暗情况下增加曝光进行补偿。
第二列的设置菜单GIF图EOS 650D针对数码单反相机特有的灰尘问题,从3个环节上采取综合除尘对策。
快门单元和机身盖等采用不易产生灰尘的材料,低通滤镜上实施了氟涂层处理,有效抑制由于静电附着的灰尘。
感应器自清洁单元能通过超声波振动,振落附着灰尘。
针对上述方式都无法去除的顽固灰尘,可以利用EOS 650D附带软件Digital Photo Professional的除尘功能,通过图像处理一并去除灰尘。
EOS 650D具备了综合性的除尘对策。
开启触摸对焦功能,只要触摸画面上的被摄体就可自动对焦。
利用丰富的自动对焦方式特性,可拍出多种多样的风格。
可在像面上进行相差检测自动对焦的Hybrid CMOS AF 在画面中央附近的有效区域内进行“面部+追踪”、“自由移动多点”、“自由移动1点”的自动对焦时发挥作用。
相差检测自动对焦迅速完成对焦后,反差检测自动对焦再进行精密合焦。
另外,使用触摸快门功能时,从对焦到拍摄都实现了自动化,可以像使用智能手机那样拍摄。
第四列的设置菜单GIF图第五列MENU菜单按键对于一些图片处理设置可以在第五列MENU菜单中实现完成。
第六列MENU菜单按键放大缩小按键,还可以在切换自动对焦或单点对焦时进行使用,也可以手部实现触屏放大缩小。
在实时取景拍摄状态下如果要进行快速操作按一下Q键即可在屏幕上进行对焦方式、图像大小、白平衡等设置,这一点还是非常人性化的。
有感:在A档和P档还有M档状态下也是我使用触屏快捷按键最多的时候,碰到抓拍场景或光线较为复杂的拍摄状态下,想对光圈或白平衡等进行参数上的修改,只需轻轻一点即可完成修改,不仅提高了我的趣味点同时也提高了拍摄的成功效率。
单反相机与其它相机最大的不同就是其采用的是单镜头反光结构。
光线从镜头进入机身,通过反光板反射至五面镜,再从五面镜射入取景窗,从而被摄影师所捕捉。
在最早的单反相机上,摄影师只能通过光学取景器来取景,然而伴随着近年来数码单反的不断发展,相机的取景方式也有了更多的选择。
实时取景就是目前在单反相机上比较流行的一种取景方式,今天笔者就以佳能650D为例,来为大家讲解下实时取景的用法。
光学取景是单反相机最传统的取景方式,这种取景方式虽然在对焦速度上有着一定的优势,但是在某些方面却有着它的局限性,比如将相机举过头顶拍摄或者放在靠近地面的位置拍摄时就非常不方便。
而实时取景功能则可以将相机取景的画面显示在LCD液晶显示屏上面,大大方便了用户的取景构图。
佳能650D虽说只是入门级单反,但是依然加入了实时取景功能。
并且该机在以往饱受争议的对焦系统中,首次搭载了Hybrid CMOS AF。
位于图像感应器中央区域的部分像素用于相差检测自动对焦,快速检测合焦位置后再进行反差检测自动对焦完成精确合焦,实时显示拍摄和短片拍摄时自动对焦更迅速、顺畅。